

Stepping back in time through your nails has never felt more relevant. The retro aesthetic of the 1970s and 1990s is having a legitimate moment, and nail art is where you can embrace that nostalgia without completely overhauling your wardrobe or décor. If you’ve been scrolling through nail inspiration feeds and feeling that pull toward something groovy yet wearable, you’re not alone—these two decades offer some of the most creative, bold, and satisfying nail designs that still feel fresh when you wear them today.
What makes 70s and 90s nail trends so enduring is their confidence. Both eras celebrated self-expression, individuality, and the willingness to experiment with color and pattern in ways that felt genuinely fearless. The 70s brought us warm earth tones, psychedelic swirls, and that unmistakable disco glitter, while the 90s reintroduced playfulness with minimalist geometry, pastel undertones, and a more ironic, tongue-in-cheek approach to retro style. Together, these two decades offer more nail design territory than you might initially realize.
The beauty of working with 70s and 90s nail inspiration is that you don’t have to commit to an all-or-nothing approach. You can pull a single element—a psychedelic swirl here, a minimalist line there—and make it your own. Whether you prefer short, manageable nails or you’re growing out a statement-making length, there’s a retro design in this collection that’ll work with your lifestyle and aesthetic. Let’s explore ten of the most wearable, creative retro nail ideas that capture the spirit of these unforgettable eras.
1. Psychedelic Swirls in Vibrant Hues
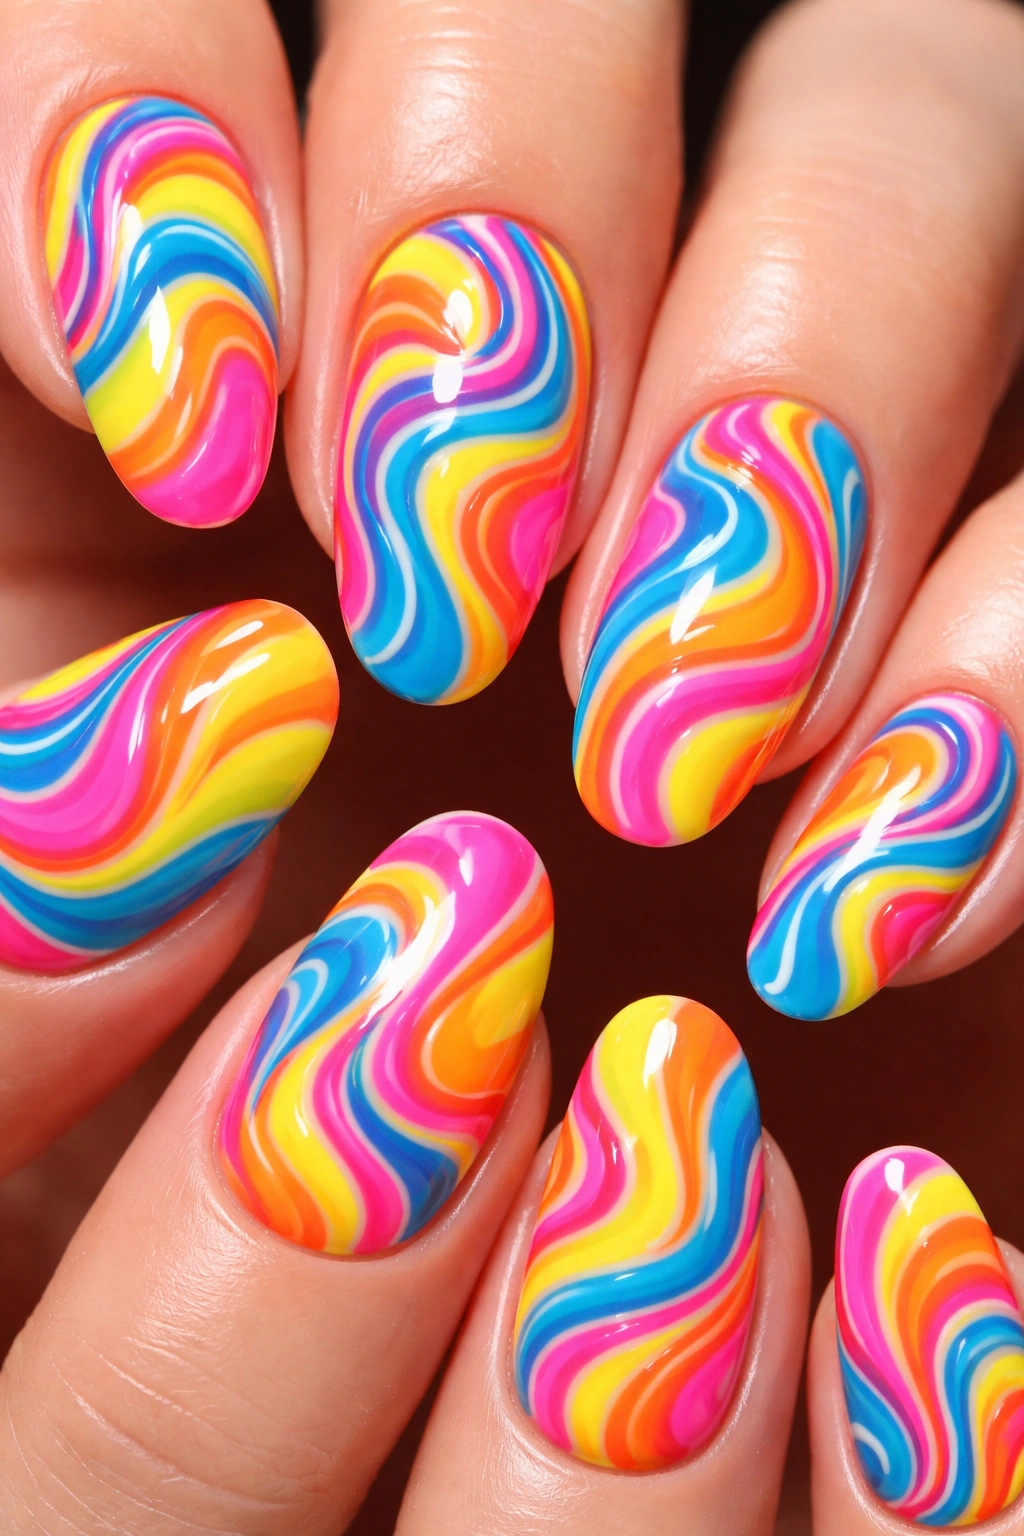
If you want to capture the absolute essence of the 1970s in one nail design, psychedelic swirls are your answer. These designs embody the free-spirited, anything-goes attitude that defined the decade—bold, unapologetic, and impossible to miss. The beauty of this style is that it works whether you lean into authentic 70s color palettes or give it a modern twist with contemporary shades.
Creating the Perfect Swirl Effect
Start with a bright base color—neon pink, hot orange, or electric blue work wonderfully—and let it dry completely. The sponge technique is your best friend here: take a makeup sponge (or even a piece of torn-up kitchen sponge), dab it lightly into a contrasting color, and press it onto your nail in gentle, overlapping motions. The goal isn’t precision; it’s beautiful chaos.
For more defined swirls, use a thin nail art brush to paint spiraling patterns directly onto your base. Drag the brush from the center outward in one smooth motion, then layer additional colors on top, slightly offset from the first swirl. Don’t overthink the placement—the charm of psychedelic design is in its organic, flowing nature.
Color Combinations That Sing
- Neon pink mixed with electric blue and lime green for a sherbet sundae vibe
- Hot orange layered with deep purple and bright yellow for authentic 70s disco energy
- Teal combined with hot pink and coral for a slightly more modern take
- Mustard yellow with burnt orange and forest green for a grounded, earthy approach
- Bubble gum pink with turquoise and white for a bold statement
Pro tip: Let each layer dry for at least two minutes between applications. Rushing the process results in muddy, blended colors rather than distinct, vibrant swirls. A quick-dry spray can save you time without sacrificing quality.
2. Flower Power Designs with Bold Blooms
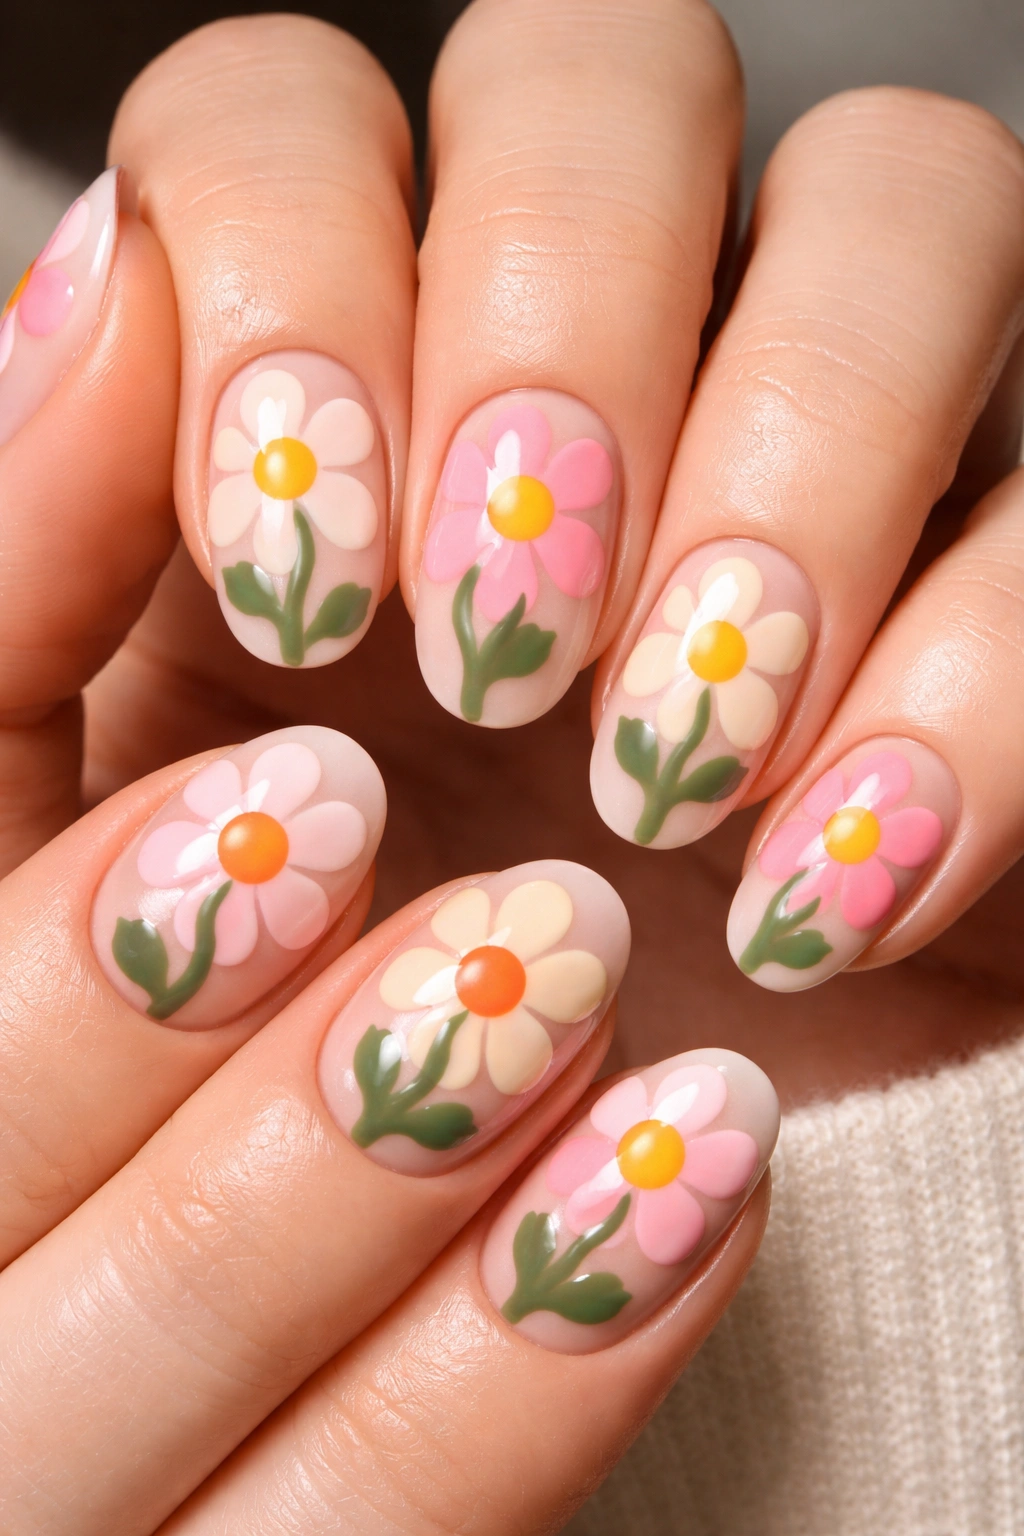
Flower power wasn’t just a 70s slogan—it was a complete visual language, and flowers became one of the most recognizable nail motifs of the era. Whether painted freehand or achieved through nail stamps, flower designs bring an instantly cheerful, optimistic energy that still resonates. The key to nailing this look (pun intended) is embracing imperfection and playing with unexpected color combinations.
Hand-Painting Florals with Confidence
You don’t need to be an artistic genius to paint convincing 70s flowers. The signature style features rounded petals, chunky stems, and a slightly childlike quality that’s actually easier to achieve than you’d think. Start with a solid base color—soft pink, cream, pale yellow, or even black for dramatic contrast.
Using a fine-tipped brush or a dotting tool, paint five to seven dots in a circular pattern to form the flower shape. Make the petals slightly imperfect; this is what gives them authentic retro charm. Fill in the center with a contrasting shade—yellow centers on pink flowers, black centers on white blooms—and add a simple curved line or two for a stem. Layer multiple flowers across your nails, varying the sizes and leaving plenty of negative space so your nails don’t feel cluttered.
Popular Flower Power Color Schemes
- Bright yellow, pink, and blue flowers on a white base for cheerful simplicity
- Bold orange and red blooms against a cream background for warmth
- Purple and green flowers with brown stems on a soft grey base for sophistication
- Rainbow flowers scattered across nude nails for a modern update
- Single statement flowers on each nail in varied bright colors
Quick tip: If hand-painting feels intimidating, quality nail stamping plates capture the 70s flower aesthetic perfectly. You get the design consistency without the pressure of freehand work.
3. Tie-Dye Effects for a Groovy Statement
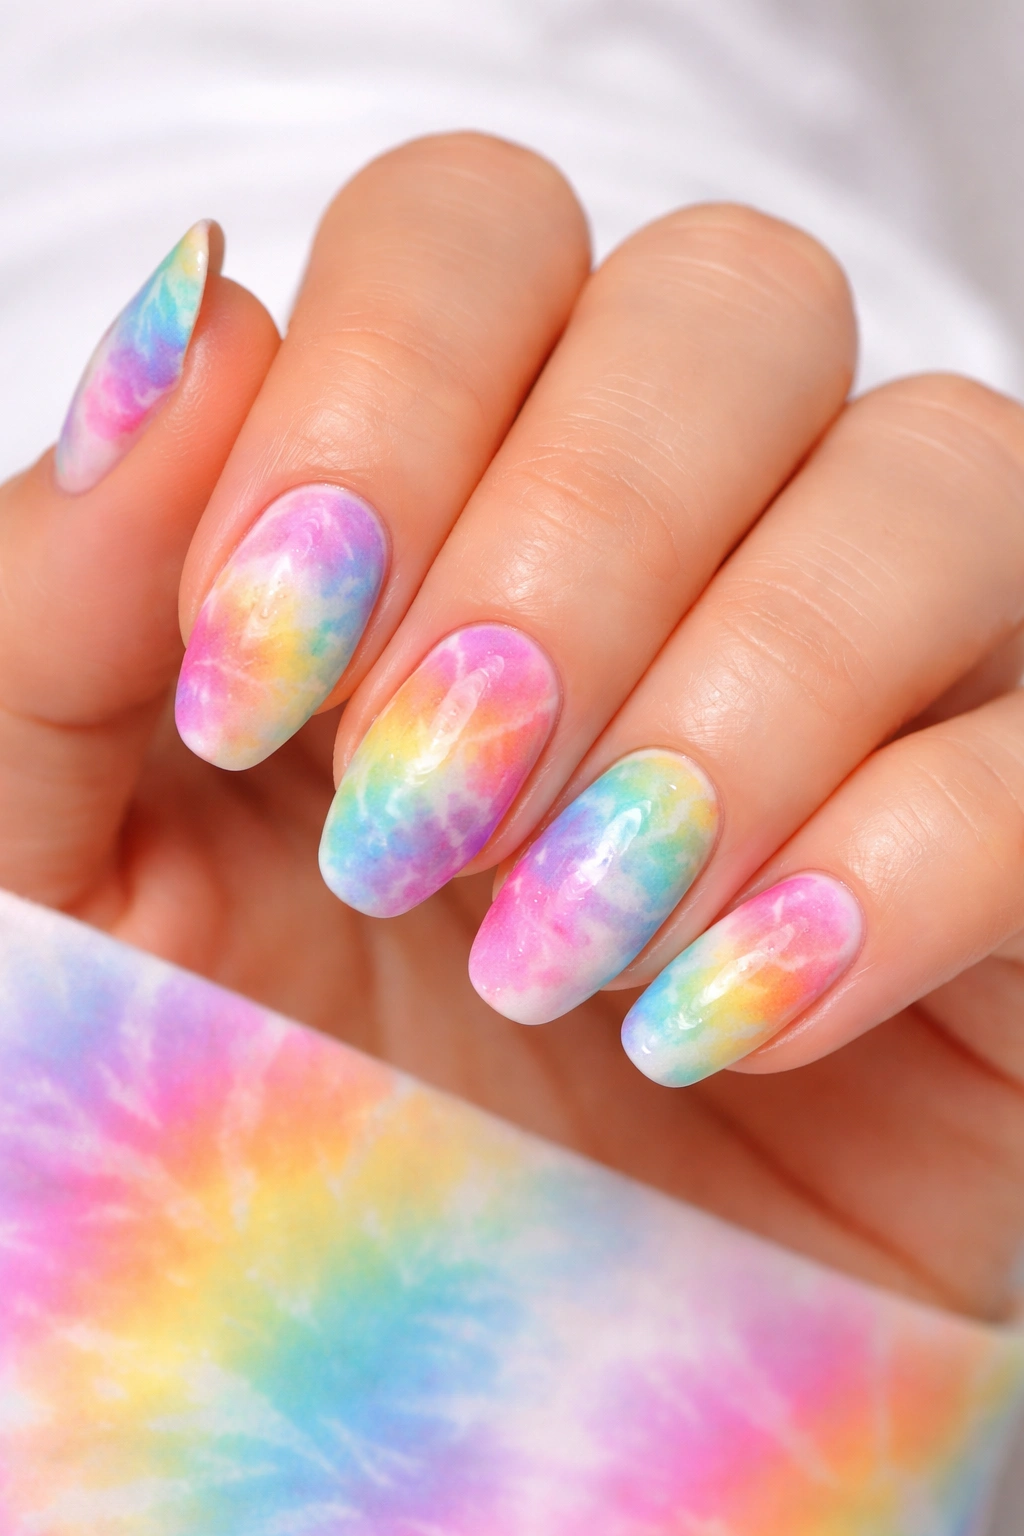
Tie-dye became synonymous with 70s culture, and translating that technique to nails creates a design that’s equal parts nostalgic and visually striking. The beauty of tie-dye nails is that they’re genuinely forgiving—the whole point is a slightly hazy, blended appearance, so perfection is impossible to get wrong. This is one of the most fun designs to experiment with at home.
The Sponging Technique for Tie-Dye Bliss
Begin with a white or cream base coat—this allows your tie-dye colors to pop with maximum vibrancy. While the base is still slightly wet (or after it dries completely, depending on your preference), take a small piece of sponge and dab it into your first color. Press and bounce the sponge gently across the nail, creating organic patches of color.
Move to your second color, applying it in the gaps and slightly overlapping the first shade where they meet. The sponge’s porous texture naturally creates a soft, diffused blend that mimics authentic tie-dye perfectly. Add a third or fourth color if you want more complexity. The more haphazard your application, the better the result. Top with a glossy finish to enhance the dreamy, watercolor quality.
Classic Tie-Dye Color Palettes
- Bright pink, orange, yellow, and blue for maximum 70s energy
- Purple, teal, and pink for a slightly muted, boho feel
- Red, orange, and yellow for warm, sunset-inspired vibes
- Blue, green, and purple for cool-toned psychedelia
- Pastel pink, lavender, and mint for a softer interpretation
Worth knowing: If you want sharper color separation rather than gentle blending, apply colors to a completely dry base and use a dry sponge with less pressure. If you prefer deeper blending, work on a barely-set wet base where colors naturally diffuse into each other.
4. Geometric Color Blocking for Modern 70s Appeal
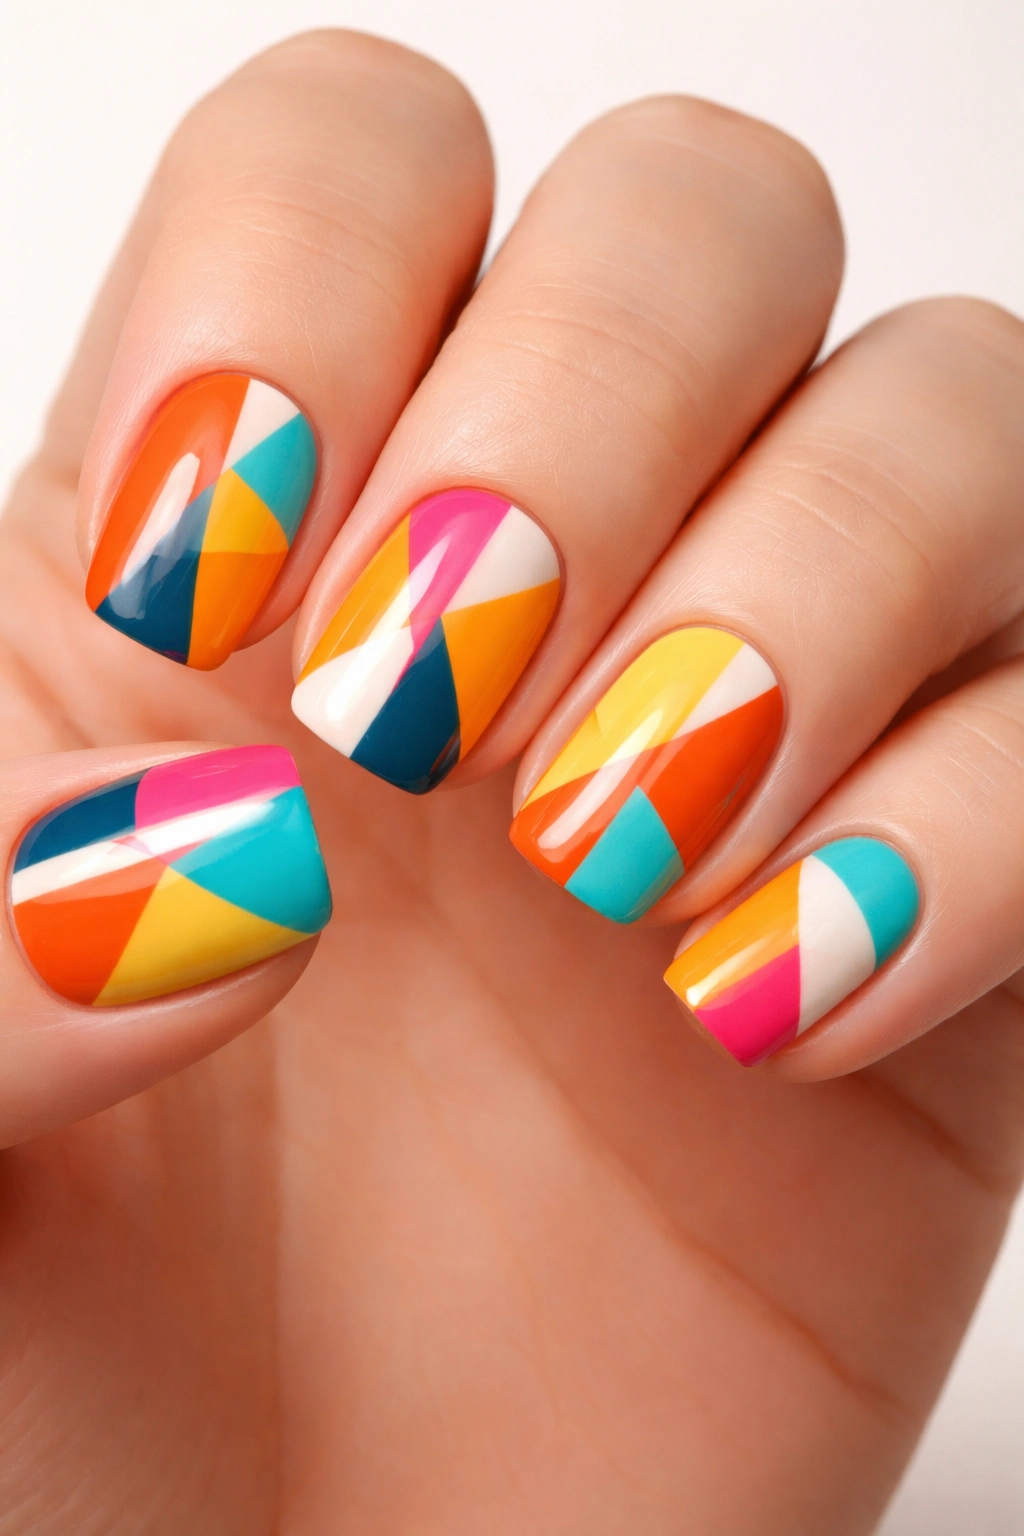
While psychedelic swirls grab attention, geometric color blocking offers a more structured, architectural approach to 70s style that feels surprisingly contemporary. Bold shapes in contrasting colors create visual impact without requiring artistic precision. This design works beautifully on both short, practical nails and long statement-making lengths.
Designing Sharp Geometric Patterns
Color blocking relies on clean lines and deliberate shape arrangement. Paint your base color, then use painter’s tape or a nail art pen to create geometric divisions. Triangles, rectangles, circles, and half-moons are all fair game. Paint each section with a distinctly different color, remove your tape carefully, and seal with a top coat.
For a more freehand approach, use a thin brush to paint bold lines that divide your nail into sections. Don’t worry about perfect symmetry—slightly irregular geometric patterns actually feel more authentically 70s. The confidence in the color choices matters more than precise execution.
Geometric Layouts That Work
- Vertical color-blocked halves in contrasting bright shades
- Diagonal stripes in three to four complementary colors
- Stacked horizontal rectangles in warm earth tones
- Diamond or triangle shapes in primary colors against a neutral base
- Half-moon designs combining bold and pastel shades
Insider note: Stamping plates make geometric patterns accessible without the precision challenge. Many nail stamping lines offer dedicated 70s geometric designs that capture this aesthetic flawlessly.
5. Disco Ball and Metallic Nails for Pure Glamour
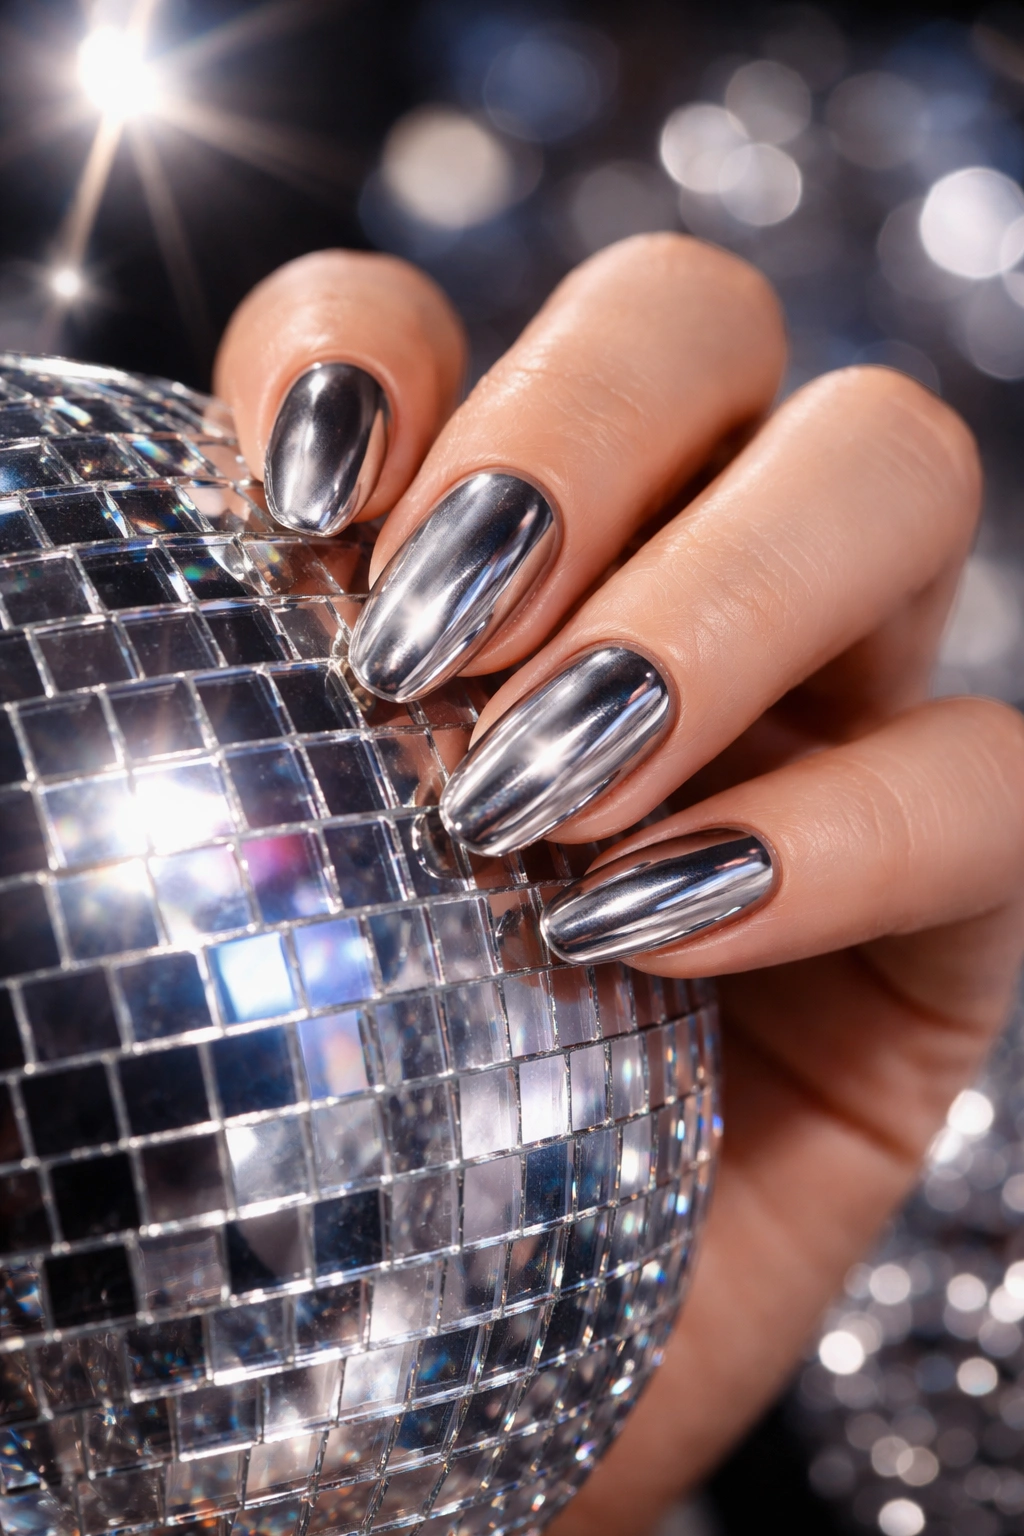
When people think of 70s luxury, they think disco—and disco means shimmer, shine, and unapologetic glamour. Metallic and chrome nails bring that disco ball energy right to your fingertips, capturing the reflective magic of the era’s most iconic nightlife aesthetic. Whether you go full chrome or use metallics as accents, this style radiates confidence and polish.
Achieving That Coveted Chrome Finish
Chrome and metallic nail polishes have evolved dramatically, and achieving a professional-grade disco ball effect is now completely achievable at home. Apply a smooth base coat, then apply chrome polish in thin, even layers—multiple thin coats create a better finish than one thick application. Use a specialized chrome powder if you’re feeling adventurous; the results are genuinely stunning.
Silver and gold chrome finishes are the classic choices, but don’t overlook holographic or iridescent versions, which catch light in multidirectional ways that feel even more magical. Allow each coat to dry fully before adding layers. Seal with a shiny top coat to lock in that reflective quality.
Metallic Design Approaches
- Full chrome manicure in silver or gold for maximum impact
- Chrome tips with a nude or pastel base for subtle disco vibes
- Metallic accents on one or two nails with solid colors on others
- Gradient effect from solid color to full metallic
- Holographic chrome layered over patterned nail art for added dimension
Real talk: Not all chrome polishes perform equally. Investing in a quality brand—whether that’s a professional salon option or a well-reviewed drugstore option—makes a tangible difference in the finish quality and longevity.
6. Checkerboard Patterns for Retro Boldness
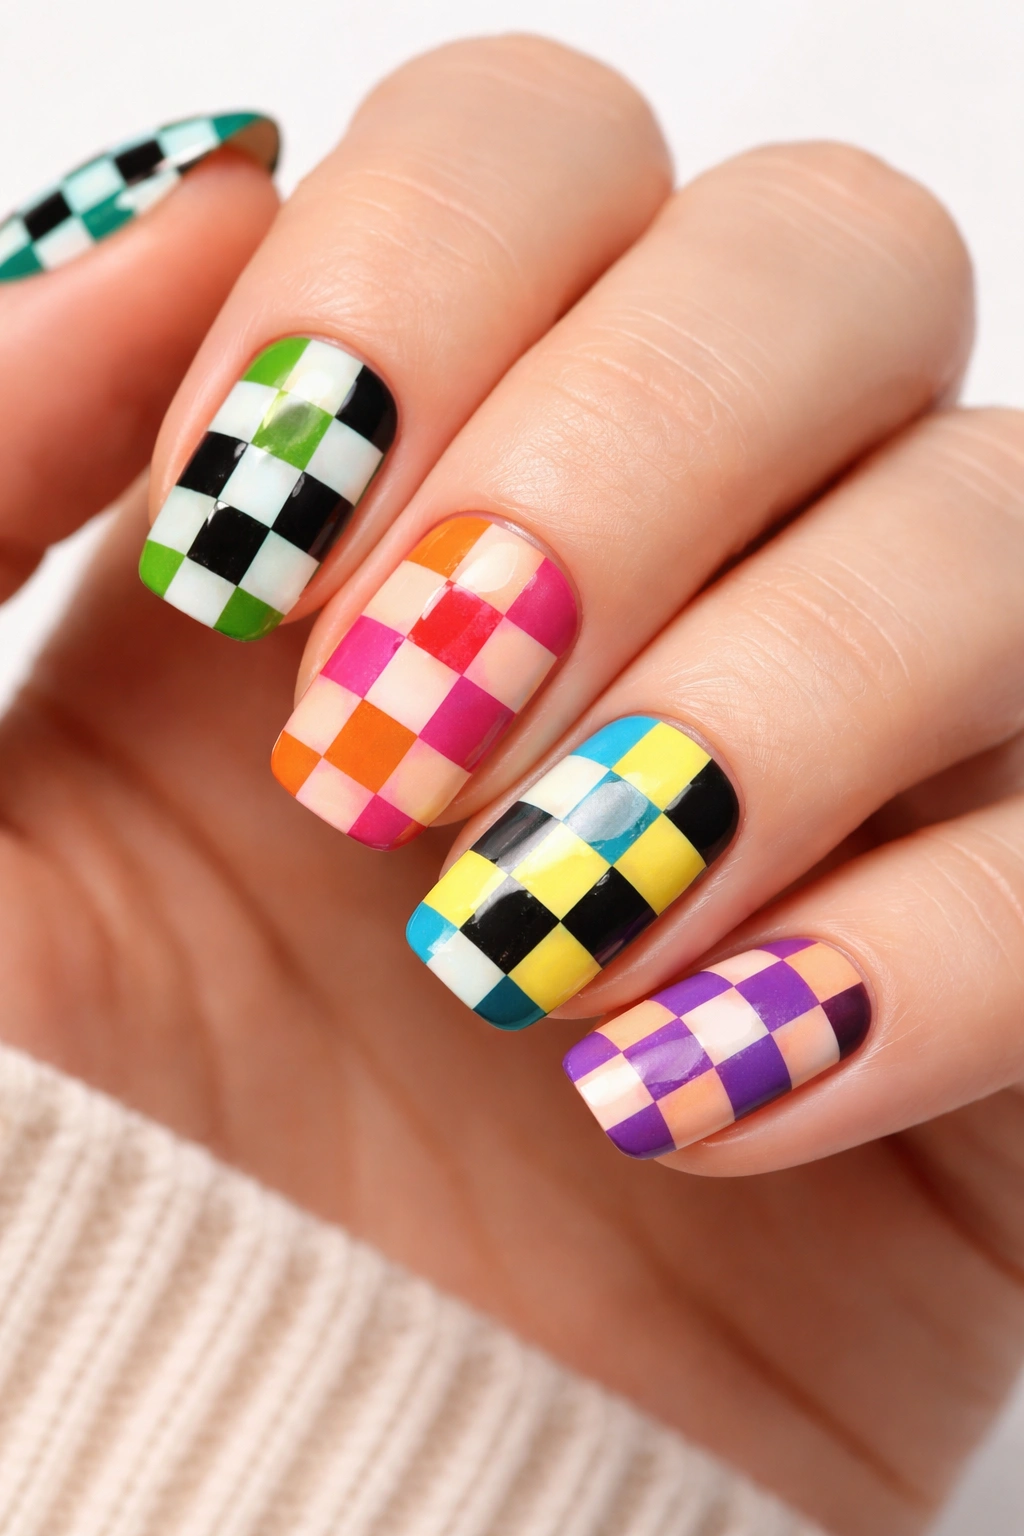
Checkerboard nails represent pure 70s energy—bold, graphic, instantly recognizable, and surprisingly wearable in spite of their maximalist appearance. The pattern was everywhere in 70s design, and translating it to nails creates a design that feels nostalgic without requiring any freehand painting skill. Whether you make it perfectly uniform or intentionally imperfect, checkerboard designs pack personality.
Creating Checkered Patterns at Home
The easiest method is using stamping plates specifically designed for checkerboard patterns. Paint your base color, stamp the checker design, and seal. This takes three minutes and delivers precision results. If you prefer hand-painting, use a toothpick or dotting tool to create a grid of dots, then fill alternating squares with a contrasting color using a tiny brush.
For a more organic, less structured look, paint wavy checkerboard patterns instead of perfectly straight lines. This variation feels more authentically 70s and is far more forgiving if your lines aren’t perfectly parallel. The slight irregularity adds charm rather than looking like a mistake.
Checkerboard Color Combinations
- Vibrant purple and orange for maximum contrast and retro energy
- Black and white for stark, graphic impact
- Brown and mustard yellow for earthy, warm vibes
- Hot pink and turquoise for playful boldness
- Navy and cream for a slightly more refined approach
Pro tip: Checkerboard patterns feel less overwhelming on shorter nails. If you have shorter nail beds, consider using just two to three rows of checks rather than a full grid. This maintains the visual impact while feeling more proportionate to your nail size.
7. Groovy Waves and Undulating Patterns
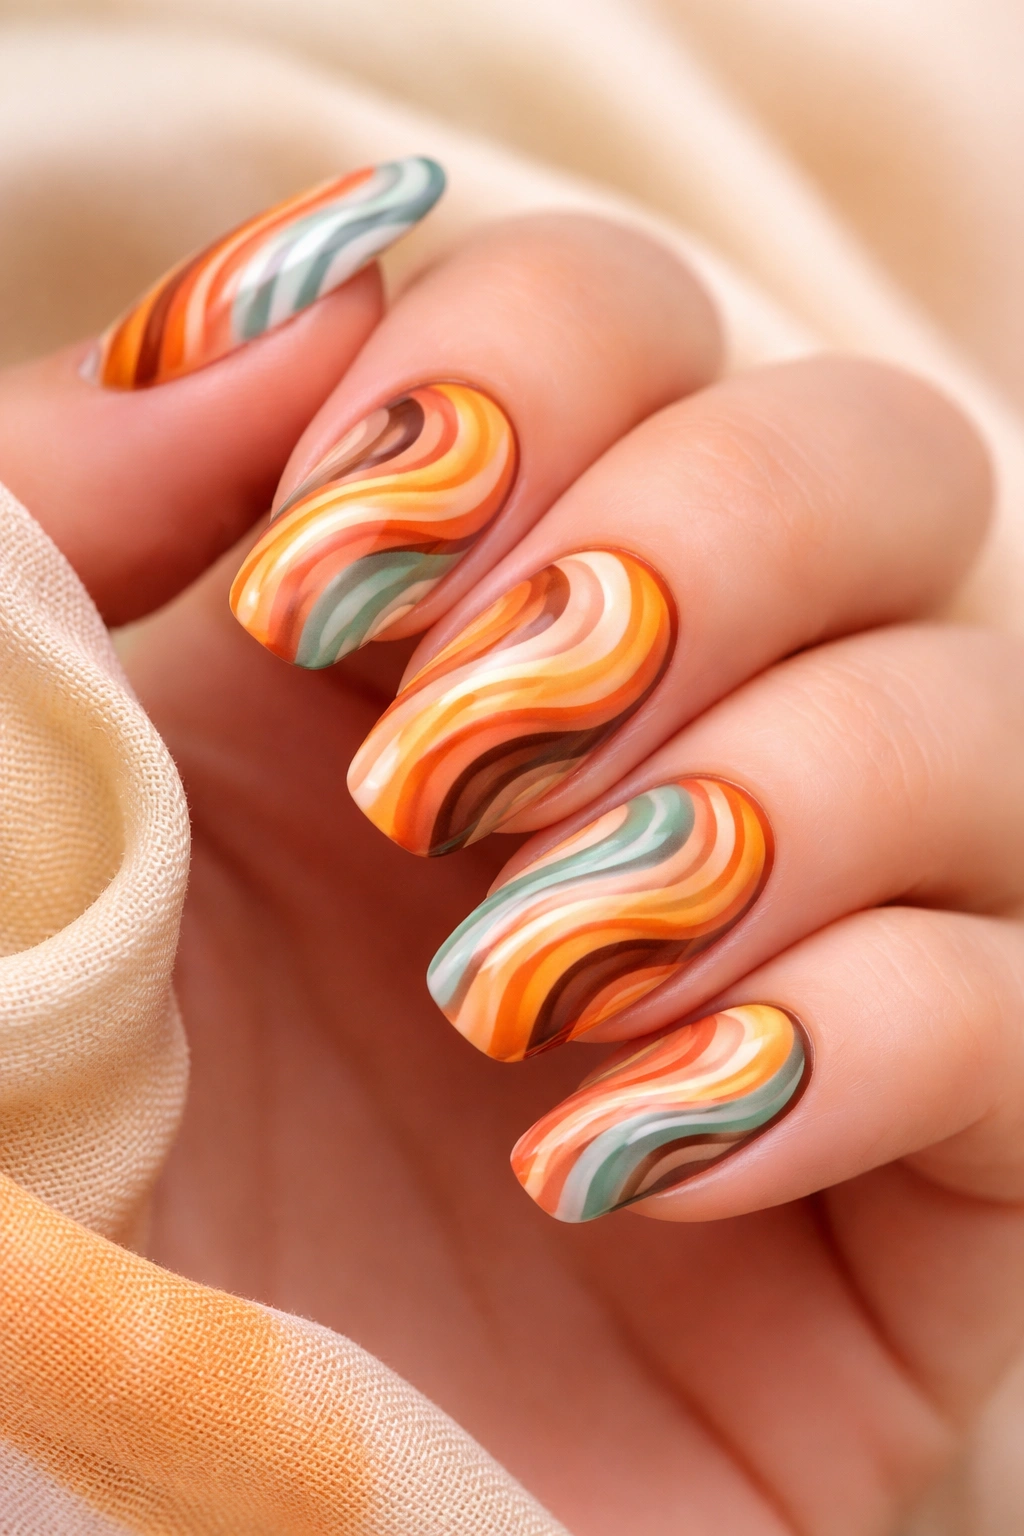
If psychedelic swirls feel too chaotic and color blocking feels too structured, groovy waves offer the perfect middle ground. These flowing, undulating patterns capture that 70s sensibility—organic, rhythmic, and deeply calming to look at. Waves work beautifully whether you interpret them literally as water-like movements or more abstractly as curved lines that move across your nails.
Painting Fluid Wave Patterns
Begin with a base color and let it dry completely. Using a thin brush, paint curved lines that flow across and around your nails. You can create waves that sweep horizontally from side to side, waves that move diagonally from one corner to another, or waves that swirl in more complex patterns. The key is maintaining a consistent rhythm—even if the waves aren’t perfectly uniform, they should feel intentional rather than accidental.
Layer multiple wave colors for added complexity. Paint the first wave pattern in one shade, let it dry, then add offset waves in contrasting colors. This creates depth and visual interest without requiring advanced artistic ability. The imperfection is actually what makes waves feel authentically retro.
Wave Patterns Worth Trying
- Red, yellow, and blue waves on a neutral base for primary color vibrancy
- Single-color waves with contrasting background for graphic simplicity
- Rainbow waves in all the warm 70s tones (rust, mustard, burnt orange, avocado)
- Fine, delicate waves in pastels for a softer interpretation
- Thick, bold waves combined with solid color sections for dramatic impact
Quick tip: If your waves feel too shaky or irregular, remember that this is retro design, not geometric precision. Wobbly, imperfect waves often feel more authentically 70s than perfectly executed ones. Embrace the quirks rather than fighting them.
8. 90s Minimalist Geometry and Line Art
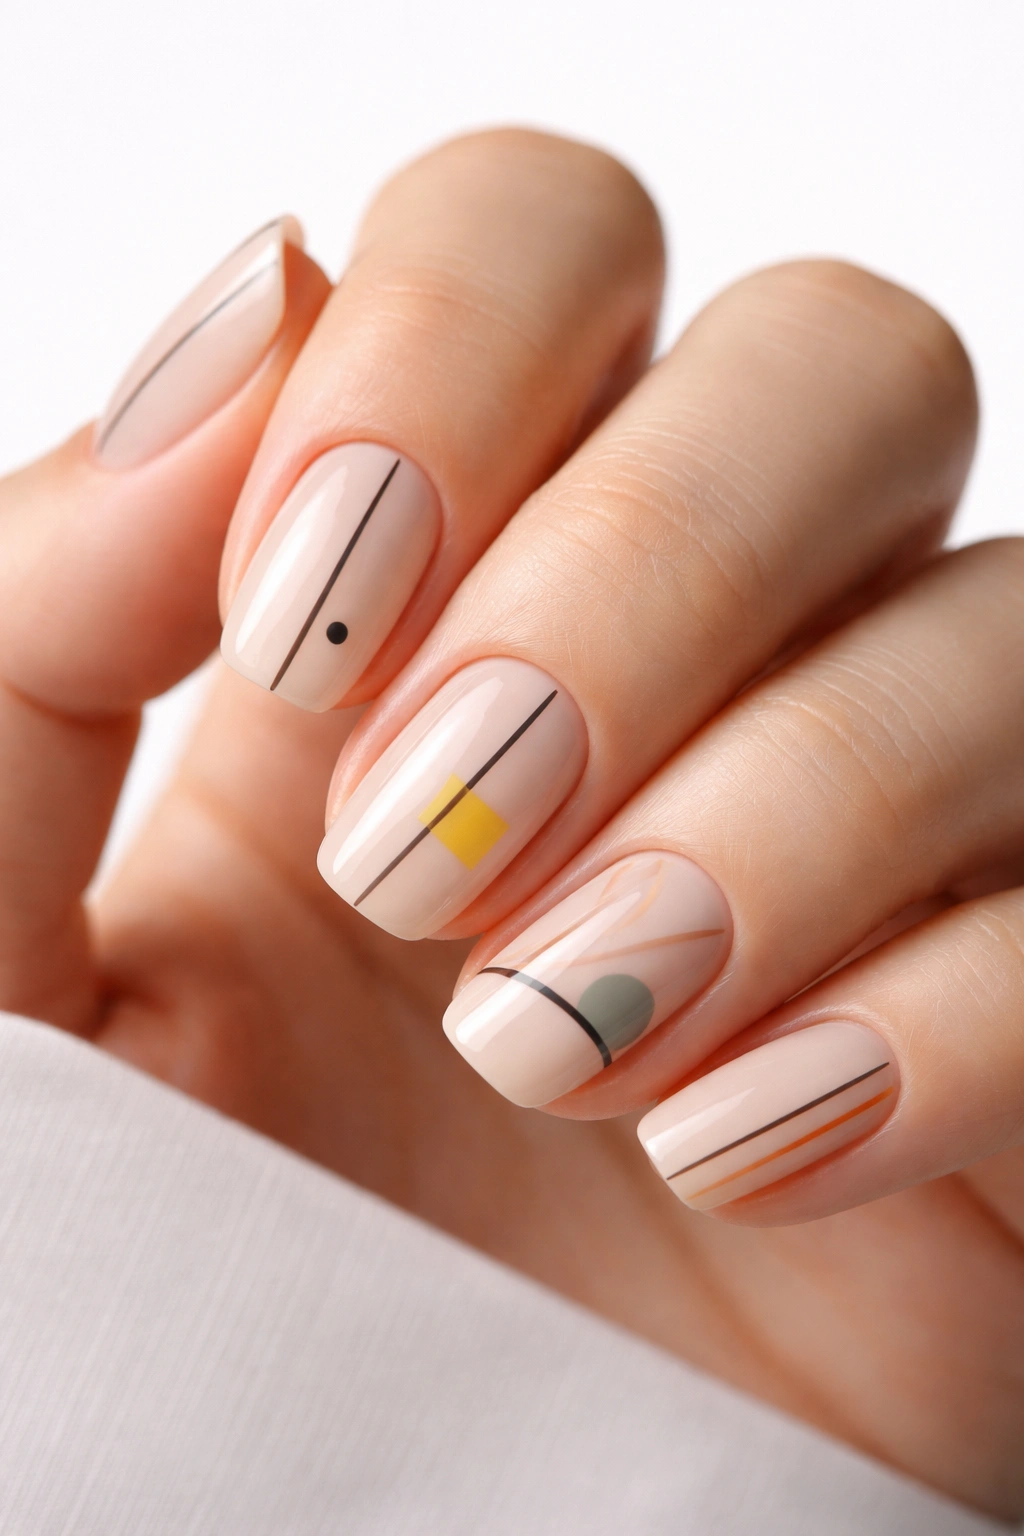
While the 70s celebrated maximum everything, the 90s introduced a counterpoint: deliberate simplicity paired with unexpected color combinations. Minimalist nail art from the 90s features clean lines, negative space, and strategic color placement that feels modern while still distinctly retro. This style is perfect if you want a nod to nostalgia without overwhelming your nails with pattern or color.
Creating Minimalist Geometric Designs
Start with a neutral base—nude, cream, white, or soft grey—and use a thin brush or nail pen to add simple geometric elements. Thin straight lines, perfect circles, or subtle half-moons are all 90s classics. You can create asymmetrical line art where different nails feature different minimal designs, or use a repeating pattern of simple shapes across all nails.
Color restraint is key here. Rather than filling every space, use color sparingly—perhaps a single thin line in a bold shade, or geometric shapes on just one or two accent nails. The negative space isn’t empty; it’s intentional and contributes to the overall design’s impact.
Minimalist 90s Design Ideas
- Single thin line in a bold color on a nude base across all nails
- Small geometric shapes (circles, triangles, squares) spaced intentionally across nails
- Half-moon designs combining two complementary colors
- Asymmetrical line art where each nail features different minimal graphics
- Checkerboard or dot patterns in small, delicate scale rather than bold blocks
Worth knowing: This style works especially well on shorter, professional-length nails where pattern space is limited. The simplicity means less is more, making it feel sophisticated rather than bare.
9. Pastel Nostalgia Blending 70s and 90s Sensibilities
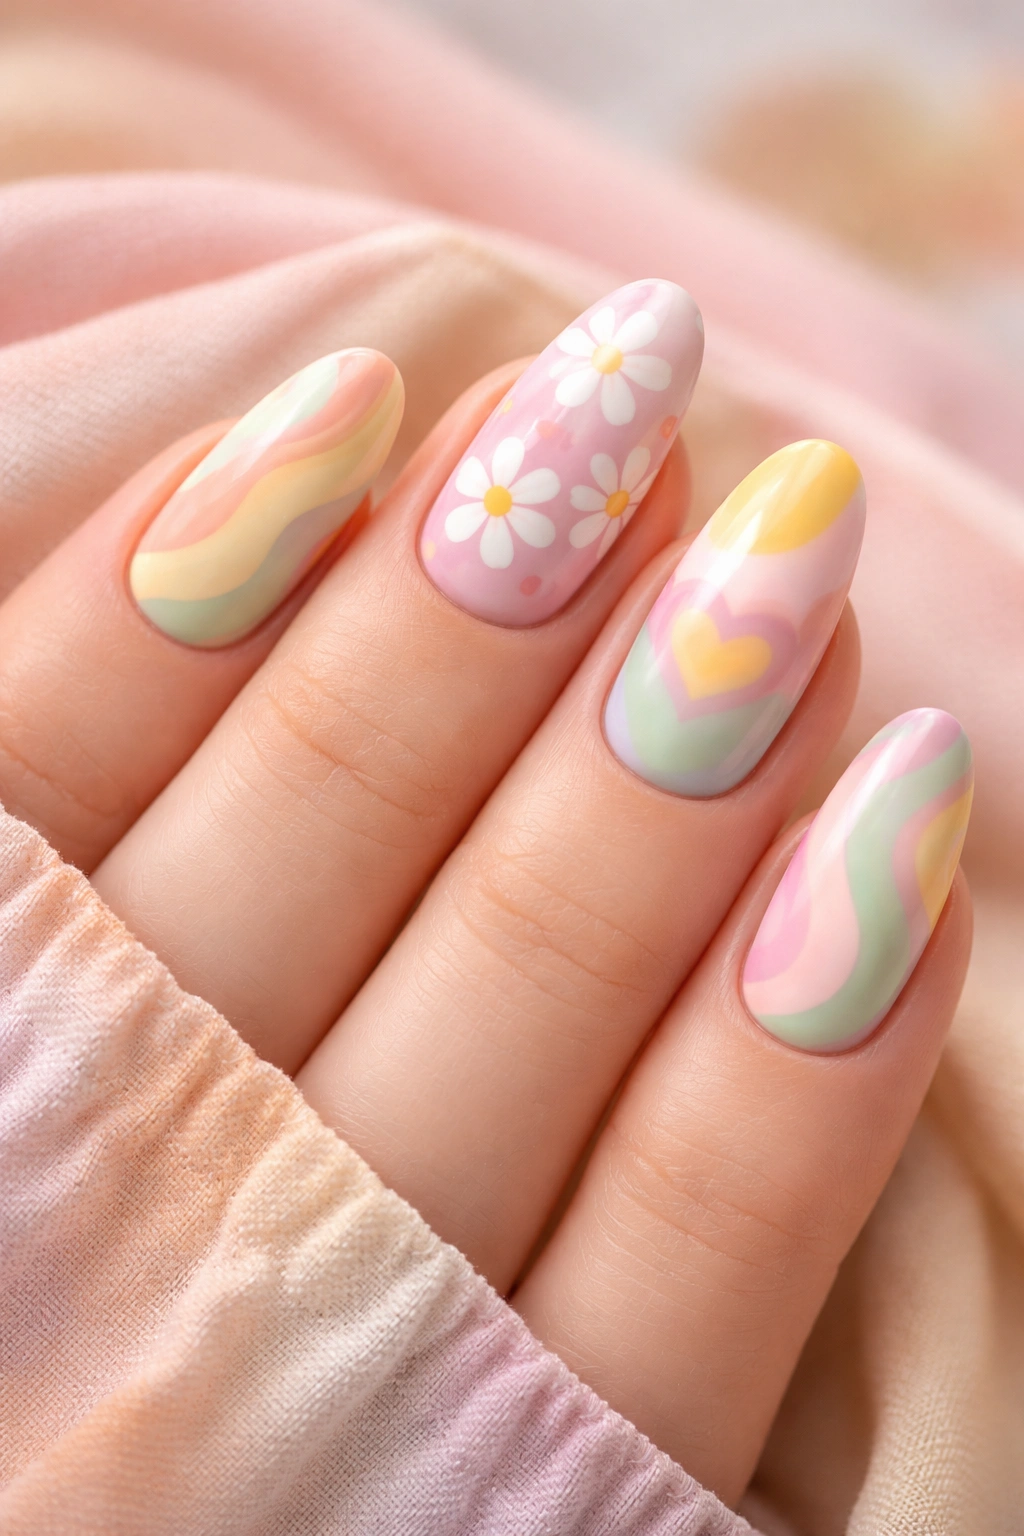
Both the 70s and 90s had distinct approaches to pastel shades. The 70s interpreted pastels through soft, dreamy, almost creamy lenses—pale yellows, soft pinks, mint greens. The 90s brought back pastels with a slightly more saturated, playful energy. Combining these interpretations creates a design that’s unmistakably retro yet comfortable to wear in any setting. Pastel retro nails feel whimsical and nostalgic without demanding attention the way brighter designs do.
Building Soft Pastel Retro Designs
Begin with a pale base color—think pale blue, soft pink, creamy yellow, or mint green. Layer gentle patterns on top using complementary pastel shades. This could be soft tie-dye in multiple pastels, delicate flower designs, or simple wave patterns in coordinating pale tones. The overall effect feels cohesive and gentle while still maintaining clear retro reference points.
Alternatively, build a multicolored pastel design using soft versions of traditional 70s colors. Paint sections in pale rust, soft avocado, muted mustard, and creamy peach. The softer tone of each shade changes the entire aesthetic from bold-and-brash to sophisticated-and-dreamy while maintaining the same retro structure.
Pastel Retro Color Combinations
- Soft pink, lavender, and mint for a gentle, dreamy approach
- Pale yellow, soft blue, and creamy white for subtle sweetness
- Muted rust, avocado, and cream for earthy softness
- Pale coral, soft sage, and white for nature-inspired delicacy
- Lavender, blush, and soft yellow for romantic nostalgia
Insider note: Pastel shades often require more careful base coat application because they can be sheer. Use a white or pale base coat first, then layer your pastel colors for maximum vibrancy without needing additional coats.
10. Mismatch Mismatch Nails Celebrating Individuality
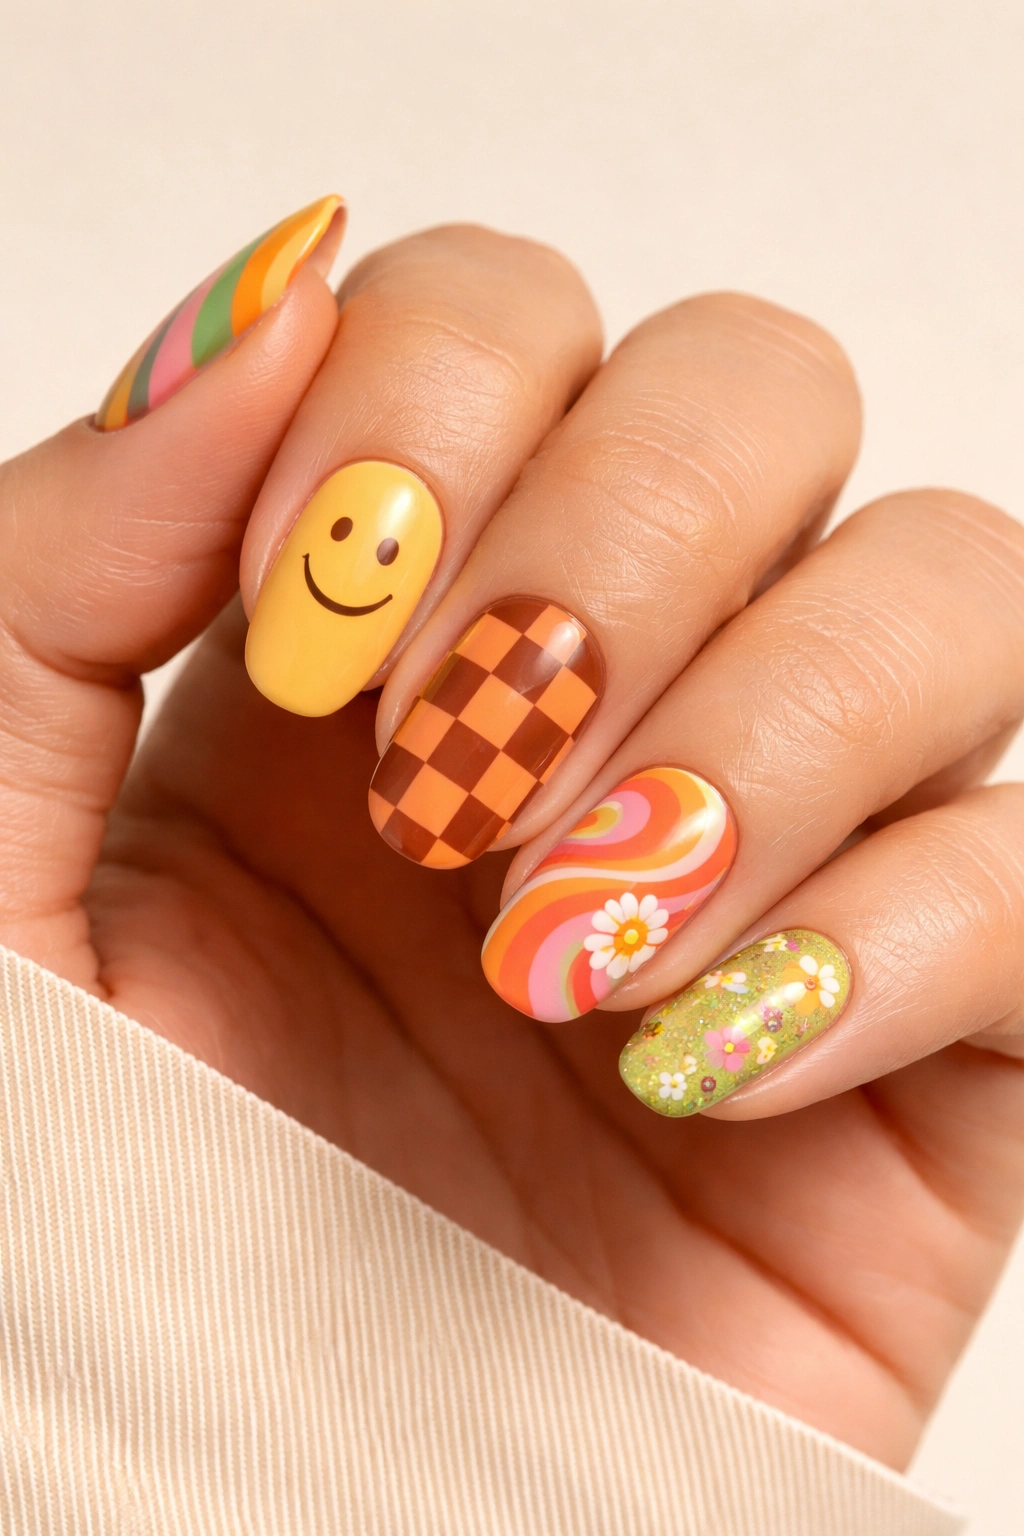
The ultimate retro-meets-modern design: mismatch nails where each finger features a completely different design, pattern, or color. This approach epitomizes the 70s and 90s celebration of individuality, and it allows you to incorporate multiple retro design ideas on a single manicure. The freedom to mix-and-match without worrying about cohesion is actually deeply liberating.
Creating a Unified Mismatch Manicure
The trick to making mismatch nails feel intentional rather than accidental is using a unifying element that ties designs together. This might be a consistent color palette (all designs use the same three to four colors), a shared theme (all features retro florals, psychedelic patterns, or geometric shapes), or a repeating element (all designs include a certain symbol or pattern type).
Paint each nail with a different base color, then add distinct pattern or design to each one. Include at least one solid color nail to provide visual rest, and alternate between simpler and more complex designs to maintain balance. A classic approach pairs psychedelic swirls on one nail with geometric blocking on another, flower designs on a third, and simple lines on a fourth, all using colors that complement each other.
Mismatch Design Combinations
- Combine 70s flowers, waves, swirls, and geometric shapes using the same color palette
- Alternate between 70s bold designs and 90s minimalist line art across all fingers
- Mix metallic accents with solid colors and patterned designs
- Pair checkerboard patterns with florals with waves in coordinating shades
- Combine pastel tie-dye with soft floral designs and clean geometric lines
Pro tip: Start your mismatch manicure by selecting your unifying element first. If you decide all designs will use rust, mustard, and cream, every nail automatically feels cohesive even though they’re visually distinct. This framework prevents mismatch nails from feeling chaotic or unintentional.
Final Thoughts

Creating a retro manicure that captures 70s or 90s energy doesn’t require advanced nail art skills or expensive salon visits. It requires permission to embrace color, pattern, and personality—the exact qualities that made these eras so visually memorable in the first place. Whether you gravitate toward psychedelic swirls, soft pastels, bold geometry, or playful mismatch designs, the key is committing to the aesthetic with confidence.
The most satisfying part of working with these retro designs is that they’re inherently forgiving. Imperfect waves feel more authentically 70s. Slightly wobbly florals capture the handmade charm of the era. Even your chrome application doesn’t need to be flawless because disco was never about perfection—it was about presence, glamour, and unapologetic joy.
Start with whichever design speaks to you most, invest in quality polish and a few basic tools (a fine brush, a dotting tool, and a sponge), and give yourself permission to experiment. Your nails are a canvas for nostalgia, self-expression, and a little bit of groovy fun. The 70s and 90s left us with a treasure trove of nail design inspiration—now it’s your turn to make it your own.
