

Picture yourself sinking into a tub filled with warm, milky water and delicate flower petals floating on the surface. That serene, dreamy aesthetic has inspired one of the most gorgeous nail trends you’ll find at salons everywhere. Milk bath nails capture that ethereal vibe right on your fingertips, featuring sheer, translucent finishes that look like your nails have been dipped in creamy bath water.
This manicure style brings together the best of both worlds—it’s neutral enough for everyday wear yet interesting enough to turn heads. The sheer, milky base creates a soft-focus effect that makes your nails look naturally polished and healthy. Whether you’re heading to a wedding, job interview, or just want something prettier than plain polish, milk bath nails deliver that effortlessly chic look.
What makes this trend so appealing is its versatility. You can keep things minimal with just a sheer milky wash, or dial things up with floral accents, glitter, or chrome finishes. The translucent quality means your natural nail slightly peeks through, creating dimension and depth that solid polish can’t match. It’s like applying a dreamy filter to your manicure.
If you’re ready to try this trend but aren’t sure where to start, we’ve rounded up ten stunning milk bath nail ideas that showcase different ways to rock the sheer finish. From classic florals to unexpected color twists, there’s something here for every style preference.
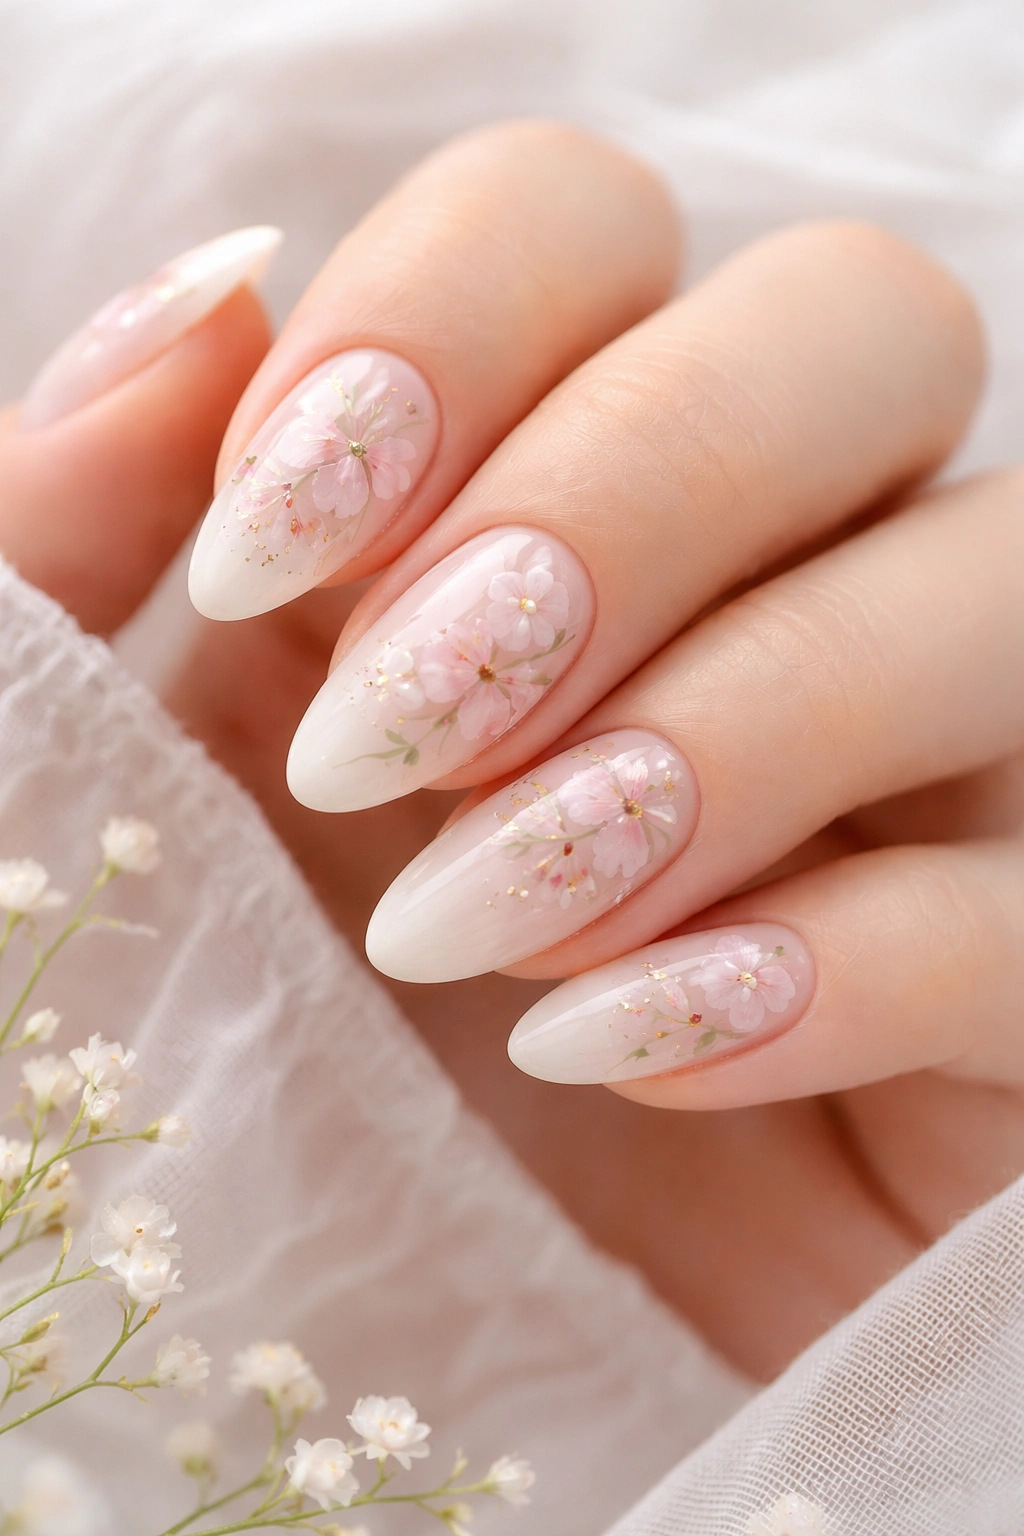
1. Classic White Milk Bath with Dried Florals
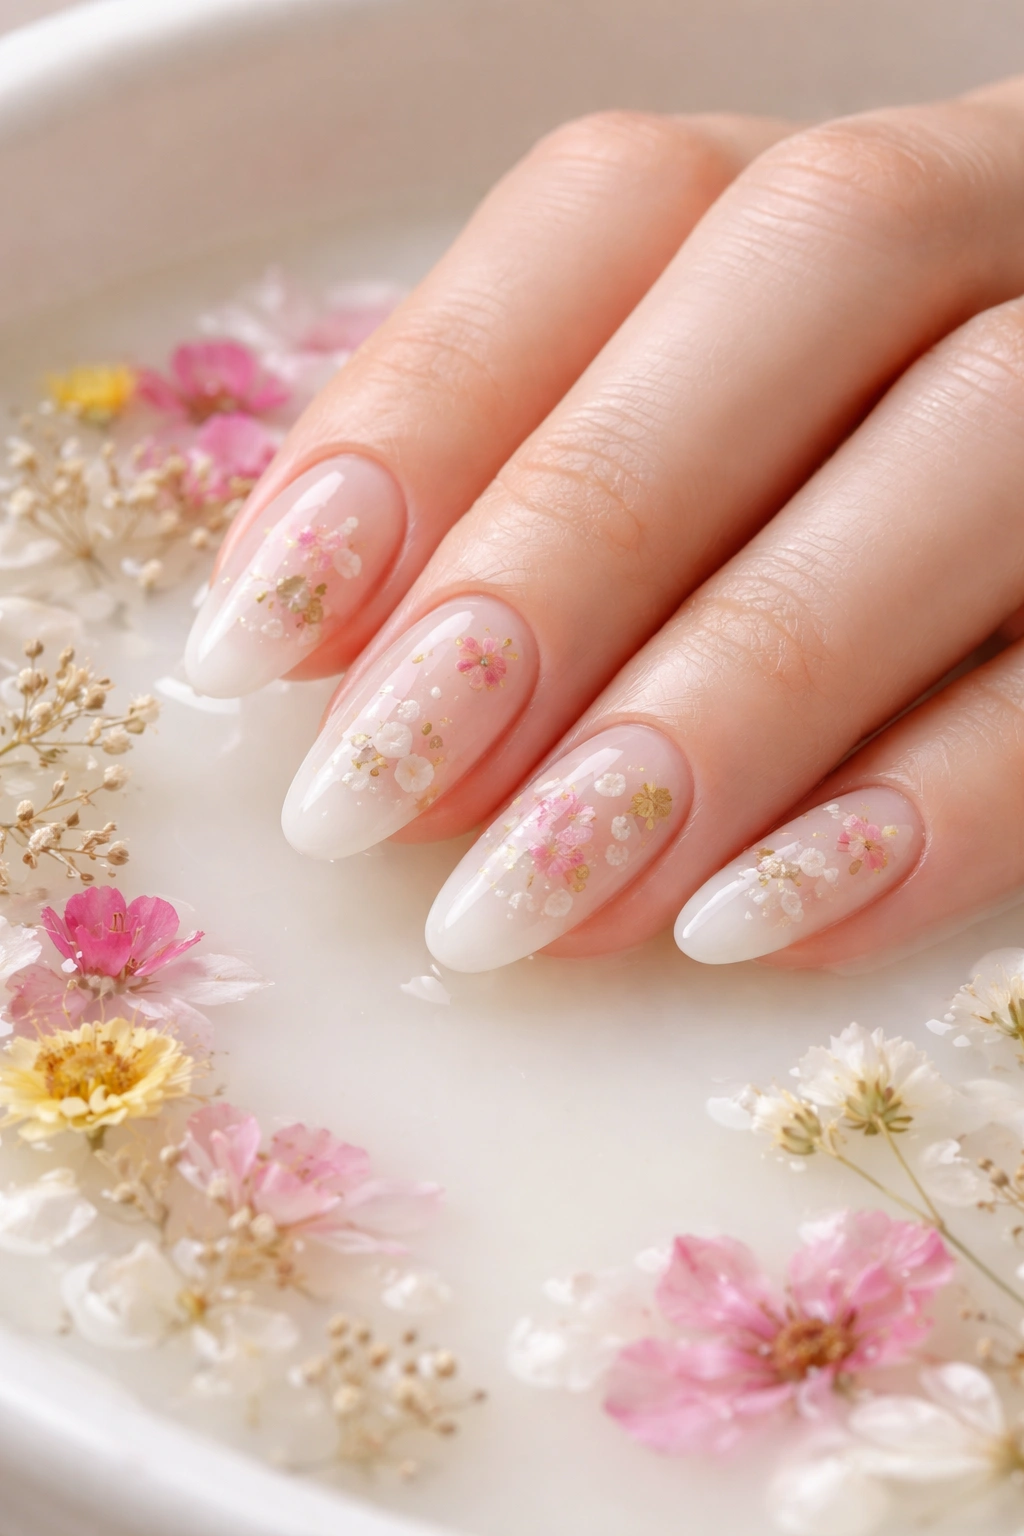
This is the OG milk bath nail that started it all. It features a sheer white base with actual dried flower petals encapsulated in the polish, creating that authentic “flowers floating in bathwater” effect.
The beauty of this design lies in its delicate, romantic appearance. Tiny pieces of dried flowers—think baby’s breath, lavender, or rose petals—are carefully placed onto wet polish, then sealed with another sheer layer. The flowers appear to be suspended in milky liquid, just like they would in an actual milk bath.
Why It’s Timeless
This version works for absolutely any occasion. Weddings? Perfect. Brunch with friends? Equally great. The neutral white base goes with every outfit in your closet, while the floral elements add just enough visual interest to keep things from feeling boring.
The sheer finish also means you won’t see harsh lines as your nails grow out. Your manicure looks fresh for weeks, making it a smart choice if you can’t get to the salon frequently.
Application Tips
- Use real dried flowers for authenticity, or grab floral nail stickers for easier application
- Apply flowers while the first milky coat is still tacky so they’ll stick properly
- Seal everything with a glossy top coat to enhance that liquid, bath-like appearance
- Keep the flowers small and delicate—oversized petals can look clunky rather than elegant
Pro tip: Pre-soak real flower petals in clear polish before applying them. This makes them flexible enough to lay flat against your nail without creating bumps.
2. Strawberry Milk Bath Nails
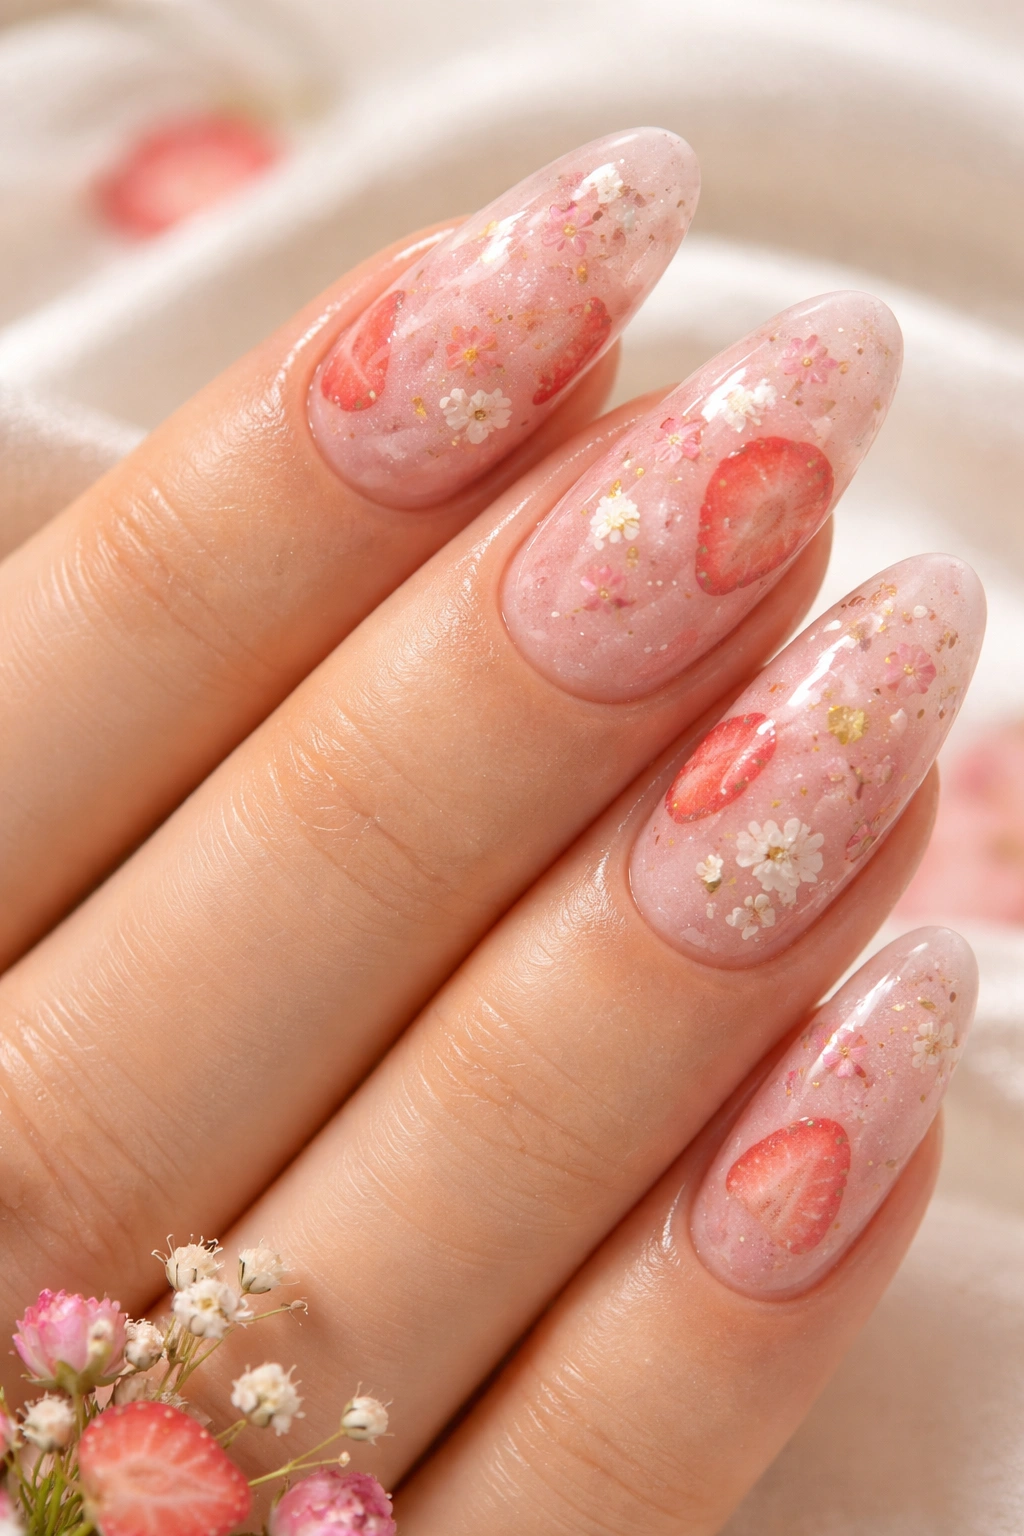
Why stick with white when you can have pink? Strawberry milk bath nails swap the classic white base for a soft, sheer pink that looks good enough to drink.
This variation brings a slightly sweeter, more playful energy while maintaining that dreamy translucent quality. The pink adds warmth that flatters practically every skin tone, from fair to deep. It’s like the difference between whole milk and strawberry milk—both delicious, just different vibes.
What Makes It Special
The sheer pink creates a naturally flushed look on your nails that mimics the healthy glow of well-maintained nail beds. It’s one of those “your nails but better” shades that looks polished without trying too hard.
You can layer it with white floral designs, gold foil flecks, or keep it simple with just the pink wash. Either way, it reads feminine and soft without being overly girly.
Color Selection Guide
- Choose a pink with white undertones rather than coral or peach for that authentic milk bath effect
- One coat should be sheer enough to see your nail bed; two coats bring more opacity
- Mix regular pink polish with clear top coat if you can’t find the perfect sheer shade
- Pair with white or cream-colored dried flowers for a cohesive look
Fun fact: This variation has become incredibly popular for bridesmaids who want something romantic but not too matchy-matchy with traditional bridal whites.
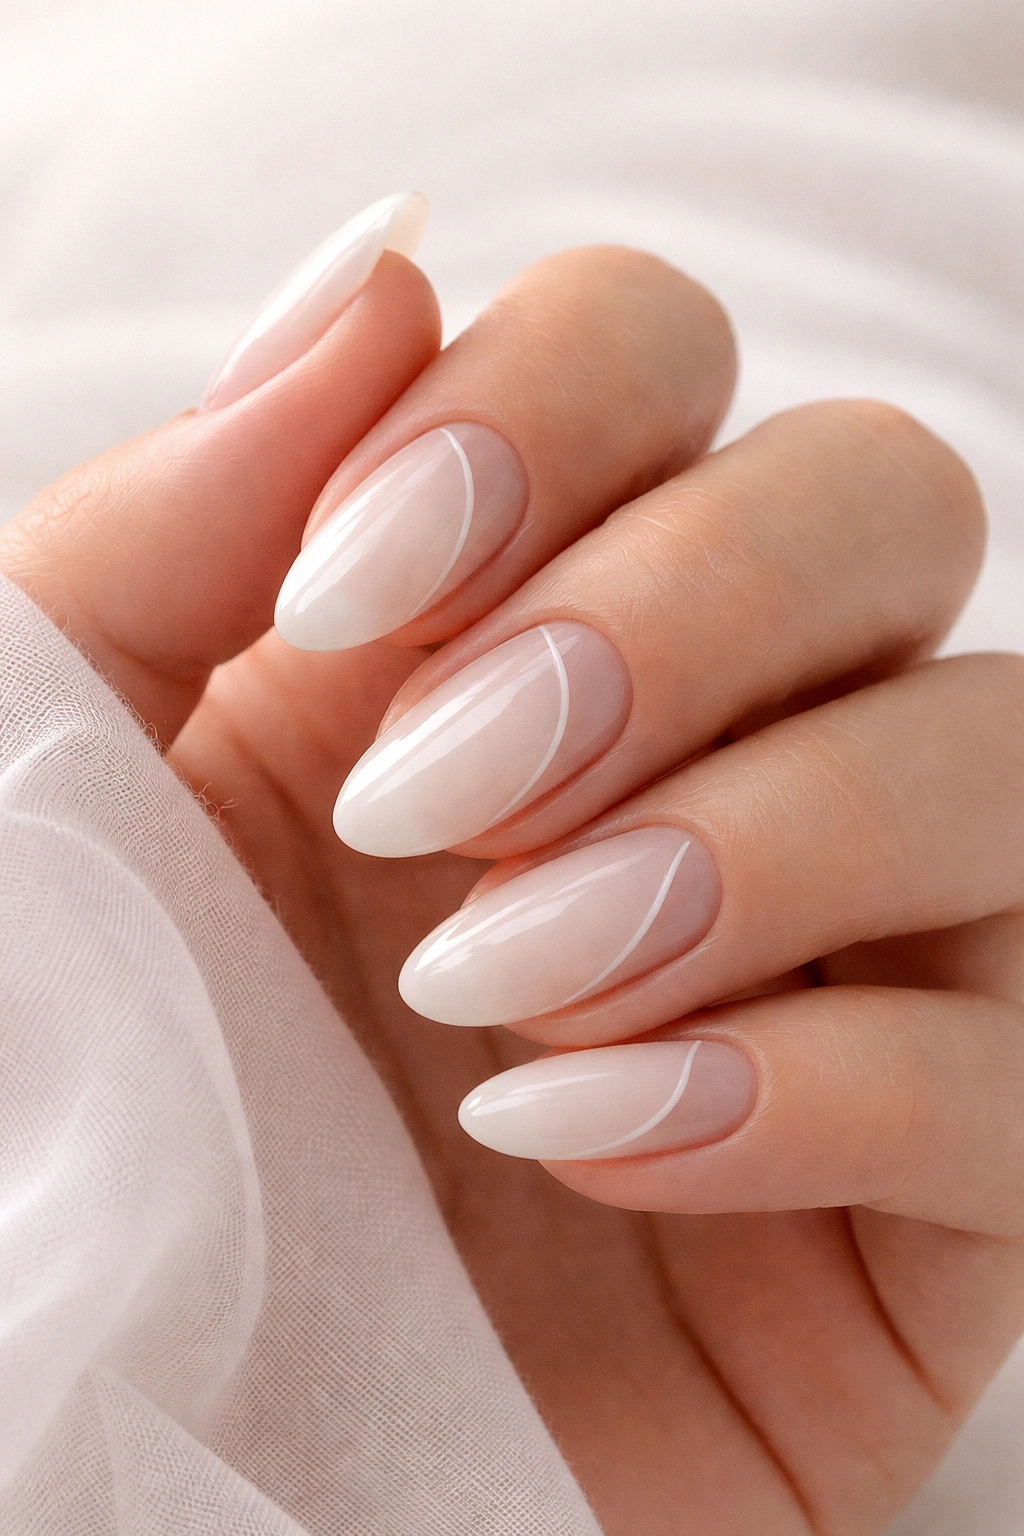
3. Milky French Manicure
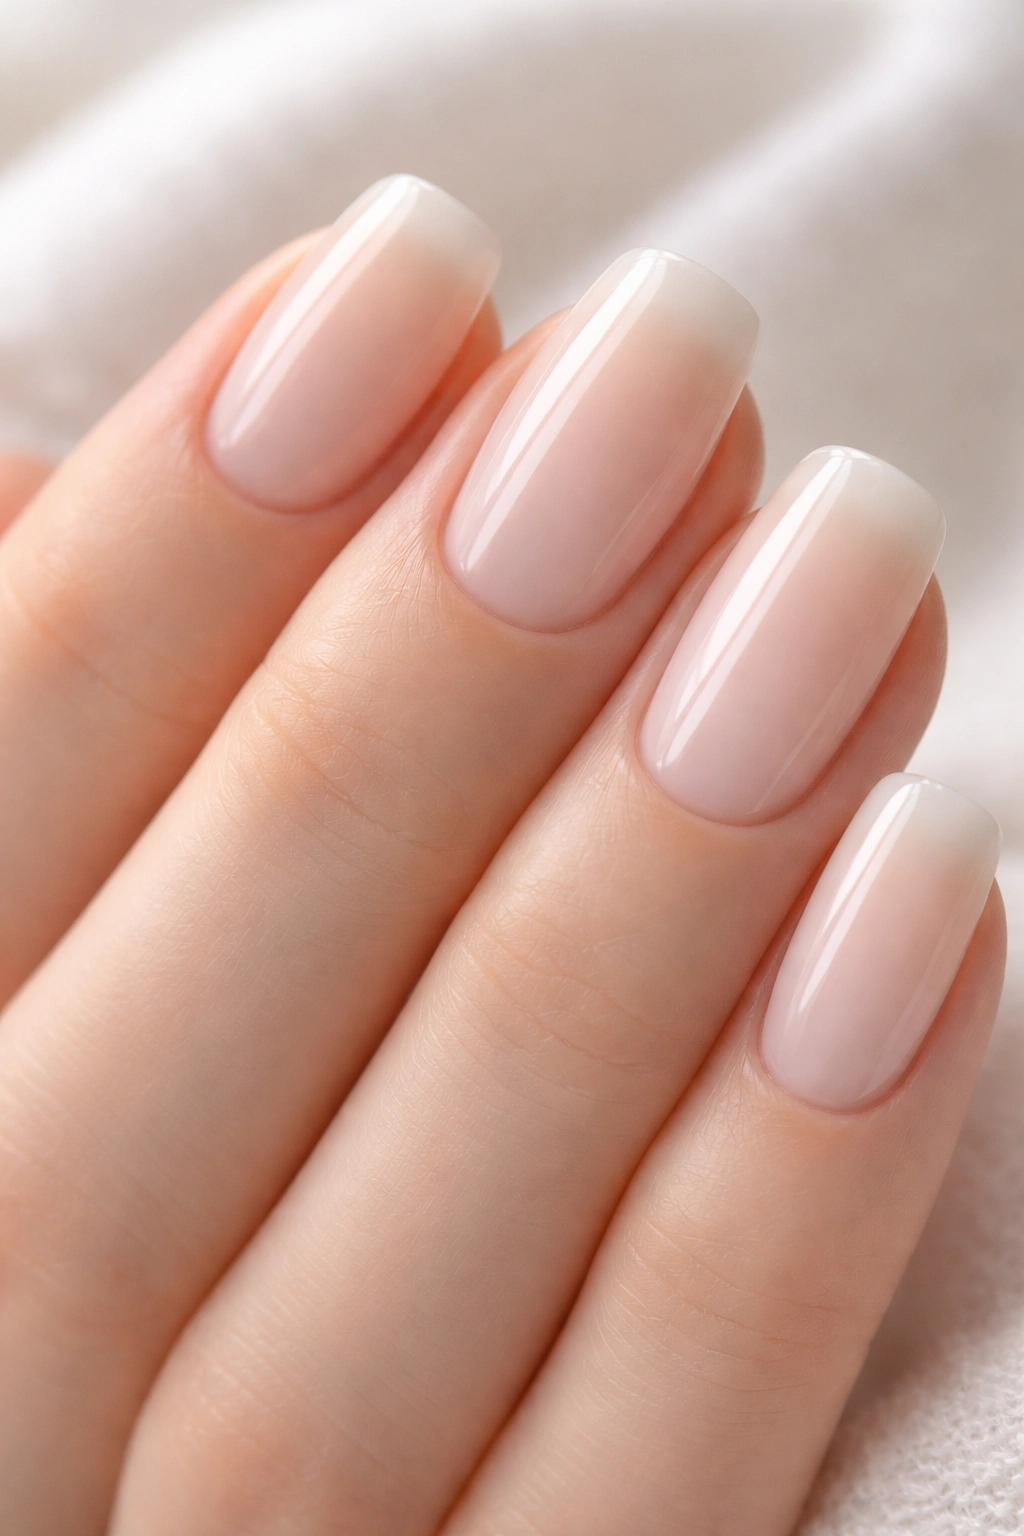
The French manicure gets a major upgrade when you combine it with the milk bath trend. Instead of the traditional crisp white tips, this version uses a sheer milky base that allows a subtle French tip to barely peek through.
This hybrid design takes two iconic nail styles and merges them into something that feels both familiar and fresh. The milky overlay softens the French tip, creating a blurred, watercolor-like effect that’s more modern than your mom’s French mani.
How to Achieve the Look
Start with your French tips—either freehand or with guides. Then, instead of leaving them crisp, apply one or two coats of sheer milky white polish over the entire nail. The tips will show through softly, creating that dreamy, diffused appearance.
The key is choosing the right opacity. Too sheer and your tips disappear; too opaque and you lose the milk bath effect. It’s a balancing act, but when you nail it (pun intended), the result is stunning.
Best Nail Shapes for This Design
- Almond and oval shapes showcase the gradient beautifully
- Shorter square nails can pull this off with a thinner French tip
- Stiletto or coffin shapes create dramatic length for the effect to really shine
- Round nails work great for a more understated, natural-looking version
This design is particularly genius because as your nails grow, the French tip naturally extends without looking grown out or sloppy.
4. Milk Bath Nails with Gold Foil Accents
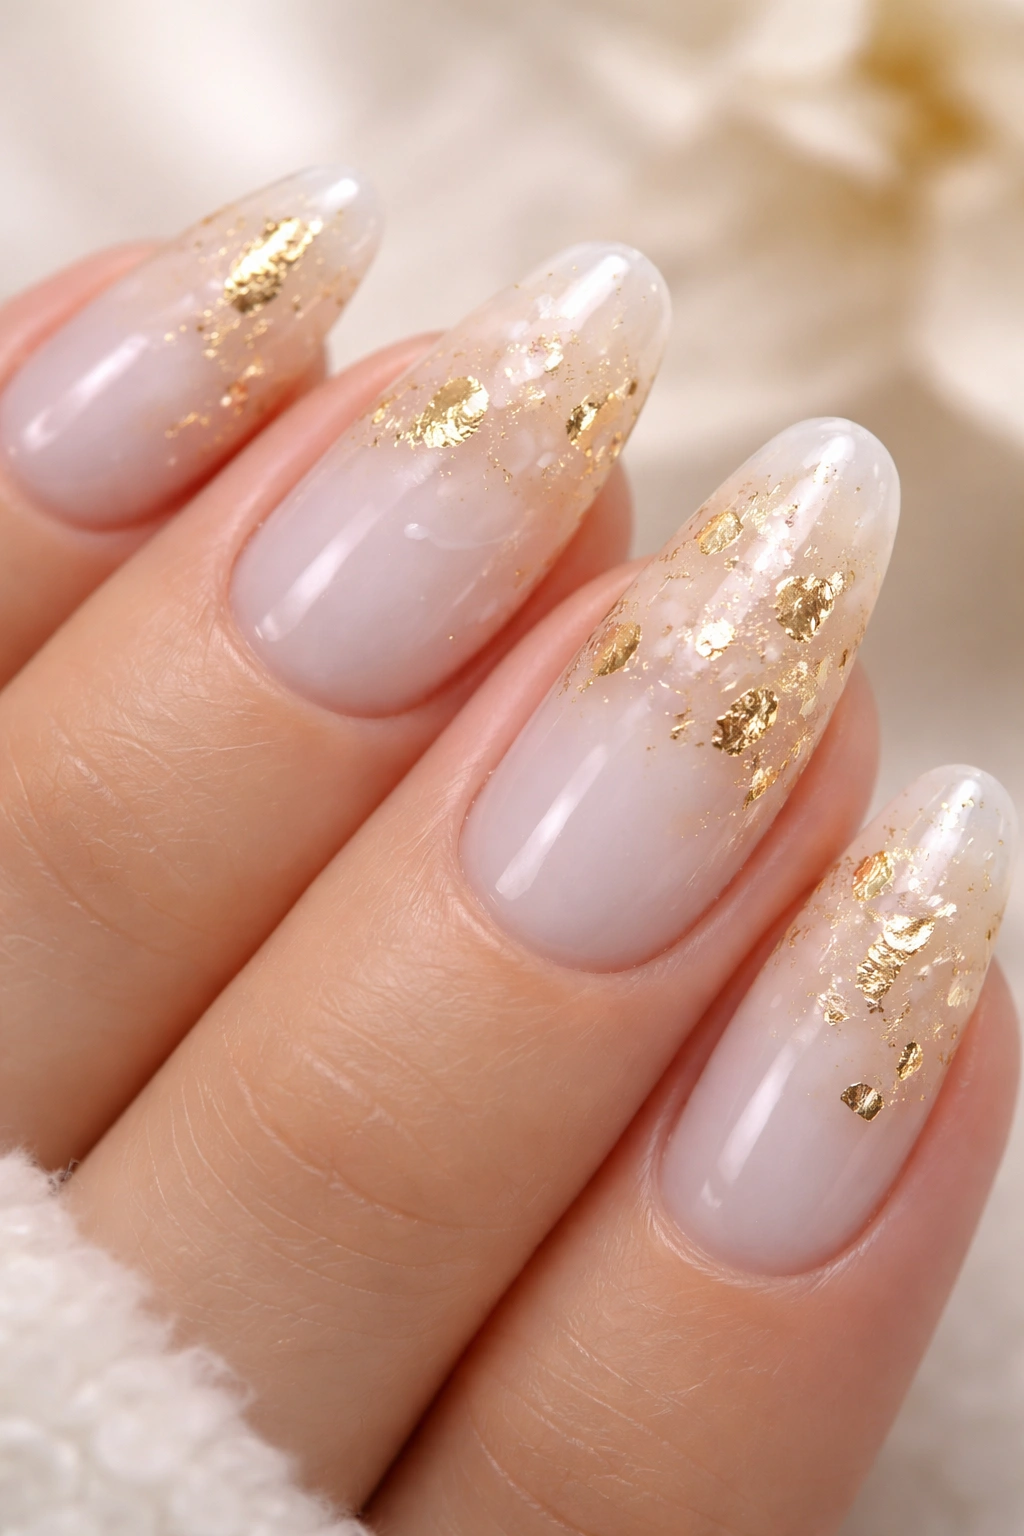
Want to add some luxe vibes to your milk bath mani? Gold foil flecks scattered across a sheer milky base create an opulent, spa-like aesthetic that’s anything but basic.
The gold catches the light beautifully against the soft, translucent background. It’s like adding bath salts or shimmering bath oils to your milk bath—a little extra indulgence that elevates the whole experience.
Why Gold Works Perfectly Here
Gold brings warmth without overwhelming the delicate milk bath aesthetic. Unlike chunky glitter, gold foil has an irregular, organic quality that mimics natural elements floating in water.
You can go heavy with the gold for a more maximalist look, or keep it sparse for subtle elegance. A few small pieces on each nail create visual interest without competing with the sheer finish.
Application Method
- Apply your sheer milky base and let it dry completely
- Use nail glue or a sticky base coat on areas where you want foil
- Press gold foil sheets onto the tacky spots, then peel away
- Seal everything with a clear top coat to keep the foil from lifting
- For easier application, try pre-cut gold foil flakes designed for nails
Pro tip: Rose gold or copper foil creates a warmer, more romantic vibe, while silver foil keeps things cooler and more contemporary.
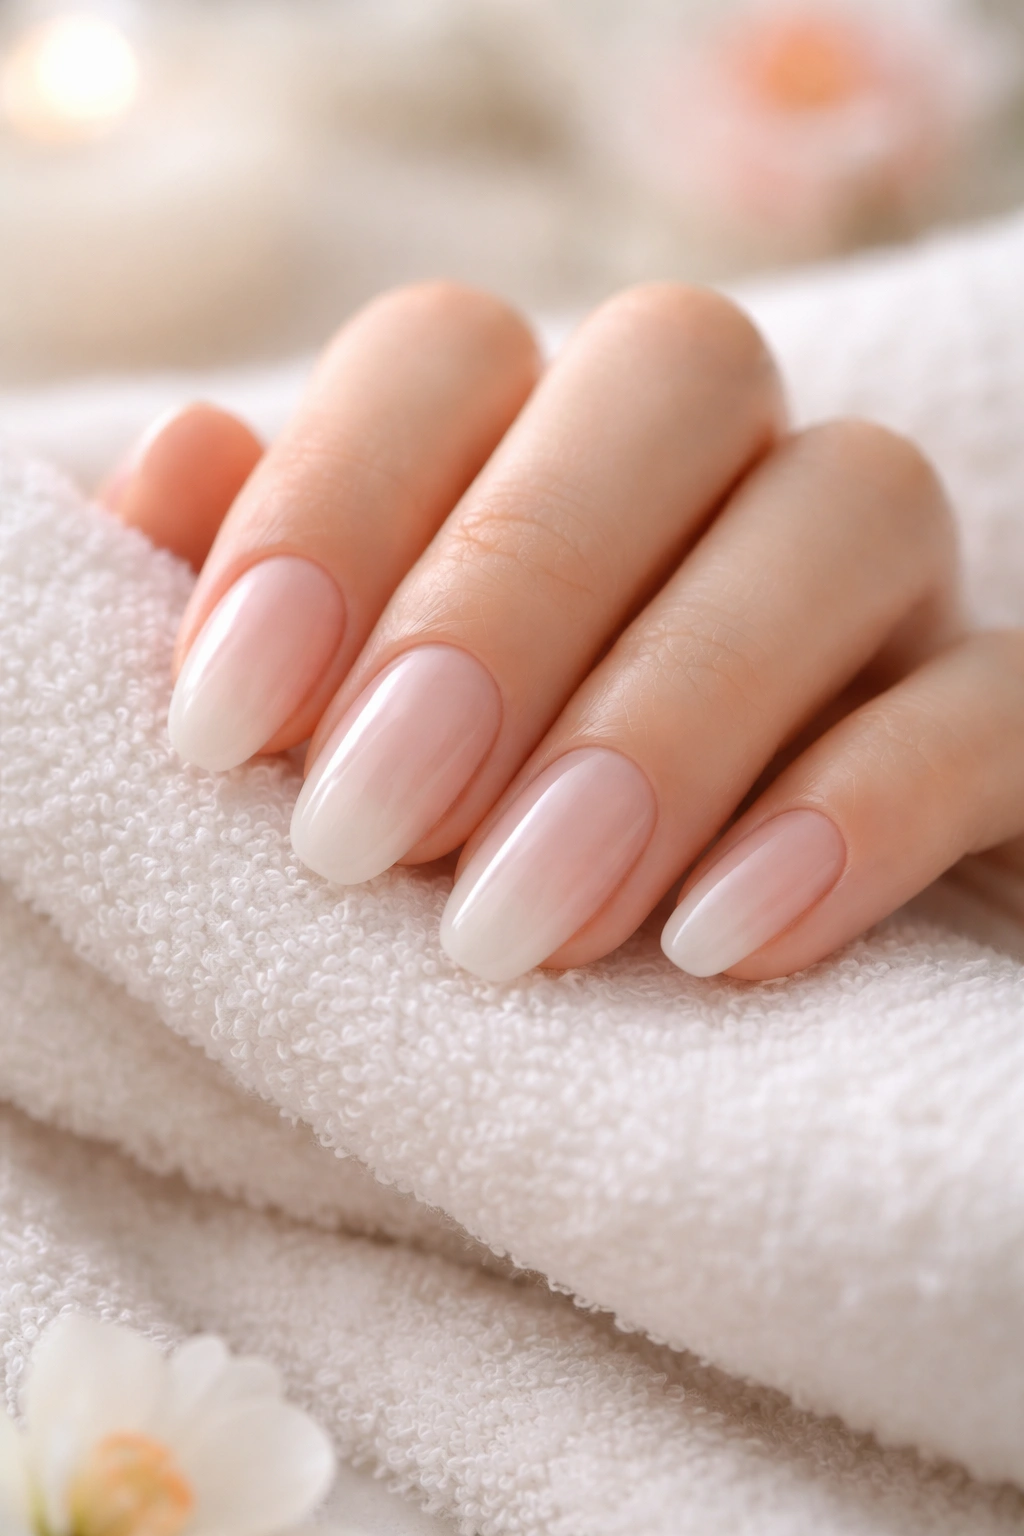
5. Ombré Milk Bath Design
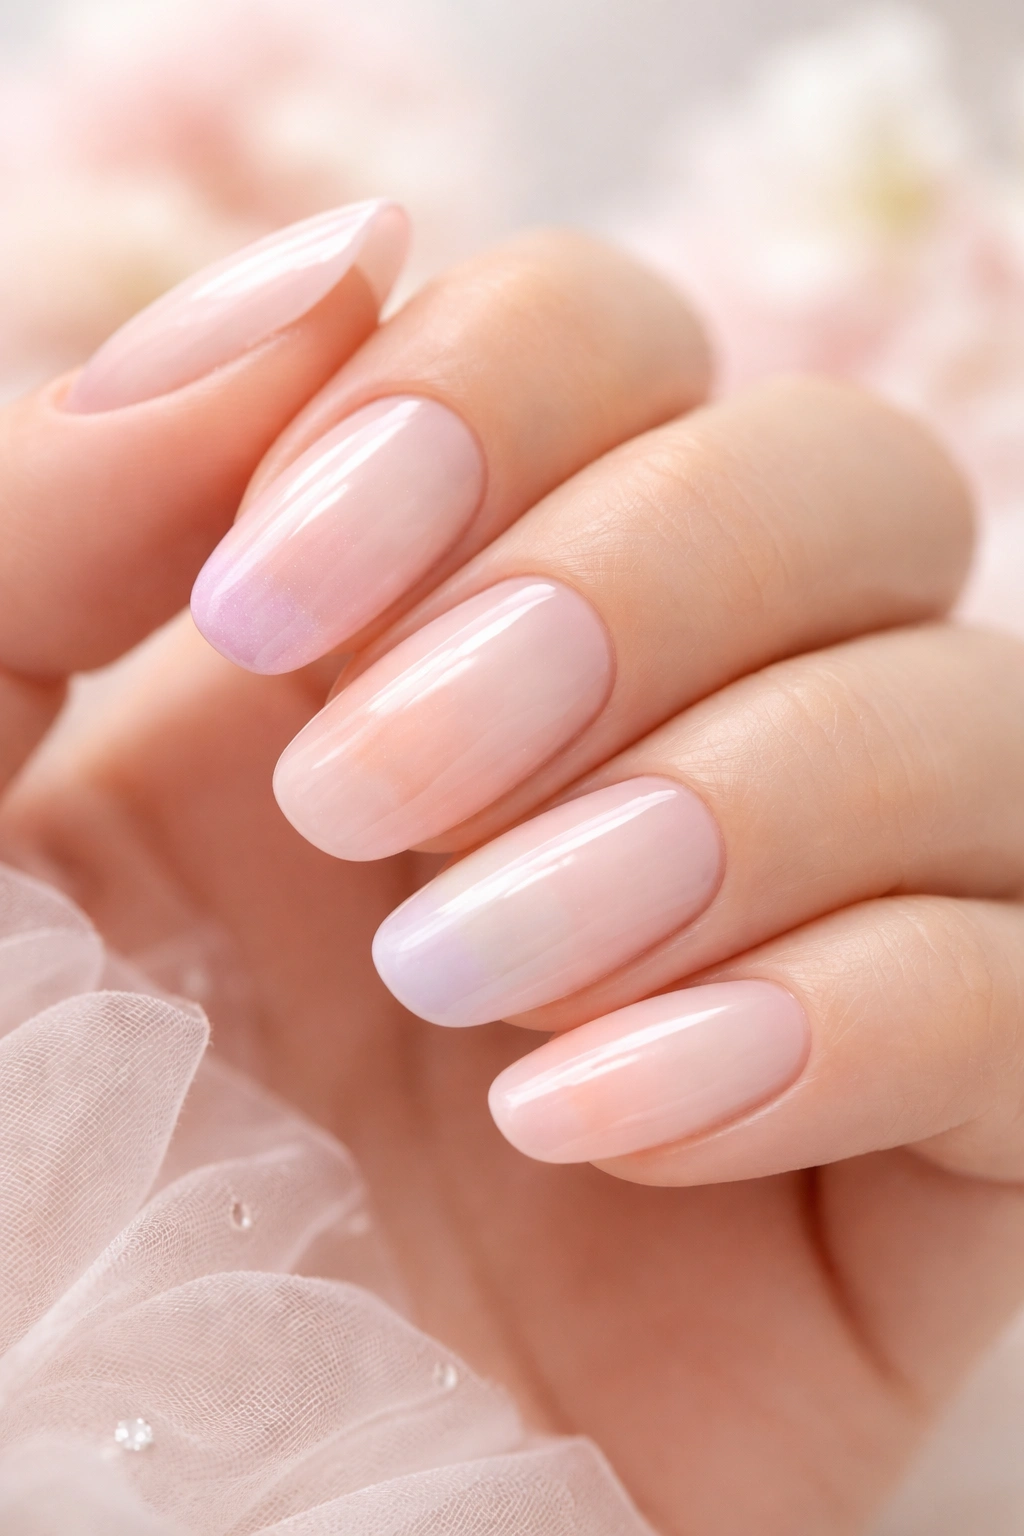
Ombré nails meet milk bath aesthetic in this gradient beauty that transitions from a milky base to soft pastel tips. Think of it as capturing different depths of bath water—lighter at the top, gradually deeper as you go down.
This design adds dimension and movement to the milk bath concept. Instead of a uniform sheer finish across the whole nail, you get tonal variation that creates visual interest while maintaining that dreamy translucency.
Creating the Gradient Effect
The trick is working with multiple shades of milky polish in similar tones. You might start with pure sheer white at the cuticle and gradually blend into a milky pink, blue, or lavender at the tip.
A makeup sponge becomes your best friend here. Dab the colors onto the sponge in the order you want them to appear, then gently pat the sponge onto your nail. The colors blur together naturally, creating that seamless gradient.
Color Combinations That Work
- Milky white to milky pink for a romantic, feminine vibe
- Milky white to milky lavender for something more whimsical
- Milky pink to milky peach for a warm, sunset-inspired look
- Milky white to milky blue for a cool, ethereal feel
The beauty of keeping everything in the milky family is that even bold color choices feel soft and wearable. You get color without the commitment of fully saturated shades.
6. Chrome Milk Bath Nails
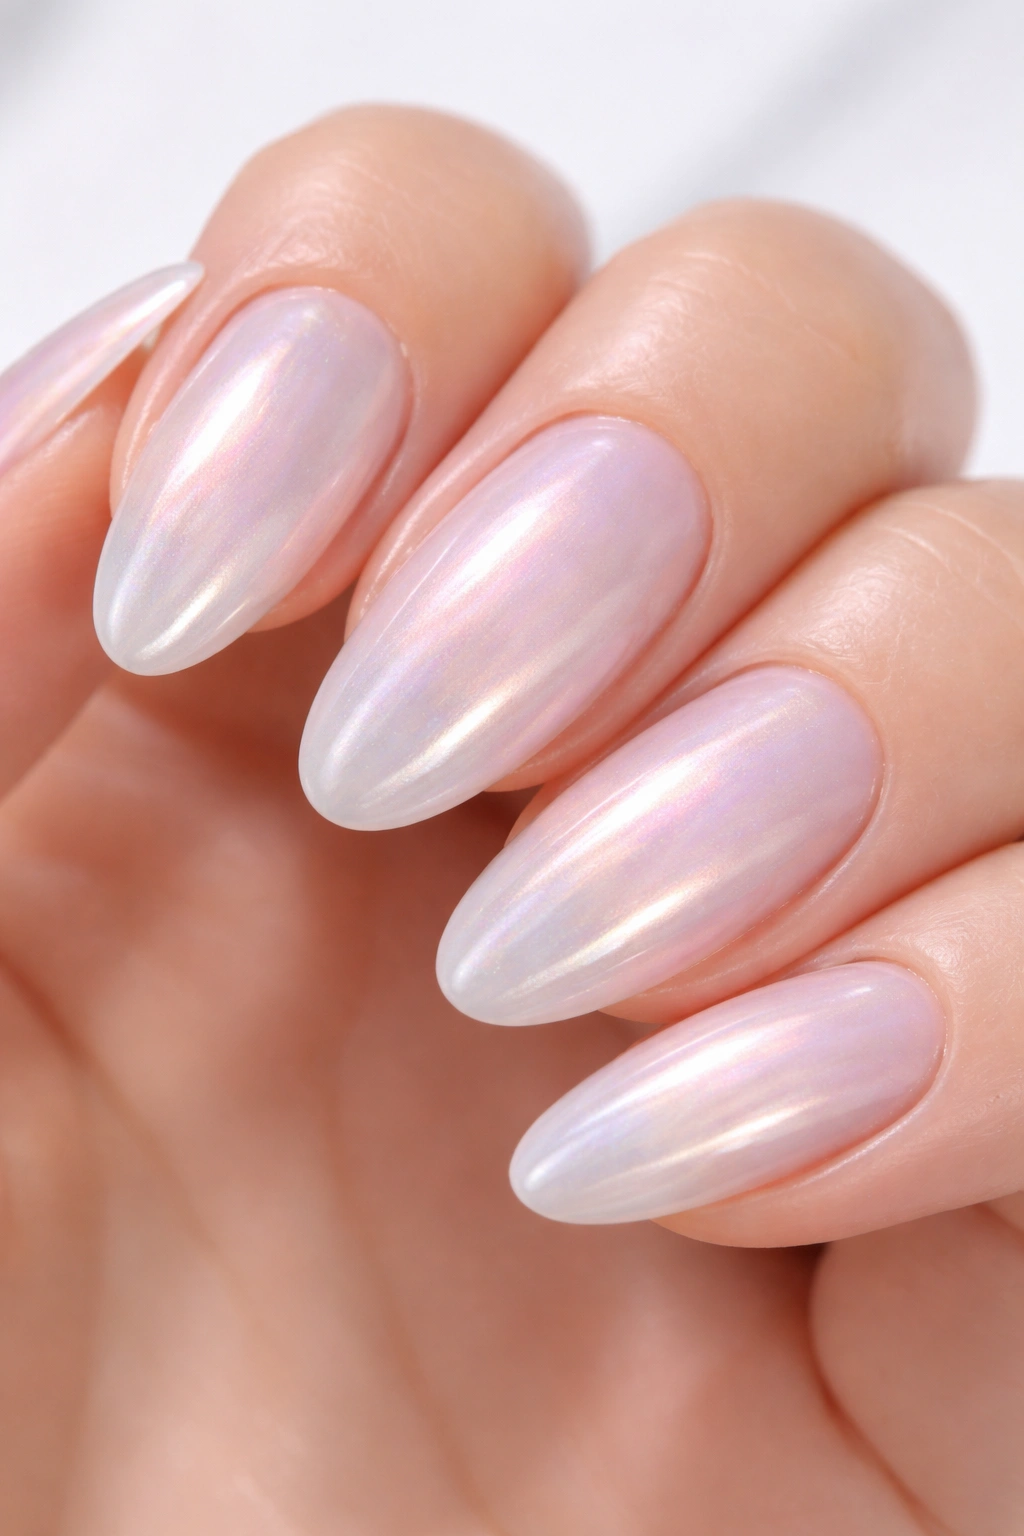
This unexpected twist combines the soft, dreamy milk bath aesthetic with the futuristic shine of chrome powder. The result? Nails that look like they’ve been dipped in liquid pearl.
Chrome powder over a milky base creates an iridescent, reflective finish that shifts in the light. It maintains the ethereal quality of traditional milk bath nails but adds a high-fashion edge that feels more contemporary and bold.
The Metallic Magic
Unlike regular chrome nails that use a dark or bold base, starting with a sheer milky foundation keeps the metallic effect soft and luminous rather than harsh. The chrome becomes more of a pearly sheen than an intense mirror finish.
This version works surprisingly well for both day and evening. The subtlety of the milky base tones down the chrome just enough for professional settings, while the reflective quality still makes a statement.
How to Apply Chrome Powder
- Paint your nails with sheer milky gel polish and cure completely
- Apply a no-wipe gel top coat and cure again
- While the nail is still warm from the lamp, rub chrome powder onto the surface with a silicone applicator or your finger
- Buff gently until you achieve the desired reflective finish
- Seal with another layer of gel top coat to protect the chrome
Different chrome powders create different effects—pink chrome reads more romantic, white chrome looks cooler and more modern, while aurora chrome brings rainbow shifts.
7. Milk Bath Nails with Hand-Painted Florals
Instead of using dried flowers or stickers, this version features delicate, hand-painted floral designs on a sheer milky base. It’s artistry at your fingertips, quite literally.
The painted approach gives you complete control over placement, size, and style of your florals. You can go for realistic botanical illustrations, abstract floral swirls, or minimalist single-stem designs. Each nail becomes a tiny canvas.
Why Hand-Painted Works Differently
While encapsulated dried flowers have a three-dimensional quality, painted florals sit flush with the nail surface, creating a sleeker finish. This makes them less prone to snagging and potentially longer-lasting.
You also have infinite color options. Mix soft pastels with your milky base for a cohesive look, or go bold with bright florals that pop against the neutral background.
Design Ideas to Try
- Delicate cherry blossoms on one or two accent nails
- Tiny wildflowers scattered across all nails in different patterns
- A single elegant orchid or rose on your ring finger
- Abstract watercolor-style floral washes rather than detailed illustrations
- Thin, trailing vines that wrap around from nail to nail
If you’re doing this yourself at home and don’t trust your painting skills, nail art pens or thin striping brushes make the process much easier than regular nail polish brushes.
8. Glitter Milk Bath Nails

Who says milk baths can’t sparkle? This version adds fine, translucent glitter to the milky base, creating a soft shimmer that catches light beautifully without looking overly flashy.
The key word here is translucent. You’re not going for chunky, opaque glitter that obscures the milk bath effect. Instead, think of very fine, glass-like particles that add subtle dimension and sparkle while maintaining the sheer, dreamy quality.
The Right Kind of Sparkle
Iridescent or opal glitter works particularly well because it shifts colors in different lighting, adding interest without being one-note. Clear glitter with a holographic finish is another great option that adds shimmer without adding solid color.
You can mix the glitter directly into your milky polish, or apply it as a separate layer between coats. Some people prefer concentrating glitter at the base of the nail and fading it out toward the tip for an ombré glitter effect.
Application Techniques
- Mix ultra-fine glitter with your sheer milky polish before applying
- Or, apply milky base, then dab glitter onto wet polish before it dries
- Use a makeup sponge to create a glitter gradient from base to tip
- Seal with multiple thin coats of top coat to smooth out any texture
- For easy removal later, apply a peel-off base coat before you start
This version is perfect for special occasions when you want something a bit more celebratory while keeping the soft, romantic milk bath vibe intact.
9. Multicolor Milk Bath Nails

Why commit to just one milky shade when you can have them all? This playful variation uses different pastel milky colors on each nail—think milky pink, milky lavender, milky mint, milky peach, and milky blue all on one hand.
It’s a rainbow manicure that doesn’t feel juvenile or overwhelming because the sheer, milky quality of each shade keeps everything soft and cohesive. The colors whisper rather than shout.
Creating Color Harmony
The trick to pulling off multiple colors without looking chaotic is keeping them all in the same tonal family. Every shade should have that milky, sheer quality with similar opacity levels.
Pastels are your friend here. Milky versions of pink, purple, blue, yellow, and green create a soft rainbow that feels fresh and fun without being too loud. The sheer finish is what ties disparate colors together into a cohesive look.
Color Arrangement Tips
- Arrange colors from warm to cool (pink, peach, yellow, green, blue, purple) for a natural gradient across your hand
- Or alternate warm and cool tones for more contrast
- Keep your thumb neutral with plain milky white so your hand doesn’t feel too busy
- Match the undertones—all warm pastels or all cool pastels, not mixed
- Test your color combination on paper first to see how they look together
This design is having a moment for those who want color without the boldness of saturated, opaque shades. It’s color for people who think they don’t like colorful nails.
10. Milk Bath Nails with Negative Space
This modern, minimalist take on milk bath nails incorporates intentional bare spots—negative space—into the design. Strategic areas of your natural nail peek through the milky polish, creating geometric patterns or organic shapes.
Negative space designs have an artsy, editorial quality that feels high-fashion. When combined with the soft milk bath aesthetic, you get something that’s both trendy and wearable, contemporary yet timeless.
Design Possibilities
You might leave a curved line of natural nail exposed down one side of each nail, or create abstract cutout shapes scattered across the milky base. Some designs feature negative space only on accent nails while keeping others fully covered in milky polish.
The contrast between your natural nail and the sheer milky polish is subtle, which is part of the appeal. It’s a design that rewards close inspection—from far away, your nails might just look like a simple neutral mani.
How to Create Clean Lines
- Use nail guides, tape, or stencils to block off areas you want to keep bare
- Paint your milky polish over the entire nail, guides included
- Carefully peel away the guides while the polish is still slightly wet for the cleanest lines
- Clean up edges with a small brush dipped in nail polish remover
- Finish with a clear top coat over everything, including the bare nail areas
Pro tip: This design works best on healthy, well-maintained natural nails since part of your nail bed will be on display. Make sure your cuticles are pushed back and your nail surface is smooth and buffed.
Wrapping Up
Milk bath nails prove that you don’t need bold colors or intricate nail art to make a statement. Sometimes the most beautiful manicures are the ones that look naturally polished and effortlessly pretty. The sheer, translucent finish flatters every skin tone, suits any nail length or shape, and transitions seamlessly from season to season.
Whether you go classic with white and florals, add a modern twist with chrome or negative space, or play with color through pastels and gradients, the milk bath aesthetic brings that dreamy, ethereal quality to your fingertips. It’s a trend that’s as versatile as it is gorgeous, giving you endless possibilities to customize the look to your personal style. Next time you’re at the salon or doing your nails at home, consider channeling those luxurious spa vibes with one of these milk bath nail ideas. Your nails (and your mood) will thank you.
