

If your manicure disappears the second you step out of direct light, it is too shy for the job. Bling coffin nails are built for the opposite effect: tapered sides, a crisp squared tip, and enough crystal flash to make even a coffee cup look dressed up. They do not whisper.
The shape matters more than people think. Almond nails can wear stones. Square nails can wear glitter. But coffin nails give you a flatter visual runway, so chrome fades, crystal lines, and centered charms look cleaner from a distance. Get the taper wrong, though, and the whole set can look heavy at the tip or oddly wide near the sidewalls.
I’ve seen gorgeous salon photos turn into annoying real-life sets because the stones sat too close to the cuticle, the apex was too flat, or the tech stacked chunky charms on thin tips. AB crystals throw blue and lilac in daylight. Champagne stones look warmer under indoor bulbs. Matte top coat next to rhinestones can make cheap stones look richer than they are. Those small choices change everything about the final look.
Some bling sets lean soft and polished. Others go full after-dark drama. The best ones know what they are doing from the first glance.
Why Bling Coffin Nails Look So Good on a Tapered Shape
Coffin shape gives sparkle direction. That is the part people notice before they can explain why they like the set. The taper pulls your eye forward, and the squared tip gives crystals, glitter fades, and French placements a clean stopping point.
Where the eye lands first
On a good coffin set, your eye travels from the cuticle to the tip in a straight line. That makes vertical crystal trails, center gems, and ombré glitter placement look sharper than they do on rounder shapes. If you want nails that look longer, lean into that line. A narrow taper with a centered design does more for the hand than random stones scattered all over the nail plate.
Short coffin nails can still carry bling, though the scale has to change. Tiny ss5 to ss8 stones near the cuticle or a slim crystal French line usually look better than a chunky cluster. Medium and long coffin nails give you room for bigger moves: charm placements, diagonal gem bands, sugar glitter, or encapsulated sparkle.
Why the flat tip helps
That squared-off end is not only about style. It also gives French tips, chrome edges, and stone placements a clearer edge. A coffin nail with a neat tip looks edited. A rounder tip can soften the look, which is great for some sets, though not when you want high-contrast glam.
And glam is the whole point here.
The Nail Tech Details That Keep Bling in Place
Why do some rhinestone nails stay sharp for two or three weeks while others start dropping stones after a couple of days? The answer usually has nothing to do with luck and a lot to do with structure.
A bling set needs a base that can handle weight. On medium and long coffin nails, that often means a proper apex built with acrylic, hard gel, or builder gel. If the nail is too flat, every tap on a phone screen or steering wheel hits harder, and charms start lifting at the edges. You can spot a weak build fast: the nail looks thin from the side, and the free edge flexes more than it should.
Stone placement matters too. Big charms belong where the nail is strongest, usually near the apex on the ring finger or middle finger. When oversized gems get glued all the way to the tip, they catch on everything—hair, denim pockets, hoodie strings, seat belts, all of it.
A few salon details are worth asking for by name:
- Builder support under long tips so the nail has enough backbone for heavy decoration
- Gel adhesive or crystal gel instead of thin brush-on glue for larger stones
- A 1-millimeter gap near the cuticle so the set grows out cleaner and feels less bulky
- Sealing around stones, not over them because top coat on faceted crystals dulls the shine
- Balanced placement across both hands so one side does not look heavier than the other
Wear matters after you leave the salon too. Dish gloves help. So does using the side of your knuckle to open a soda can. I know that sounds fussy. It also saves you from losing a $12 charm on day three.
Choosing Bling Coffin Nails That Fit Your Routine
More sparkle is not always better.
If you type all day, handle fabric, work with hair, or spend half your life digging through a tote bag, a full 10-finger charm set can get old fast. You may love the photo and hate the wear. In that case, go for two accent nails per hand, smaller stones, flatter crystal placements, or encapsulated glitter that gives shine without texture.
Then there is the opposite problem: nails that look too cautious. If you already wear bold rings, sharp eyeliner, patent leather, or deep lip colors, tiny rhinestones on a pale nude base may disappear on you. Your hands can carry more than you think. Medium coffin nails with one statement crystal cluster and a chrome detail usually land in a nice middle ground.
I keep circling back to scale because it matters. A bling set looks strongest when the shape, stone size, and nail length agree with each other. Tiny stones on long nails can look stingy. Giant gems on a short coffin can look crowded. Match the weight of the design to the length, and the whole set starts making sense.
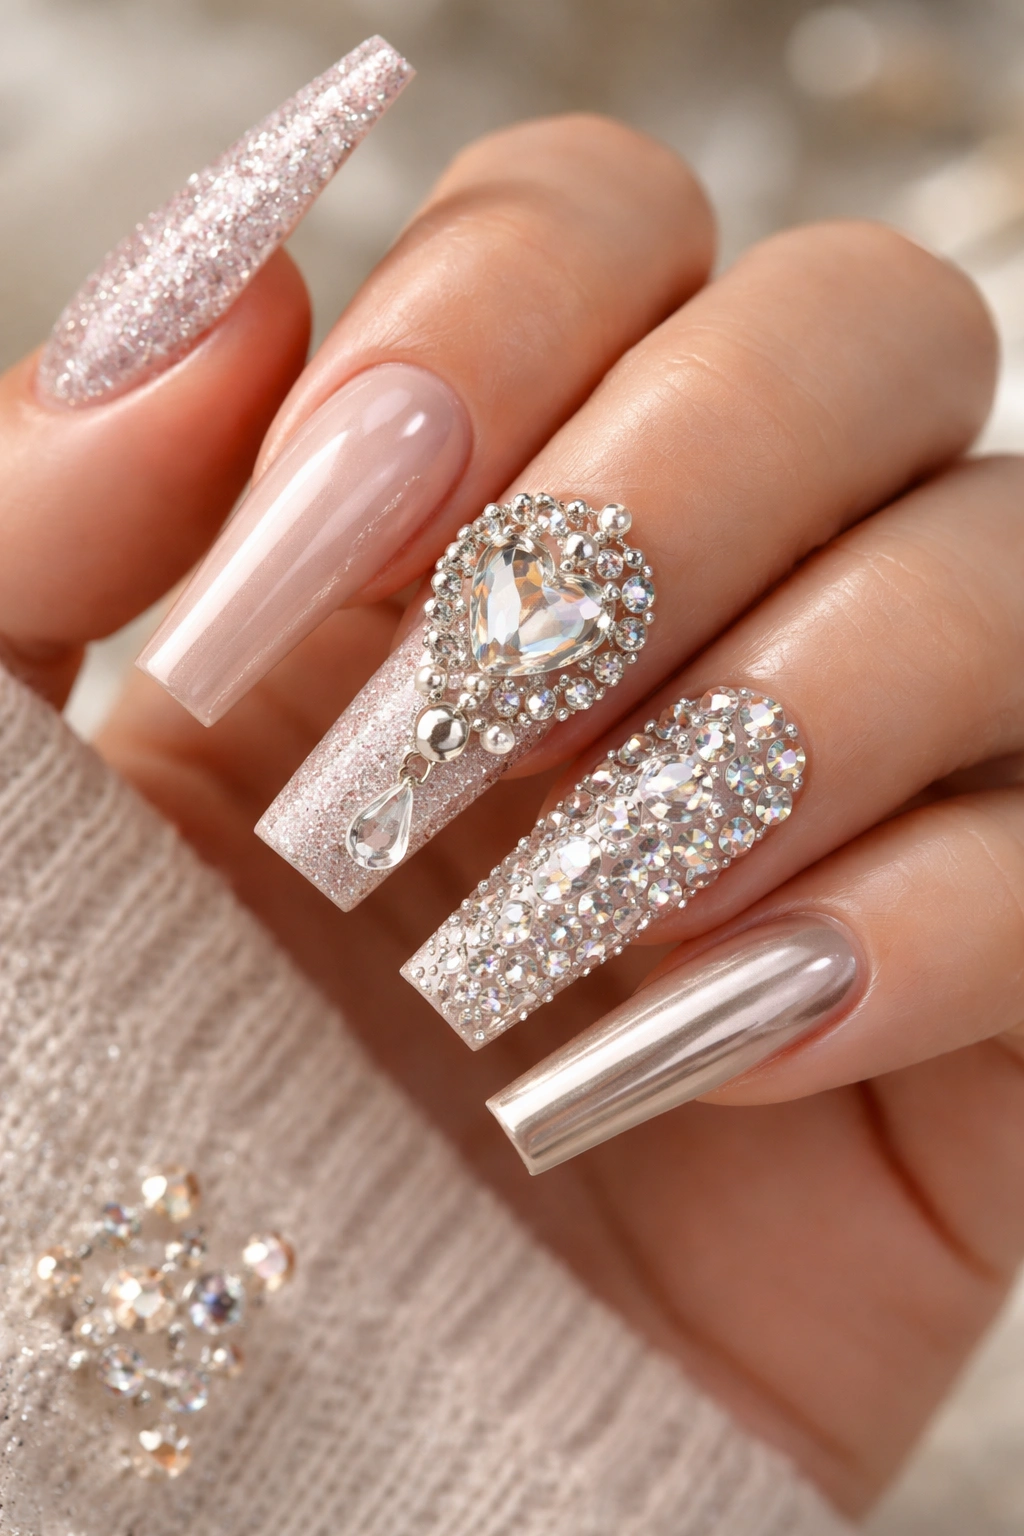
1. Nude Coffin Nails With Crystal Cuticle Arches
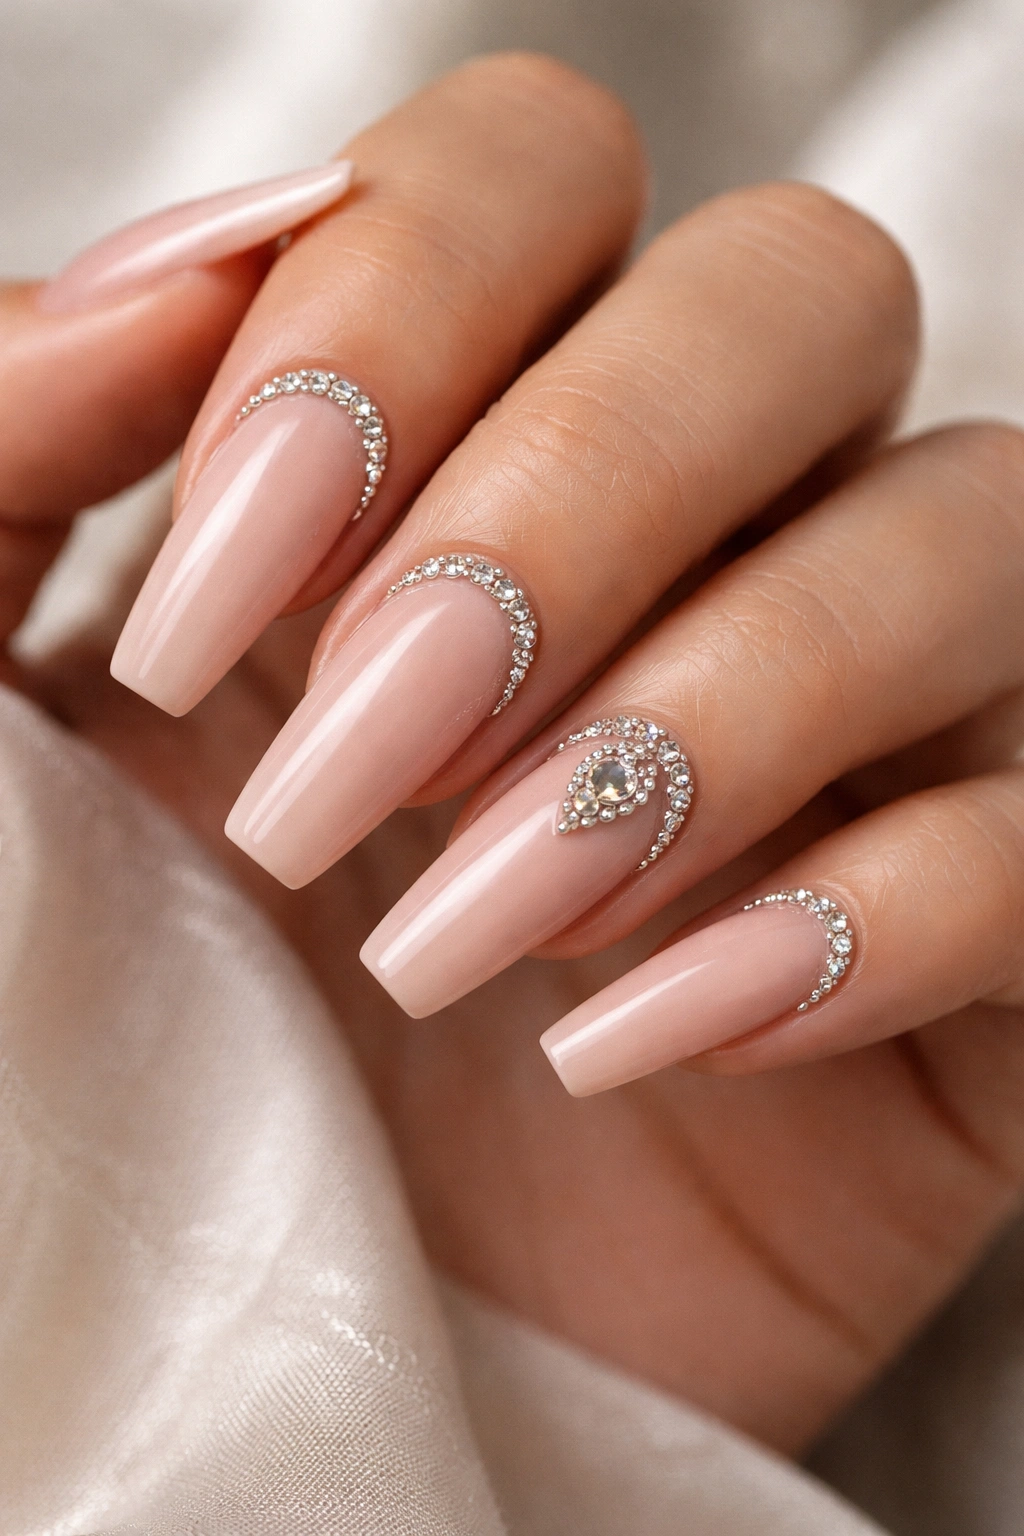
Under soft light, this set looks polished. Under direct light, the cuticle line flashes like a row of tiny rings.
A sheer beige or pink-nude base is doing quiet structural work here. It keeps the coffin shape clean, lets your skin tone show through a little, and gives the crystals room to stand out. Cuticle arches are one of my favorite ways to wear bling because they frame the nail instead of burying it. You still see shape, color, and length.
Why this design works
This look flatters almost every hand because it pulls attention toward the base of the nail, where growth looks neat longer. On a medium coffin, a curved line of ss5 and ss7 crystals can make the fingers look longer. On a long coffin, add one slightly larger center stone on the ring finger and leave the rest smaller. That keeps the set from looking crowded.
What to ask for at the salon
- A milky nude or pink-beige base, not a chalky flat nude
- Crystals placed in a curved half-moon, about 1 millimeter away from the cuticle
- One accent nail with a slightly larger gem at the center of the arch
- Glossy top coat on the base, sealed around the stones
Best if you want sparkle that still lets your jewelry do some talking.
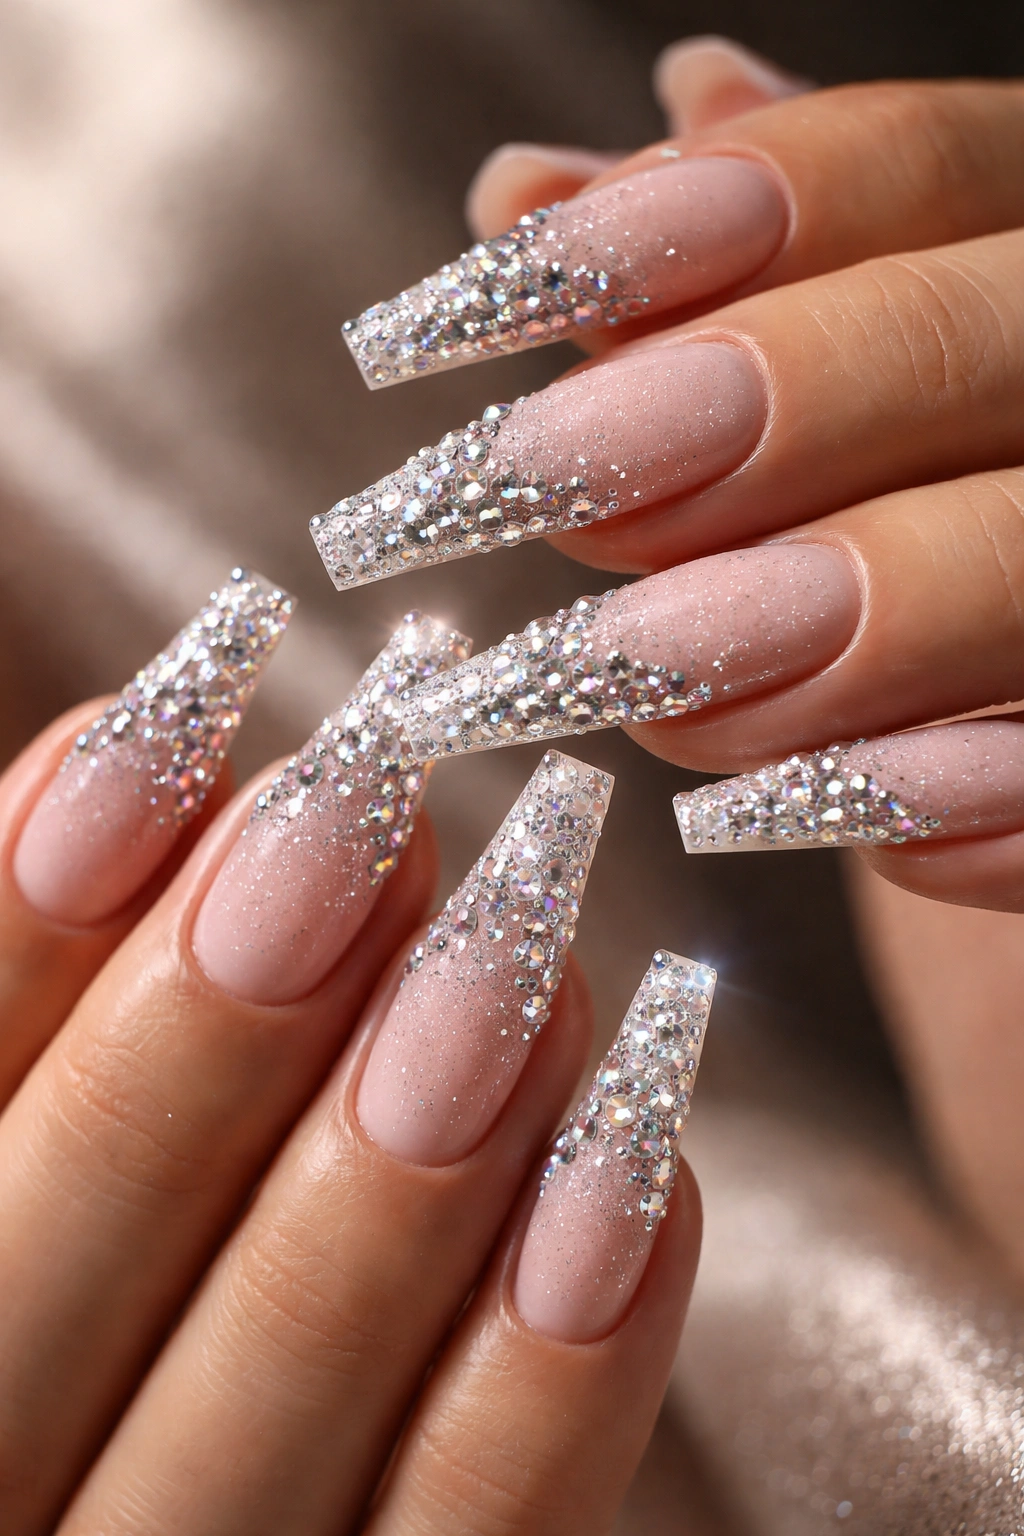
2. Silver Glitter Coffin Nails With AB Stone Tips
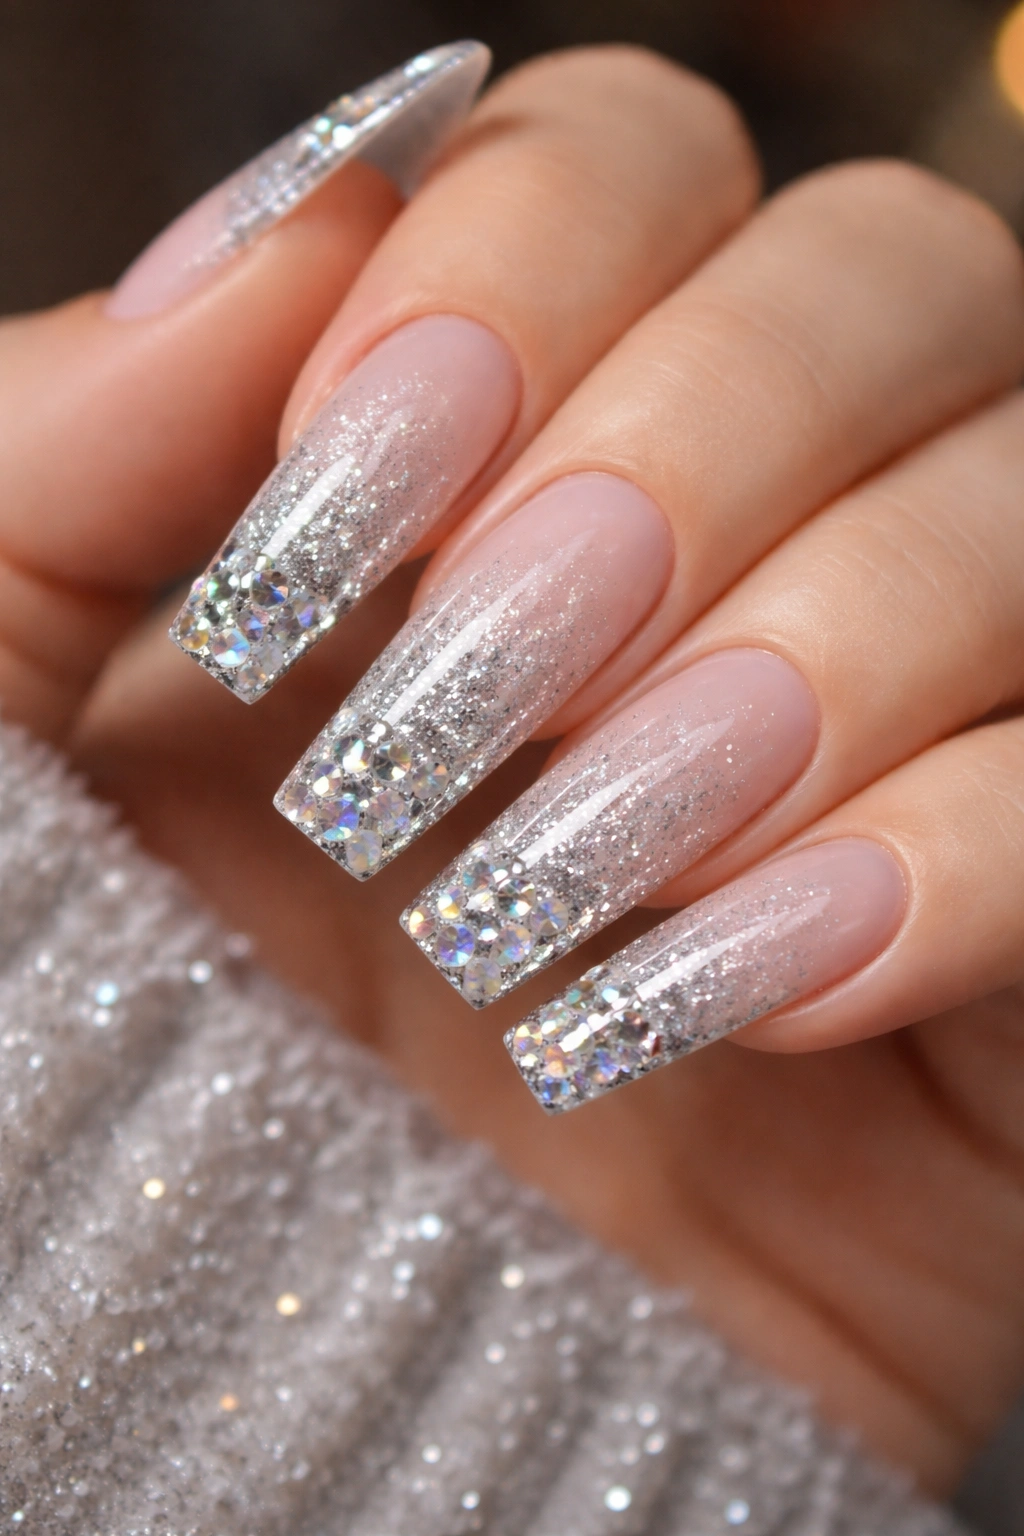
If you want your nails to show up from across the room, go silver. Not dull gray-silver, either. I mean fine reflective glitter laid over a cool base, then pushed harder at the tip with AB stones that throw pink, blue, and pale green when the light hits from the side.
This design works because the shine builds as the eye moves outward. A silver base alone can look flat. A full rhinestone tip alone can feel top-heavy. Put them together, and the look gets lift. The coffin shape helps because the straight tip gives the crystal line a hard finish.
I like this set best on longer nails, where the gradient has space to breathe. Start with a sheer gray, icy nude, or soft transparent silver at the cuticle. Pack denser glitter through the last third of the nail. Then place AB stones along the smile line or stack them at the tip edge like a sparkling border.
Indoor light makes this set look sharp. Flash photography makes it look wild. That is part of the fun.
3. Black Coffin Nails With Oversized Gem Clusters

Black polish does something that lighter shades cannot: it makes every stone look brighter and more expensive than it is. Even simple glass crystals pop harder against a true black base than they do on pale pink or white.
I love this look when it is edited. One or two oversized gem clusters per hand are enough. Put them on the ring finger, maybe the middle finger too, and let the rest of the nails carry smaller details—single stones, chrome stars, or a micro-crystal line near the cuticle. When every nail has a bulky cluster, the set can cross from sharp into costume.
A few details make the difference:
- Use jet black or black cherry, not faded charcoal
- Keep the largest gems close to the apex, not dangling off the tip
- Mix stone cuts: round, teardrop, maybe one marquise
- Leave some negative space so the cluster looks placed, not piled
This style has attitude. It also asks for a little patience. If you wear contact lenses, zip a lot of fitted jackets, or pull tights on in a rush, oversized clusters need more care than flatter crystal work. Worth it? On the right night, yes.
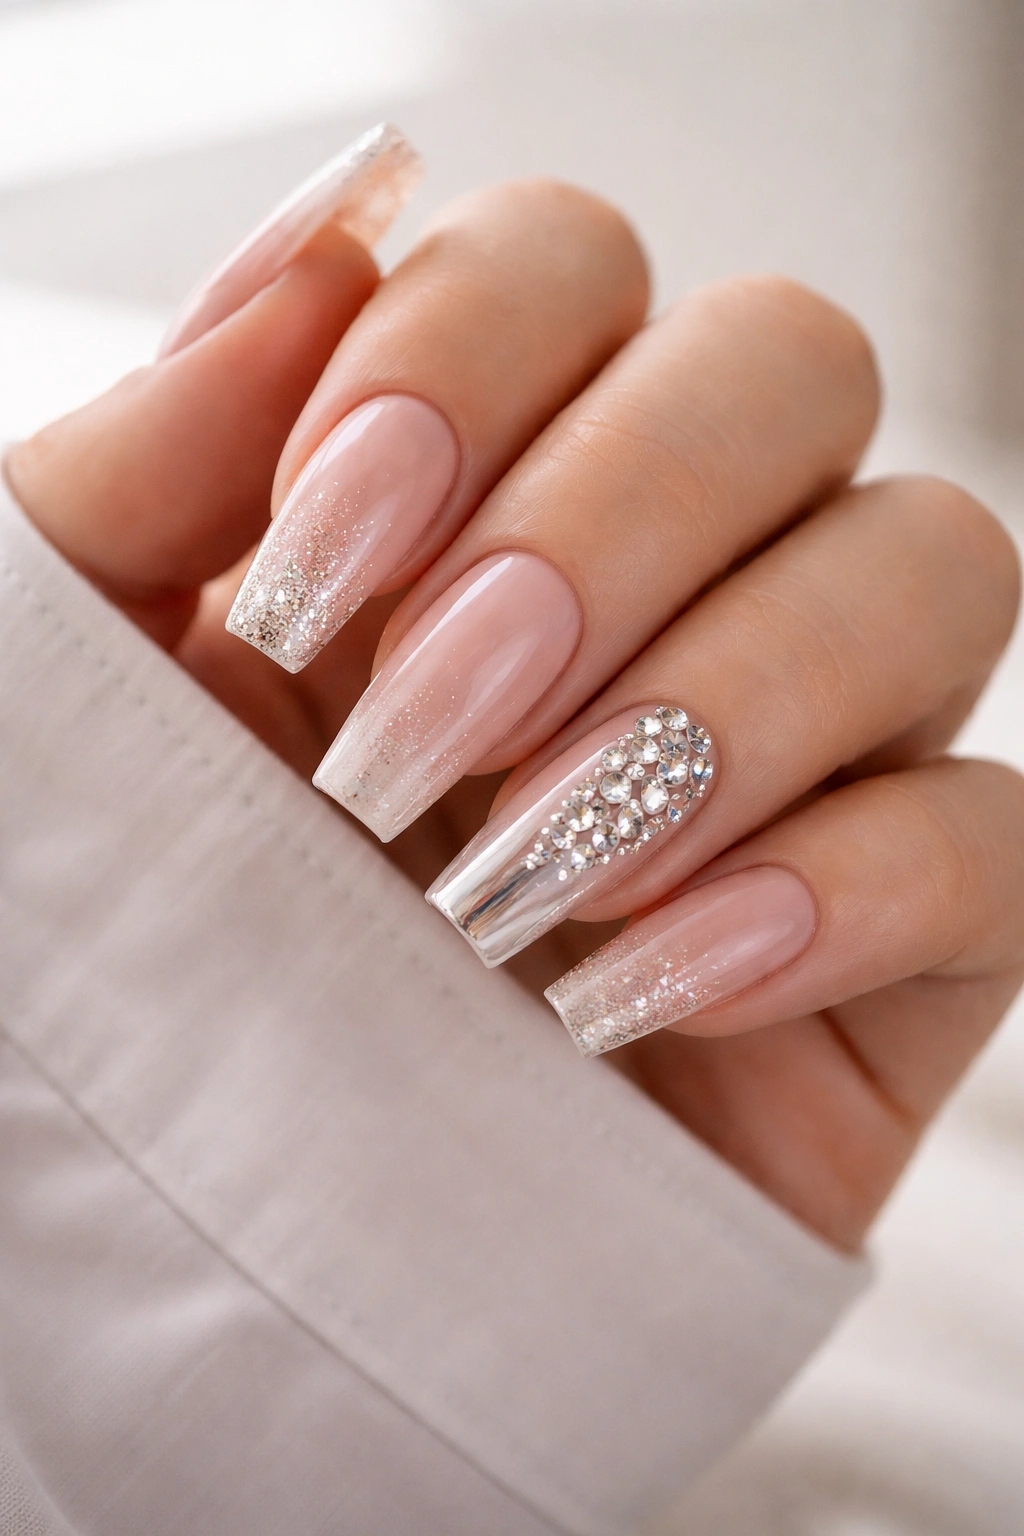
4. Milky White Coffin Nails With Pearls and Chrome
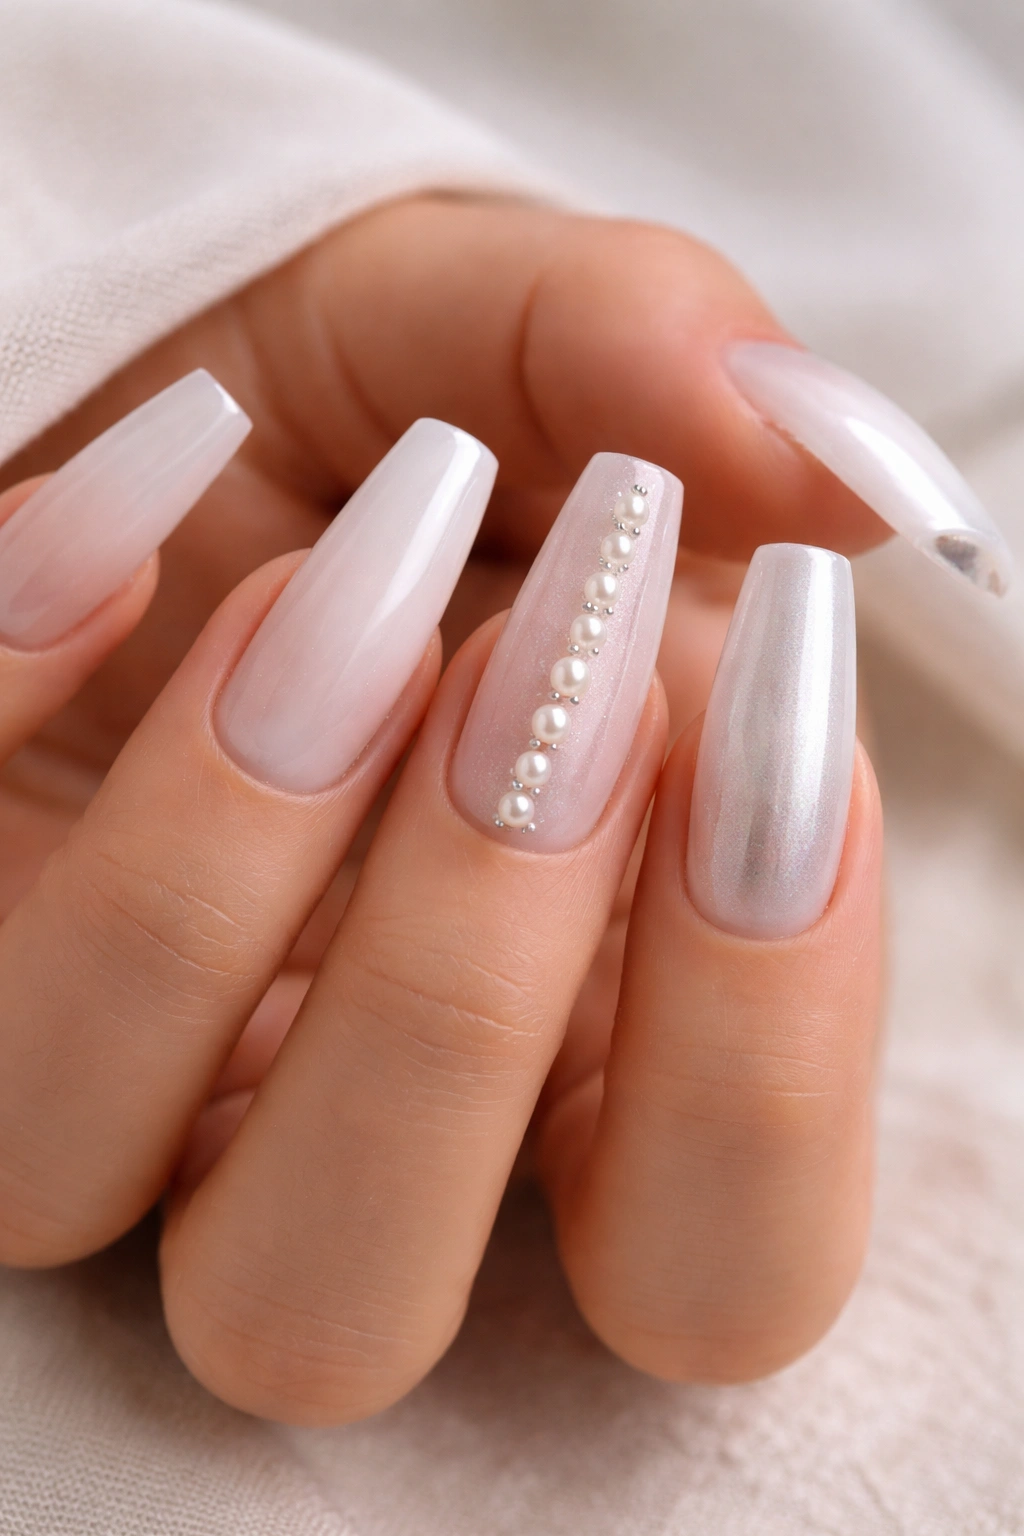
Want bling without the hard edge of a full rhinestone set? Go milky white.
A translucent white base softens everything. Then add a pearl sheen or a whisper of chrome powder on top—nothing mirror-like, more of a glazed finish—and place half pearls or flat-backed pearls on one or two accent nails. The result lands somewhere between clean and dressed up, which is harder to pull off than it sounds.
Pearls change the mood fast. Tiny 2-millimeter pearls placed in vertical lines feel tailored. Bigger pearls mixed with clear crystals feel more formal. I prefer pairing pearls with a few small silver stones so the set does not turn flat. That little hit of faceted light stops the look from reading too soft.
Medium coffin length suits this design best. Short coffin nails can wear it, though the pearl size needs to stay restrained. Long nails let you play with chrome underlayers, pearl cuticle frames, or a diagonal pearl trail from one corner to the center.
This is the set I’d reach for when I want bling that looks polished close up, not loud from six feet away.
5. Rose Gold Coffin Nails With Crystal French Tips
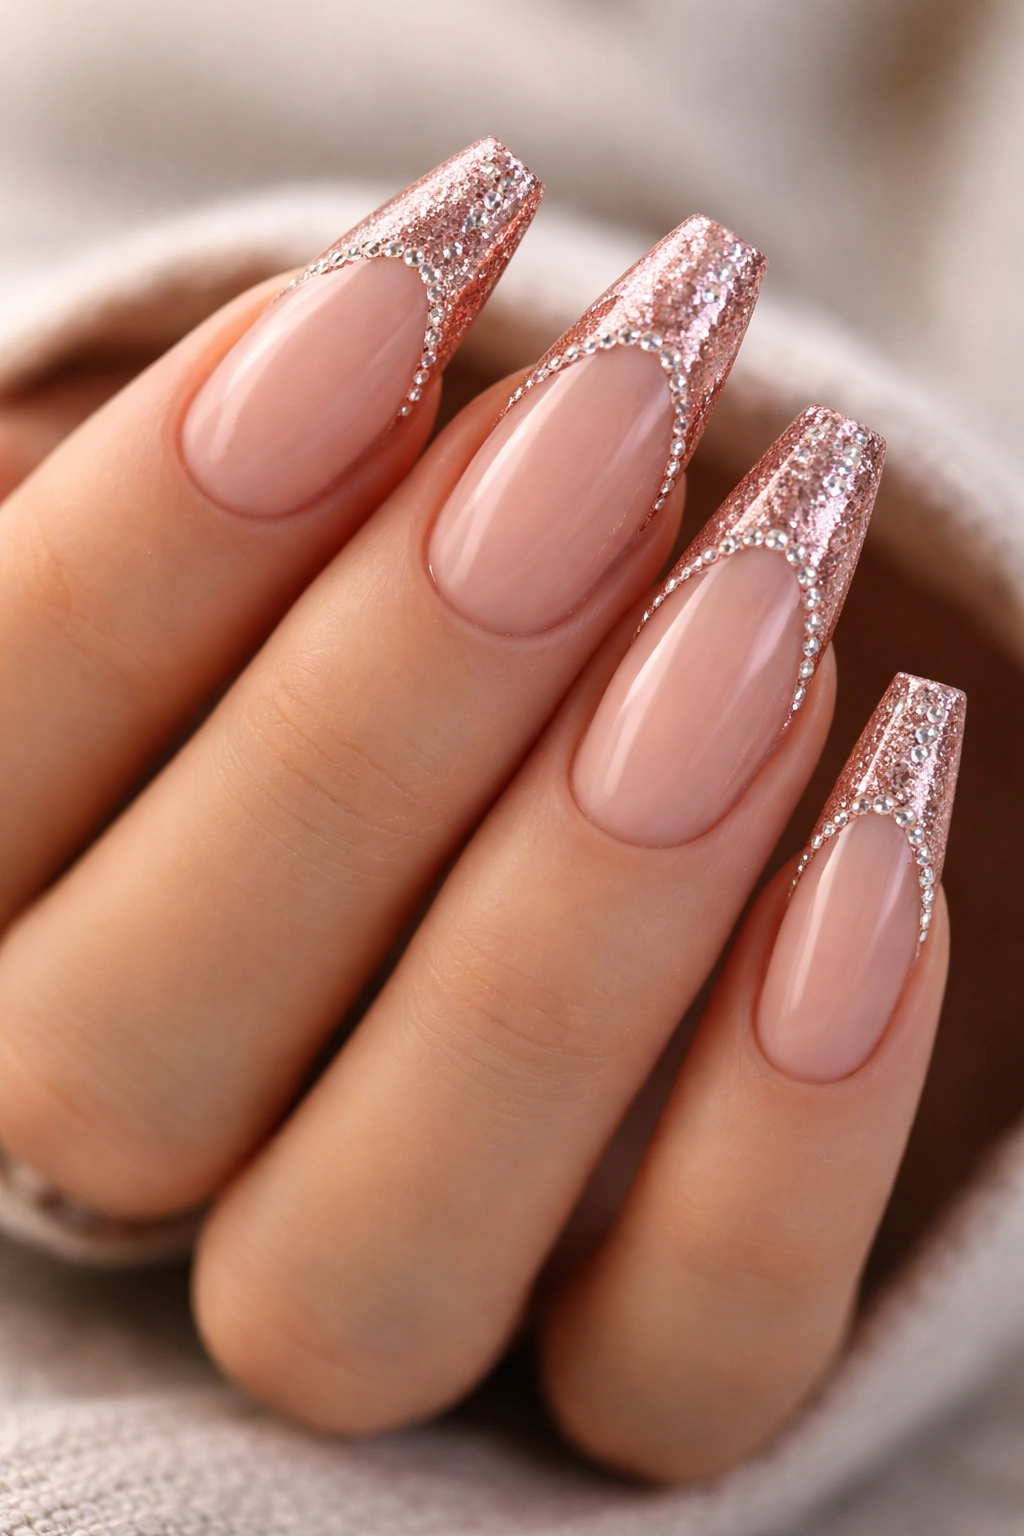
Unlike a full glitter set, a rose-gold French keeps the sparkle parked at the edge. That gives you shine, structure, and a little restraint all at once.
A rose-gold base can come from foil, chrome powder, shimmer gel, or fine metallic polish. My pick is a nude base with a rose-gold French tip and a crystal line tracing the smile. You get three layers of contrast there: skin-toned base, warm metallic edge, and clear stone sparkle sitting right between them.
Best nail length for this look
Medium coffin nails handle this design beautifully because the French line stays visible without eating half the nail. On a longer set, you can deepen the smile line and add one fully iced-out accent nail. Short coffin lengths still work, though the French has to stay narrow—about 2 to 3 millimeters—or the nail starts looking compressed.
Placement that flatters the hand
Keep the crystal line fine. Tiny ss3 to ss5 stones are enough. Oversized gems along a French line can make the tip look bulky, and rose gold needs some air around it. Pair the nails with yellow-gold rings if you like mixed metals, or lean into rose-gold jewelry for a warmer, more unified look.
This one wears better than it looks like it would. The sparkle sits where the eye expects decoration anyway—right at the tip.
6. Ruby Red Coffin Nails With Gold Foil and Rhinestones
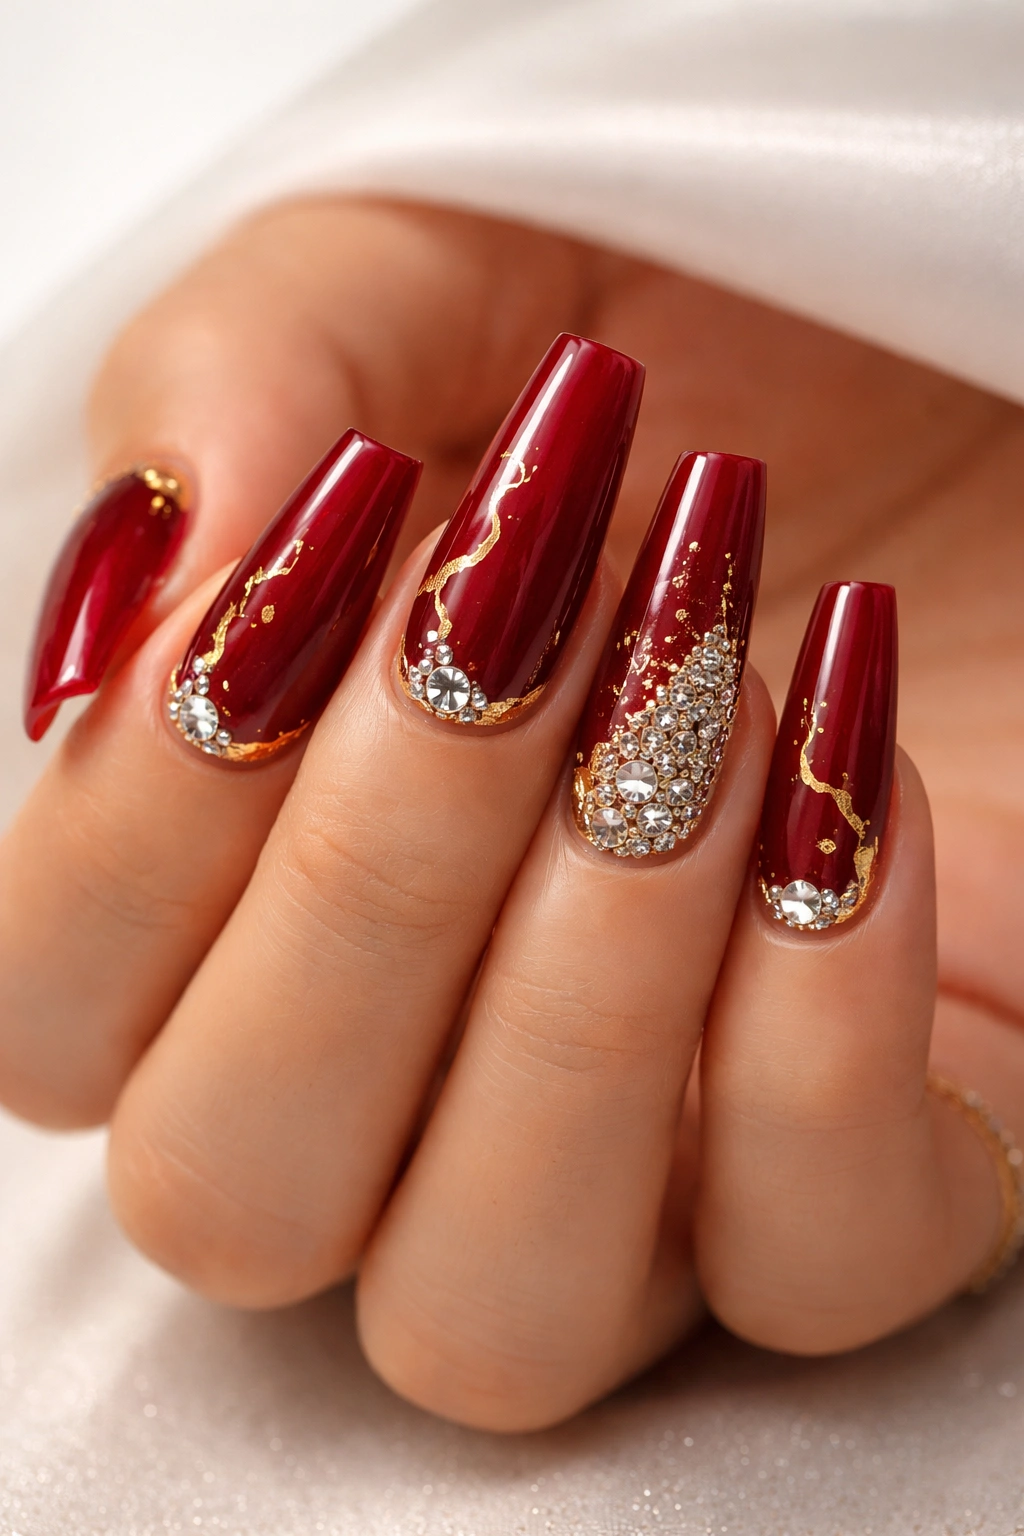
Red acrylic catches attention before the stones even start working. That is why a ruby set with gold foil and rhinestones feels rich so fast. The color does half the heavy lifting.
Skip tomato red. Go deeper. A ruby, garnet, or wine-leaning red gives gold foil something to push against. I like the foil kept thin and irregular, almost like little torn leaves trapped under top coat. Then bring in small clear or champagne rhinestones near the cuticle and one accent cluster on the ring finger.
There is a reason this combo keeps showing up on mood boards and salon pages. It looks expensive because the palette already lives in jewelry territory: red stone, gold metal, clear crystal. You do not need a complicated pattern. A strong color story can carry the whole design.
One caution, though. Red exposes sloppy edges faster than pale shades do. Ask for tight sidewall cleanup and a crisp cuticle area. A rich red with messy borders loses its bite.
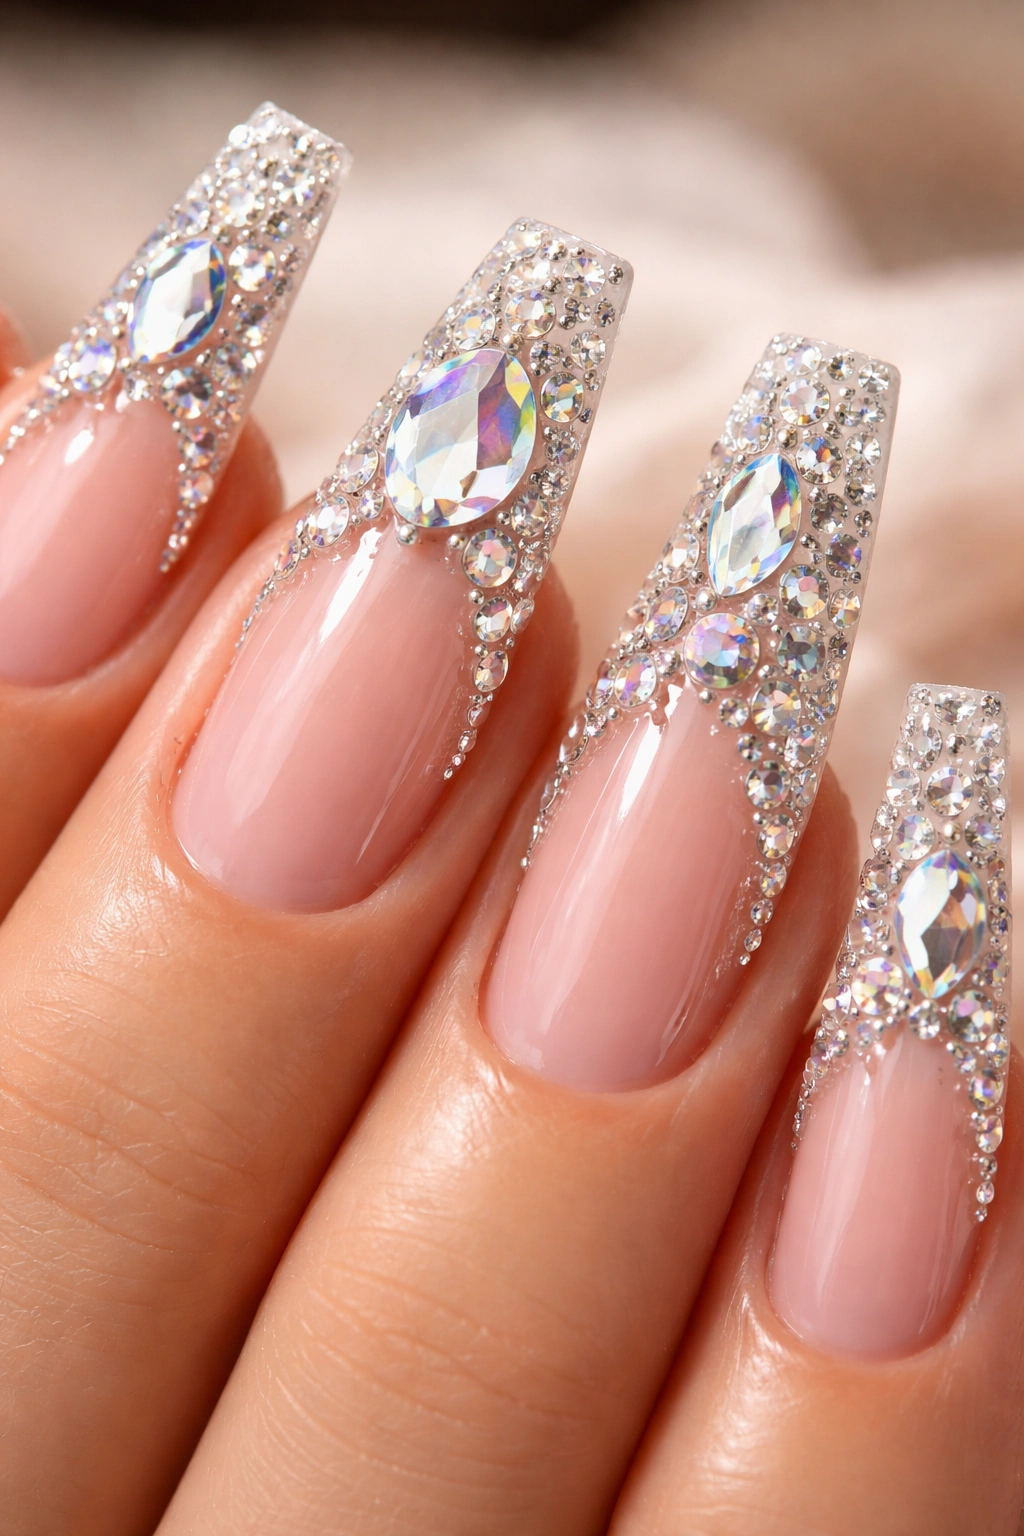
7. Clear Coffin Nails With Encapsulated Glitter and Floating Stones
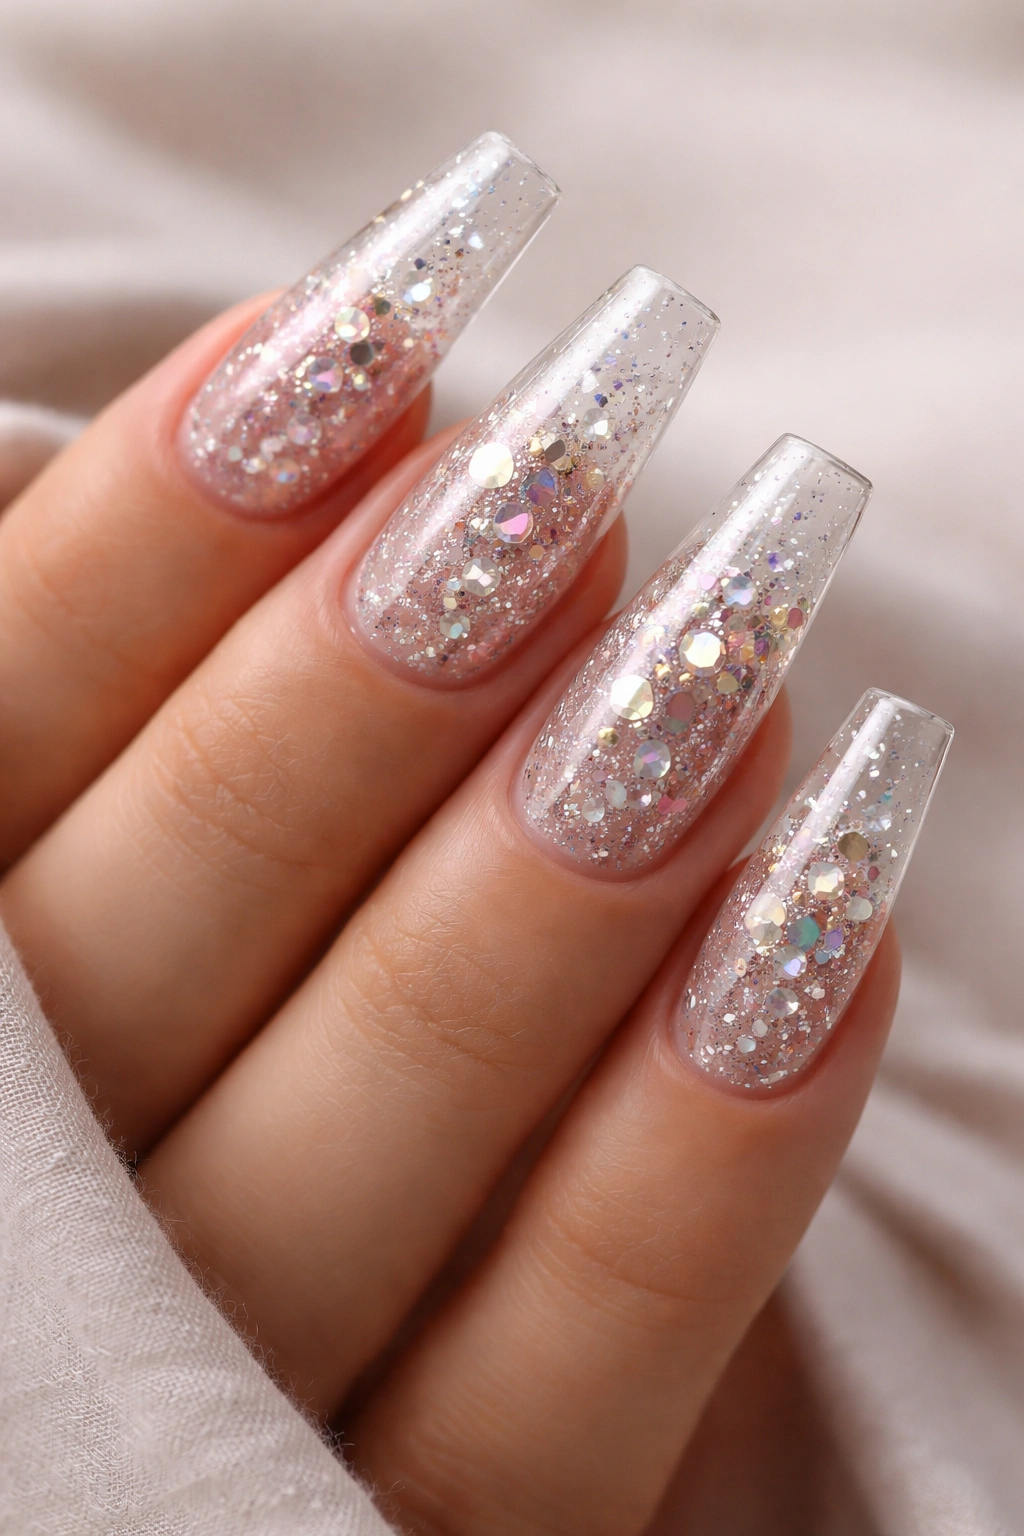
This one is craft-heavy.
Done well, clear coffin nails with encapsulated glitter look like the sparkle is suspended inside glass. That depth is the whole appeal. Instead of gluing everything on the surface, the tech layers clear acrylic or hard gel over glitter, flakes, or tiny crystals so the nail stays smooth when you run a finger across it.
Why encapsulation earns the extra time
Surface bling gives sharp texture and direct shine. Encapsulated bling gives depth. You can see pieces at different layers, and the nail catches light from inside instead of only on top. On a long coffin, that effect is gorgeous—silver glitter at the base, iridescent flakes through the center, maybe one floating gem near the tip under a clear layer.
There is also a practical upside. Encapsulated details snag less than exposed charms or crystal clusters. If you like bling but do not want to baby your nails every hour, this is one of the smartest routes.
Try this setup:
- Clear or slightly pink-toned transparent base
- Fine glitter near the cuticle, chunkier pieces through the middle
- One or two encapsulated stones per accent nail
- A sharply filed coffin tip so the clear design still feels deliberate
It takes skill to build a clear nail that stays crisp instead of cloudy. When it is done right, though, it looks expensive in a way surface glitter rarely does.
8. Pink Ombre Coffin Nails With Sugar-Crystal Accent Nails
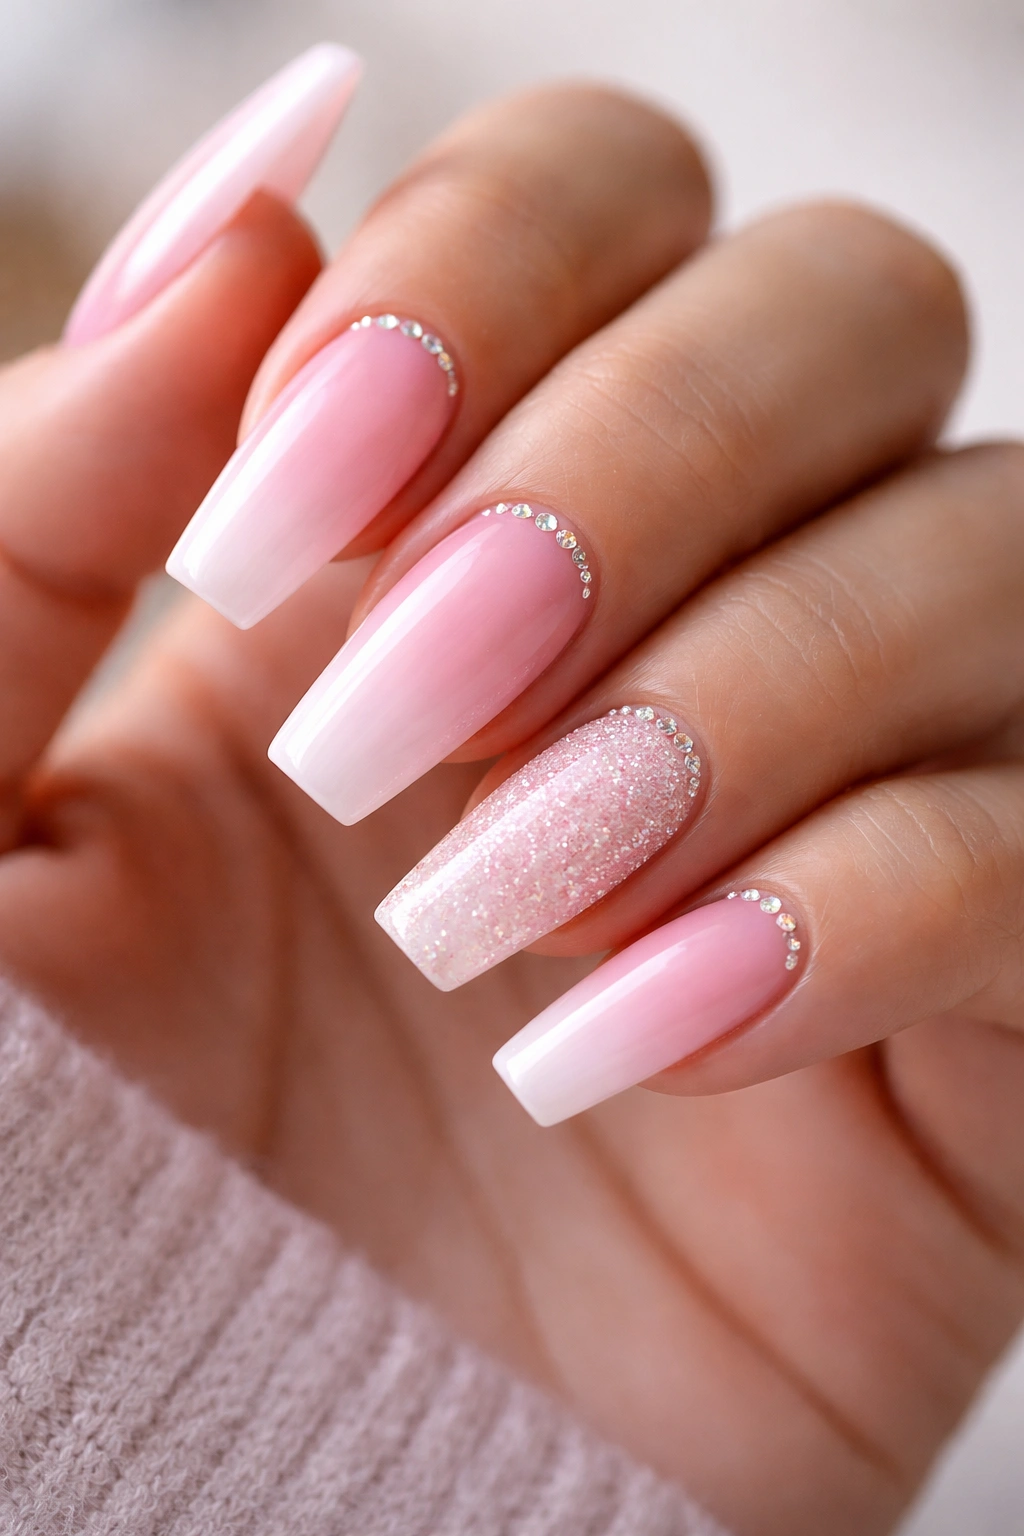
A pink ombré set can go sweet fast. The sugar-crystal accent keeps it from feeling sleepy.
Start with a baby pink or dusty rose at the cuticle and fade it into milky white or a brighter pink through the tip. Then pick one nail on each hand—ring finger works well—and cover it in sugar glitter, the textured kind that looks like crushed crystals. Add a few tiny rhinestones near the cuticle or down one side, and the contrast between soft fade and rough sparkle wakes the whole set up.
This style suits medium coffin lengths especially well. Long nails can carry it too, though you want the ombré smooth and stretched out, not banded. Sugar glitter tends to look richest when it is dense, so save it for accent nails instead of all ten fingers unless you are ready for texture on every surface you touch.
I like this set for people who want bling that still feels feminine without going bridal. It has softness, though the textured accent gives it more edge than plain pink ever could.
9. Matte Burgundy Coffin Nails With Glossy Gem Lines
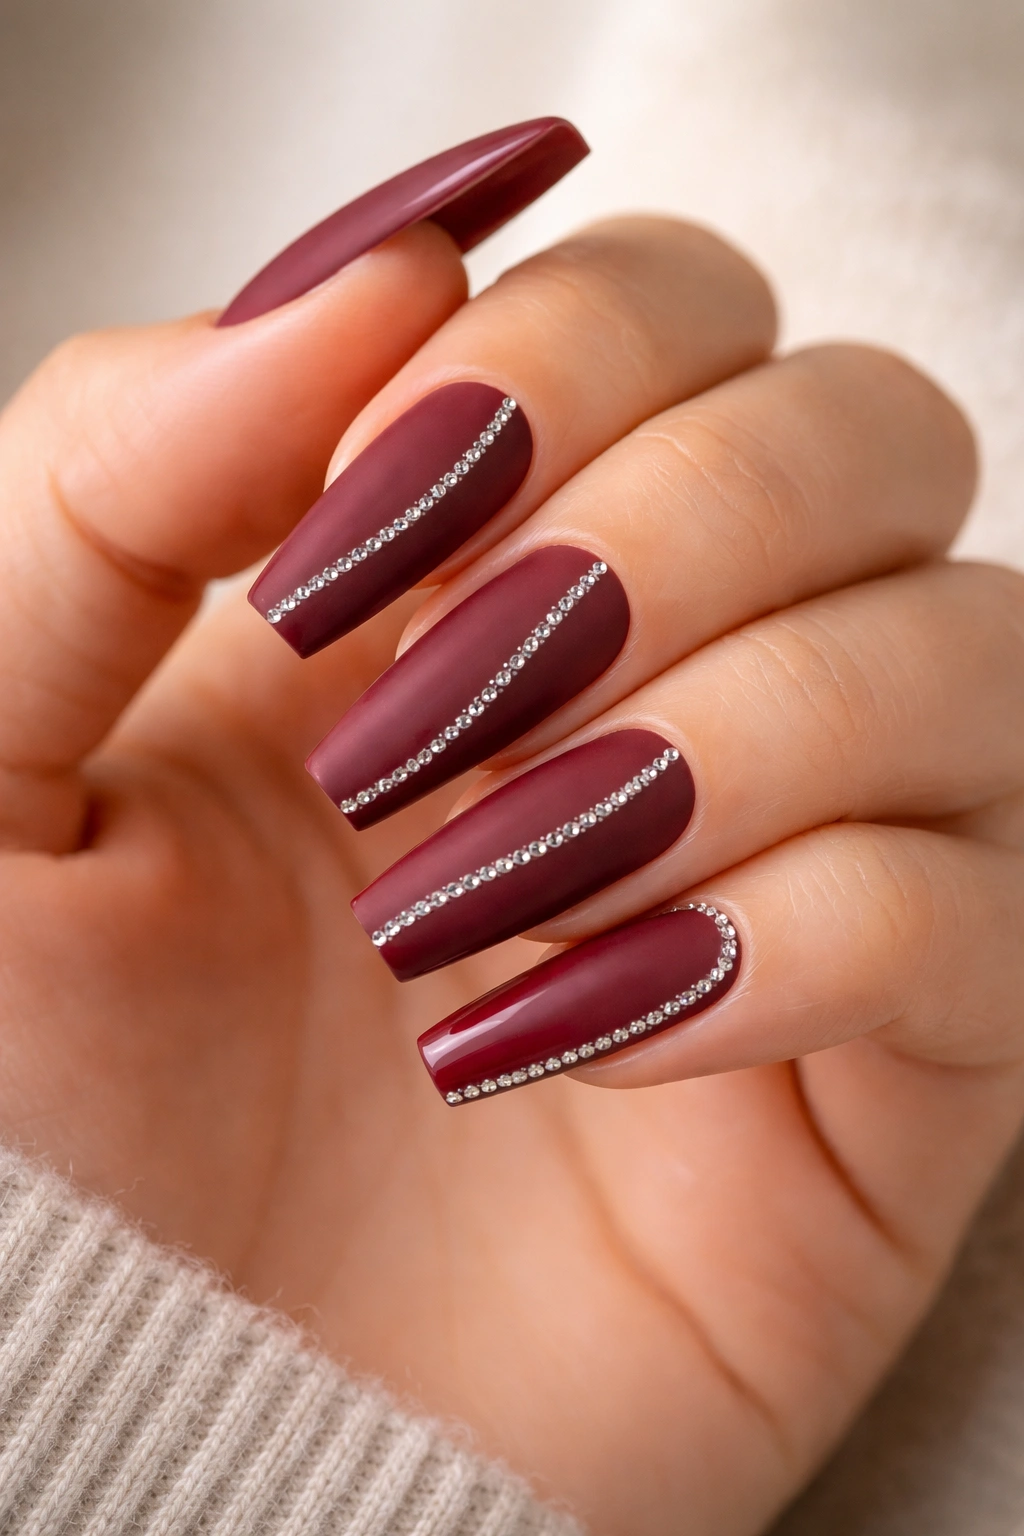
Matte and bling should clash on paper. On the hand, they look far better than they have any right to.
The trick is contrast. A velvety burgundy base absorbs light. Crystals and glossy gel lines bounce it back. Put the two side by side and each surface makes the other stronger. Burgundy also brings more depth than bright red, which helps the sparkle feel grounded instead of scattered.
I’m picky about gem placement on matte nails. Random stones can make the surface look dusty or unfinished. Thin vertical gem lines, diagonal sweeps from one sidewall to the other, or a centered cuticle-to-tip trail work better because they look planned. Add one glossy French outline on a single nail and leave the rest matte. That little gloss detail ties the crystals back into the set.
This design also wears nicely in photos from arm’s length. The matte base gives shape. The gem line gives focus. You do not need giant charms or heavy glitter because the finish contrast is already doing real work.
And yes, matte top coat scratches faster than gloss. That is the trade. On burgundy, the payoff is worth it.
10. Emerald Green Coffin Nails With Diamond-Framed Cuticles
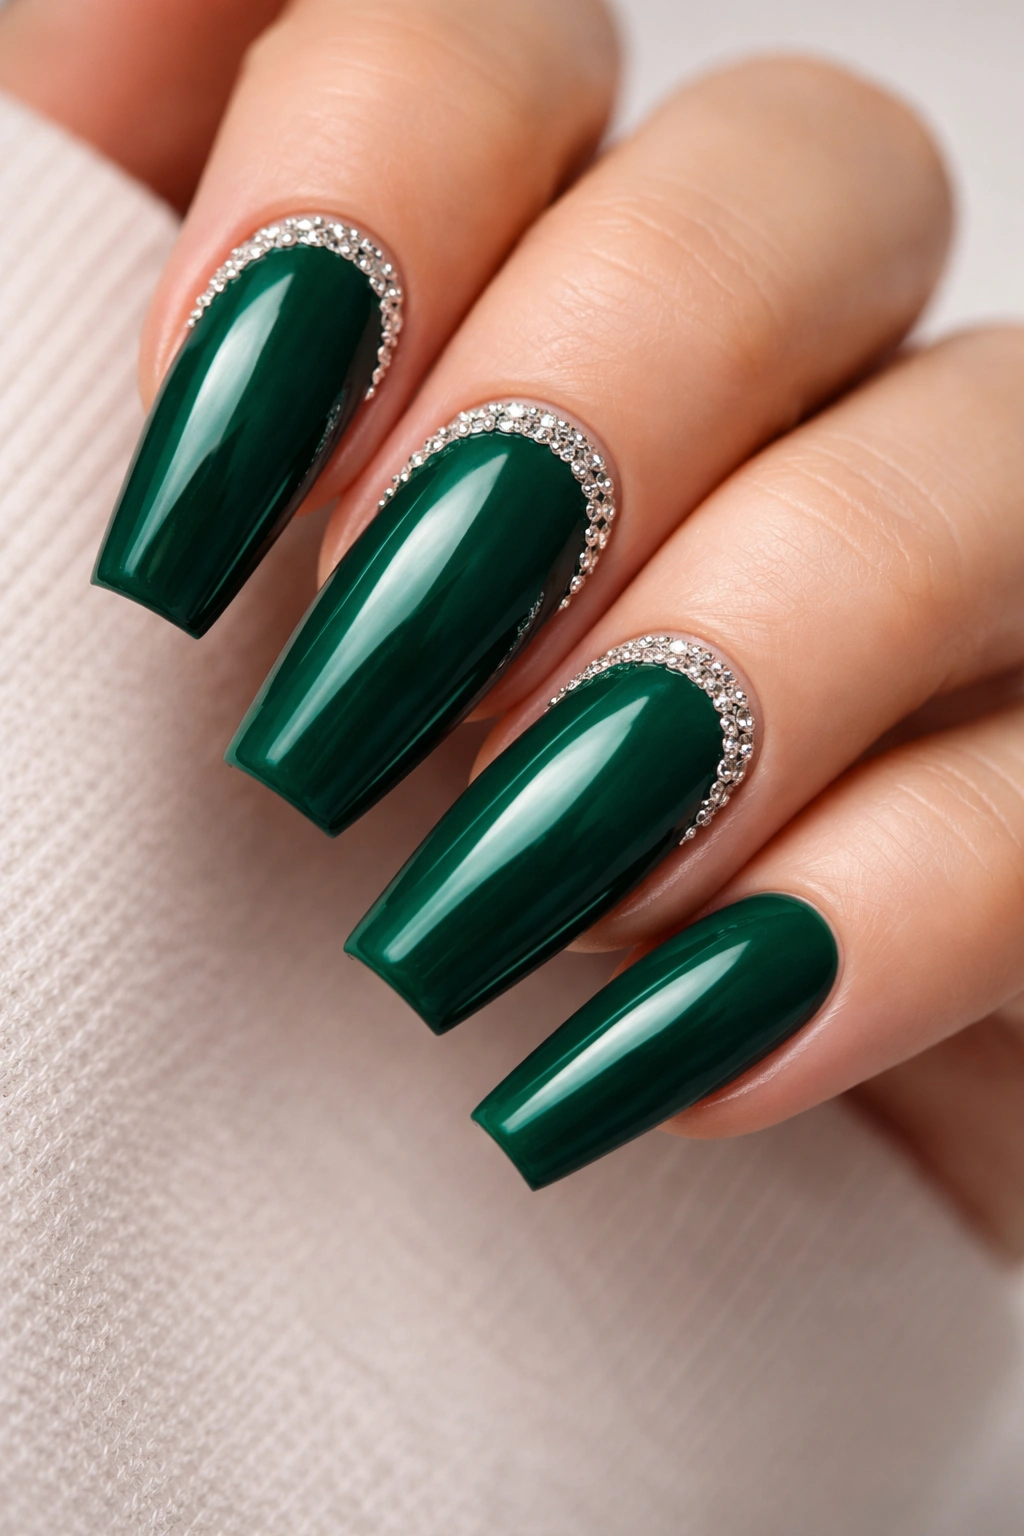
Emerald is one of those shades that makes skin look warmer and rings look better. Add crystal framing at the cuticle, and the whole manicure starts feeling like jewelry instead of polish.
A clean emerald base—cream, jelly, cat-eye, or fine shimmer—sets the tone. Then the cuticle gets framed with small clear stones in a tight half-moon shape. The placement matters here. You want the stones tucked close enough to look deliberate, though not so close that the new growth crashes into them after a few days.
How to keep this design sharp
Use the frame on two or three nails, not all ten. Let the remaining nails carry plain emerald polish, a chrome stripe, or a tiny single stone. That keeps the framed nails special. If every nail is outlined, the eye stops knowing where to land.
Quick design notes
- Deep emerald cream looks rich and tailored
- Cat-eye emerald adds movement under low light
- Clear stones suit this best, though one dark green crystal on the ring finger can be gorgeous
- Gold jewelry beside emerald nails looks especially strong
This is a high-color set with controlled bling. Sharp. Clean. Hard to ignore.
11. Baby Blue Coffin Nails With Silver Chains and Stones
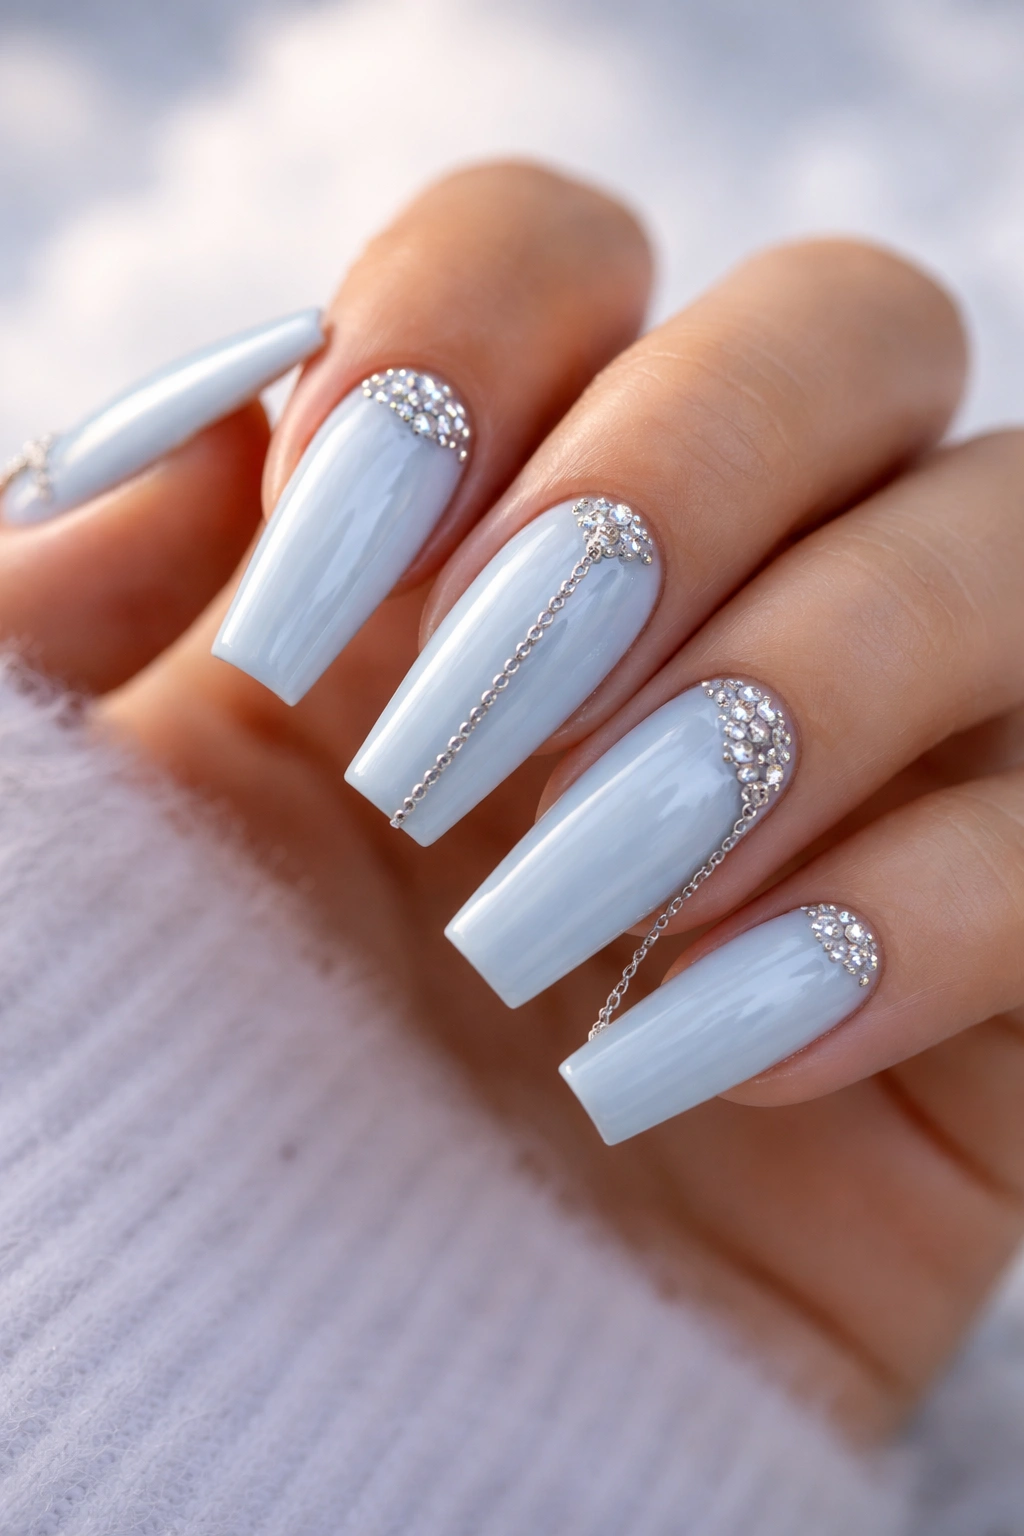
Can chain details look polished instead of fussy? They can, though only when the rest of the nail stays disciplined.
Baby blue gives you a soft background that stops silver chain accents from turning too harsh. I like a cloudy pastel blue or an icy blue-gray more than a candy shade here. Then add a thin chain draped across one nail, anchored with tiny flat-backed stones at each end. On another nail, use a straight chain line down the center like a metallic seam.
What makes chain nails wearable
The chain has to sit flush. If the links rise up at the edges, they catch on knitwear and hair almost immediately. Ask for chain details pressed into gel and sealed around the sides. Save heavy chain work for one or two nails per hand. More than that starts feeling bulky, and blue needs some open space to stay crisp.
You can push this set in different directions. Add silver chrome on the thumb for a cooler, more futuristic look. Keep the rest plain and glossy if you want the chain details to carry the design alone. Either way, this is a smart choice when you like the idea of bling but want something a little less expected than classic rhinestones.
12. Black-and-Nude Coffin Nails With Crosshatch Crystal Grids
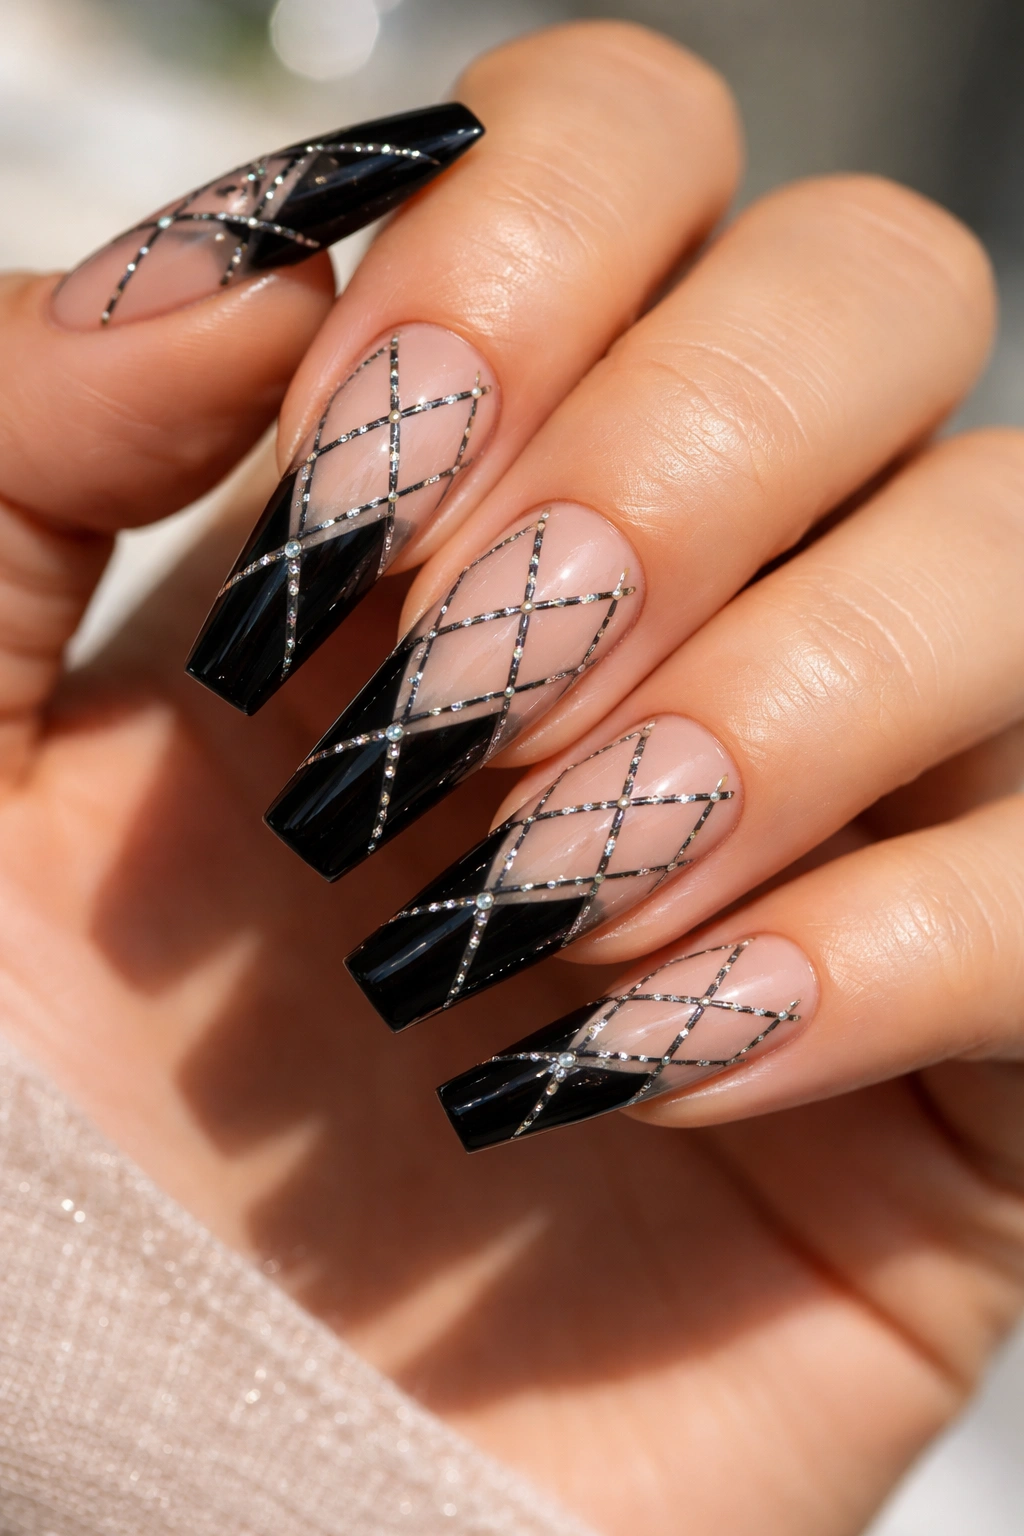
Graphic nails hit differently from soft glam nails. Black-and-nude coffin sets with crosshatch crystal grids prove that point fast.
Take a nude base on some nails and glossy black on others. Then create a crisscross pattern using thin black gel lines, micro crystals placed at the intersections, or both. The result feels architectural. It has edge. It also suits coffin shape better than round or oval because the straight sides help the grid stay clean.
This design works best when the palette stays restrained. Nude, black, clear stone. Maybe one silver line if you want extra light. Add too many colors and the structure gets muddy.
A few choices help it land:
- Use micro crystals, not bulky stones
- Keep the lines fine and straight, almost like thread
- Put the busiest pattern on two nails per hand
- Let one or two nails stay plain glossy black so the set can breathe
I like this look for someone who wants bling with a sharper attitude. It is less jewelry-box glam, more fashion-photo glam. Still flashy—just colder.
13. Lavender Coffin Nails With Aurora Borealis Rhinestones
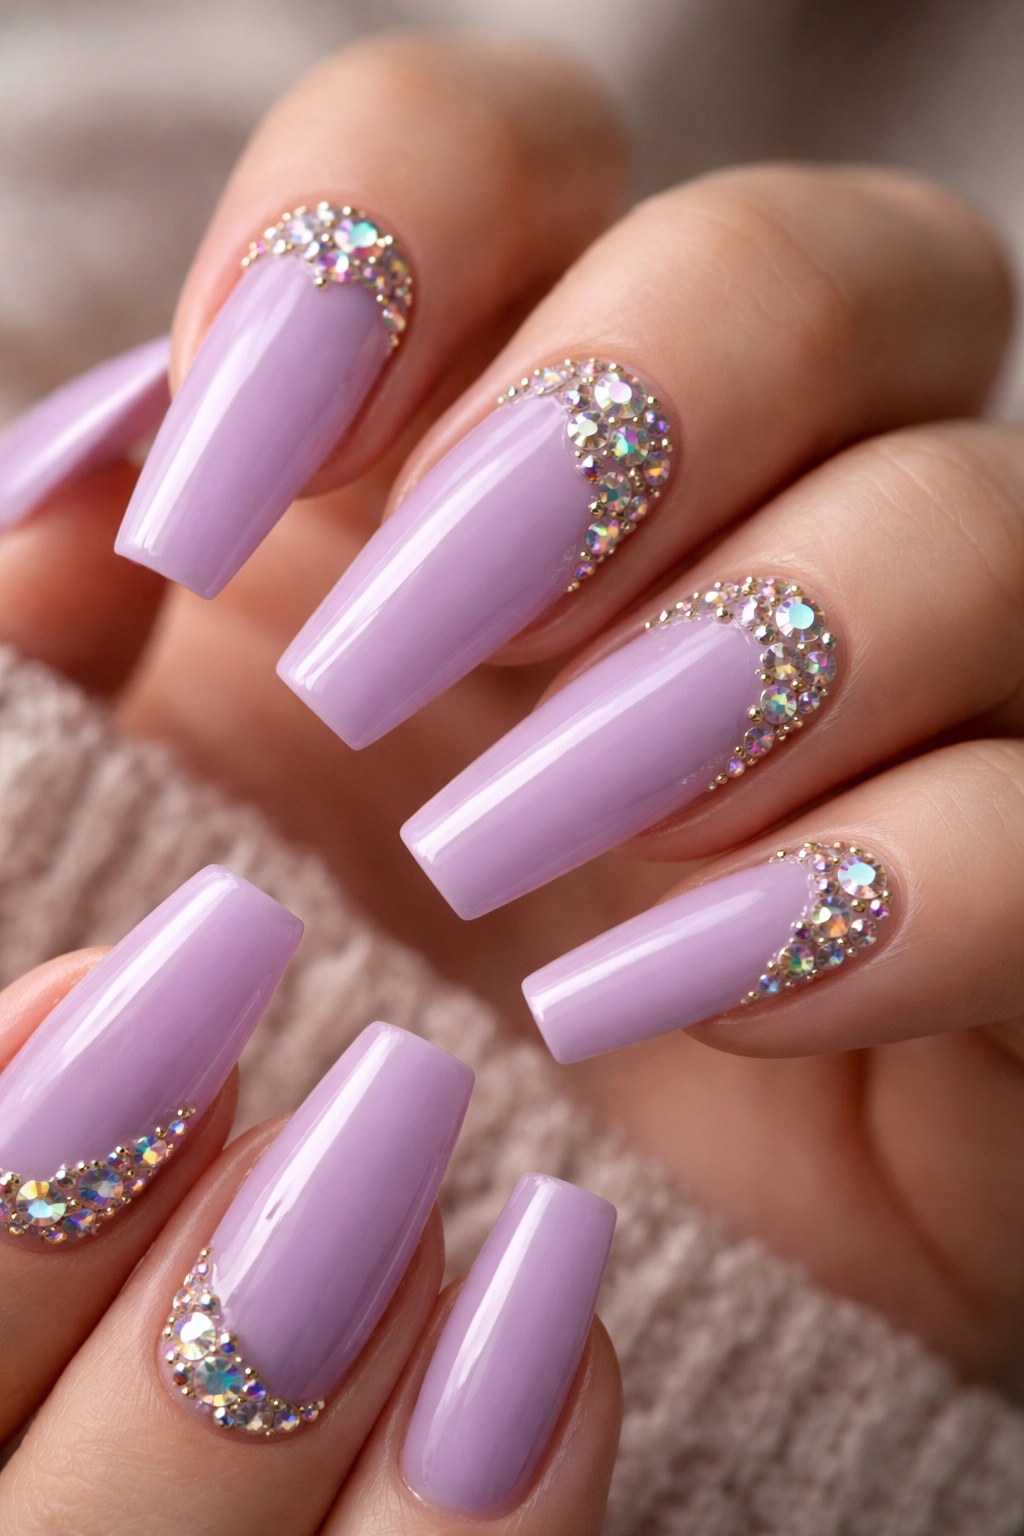
Lavender and AB stones belong together. The polish pulls out the lilac in the crystal finish, and the crystal finish throws blue, pink, and silver back onto the polish. The color conversation between the two is what makes this set feel richer than a plain pastel manicure.
A pale lavender base gives a softer effect. A grayer lavender feels cooler and more grown-up. Then place aurora borealis rhinestones either in a diagonal line, a clustered French corner, or a cuticle curve. I like mixing one or two tiny chrome details into this set because lavender can turn powdery if every surface stays soft.
This is one of the easier bling coffin looks to wear across different lengths. Short-medium coffin nails can carry a small AB corner cluster and still look tidy. Long nails give you room for ombré lavender, iridescent flakes, or a full AB tip on one accent finger.
The set shines hardest when the base is smooth and glassy. Chalky lavender kills the mood. Go glossy, clean, and a touch translucent if you can.
14. Gold Chrome Coffin Nails With a Jewel-Covered Ring Finger
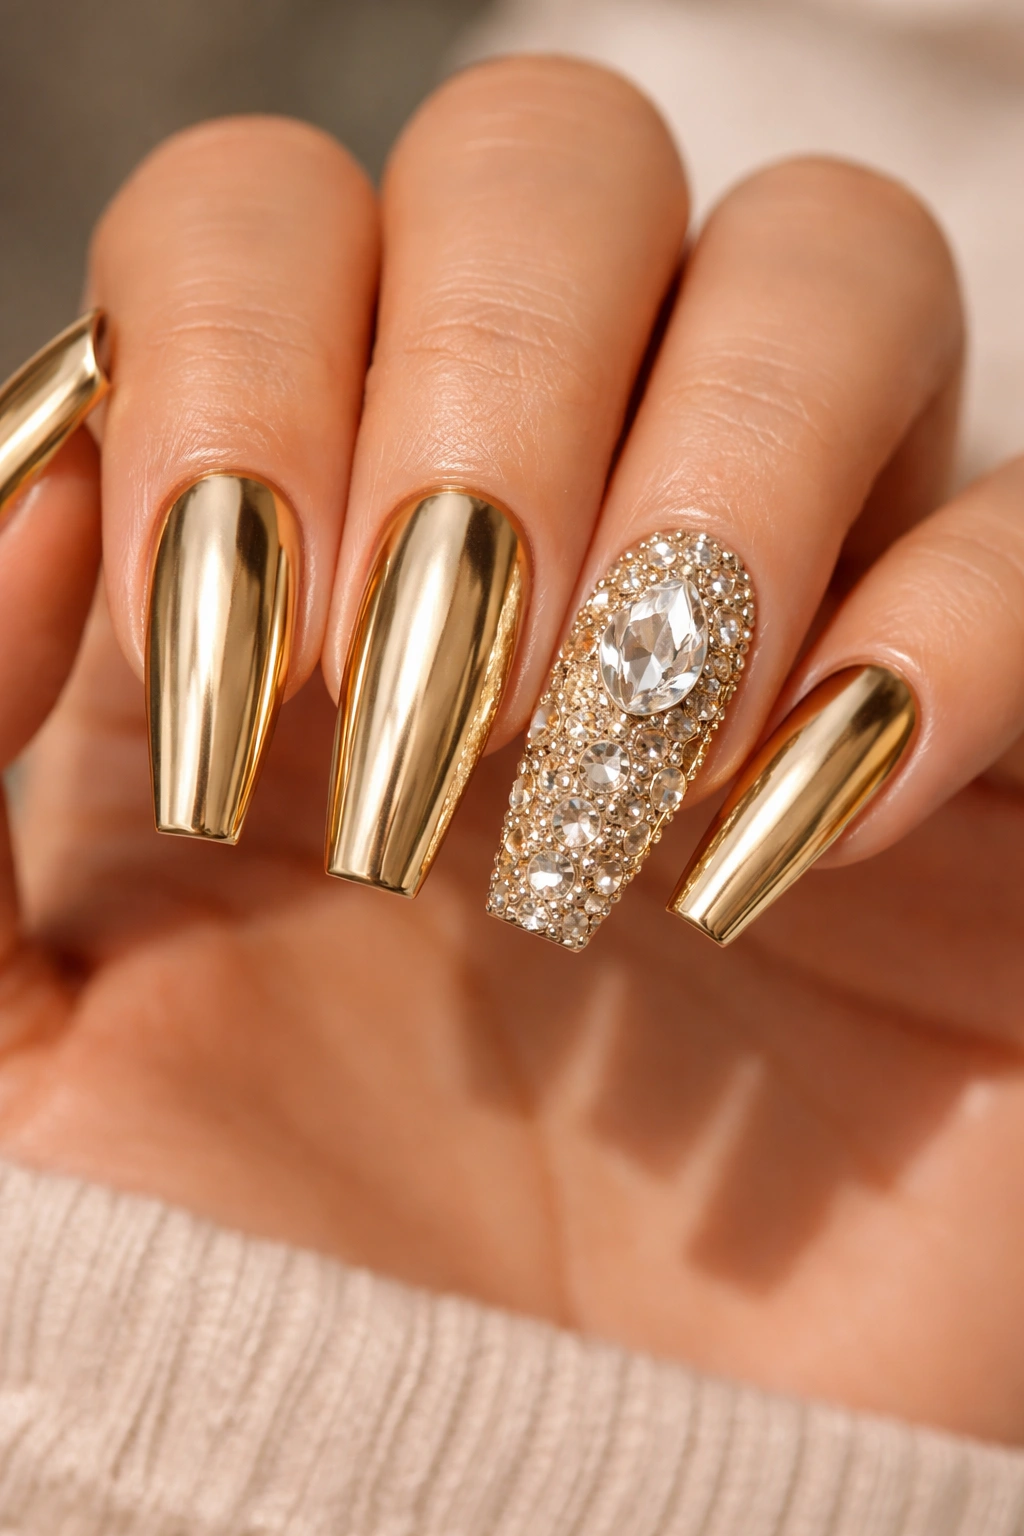
If a full bling set feels like too much maintenance, this is the shortcut I keep recommending. Most of the nails stay in reflective gold chrome. One ring finger gets the full jewel treatment. The hands still look dressed up, though you only have one high-texture nail per hand to deal with.
Gold chrome on coffin nails already makes a statement because the shape sharpens the mirror finish. Add one ring finger covered in mixed clear and champagne stones—maybe a pear-cut gem near the apex, smaller rounds around it—and you get contrast between smooth metal and raised jewelry.
Why this combination works
Chrome gives broad flash. Stones give pinpoint flash. The eye likes that mix because the shine changes as the hand moves. If every nail is mirror chrome and every nail is packed with crystals, the set can start looking heavy. One jewel-covered accent finger keeps the look more focused.
Ask for these details
- A warm gold chrome, not a muddy bronze
- One accent nail with mixed crystal sizes for depth
- Clean sidewalls, because chrome shows every filing mistake
- A square, crisp tip so the metallic finish looks intentional
This one pairs especially well with gold rings, watches, and stacks of bangles. No surprise there.
15. Mixed-Texture Bling Coffin Nails With Charms, Crystals, and 3D Accents
This is the maximalist set. It is not for someone who wants to forget they are wearing nails.
Done badly, mixed-texture bling looks messy in seconds. Done well, it feels like a tiny curated collection across ten fingers: one nail with a 3D bow or heart charm, one with clear crystals, one with chrome details, one with sugar glitter, one left almost plain so the eye can rest. Editing matters more than sparkle here.
I would build this design around a tight color story first. Pick two main colors and one metal. Think black, silver, and clear. Or blush, white, and rose gold. Once the palette is locked, mix textures inside that lane. The set stays bold, though it does not drift.
Placement matters even more. Keep bulky 3D accents to one nail per hand. Use flatter crystals on the others. Put your heaviest charm where the nail is strongest, close to the apex. Let at least two nails stay lighter on decoration, because your hand needs visual pauses. Otherwise every finger competes at once, and nothing wins.
This is the set for birthdays, trips, photo shoots, concerts, or any time you want your nails to lead the outfit instead of finishing it. High effort. High payoff. Zero subtlety.
Final Thoughts
The best bling coffin nails are not only about sparkle. They are about balance—length against stone size, color against shine, texture against wear. When those parts line up, a bold set looks sharp instead of chaotic.
If you are choosing between two designs, pick the one that matches how you use your hands. Encapsulated glitter and cuticle crystals tend to wear easier than big tip charms and chain drapes. Matte contrast looks rich. Clear depth looks expensive. Black makes stones hit harder. Nude lets shape carry more of the look.
And if you are going bold, go bold on purpose. A clean coffin shape, smart stone placement, and one strong design idea will always outlast a set that tries to do every trick at once.
