

White stilettos are a wedding day statement—elegant, elongated, and undeniably feminine. Whether you’re walking down the aisle as the bride, standing as a bridesmaid, or attending as a guest, the right white stiletto nail design can elevate your entire look. But here’s the thing: not every white stiletto nail design works for every wedding aesthetic. A winter elopement calls for something different than a summer garden celebration, and a minimalist ceremony demands a different approach than a glamorous ballroom affair.
The beauty of white stilettos for weddings is their versatility. Pure white offers that classic bridal sophistication, while subtle off-whites like ivory and cream bring warmth and a touch of vintage romance. You can keep them clean and minimalist for understated elegance, or layer them with gold leaf, pearls, crystals, and intricate nail art for maximum impact. The key is choosing a design that makes you feel confident and bride-ready—whether you’re the main event or part of the celebration.
What makes a white stiletto nail design wedding-worthy isn’t just the color—it’s the execution. The shape needs to be flawless, the color needs to complement your skin tone, and the embellishments need to enhance rather than overwhelm. We’ve curated twelve stunning white stiletto designs specifically chosen for weddings, covering everything from timeless classics to modern trends. Each one is achievable (either at a salon or DIY if you’re patient), photograph beautifully, and pairs seamlessly with bridal or formal guest attire.
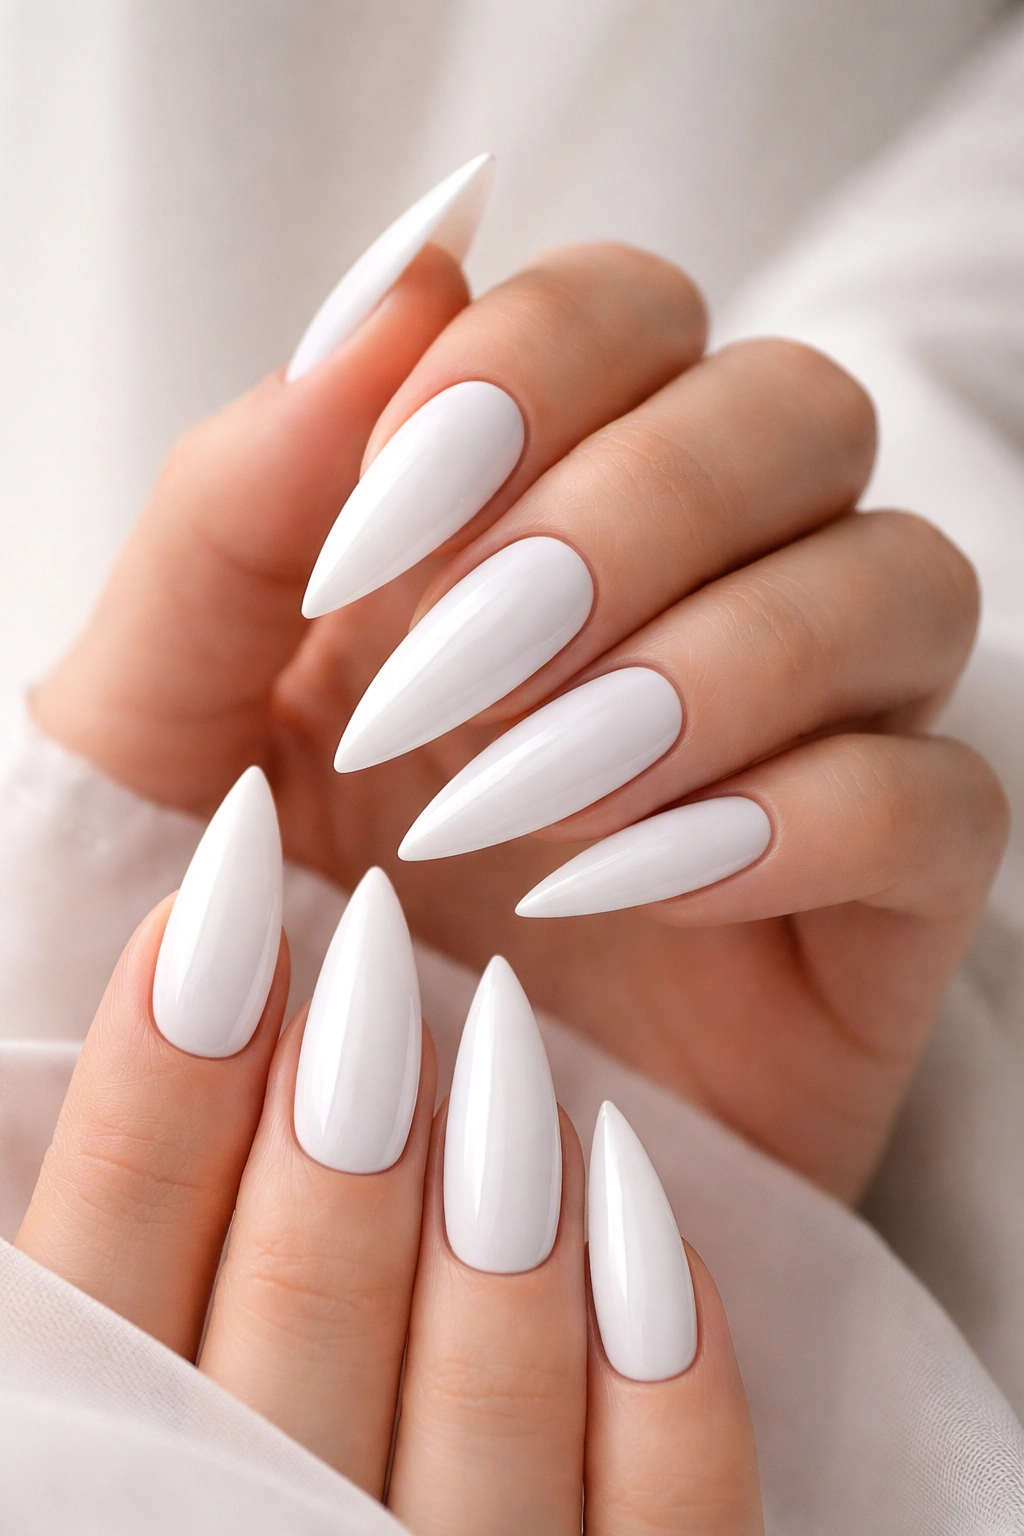
1. Pure White Glossy Stilettos with Clean Lines
The purest, most iconic white stiletto design starts with an immaculate glossy finish in pure white—no embellishment, no texture, just flawless shine. This is the nail equivalent of a white silk wedding dress: timeless, sophisticated, and universally flattering. The key to making this work isn’t the design itself but the execution—the color needs to be opaque with no streaking, the edges need to be razor-sharp, and the gloss needs to catch the light without looking plastic.
Why This Works for Weddings
Pure white glossy stilettos are the bridal standard for good reason. They frame your hands without distraction, they photograph beautifully in both daylight and flash photography, and they complement every skin tone when you choose the right undertone. A true bright white works on cooler skin tones, while a slightly warmer white (closer to cream) is more flattering on deeper or warmer complexions. This design also works for every wedding setting—whether you’re at a black-tie ballroom or a casual beach ceremony.
How to Achieve It
- File your stiletto nails to a sharp, pointed tip with a high arch at the apex—the longer the nail, the more dramatic the point can be
- Use a white gel or polish specifically labeled as “pure white” or “bride white” (not off-white, ivory, or pearl)
- Apply three thin coats rather than two thick coats to avoid streaking and achieve true opacity
- Seal with a high-shine top coat and cure under UV light if using gel
- Buff gently between coats with a soft buffer to ensure smooth adhesion
Pro tip: If your natural nails are slightly yellowed, apply a white base coat first to neutralize any undertone before applying your white color. This ensures the white stays pure and bright.
2. White with Delicate Gold Leaf Accents
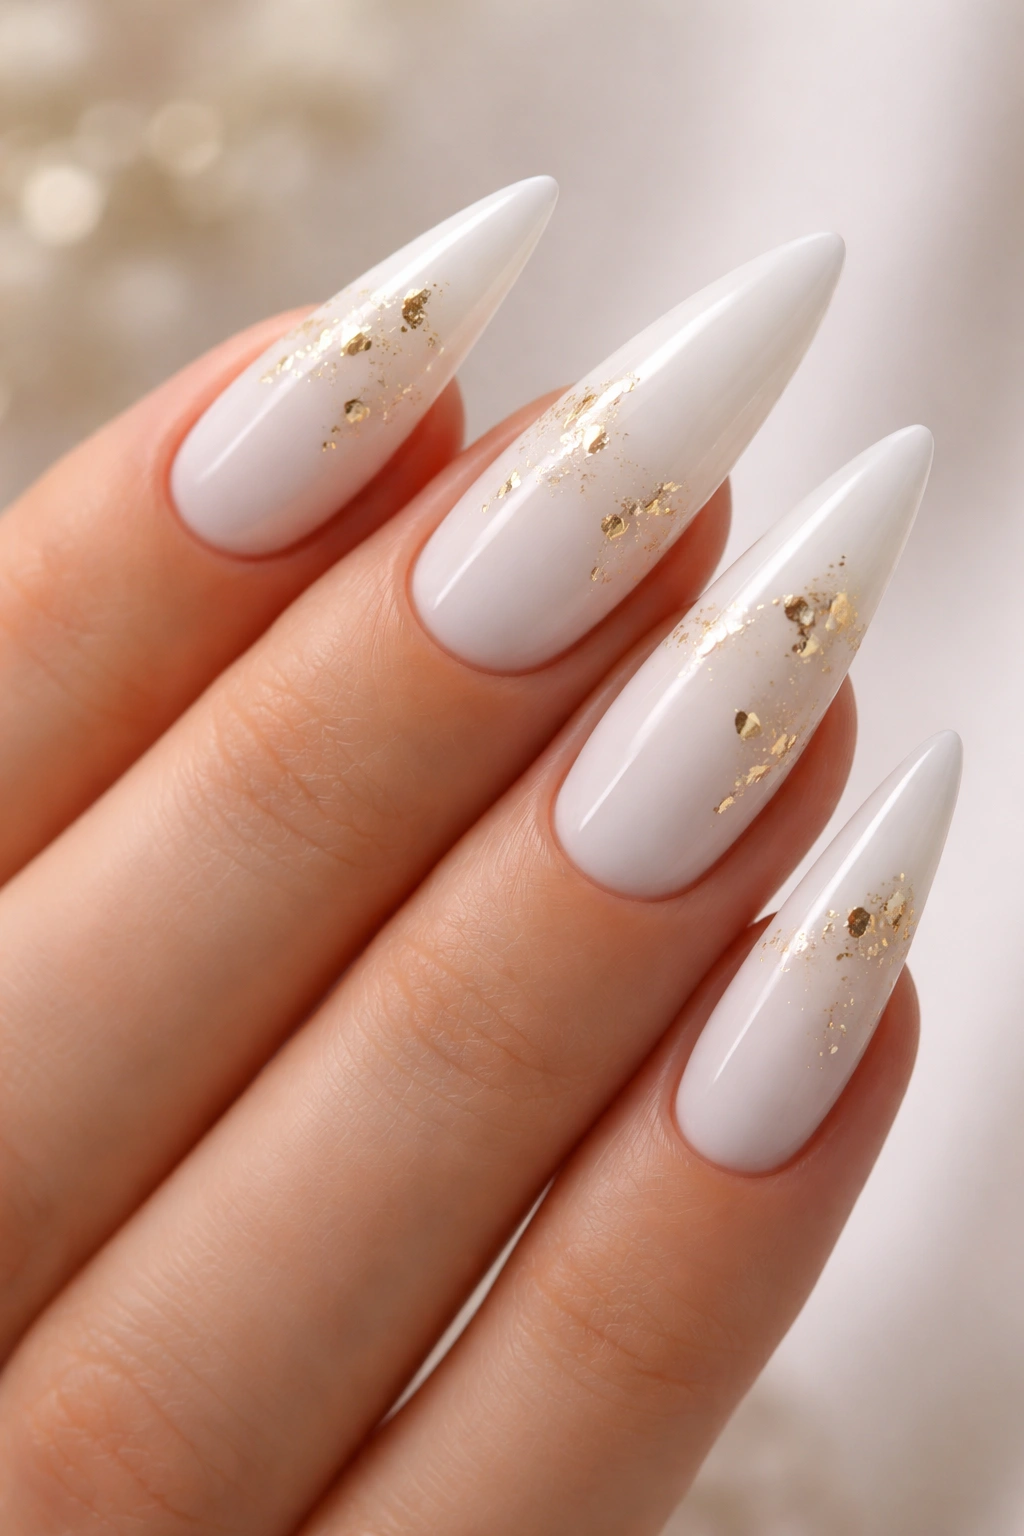
Gold leaf brings a whisper of luxury to white stilettos without overwhelming the design. Real or imitation gold leaf is applied to the base color in irregular, artistic patterns—sometimes concentrated at the tip, sometimes scattered across the nail, sometimes creating a gradient effect. The key is restraint: the gold should enhance the white, not cover it. You’ll see white as the dominant color, with just enough gold catching the light to add warmth and elegance.
Why This Works for Weddings
Gold and white is one of the most timeless luxury color combinations in fashion and design. It evokes classic bridal elegance without looking costume-y or overly dramatic. The gold adds just enough shimmer to photograph well without creating harsh glare, and it pairs beautifully with white, ivory, or gold metallic fabrics in bridal gowns and bridesmaid dresses. This design flatters all skin tones and works especially well if your wedding jewelry includes gold accents.
How to Achieve It
- Start with a crisp white base coat applied smoothly in 2-3 coats
- Once fully dry or cured, apply a thin layer of clear gel or glossy top coat
- While the top coat is still tacky (for gel) or wet (for polish), apply gold leaf flakes using a thin brush or tweezers
- Press gently and seal with another layer of clear top coat
- You can layer the gold at the tips for a gradient effect, or scatter it randomly for an organic look
Worth knowing: Real gold leaf is significantly more expensive but creates a richer, more authentic appearance. Imitation gold leaf (aluminum) is more affordable and photographs nearly identically, making it a solid budget-friendly choice.
3. White Stilettos with Subtle Pearl Dust

Pearl dust creates a barely-there shimmer that catches light without overwhelming the nail. This approach uses a white base with an iridescent or pearl shimmer mixed throughout, creating a soft luminous effect. It’s different from glitter or sparkle—instead of discrete sparkles, pearl dust creates a cohesive subtle sheen that makes the nail glow. The effect is understated but undeniably elegant.
Why This Works for Weddings
Pearl finishes have a soft, romantic quality that feels inherently bridal. The shimmer is sophisticated enough for formal events but delicate enough to suit minimalist aesthetics. Pearl dust reflects light in a way that’s flattering on camera—your nails will look luminous and polished without the harsh glare of full glitter. This design pairs beautifully with lace, satin, pearls, or any sparkly bridal jewelry you’re wearing.
How to Achieve It
- Apply two coats of a white base color (gel or polish) and let cure or dry completely
- Mix a tiny amount of pearl dust or mica powder into a clear top coat using a glass stirring rod
- The ratio should be roughly 1 part pearl dust to 10 parts top coat—you want subtle shimmer, not a thick glittery layer
- Apply this pearl-infused top coat in one smooth layer and seal with a glossy finish
- Alternatively, purchase pre-made pearl or shimmer white polishes designed for this exact effect
Pro tip: Apply the pearl coat slightly thicker on the upper two-thirds of the nail and a bit thinner near the cuticle for a subtle gradient effect that catches light as your hands move.
4. Ombre White to Blush Pink Stilettos
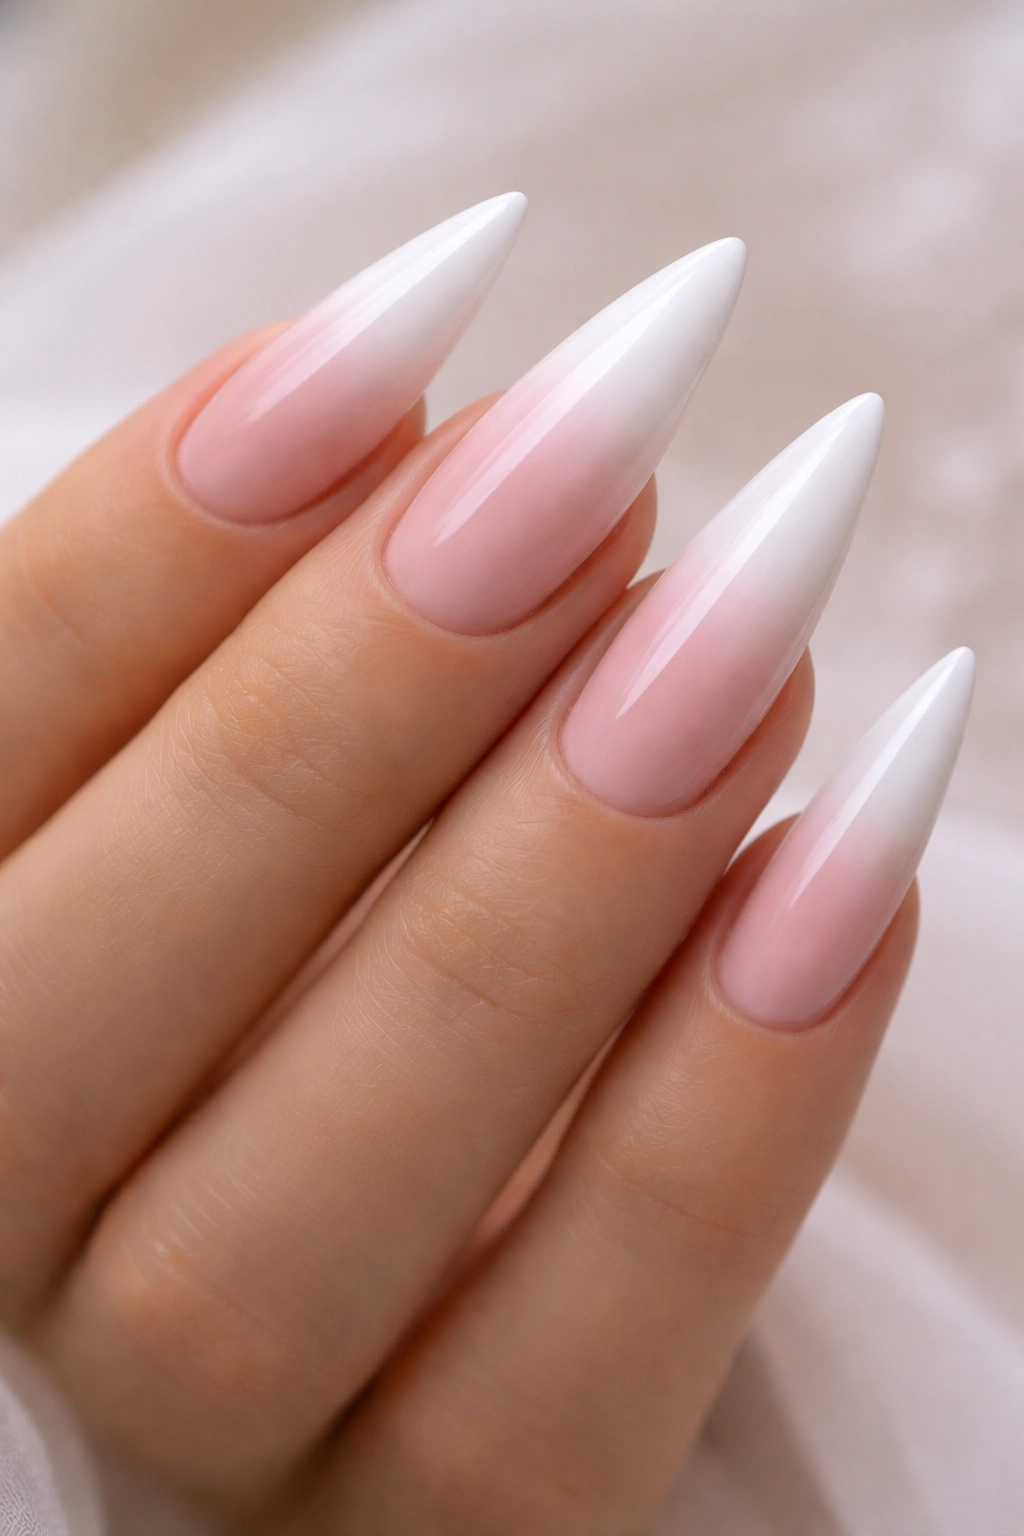
Ombre transitions are pure romance—a gradient from pure white at the tips to soft blush or dusty rose as you move toward the base. The transition should be gradual and seamless, not a harsh color block. This design works beautifully on stiletto nails because the length of the nail gives you plenty of space to create a smooth, flowing gradient. The effect is bridal, feminine, and distinctly modern.
Why This Works for Weddings
Blush and white is a softer alternative to pure white, especially flattering if you have warmer skin tones or prefer a less stark appearance. The gradient adds visual interest and depth without adding any texture or embellishment, keeping the overall look elegant and wearable. This design photographs exceptionally well and pairs seamlessly with blush, cream, white, or ivory wedding attire. It’s also sophisticated enough for a guest look without reading as overly matchy.
How to Achieve It
- Apply a pale blush or dusty rose base coat to the entire nail and cure or dry
- On a nail art palette or ceramic tile, create a gradient by mixing your blush base with pure white using a soft, flat brush
- Blend the colors on the palette so you have pale blush, medium blush, light blush, and white side by side
- Using a soft flat brush or sponge, apply from dark (at the base) to light (at the tip), blending as you go
- Seal with a glossy top coat to blend and smooth any visible transitions
Worth knowing: Sponging creates softer blends than brush application. Use a makeup sponge or nail art sponge to dab and blend the colors for the most seamless ombre effect.
5. White Stilettos with Thin Black or Navy Line Art
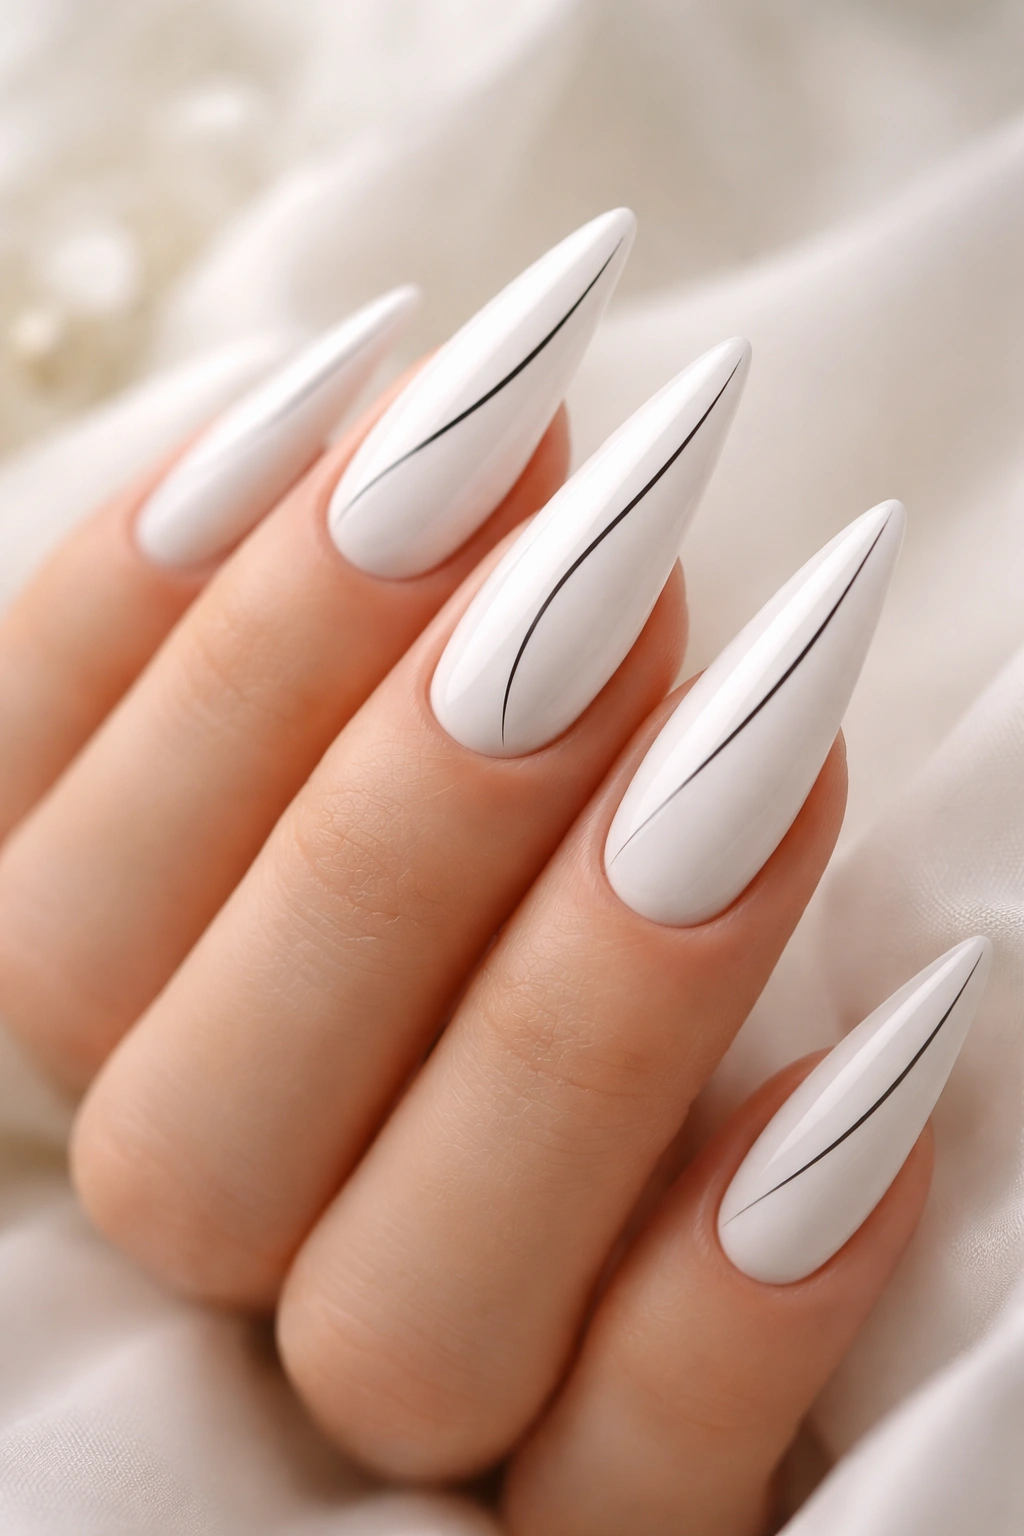
Minimalist line art—a single thin black or navy line creating a subtle geometric design—brings modern sophistication to white stilettos. A single linear design might run vertically down the center, create a thin geometric frame, or outline the cuticle in a delicate border. The line should be thin enough that it reads as intentional design, not accidental, while staying elegant enough for a formal event.
Why This Works for Weddings
This design splits the difference between classic bridal elegance and contemporary minimalism. The line art adds visual interest without overwhelming the nail, making it ideal for brides or guests who prefer understated sophistication over full-coverage design. The contrast between white and dark line work photographs beautifully and creates definition that reads well in photos. This design is especially effective for modern, minimalist, or urban wedding aesthetics.
How to Achieve It
- Apply 2-3 coats of pure white base to all nails
- Once dry or cured, use a thin nail art brush or a 0000 fine-tipped pen designed for nail art to create your line design
- Black or navy gel paint works better than polish for crisp, precise lines
- Keep lines thin and intentional—thick lines read as amateur, while thin clean lines look designed
- Seal with glossy top coat to protect your line work
Pro tip: Practice your line design on a nail wheel or nail practice tips first. Thin, precise line art requires a steady hand and the right brush size—a brush that’s too thick will destroy the delicate effect.
6. White with Luxury Pearl and Crystal Accents
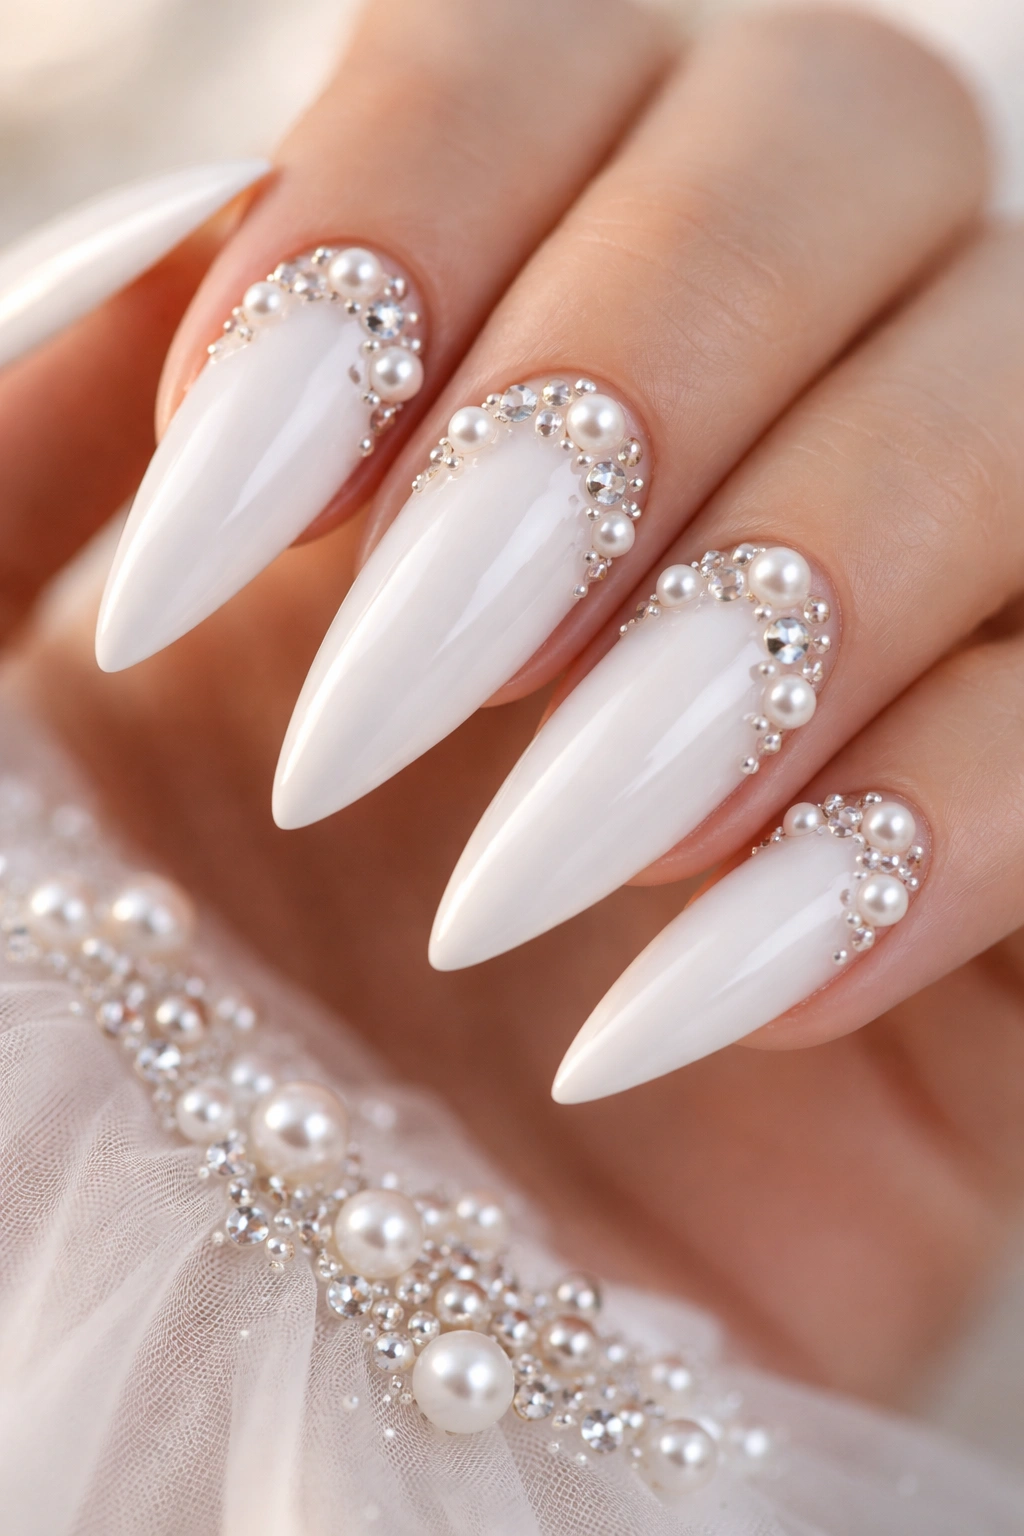
This is the elevated approach: a white base studded with carefully placed genuine or high-quality faux pearls and small crystals, especially concentrated near the cuticle or along the sides. The placement should feel curated and intentional, not chaotic. Real pearls (freshwater or AB crystals) elevate this design significantly, but high-quality glass pearls and Swarovski crystals achieve nearly identical visual impact.
Why This Works for Weddings
Pearls and crystals are inherently bridal and formal. They catch light beautifully in photographs and in person, creating an impression of luxury and intentionality. This design works for brides who want their nails to be a statement piece and for guests who want to feel elevated and special. The weight of the embellishments is substantial enough that nails should be applied professionally to ensure they last through a full day of wedding activities. This design pairs beautifully with formal bridal gowns, especially those with beading or crystal detailing.
How to Achieve It
- Apply a white base (gel or polish) and let cure or dry completely
- Apply a thick layer of clear builder gel or glossy top coat to create a “bed” for the embellishments
- While the gel is still tacky, use tweezers to carefully place pearls and crystals in your chosen pattern
- Press each embellishment gently into the gel to secure it
- Apply another thin layer of clear gel on top to seal the embellishments in place and cure
- Finish with a glossy top coat
Worth knowing: Nail glue can be used instead of gel, but gel offers better longevity and a more professional finish. Embedded crystal work typically lasts 2-3 weeks with gel, 7-10 days with polish and glue.
7. Ivory Stilettos with Lace-Inspired Design
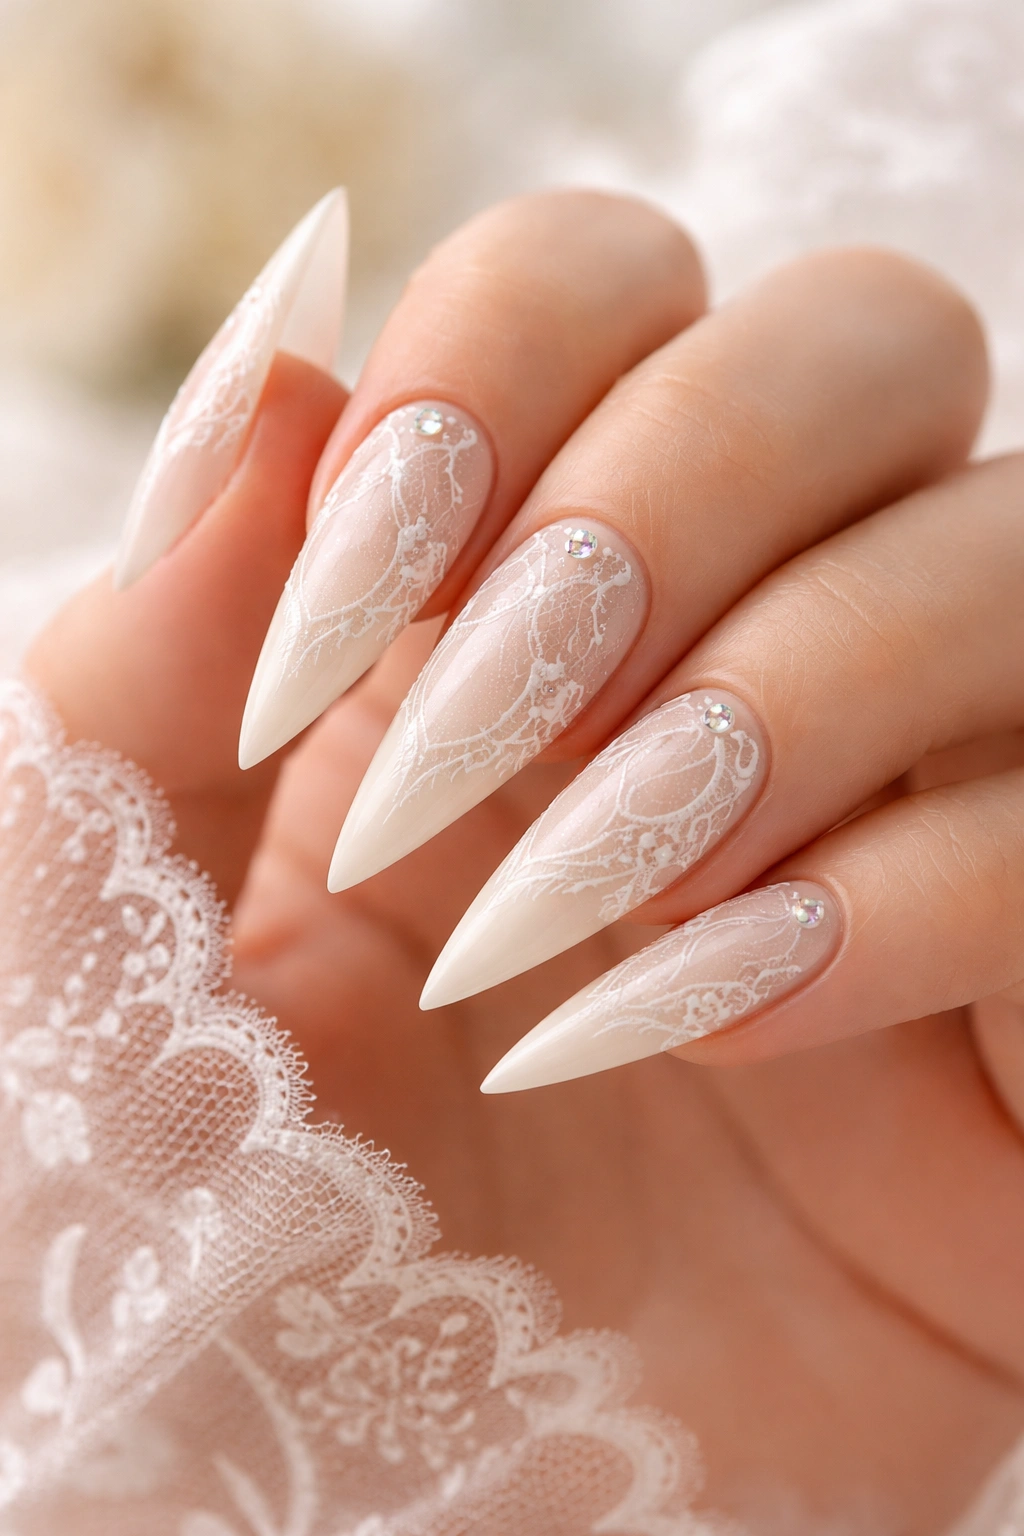
Lace patterns translated to nails create a romantic, feminine aesthetic—delicate white-on-white or ivory-on-ivory line work that mimics the intricacy of actual lace. The design uses fine lines, scallops, and negative space to create a lace-like appearance across the nail surface. Because it’s minimal color contrast, the effect is elegant and refined rather than visually loud.
Why This Works for Weddings
Lace is fundamentally bridal. It evokes vintage romance, delicate femininity, and heirloom quality—all deeply associated with wedding aesthetics. White-on-white or ivory-on-ivory lace maintains the purity of a white stiletto while adding significant visual interest and artistry. This design reads as thoughtful and intentional, perfect for brides who are paying attention to every detail. It photographs beautifully, especially in natural light, and pairs with every bridal aesthetic from classic to bohemian.
How to Achieve It
- Apply 2-3 coats of ivory or cream base color (slightly warmer than pure white) for a soft, romantic foundation
- Using a thin nail art brush and pure white or slightly lighter ivory gel or polish, paint delicate lace patterns
- Reference actual lace designs for authentic pattern inspiration—think scallops, florals, geometric interlocking patterns
- Keep lines thin and detail fine—delicate lace reads as intentional; thick lines read as amateur
- Seal with a glossy top coat for shine and protection
Pro tip: Lace nail stencils are available online and through nail supply retailers, eliminating the need to freehand perfect lace patterns. These stencils stick temporarily to the nail and allow you to paint crisp, consistent lace designs.
8. White Stilettos with Gold or Silver Confetti Flakes
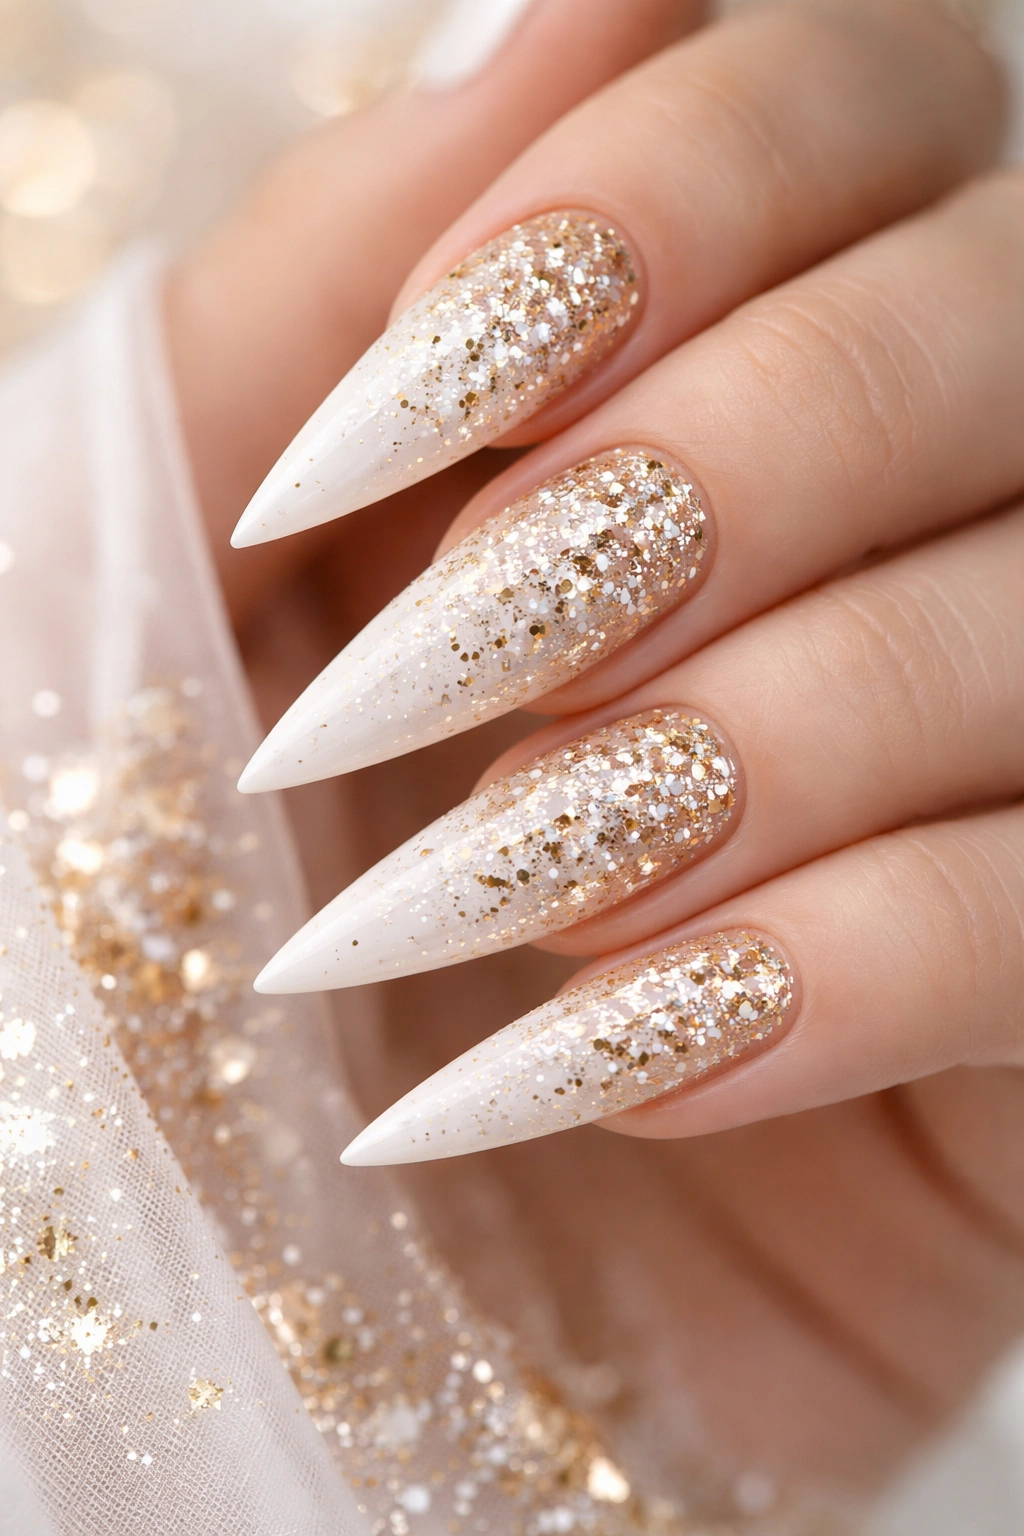
Confetti-style flakes—small metallic shapes mixed throughout the nail—create a celebratory, festive aesthetic while remaining elegant. Unlike chunky glitter, confetti flakes are smaller, closer together, and create a dense packed sparkle effect. Gold confetti feels warm and celebratory; silver confetti feels icy and modern. The density can vary from fully covered in confetti to scattered accents.
Why This Works for Weddings
Confetti evokes celebration and joy—perfect energy for a wedding day. Unlike full glitter designs that can feel costume-y, confetti flakes on a white base read as intentionally festive without sacrificing sophistication. This design works beautifully for bridesmaids, wedding guests, or brides who want nails that match the celebratory energy of their event. The sparkle photographs brilliantly and adds visual punch to wedding day photos and videos.
How to Achieve It
- Apply 2-3 coats of white base color and let cure or dry
- Apply a sticky top coat (gel) or use wet polish as your adhesive base
- Sprinkle your chosen confetti flakes over the sticky layer—you can cover the entire nail or create a gradient by concentrating flakes at the tip
- Tap gently to ensure they stick and press any loose flakes down with a brush
- Seal with a smooth top coat, being careful not to push the flakes around
Worth knowing: Some confetti will inevitably float in the top coat as you apply it. This actually creates a more natural, dimensional effect. If you want flakes to stay exactly where you place them, use gel products with heavier builder gel that doesn’t move as easily.
9. Stilettos with Negative Space French Tips
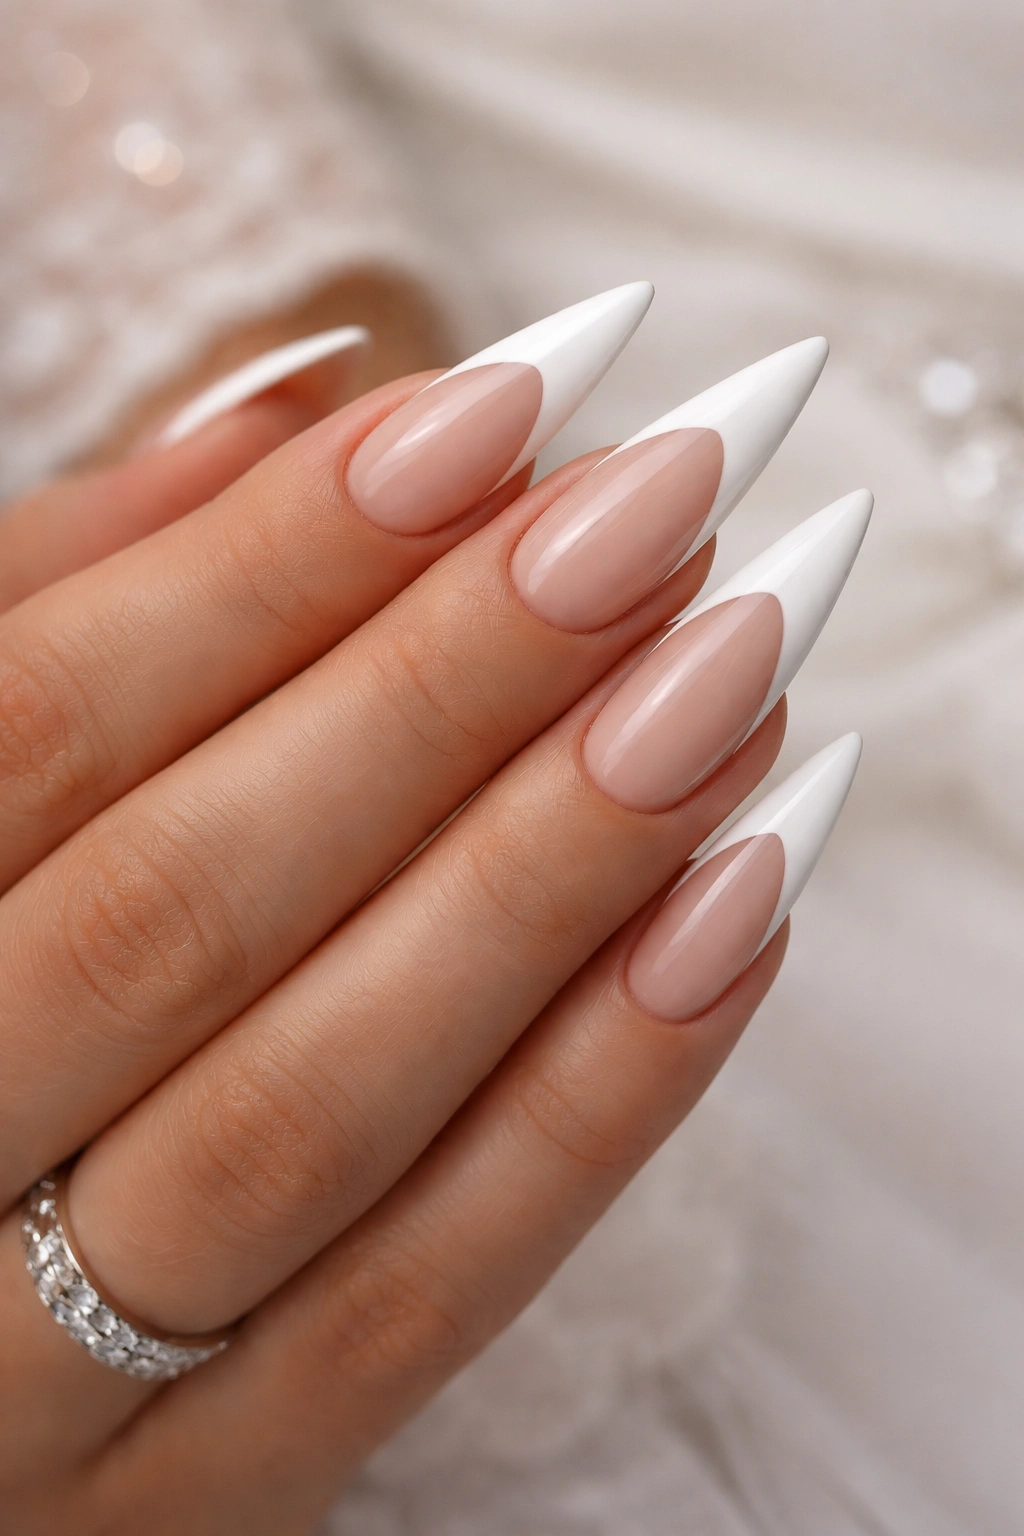
A modern twist on the French manicure: instead of white tips and a natural base, reverse it with white throughout the nail and negative space (bare nail) creating the “tip.” The bare space at the tip might be curved, angular, geometric, or asymmetrical. It’s a sophisticated, contemporary approach that maintains white stiletto elegance while adding modern design sensibility.
Why This Works for Weddings
Negative space designs feel current and intentional without reading as trendy or dated. This approach maintains white as your primary color while introducing visual interest through clever negative space technique. It’s ideal for brides or guests who love modern aesthetics and want nails that feel more editorial than traditional. The design photographs beautifully and creates interesting shadows and depth that enhance nail shape.
How to Achieve It
- Apply 2-3 coats of white base color to build opacity and coverage
- Once dry or cured, identify where your negative space will be (tip, side, cuticle area, or a geometric pattern)
- Use a cuticle pusher or wooden stick to carefully scrape away the white color in your chosen pattern while still tacky
- For precise shapes, use nail art stencils or tape to create clean lines before scraping
- Alternatively, paint the negative space area with clear base before applying white, so the white won’t stick to bare nail in that area
- Finish with a glossy top coat
Pro tip: File the edges of your negative space area smooth to avoid sharp edges. The bare nail should feel refined and intentional, not rough or hastily done.
10. Marble-Effect White Stilettos
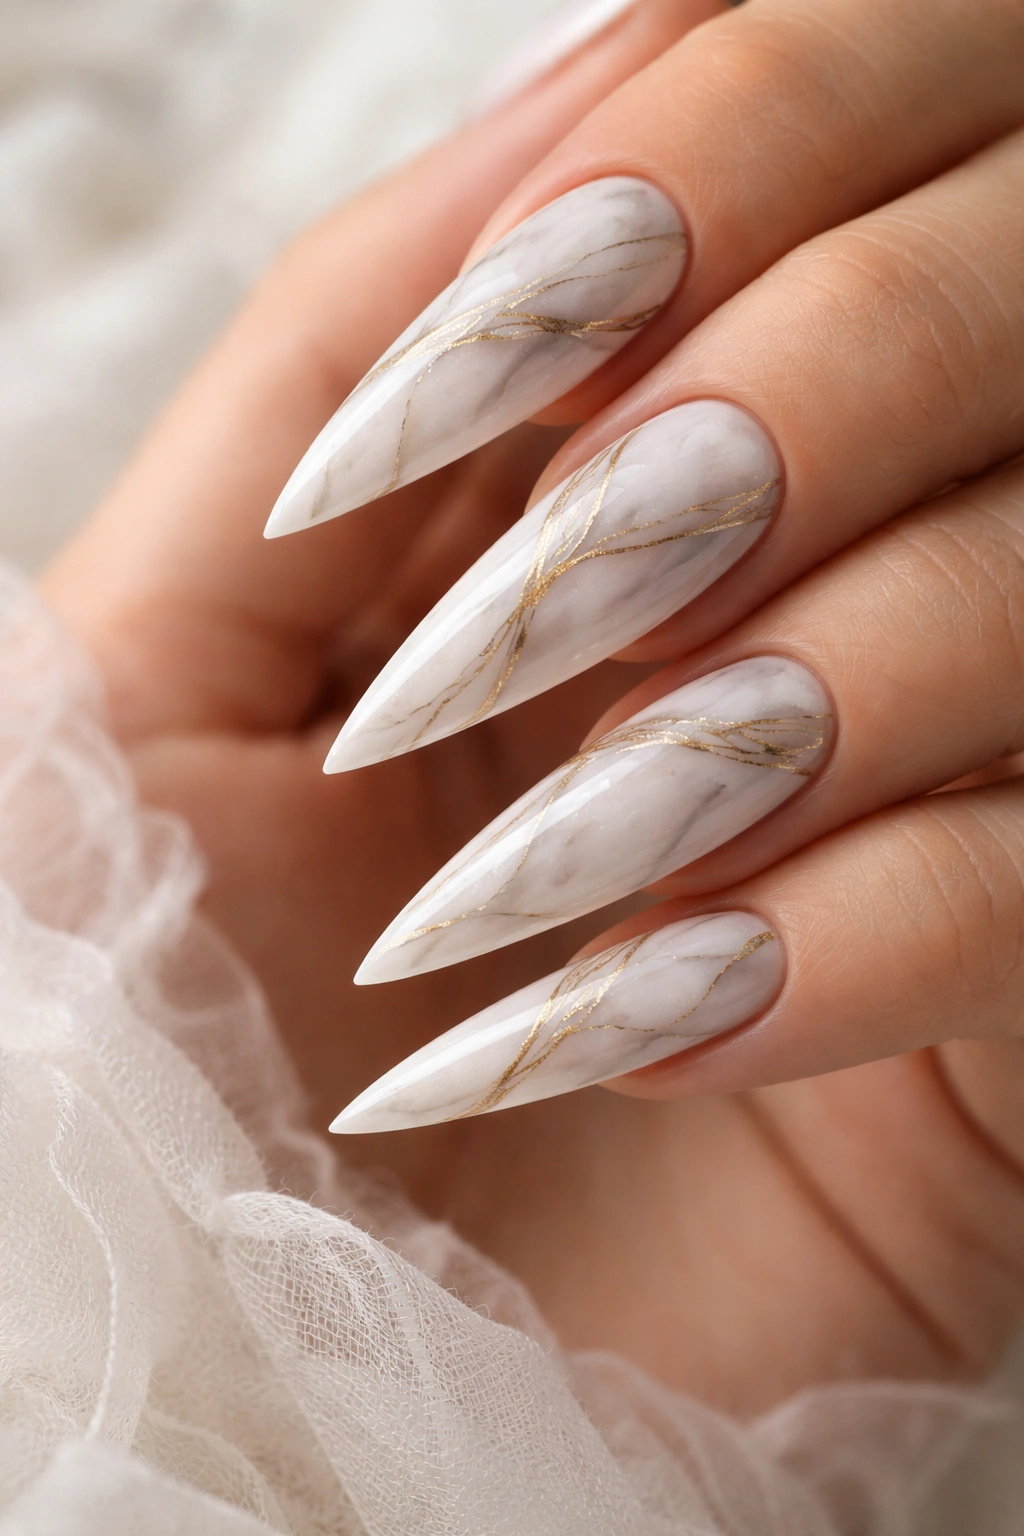
Marble nail art creates a sophisticated, stone-like appearance using a water marble technique or gel marble effect. Soft white, gray, and sometimes pale gold or pink are swirled together to create organic, natural-looking marble patterns. The effect feels organic, luxurious, and distinctly modern—like wearing a polished stone on your fingertip. Marble patterns are unique on every nail, adding individuality while maintaining a cohesive aesthetic.
Why This Works for Weddings
Marble is an inherently luxe material associated with high-end design and sophisticated interiors. Marble nails read as intentional, artistic, and elevated without being overly decorative. The organic nature of marble patterns means no two nails are identical—each one is unique and special. This design works beautifully for brides who want nails that feel like wearable art. It photographs exceptionally well with natural and artificial light and pairs with elegant, minimalist, or luxe wedding aesthetics.
How to Achieve It
- Apply a white base coat to all nails and let cure or dry fully
- On a nail art palette, drop small amounts of white, pale gray, and optional accent colors into water (or use gel marble techniques without water)
- Swirl colors together with a thin brush to create marble patterns
- Use a nail art sponge or cotton swab to pick up the pattern and press onto your nail
- Alternatively, create marble effects directly on the nail by dropping gel colors onto a tacky base and swirling with a brush
- Seal with glossy top coat
Worth knowing: Water marble technique can be tricky—gel marble techniques are more forgiving and produce more consistent results. Practice on nail wheels before attempting on your own nails, or visit a salon experienced in marble nail art.
11. White Stilettos with Delicate Floral Designs

Hand-painted florals—tiny roses, peonies, lilies, or wildflowers—scattered across white stilettos create romantic, artistic beauty. The flowers are typically painted in soft complementary colors (pale pink, blush, gold, sage green) in miniature scale, maintaining white as the dominant nail color. The design should feel organic and naturally scattered, not perfectly symmetrical or rigid.
Why This Works for Weddings
Florals are fundamentally romantic and bridal. Hand-painted floral designs read as artistic and thoughtful, perfect for brides or guests who love feminine aesthetics. Tiny florals maintain sophistication—they’re not childish or costume-y, they’re intentional and refined. This design works especially well if your wedding includes floral elements (bouquets, centerpieces, arch flowers) that you can echo in nail design. Florals photograph beautifully and create visual interest without being distracting.
How to Achieve It
- Apply 2-3 coats of white base and let fully cure or dry
- Using a thin nail art brush and gel or acrylic paint, freehand paint tiny floral designs
- Start with simple shapes: small circles for flower centers, curved lines for petals, thin lines for stems and leaves
- Keep flowers miniature—oversize florals look less refined
- Scatter designs across nails in organic, non-symmetrical patterns
- Seal with glossy top coat
Pro tip: Reference real flower shapes and colors for more realistic designs. Having a photo reference of your chosen flowers dramatically improves accuracy and makes painting easier. Practice floral designs on nail wheels multiple times before attempting on your own nails.
12. Bridal Classic with Understated Rhinestone Accents
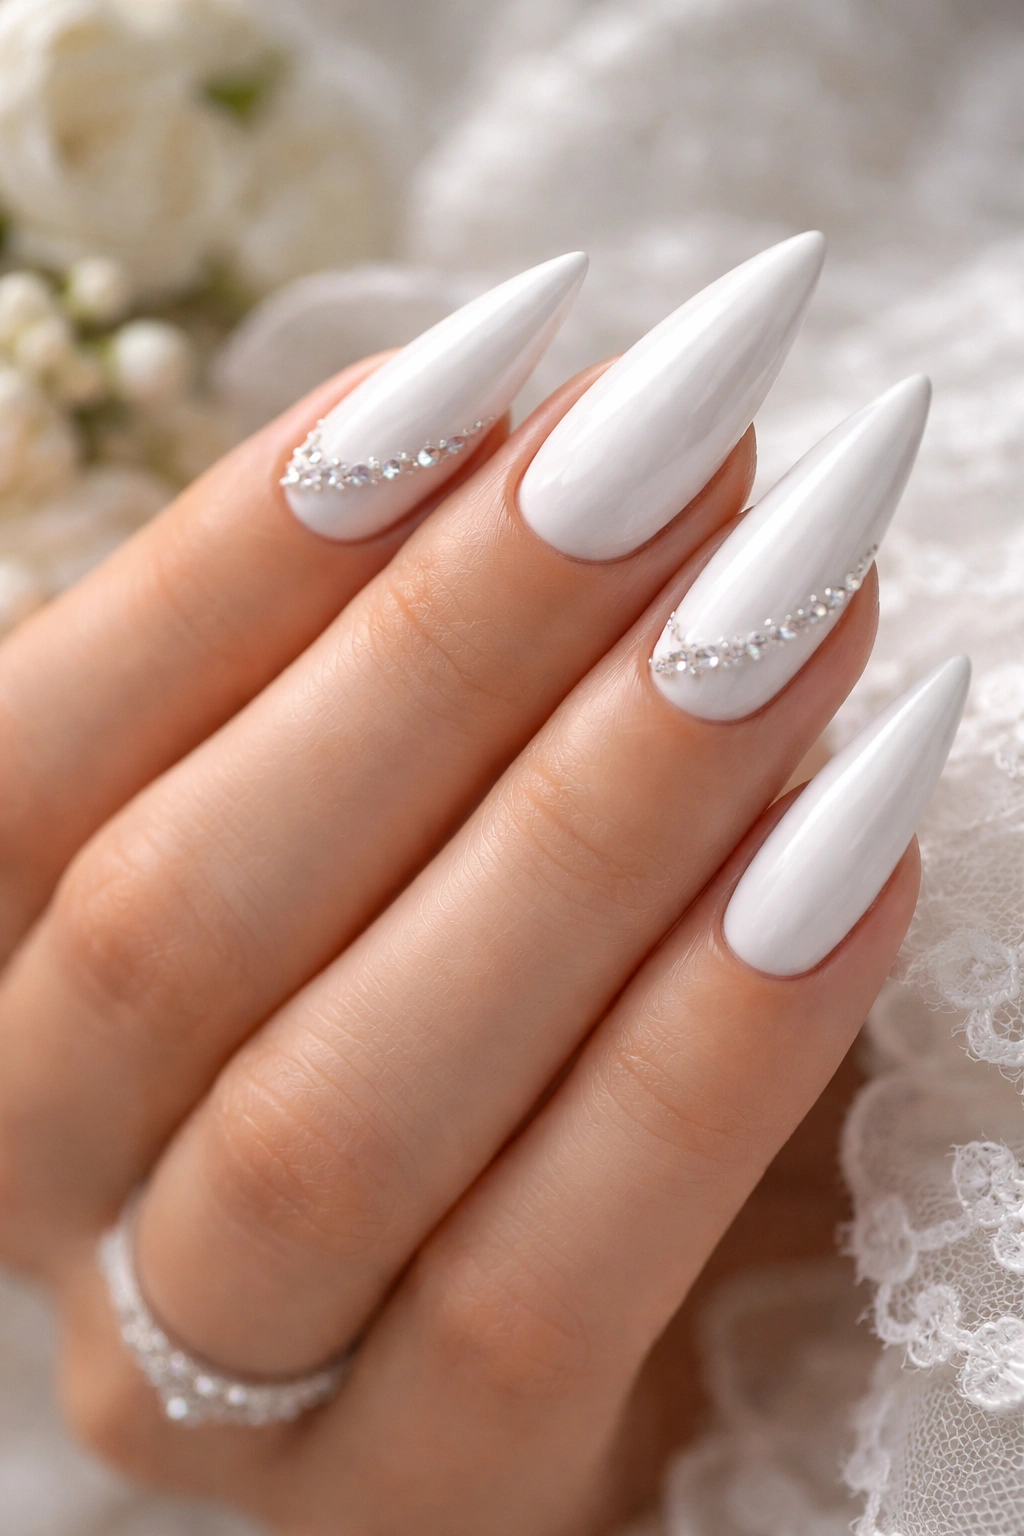
Pure white stilettos with just a few strategically placed rhinestones—typically small, high-quality crystal rhinestones (Swarovski or equivalent) positioned at the cuticle line or along one side in a subtle linear pattern. The rhinestones catch light without overwhelming the nail; white remains dominant. This approach walks the line between glamorous and elegant, adding sparkle without crossing into costume territory.
Why This Works for Weddings
Rhinestones are inherently bridal and formal. Small, strategically placed rhinestones add luxury and intentionality without looking busy or chaotic. This design is the choice for brides who want their nails to sparkle and shine while maintaining elegance—no one will be distracted by busy nail art, but everyone will notice how polished and special your nails look. This design works with every wedding dress style and pairs beautifully with formal jewelry.
How to Achieve It
- Apply 2-3 coats of pure white base and cure or dry fully
- Apply a sticky top coat (for gel) or use builder gel as your adhesive base
- Using tweezers or a rhinestone picker, place individual rhinestones in your chosen pattern
- Press gently to secure each stone in the sticky layer
- Apply a seal coat of clear gel on top, being careful to seal around (not over) the rhinestones
- This keeps stones secure and prevents them from snagging or lifting during the day
Worth knowing: Swarovski crystals are worth the investment for bridal nails—they hold light beautifully and look noticeably more expensive than budget rhinestones. Budget for $30-50 extra per manicure at a salon for quality rhinestone work.
Final Thoughts
Choosing a white stiletto design for a wedding comes down to your personal style, the wedding aesthetic, and how much nail art speaks to you. A pure glossy white is always perfect—there’s a reason it’s the bridal standard. But if you want your nails to be a subtle extension of your wedding day style, any of these designs works beautifully. The key is clean execution, quality materials, and choosing a design that makes you feel confident and stunning.
White stilettos photograph beautifully and feel inherently formal and elegant. Whether you’re keeping it completely minimal or adding pearls, gold leaf, or hand-painted florals, your nails will be polished, sophisticated, and wedding-appropriate. Book your appointment with a nail technician experienced in bridal nails, bring reference photos of your chosen design, and give yourself plenty of time before the big day to ensure your nails are perfect. Your hands will be visible throughout the day—in photos, as you hold your bouquet, as you exchange rings—so invest in nails that make you feel like the best version of yourself.
