

Terracotta nails have quietly become one of the most versatile and flattering nail trends, and there’s a good reason why. That warm, earthy burnt-orange-to-rusty-brown palette photographs beautifully, complements nearly every skin tone, and works whether you’re showing off a minimalist aesthetic or diving into detailed nail art. The magic gets even better when you pair terracotta with a short squoval shape — that rounded square that’s suddenly everywhere because it actually works for real life.
Squoval nails are the practical middle ground between trendy and wearable. They’re longer than a basic square but way sturdier than a sharp almond or stiletto point. You get that elongated, elegant silhouette without the constant breakage or the impracticality of dramatic shapes. Add terracotta to the mix, and you’ve got a color that feels sophisticated enough for anything, from professional settings to casual weekend hangs. Unlike stark nude or stark white, terracotta has personality — it suggests warmth, creativity, and someone who actually thinks about details.
The best part? Terracotta short squoval nails work with virtually any design direction. You can go pure minimalist with a single color, layer in geometric patterns, add delicate line art, play with textures and finishes, or create something abstract and artistic. Whether you’re a nail art enthusiast who spends hours creating intricate designs or someone who just wants a polish that makes your hands look better, terracotta offers endless possibilities. Here are twelve of the cutest approaches to styling this trend.
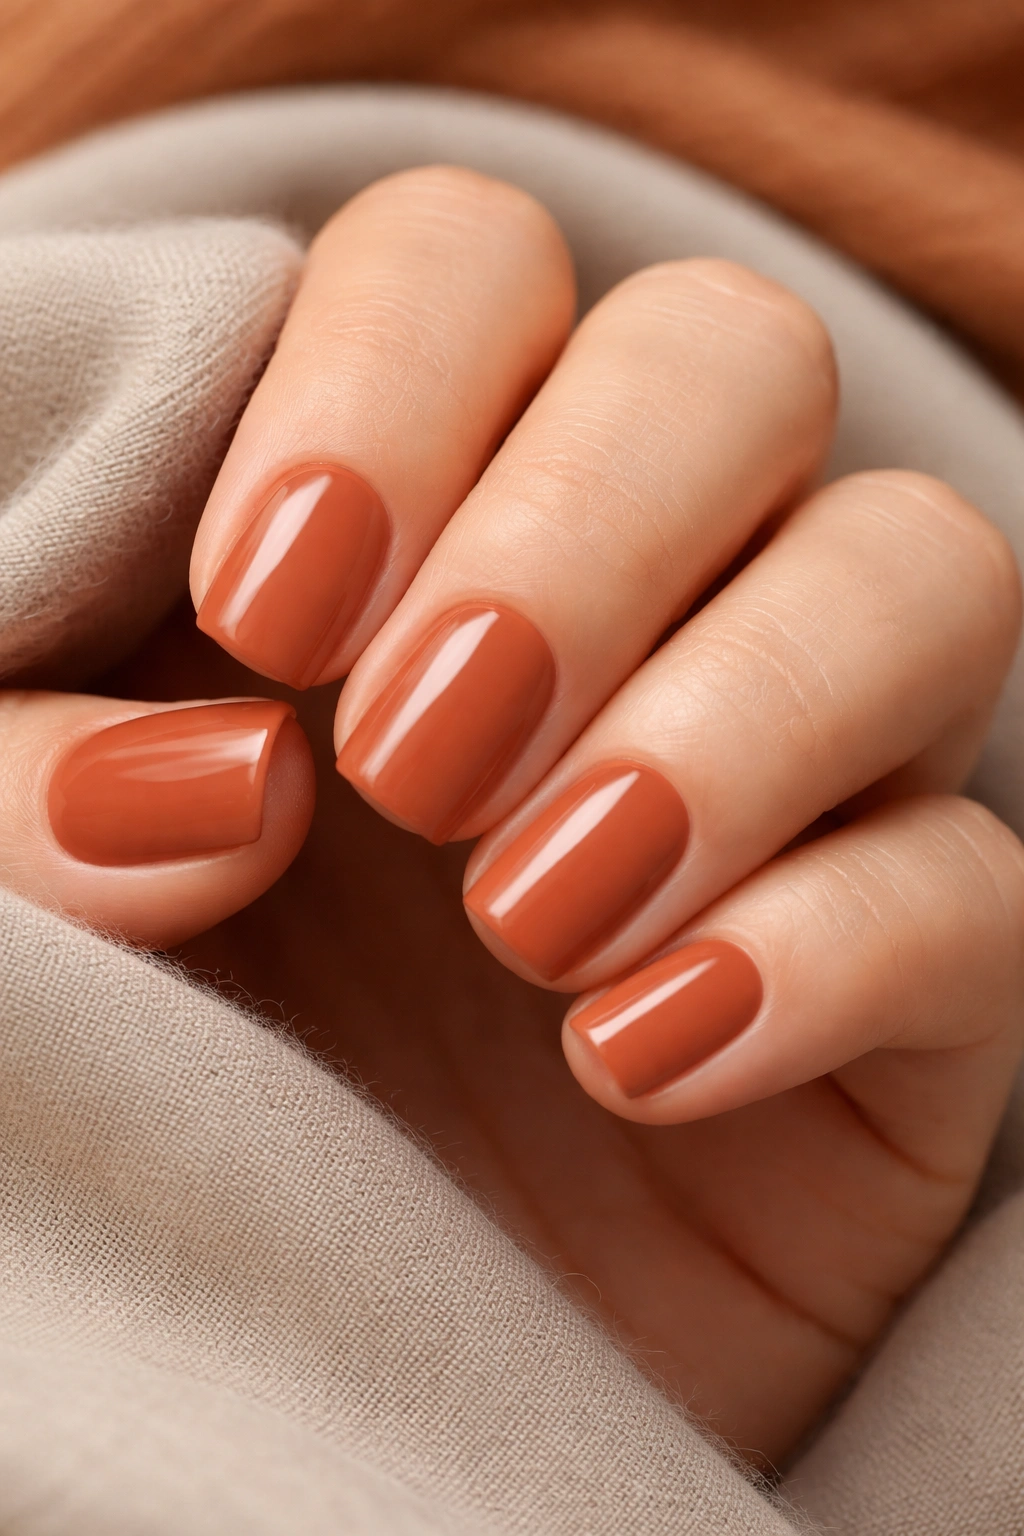
1. Solid Terracotta With High-Shine Glossy Finish
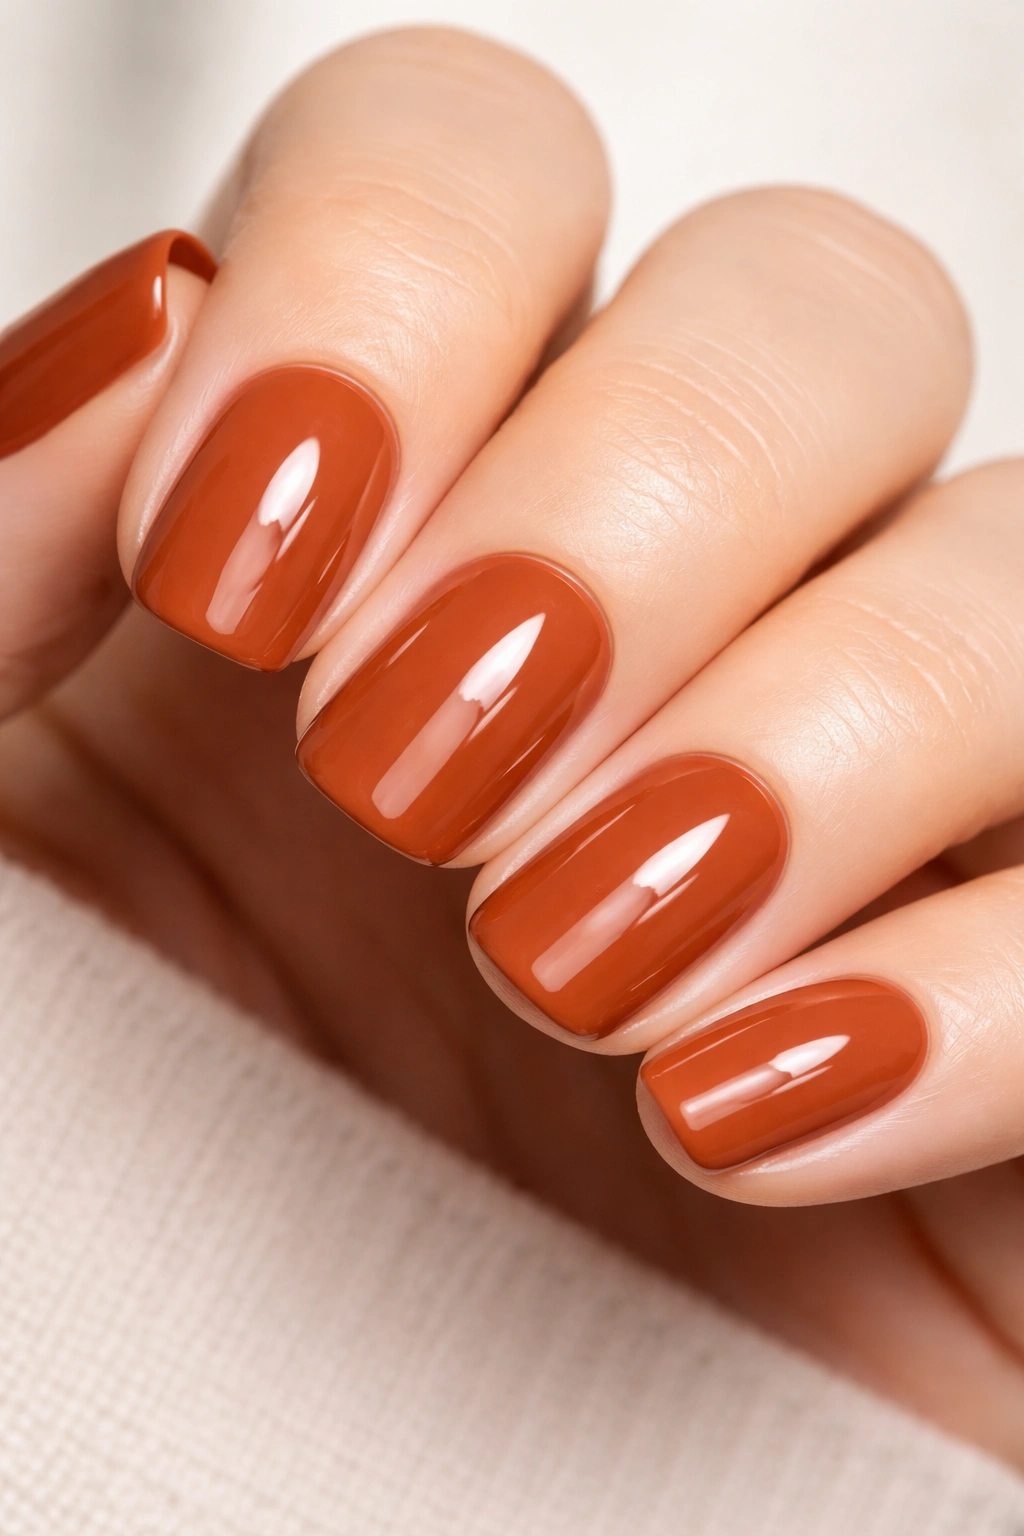
Sometimes the best nail look is the simplest one, and a solid terracotta with a mirror-bright glossy finish proves it. This is pure elegance in its most uncomplicated form — just one rich, consistent color from cuticle to edge with a lustrous topcoat that catches light beautifully.
Why This Design Stands Out
The magic of this approach lives in the finish quality. A genuinely glossy topcoat (not a matte or satin finish) transforms a simple color into something that feels expensive and intentional. Terracotta naturally has warmth and depth, so when you add that reflective shine, it looks like you’ve got a professional manicure that cost serious money. The high shine also makes your nails appear slightly longer and more elongated, which complements the squoval shape beautifully.
What to Know Before Trying It
- Polish formula matters: Not all reds and oranges are created equal. Look for a terracotta with warm undertones rather than a true red or pure orange — you want that earthy, clay-like quality that makes terracotta distinctive.
- Application technique: Apply thin layers rather than one thick coat. Two thin coats of color plus a quality topcoat will give you better shine and longevity than trying to achieve full coverage in one coat.
- Squoval shape maintenance: This style benefits from keeping your nails clean and your cuticles pushed back. The simple design means any imperfection shows, so consistent filing and maintenance keep it looking polished.
- Longevity: A glossy finish tends to chip more visibly than matte or satin, but that’s not necessarily bad — it lets you know when to refresh.
Pro tip: If your natural nail beds aren’t perfectly uniform in color, apply a light nude or peachy base coat first. This creates an even canvas and makes the terracotta color look richer and more cohesive.
2. Terracotta With Delicate White Line Art
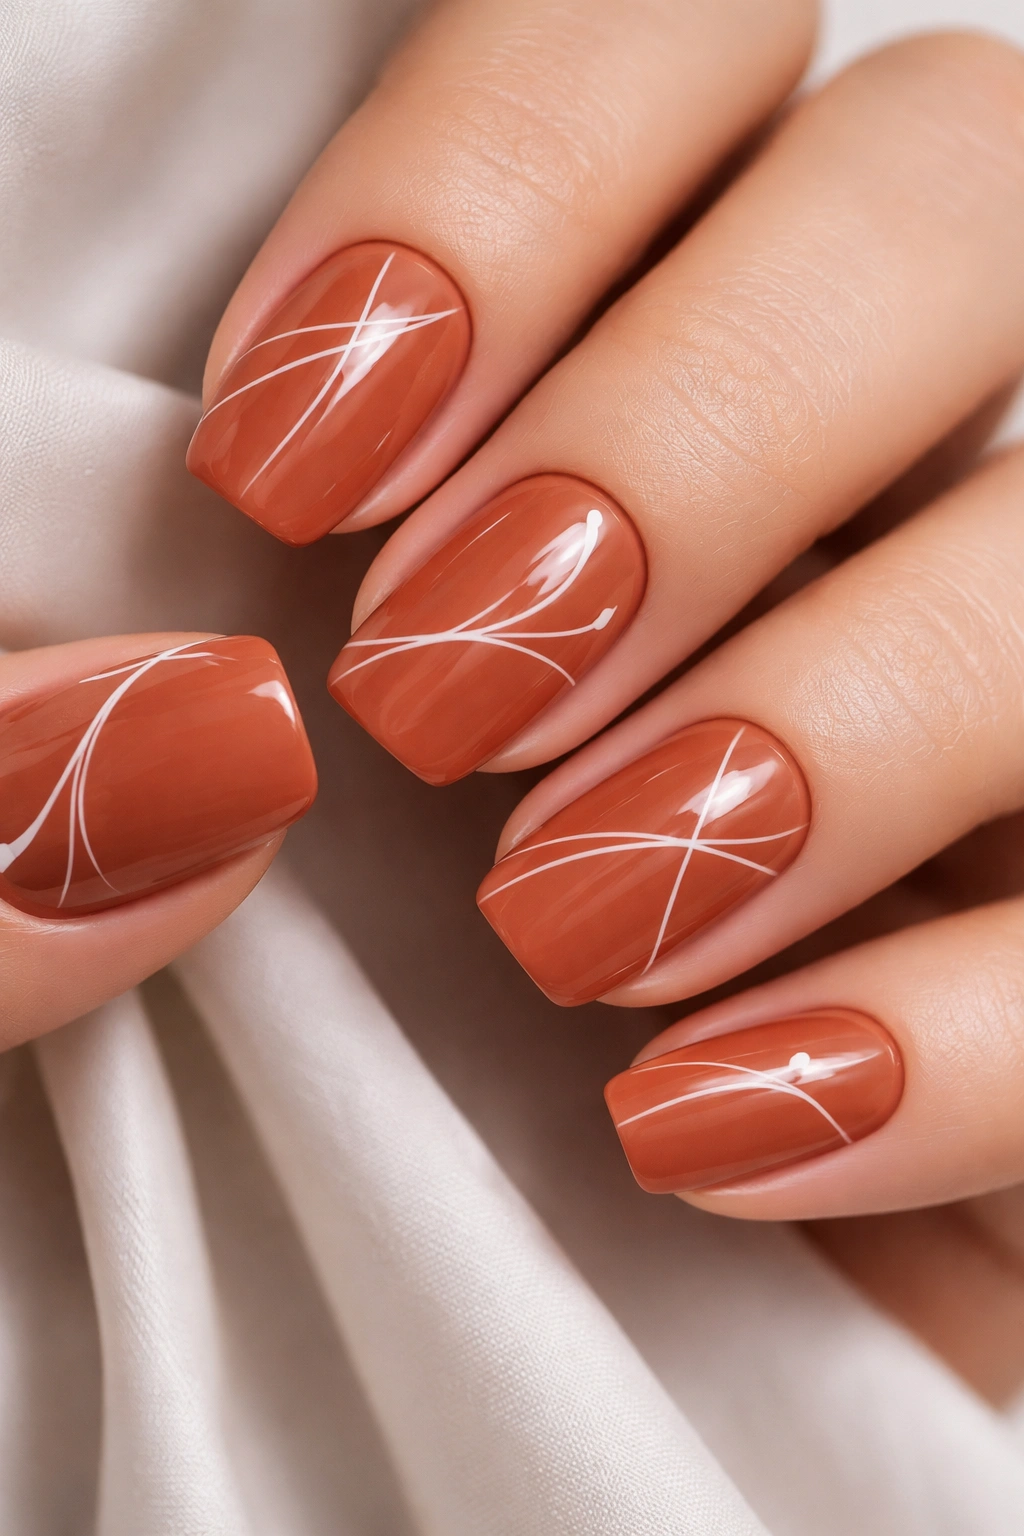
This design takes minimalist line art and runs it across terracotta in clean white or cream lines — think thin geometric shapes, abstract doodles, or scattered linear patterns. The contrast between the warm terracotta base and cool white creates visual interest without feeling busy or overwhelming.
Why It Captures That “Cute” Factor
Line art has an inherent sophistication that reads as intentional and artistic rather than chaotic. When you pair simple white lines — maybe crossing at angles, forming small geometric shapes, or creating abstract figures — over terracotta, you get something that looks effortlessly cool. It’s the kind of design that looks like you sat down with a vision, which immediately makes it feel more special than a full-coverage pattern would.
Design Ideas to Explore
- Thin geometric grid: Paint small crossing lines forming a grid or tic-tac-toe pattern on a few accent nails
- Abstract scattered lines: Random thin lines at different angles, almost like someone casually drew across your nails — intentionally imperfect
- Minimalist face outlines: Tiny line-drawn faces or abstract features on one or two nails
- Negative space shapes: White lines that outline or frame empty spaces within the terracotta
- Curved swirls and flourishes: Flowing lines that create movement without feeling heavy
Insider note: Use a thin acrylic or gel brush, or grab a fine-tip nail art pen. Regular polish applied with a regular brush will look thick and clunky for this style — precision is everything.
3. Terracotta Ombre to Cream
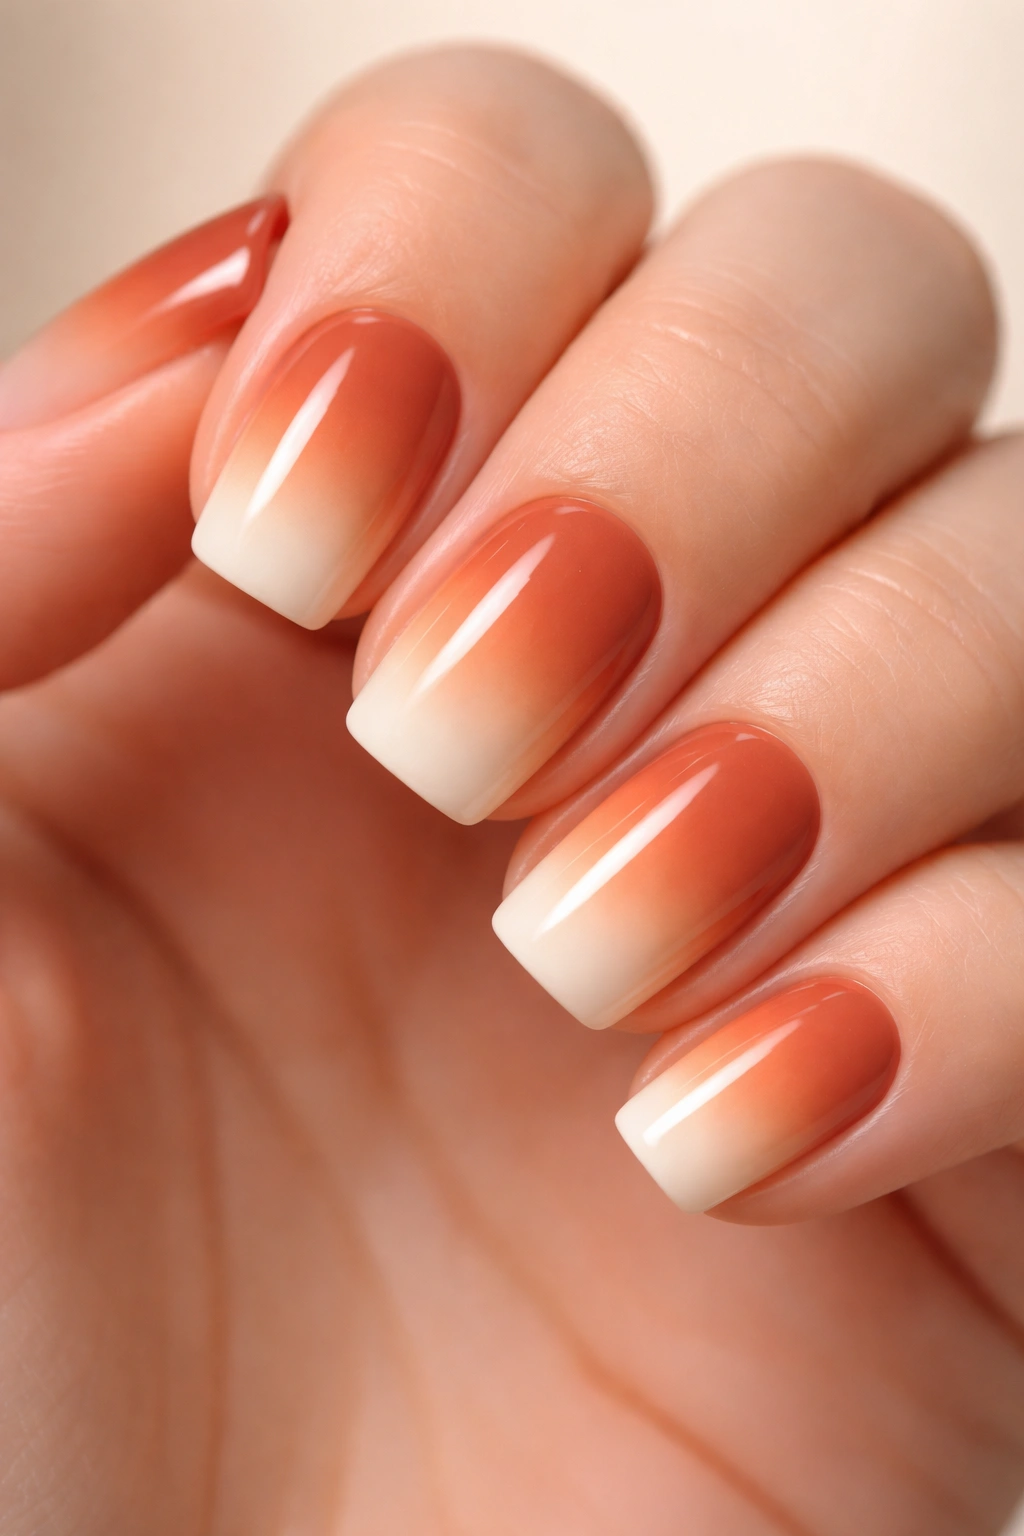
This gradient design starts with deeper terracotta at the base and gradually fades to cream or off-white at the tips. The transition creates depth and visual interest while maintaining the elegant, wearable quality of terracotta as the dominant color.
What Makes This Gradient Work
Ombre designs can look dated fast, but when you’re working with terracotta at one end of the spectrum and cream at the other, you’re staying in a warm, cohesive palette that never feels trendy in a cheap way. The gradient gives you more color interest than solid, but it’s softer and more blended than a sharp color-blocking design. Plus, it visually elongates the nail by drawing the eye down the gradient toward the tip.
How to Achieve This Look
- Sponge gradient method: Use a wedge makeup sponge to blend two colors together on the nail. Dab one color on one side of the sponge and cream on the other, then press onto the nail multiple times, adjusting the colors until you get a smooth transition.
- Brush blending: Apply terracotta to the base and cream to the tips, then use a clean, slightly damp brush to blend the colors where they meet. This requires a bit of practice but feels more controlled.
- Gel method: If using gel, apply terracotta as a base, then apply cream gel to the top third and cure, creating a sharper ombre. Use a soft brush to blend slightly with the uncured color.
Key detail: The smoother and more gradual your ombre, the more expensive it looks. Harsh lines read as amateur, so take your time blending where the colors meet.
4. Terracotta With Copper Metallic Accents
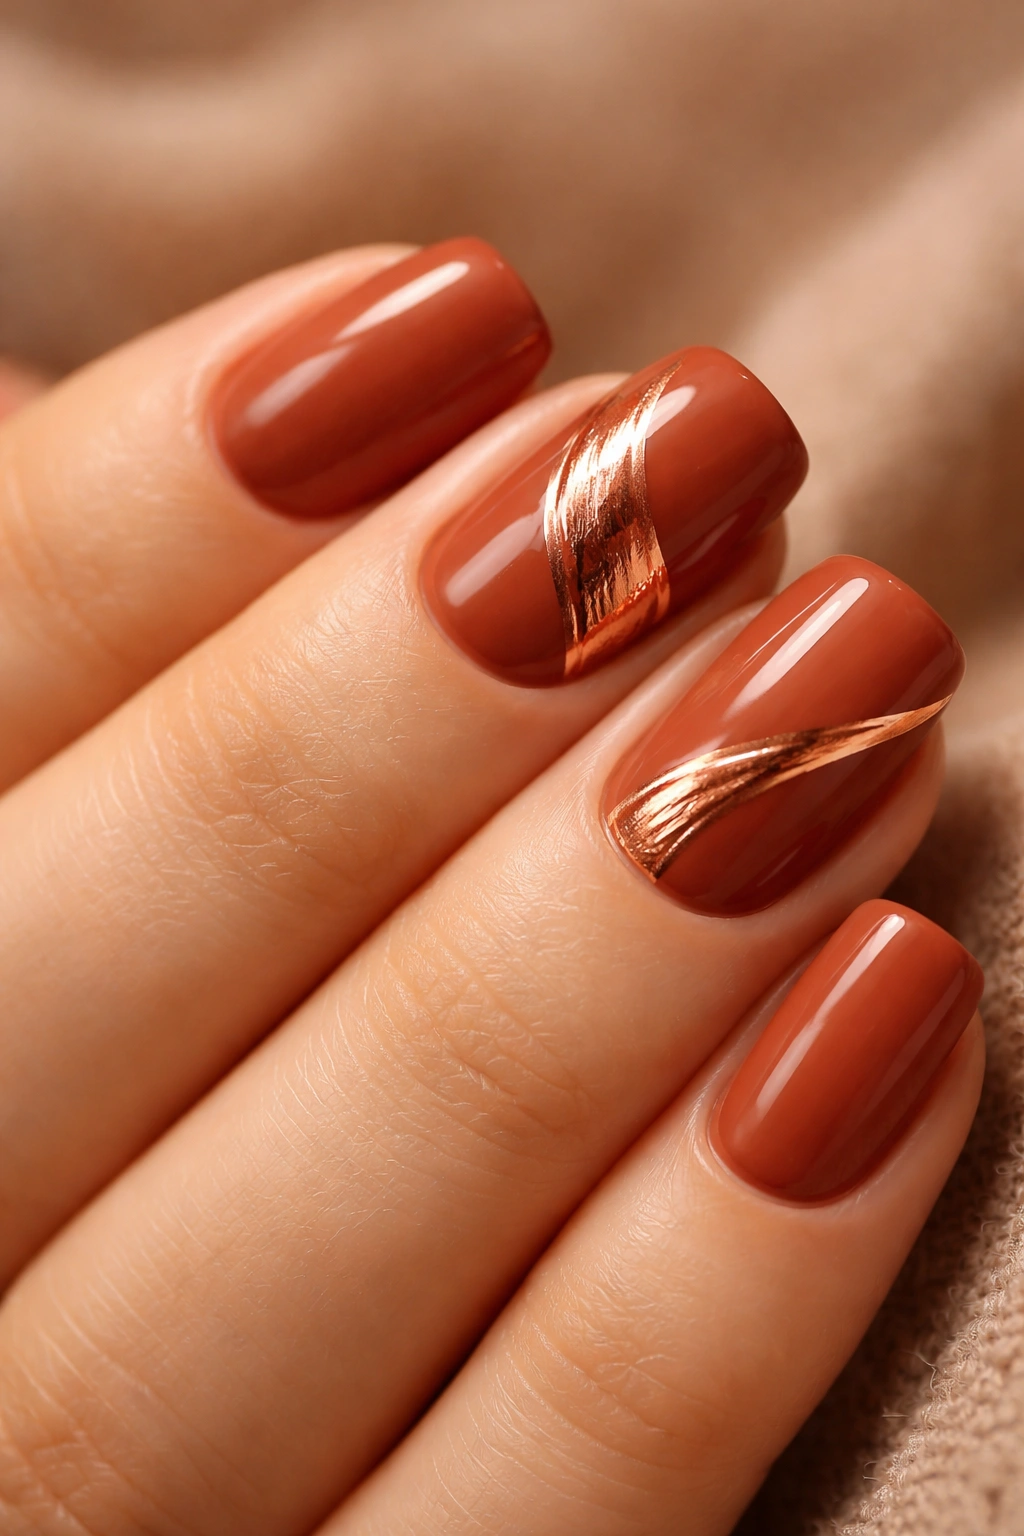
This design pairs warm terracotta with metallic copper details — stripes, geometric shapes, or scattered flecks. Copper has that warm glow that complements terracotta perfectly while adding just enough sparkle and shine to feel celebratory without being over the top.
Why Copper and Terracotta Are a Perfect Pairing
Both colors share warm, earthy undertones, so they’re naturally harmonious rather than clashing. Copper is metallic and reflective, which means even on short nails, adding copper details draws light and makes your nails look more dimensional. The combination feels organic and natural, like something you’d find in nature — rusty earth tones and copper minerals together.
Creative Copper Placement Ideas
- Accent nail: Paint one or two nails with copper detail while the others stay solid terracotta
- Metallic tips: Paint just the tip with copper, creating a reverse ombre or French-inspired gradient
- Geometric shapes: Apply copper in triangles, lines, or hexagons over the terracotta base
- Foil flakes: Sprinkle metallic copper foil onto wet topcoat for a scattered, textured effect
- Copper half-moons: Create half-moon shapes at the cuticle or tip in copper
Worth knowing: Copper metallic finishes come in different intensities. A matte copper is softer and more subtle; a shiny copper foil is more dramatic and eye-catching. Choose based on how much shine you want the design to have.
5. Terracotta With Matte Finish and Glossy Top Coat Layer
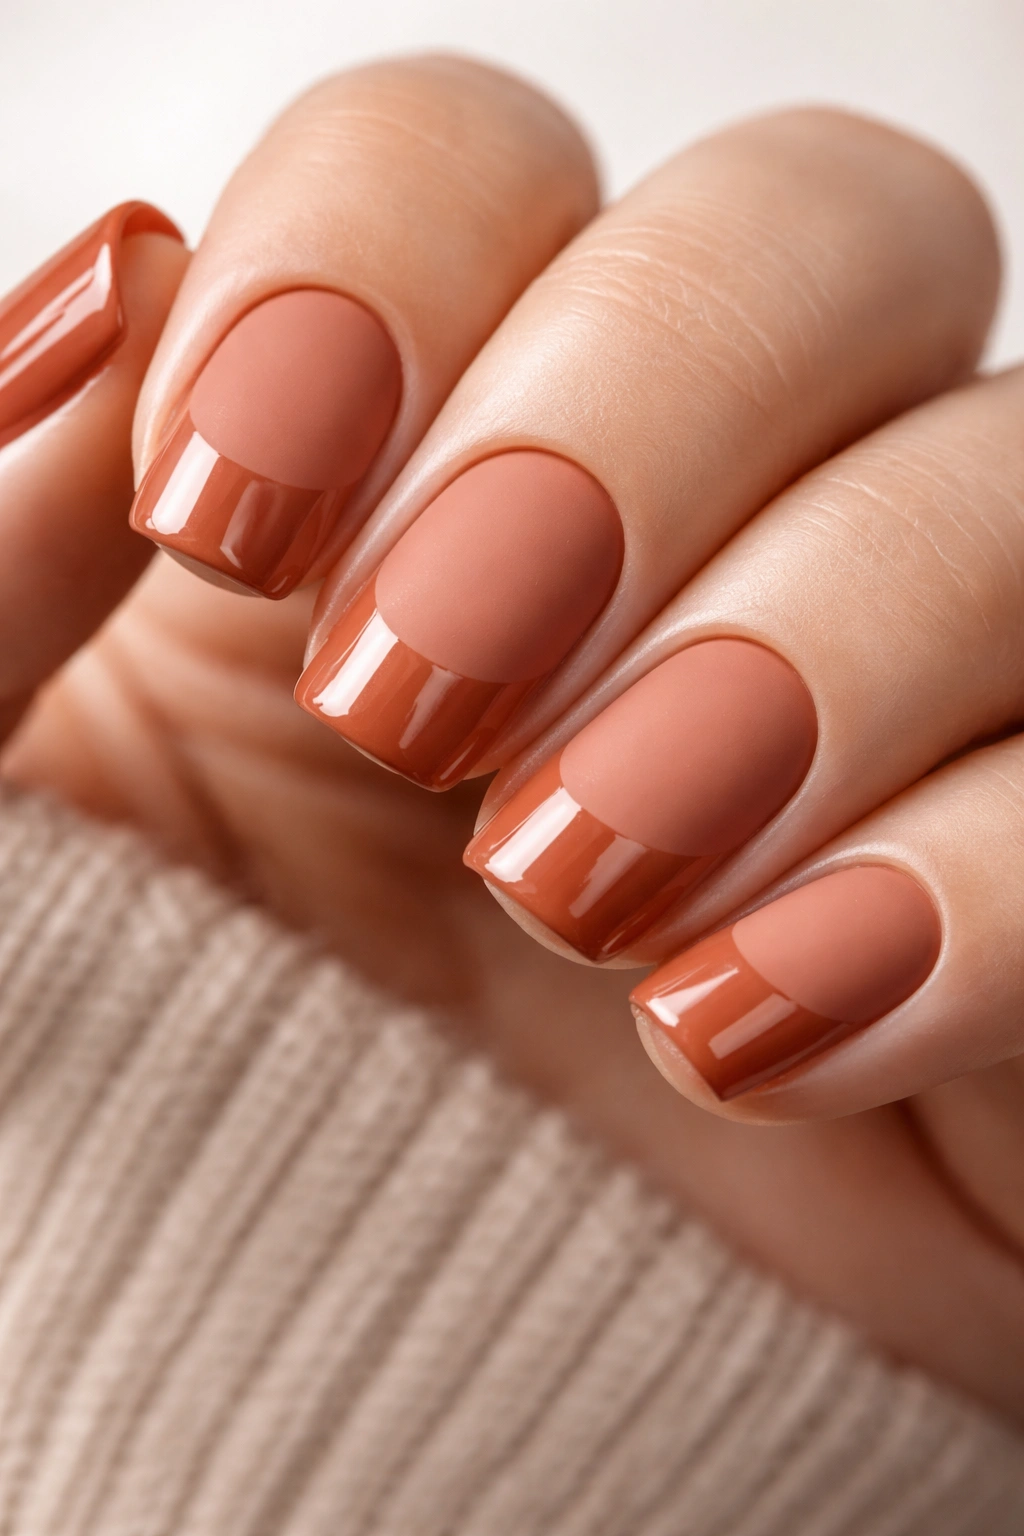
This design plays with finishes — a matte terracotta base with a glossy, shiny topcoat painted only on the tips or in specific geometric sections. The contrast between matte and glossy creates texture and visual interest without using multiple colors.
The Appeal of Mixed Finishes
Our eyes are drawn to contrast and texture. When you have a matte section next to a glossy section on the same color, the glossy part looks brighter and shinier, and the matte part looks more velvety and soft. This contrast makes the nail design feel more intentional and thoughtful than a single-finish approach. It’s also deceptively easy to do — you’re just applying products differently, not mixing multiple colors.
Execution Methods
- French glossy tips: Apply matte terracotta to the entire nail, then paint glossy topcoat only on the top third or quarter
- Geometric glossy sections: Map out specific geometric shapes (triangles, stripes, grid squares) and apply glossy topcoat only to those areas
- Half-matte, half-glossy: Paint the base matte, paint the upper half glossy with a clear division down the middle
- Scattered glossy spots: Apply glossy topcoat in random small sections across the matte base for a dappled effect
Pro tip: Apply matte topcoat first, cure if using gel, then apply glossy topcoat to only the areas you want shiny. If you mess up the boundary, you can clean it up with an angled brush dipped in rubbing alcohol before it fully cures.
6. Terracotta With Thin Gold Stripes and Geometric Patterns

Gold lines and geometric shapes layer over terracotta in a structured, almost art-deco-inspired design. Thin gold lines create borders, angles, or repeating patterns that feel refined and modern without being overly trendy.
Why Geometric Gold Works So Well
Gold is naturally sophisticated, and thin geometric patterns feel more modern than thick, bold designs. This combination — warm terracotta with cool geometric gold details — creates a balanced visual that feels intentional and artistic. The geometry gives the eye something to follow, which makes the design feel more complex and impressive than its actual execution suggests.
Geometric Pattern Inspiration
- Linear angles: Thin gold lines crossing at sharp angles across the nail, creating an abstract geometric feel
- Striped border: A single thin gold stripe running along the edge, either at the base, the side, or framing the entire nail
- Grid pattern: Thin gold lines creating a subtle grid or lattice effect over the terracotta
- Hexagons or diamonds: Gold outlines of geometric shapes scattered across the nail
- Art deco lines: Curved and straight gold lines creating an art deco-inspired pattern
Insider detail: Use a fine gold gel pen or a thin gel brush for the cleanest lines. Regular polish applied with a regular brush will look too thick and clunky for delicate geometric work.
7. Terracotta Speckled With Black Specs and Flecks
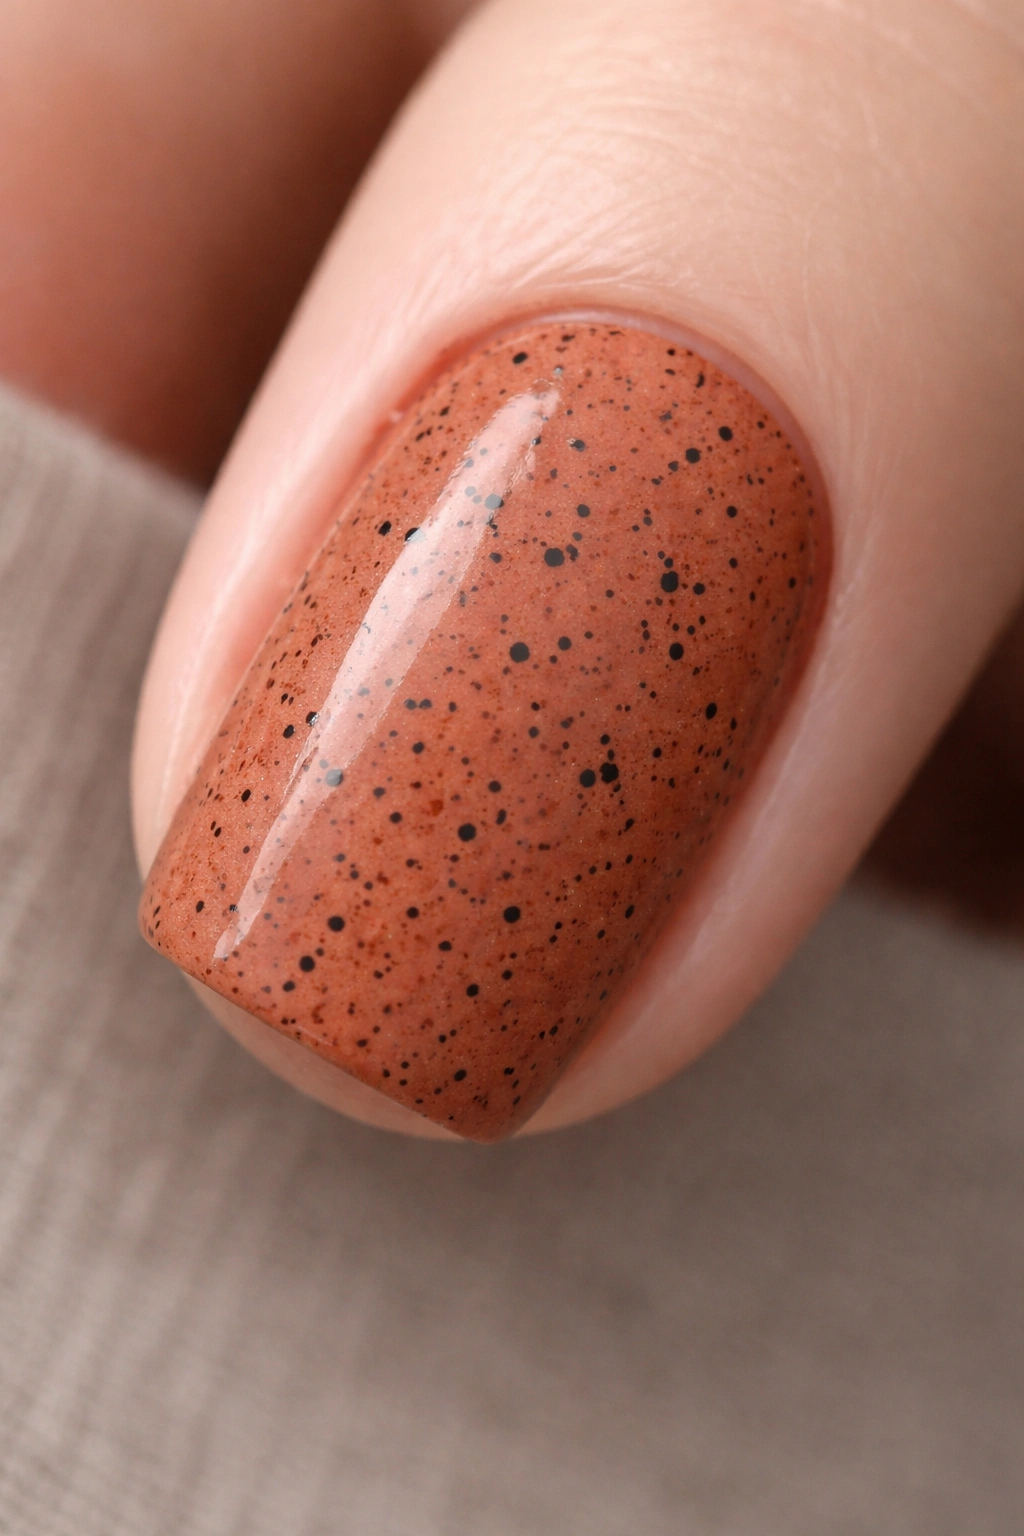
This playful design incorporates tiny black speckles or flecks scattered across terracotta — like a terrazzo or granite texture. The speckles add visual interest and a slightly artistic, handmade quality without feeling chaotic.
The Appeal of Speckled Texturing
Speckled nail designs feel contemporary and intentional, like you chose this aesthetic deliberately rather than defaulting to solid color. Black specs on warm terracotta create subtle contrast that adds depth. The speckles also help mask any minor imperfections in the base color application, making the overall manicure look more forgiving and salon-quality.
How to Create the Speckle Effect
- Paint-flick method: Dip a thin brush or toothpick in black gel or polish and flick it across the nail while the base is still wet or tacky
- Splatter technique: Using a thin brush, tap black polish onto the nail while lightly dragging the brush to create random spray marks
- Dotting tool: Use a small dotting tool dipped in black to create tiny dots in a scattered pattern — more controlled than other methods
- Sponge stippling: Dab a sponge lightly dipped in black polish across the terracotta surface
- Ready-made speckled polish: Some brands make pre-speckled polishes that give this effect in one application
Real talk: The key to making speckles look intentional rather than accidental is keeping them varied in size and distribution, with more speckles toward the edges and slightly fewer toward the center of the nail.
8. Terracotta With Soft White Nude Ombre and Pearl Finish
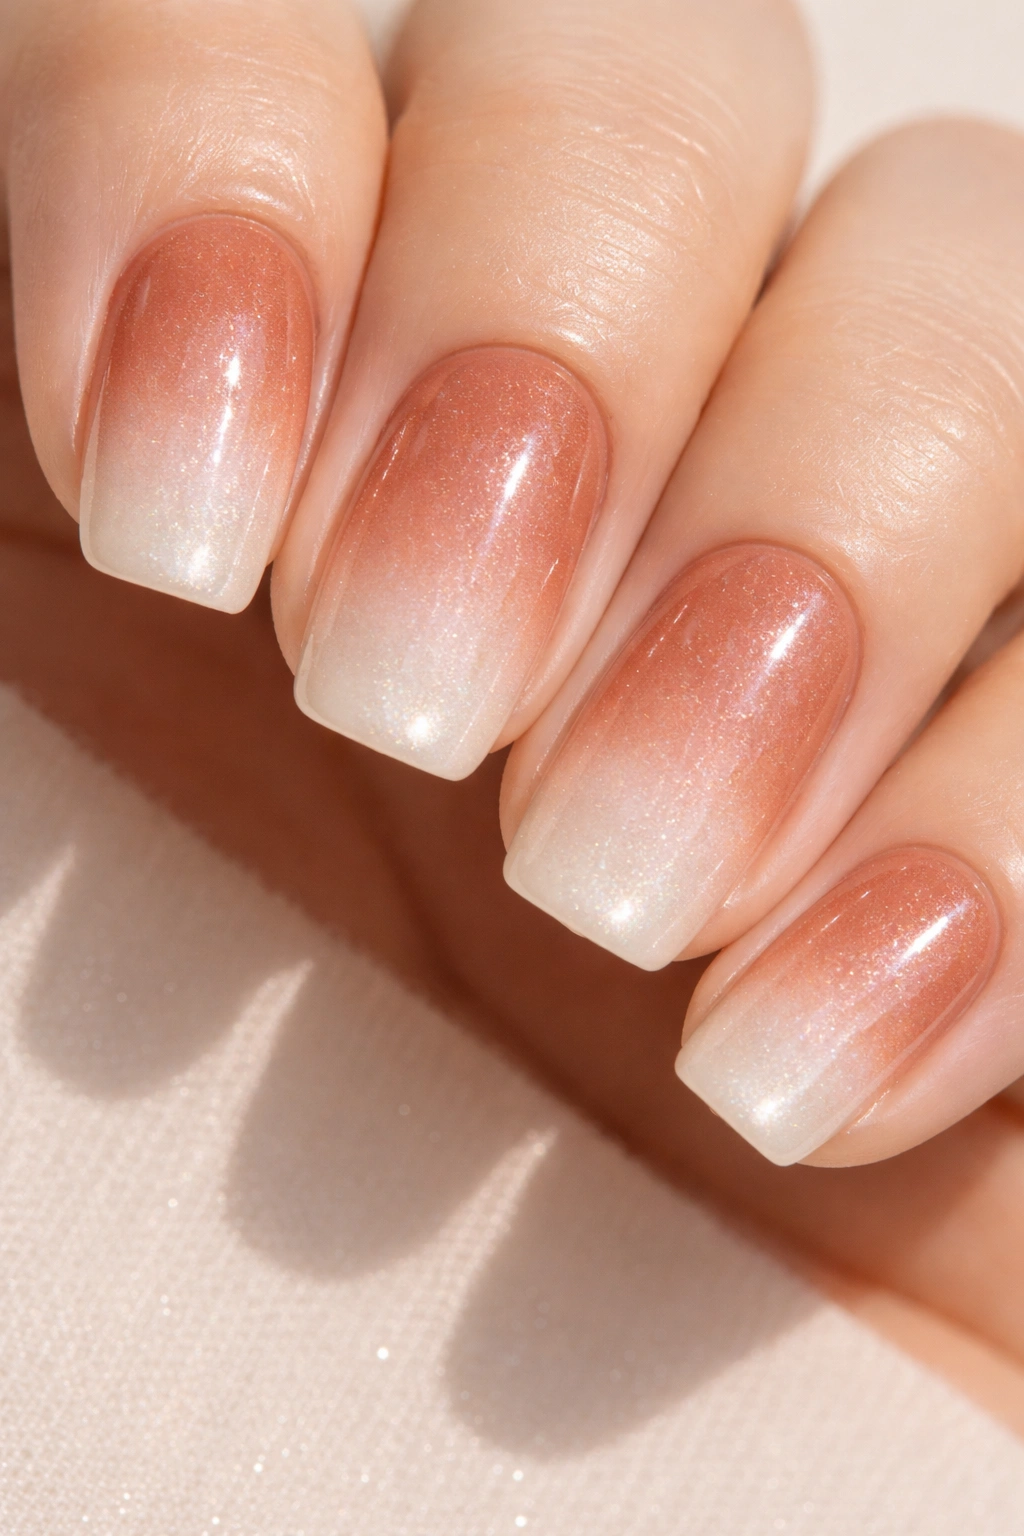
This elegant design transitions terracotta gradually to a soft white or pale nude at the tips, finished with a pearlescent topcoat that creates a subtle shimmer across the entire nail. The pearl finish catches light and adds dimension without being glittery or obvious.
Why Pearl Finishes Elevate a Design
A pearlescent or pearl topcoat adds a multidimensional quality that makes nails look more expensive and intentional. Unlike a straight glossy finish, pearl creates subtle color shifts as light moves across the nail, which is inherently more interesting to look at. When applied over an ombre gradient, the pearl finish enhances the gradient by making lighter and darker areas catch light differently.
Achieving the Pearl Ombre Look
- Base and gradient: Apply terracotta to the base, fade to pale nude or cream at the tips using sponge blending
- Pearl topcoat: Seal everything with a pearlescent topcoat, which adds shimmer uniformly across the ombre gradient
- Gel method: Apply the ombre in gel (terracotta base, fading to white at tips), then seal with a pearl gel topcoat and cure
- Polish method: Use the sponge gradient technique with regular polish, then apply a pearlescent topcoat
Worth knowing: Pearl finishes look best in natural light or soft lighting — they can look slightly muddy under bright fluorescent light. Test your finished nails in different lighting before committing to this look.
9. Terracotta With Negative Space Moon Shapes
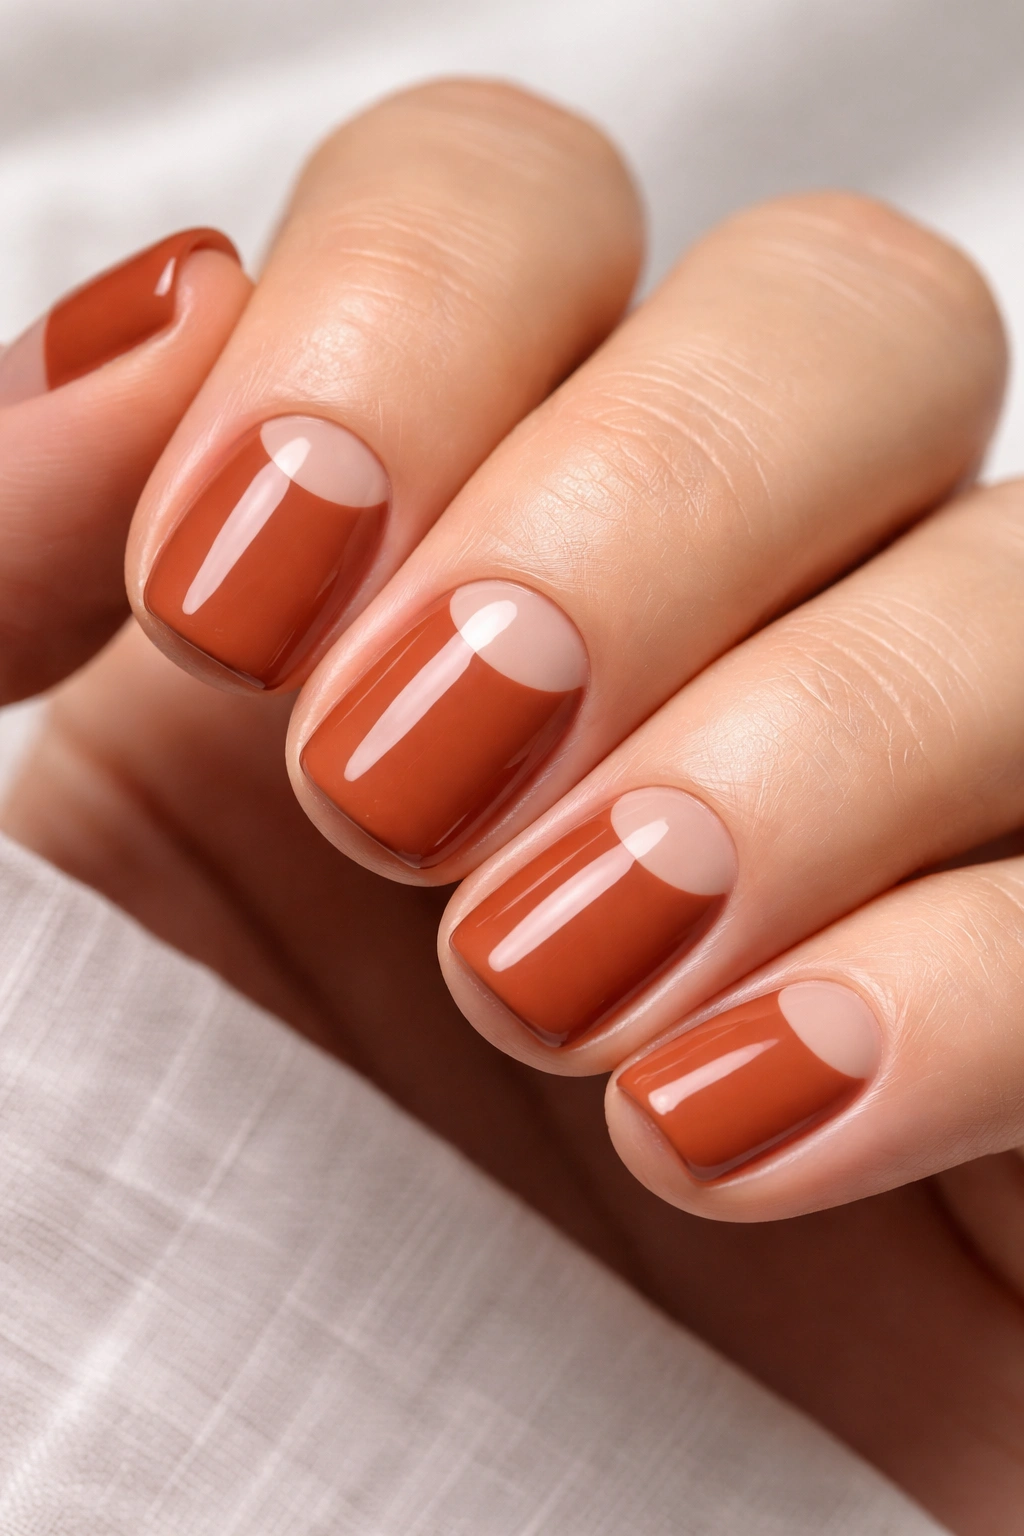
This modern design uses negative space — leaving small moon-shaped sections bare or in a base color — creating a pattern across the terracotta. Negative space designs feel contemporary and artistic, especially when paired with that warm earthy color.
The Modern Appeal of Negative Space
Negative space designs feel intentional and editorial in a way that feels more sophisticated than a standard pattern. When you leave small sections of the nail bare (or in a nude base color) against terracotta, you’re creating contrast and visual interest through subtraction rather than addition. This approach feels very current and design-forward.
Negative Space Arrangement Ideas
- Crescent moons: Paint small crescent shapes in negative space, arranged down the center or scattered across the nail
- Half-moon base: Leave the base half-moon area bare or in nude, paint the rest terracotta
- Circle cutouts: Small circular negative space shapes, evenly spaced or scattered
- Linear negative space: Thin vertical or horizontal lines of negative space running through the terracotta
- Scattered geometric shapes: Small circles, triangles, or squares left bare against the terracotta background
Pro tip: If you’re using regular polish, let the terracotta dry completely, then carefully paint around the negative space areas with a steady hand. If you’re using gel, map the design first and be very precise with your brush strokes.
10. Terracotta Base With Burnt Orange and Rust Ombre
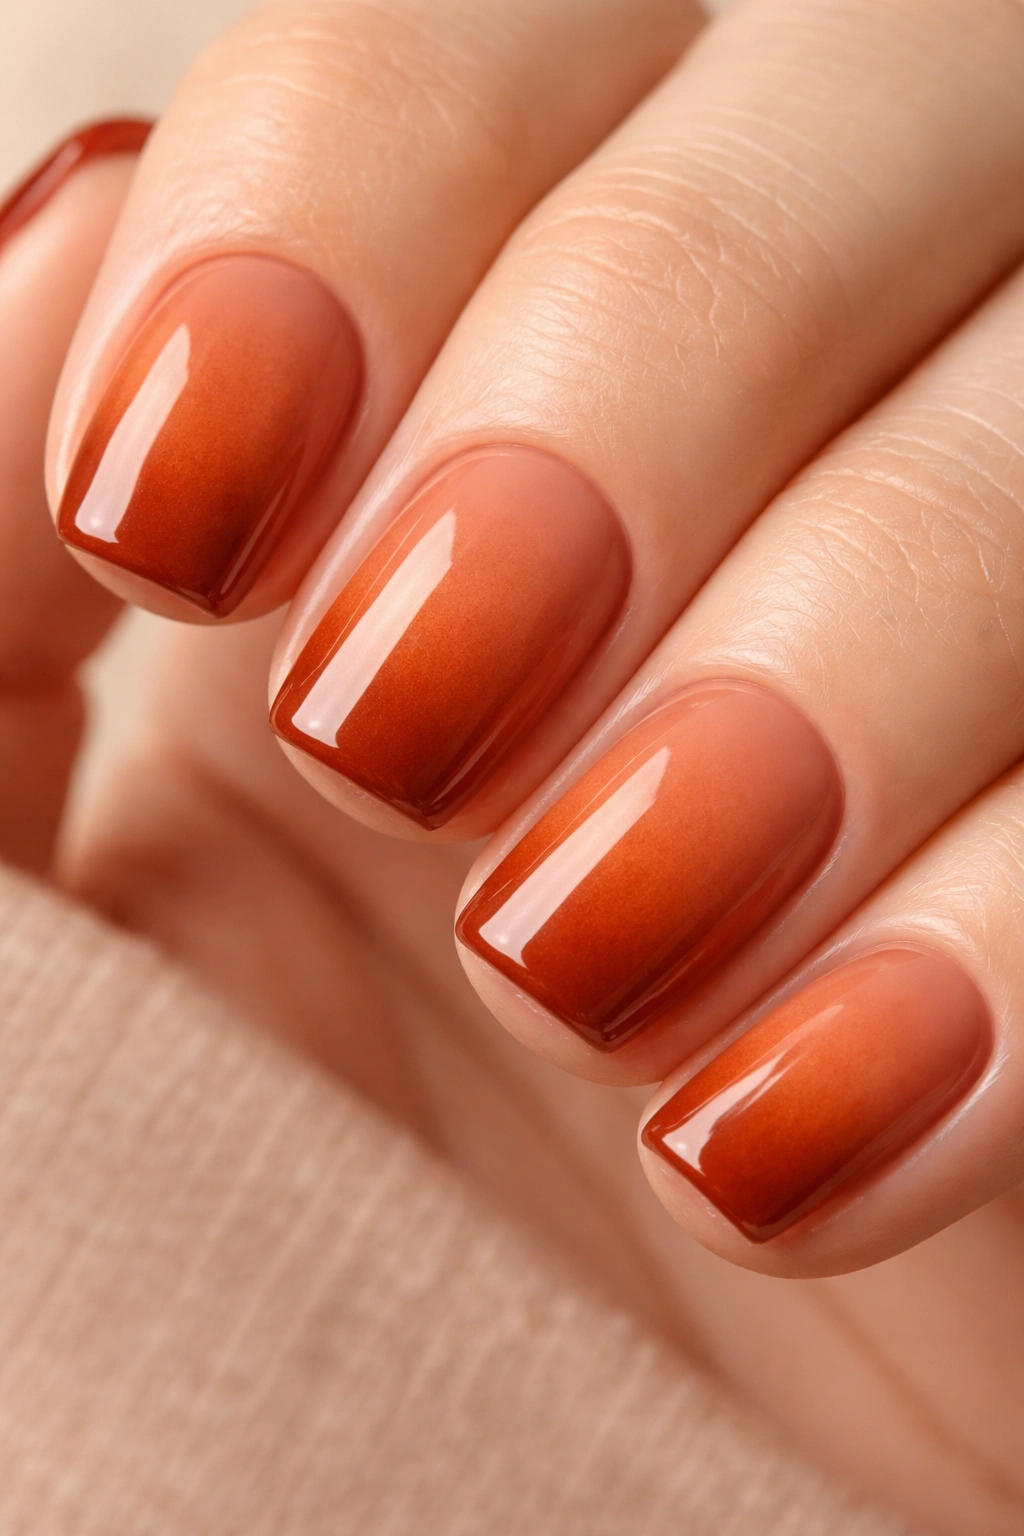
This monochromatic approach uses different shades within the terracotta-rust-burnt orange family, creating an ombre from lighter terracotta to deeper rust or burnt orange. All colors stay in the same warm family, making it cohesive and sophisticated.
Why Monochromatic Ombre Feels Luxe
Staying within one color family creates sophistication and intentionality. Rather than jumping between contrasting colors, you’re exploring depth and variation within a single palette — which feels more editorial and carefully curated than a multicolor design. This approach works beautifully on short squoval nails because it creates the illusion of length through gradient without relying on contrasting colors.
Shade Progression Ideas
- Light to dark: Begin with a warm peachy-terracotta at the base, deepen gradually to rust or burnt orange at the tips
- Center focus: Lightest at the base and tips, deeper rust in the middle section of the nail
- Side-to-side gradient: One side lighter terracotta, fading to burnt orange on the other side
- Swirled ombre: Create a swirled gradient where the colors blend and move in soft waves rather than a linear progression
Key detail: The more seamlessly you blend the color transitions, the more expensive and intentional the look becomes. Take time to blend thoroughly where shades meet.
11. Terracotta With Minimalist Dot Pattern

Simple polka dots in white, cream, or a contrasting color scattered across terracotta create playful visual interest. This design is effortless to execute and works beautifully on short nails where complexity can feel overwhelming.
Why Dots Are Deceptively Sophisticated
Polka dots seem simple, but when executed intentionally — with consistent sizing and spacing — they read as design-forward and intentional. On terracotta, white or cream dots create soft contrast that’s elegant rather than juvenile. The dots also draw light and create visual interest without making the nail look busy.
Dot Pattern Variations
- Classic scattered dots: Small white or cream dots randomly distributed across the terracotta
- Gradient dot sizing: Large dots at the base, gradually becoming smaller toward the tip
- Clustered dots: Small groups of two or three dots, with empty space between clusters
- Ombré dot density: Fewer dots at the base, increasing in number toward the tips
- Geometric dot placement: Dots arranged in organized lines, grids, or geometric patterns
- Colored dots: Instead of white, use other colors like soft pink, pale yellow, or sage green for a more playful feel
Pro tip: Use a dotting tool (available at any beauty supply store) or the blunt end of a bobby pin dipped in polish or gel for perfectly consistent dots. The consistency is what makes this design feel intentional rather than haphazard.
12. Terracotta With Stamped Floral Accents
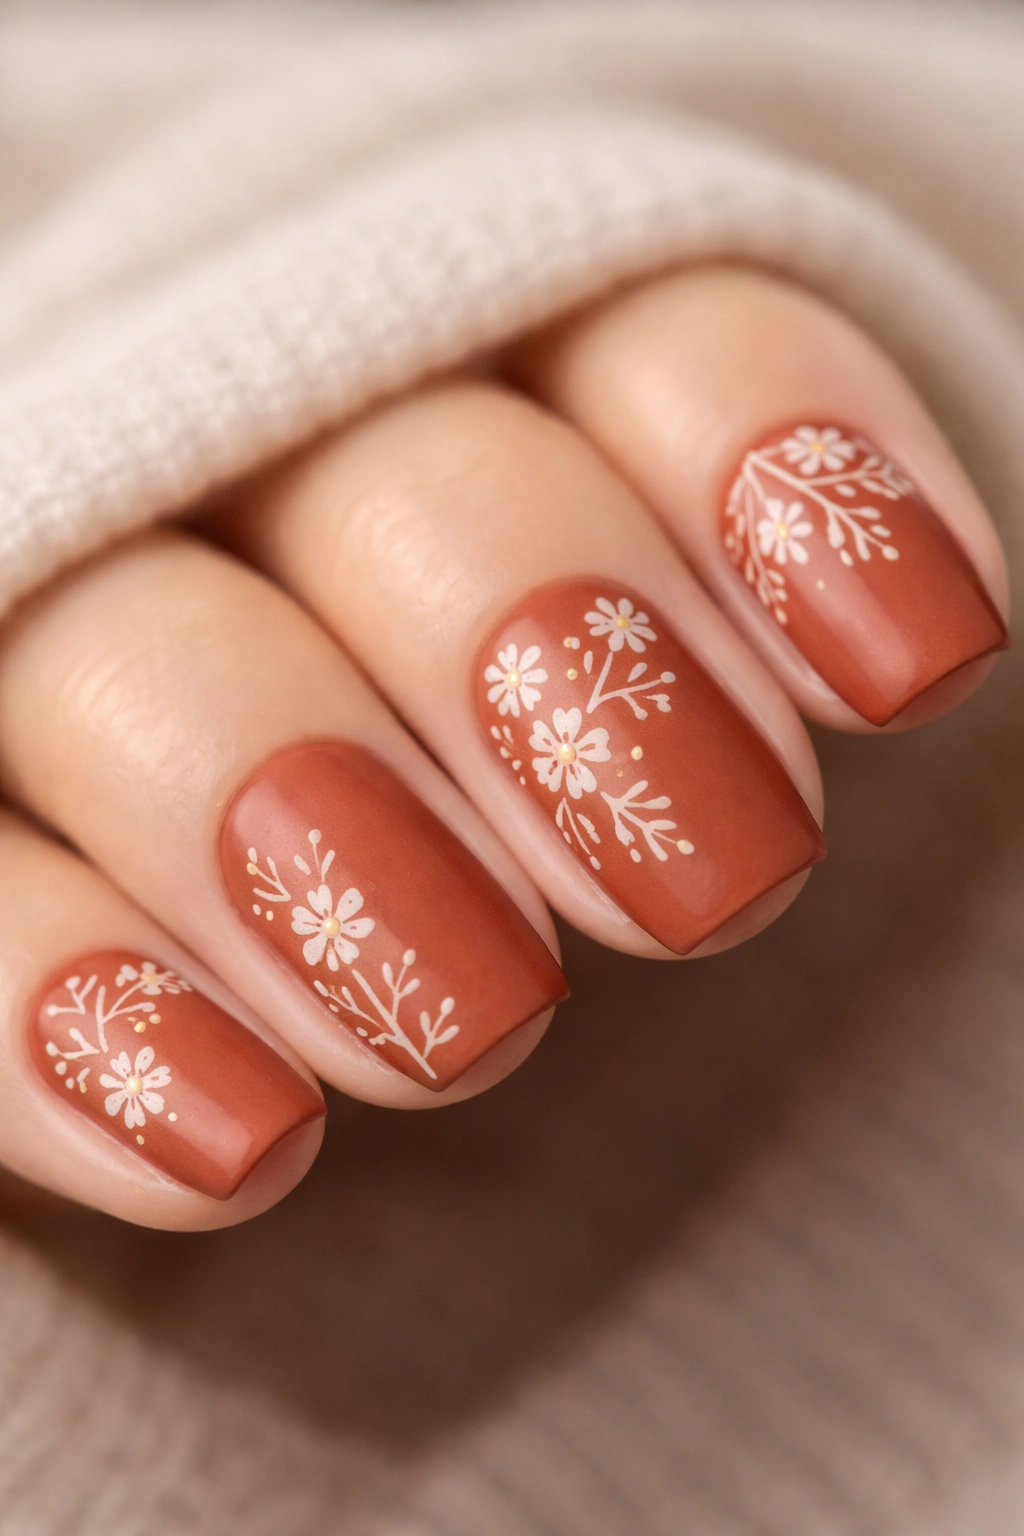
This design incorporates delicate floral patterns stamped or hand-painted on terracotta — small flowers, botanical details, or nature-inspired motifs that feel organic and artistic. Florals pair beautifully with warm terracotta tones.
Why Florals Elevate Terracotta Nails
Florals feel inherently feminine and artistic, and pairing them with earthy terracotta creates a botanical, natural aesthetic. Small floral details make a design feel more intentional and artistic than a solid color, but they’re still minimal and wearable. The warm terracotta acts as a neutral backdrop that lets delicate floral elements shine.
Floral Design Ideas
- Stamped florals: Use a nail stamp and stamper to apply pre-designed small floral patterns across the nail
- Hand-painted blooms: Paint tiny flowers (small daisies, roses, or wildflowers) in lighter or deeper tones on select nails
- Botanical line art: Delicate line-drawn flowers, leaves, or botanical elements in white or cream
- Wildflower meadow: Multiple small different flowers scattered across the nail in a natural, loose arrangement
- Single statement flower: One larger floral element on an accent nail, with remaining nails solid terracotta
- Floral accents: Small flower clusters only on the tips or in one corner of the nail
Real talk: If hand-painting florals feels too ambitious, nail stamping plates with floral designs are a game-changer. They allow you to create intricate botanical details without requiring serious artistic skill.
Final Thoughts
Terracotta short squoval nails hit that sweet spot between having genuine personality and remaining effortlessly wearable. Whether you go minimalist with solid color or explore texture, patterns, and finishes, this warm, earthy palette works for basically any occasion. The squoval shape keeps everything practical — you’re not worried about tips breaking or getting in the way — while still feeling intentional and polished.
The designs above offer starting points, but terracotta is forgiving enough to remix, combine, or adapt based on what appeals to you. The color itself does a lot of the heavy lifting by looking warm, sophisticated, and flattering. From there, you can keep things simple or get creative with finishes, accents, and patterns. Pick a design that speaks to you, commit to it for a manicure cycle, and see how it feels. Chances are high you’ll find yourself reaching for terracotta again and again.
