

Stiletto nails command attention the moment you walk into a room, and adding bling transforms them from striking to absolutely unforgettable. There’s something about the combination of that dramatic pointed shape with glittering, sparkling embellishments that makes heads turn—it’s pure nail confidence. Whether you’re drawn to subtle shimmer or full-on crystal coverage, the right sparkly stiletto design can elevate your entire aesthetic and give you that red-carpet-ready feeling every single day.
The beauty of bling stiletto nails is that they work for virtually every occasion and personal style. You can go delicate and refined with understated crystal accents, or you can lean into pure glamour with full coverage diamond effects that catch light from every angle. The key is choosing a design that feels authentically you—something that makes you smile when you look down at your hands.
Let’s walk through twelve stunning stiletto nail designs that combine sharp elegance with serious sparkle.
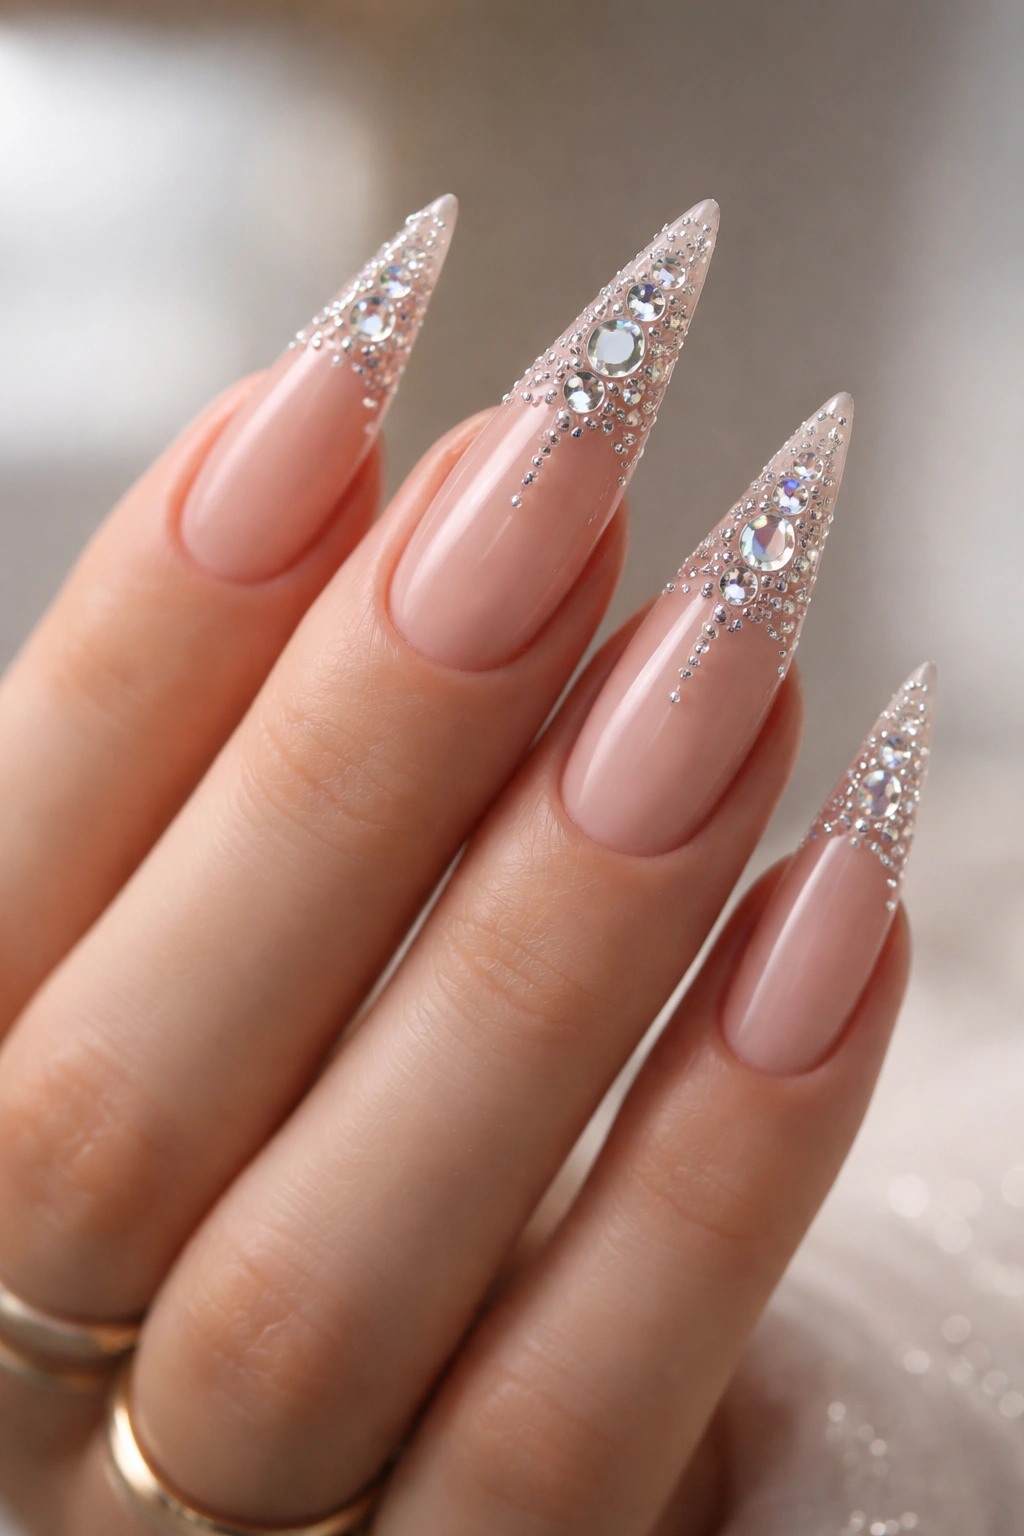
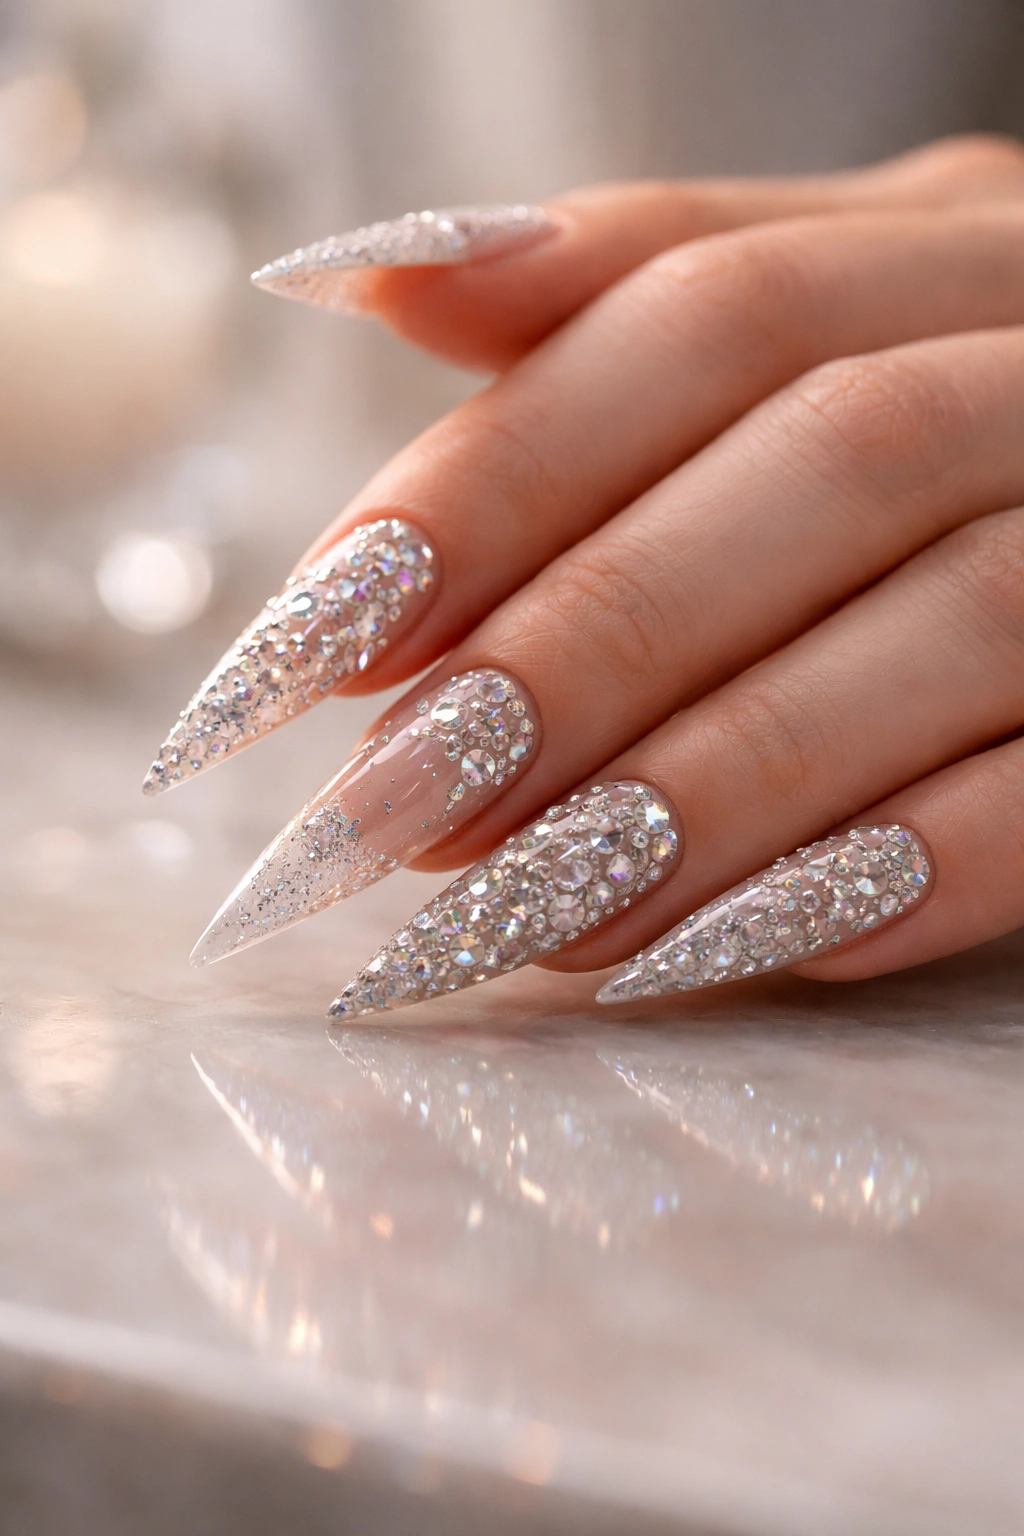
1. Diamond Cascade

Imagine a waterfall of diamonds flowing down your stiletto nails, creating the illusion of precious stones spilling across your fingertips. This design starts with a clear or nude base and features progressively smaller crystals arranged in a cascading pattern, with the densest concentration of sparkle near the tip of the stiletto.
Why This Design Stands Out
The diamond cascade works because it creates movement and depth—your nails don’t feel flat or static. The arrangement of crystals in graduating sizes tricks the eye into seeing dimension and flow, making your nails look expensive and intentional. Light bounces off each stone differently, creating a constantly shifting sparkle effect that’s mesmerizing.
How to Achieve It
- Use high-quality clear gel or builder gel as your base
- Select premium crystals in 2-3 graduating sizes (large rhinestones near the tip, medium in the middle, tiny ones toward the base)
- Arrange them in a loose diagonal or curved pattern rather than rigid lines
- Seal everything with a glossy top coat to lock in the crystals and protect them
- Request this from a nail technician experienced in crystal placement if you’re doing it professionally
Pro tip: Ask your technician to apply the largest crystals first and work backward—this prevents them from shifting as you add smaller stones.
2. Rose Gold Glitter Gradient
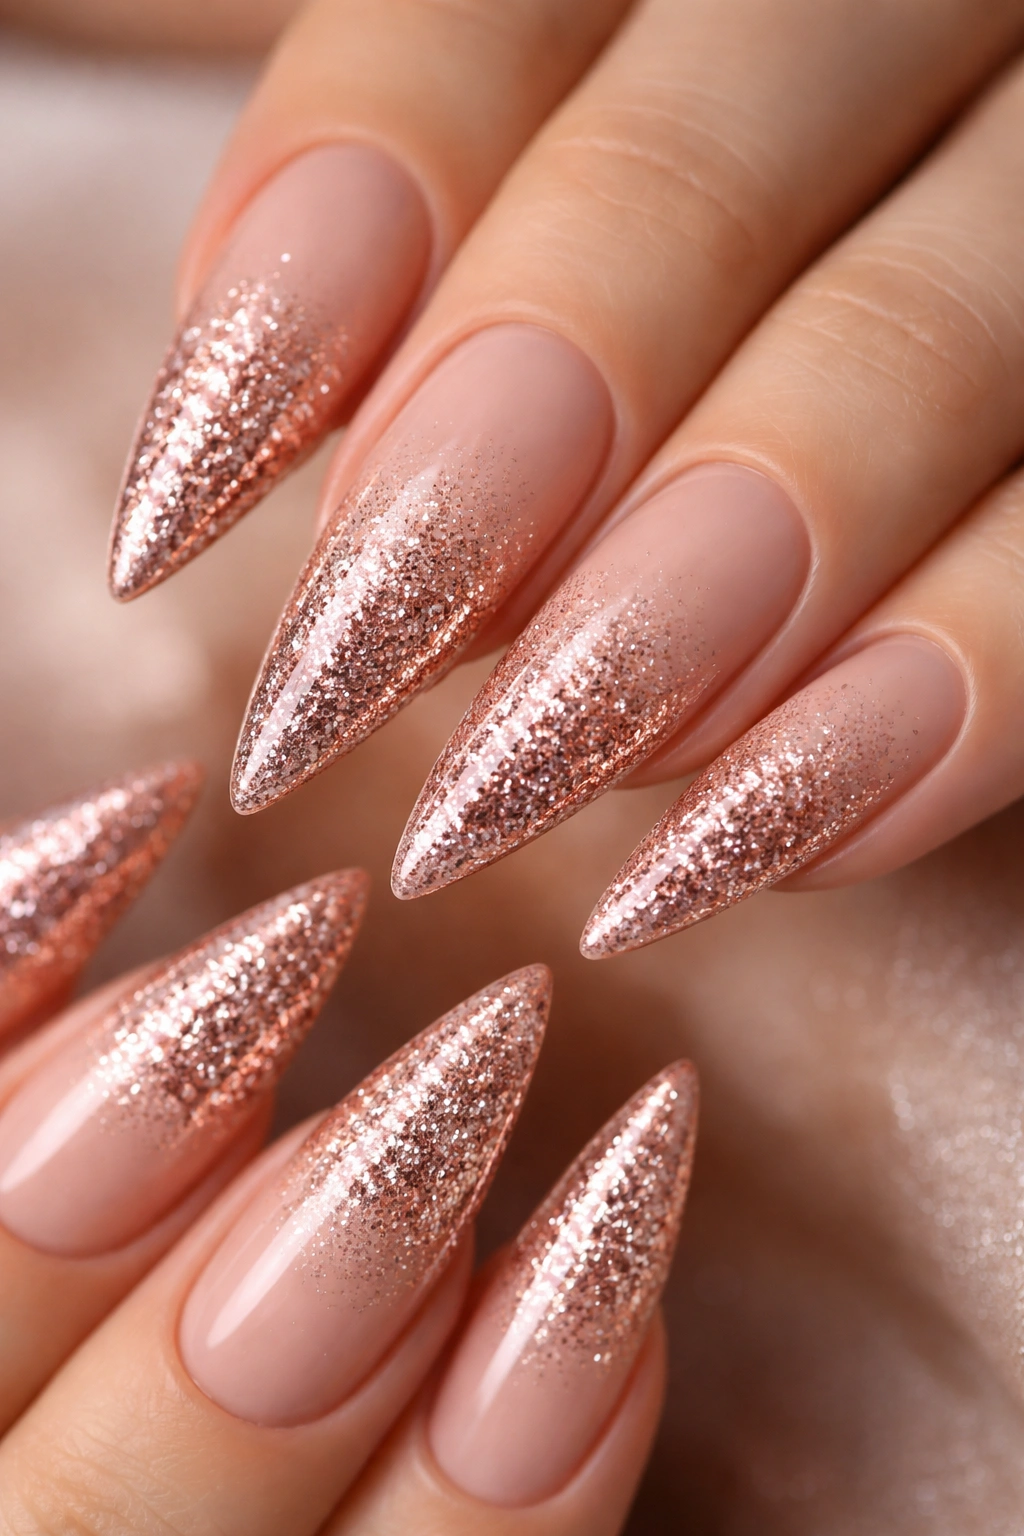
Rose gold is having a major moment, and for good reason—it’s warm, flattering, and sophisticated without being overly trendy. This design features a gradient that transitions from a soft nude or blush base at the cuticle to a dense rose gold glitter concentration at the tip of the stiletto, creating an ombré effect that’s absolutely stunning.
What Makes It Different
Unlike solid glitter nails that can feel one-dimensional, the gradient creates visual interest and depth. The transition from minimal sparkle to maximum sparkle draws the eye downward toward your nail tips, emphasizing the sharp, elegant stiletto shape. It’s also more practical than full glitter coverage because the nude base is easier to maintain and shows less wear.
Application Details
- Start with a clean, shaped nail bed in a nude or pale pink base
- Mix rose gold glitter with clear gel in varying concentrations (light at the base, heavy at the tip)
- Apply in layers, blending each layer slightly for a seamless transition
- Seal with a protective glossy top coat
- This design works beautifully on any skin tone and pairs well with rose gold jewelry
Insider note: Use fine rose gold glitter mixed with a tacky gel base rather than loose glitter—it stays put much longer and looks more refined.
3. Mirror Metallic with Rhinestones
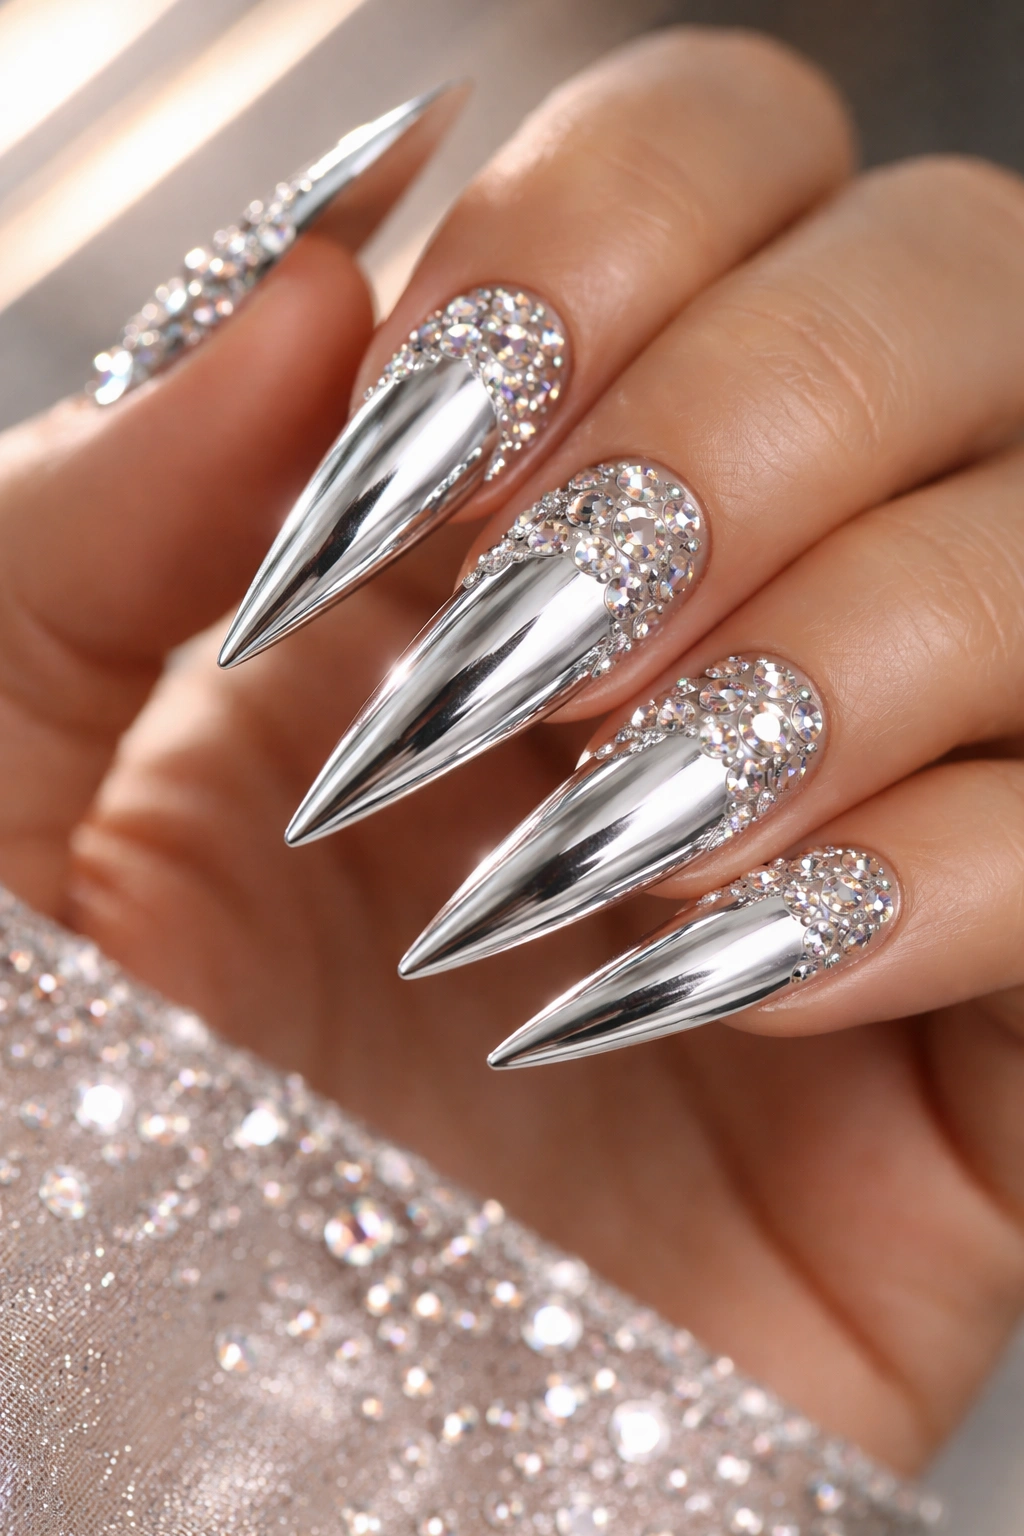
Mirror metallic is like having liquid chrome on your fingertips, and adding scattered rhinestones creates the perfect balance of modern and glamorous. This design features a reflective metallic base (usually silver, gold, or rose gold) with strategically placed rhinestones that catch light and add dimension to the mirror effect.
The Real Appeal
Mirror metallic nails are the ultimate statement because they literally reflect everything around them—you’ll see your environment bouncing off your nails. Adding rhinestones breaks up the mirror effect just enough to keep it from feeling too costume-y, grounding it in sophistication. The combination of the two finishes creates a luxury jewelry vibe.
Best Practices for This Look
- Use a proper mirror chrome powder (not just metallic glitter) applied over a tacky gel base
- Buff the powder gently to activate the mirror effect
- Apply scattered rhinestones in a pattern that feels intentional (diagonal line, curved accent, or scattered focus near the tip)
- Seal everything with a matte top coat first, then a glossy top coat—this prevents the mirror effect from looking cloudy
- This works best on shorter stilettos because longer nails can feel overwhelming with the reflective effect
4. Midnight Ombre with Crystal Points
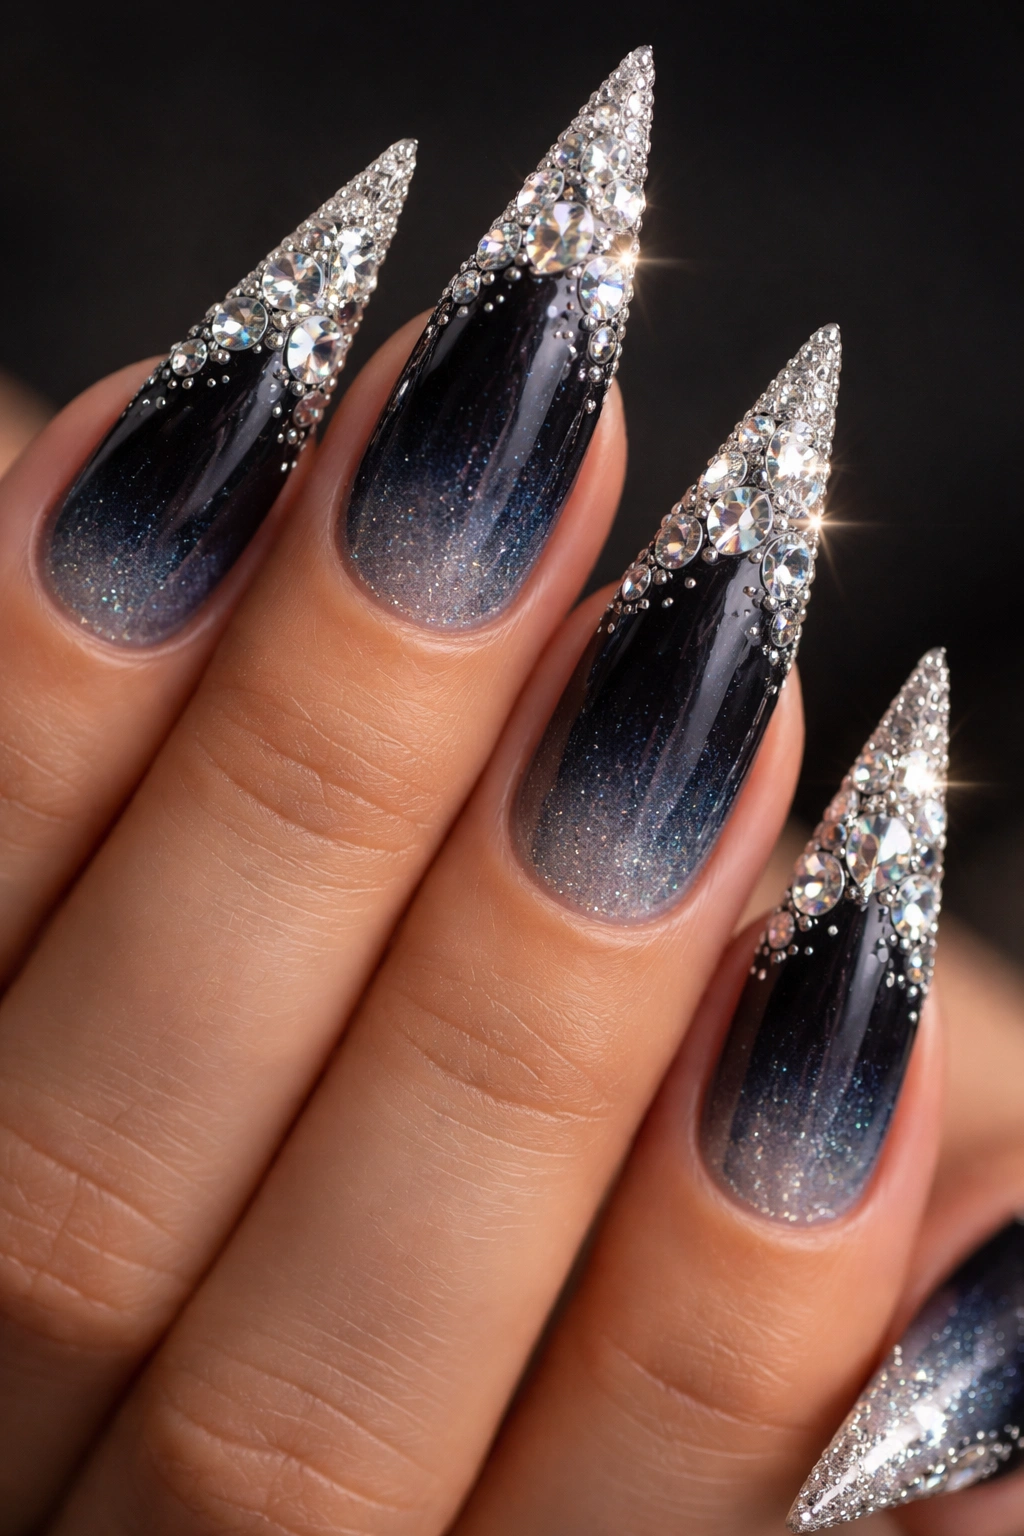
This dramatic design combines a dark, moody color gradient with strategically placed crystals that create the illusion of sharp sparkle points emerging from the nail. It typically starts with a deep midnight blue or black base at the cuticle and fades to a lighter shade (often silver or light blue) at the tip, with crystals clustered to look like they’re breaking through the color gradient.
Why It’s So Striking
The contrast between the dark base and the bright crystals creates serious visual drama. Your nails literally look like they’re glowing from within. This design works especially well on stilettos because the pointed shape naturally complements the sharp, angular placement of the crystals.
Creating the Effect
- Build your base color in midnight blue or black gel
- Create an ombre effect by blending a lighter shade toward the tip using a sponging technique
- Position larger crystals strategically to look like they’re emerging from the gradient
- Use varying crystal sizes to create depth—larger ones at the points, smaller ones scattered around
- Apply a semi-matte finish to let the crystals be the show-stopper
Worth knowing: This design looks incredible under UV or blacklight, so it’s perfect if you’re going out dancing or to evening events.
5. Champagne Silk Effect with Swarovski
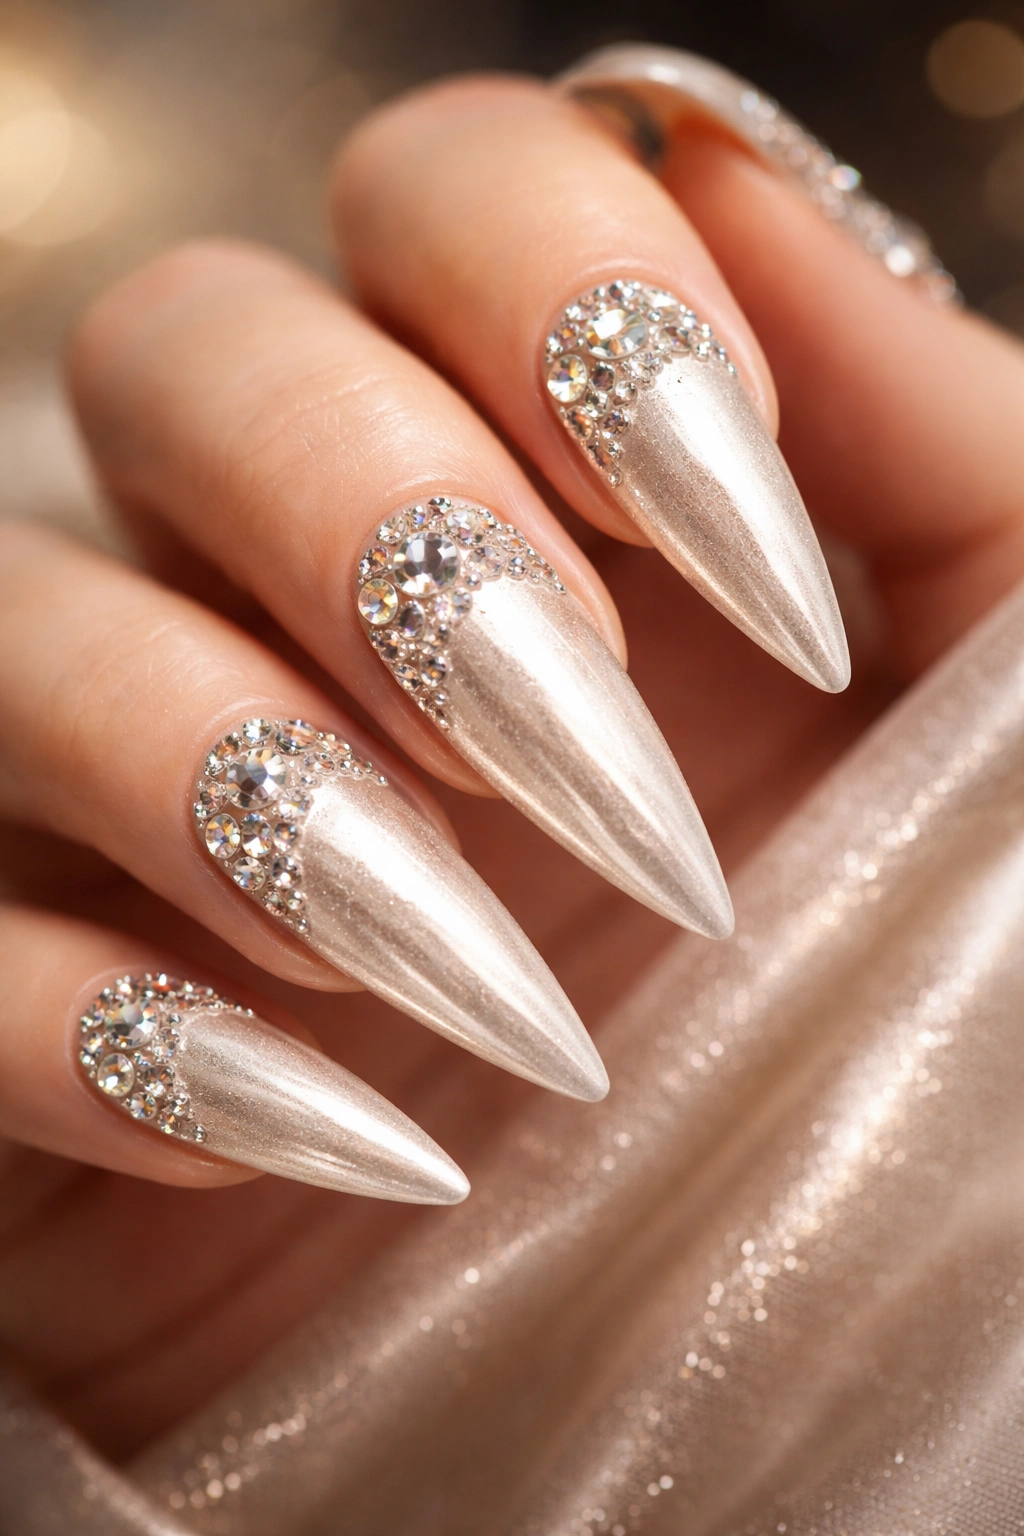
Champagne is the color of celebration, and combining a silky, soft-focus finish with premium Swarovski crystals creates a nail design that feels like luxury jewelry. This design features a champagne-colored base with a silk or velvet texture, embellished with Swarovski crystals that are positioned either in a scattered pattern or arranged in an intentional design (like a line, accent on the tip, or focal point on the ring finger).
What Sets It Apart
Swarovski crystals are superior to regular rhinestones—they’re cut with precision, catch light beautifully, and feel genuinely luxurious. The silk texture finish on the base adds depth and prevents the nails from looking flat. Together, they create a design that feels expensive and refined without being over-the-top.
Application Tips
- Choose a champagne gel in a warm tone with peachy or golden undertones
- Apply a silk texture powder or use a matte top coat before adding crystals (this prevents slipping)
- Select premium Swarovski crystals in a clear or champagne tone for maximum light reflection
- Position crystals in a pattern that complements your finger shape and personal style
- Seal with a glossy top coat to protect the crystals and enhance their sparkle
This design is perfect for weddings, special occasions, or any time you want to feel genuinely glamorous.
6. Black Chrome with Nail Art Studs

Black is the ultimate backdrop for sparkle, and chrome creates a futuristic, high-tech vibe that’s absolutely modern. This design combines a black chrome base with metallic studs (usually gold, silver, or holographic) arranged in geometric patterns or scattered across the nail for a punk-glam aesthetic that feels current and confidently bold.
The Edge and the Elegance
What makes this design work is the contrast—the matte chrome creates a serious, sophisticated foundation, while the sparkly studs add personality and fun. It’s edgy without being costume-y, and glamorous without feeling overdone. Stilettos enhance the geometric, architectural quality of stud placements.
How to Pull It Off
- Apply a quality black gel base and cure
- Use a black chrome powder applied over a tacky base, buff gently to activate the effect
- Choose metallic studs in sizes that complement your nail length (larger studs on longer nails, smaller on shorter)
- Arrange studs in intentional patterns: a line down the center, diagonal accent, scattered constellation, or frame the edges of the nail
- Seal everything under a protective top coat
- This design works beautifully with edgy jewelry and modern fashion
Insider note: Use nail glue specifically designed for applying studs or embellishments—regular gel won’t hold them as securely.
7. Holographic Rainbow Sparkle
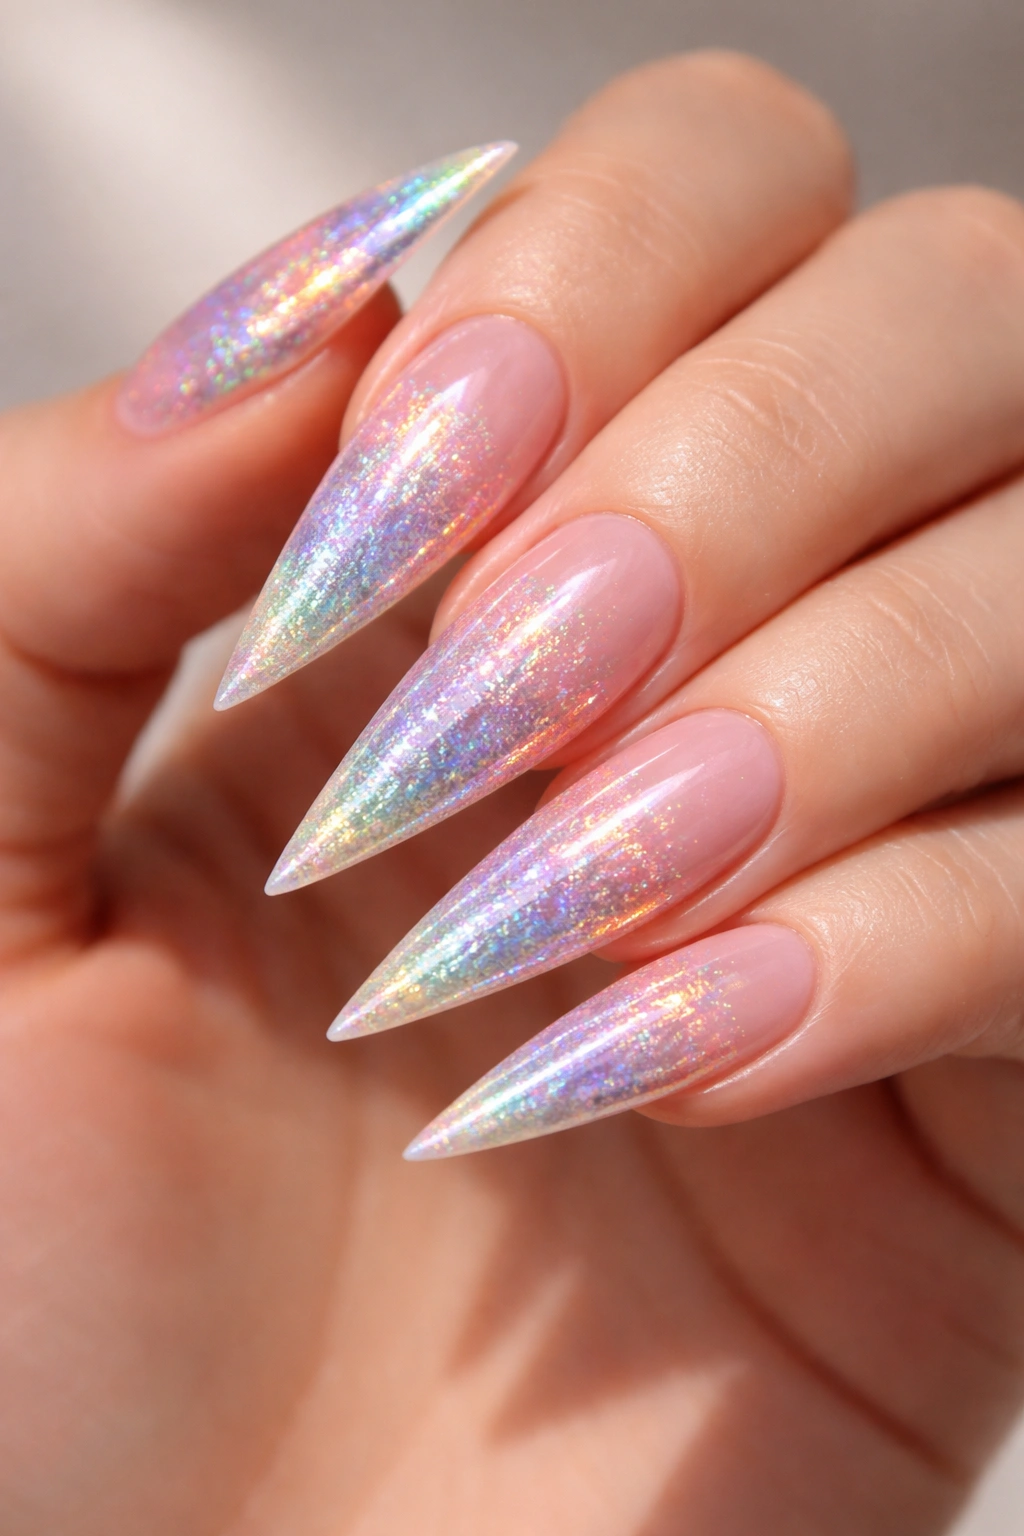
Holographic is pure magic—it shifts colors depending on the angle and light, creating a nail design that’s never the same twice. This design features a holographic glitter or powder base that transitions through rainbow hues, sometimes with additional iridescent sparkles or crystals layered on top for maximum dimension and light-catching ability.
Why It Captivates
Holographic nails draw attention because they’re genuinely mesmerizing—people can’t stop watching the color shifts as you move your hands. The rainbow effect feels playful and luxe simultaneously. On stilettos, the pointed shape actually enhances the holographic effect because light hits the angles differently.
Creating Holographic Nails
- Start with a clear or pale pink base to let the holographic effect shine
- Apply holographic powder mixed with clear gel, building it up in layers for intensity
- You can use holographic glitter instead of powder for a chunkier, more textured sparkle
- Layer with additional iridescent crystals if you want extra dimension
- Seal with a glossy top coat to protect the effect and enhance the shine
- This design works on any base color, but works best on light, neutral bases
Pro tip: Holographic designs photograph beautifully—they show up incredibly vibrant in photos because the camera captures multiple color reflections.
8. Pearl Encrusted Elegance
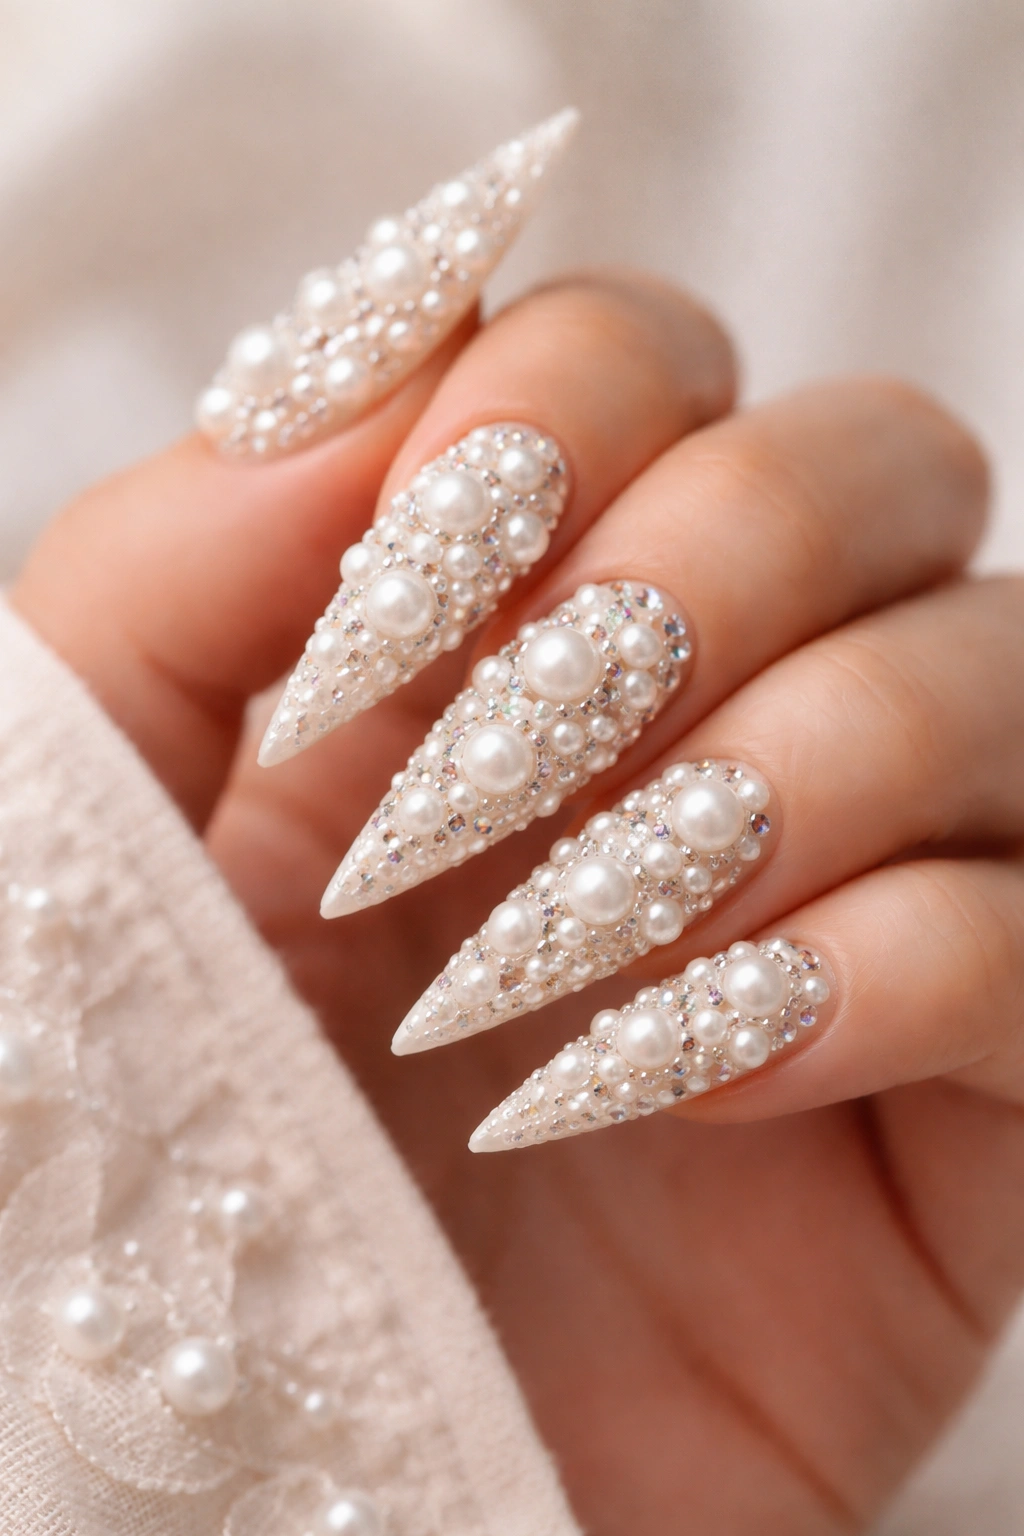
Pearls have an inherent sophistication that feels timeless and refined. This design covers the nail in pearl beads or pearl-shaped crystals, creating a textured, almost 3D effect that’s luxurious and vintage-inspired. The pearls are typically applied in a pearl or cream base color, sometimes with a nude or champagne underlayer for added dimension.
The Refined Appeal
Pearl-encrusted nails feel like wearable art—they’re tactilely interesting and visually stunning. Unlike diamonds, which are all sparkle and sharp edges, pearls have a soft, lustrous quality that feels elegant and understated. This design works beautifully for people who want glamour with sophistication rather than pure flash.
Application Approach
- Choose a pearl or cream-colored gel base
- Select pearl beads or pearl-shaped crystals in varying sizes
- Apply pearls densely across the entire nail or create an accent design (heavy at the tip, sparse at the base)
- Use a tacky base that allows the pearls to adhere securely
- Some technicians leave slight gaps between pearls for a refined look; others cover completely for maximum texture
- Seal with a glossy top coat (matte can dull the pearl luster)
This design pairs beautifully with neutral clothing and delicate jewelry.
9. Gold Foil Abstract Design
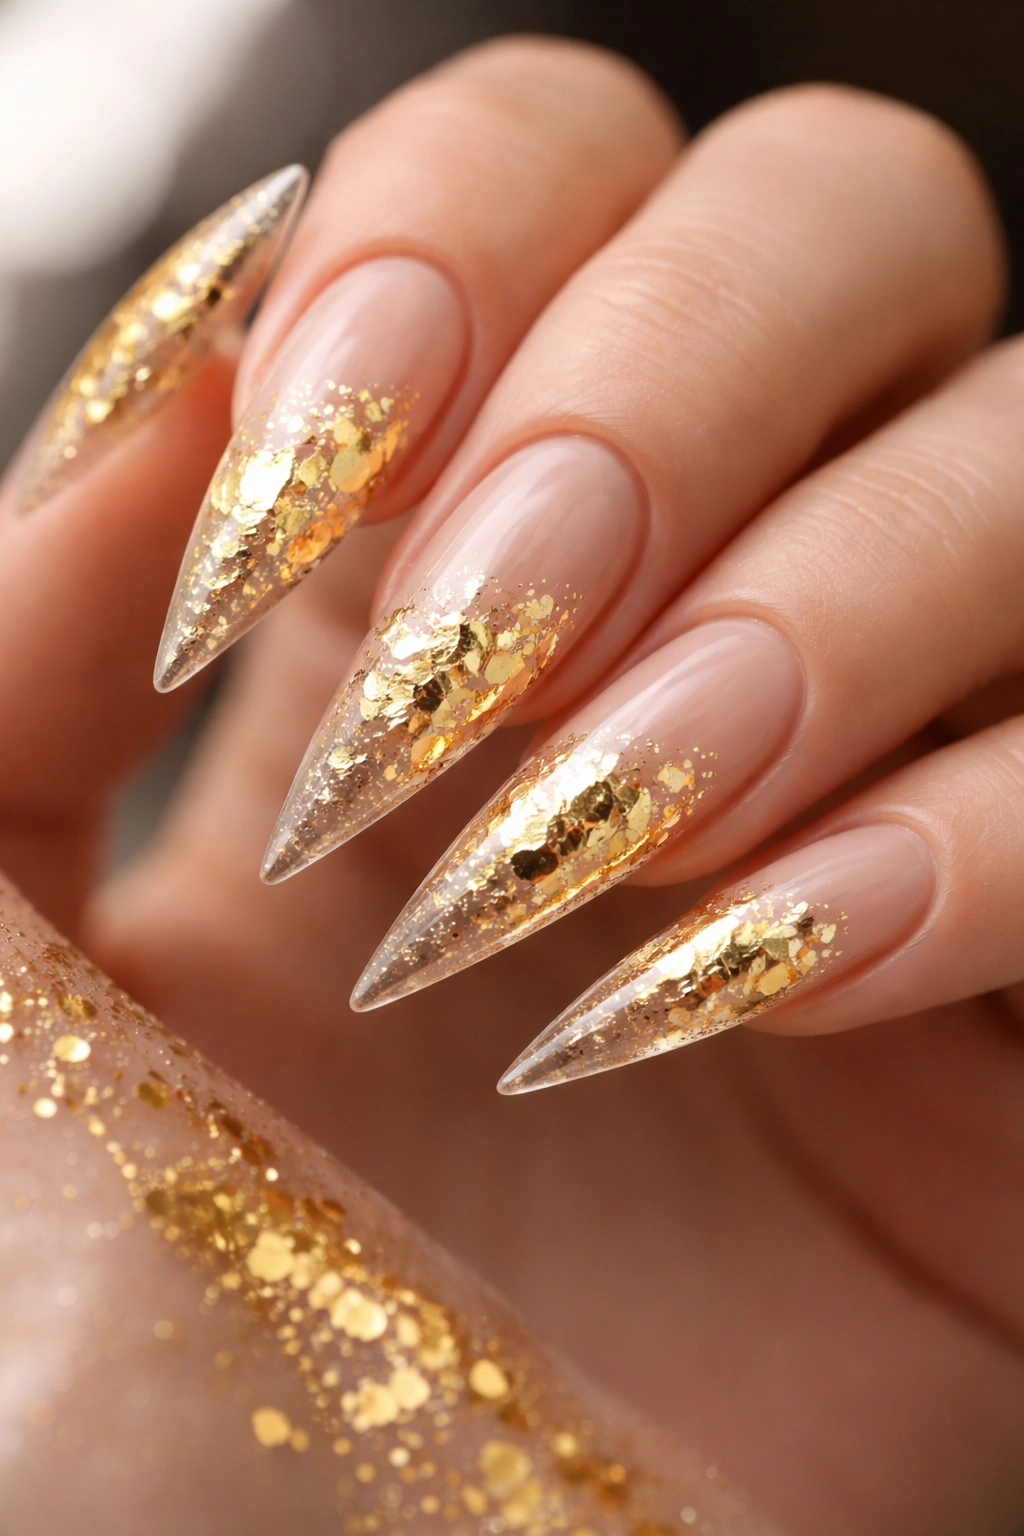
Gold foil creates an organic, artistic effect that feels sophisticated and intentional. This design uses gold foil pieces (irregular shapes that catch and reflect light) embedded in a clear or nude base, often arranged in abstract patterns or concentrated toward the tips of the stilettos. The foil creates the illusion of gold being suspended within the gel, with the abstract arrangement adding artistic flair.
What Makes It Work
Gold foil feels luxe without being too formal—it’s glamorous but approachable. The abstract, organic arrangement prevents it from looking stiff or overdone, making it feel like a modern art piece rather than costume jewelry. On stilettos, the pointed shape complements the angular fragments of foil beautifully.
How to Achieve It
- Apply a clear or pale nude gel base
- Layer in gold foil pieces in abstract patterns—you can let them be freeform or create a loose directional pattern
- Some designs concentrate foil toward the tips; others scatter it throughout
- Seal everything carefully under a glossy top coat without disturbing the foil placement
- This design works beautifully as a standalone statement or paired with additional crystals for more sparkle
Worth knowing: Gold foil works best with warm-toned skin, but looks stunning on everyone when paired with the right base color.
10. Crystal-Studded Nude
Sometimes the most elegant approach is the most minimalist. This design features a nude or skin-tone base that’s studded with crystals in strategic placement—typically clustered at the tip, arranged in a single line down the center, or creating a subtle accent on the ring finger. The nude base keeps the look refined while the crystals add just enough sparkle to make a statement.
The Power of Simplicity
This design proves that you don’t need full coverage to look expensive and put-together. The neutral base elongates the finger visually, while the crystals add exactly the right amount of glamour without overwhelming the look. It’s versatile enough for work, professional settings, or formal events, but still feels special and intentional.
Creating the Look
- Start with a nude gel in a shade that matches your skin tone
- Select premium crystals in clear or a soft color tone
- Apply crystals in a sparse, intentional pattern rather than scattered randomly
- Placement matters here—crystals near the tip create elegance; a single line draws the eye; an accent on one finger adds personality
- Seal carefully with a protective top coat
- This design works on any nail length, but looks particularly striking on longer stilettos
11. Neon Glitter Fade
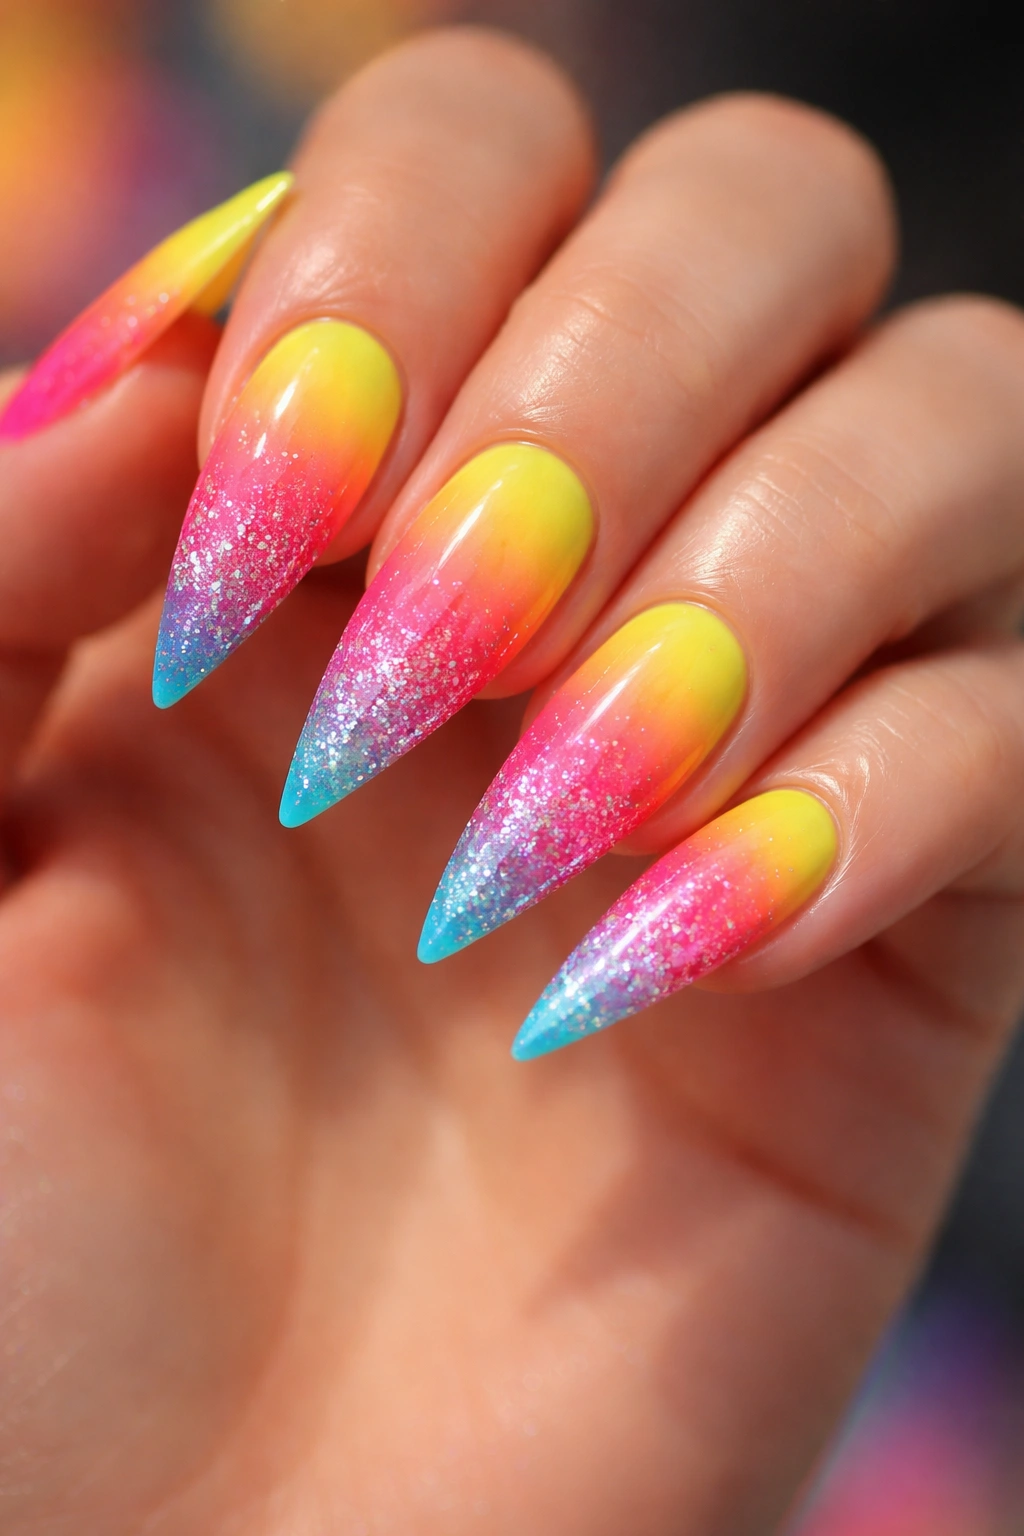
For people who want pure fun and energy, neon glitter fade combines a vibrant neon base (hot pink, electric blue, lime green, or electric orange) with a glitter gradient that intensifies toward the tip. This design is bold, playful, and absolutely attention-grabbing—it’s for people who want their nails to be the first thing anyone notices.
The Bold Statement
Neon nails instantly transform your entire vibe—they read confident, fun, and unapologetically bold. Adding a glitter fade rather than solid neon prevents the design from feeling too costume-y. The gradient creates sophistication within the boldness. This works beautifully for people who love color and aren’t afraid to stand out.
Application Details
- Choose a neon gel in your favorite vibrant shade
- Create a glitter fade by gradually adding more glitter toward the tip (sponging technique works well)
- Use glitter in a complementary shade or in holographic/iridescent for maximum impact
- Some people add crystals or studs to the brightest section for extra dimension
- Seal with a glossy top coat to make the neon pop even brighter
- This design requires confidence, but it absolutely delivers on the showstopper factor
Pro tip: Neon glitter nails photograph incredibly well and often generate the most compliments in person.
12. Rose Quartz Essence
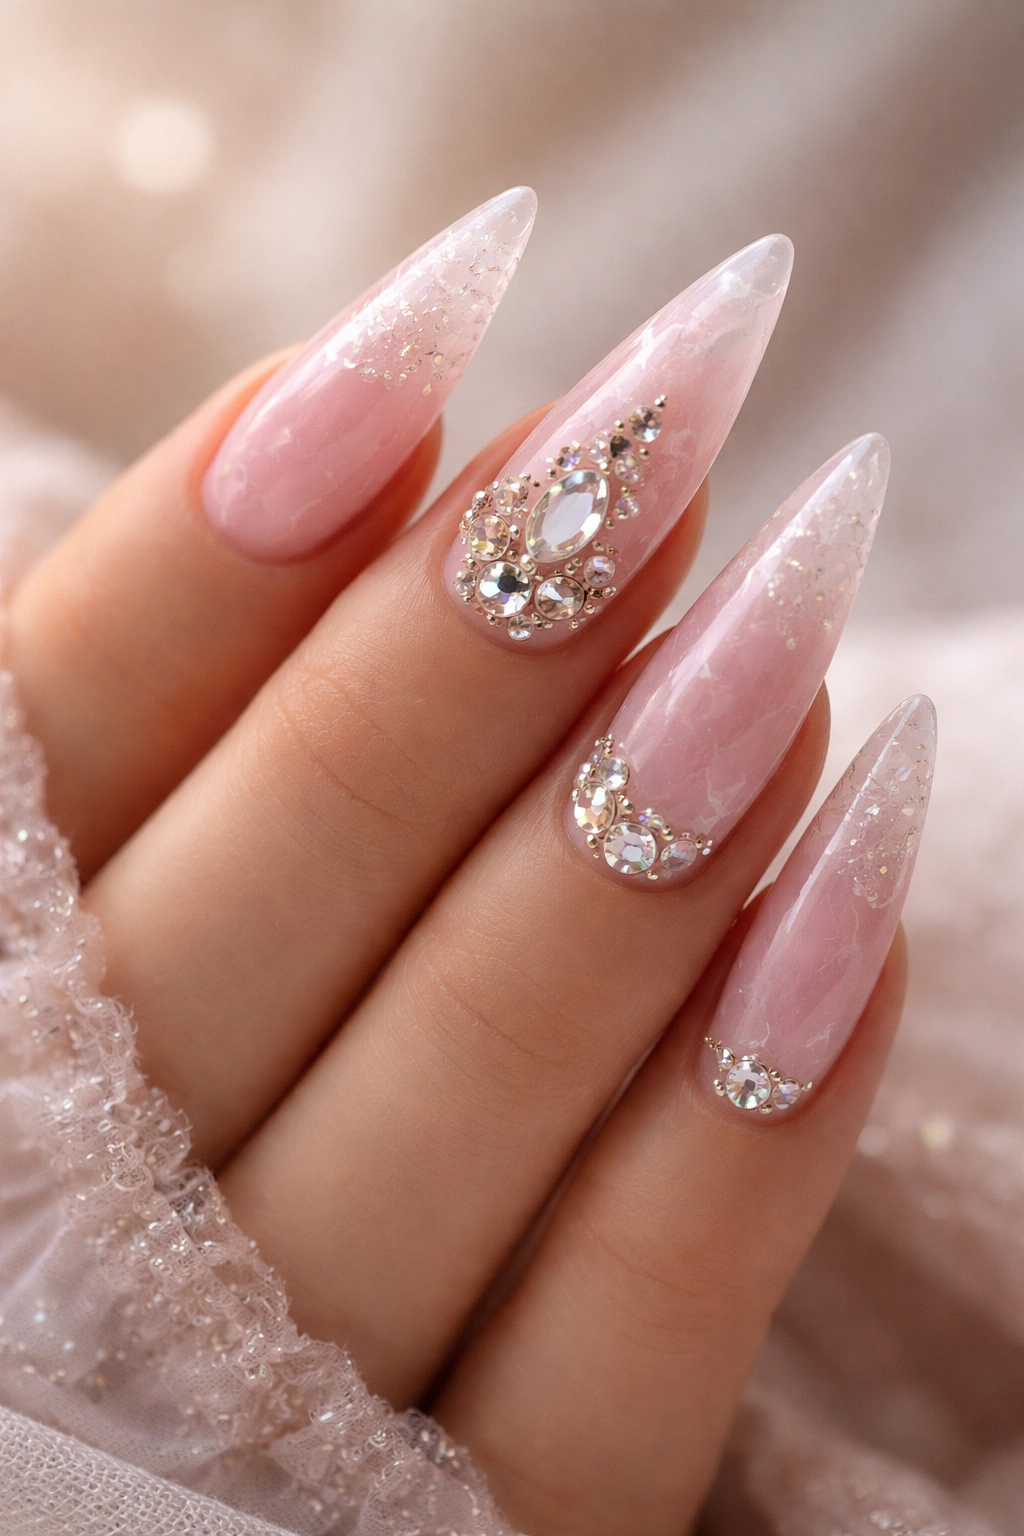
Rose quartz is known as the stone of love and compassion, and translating its soft pink, milky appearance into nail design creates something beautiful and meaningful. This design features a pale pink base with a slightly opaque, stone-like quality, sometimes embedded with clear or rose-toned crystals that mimic the light-catching properties of actual rose quartz. The effect is delicate, feminine, and genuinely sophisticated.
The Gentle Glamour
This design appeals to people who want sparkle without aggressiveness—it’s gentle glamour. The soft pink base is universally flattering, and the crystals add just enough shine to make the design special without it being loud. Rose quartz has become increasingly popular in wellness and beauty spaces, making this design feel current and intentional.
Creating Rose Quartz Nails
- Use a soft pink gel with a slightly milky or translucent quality
- Apply the base in thin layers to build up the opaque, stone-like appearance
- Embed clear or rose-toned crystals throughout or in a concentrated pattern
- Some designs keep crystals minimal (one per nail); others layer them more densely
- You can create a gradient effect by making the pink darker toward the tip and lighter at the base
- Seal with a glossy top coat to protect the crystals and enhance the luminous quality
This design pairs beautifully with rose gold jewelry and works for virtually any occasion.
Final Thoughts
The right stiletto nail design with bling is about more than just looking glamorous—it’s about feeling confident and expressing your personal style in a way that makes you genuinely happy. Whether you’re drawn to the icy sparkle of diamond cascades, the warm glow of champagne and Swarovski, or the bold energy of neon glitter, there’s a design that perfectly matches who you are.
The key to keeping these designs looking fresh and beautiful is proper maintenance: avoid exposing them to excessive water immediately after application, be gentle with your hands during daily activities, and schedule regular touch-ups every two to three weeks. Crystals and embellishments stay secure longer when sealed properly and handled with care.
Consider your lifestyle, personal aesthetic, and the occasions you’ll be wearing these nails for when you choose your design. A design that feels authentically you will always look better and feel more special than trying to force a trend that doesn’t align with your style. Your nails are your tiny works of art—choose designs that make you excited to look down at your hands.
