

There’s something undeniably charming about slipping into the coquette aesthetic—all soft edges, vintage romance, and unapologetically feminine details. And nowhere does this trend shine brighter than on your fingertips. Coquette nails blend delicate pastels, playful bows, and that signature shade of pink into manicures that feel equal parts flirty and sophisticated.
What makes this aesthetic so magnetic isn’t just the sweetness—it’s the confidence behind it. These aren’t shy nails. They’re conversation starters, the kind that make you feel put-together whether you’re grabbing coffee or dressed up for something special. Bows add that whimsical touch, turning even the simplest base into a work of wearable art.
Pink, of course, reigns supreme in the coquette world. From barely-there ballet hues to bold bubblegum brights, this shade captures the essence of the aesthetic better than any other. Pair it with delicate bows—whether hand-painted, three-dimensional, or adorned with pearls—and you’ve got a manicure that channels old-world charm with a fresh, modern twist.
1. Classic Pink French Tips With Dainty Bows
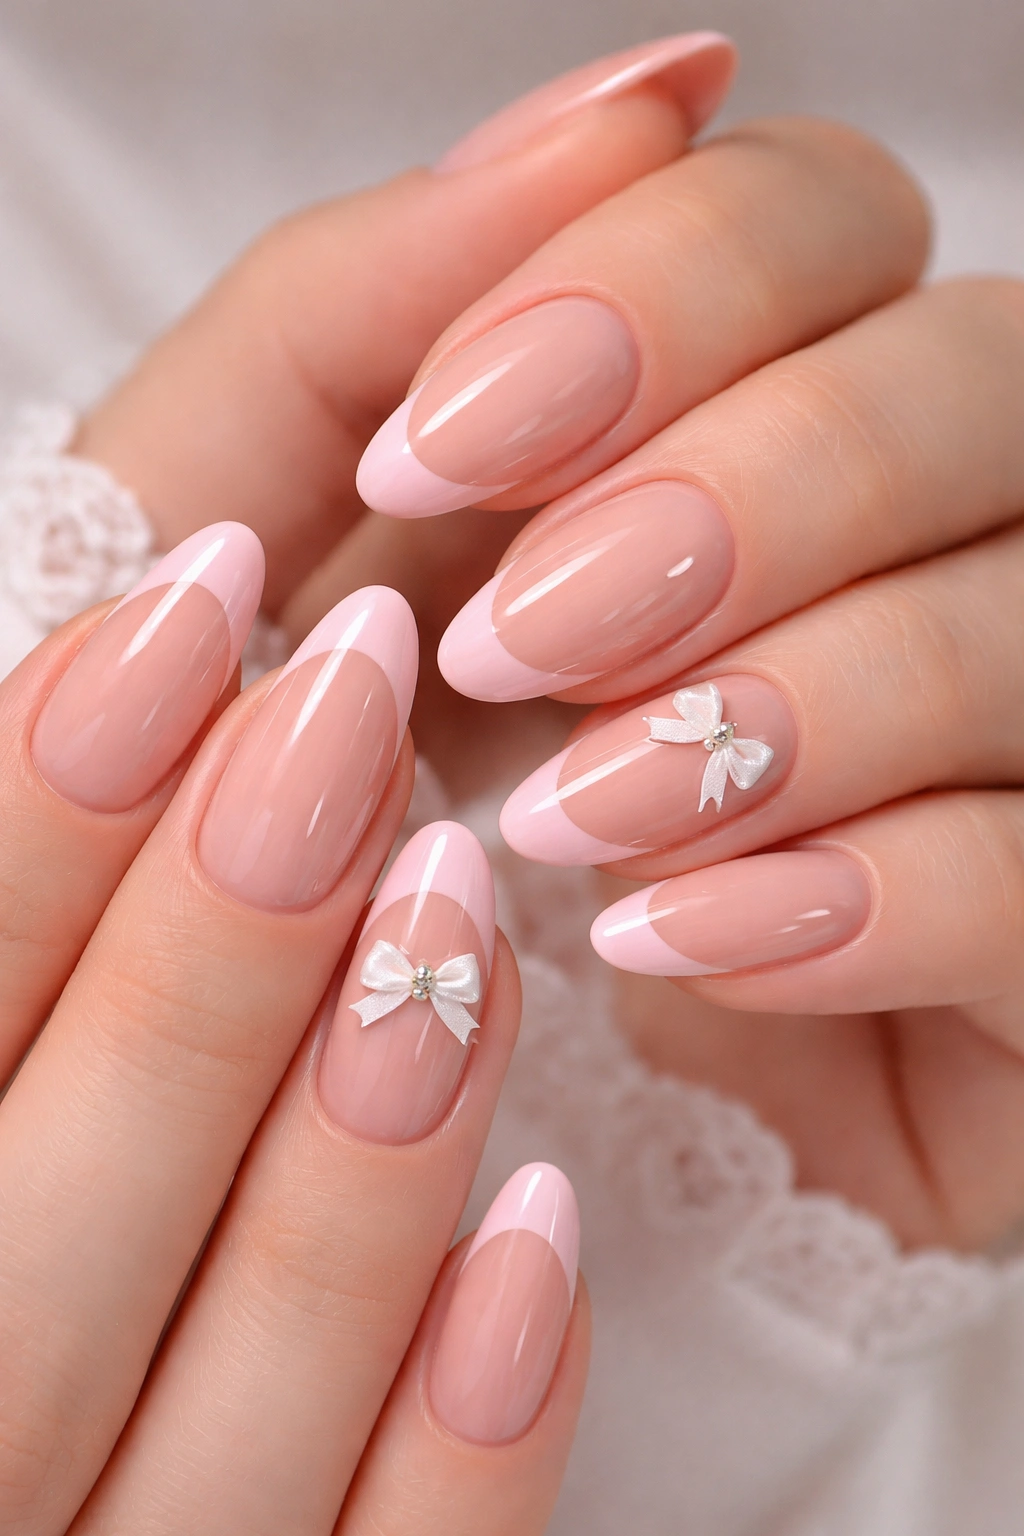
The French manicure gets a coquette upgrade when you swap stark white for soft pink and add tiny bow accents. This look walks the line between timeless and trendy, making it perfect for anyone who wants elegance without sacrificing personality.
Start with a sheer pink or nude base that lets your natural nail peek through. The tips can be either a slightly deeper pink or a creamy white, depending on how much contrast you prefer. Once your base is set, the magic happens with miniature bows.
Why This Design Works
French tips already elongate your fingers and create a polished look. Adding bows—especially on just one or two accent nails—keeps things from feeling overdone. It’s the design equivalent of wearing a silk ribbon in your hair: intentional but effortless.
The best part? This style suits any nail length. Short nails look sweet and practical, while longer almond or oval shapes give the bows more room to shine.
Key Details to Consider
- Place bows on your ring fingers for subtle asymmetry
- Use a thin brush or nail stickers if freehand painting feels intimidating
- A glossy top coat makes the whole design look more expensive
Pro tip: White bows on pink tips create more visual pop than pink-on-pink, which reads softer and more monochromatic.
2. Glazed Pink Nails With Pearl-Studded Bows
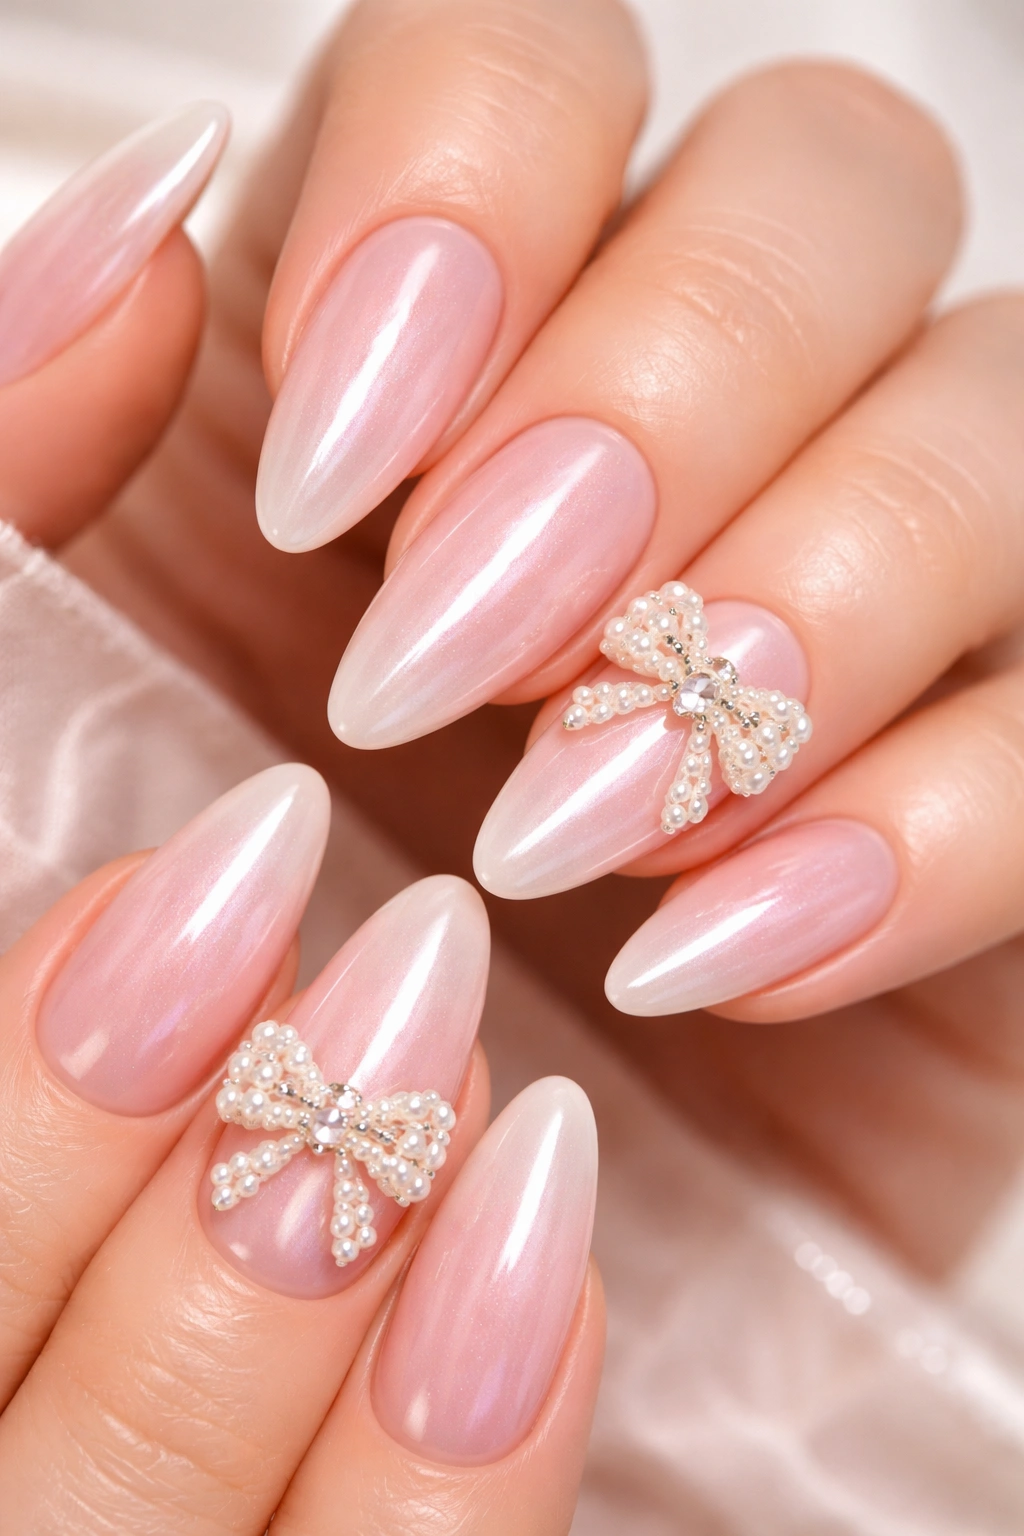
Nothing says luxury quite like a glazed finish, and when you combine that pearlescent sheen with delicate bows and actual pearl embellishments, you’re entering high-fashion territory. This design feels like something you’d spot on a runway—or on someone who definitely has their life together.
The glazed effect creates dimension and depth, catching light from every angle. It’s not quite chrome, not quite shimmer—it sits somewhere in between, giving your nails that “expensive manicure” glow without trying too hard.
What Makes It Special
Pearls have always carried an air of sophistication, and in nail art, they add texture that flat polish just can’t match. When you nestle a pearl at the center of a painted bow or scatter them along the nail, the design goes from pretty to striking.
This look particularly shines on almond or oval shapes. The curved silhouette mirrors the roundness of the pearls, creating visual harmony across your whole hand.
Application Tips
- Apply your glazed pink polish in thin layers to avoid streaking
- Use nail glue specifically designed for embellishments to secure pearls
- Keep pearl placement minimal—less is definitely more here
Fun fact: The glazed nail trend has roots in the “glazed donut” aesthetic, but the coquette version feels more refined than sugary.
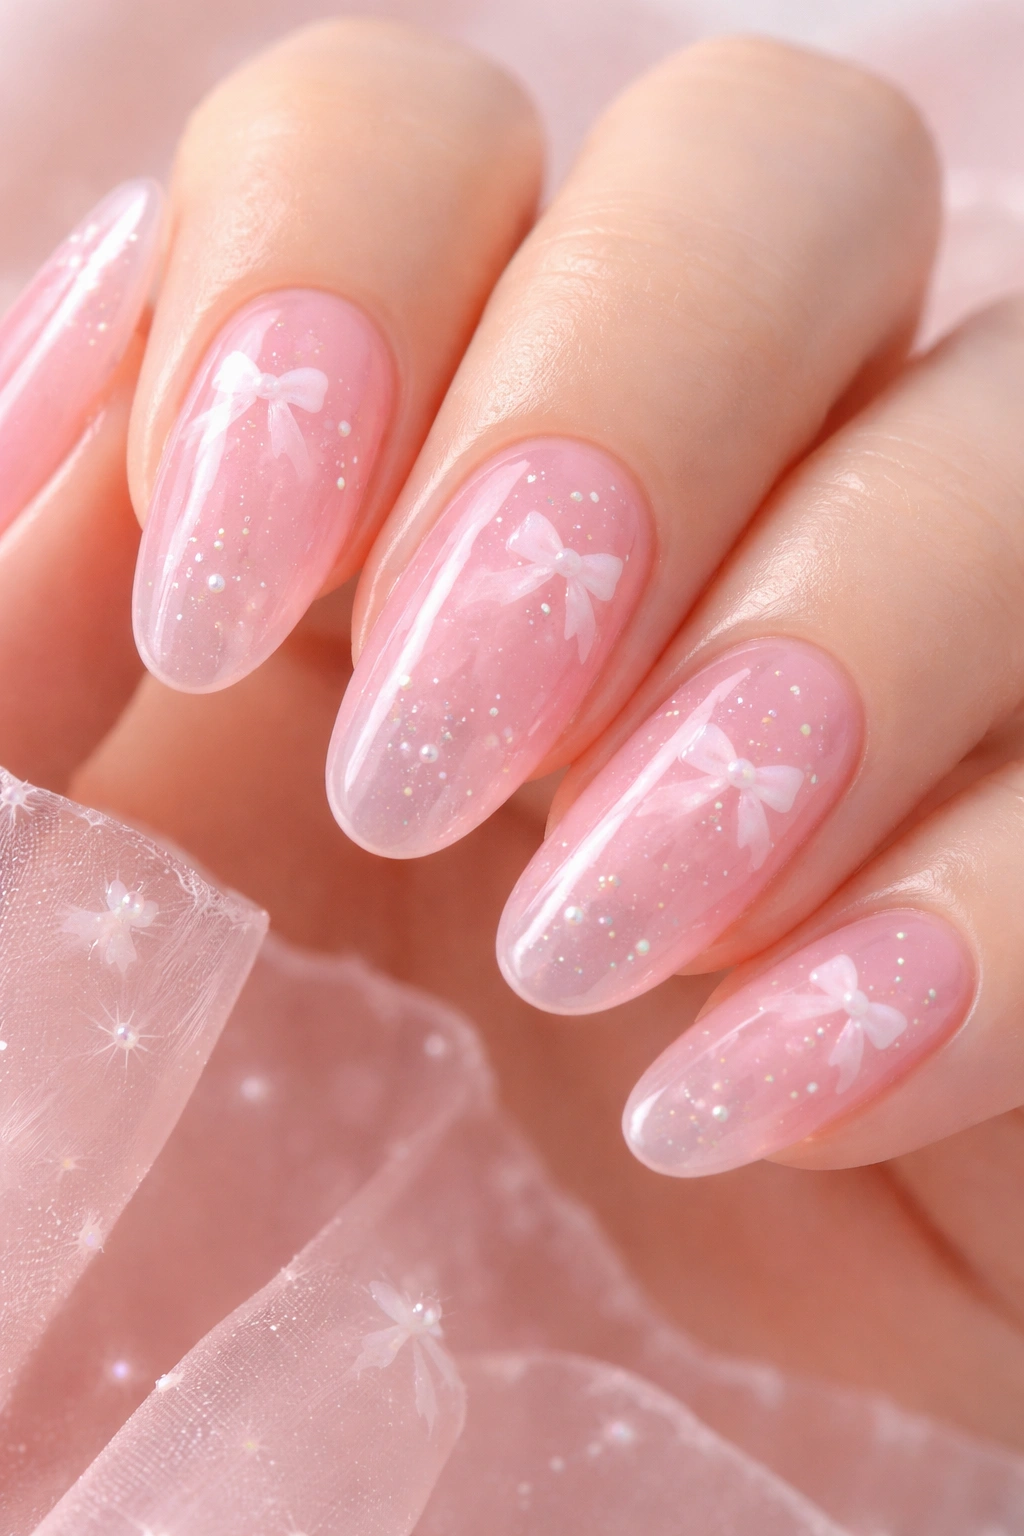
3. Baby Pink Aura Nails With Hand-Drawn Bows

Aura nails have taken over for good reason—the soft, diffused color gradient looks dreamy without requiring expert blending skills. When you center that aura effect in baby pink and finish with hand-drawn bows, you get a manicure that belongs in a fairytale.
The technique involves layering translucent pink in the center of each nail, letting it fade naturally toward the edges. It creates an almost ethereal glow, like your nails are lit from within.
The Artistic Touch
Hand-drawn bows give this design its personality. Unlike stickers or pre-made charms, painted bows have slight imperfections that make them feel more authentic and less mass-produced. Each bow becomes unique, which honestly adds to the charm.
You can keep the bows simple—just two loops and tails—or get detailed with shading and highlights. Either way, they stand out beautifully against the soft aura base.
Design Variations
- Try white bows for maximum contrast against the pink aura
- Add tiny hearts or stars around the bows for extra whimsy
- Use a matte top coat on the bows but keep the base glossy
Pro tip: Practice your bow technique on paper first. Once you nail the shape, translating it to your nails becomes much easier.
4. Milky Pink Base With 3D Ribbon Bows
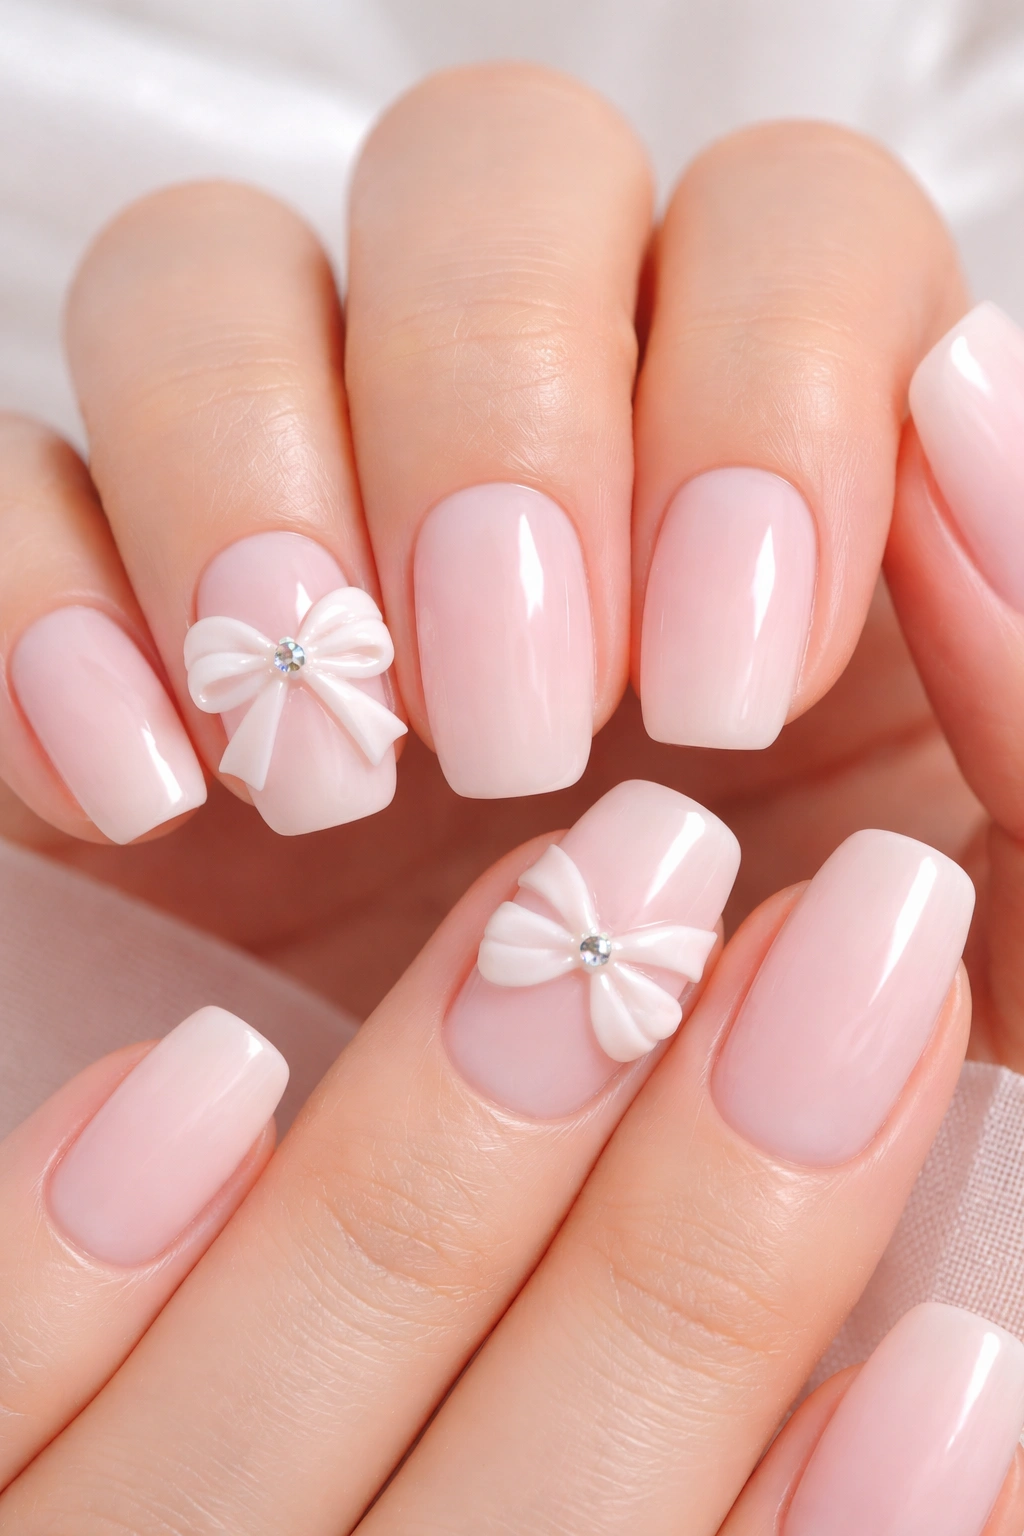
Three-dimensional bows elevate any manicure from cute to couture. These aren’t flat designs—they’re actual dimensional elements that sit on top of your nail, creating texture you can feel. Paired with a milky pink base, they look like tiny gifts wrapped on each finger.
Milky pink strikes the perfect balance between opaque and sheer. It’s not quite nude, not quite bubblegum—it’s that in-between shade that flatters every skin tone and complements any outfit.
Why 3D Elements Matter
Dimensional nail art adds visual interest that photographs beautifully and catches attention in person. When someone compliments your nails, they’ll want to look closer, and that’s when the details really shine.
These bows can be made from gel, acrylic, or even tiny fabric ribbons sealed with top coat. Some nail artists sculpt them by hand, while others use pre-made charms. Both options work—it just depends on your budget and patience level.
Styling This Look
- Keep 3D bows to one or two accent nails to avoid overwhelming the design
- Choose bows that match or slightly contrast your base color
- Be mindful of bow size—oversized ones can catch on clothing
Heads up: 3D elements require extra care. They’re stunning but need gentle handling to last your full wear time.
5. Soft Pink Ombre With Tiny Black Bows
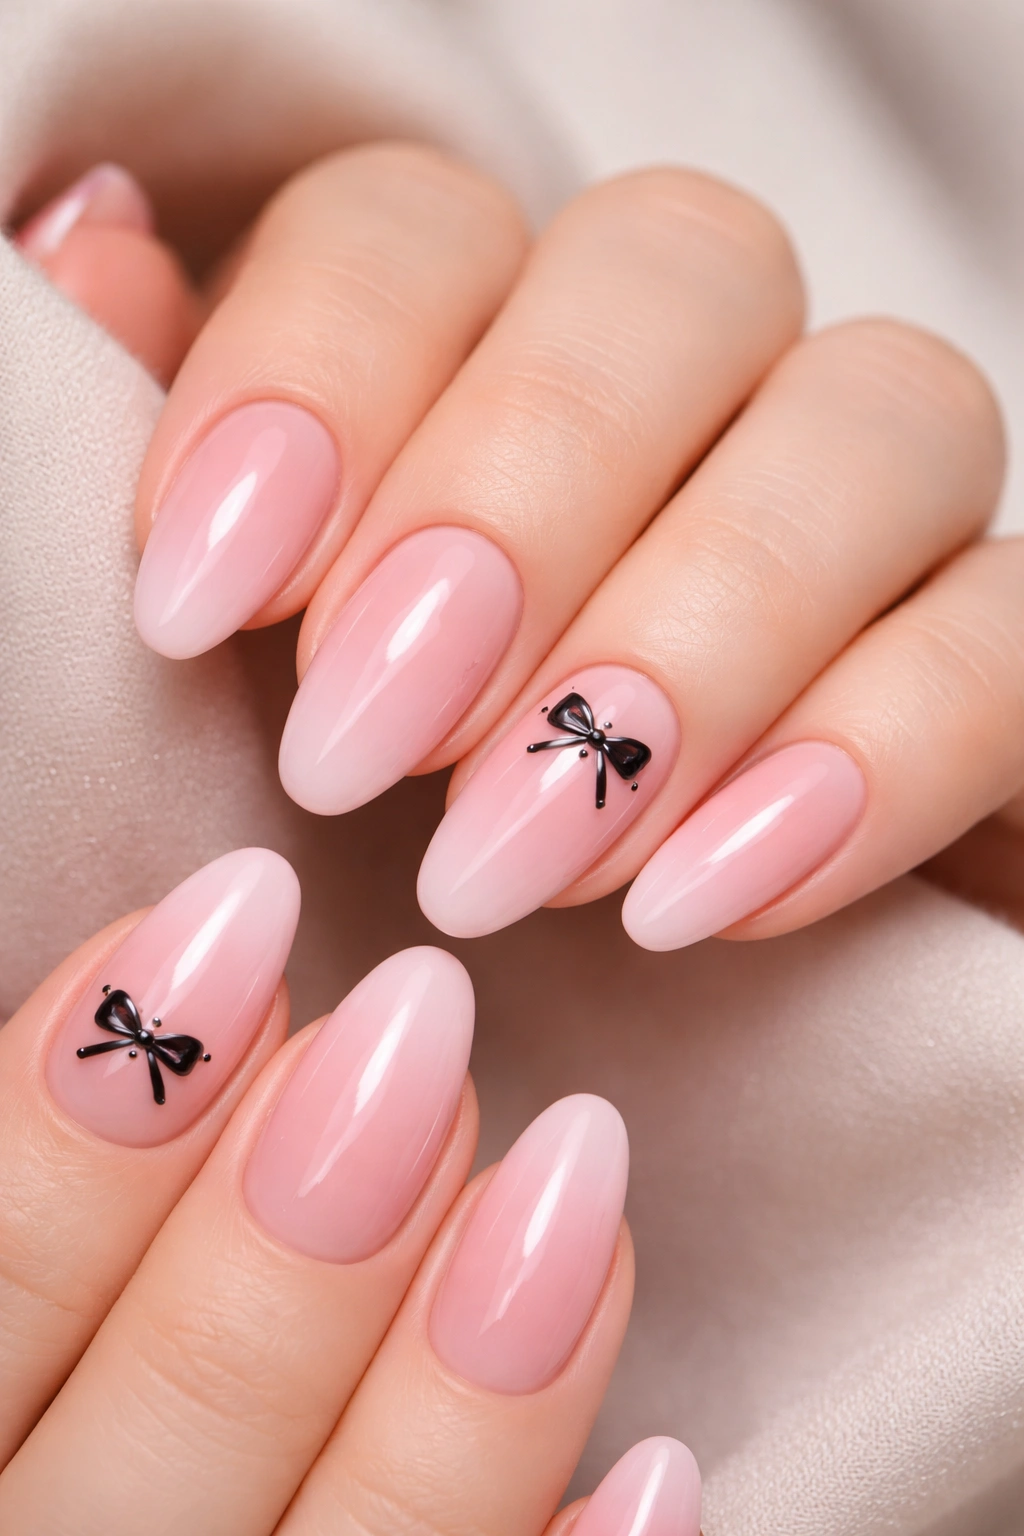
Who says coquette nails have to be all pastels? Adding black bows to a soft pink ombre creates striking contrast that feels more sophisticated than purely sweet. It’s the manicure version of pairing a floral dress with combat boots—unexpected but somehow perfect.
The ombre technique blends pink from light at the cuticle to slightly deeper at the tip, creating gradual transition that’s visually soothing. When you drop in black bow details, they become focal points that demand attention.
The Color Psychology
Pink reads feminine and approachable, while black adds edge and modernity. Together, they create balance—you’re sweet but not saccharine, pretty but not precious. It’s a combination that works for coffee dates and cocktail parties alike.
Black bows can be hand-painted with a thin brush or applied as stickers. Either way, they stand out sharply against the pink gradient, making even small bows look bold.
Placement Strategies
- Put black bows on accent nails for a curated look
- Try placing them at the base of the nail instead of the tip for something different
- Pair with a single rhinestone at the bow’s center for extra sparkle
Pro tip: Use a matte top coat on the black bows but leave the ombre glossy for contrast in texture, not just color.
6. Rose Pink Chrome With Pearl Bow Accents
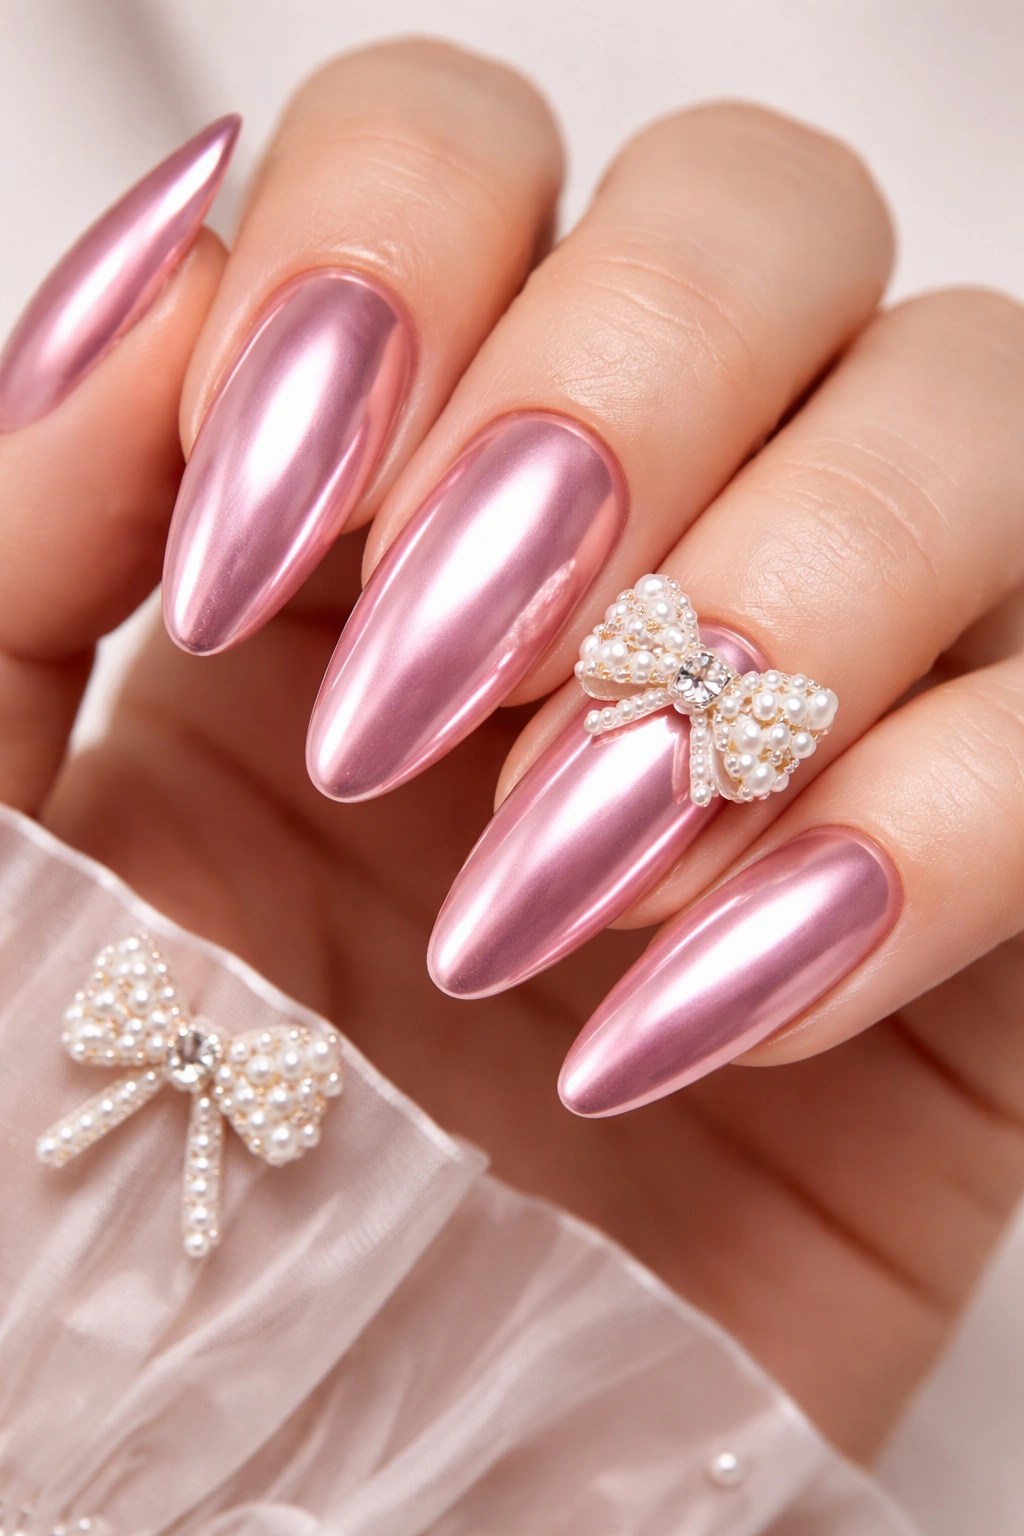
Chrome finishes have staying power in the nail world, and when you choose a rose pink shade, you get all that mirror-like shine with romantic undertones. Add pearl accents shaped into bows, and suddenly your manicure looks like something a luxury brand would feature in their campaign.
Rose pink chrome sits somewhere between pink and mauve, with cool undertones that photograph gorgeously. The chrome effect reflects light in ways that regular polish can’t, creating dimension and movement with every gesture.
The Luxury Factor
Pearls arranged into bow shapes take patience and precision, but the payoff is worth it. This technique involves using tiny pearl beads or caviar beads to outline or fill in bow designs. The texture contrast between smooth chrome and dimensional pearls is what makes this look stand out.
It’s a high-impact design that doesn’t require complicated nail art skills—just steady hands and good adhesive. The chrome does most of the heavy lifting visually, while the pearls provide that coquette signature detail.
Getting This Look Right
- Use chrome powder over gel polish for the best mirror finish
- Apply pearls with strong nail glue or builder gel for lasting hold
- Keep pearl bows small and delicate to maintain the coquette aesthetic
Keep in mind: Chrome finishes show imperfections easily, so proper nail prep is essential for a flawless result.
7. Bubblegum Pink With Painted White Bows
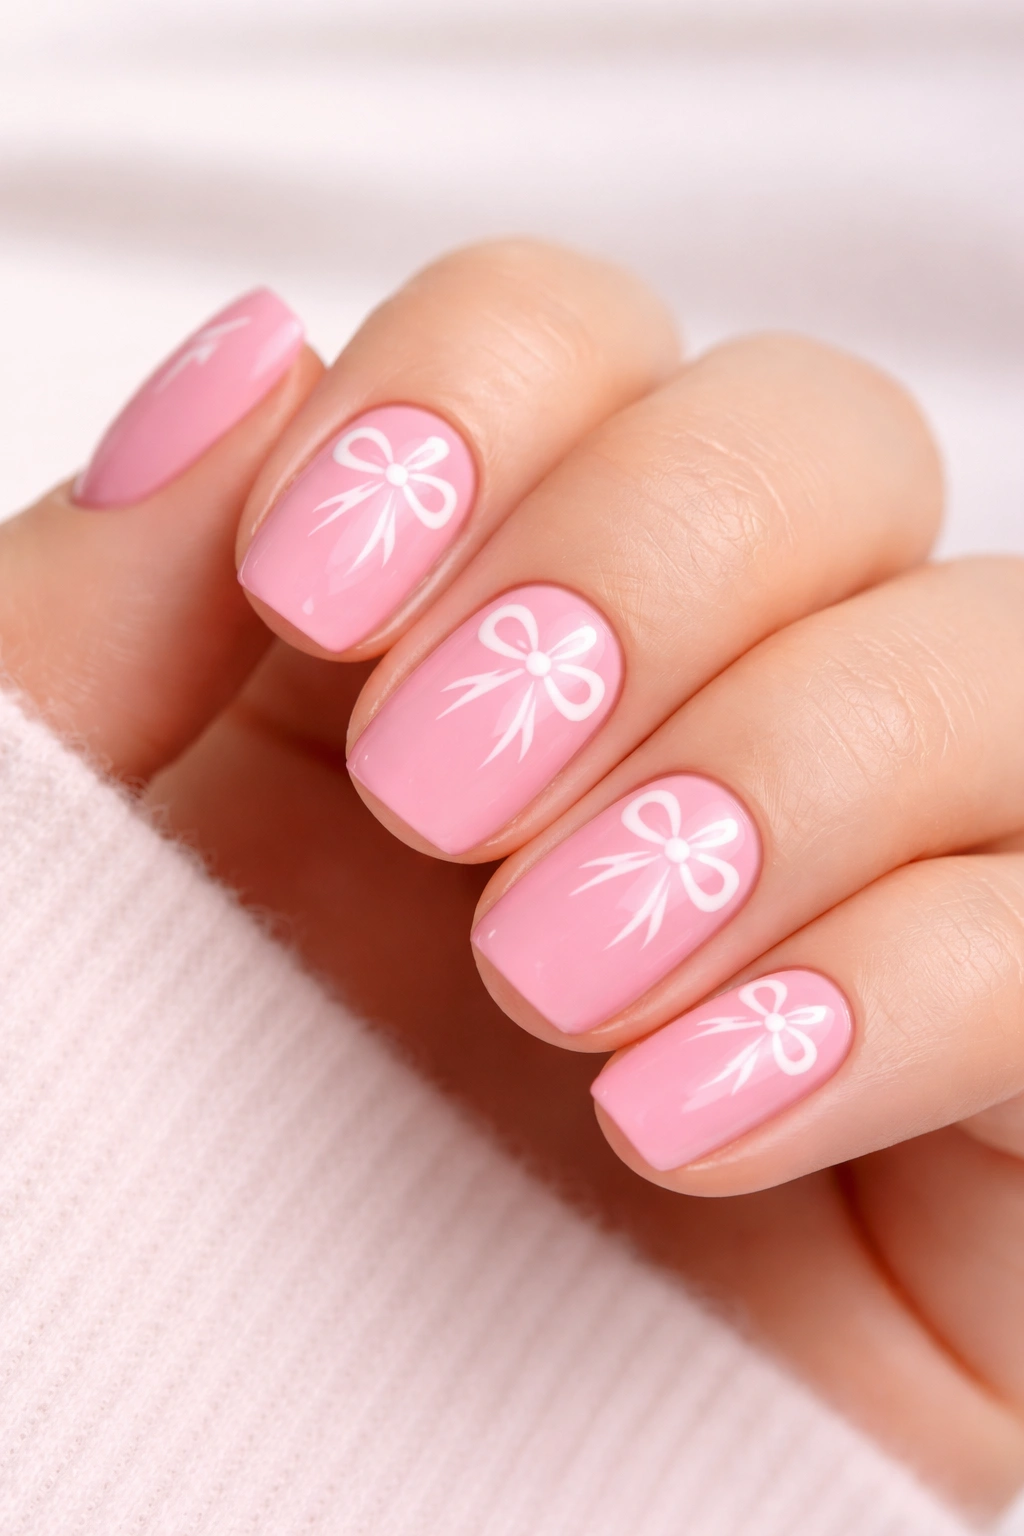
Sometimes you want to go bold with your pink, and that’s where bubblegum shades come in. Bright, cheerful, and impossible to ignore, this pink makes a statement before you even add the bow details. White painted bows on top create crisp contrast that’s playful without being childish.
Bubblegum pink is having a moment, and not just in the coquette world. It’s vibrant enough to feel fun but still polished enough for grown-up settings. The shade works particularly well in warmer months but honestly looks good any time of year.
The Design Approach
White bows on bright pink create the kind of contrast that makes your manicure visible from across the room. You can paint them as simple outlines or fill them in completely, depending on how much coverage you want.
This combination channels nostalgic energy—think vintage hair ribbons and retro fashion—but feels entirely current. It’s familiar and fresh at the same time, which is exactly what makes it work.
How to Wear It
- Try this on shorter, squoval nails for a cute, wearable look
- Use a glossy top coat to make the colors pop even more
- Add a single rhinestone at each bow’s center for subtle sparkle
Pro tip: If bubblegum pink feels too bold for your entire hand, try it on just your accent nails with neutral pink on the rest.
8. Dusty Pink With Lace-Pattern Bows
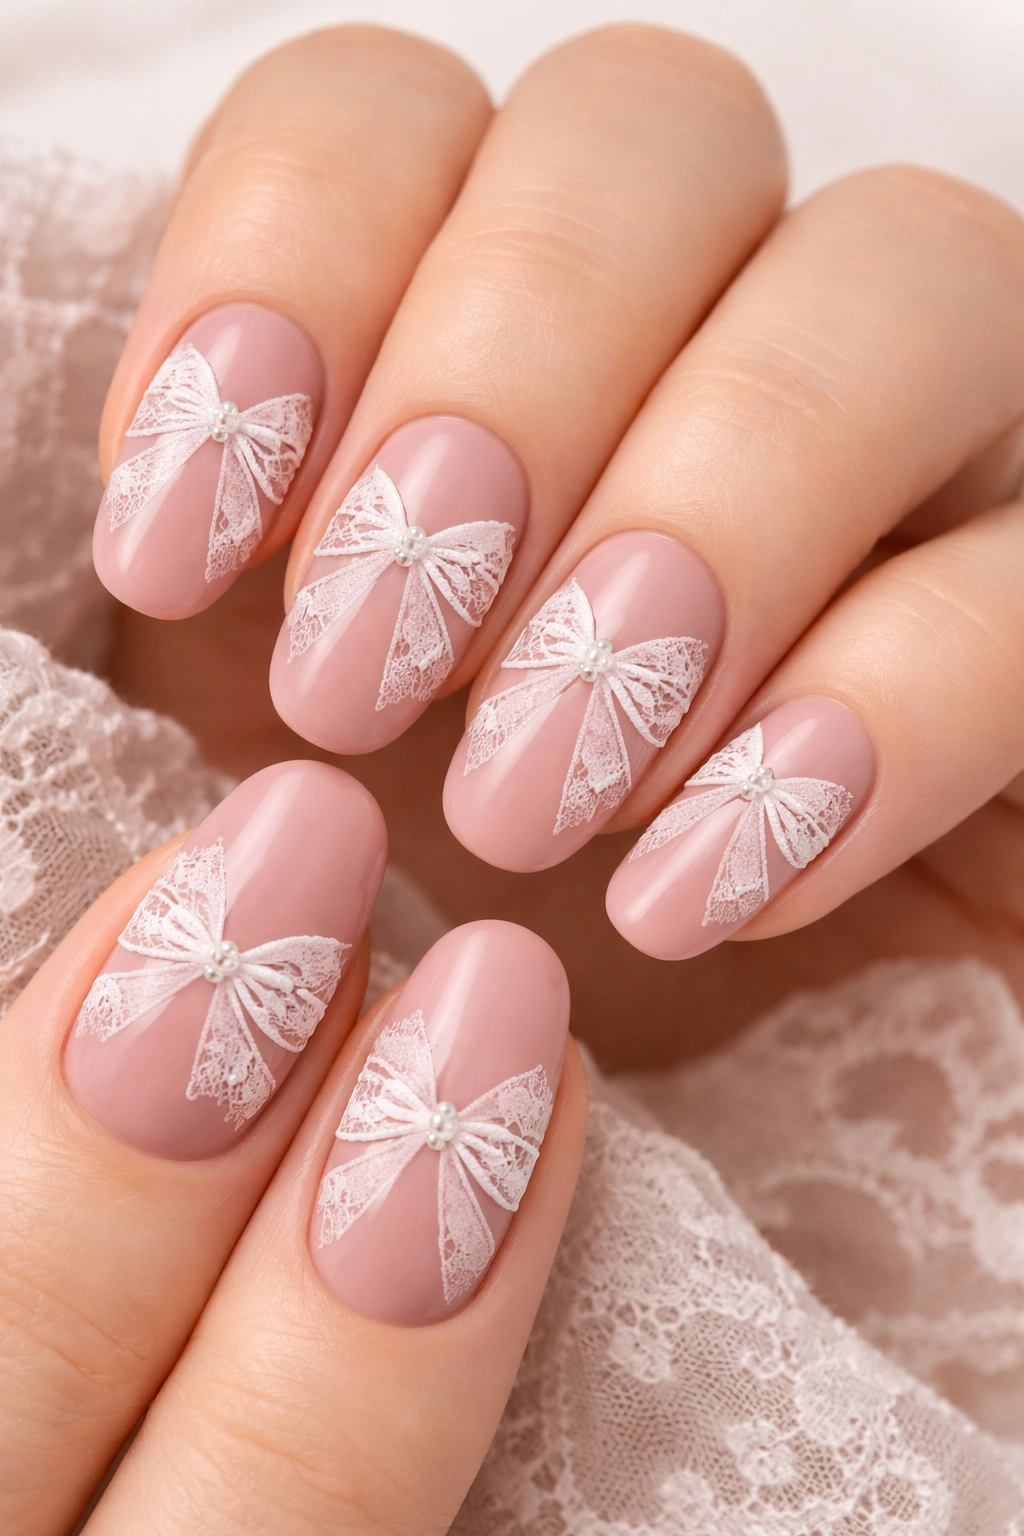
Lace and bows go together like romance and roses. When you incorporate lace patterns into your bow designs on a dusty pink base, you’re creating something that feels vintage-inspired but thoroughly modern. This look channels old-world elegance without feeling costume-y.
Dusty pink has muted, sophisticated tones that work beautifully for those who find brighter pinks overwhelming. It’s subdued but still definitively pink, making it the perfect backdrop for intricate details.
The Lace Element
Creating lace-pattern bows requires a thin brush and steady hand, but nail stamping plates can also achieve this effect with less stress. The delicate, web-like patterns mimic real lace fabric, adding texture and interest to an otherwise simple bow shape.
Lace details make any manicure look more expensive and thoughtful. They suggest you took time with your nails, even if you knocked them out in under an hour.
Technical Details
- White or cream lace patterns show up best on dusty pink
- Practice the lace technique on paper or practice nails first
- Seal everything with a quality top coat to protect the delicate details
Worth noting: Lace patterns photograph beautifully, making this design particularly Instagram-worthy if you’re into that.
9. Hot Pink French With Black Bow Accents
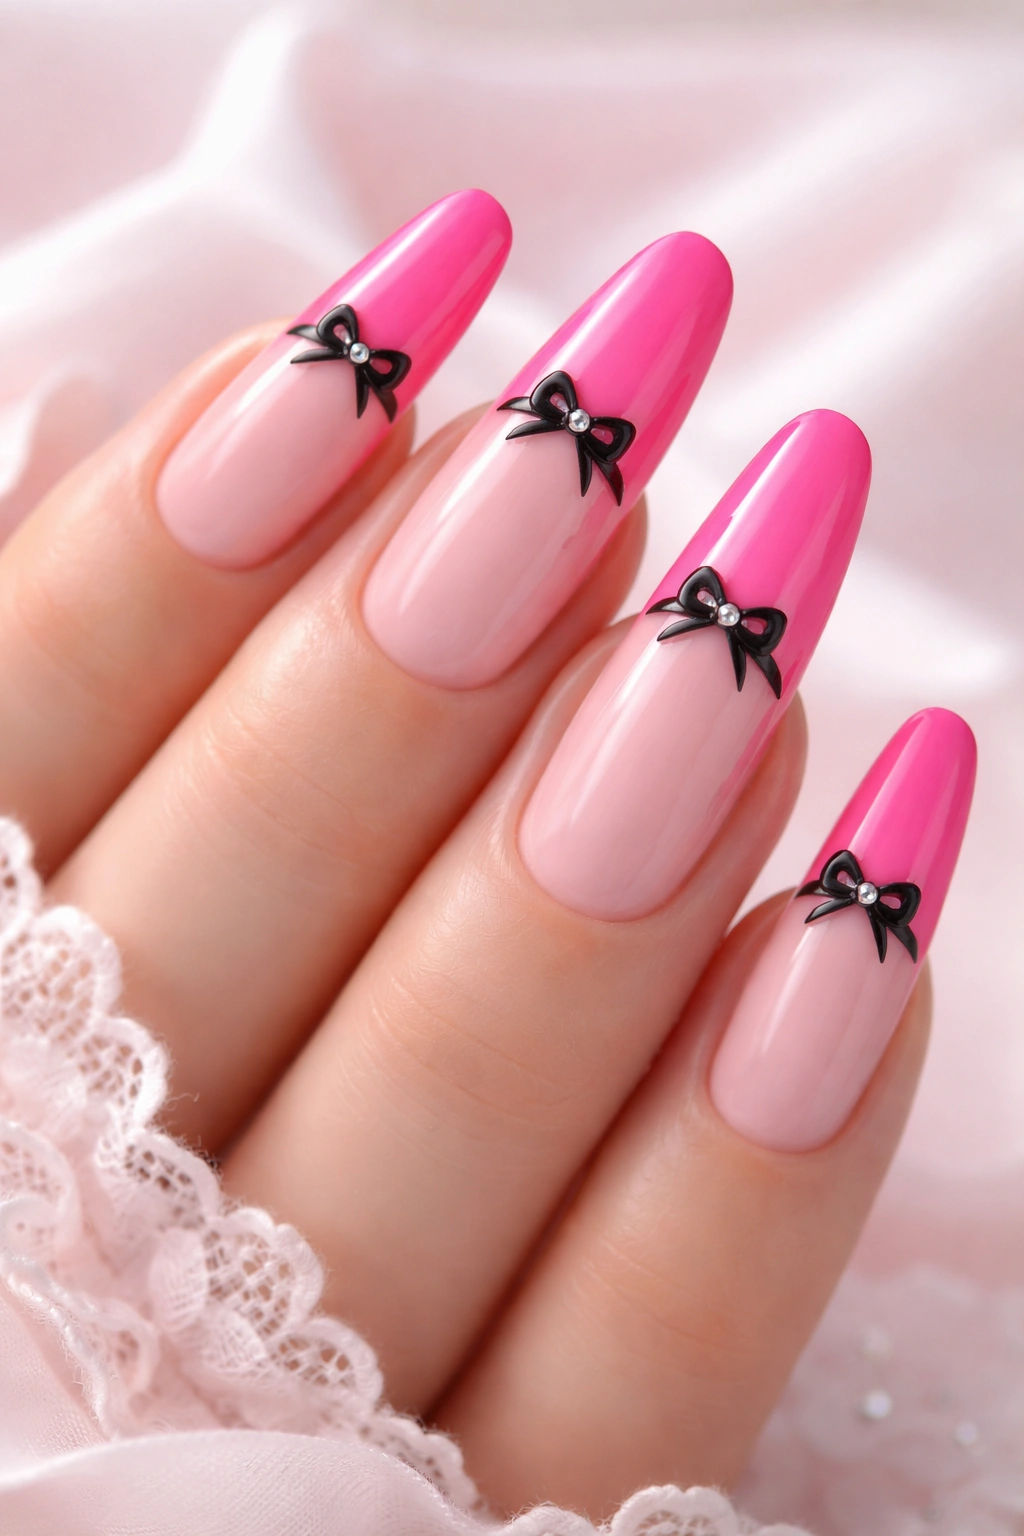
For those who like their coquette with extra confidence, hot pink French tips with black bow accents deliver drama without sacrificing the aesthetic’s signature sweetness. This combination feels bold, intentional, and just a little bit rebellious.
Hot pink isn’t for the faint of heart—it’s loud, it’s proud, and it demands attention. But when you pair it with classic French tip placement and black bow details, you create balance between daring and refined.
Why This Combination Works
Black and hot pink is a color pairing that’s been iconic across decades of fashion. In nail art, it creates visual punch that’s hard to ignore. The black bows ground the brightness of the pink, keeping the whole look from veering into overwhelming territory.
This design suits longer nail shapes particularly well. The extra length gives you room to really showcase the contrast and detail work.
Styling Considerations
- Place black bows at the base of the French tip for cohesive design
- Try alternating fingers—not every nail needs a bow
- Matte black bows against glossy hot pink create textural interest
Pro tip: This look pairs surprisingly well with minimalist outfits. Let your nails be the statement piece.
10. Blush Pink With Gold Metallic Bows
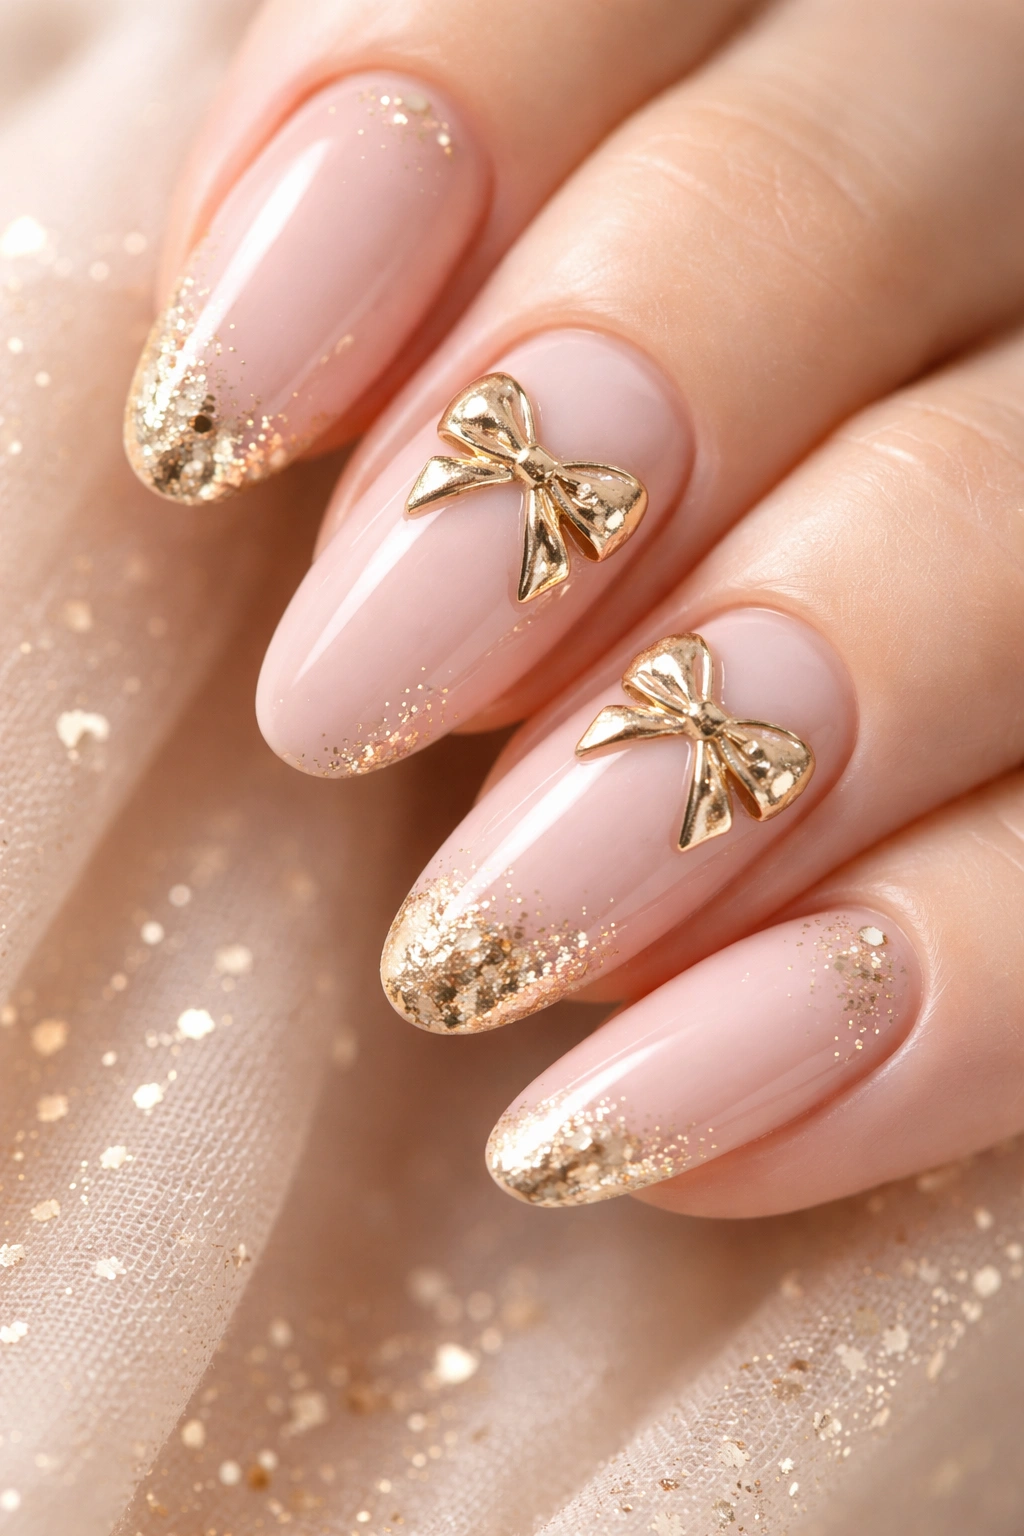
Gold adds instant luxury to any manicure, and when you incorporate metallic gold bows into a blush pink base, you’re creating something that feels expensive and special. This combination works for celebrations, date nights, or any time you want to feel a little extra.
Blush pink is universally flattering—it’s warm enough to complement most skin tones but still reads definitively as pink. It’s softer than hot pink but more present than barely-there ballet shades.
The Metallic Touch
Gold metallic polish or gold foil can create bow designs that catch light gorgeously. Unlike flat colors, metallics have reflective qualities that make your nail art literally shine. They elevate the design from pretty to stunning.
You can paint gold bows freehand, use gold foil transfers, or apply pre-made gold bow charms. Each method creates slightly different effects, but all deliver that luxe metallic finish.
Design Options
- Try rose gold instead of yellow gold for a softer metallic effect
- Place one gold bow on each hand for subtle elegance
- Combine gold bows with pearl or rhinestone accents
Something to try: Alternate between blush pink and white nails, putting gold bows only on the white ones for dimension.
11. Light Pink With Bow-Shaped French Tips
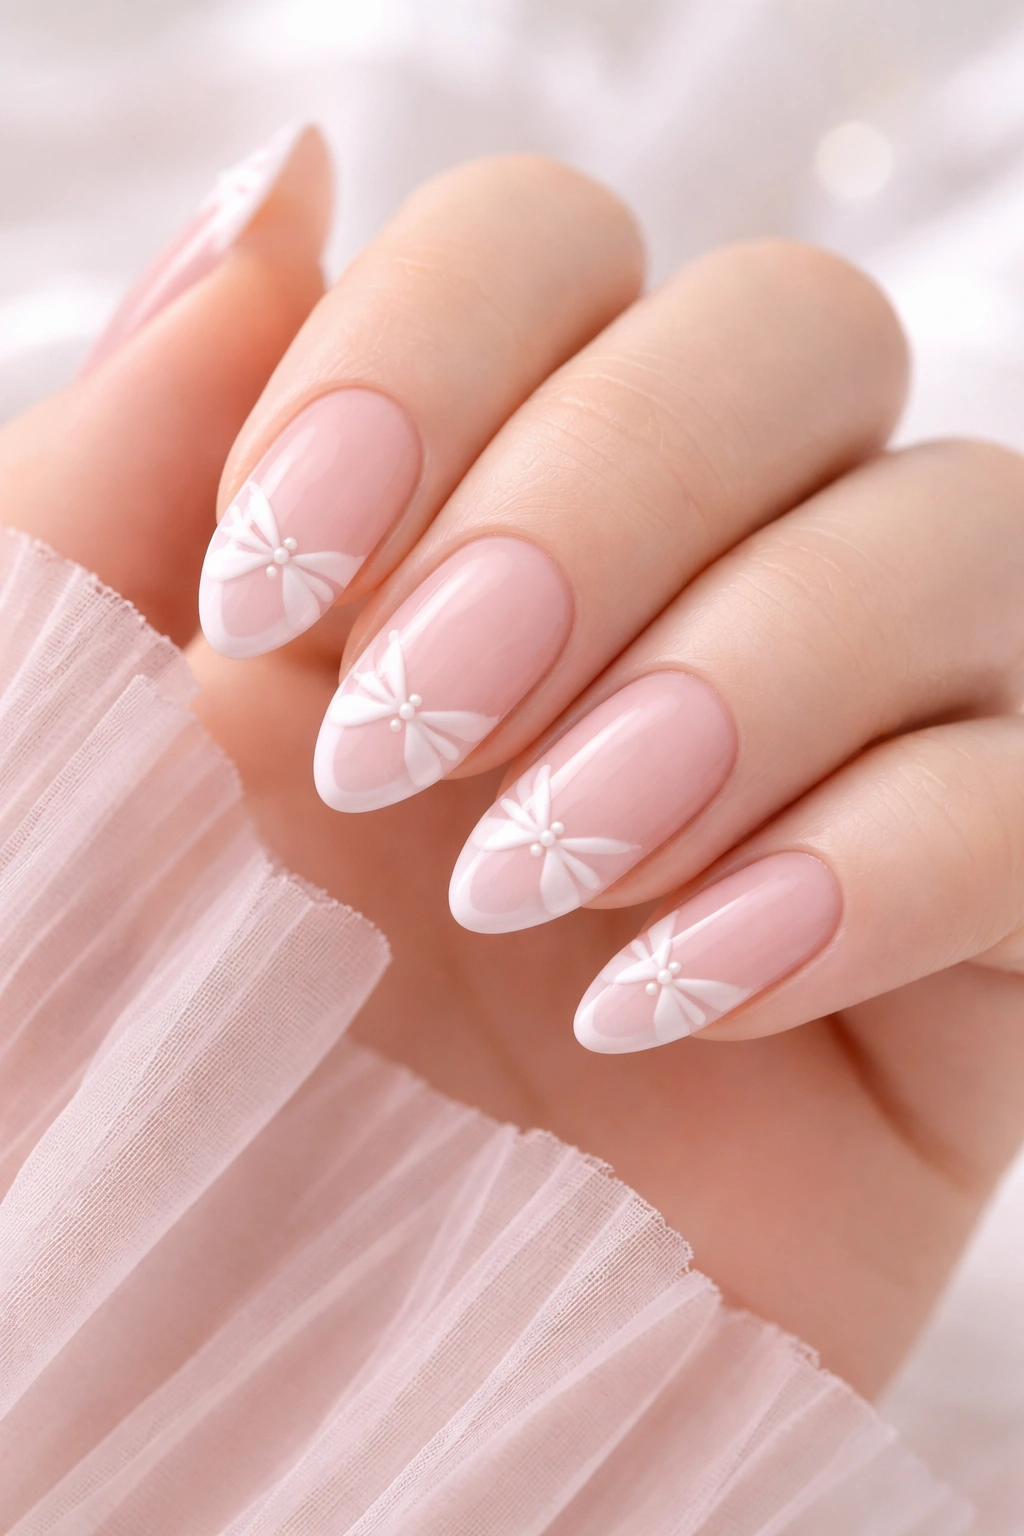
Instead of adding bows as separate elements, what if the French tip itself was bow-shaped? This clever design creates visual interest through shape rather than embellishment, resulting in a look that’s unique but still totally wearable.
Light pink works as the perfect base because it doesn’t compete with the bow-shaped tips. The design relies on silhouette and negative space, so keeping the base subtle lets the shape do the talking.
The Technical Approach
Creating bow-shaped French tips requires careful painting or using nail guides. The tip curves inward on the sides and points slightly in the center, mimicking the outline of a tied ribbon. It’s trickier than standard French tips but not impossibly difficult.
Once you’ve outlined the bow shape, you can fill it in with white, deeper pink, or even keep it as negative space outlined in color. Each variation creates a different effect.
Making It Work
- Use nail guides or tape to create clean, symmetrical bow shapes
- Keep your hand steady—this design shows wobbles more than standard French tips
- Practice on one nail first before committing to the full set
Pro tip: This design looks particularly striking on almond or stiletto shapes where you have more tip space to work with.
12. Pink Jelly Base With Floating Bow Details
Jelly nails have a translucent, squishy appearance that’s both retro and current. When you use pink jelly as your base and add delicate painted or decal bows, you create depth—the bows appear to float within the nail rather than sitting flat on top.
Pink jelly polish has that see-through quality that’s less opaque than regular polish but more present than sheer. It’s somewhere in the middle, creating a glassy, dimensional effect that’s uniquely appealing.
The Floating Effect
The trick with jelly nails is layering. You apply jelly polish, add your bow details, then seal with more jelly polish or clear top coat. This sandwiches the design between layers, creating that suspended, floating appearance.
It’s a technique that looks complex but is actually quite forgiving. The translucent nature of jelly polish hides small imperfections while still showcasing your design.
Getting Creative
- Try placing bows at different depths on different nails
- Add tiny hearts or stars along with bows for extra detail
- Use contrasting colors for bows so they show through the jelly clearly
Just know: Jelly polish typically requires multiple coats for good color payoff, so factor in extra drying time.
Conclusion
Coquette nails with bows and pink aren’t going anywhere. They’ve proven themselves as more than a passing trend—they’re a whole mood, a way of bringing romance and playfulness into your everyday style. Whether you go soft with baby pink and pearls or bold with hot pink and black accents, you’re tapping into something that feels both nostalgic and completely current.
The beauty of this aesthetic is its flexibility. You can dial the sweetness up or down depending on your personal style, your outfit, or just how you’re feeling that day. There’s no wrong way to wear coquette nails, as long as they make you feel like the best version of yourself—ribbon and all.
