

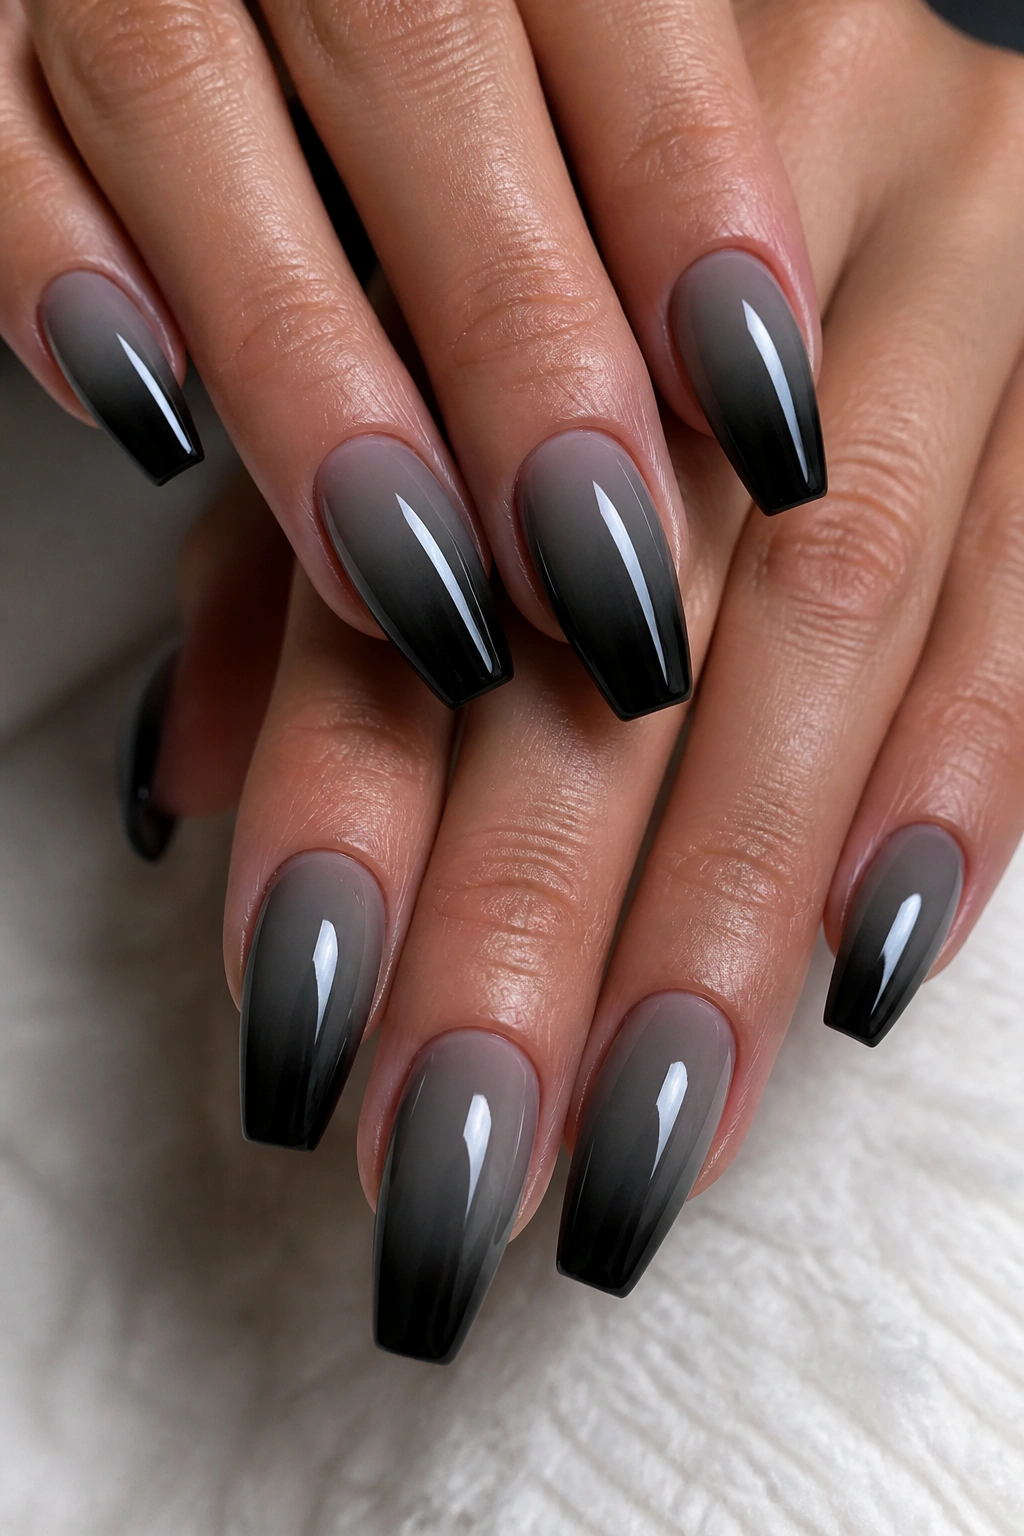
Black ombre coffin nails can look sleek and expensive, or they can look muddy by day three. The gap between those two outcomes usually comes down to shape, fade placement, and finish—not the color alone. Black pigment is unforgiving. If the blend crowds the sidewalls or turns into a hard stripe across the middle, the whole set loses that long, sharp effect people want from a coffin shape.
I keep coming back to the same point because it matters: the best dark fades are not solid black with a little gray dabbed on top. They move with intention, starting from a sheer base, smoky middle, or tinted neutral and deepening toward the tip in a way that makes the nail look longer. When the blend is right, you notice the shape first and the color second.
That’s also why black ombre works so well on coffin nails and not quite as well on every other shape. Almond can make the fade look softer. Square can make it look heavier. Coffin gives you that flat tip and those straight sidewalls, which means the gradient has room to stretch out instead of bunching up.
Some versions read clean and minimal. Others lean hard into chrome, velvet, glitter, marble, or texture. A few are salon-showoff nails, no question. A few are quiet enough to wear to work all week and still enjoy staring at in the car.
Why Black Ombre Coffin Nails Look Better on a Tapered Shape
A coffin nail gives black ombre room to breathe. That flat tip acts like a clean stopping point, so the darkest part of the fade looks crisp instead of random. On a rounded shape, the black can drift and feel soft. On coffin, it ends with a little attitude.
Length matters here, but not in the way people think. You do not need extra-long nails for this style to work. A medium coffin—about 14 to 18 mm beyond the fingertip—already gives enough space for a visible transition from nude, sheer pink, gray, or clear into black. Shorter than that, and the ombre needs tighter control or it turns into a black tip with a dusty band under it.
The sidewalls matter too. Straight sidewalls make the fade look slimmer. If the nail flares out, the black section starts reading wide and blunt, which fights the sharp look you’re after.
Where the fade should start
On a medium set, I like the darkest pigment concentrated on the top third of the nail, with a soft build through the middle. On a longer set, you can push the black down a bit farther—closer to the halfway point—without losing that lifted look. Any lower than that on most hands, and the nails start looking shorter instead of longer.
That little placement tweak changes everything.
Choosing Length and Width Before You Pick a Design
The smartest thing you can do before settling on a black fade design is pick the right coffin proportion for your hand. A lot of inspiration photos look good because the shape is dialed in first. The art comes after.
If your fingers are shorter or your nail beds run wide, ask for a soft coffin rather than an aggressive taper. Keep the sidewalls straight, but do not pinch them in so hard that the nail starts looking narrow at the stress point. That shape throws off balance, and once dark pigment goes on, every filing mistake shows.
Here’s a rough guide that works in practice:
- Short-medium coffin: good for typing, daily chores, and understated ombre looks
- Medium coffin: the sweet spot for most black fade designs
- Long coffin: best when you want chrome, velvet, marble, or clear-acrylic effects
- Extra-long coffin: high drama, higher maintenance, more likely to snag if the apex is weak
Width matters as much as length. A black ombre set on a nail that’s filed too broad can look heavy. Filed too narrow, it can look fragile and a little off. If you bring a photo to the salon, pick one with hands shaped somewhat like yours. That saves a lot of disappointment.
Matte, Gloss, Chrome, and Velvet Finishes Change the Whole Set
Same fade. Different top coat. Entirely different mood.
A matte finish makes black ombre look dry, soft, and editorial. It also shows lint, makeup smudges, and cuticle oil marks faster than gloss. If you like that velvety look, keep a microfiber cloth nearby because matte top coat picks up evidence.
A gloss finish gives the gradient more depth. The black looks inkier, the sheer base looks cleaner, and any glitter or foil under the surface reads richer. Gloss also hides minor surface wear better during the first week.
Chrome sits in a different lane. A thin gunmetal chrome dusting over a black fade can make the nails look colder and sharper, almost metallic under direct light. Velvet magnetic gel does something else entirely—it throws a soft shifting glow across the nail, which makes the ombre feel deeper than it is.
My honest rule on finishes
If the design already has texture, stones, marble, or foil, I usually lean glossy. If the set is plain black-to-nude with no extras, matte often looks stronger. Too many effects stacked on a matte top coat can make the whole manicure feel chalky.
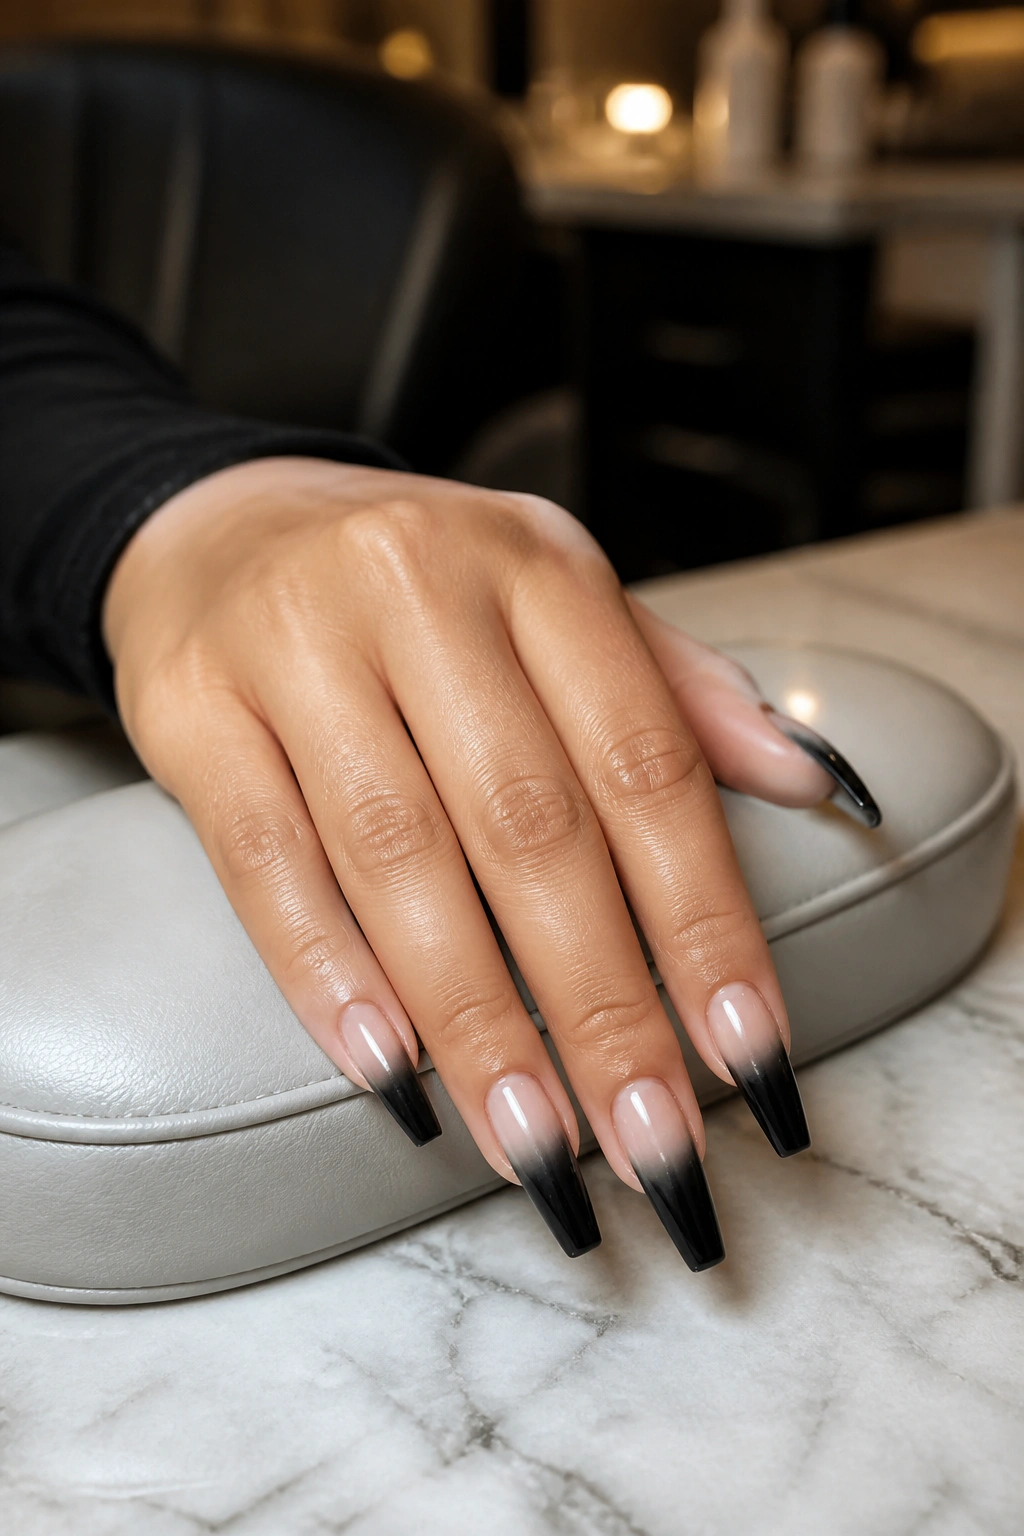
1. Matte Nude-to-Black Fade
If I had to pick one black ombre coffin nail look that misses the least, it would be this one. A sheer nude base fading into matte black at the tip is clean, lean, and sharper than half the loud designs people save to their boards and never actually wear.
Why this one works so well
The nude base keeps the cuticle area light, which helps the manicure grow out more gracefully. Matte black on the tip creates a velvety edge that makes the flat coffin end look even more deliberate. You get contrast without clutter.
On medium coffin nails, this style can look polished for work and still hold its own with rings, leather, denim, or a black blazer. On longer nails, it turns moodier—less office, more after-hours.
Quick details that matter
- Ask for a sheer pink-beige or taupe nude, not an opaque nude. Transparency makes the fade smoother.
- Keep the black on the top third to top forty percent of the nail for the cleanest line of length.
- Use two thin coats of matte top gel rather than one thick coat if your tech wants a smoother, less patchy finish.
- Refresh with cuticle oil twice a day, then wipe the nail surface if you want the matte to stay dry-looking.
Best move: keep accent art off this set. The whole point is restraint.
2. Glossy Smoke Fade on Medium Coffin Nails
This is the black ombre set I suggest when someone wants edge without looking overdone. The base starts as a cool gray haze or translucent smoky neutral, then deepens into black under a high-shine top coat. It looks smoother than nude-to-black and a little colder, which I like.
The gloss matters here more than the color. Under salon lights, the surface catches enough reflection to make the fade look deeper, almost like the pigment sits inside the nail instead of on top of it. In daylight, the gray center keeps the black from feeling too blunt. That makes medium-length coffin nails look longer.
This style is also forgiving on different skin tones because the middle shade does more work than a beige nude would. If beige nudes tend to pull too peach or too yellow on you, smoke gray fixes that problem fast. Ask for a blend with charcoal in the middle rather than a sudden jump from sheer to black.
I would skip heavy gems with this one. A glossy smoke fade wants clean lines, maybe one tiny crystal on each ring finger at most. Any more than that and you lose the sleek part that makes it special.
3. Micro-French Edge Over a Soft Black Ombre
What happens when you layer a micro-French line over a black fade? You get a set that looks thought-out in a way most ombre nails do not.
The trick is subtlety. The ombre should stay soft, with black concentrated toward the tip, then a razor-thin French edge—about 0.5 to 1 mm—drawn in dense black or patent gel right at the free edge. That extra line snaps the coffin shape into focus.
You notice it most from the side. A plain fade can blur at the tip after a few days of wear, especially if the top coat is thick. The micro-French border brings back the shape and makes the nail look freshly filed.
How to ask for it
Tell your nail tech you want a soft black ombre first, crisp micro-French second. That order matters. If the French line goes down before the blend is settled, the artist has to work around it, and the fade can start looking stiff.
This one suits clients who want detail but hate clutter. From a distance it reads clean. Up close, it has bite.
4. Jet Black to Clear Acrylic Fade
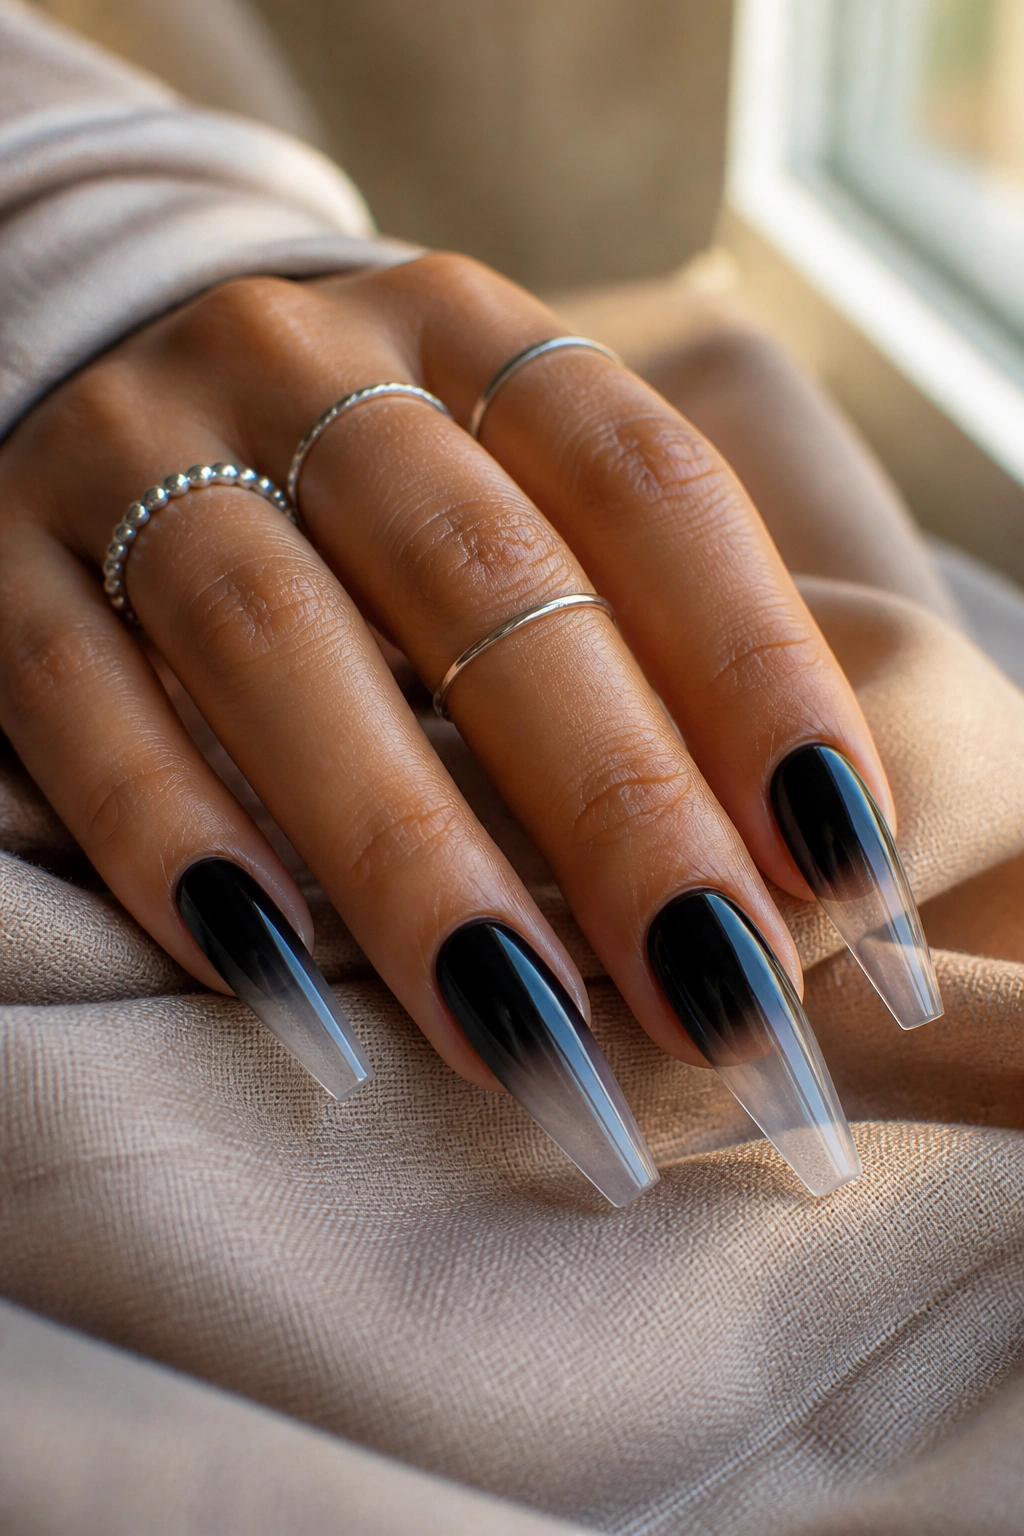
Picture a long coffin set where the tips seem to disappear before the black takes over. That’s the pull of a black-to-clear fade. It looks colder, harder, and more sculptural than nude-based ombre.
This design works best with clear acrylic or clear builder gel extensions, because the transparency needs to look intentional, not patchy. When the black fades into a glassy free edge, the nail gets that floating effect that photographs well but—more to the point—looks sharp in person too.
A few things have to go right:
- The clear section needs to stay bubble-free
- The black pigment should be packed close to the body of the nail, not dusted all the way through
- The underside of the extension has to be cleaned and top-coated if you want that see-through tip to stay crisp
- Long length helps; on short coffin nails, this look loses half its drama
I like this set with silver jewelry and nothing else on top. No glitter. No marble. No decals. Clear acrylic already gives enough contrast. Pile more on it and the whole thing starts fighting itself.
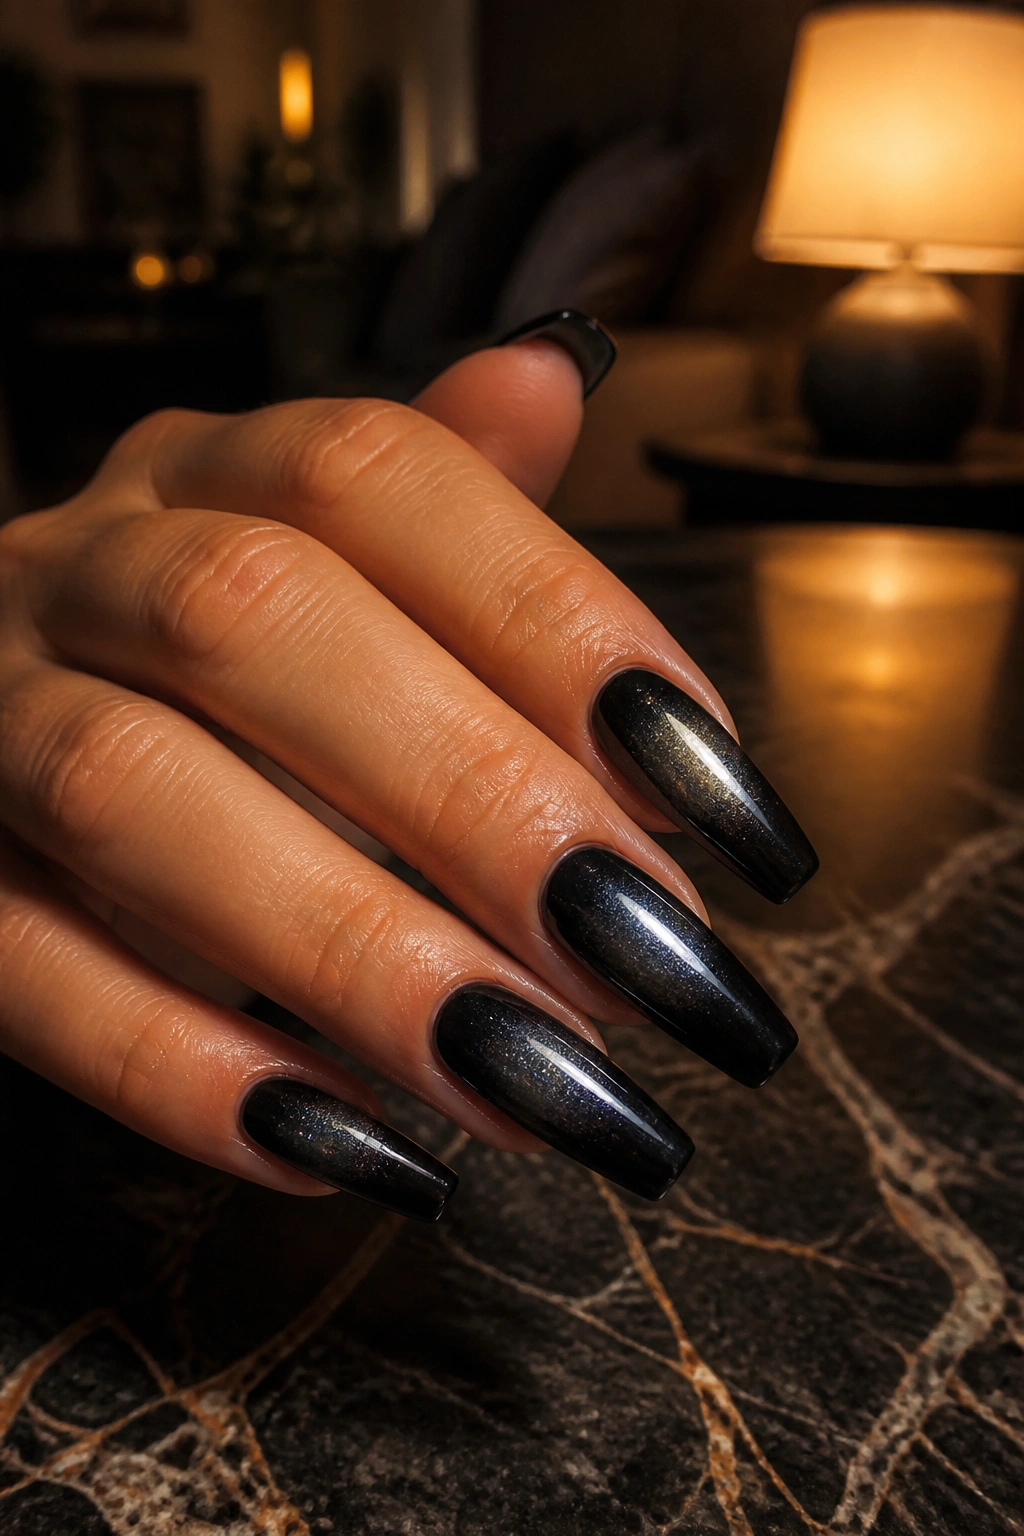
5. Charcoal Glitter Fade
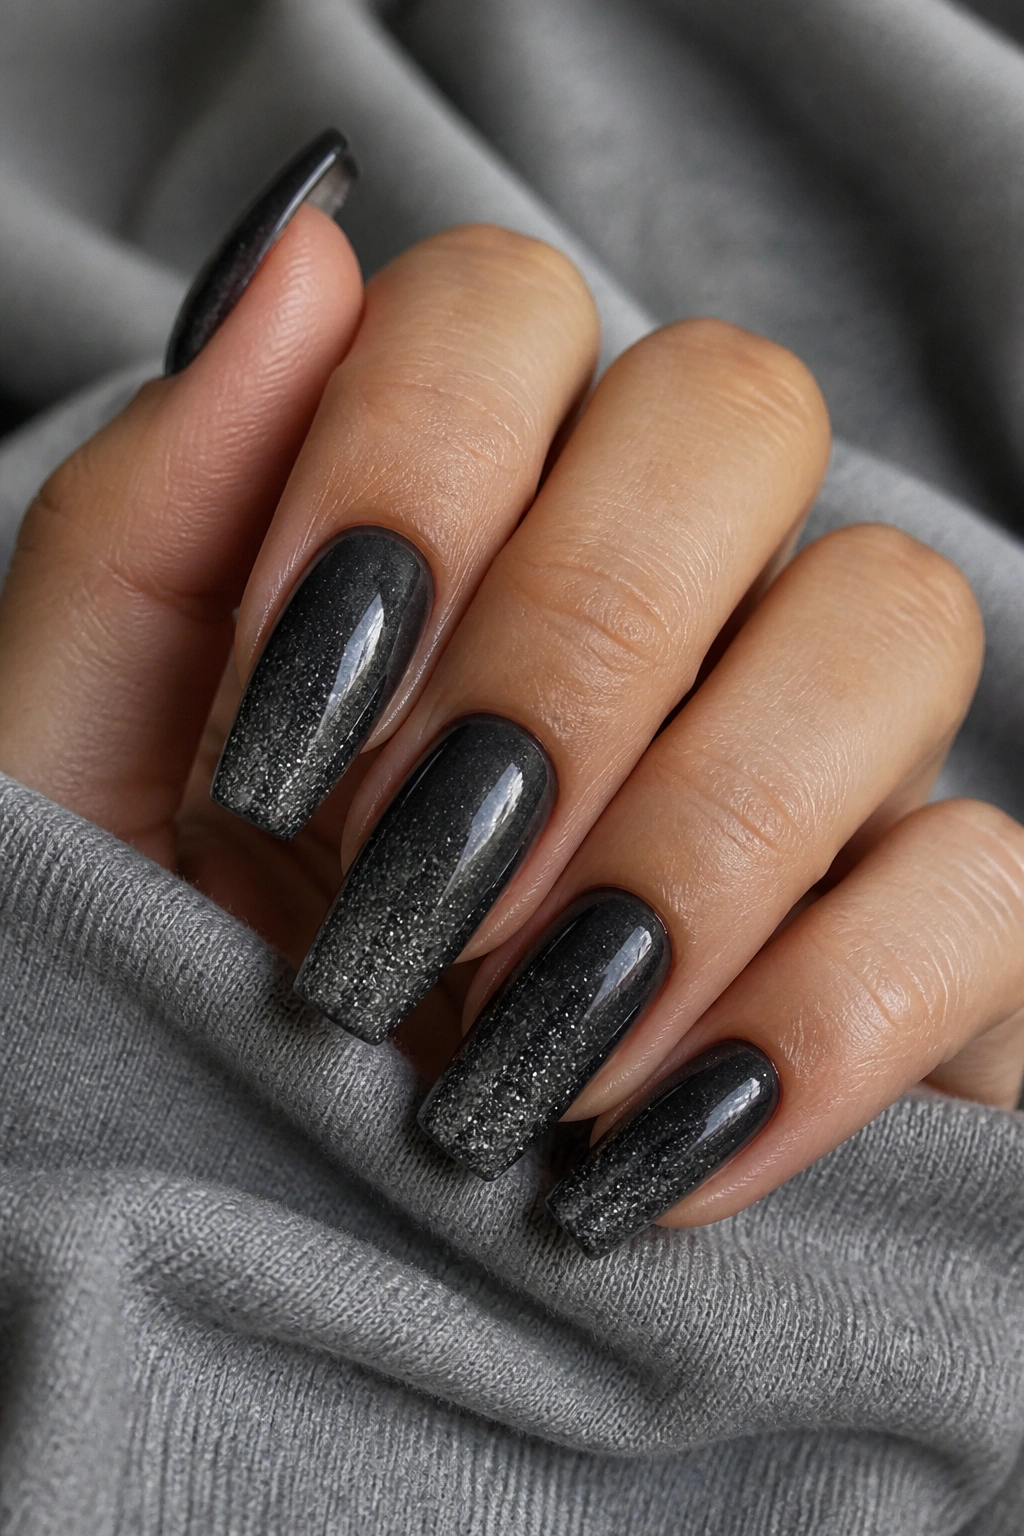
There’s a narrow lane where glitter still looks sharp instead of busy, and charcoal glitter ombre sits right in it. The key is choosing a fine black or gunmetal sparkle rather than chunky silver hex pieces. Fine glitter melts into a fade. Big glitter interrupts it.
A good charcoal glitter set starts with a smoky or nude base, then layers black pigment at the tip, then presses fine glitter through the darkest section and slightly into the middle. You want scattered shine, not a full disco wall. When the glitter density thins out as it moves downward, the ombre stays intact.
I like this design on medium and long coffin nails because the light catches at the tip whenever you move your hands. Matte would kill that effect, so go glossy. A thick glassy top coat smooths the surface and stops the glitter from feeling gritty when you run a finger across it.
One warning, though. Cheap glitter top layers can make the black look gray and dusty after a few days. If the sparkle sits too high in the coating, the tip loses depth. Ask for glitter embedded under a clear layer, not floating on top of the final coat.
Charcoal glitter ombre is strong on weekends, events, dinners, and photos. It can still work day to day if the sparkle stays fine and the rest of the set stays clean.
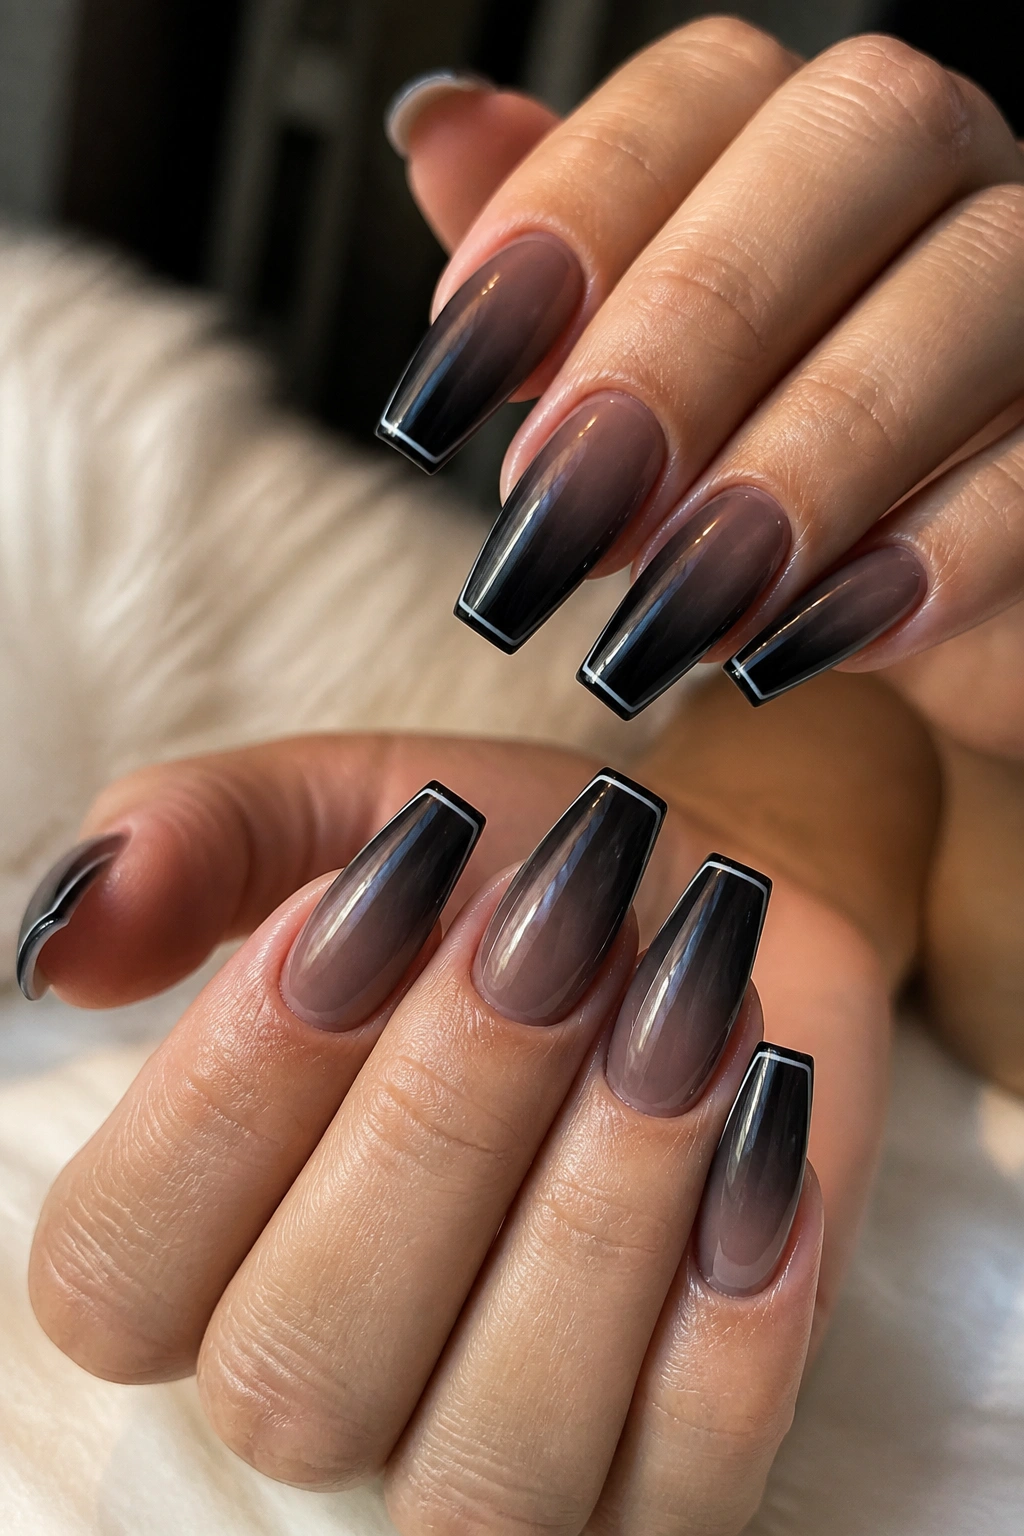
6. Black Cherry to Onyx Gradient

Unlike a plain black fade, a black cherry ombre has warmth hiding inside it. That small shift makes a big difference. Instead of going from nude or gray to black, the nail moves through a deep wine or oxblood tint before reaching onyx at the tip.
That middle tone gives the manicure more dimension, especially on warmer skin or under indoor lighting where straight black can look flat. You still get the dark, sharp coffin shape, but the nails feel richer and less severe. I like this one during colder months with gold rings, dark coats, and makeup that leans berry or brown.
There’s a catch. The cherry has to stay dark. If the red goes too bright, the set stops reading black ombre and starts looking burgundy. Ask for the wine shade to sit under or behind the black, almost like a shadow, not a full second color fighting for attention.
Longer coffin nails show this effect best because you need space for that hidden red to appear. On medium length, keep the transition tight and concentrated near the tip. On extra-long nails, the color can stretch a bit more, which makes the whole fade look moodier.
If straight black feels too harsh on you, this is one of the smartest ways around it.
7. Gunmetal Chrome Veil Over a Black Fade

Chrome can go tacky fast. A thin gunmetal veil over a black ombre, though, lands in a much cleaner place.
Start with a soft black fade on a neutral or smoky base. Cure it, apply a no-wipe top coat, then rub a gunmetal or graphite chrome powder across the top half of the nail only. Leaving the cuticle area lighter keeps the ombre visible underneath. Cover the entire nail in chrome and you lose the fade.
What makes it different
Standard silver chrome reads mirror-bright and loud. Gunmetal looks colder, deeper, and more expensive because it lets some of the black show through. You get reflection, but it still feels dark.
This one shines on medium-long coffin nails with sharp sidewalls. Any wobble in the shape shows under chrome because reflective finishes expose everything: lumps, dips, uneven apex, streaky top coat. If your nail tech is a strong shaper, this design looks crisp. If not, pick matte.
Best use case
Wear this when you want the set to look dressed up without adding stones or patterns. Chrome already does enough. Add one accent nail at most, maybe none.
8. Velvet Magnetic Black Ombre
Soft light skimming across velvet magnetic gel is one of those nail effects that makes people stop mid-sentence and grab your hand. It does not need much explanation once you see it. The cat-eye shimmer sits inside the black, then shifts as you move, which gives a black ombre set depth that flat gel cannot fake.
The cleanest version starts with a charcoal or black fade, then a magnetic gel goes over the top section. The magnet should be held in place for 5 to 10 seconds per nail before curing so the reflective particles pull into one concentrated band. A weak magnet pass leaves the effect muddy. You want a distinct glow line, not random sparkle.
Long coffin nails show this best because there’s more surface for the light line to travel across. On a medium set, ask for the cat-eye focus to sit diagonally rather than straight across. Diagonal placement tends to elongate the nail.
I prefer velvet black ombre with a glossy finish and no extra art. The moving light is the art. Throw rhinestones on top and the design starts competing with itself. Also, keep the magnetic gel layers thin. Thick coats wrinkle under the lamp, and dark wrinkled gel looks bad up close.
9. Crystal Cuticle Arc with Black Ombre
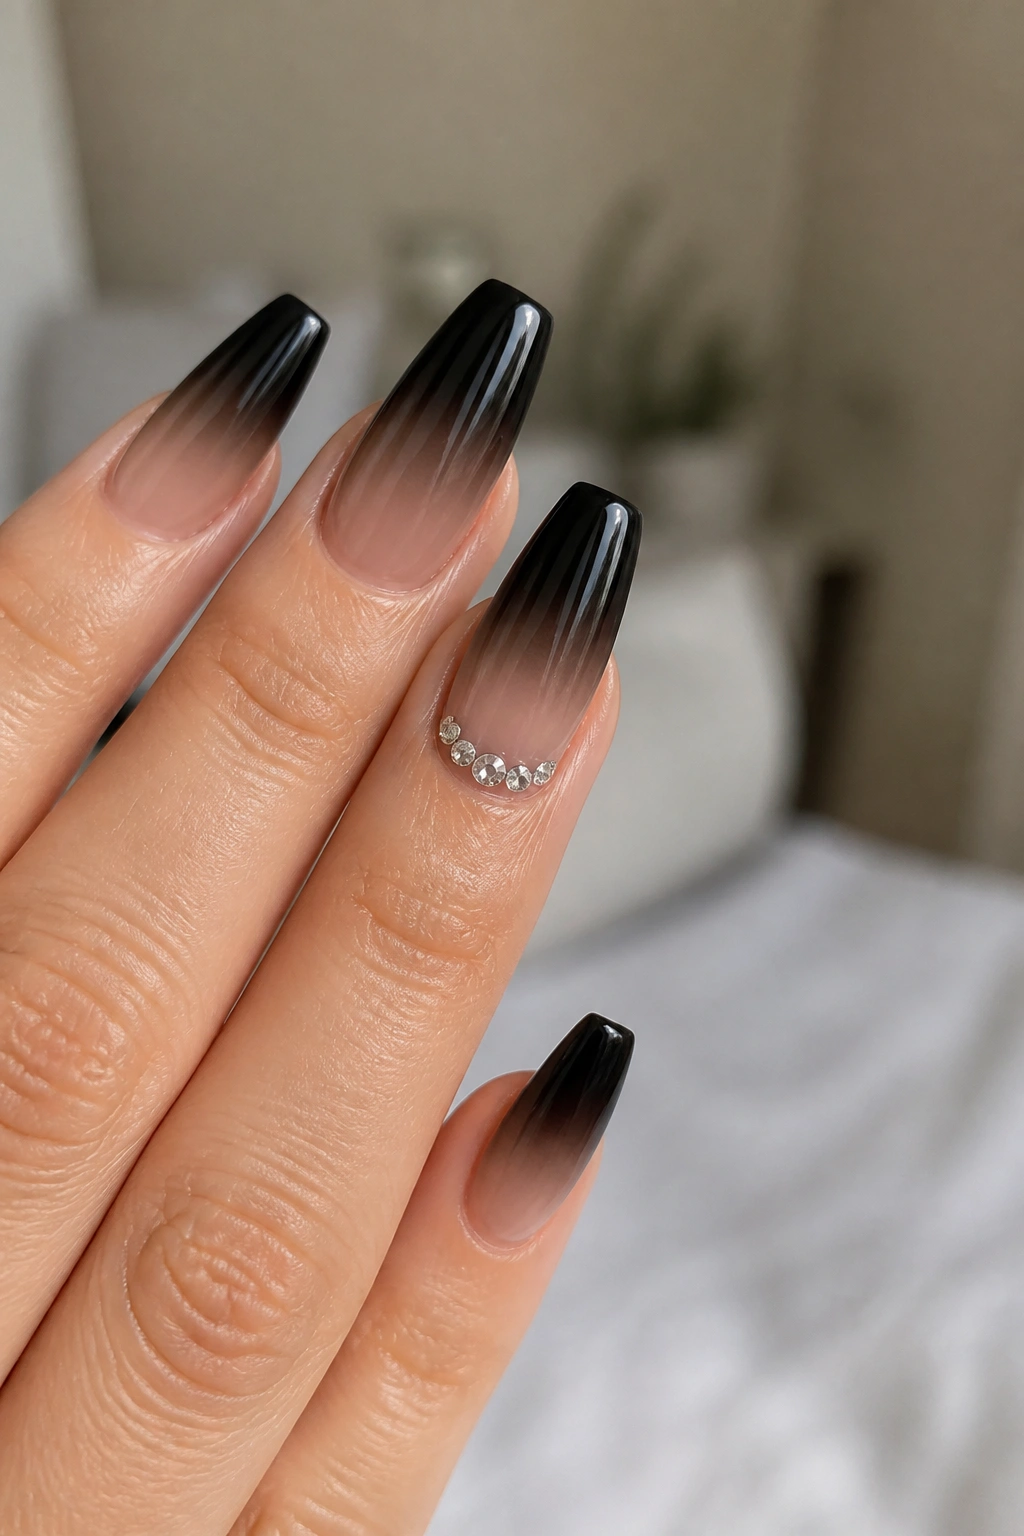
You do not need a full rhinestone nail to make black ombre feel dressed up. A small crystal arc near the cuticle does more and looks cleaner.
The placement is what keeps this sharp. Instead of scattering stones across the nail, set 5 to 8 small crystals in a half-moon line hugging the cuticle edge on one or two nails per hand. That tiny frame catches light while the black fade keeps the set grounded.
Placement details that save the design
- Use ss3 to ss5 stones for medium coffin nails
- Keep them on the ring finger and maybe the thumb
- Leave a sliver of space near the cuticle so the set does not look crowded during grow-out
- Seal around, not over, the stones if you want them to stay bright
What I like about this style is balance. Black ombre can feel tough. Tiny crystals add lift without softening it too much. They also draw the eye toward the lighter base, which helps the fade look longer.
This is a smart choice if you want event nails but do not want a full glitter or chrome set. You still get shine. You still get edge. You can still wear it past one weekend.
10. Matte Croc Accent on a Smoky Fade
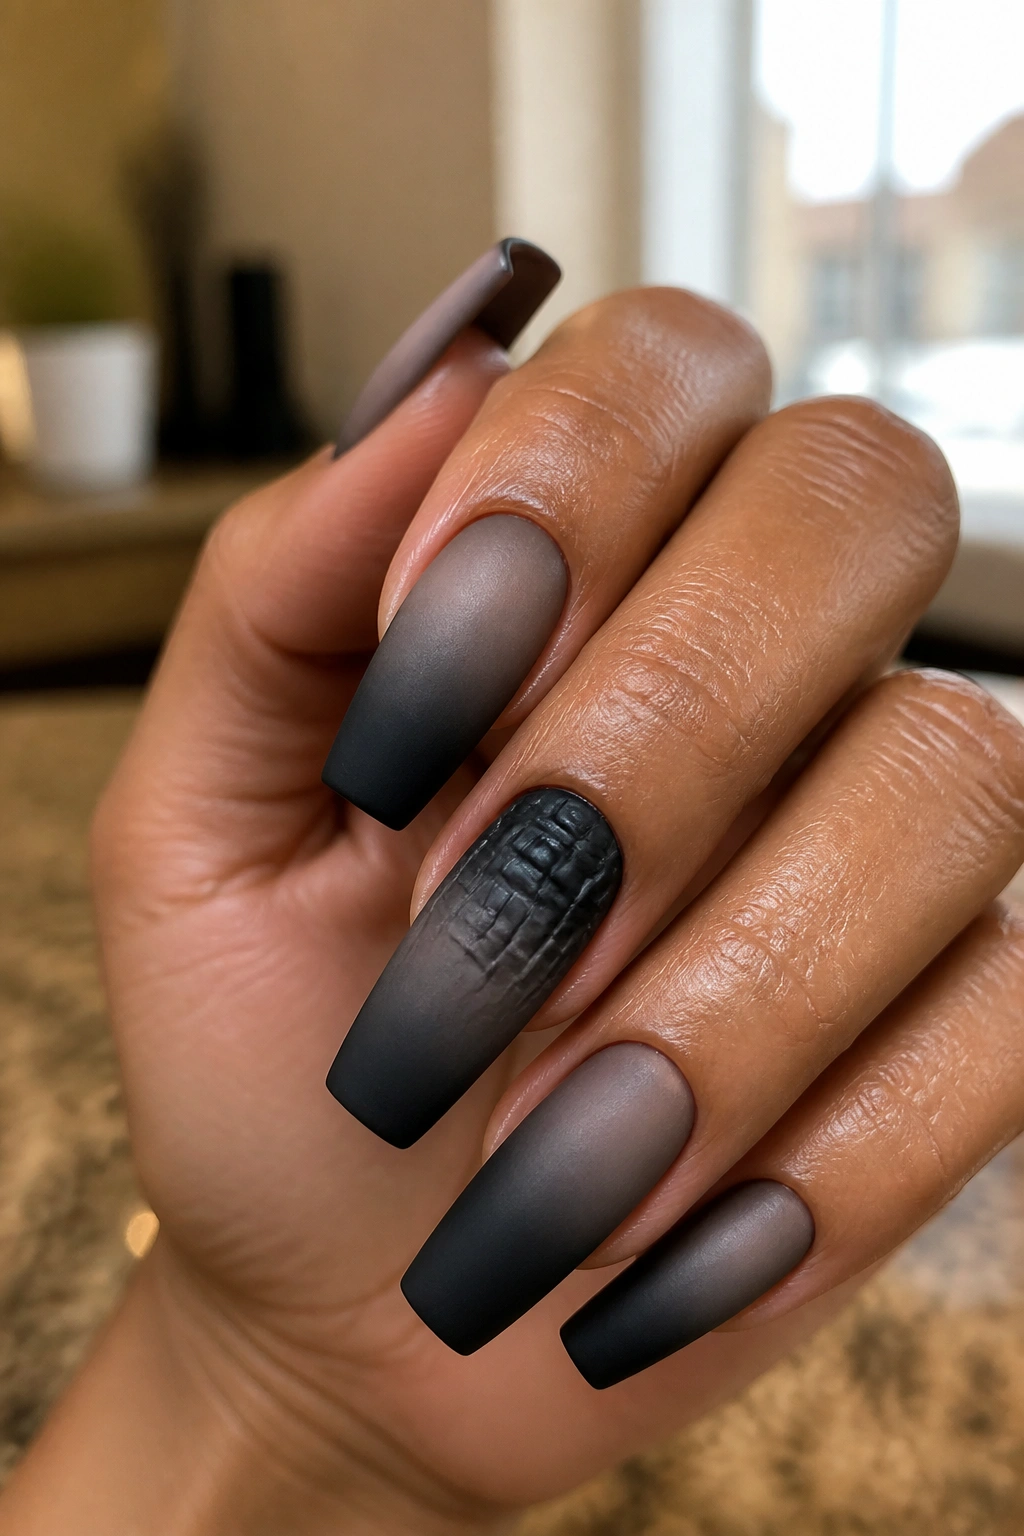
Texture changes the mood fast, and matte croc print is one of the few textured nail designs that still works with black ombre coffin nails. Done on every finger, it’s too much. Done on one or two accent nails against a smoky fade, it looks intentional and sharp.
I like a set where most nails carry a smooth gray-to-black ombre, finished matte, and the ring finger or middle finger gets a raised croc pattern in black gel. The croc should sit on the top half of the nail or just the tip. Full-nail texture can look bulky, especially on medium length.
You need product control for this one. The raised pattern has to be thick enough to hold shape and thin enough to cure hard without leaving soft pockets underneath. If the bumps are too tall, they catch on knitwear and hair. If they’re too flat, the texture disappears once matte top coat goes on.
This set has attitude. No other way to put it. It works with all-black outfits, silver rings, and shorter styling choices around the hands. If you stack it with glitter, crystals, marble, and chrome, it collapses. Texture wants space around it.
11. White Ink Marble Over Black Ombre
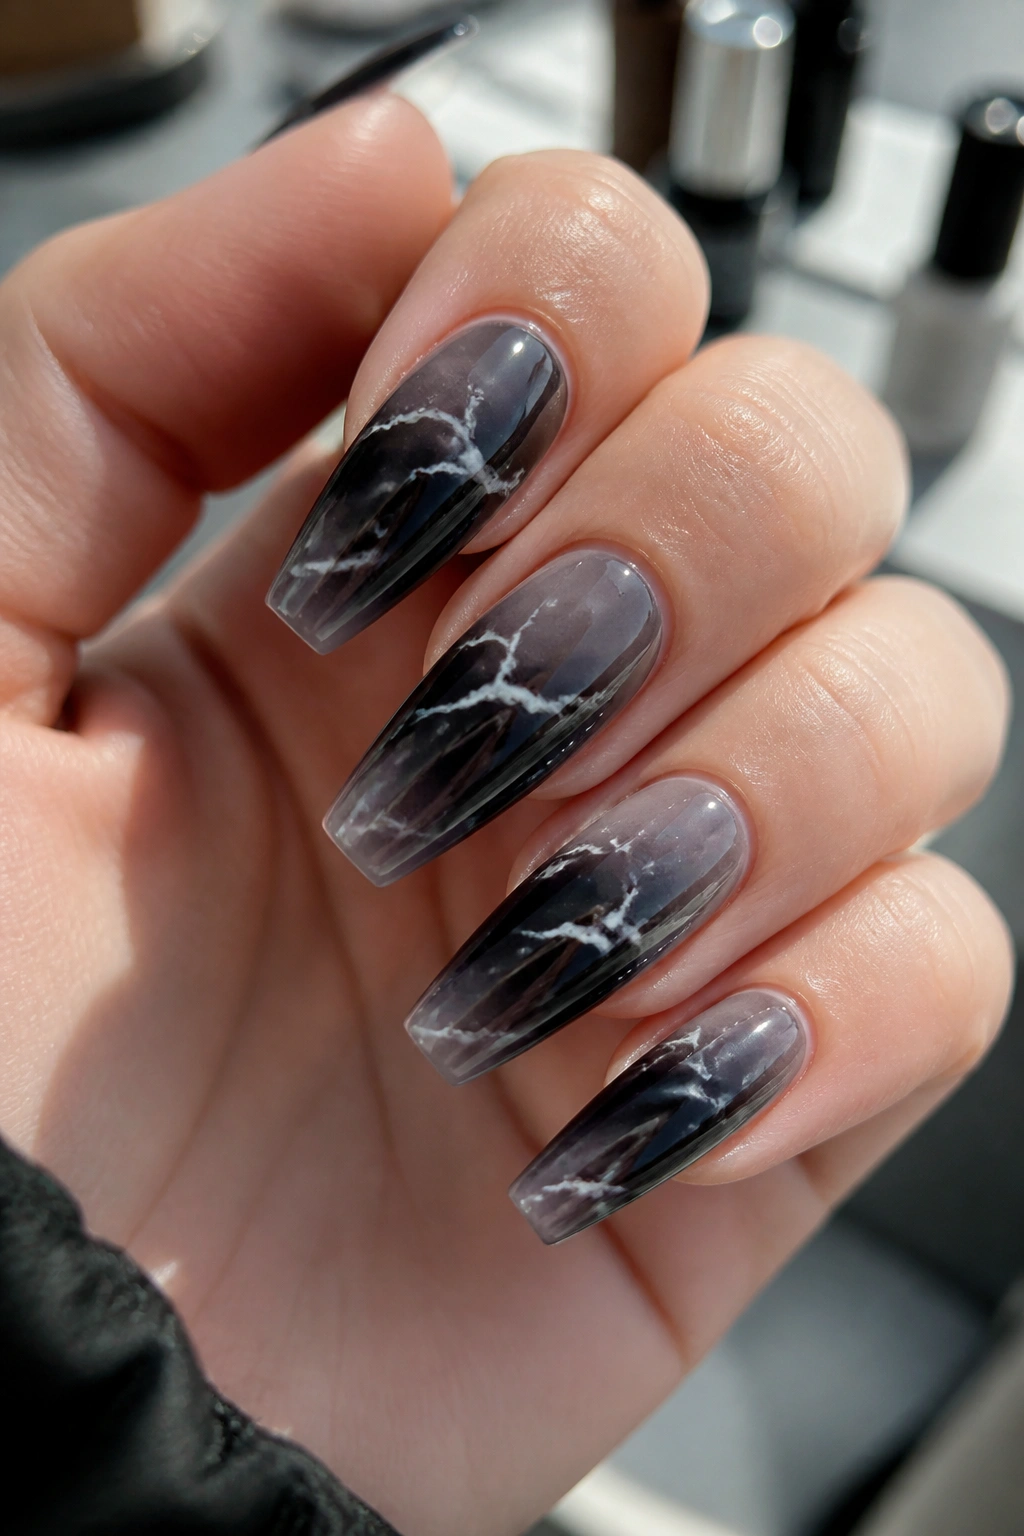
A thin white marble swirl over a black fade can look like smoke trapped under glass. That’s the version I like. The bad version looks like someone dragged white polish through half-cured gel and hoped for the best.
Start with a soft black ombre on a nude, gray, or clear-toned base. Then add fine white ink or gel paint lines, keeping them thin and irregular. A few veins across one side of the nail, with some sections feathered out using alcohol or blooming gel, is enough. Cover the whole nail in thick white lines and the ombre disappears.
Who this suits best
This design is strong on longer coffin nails where the marble has room to travel. It also works well if you like black nails but want a little movement instead of a straight fade or solid chrome.
There’s a practical upside too. White marble distracts from tiny surface scratches that can show on dark glossy sets after several days. It gives the eye somewhere else to go. That does not mean you should treat the set roughly. It just means the design wears with a little more grace.
If you choose marble, keep the rest of the set quiet. Maybe two accent nails, not ten.
12. Silver Foil-Tipped Black Ombre
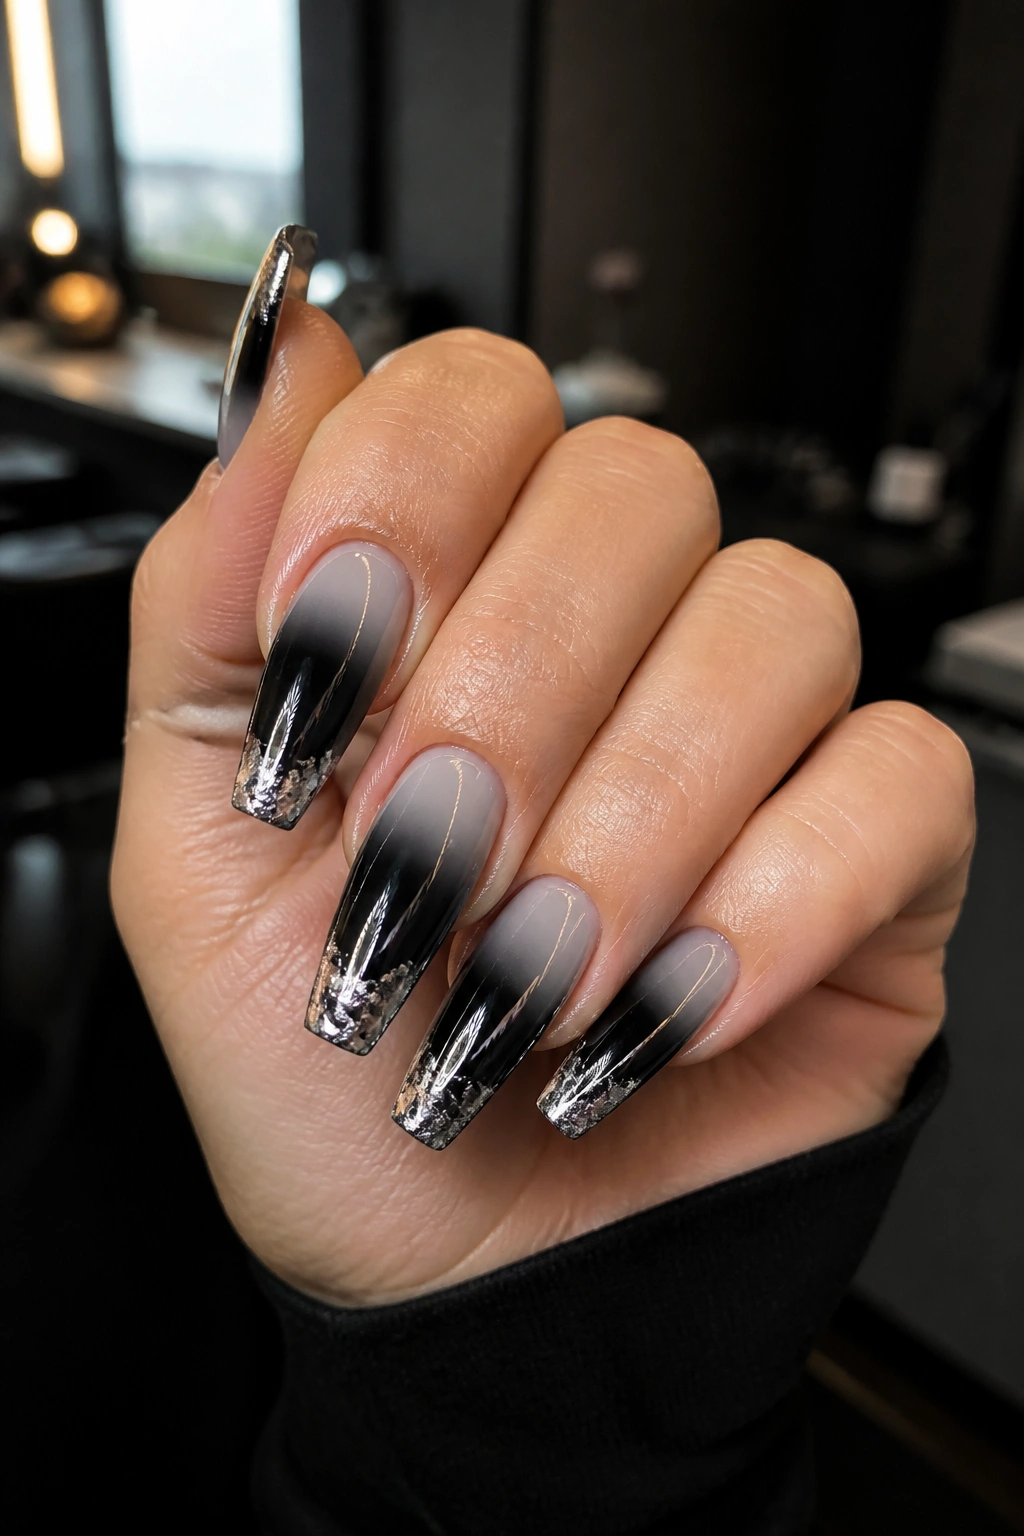
Some nail art tries too hard. Silver foil at the tip of a black ombre set does not need to. A little torn foil pressed into the darkest section of the fade gives the nail a fractured-metal look that sits well on a coffin shape.
The trick is placement. Press the foil into the top quarter of the nail, mostly along the free edge and corners, then let a few pieces break downward into the black. You want uneven shards, not a clean stripe. A stripe reads like a French tip. Broken foil reads sharper.
I like this style glossy because the top coat sinks around the foil and makes the surface look deep. Matte foil can work, though it loses some of that metallic contrast. If you go matte, keep the foil sparse.
This design also handles grow-out better than stone-heavy sets because there’s no raised decoration near the cuticle. The wear shows at the free edge first, which is easier to live with for a few extra days. Ask your tech to fully encapsulate the foil under builder gel or clear acrylic if you want the smoothest finish. Exposed foil edges can lift, and once that starts, you’ll feel it every time your hands brush fabric.
What to Tell Your Nail Tech Before the First Layer Goes On
A good black ombre set starts with a better conversation than “I want these.” Photos help, but they do not answer the questions that shape the end result.
Tell your tech these details up front:
- Length: short-medium, medium, long, or extra-long
- Shape: soft coffin or sharp coffin
- Base tone: sheer nude, smoky gray, cherry tint, or clear
- Finish: matte, gloss, chrome, or velvet
- Accent level: plain set, two accent nails, or full art
Ask where the fade will begin. Ask whether the black will be airbrushed, sponged, brushed in gel, or layered in acrylic. Each method leaves a different texture. Airbrush gives the smoothest gradient. Sponging can work, though it sometimes leaves a grainier middle. Gel blending looks rich when done in thin passes.
One more thing. If you want long coffin nails, ask about structure, not only shape. The apex needs to sit in the right spot or the set will look good for a day and start feeling flimsy after that.
How to Keep Black Ombre Coffin Nails Looking Crisp Between Fills

Dark nails show wear faster. That’s not bad news; it’s just the trade-off. Black pigment makes chips, scratches, lint, and tip wear easier to spot than milky pinks or pale nudes.
Cuticle oil helps more than people think. Use a drop morning and night, then rub it into the sidewalls and the skin under the free edge. Hydrated skin makes the whole manicure look fresher, and it also reduces that dry, chalky halo matte sets can get around the cuticle line.
A few habits keep the set cleaner for longer:
- Wear gloves for dishwashing and strong cleaners
- Do not use the tips as tools for cans, labels, or boxes
- Wipe matte nails with a soft damp cloth if makeup or dust settles on them
- Re-top gloss sets if the shine starts looking scratched after 10 to 14 days
Peeling off lifted product is the fastest way to wreck both the design and your natural nail underneath. Book the fill. Or remove them the right way. Black ombre looks best when the surface stays smooth and the shape stays strict.
Final Thoughts
The sharpest black ombre coffin nails all share the same bones: a clean taper, a fade that starts in the right place, and a finish that matches the design instead of fighting it. Everything else—glitter, marble, chrome, velvet, crystals—is decoration on top of that structure.
If you like your nails dark but do not want them to feel flat, black ombre gives you more room to play than a full solid set. You can go soft with matte nude-to-black, colder with smoke gray, richer with black cherry, or harder with clear acrylic and chrome.
My own bias? I still think the plain matte nude fade and the glossy smoke fade are the strongest everyday options. They hold onto that sharp coffin look without asking for too much upkeep, and they don’t rely on extra art to make an impression.
Pick the shape first. Then the fade. Then the finish. That order usually gets you the set you wanted in the first place.
