

Long oval nails have become the go-to shape for anyone seeking an elegant, versatile canvas that flatters virtually every hand shape and skin tone. Unlike almond nails, which taper to a sharper point, long ovals offer that elongating effect while maintaining softer, more forgiving edges—which means less breakage and more daily wearability. The beauty of this shape lies in its adaptability: it works equally well with minimalist designs, dramatic nail art, bold colors, and intricate patterns.
If you’ve been scrolling through nail inspiration and keep returning to oval designs, you’re not alone. This shape has dominated the nail world for good reason. It’s flattering, practical, and provides enough surface area to showcase detailed artwork without the brittleness that comes with ultra-pointy shapes. Whether you prefer understated elegance, eye-catching patterns, or everything in between, there’s an oval nail design that’ll make you want to book that appointment immediately.
The designs below span a full range of styles, color palettes, and techniques. Some are perfect for special occasions, while others work beautifully for everyday wear. Take screenshots, save your favorites, and show them directly to your nail technician—visual references eliminate guesswork and help you get exactly what you’re envisioning.
1. Classic French Manicure With Modern Twist
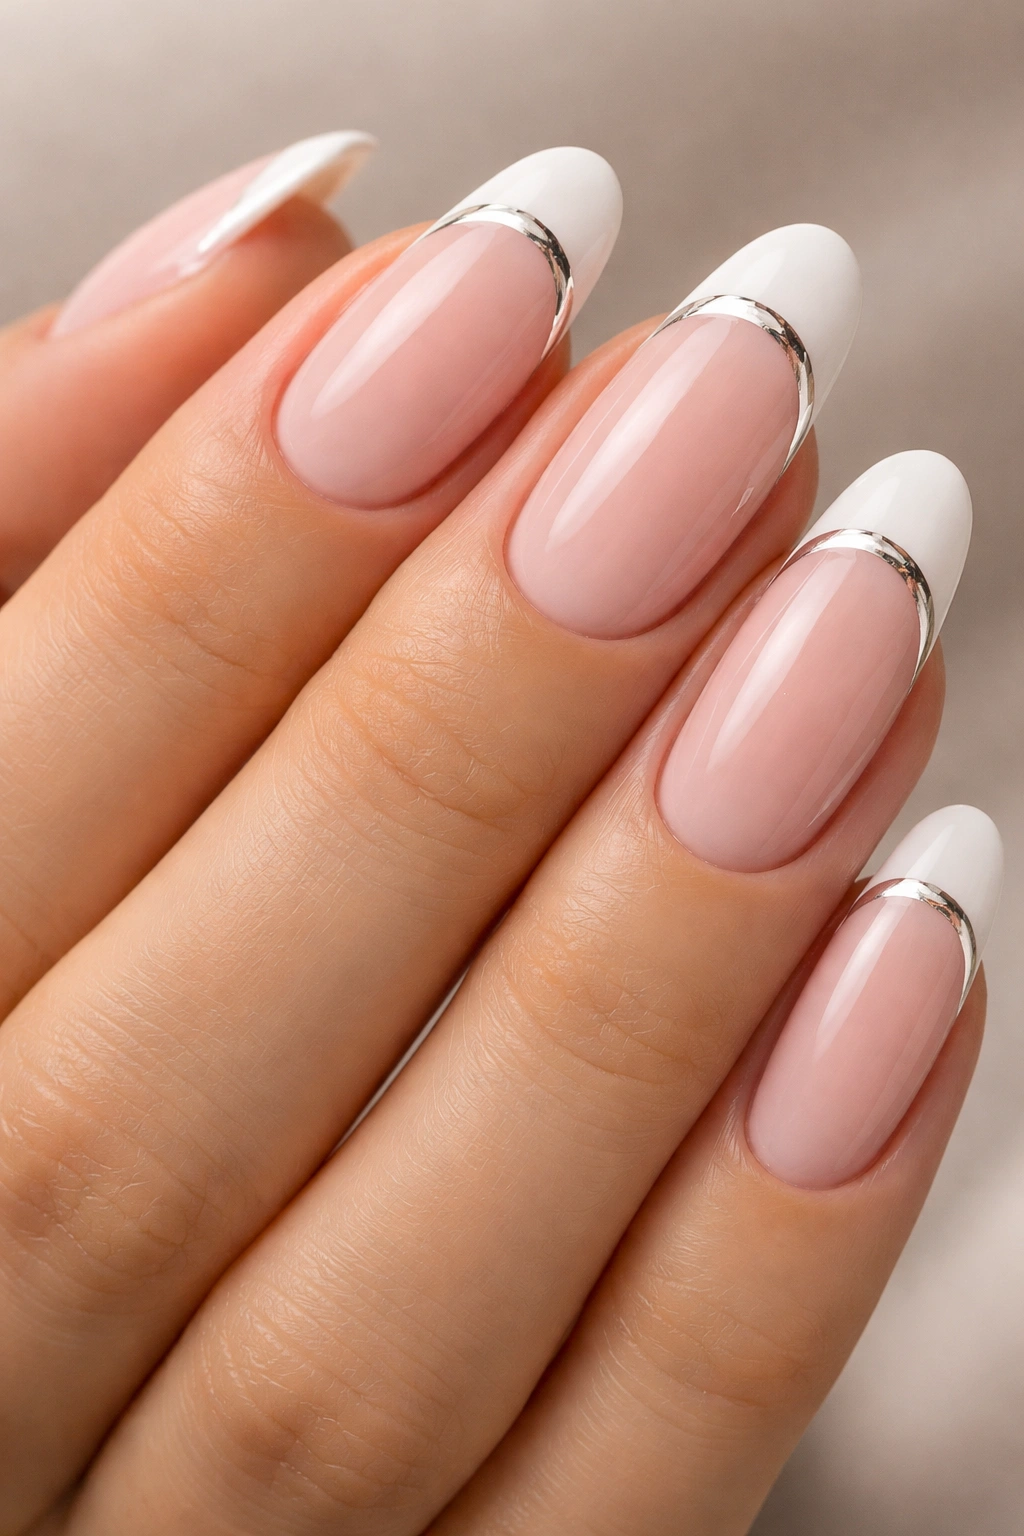
A timeless French manicure proves that sometimes the simplest designs hit hardest. This version uses a nude or soft pink base with a crisp white tip, but the modern twist comes from making that white line slightly thicker than traditional, or adding a thin gold or silver stripe just above it for subtle shimmer.
Why This Design Works
French manicures photograph beautifully and pair with literally any outfit or occasion—business meetings, weddings, casual Friday nights out. The clean lines actually make your nails look longer and more refined. Because it’s so minimal, the focus stays on the elegant oval shape itself rather than competing with busy patterns.
Design Elements to Request
- Soft pink base coat that matches your skin tone for maximum elongating effect
- Bright white tip line (slightly thicker than traditional for modern appeal)
- Optional gold or silver accent stripe between base and tip
- High-shine topcoat for that salon-fresh finish
- Ultra-smooth, even finish with zero texture
Pro tip: Ask your technician to slightly round the white tip edge rather than creating a perfectly straight line—it looks more contemporary and less 1980s.
2. Ombré Gradient From Nude to Deep Burgundy
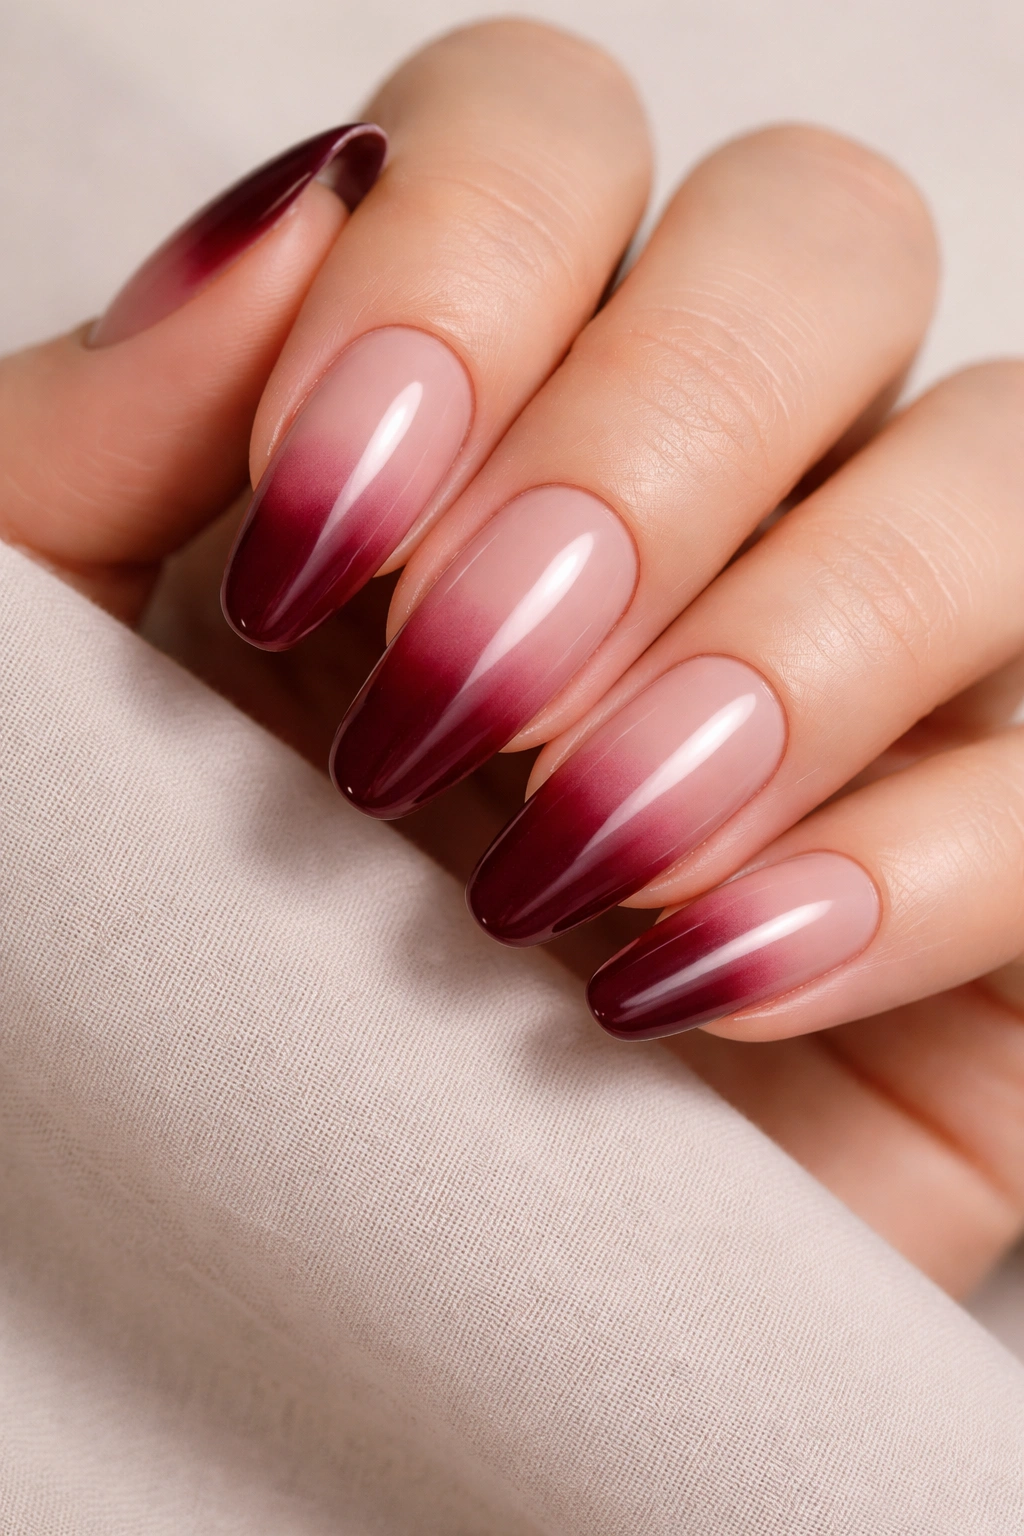
This gradient design transitions smoothly from a barely-there nude at the base to a rich, sophisticated burgundy at the tips. The color shift happens gradually across the nail surface, creating an almost 3D effect that draws the eye down the length of your nail.
What Makes This Design Stand Out
Ombré gradients create the illusion of longer, more refined nails because your eye follows the color transition down the nail bed. The combination of neutral and deep tones reads as both elegant and slightly edgy—sophisticated enough for professional settings but interesting enough to be a conversation starter.
How to Achieve This Look
- Multiple gel polish colors blended together on a sponge
- Soft nude as the base shade
- Burgundy, wine, or deep plum as the darkest shade
- 2-3 intermediate shades for seamless blending
- Matte or glossy topcoat depending on your preference
- Brush the blended ombré onto the nail in smooth, overlapping motions
Worth knowing: This style can hide minor imperfections better than solid colors because the gradient movement tricks the eye.
3. Minimalist Black Line Art

Delicate black line drawings—think abstract faces, geometric shapes, or flowing lines—sit on a clean white or nude background. The designs are intentionally simple: thin black lines creating unexpected visual interest without overwhelming the nail.
The Beauty of This Design
Line art on oval nails strikes the perfect balance between “I put effort into this” and “I’m effortlessly cool.” The simplicity actually demands precision from your technician, which means you’re looking at quality work. These designs age incredibly well—they won’t feel dated in six months.
Design Elements to Request
- Ultra-clean white or nude base that’s perfectly opaque
- Hair-thin black lines (usually achieved with a fine liner brush or thin gel pen)
- Simple, repeating patterns or unique artwork
- Asymmetrical designs for more visual interest
- Glossy topcoat to make the lines pop
- One or two designs across all nails, not every nail different
4. Chrome or Mirror Powder Finish

Chrome powder creates an otherworldly metallic finish that shifts and shimmers as you move your nails. On long ovals, this creates a sleek, almost liquid-metal appearance that’s impossible to ignore. The finish catches light differently at every angle.
Why This Technique Transforms Ovals
Chrome powder emphasizes the elongated shape because the reflective surface makes each nail appear larger and more prominent. It’s bold without being loud—your nails become a statement piece without requiring bright colors or patterns.
How This Finish Works
- Base gel polish (usually a very light nude, white, or dark color for contrast)
- Chrome powder applied with a special applicator or sponge
- Typically needs multiple layers for full opacity
- High-shine topcoat to seal and protect the chrome
- Lasts 2-3 weeks with proper care
- Requires careful removal to avoid damaging the nail bed
Insider note: The color underneath the chrome matters—a nude base gives you a rose gold or champagne chrome, while white gives you pure silver, and black creates a gunmetal effect.
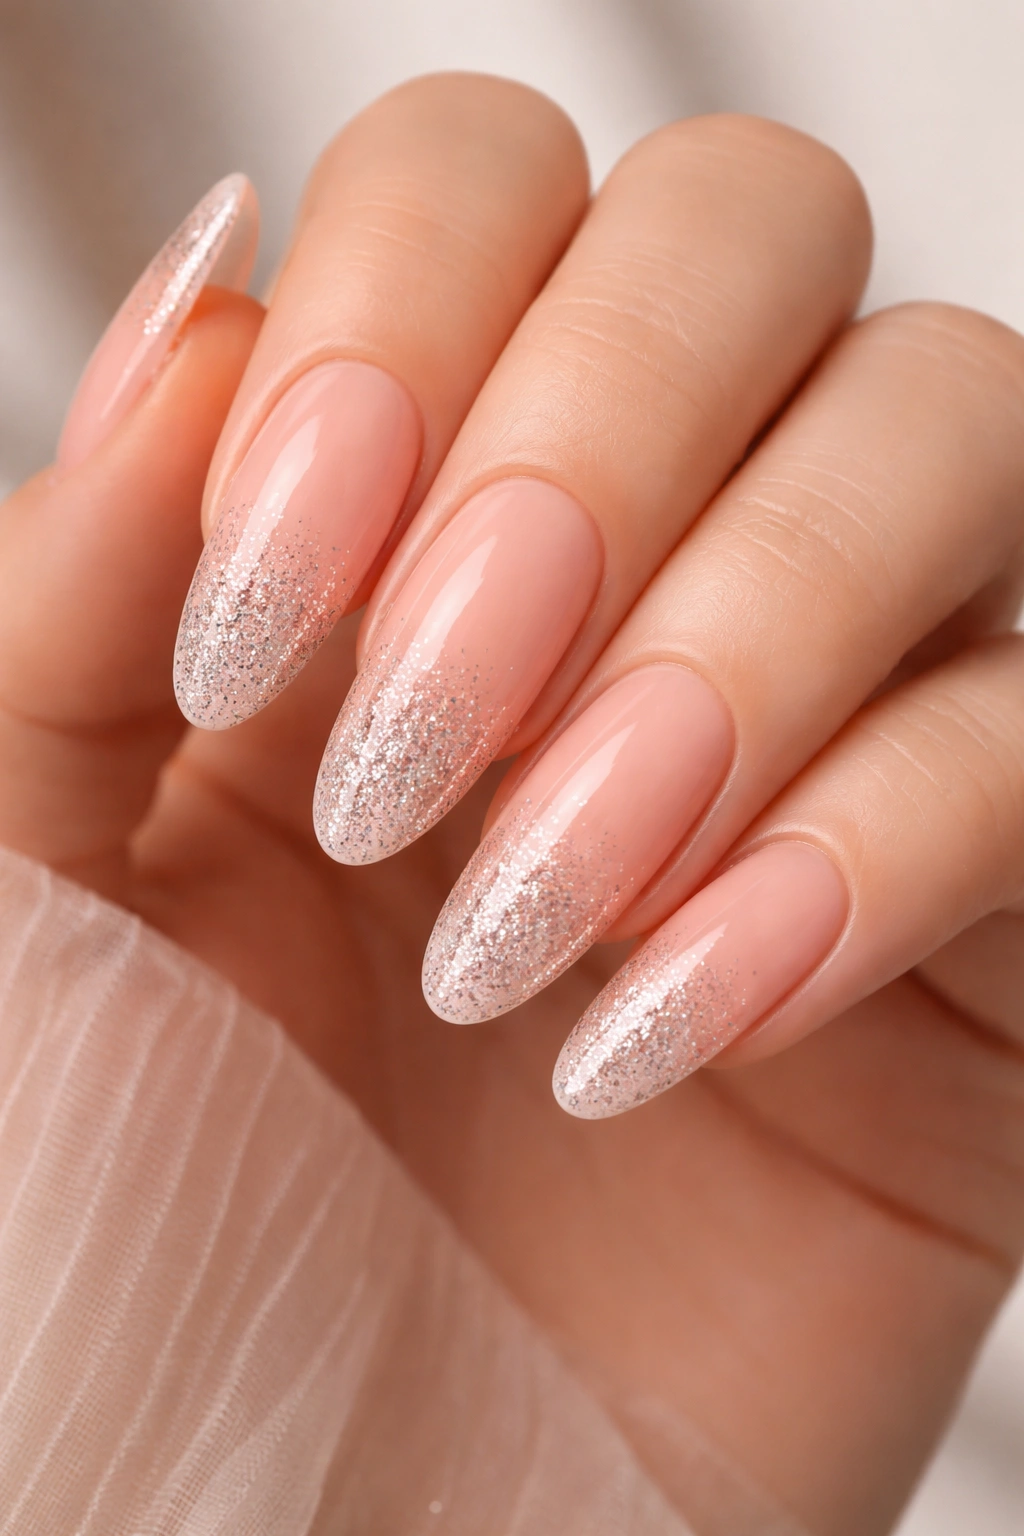
5. Soft Pink Base With Sparkle Tips
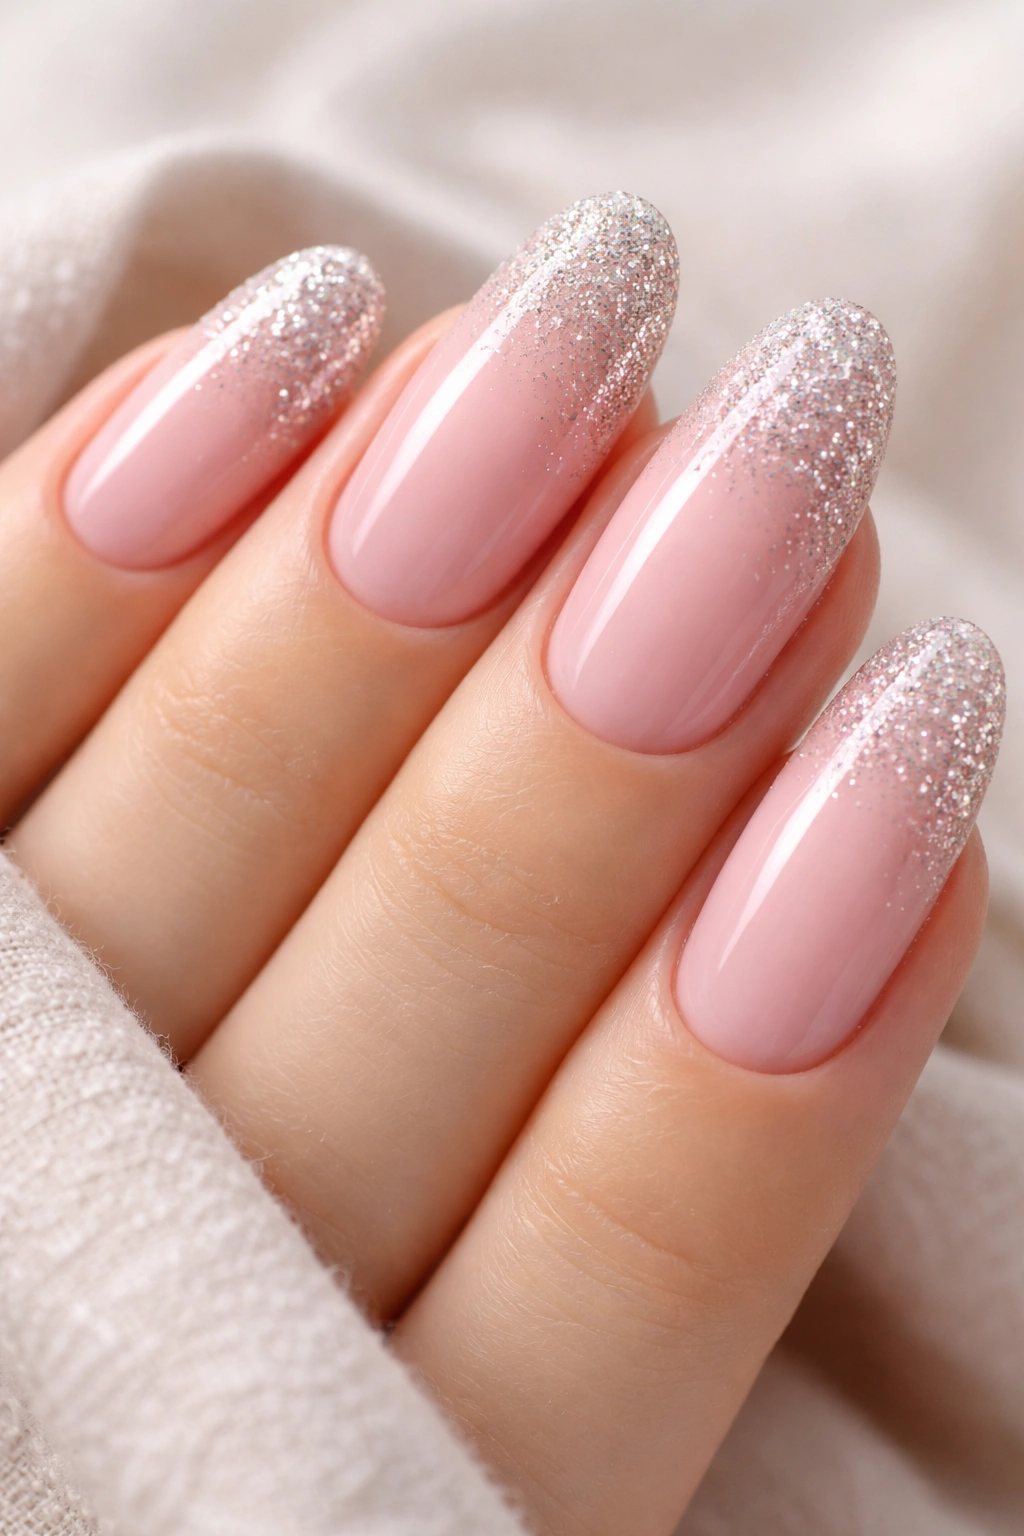
Imagine a romantic, feminine design: soft blush pink covers the entire nail, and just the tips are coated with fine glitter or sparkly gel polish. The contrast between matte softness and shimmering tips creates dimension and visual interest without requiring skill with nail art.
What Makes This Design Perfect
This is the design you choose when you want to feel polished without commitment to high-maintenance nail art. The soft pink is universally flattering, and the glitter tips catch light beautifully without being loud or unprofessional. It works for everything from date nights to office settings.
Design Elements to Request
- Opaque soft pink gel base
- Clear gel mixed with fine glitter, or pre-made glitter gel
- Apply sparkle only to the tip area (roughly the top third of the nail)
- High-shine topcoat
- Even, smooth application with no bald spots in the glitter
- Consider adding a thin gold stripe between the pink and sparkle for extra polish
6. Negative Space Geometric Patterns
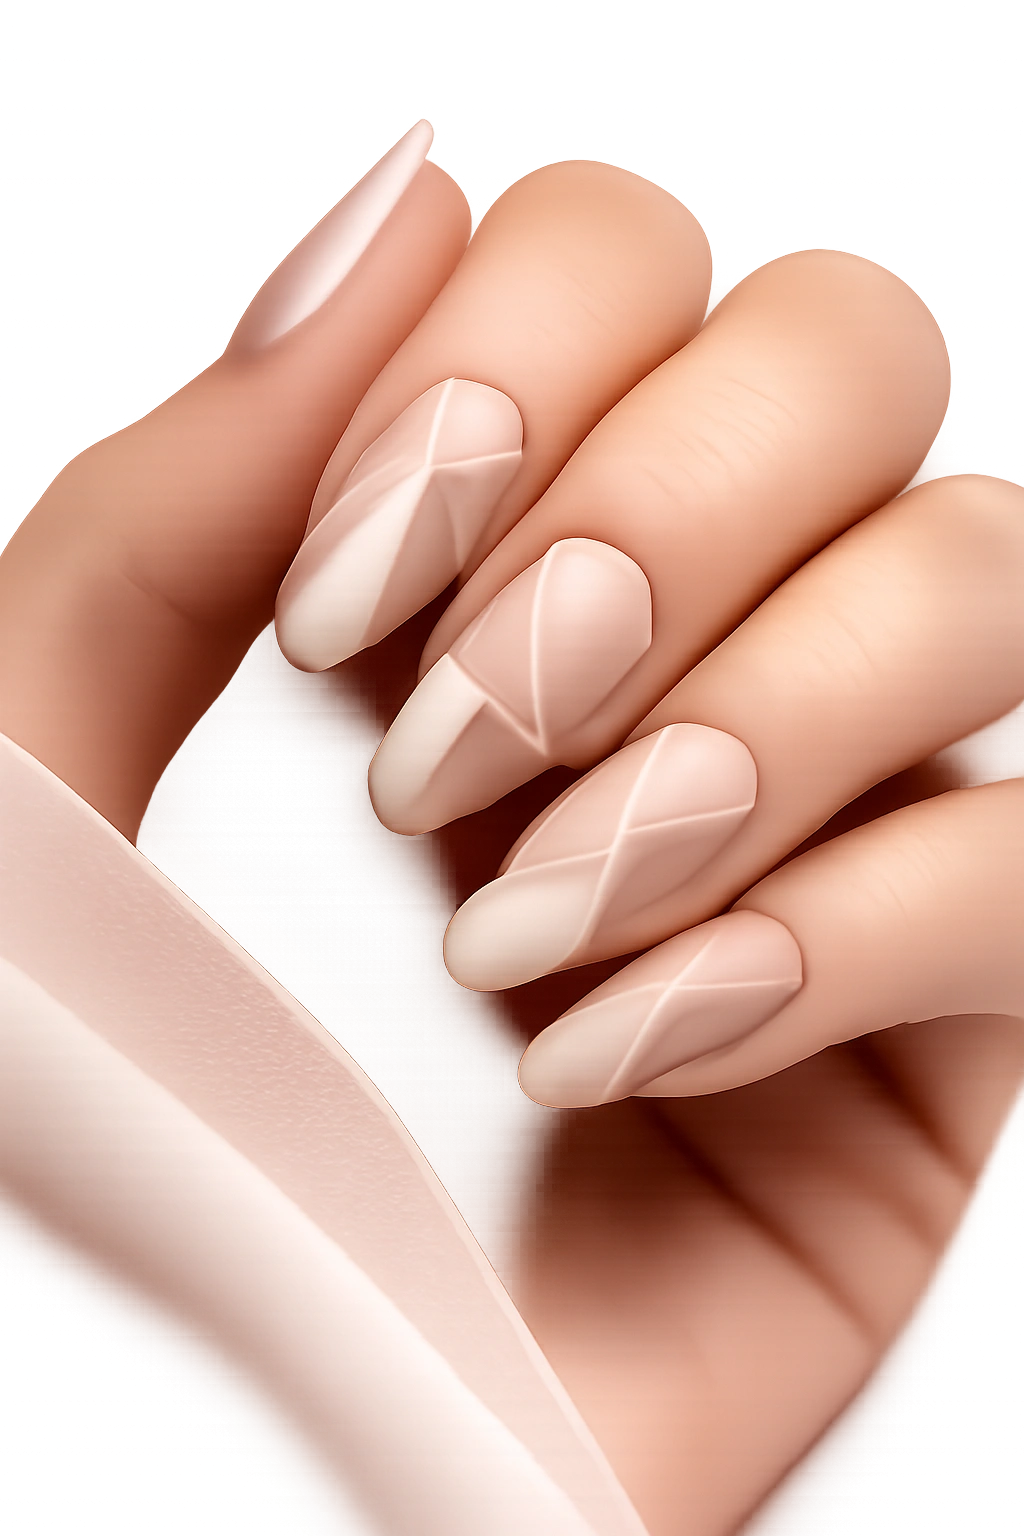
Negative space designs use the natural nail color (or a base coat) as part of the actual design. Geometric shapes—triangles, lines, circles—are carefully painted so that bare or base-colored nail shows through, creating an optical illusion effect.
The Sophistication Factor
Negative space designs look expensive and intentional. They read as more artistic than simple color application, and they work beautifully on oval nails because the negative space patterns emphasize the length and elegance of the shape.
How to Execute This Design
- Neutral or nude base color (or leave nails bare for true negative space)
- Paint geometric shapes with one or two accent colors
- Keep shapes clean and precise with a thin brush
- Popular patterns: thin vertical lines, triangular sections, circular cutouts
- Can combine multiple colors with the negative space technique
- Matte finish often looks more modern than glossy for geometric designs
7. Dusty Rose With Gold Foil Accents
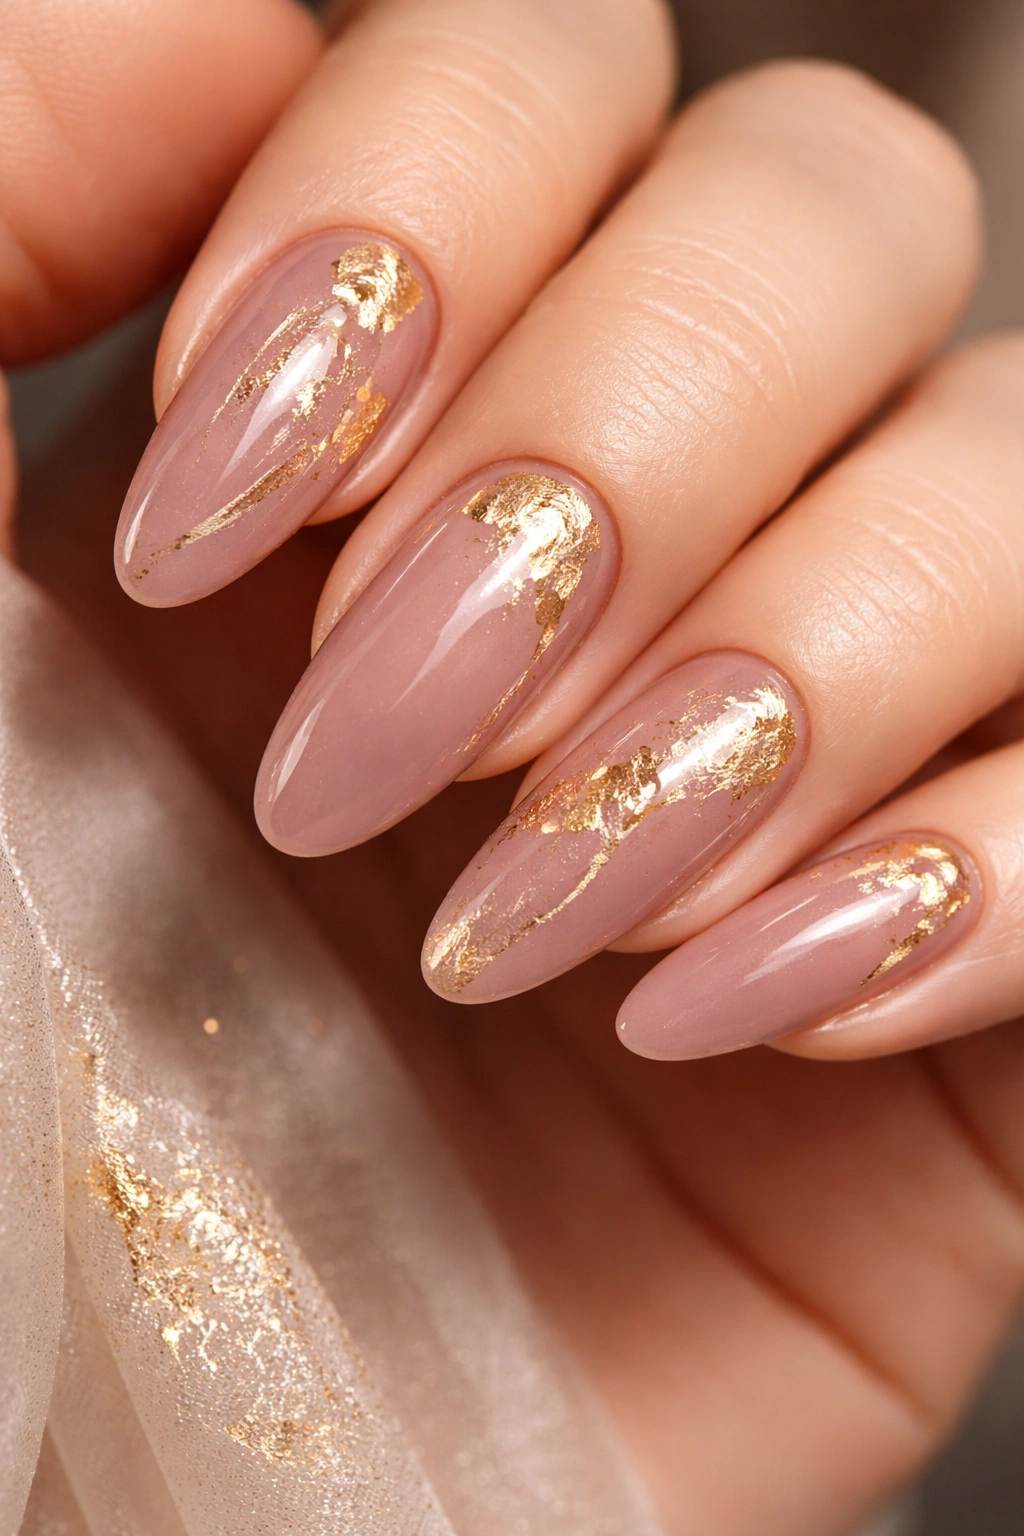
A muted, slightly grayed-out rose pink forms the base, while real gold foil is embedded into the gel polish to create scattered or linear accents across each nail. The foil catches light while the dusty rose keeps the overall aesthetic soft and romantic.
Why Gold Foil Elevates This Design
Gold foil creates depth and texture that solid polish can’t achieve. On long ovals, the foil flecks guide the eye along the length of the nail, making the elongated shape even more apparent. This design reads as luxurious without requiring artistic skill.
Design Elements to Request
- Dusty rose or mauve pink base gel
- Real gold foil (not gold glitter—foil has larger, flatter pieces)
- Random placement for organic feel, or structured lines for modern look
- High-shine topcoat to protect the foil and make it luminous
- Apply foil while gel is still tacky for best adhesion
- Typically more expensive than standard gel—expect to pay extra
Pro tip: Request larger foil pieces rather than tiny flecks—they’re more visible and impactful on oval nails.
8. Deep Emerald Green With White Contrast
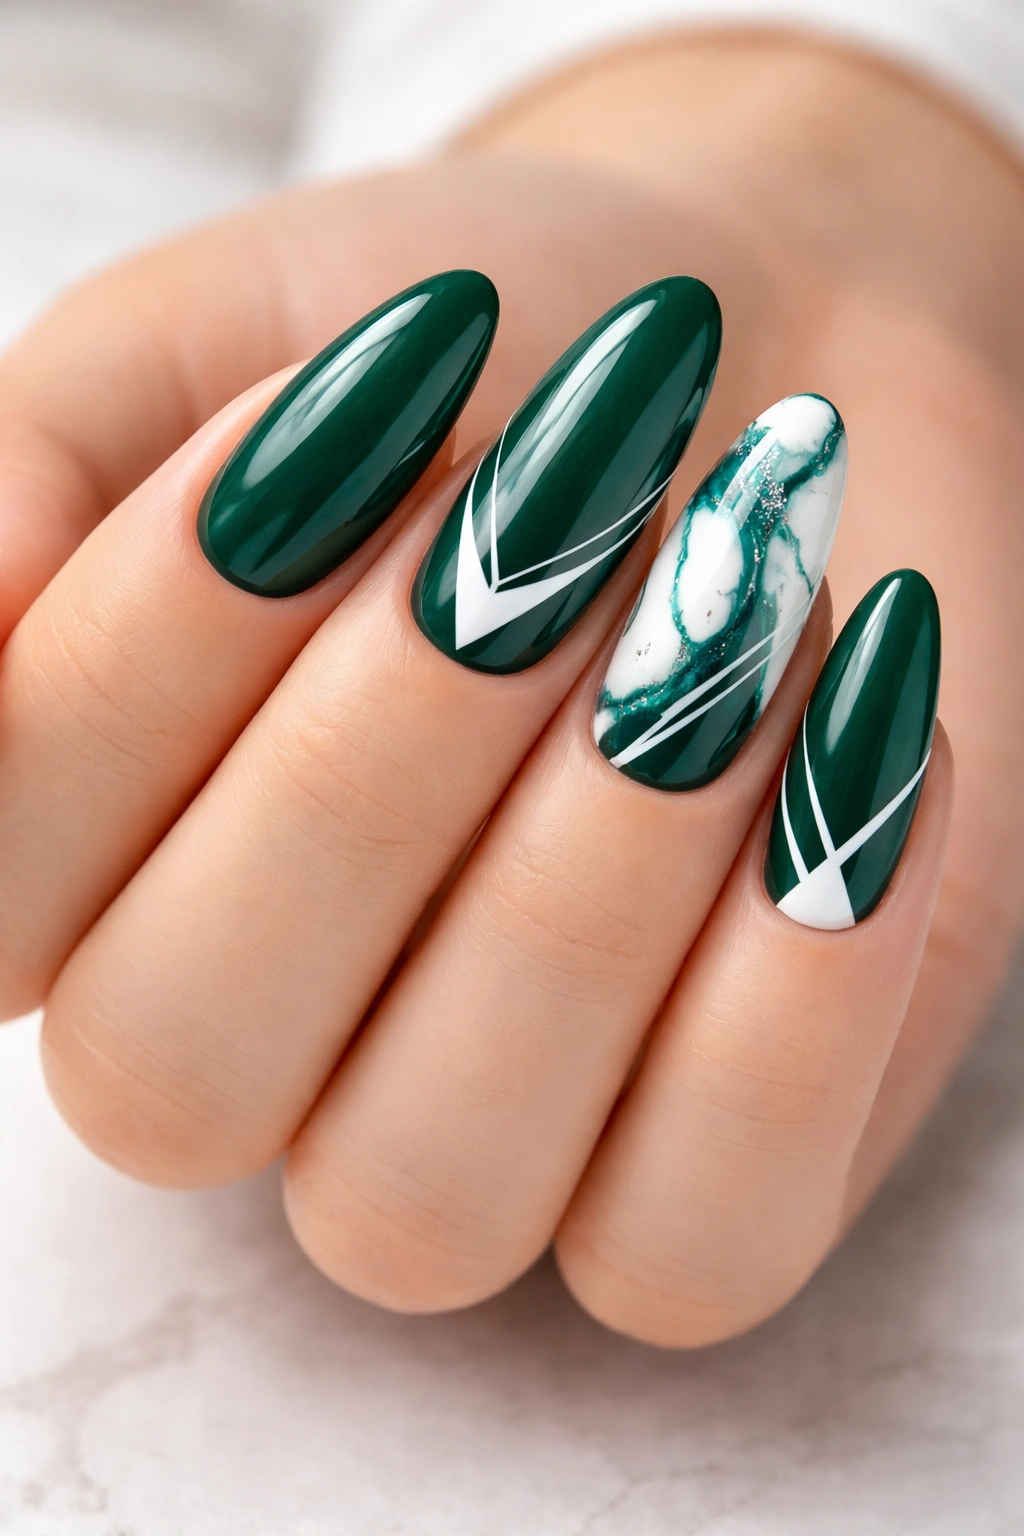
Rich, jewel-toned emerald green provides the base, while crisp white is used to create designs like marble patterns, geometric shapes, or simple accent stripes. The contrast between deep green and bright white creates a striking, high-impact look.
The Elegance of This Combination
Emerald and white together read as sophisticated and intentional. The green is jewel-toned enough to feel luxurious, and the white prevents it from appearing heavy or dated. On long ovals, this color combination emphasizes the nail’s refined shape.
Design Ideas to Request
- Solid emerald green base with white marble swirls
- Emerald base with white geometric patterns on one or two accent nails
- Thin white vertical or diagonal stripes across emerald
- Emerald with white tips (a modern twist on French)
- Half emerald, half white negative space design
- Consider matte topcoat for more contemporary vibe
9. Soft Cream With Pressed Flowers
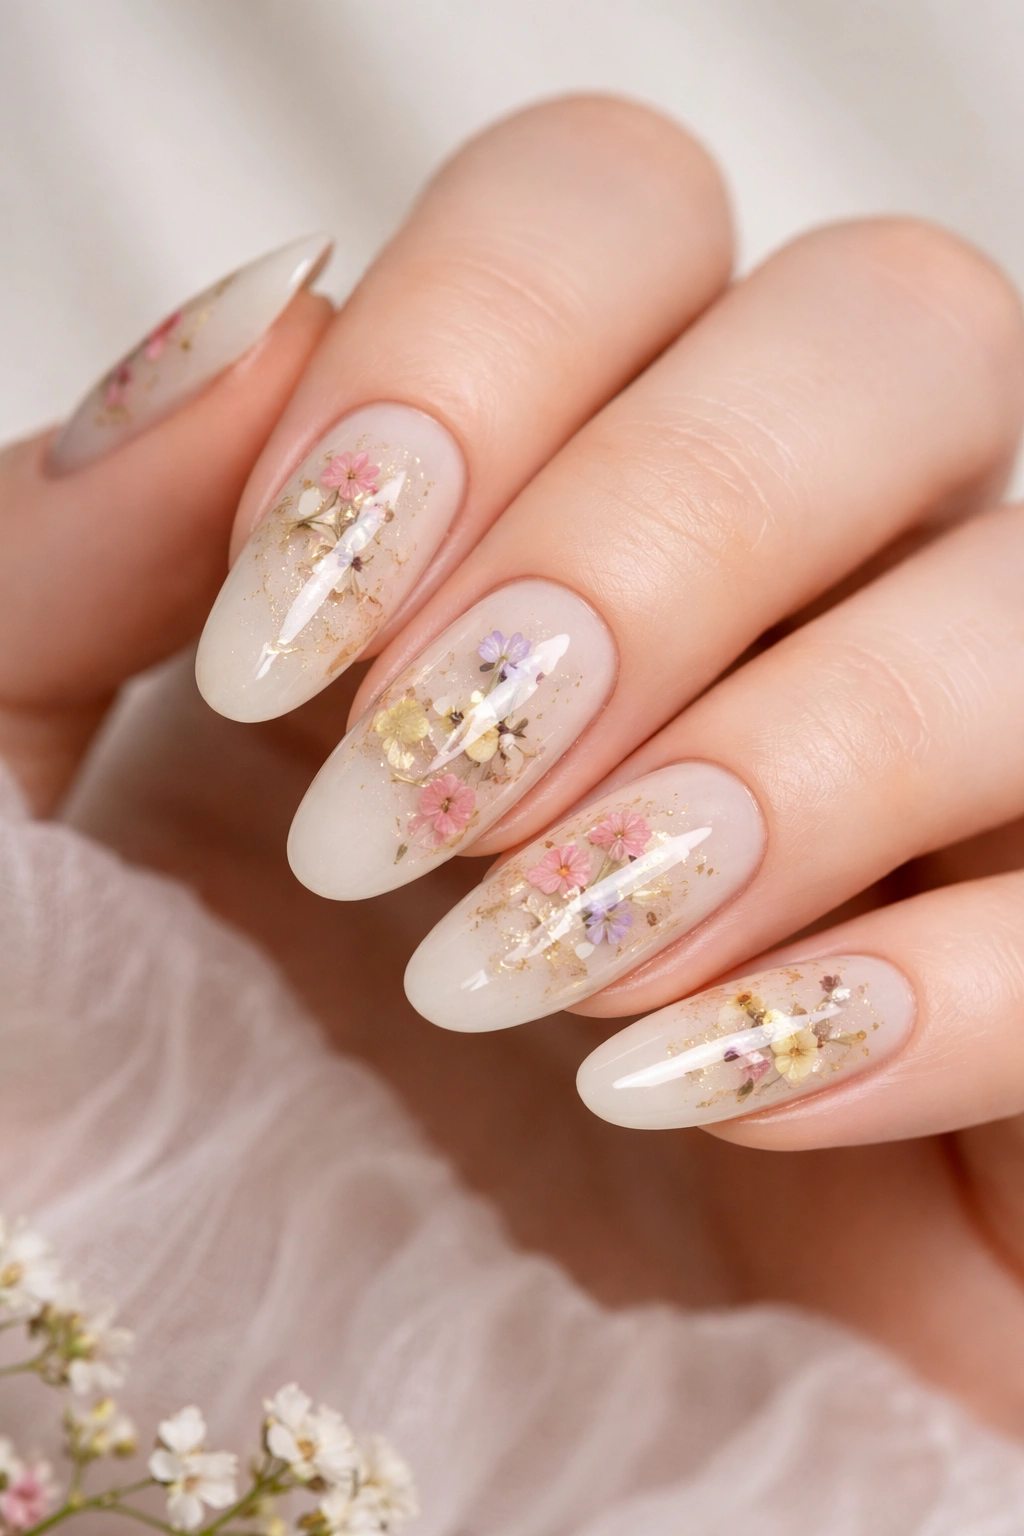
Cream or pale yellow base polish with real or faux dried flowers, leaves, or botanical elements embedded beneath the topcoat. This creates a romantic, garden-inspired aesthetic that’s completely unique—no two nail sets look identical.
Why This Design Feels Special
Pressed flowers transform nails into tiny works of art. The botanical elements add natural texture and movement that catches the eye. This design is perfect if you want something that feels handcrafted and personal rather than mass-produced.
How This Technique Works
- Pale cream or warm white base color
- Carefully place dried flowers or botanical elements on each nail
- Apply clear gel to seal and protect the flowers
- High-shine topcoat for protection and luminosity
- Flowers must be positioned while the gel is tacky
- Requires skilled placement to avoid air bubbles
- Lasts the full 2-3 week cycle with careful handling
Worth knowing: You can source pressed flowers from specialty shops or ask your technician which flowers they recommend—some hold color better than others.
10. Nude Base With Delicate Lace Patterns
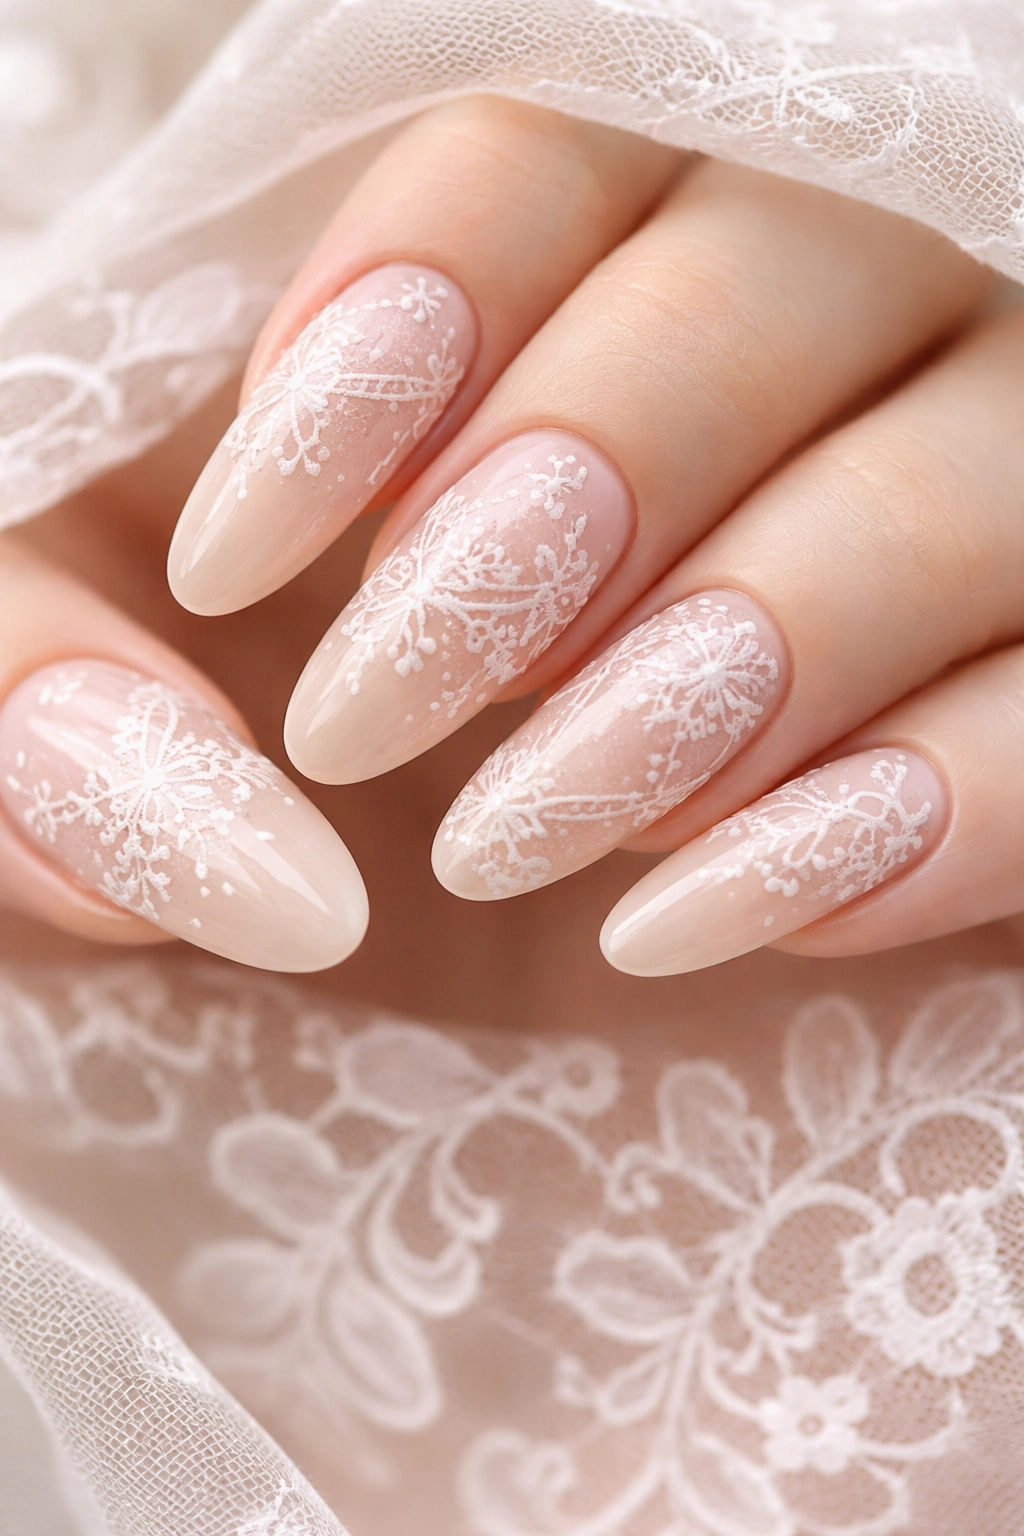
A nude, skin-toned base serves as the canvas for intricate lace-like patterns in white or gold. The patterns mimic actual lace detailing, creating an elegant, almost lingerie-inspired aesthetic without being overly suggestive.
The Refined Nature of Lace Designs
Lace patterns on oval nails look graceful and intentional. The delicate lines emphasize the nail’s elongated shape, and the overall effect reads as much more refined than simple solid colors. This design works beautifully for weddings, date nights, or whenever you want to feel especially put-together.
Design Elements to Request
- Opaque nude base that matches your skin tone
- Fine white or gold lines creating lace patterns
- Can be full coverage or confined to tips and accent nails
- Matte or glossy finish—both work well with lace
- Symmetrical patterns for traditional feel, asymmetrical for modern twist
- Consider adding tiny rhinestones at pattern intersections for extra sparkle
11. Peachy Beige Ombré With Sparkle Gradient
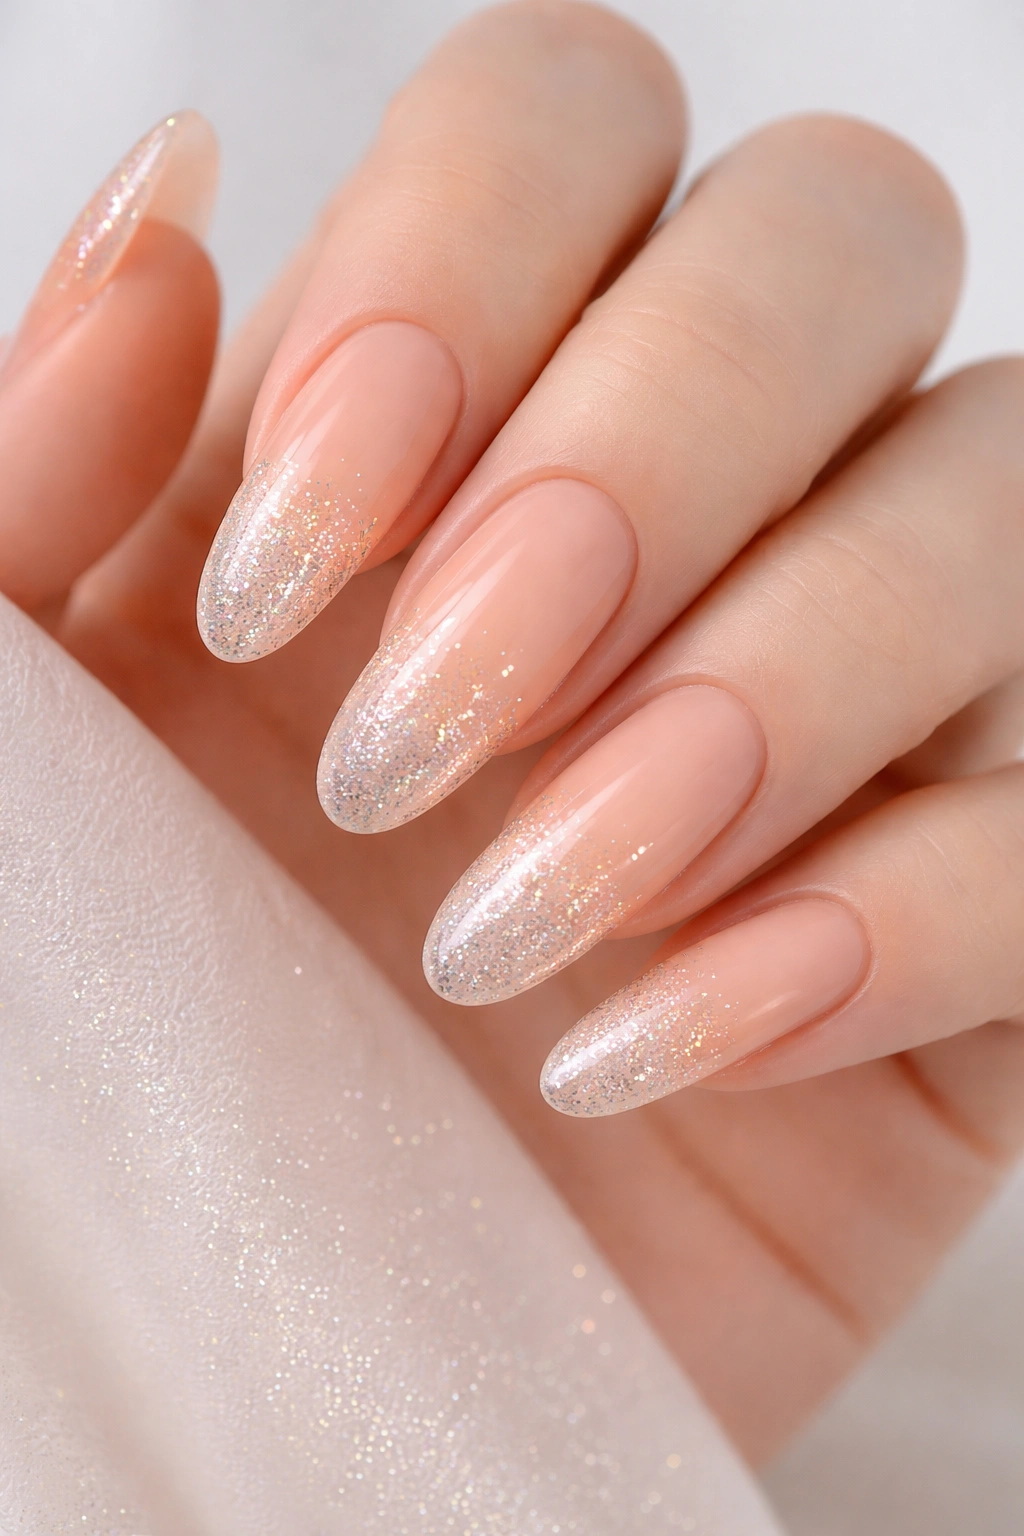
This design layers color and texture: a peachy-beige base transitions to clear or sparkle-filled gel at the tips. The sparkle gradually becomes denser toward the very tip, creating an ombré effect where texture meets color.
What Makes This Design Wearable
The warm, neutral base color works with every skin tone, while the sparkle gradient adds just enough drama without being over-the-top. This is the design you choose when you want to look polished and slightly fancy without committing to bold colors or intricate patterns.
How to Achieve This Look
- Peachy or warm beige gel base
- Clear gel with fine glitter mixed in
- Apply pure clear gel at the middle of the nail
- Gradually increase glitter density toward the tip
- Create seamless blending between layers
- Glossy topcoat for extra luminosity
- Usually requires layering 3-4 different gel applications
12. Burgundy Manicure With Nude Accent Nail
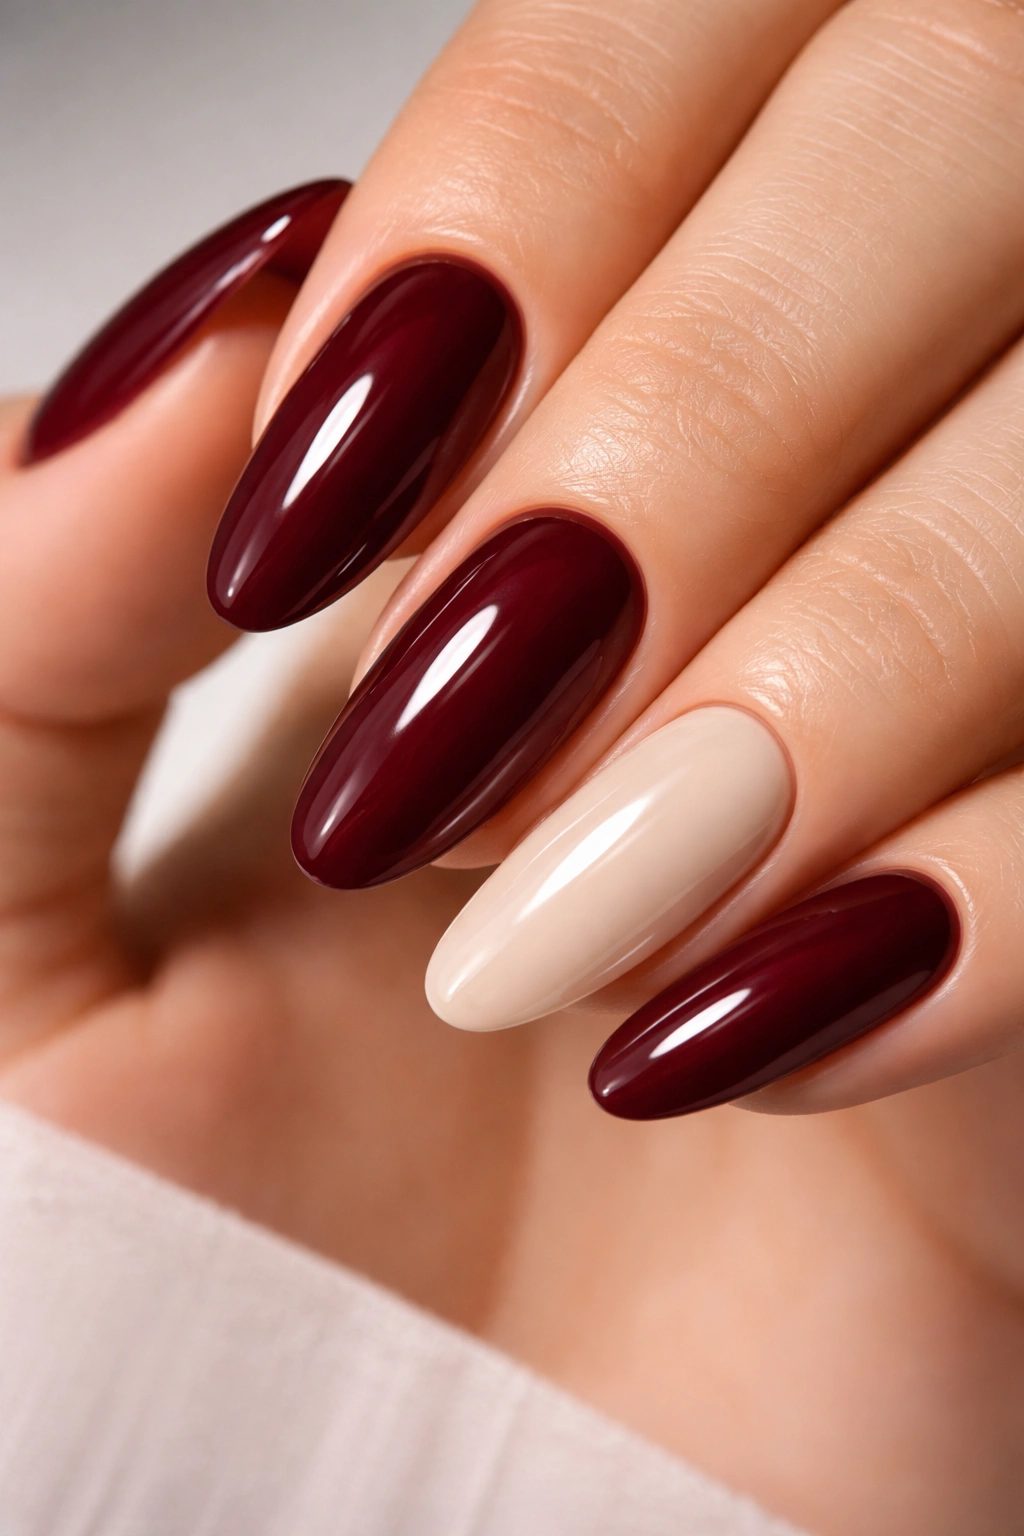
One accent nail breaks away from the color: burgundy covers most nails while one nail (usually the ring finger) remains nude or white. This creates asymmetrical interest while keeping the overall aesthetic sophisticated and cohesive.
Why Single Accent Nails Work on Ovals
The accent nail becomes a focal point that draws the eye and adds visual interest. On long ovals, this asymmetry actually makes your hands look more refined—it breaks up uniformity in an intentional, artistic way.
Design Ideas to Request
- Deep burgundy or wine on 4 nails
- Nude, white, or silver on the accent nail
- Can add thin gold stripe to the accent nail for extra detail
- Or reverse it: nude on most nails with one burgundy accent
- Consider matte topcoat on the burgundy for deeper appearance
- Glossy on the accent nail to make it stand out
Pro tip: If you have longer nails, the ring finger works best as the accent nail—it naturally catches light and attention.
13. Blush Pink With Rhinestone Details
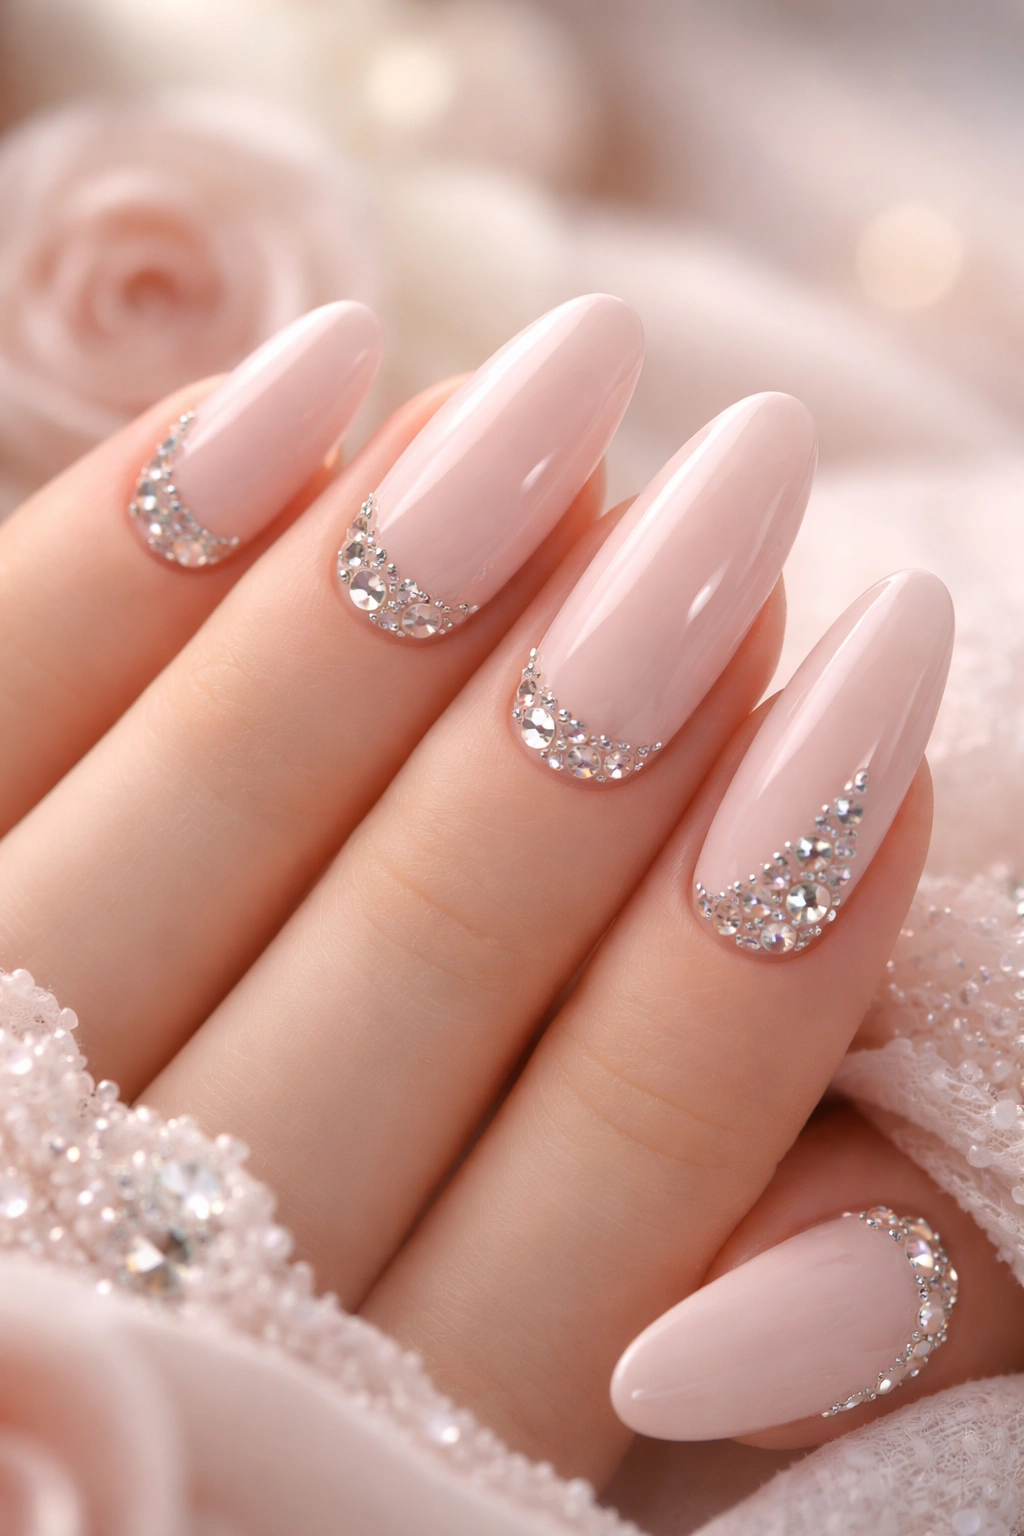
A soft, romantic blush pink provides the base, while carefully placed rhinestones create designs along the tips or in scattered patterns. The gems catch light beautifully and add dimension without being overwhelming.
The Luxury Feel of Rhinestones
Rhinestones elevate even simple designs to look expensive and intentional. On long oval nails, strategically placed gems guide the eye and emphasize the shape. This design reads as special-occasion worthy while still being wearable for everyday.
Design Elements to Request
- Opaque blush pink gel base
- High-quality rhinestones (not cheap craft-store quality)
- Can create patterns: diagonal lines, scattered across tips, or clustered around one or two accent nails
- Apply rhinestones while gel is still tacky for best adhesion
- High-shine topcoat to make gems sparkle
- Consider varying rhinestone sizes for more visual interest
14. Soft White With Minimalist Geometric Accent
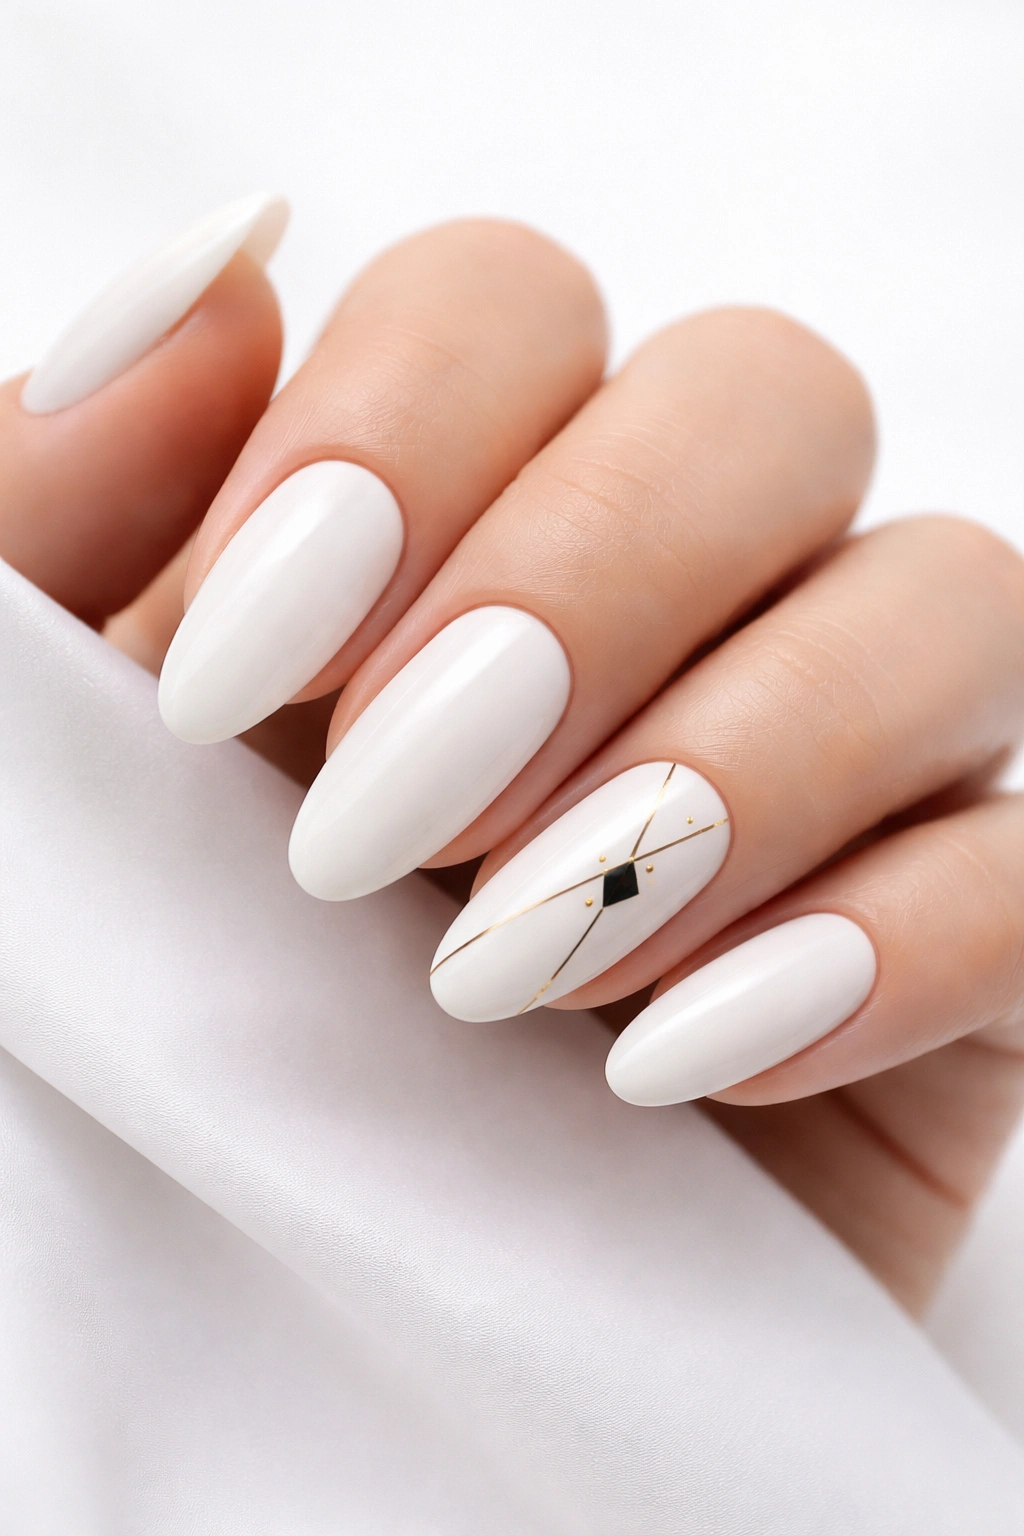
Pure white covers all nails while one or two accent nails feature geometric designs in black, gold, or a soft color. The designs might be simple: a single triangle, clean lines, or abstract shapes.
Why This Approach Works
Minimal geometric accents on white backgrounds look contemporary and intentional. The white keeps your nails looking clean and bright, while the geometric element prevents them from appearing boring. This design works for professional settings and special occasions alike.
Design Ideas to Request
- Bright white base, opaque and smooth
- Black or gold geometric shapes on one accent nail
- Can be simple: single triangle pointing down, or more complex: interlocking lines
- Matte geometric designs look more modern on glossy white backgrounds
- Consider negative space geometry for added sophistication
- Clean, precise lines essential for this design to work
15. Warm Taupe With Rose Gold Tips
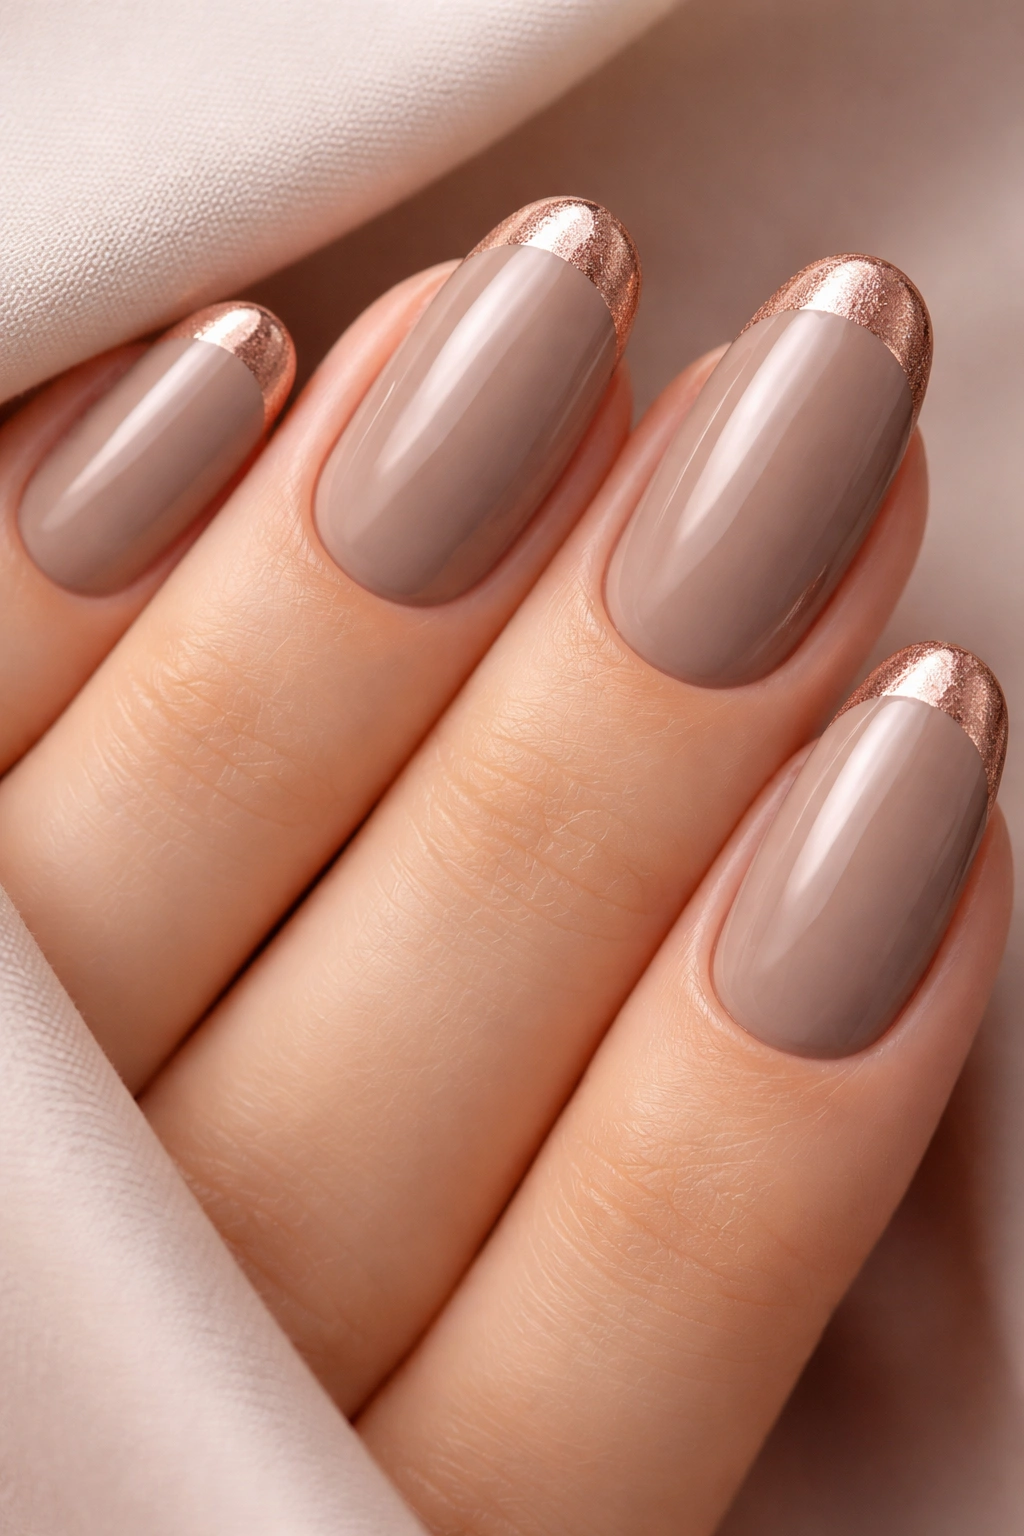
A sophisticated taupe or greige tone forms the base while rose gold covers the tips. The warm undertones in both colors make this combination feel cohesive and flattering against every skin tone.
The Versatility of This Palette
Taupe and rose gold work for literally any occasion and season. The taupe grounds the design with sophistication, while the rose gold tip adds warmth and subtle glamour. On long ovals, this color combination emphasizes elegance without boldness.
How to Achieve This Design
- Opaque taupe or greige gel base
- Rose gold gel or rose gold chrome powder on the tips
- Create clean transition line between taupe and rose gold
- Can do a straight line or slightly curved transition for variation
- High-shine topcoat
- Can add thin white or gold accent stripe at transition line
16. Lavender Base With Purple Ombré Fade
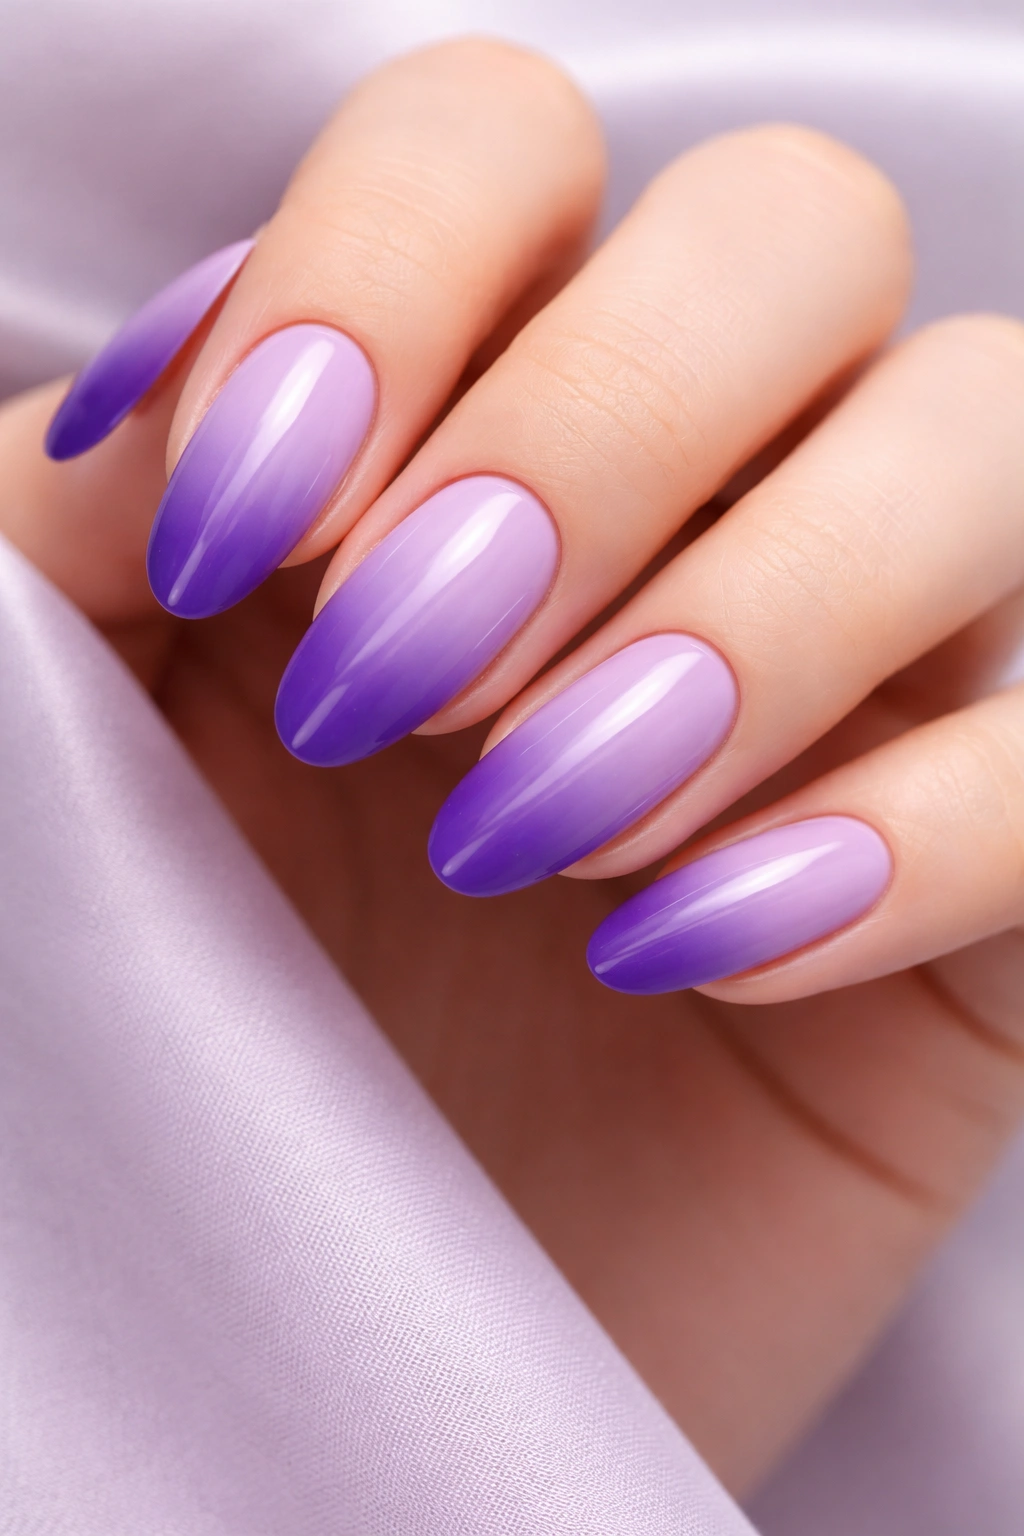
Soft lavender forms the base and gradually deepens to rich purple toward the tips. The color shift is smooth and gradual, creating a soothing, elegant aesthetic.
What This Design Conveys
Purple ombré reads as both calming and slightly luxurious. Lavender is universally flattering, and the deeper purple adds depth and sophistication. On long ovals, the color gradient emphasizes length beautifully.
Design Elements to Request
- Soft lavender base color
- Multiple shades of purple (light lavender, medium purple, deep purple)
- Blend shades using sponge technique for seamless gradient
- Apply gradient to all nails or just tips for softer effect
- Matte topcoat for sophisticated feel, or glossy for more impact
- Even, well-blended transitions essential for this design
17. Nude With Thin Gold Striping
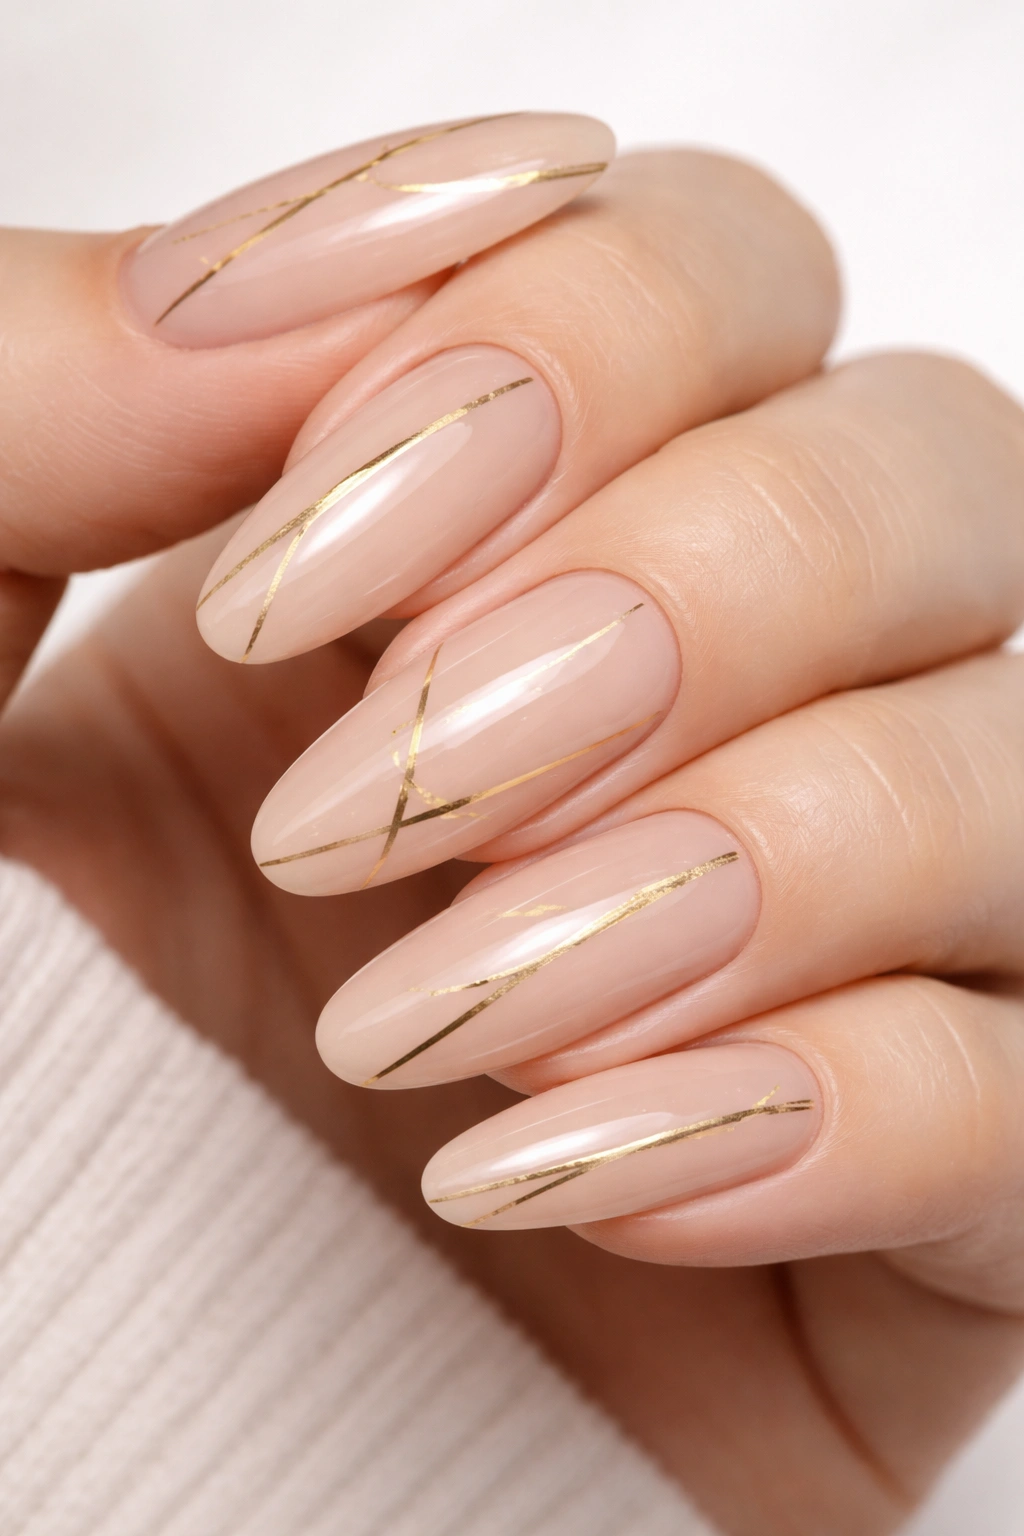
A neutral nude base serves as backdrop for delicate gold stripes that can run vertically, horizontally, or diagonally. The stripes can be super minimal (one per nail) or more prominent (multiple stripes creating patterns).
Why Gold Striping Elevates Simple Designs
Gold stripes add luxury and intentionality to basic nude nails. They catch light beautifully and create visual interest without requiring detailed artwork. This design works for any setting and age group.
How to Execute This Design
- Opaque nude gel base
- Thin gold gel polish or gold paint applied with striping brush
- Can create vertical lines for elongating effect
- Horizontal lines create more relaxed feel
- Diagonal striping works for modern aesthetic
- Keep lines straight and even for polished appearance
- High-shine topcoat protects the stripes
Pro tip: If you’re nervous about straight lines, ask your technician to use painter’s tape to create perfect edges before applying gold.
18. Deep Navy With Starry Night Pattern
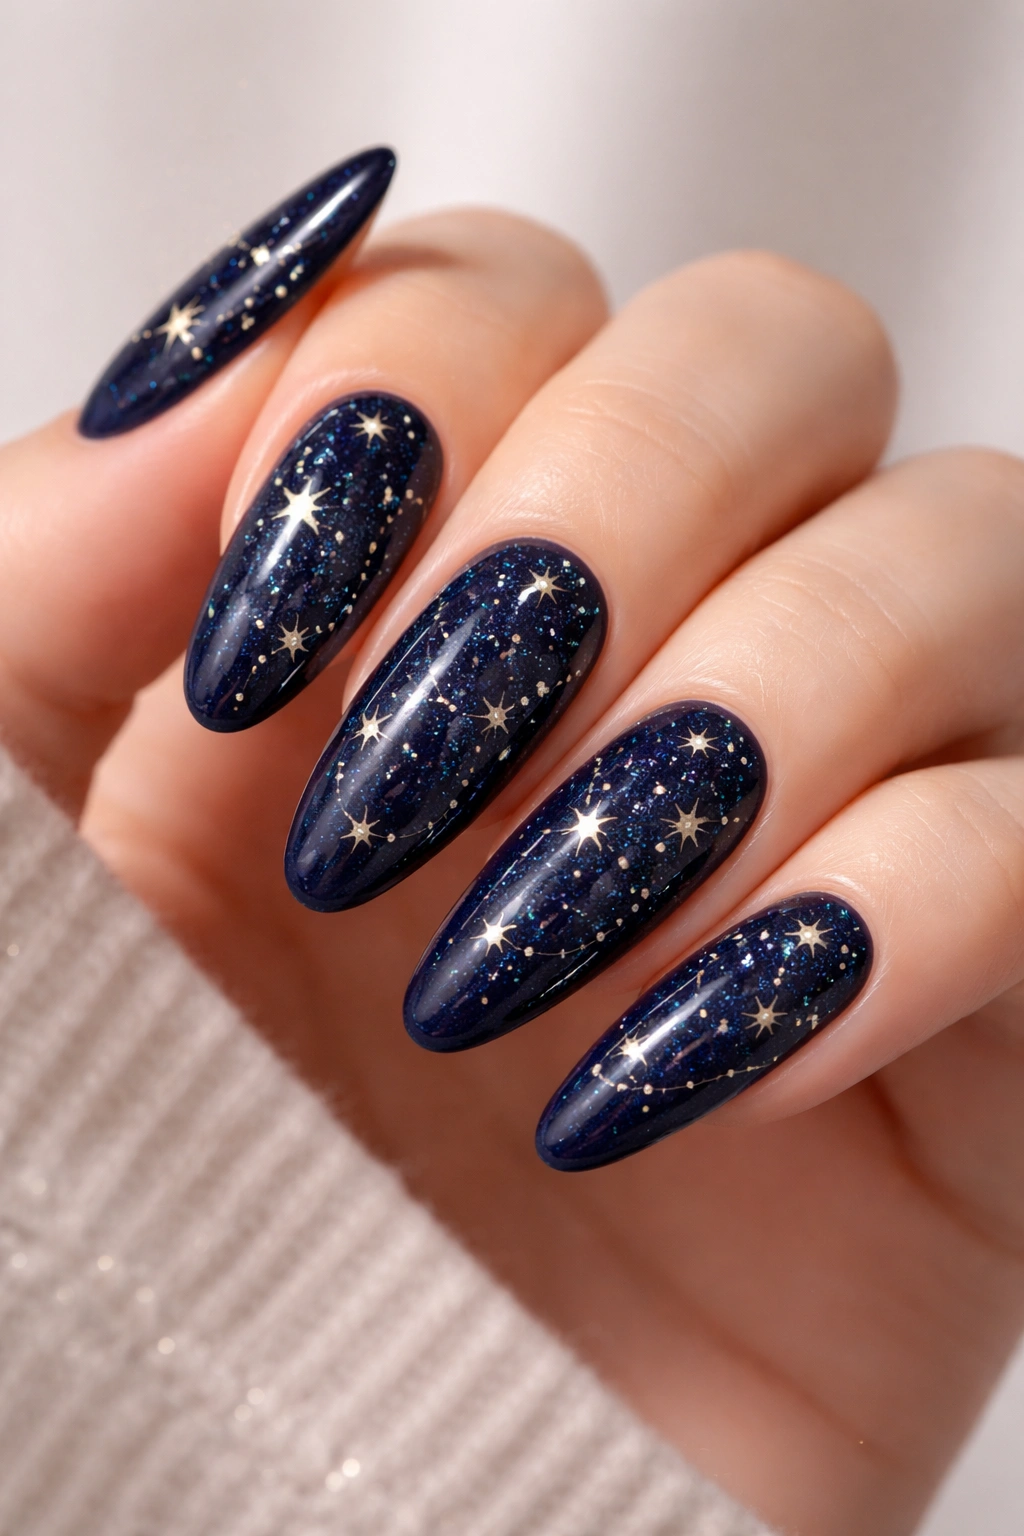
Rich navy blue base dotted with tiny white or gold stars creates a celestial-inspired design. Stars can be scattered randomly or arranged in constellation-like patterns.
The Dreaminess of This Design
Starry night designs feel whimsical and romantic without being childish. The deep navy grounds the design, while the stars create movement and visual interest. On long ovals, the scattered stars guide the eye along the nail’s length.
Design Ideas to Request
- Opaque dark navy or midnight blue base
- Tiny white or gold dots scattered across each nail
- Can cluster stars more densely on some nails for variation
- Constellation patterns for more intentional look
- Add a thin gold crescent moon on one accent nail
- High-shine topcoat to make stars sparkle
19. Peachy-Pink With Fine Ombre Gradient to Clear
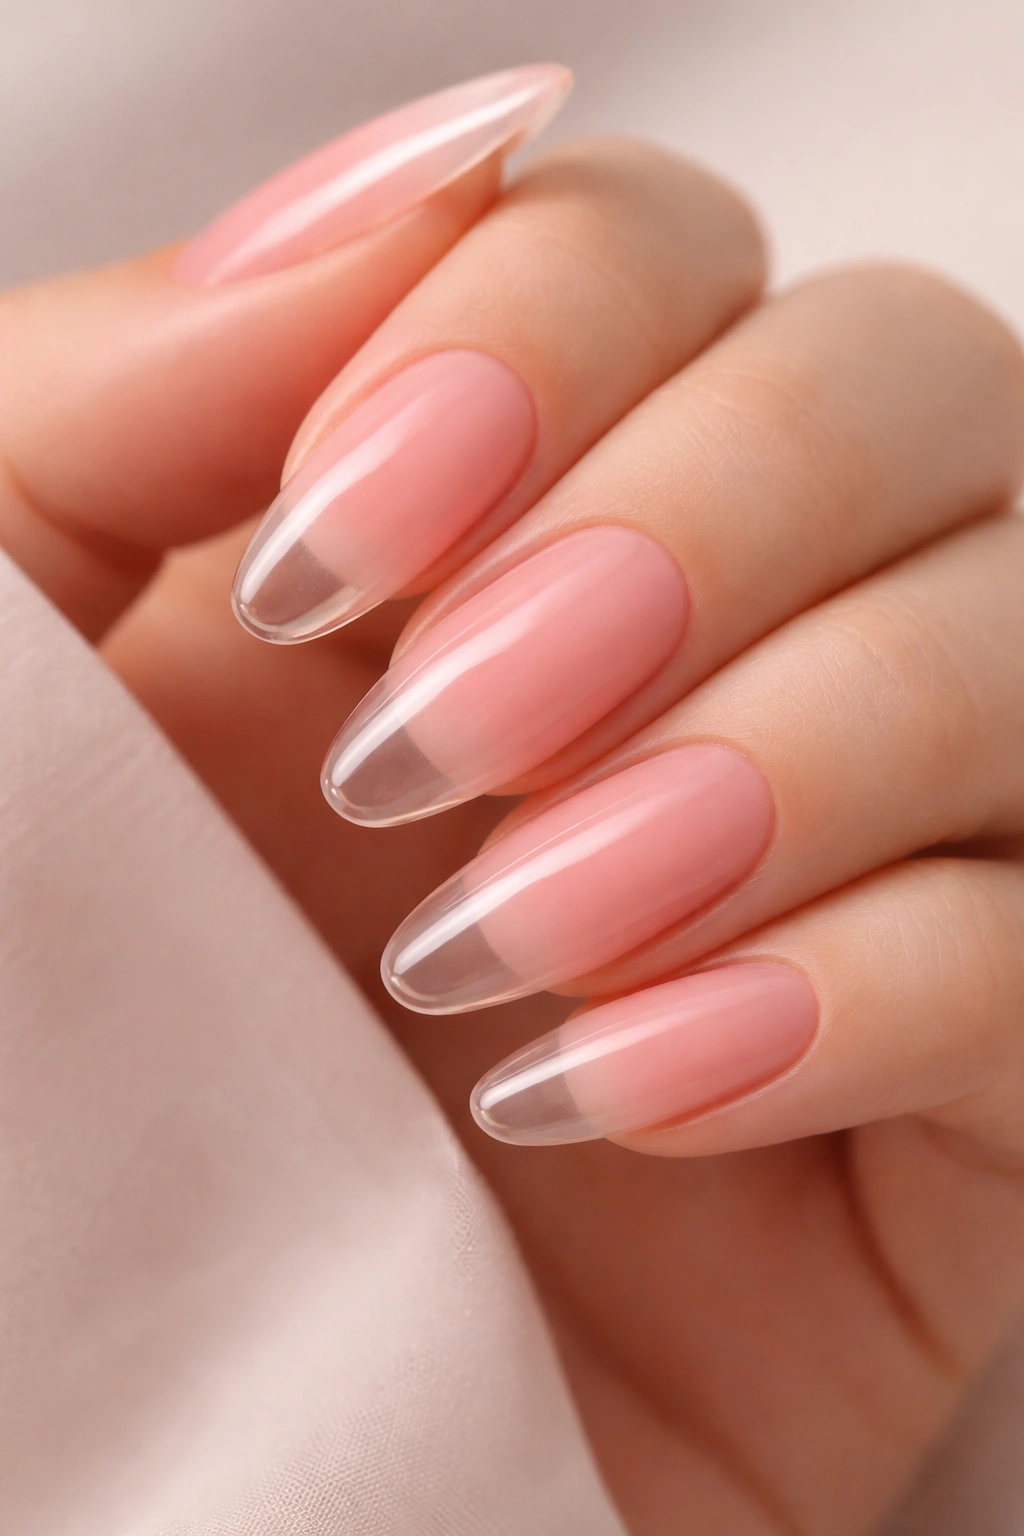
Peachy-pink at the base gradually transitions to completely clear gel at the tips. The effect is subtle—your natural nail shows through at the tips while the base remains opaque and colorful.
Why Gradient-to-Clear Works on Ovals
This design creates an almost 3D effect, making nails appear even longer. The clear tips feel lighter and more modern than solid colors, and the peachy-pink base is universally flattering. This design works for any occasion.
How to Achieve This Look
- Opaque peachy-pink gel base
- Clear gel mixed with translucent peachy tint for transition
- Pure clear gel at the tips
- Create seamless blending between layers
- Can add subtle glitter to transition zone for more dimension
- Glossy topcoat
- Requires careful sponging technique for smooth gradient
20. Classic Red With Subtle Texture
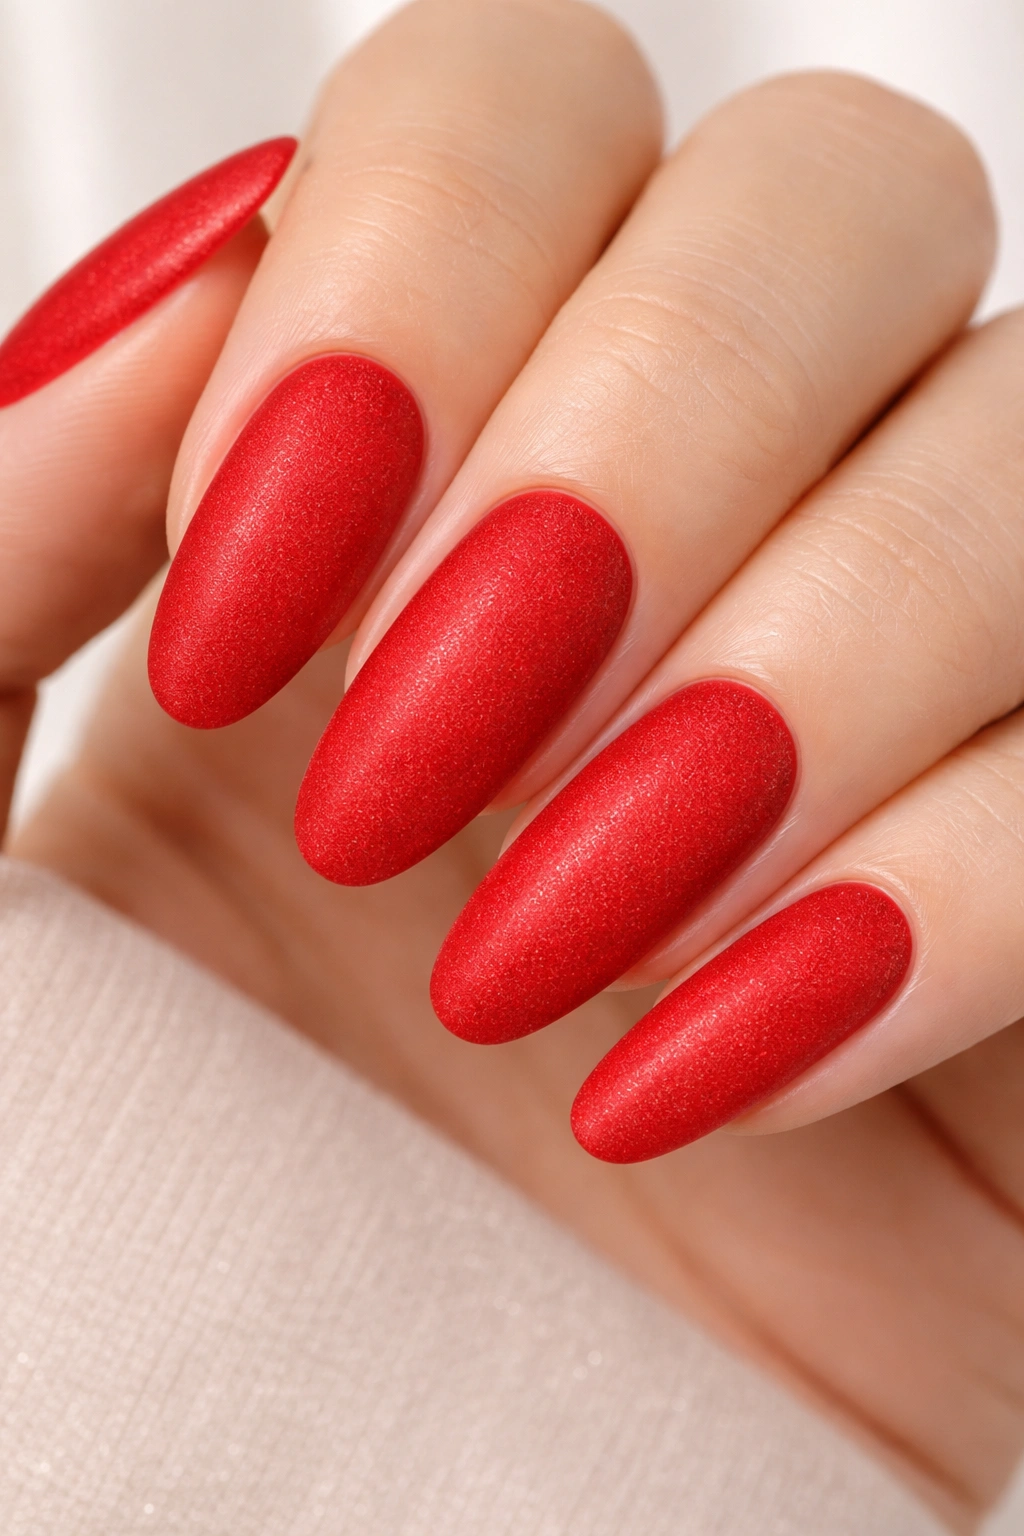
Bright, iconic red forms the base while a subtle texture—matte finish, small dots, or fine glitter—adds depth. Classic red never goes out of style, but the textured element prevents it from feeling flat or dated.
Why Red Remains Timeless on Ovals
Red is the ultimate power color, and on long ovals, it looks refined and intentional. The subtle texture keeps it modern while honoring the timeless appeal of red nails. This design works for any season or occasion.
Design Ideas to Request
- Opaque, true red gel (not orange-red or burgundy)
- Matte topcoat instead of glossy for modern feel
- Or glossy with fine glitter scattered across all nails
- Can create subtle polka dots in white for added interest
- Thin white tip line for updated French-red hybrid
- High-shine topcoat if you go the glitter route
Worth knowing: True red shows absolutely every brushstroke and imperfection, so this requires excellent application technique.
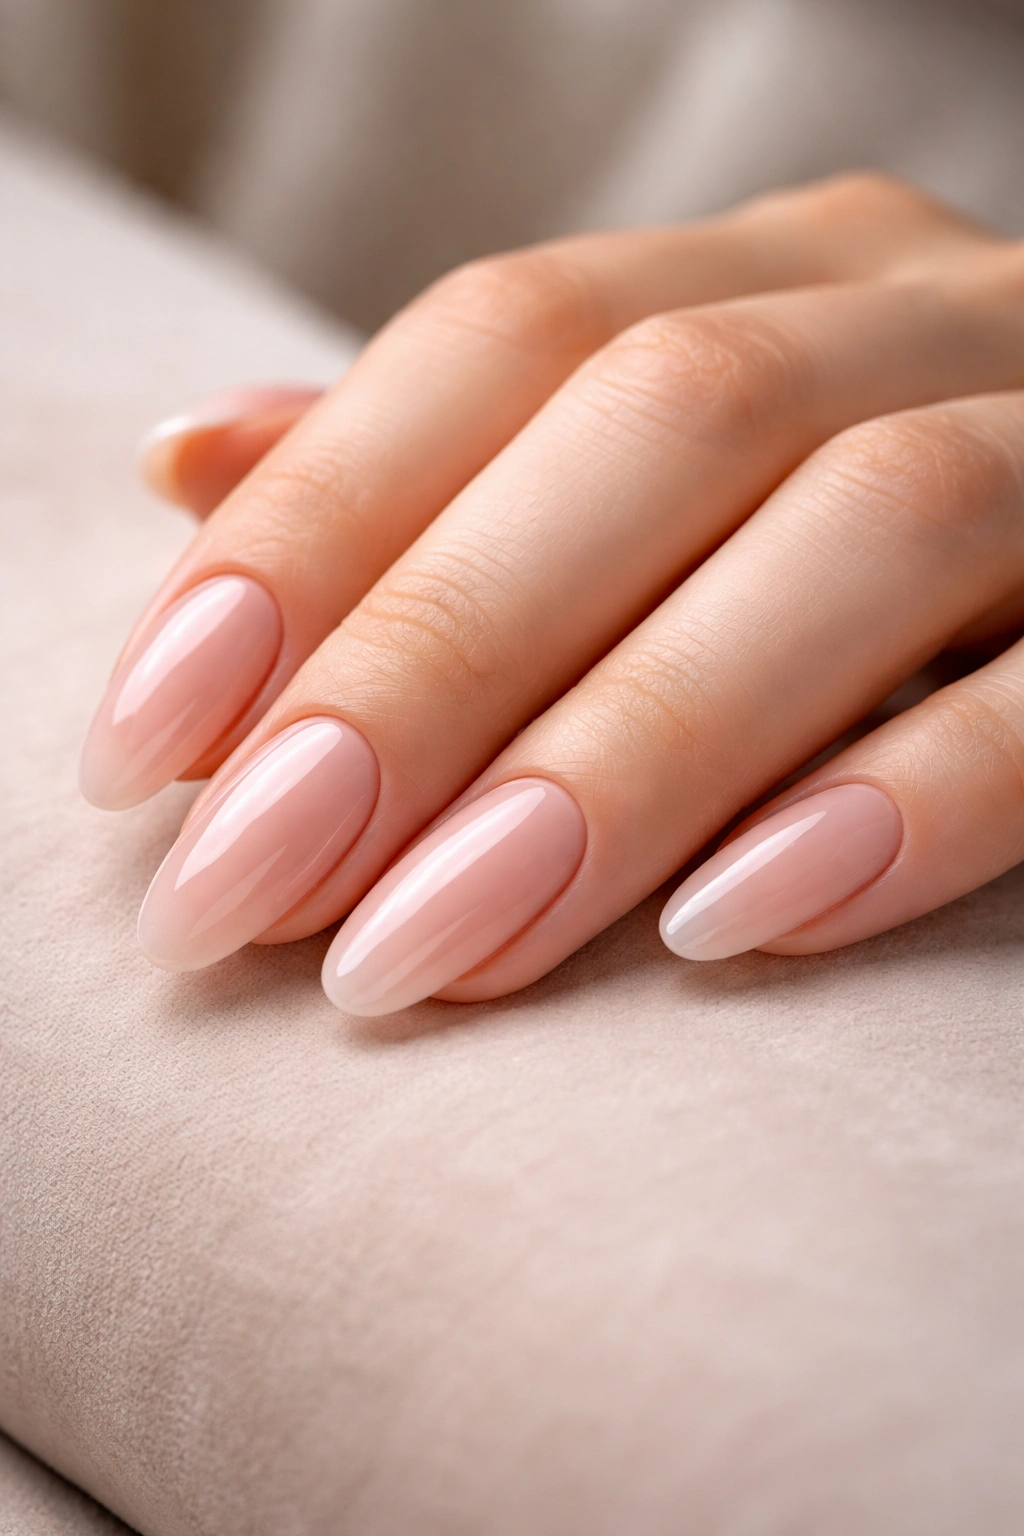
21. Milky White With Translucent Blush Tips
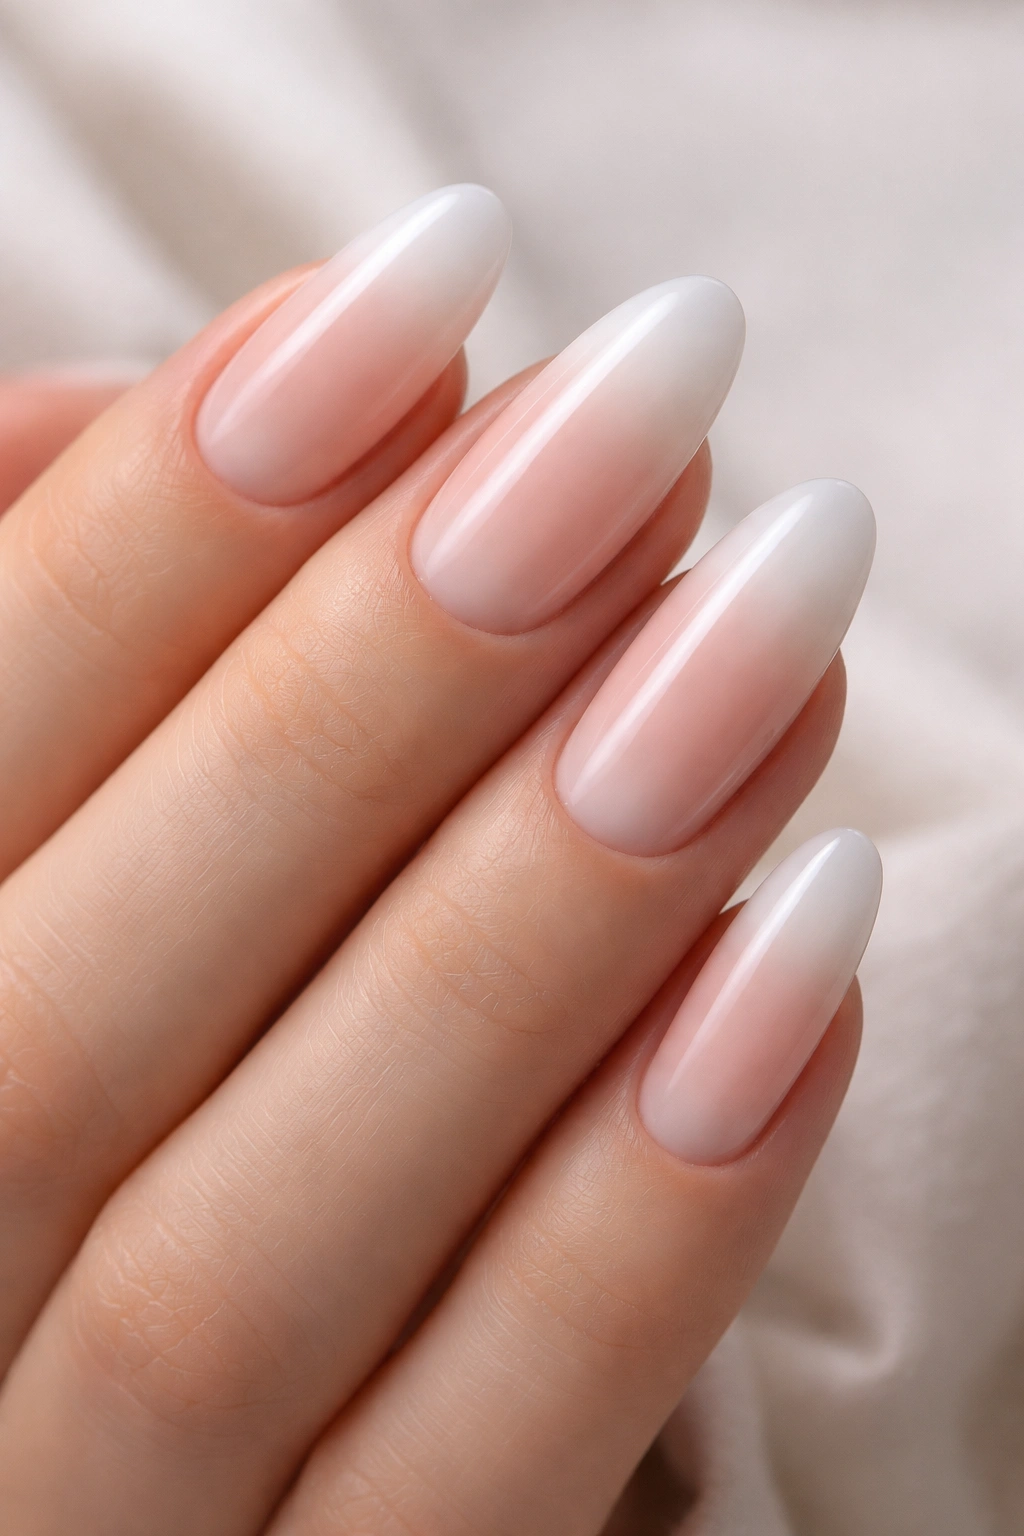
Creamy, opaque white base transitions to a translucent blush or peachy tone at the tips. Your natural nail bed shows through the blush color, creating a soft, dimensional effect.
The Softness of This Approach
This design feels romantic and approachable—not cold like pure white, but not boldly colored either. The translucent tips create depth while keeping the overall vibe soft and elegant. This works beautifully for weddings and special occasions.
How to Achieve This Design
- Opaque milky white gel base
- Translucent blush or peachy gel for tips
- Create gradient by applying translucent color only to tip area
- Can add subtle glitter to transition zone
- High-shine topcoat
- Requires careful, even application for seamless look
22. Sage Green Base With Botanical Line Art
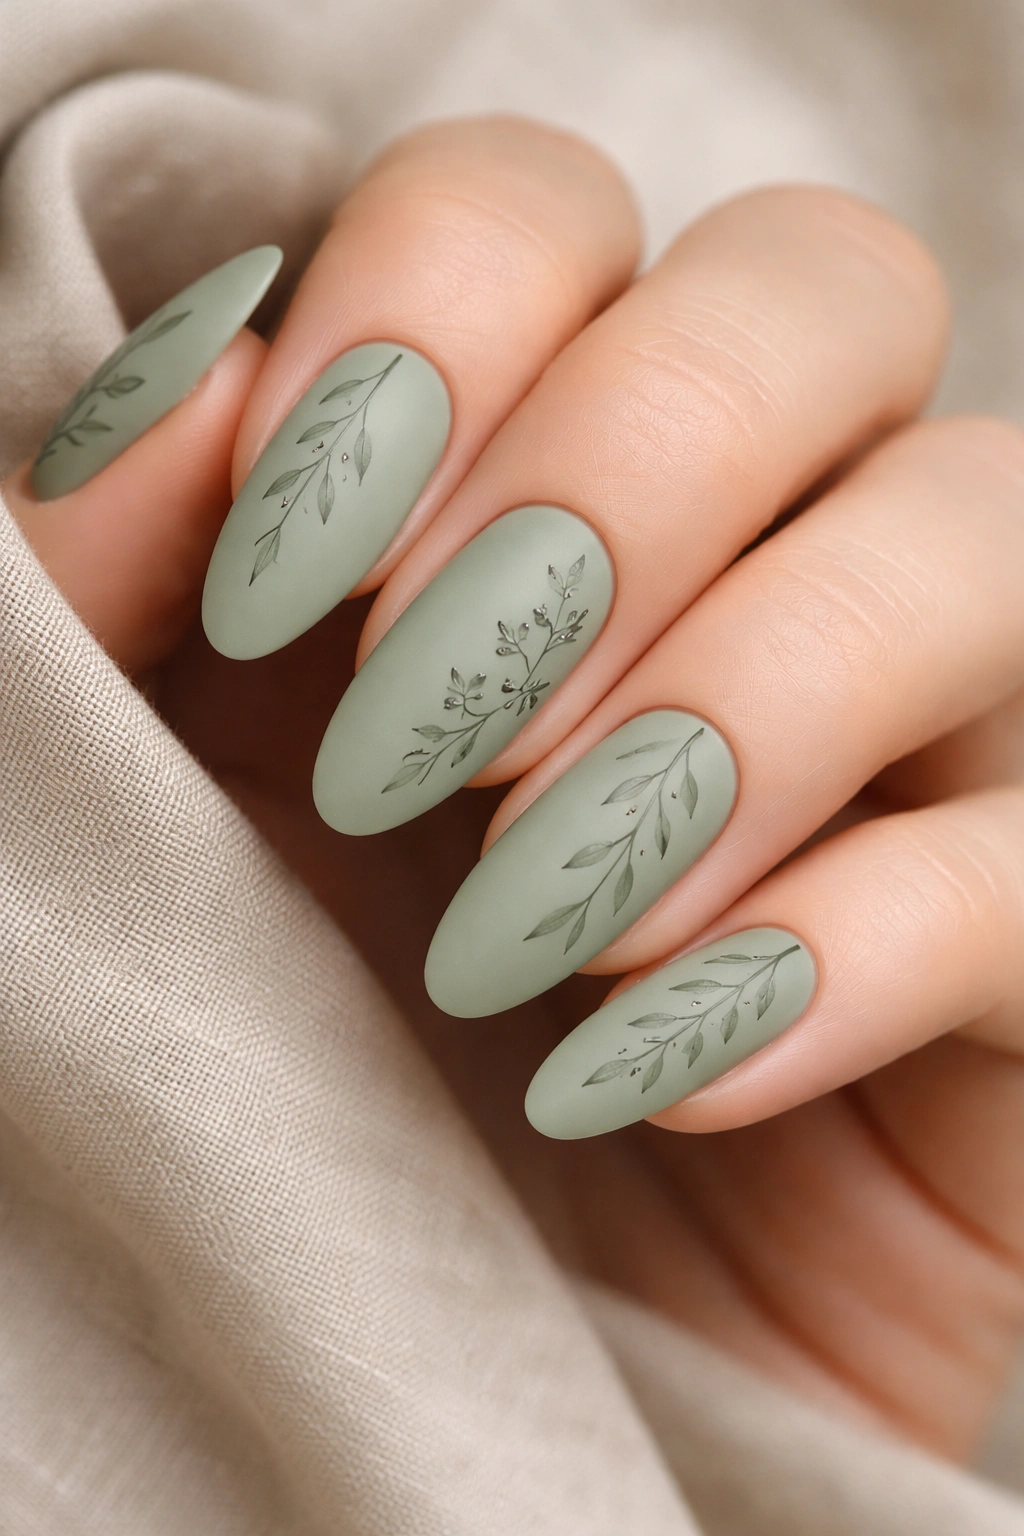
Muted, sophisticated sage green forms the base while delicate line art (leaves, vines, simple flowers) in darker green or black creates botanical patterns.
The Understated Elegance of This Design
Sage green is having a major moment, and for good reason—it’s sophisticated, calming, and flattering to multiple skin tones. The botanical line art adds nature-inspired interest without being loud. On long ovals, this design reads as refined and thoughtful.
Design Elements to Request
- Opaque sage green gel base
- Darker green or black thin lines for botanical artwork
- Simple leaf patterns, vine swirls, or tiny flower shapes
- Can concentrate designs on accent nails for subtlety
- Matte topcoat for more contemporary feel
- Consider adding one small gold accent near designs
23. Champagne Gold With Subtle Shimmer Throughout
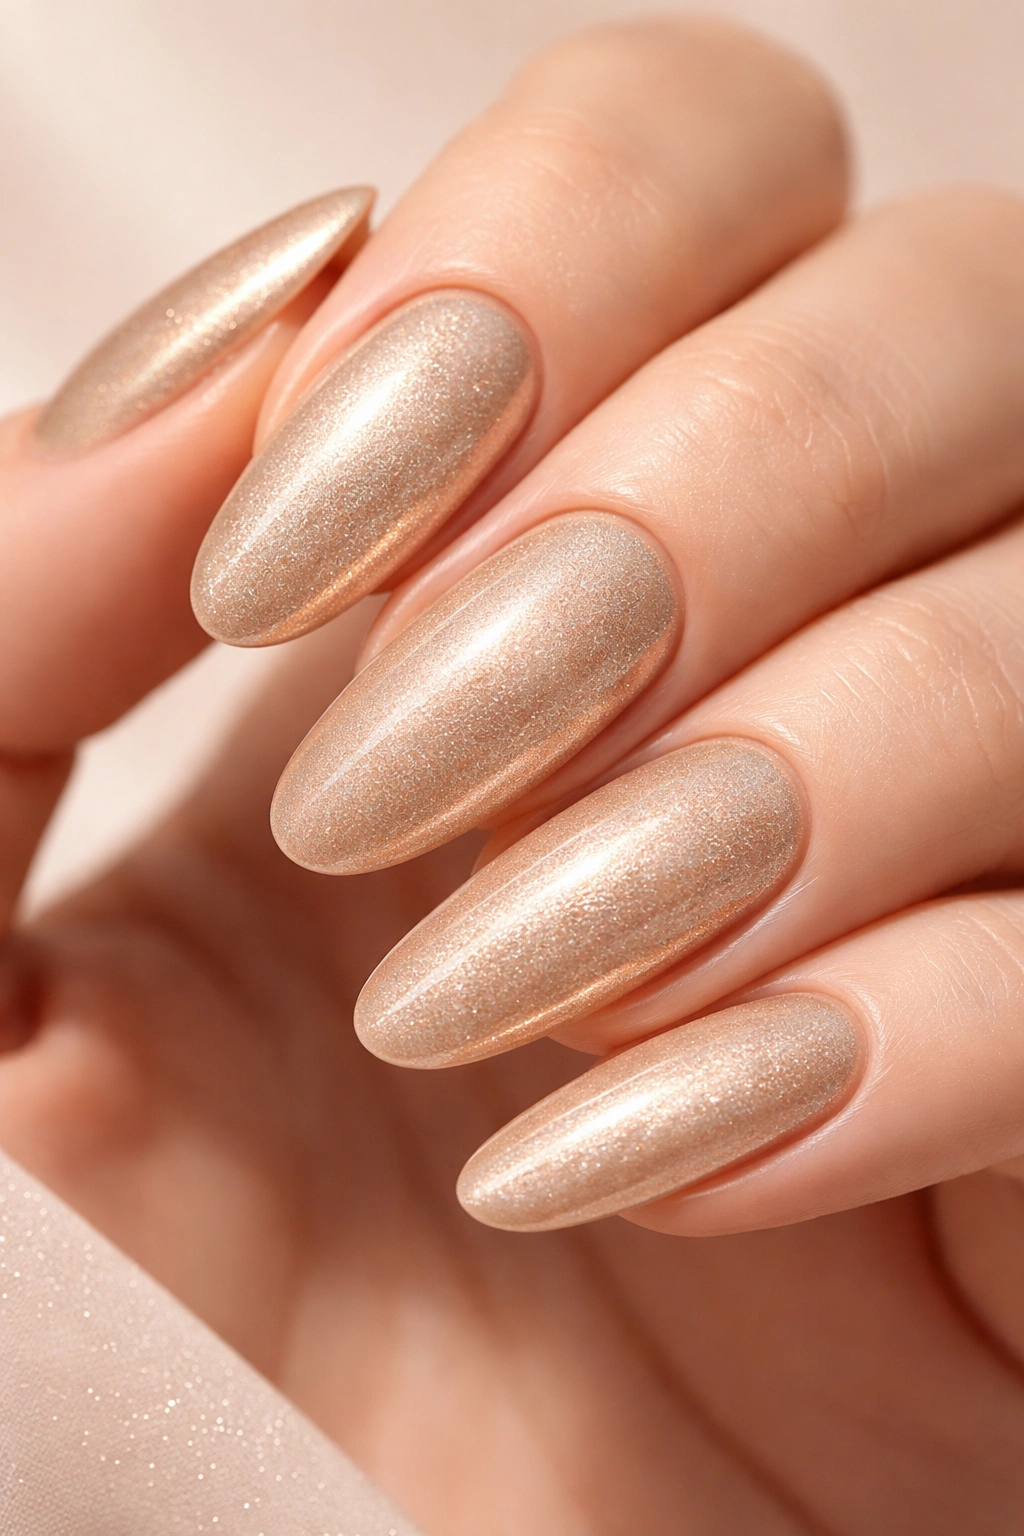
Soft champagne gold covers all nails with fine shimmer distributed evenly throughout the color. It’s metallic without being overwhelming—elegant and warm.
Why Champagne Gold Is Universally Flattering
Champagne gold works against every skin tone and with every outfit. It reads as luxurious and polished without being too bold. On long ovals, the shimmer catches light beautifully and emphasizes the nail’s elegant length.
How to Achieve This Design
- Champagne gold gel with micro-shimmer mixed throughout
- Build opacity with 2-3 thin layers rather than one thick layer
- Even application essential to avoid patchy appearance
- High-shine topcoat to amplify shimmer
- Glossy finish makes it glow
- Can add thin white or clear accent stripe for definition
24. Pale Pink With Artistic Marble Effect
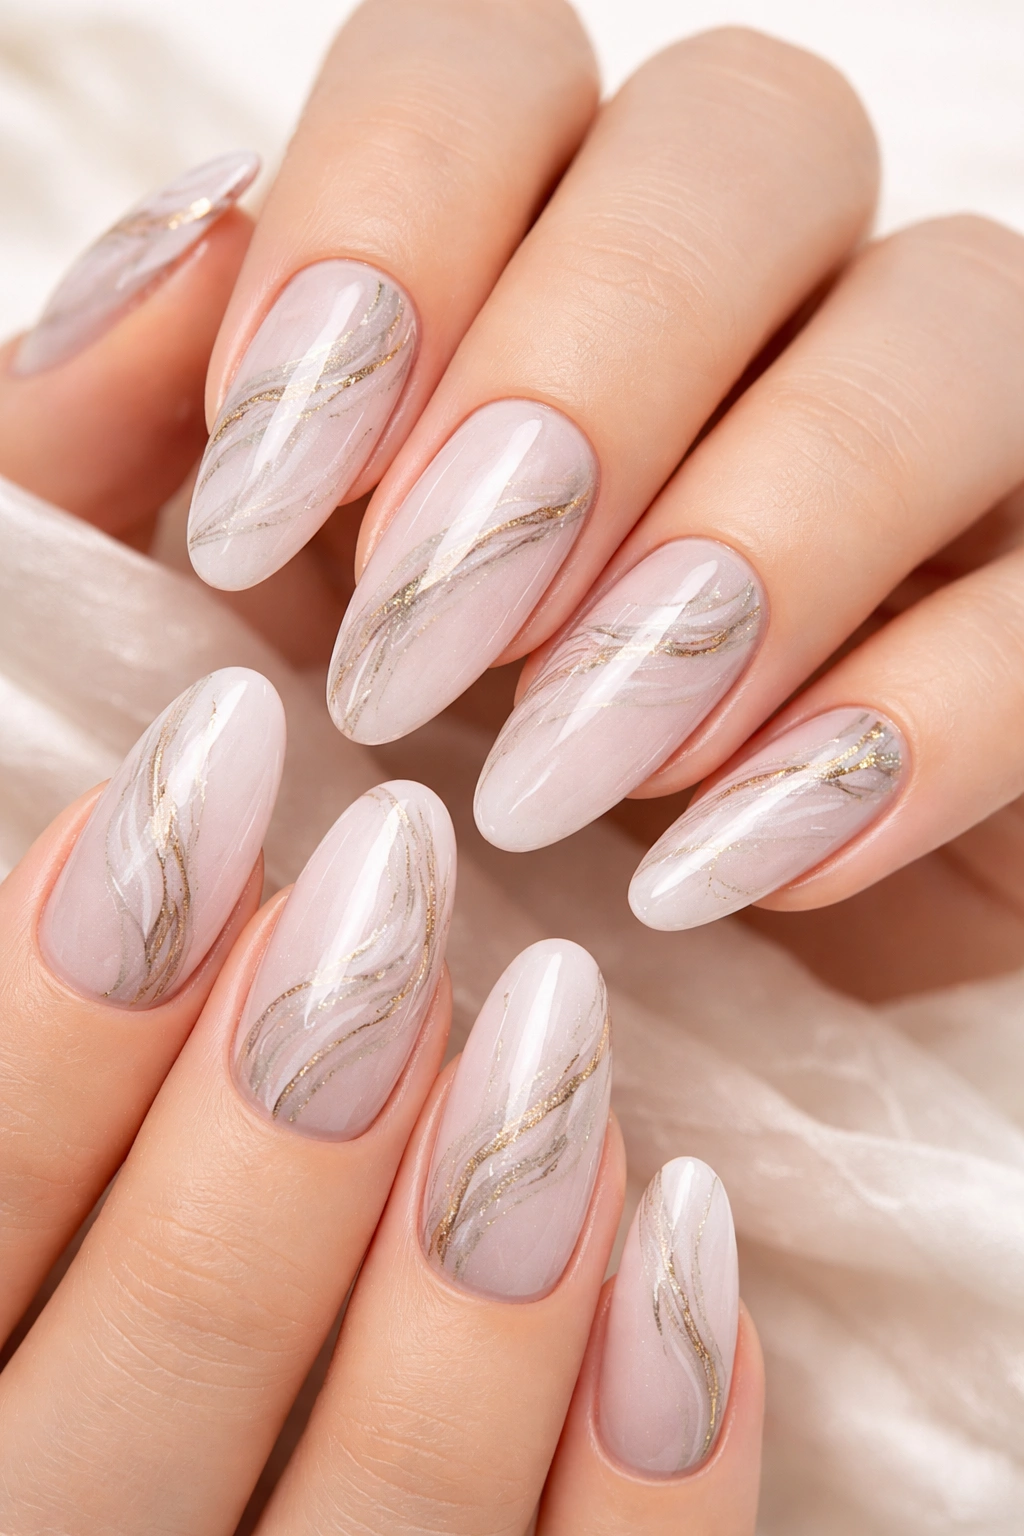
Soft pale pink serves as the base while white, grey, and hints of gold create organic marble patterns. The effect should look natural and flowing, not rigid or geometric.
What Makes Marble Designs Timeless
Marble patterns look expensive and artistic without requiring you to be artistic. The flowing lines and organic color combinations create visual interest and movement. On long ovals, marble designs emphasize the nail’s elegant shape through flowing patterns.
How to Create Marble Patterns
- Pale pink gel base
- Apply white, grey, and gold gel in organic swirls
- Use a thin brush to create veining patterns
- Can drag colors together with a toothpick or dotting tool
- Each nail should have unique marble pattern
- Sealing topcoat to protect the detailed work
- Matte topcoat works well for marble (more natural appearance)
25. Mauve With Nude Ombre and Rhinestones
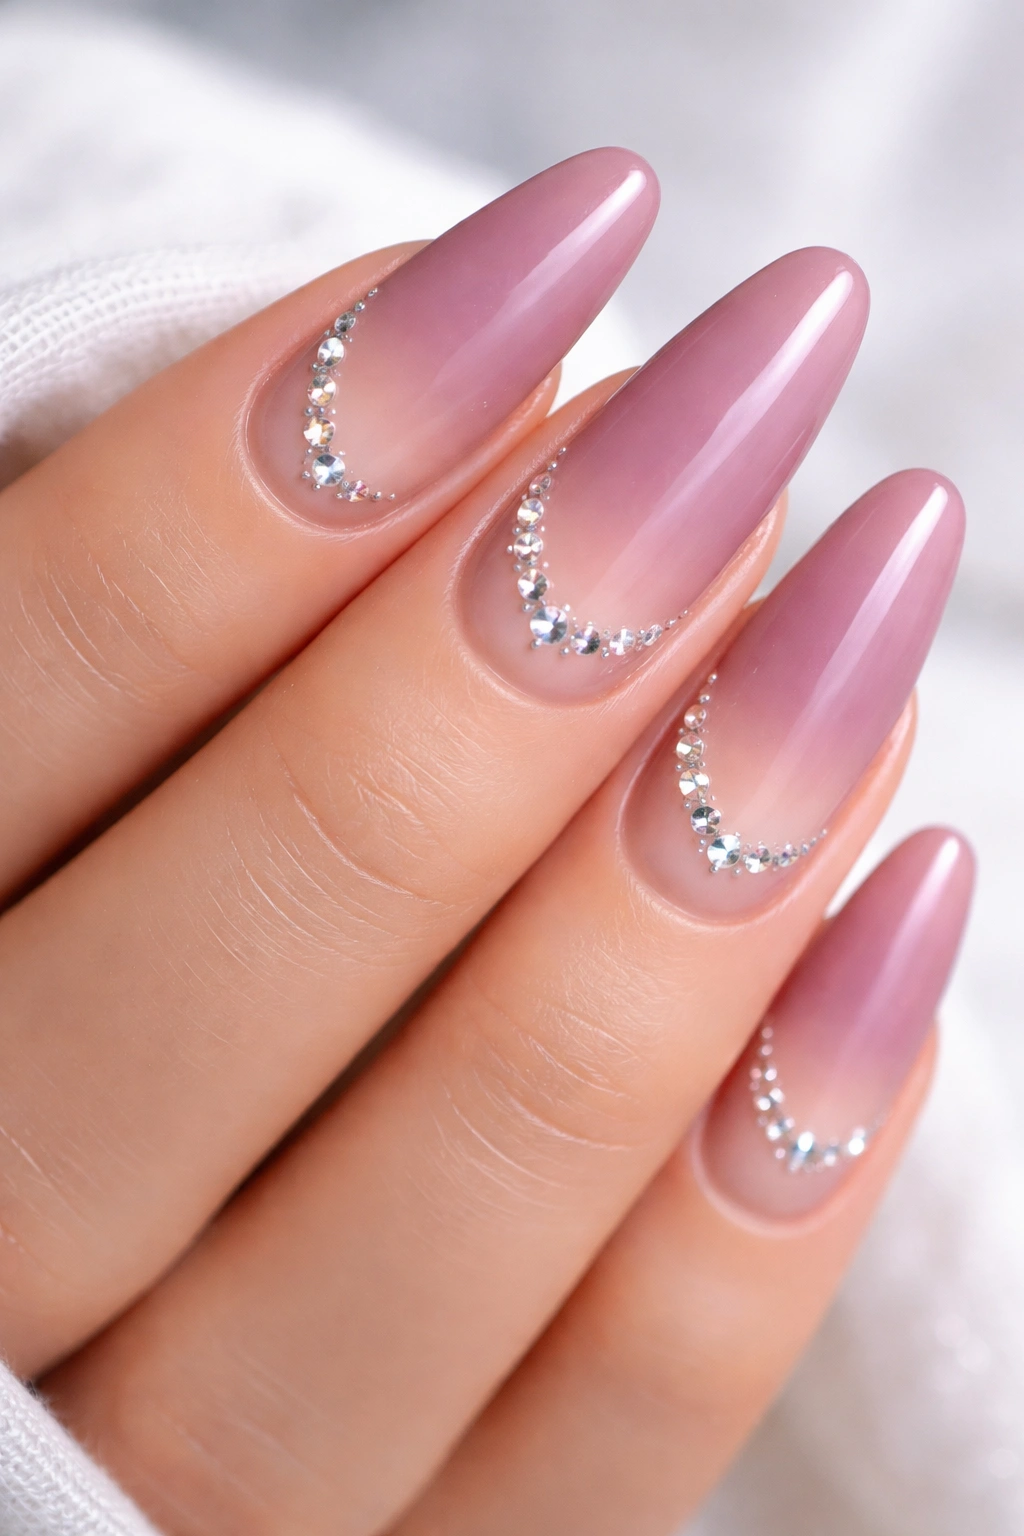
Mauve base gradually ombres to nude at the tips, with strategically placed rhinestones that catch light. The color transition is soft, and the gems add just enough glamour.
The Sophisticated Feel of This Design
Mauve is having a major resurgence, and it pairs beautifully with nude for an ombré effect that reads as both modern and elegant. The rhinestones add sparkle without being over-the-top. This design works for date nights and special occasions.
Design Ideas to Request
- Opaque mauve gel base
- Nude or blush gel for tips
- Sponge-blended ombré transition
- High-quality rhinestones placed along the ombré line
- Can create patterns with stones or scatter them randomly
- High-shine topcoat to make gems sparkle
26. Creamy Off-White With Delicate Gold Leaf
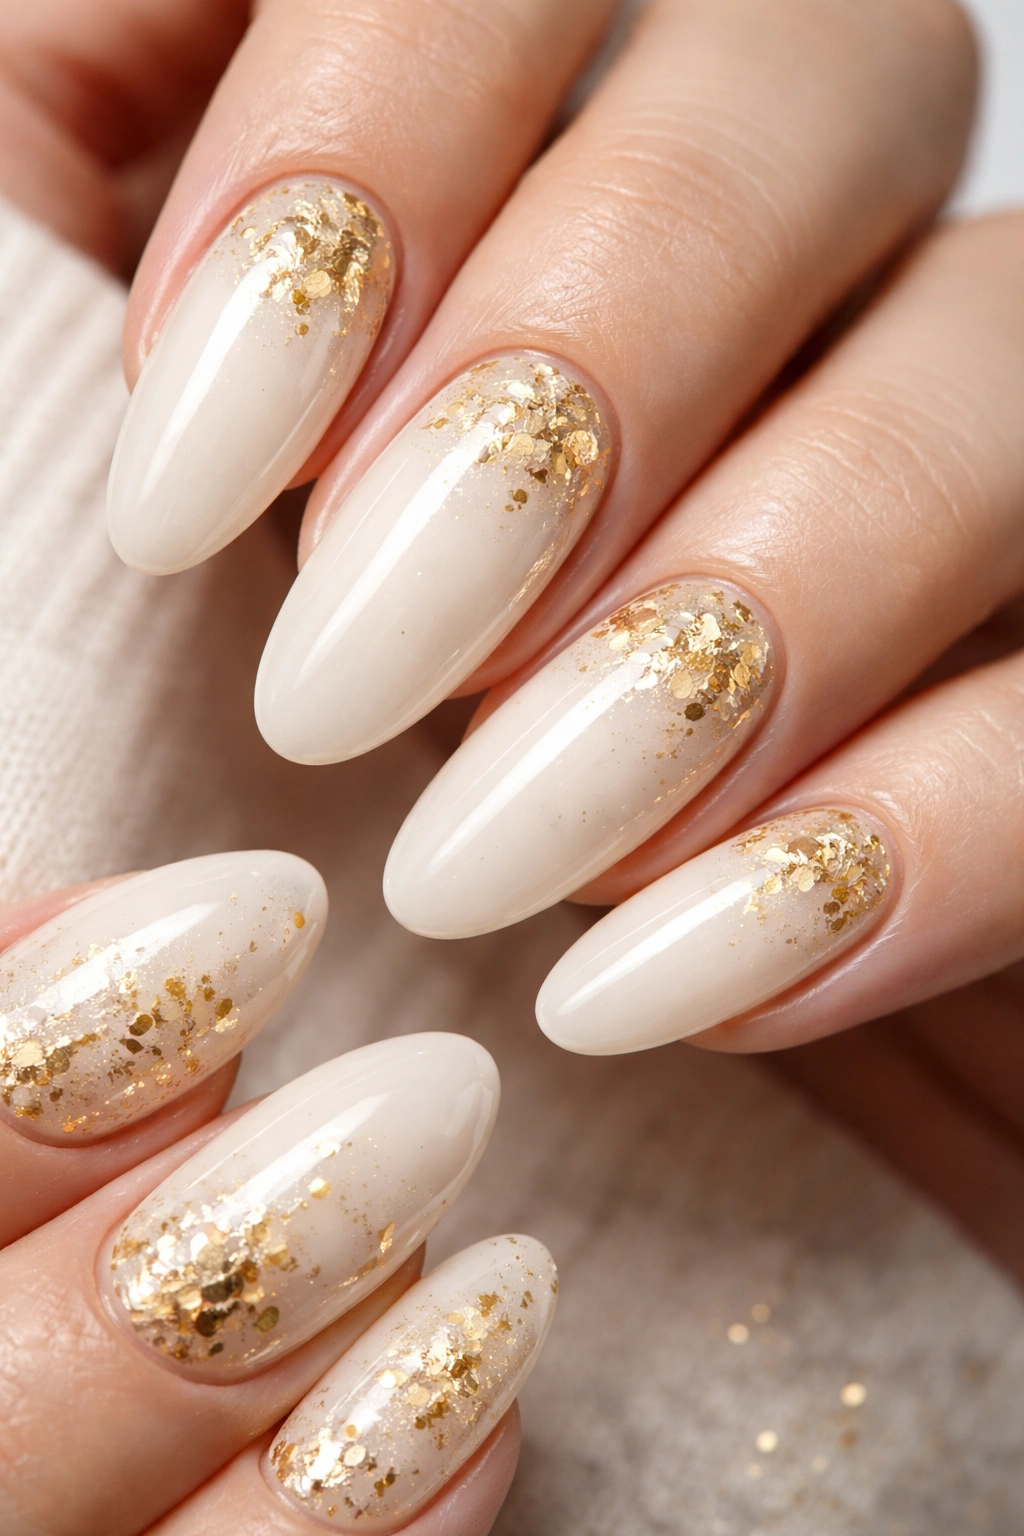
Off-white or cream base with actual gold leaf flecks embedded under the topcoat. The gold leaf creates an organic, luxurious texture that looks handcrafted.
Why Gold Leaf Feels Special
Real gold leaf looks far more sophisticated than gold foil or glitter. The organic shapes and placement create uniqueness—no two nails look identical. This design reads as artistic and intentional.
How This Technique Works
- Opaque cream or off-white gel base
- Gold leaf (real or faux) applied while gel is still tacky
- Can cover entire nail or concentrate leaf on tips
- Apply topcoat carefully to seal the delicate leaf
- High-shine topcoat to protect and illuminate
- Requires skilled placement to avoid wrinkles or air bubbles
- More expensive than standard gel due to gold leaf material cost
27. Soft Peach With Fine Glitter Ombre
Peachy base gradually transitions to sparkly clear gel at the tips, with glitter density increasing toward the nail edge. The effect is a soft color that becomes progressively more glittery.
The Wearability of Glitter Ombré
Glitter ombré allows you to have sparkle without committing to fully glittered nails. The soft peach keeps it wearable for work, while the glitter tips add a touch of glamour. This design works for any season.
Design Elements to Request
- Opaque soft peach gel base
- Translucent peach-tinted gel for the transition zone
- Fine glitter mixed into clear gel for tips
- Gradually increase glitter density from middle to tip
- Glossy topcoat for maximum sparkle
- Evenly blended transitions essential
28. Dark Plum Base With Holographic Details
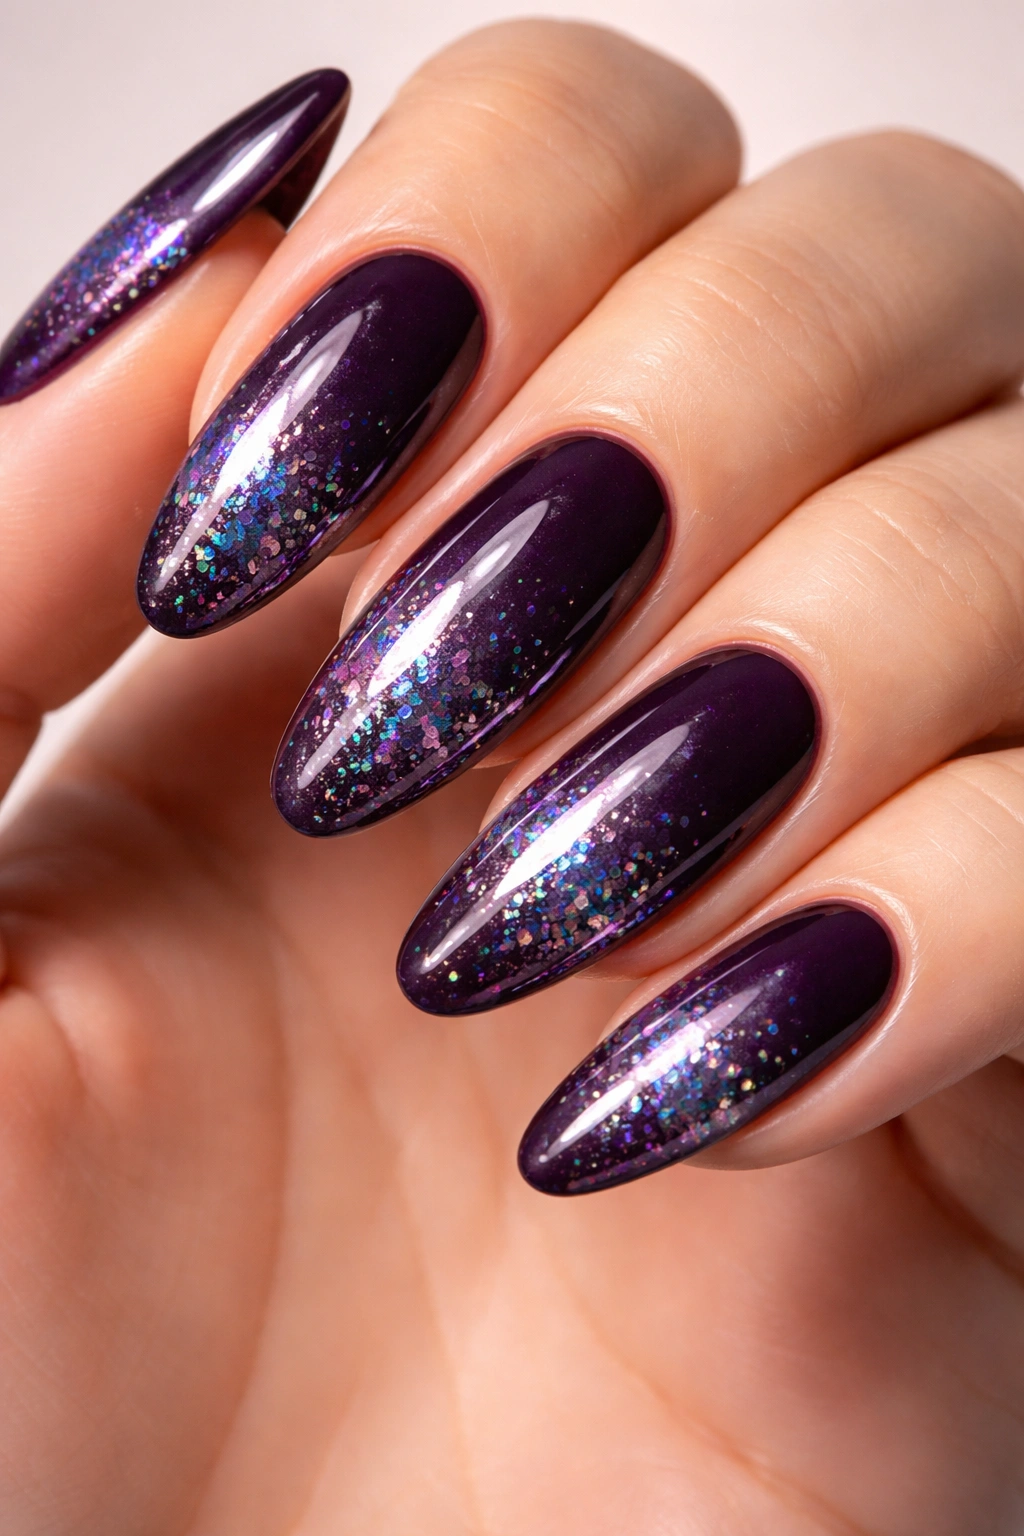
Deep, sophisticated plum covers the nails while holographic accents (which shift colors in light) add modern, eye-catching details. Holo flecks can be scattered throughout or concentrated on certain areas.
Why Holographic Elements Feel Contemporary
Holographic accents are trend-forward without being trendy—they catch light in unique ways and create a futuristic aesthetic. Plum grounds the design, preventing it from feeling gimmicky. On long ovals, holographic details draw the eye along the nail’s length.
Design Ideas to Request
- Deep plum or eggplant gel base
- Holographic flecks or powder for dimension
- Can cover entire nail with holo or use it as accent stripes
- Can create geometric patterns using holo material
- Very high-shine topcoat essential to show off the holographic effect
- Can also use holographic tips for French-manicure-style effect
29. Nude Base With Personalized Initial or Minimal Text
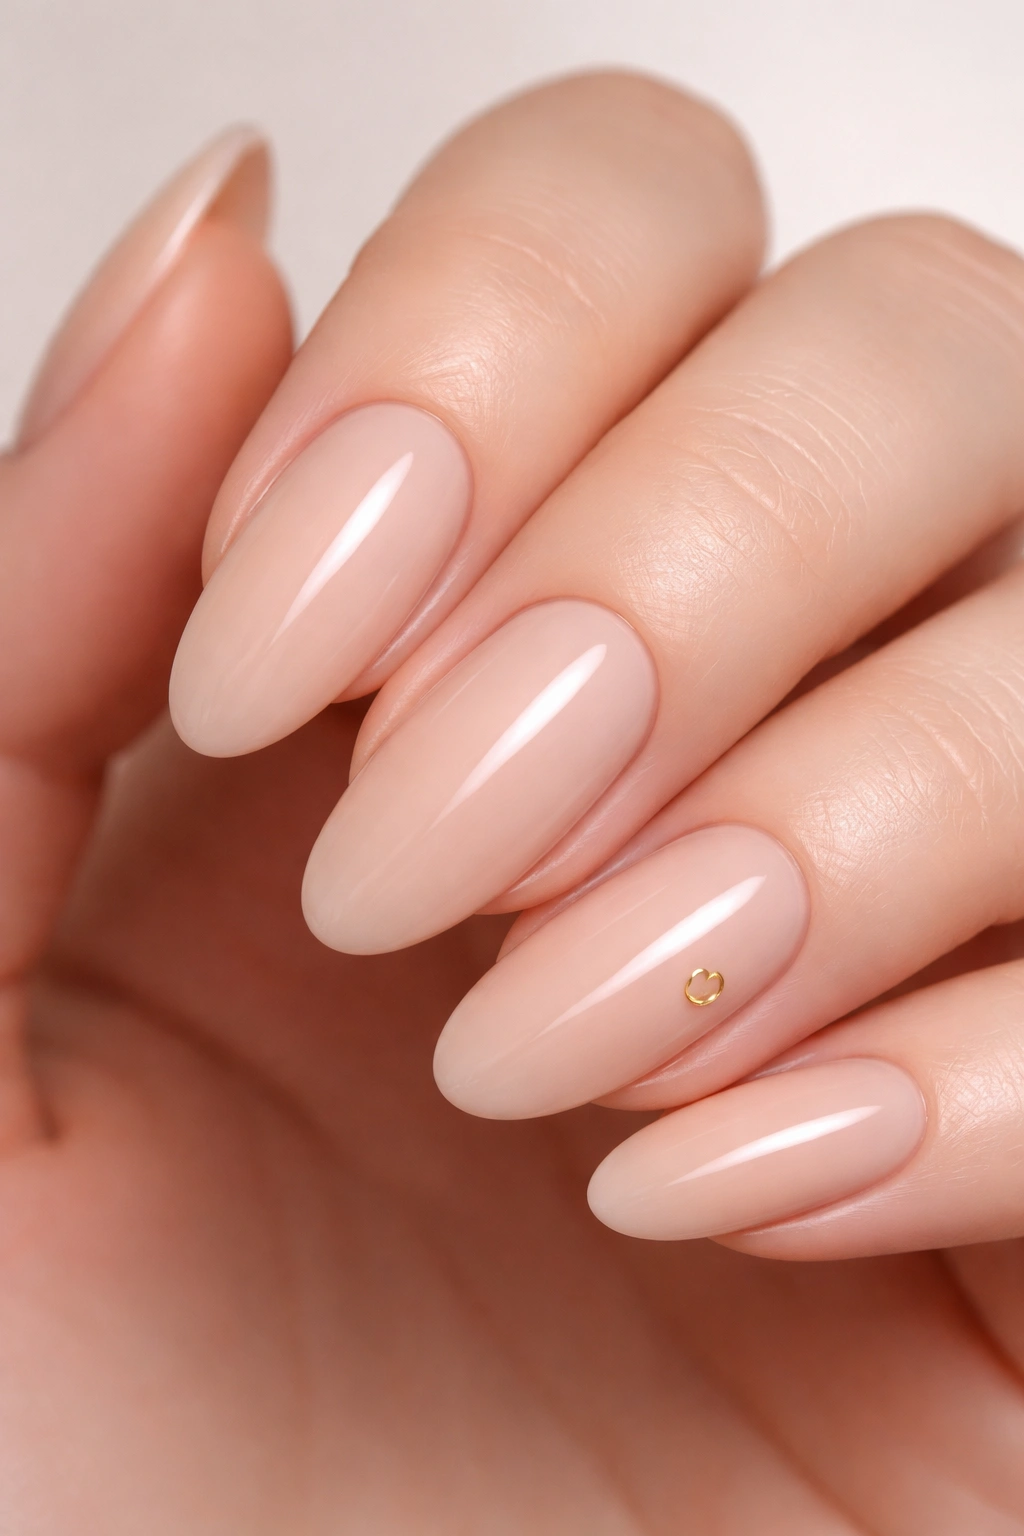
Skin-toned nude base with a single initial, meaningful word, or tiny date written in an elegant font. The text is small and refined, not bold or obvious.
The Personalization Factor
Personalized nails feel special and meaningful. A single small initial or date adds sentimental value without being loud. On long ovals, small text centered on one nail becomes a focal point without overwhelming the design.
How to Execute This Design
- Opaque nude gel base
- Black, gold, or white gel paint for text (depending on contrast preference)
- Use fine striping brush for precision
- Can place initial on one or all nails
- Glossy or matte topcoat both work
- Consider adding tiny diamonds or rhinestones next to text for elegance
30. Gradient From Soft Pink to Deep Burgundy With Gold Accents
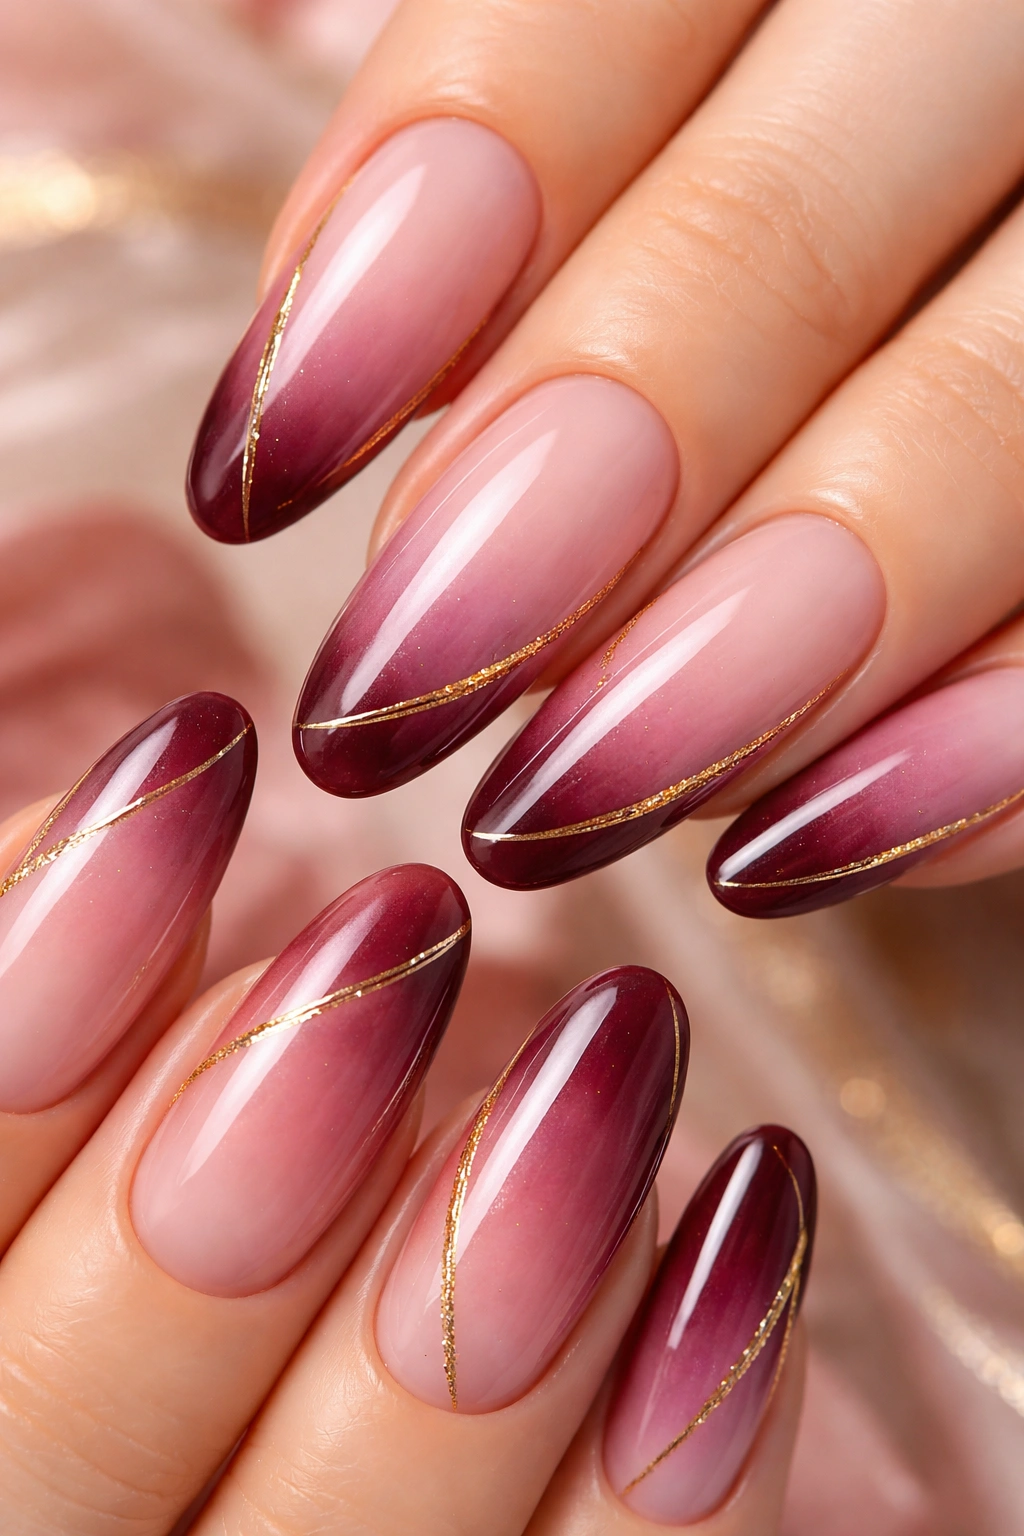
Soft pink at the base gradually deepens through rose, mauve, and finally deep burgundy at the tips. Thin gold accents run along the sides or in stripe patterns throughout.
The Romance and Drama of This Design
This gradient combines soft, romantic tones with deep, luxurious burgundy. The gold accents add polish and prevent the design from feeling heavy. On long ovals, the color gradient emphasizes the nail’s length beautifully.
How to Achieve This Look
- Soft pink gel base
- Multiple shades of rose, mauve, and burgundy
- Sponge-blend shades together for seamless gradient
- Apply gold gel stripes or accents before final topcoat
- Can run gold vertically, horizontally, or scattered throughout
- High-shine topcoat to bring everything together
- Requires multiple applications and careful blending technique
Final Thoughts
Long oval nails offer endless design possibilities, from minimalist elegance to dramatic, eye-catching art. The key to finding your perfect design is considering your lifestyle, skin tone, and personal style rather than just jumping on whatever’s trending this moment. Do you spend your days typing and need something practical? A simple French manicure or solid color with subtle accents might serve you best. Do you want heads to turn? Chrome powder or holographic accents deliver impact without looking over-the-top on the oval shape.
When you’re ready to book an appointment, save your top 3-5 designs and show them to your technician. Include a close-up photo of the oval shape itself so they understand the length and curve you’re after. The best nail designs come from clear communication between you and someone who understands the technical side of creating exactly what you’re envisioning.
Long ovals are forgiving, flattering, and endlessly versatile. Whether you’re drawn to classic elegance, trendy textures, or artistic expression, there’s an oval nail design waiting for you to make it your signature look.
