

Soft square nails have become the go-to shape for anyone who wants something between the edgy corners of a sharp square and the gentle curves of an almond. They’re basically the Goldilocks of nail shapes — not too sharp, not too rounded, just right. This hybrid shape gives you more surface area than traditional squares (perfect for showcasing nail art) while keeping that sophisticated, polished look without the risk of those sharp corners breaking off or catching on things. If you’re tired of plain manicures and ready to try designs that actually make people ask for your nail inspo, you’re in the right place.
The beauty of soft square nails is their versatility. They work with minimalist designs that whisper sophistication, bold patterns that scream creativity, and literally everything in between. Whether you’re into pastels and delicate details or rich jewel tones and sparkle, the soft square canvas makes almost any design look intentional and put-together. Let’s explore 30 specific designs that prove soft square nails don’t have to be boring — they can be absolutely gorgeous.
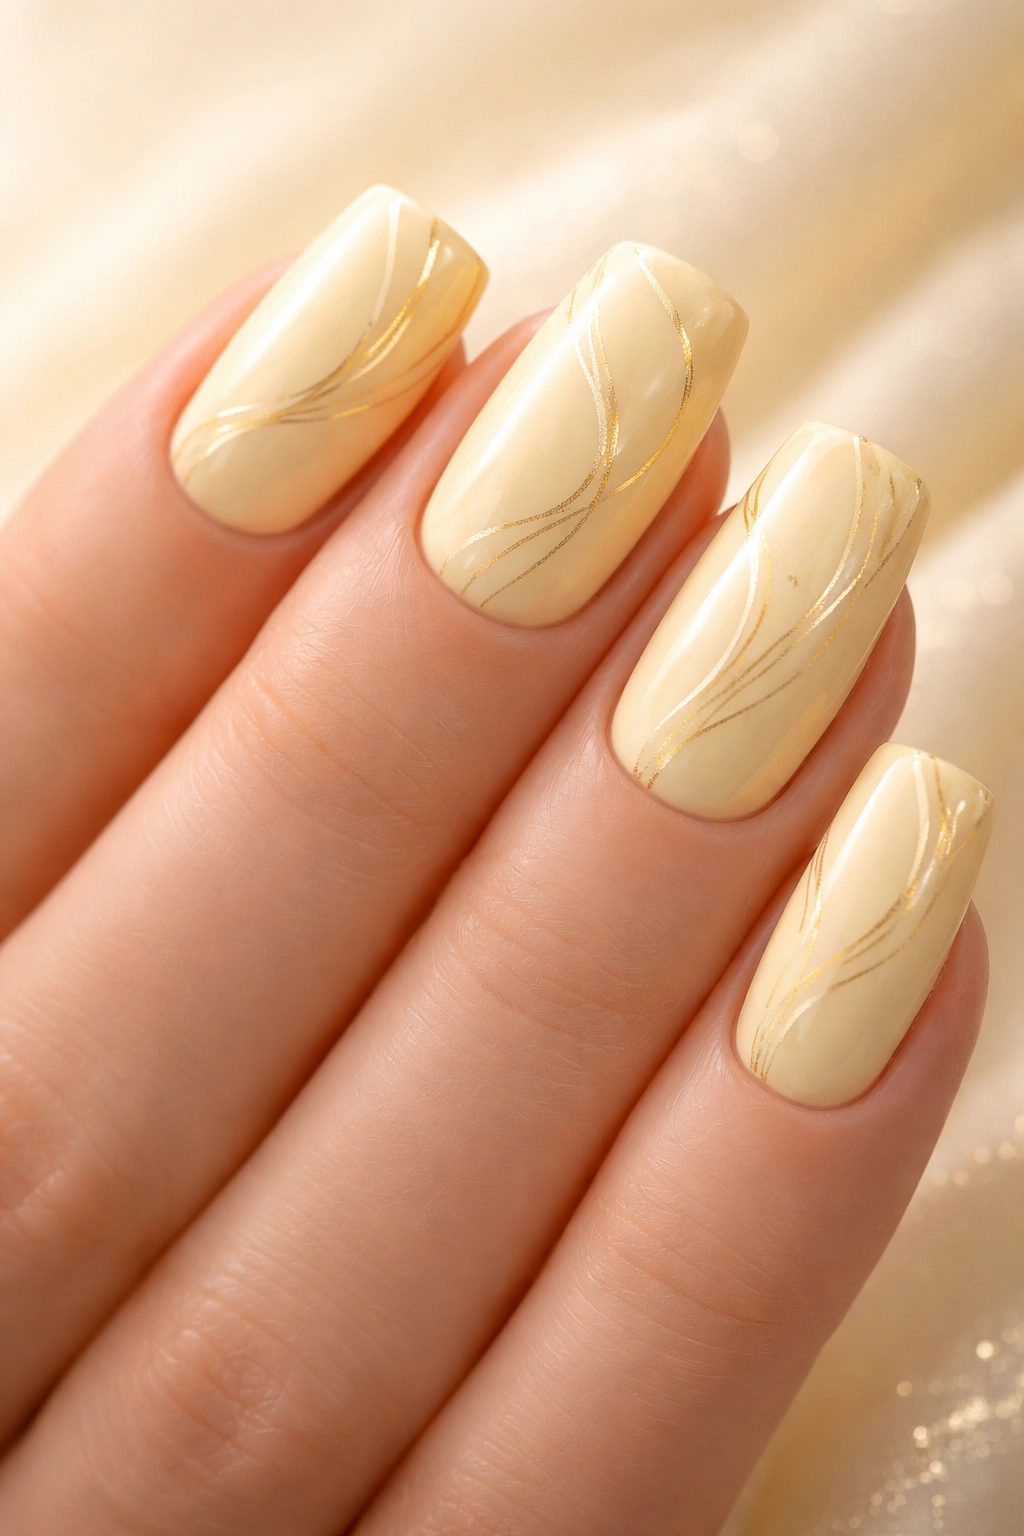
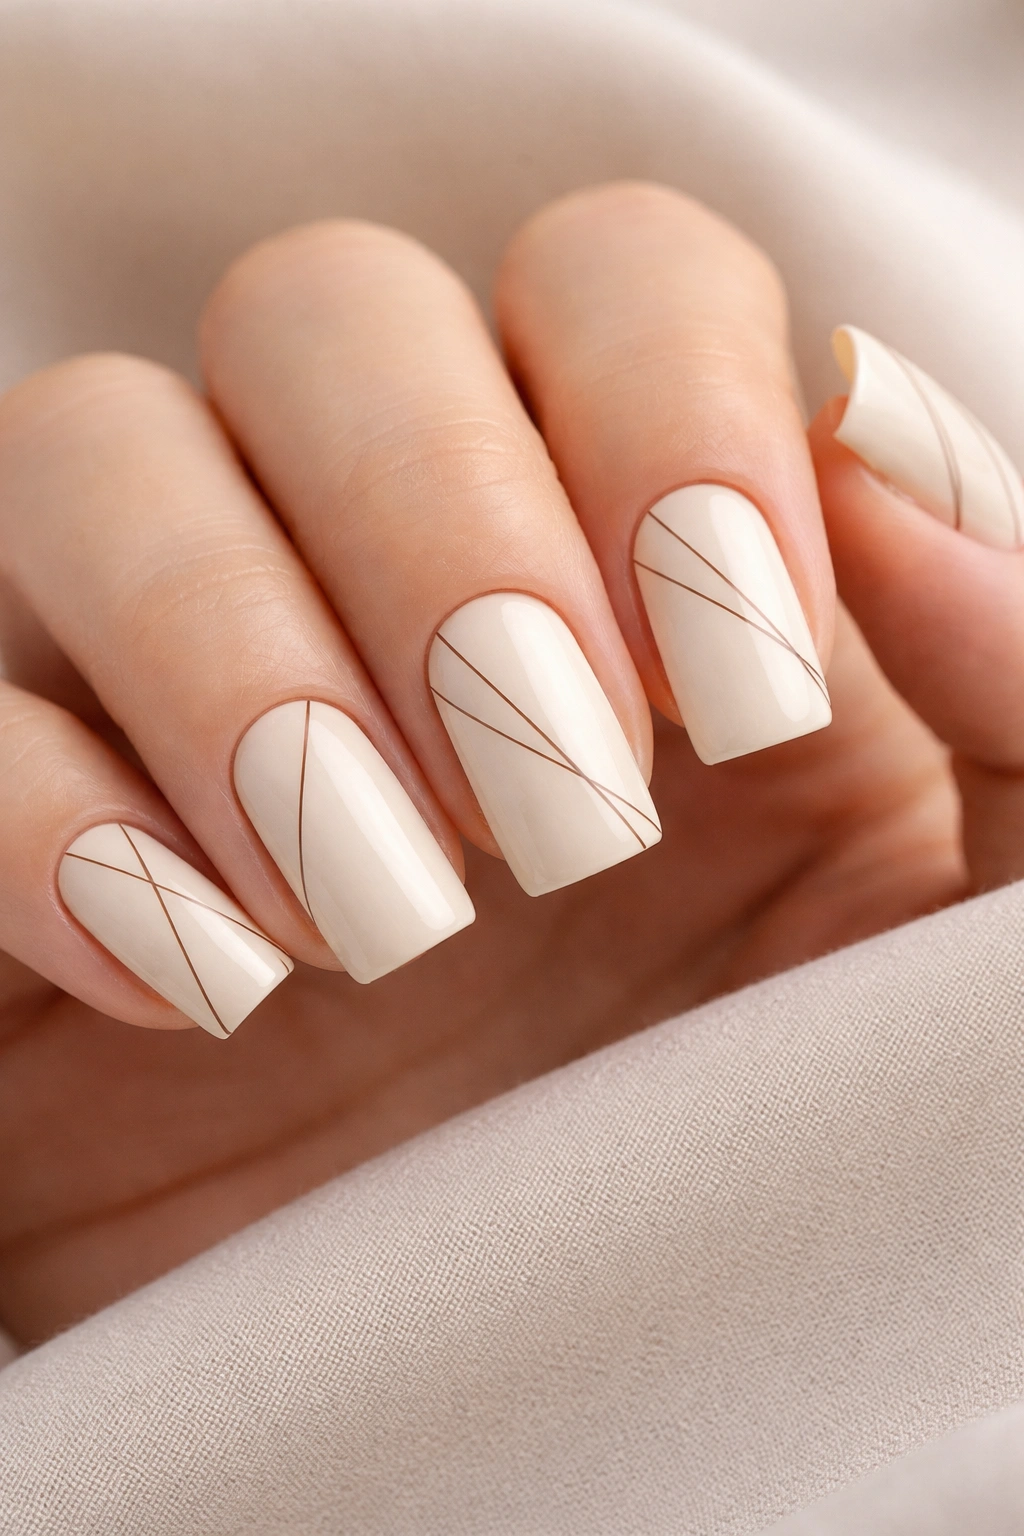
1. Barely-There Beige with Thin Gold Lines
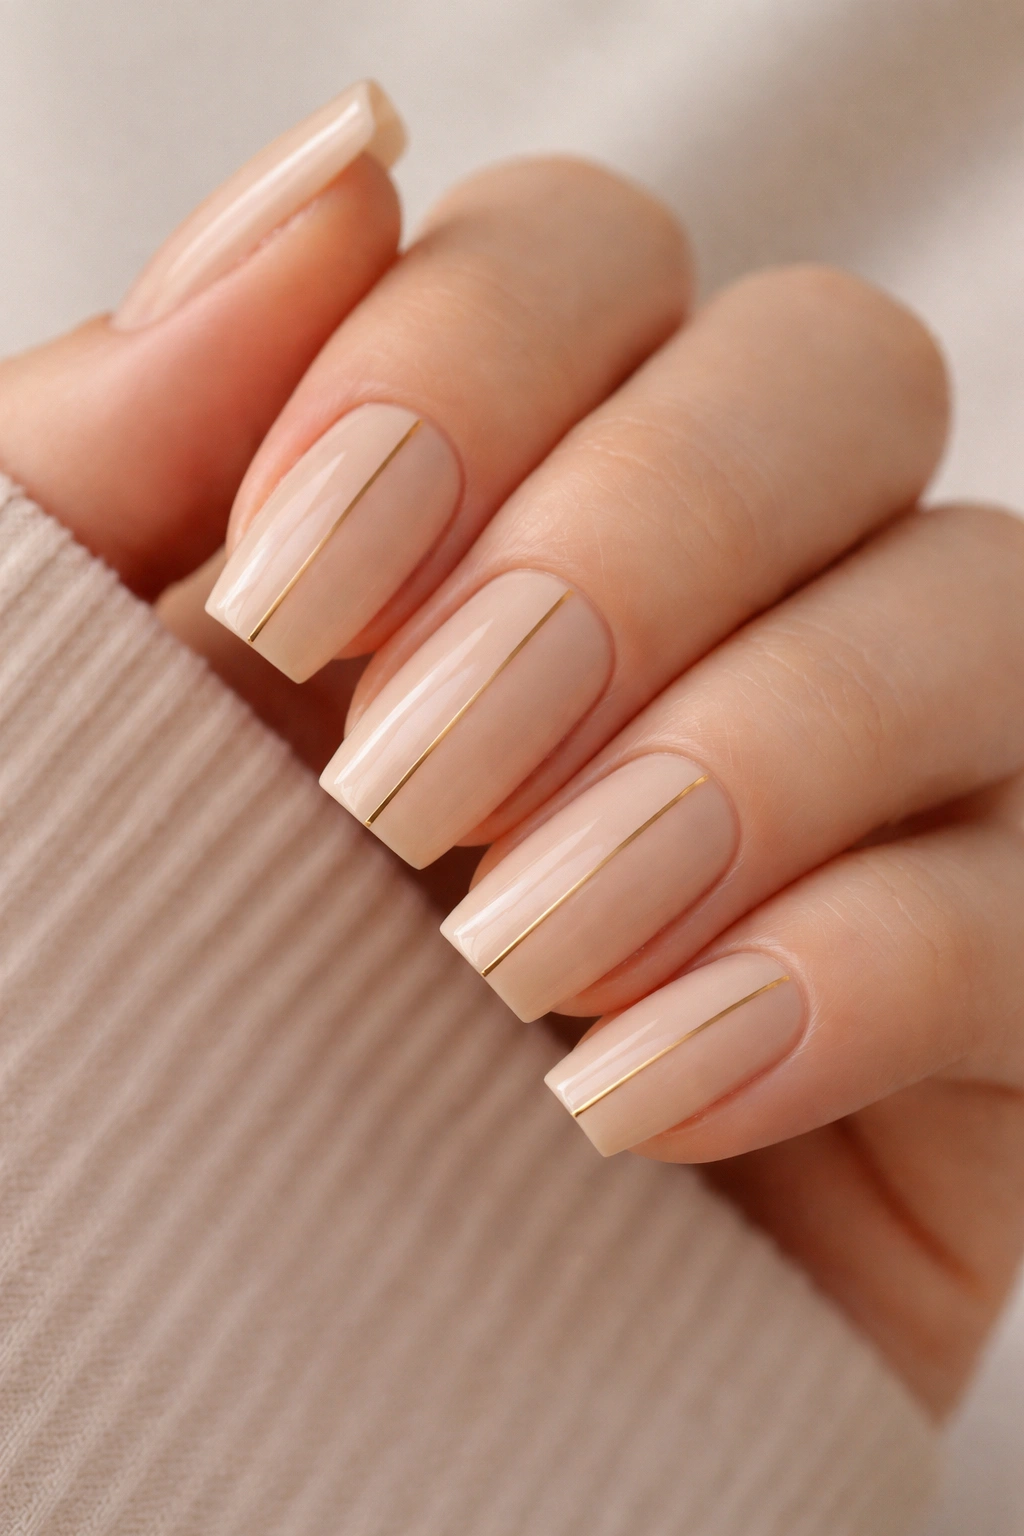
This is the definition of quiet luxury on your fingertips. A warm, creamy beige base pairs with the thinnest gold pinstripes running vertically down the center of each nail, creating an almost architectural feel without trying too hard.
Why This Works So Well
The minimalist gold lines add enough visual interest to keep things from feeling plain while the neutral beige keeps the whole look refined and wearable for literally any occasion. You get sophistication without the commitment of a bold design.
How to Nail This Look
- Start with a smooth base of creamy beige — think ballet slipper or tan nude
- Let it dry completely, then use a thin striping brush with pale gold to paint a single line down the center of each nail
- Keep the line as straight as possible for maximum elegance
- Finish with glossy topcoat for that expensive, salon-finished appearance
The key here is the beige choice — it needs to be warm enough to feel intentional but neutral enough to go with everything in your closet.
2. Dusty Rose with Subtle Glitter Gradient
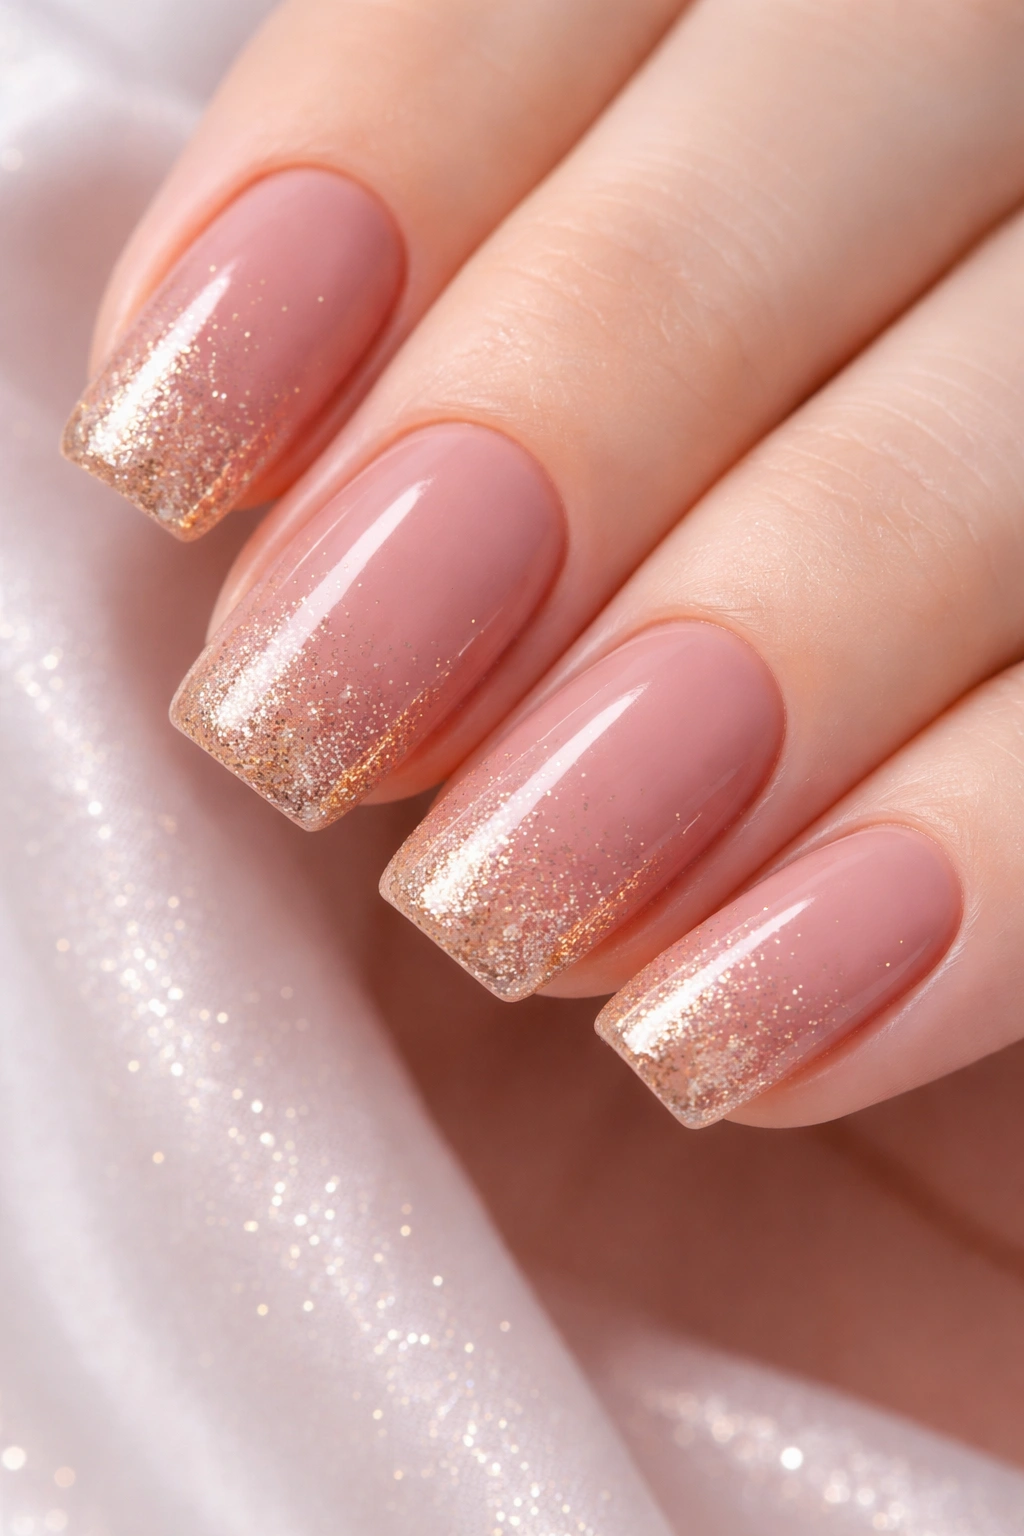
Picture a soft rose tone that’s almost gray-pink, fading into barely-there gold glitter at the tips. It’s romantic without being over-the-top, and it catches the light beautifully.
The Perfect Balance of Shimmer
This design lives in that sweet spot between understated and eye-catching. The muted rose keeps it wearable, while the glitter gradient gives you just enough sparkle to feel special.
How to Apply It
- Paint the entire nail with dusty rose or mauve-pink base polish
- Once dry, dip a dense makeup sponge into fine gold glitter polish
- Press and pat (don’t swipe) the sponge onto just the last half of each nail for a gradual gradient
- Seal everything with a glossy topcoat to blend the effect slightly
Pro tip: Let the first coat of gradient be lighter and sheer, then add a second application of sponge-dabbing if you want more intensity in the glitter.
3. Cream with Chocolate Brown Matte Tips

A creamy off-white base with matte chocolate brown tips creates a color-blocked effect that’s incredibly chic. It’s like a deconstructed French manicure but make it modern.
Why Color Blocking Never Goes Out of Style
This look works because it’s bold enough to be noticeable but subtle enough to feel sophisticated rather than playful. The matte finish on brown against glossy cream adds texture interest too.
Achievement Method
- Apply 2-3 coats of creamy white or off-white to the entire nail
- Once fully dry, place a thin line of painter’s tape straight across where you want the brown to start (usually about 1/3 of the way down from the tip)
- Paint the exposed tip portion with matte chocolate brown polish
- Remove tape while still slightly tacky for the cleanest line
- Top with matte topcoat on the brown section only, keeping the base glossy
The tape method gives you crisp, clean lines that hand-painting can’t match.
4. Soft Lavender with White Daisy Chains

A dreamy lavender base gets delicate white daisies with tiny yellow centers scattered across it in a loose, random pattern. It’s romantic and springy without being juvenile.
The Charm of Hand-Painted Details
These tiny flowers feel special because they’re hand-done, not stamped. Even if they’re not perfectly symmetrical, that imperfection makes them feel personal and charming.
How to Paint Them
- Start with 2 coats of soft, muted lavender
- Using a thin detail brush or dotting tool, paint small white circles for the flower petals
- Add a tiny yellow dot in the center of each flower
- Space them irregularly across the nail for a natural, picked-just-now feeling
- Finish with a shiny topcoat
You don’t need to be an artist for this — simple dots form petals, and it looks effortless and sweet.
5. Sage Green with Cream Leaf Details

Imagine a sophisticated sage green base with delicate cream-colored leaves trailing across the nail in a diagonal pattern. It’s nature-inspired without looking like a garden exploded on your fingers.
Why This Botanical Approach Works
The muted sage green is calming and wearable, while the leaf details add artistry without overwhelming the design. It’s the kind of manicure that makes you feel like you have your life together.
Execution Strategy
- Paint the entire nail with sage green (about 2 coats for full opacity)
- Use a very fine detail brush with cream or off-white polish to paint simple leaf shapes
- Make each leaf with just 2-3 brushstrokes for an organic, loose look
- Add a thin center line to each leaf for definition
- Seal with glossy topcoat
Pro tip: If painting leaves feels intimidating, you can find leaf-shaped nail stamps that make this design foolproof.
6. Blush Pink with Rose Gold Flecks
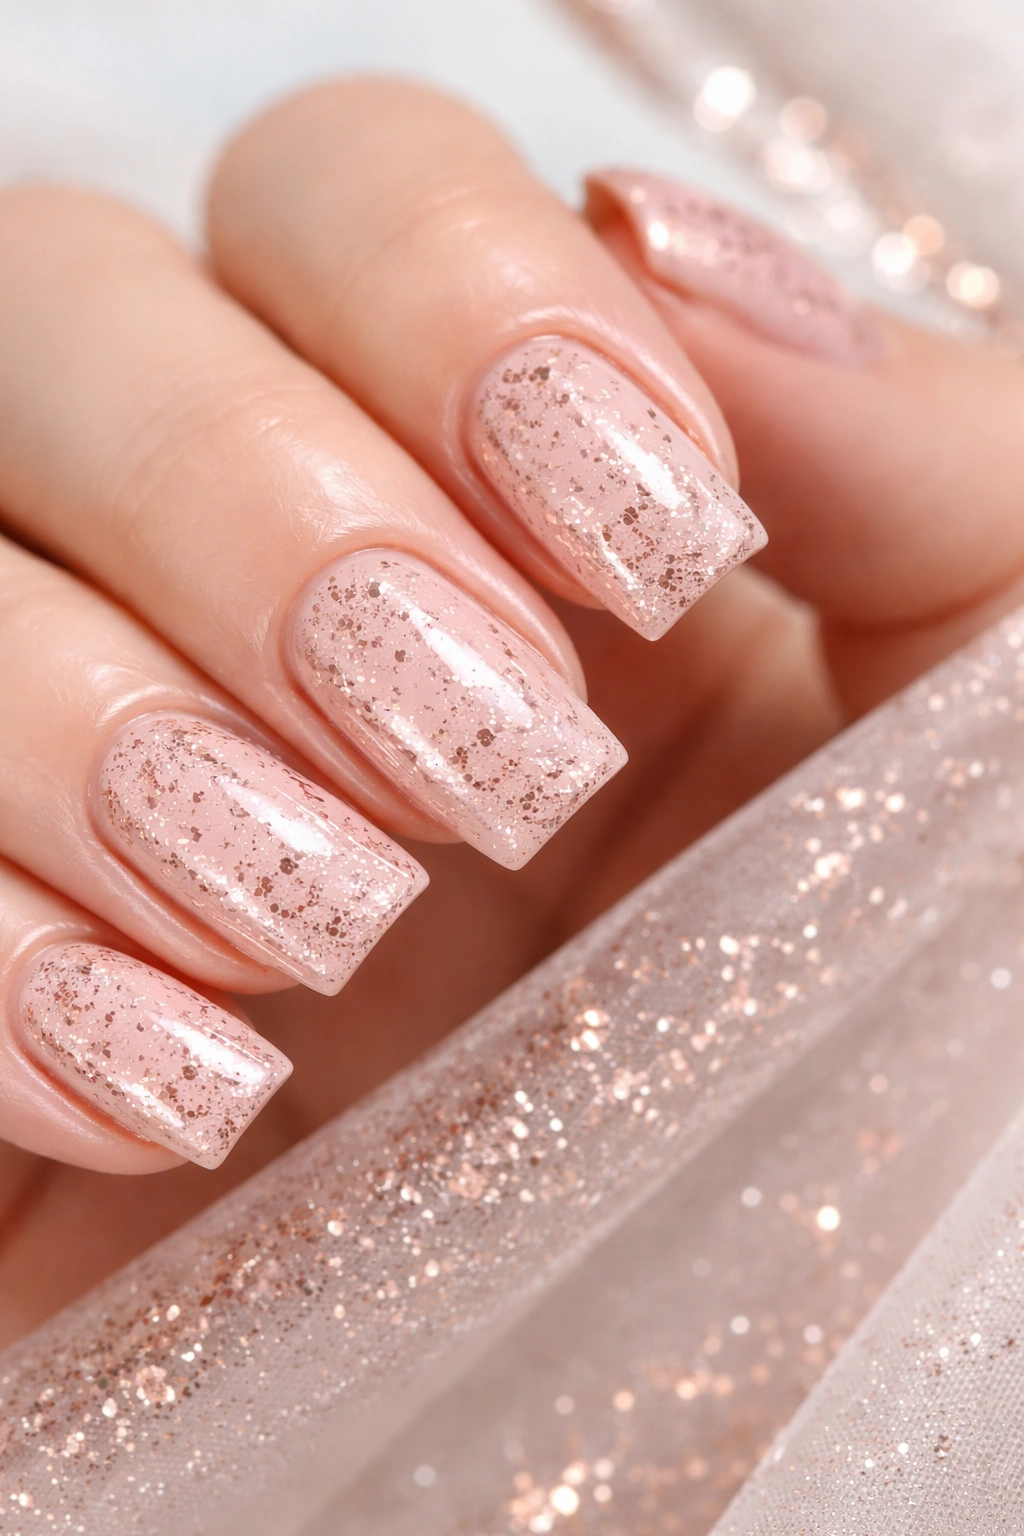
A soft, barely-there blush pink base gets dotted with tiny rose gold metallic flecks scattered randomly across the entire nail. The flecks catch light and create subtle sparkle.
The Elegance of Subtle Metallics
This design is proof that you don’t need heavy glitter or complex patterns to make nails feel elevated. A few strategically placed metallic touches completely change the vibe.
How to Create This
- Apply 2 coats of blush pink to each nail, ensuring smooth, even coverage
- Using a toothpick or thin dotting tool dipped in rose gold polish, place tiny dots all over the nail
- Work in different densities — some nails can have more dots than others for visual interest
- Seal with glossy topcoat
The randomness is intentional here — it should look effortless, not calculated.
7. Pale Yellow with Tiny Sunflower Accents
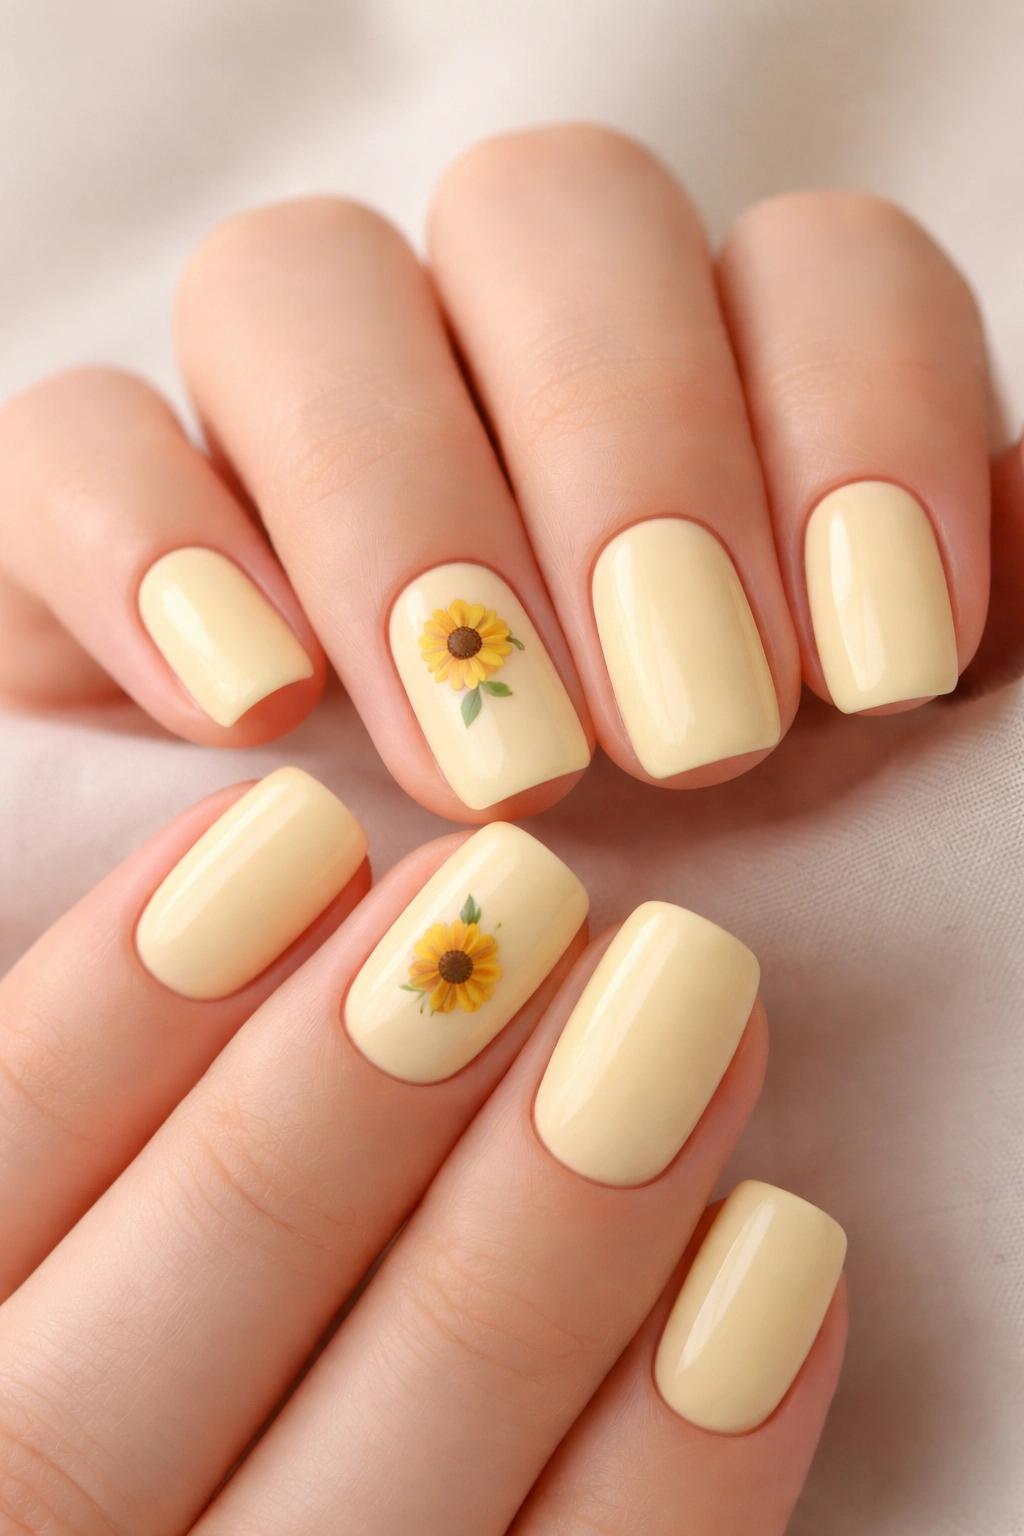
A cheerful pale yellow base (think pale butter, not bright highlighter) gets a single small sunflower on one or two nails. Minimal art, maximum impact.
Why Less is More
By limiting the sunflower to just one or two accent nails, you create a focal point that draws the eye without making the design feel busy. It’s a calculated use of negative space.
The Sunflower Method
- Paint all nails with pale yellow (2 coats minimum)
- On your accent nail (usually your ring finger), use a detail brush to paint a circle for the flower center in burnt orange
- Paint small yellow petals around the center in a circular pattern
- Add a few green brushstrokes for leaves
- Use glossy topcoat to seal
This design is perfect for summer and instantly reads as fresh and optimistic.
8. Cool Gray with Silver Geometric Lines
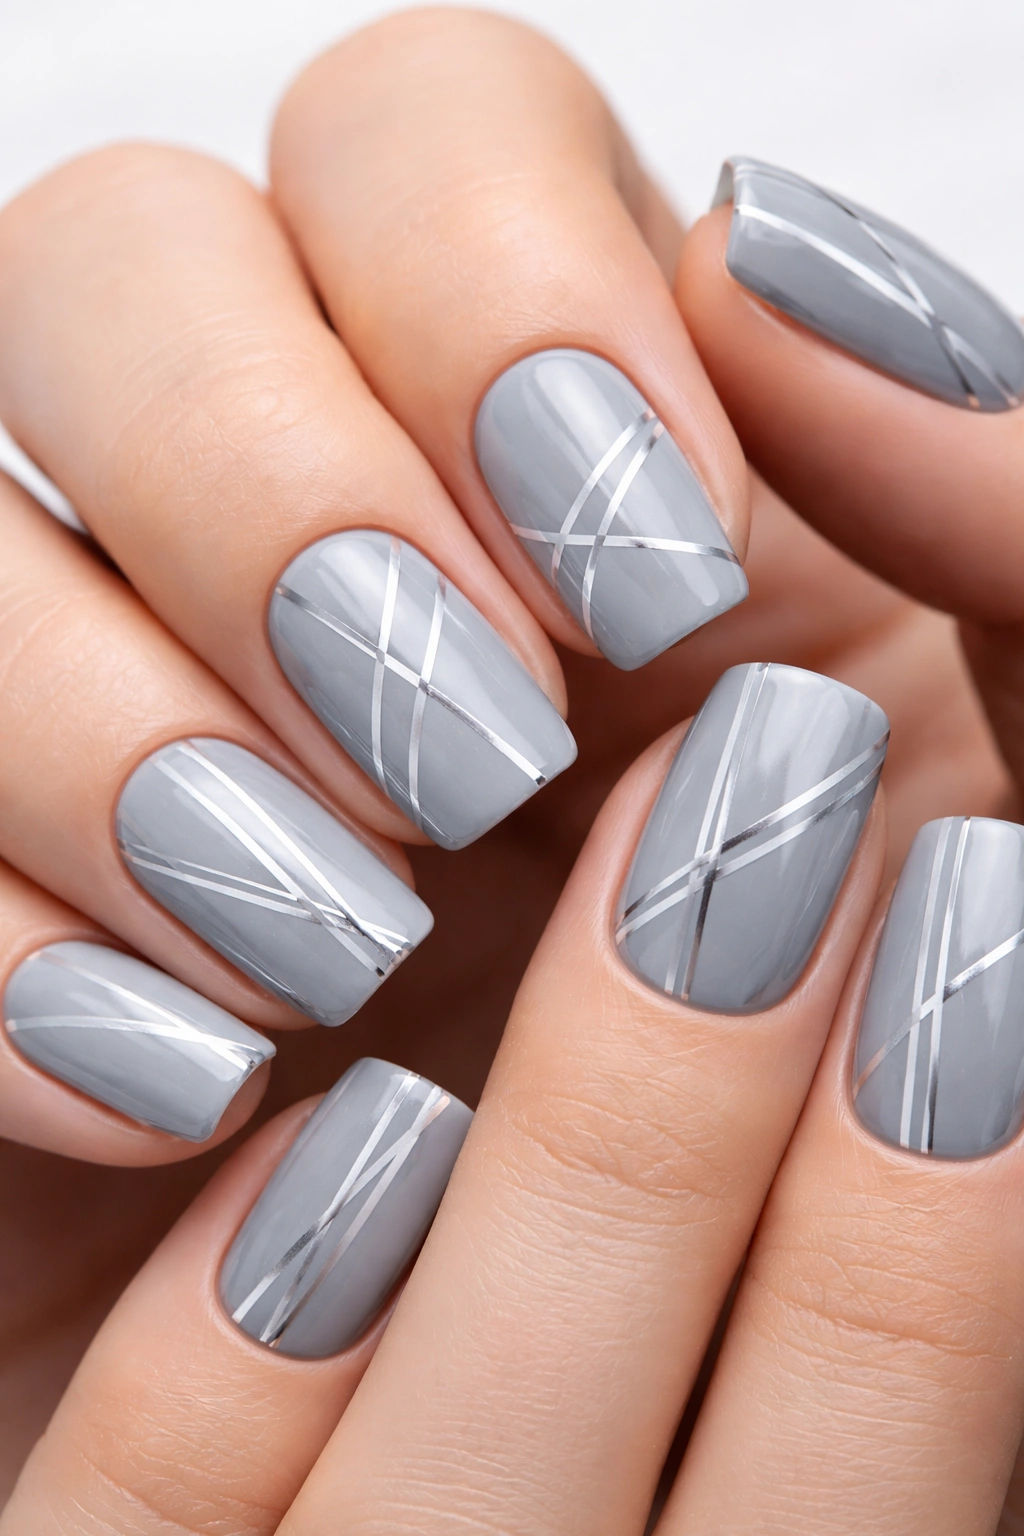
A sophisticated cool-toned gray base crisscrossed with thin silver metallic lines in geometric patterns. It’s futuristic and elegant at the same time.
The Power of Geometric Design
Clean lines and angular patterns make any design feel modern and intentional. Paired with metallic accents, it becomes almost architectural.
How to Execute
- Paint the entire nail with cool, medium gray (2 coats)
- Using a thin striping brush and silver metallic polish, draw straight lines across the nail at various angles
- Some nails can have parallel lines, others can have intersecting patterns
- Keep the lines perfectly straight for maximum impact
- Finish with glossy topcoat
Pro tip: Use painter’s tape if you struggle with straight lines — tape off sections and paint silver, then remove while wet.
9. Soft Coral with White Negative Space Designs
A warm coral base gets sections carved out (negative space) where your actual nail shows through, or filled with white polish, creating an artistic, gallery-like effect.
The Appeal of Negative Space
This technique makes even simple designs feel sophisticated and considered. It’s also visually lighter than full-coverage designs, perfect if you want a fresh feeling.
How to Create It
- Paint the coral base (2 coats for opacity)
- Once dry, lightly sketch your design with a pencil or white eyeliner (it’ll rub off)
- Using painter’s tape, tape off the shapes you want to remain as negative space
- Paint white polish carefully around the taped sections
- Remove tape while slightly tacky
- Seal with topcoat
The key is having a clear design in mind before you start — abstract shapes and geometric forms work better than complex images.
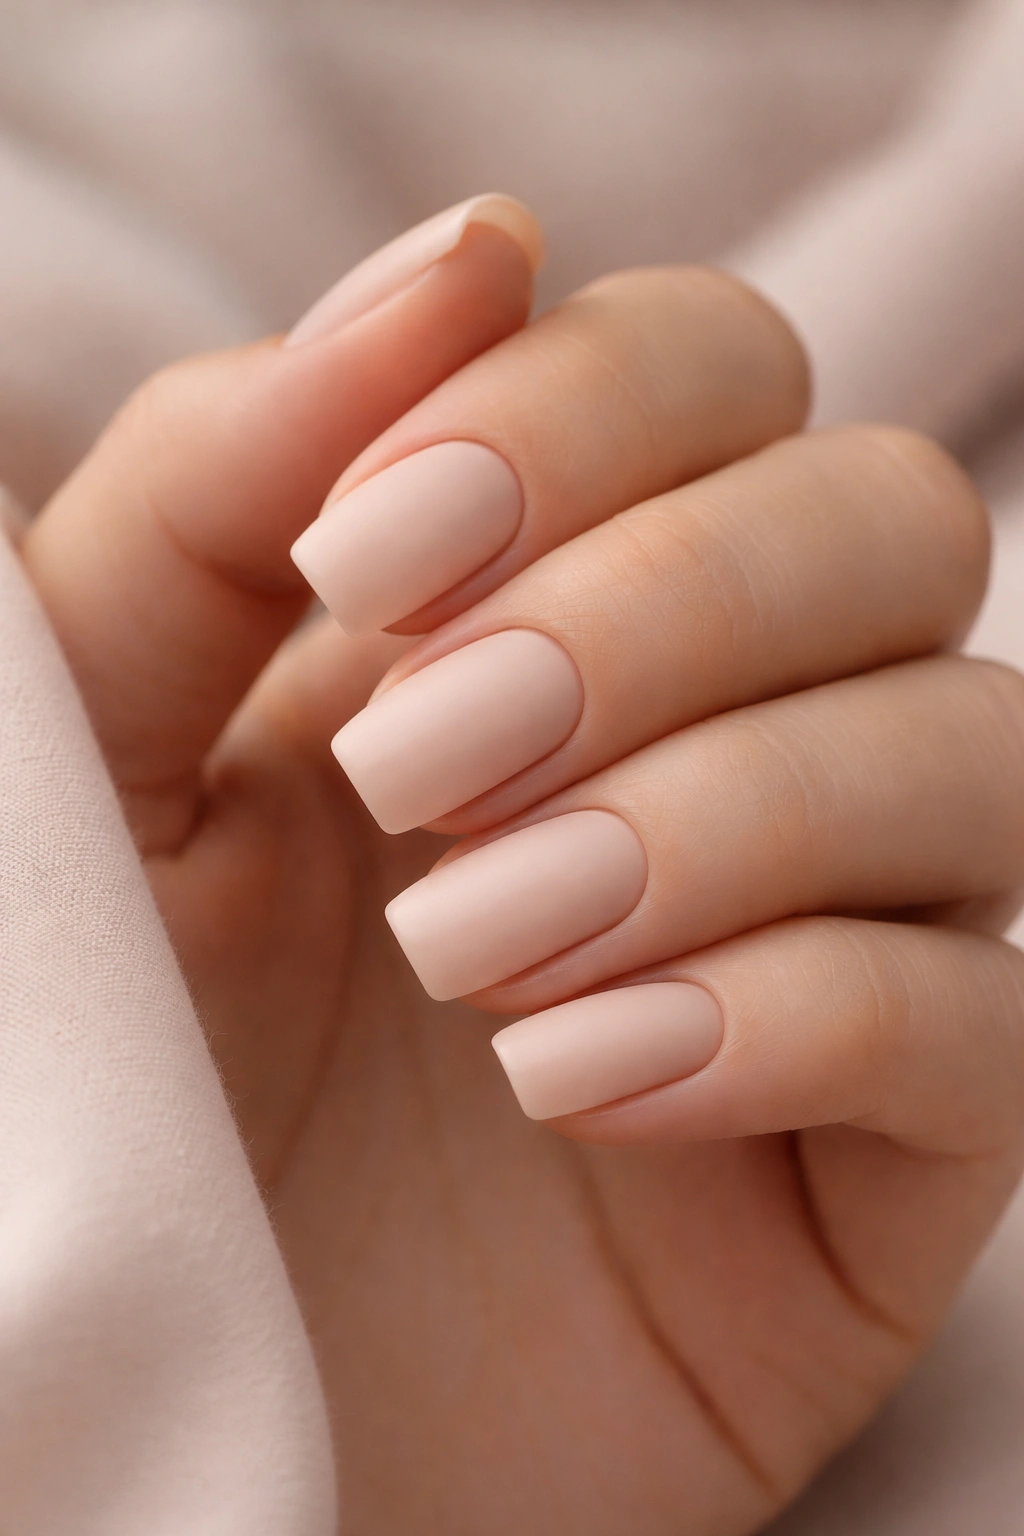
10. Mauve Nude with Delicate Speckle Effect
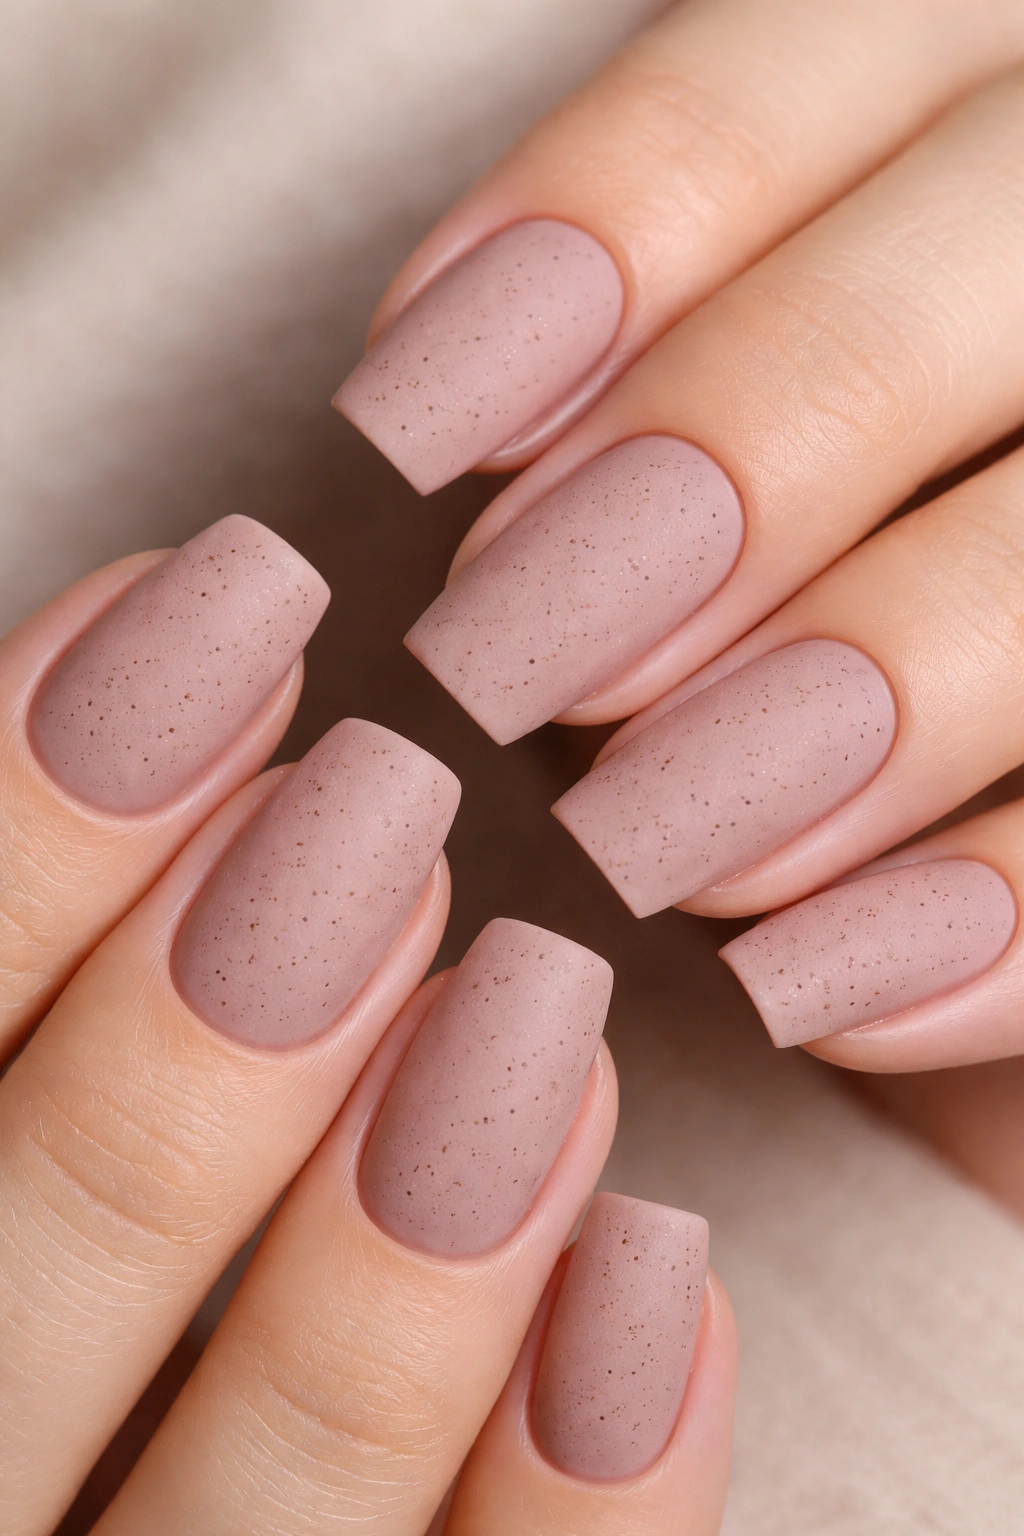
A warm, mauve-brown nude base gets a fine speckle effect in deeper brown, creating a subtle texture that’s visible up close but reads as solid from a distance. It’s understated but interesting.
Why Texture Matters
Adding dimension through subtle texture makes nails feel more refined and thoughtful. This isn’t glittery or chunky — it’s sophisticated.
The Speckle Application
- Paint the entire nail with your mauve nude base (2 coats)
- Using a toothpick or fine dotting tool dipped in dark brown polish, add tiny scattered dots all over the nail
- Keep the dots very small and slightly irregular in density
- Aim for speckles rather than obvious polka dots
- Finish with a matte topcoat for a velvety finish, or gloss for shine
This design photographs beautifully and feels luxurious without trying too hard.
11. Pale Pink with Delicate Lace Design
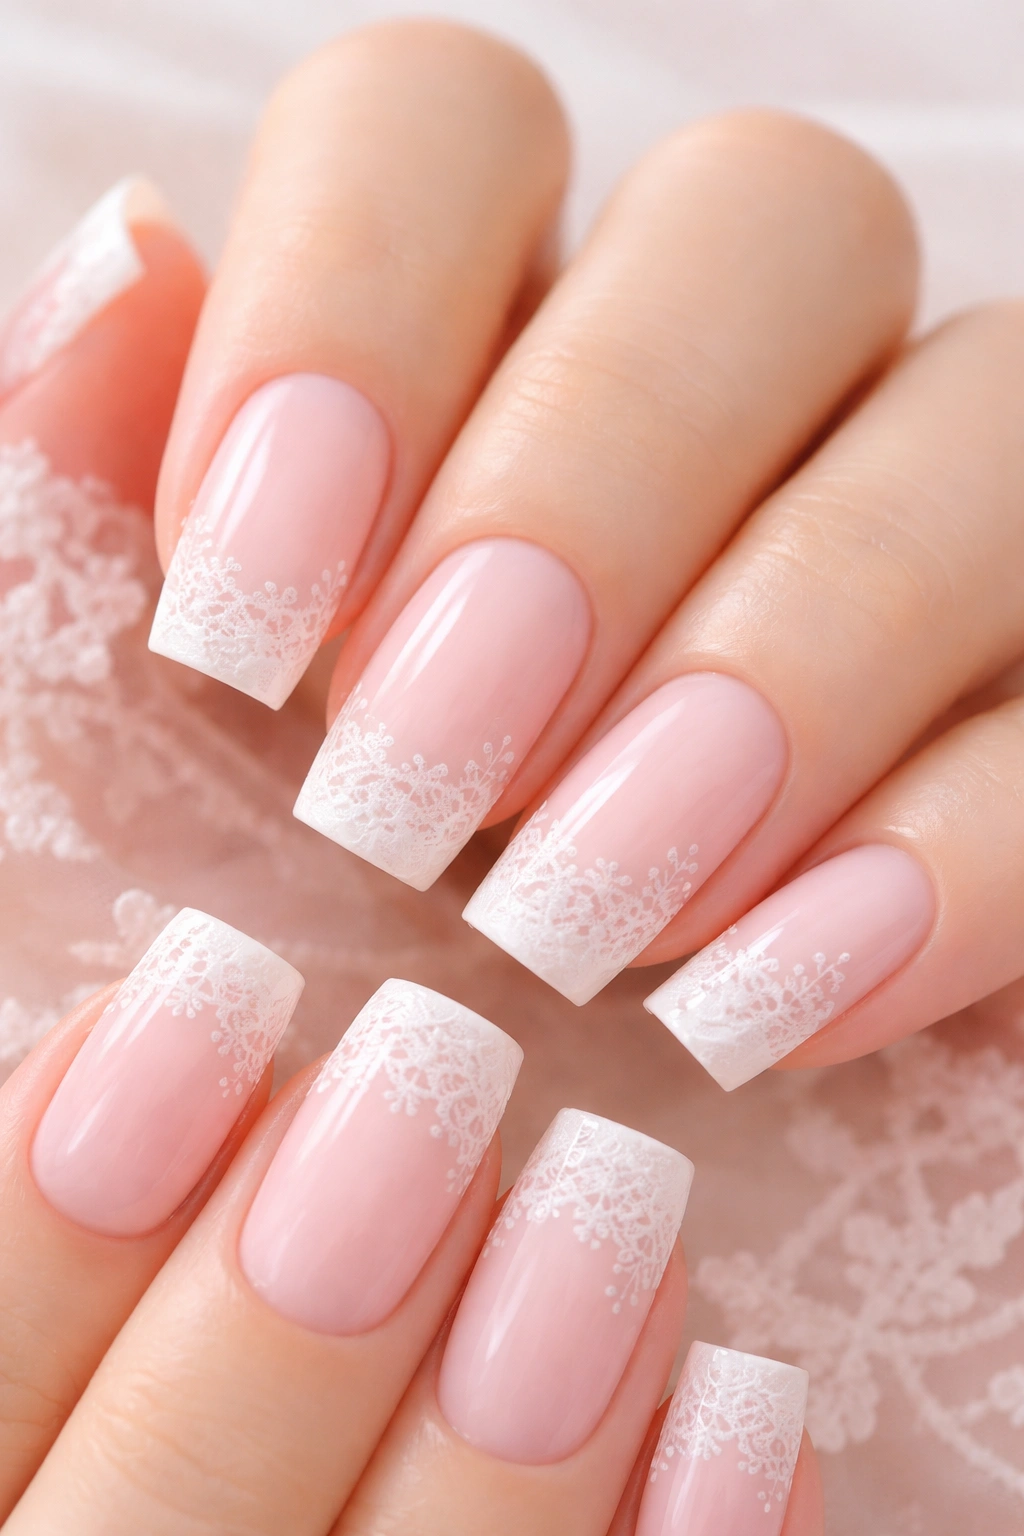
A milky pale pink base with white or pale gold lace patterns meticulously painted or stamped on. Think the delicate detail you’d find on wedding lingerie, but on your nails.
The Romance Factor
Lace instantly reads as feminine and intricate. It’s special-occasion-ready but can also be worn everyday if you love that aesthetic.
How to Achieve It
- Paint pale pink base coats until fully opaque (2-3 coats)
- If you’re skilled with a detail brush, paint thin white lines in lace-like patterns — think scallops and loops
- If painting feels risky, invest in a lace-pattern nail stamp and use white polish to transfer the design
- Add a second color of lace or gold accents for richness
- Seal with gloss topcoat
Pro tip: Lace designs look more impressive than they are if you use a stamp — most people won’t know the difference.
12. Warm Taupe with Rose Gold Accents
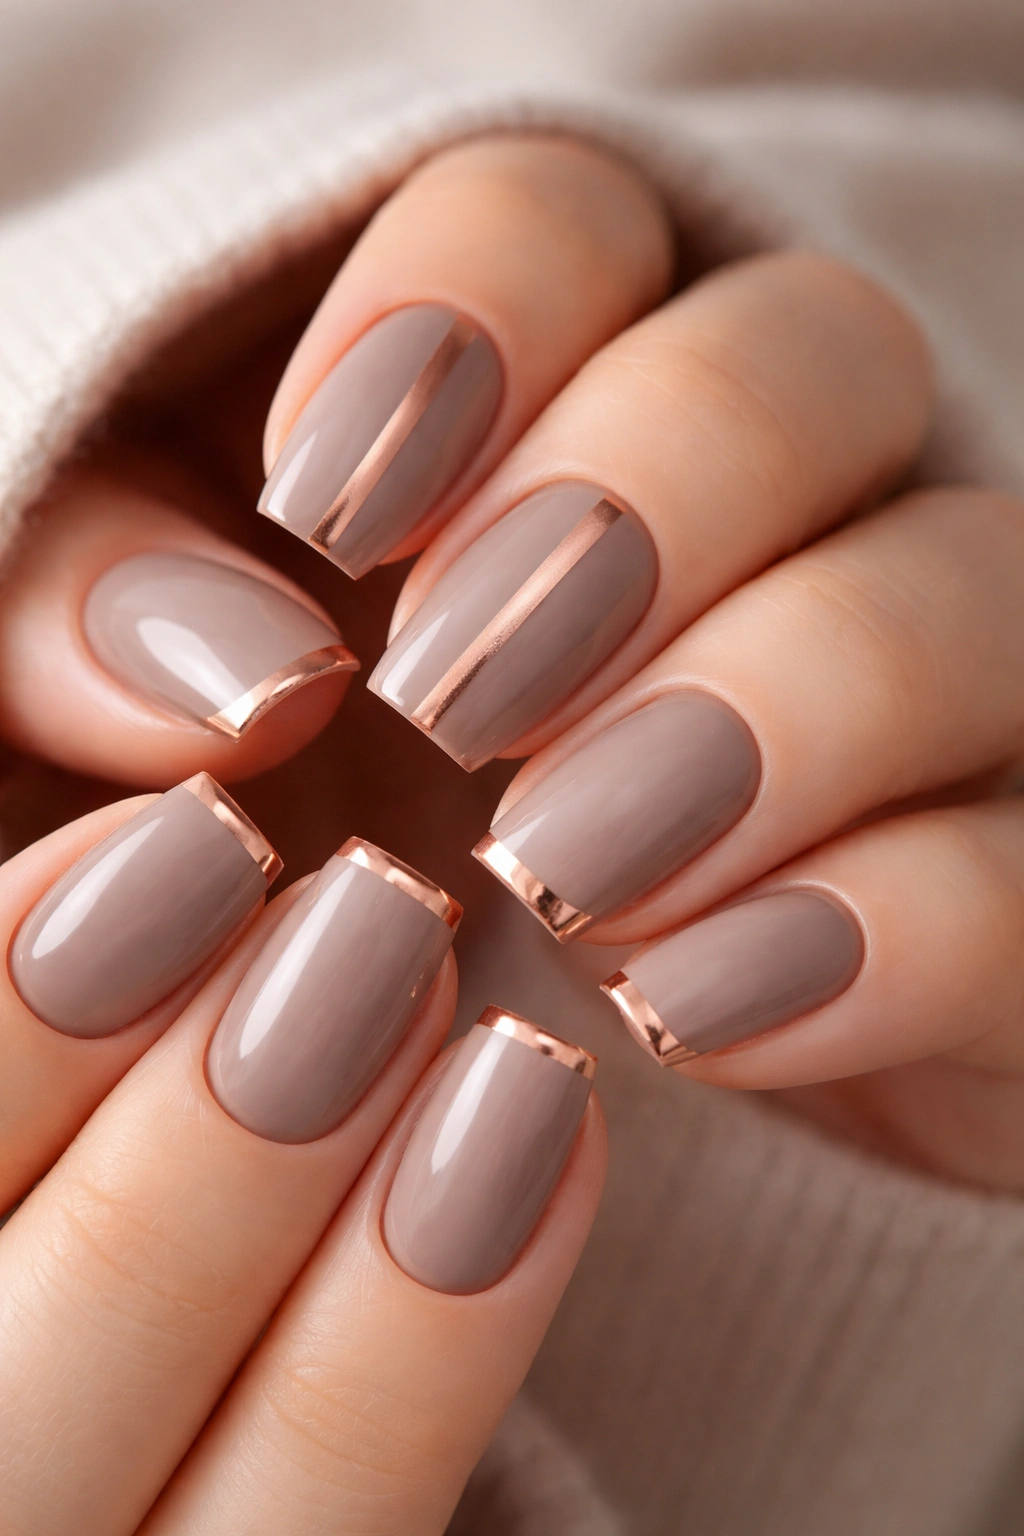
A neutral taupe base (the bridge between brown and gray) paired with rose gold metallic details on specific nails. Some might have a rose gold stripe, others a rose gold tip, for variety.
The Versatility of Taupe
Taupe goes with literally everything in your wardrobe because it’s already a blend of colors. Adding rose gold keeps it from feeling flat.
How to Design It
- Paint all nails with warm taupe (2 coats)
- On alternating nails, paint a thin vertical stripe in rose gold down the center
- On other nails, paint just the tip portion in rose gold (like a French manicure but with rose gold)
- Mix up the pattern so it feels intentional but not too matchy
- Seal with gloss topcoat
This is a perfect everyday design that feels polished without being too precious.
13. Powder Blue with Wispy Cloud Patterns
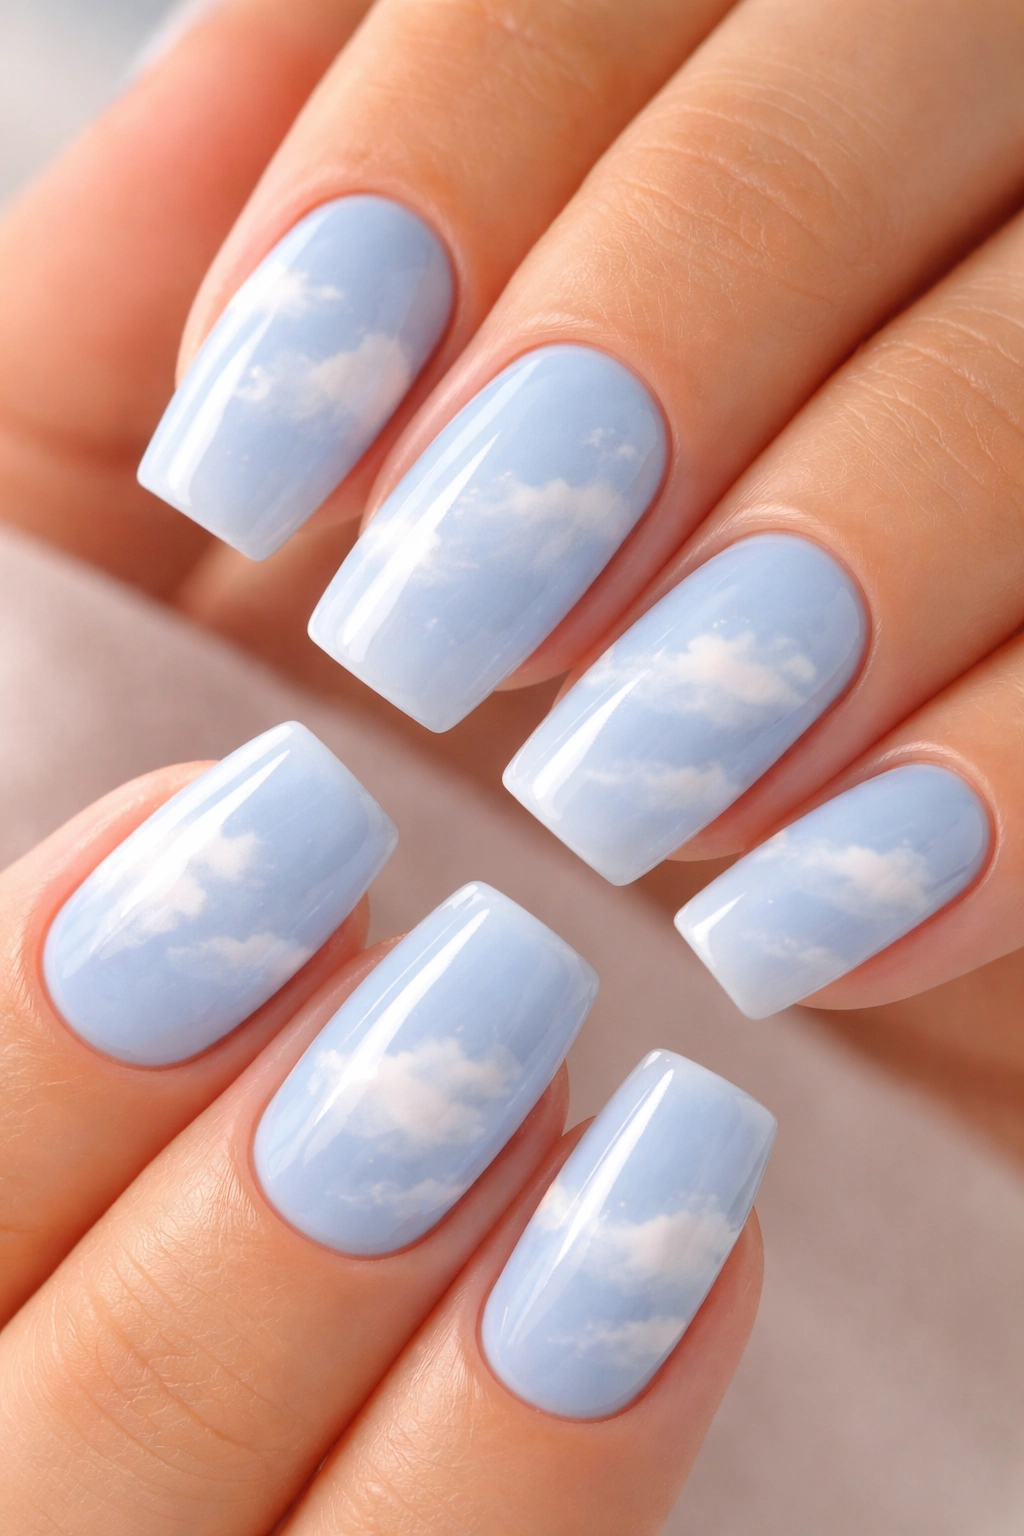
A soft, powder blue base with wispy white clouds painted loosely across the nail. It’s dreamy and calming, like holding a piece of sky on your fingertips.
Why This Design Soothes
Soft blue + cloud imagery = inherently calming. This is the manicure version of a peaceful mood.
How to Paint Clouds
- Base coat with powder blue (2 coats)
- Using a fine brush or sponge with white polish, gently sweep and dab to create cloud shapes
- Don’t try to make them perfect — clouds are soft and undefined
- Some nails can have more clouds than others
- Layer with a glossy topcoat
Pro tip: You can also use a makeup sponge dabbed with white to create the cloud effect if brush painting feels uncertain.
14. Cream with Charcoal Gray Half-Moons
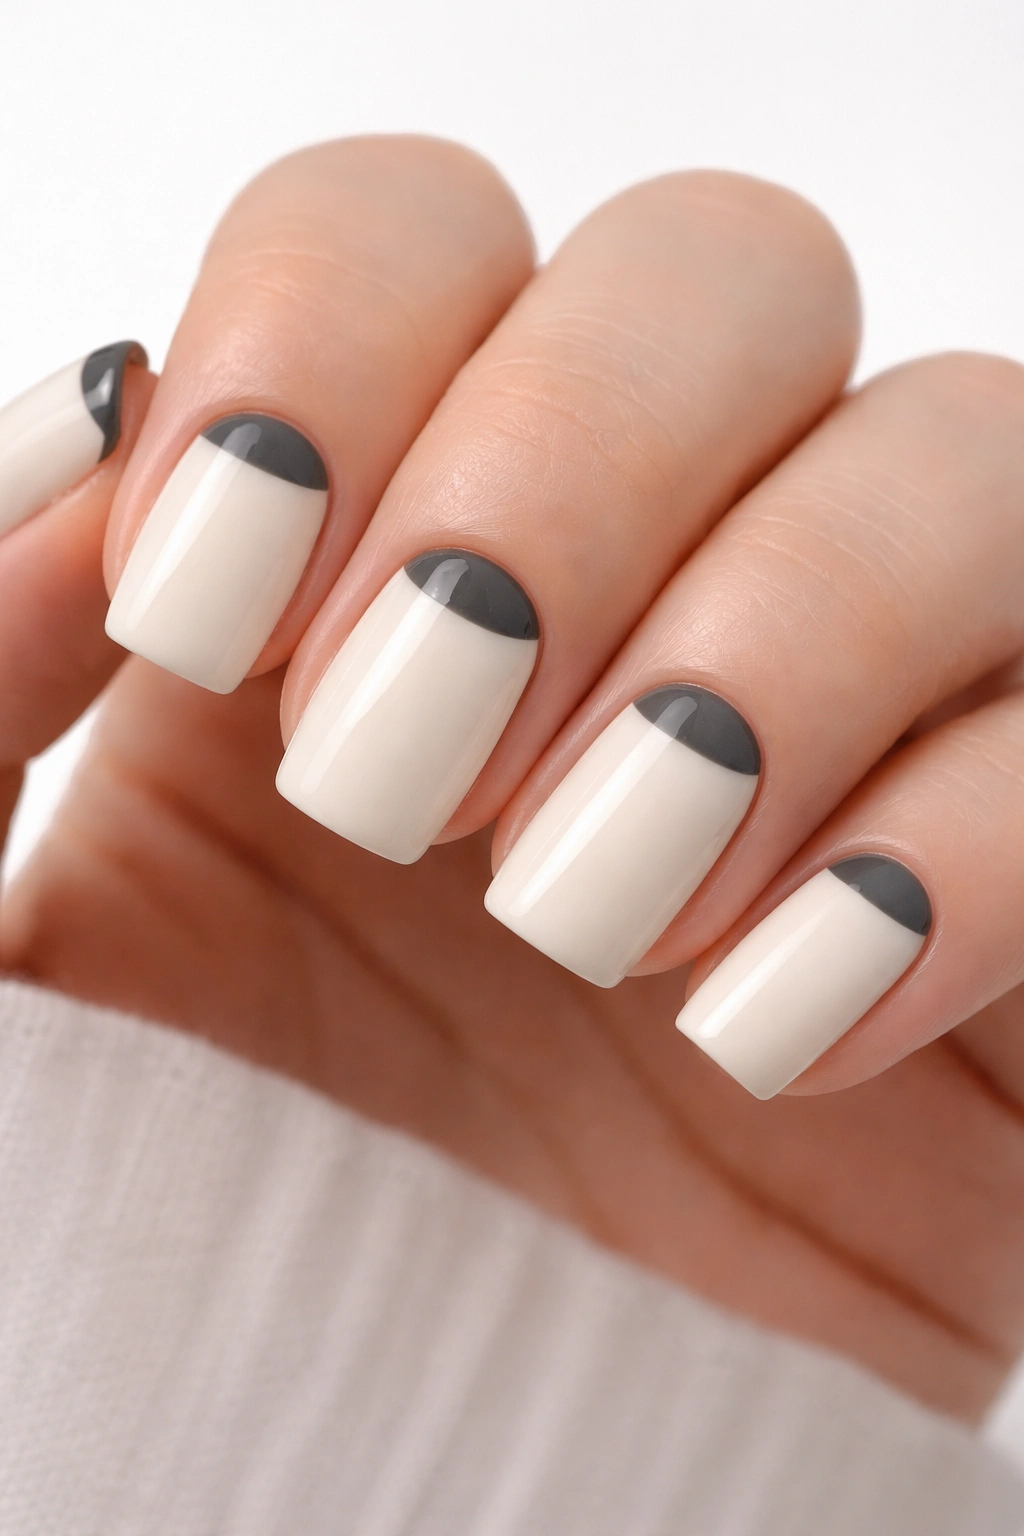
A creamy off-white base with charcoal gray half-moon shapes at the base of each nail (the opposite of a French manicure). It’s classic with a modern twist.
The Reverse-Manicure Concept
By putting the accent at the base instead of the tip, you completely change the visual impact while maintaining that structured, elegant look.
Execution Steps
- Paint entire nail with cream or off-white (2 coats)
- Use a curved nail guide or stencil (or freehand if confident) to outline a half-moon at the nail base
- Fill in the half-moon area carefully with charcoal gray polish
- Keep the edge between cream and gray as clean as possible
- Seal with topcoat
This design is perfect for minimalists who want something more interesting than a solid color.
15. Soft Peach with Coral Ombre Gradient
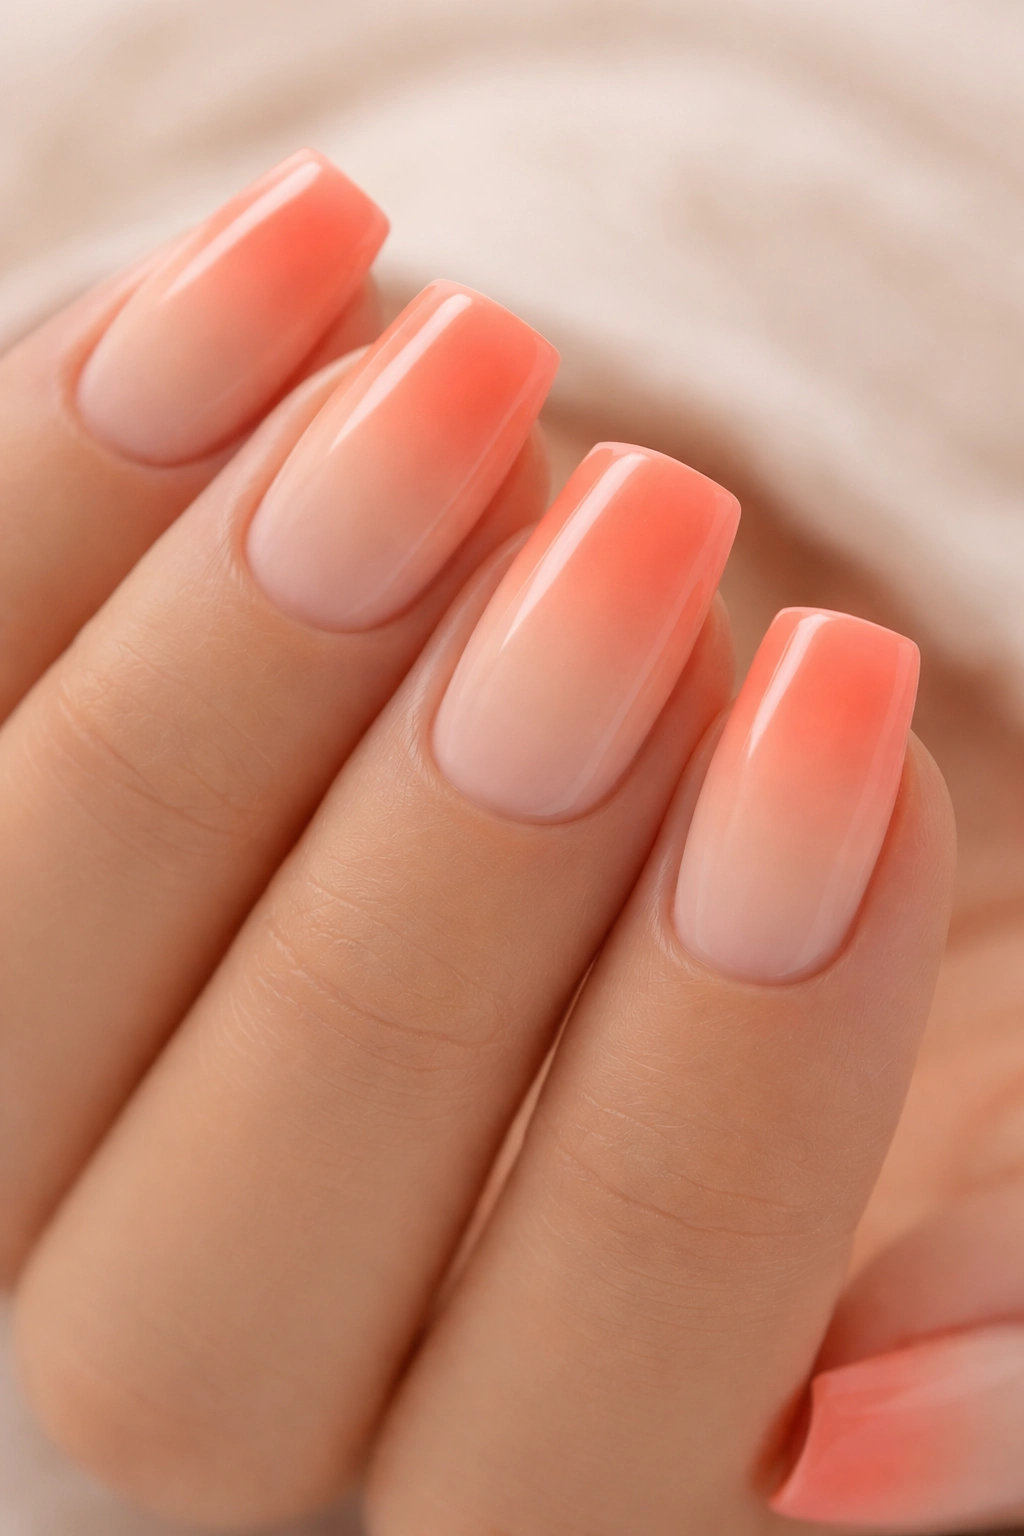
A warm soft peach that gradually deepens into coral toward the tips. It’s a warm, fruity gradient that feels summery and fresh.
Why Warm Gradients Feel Welcoming
Peachy-coral tones are flattering to almost every skin tone and feel inherently warm and approachable. A gradient adds dimension without complexity.
How to Create the Ombre
- Paint the entire nail with pale soft peach (2 coats)
- Using a makeup sponge, apply a deeper coral polish to the tips
- Sponge and blend the two colors together by dabbing and pressing (not swiping)
- Build gradually — you want a gentle transition, not a harsh line
- Second coat of blending if needed for a seamless gradient
- Finish with gloss topcoat to blend the effect
The key is gentle blending — use a light touch with the sponge.
16. Butter Yellow with Delicate Golden Swirls
A warm, creamy butter yellow base with delicate golden swirls or marbled patterns across the surface. It’s cheerful without being childish.
The Elegance of Golden Details
Gold on yellow could be cheesy, but subtle swirls keep it sophisticated. It’s like edible gold leaf on a beautiful dessert.
How to Create Swirls
- Paint butter yellow base (2 coats for full coverage)
- Using a very thin brush with gold metallic polish, paint thin, flowing swirls across each nail
- Swirls can curve, spiral, or flow freely — there’s no “right” way
- Keep them delicate and slightly wispy rather than bold
- Seal with glossy topcoat
Alternative: Use a gold foil or gold leaf positioned under the topcoat for a more luxe look.
17. Soft Mint with White Stripe Detail
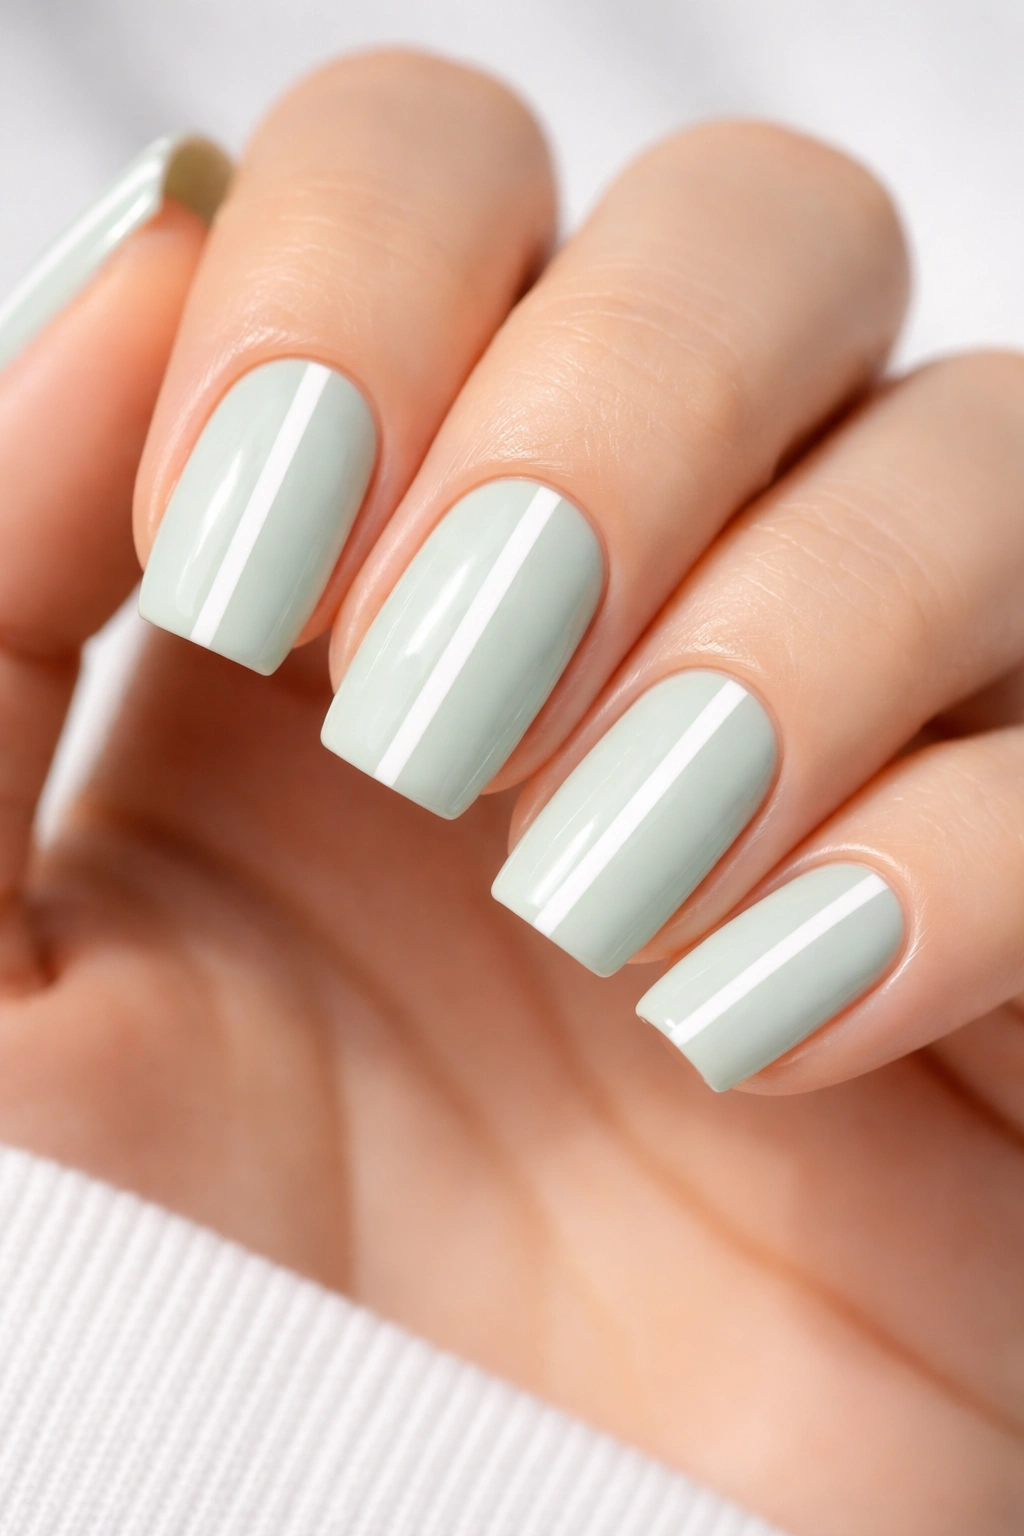
A cool, pale mint green base with a single clean white vertical stripe down the center of each nail. Minimalist but striking.
The Power of One Perfectly Placed Stripe
This design proves that you don’t need complexity to create impact. One clean line transforms the whole look.
Simple Execution
- Paint the entire nail with soft mint (2 coats)
- Once dry, carefully apply painter’s tape down the center of the nail
- Paint white polish along the exposed tape edge
- Remove tape while still slightly wet for the sharpest line
- Use matte topcoat for a velvety finish or gloss for shine
Pro tip: A white striping brush makes this even easier than tape — it takes practice but is worth learning.
18. Blush with Micro Gold Glitter Tips
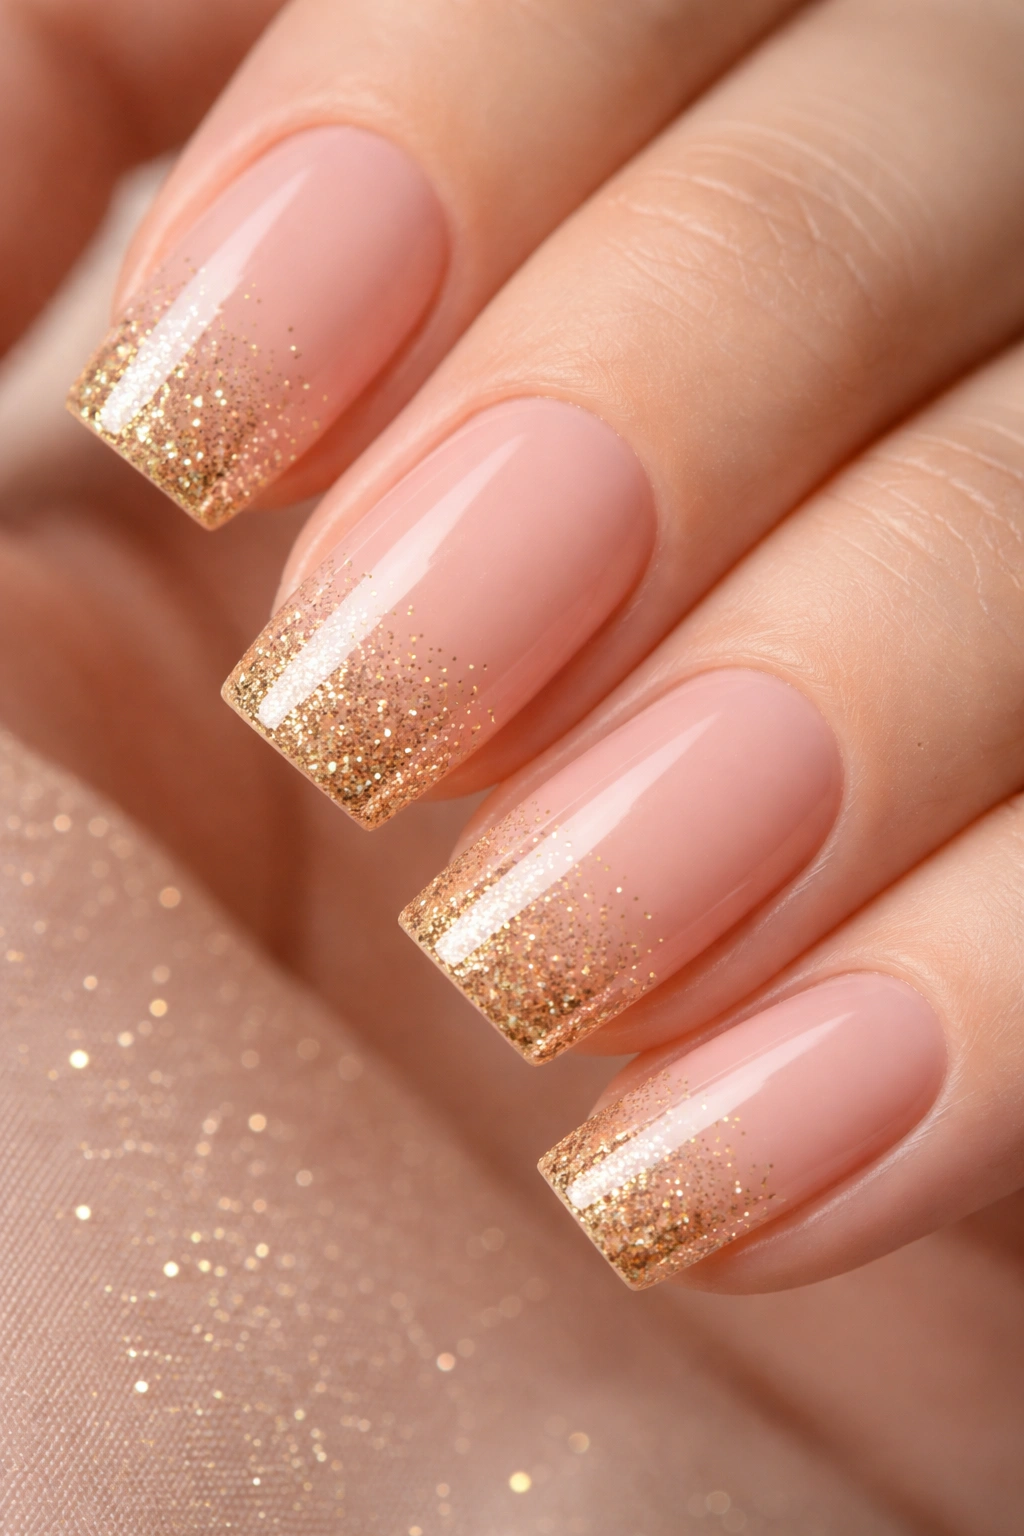
A warm blush pink base with a gradient of tiny, refined gold glitter concentrated at the tips. It’s glittery but not costume-like.
Why Micro Glitter Reads as Sophisticated
Large glitter chunks feel party-ready; fine micro glitter feels luxe and intentional. The difference is entirely in the glitter size.
How to Apply
- Paint blush pink on the entire nail (2 coats)
- Load a dense makeup sponge with micro gold glitter polish
- Press and roll the sponge onto just the tip area, building up gradually
- The glitter should be heaviest at the very tip and fade toward the base
- Seal with glossy topcoat, using a light hand to avoid flattening the glitter
This design is beautiful for date nights or special events.
19. Ivory with Simple Navy Geometric Blocks
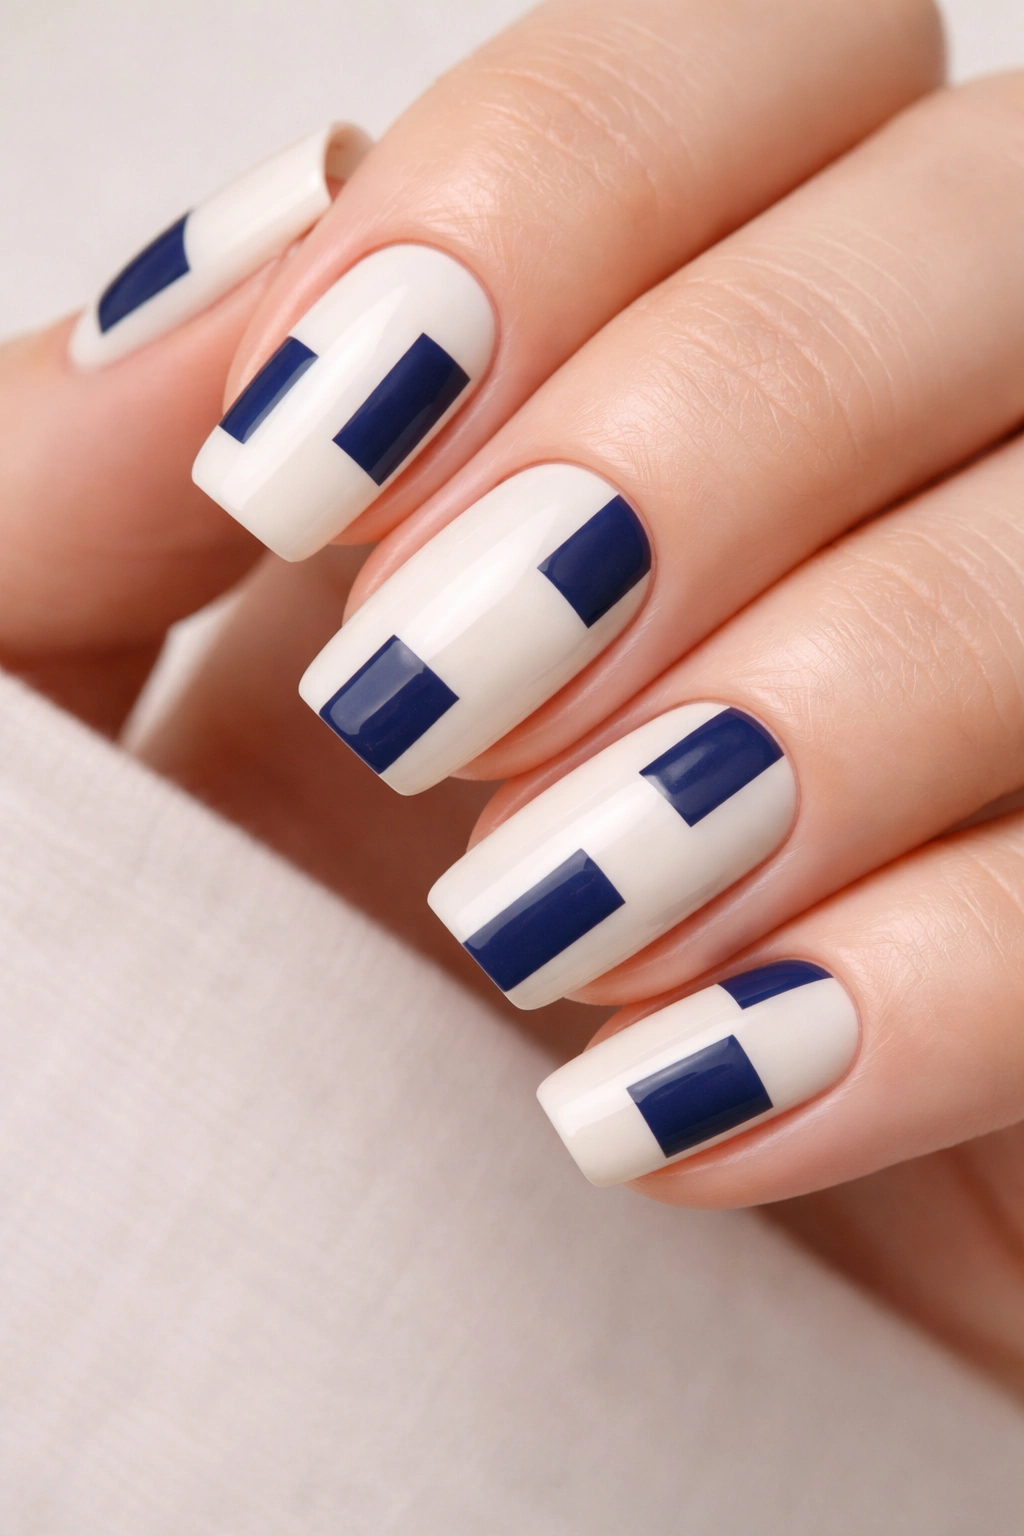
An ivory or off-white base with navy blue geometric blocks or rectangles scattered across the nail. It’s architectural and modern.
Why Geometry Always Feels Current
Clean lines and shapes inherently feel intentional and designed. This is a pattern that never looks dated.
How to Design It
- Base coat of ivory (2 coats)
- Using painter’s tape, mask off rectangular or square shapes on different nails
- Paint navy blue carefully within the taped areas
- Remove tape while slightly tacky
- Vary the size and placement of blocks so it doesn’t feel too rigid
- Seal with gloss topcoat
Pro tip: This design looks even better if the blocks are asymmetrical and random rather than perfectly spaced.
20. Warm Beige with Copper Metallic Lines and Dots
A warm beige or sand tone base with a combination of thin copper lines and copper dots creating an abstract pattern. It’s earthy and modern.
Mixing Metallics with Neutrals
Copper feels warmer than silver and pairs beautifully with warm beiges. Together they create a cohesive, natural palette.
How to Create the Pattern
- Paint beige base (2 coats)
- Using a thin striping brush with copper metallic, paint thin, slightly irregular lines across the nail
- Use a dotting tool to add copper dots of various sizes between and around the lines
- Create an organic, abstract composition rather than a structured pattern
- Finish with glossy topcoat
This is the kind of design that looks accidentally perfect — purposeful but not over-thought.
21. Pale Pink with Rose Quartz Texture Effect
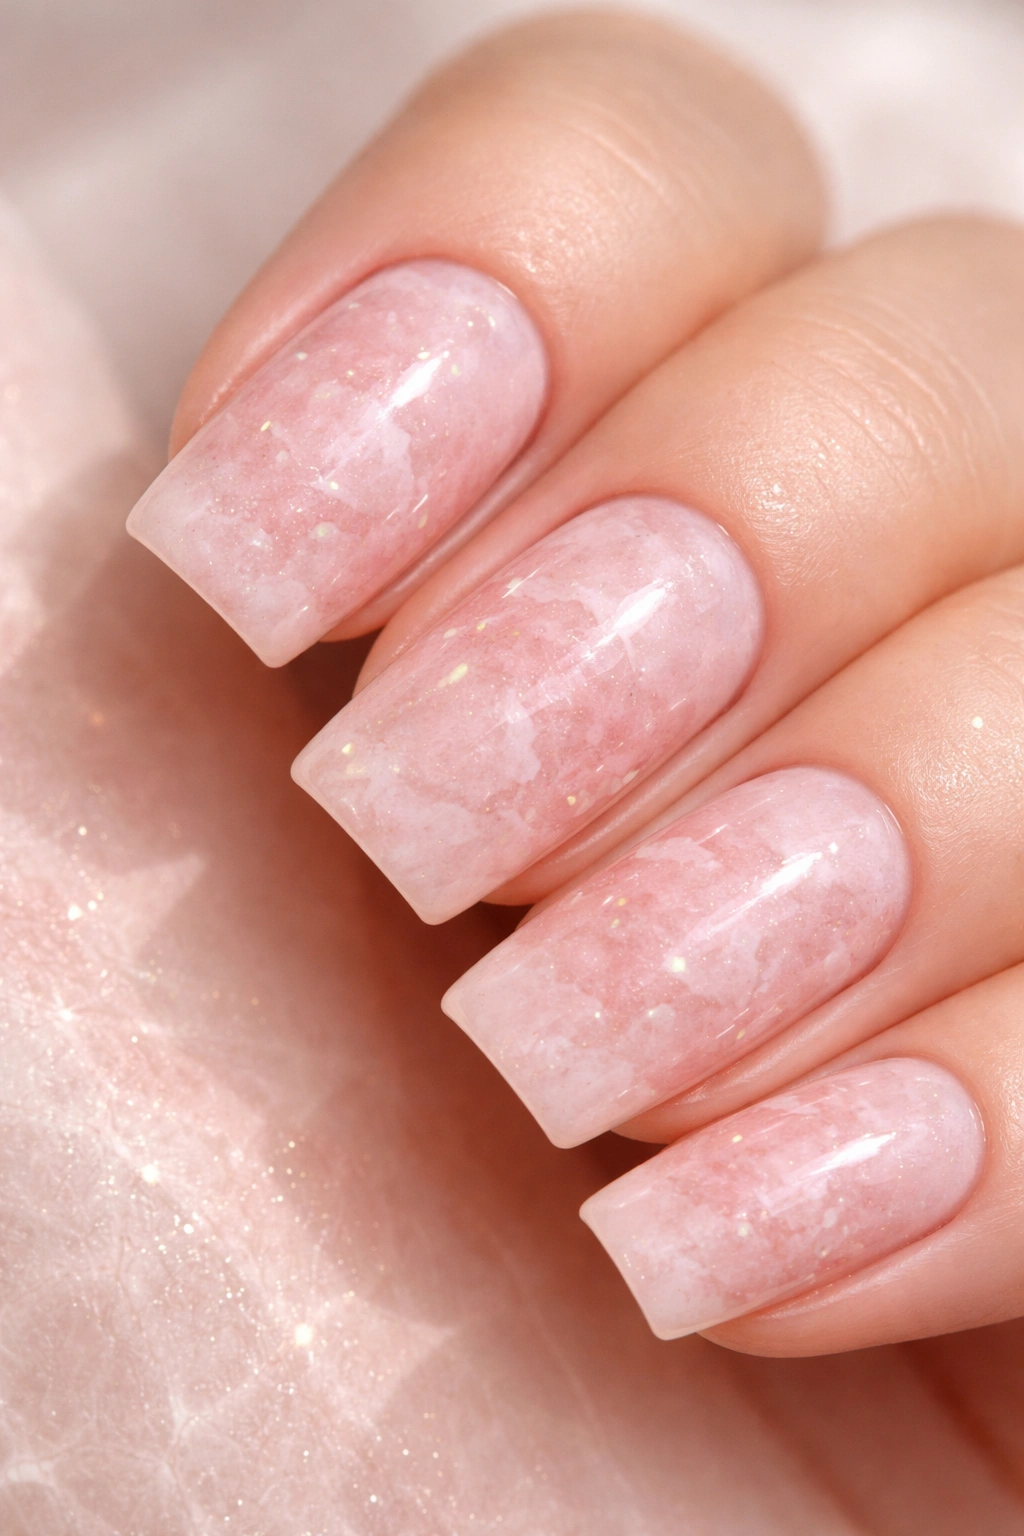
A soft pink base with a speckled, textured finish that mimics the appearance of rose quartz stone. It’s natural and sophisticated.
The Appeal of Stone-Inspired Nails
Nature-inspired textures feel earthy and grounded. This design references rose quartz without being literal.
How to Achieve the Texture
- Paint pale pink base (2 coats)
- Using a toothpick or thin dotting tool, apply tiny dots in slightly deeper pink and pale white across the nail
- Vary the density — some areas denser, some sparse
- The dots should be very small and numerous, creating a speckled texture rather than obvious polka dots
- Seal with matte topcoat for that natural stone finish
Pro tip: This design is incredibly forgiving because imperfection is actually the goal.
22. Cool Gray with Holographic Accent Nails

A muted cool gray on most nails, with one or two holographic or iridescent accent nails. The holo shifts colors subtly as you move your hand.
The Magic of Holographic Polish
Holographic polish is the sleeper superstar of nail design — it looks subtle from straight-on but becomes incredibly striking at an angle.
How to Create It
- Paint cool gray on your base nails (all except accent nails) — 2 coats
- On accent nails (usually ring and middle fingers), paint holographic or iridescent polish — 2-3 coats depending on the brand
- The holographic effect requires building coverage, so don’t skimp on coats
- Seal with glossy topcoat to make the effect pop
The contrast between matte-ish gray and shimmering holo creates visual drama.
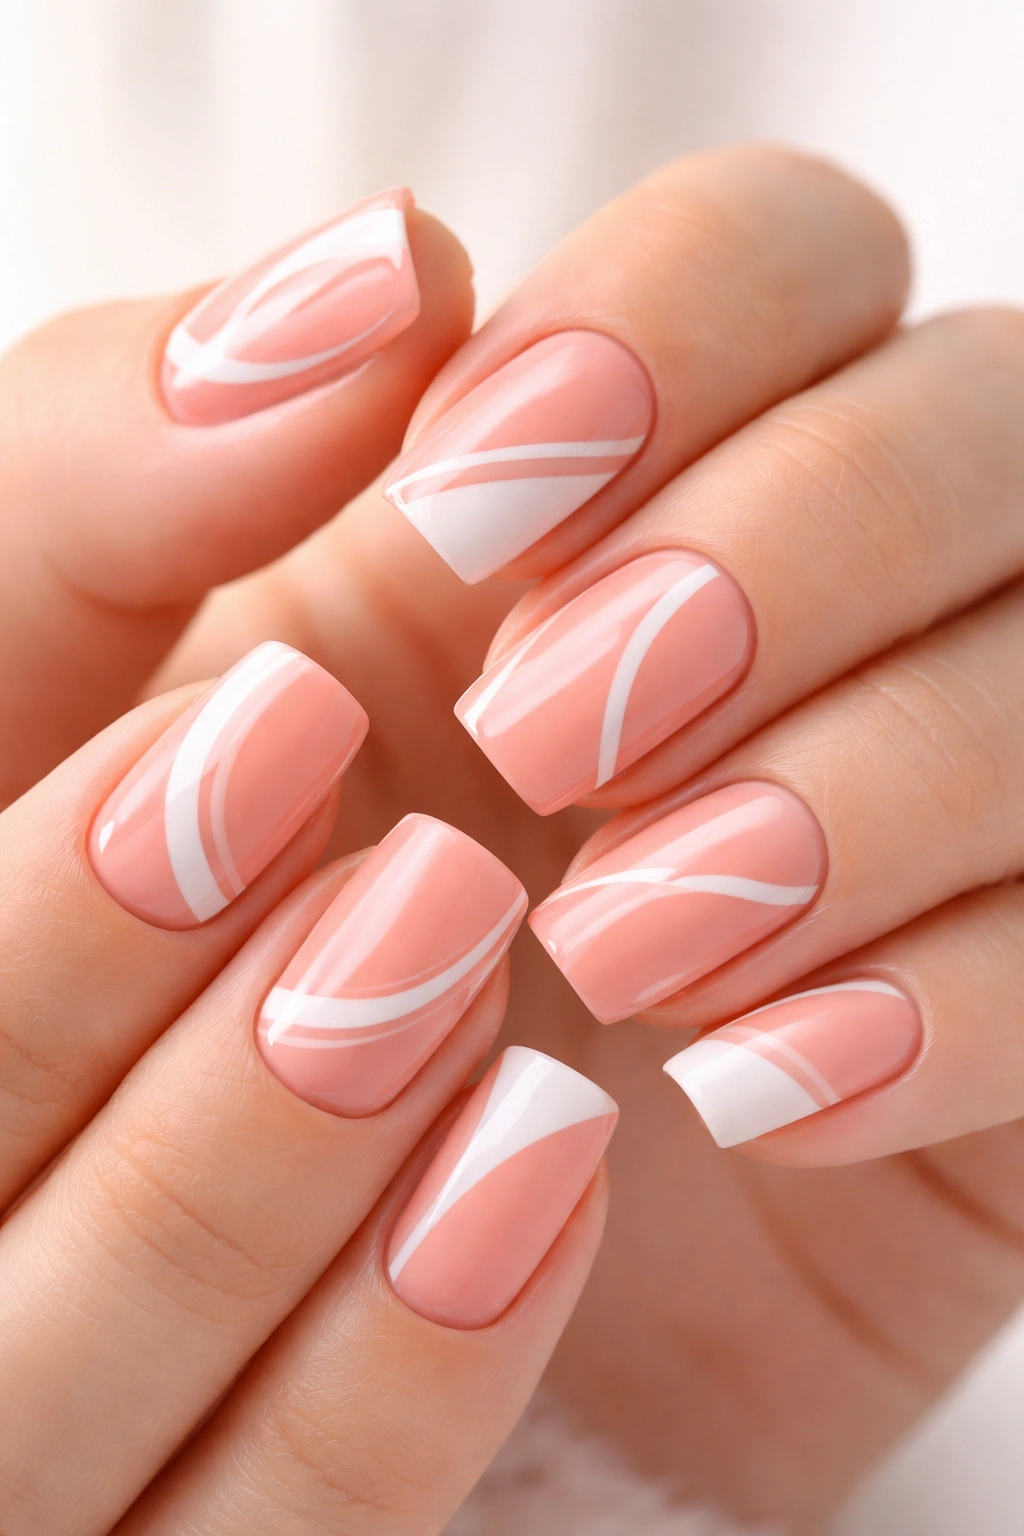
23. Soft Peach with White Wavy Lines
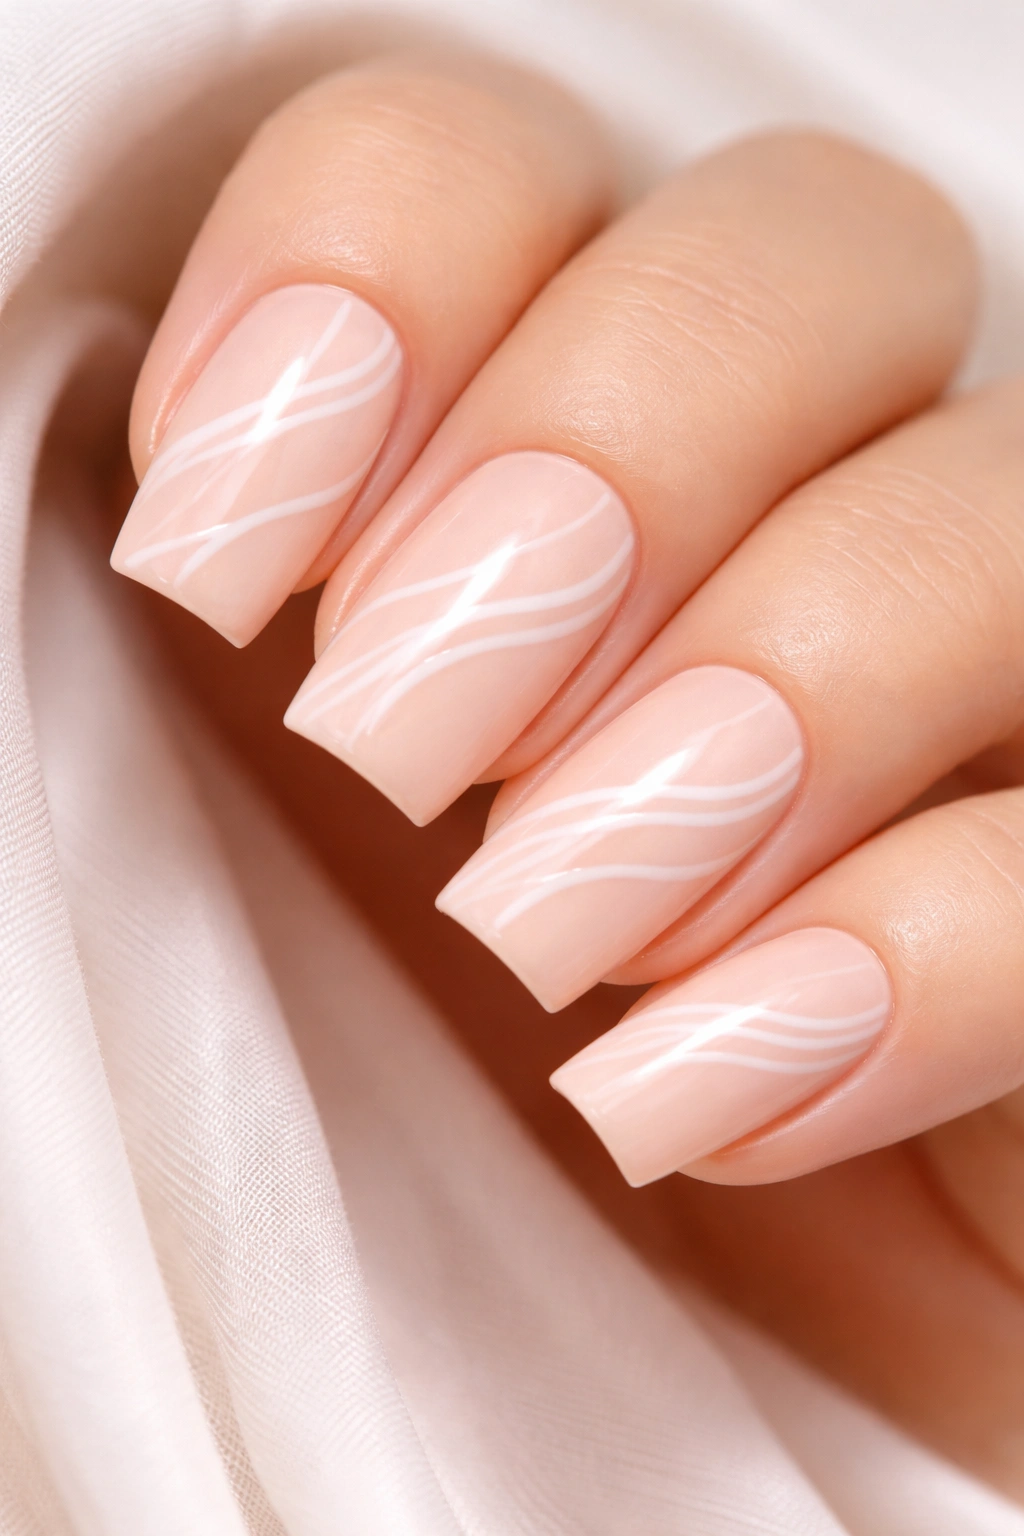
A warm soft peach base with white wavy lines flowing horizontally across the nail. It’s organic and movement-filled without being busy.
Why Wavy Lines Feel Feminine
Curves and waves inherently feel softer and more organic than straight lines. They’re the visual representation of flow.
How to Paint Waves
- Paint soft peach base (2 coats)
- Using a thin detail brush with white polish, paint gentle waves flowing horizontally
- Start at one side and let the brush flow to the other side
- Don’t overthink the perfection — slightly imperfect waves look more natural
- Add 2-3 wavy lines per nail at different heights for overall coverage
- Seal with glossy topcoat
Pro tip: Practice your wave on paper or a nail wheel first if you’re nervous.
24. Dusty Rose with Pressed Flowers Under Topcoat
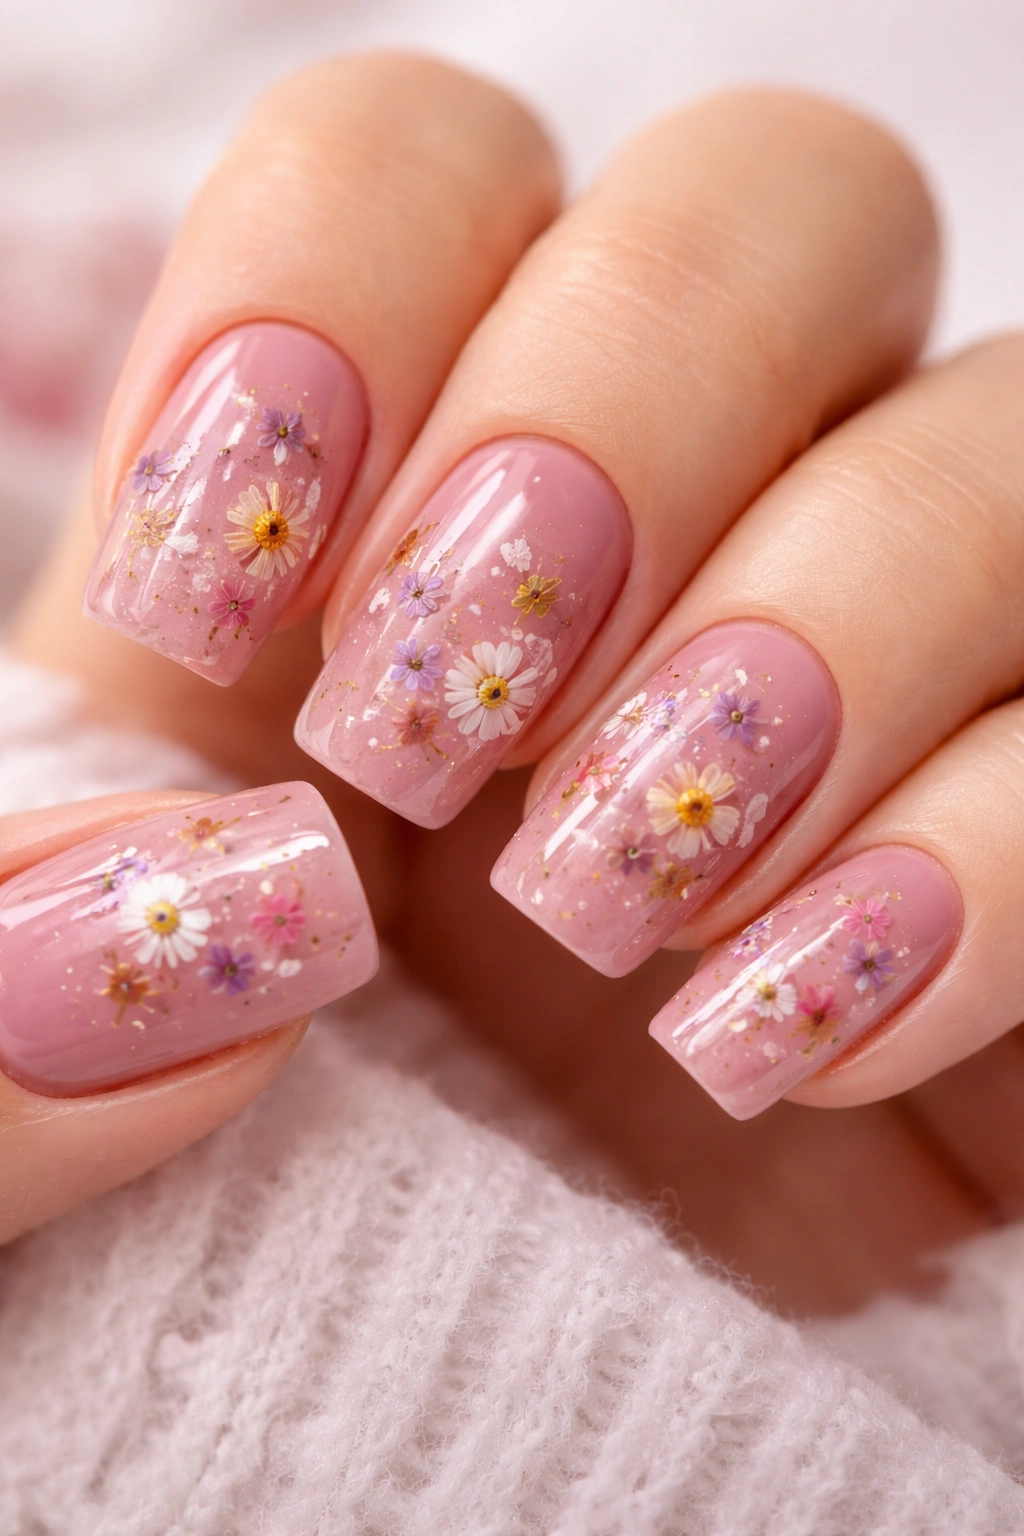
A dusty rose or mauve base with actual pressed flowers or flower petals sealed under a thick layer of clear topcoat. It’s botanical and unique.
Why Pressed Flowers Are Special
They’re inherently one-of-a-kind. No two sets will be identical, which gives your manicure a truly personal quality.
How to Seal Flowers Under Topcoat
- Paint dusty rose base (2 coats)
- Allow to fully dry
- Place tiny pressed flowers (like forget-me-nots or baby’s breath) on the sticky base of a thick topcoat before applying it to the nail
- Alternatively, brush thick topcoat on the nail first, carefully place flowers, then seal with another topcoat layer
- Use at least 3 coats of topcoat to ensure the flowers stay secure
- Allow extra drying time
This creates a delicate, romantic, and conversation-starting design.
25. Cream with Subtle Brown Linear Details
A creamy off-white base with thin brown lines creating a minimalist geometric or linear pattern. It’s artistic without being loud.
The Sophistication of Thin Lines
Thin, precise lines feel more refined than thick ones. This is the manicure equivalent of elegant architecture.
How to Execute
- Paint cream base (2 coats)
- Using a thin striping brush with medium brown polish, create your linear design
- Options include: parallel lines, intersecting angles, abstract compositions, or grid patterns
- Keep lines thin and space them intentionally
- Some nails can have different patterns from others for visual interest
- Seal with matte topcoat for an understated finish
This design is proof that elegance isn’t about volume — it’s about intention.
26. Pale Yellow with Tiny Black Polka Dot Details
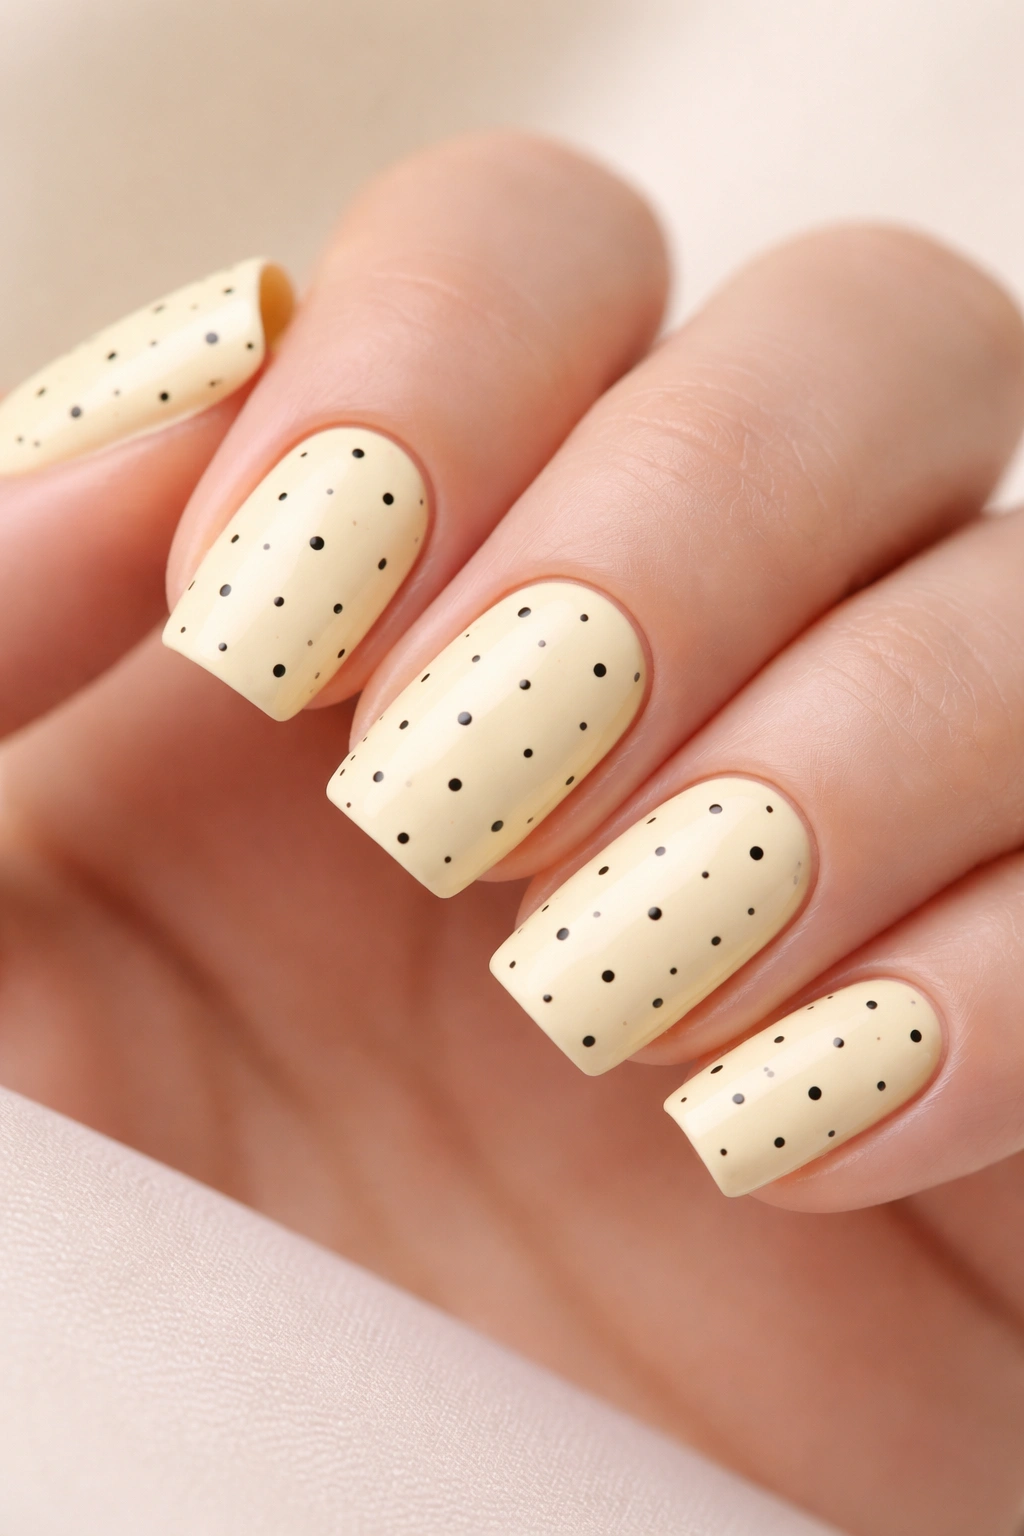
A cheerful pale butter yellow base with tiny black polka dots scattered across the nail. It’s retro-cute but softened by the pale yellow.
Making Polka Dots Feel Grown-Up
Polka dots can feel childish, but the key is in the execution — tiny dots on a muted color read as sophisticated, not playful.
How to Create Perfect Dots
- Paint pale yellow base (2 coats)
- Using a dotting tool, apply tiny black dots across the nail
- Keep dots small and slightly irregular in spacing for a natural look
- Work quickly while the base is still slightly sticky so dots adhere well
- Less is more — don’t cover every millimeter
- Seal with glossy topcoat
Pro tip: A toothpick works just as well as a dotting tool if you’re careful and gentle.
27. Soft Lavender with Pale Silver Foil Flakes
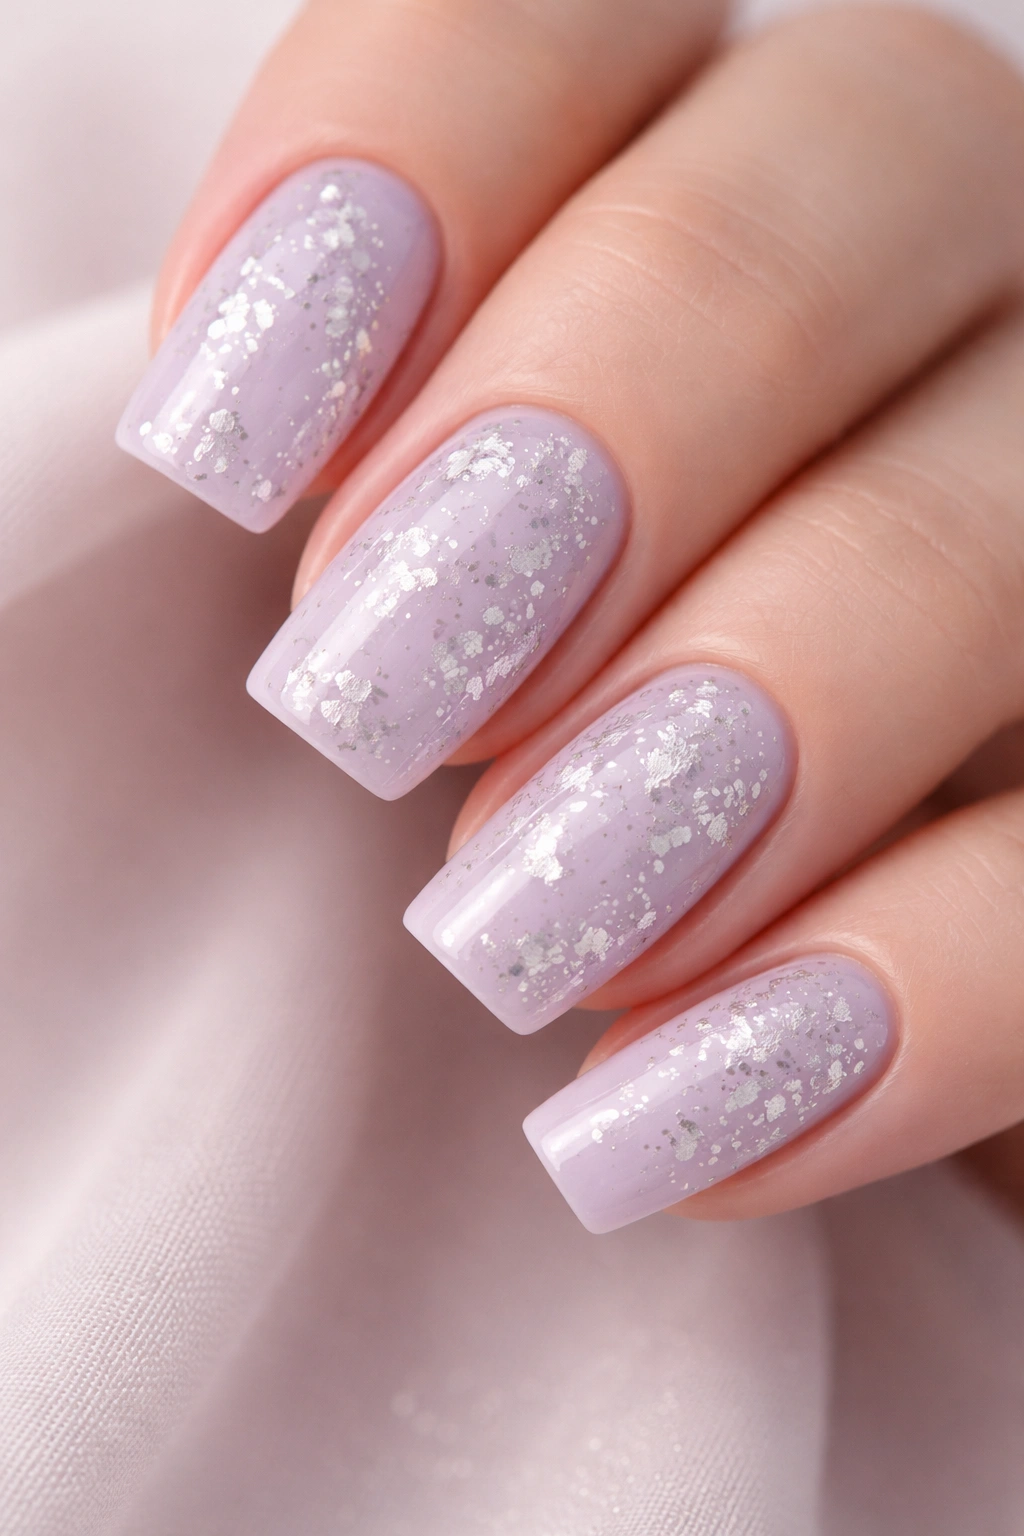
A dreamy soft lavender base with subtle silver foil flakes or confetti scattered throughout. It’s ethereal and sparkly without being overdone.
The Delicacy of Foil Flakes
Unlike glitter, foil flakes are flat and create a more refined shimmer. They feel upscale and special.
How to Apply Foil Flakes
- Paint soft lavender base (2 coats)
- While still slightly tacky (or with a sticky base coat), use tweezers to carefully place silver foil flakes on the nail
- Space them irregularly for a natural look
- Seal with thick, clear topcoat to secure the flakes permanently
- Multiple topcoat layers ensure they won’t lift
This design makes even short nails look elegant and intentional.
28. Warm Taupe with Delicate Gold Leaf Accents
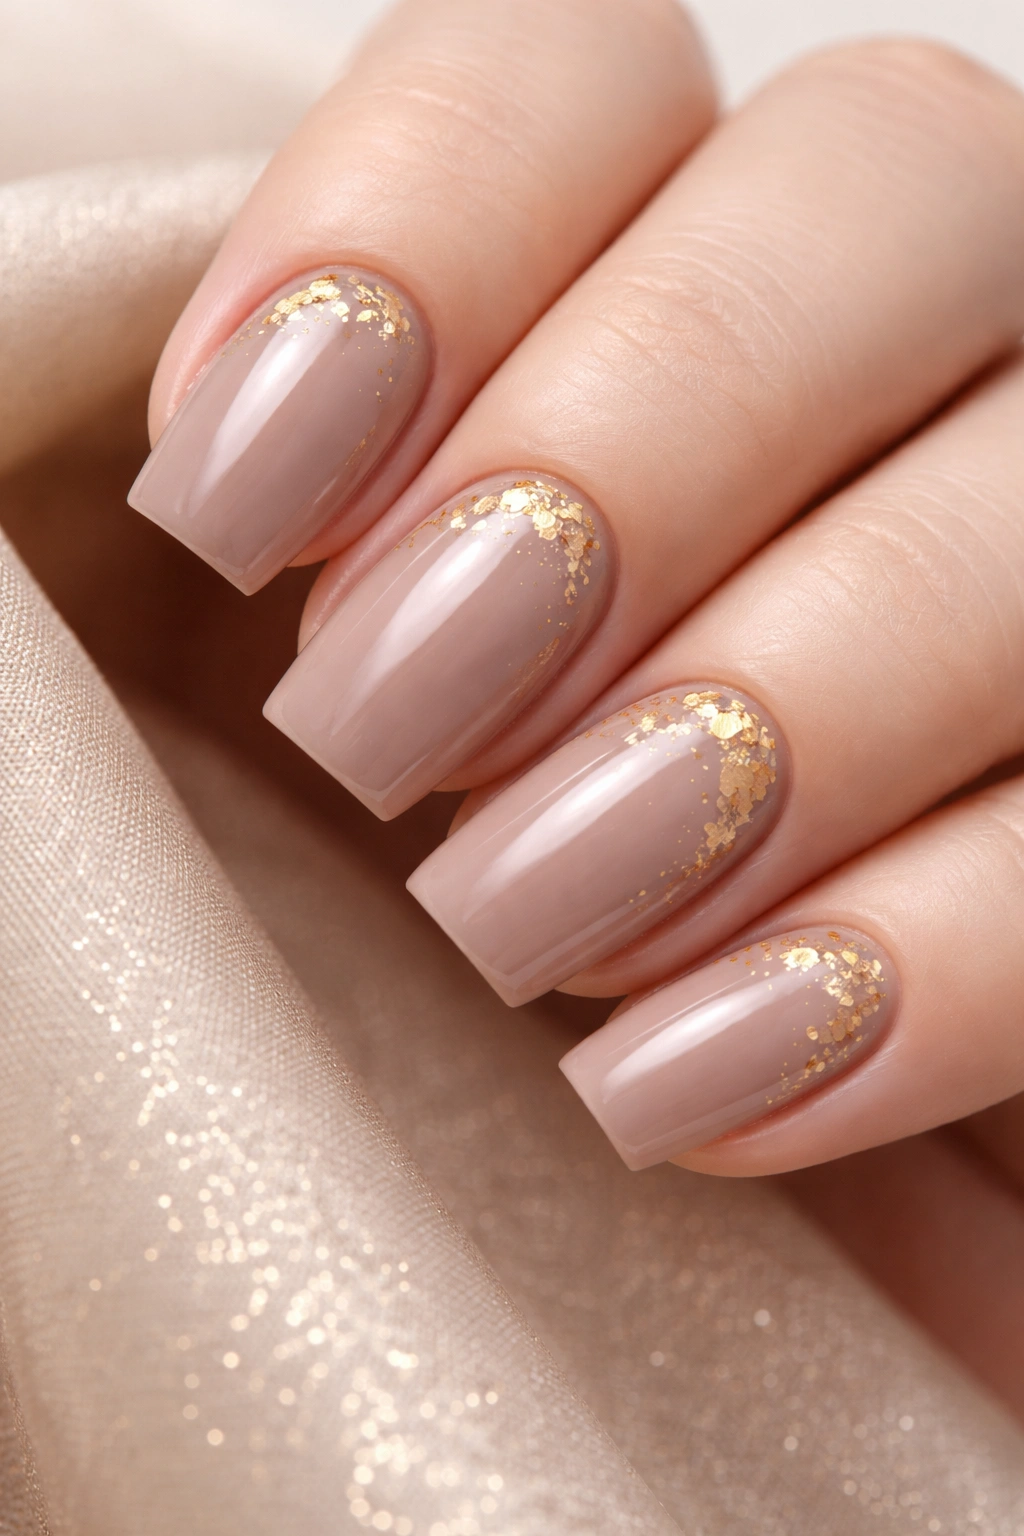
A sophisticated warm taupe base with gold leaf applied to specific areas or the entire nail. It’s luxurious and textured.
The Luxury of Gold Leaf
Gold leaf immediately signals luxury and intentionality. It’s a small investment that transforms the entire look.
How to Apply Gold Leaf
- Paint taupe base (2 coats)
- Apply a sticky base (like topcoat or special adhesive) where you want the gold leaf
- Using tweezers or a special applicator, carefully place gold leaf fragments on the sticky surface
- You can cover the whole nail or just parts of it
- Seal with multiple layers of clear topcoat
- Handle gently until fully cured
The result looks like you paid for a high-end salon manicure.
29. Soft Coral Pink with Ombré Gradient to Peach
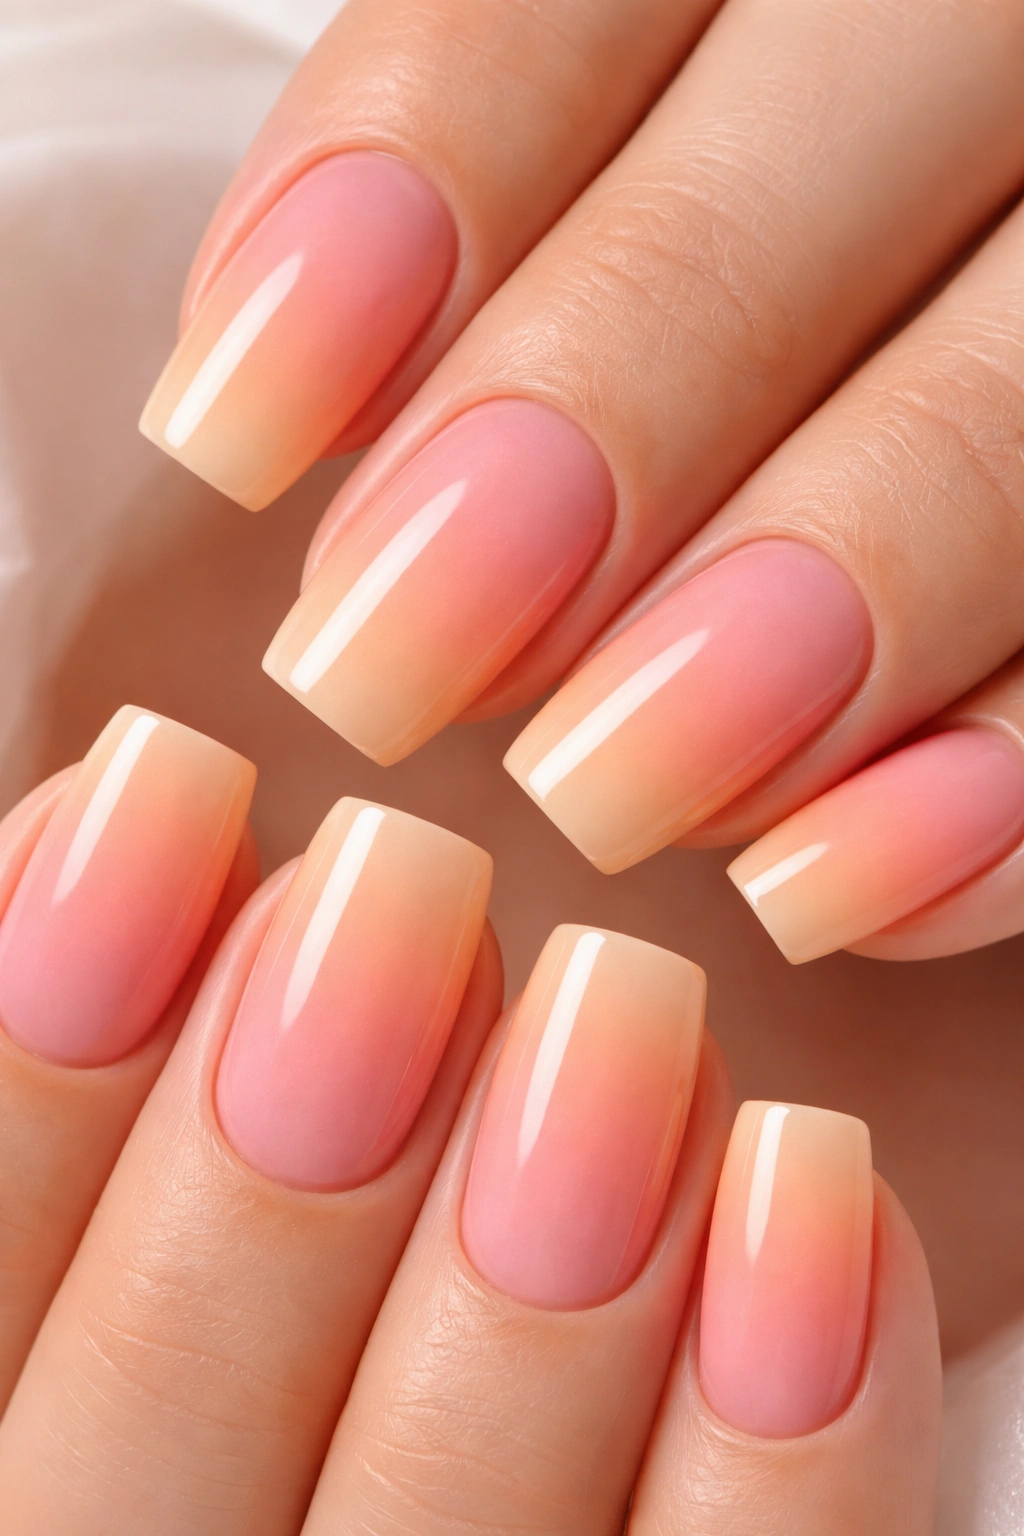
A soft coral-pink that gradually transitions to a warm peach. It’s a warm, fruity gradient that feels summery and dimension-filled.
The Flattery of Warm Gradients
Warm gradients are inherently flattering and create visual interest while maintaining cohesion. This color combo is universally wearable.
How to Create the Ombré
- Paint the entire nail with soft coral-pink (2 coats)
- Using a makeup sponge, apply peach polish from the tip area backward
- Press and dab to blend the two shades, creating a gradual transition
- The transition should take up the middle half of the nail, darkest at the tip
- Second blend coat if needed
- Finish with gloss topcoat to blend everything smoothly
The beauty of ombré is that imperfect blending actually looks better — it creates a more natural gradient.
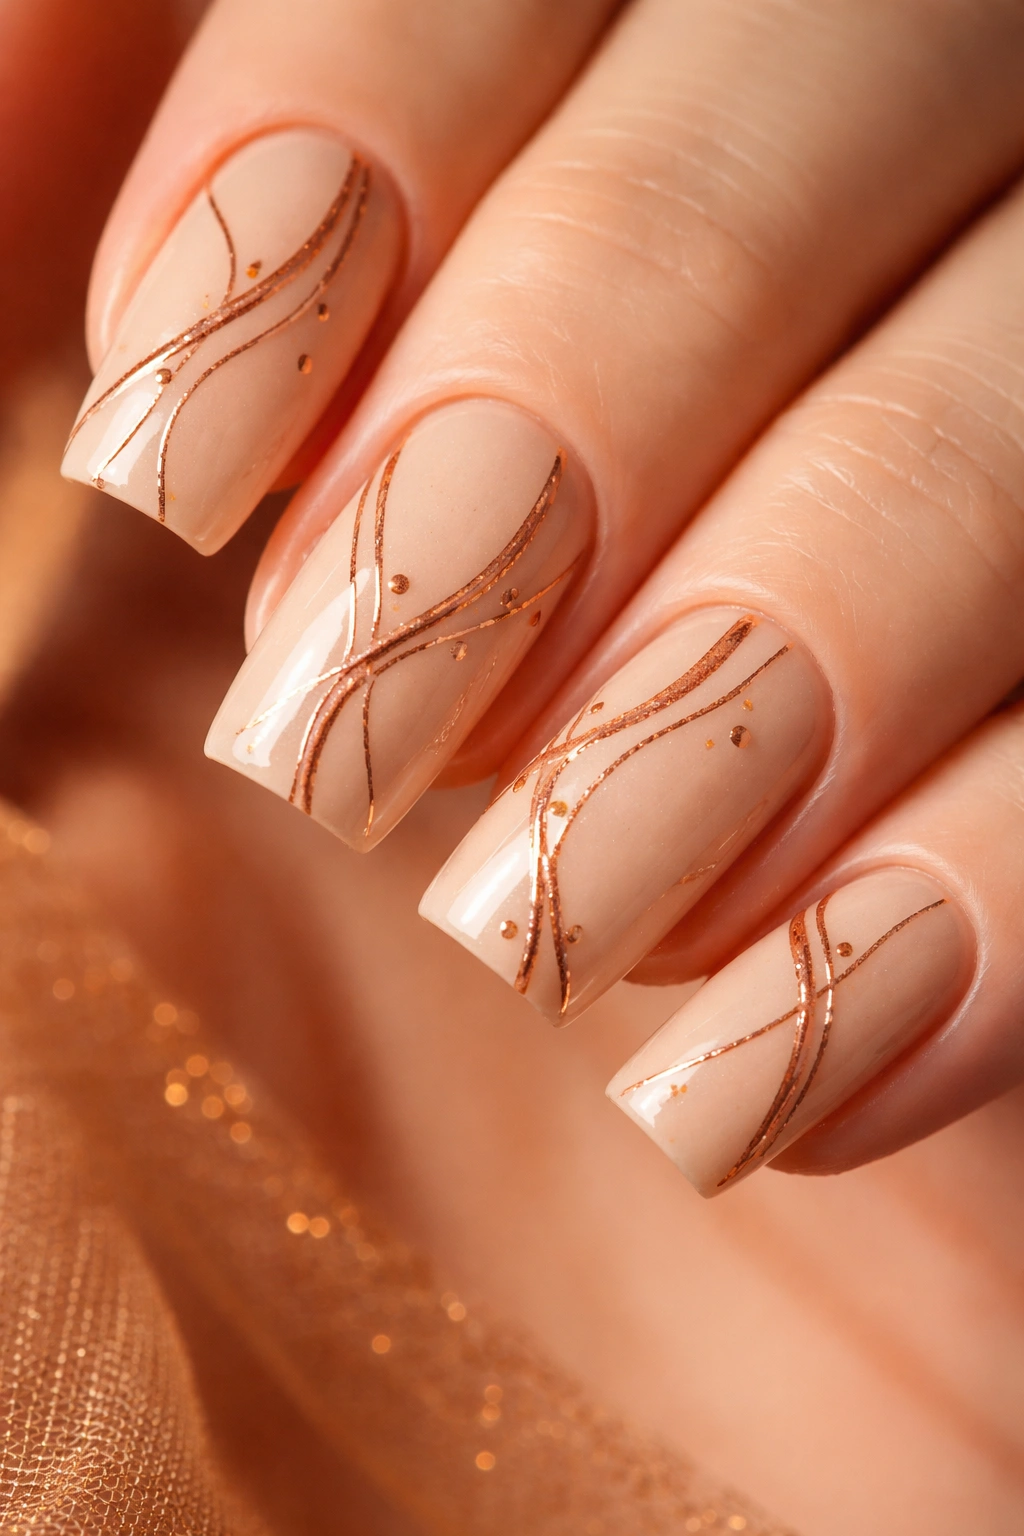
30. Pale Nude with Gossamer Thin Gold Lines and Shimmers
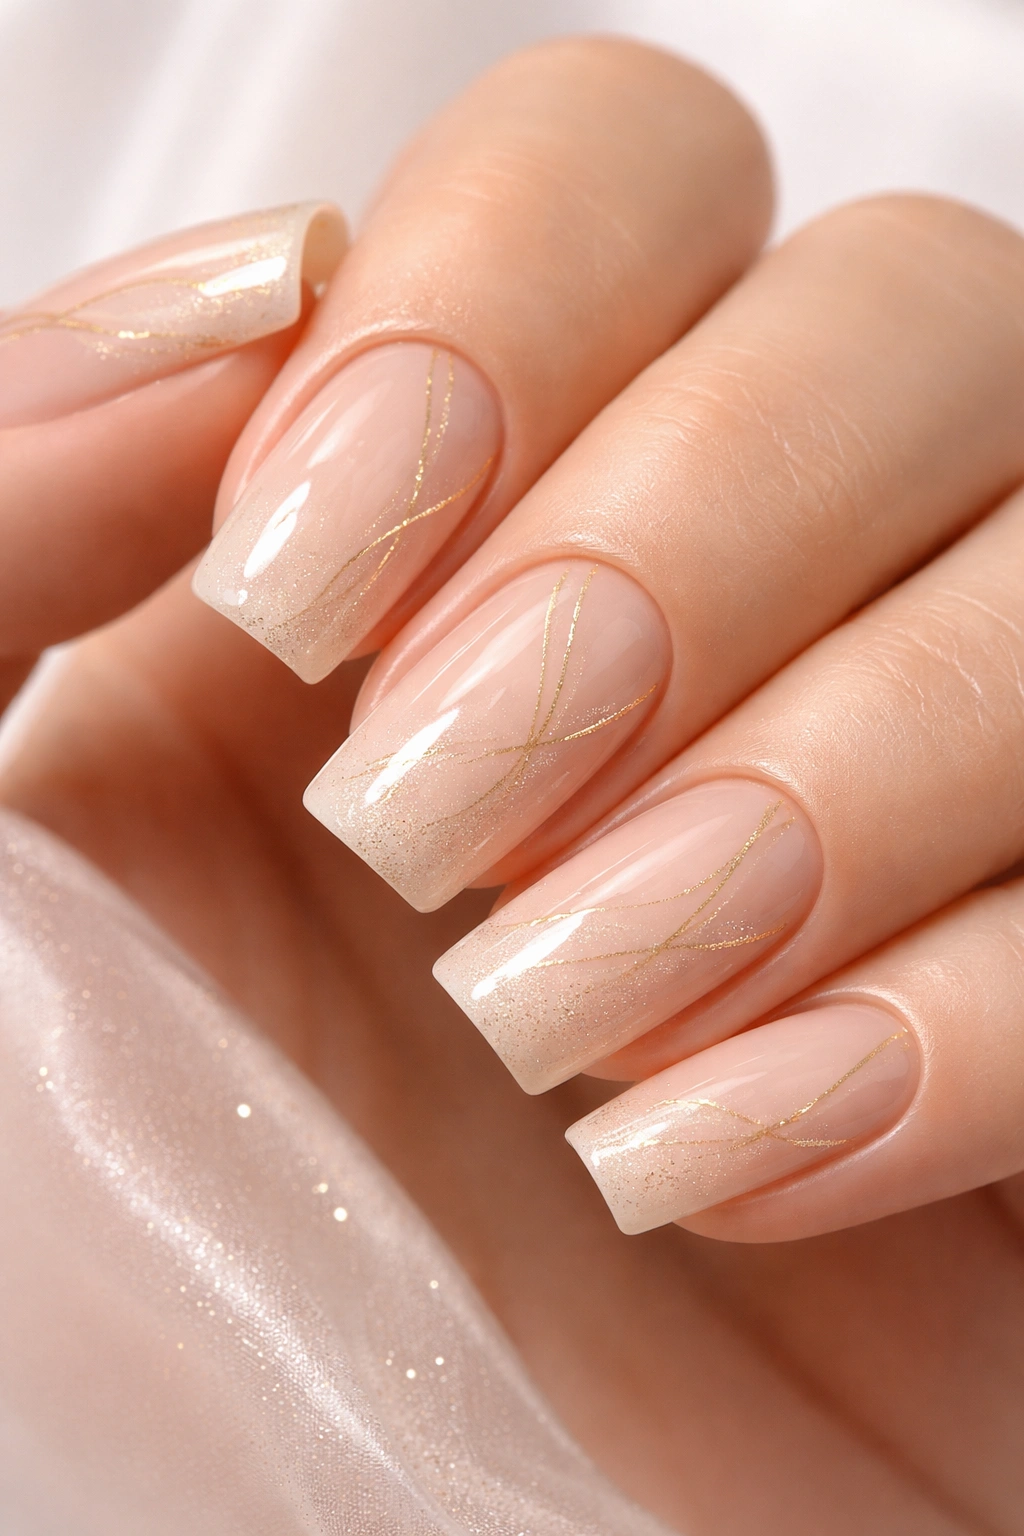
A barely-there pale nude base with the finest gossamer-thin gold lines creating an abstract, delicate pattern, plus tiny gold shimmer dust. It’s the ultimate in refined simplicity.
Why Restraint Creates Impact
This is the manicure equivalent of a whisper — understated but unmistakably there. It’s the kind of design people lean in closer to appreciate.
How to Create This Delicate Design
- Paint pale nude base (2 coats, ensuring full opacity)
- Using an ultra-fine striping brush with pale gold or champagne polish, paint the thinnest possible lines across the nail in an abstract pattern
- Dust tiny flecks of shimmer or fine glitter in the same gold tone throughout
- Keep the overall effect light and airy — this is all about suggestion, not boldness
- Seal with glossy topcoat
This design is perfect for those who want their nails to be beautiful but not the center of attention.
Final Thoughts
Soft square nails are basically a blank canvas for your creativity, and these 30 ideas barely scratch the surface of what’s possible. The beauty of this shape is that it works with literally any design — minimalist or maximalist, matte or glossy, sparkly or completely subdued. What matters most is choosing designs that make you feel confident and happy when you look down at your hands.
The best manicure is always the one that makes you feel amazing. Whether you’re drawn to the barely-there elegance of thin gold lines on beige or you love the impact of a bold gradient, soft square nails work for every aesthetic. Pick a design that speaks to your personal style, don’t stress too much about perfect execution, and remember that most “imperfections” actually make the design feel more personal and intentional.
Start with one design that catches your eye and build from there. Many of these can be mixed and matched or adapted to your favorite colors. The point is to have fun with your nails and wear something that makes you feel like the best version of yourself every single day.
