

Short squoval nails have emerged as the perfect middle ground between sharp stilettos and soft rounded nails — they’re chic, practical, and endlessly versatile. The squoval shape combines the elongated elegance of an oval with the modern edge of a square, giving you a nail that looks sophisticated without being fragile or difficult to maintain. Acrylic nails in this shape are particularly forgiving because they hold their form beautifully and provide a generous canvas for creative designs, whether you’re after something minimalist and understated or bold and eye-catching.
What makes short squoval acrylics so appealing is their accessibility. They’re long enough to feel polished and intentional, but short enough that you can actually live your life — type, cook, exercise, and work without worrying about breakage. The shape itself is flattering on most hand shapes and nail beds, and the slightly squared-off edge adds a contemporary touch that feels current without being trendy in a way that dates quickly. Plus, short nails don’t require the same level of meticulous maintenance that longer styles demand, which means your manicure stays looking fresh longer.
Whether you’re looking for a new design to take to your next salon appointment or you’re hunting for inspiration for your DIY acrylic application, the designs below span every aesthetic — from classic French ombré to geometric patterns, metallic accents, nature-inspired themes, and bold color combinations. Each one is specifically designed to work on shorter lengths where the shape and details are the real stars of the show.
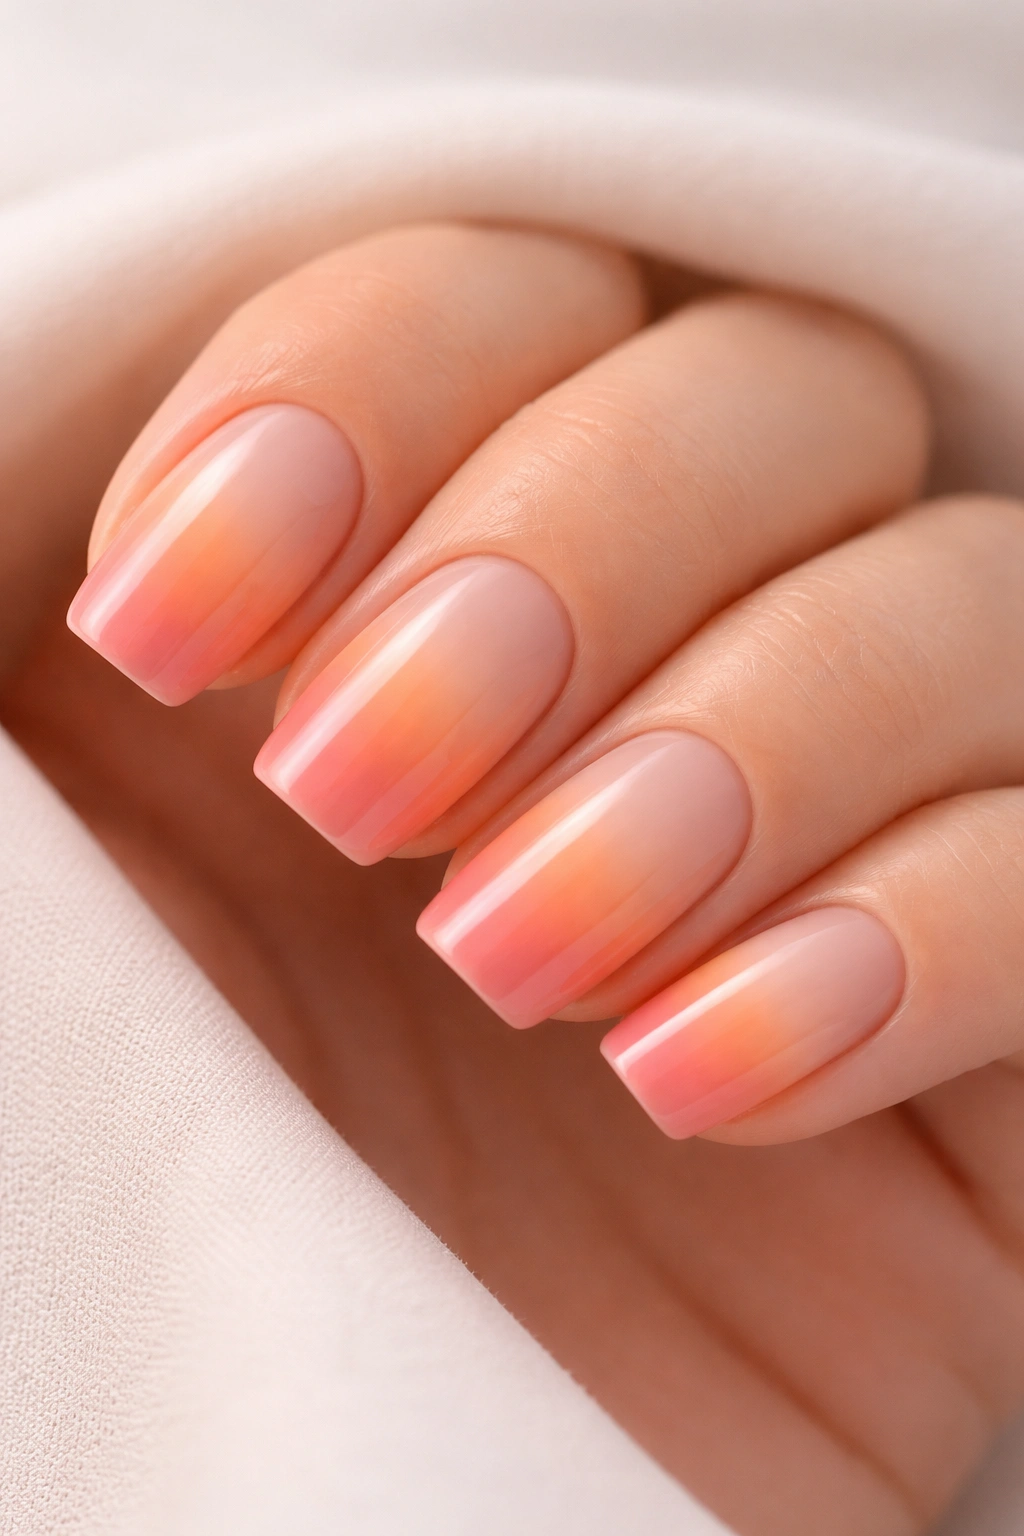
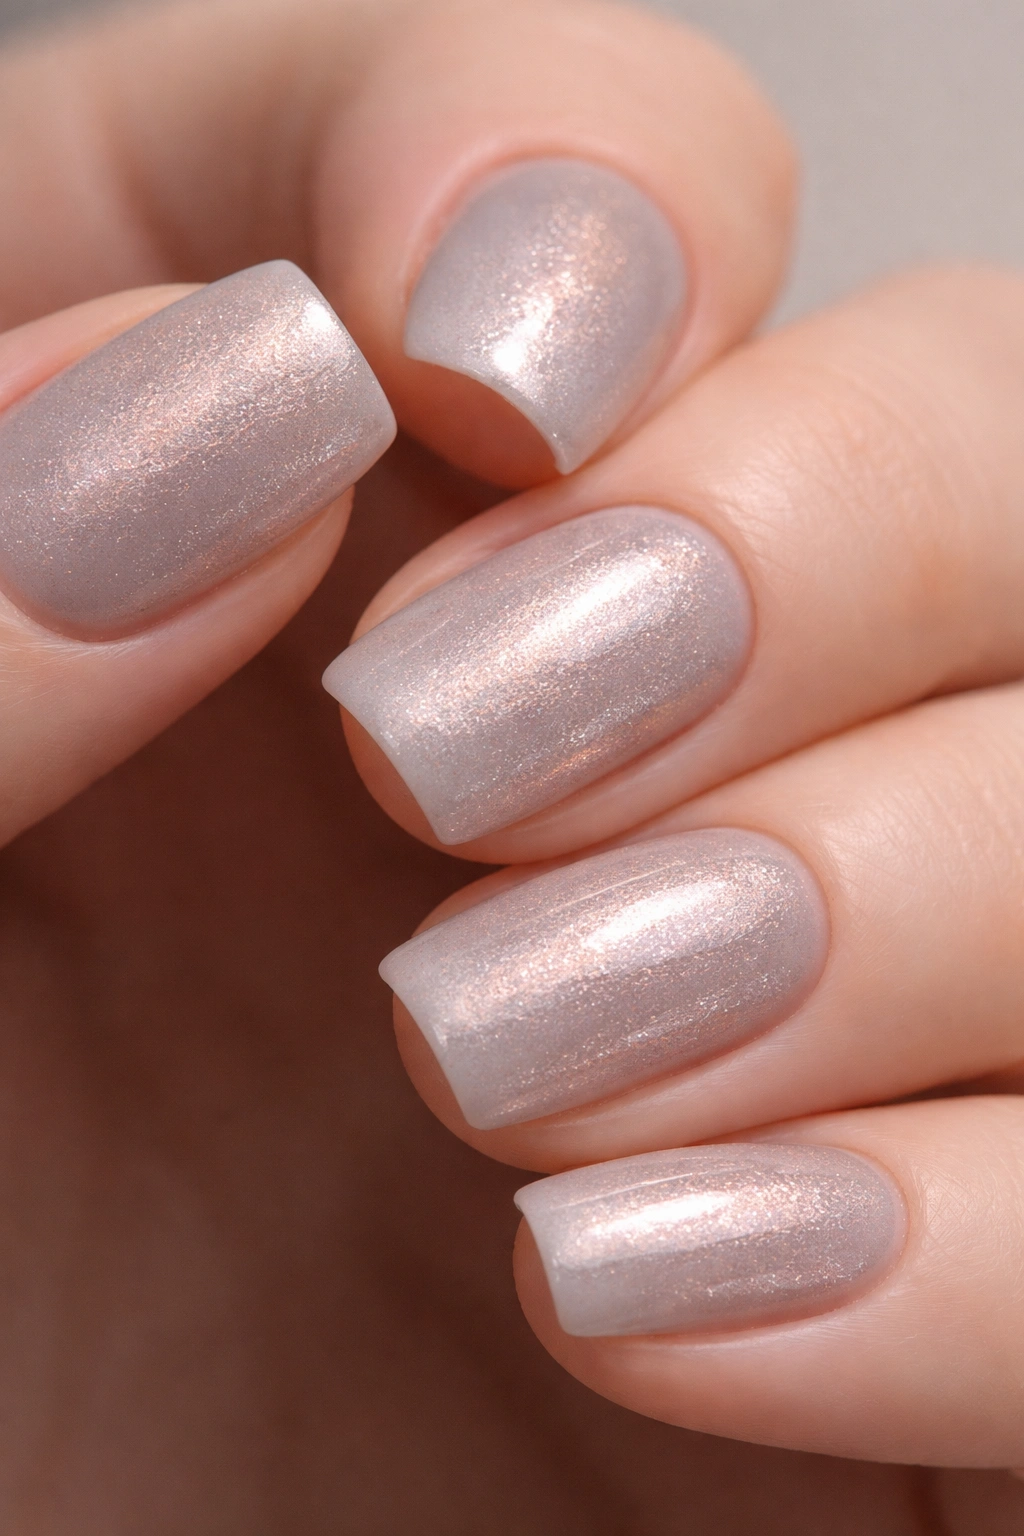
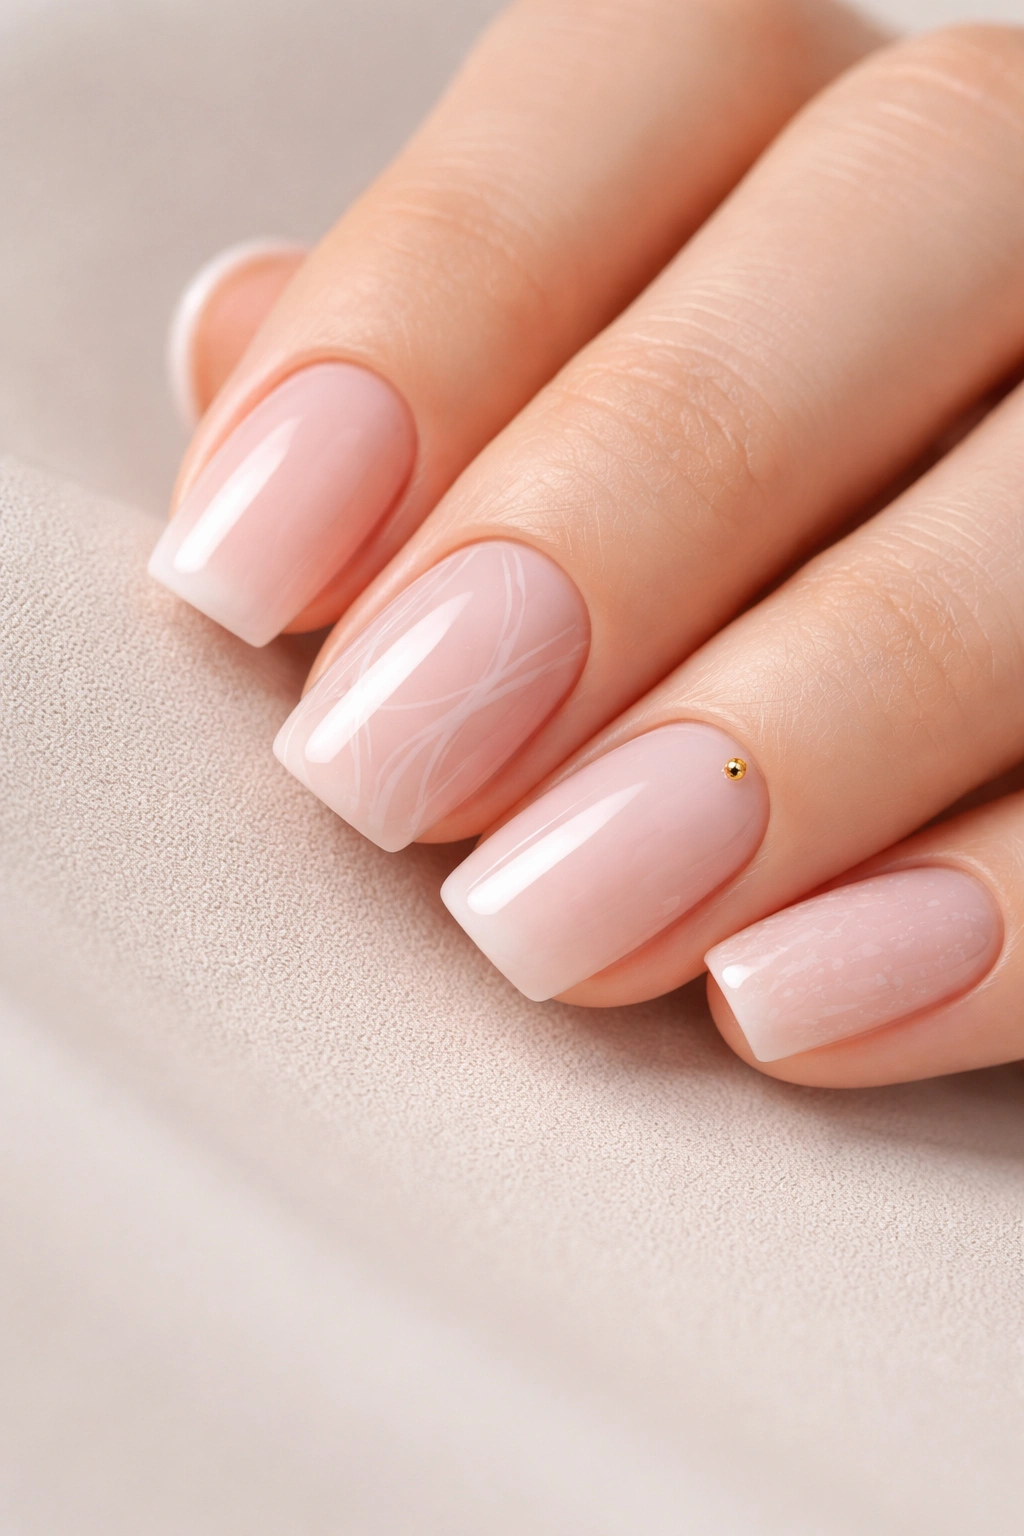
1. Soft Pink Ombre with Gold Micro-Flecks
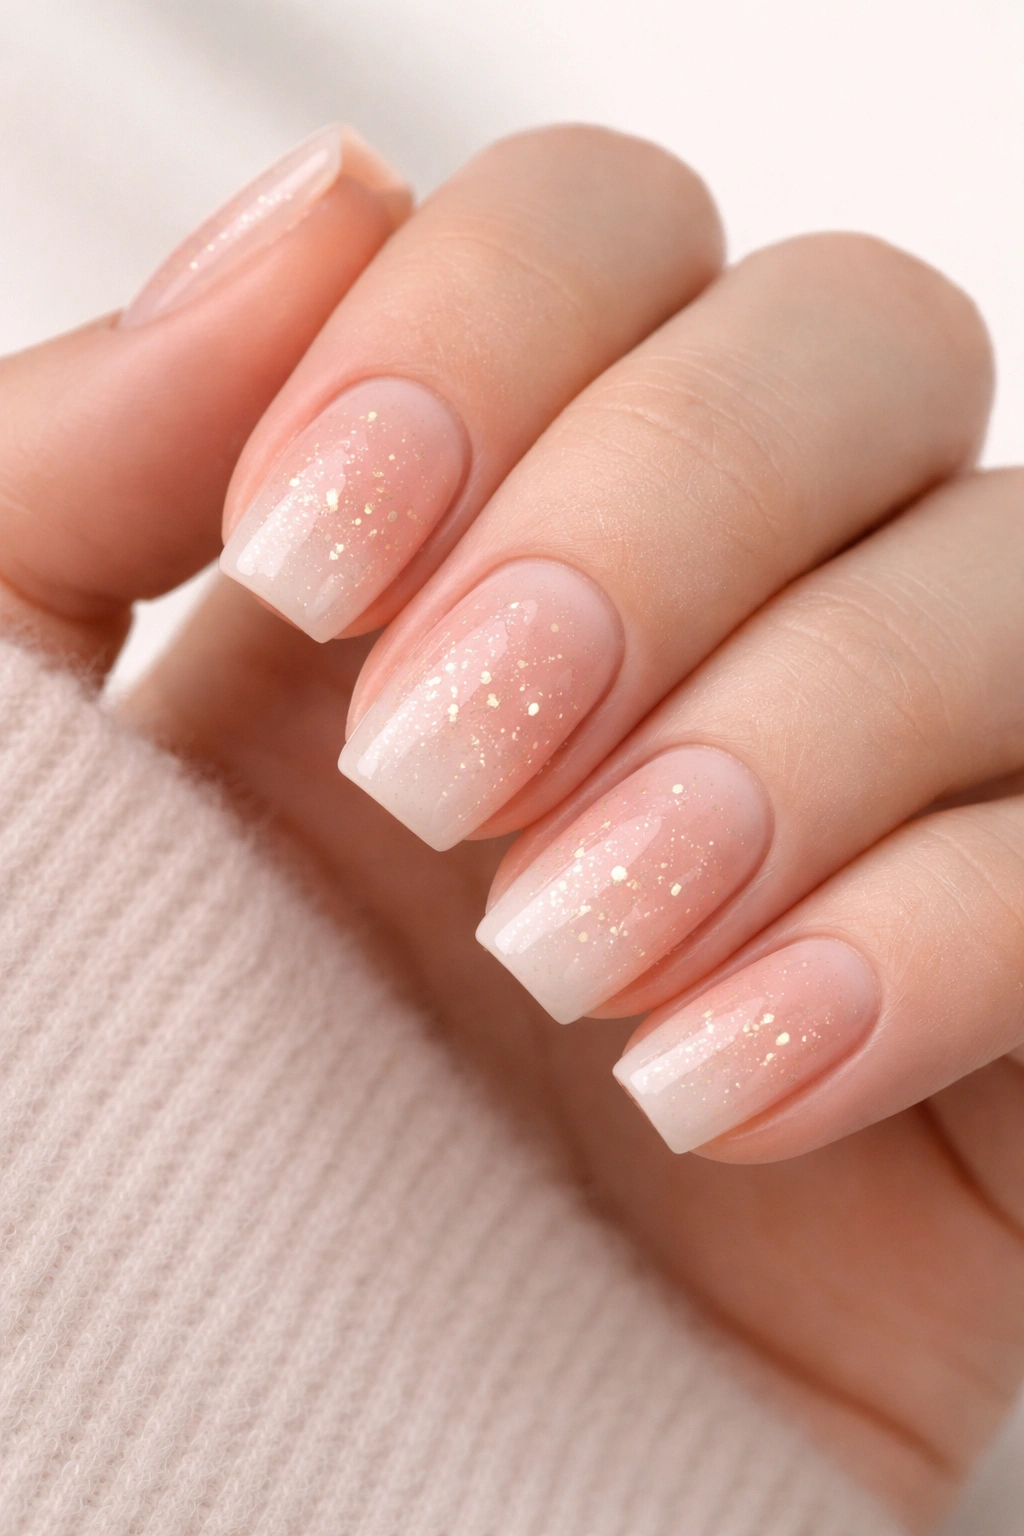
This design captures understated luxury by blending a delicate gradient from white at the base to soft peachy-pink at the tips, with microscopic gold sparkle distributed throughout the ombre transition. The effect is like frosted glass catching light, sophisticated enough for professional settings but with just enough shimmer to feel special.
Why This Works for Short Nails
The gradient effect on short nails creates an illusion of length because the eye travels vertically across the color transition rather than stopping at the nail’s edge. The soft pink doesn’t show growth lines as easily as a solid color, which means this design stays looking fresh for 3-4 weeks without touch-ups.
Application Details
- Base coat with a thin layer of builder gel
- Sponge white acrylic powder onto the base
- Apply peachy-pink over the middle and tip sections
- Dust micro-flecks of gold while the gel is still tacky
- Seal with a glossy topcoat for shine
2. Classic French Ombre with Soft Transition
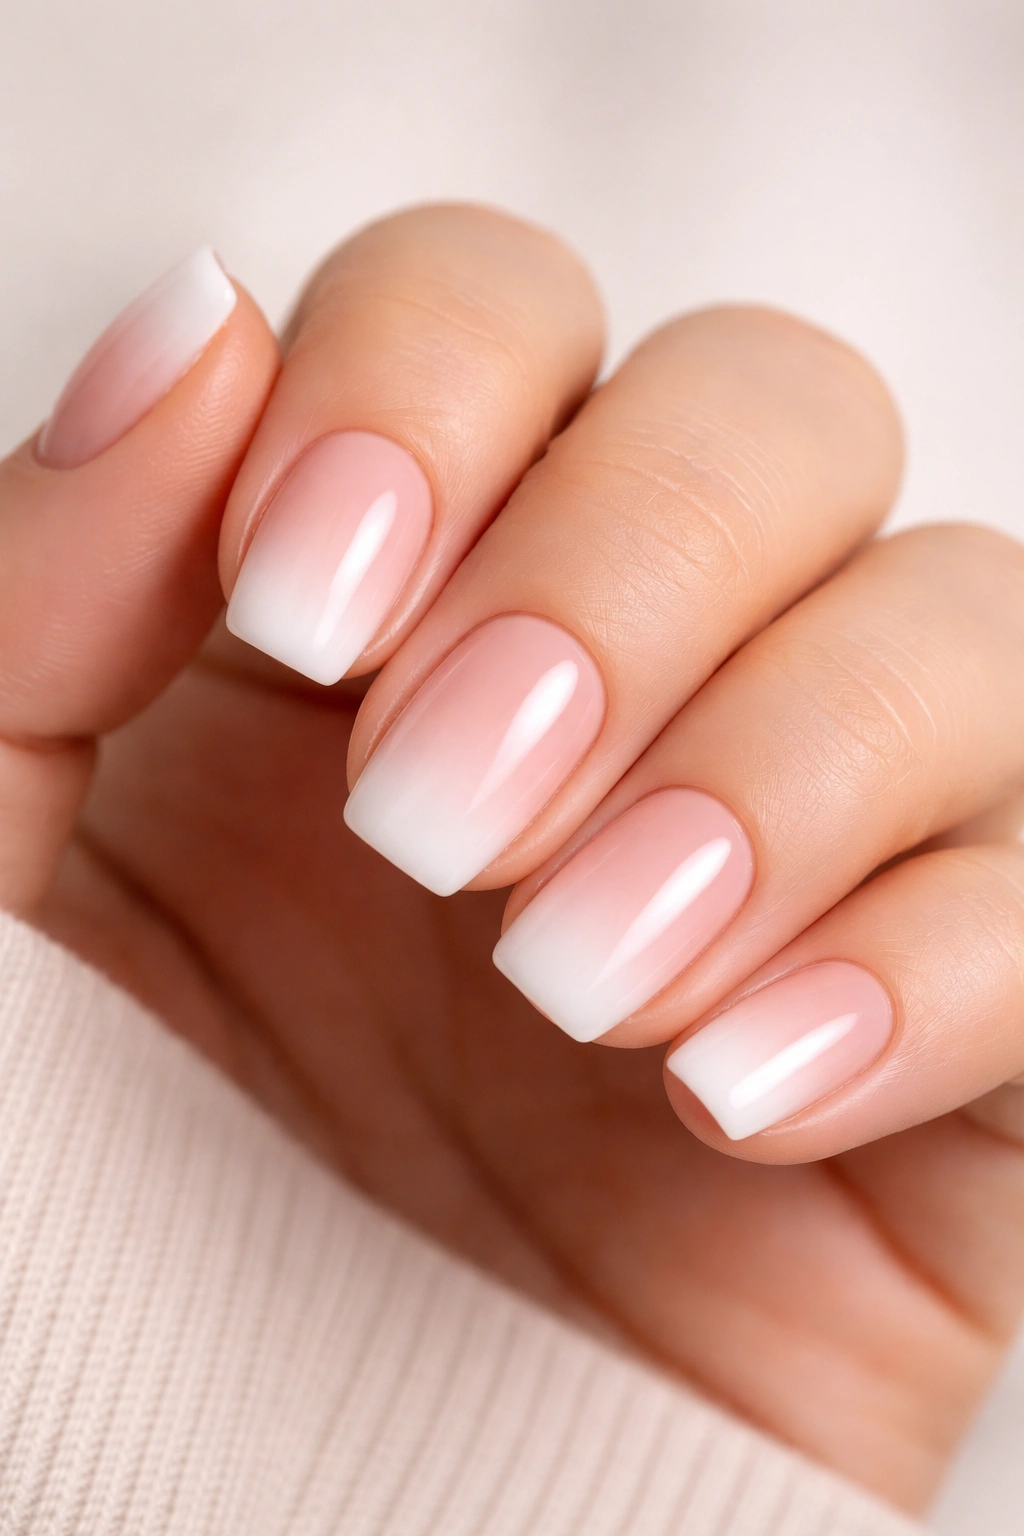
The modern take on a French manicure replaces the stark white line with a gradual, soft transition from nude to white that looks contemporary rather than dated. On short squovals, this creates a crisp, clean look that works for every occasion.
The Modern French Advantage
A traditional French tip’s sharp line can look too severe on shorter nails, but the ombre version softens that edge while keeping the timeless appeal. The nude base elongates the finger visually, and the gradient prevents that “grown-out” appearance for much longer than a traditional French.
Key Details
- Start with a nude base that matches your skin tone
- Create the transition by sponging white gradually over the middle section
- The white should be most opaque at the tip, fading to nearly transparent at the transition zone
- Finish with a matte or glossy topcoat depending on preference
3. Dusty Rose with Raised Gold Geometric Lines
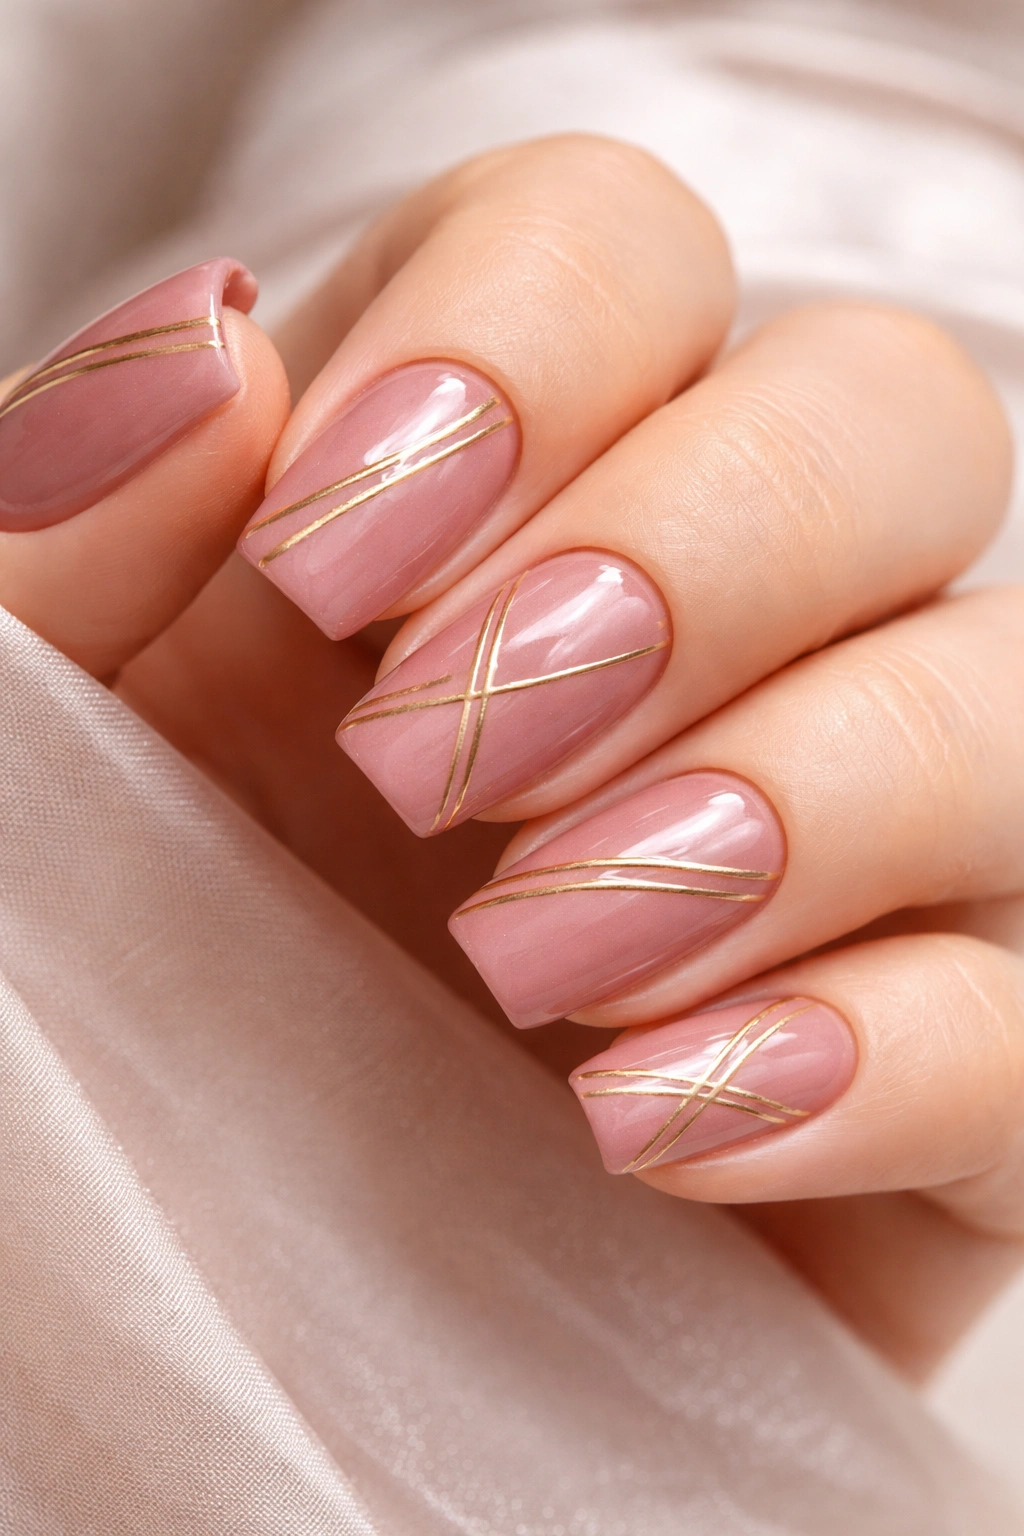
Picture a soft, muted rose base with thin, raised metallic gold lines creating angular geometric patterns across the nail surface. The raised metallic detail adds dimension and catches light from different angles.
Dimension Through Detail
Rather than using flat embellishments, this design uses textured metallic lines that create actual depth — your fingers look more interesting and expensive-looking in photographs and in person. The geometric pattern is contemporary without being too trendy.
Application Approach
- Apply dusty rose base as a solid color
- Once cured, use a fine detail brush with metallic gold gel to create angular lines
- Build up the gold slightly with multiple thin layers for that raised effect
- Add a glossy topcoat that creates shine over the matte rose
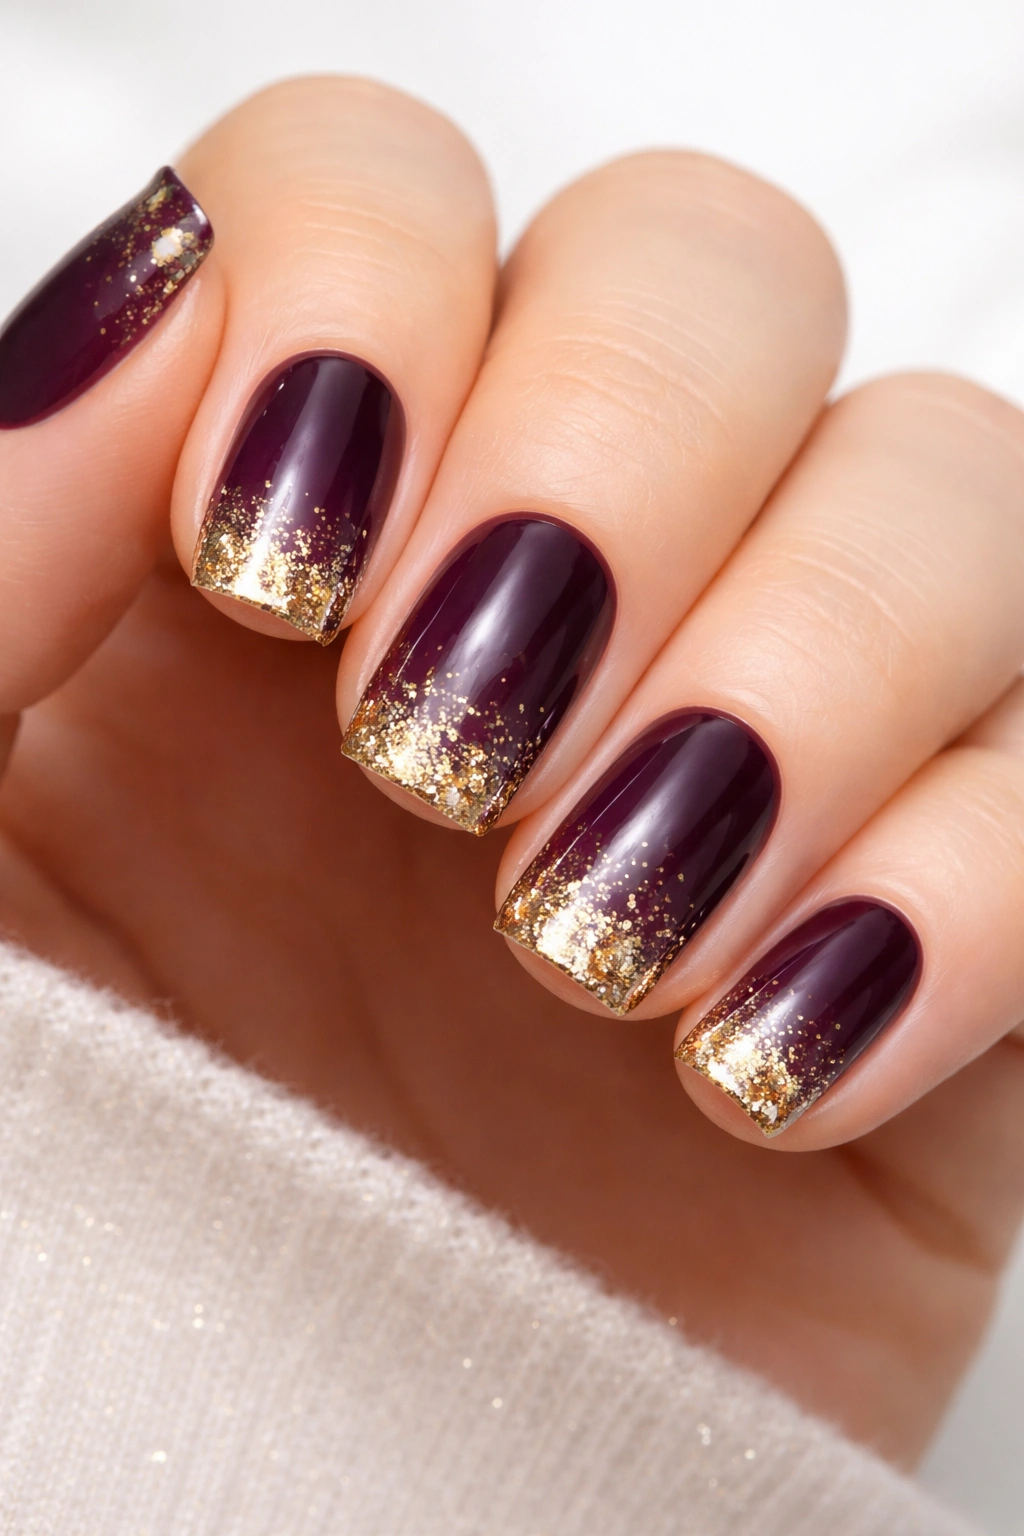
4. Cream Base with Burgundy Accent Nail
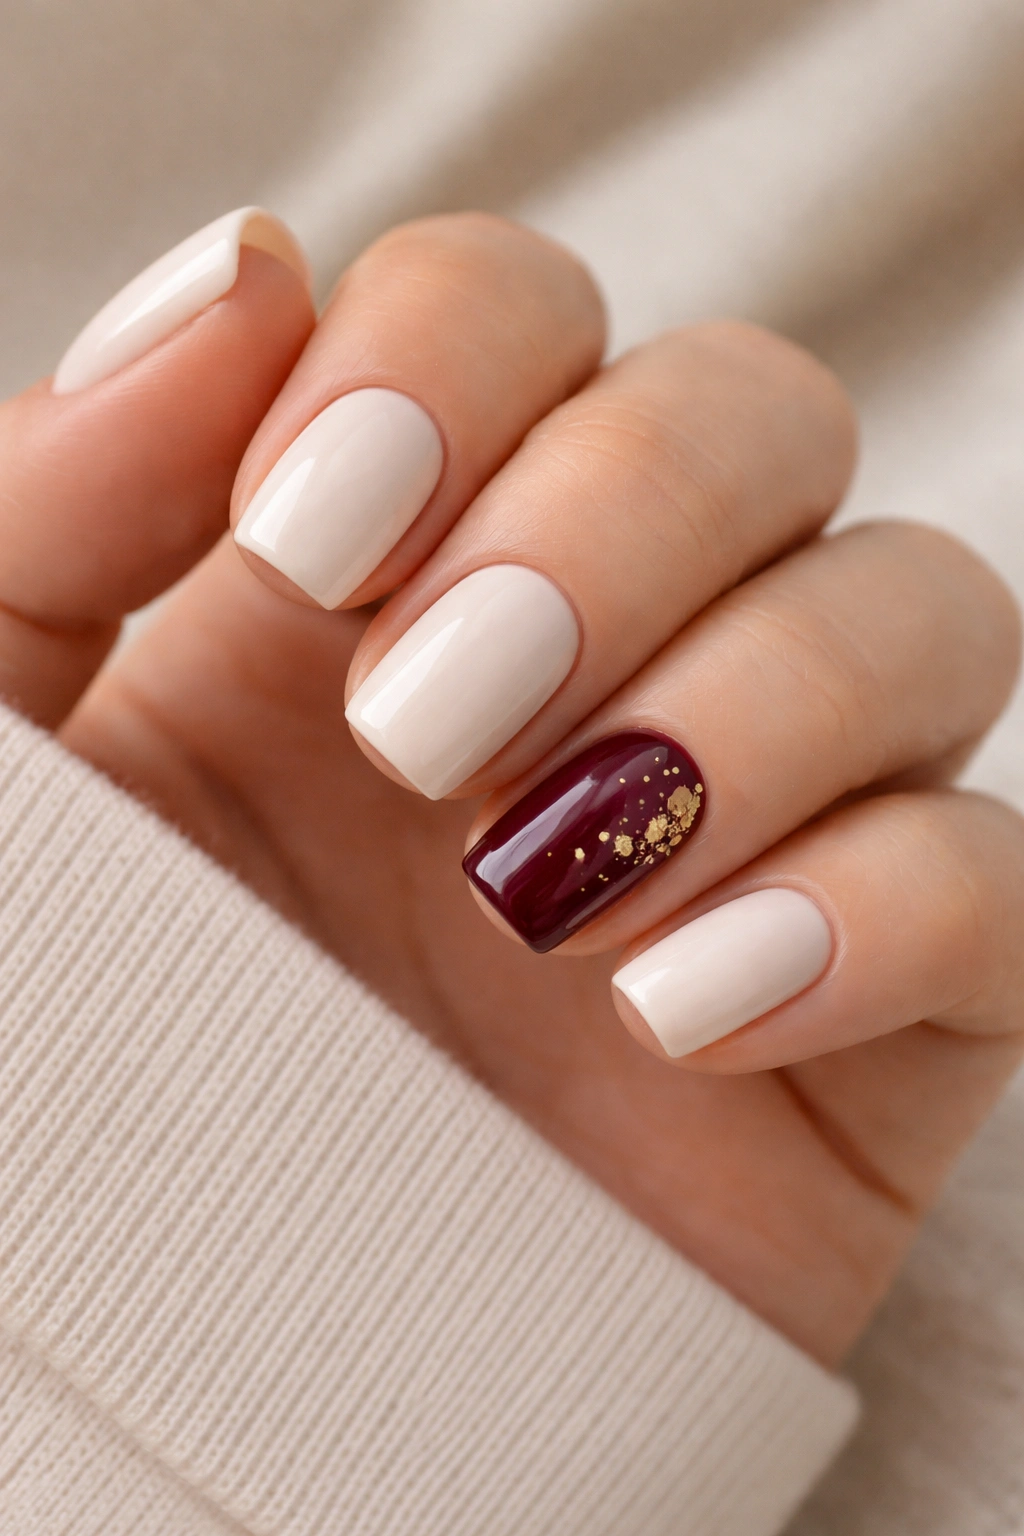
A creamy, warm white base color covers most nails while a single accent nail features deep burgundy with a gold foil accent. This provides visual interest without overwhelming, and the contrast is striking without being jarring.
The Accent Nail Strategy
On short nails, a single accent nail draws the eye without creating a busy look. The burgundy-and-gold combination feels luxe while remaining totally wearable for everyday situations. This design works particularly well if you have several nails that are slightly different lengths — make the slightly longer or oddly-shaped nail the accent.
Design Execution
- Create a cream base on nine nails
- On the accent nail, apply a deep burgundy
- While the burgundy is still slightly tacky, apply small pieces of gold foil to create a scattered, organic placement
- Seal with topcoat
5. Pale Nude with Delicate Floral Watercolor
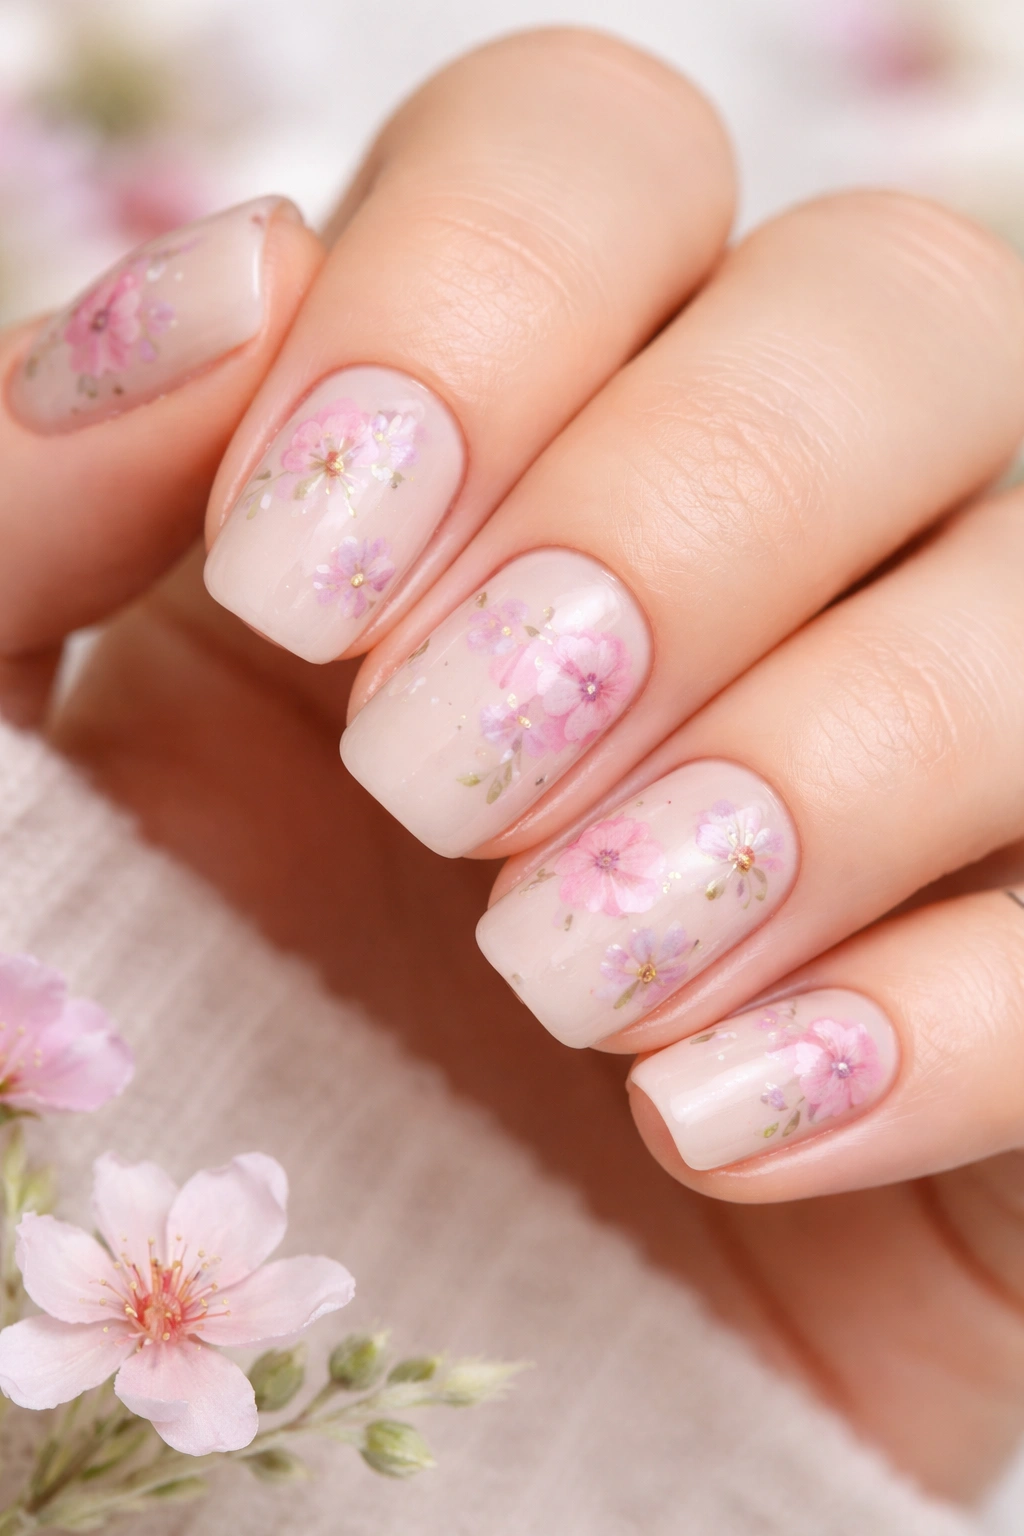
Tiny hand-painted flowers in soft pinks, purples, and greens are scattered across a pale nude base like a watercolor painting. The flowers are intentionally imprecise and organic-looking rather than perfect.
Watercolor Elegance
The beauty of the watercolor technique is that it mimics actual artistic painting — imperfections read as intentional rather than sloppy. On short nails, these delicate florals are visible but not overwhelming, creating an artistic statement that feels personal and thoughtful.
Painting Method
- Use a pale nude as your foundation
- Thin out your nail polish or gel with a mixing medium to achieve a more translucent consistency
- Dab and drag colors with a small brush to create loose flower shapes
- Layer colors while still wet so they blend slightly
- Define centers with a dot of darker color once dry
6. Bright White with Black Minimalist Line Art
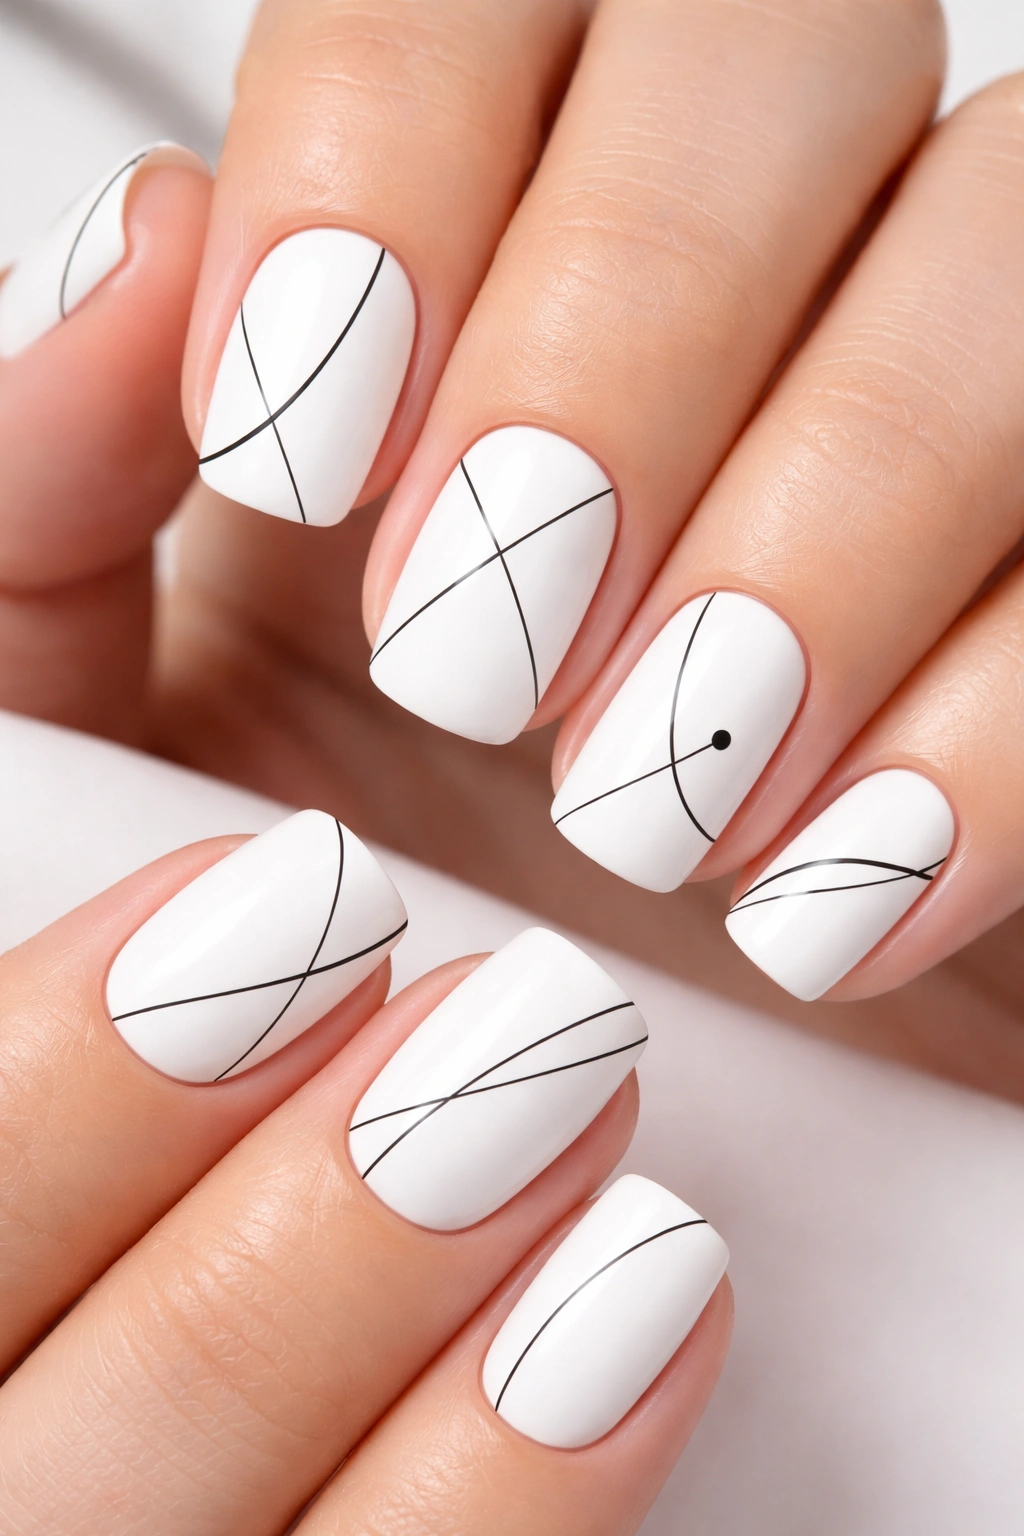
A clean white base features super-fine black lines creating simple geometric shapes or abstract designs. The minimalism is the entire point — these designs should feel intentional and editorial.
Why Minimalism Matters
Minimalist nail art proves that you don’t need color, glitter, or complexity to make an impact. On short nails, this clean approach emphasizes the shape itself and shows that your nails are intentional and well-maintained.
Execution Tips
- Use a bright, opaque white as your base
- Once fully cured, use a very fine brush or a thin nail art pen with black gel
- Create straight lines, small triangles, or abstract shapes
- Keep designs symmetrical across the nail for a refined look
- The white and black contrast should be sharp and clean
7. Champagne Nude with Scattered Pearl Accents
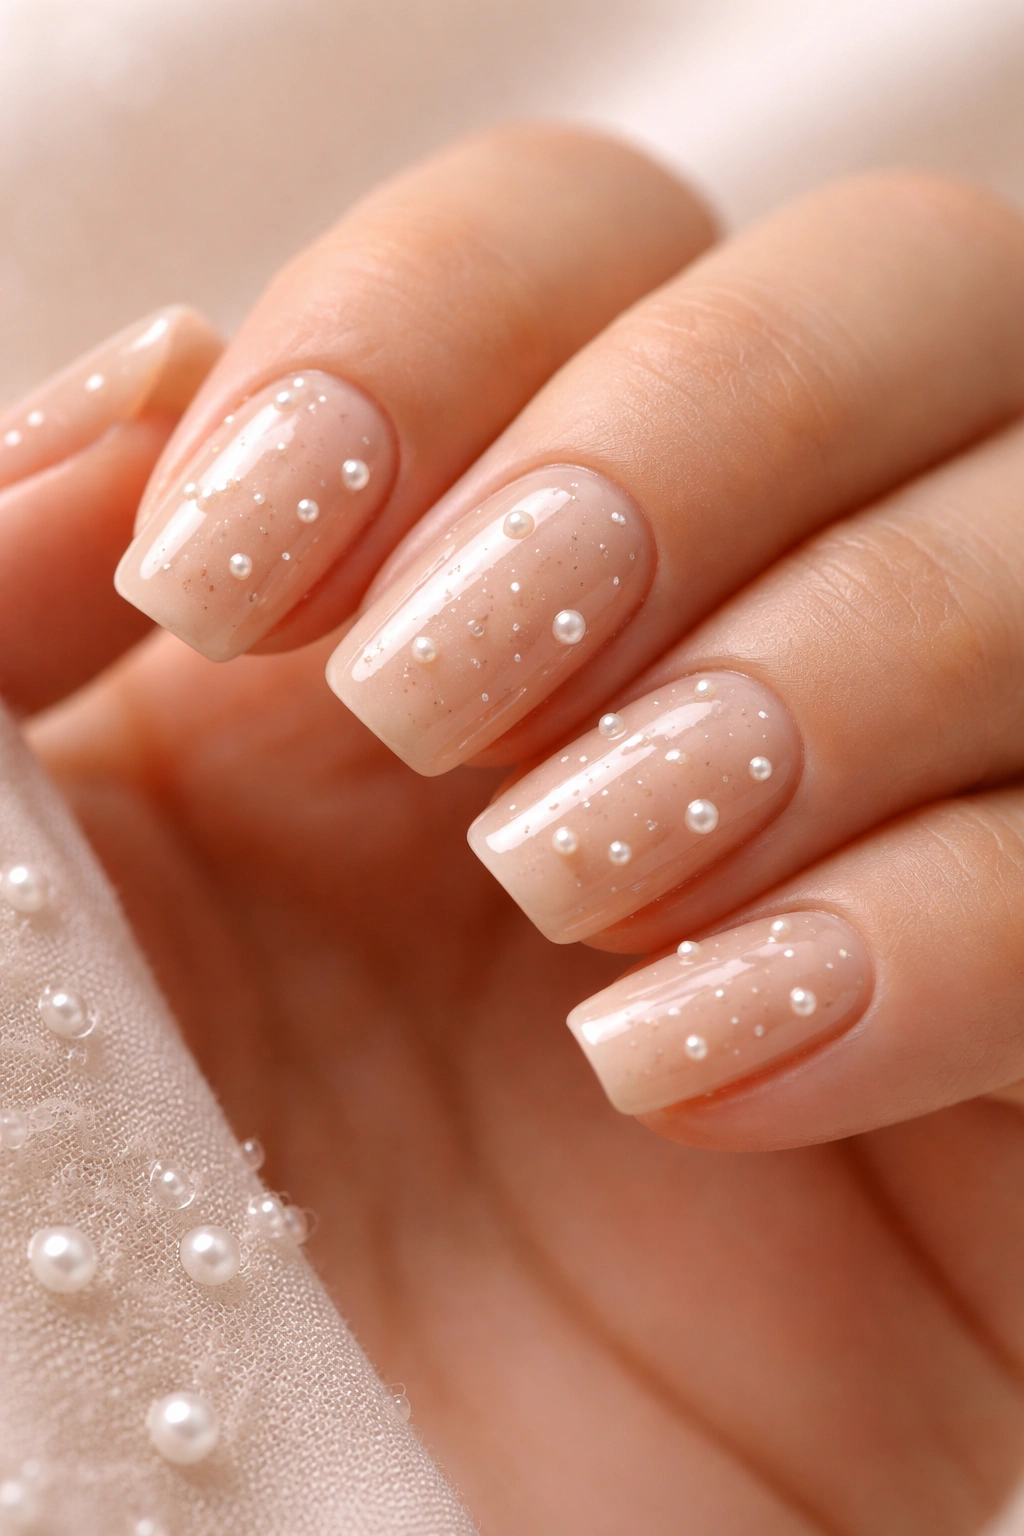
A warm, champagne-nude base topped with scattered pearl beads or caviar micro-beads creates texture and sparkle without color. The pearls catch light subtly rather than screaming for attention.
Textured Elegance
The pearls add dimension that reads as sophisticated rather than playful. On short nails, scattered pearl accents look more refined than a solid stone or glitter application — they’re intentional and carefully placed rather than covering the entire surface.
Application Process
- Apply champagne nude gel as your base
- Before curing, sprinkle tiny pearl beads across the surface
- Cure to set the beads in place
- These will naturally sit slightly raised on the nail surface
- Seal with topcoat, which will create a smooth surface over the pearls
8. Soft Lavender with Subtle Chrome Gradient
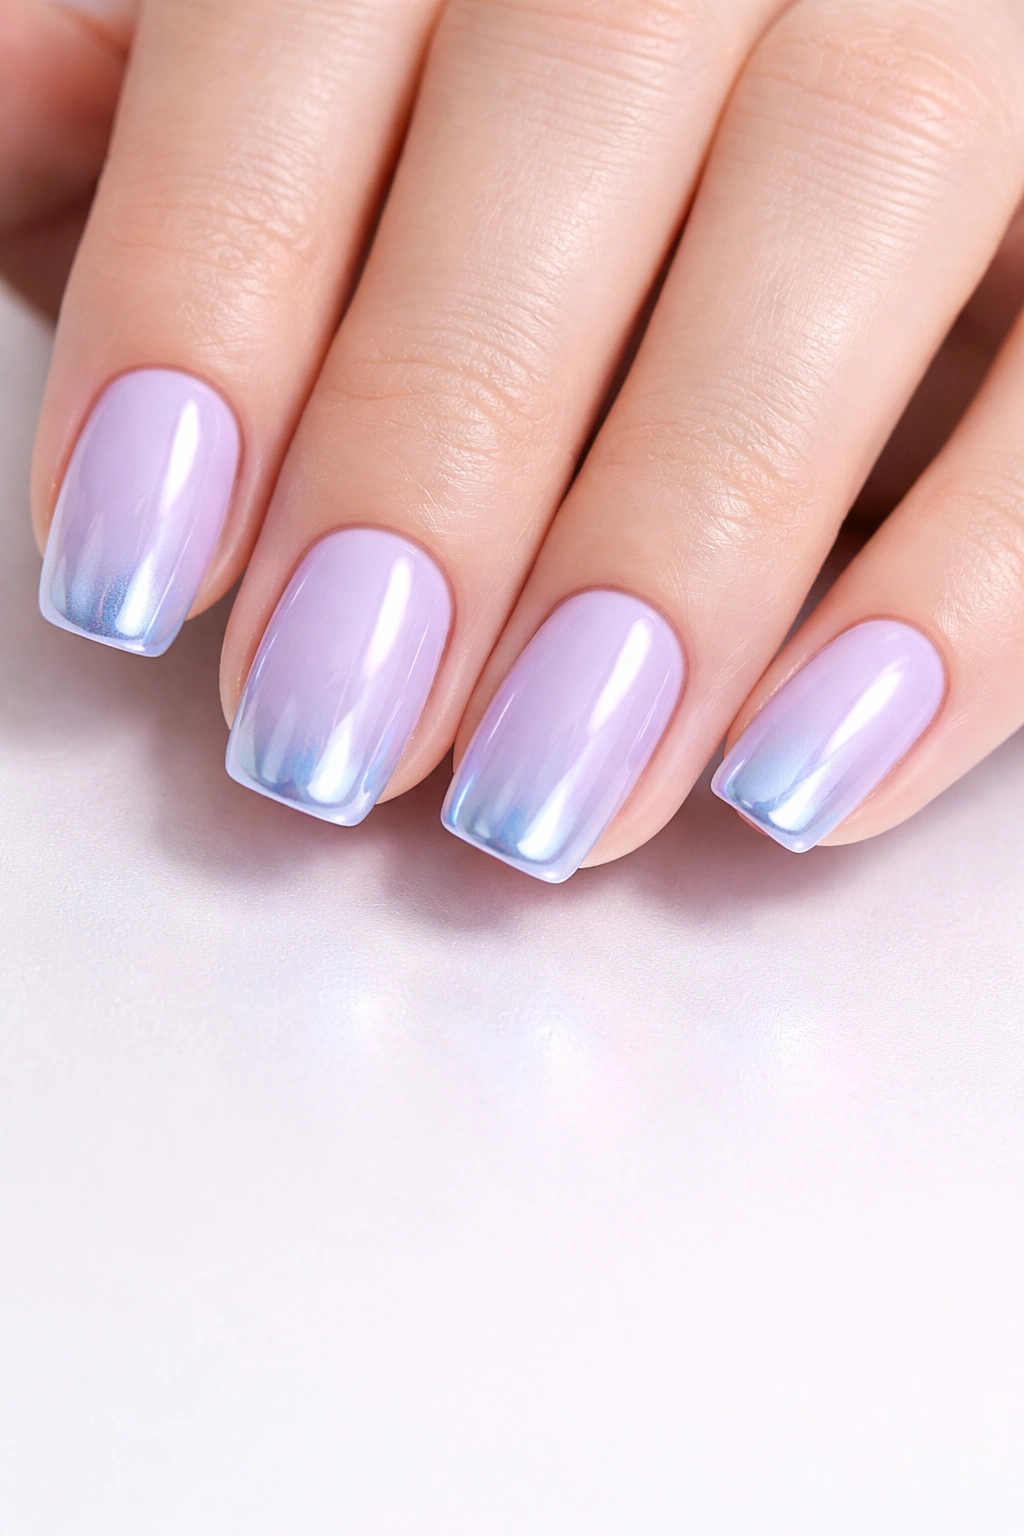
A pale lavender base transitions into a soft chrome effect at the tips, creating an iridescent shimmer that shifts from purple to blue depending on the light. The chrome isn’t full-coverage — it’s blended and subtle.
Chrome Done Right
Chrome powder can look cheap and plasticky if overapplied, but a subtle gradient using just a touch of chrome powder creates an expensive, editorial look. The lavender base keeps it soft rather than futuristic.
Chrome Application
- Apply soft lavender as your base color
- Once cured, use a sponge to apply chrome powder to the tip area
- Blend the chrome into the lavender so there’s a gradual transition
- Use a lighter hand than you think — you can always add more chrome
- Buff any powder residue and seal with a non-wipe topcoat
9. Deep Emerald with Gold Leaf Details
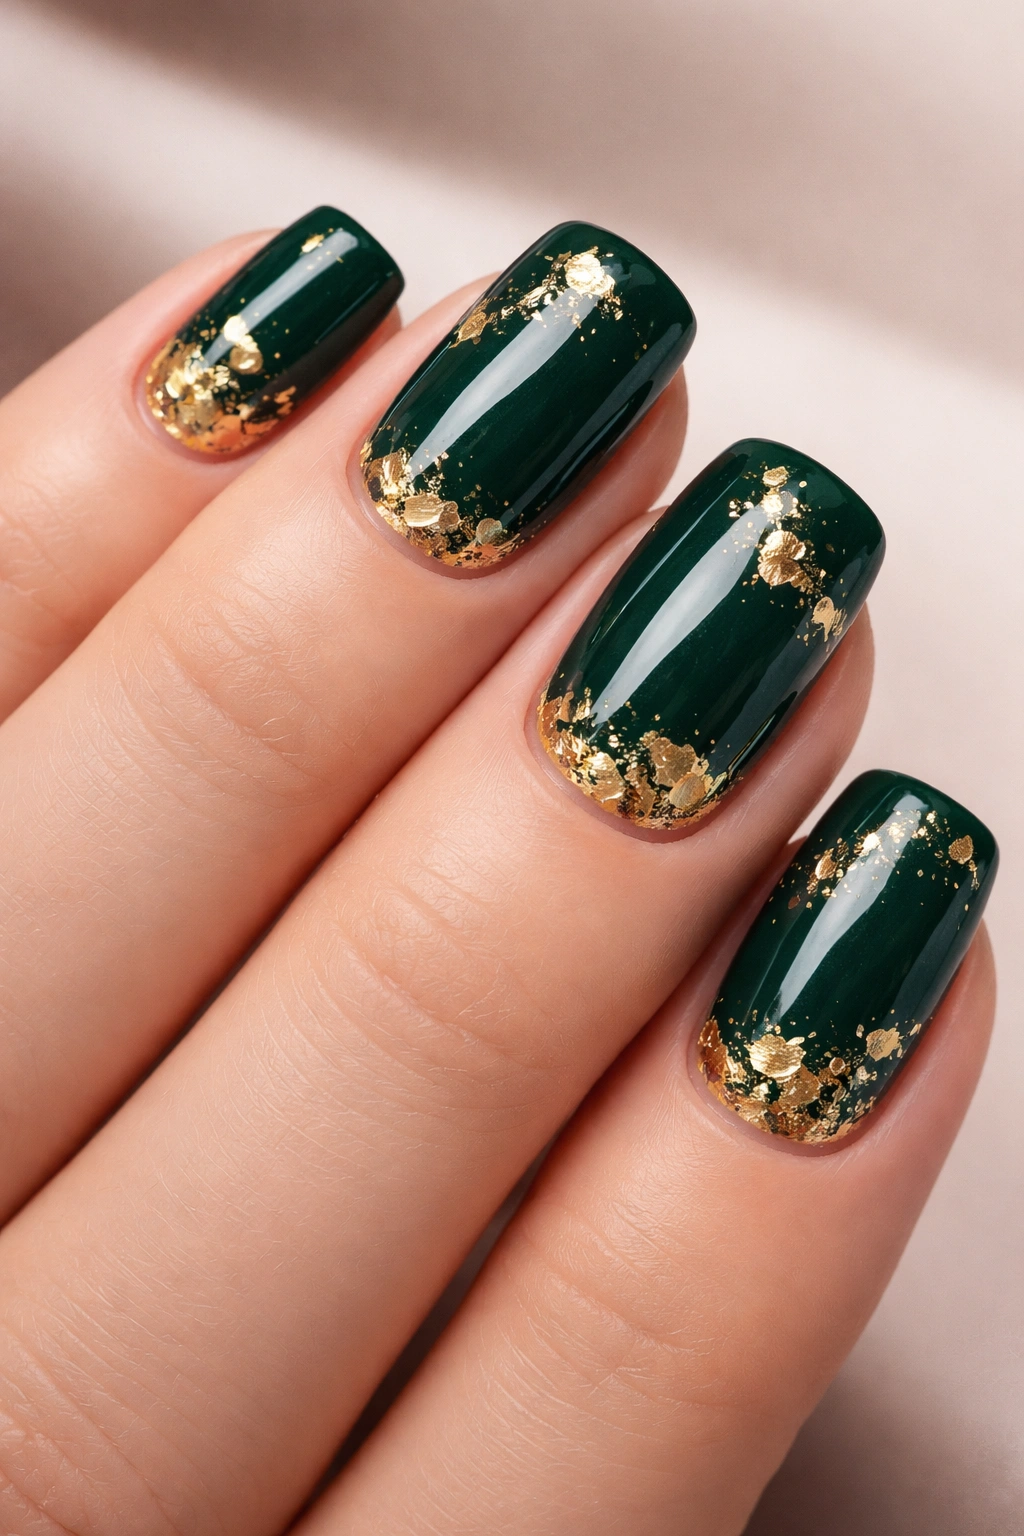
A rich, jewel-tone emerald base is topped with scattered pieces of actual gold leaf that sit under a clear topcoat. The gold catches light and creates movement across the nail.
Jewel Tone Authority
Emerald is a color that feels instantly luxurious and speaks to intentionality. On short nails, it looks rich and sophisticated rather than costume-y. The gold leaf adds glamour without needing additional colors or designs.
Gold Leaf Technique
- Apply emerald gel as a solid base
- While still slightly tacky, carefully apply small pieces of gold leaf
- Press gently so the leaf adheres
- Seal immediately with topcoat to lock the leaf in place
- The leaf will have natural variations and wrinkles — that’s part of the beauty
10. Milky White with Thin Silver Striping
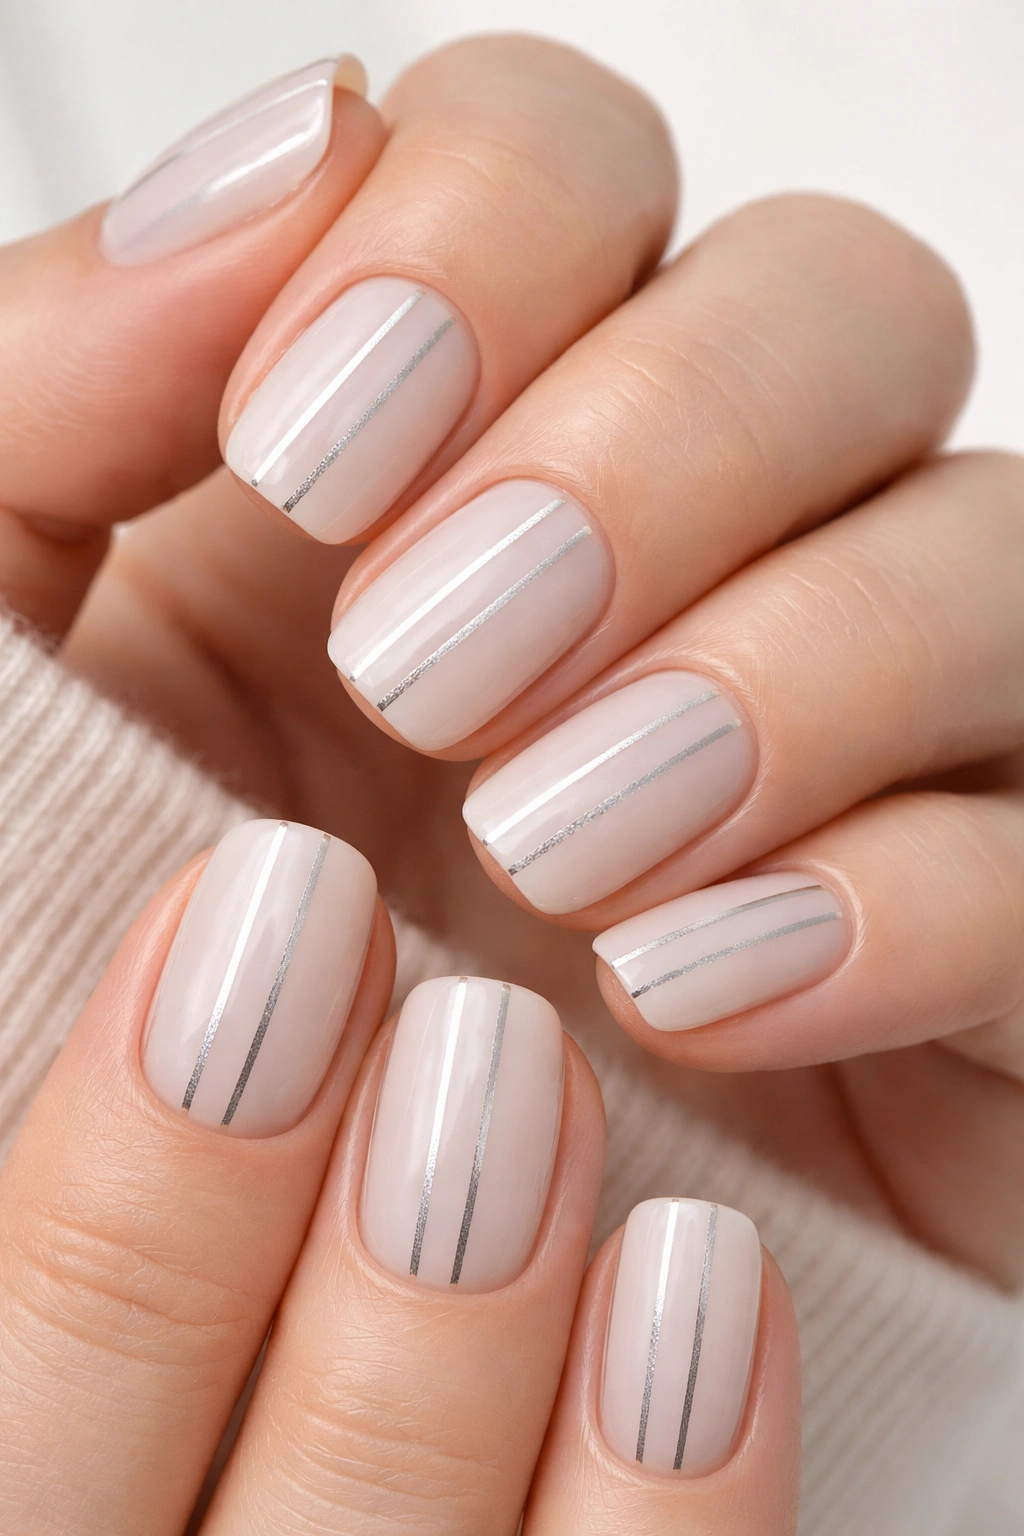
A soft, milky white (almost translucent) base with perfectly straight, thin silver stripes running vertically down each nail. The stripes are evenly spaced and create a clean, architectural look.
Striping Mastery
Striping requires a steady hand and proper preparation. The key is using striping tape under the gel stripes to keep them perfectly straight — you remove the tape before curing so the stripes set perfectly.
Striping Process
- Apply milky white as your base and cure
- Place thin striping tape vertically down the nail, leaving equal space between strips
- Apply silver gel over the exposed areas
- Cure, then carefully peel away the tape
- The stripes should have razor-sharp edges
- Seal with topcoat
11. Warm Beige with Tortoiseshell Effect
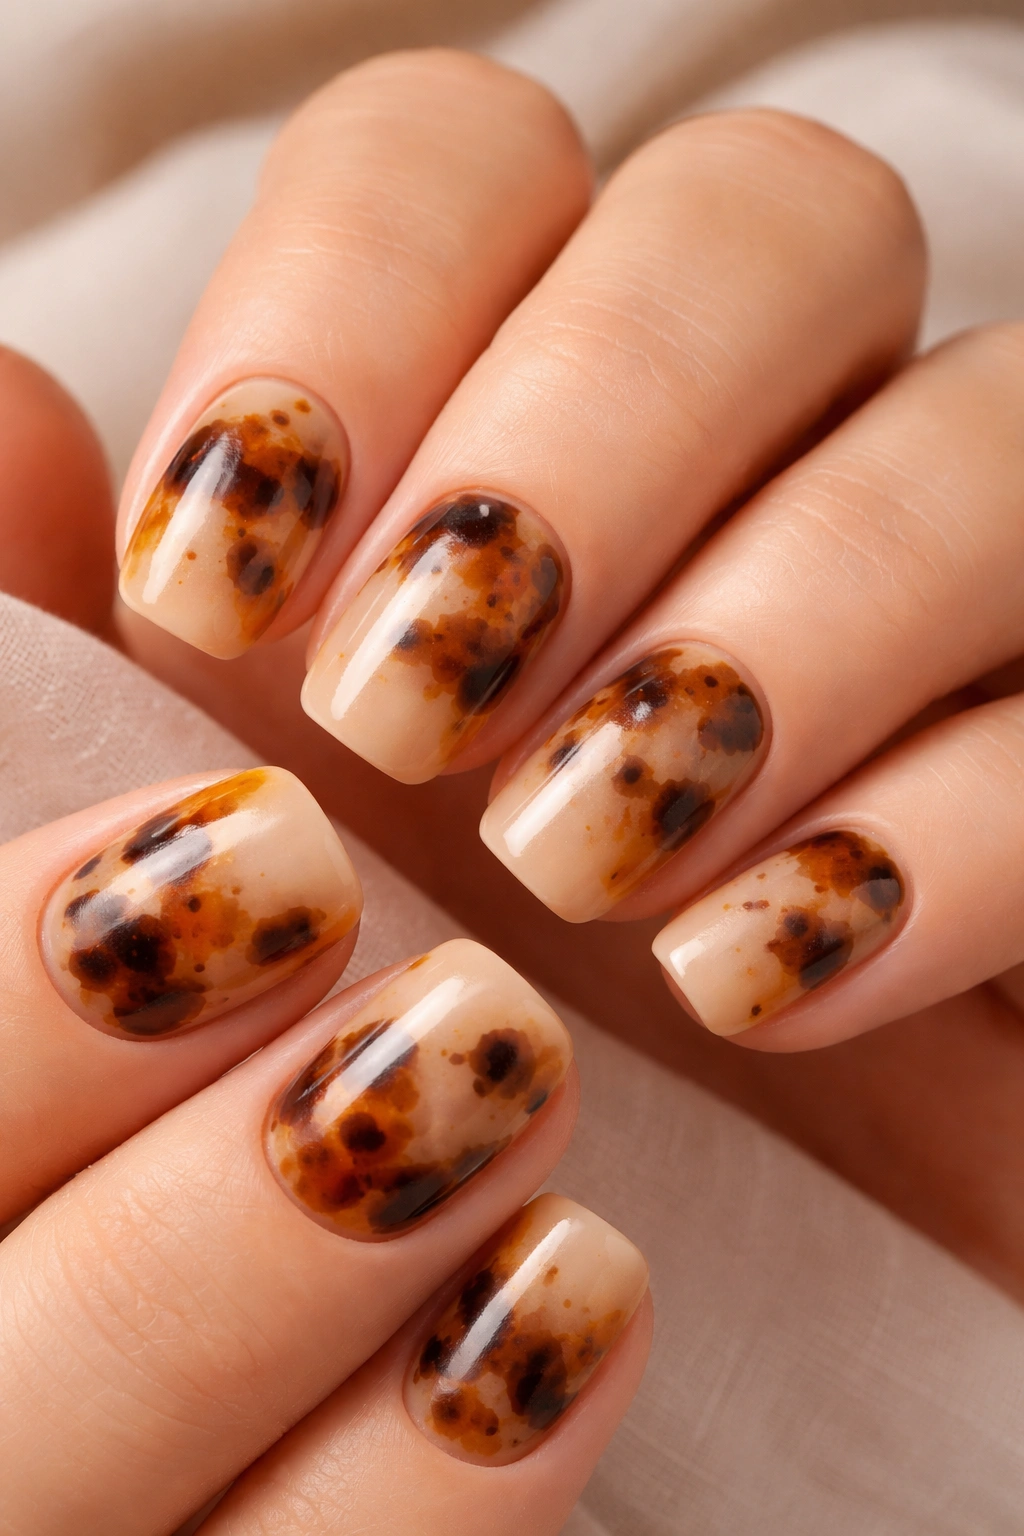
A warm beige base is overlaid with browns, taupes, and burnt oranges in an organic, speckled tortoiseshell pattern. The colors blend slightly into each other rather than having hard edges.
Tortoiseshell Appeal
The tortoiseshell pattern feels natural and organic — it’s inspired by actual tortoiseshell but works in a much wider range of colors than the traditional brown-and-orange combination. This version uses earth tones that feel warm and autumnal.
Creating Tortoiseshell
- Apply warm beige base
- While still tacky, dab in patches of brown, taupe, and burnt orange
- Use a sponge or detail brush to blur the color boundaries
- The result should look organic, not perfectly geometric
- Some colors will blend while others stay distinct
- Seal with topcoat
12. Ballet Pink with Diamond Foil Accents
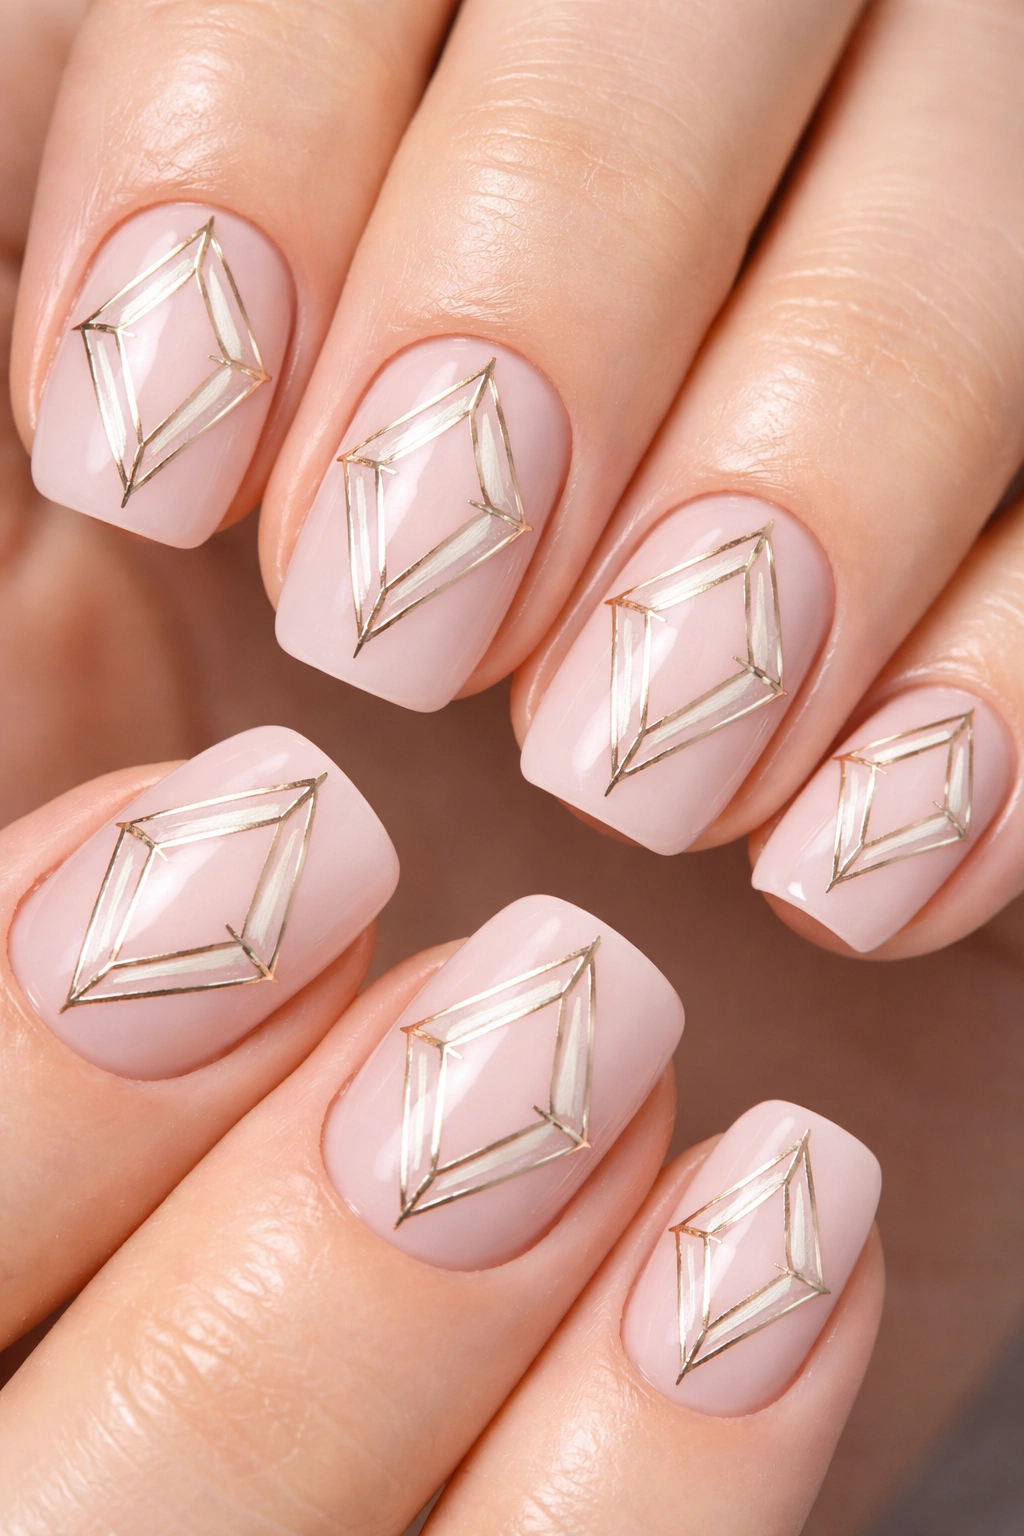
A classic ballet pink (soft peachy-pink) base is decorated with geometric diamond shapes outlined in metallic foil. The foil creates a metallic outline around each diamond shape.
Diamond Details
The diamond shape is universally flattering and sophisticated. When outlined in metallic foil, each diamond becomes a focal point without overwhelming the nail. The ballet pink keeps everything elegant and wearable.
Foil Outline Application
- Apply ballet pink base and cure
- Use a thin brush with metallic gel to paint diamond outlines
- Fill the inside of each diamond with the same pink (or leave empty for negative space)
- Apply foil to the metallic lines to enhance the shine
- The foil should stick only to the metallic areas, creating outlined diamonds
13. Blush Nude with Ombré Sunset
A base that transitions from pale blush at the base through peachy tones to warm coral at the tip, mimicking a sunset gradient. The transition is soft and blended rather than having distinct color blocks.
Ombré Execution
The sunset ombré is one of the most flattering gradient options because the warm tones complement most skin tones. The colors naturally work together, creating harmony rather than contrast.
Sponging Technique
- Apply pale blush as your base
- Sponge peachy tones into the middle section
- Sponge coral into the tip area
- Blend areas where colors meet by sponging lighter color back over the blend line
- Multiple light layers create better blending than one heavy application
- Seal with topcoat
14. Soft White with Pressed Flower Design
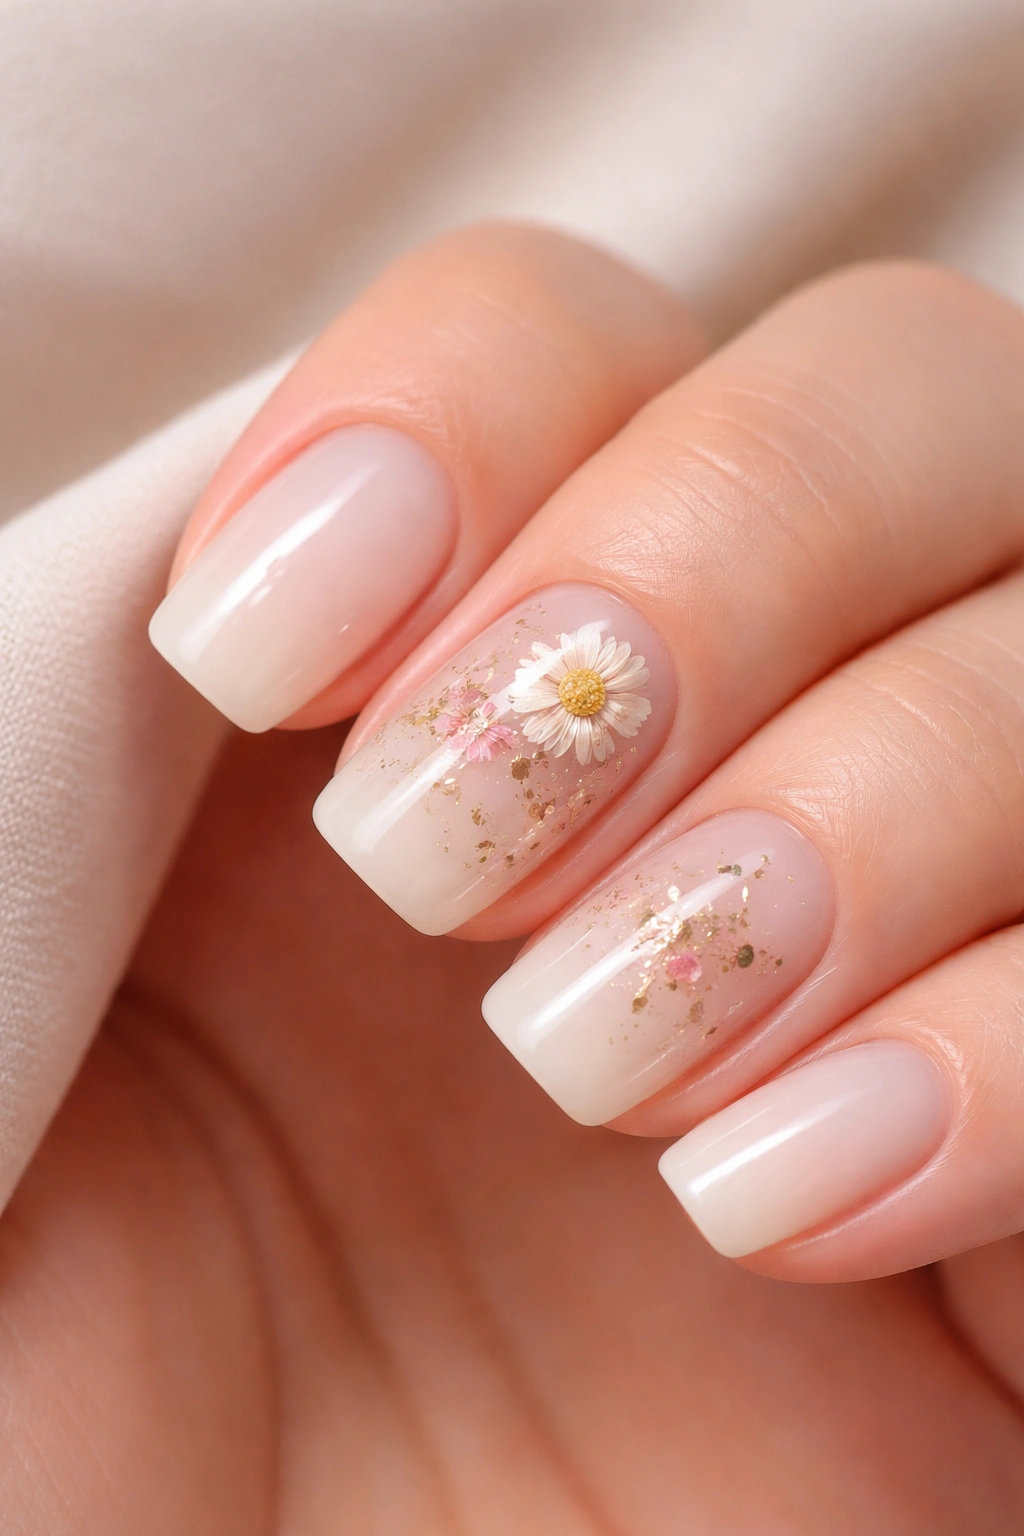
A translucent white base encases real, delicate pressed flowers or botanicals. The flowers are visible under the clear surface, creating a nature-inspired look that’s unique to each nail.
Botanical Beauty
Pressed flowers are lightweight and flat, making them ideal for acrylic nails. Each nail will be slightly different depending on the flower placement, creating a one-of-a-kind manicure. This design works particularly well for outdoor weddings or spring events.
Embedding Flowers
- Create a thin white acrylic base
- While still soft, press a delicate flower into the wet acrylic
- Build up acrylic around the flower to secure it
- Seal with additional white acrylic and finish with clear topcoat
- The flower should be clearly visible through the finished nail
15. Nude Beige with Metallic Marble Effect
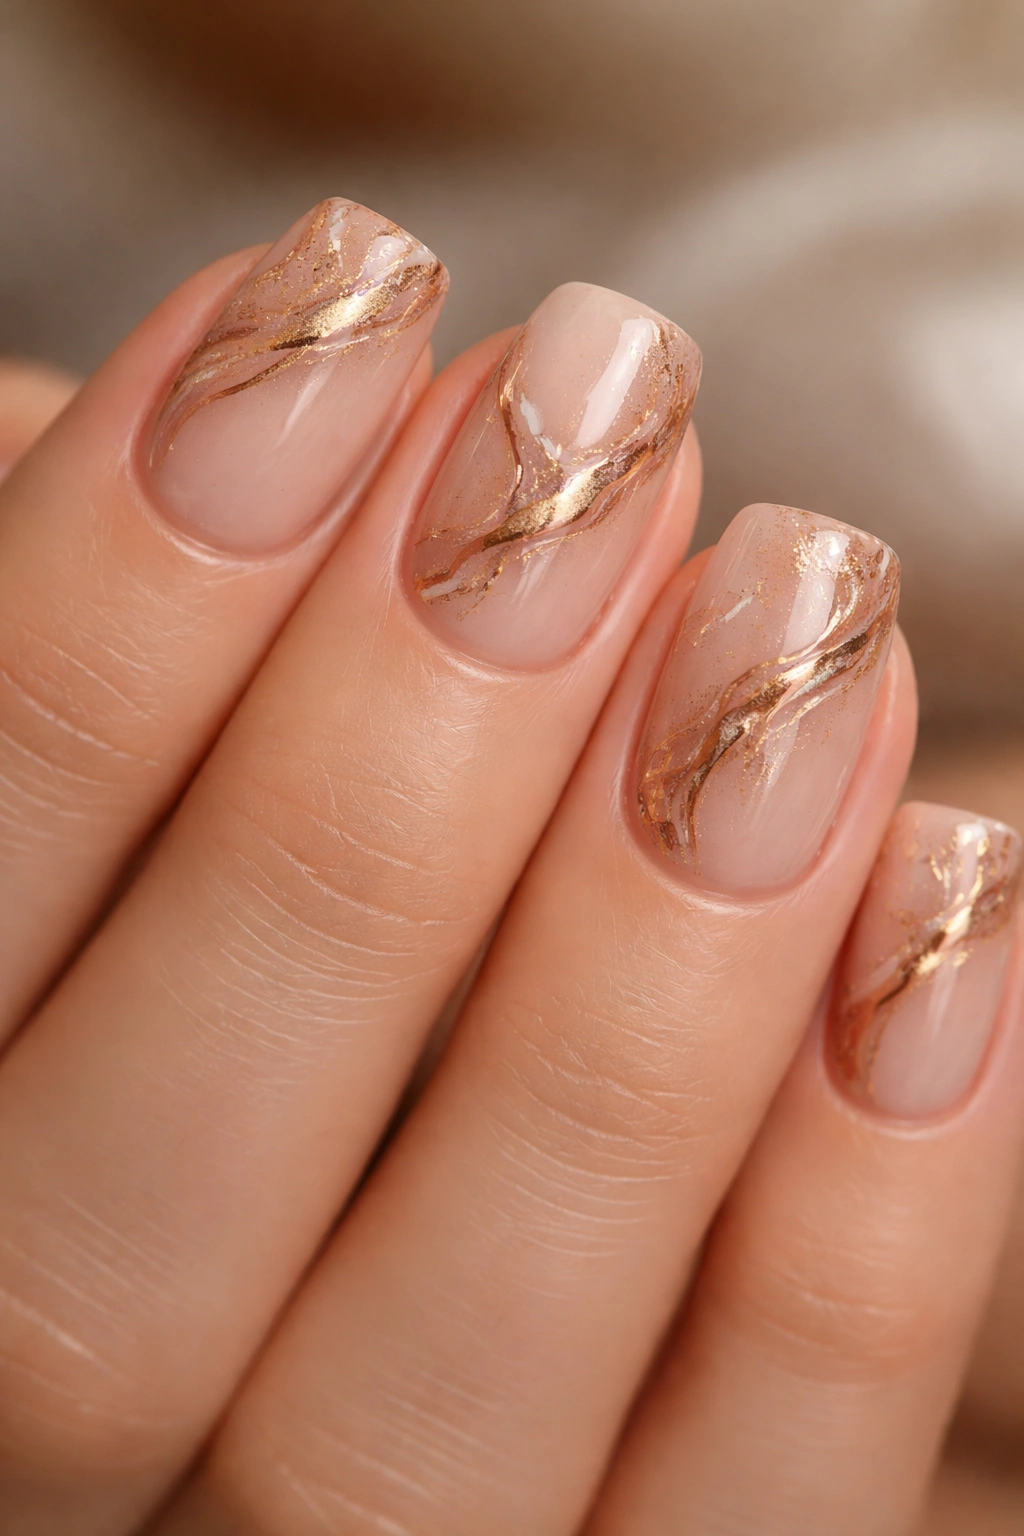
A warm nude base is marbled with metallic gold and rose gold, creating a fluid, organic pattern that looks like actual marble stone. The metallic swirls run through the base color rather than sitting on top.
Marble Illusion
True marble effect is created by mixing colors while the base is still wet, not by drawing on top. This technique creates depth and makes the nail look three-dimensional. On short nails, the marble effect makes the surface look more interesting and expensive.
Creating Marble
- Apply nude beige base
- While still wet/tacky, dab in streaks of metallic gold and rose gold
- Use a thin brush or striping tool to drag the colors together in swirling motions
- The swirls should feel organic and random
- Cure once you’re happy with the pattern
- Seal with glossy topcoat
16. Pale Pink with Raised Dot Details
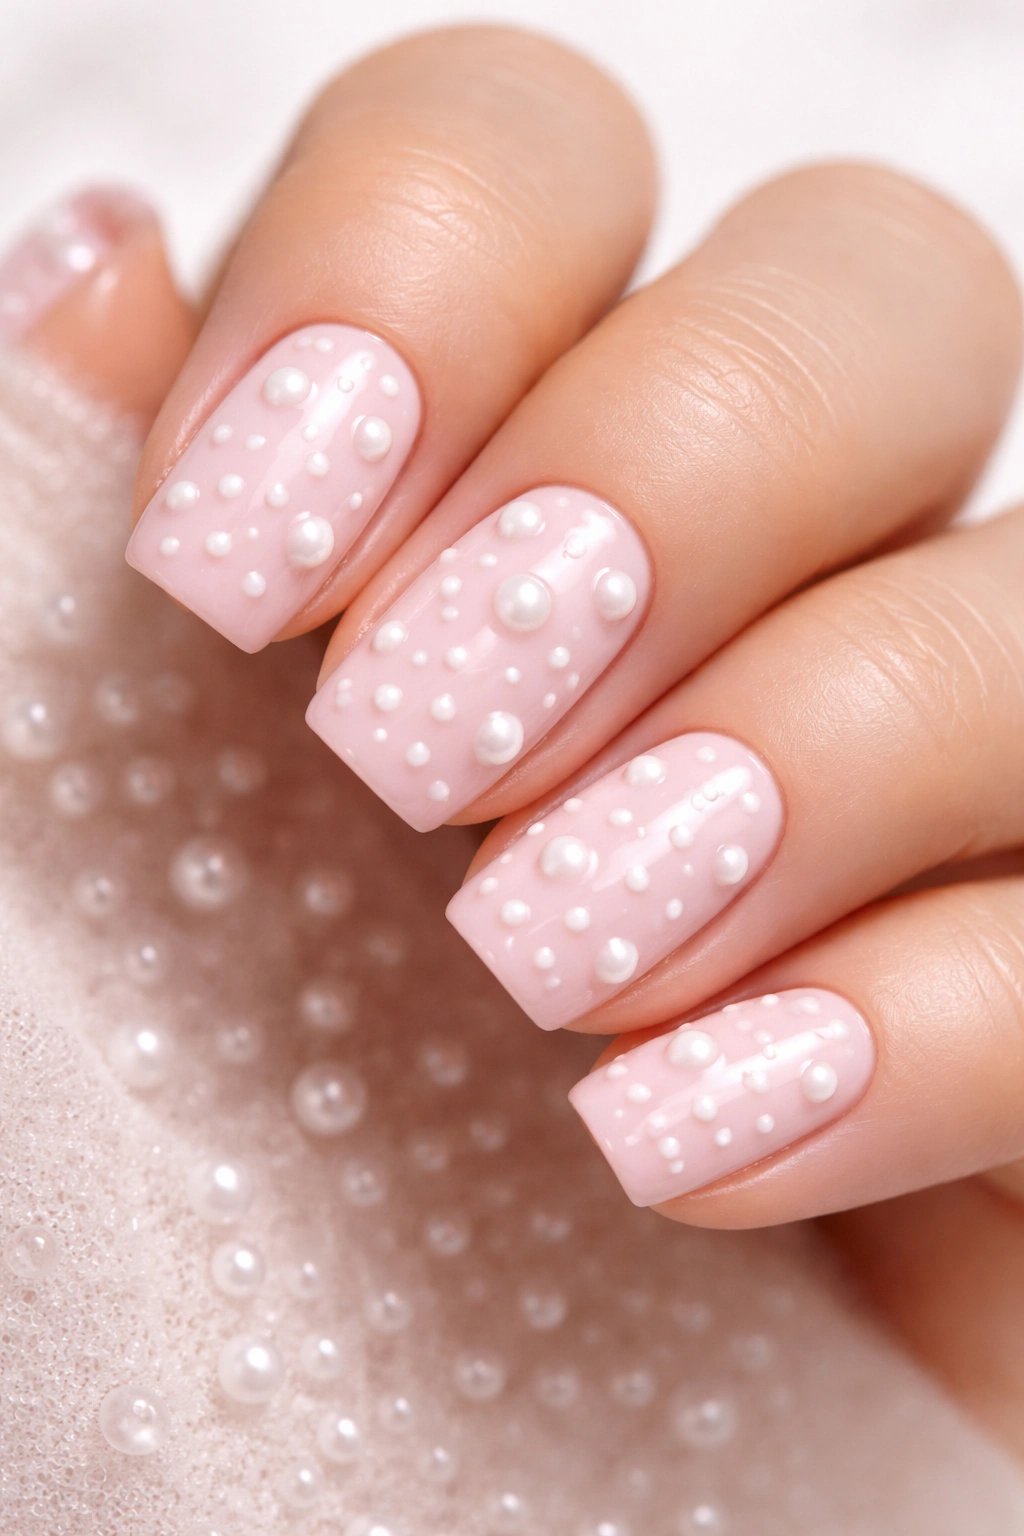
A soft pale pink base decorated with raised, dimensional white or pearl dots arranged in a scattered or geometric pattern. The dots actually have height rather than being flat nail art.
Dimensional Details
Raised dots created using a thicker gel or acrylic create actual texture that you can feel. This adds luxury and interest without requiring complicated application. The dots catch light and create movement.
Dot Application
- Apply pale pink base and cure
- Use a dotting tool dipped in white or pearl gel
- Create dots of varying sizes across the nail
- Build up each dot slightly so it has dimension
- Cure and seal with topcoat
- The topcoat will smooth over the dots slightly but they’ll remain raised
17. Deep Plum with Gold Glitter Fade
A rich plum base that fades into a glitter gradient, with gold glitter concentrated at the tips and fading toward the cuticle. The glitter creates movement and catches light dramatically.
Glitter Gradient Purpose
Rather than applying glitter all over, the gradient concentrates sparkle where it’ll be most visible and noticeable. On short nails, this prevents the glitter from overwhelming the design while still creating visual interest.
Glitter Fade Technique
- Apply deep plum base
- On a separate nail, mix plum with gold glitter
- Sponge pure glitter onto the tips
- Sponge the plum-glitter mixture into the middle area to create transition
- Sponge pure plum back toward the base
- The result is a gradient from plum to heavily glittered tips
18. Cream with Tiny Black Cat Eye Design
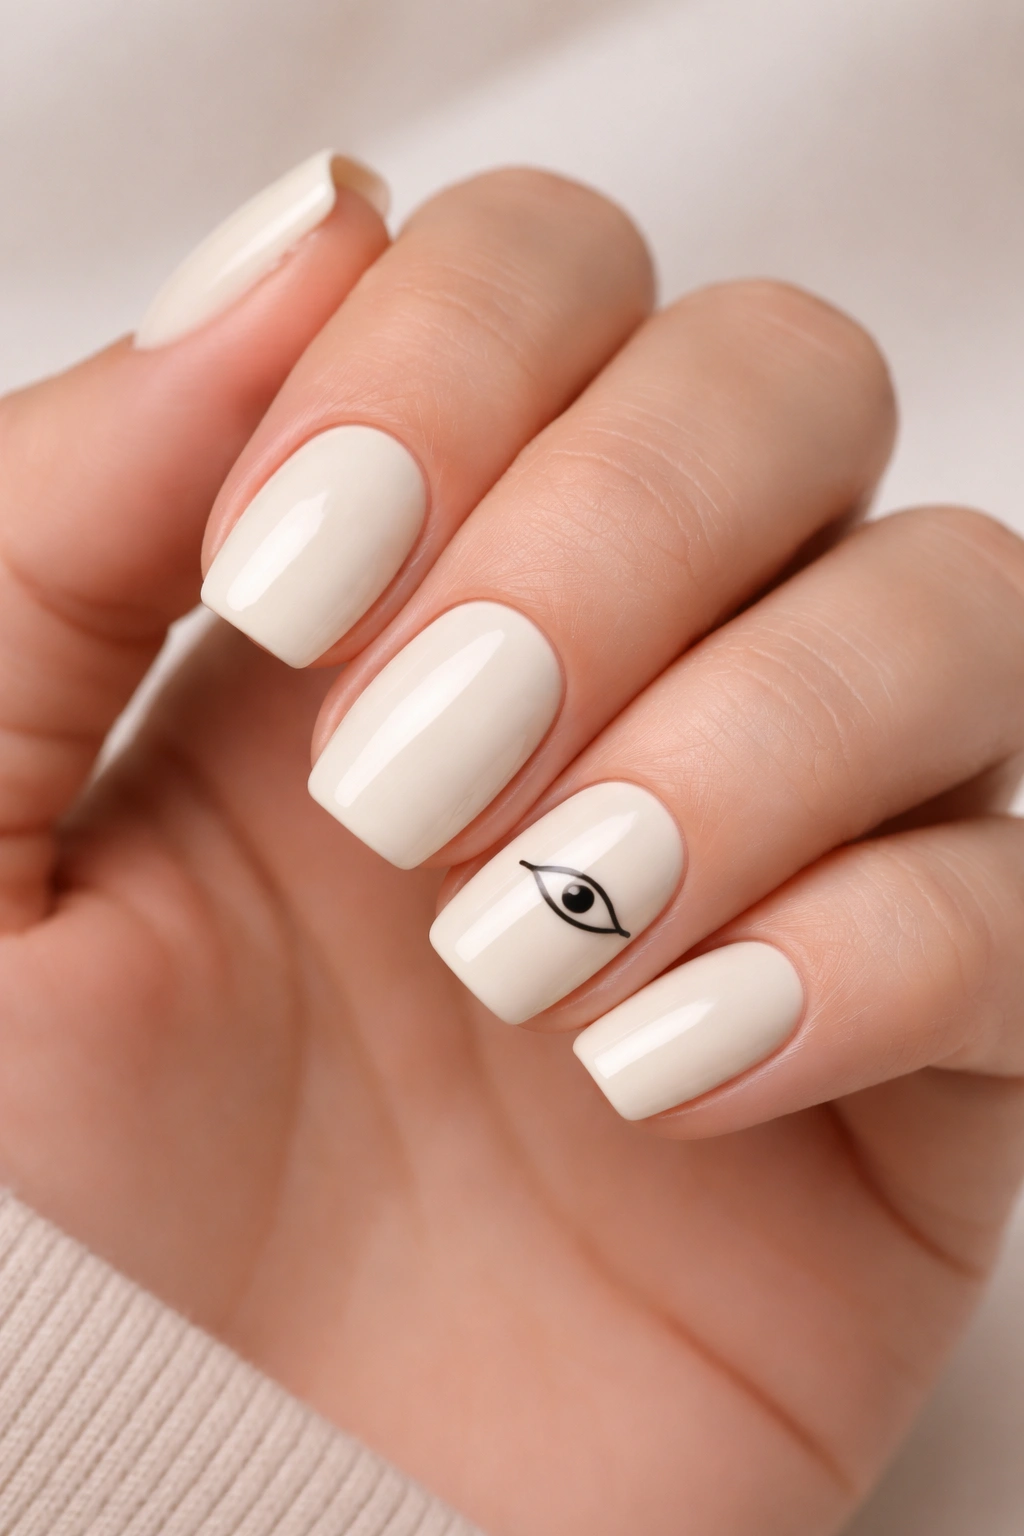
A creamy off-white base features miniature cat-eye designs in black on one or more nails. The cat eyes are simple line art rather than realistic, maintaining an editorial feel.
Playful Elegance
Cat eyes feel quirky and fun while remaining sophisticated when executed in simple line art on a neutral base. This design works for anyone who wants personality without being too cutesy.
Cat Eye Application
- Apply cream base
- Use a very thin brush with black gel
- Create simple eye shapes: two curved lines forming an eye, with a tiny line connecting to the wing
- You can do a single cat eye per nail or multiple
- The simplicity of line art keeps it from feeling childish
- Seal with topcoat
19. Warm Tan with Burnt Orange Accent Stripes
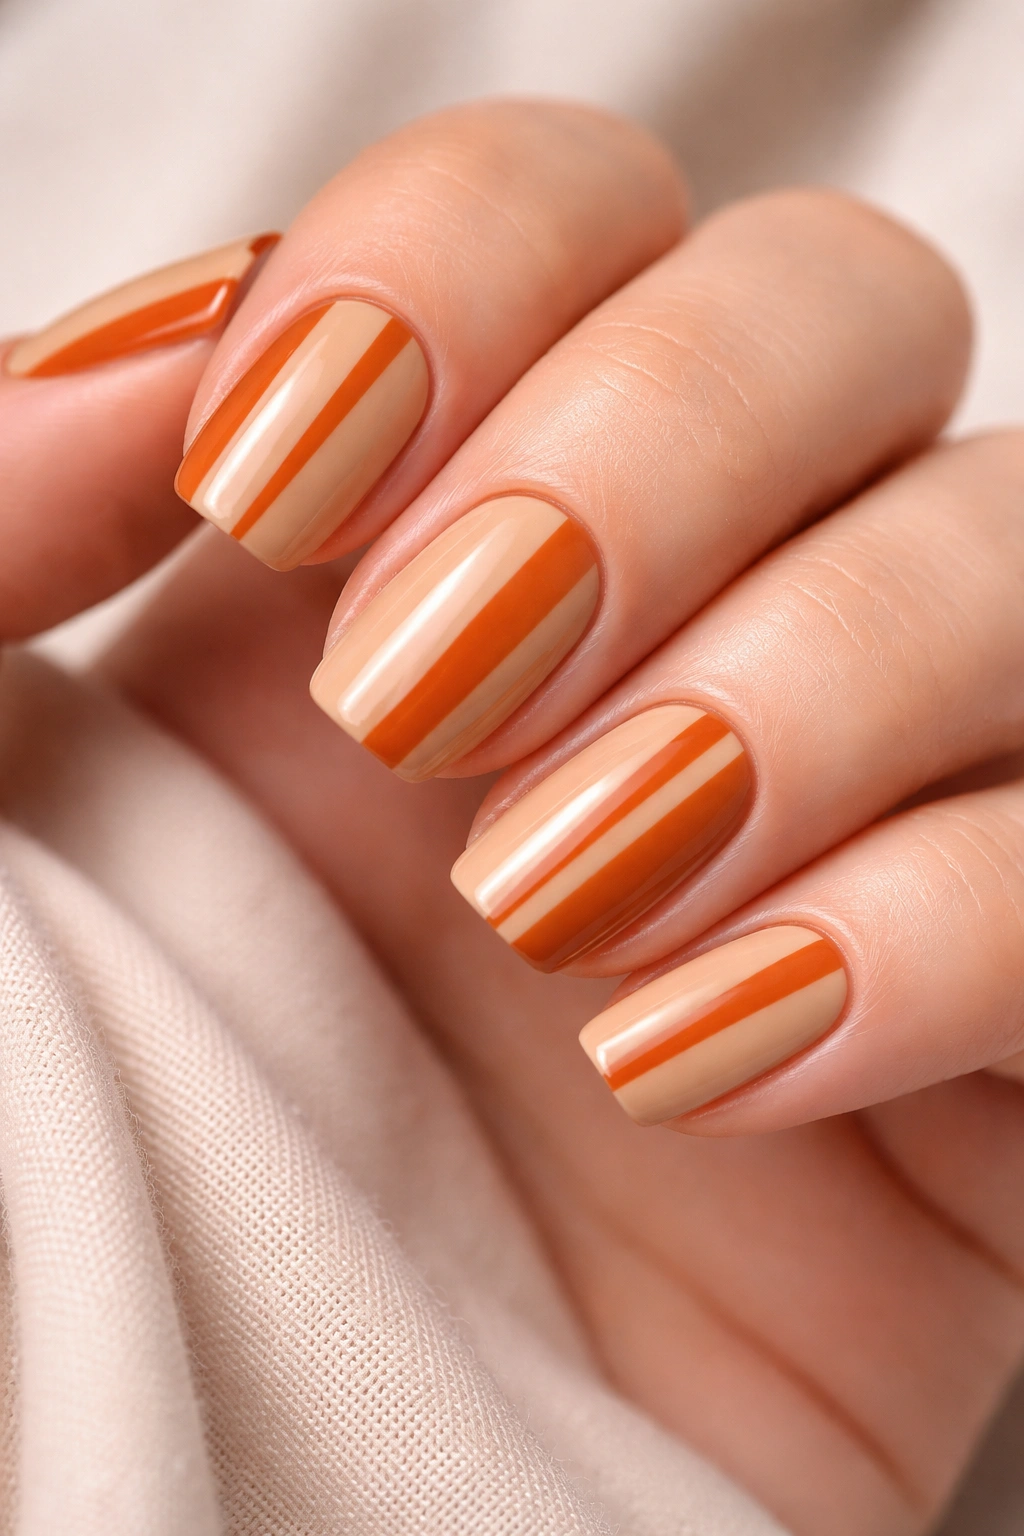
A warm tan base with vertical burnt orange stripes in alternating widths — some thin, some slightly thicker. The stripes create movement and visual interest through simple color blocking.
Striped Simplicity
Using two complementary warm tones keeps this design cohesive while adding dimension. The varying stripe widths prevent it from feeling too uniform or boring.
Stripe Application
- Apply warm tan as your base
- Use striping tape to create vertical stripe guides
- Apply burnt orange in the taped areas with varying tape widths
- Create some thin stripes and some wider ones for visual rhythm
- Cure with tape still on, then peel away
- Seal with topcoat
20. Sheer Pink with Holographic Glitter Tips
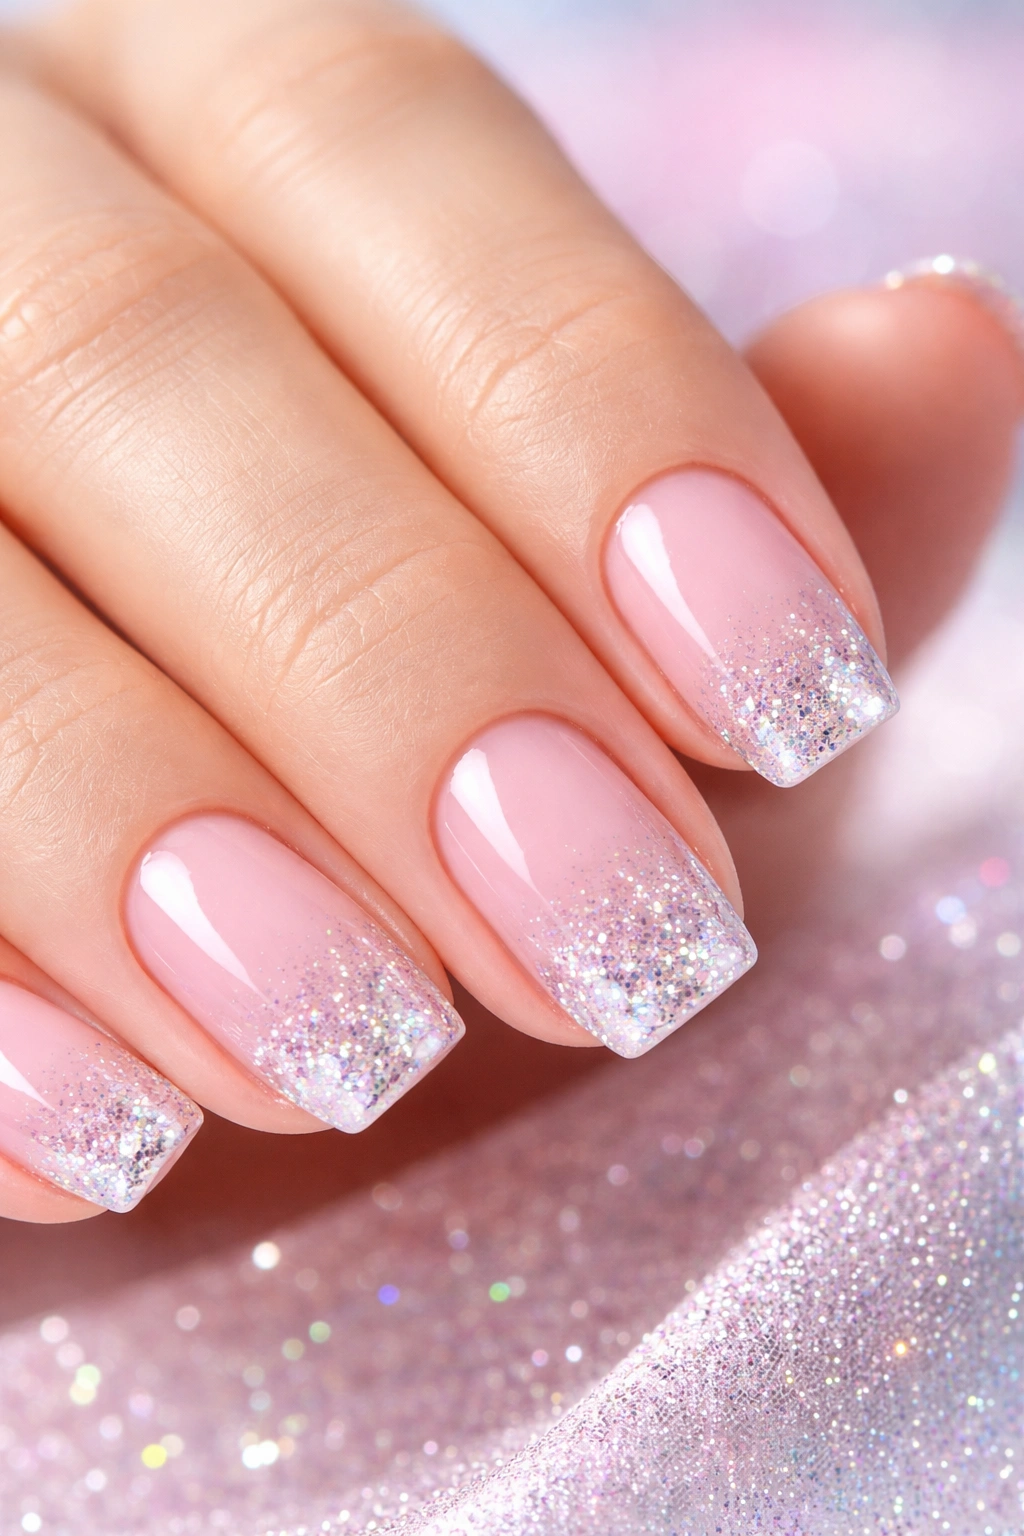
A translucent, sheer pink base that allows your nail bed to show through slightly, topped with holographic glitter concentrated at the tips. The sheer quality keeps it delicate while the glitter adds glamour.
Sheerness Factor
Sheer pink is extremely flattering because it creates the illusion of a stronger, healthier nail bed. The translucent quality means the design feels light and elegant rather than heavy.
Sheer Glitter Application
- Apply a thin layer of sheer pink that you can see through
- Apply holographic glitter to the tips only
- Use a sponge to blend the glitter slightly into the sheer pink at the transition zone
- The sheer pink will show through between glitter pieces, creating a see-through effect
- Seal with topcoat
21. Soft Gray with Rose Gold Dusting
A cool, muted gray base dusted with rose gold powder that creates a soft, metallic shimmer without being overly shiny. The rose gold sits on the surface like a fine powder rather than being mixed in.
Powder Aesthetic
Rose gold powder over gray creates an unexpectedly sophisticated combination that feels contemporary and expensive. The powder effect is more subtle than solid metallic, making it wearable for professional settings.
Dusting Technique
- Apply soft gray as your base and cure
- Use a fluffy brush to dust rose gold powder across the entire surface
- The powder should sit loosely on the surface — don’t press hard
- Seal gently with topcoat, which will set the powder without removing it entirely
- Some powder will mix slightly into the topcoat, creating a subtle shimmer
22. Ivory with Delicate Gold Vine Pattern
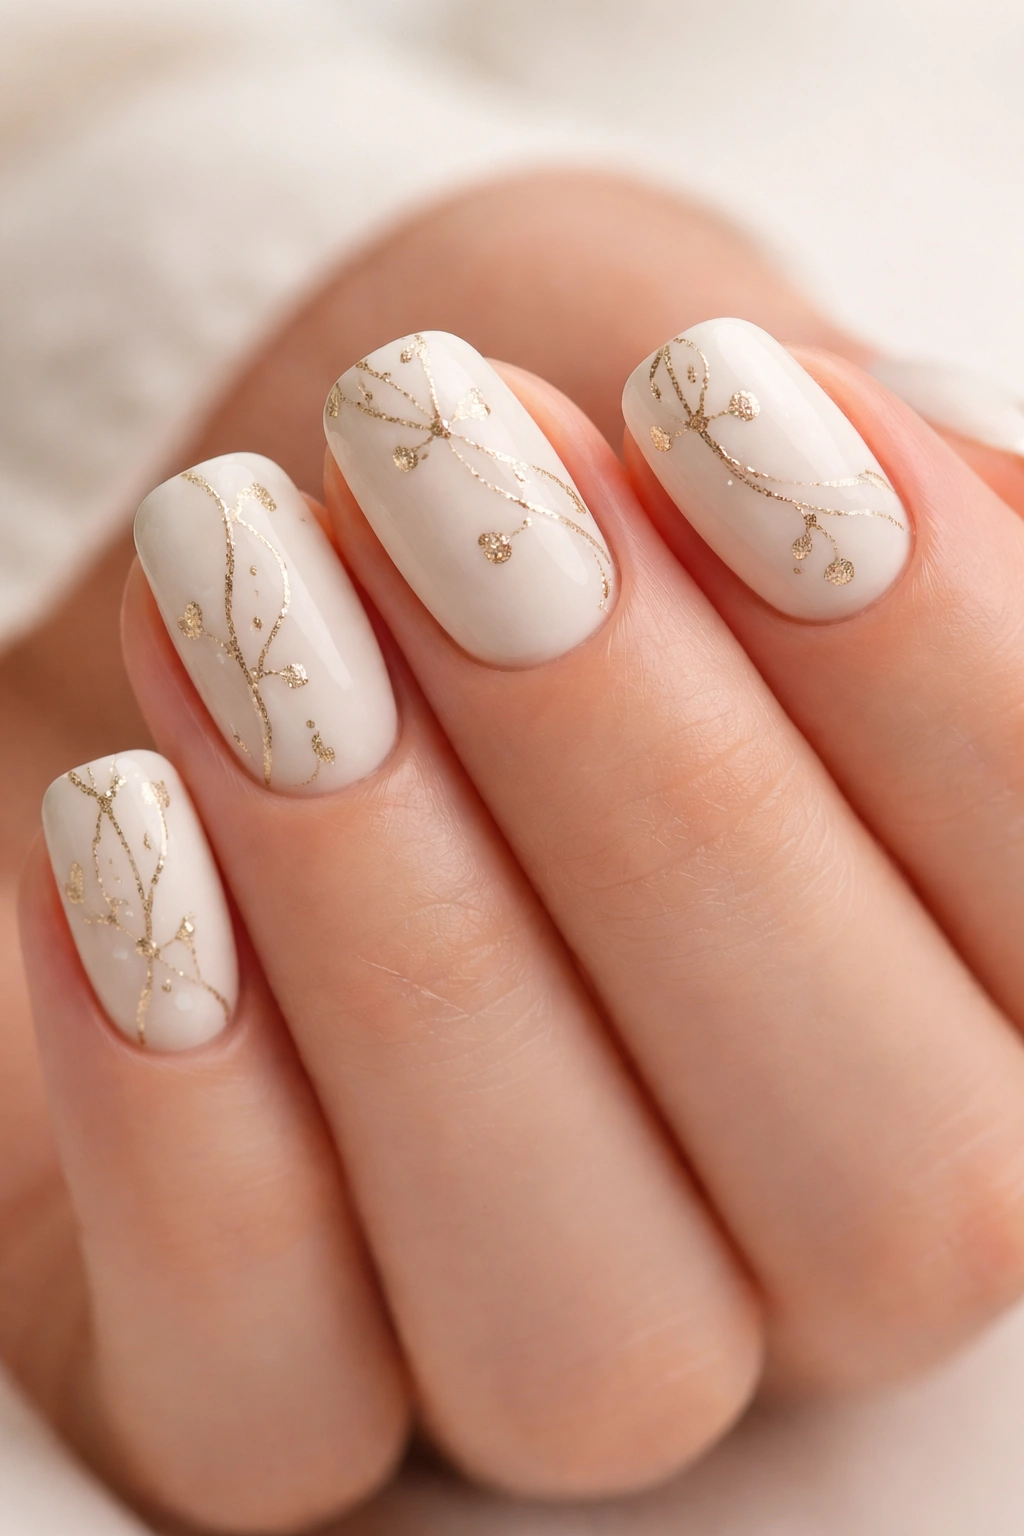
An ivory base decorated with thin, hand-painted gold vines that curl organically across the nails. The vines are imperfect and flowing rather than geometric.
Organic Line Work
Delicate vines create movement and elegance while feeling organic and natural. The gold color adds luxury without requiring sparkle or shine. This design feels special but not costume-y.
Vine Painting
- Apply ivory base
- Thin gold gel with mixing medium to make it flow smoothly
- Use a thin detail brush to paint flowing vine patterns
- Vines can curl, split into smaller branches, or intertwine across multiple nails
- The imperfect nature of hand-painting adds to the charm
- Seal with topcoat
23. Millennial Pink with Matte Finish and Pearl Top
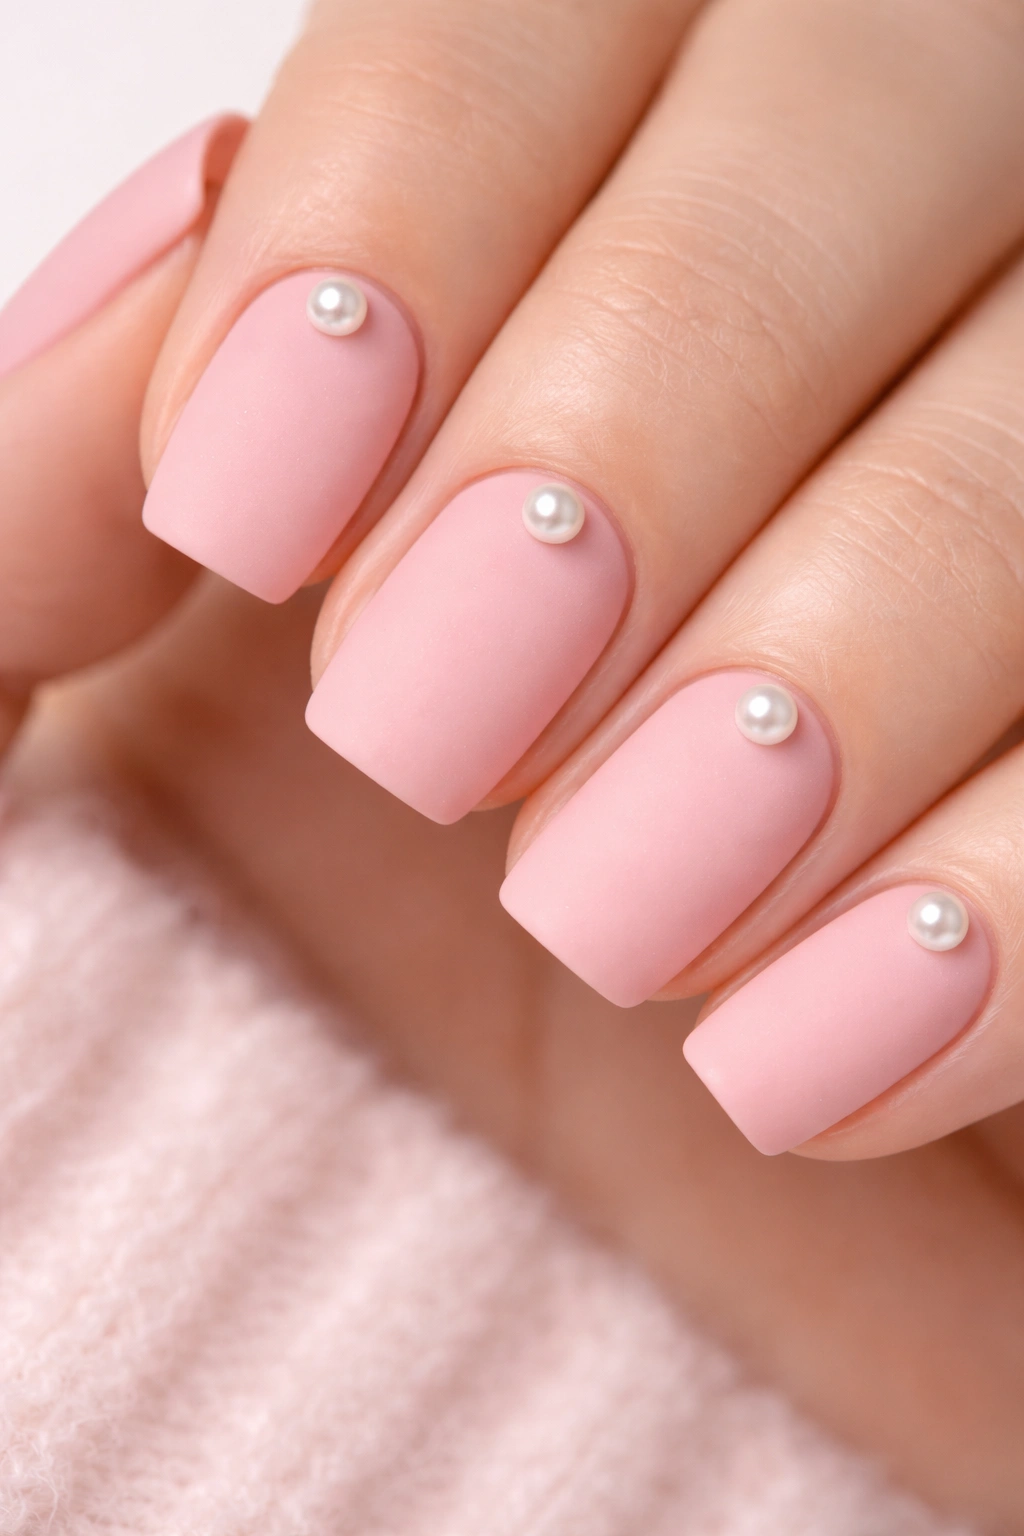
A bright, cheerful millennial pink with a completely matte finish, topped with a single pearl bead centered on each nail. The matte-and-shiny contrast creates visual interest.
Matte Contrast Strategy
Matte finishes are having a major moment because they feel modern and sophisticated. Adding a single pearl glossy element creates contrast that makes both finishes look better.
Matte Pearl Application
- Apply millennial pink base
- Cure with a matte topcoat instead of glossy
- Buff away any shine to ensure true matte
- Apply one pearl bead to the center of each nail
- The pearl will naturally be shiny and sit slightly raised
- The matte base makes the pearl stand out more dramatically
24. Caramel Brown with Amber Foil Accents
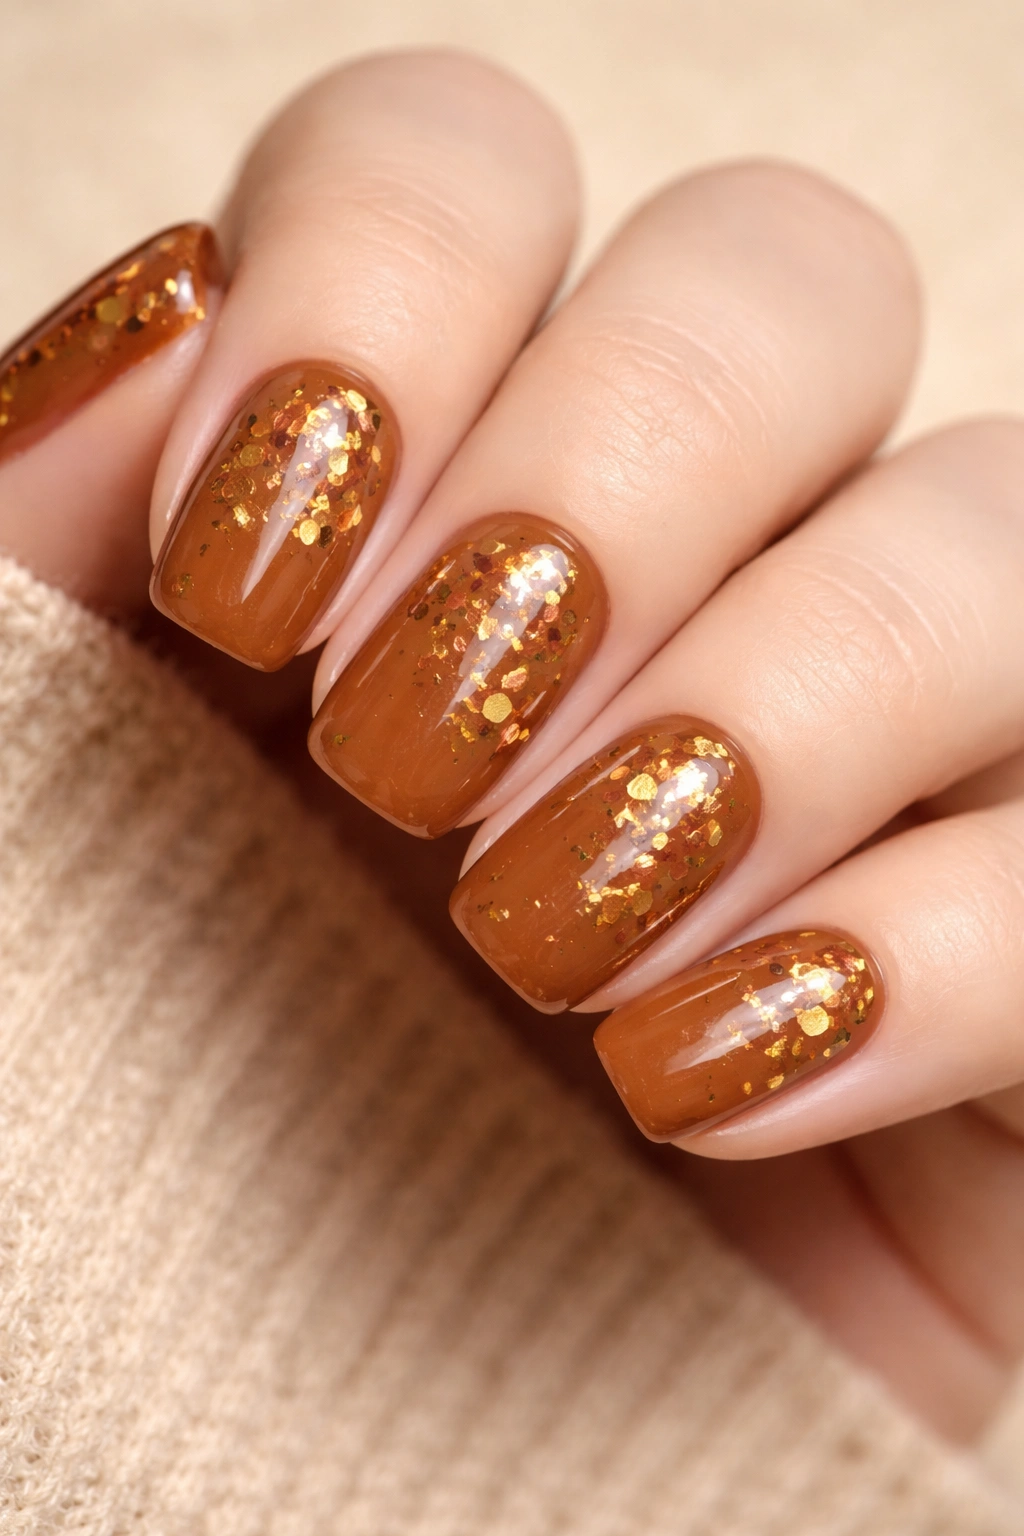
A warm, creamy caramel brown base decorated with pieces of amber-toned foil that create a scattered, glamorous effect. The warm tones work together harmoniously.
Foil Warmth
Amber foil over caramel creates a warm, cohesive design that feels autumnal and sophisticated. The foil pieces add sparkle without creating a busy look when scattered thoughtfully.
Foil Placement
- Apply caramel brown as your base
- Apply small amounts of metallic gold or amber gel in scattered locations
- Quickly apply amber foil while the gel is still tacky
- The foil will stick only to the metallic areas
- Spread the foil pieces across different nails rather than concentrating on one
- Seal with topcoat
25. Pale Peach with Ombre Nude-to-Pink Gradient

A soft pale peach base that gradually transitions into a warm peachy-pink at the tips, creating a monochromatic gradient within the warm color family. The transition is subtle and blended.
Monochromatic Elegance
Staying within one color family creates a refined, cohesive look that feels intentional and sophisticated. On short nails, the gradient draws the eye vertically without harsh color changes.
Subtle Gradient Application
- Apply pale peach as your base
- Sponge slightly deeper peach into the middle section
- Sponge peachy-pink into the tips
- Keep colors very close in tone so the transition is subtle
- Multiple light sponging layers create better blending than one heavy application
- Seal with glossy topcoat for a polished finish
Final Thoughts
The beauty of short squoval acrylics is that they work for literally every aesthetic and lifestyle. Whether you’re drawn to minimalist elegance, playful designs, metallic accents, or soft gradients, this shape accommodates every vision while remaining practical and wearable.
The designs above range from office-appropriate to celebration-worthy, but the real magic is how customizable each one becomes when you work with a talented nail technician. That dusty rose with geometric lines? You could adjust the line pattern or swap the rose for a different color and it becomes entirely new. The ombré sunset? It works in every color combination you can imagine.
Before your appointment, take screenshots of the designs that speak to you and discuss the technical details with your technician — ask about longevity, maintenance requirements, and how each design works on your specific nail shape and size. The best manicure is one that you genuinely love wearing and one that actually works with your daily life. Short squovals give you that perfect balance of looking intentional and polished while being practical enough for real living.
