

Coffin nails have become one of the most flattering and versatile nail shapes, and the best part? They work beautifully on medium-length nails without requiring extreme length or constant maintenance. Unlike super long acrylics that demand careful navigation through everyday life, medium coffin nails hit that sweet spot where they feel feminine and polished while remaining practical for work, exercise, and daily activities. The tapered coffin shape—wider at the base and narrowed toward the tip—creates an elegant, elongating effect that makes your fingers look naturally more graceful, even when you’re not starting with the longest nail beds.
The challenge with coffin nails isn’t actually creating the shape itself. What matters most is choosing designs that work with the proportion. Simple, clean designs tend to look far more sophisticated on medium nails than intricate nail art that can overwhelm a smaller canvas. The designs that shine on medium coffin nails are those that embrace the shape rather than fighting against it—think minimalist lines, soft color gradients, strategic accent details, and finishes like matte or shimmer that add dimension without visual clutter.
What makes medium coffin nails so special is their accessibility. You can achieve this look whether you’re getting a professional manicure, working with press-on nails, or painting at home. The designs that work best tend to emphasize cleanliness, subtle texture, soft color palettes, and strategic accents rather than complicated 3D embellishments. Whether you prefer the understated elegance of nude polish or want to experiment with soft pastels, jewel tones, or metallics, the coffin shape pairs with virtually everything and transforms even the simplest design into something statement-making.
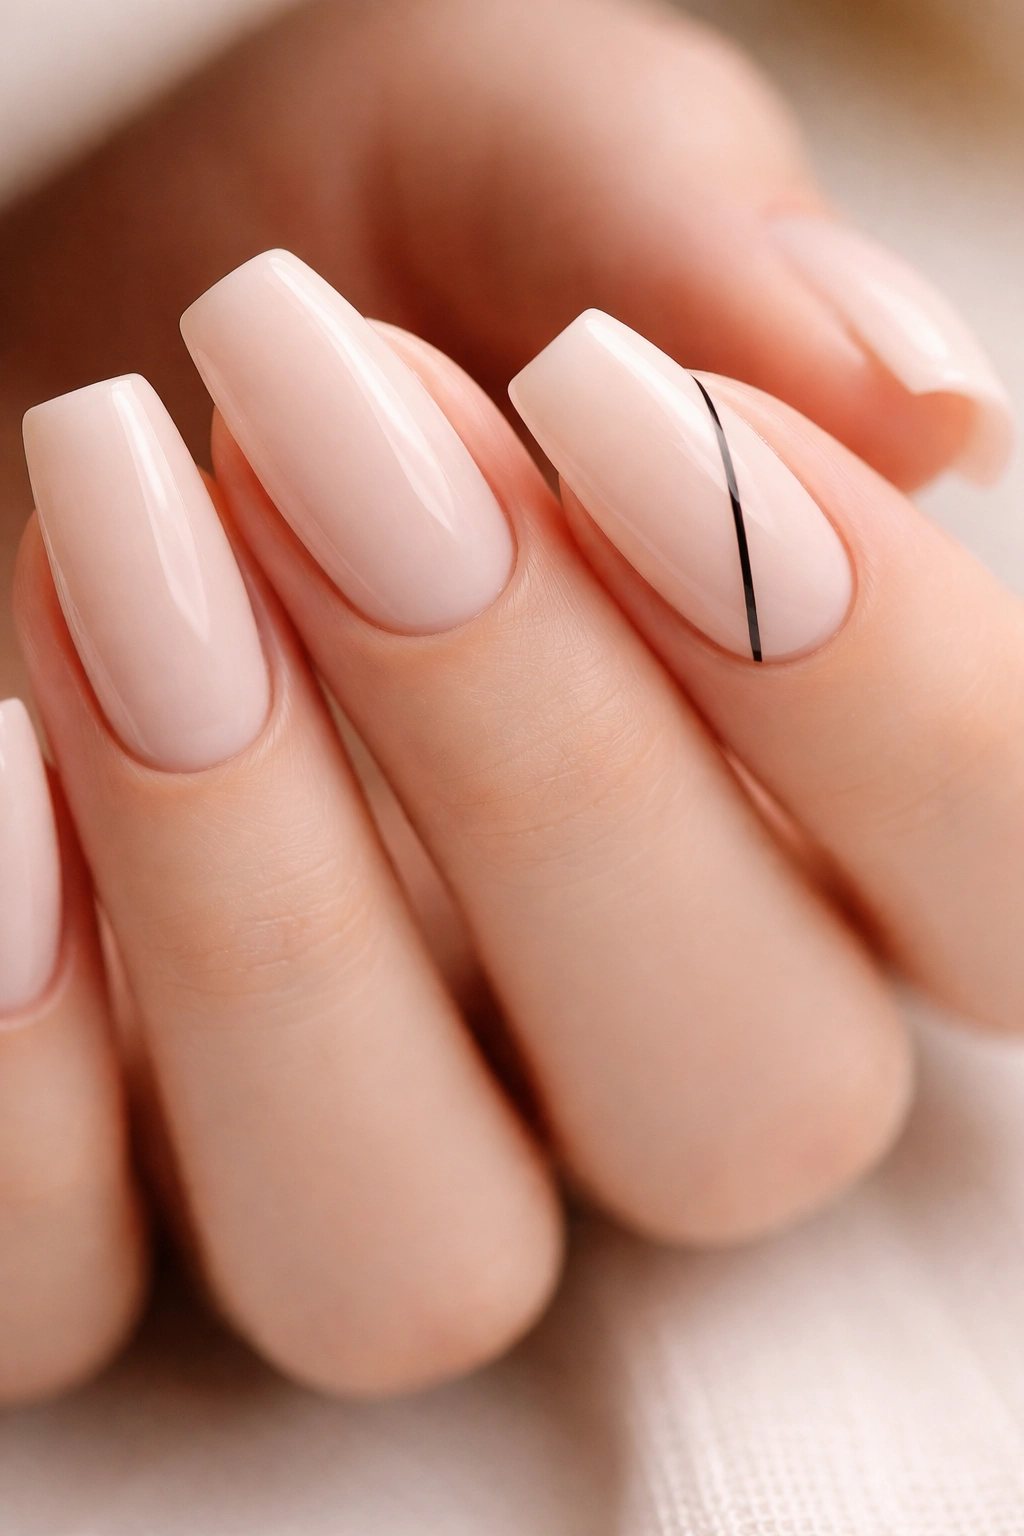
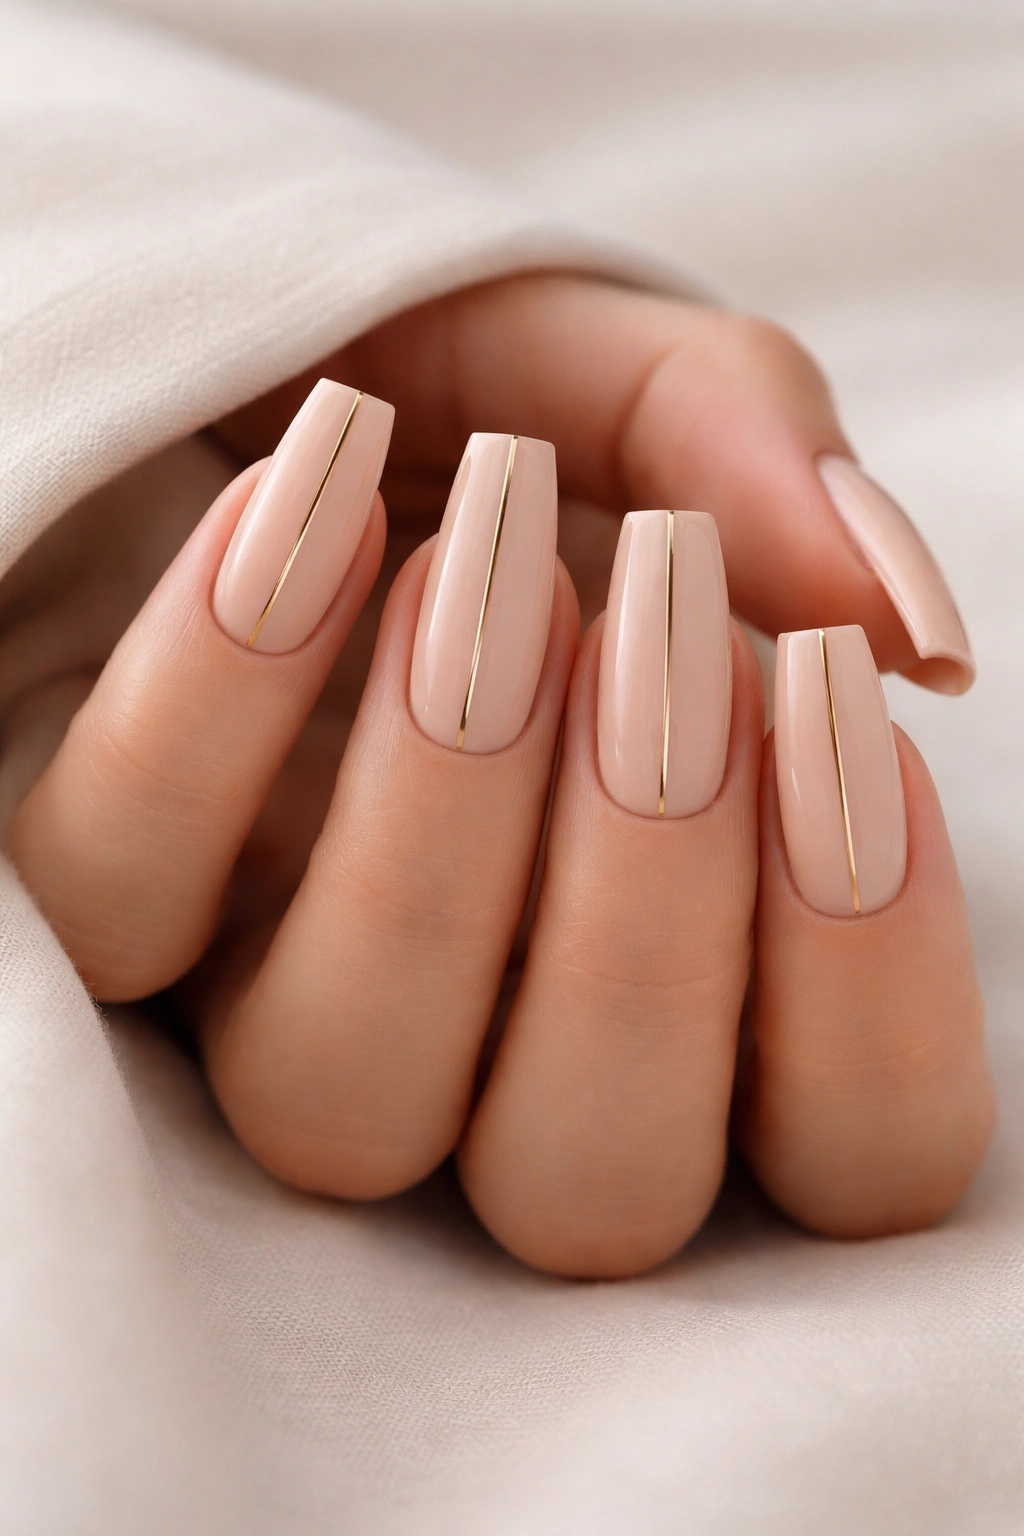
1. Nude with Delicate Gold Accent Line
This timeless combination proves that less is genuinely more when you’re working with the right proportions. Start with a creamy nude base—something close to your skin tone but slightly warmer—then use a thin gold striping brush or a steady hand with a gold gel pen to draw a single, perfectly straight line down the center of each nail from cuticle to tip. The contrast between the warm neutral and the metallic gold is subtle enough to feel professional yet refined enough to work for any occasion.
Why This Design Works
The single vertical line actually makes your nails look longer and more elegant by drawing the eye downward. It’s a trick that high-end nail technicians use constantly because it genuinely flatters the nail bed proportions without requiring any complicated technique. The gold catches light in a way that adds dimension without feeling over-the-top.
Application Tips for Success
- Use a nude that matches your skin tone exactly rather than one that’s too pink or too orange
- Apply the gold line when your base is completely dry to avoid smudging
- A thin striping brush gives cleaner results than a regular polish brush
- Seal everything with a glossy top coat to make the gold pop
- If you’re not confident in freehand lines, striping tape under the gold polish helps
Pro tip: This design stays elegant longer because the nude base hides natural nail growth beautifully, so you can stretch your time between fills if you’re working with extensions.
2. Soft Pink and White Ombre Gradient

The ombre gradient effect feels modern and artistic without requiring detailed painting skills or elaborate tools. Begin with a soft pink on your nail tips—something peachy and warm rather than bright or cool-toned—then gradually blend white polish toward the base using a sponge, creating a smooth transition between the two colors. The coffin shape actually makes this easier because the tapered sides naturally guide the color blend.
How to Master the Ombre Effect
A makeup sponge works perfectly for this technique. Paint both colors directly onto the sponge in horizontal stripes, lightly bounce the sponge onto your nail, and let the sponge’s porous texture do the blending work for you. It’s genuinely harder to mess up than it sounds, and the slightly imperfect blend actually looks more natural than a perfectly sharp gradient would.
Color Combinations That Work Best
- Soft pink to white (romantic and timeless)
- Peachy orange to cream (warm and flattering to most skin tones)
- Coral to pale pink (subtle and summery)
- Dusty rose to ivory (sophisticated and wearable)
Worth knowing: This design looks different depending on your nail shape and length, but coffin nails create a particularly elegant canvas because the taper showcases the gradient beautifully across the entire nail.
3. Minimalist Black Line Design
If you want impact without complexity, a single thin black line against a neutral nude or white base creates sophisticated nail art that looks intentional and artistic. Rather than a straight line down the center (which we covered earlier), try creating a diagonal line, a thin swoosh near the tip, or a minimalist geometric shape like a small triangle or rectangle on just one accent nail per hand.
Design Placement Ideas
- Diagonal line from top-left to bottom-right
- Thin horizontal line placed one-third down from the tip
- Small triangle or check mark accent on the ring finger only
- Curved swoosh that follows the natural curve of the nail tip
- Minimalist mountain range outline at the tips
Techniques for Crisp, Clean Lines
- Use a thin striping brush or a detail liner brush designed for nail art
- Allow your base color to fully cure before adding lines
- Work with thin layers rather than trying to get full coverage in one stroke
- A steady hand matters more than pressure—let the brush do the work
- Seal with a glossy top coat for a polished finish
Real talk: If your hands shake, you can use striping tape to create perfectly straight lines while you’re learning, which removes the pressure and helps you build confidence.
4. Peachy Cream with Matte Finish
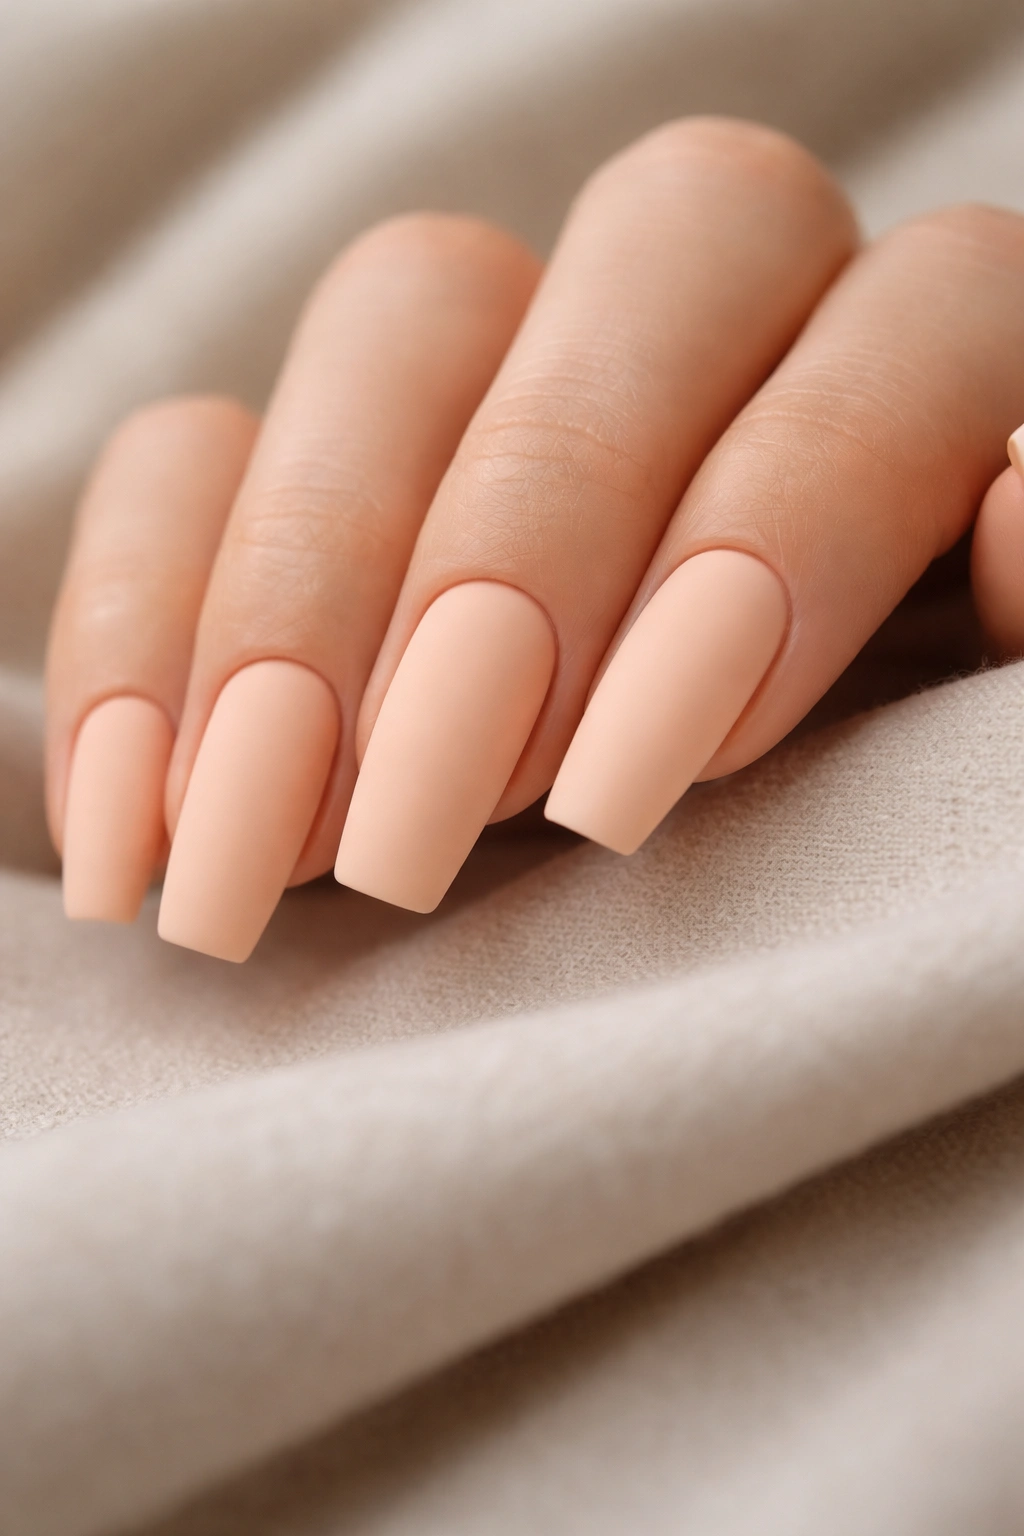
Sometimes the most impactful designs are the simplest color choices combined with the right finish. A single creamy peach-toned polish with a matte top coat creates a sophisticated, velvety look that feels luxury without being complicated. The matte finish gives the polish a unique depth that glossy versions can’t achieve, and it works beautifully with coffin nails because it showcases the shape’s clean lines.
Why Matte Finishes Transform Simple Designs
A matte top coat changes the entire energy of a color. The same polish that looks standard glossy suddenly feels intentional, modern, and tactile. Peach specifically is universally flattering because it bridges the gap between warm and cool undertones, making it work for nearly every skin tone.
Getting the Matte Look Right
- Apply your peach polish in two coats for full opacity
- Use a quality matte top coat rather than matte polish (they finish differently)
- Matte finishes are prone to chipping around the tips, so seal edges carefully
- Buff very gently between coats to ensure proper adhesion
- The finished look should feel almost velvety to the touch
Insider note: If you love matte finishes but worry about durability, apply a glossy top coat to just the tips where wear happens fastest, leaving the matte effect on the main nail surface.
5. Classic French with Extended Coffin Tips
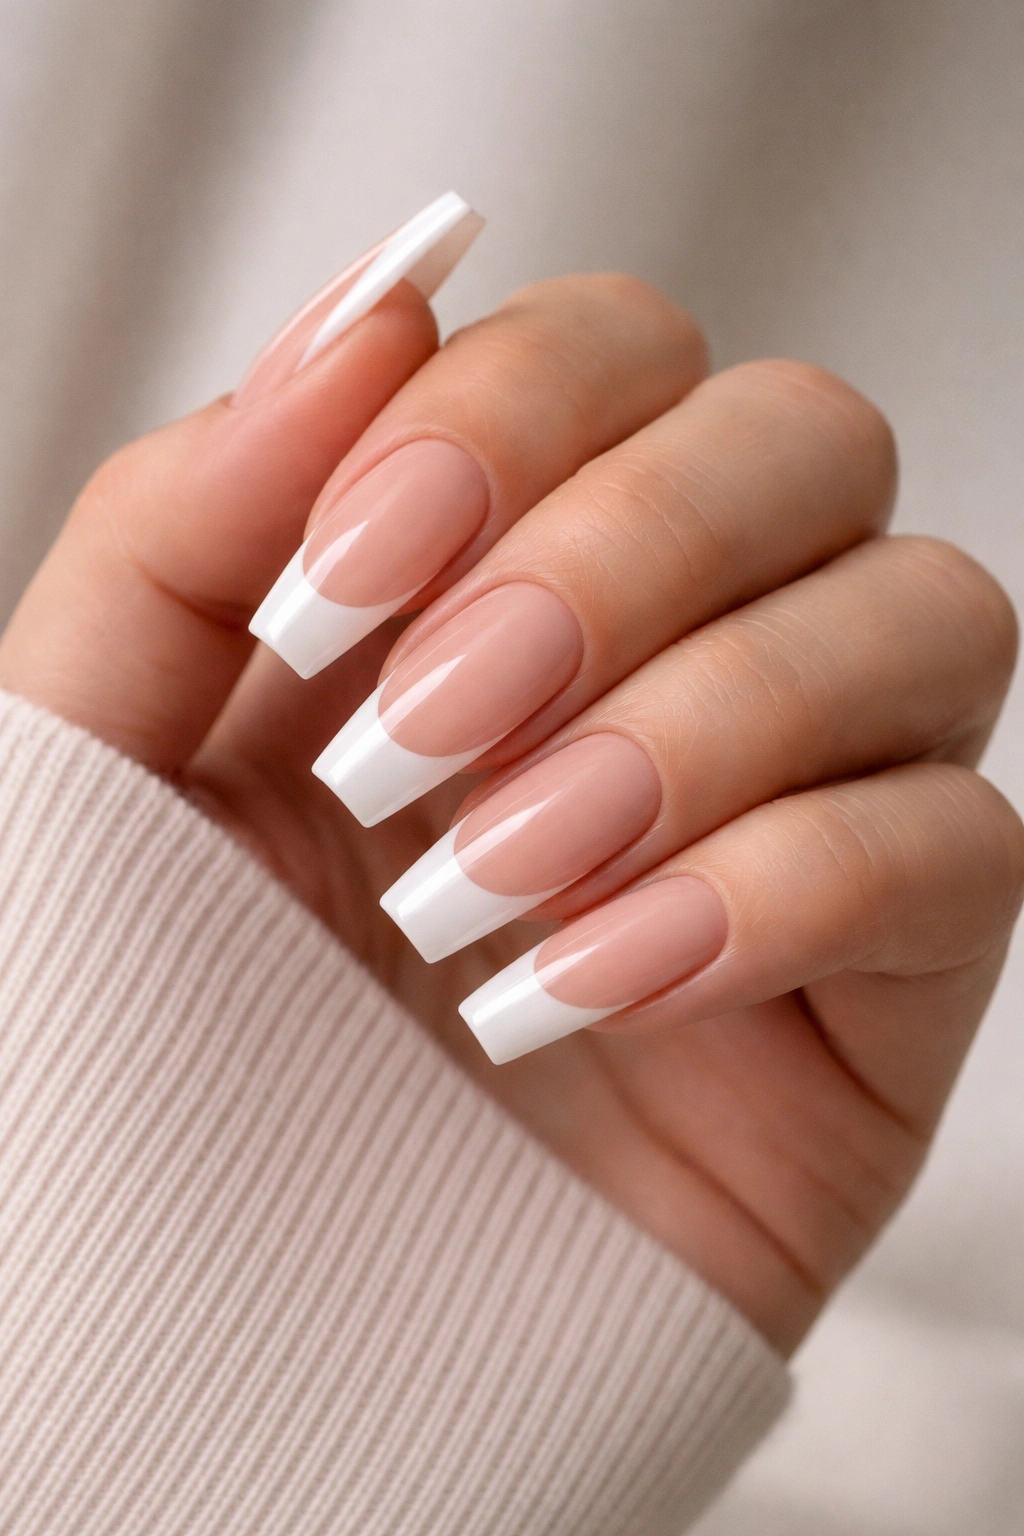
The French manicure never goes out of style, and the coffin shape takes this classic design to another level. Instead of the traditional thin white line at the tip, extend the white to cover about one-third of the nail length, letting the coffin shape create natural definition between your neutral base and the white tip. The tapered coffin edges make this proportion look even more elegant than it would on a square nail.
What Makes Coffin French Different
The width variation of the coffin shape creates automatic dimension that a standard French manicure doesn’t have. Your nail tips appear more delicate and refined because the tapered sides frame the white perfectly. This proportion works particularly well on medium-length nails because the white coverage feels balanced rather than heavy.
Creating Clean White Tip Lines
- Use a french manicure guide (available at beauty supply stores) for straight edges
- Paint white polish in thin layers to avoid opacity issues at the edges
- Work from the center outward to ensure the shape stays even
- Seal the white area with top coat before removing guides to prevent chipping
- Clean up any mistakes with a detail brush and nude polish before final sealing
Worth knowing: If you’re getting this done professionally, ask your nail technician to slightly angle the white line to follow your natural nail growth—it photographs better and feels more modern than a perfectly straight line.
6. Burgundy Glossy Polish
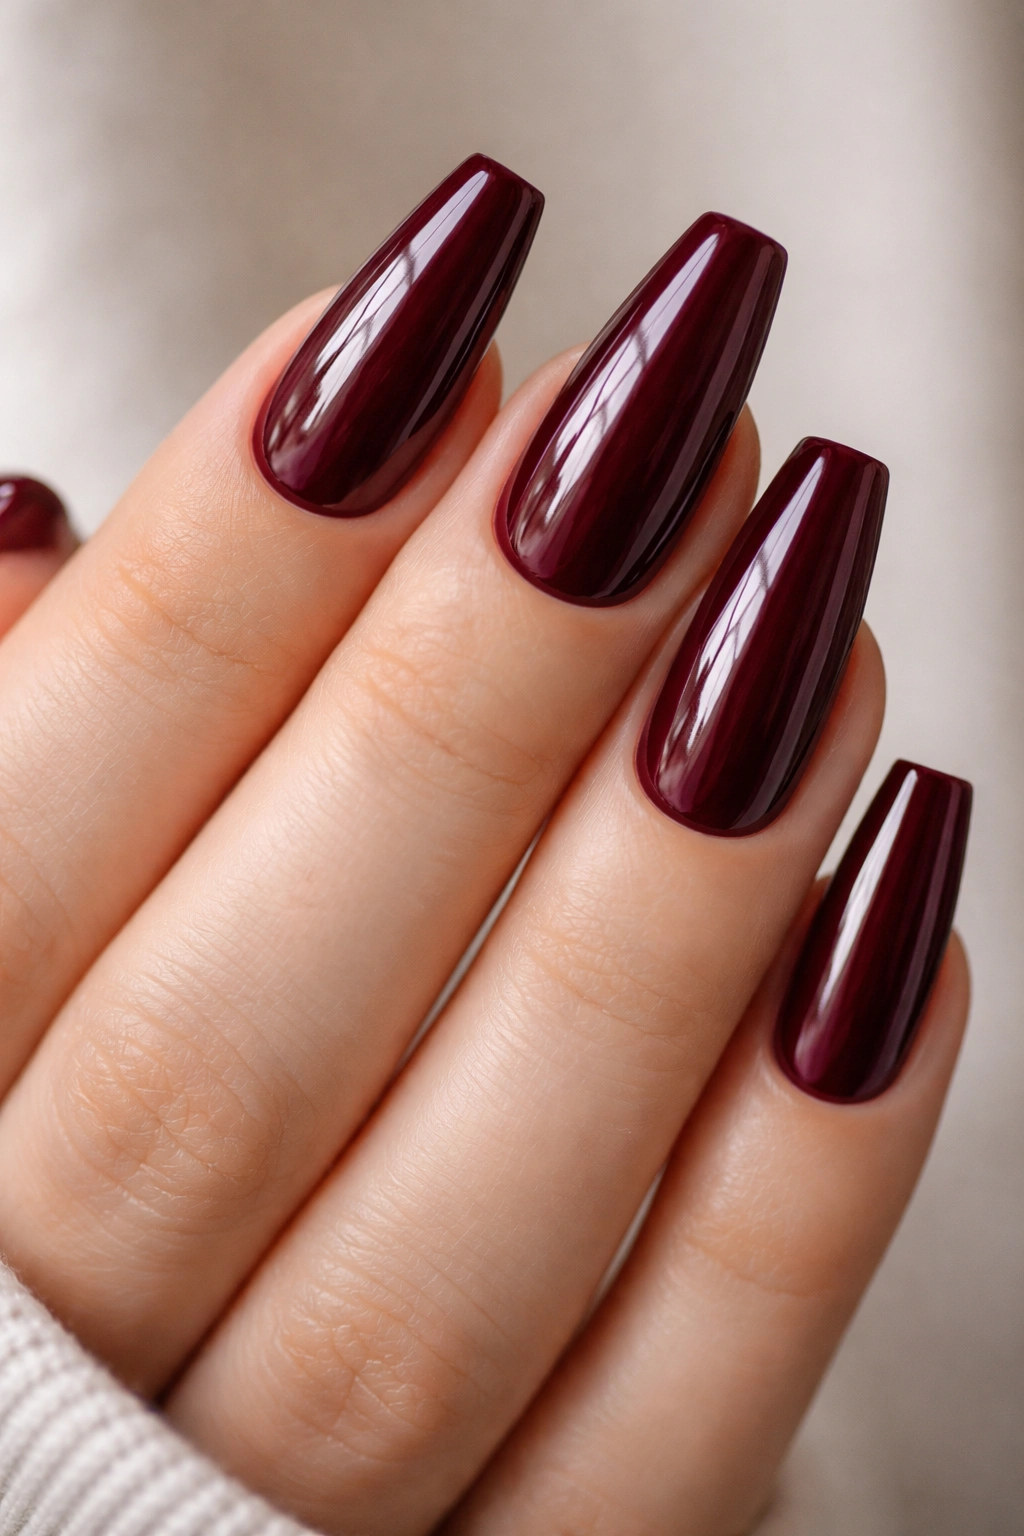
For anyone who wants their nails to feel dramatic without being complicated, a deep burgundy glossy finish delivers. This rich wine tone photographs beautifully, looks expensive, and works year-round despite feeling like a deeper, more sophisticated color choice. On medium coffin nails, glossy burgundy creates a polished, put-together appearance that’s appropriate for professional settings or nights out.
Why Burgundy Works on Every Skin Tone
Burgundy sits in a special place on the color wheel where it flatters nearly everyone. It’s deep enough to look intentional and sophisticated, but it’s warmer than true red, making it less aggressive and more wearable than brighter shades. The glossy finish amplifies the richness of the color.
Achieving Perfect Burgundy Coverage
- Burgundy can appear patchy if you don’t use full opacity
- Apply in two coats, allowing full drying time between layers
- Consider a burgundy base coat under your burgundy polish for deeper color
- Seal with a high-shine top coat to enhance the glossy finish
- The color looks better slightly cooler than warmer burgundy versions
Pro tip: Burgundy pairs beautifully with minimal accent details like a single thin gold line or small gold foil accents on just your accent nails if you want to elevate the look without adding complexity.
7. Nude with Tiny Diamond Embellishments
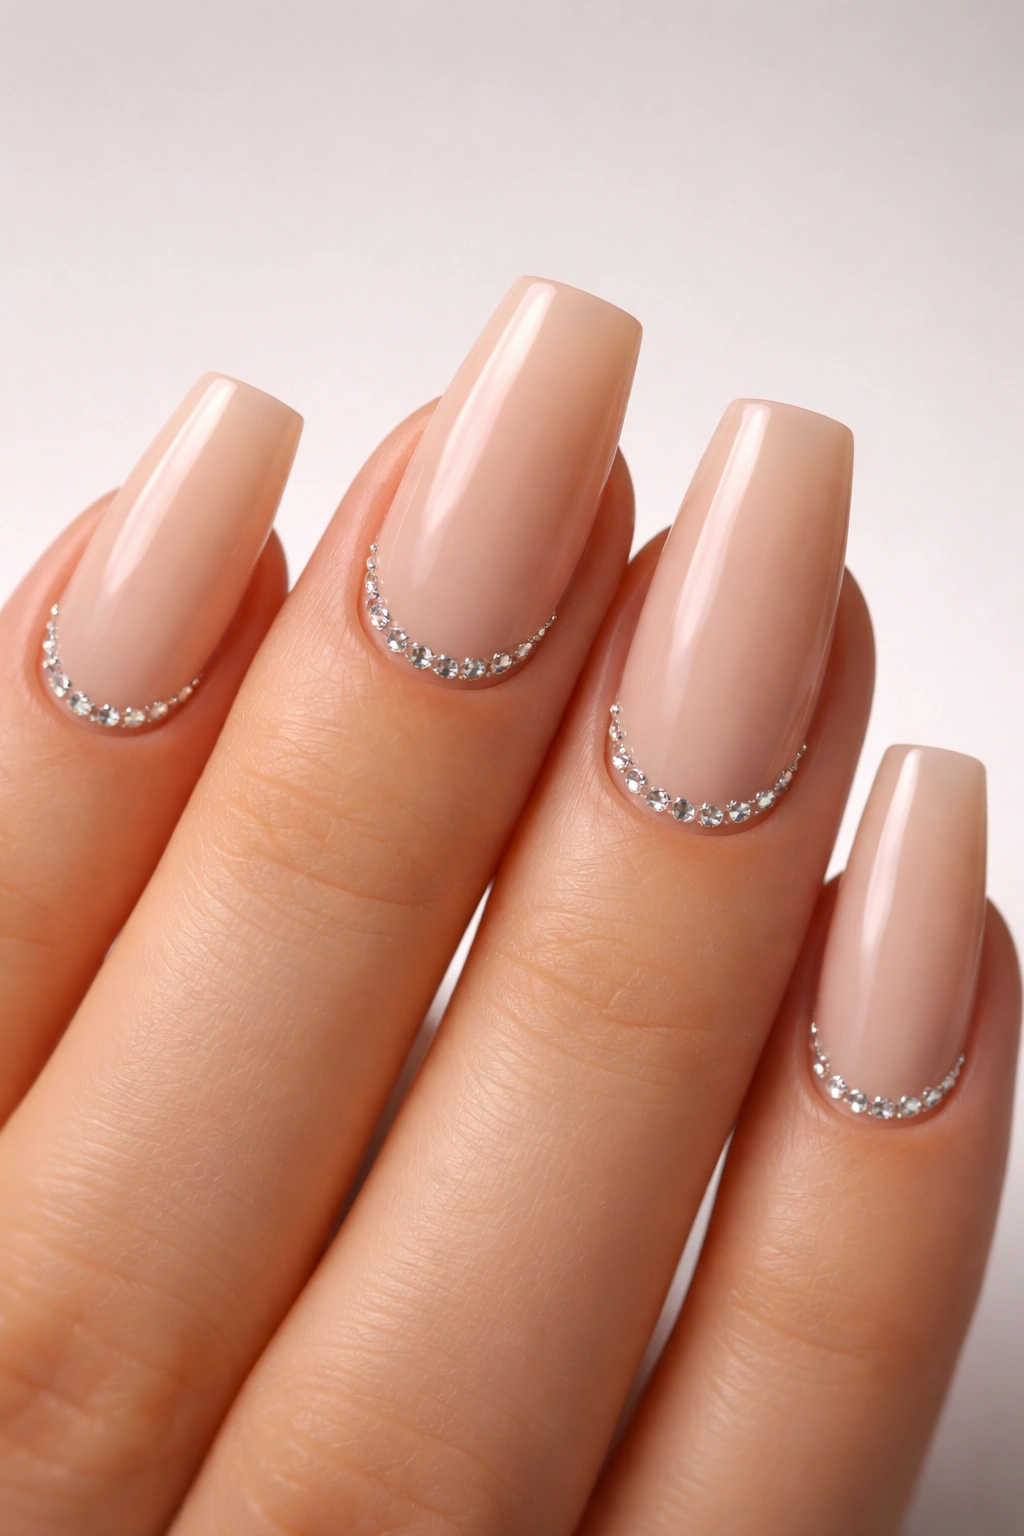
If you want to add dimension and texture without covering your entire nail with design, strategic placement of small rhinestones or diamond accents is incredibly effective. Use a nude base that matches your skin tone, then place tiny diamond accents along the nail line (where the nail meets the skin) or scattered lightly across just one or two fingers. The coffin shape’s tapered tip creates a beautiful frame for these delicate details.
Placement Strategies for Maximum Impact
- Line of tiny diamonds along the entire bottom edge (most elegant)
- Three to five diamonds placed diagonally from inner corner to tip
- Diamonds only on the accent nail (ring finger or pinky)
- Small cluster of diamonds on just one side of each nail
- Single diamond accent at the center of the tip
Securing Diamonds So They Actually Stay
- Use a sticky base coat or diamond adhesive specifically made for nails
- Press diamonds into uncured gel polish before curing for the strongest hold
- For regular polish, use a clear rhinestone adhesive and seal with thick top coat
- Small diamonds hold better than large ones on nails that get regular use
- Check diamonds regularly and replace any that loosen
Worth knowing: Diamond accents look most sophisticated when you use one size and quality level throughout—mixing different stone types or sizes can look chaotic instead of intentional.
8. Pastel Lavender with Glitter Tips
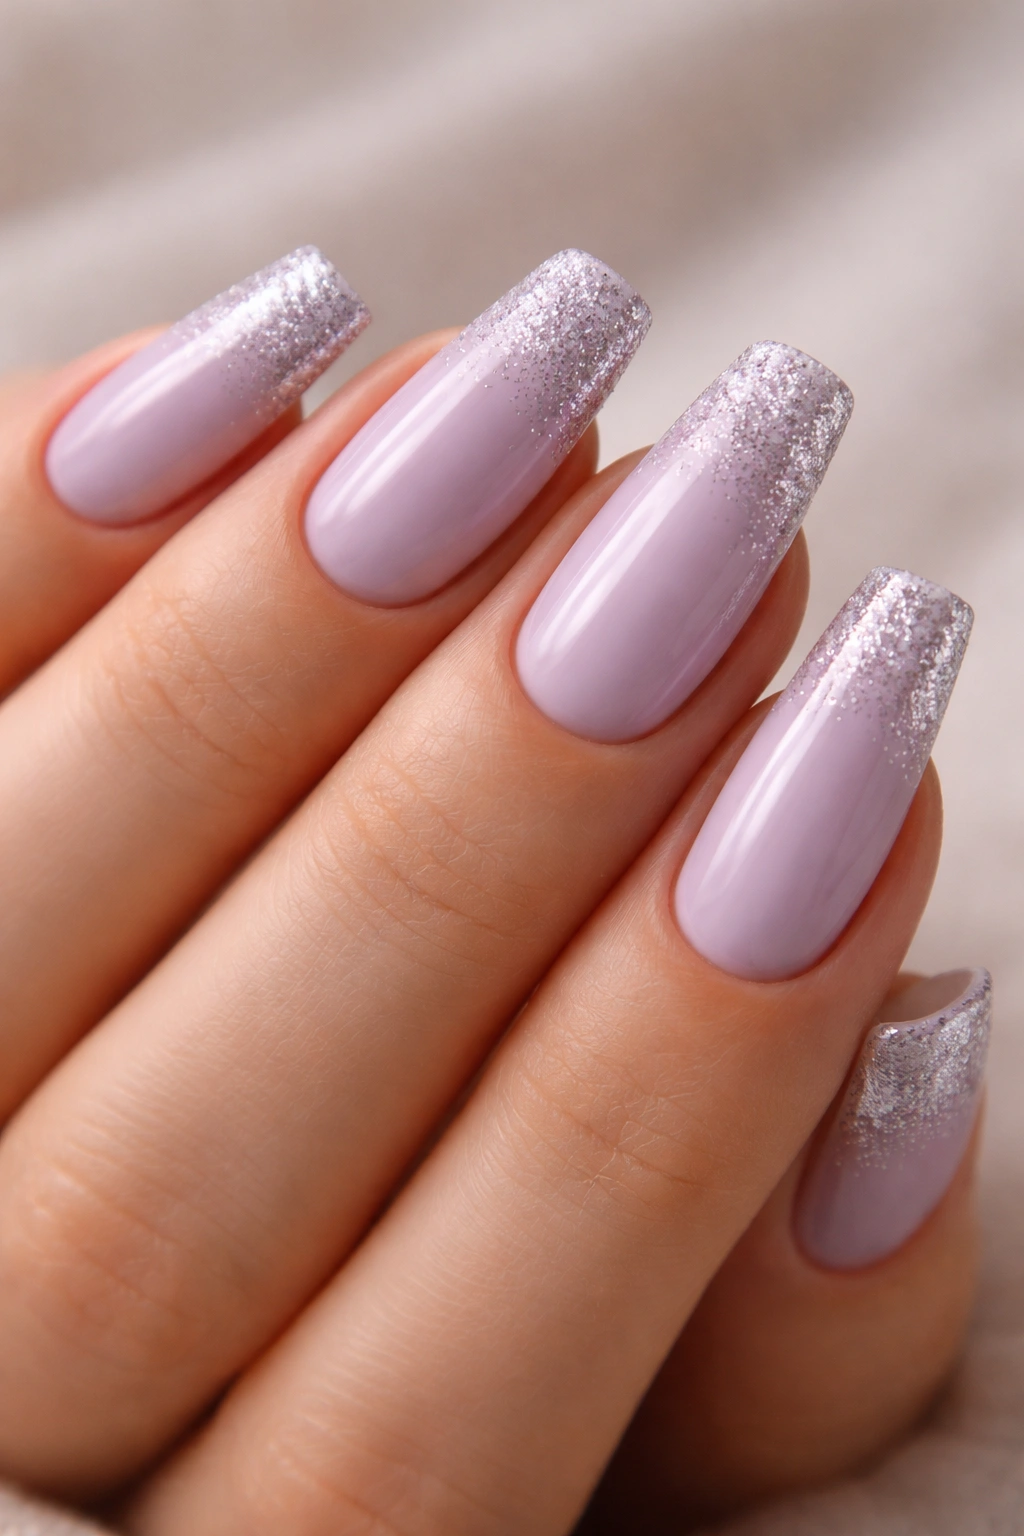
Soft pastels feel fresh and modern, and pairing pastel lavender with subtle glitter creates movement and dimension without overwhelming the coffin shape. Apply a creamy lavender base, then add a glitter gradient or full glitter coverage only to the tips of your nails, allowing the glitter to fade into the solid lavender toward the base. This creates a subtle sparkle effect that catches light without feeling overdone.
Glitter Application Techniques
- Use a glitter topper (clear base with suspended glitter particles) for smooth application
- Apply glitter only to the tips by using a makeup sponge to dab it on
- Create a gradient by applying more glitter at the very tip and less as you move toward the base
- Allow the lavender base to fully cure before applying glitter topper
- Seal glitter very generously—it needs extra top coat to stay put
Pastel Shades That Work Best
- Soft lilac lavender (most universally flattering)
- Pale periwinkle (slightly cooler)
- Dusty mauve (warmer undertone)
- Pale purple (modern and slightly bolder)
Real talk: Glitter can feel scratchy on your nails if it’s not sealed properly, so invest in a high-quality top coat and apply it in multiple thin layers rather than one thick layer.
9. Coral and Cream Color Block
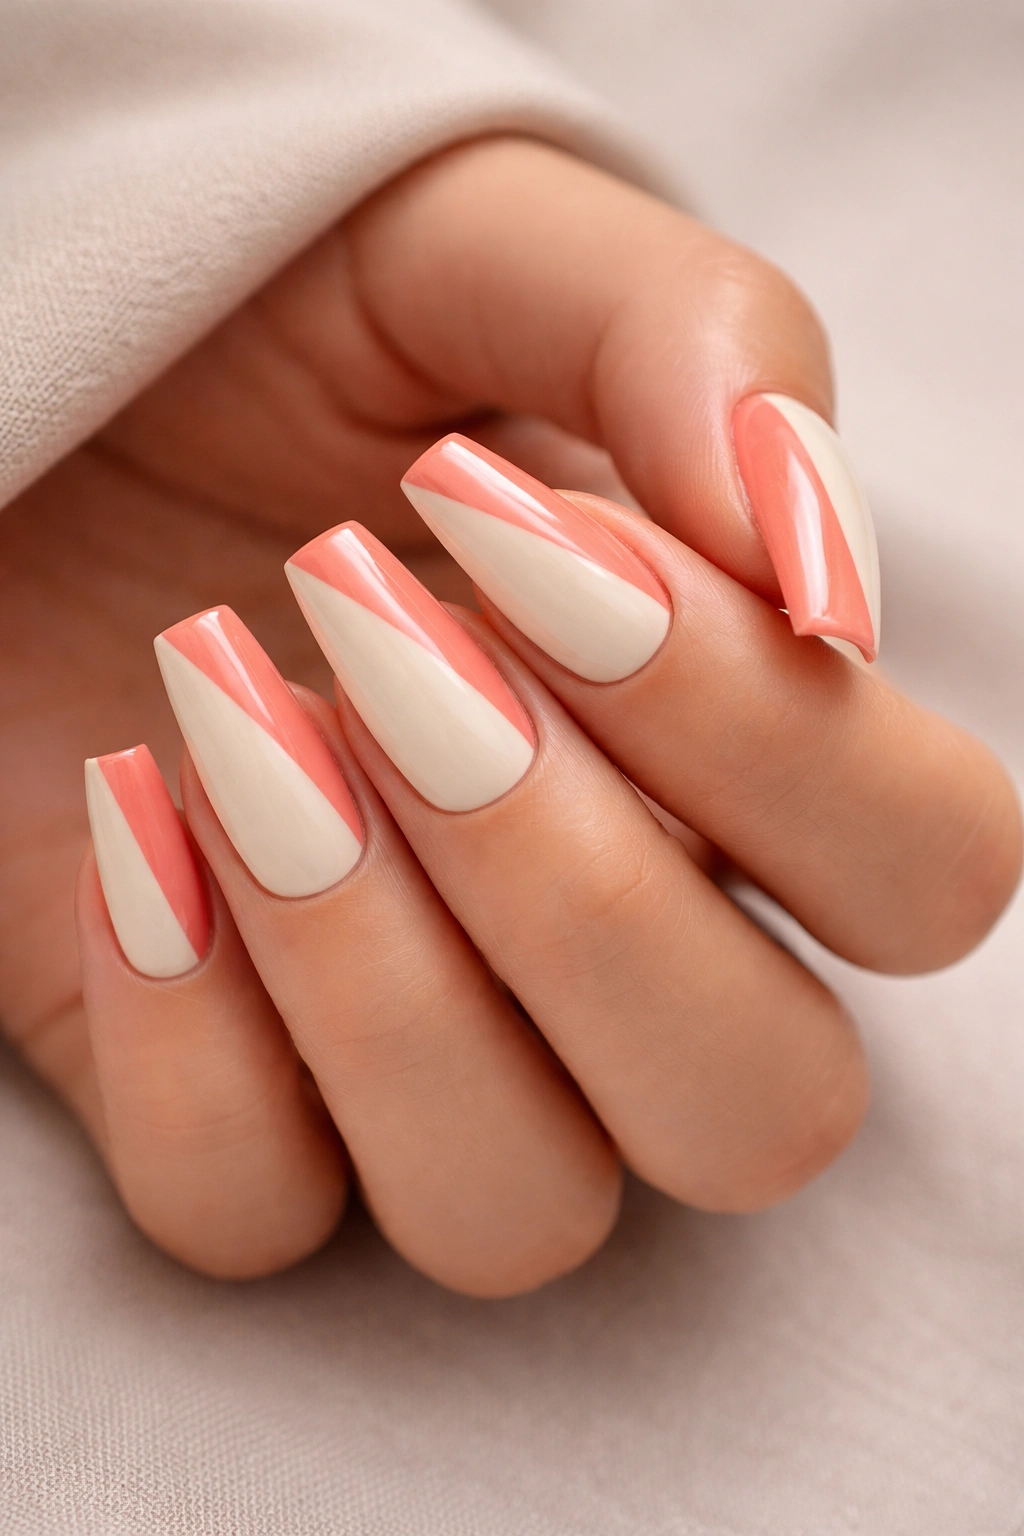
Color blocking uses two or more contrasting colors in geometric sections on the same nail, and the coffin shape is an ideal canvas for this technique. Paint the inner two-thirds of your nail creamy white or soft ivory, then fill the outer sections (the tapered sides and tip) with a warm coral color. The natural taper of the coffin shape creates automatic geometric definition without needing to paint precise lines.
Creating Color-Blocked Sections Cleanly
- Use painter’s tape to define the boundary between colors
- Paint one color completely, allow it to dry, then apply the contrasting color
- The coffin taper means your tape line will naturally follow the shape
- Remove tape while polish is still slightly tacky for clean edges
- Seal everything together with a glossy top coat
Color Combinations Worth Trying
- Cream with coral (warm and summery)
- White with peachy nude (soft and romantic)
- Ivory with warm orange (bold but balanced)
- Off-white with terracotta (earthy and sophisticated)
Pro tip: This design works better on medium nails than very long ones because the proportions feel more balanced—the color-blocked sections don’t feel too chunky or overwhelming.
10. Matte White with Simple Line Art
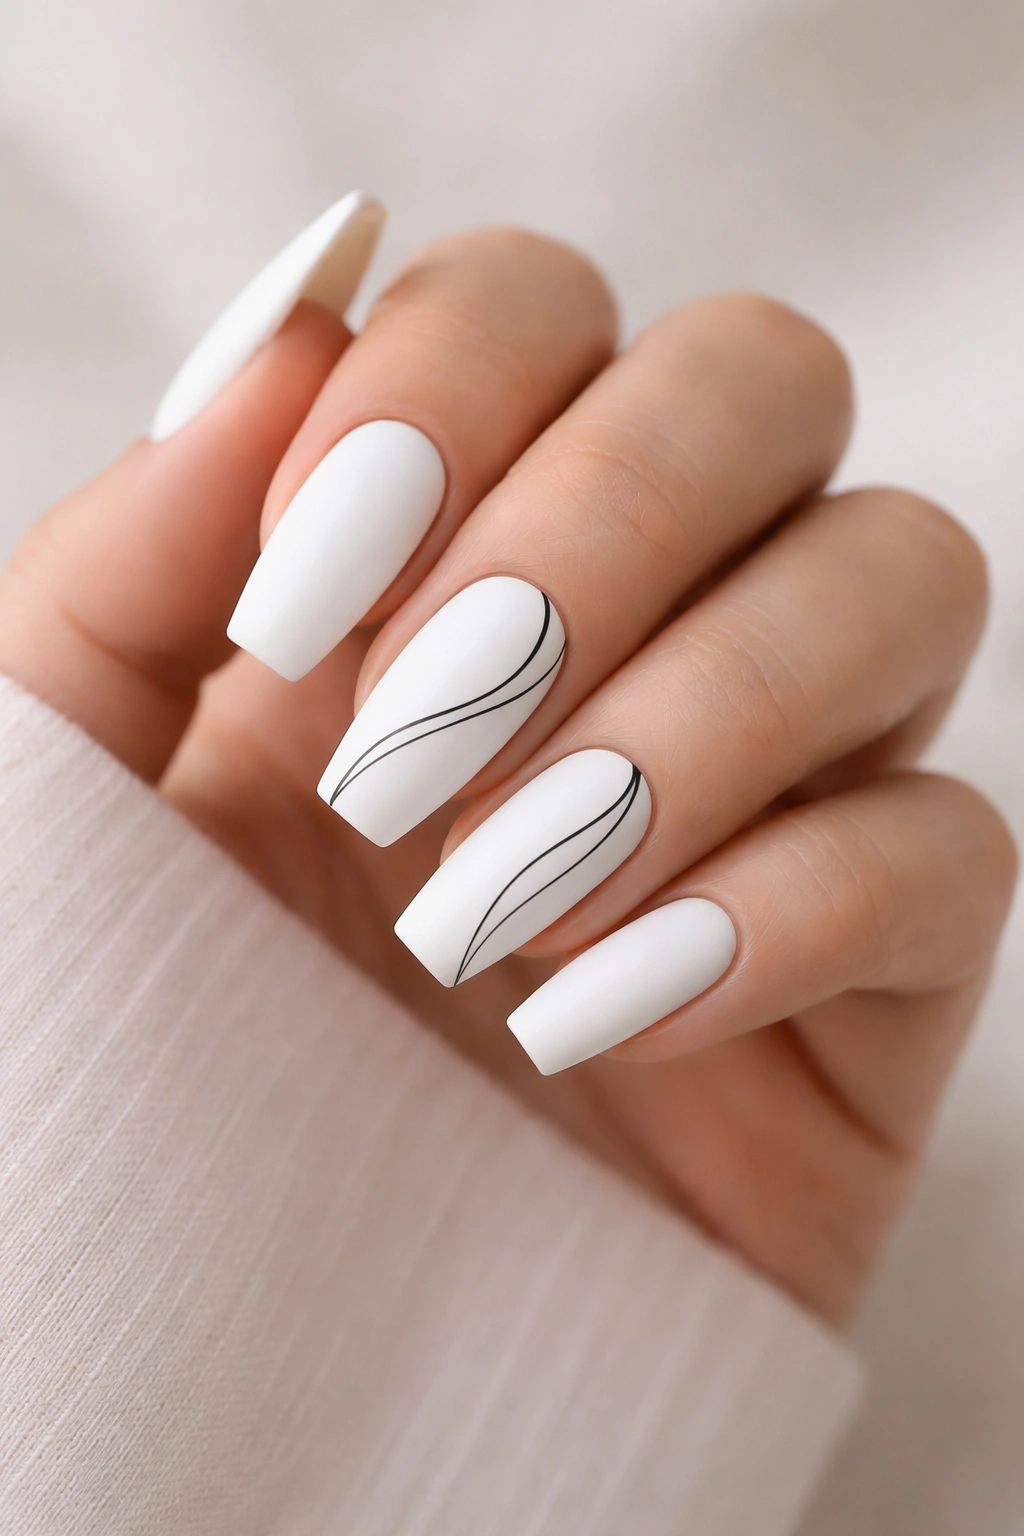
Start with a clean matte white base, then add minimal black line art—maybe a thin geometric shape, a tiny plant motif, or abstract lines. Matte white is bold enough that it can carry simple design elements without needing additional embellishments, and the coffin shape gives these designs room to breathe. The contrast between crisp white and thin black lines is inherently sophisticated.
Line Art Ideas That Translate Well to Nails
- Minimalist plant stems or leaves
- Abstract geometric shapes (triangles, rectangles, circles)
- Thin wavy lines following the nail contour
- Small dot patterns scattered across the nail
- Continuous line drawings that feel artistic and intentional
Making Line Art Look Professional
- Use a very thin detail brush or nail art liner
- Thin lines are infinitely more sophisticated than thick ones
- Practice your design on paper first to build confidence
- Allow white base to fully cure before adding black details
- Seal with a glossy top coat to add dimension and protect lines
Worth knowing: You don’t need to cover every nail with the same design—adding line art to just two or three fingers creates more visual interest than complete matching designs.
11. Warm Caramel with Gel Shine

For a warm, sophisticated look that feels effortlessly elegant, caramel is the answer. This creamy tan-brown shade sits beautifully between nude and deeper brown, working with virtually every skin tone. Apply it with a gel finish for that deep, dimensional shine that regular polish can’t quite capture, and let the coffin shape speak for itself without added designs.
Why Caramel Is Underrated
Caramel feels less expected than nude or pink, which automatically makes it feel more intentional and stylish. It photographs beautifully, looks great in all lighting conditions, and pairs well with both casual and formal outfits. The gel shine gives it dimension that solid polish versions lack.
Achieving the Perfect Caramel Shade
- Caramel leans warm, so avoid versions that veer into gray or ashy territory
- The best caramel shades have subtle warmth that complements gold jewelry
- Apply in two coats for full opacity and richness
- Gel polish automatically looks glossier and more refined than regular polish
- The shine reflects light in a way that makes the color appear deeper
Real talk: If you’re using gel polish, you’ll need proper curing equipment, but the longevity and shine are worth it—caramel looks fresh for two to three weeks without dulling.
12. Sage Green and Nude Two-Tone
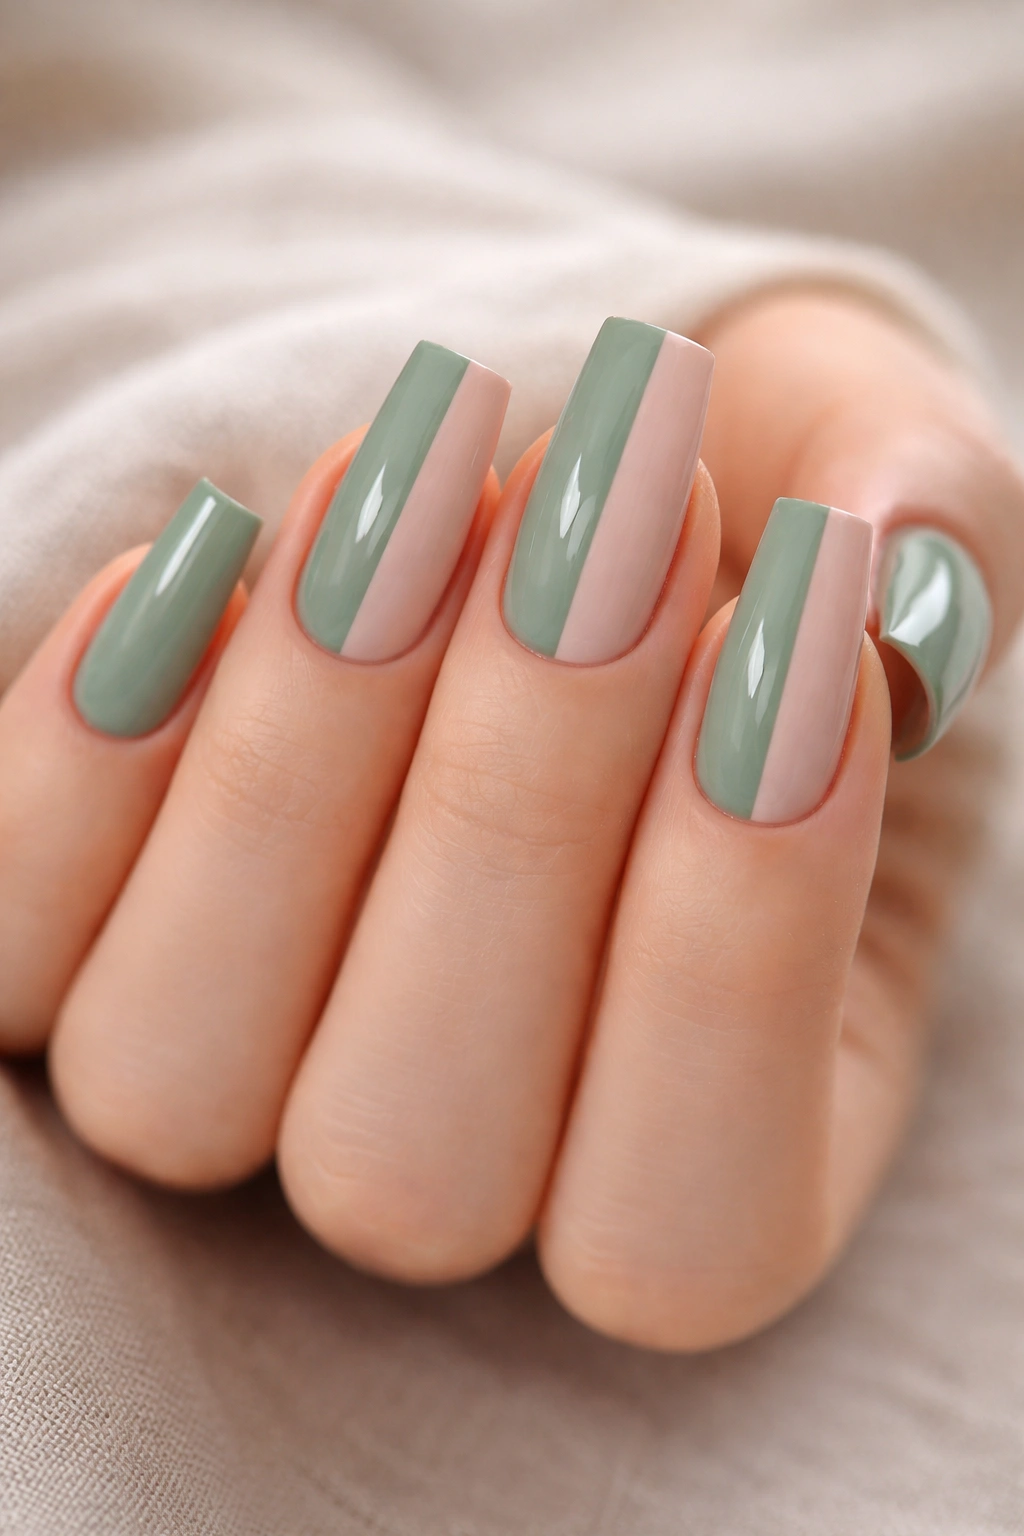
Sage green has become incredibly popular because it’s sophisticated without being dramatic, and pairing it with nude creates a cohesive, considered look. Paint half your nail in soft sage green and half in matching nude, dividing vertically down the middle so that each color takes up roughly half the coffin surface. The coffin shape’s taper creates natural visual interest in this otherwise simple color split.
Techniques for Solid Two-Tone Designs
- Paint each color on half of the nail (vertical split is most effective)
- Use painter’s tape to define the midline clearly
- Paint one color, dry completely, then apply the contrasting color
- The coffin’s natural curve means edges won’t look as sharp as they would on square nails
- Seal both colors together with a top coat that harmonizes them
Sage Green Shades to Look For
- Soft, muted sage (most versatile)
- Slightly warmer sage with gray undertones (more sophisticated)
- Pale sage that’s almost whitewashed (subtle and modern)
- Deeper forest sage (more dramatic)
Pro tip: Two-tone designs create the illusion of narrower nails because the division line draws the eye vertically, which is particularly flattering on medium coffin nails.
13. Soft Beige with Thin Gold Stripes
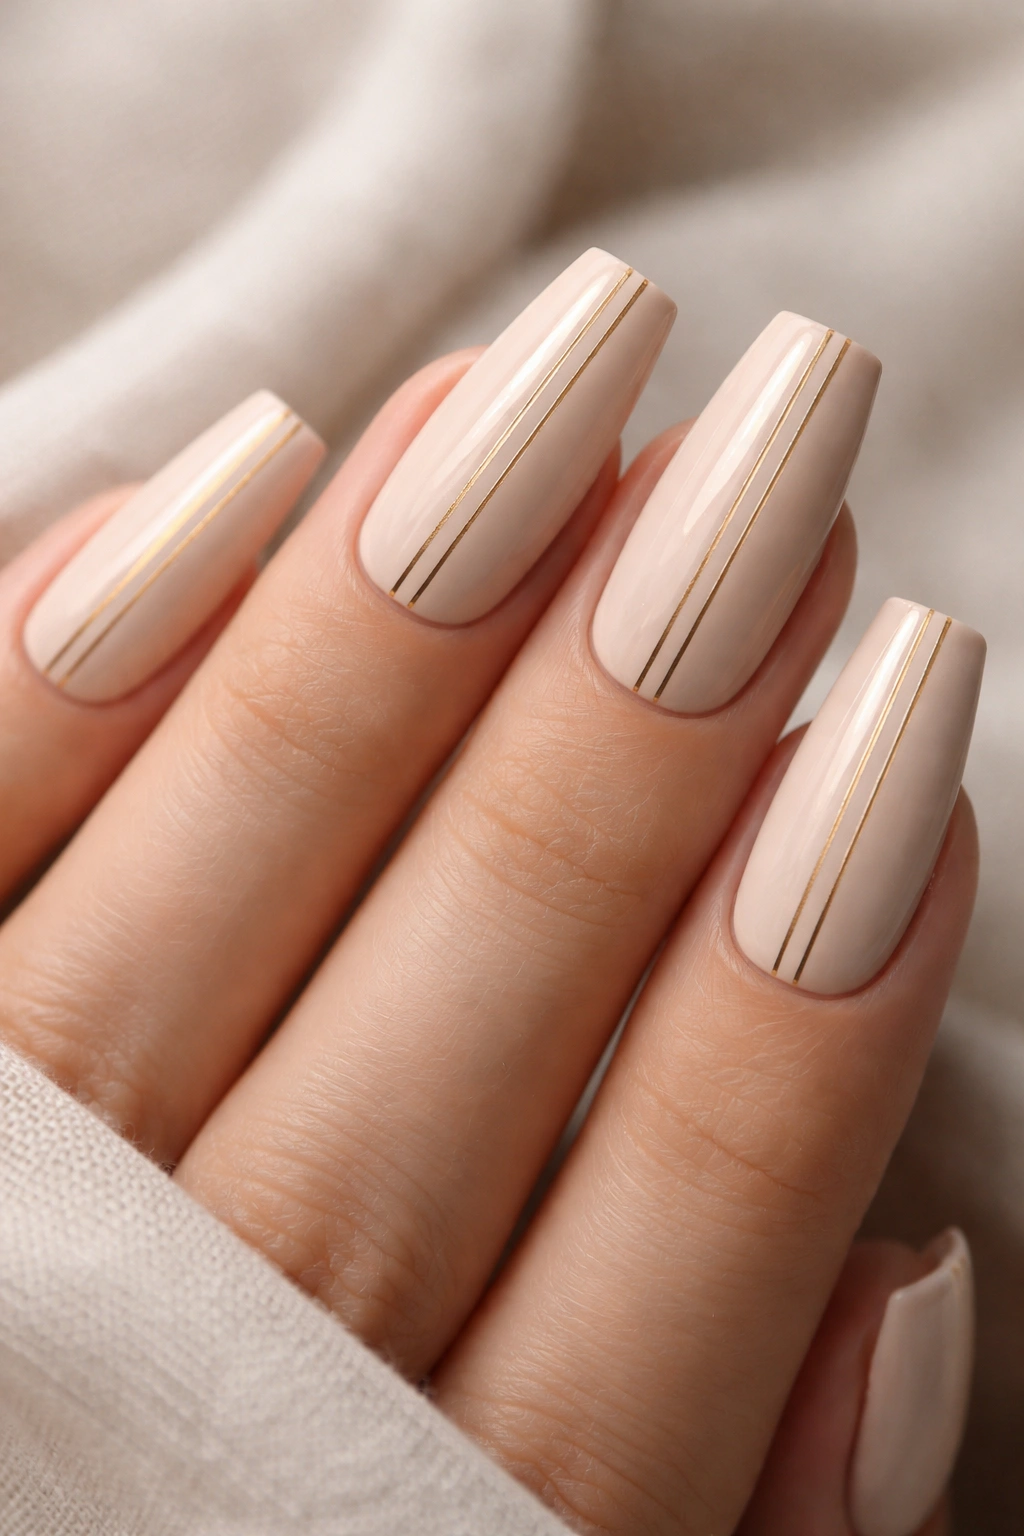
This design combines the easiest color (soft beige that works with every outfit) with elegant metallic detail that feels high-end without being complicated. Apply a creamy beige base in two coats, then use a gold striping brush to create two or three thin parallel lines running vertically down the center of each nail. The stripes create rhythm and movement without being busy.
Placing Stripes for Best Visual Effect
- One thin line down the exact center (classic and clean)
- Two lines parallel to each other, slightly off-center (more movement)
- Three thin lines evenly spaced (sophisticated and intentional)
- Lines don’t need to run the entire length—they can start halfway down the nail
Getting Gold Details Right
- Thin lines look more sophisticated than thick ones
- Gold should be warm, not brassy or yellow
- Striping brushes come in different widths—choose one that feels controllable
- Let the base dry completely before adding gold to avoid muddiness
- A glossy top coat makes gold pop against beige
Worth knowing: This design photographs beautifully because the metallic detail catches light, making your nails look shinier and more polished than they might in person.
14. Baby Blue with Cloud Design
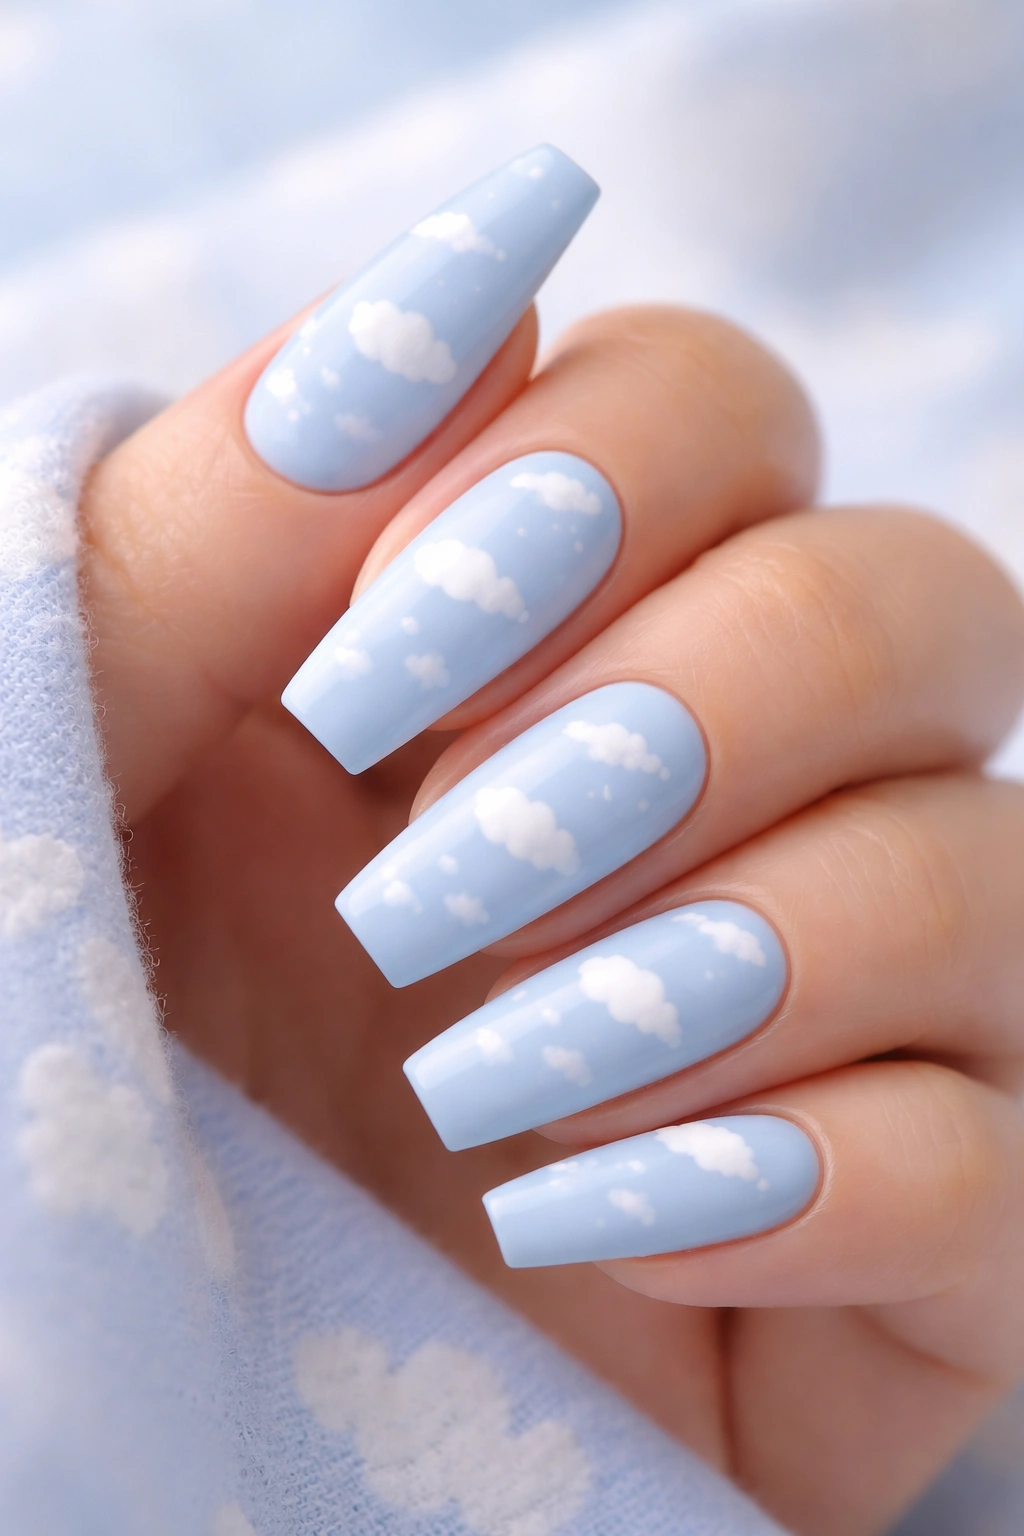
For a whimsical, wearable design, soft baby blue with tiny cloud details feels both playful and sophisticated. Paint a pale blue base, then use a detail brush or toothpick to dot small white cloud shapes across your nail. Keep the clouds tiny and scattered rather than large or concentrated—this creates a pattern that feels intentional without being overwhelming on medium nails.
Creating Cloud Designs That Look Intentional
- Use white or off-white for clouds against pale blue
- Clouds are essentially just clusters of connected small circles
- Scatter clouds unevenly—don’t worry about perfect symmetry
- Keep clouds relatively small (about the size of a lentil) to maintain sophistication
- You don’t need clouds on every nail—two or three fingers is plenty
Color Combinations for Cloud Designs
- Pale blue with white clouds (most classic)
- Dusty blue with cream clouds (warmer and softer)
- Lavender blue with white clouds (more romantic)
- Sky blue with pale gray clouds (modern and subtle)
Real talk: Cloud designs feel very cute when they’re hand-painted because they’re slightly imperfect, which is actually what makes them charming and authentic-looking.
15. Dusty Rose with Foil Accents
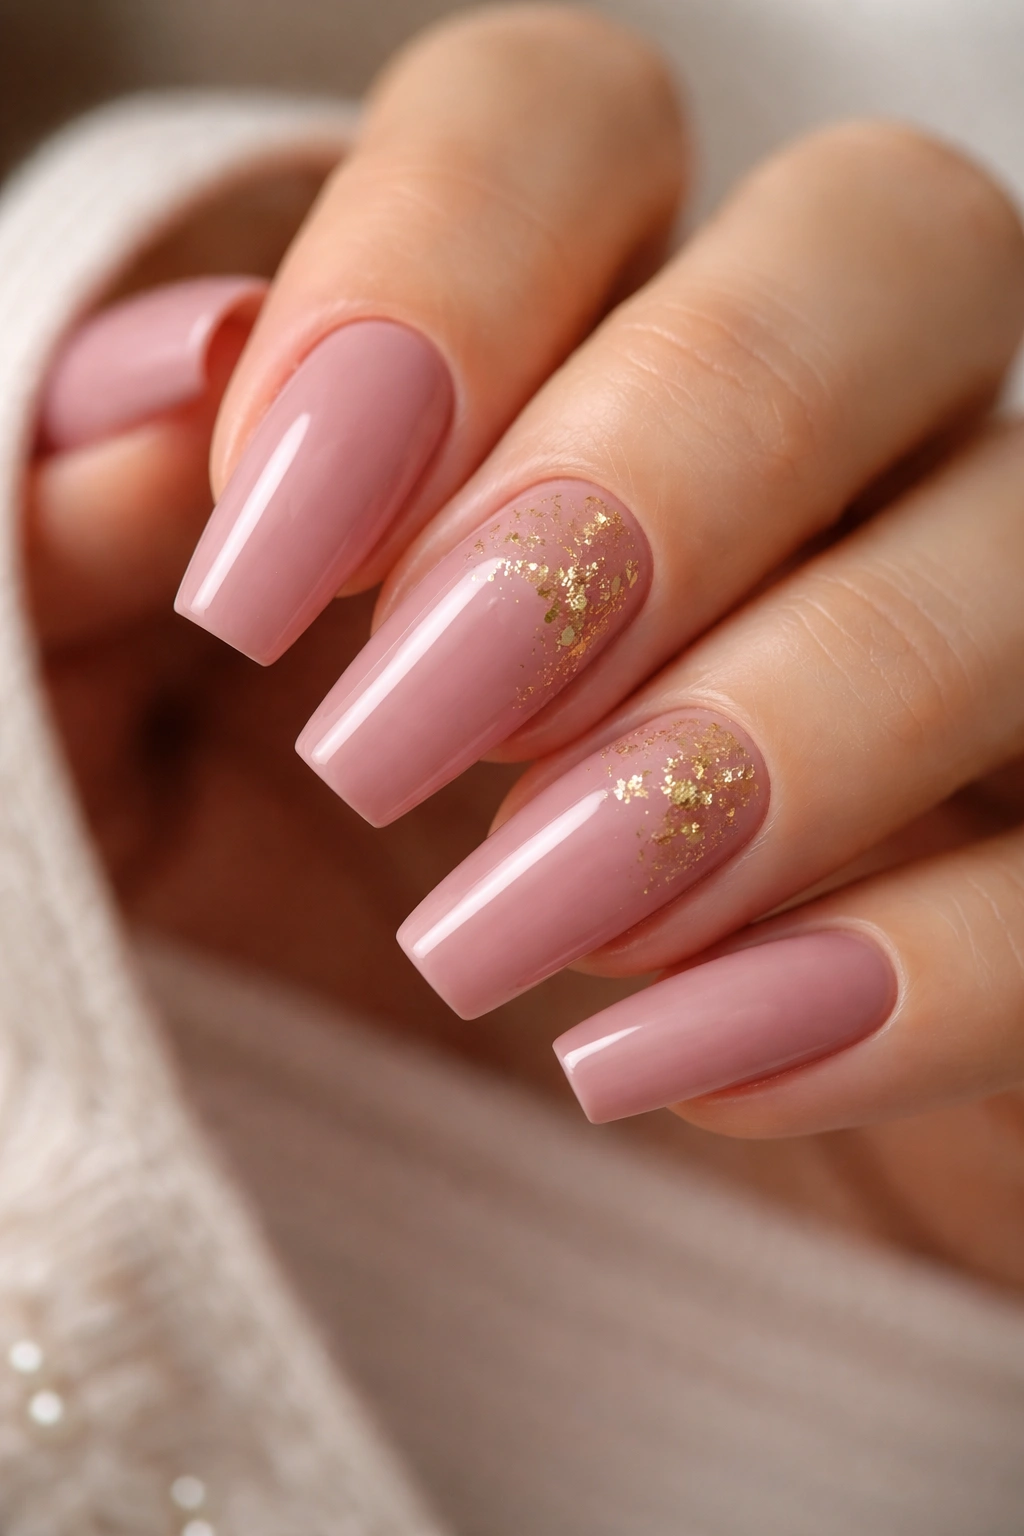
Dusty rose is that perfect mauve-pink that feels both warm and cool, sophisticated and soft. To elevate the simplicity, add small foil accents—either gold or rose gold foil pieces—randomly scattered across one or two nails. Foil (metallic leaf) catches light in a completely different way than glitter and feels more refined and expensive.
Using Foil as a Nail Accent
- Foil requires a sticky base coat to adhere properly
- Press small pieces of foil onto the sticky base using tweezers
- Don’t cover the entire nail—use foil strategically on just one or two nails
- Foil accents on the center of the nail feel more sophisticated than concentrated on tips
- Seal foil very carefully with thick top coat to protect pieces from lifting
Dusty Rose Shades Worth Trying
- Muted mauve-rose (most universally flattering)
- Slightly warmer dusty rose (works on warm skin tones)
- Cooler dusty rose with gray undertones (suits cool undertones)
- Dusty rose with subtle shimmer (adds dimension without being glittery)
Worth knowing: Foil feels luxurious and looks expensive, but it requires more careful maintenance than other accents because it can catch on things. Apply a protective glossy top coat over foil pieces.
16. Natural Nude with Subtle Shimmer
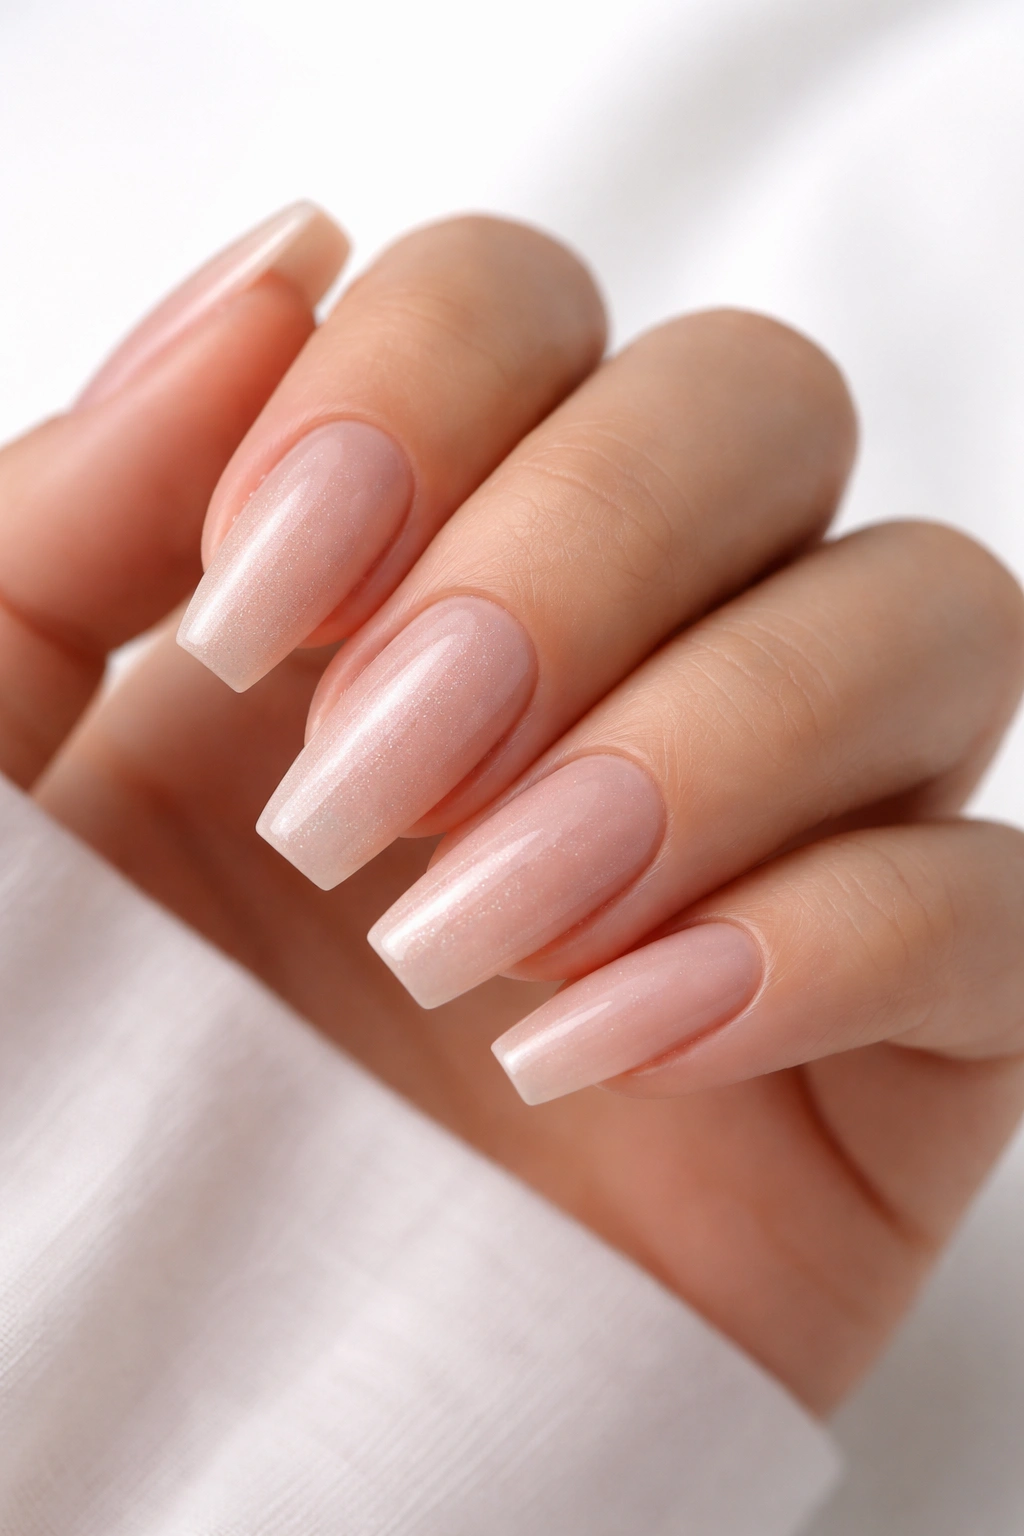
Sometimes the most sophisticated nails are ones that look almost natural but have just enough shimmer to catch light and add dimension. Use a nude polish that matches your actual nail color almost exactly, but choose a formula with subtle shimmer particles built in. The coffin shape will look naturally elegant, and the shimmer adds just enough interest without feeling like you’re wearing nail art.
Selecting Nude Polish with the Right Shimmer
- Shimmer should be barely visible in indoor light but catch light beautifully in sunlight
- Avoid shimmers that feel glittery or chunky—aim for ultra-fine particles
- The nude should match your natural nail tone, not your skin tone
- Multiple thin coats build color depth while maintaining the shimmer effect
- One thick coat can make shimmer look cloudy instead of refined
Why Subtle Shimmer Elevates Simple Design
Shimmer creates dimension that makes nails look healthier and more polished than completely flat color. It’s the difference between looking naturally gorgeous and looking like you just painted your nails solid color. For professional settings where you want elegant nails that don’t announce themselves, this is perfect.
Pro tip: Nude shimmer photographs beautifully in any lighting because it has dimension that photographs well, making your hands look consistently polished across different photos and settings.
17. Pale Yellow with Delicate Floral
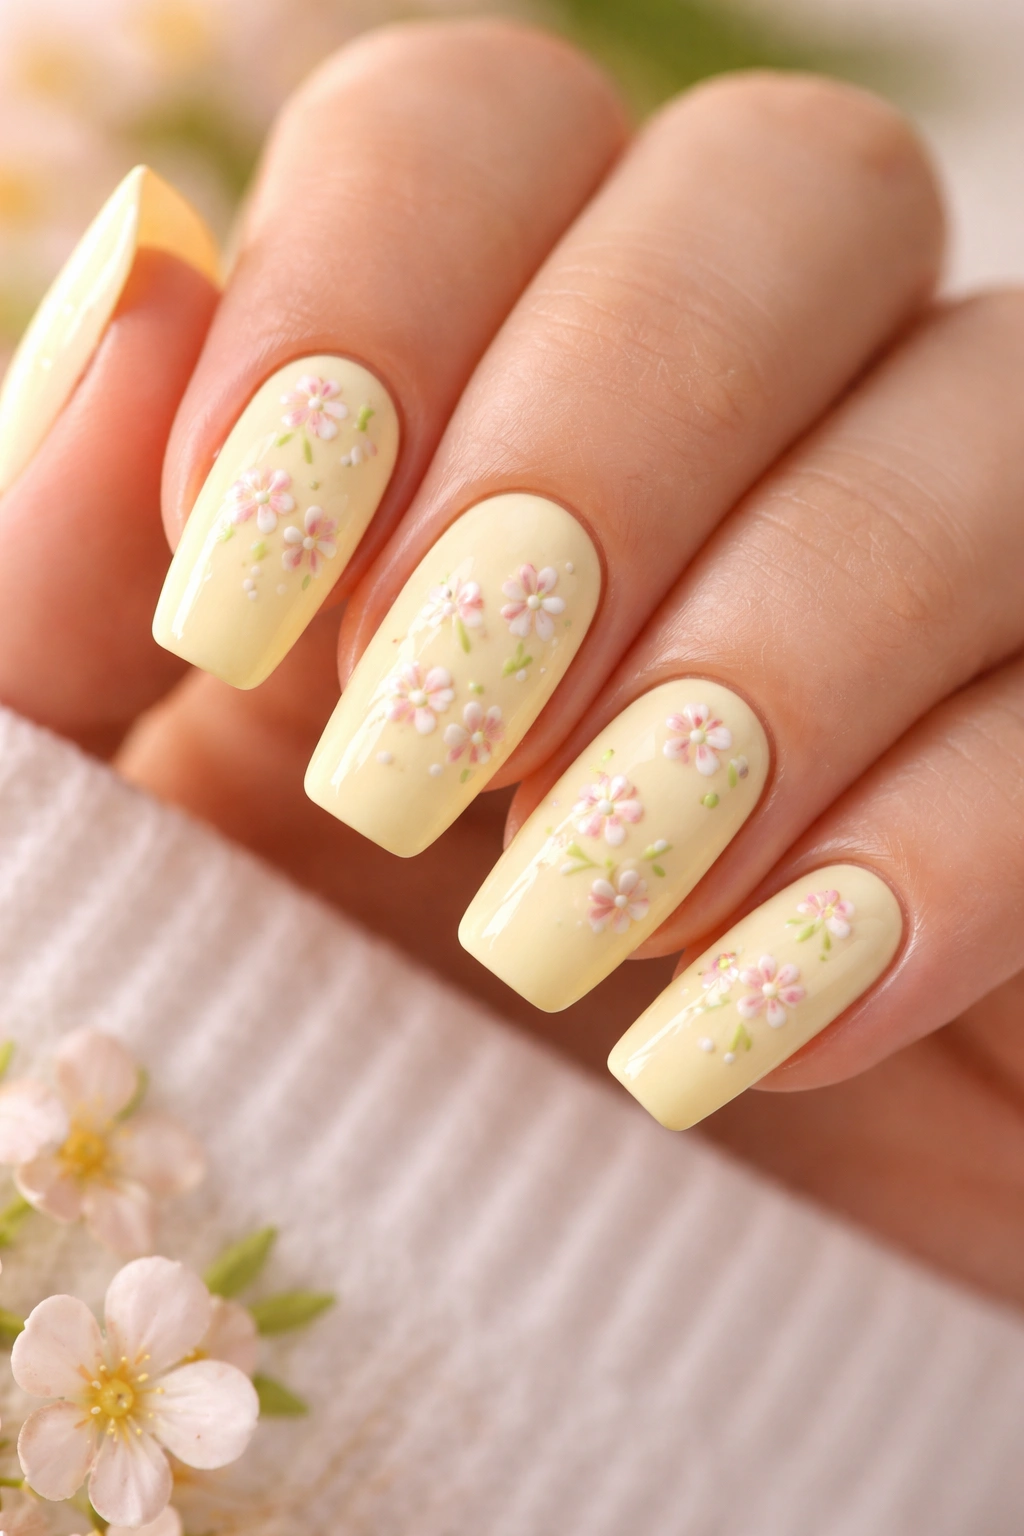
Pale yellow feels fresh and cheerful without being loud, and adding tiny floral details keeps the design light and romantic. Paint a soft, buttery pale yellow base, then use a thin detail brush to create small flower shapes (simple five-petal designs work beautifully) in a contrasting color like white or soft pink. Scatter flowers across your nails rather than creating a concentrated pattern.
Painting Simple Flowers on Nails
- Five small dots arranged in a circle becomes an instant flower
- Add a tiny dot in the center for definition
- Flowers don’t need to be identical—slight variations look more natural
- Space flowers out so they don’t feel cluttered on the medium nail surface
- Very thin brushes and steady hands create the most refined florals
Color Combinations for Yellow Base
- Pale yellow with white flowers (cheerful and clean)
- Soft yellow with pink flowers (romantic and summery)
- Pale yellow with pale green leaves (more botanical)
- Butter yellow with cream flowers (warm and vintage)
Worth knowing: Pale yellow can stain nails if it’s not sealed properly, so use a base coat under your yellow polish and make sure your top coat is robust enough to protect the color.
18. Taupe with Minimalist Geometric Pattern
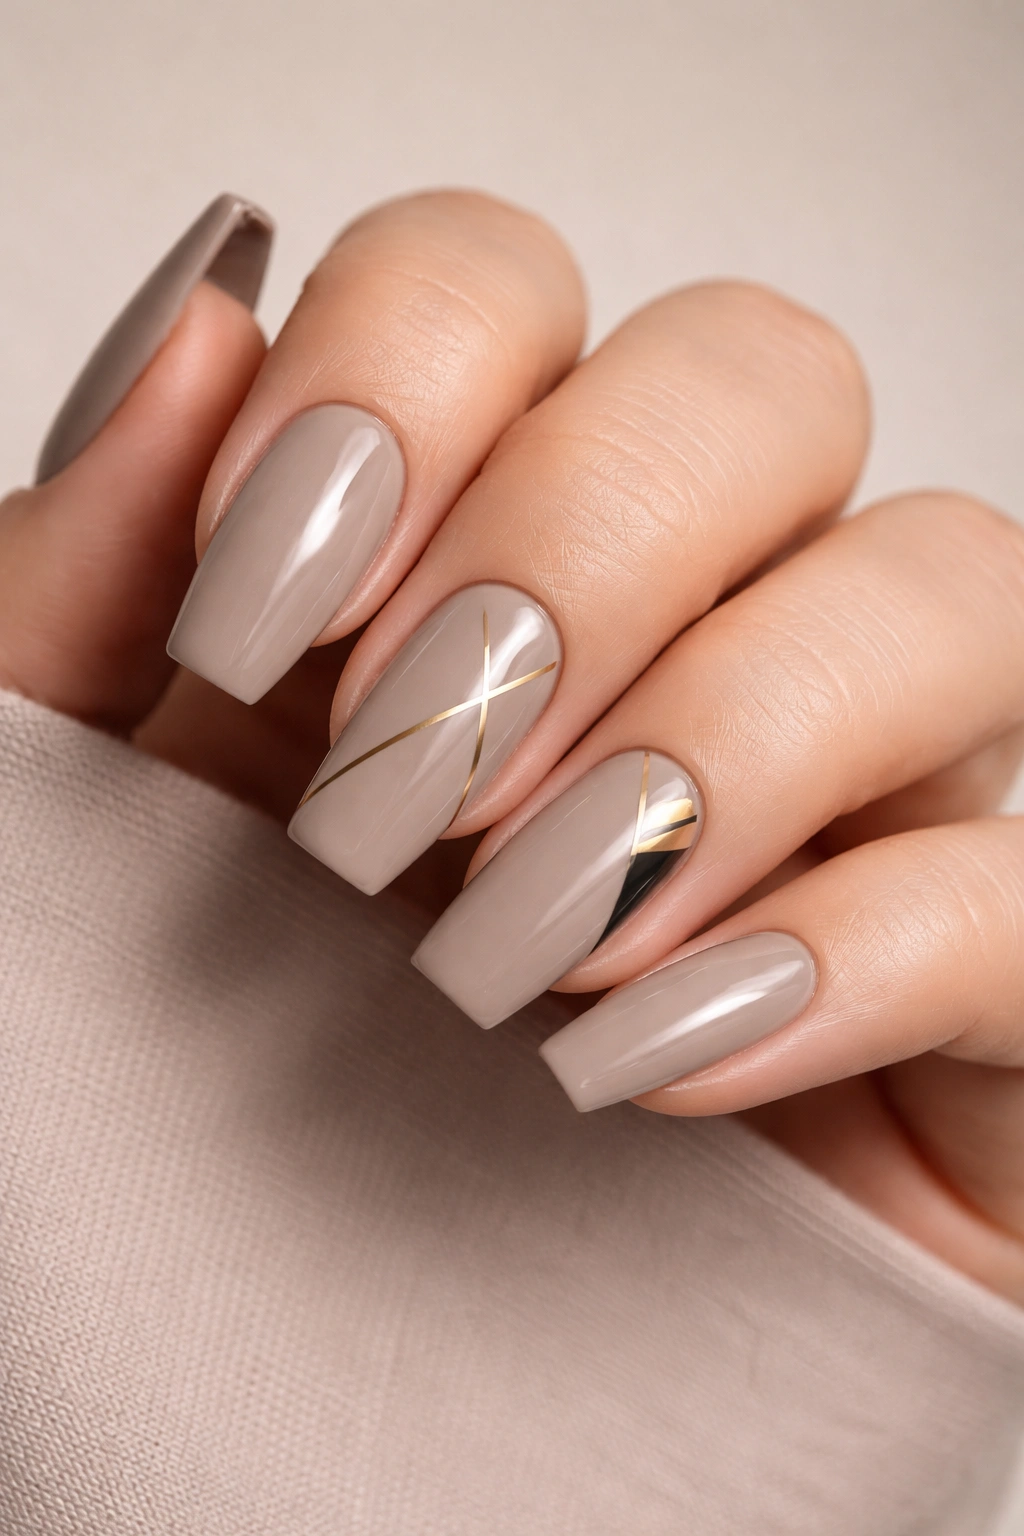
Taupe is sophisticated and neutral while feeling more interesting than standard beige or nude. Create a minimalist geometric design by painting small triangles, squares, or abstract shapes in gold or black on a taupe base. Keep the design minimal—just a few shapes on one or two nails—so it feels intentional and artistic rather than busy.
Geometric Designs That Work Best
- Three or four small triangles arranged vertically
- Scattered small squares (like a subtle grid)
- One larger geometric shape on the accent nail
- Abstract connected lines that form loose shapes
- Small diamond or hexagon shapes
Creating Clean Geometric Shapes
- Painter’s tape helps you achieve perfect straight edges
- Use a thin detail brush for precision
- Geometric designs look better when they’re well-defined rather than hand-painted loose
- Symmetry matters for geometric patterns—take your time with placement
- Seal geometric details with glossy top coat for crisp definition
Real talk: Taupe is actually harder to pull off than it sounds because it can look dull if the shade is too gray or muddled. Choose taupe with slight warmth rather than one that veers into grayish brown.
19. Soft Peach with Matte Top Coat
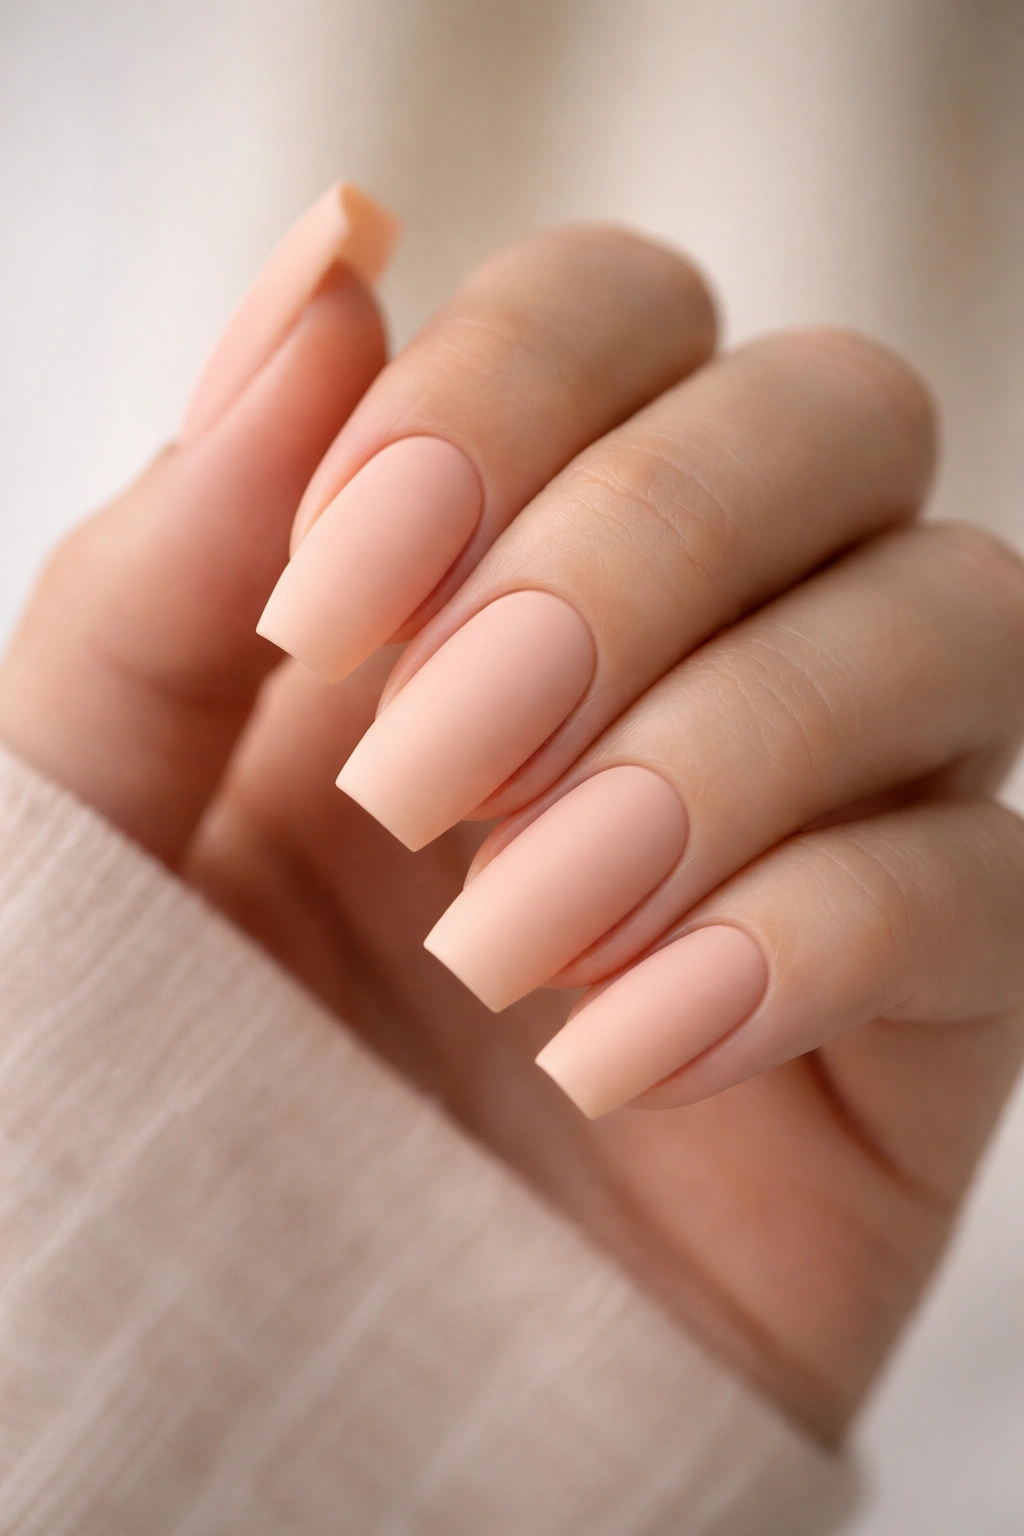
Soft peach is the universal shade—it works on virtually every skin tone and looks elegant in any context. The matte finish gives it depth and intentionality that glossy peach sometimes lacks. Apply your peach polish in two coats, then finish with a matte top coat instead of glossy, and watch how the color transforms from standard to sophisticated.
Why Matte Changes Everything
Matte finishes make colors look more complex and interesting because the light behaves differently on a non-reflective surface. Peach that would look straightforward glossy suddenly feels intentional and modern when matte. The velvety texture adds tactile interest that readers notice even if they don’t consciously understand why the nails look elevated.
Peach Shades That Work Beautifully Matte
- Soft peach (most versatile)
- Peachy nude (subtle and professional)
- Warm peach with slight coral undertone (flattering on most skin tones)
- Pale peachy beige (nearly nude but warmer)
Pro tip: Matte finishes wear faster on tips where your nails naturally experience friction, so consider applying glossy top coat only to the tips while keeping the main nail surface matte for a hybrid look.
20. Champagne Gold with Scattered Glitter
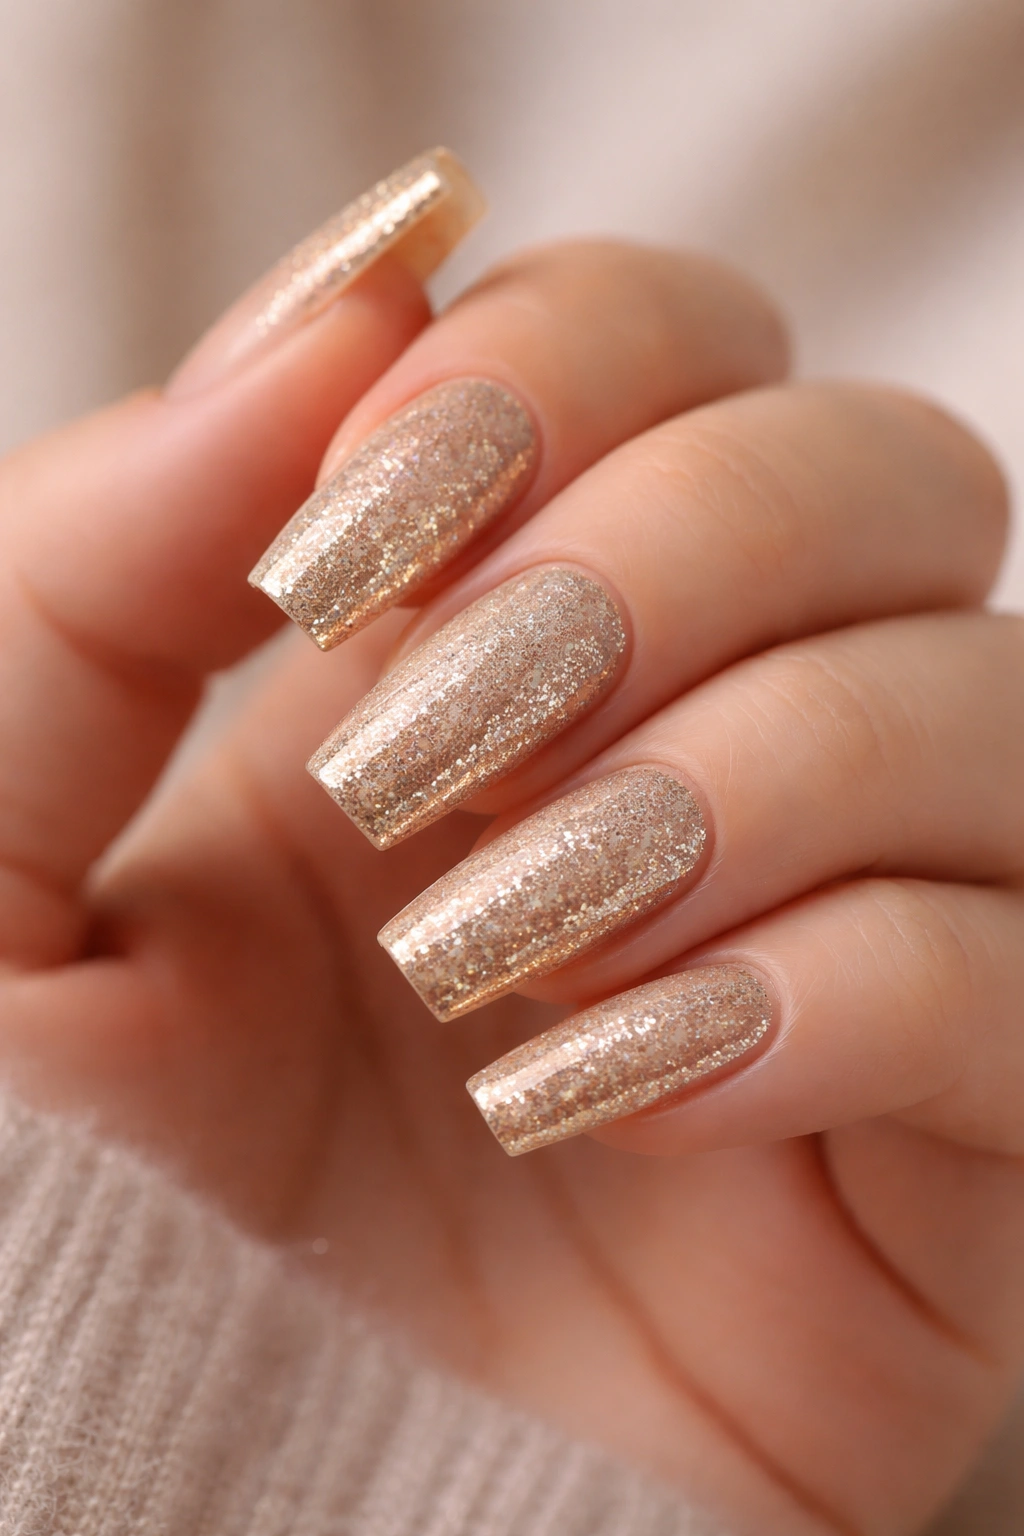
Champagne gold is inherently luxurious and celebratory, and adding scattered glitter elevates it from simple to special. Apply a creamy champagne gold base, then randomly scatter small glitter pieces across the nail rather than creating a glitter gradient. The scattered effect feels more intentional and artistic than covering the entire nail with glitter while maintaining an air of sophistication.
Applying Scattered Glitter Effectively
- Use a glitter topper formula that allows you to control glitter placement
- Dab glitter on with a sponge or detail brush rather than painting
- Scatter pieces asymmetrically for a more natural, artistic look
- Leave some areas of champagne gold visible between glitter pieces
- Seal everything with thick, protective top coat
Why Champagne Gold Feels Special
Champagne gold sits in a unique color space where it looks elegant and refined rather than costume-y. It has warmth without being brassy, and sparkle without being over-the-top. On medium coffin nails, champagne gold feels celebratory and polished without being dramatic.
Glitter Styles That Complement Champagne Gold
- Fine iridescent glitter that shifts colors
- Warm gold chunky glitter (scattered, not full coverage)
- Rose gold glitter mixed with champagne for subtle color shift
- Small sparkle pieces that catch light without overwhelming
Worth knowing: Champagne gold photographs beautifully and looks incredible in person, making it an excellent choice for occasions where you want your nails to feel special and intentional.
Final Thoughts
The beautiful thing about medium coffin nails is that they don’t require extreme length, constant maintenance, or complicated nail art to look absolutely stunning. These twenty designs prove that the right color, finish, and minimal details are actually all you need to create nails that look expensive, intentional, and flattering to your hands. Whether you prefer understated elegance with a single gold stripe or slightly more elaborate designs like scattered glitter or delicate florals, coffin nails provide the perfect canvas.
What works about this shape is its proportions—it’s somehow both dramatic and wearable, feminine without being dainty, and sophisticated without demanding high-maintenance care. You can refresh these designs quickly, adapt them slightly based on what products you have available, and feel confident that whatever you choose will photograph beautifully and compliment your hands.
Start with whichever design resonates most with your personal style, and remember that even simple colors with thoughtful finishes (matte, shimmer, gel shine) can look just as polished as more complicated designs. The coffin shape does most of the heavy lifting for you—your job is just choosing colors and details that make you feel confident and beautiful.
