

A plain nude manicure has its place. But coffin nails? They almost beg for color. The long tapered sides and squared-off tip give polish more room to show off, so colorful coffin nails can look graphic, playful, polished, or a little loud in the best way.
That shape changes everything. A red that feels standard on a short squoval nail turns sharper on a coffin tip. A pastel swirl that might look sweet on an almond shape lands with more structure here. Even tiny details—thin French lines, a halo of airbrushed color, one strip of chrome—read more clearly because the nail has actual space.
I keep coming back to coffin nails for one reason: they handle bold ideas better than most shapes do. You can go full neon, lean into jelly finishes, or keep the art tight and geometric. The shape can take it. It also flatters both medium and longer lengths, which matters if you want drama without trying to type on two-inch tips.
Pick the wrong color, though, and the shape can start to feel heavy. Pick the right one, and your whole manicure looks sharper before anyone even notices the art.
Why Colorful Coffin Nails Show Off Color Better Than Shorter Shapes

Coffin nails have a built-in advantage: they create a clean runway for color. Because the sidewalls taper inward and the free edge stays flat, bright shades look more deliberate here than they often do on rounder shapes. You get structure plus impact.
Length matters too. A medium coffin—about 4 to 8 millimeters past the fingertip—is often the sweet spot for bold color if you still want your hands to feel practical. Go shorter and some detailed art starts to crowd itself. Go longer and a soft pastel can look washed out unless the polish is opaque or layered over a milky base.
There’s also a finish issue that people skip. On coffin nails, glossy top coat makes color look deeper, while matte top coat makes shape stand out first. If you’re wearing cobalt, cherry red, or lime green, gloss usually gives you the richer result. Matte has its place, though—especially on graphic designs where you want the lines to do the talking.
A few design rules help almost every bright coffin set:
- Keep the cuticle area clean so the color doesn’t make the nail plate look crowded.
- Ask for crisp side tapering, not a wide “ballerina” shape that starts to flare.
- If you love neon shades, use two thin coats over a white base so the color stays true.
- For medium-long lengths, a builder gel overlay helps bright manicures stay smoother for longer.
That shape is already making a statement. The color should work with it, not fight it.
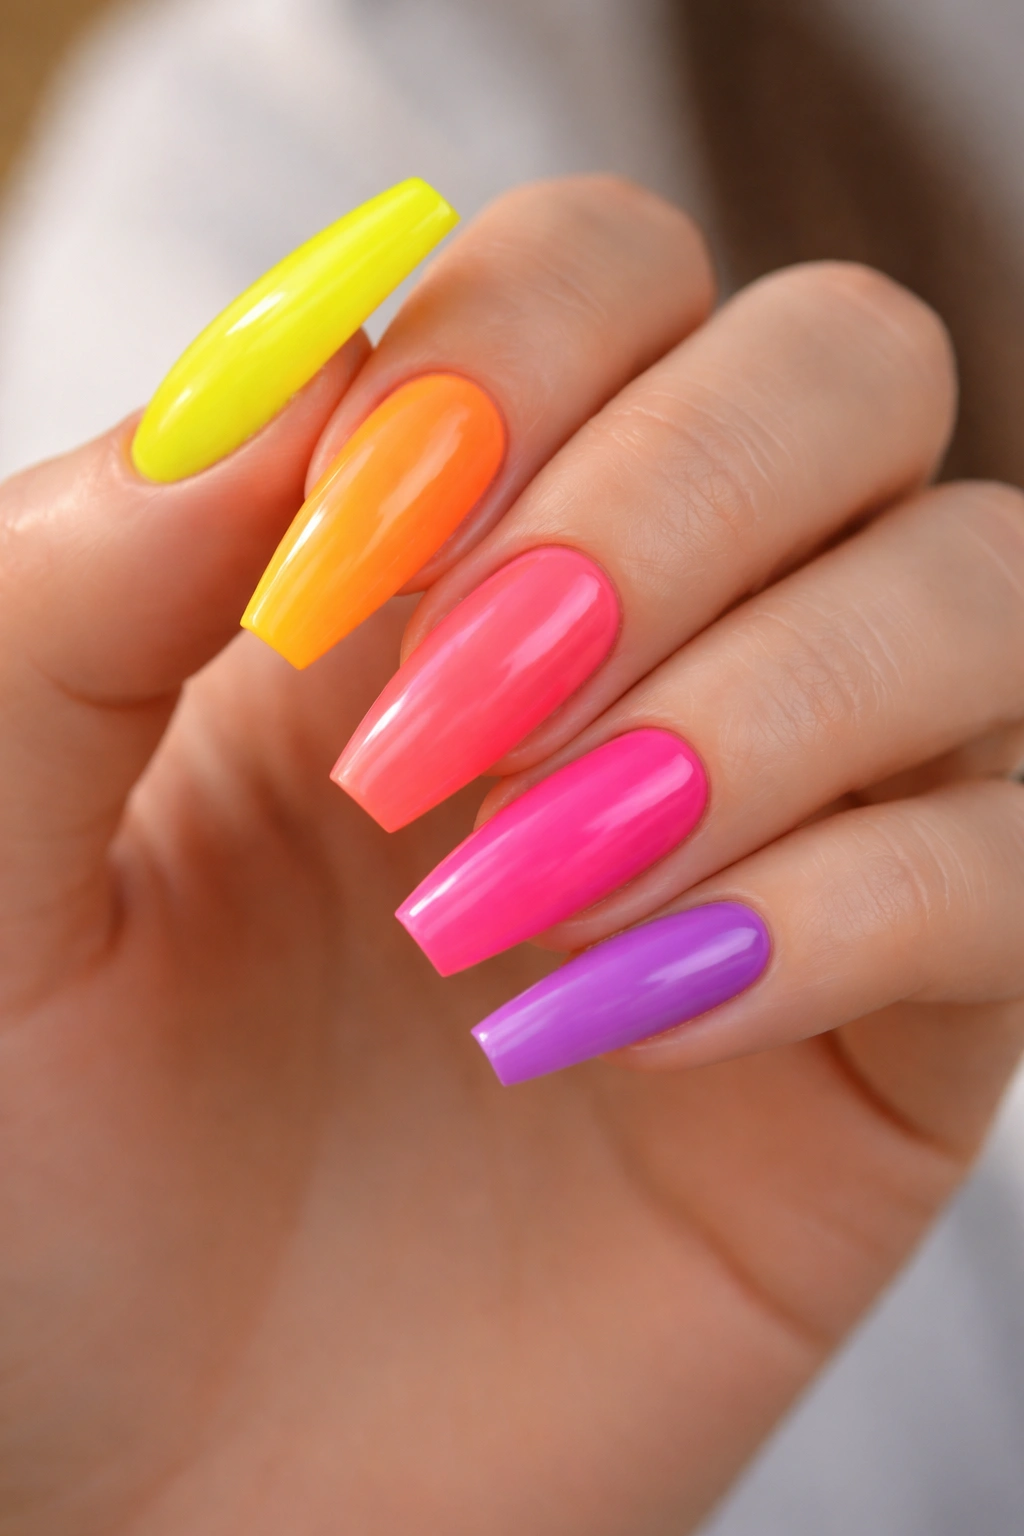
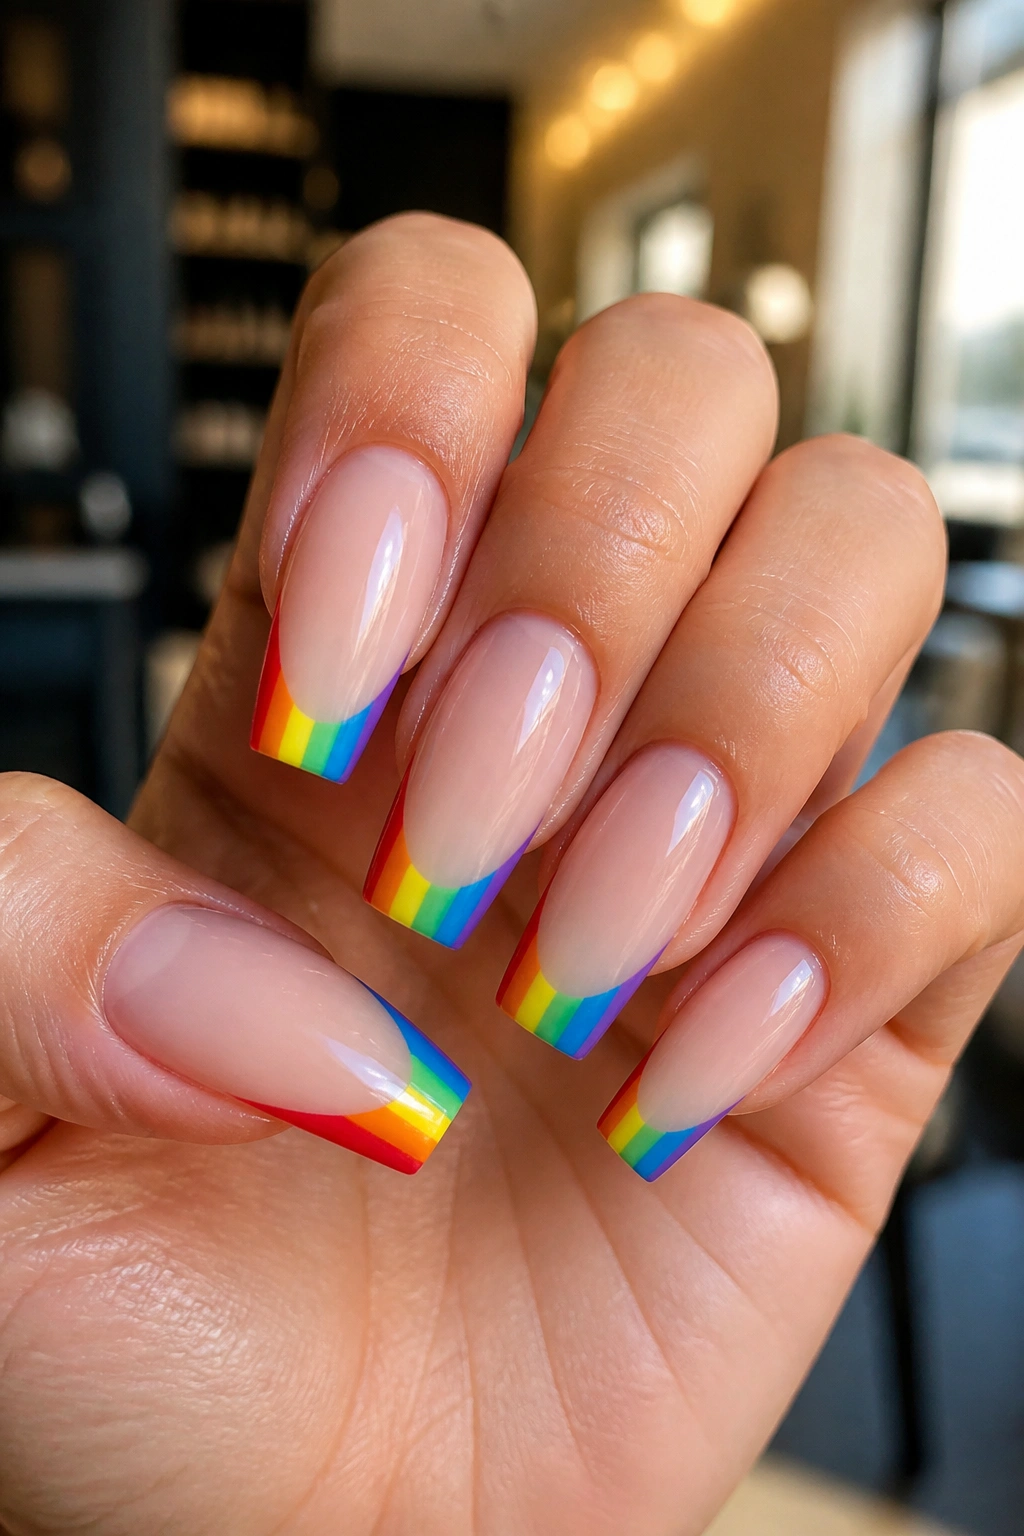
1. Rainbow French Tips on a Milky Nude Base
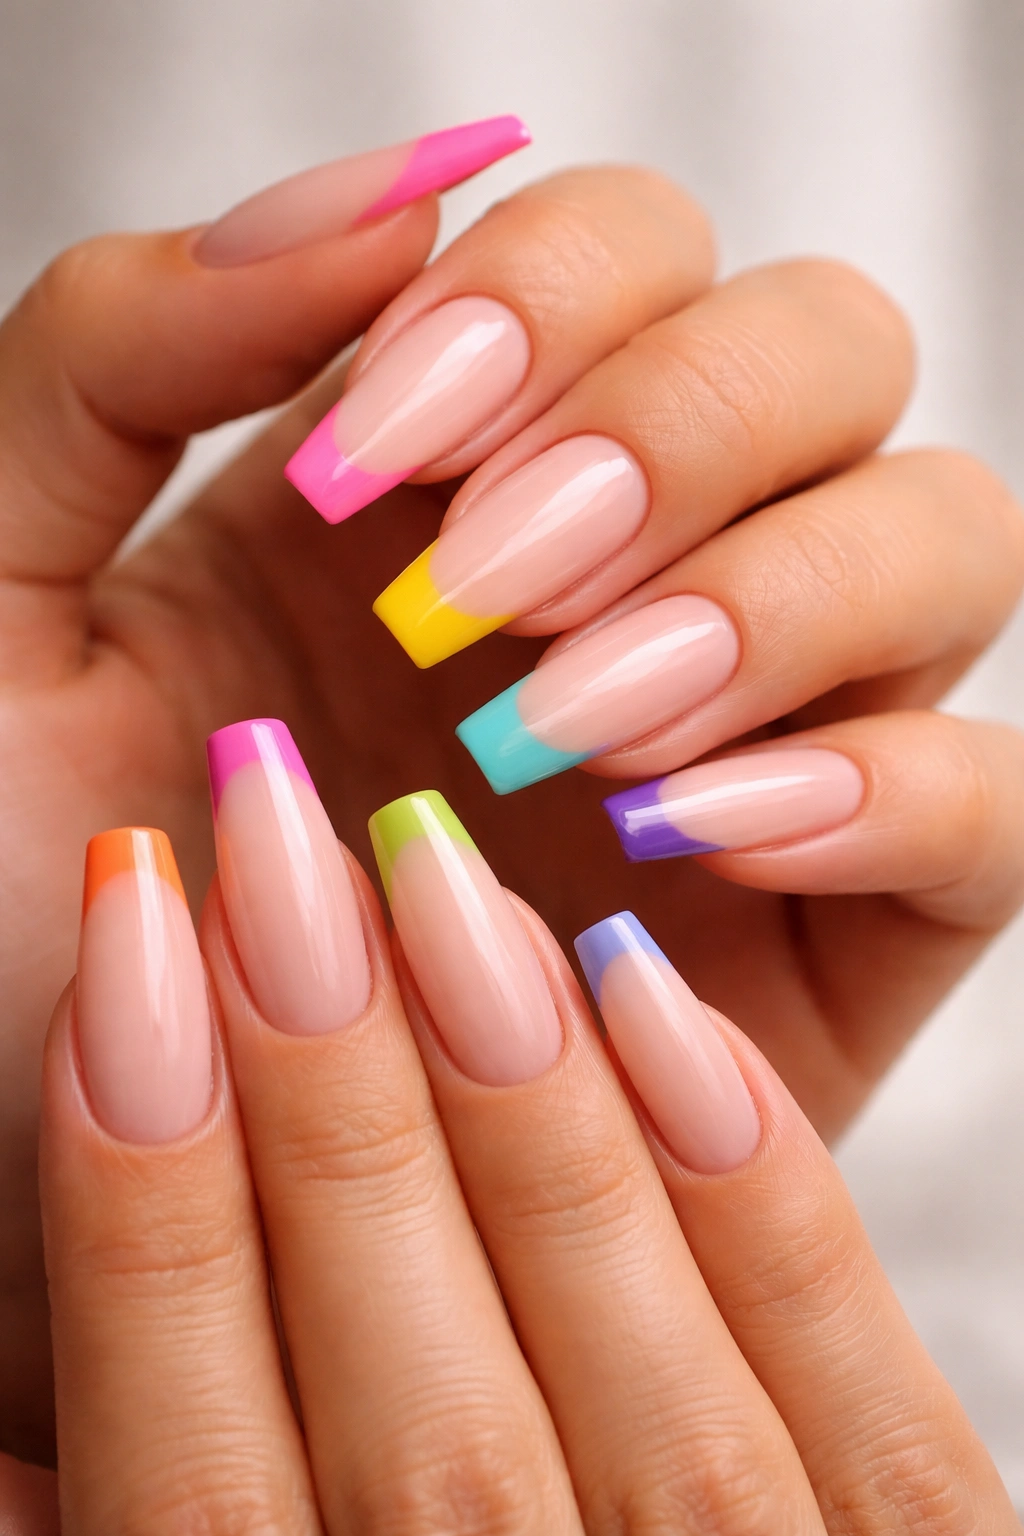
If you want colorful coffin nails without covering the full nail in pigment, rainbow French tips are one of the smartest ways to do it. The milky nude base keeps the set clean, then each tip gets its own shade—red, orange, yellow, green, blue, purple, or a tighter palette if you want less contrast.
Why It Works on Coffin Nails
The flat tip does half the job for you. A curved French line can get messy on shorter shapes, but coffin nails give the color a straight edge to sit on. That means the manicure looks sharper, especially when the colored band is kept at 2 to 4 millimeters thick.
Quick Details to Ask For
- Use a semi-sheer pink or beige base, not a fully opaque nude.
- Keep the smile line softly curved, not too deep.
- Choose six to ten shades that have equal brightness so one nail doesn’t look dull next to the others.
- Finish with high-shine gel top coat so the tips look glassy rather than chalky.
My take: this is one of the easiest bright looks to wear to work, dinner, vacation, anywhere. It has color, but it doesn’t feel like your hands are shouting.
2. Hot Pink to Tangerine Ombré
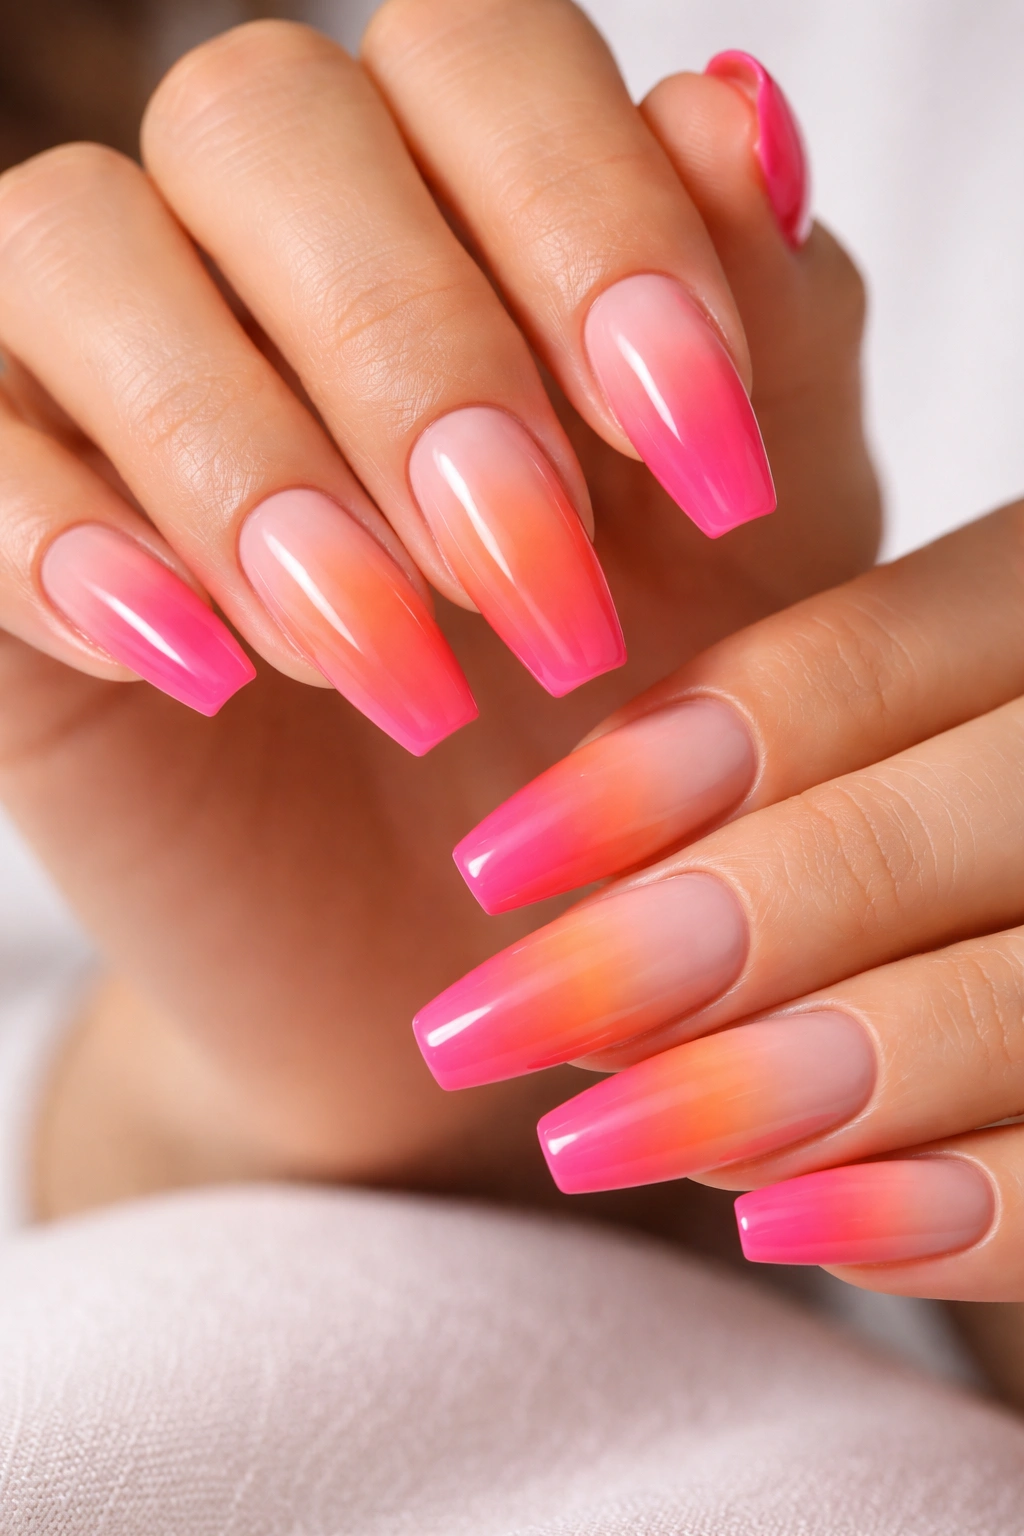
Few color combinations hit harder on a coffin shape than hot pink fading into tangerine orange. It has that warm, electric gradient you see in a sunset drink or a stack of fruit ice pops, and on a long tapered nail it looks fast, almost like the color is moving.
The trick is keeping the blend soft. A harsh line in the middle kills the whole effect. When I’ve seen this set look its best, the artist starts with a white base, sponges or airbrushes the shades in thin layers, then seals everything under a thick glossy top coat. The final result should look melted, not striped.
Medium and long coffin lengths both handle this well. On a medium set, the fade reads bright and punchy. On a longer set, it starts to feel more dramatic—good if you like your manicure to do more than quietly sit there. A little chrome powder over the ombré can work too, though I prefer plain gloss here because it keeps the color cleaner.
Skip extra gems. Skip little decals. This design already has enough going on.
3. Cobalt Blue Chrome Mirror
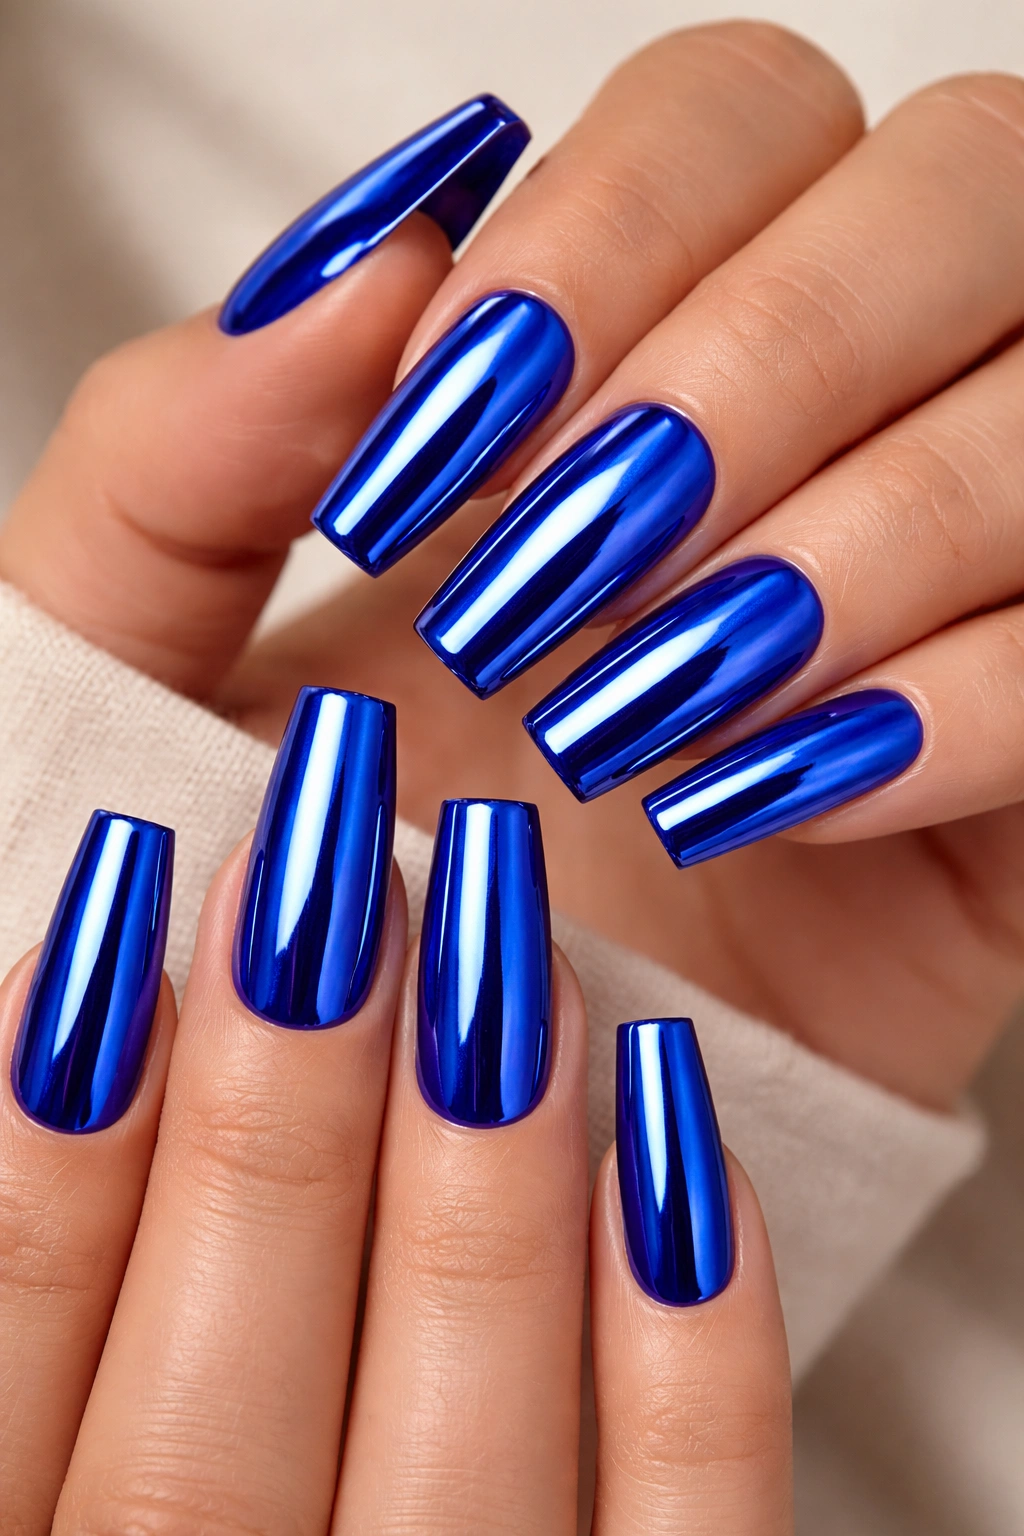
Cobalt chrome is loud, cold, and a little ruthless—in a good way. If you want a manicure that looks crisp from across the room, this is one of the strongest choices on the list.
What makes it work is the base underneath. Ask for a royal blue or black gel base before the chrome powder goes on. Blue over blue gives a brighter metallic finish. Blue over black looks moodier and deeper, almost like polished car paint under studio lights. Both can work; they just read differently.
Coffin nails help because chrome likes a flat plane. The reflective surface looks smoother on a squared tip than it often does on a rounded shape, where the shine can break up. Keep the nails filed evenly—one crooked sidewall ruins a mirror finish fast.
I like this look most on a full set with no accent nails at all. No crystals. No swirls. No tiny stars. Just blue chrome and a sharp shape. That restraint makes the color feel more expensive.
4. Lime Green Nails with Tiny White Daisies

Why does lime green work so well with simple daisy art? Because the base color is already carrying the energy, so the flowers only need to soften it.
A juicy lime shade can turn muddy if the undertone leans olive, so ask for a yellow-leaning neon green instead. It looks fresher on the nail and gives the white petals more contrast. On coffin nails, I like the daisies clustered near one corner or scattered on two accent nails rather than stamped across all ten.
Where to Place the Flowers
Put one daisy near the cuticle on one nail, then another near the tip on the next. That staggered placement keeps the set from looking like printed wallpaper. Tiny yellow centers help, though they should stay small—about the width of a dotting tool head, not a chunky blob.
A glossy top coat makes the green look slick and juicy. Matte turns it chalkier, which can be cool if that’s what you want, but the white flowers lose a little crispness. This design leans playful, and coffin shape stops it from drifting too cute.
5. Lavender and Lemon Color-Block Panels

I once saw this done with hard-edged diagonal panels across a medium coffin set, and it sold me on yellow polish again. Lavender and pale lemon sound soft on paper, yet the clean blocks make them look sharper than you’d expect.
The key is contrast through placement, not darkness. Put lavender on the lower half of one nail, lemon on the upper half, then reverse it on the next nail. That alternating pattern gives the set rhythm without making every nail identical.
A few details matter:
- Ask for opaque pastel gels, not sheer shades that need four coats.
- Keep each dividing line straight or slightly diagonal, about halfway across the nail.
- Add a thin silver striping line on one or two nails if you want more definition.
- Stay with gloss, because matte can make pastel blocking look flat.
This one suits people who like color but don’t want neon. It’s cheerful, clean, and a little unexpected—especially on a coffin shape, where pastels can look more graphic than sweet.
6. Turquoise Marble with White Veining
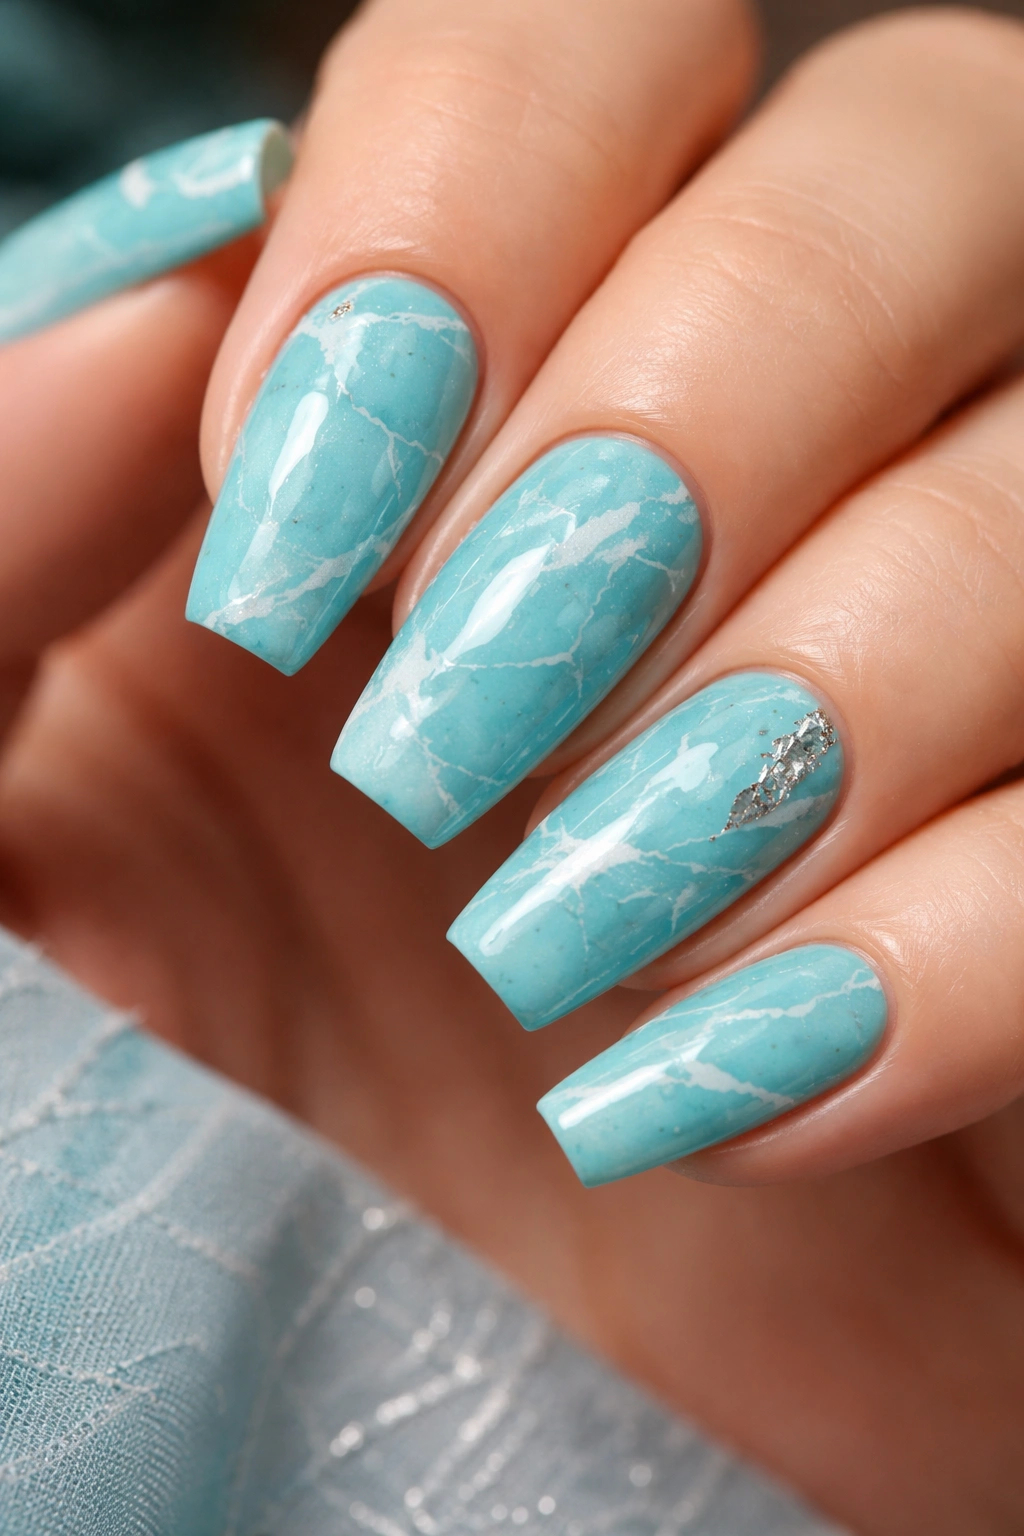
Turquoise marble nails can go wrong fast. Too much white, and they look cloudy. Too much black, and the stone effect starts reading muddy. The version I like uses bright turquoise as the main field, then adds thin white veins with a detail brush and a little blooming gel so the lines feather at the edges.
Coffin nails give marble room to breathe. On a shorter square set, those veins can look cramped. Here, you can let one thick swirl cross the center, then trail off with finer lines toward the tip. A touch of silver foil on one or two nails helps mimic the look of polished stone, though more than that gets busy.
There’s a texture choice here. Full gloss makes the set look like polished gemstone. A velvet matte top coat makes it read more like carved stone. Both are good. I lean gloss because turquoise already has that water-and-light quality that deserves some shine.
If you wear silver jewelry often, this manicure tends to click right into the rest of your look.
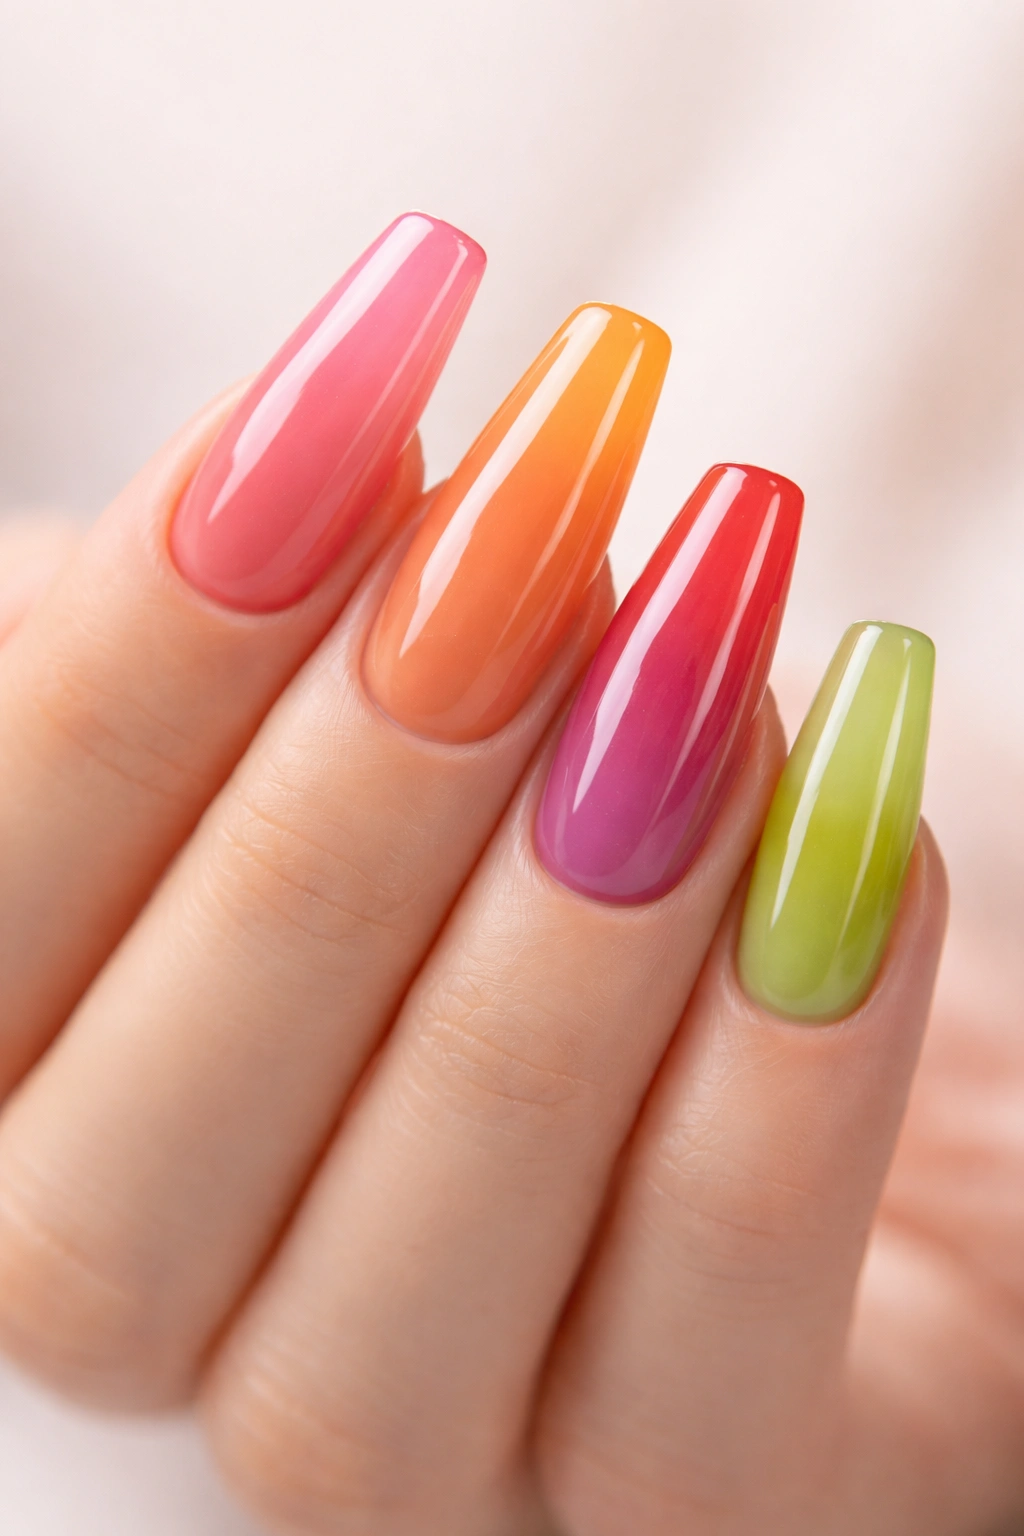
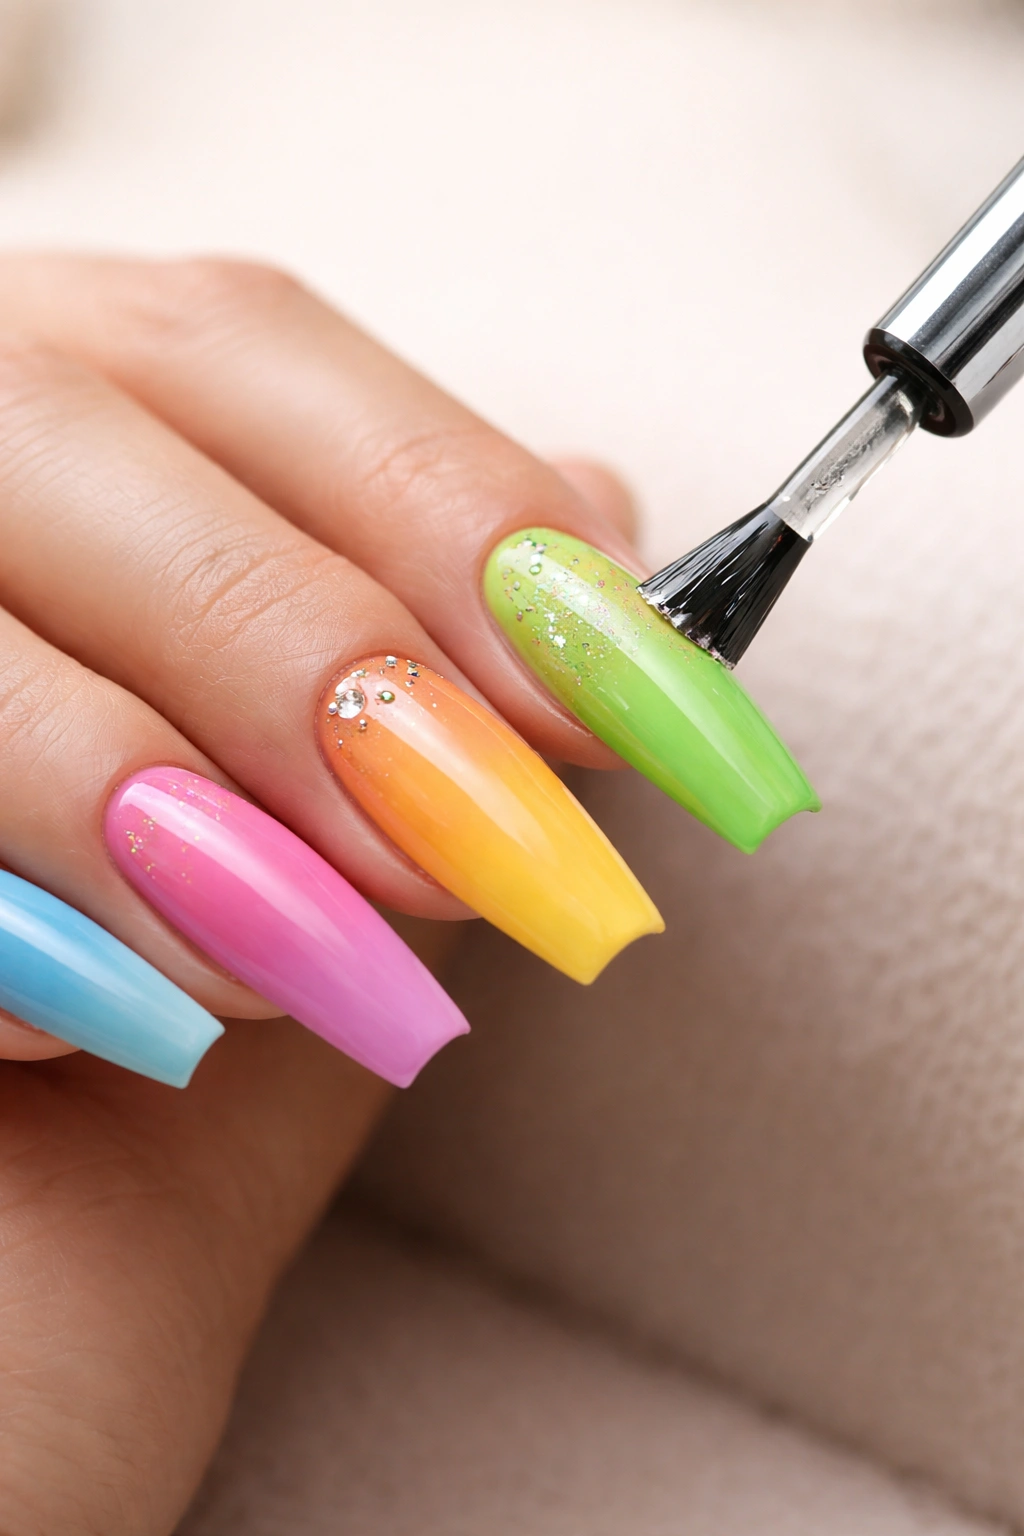
7. Neon Skittle Nails with a Different Shade on Each Finger
A skittle set sounds easy. Paint every nail a different color and move on. But the good versions are more controlled than that. Color order matters—a lot.
How to Keep It From Looking Random
The cleanest skittle manicures use a planned gradient across the hand. Try yellow, tangerine, coral, pink, and violet from thumb to pinky, or go cooler with lime, teal, cobalt, lilac, and fuchsia. When adjacent shades have some relationship, the set looks chosen rather than grabbed out of a drawer.
Good Shade Families for Coffin Nails
- Warm neons for vacation energy
- Sorbet tones for a lighter, softer finish
- Full jewel shades if you want richer color without neon brightness
- One hand warm, one hand cool if you like contrast
This is one of the best colorful coffin nail ideas for indecisive people because you don’t have to commit to one shade. I’d keep the finish the same across all ten nails, though. Mixed matte and gloss can start to feel messy unless the rest of the design is stripped back.
8. Cherry Red with Aqua Graphic Lines
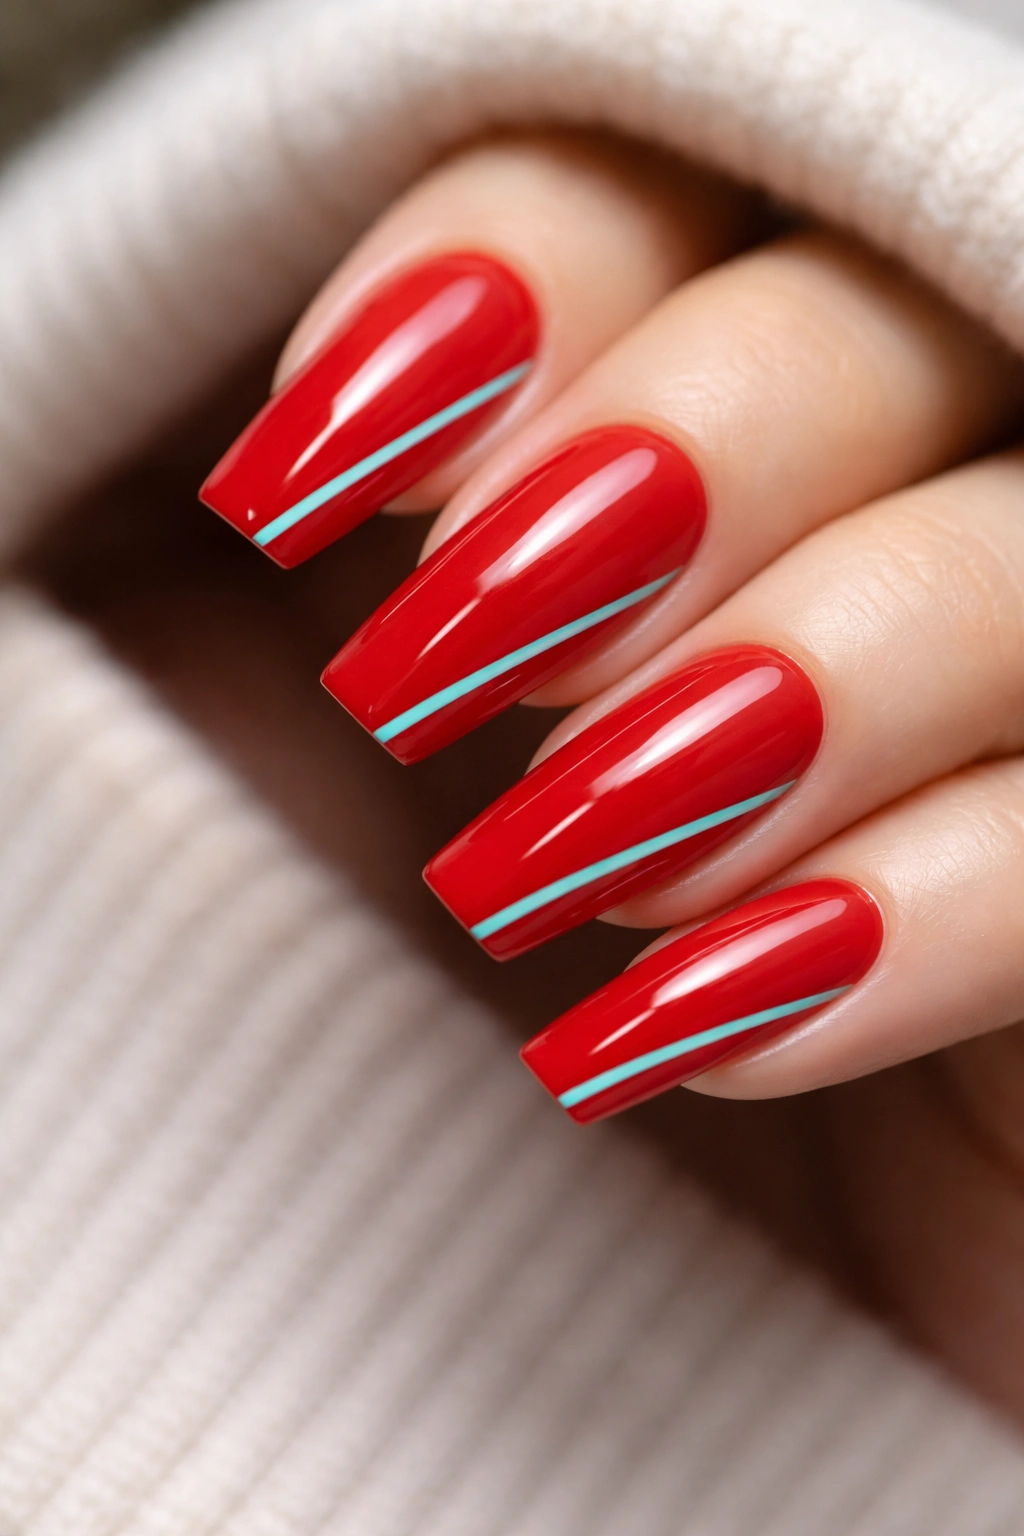
Unlike a classic red manicure, cherry red with aqua line work has edge. The red keeps the look grounded. The aqua cuts through it and adds tension, almost like vintage packaging art or a sharp little poster design.
You do not need much aqua. One curved line near the sidewall, a double stripe across the tip, or a negative-space wave down the center is enough. Coffin nails help because they support clean geometry; the longer side edges keep those lines looking purposeful instead of squeezed in.
This is a strong pick if you want color without going pastel or neon. Red has weight. Aqua lightens it without making it childish. I’d wear this with a glossy finish and a short-medium coffin length so the design stays sleek.
Ask your nail artist for ultra-thin striping lines, not thick ribbon-like waves. Thick aqua lines can overwhelm the red and make the manicure look more costume-like than sharp. Fine lines keep the balance where it should be.
9. Sunset Aura Nails with a Soft Glowing Center
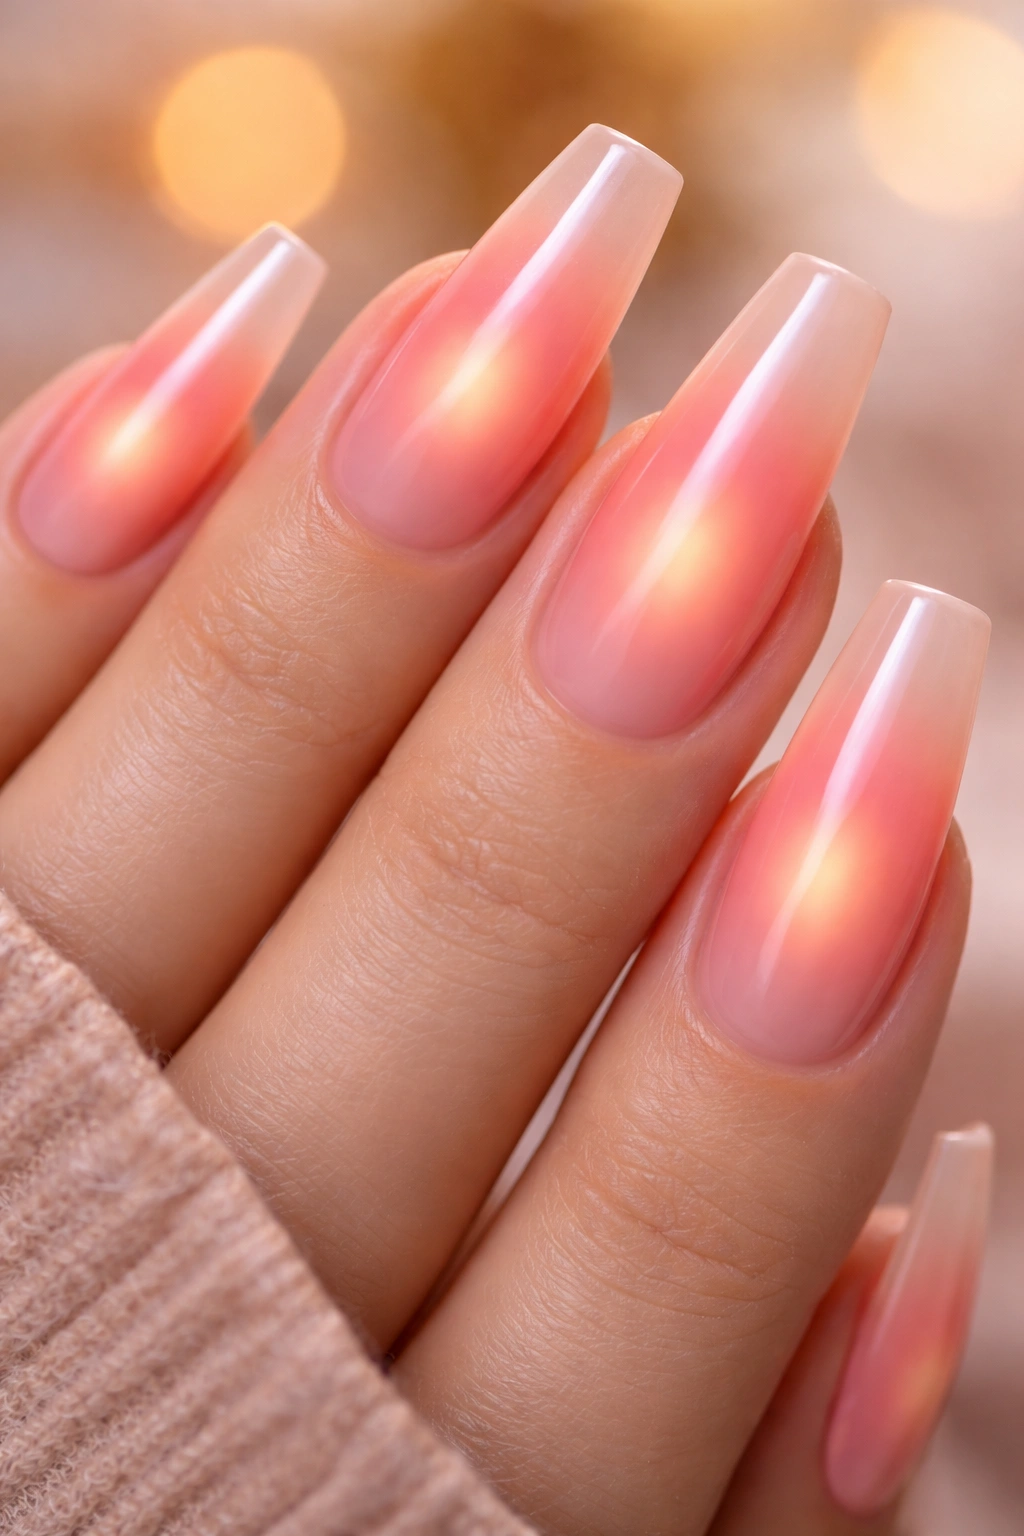
Aura nails were made for coffin tips. That soft cloud of color in the center of the nail has enough room to fade outward here, which is why the effect looks smoother on this shape than it often does on shorter nails.
For a sunset version, start with a sheer peach, pink, or nude base, then airbrush or sponge a warm coral, orange, or magenta halo into the center. The edges should stay softer and lighter. If the middle blob looks too sharp, ask for another diffused pass before top coat. Aura nails need blur.
This is one of the few colorful sets that can feel both soft and dramatic at the same time. A bright center on a long coffin nail pulls the eye inward, which makes the shape look even more elongated. A little chrome powder over the halo can work, though plain gloss usually lets the color glow more cleanly.
I’d avoid adding line art on top. Aura nails lose their charm when too many extra elements sit over the fade.
10. Pastel Checkerboard Tips
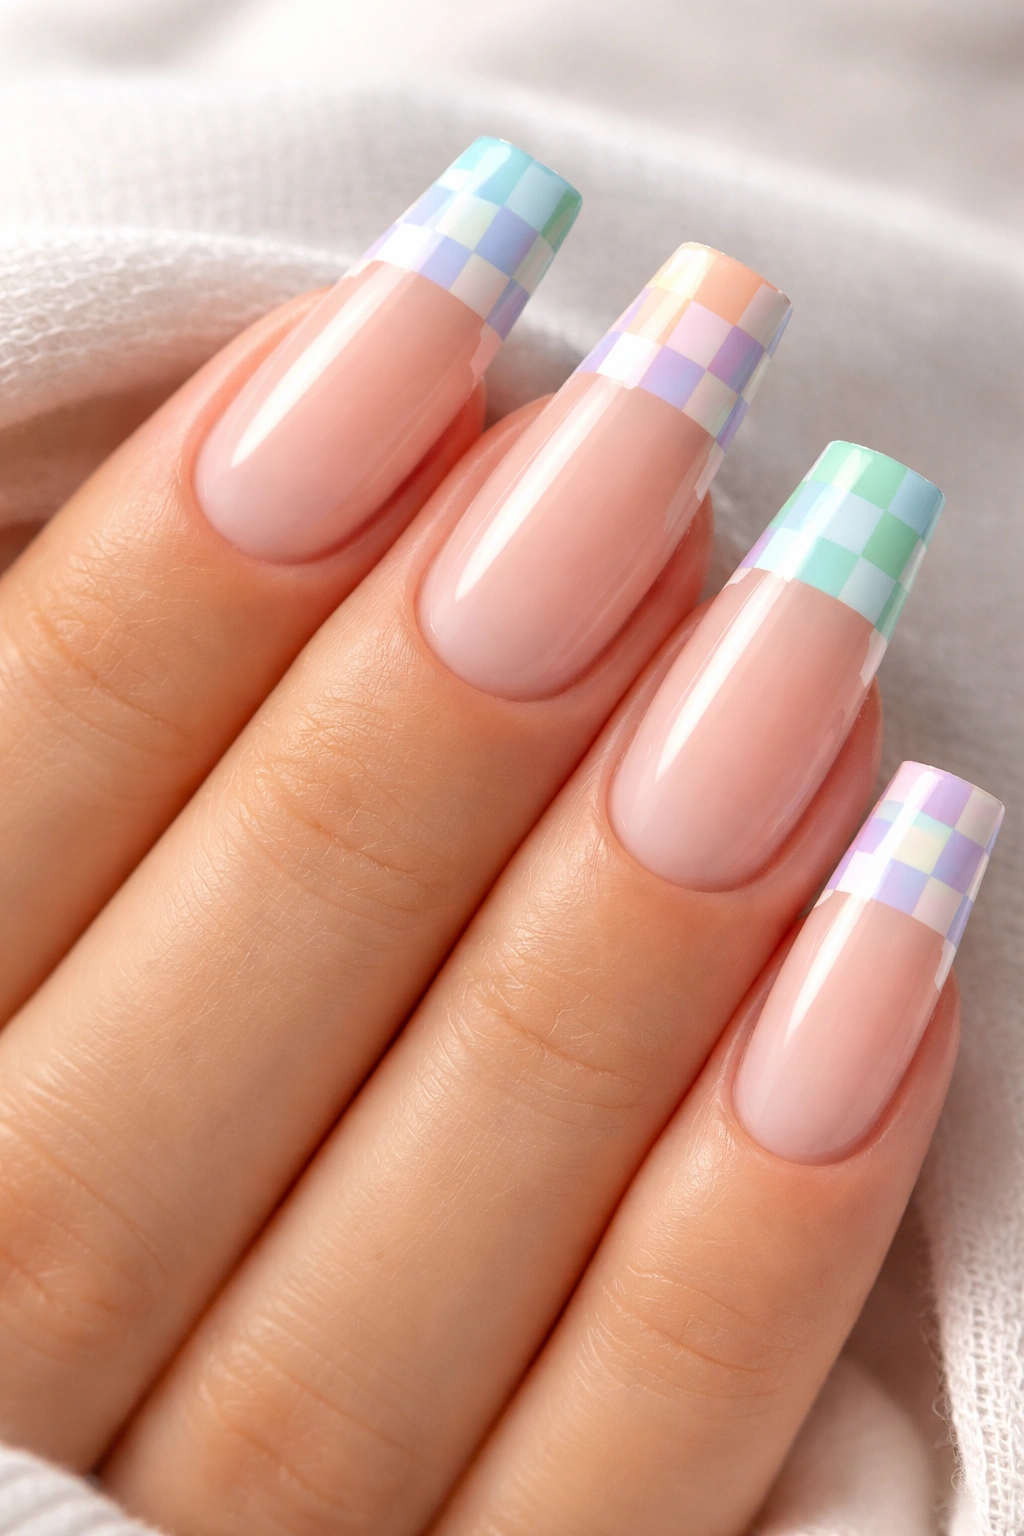
Checkerboard nails can drift costume-fast if the pattern takes over the full nail. On coffin shapes, I prefer checkerboard only at the tips, leaving the rest of the nail sheer or milky. That keeps the pattern playful without turning the whole set into a wall of squares.
A good color mix here is baby blue, soft lilac, pale peach, and mint. Using four shades instead of two makes the checker pattern look fresher, and the negative space below the design gives your eyes a place to rest.
Ask for these details:
- Keep each square small and even, around 2 to 3 millimeters if the nail length allows.
- Limit the pattern to the top third of the nail.
- Use a fine liner brush, not a dotting tool, for crisp corners.
- Seal with thicker top coat so the tiny color blocks feel smooth.
This is one of those manicure ideas that looks lighthearted from a distance and technical up close. Coffin nails give it the clean frame it needs.
11. Blacklight Neon Graffiti Nails
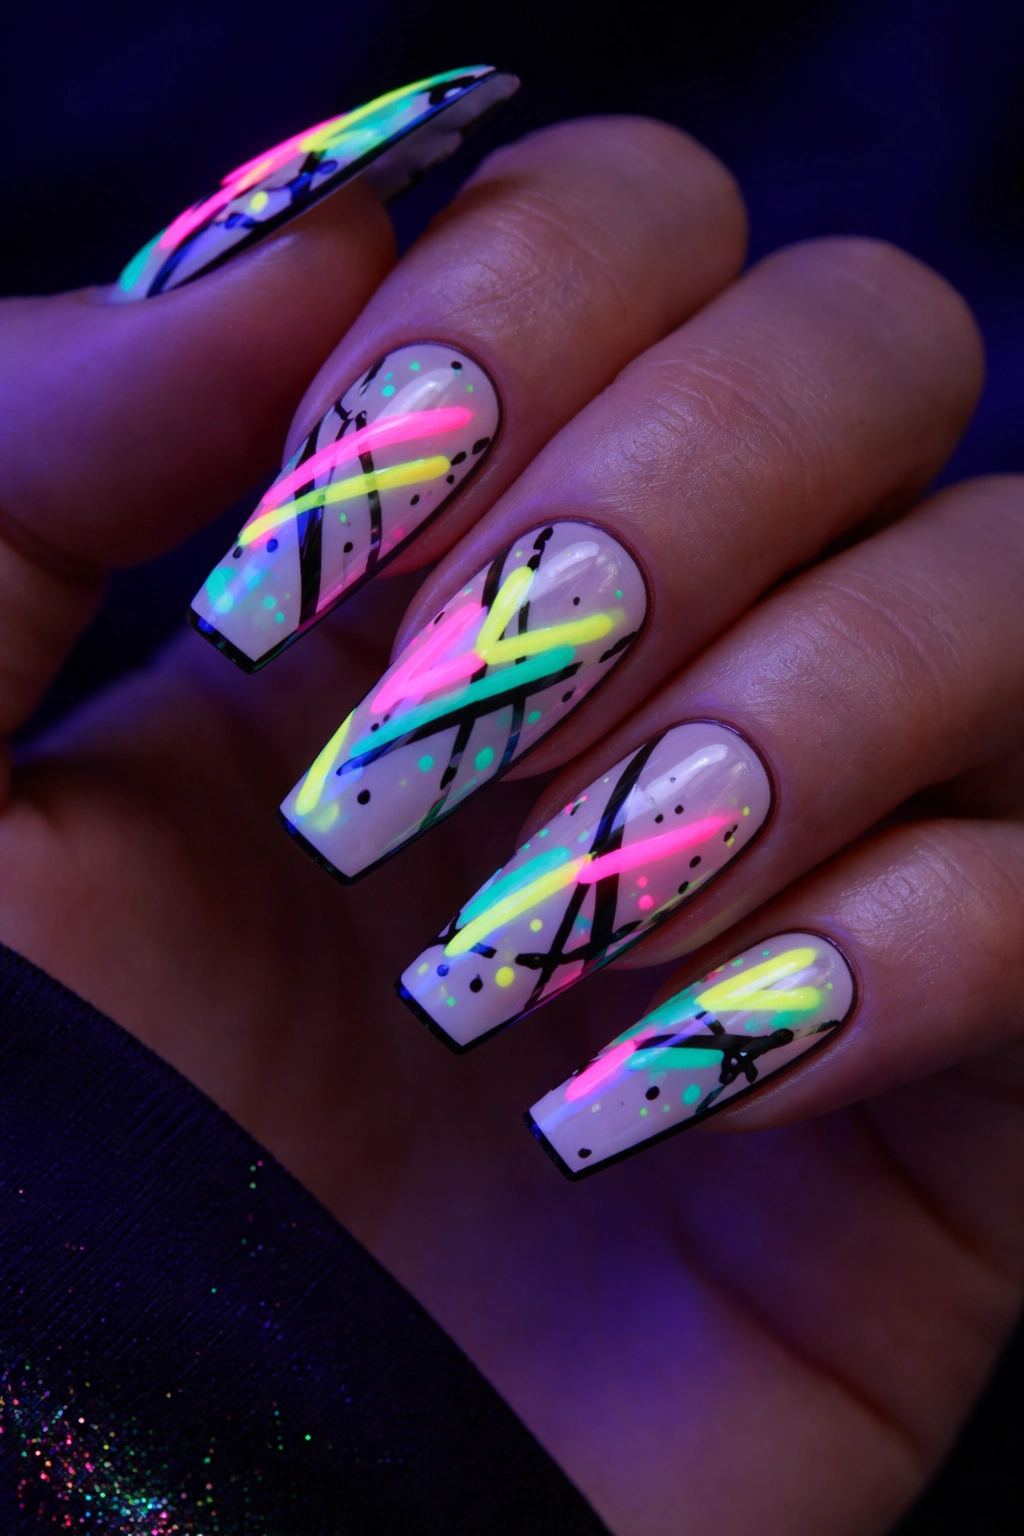
Some nail looks are meant to behave. This isn’t one of them.
A blacklight graffiti set usually starts with a white or pale nude base, then layers sharp neon scribbles, arrows, stars, paint streaks, or abstract marks across the surface. The trick is making it feel loose without turning it into clutter. That means choosing two or three neon shades, not six, and repeating those shades across the whole set.
Coffin shape helps because the tip feels architectural, almost like a little canvas panel. Sharp sidewalls make even messy-looking line work feel more controlled. I’d use neon yellow, electric pink, and acid green, then add a touch of black outlining on only a few nails so the design has some anchor.
Gloss is the way to go here. Matte can mute the neon. If your salon carries UV-reactive gel, even better—the colors pop harder under club lighting and still read bright in daylight. This is a manicure with attitude, and it knows it.
12. Mixed Jelly Candy Nails
What’s the difference between a bright solid manicure and a jelly set? Light passes through jelly color. That one change gives the whole look a softer, almost candy-like finish.
On coffin nails, mixed jelly shades look best when the colors stay in the same family: watermelon pink, orange soda, cherry red, grape, or lime. Transparent polish in ten unrelated shades can look chaotic. A tighter palette reads cleaner, even when the colors are loud.
Pick the Right Transparency
You want enough tint to see the color at a glance, but not so much that it starts acting like a standard cream polish. Two thin coats usually do it. Add a glossy top coat and the nails look like hard candy. Add tiny decals or foil underneath, and the jelly effect starts to show depth through the color.
This style is fun on natural-looking medium coffin nails because it doesn’t need heavy art to make an impact. The finish is the whole point. If you like color but hate a busy surface, jelly nails are a smart middle ground.
13. Coral Nails with Gold Foil Flecks
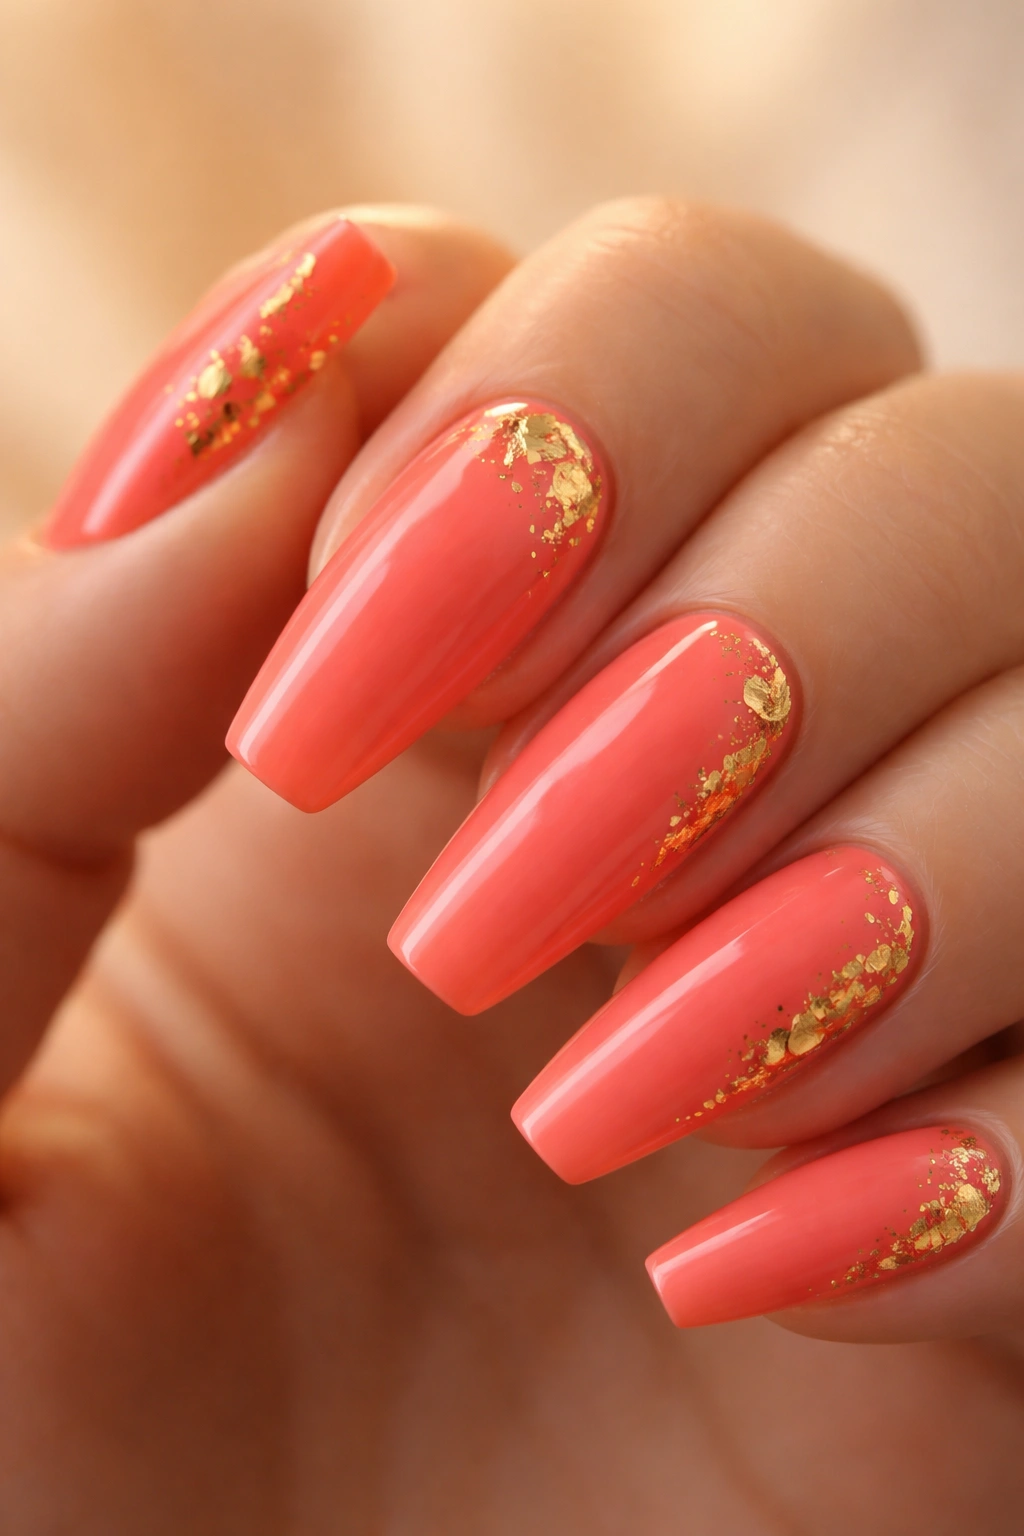
Coral already has warmth built in, which is why gold foil sits so naturally against it. The pairing feels sunny and rich without needing extra detail.
Where the Foil Should Go
Scatter the foil near the cuticle on one nail, down one side on another, then across the tip on a third. Random placement is good. Uniform placement can look stamped on. The foil pieces should stay small too—think torn flakes, not big metallic chunks.
A Few Practical Notes
- Use a true coral, not a dusty salmon, if you want stronger contrast.
- Keep foil to three or four nails so the set still feels clean.
- Press foil flat before top coat or the surface will snag.
- Choose warm gold, not pale champagne, if your coral leans orange.
I like this look for people who want color with a little shine but don’t love full chrome. It has enough flash to catch the eye when your hand moves, yet the base color still does most of the talking.
14. Mint and Lilac Swirl Nails
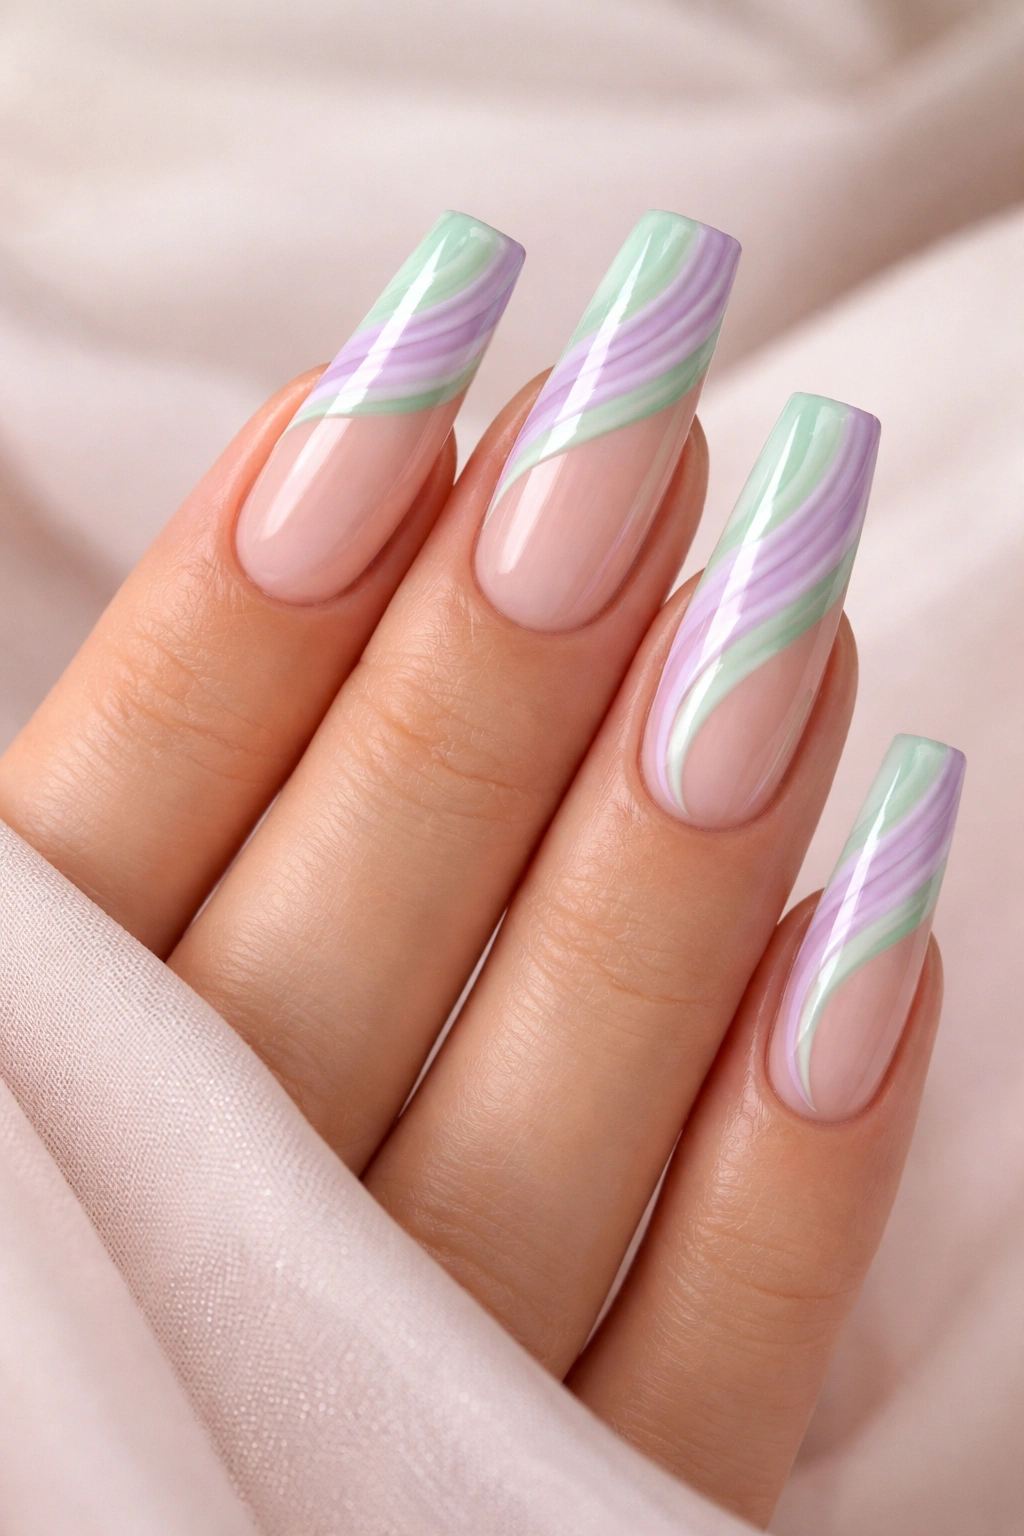
Mint and lilac can look flat if they’re painted as simple solids side by side. Swirl them together, though, and they wake up. On a coffin nail, those curved lines have space to sweep from cuticle to tip without bunching up in the middle.
The nicest version uses a sheer pink or milky base, then layers mint and lilac in loose ribbon shapes across each nail. Some lines can overlap. Some can fade out. One nail might lean mint-heavy while the next leans lilac. That variation keeps the set from feeling copied and pasted ten times.
A glossy finish gives the swirls a smooth, syrupy look. Matte makes the design more graphic and a little drier-looking. I’d stay with gloss unless you want the pattern to feel more retro.
There’s a softness to this manicure, but the coffin shape stops it from getting sleepy. That contrast is what makes it land.
15. Primary-Color Pop Art Outlines
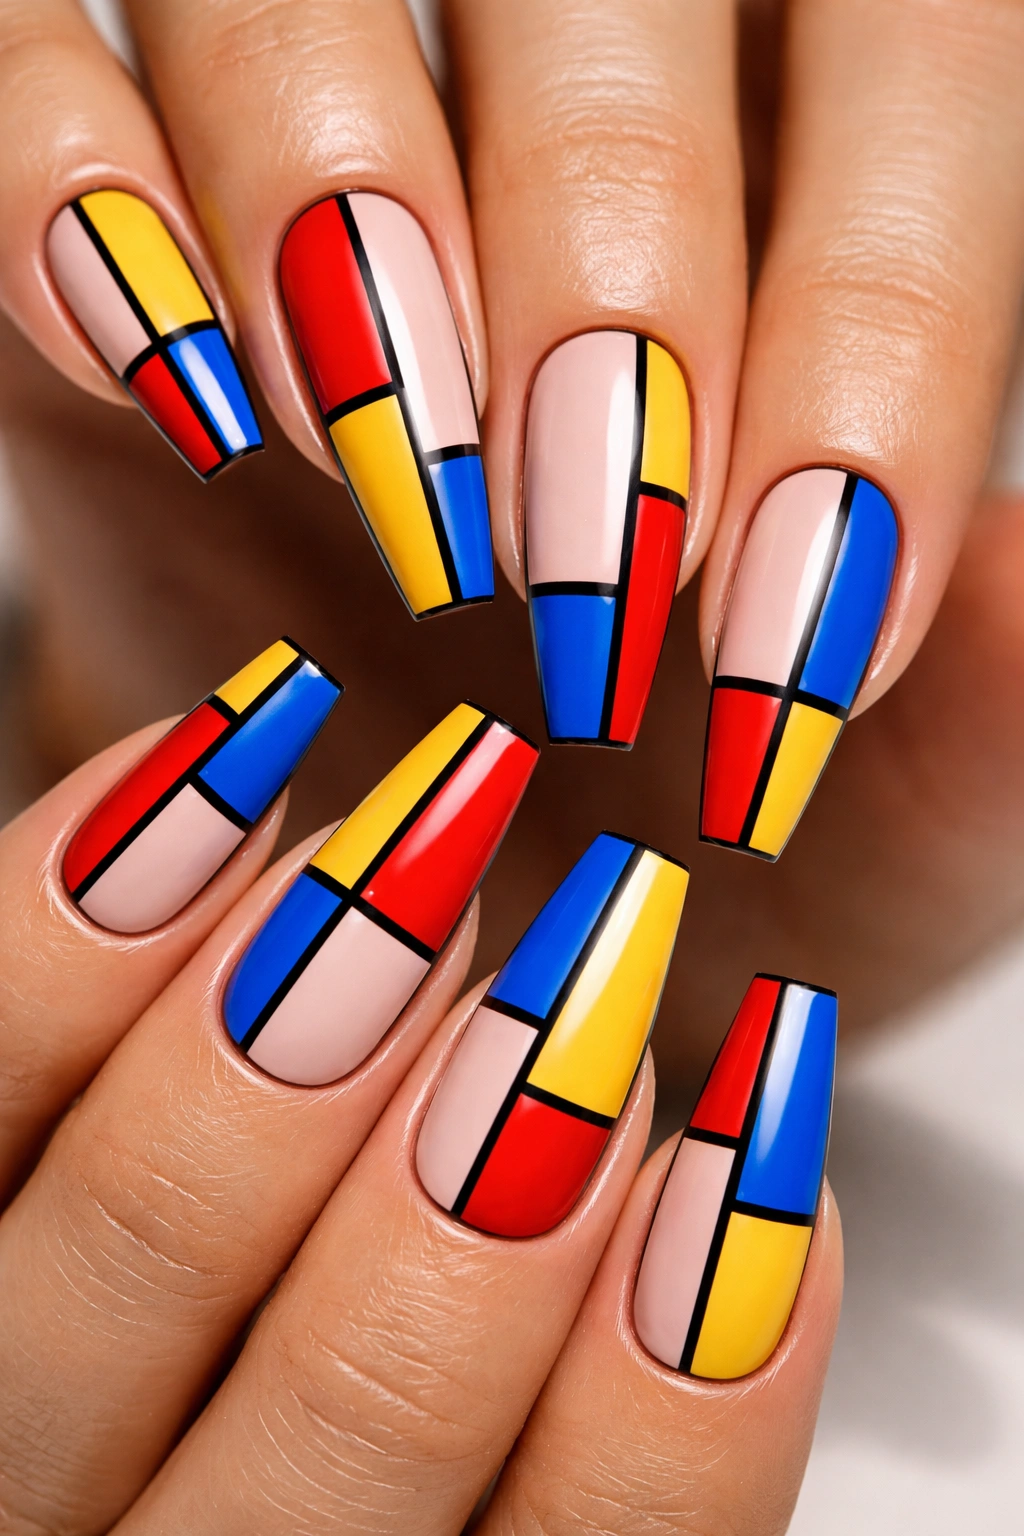
This one is for anyone who likes their manicure crisp, cheeky, and a little comic-book. Primary-color pop art nails use red, yellow, and blue in hard-edged blocks or outlines, often over a white or nude base, with a thin black line to sharpen the shapes.
The best part is that you can control how bold it gets. A full pop-art set covers most of the nail. A cleaner version uses outlined color panels near the tip or sidewall and leaves the rest neutral.
A few smart ways to wear it:
- White base with red, yellow, and blue corner blocks
- Nude base with thin black outlines and one bright half-moon on each nail
- One accent nail in full pop art, nine nails in single-color French tips
- Matte finish if you want a printed-poster feel
This design likes precision. Crooked lines show fast. Ask for sharp edges and enough contrast between each color block so nothing blends together. Coffin nails, with their straight tip and long sides, are almost unfairly good for this style.
16. Berry Tie-Dye Wash
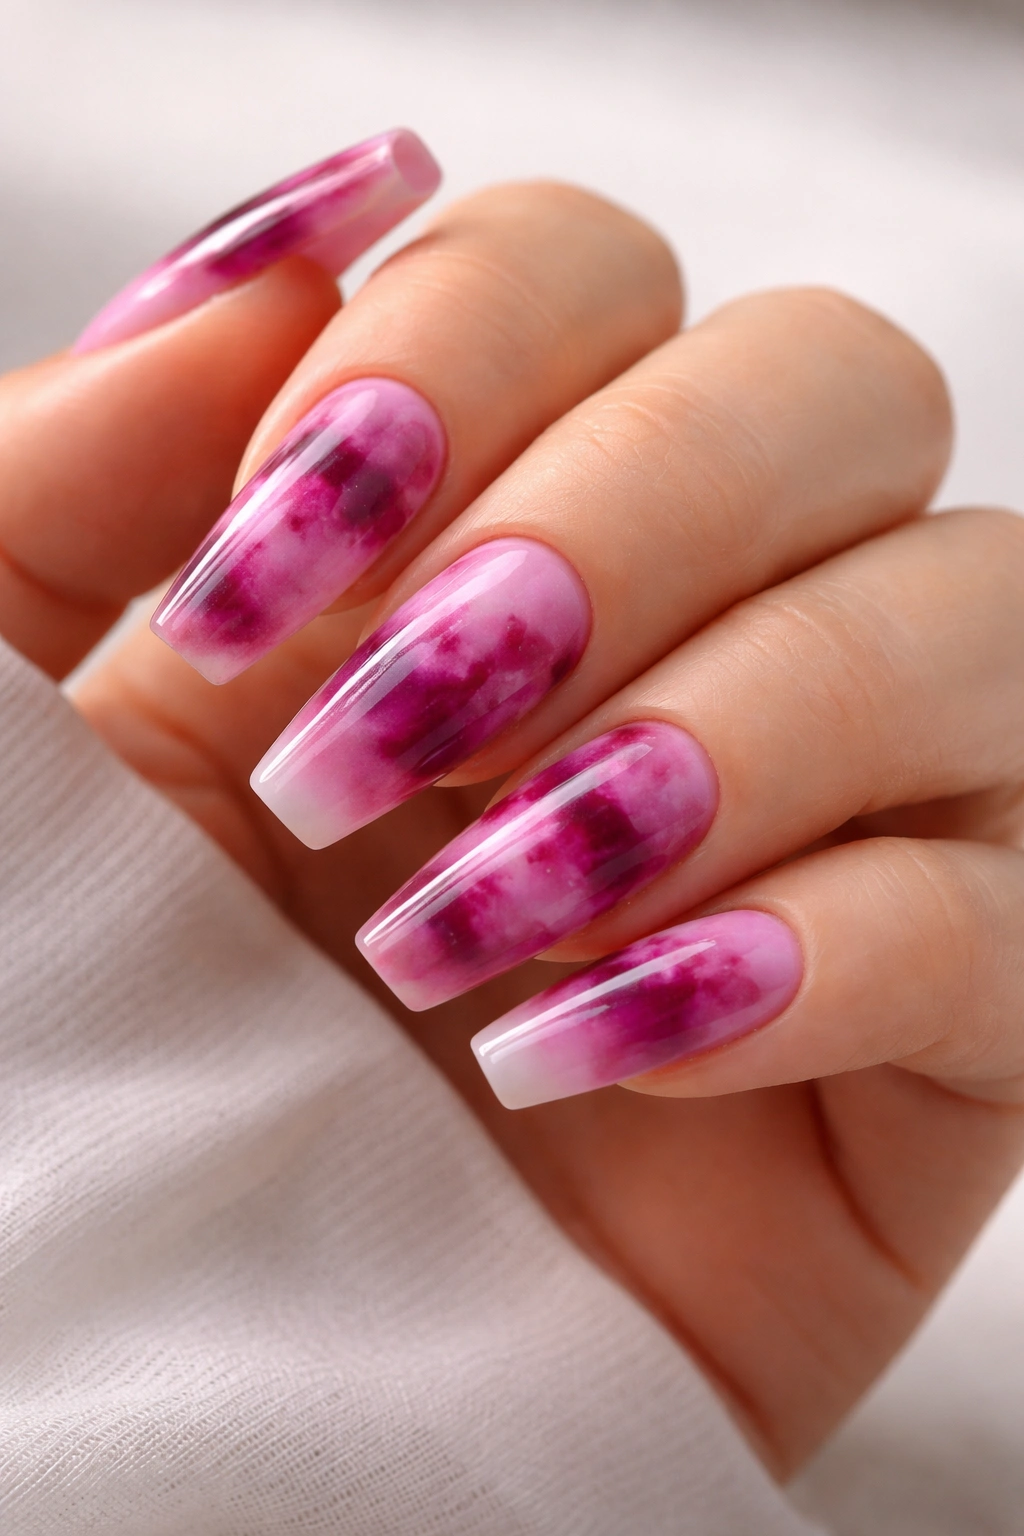
Tie-dye on nails can go tacky in a heartbeat. The fix is color choice. Skip rainbow. Go with berry tones—raspberry, plum, magenta, grape—and the whole look gets moodier and more wearable.
A blooming gel base helps here. Drop the colors in while the layer is still mobile, then let them spread into each other before curing. You’re not looking for perfect circles. You want soft irregular pools with a little feathering at the edges, like watercolor that wandered across paper.
Coffin nails give those blooms room to expand. On a tiny nail plate, tie-dye can look cramped and muddy. Here, each patch of color can breathe. A touch of white in the mix helps brighten the berry palette and stops the deeper shades from collapsing into one dark blur.
I’d keep the finish glossy and skip rhinestones. Tie-dye already has movement. Extra texture usually muddies the idea.
17. Emerald Cat-Eye with a Rainbow Flash
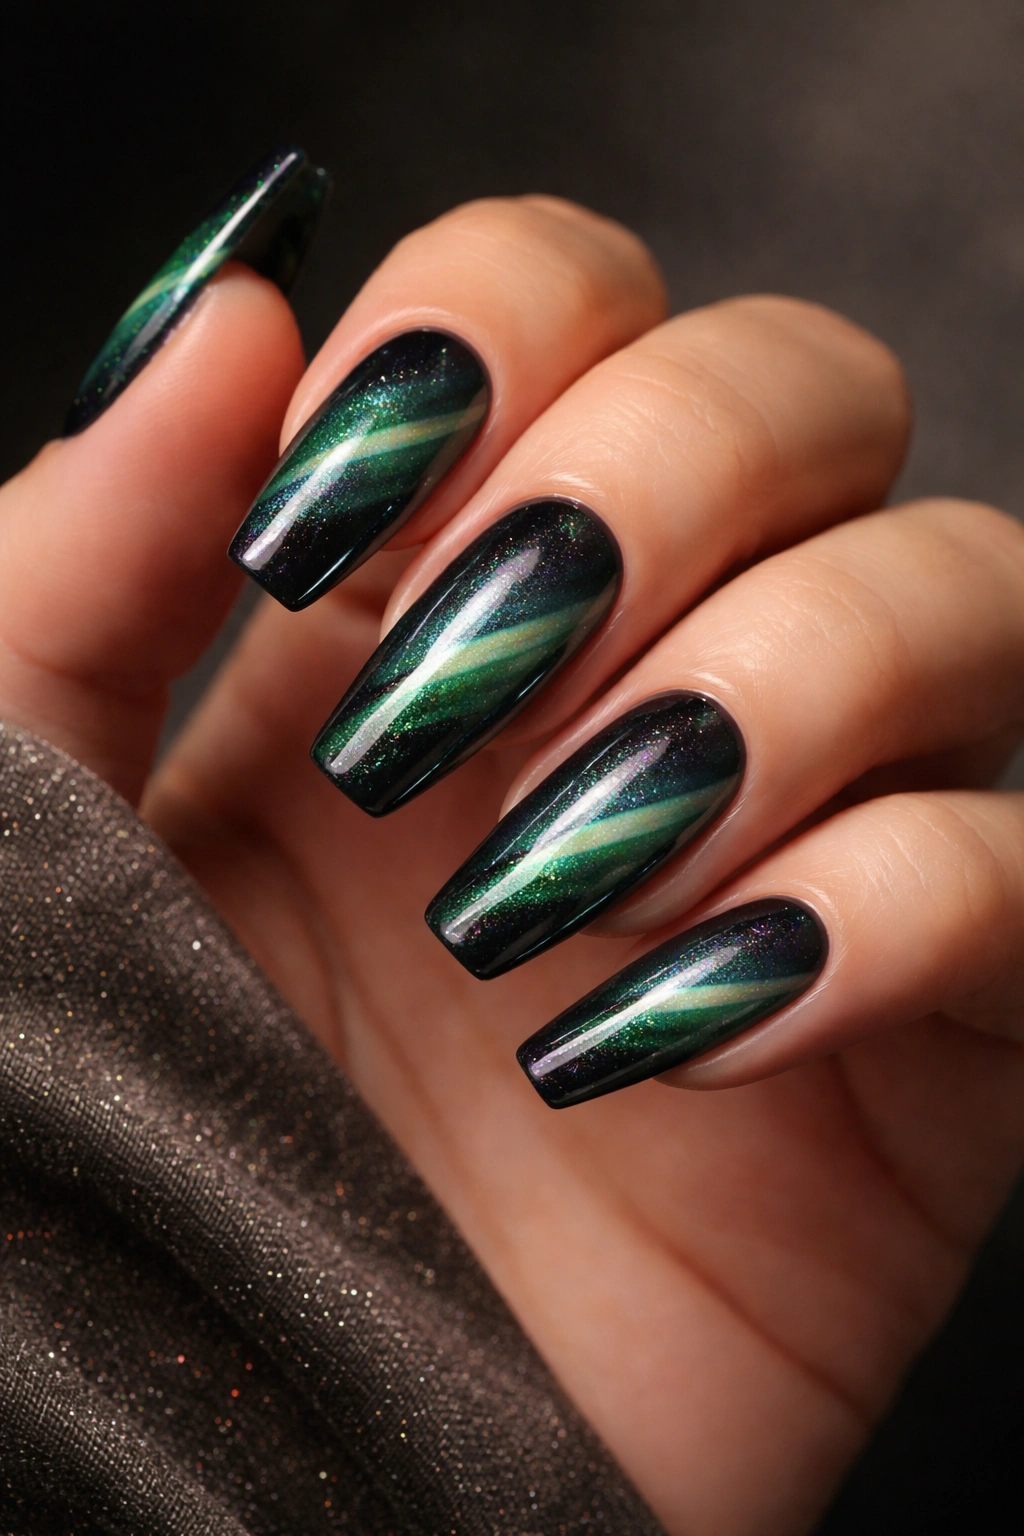
If chrome feels too hard and glitter feels too obvious, cat-eye gel is a smart middle lane. Emerald is my favorite base for it because green has enough depth to hold the magnetic shimmer, and when the light hits from an angle you get that shifting ribbon of color that almost looks wet.
Coffin nails suit cat-eye polish better than short rounded shapes because the magnetic line has farther to travel. You can pull the shimmer diagonally, straight down the middle, or into a soft velvet effect with the magnet. Each one changes the mood.
This look works best for people who want color with some mystery. It doesn’t shout like neon orange. It moves when your hands move, which makes it more interesting at close range than in a static photo. A little rainbow flash top coat over emerald can add extra color shift, though I’d keep it subtle. Too much shimmer on top of cat-eye turns the finish murky.
Dark green plus sharp coffin shape is hard to beat.
18. Peach-to-Fuchsia Watercolor Clouds
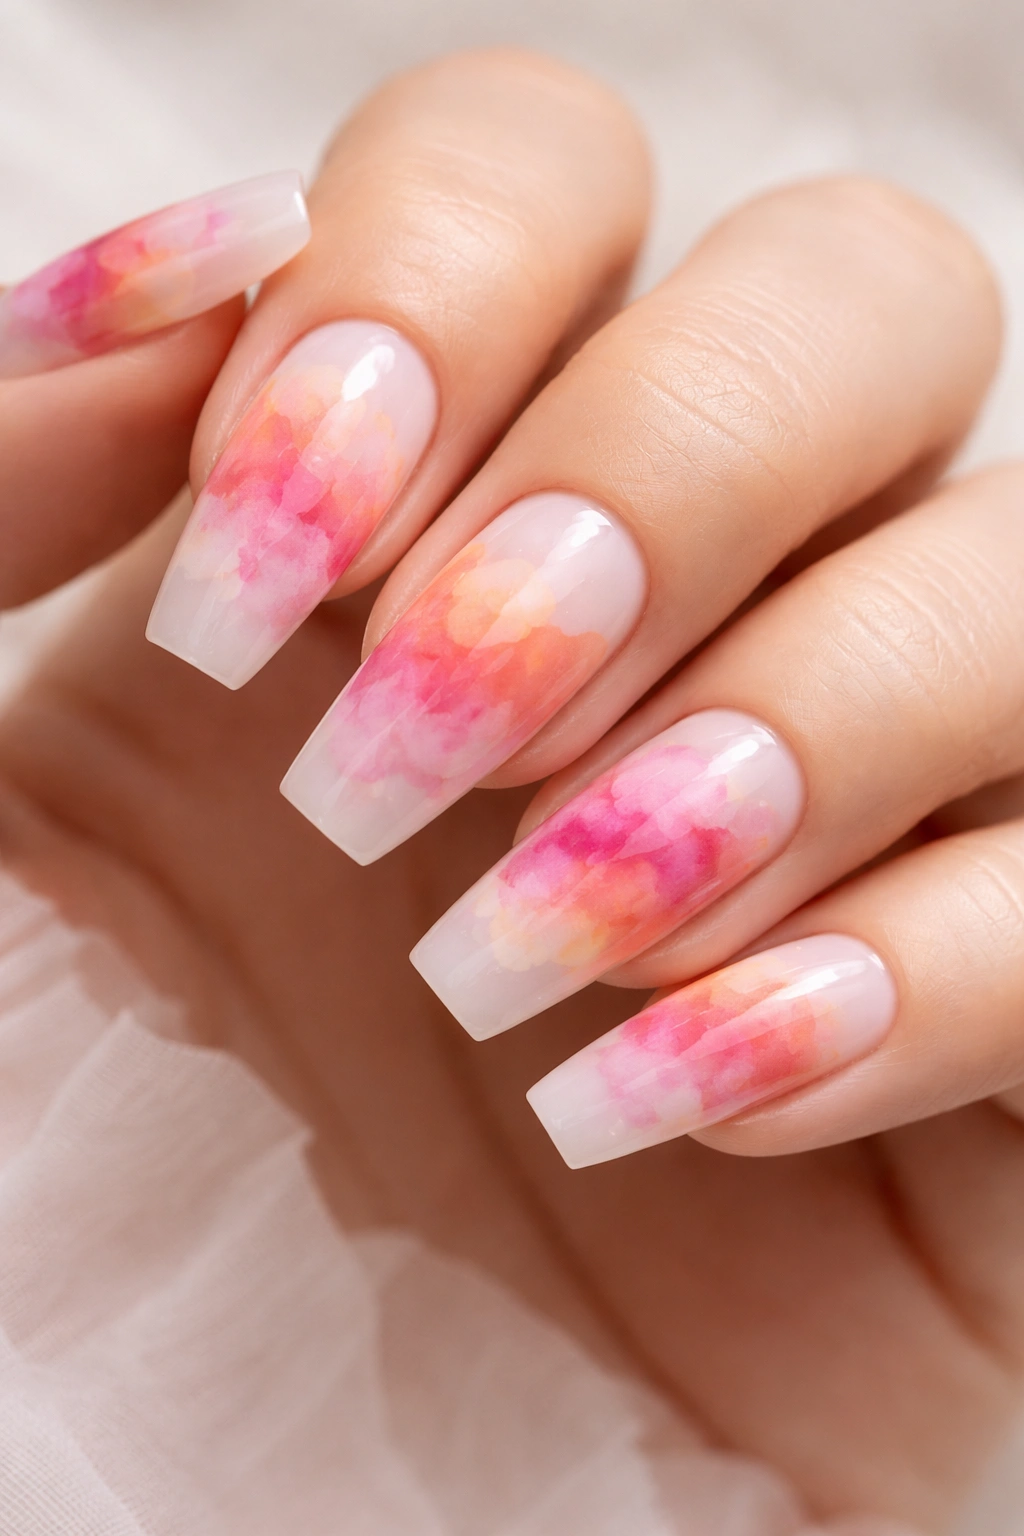
Picture a milky base with soft patches of peach, rose, and fuchsia drifting across the nail like diluted ink. That’s the appeal of watercolor cloud nails. The colors look airy, but the coffin shape gives them enough edge that the design still feels polished.
How to Get the Soft Edges Right
Use sheer gel colors or blooming gel and keep the brush damp with cleanser so the pigment diffuses instead of sitting in blunt blobs. The edges should blur out. If every color patch has a hard border, the look turns spotted rather than washed.
I like this manicure on medium-length coffin nails where the color can spread across the center and float toward the tip. Tiny gold dots near one or two cuticles can work as a finishing touch, though you don’t need them. The whole idea here is softness with shape.
When this design is done well, it feels painterly without being messy. That line is thin. Good application is what holds it.
19. Teal Nails with Silver Abstract Flames
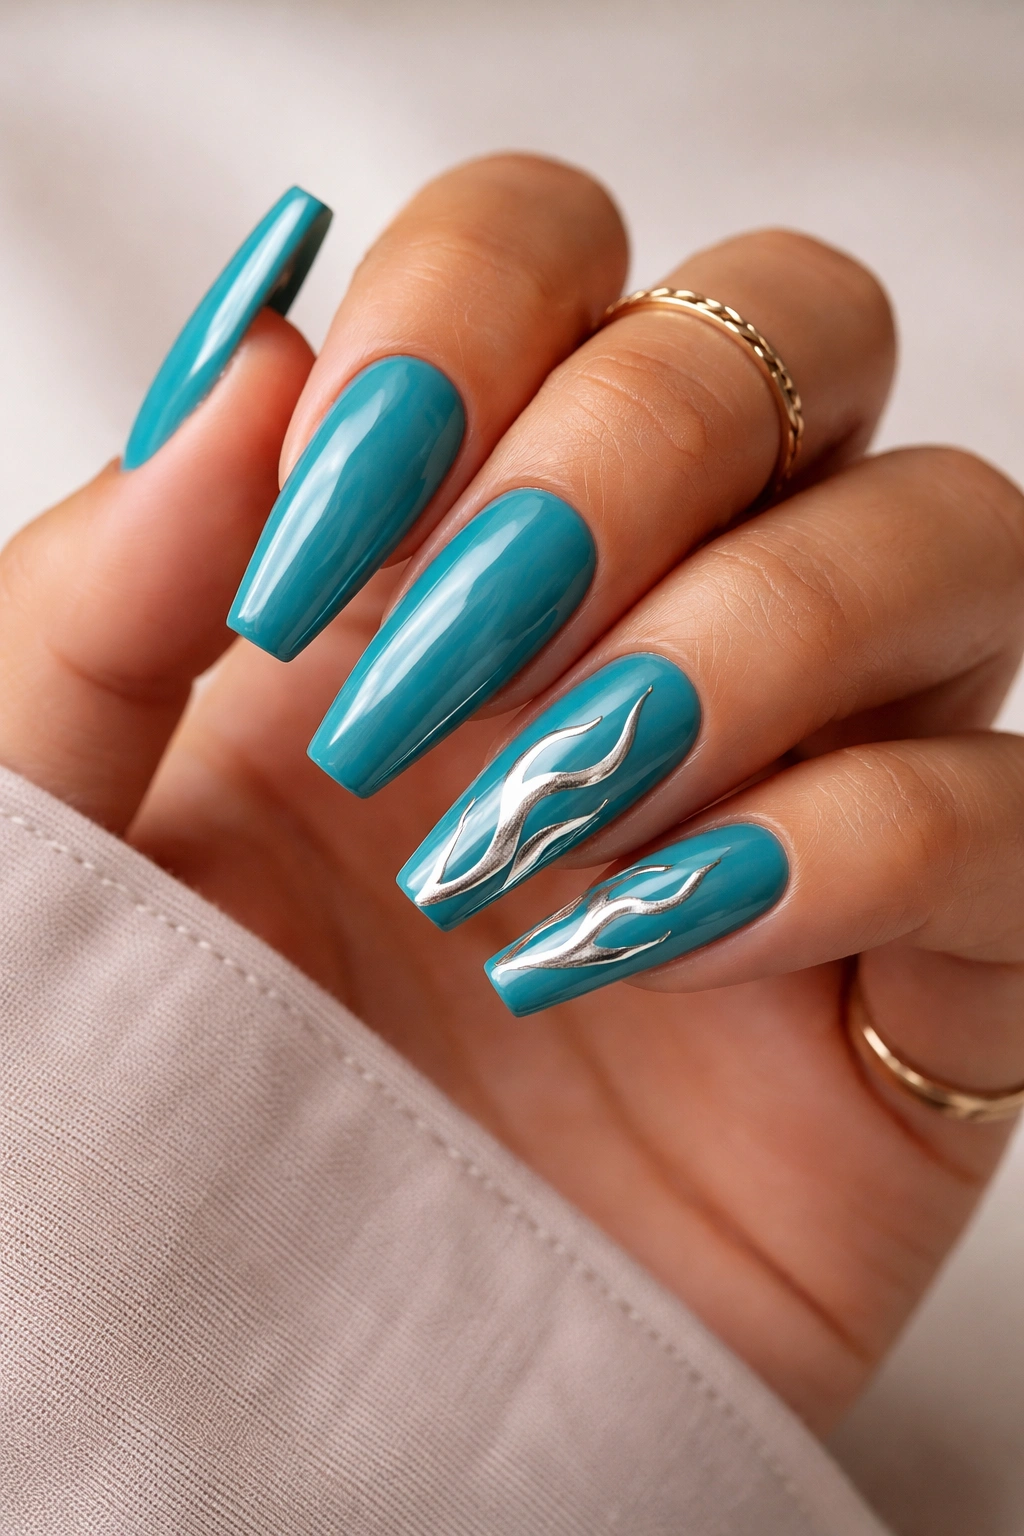
Silver flame art over teal has a cool, sharp energy that feels fresher than the usual red-and-black flame combo. The teal base gives you color depth. The silver lines add motion.
Keep the flames abstract. They should taper, bend, and split, not look like cartoon fire stickers. On coffin nails, start one flame low near the sidewall, pull another up from the tip, and let a third trail diagonally across the center on an accent nail. That staggered placement makes the set feel alive.
A metallic silver liner polish gives the cleanest flame edge, though chrome powder over painted flames can work if you want more reflectiveness. I’d use teal on all ten nails and limit the flames to four or five fingers. Full flames on every nail can get heavy fast.
This is one of the stronger picks if you like bold color but still want the set to read sleek rather than sweet. It has movement, contrast, and enough attitude to stand on its own.
20. Multicolor Glazed Pearl Nails
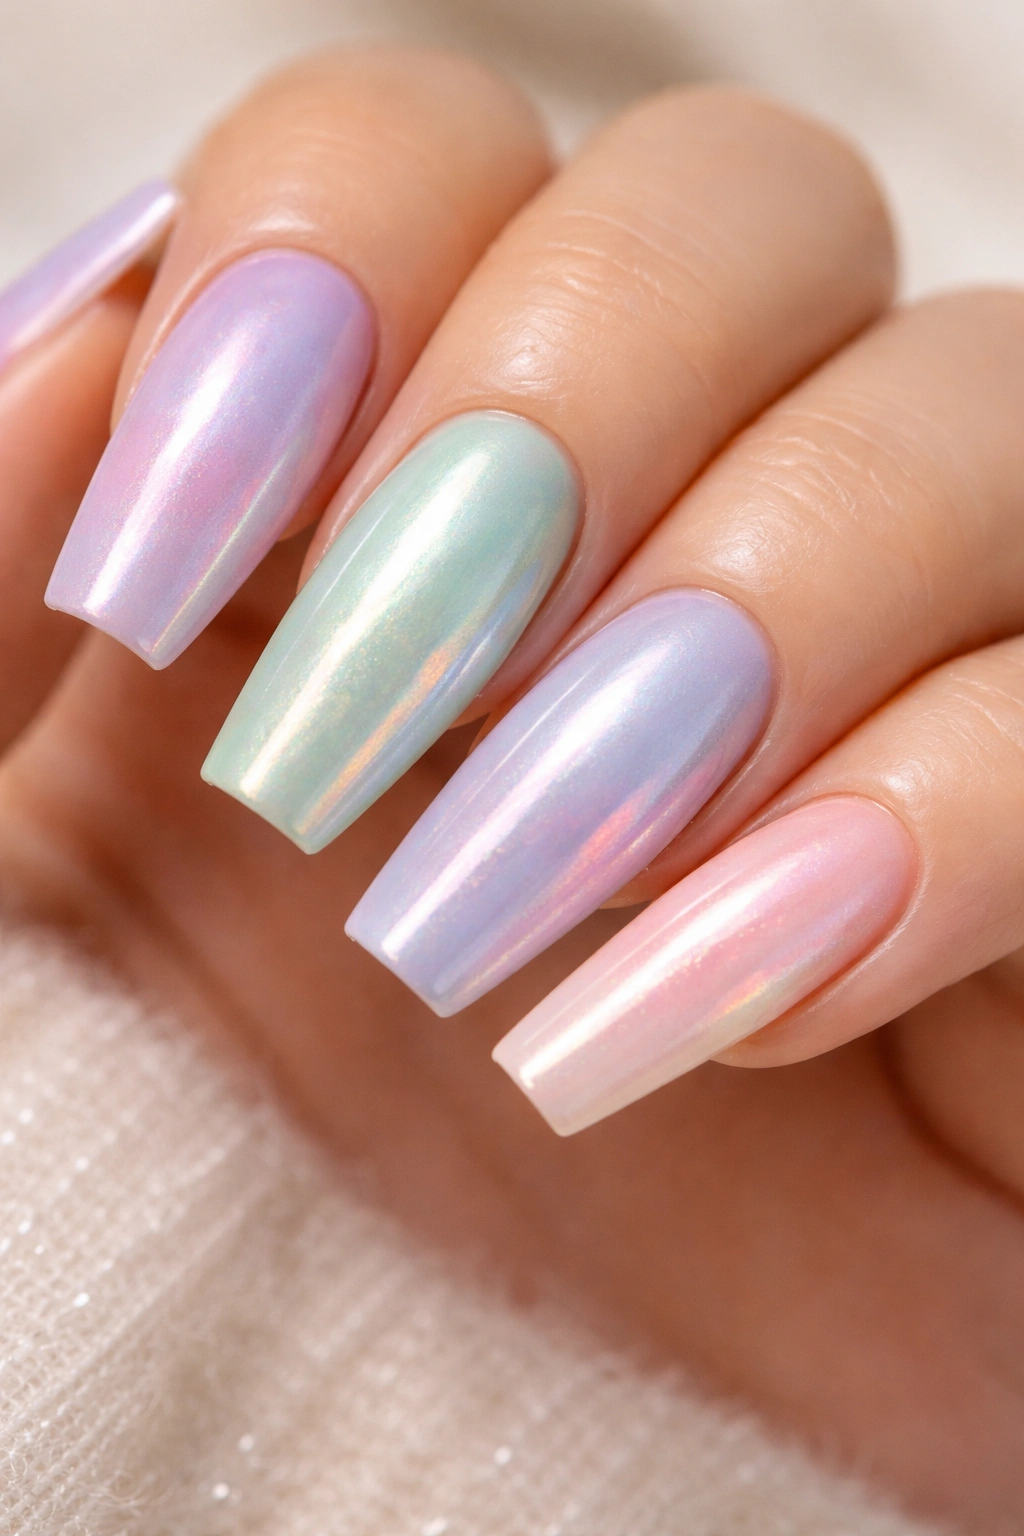
Glazed pearl nails don’t have to be pale beige. A multicolor glazed set—think lilac, mint, baby blue, pink, and soft peach under a pearly chrome veil—gives you color with a smoother, almost shell-like finish.
What makes this one different from regular chrome is the softness. The base shades stay visible, but the pearl powder blurs them into each other a little. On coffin nails, that haze looks elegant because the shape is already crisp. You get contrast between structure and finish.
How to Ask for This at the Salon
Start with creamy pastel shades, one color per nail or alternating across the hands. Then ask for a fine pearl powder, not a mirror chrome. The end result should glow, not reflect like metal. A milky top coat can soften it even more if you want a cloudier finish.
This is a good choice if you want colorful coffin nails that still feel polished enough for everyday wear. The color is there. It just arrives in a quieter way than neon, marble, or graphic line work.
Making Colorful Coffin Nails Last Longer Between Appointments
Bright polish shows chips faster. That’s the bad news. Coffin shape also puts more pressure on the corners of the tip, which means maintenance matters more with this shape than with short round nails.
Prep starts the whole thing. If you’re doing polish at home, push back the cuticles, remove shine from the nail plate with a 180-grit file, wipe with alcohol, then use a dehydrator or primer if your system needs one. Oily nail beds are rough on bright shades, especially neons and chromes.
A few habits make a bigger difference than people think:
- Cap the free edge with base coat, color, and top coat
- Wear gloves for dishwashing and long cleaning sessions
- Add cuticle oil once or twice a day so the manicure doesn’t dry out and lift at the edges
- File tiny snags early before they turn into cracks
- If you wear regular polish, refresh with one thin layer of top coat every 2 to 3 days
Gel lasts longer, but even gel coffin nails need respect. Don’t use them to pry open cans, scrape stickers, or dig in your bag for keys. I know. Everyone does it once.
If your shape starts to widen after a week or two, a quick sidewall file can sharpen it back up. That one small fix helps colorful coffin nails keep their clean look much longer.
Final Pick
If you want the safest entry point, go with rainbow French tips, sunset aura nails, or a planned skittle set. They give you color without demanding too much from the rest of your look. If you want more edge, cobalt chrome, teal flames, and pop art outlines have more bite.
I’d save two ideas before your appointment, not twelve. One design usually wins once you picture it on your own hand shape, your jewelry, your day-to-day clothes, the length you can actually live with. That last part matters more than people admit.
Coffin nails already bring structure. Color is where the fun starts.
