

Coffin nails have become the gold standard for anyone who wants to make a bold statement with their manicure. Their elongated shape and tapered edges create an instantly glamorous, edgy look that flatters longer nail beds beautifully. Hot pink is one of the most striking choices you can make — it’s confident, eye-catching, and somehow manages to work for everything from casual weekends to special occasions. The combination of hot pink polish on coffin-shaped nails gives off an undeniable aura of polish and attitude.
The beauty of hot pink coffin nails is their incredible versatility. A single base color can be transformed into dozens of completely different designs depending on the finishes, accents, and complementary elements you pair with it. Whether you’re drawn to minimalist elegance, sparkly glamour, artistic nail art, or bold color blocking, hot pink coffin nails offer endless creative possibilities. The shade itself is forgiving too — it looks stunning on virtually every skin tone, from fair to deep complexions, which is part of why it remains such a perennial favorite.
Long coffin nails give you a much larger canvas than shorter nail shapes, making them the perfect foundation for intricate designs and eye-catching details. You’ll have room for glitter gradients that actually stand out, enough space for geometric patterns that feel intentional rather than cramped, and the structural support needed to keep embellishments secure and stunning. If you’ve been looking for fresh hot pink coffin nail inspiration that goes beyond basic solid color, you’re in exactly the right place.
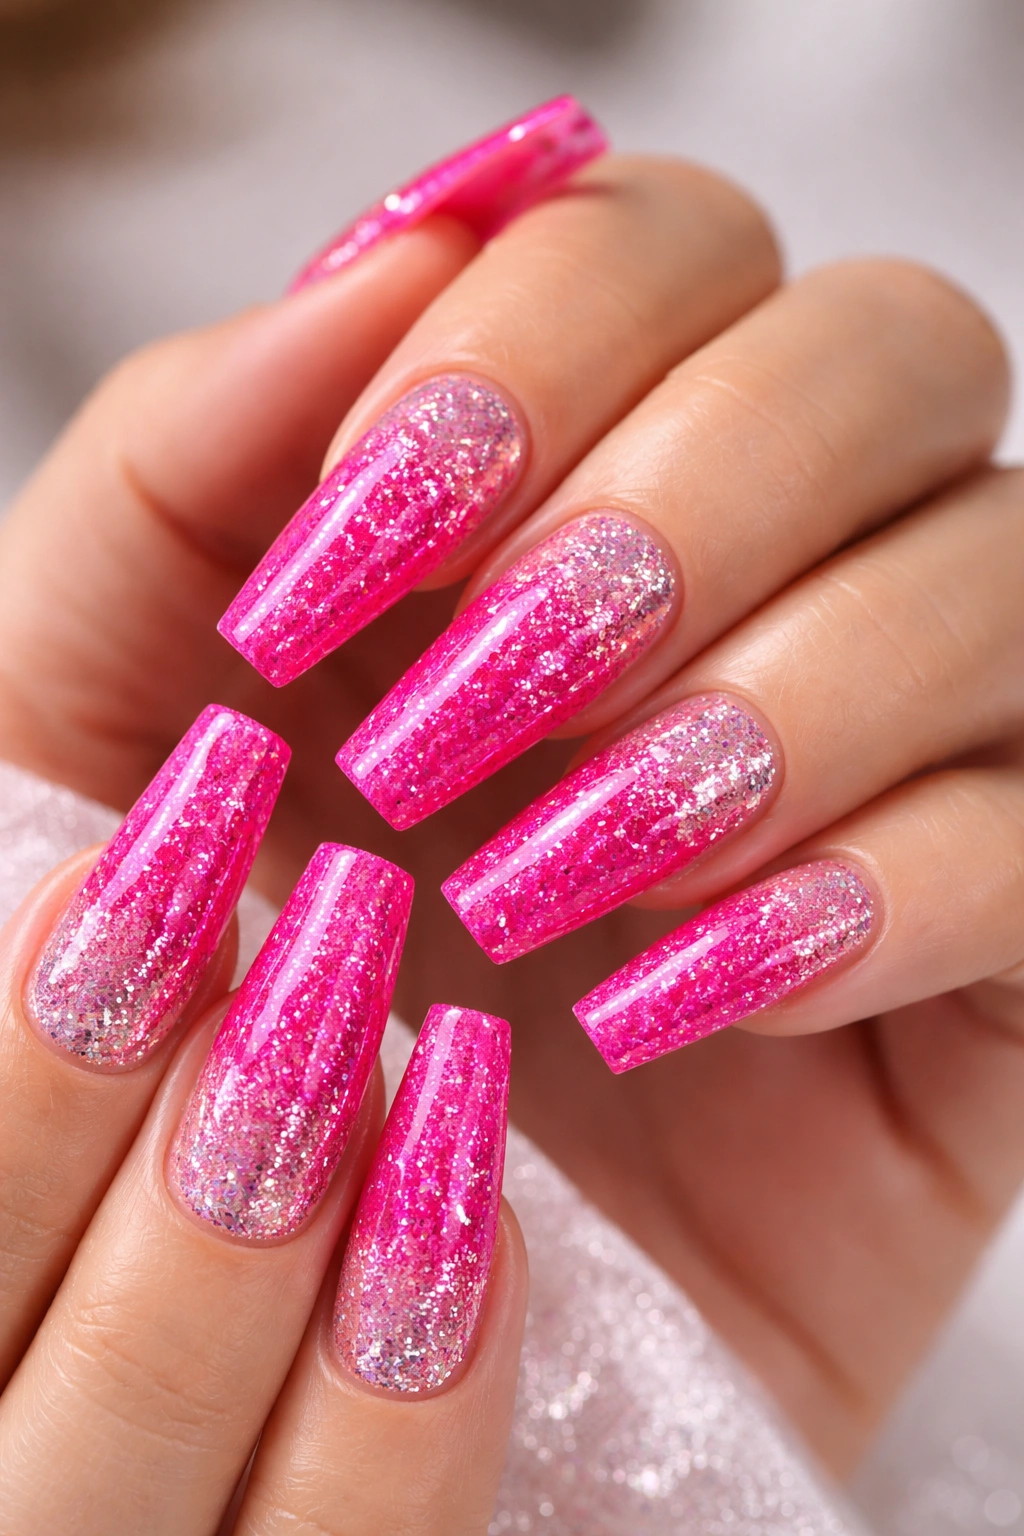
1. Hot Pink Glitter Gradient Fade
A glitter gradient creates one of the most dimensionally interesting hot pink coffin nail designs you can achieve with relatively simple techniques. This style uses a dense hot pink base, then gradually layers increasingly fine glitter from the tips moving toward the cuticle, creating a fade effect that catches light beautifully from every angle.
Why This Design Works for Long Nails
The gradient approach is particularly flattering on elongated coffin shapes because it draws the eye down the length of the nail, emphasizing the dramatic line and point. The glitter concentration at the tips creates a natural focal point that makes the length feel intentional and glamorous rather than accidentally overgrown.
How to Create and Maintain This Look
- Apply a bright hot pink cream polish as your base coat in two thin layers for smooth coverage
- Use a makeup sponge to stipple increasingly coarse glitter onto the top third of the nail, concentrating density near the free edge
- Add a layer of medium glitter to the middle section, covering about half the sponge’s surface with product before stippling
- Use the finest glitter dust on the upper third, creating a subtle shimmer that transitions to the base color
- Seal everything with a thick layer of glossy top coat, which both secures the glitter and smooths the texture differences
This design photographs exceptionally well under flash photography and in natural sunlight. The gradient’s visual depth makes your nails look longer and more artistic than they actually are.
2. Hot Pink Marble with Metallic Gold Veining
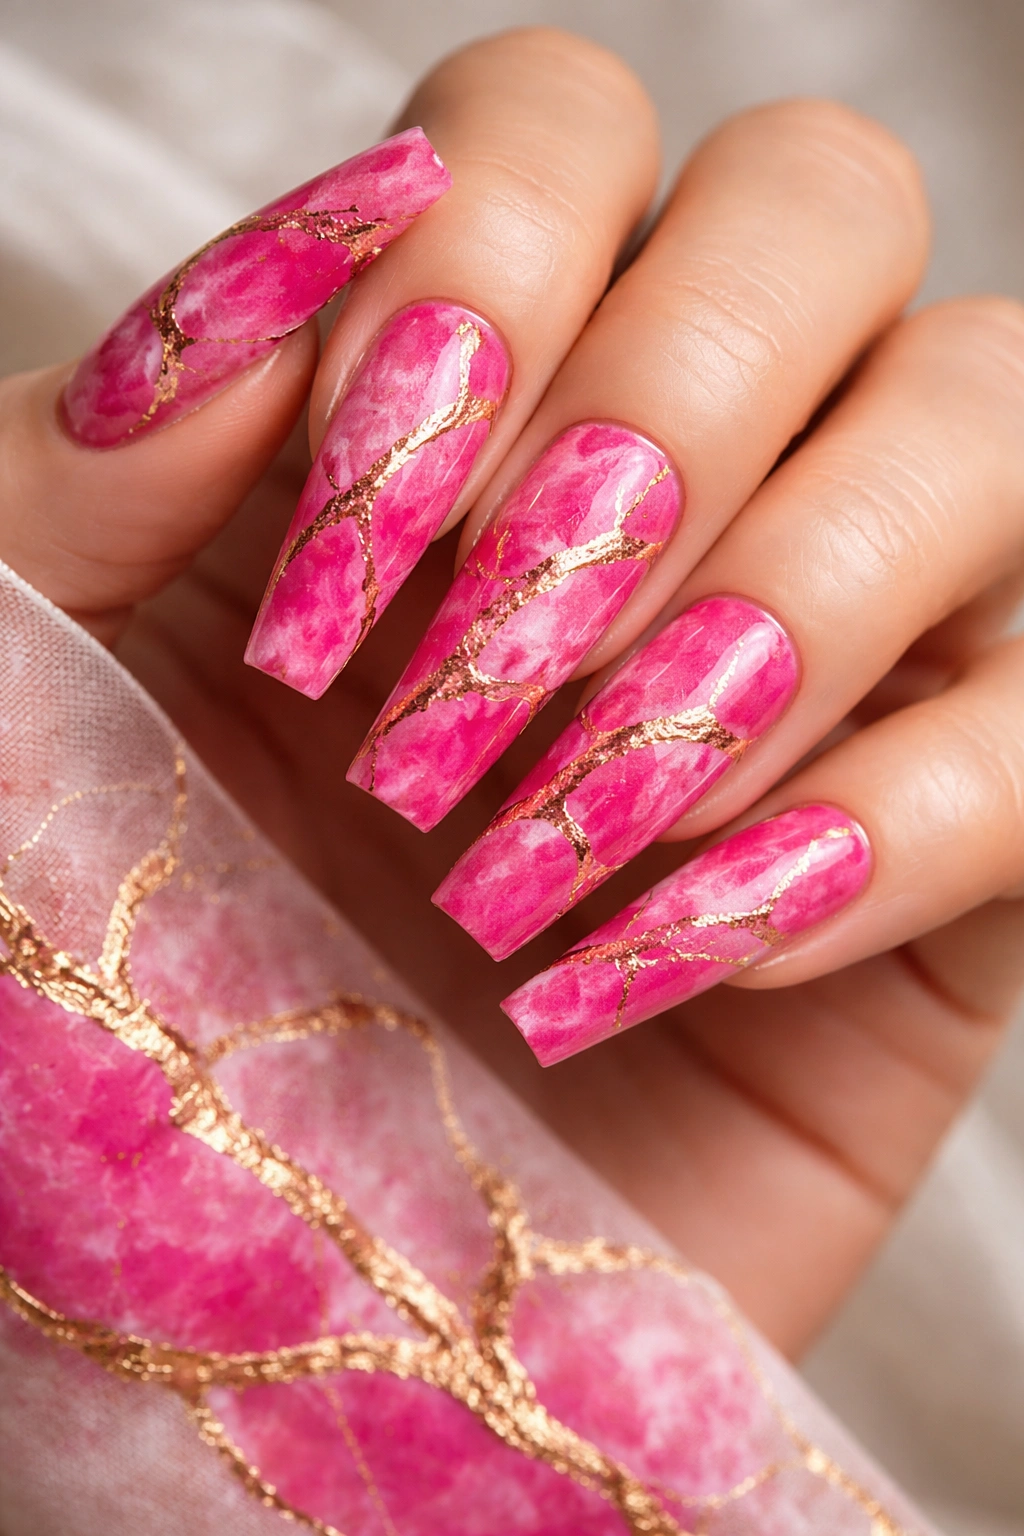
Marble nail art brings an upscale, sophisticated element to hot pink coffin nails that reads as intentionally artistic rather than casual. Fine lines of metallic gold paint swirl across the surface in organic patterns, mimicking natural marble stone and creating movement and visual interest.
The Art of Nail Marbling on Coffin Shapes
Long coffin nails give you enough space to create genuine veining patterns that look professional rather than haphazard. The pointed tip naturally accommodates the finest detail work, allowing you to extend thin lines right to the edge without them looking cramped or crowded.
Application Tips for Lasting Marble
- Start with a hot pink cream base, fully cured if using gel, or completely dry if using traditional polish
- Use an ultra-thin detail brush or a striping brush loaded with metallic gold polish or gel
- Create irregular, branching lines that don’t follow any predictable pattern — this randomness is what makes marble look authentic
- Some lines should intersect, some should trail off, and some should terminate mid-nail for organic flow
- Allow the gold to dry or cure fully before applying top coat to prevent the colors from bleeding together
The contrast between matte hot pink and shiny gold creates a luxury feel that works beautifully for professional settings, date nights, or any occasion where you want to feel put-together.
3. Neon Hot Pink Ultra-Shine
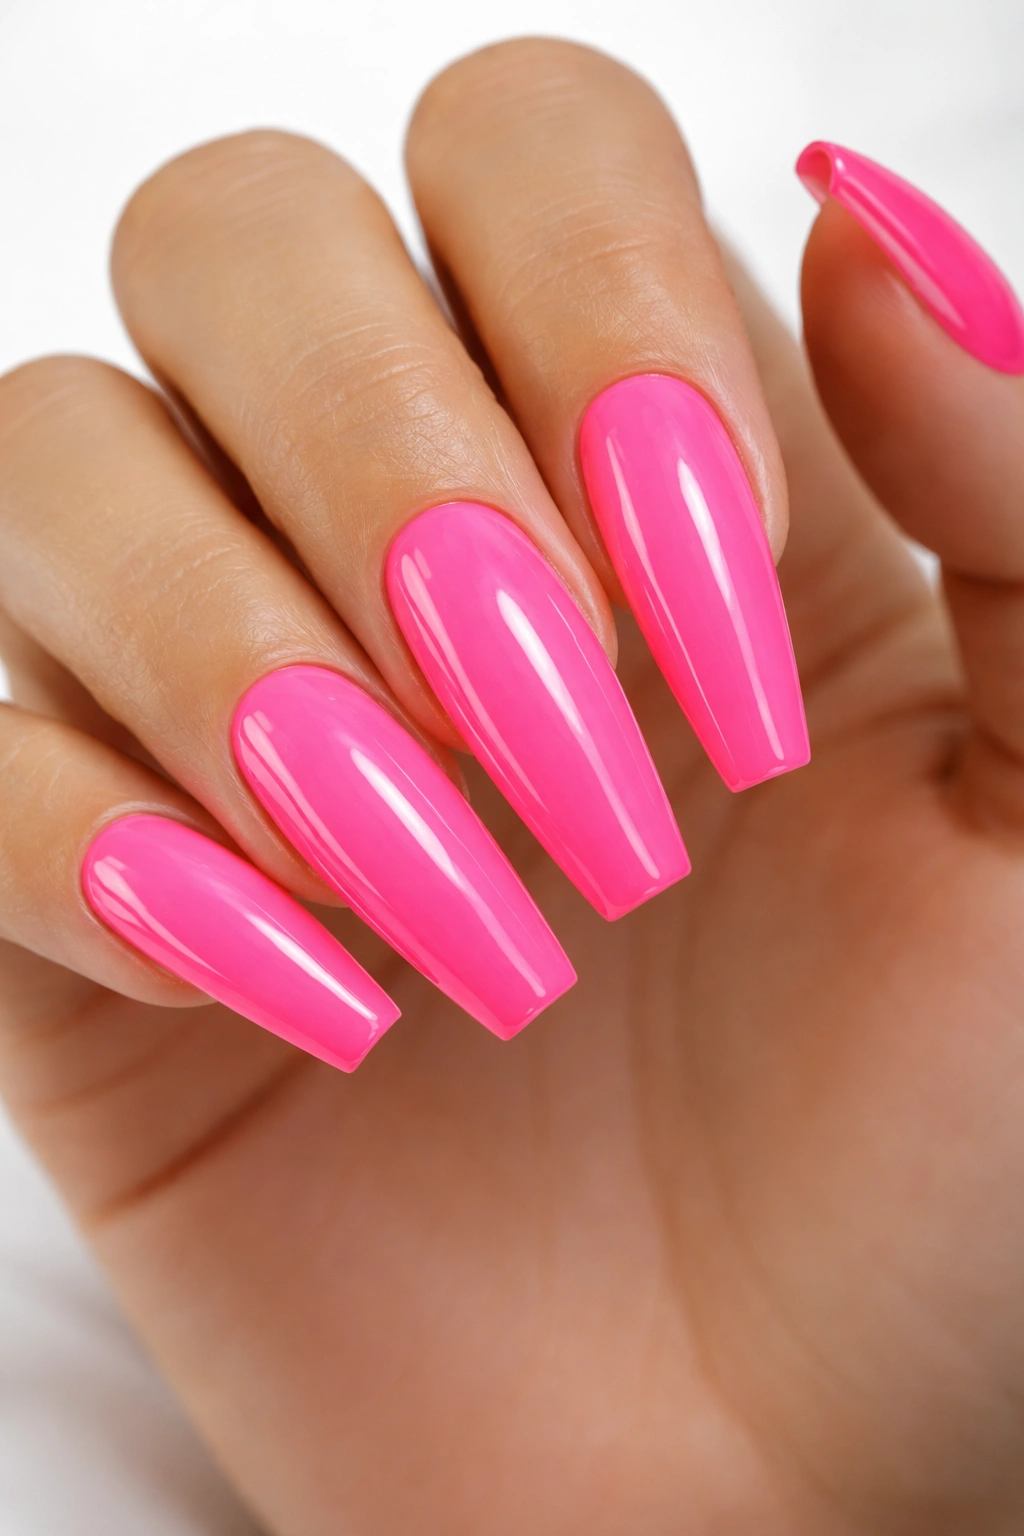
Sometimes the most stunning nail look is the simplest one — a pure, vibrant neon hot pink with an ultra-glossy finish that reflects light like a mirror. This high-impact design requires absolutely no embellishment because the color and shine do all the work themselves.
Achieving True Neon Without Staining
True neon hot pink has blue undertones that make it almost glow, especially under certain lighting conditions. Finding a shade that leans neon rather than cool or warm takes some searching, but once you find it, the payoff is undeniable — your nails will look impossibly bright and polished.
The High-Shine Finish That Makes It Pop
- Invest in a premium top coat specifically formulated for high gloss — not all finishes are created equal
- Apply three thin layers of the hot pink polish rather than two thick ones for the most even, reflective finish
- Each layer should be wiped clean of the brush before application to prevent dripping or pooling
- Finish with a thick layer of glossy top coat, building it up slightly to create a dome effect that magnifies shine
- Consider using a gel system for this look if you want the shine to last through multiple hand washes
This design is perfect when you want your nails to do the talking without any competing patterns or designs. Confidence is the only accessory you need.
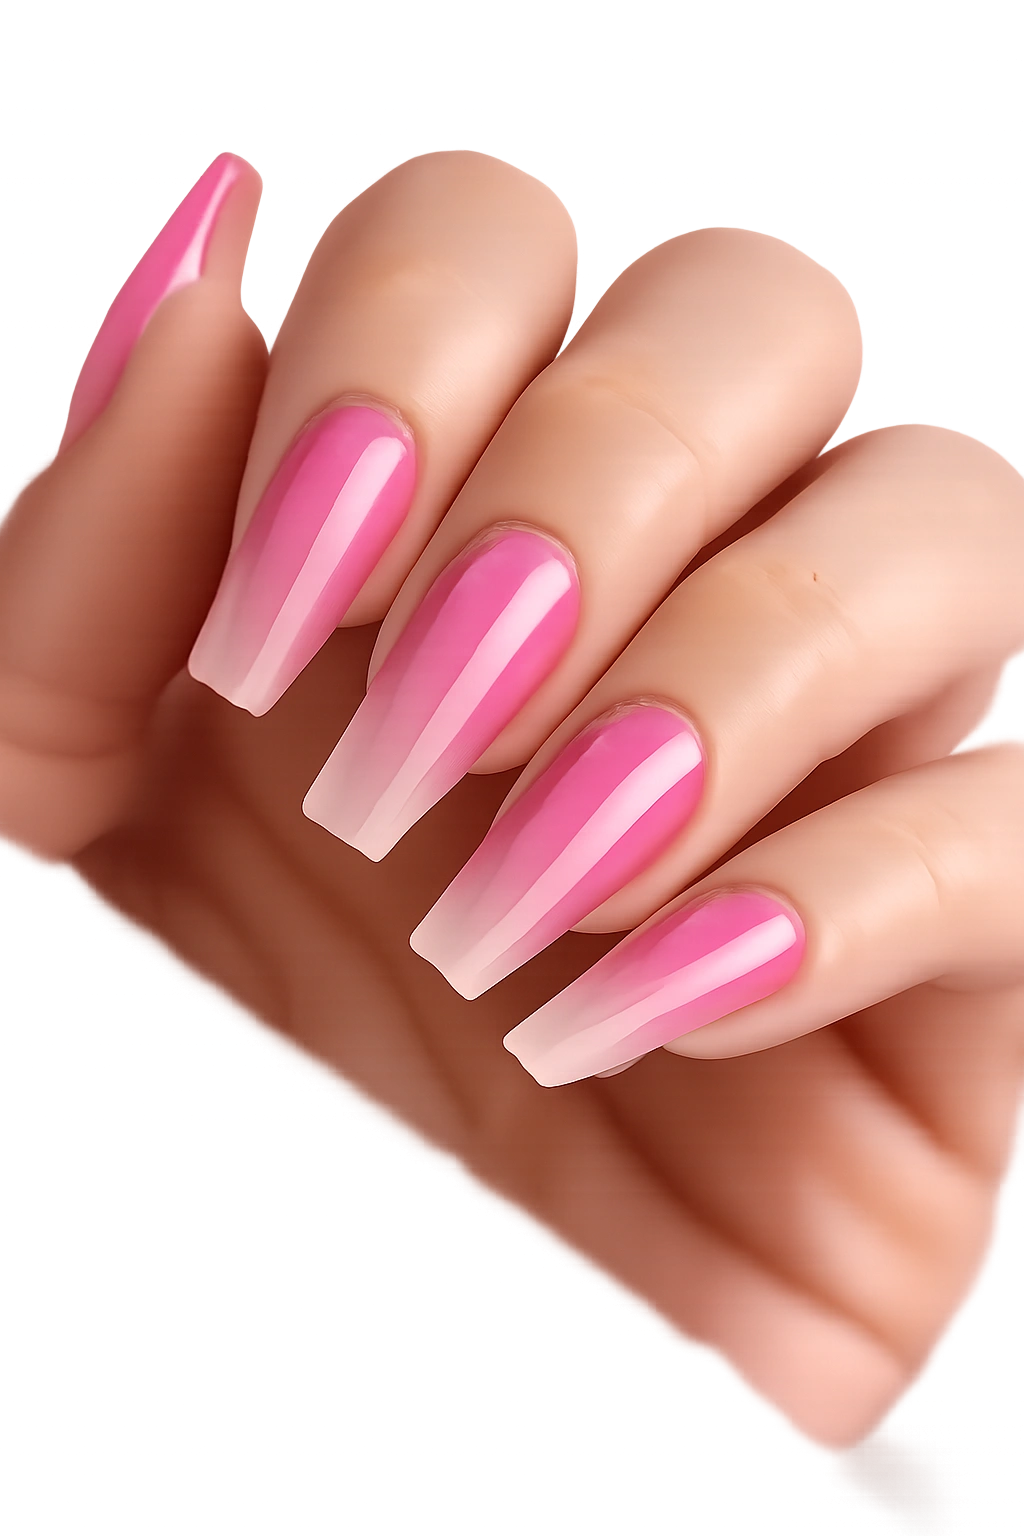
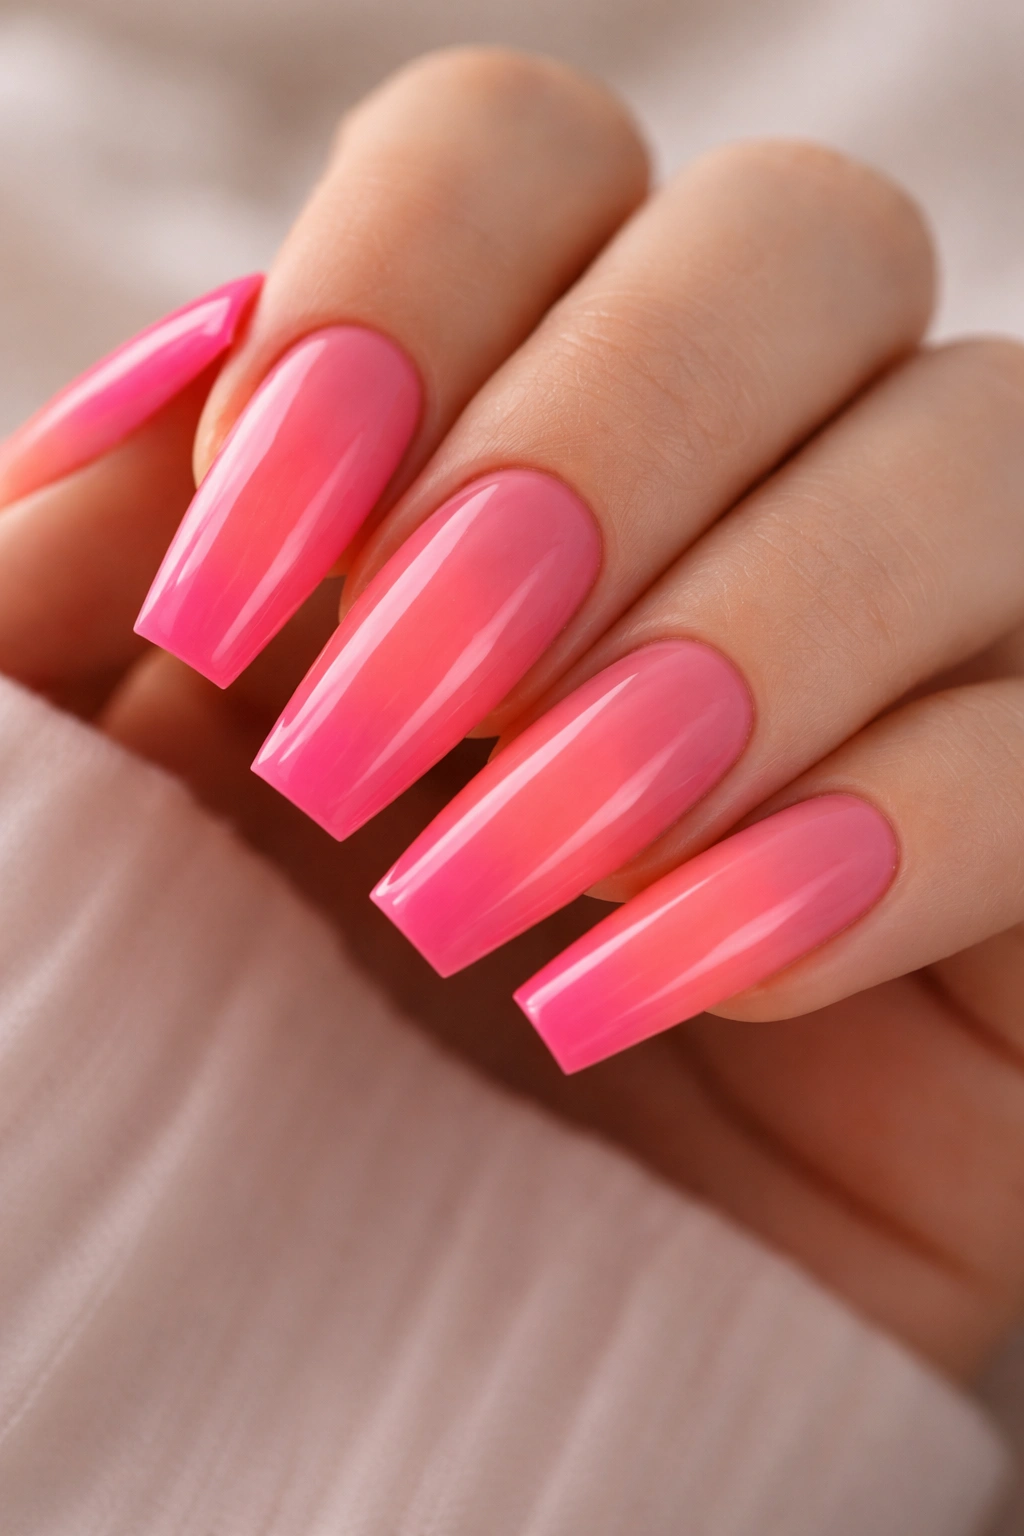
4. Hot Pink Ombre to Nude Gradient
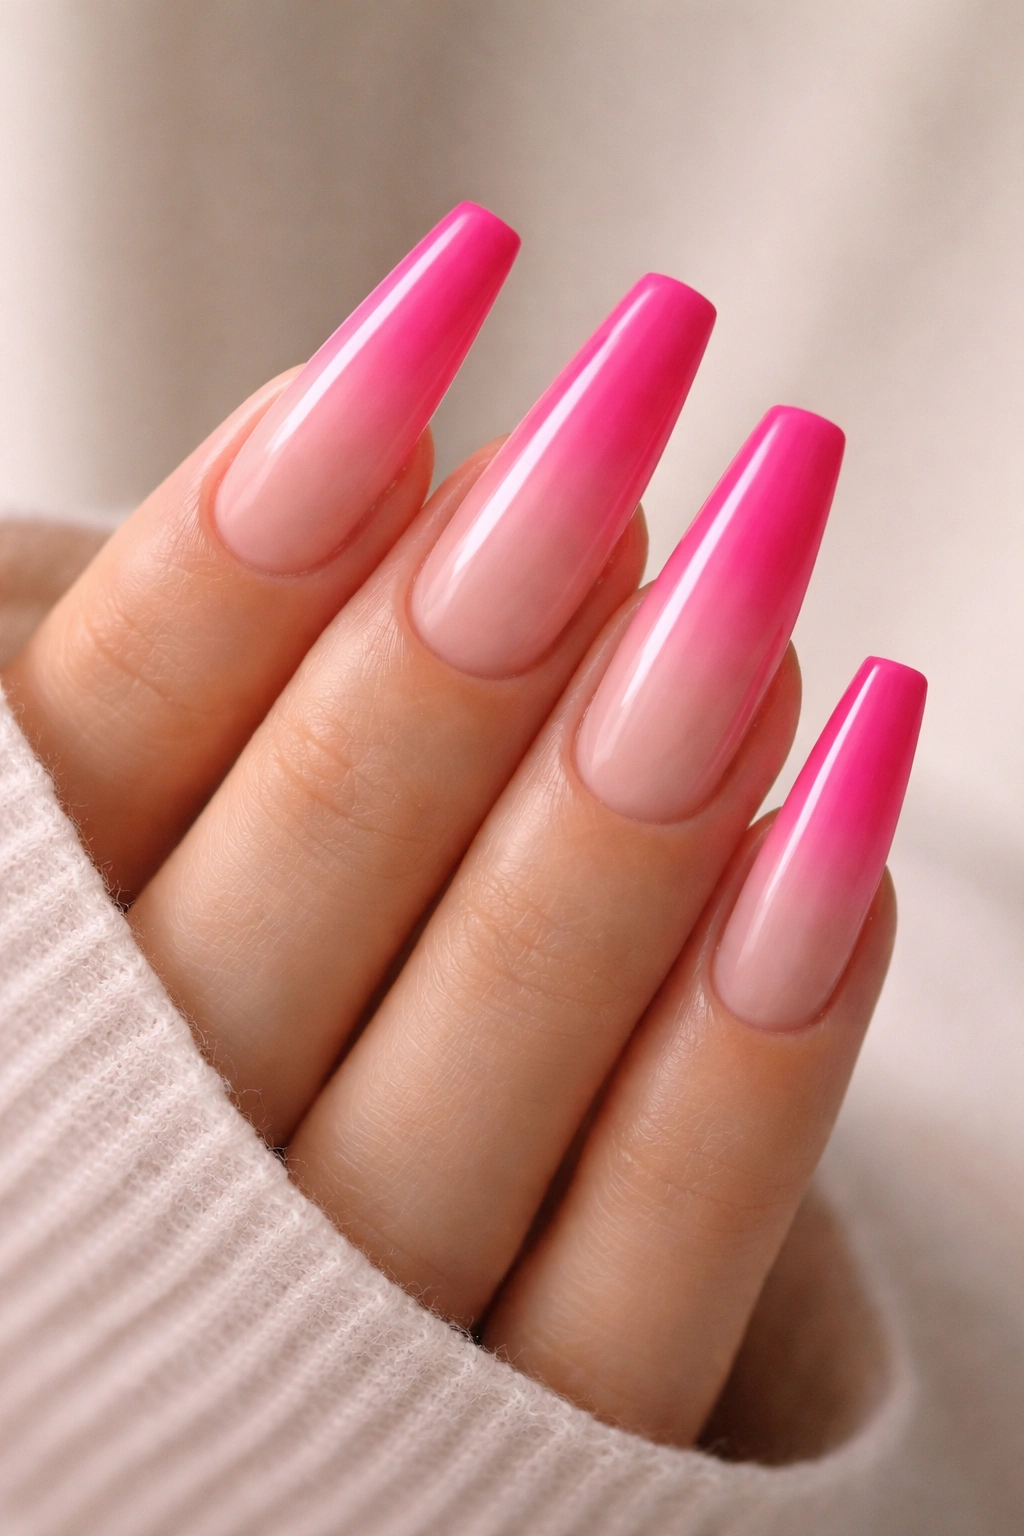
An ombre that transitions from hot pink at the tips to nude at the cuticle creates an elongating effect that’s particularly flattering on long coffin nails. The gradient works with your skin tone rather than contrasting boldly against it, making this a surprisingly wearable everyday design that still feels intentional and polished.
Why Ombre Works on Extended Nail Shapes
The length of coffin nails creates natural room for a smooth, gradual color transition. Shorter nail shapes can look choppy when you try to ombre them, but longer nails give the gradient space to breathe and flow naturally from one shade to another.
Creating a Seamless Gradient
- Choose a nude shade that closely matches your skin tone — this creates the most flattering elongating effect
- Use a makeup sponge method or a gradient brush to blend hot pink and nude together on the nail
- Work in thin layers, building color gradually rather than trying to force a gradient in one application
- Blend slightly with a damp sponge to eliminate harsh lines between colors
- The final result should look like the color fades imperceptibly from hot pink to nude
This design works beautifully for work environments where you want something stylish but not aggressively bold. It’s also surprisingly easy to maintain because the gradient camouflages growth better than a solid color.
5. Hot Pink with Geometric Line Design
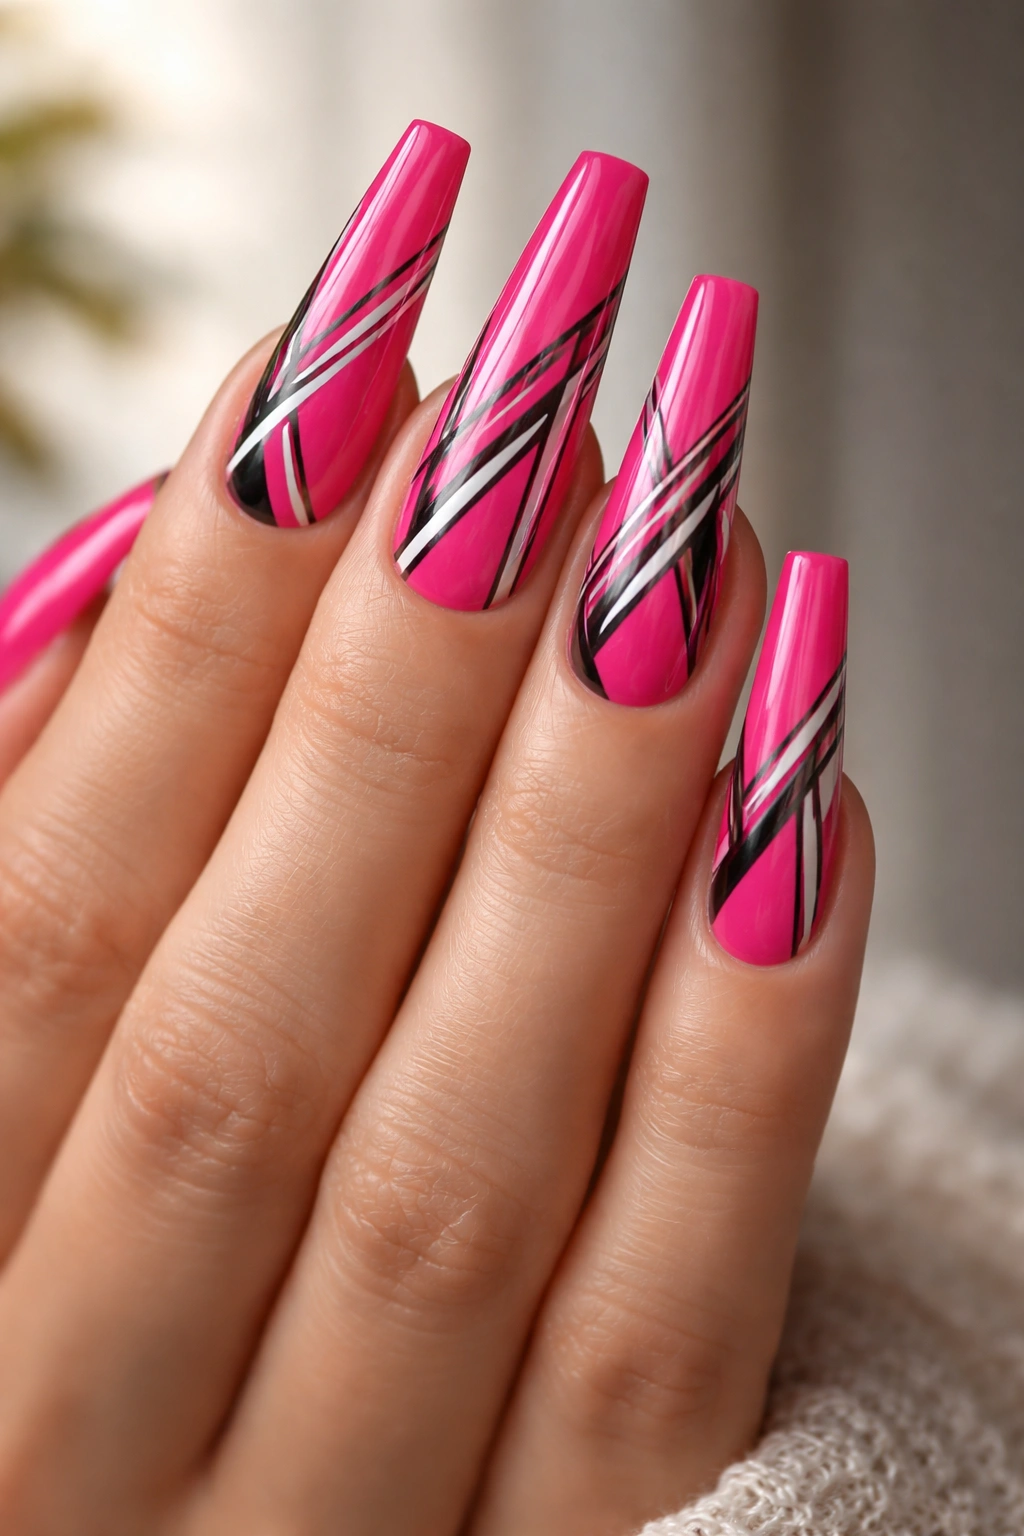
Clean geometric patterns using black, white, or metallic lines overlaid on hot pink create modern, artistic nails that feel contemporary and intentional. Simple shapes like triangles, squares, or abstract line work can completely transform the aesthetic while remaining easy to execute.
Geometric Designs That Enhance Long Nail Length
The extended surface area of coffin nails allows you to create geometric patterns that actually have visual weight and presence. You can run lines vertically to emphasize the nail’s length, or create larger shapes that would look cramped on shorter nails.
Painting Clean Lines on Curved Surfaces
- Use a high-quality thin detail brush or striping brush with precision-holding capability
- Work on a hard, non-flexible surface so your hand remains steady — rest your arm on a table, not suspended in air
- Apply one thin line, let it dry completely, then apply a second coat for depth and opacity
- Black lines are the easiest to execute and most forgiving of tiny imperfections
- Metallic lines create sophistication while white creates a graphic, high-contrast look
Consider starting with simple vertical lines before attempting more complex geometric shapes. The more you practice, the more intricate your designs can become.
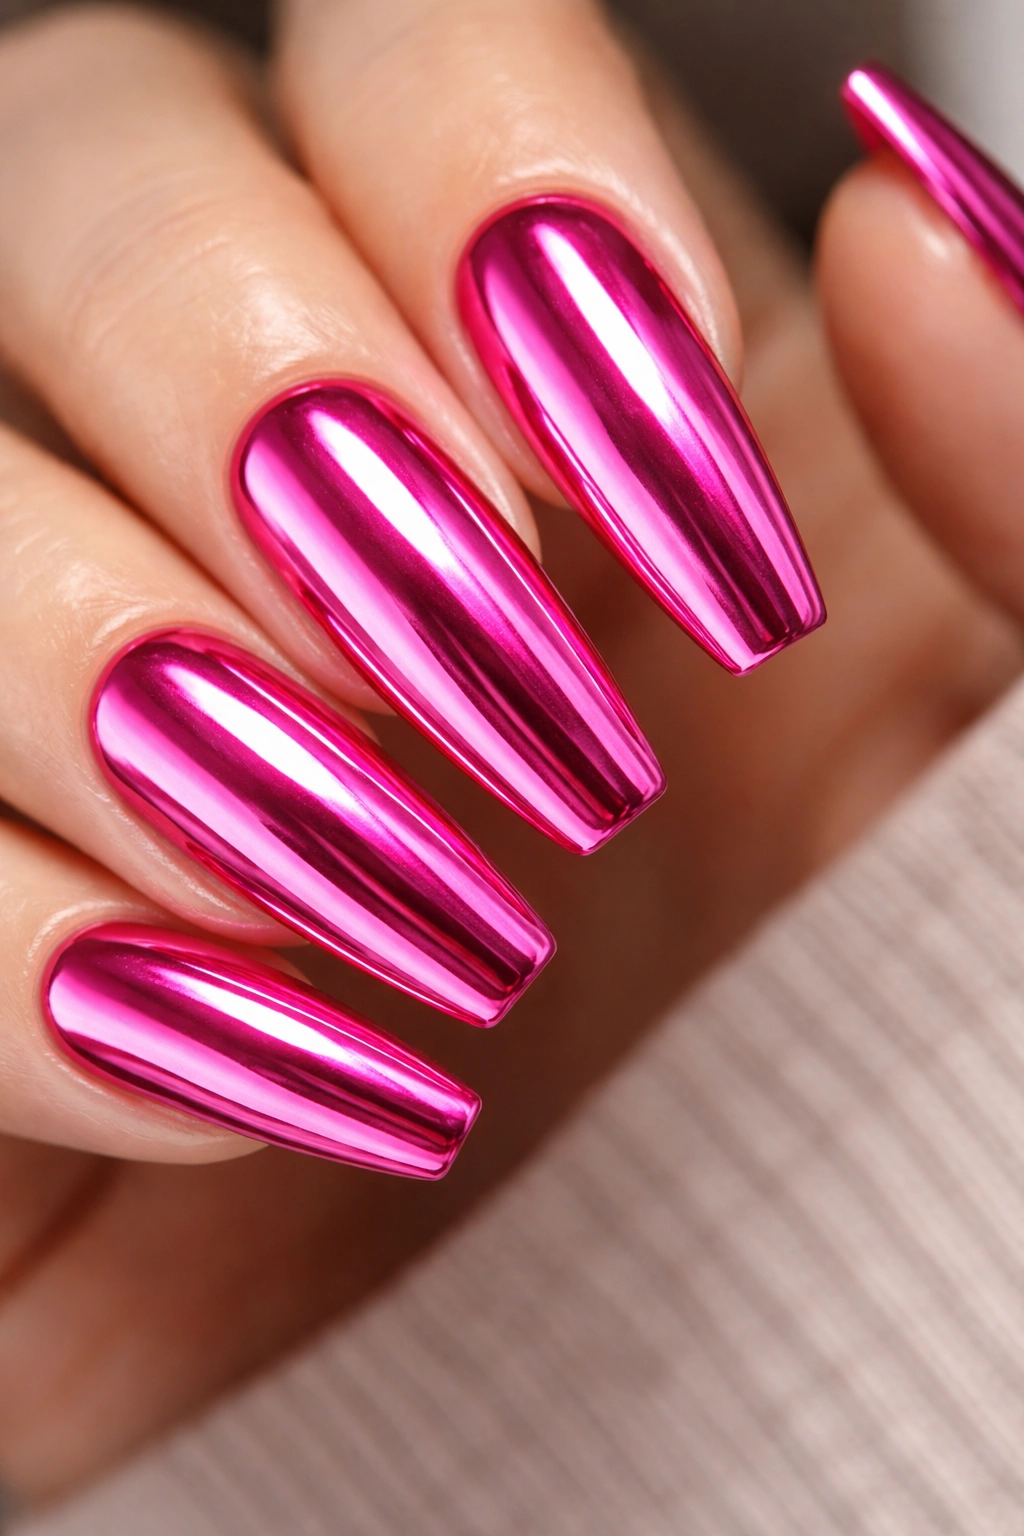
6. Hot Pink Chrome Nail Finish
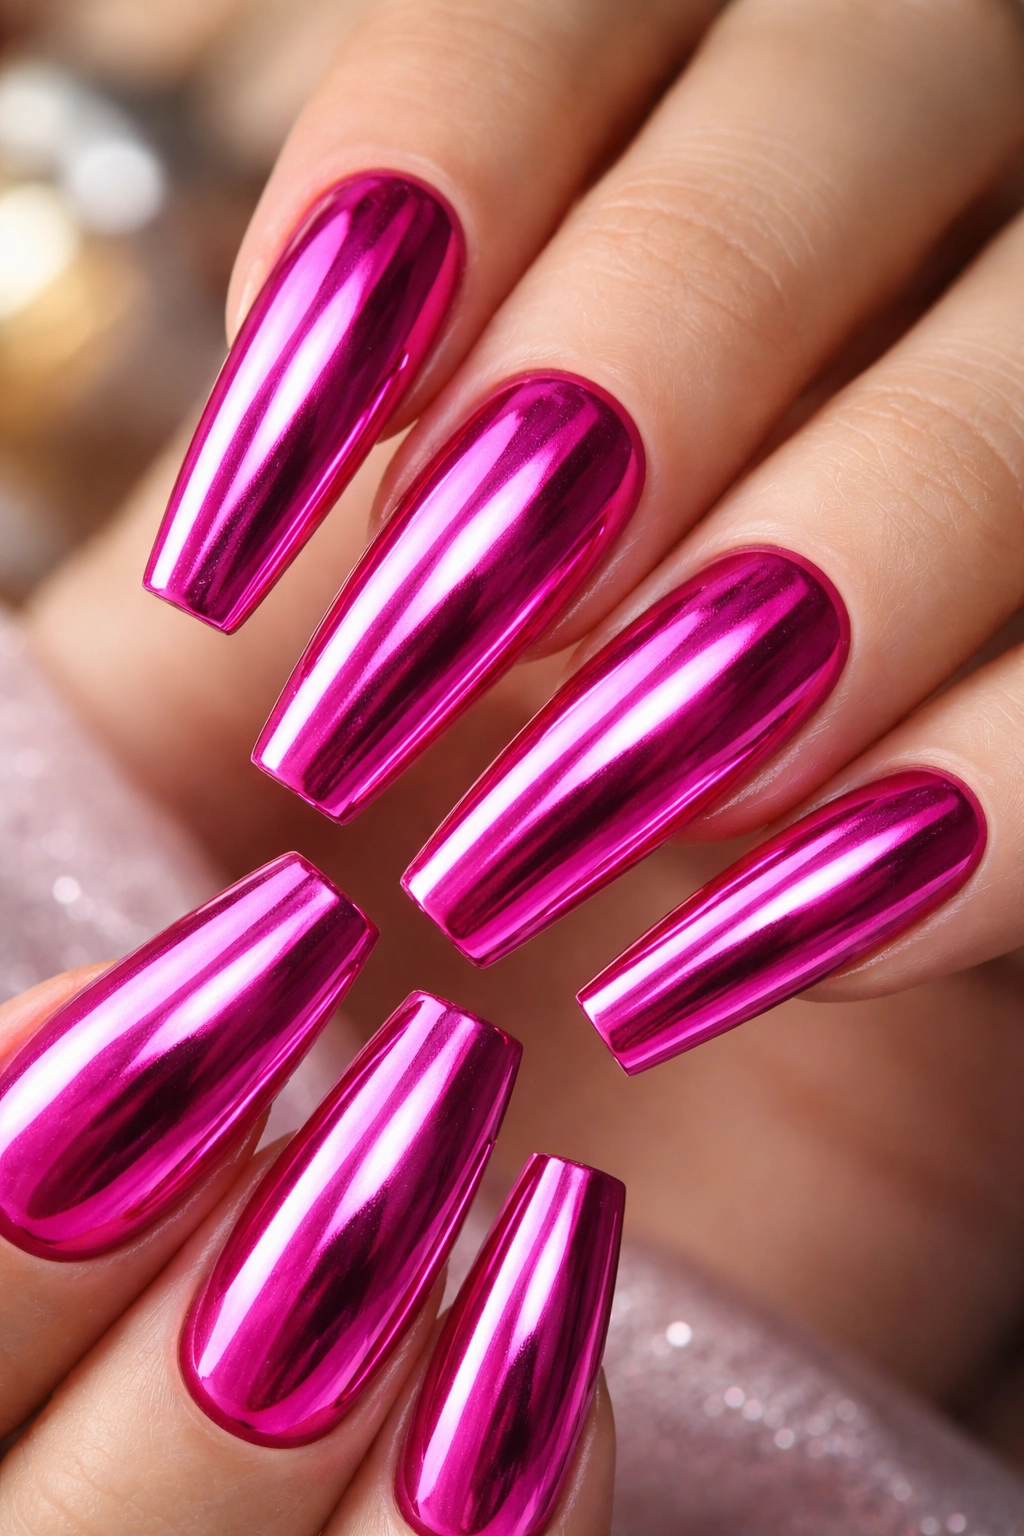
Chrome or mirror finishes applied over hot pink create an almost three-dimensional effect that looks like liquid metal coating your nails. The chrome powder reflects light so effectively that it literally looks like your nails are transforming into shiny chrome.
The Technology Behind Chrome Nails
Chrome nail powder works by using ultra-fine pigment particles that create a mirror-like reflection. When applied correctly over a sticky base layer, these particles align and create an effect that’s impossible to achieve with regular polish or even holographic finishes.
Application Technique for Flawless Chrome
- Apply a hot pink base coat and cure completely if using gel system
- Don’t wipe the sticky residue layer — this is essential for chrome powder to adhere properly
- Use a soft velvet applicator pad to gently rub chrome powder across the surface in gentle, circular motions
- Build coverage gradually with multiple light applications rather than one heavy application
- Seal with a heavy-duty top coat to prevent the chrome from rubbing off with daily wear
Chrome finishes are relatively high-maintenance because they’re sensitive to oils and friction, but the wow-factor payoff makes them worth the effort for special occasions or photo-worthy events.
7. Hot Pink Velvet Matte Finish
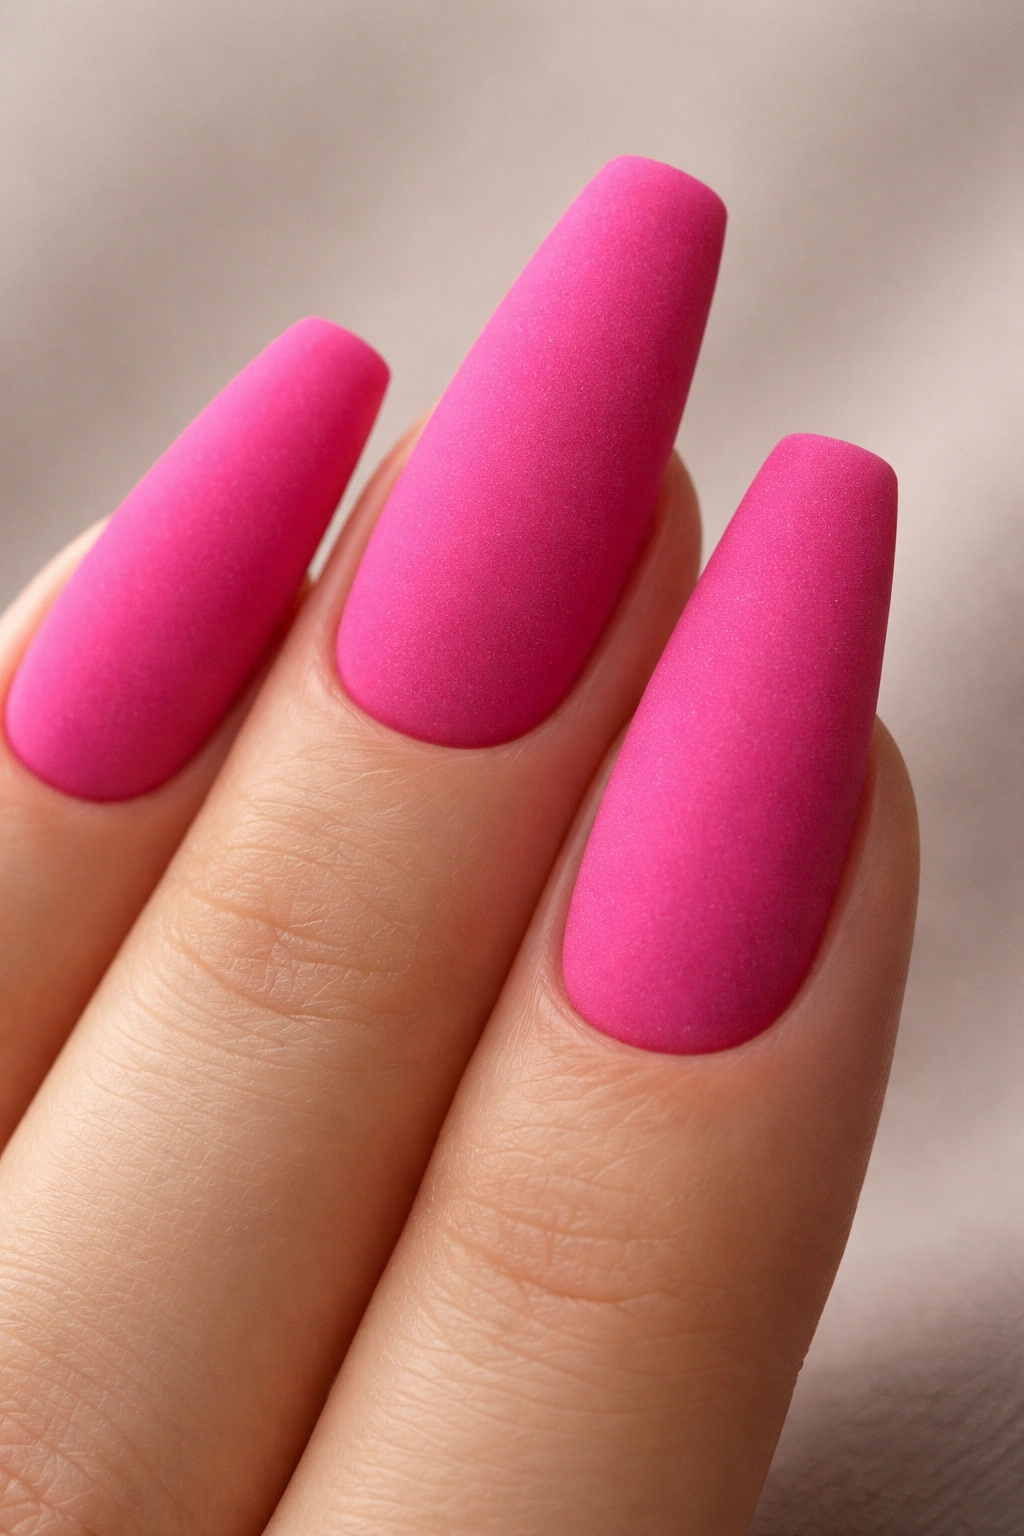
A completely matte, velvety hot pink creates a soft, tactile aesthetic that’s completely different from glossy nails. The matte finish makes the color appear richer and deeper than glossy versions, almost like crushed velvet fabric translated into nail form.
The Unexpected Appeal of Matte Color
Matte finishes are particularly interesting on hot pink because the bold color becomes even more sophisticated when it’s not shiny. Without the gloss bounce, the color itself becomes the star, and the velvety texture adds an element of luxury and intentionality.
Achieving True Matte Without Texture
- Use a matte top coat specifically formulated for smooth matte finishes rather than texture matte finishes
- Some matte top coats are formulated to remain completely smooth, while others create a bumpy texture — check descriptions carefully
- Apply thin layers of top coat to avoid over-saturation, which can sometimes create uneven matte finish
- Allow each layer to fully dry or cure before applying the next
- Matte nails require slightly more frequent moisturizing because the finish doesn’t provide a water-protective seal the way gloss does
This design is stunning for fall and winter when matte finishes feel seasonally appropriate, and it’s surprisingly elegant for minimalist fashion sensibilities.
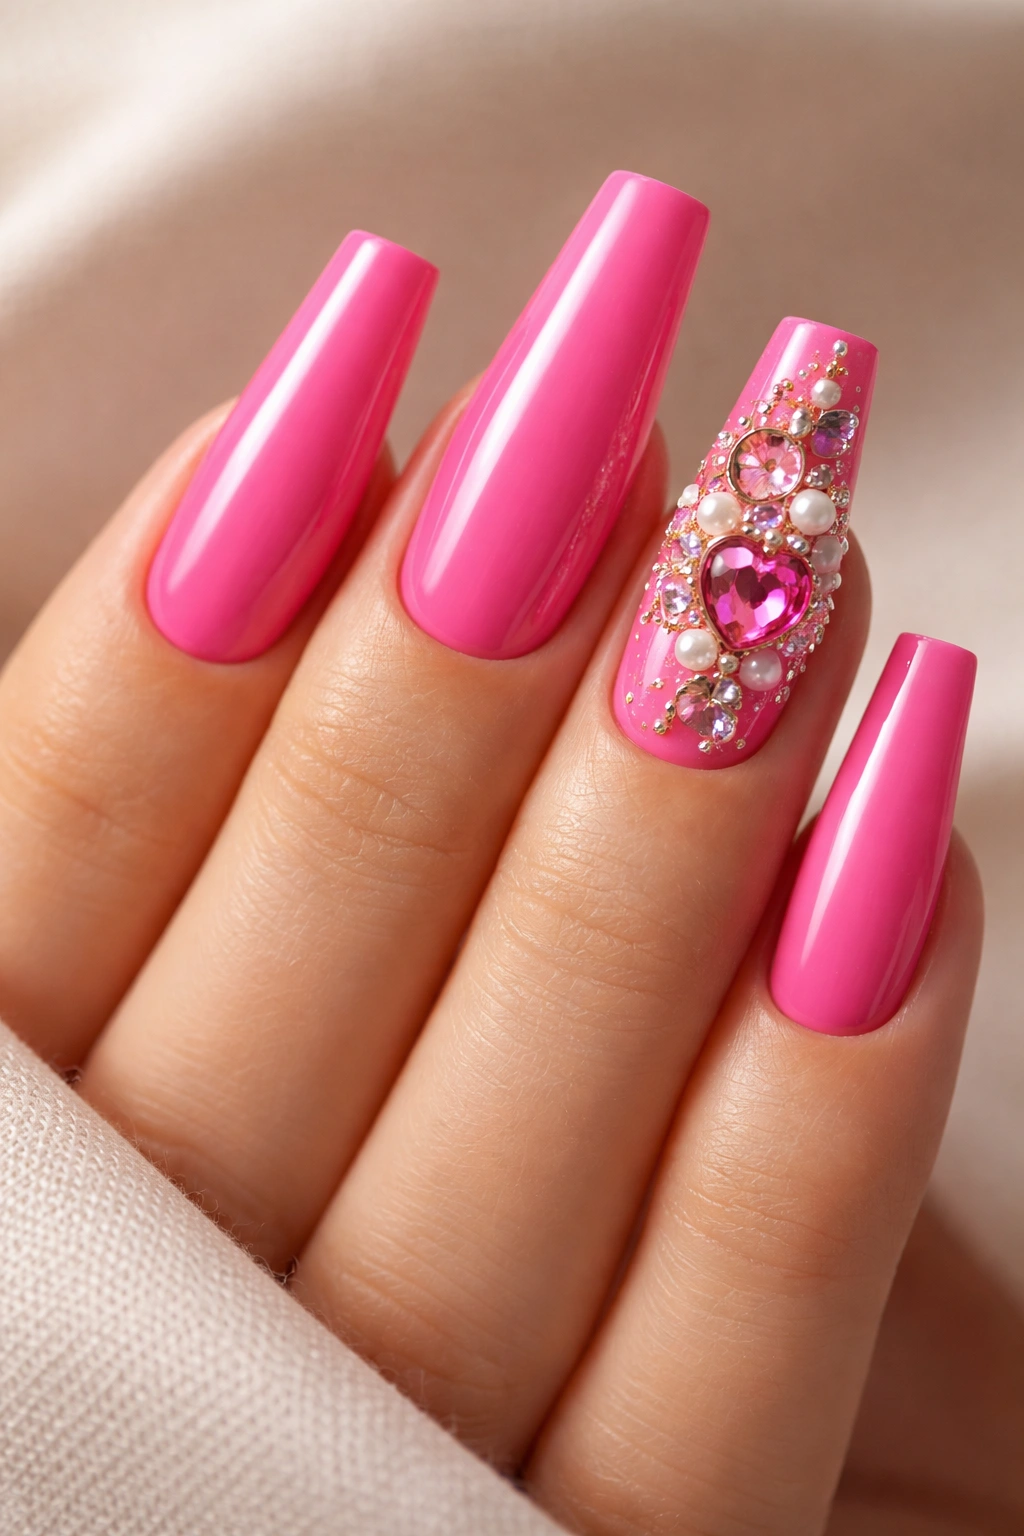
8. Hot Pink with Diamond and Crystal Accents

Strategically placed diamonds and crystals transform hot pink coffin nails from simple to absolutely stunning. Rather than covering the entire nail with rhinestones, placing a few larger stones or a concentrated sparkly accent creates visual interest without overwhelming the design.
Strategic Rhinestone Placement
The most elegant approach uses asymmetrical placement — perhaps a cluster of diamonds on one accent nail, or a diagonal line of graduating stone sizes that draws the eye across the nail length.
Securing Stones for Longevity
- Use nail glue specifically designed for rhinestones rather than regular adhesive
- Place larger stones in the center, with smaller supporting stones around them for balanced visual weight
- Allow glue to set completely before handling your nails — usually 2-3 minutes minimum
- For gel systems, use non-toxic gel-safe adhesive and cure briefly after application
- Consider placing stones only on accent nails to reduce catching and breakage risk
Large statement stones near the tips catch light constantly and create an undeniable glamorous impact. Even a single large stone per hand can create a designer-quality effect.
9. Hot Pink Cat Eye Nail Art
The cat eye effect uses a special magnetic gel that creates a striped pattern when a magnet is moved across the surface before curing. Applied over hot pink, this creates a striking linear design that looks like feline eyes or wood grain.
How Cat Eye Magnetic Gels Work
Magnetic particles suspended in gel respond to magnet placement by creating patterns of raised pigment. The pattern you create depends on how you move the magnet — vertical strokes create vertical lines, diagonal movements create diagonal patterns, and slow sweeping motions create waves.
Creating the Perfect Cat Eye Pattern
- Start with a hot pink magnetic gel base, applied in a smooth, even layer
- While the gel is still wet, place a strong magnet perpendicular to the nail surface
- Drag the magnet slowly downward for vertical cat eye, diagonally across for striped effects
- Hold the magnet steady for 3-5 seconds to allow the particles to fully align
- Cure the gel with the magnet still in place, then remove it carefully
- Top coat seals the pattern and adds shine
The cat eye effect is relatively technique-forgiving because the magnet does most of the work. Even slight variations in magnet placement look intentional and artistic.
10. Hot Pink with White French Nail Tips
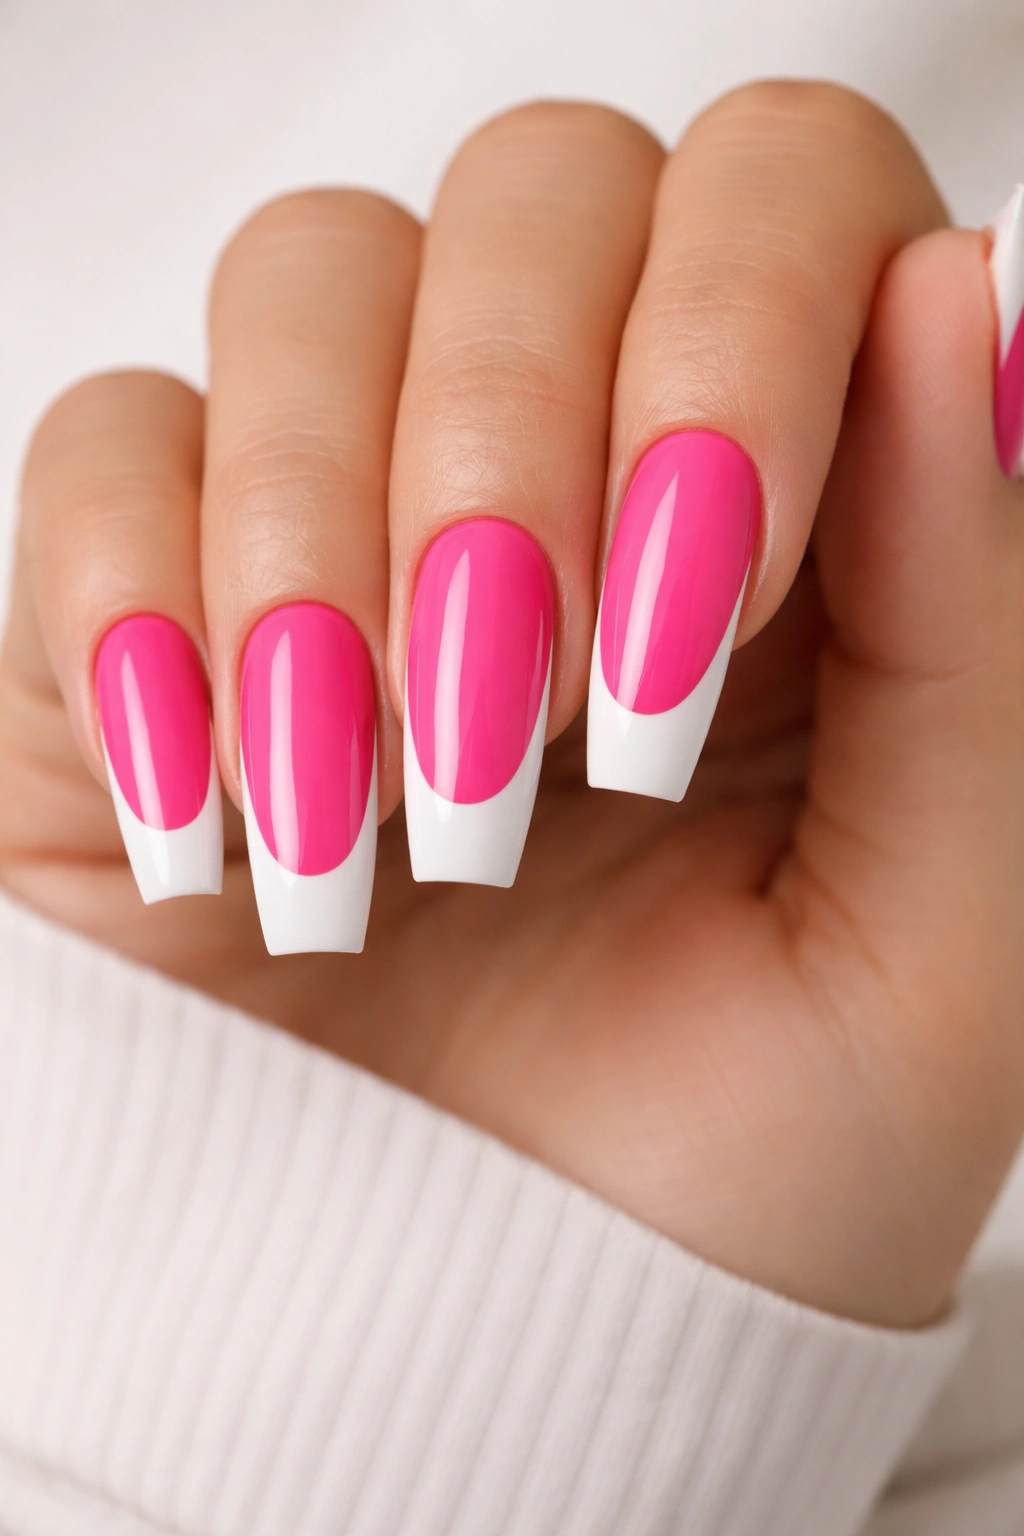
The classic French manicure gets a bold update when you swap pale pink for vibrant hot pink as the base and use crisp white tips. The contrast between the hot pink and white creates a contemporary twist on a timeless design.
Modern French Manicure Proportions
Traditional French tips feature a thin white line, but contemporary versions often use thicker, more dramatic tips that better complement longer nails. On long coffin nails, a thicker white tip (roughly 3-4mm) creates more impact.
Creating Straight Tips on Coffin Shapes
- Apply hot pink as your full base in two thin, even coats
- Use a thin striper brush or specialized French tip guide to paint white tips
- Work slowly and deliberately — rushing this step leads to uneven lines
- Paint the white tip in one clean stroke from the side of the nail to the other
- Allow white polish to dry fully before applying top coat
- The white should extend slightly past the actual tip to create the French manicure illusion
This design reads as polished and professional while still being undeniably trendy and modern. It’s perfect for occasions where you want sophistication with personality.
11. Hot Pink Holographic Finish
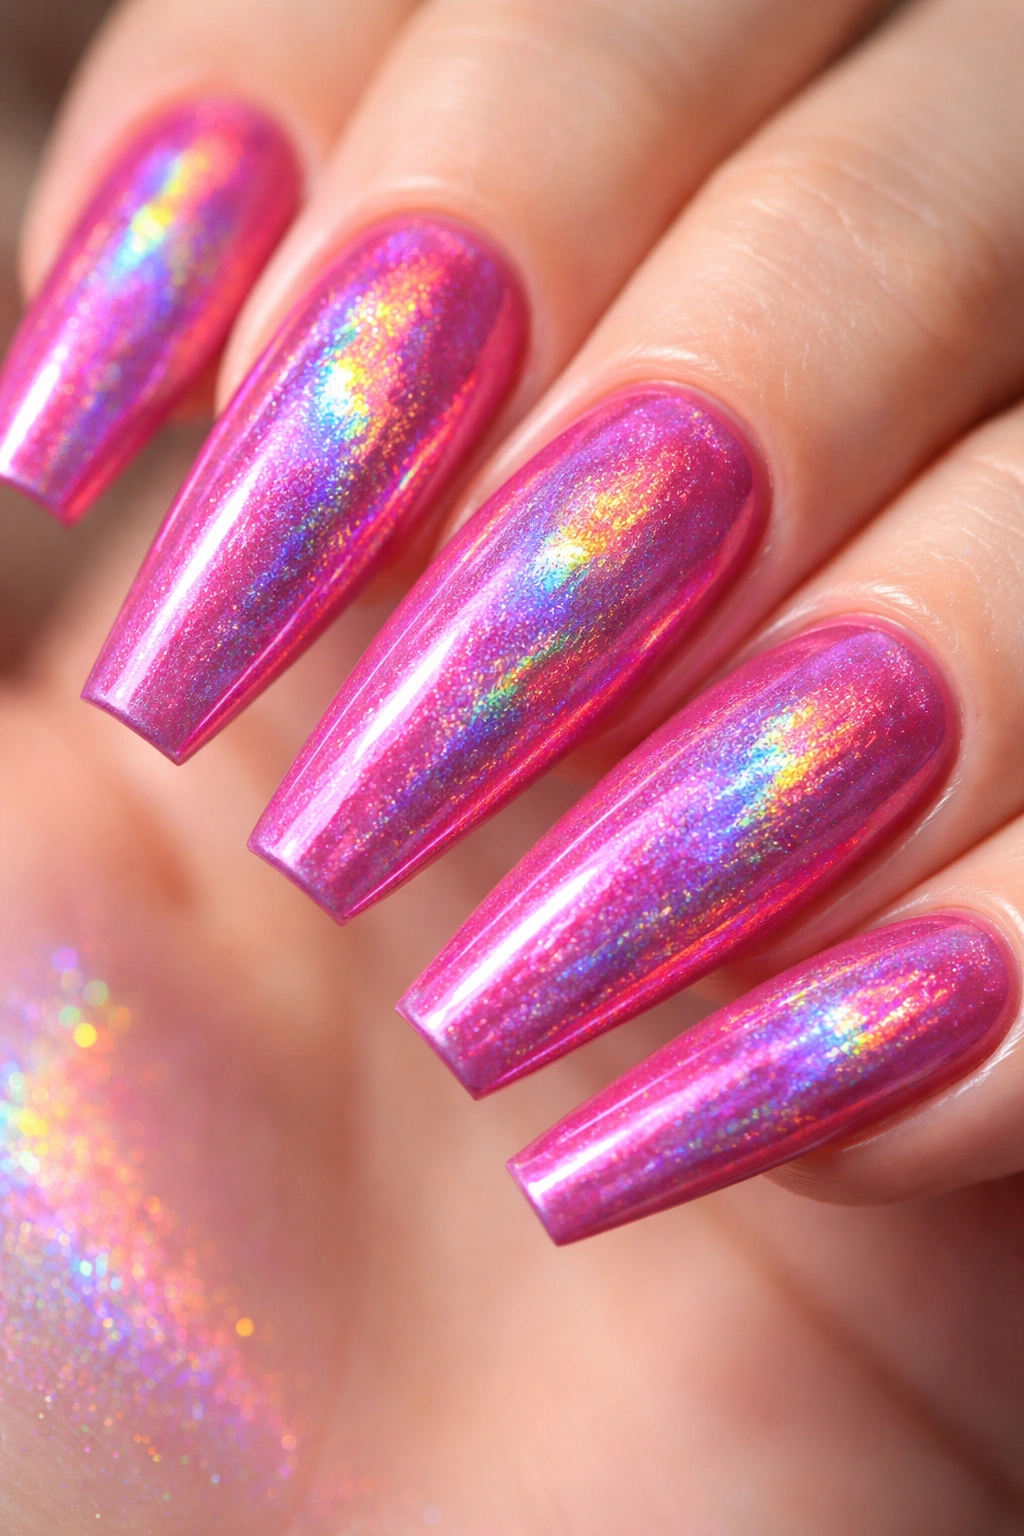
Holographic polishes contain particles that refract light into rainbow colors, creating a prismatic effect over your hot pink base. The result is nails that shift between hot pink, purple, blue, and green depending on lighting and movement.
The Multidimensional Appeal of Holographic
Holographic finishes are particularly striking on hot pink because the underlying color remains visible while being complemented by rainbow light reflections. The result is far more complex and interesting than a solid color alone.
Application for Maximum Holographic Effect
- Use a holographic top coat over hot pink, or a holographic polish with hot pink undertones
- Apply in thin coats to avoid the finish looking muddy or the rainbow effect being obscured
- The angle of light is crucial to the effect — direct sunlight and flash photography showcase holographic nails best
- Some holographic products work better under natural light while others prefer LED or artificial light
- Multiple thin applications create better effect than one thick application
Holographic nails are conversation-starters that work beautifully for parties, special events, or any time you want to feel like your nails are actively sparkling with color-shifting energy.
12. Hot Pink with Rhinestone Full-Coverage Design
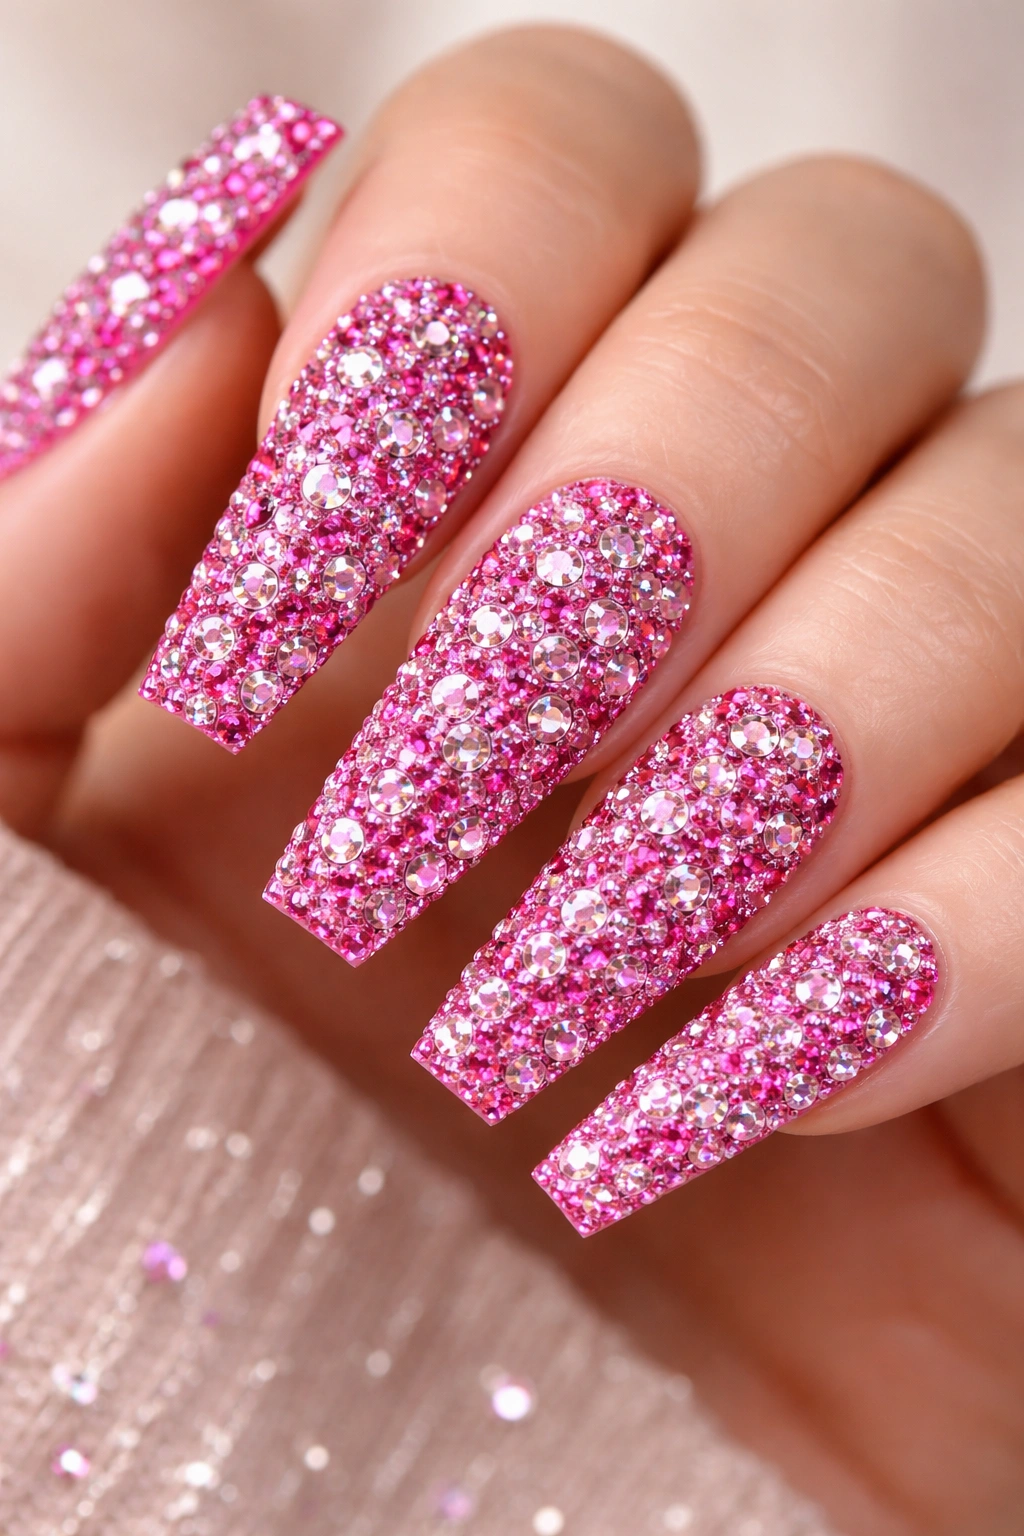
When you commit to full rhinestone coverage, you create nails that absolutely glitter from every angle. Tiny rhinestones densely packed across the entire surface transform your hot pink into a glittering jewel.
Rhinestone Density for Maximum Impact
Full coverage doesn’t mean every single millimeter needs a stone — instead, focus on placing stones closely enough that you can’t see much hot pink showing through. This creates the effect of glitter coverage without the weakness of glitter polish.
Application Technique for Durability
- Use a slightly thick layer of base coat or builder gel to give yourself a tacky surface
- Work in sections, applying adhesive to the nail and then pressing stones into place using a dotting tool
- Start with larger stones at the base, graduating to smaller stones toward the tip
- This size progression creates a more natural, flattering look than uniform stone sizing
- Seal completely with a thick layer of top coat, building it up to cover all stone edges
The weight of full rhinestone coverage means you’ll experience more drag when typing or writing, but the visual payoff is undeniable.
13. Hot Pink to Nude Gradient with Transparency
This design uses a sheer or semi-transparent gradient that allows your skin tone to show through, creating an incredibly soft and subtle transition. The effect is sophisticated and elongating without being bold or attention-grabbing.
Transparency as a Design Element
Using translucent or semi-sheer polishes creates visual depth that opaque colors can’t achieve. The gradient has more complexity because you’re not just seeing the polish — you’re seeing the polish blended with your skin tone beneath it.
Creating Translucent Gradients
- Start with a sheer hot pink that’s semi-transparent rather than fully opaque
- Apply in thin layers to build color gradually while maintaining translucency
- Use a makeup sponge to blend the hot pink with nude translucent polish at the midpoint
- The blend should look seamless, with your skin showing through throughout
- This design looks entirely different depending on skin tone — test on a hidden area first
This ultra-subtle design is perfect for professional environments or when you want something beautiful that doesn’t announce itself loudly.
14. Hot Pink with Metallic Silver Swirls
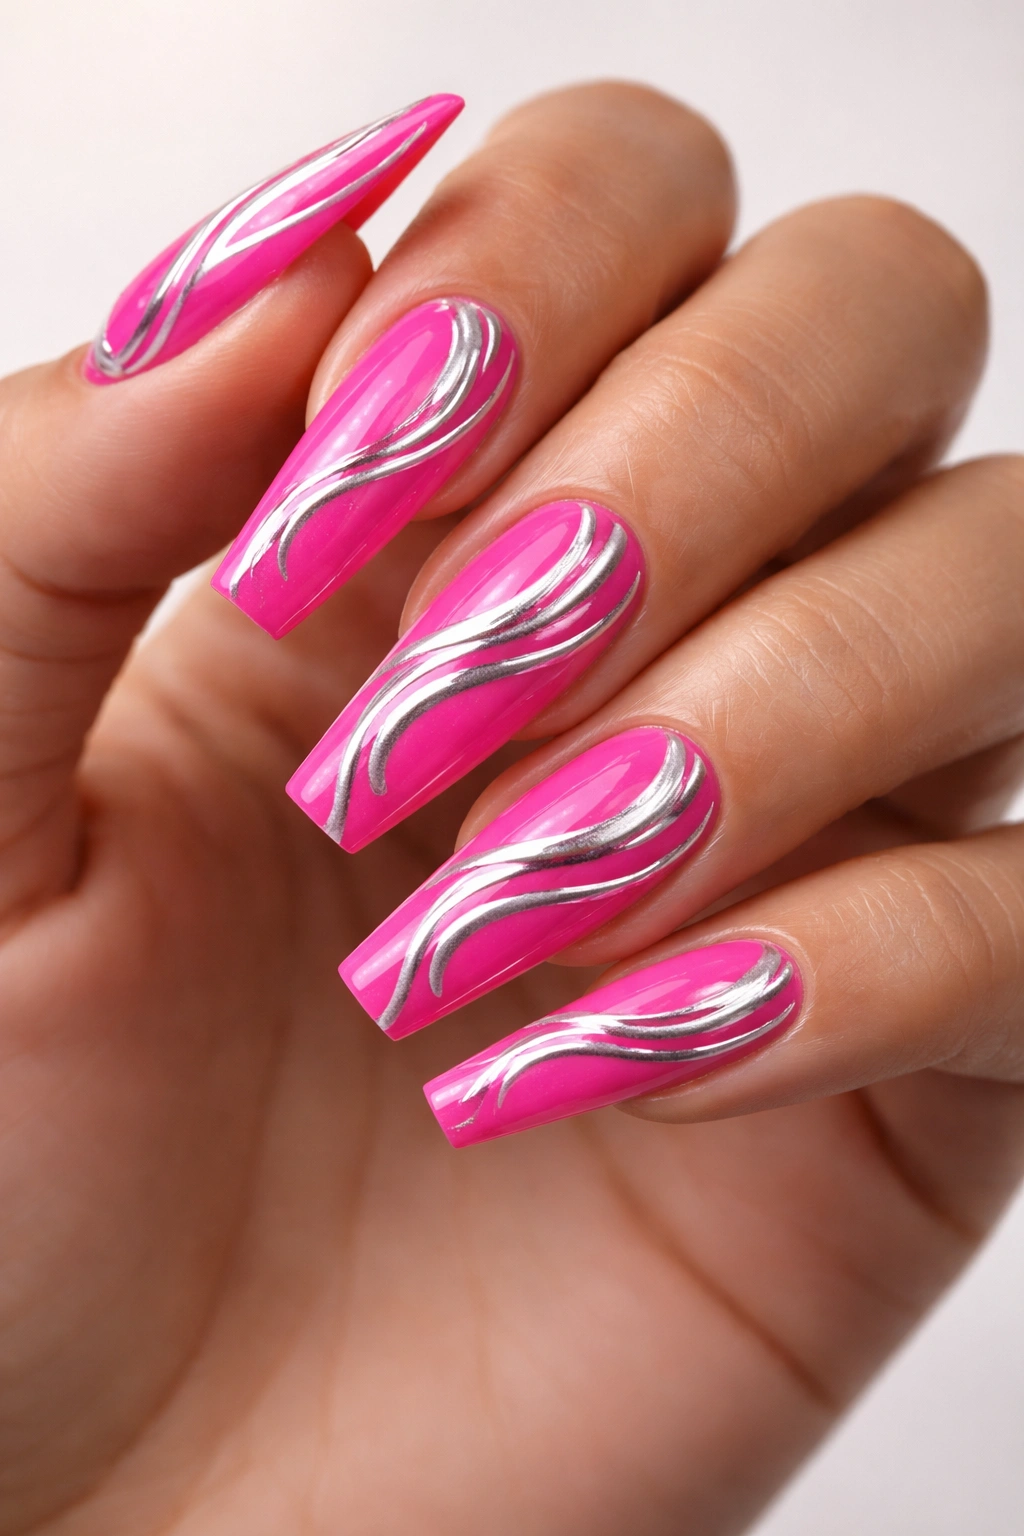
Metallic silver paint swirled in organic, flowing patterns across hot pink creates a design that feels both artistic and glamorous. The swirls should flow along the nail’s natural lines rather than fighting against them.
Swirl Patterns That Enhance Nail Shape
On coffin nails, let swirls follow the slight curve of the nail, working from the cuticle toward the tip. Swooping patterns that complement the coffin shape’s architecture look intentional and flattering.
Painting Fluid Swirls
- Use a very thin detail brush loaded with metallic silver gel or polish
- Work quickly and confidently — tentative, slow brushwork makes swirls look shaky rather than fluid
- Allow each swirl to dry or cure completely before applying the next layer of top coat
- Some swirls can loop and connect, while others trail off at the edge — vary the pattern
- This design looks best when the silver has depth, so use a high-quality metallic product
Swirl designs feel artistic and unique even though the application is relatively straightforward. No two swirl patterns ever look identical, which makes each manicure feel custom.
15. Hot Pink Gradient with Silver Ombre Effect
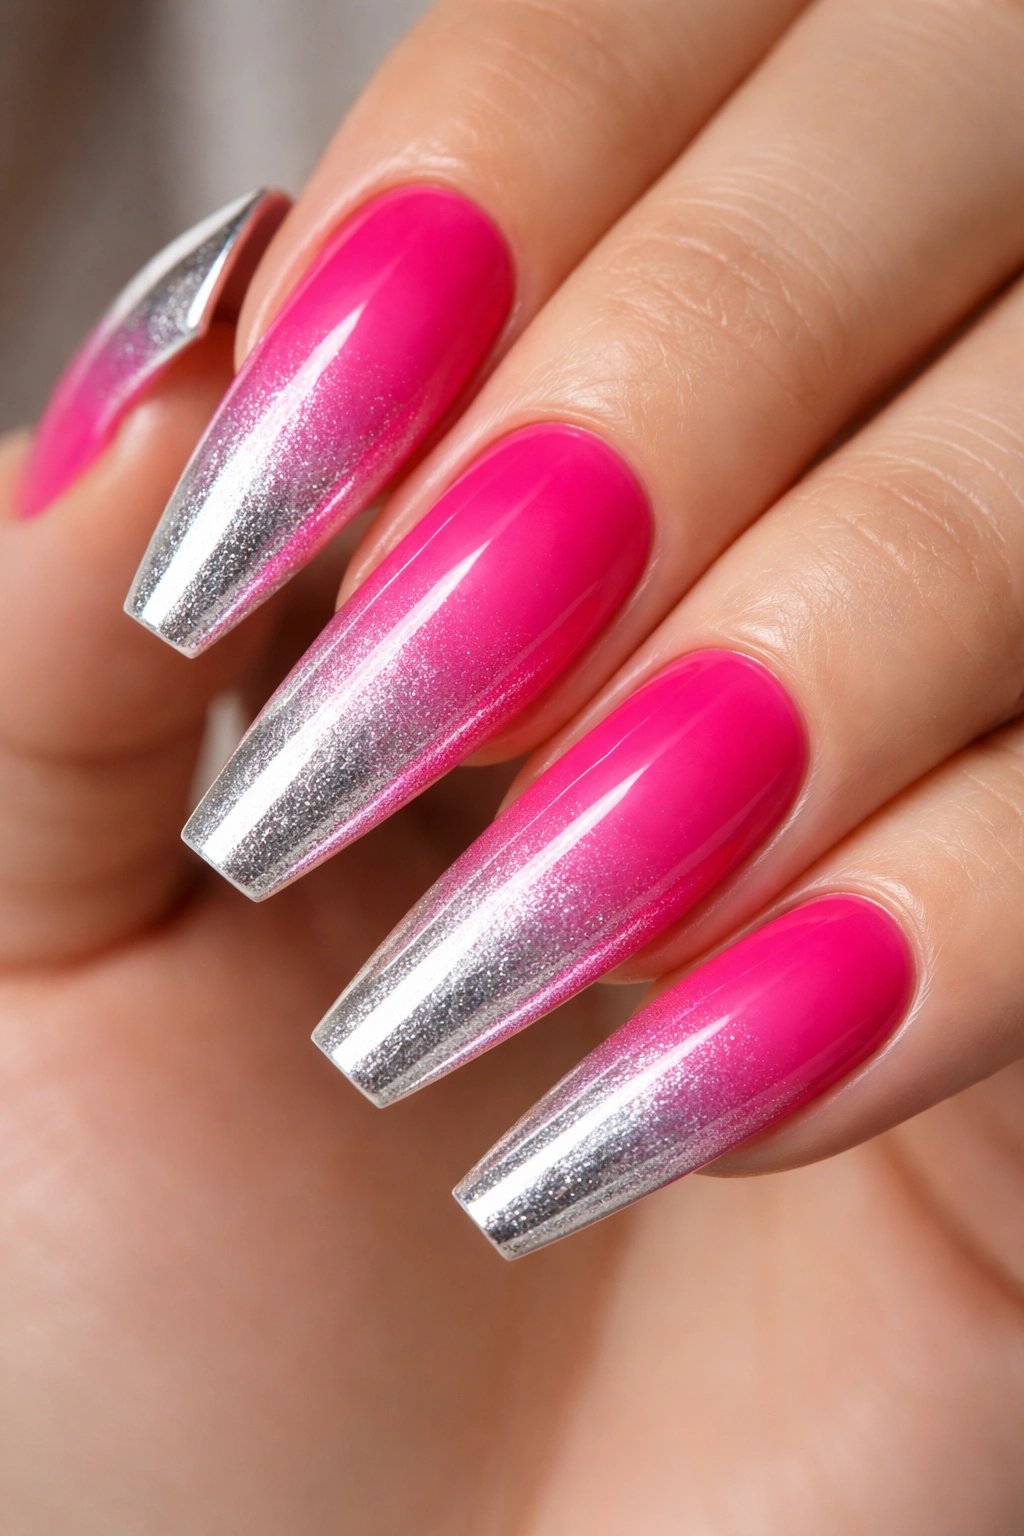
A gradient that incorporates silver creates a dual-effect design where color intensity increases while metallic shine builds. Starting with hot pink at the base and transitioning to silver at the tip creates an almost reverse chrome effect.
Building Dual-Effect Gradients
This design works best with products that contain both color pigment and reflective particles. Some holographic polishes or color-shifting gels achieve this effect naturally.
Technique for Gradient Into Silver
- Apply hot pink as your full base coat, two thin layers
- Use a makeup sponge to apply an increasingly silvery product toward the tips
- Work in the transition zone several times to create a smooth blend
- The midpoint should look purple or muted from the hot pink and silver combining
- Seal with a top coat that won’t dull the silver reflection
This creates an almost three-dimensional effect where the nail appears to be transforming from one thing into another as you move from cuticle to tip.
16. Hot Pink with Black Accent Nail Design
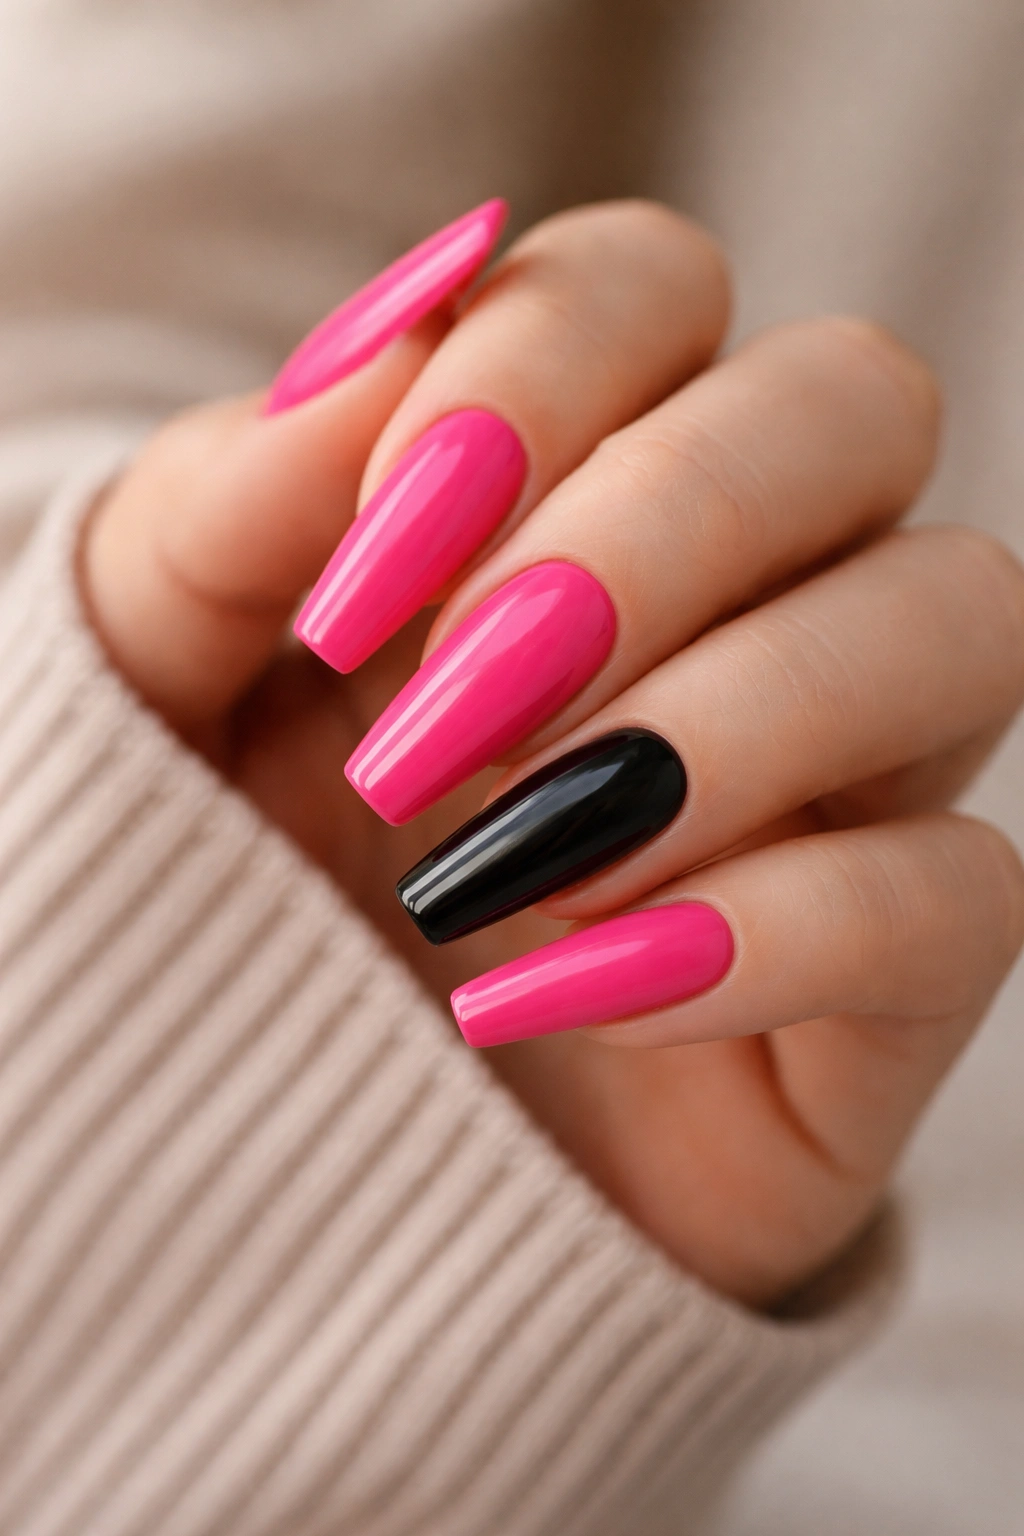
Creating one or two accent nails in solid black while keeping the rest hot pink creates high contrast and visual drama. The black usually appears on the ring finger or pinky, though any asymmetrical arrangement works.
Color Contrast as a Styling Tool
Black and hot pink create maximum visual contrast that feels edgy and intentional. This pairing reads as modern, bold, and fashion-forward without crossing into costume territory.
Alternating Colors Strategically
- Apply hot pink to four nails in two thin, even coats
- Paint your accent nail (or nails) in rich black, also in two coats
- Make sure both colors are fully opaque — any uneven coverage will compromise the contrast effect
- Keep both colors glossy for a cohesive, polished appearance
- The stark division between colors is what makes this design striking
You can also add subtle designs to the black nail — perhaps a small hot pink accent dot or minimal line — to tie the color story together.
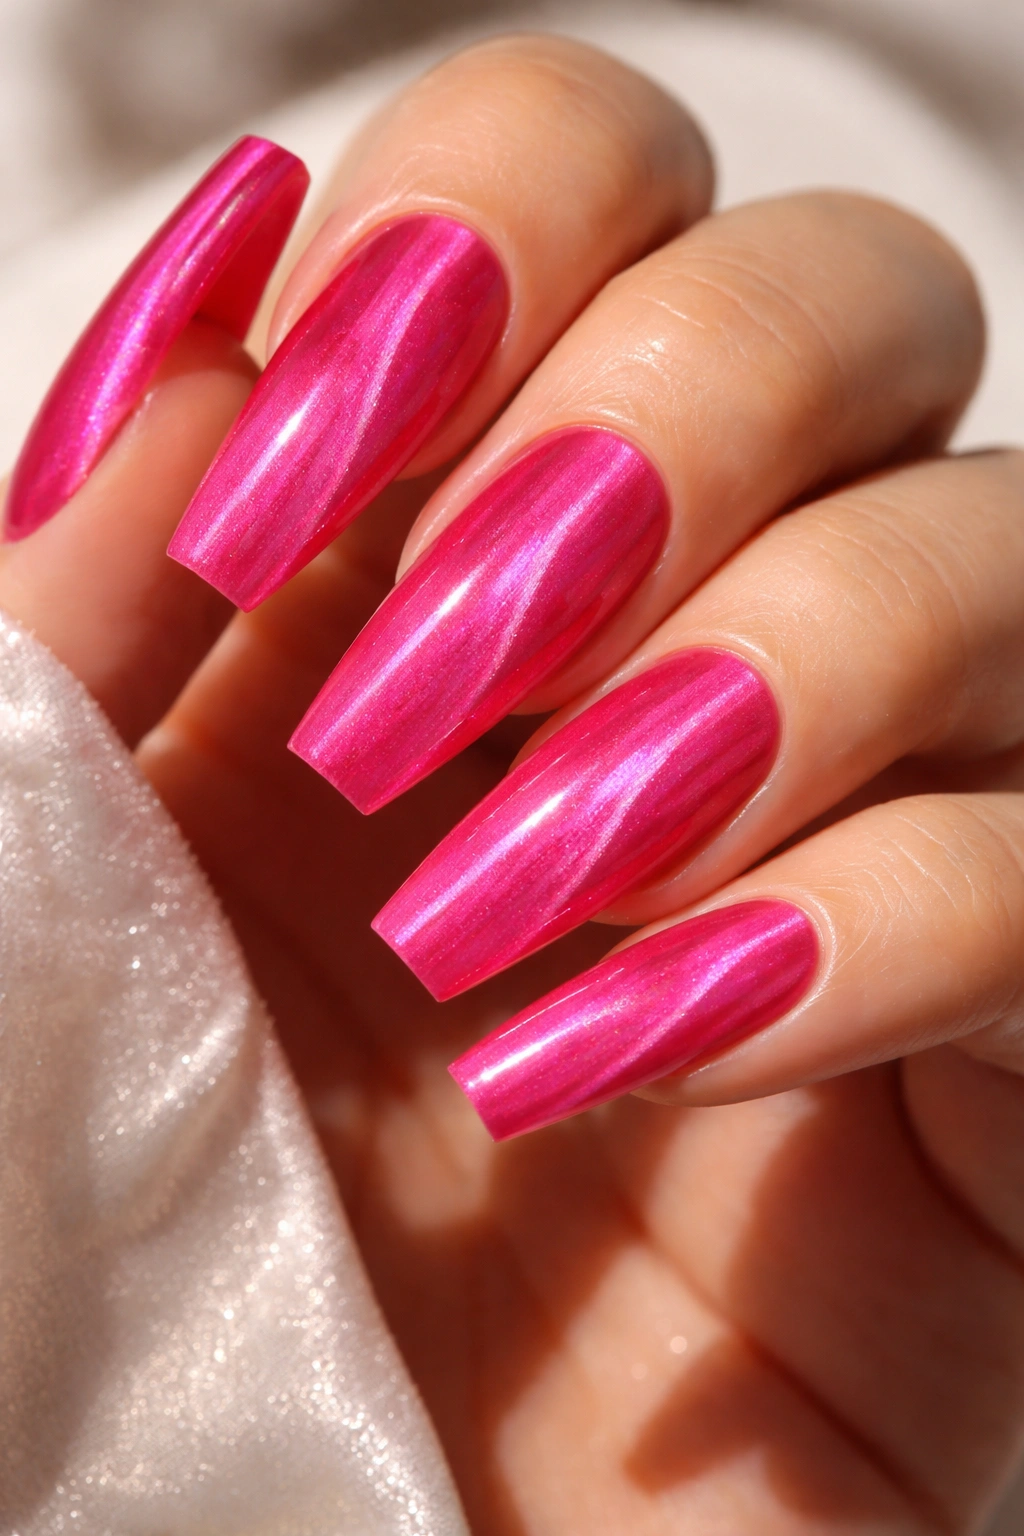
17. Hot Pink Pearl Finish Nails
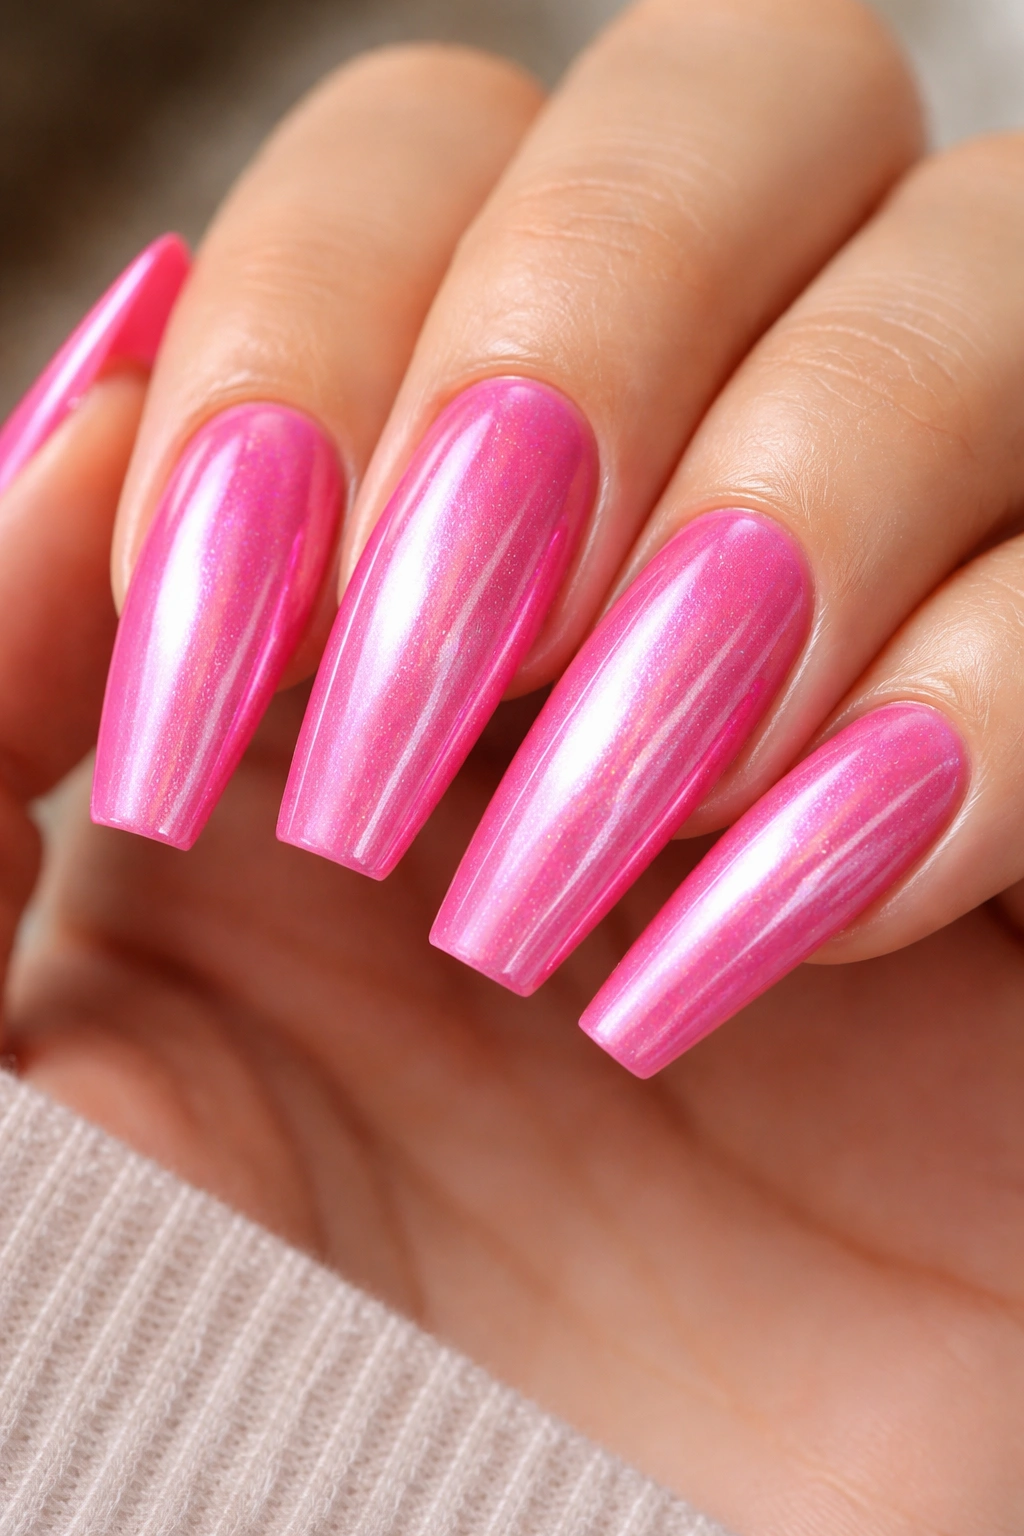
Pearl finishes create a shimmering, iridescent quality that’s different from holographic or chrome. The effect is softer and more subtle, with light reflecting through the finish rather than bouncing off reflective particles.
Pearl Finishes vs. Other Shimmer Finishes
Pearl creates an inner glow rather than a mirror effect. The hot pink maintains its vibrancy while being enhanced by a luminous quality that makes the nails look incredibly polished and expensive.
Application for Pearlescent Effect
- Choose a hot pink polish specifically formulated with pearl pigments rather than adding shimmer yourself
- Apply in thin coats — pearl finishes can look chalky or muddy if over-applied
- Two coats usually provides enough opacity while maintaining the pearlescent effect
- A glossy top coat enhances the pearl’s luminous quality
- This finish looks particularly stunning in natural light and indoor lighting
The subtlety of pearl finishes appeals to people who want their nails to sparkle without being aggressively flashy.
18. Hot Pink with 3D Nail Art Elements
Three-dimensional embellishments — tiny charms, studs, textured elements — applied to hot pink create sculptural, artistic nails. 3D elements can range from tiny beads to actual miniature objects attached to the nail surface.
3D Elements That Enhance Rather Than Overwhelm
The most elegant 3D designs use restraint — perhaps a small cluster of elements on the accent nail, or a single meaningful charm rather than covering the entire nail surface.
Securing 3D Elements Properly
- Use gel-safe adhesive specifically designed for attaching embellishments to gel manicures
- For traditional polish, use a strong nail adhesive that won’t create a visible glue line
- Position 3D elements on top of your base color and cure, then apply top coat around (but not over) them to avoid losing the dimensional effect
- Some elements need curing before top coat application to secure them properly
- Be mindful of catch-points when choosing 3D embellishments for nails
3D elements are best reserved for special occasions or photo shoots since they increase breakage risk with daily wear.
19. Hot Pink Mirror Metallic Finish Nails
Mirror metallic finishes create a truly reflective surface that looks like liquid metal coating your nails. Similar to chrome but often with different color payoff, mirror finishes are maximally dimensional and eye-catching.
Mirror vs. Chrome Finishes
While chrome typically produces silvery reflection, mirror metallics can come in gold, rose gold, copper, or even hot pink metallics that enhance rather than completely transform your base color. The hot pink mirror effect creates a shimmering, reflective hot pink rather than a cool silver.
Achieving Mirror Metallics
- Use a high-quality mirror metallic polish or powder specifically designed for nails
- Build coverage in thin layers rather than one thick application
- For powder products, use the designated application tool and work in gentle motions
- Seal thoroughly with top coat to protect the reflective surface from dulling
- This finish requires extra protection from oils and friction
Mirror metallics photograph beautifully and look positively futuristic in person.
20. Hot Pink with Coral Ombre Blend
A warm ombre that blends hot pink at the tips with coral at the base creates a design that feels cohesive while offering subtle visual interest. The blend of two related warm tones creates depth without harsh contrast.
Related Color Gradients
Instead of dramatic contrasts, this design uses color harmony to create sophistication. Hot pink and coral are neighbors on the color wheel, so blending them creates a natural-looking gradient that enhances rather than fights against your nail length.
Blending Similar Warm Tones
- Establish where the color should transition — typically somewhere in the middle of the nail
- Apply hot pink to the tips and coral to the base in separate areas
- Use a makeup sponge to blend the overlap zone gently
- Work in thin layers to create gradual transitions rather than sudden color shifts
- The blend should look like one color slowly becoming another
This gradient is particularly flattering on people with warm undertones, and it works beautifully for both professional and casual settings.
Final Thoughts
Hot pink coffin nails offer an incredible range of design possibilities, whether you’re drawn to simple elegance, sparkly glamour, or bold artistic statements. The key to choosing the right design for you is thinking about how much daily maintenance you’re willing to commit to — mirror finishes and full rhinestone coverage require extra care, while gradients and painted designs are relatively low-maintenance once applied.
The real magic of long coffin nails is that they give you enough surface area to express creativity without needing to commit to permanent changes. You can switch designs every few weeks, experiment with techniques, and gradually develop nail art skills over time. Start with designs that feel achievable to you, whether that’s simple gradients or bold solids with minimal embellishment, then gradually work toward more complex designs as your confidence grows.
Remember that a well-executed simple design always beats a poorly executed complicated one. Take your time with application, invest in quality products, and don’t be afraid to start over if something isn’t working. Your nails are a visible extension of your personal style, and hot pink is the perfect color to make that statement loud and clear.
