

Glitter acrylic nails aren’t just a trend—they’re a lifestyle for those of us who believe more sparkle is always the answer. There’s something undeniably confident about hands that catch the light with every gesture, turning even the most mundane tasks into opportunities to shine. Whether you’re reaching for your morning coffee or typing away at your desk, glitter acrylics transform your nails into tiny disco balls that refuse to be ignored.
The beauty of glitter acrylics lies in their incredible range. You can go full maximalist with chunky, holographic pieces that practically shout for attention, or keep things whisper-soft with fine shimmer that adds just a hint of magic. These nails work year-round, adapting to every season and occasion with ease. Swap out winter’s icy silvers for spring’s pastel sparkles, then dive into summer’s bold neons before settling into fall’s warm metallics.
What makes glitter acrylics particularly appealing is their durability. Unlike regular polish that chips within days, acrylic nails encapsulate that glitter, locking it in place for weeks of uninterrupted sparkle. You won’t find yourself leaving a trail of glitter everywhere you go (well, maybe just a little). The acrylic acts as a protective shell, keeping your design intact through handwashing, typing, and all the daily wear that would destroy a regular manicure.
Why Glitter and Acrylics Are Made for Each Other
Acrylic nails create the perfect foundation for glitter application. The material’s flexibility allows nail techs to mix glitter directly into the acrylic powder, creating depth and dimension that’s impossible with regular polish. You’re not just looking at glitter sitting on top of your nail—you’re seeing layers of sparkle suspended in a crystal-clear medium.
This encapsulation method means your glitter won’t budge. Celebrity nail artist Queenie Nguyen points out that glitter nails are “festive, fun, and long-lasting.” The acrylic seals everything in place, so you don’t have to worry about rough textures or pieces falling off mid-conversation. Run your fingers over a properly done glitter acrylic set, and you’ll feel smooth, glossy perfection.
The strength of acrylics also supports heavier glitter concentrations. Want full coverage with chunky hexagonal pieces? Acrylics can handle it. Dreaming of mixing three different glitter sizes for a multidimensional effect? Go for it. The structural integrity of acrylic allows for creative freedom that gel or regular polish simply can’t match.
Choosing Your Glitter: Fine vs. Chunky
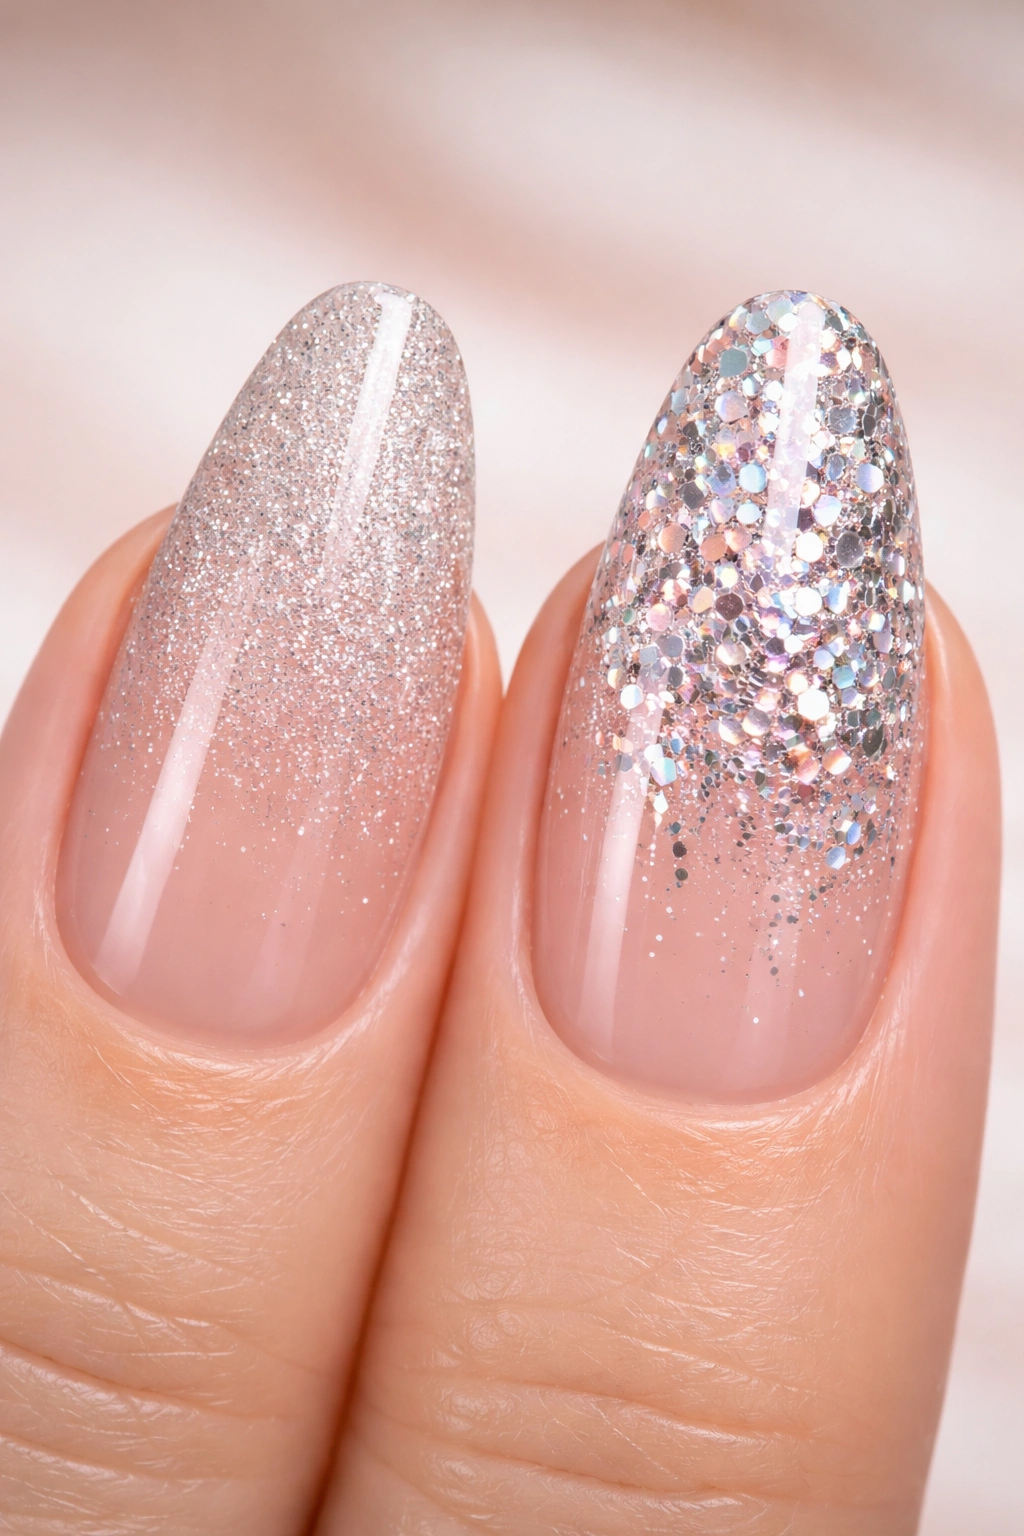
Fine glitter gives you that “my nails but sparklier” vibe. It’s subtle enough for professional settings but still catches light beautifully. Think of it as the gateway glitter—perfect if you’re testing the waters before committing to full-on sparkle. Fine glitter works especially well for gradient effects, where you want a soft transition from bare nail to full shimmer.
Chunky glitter brings the drama. These larger pieces create visible texture and serious visual impact. They’re conversation starters, the kind of nails that make strangers compliment you in grocery store lines. Chunky glitter comes in various shapes too—hexagons, squares, stars, and even hearts. Each shape catches light differently, creating a dynamic, ever-changing effect.
Many nail artists recommend mixing both types. Layer fine glitter as your base for overall sparkle, then strategically place chunky pieces for focal points. This combination creates depth and keeps your nails interesting from every angle. You’ll notice different details depending on how the light hits, making your manicure endlessly fascinating.
Application Techniques That Actually Work
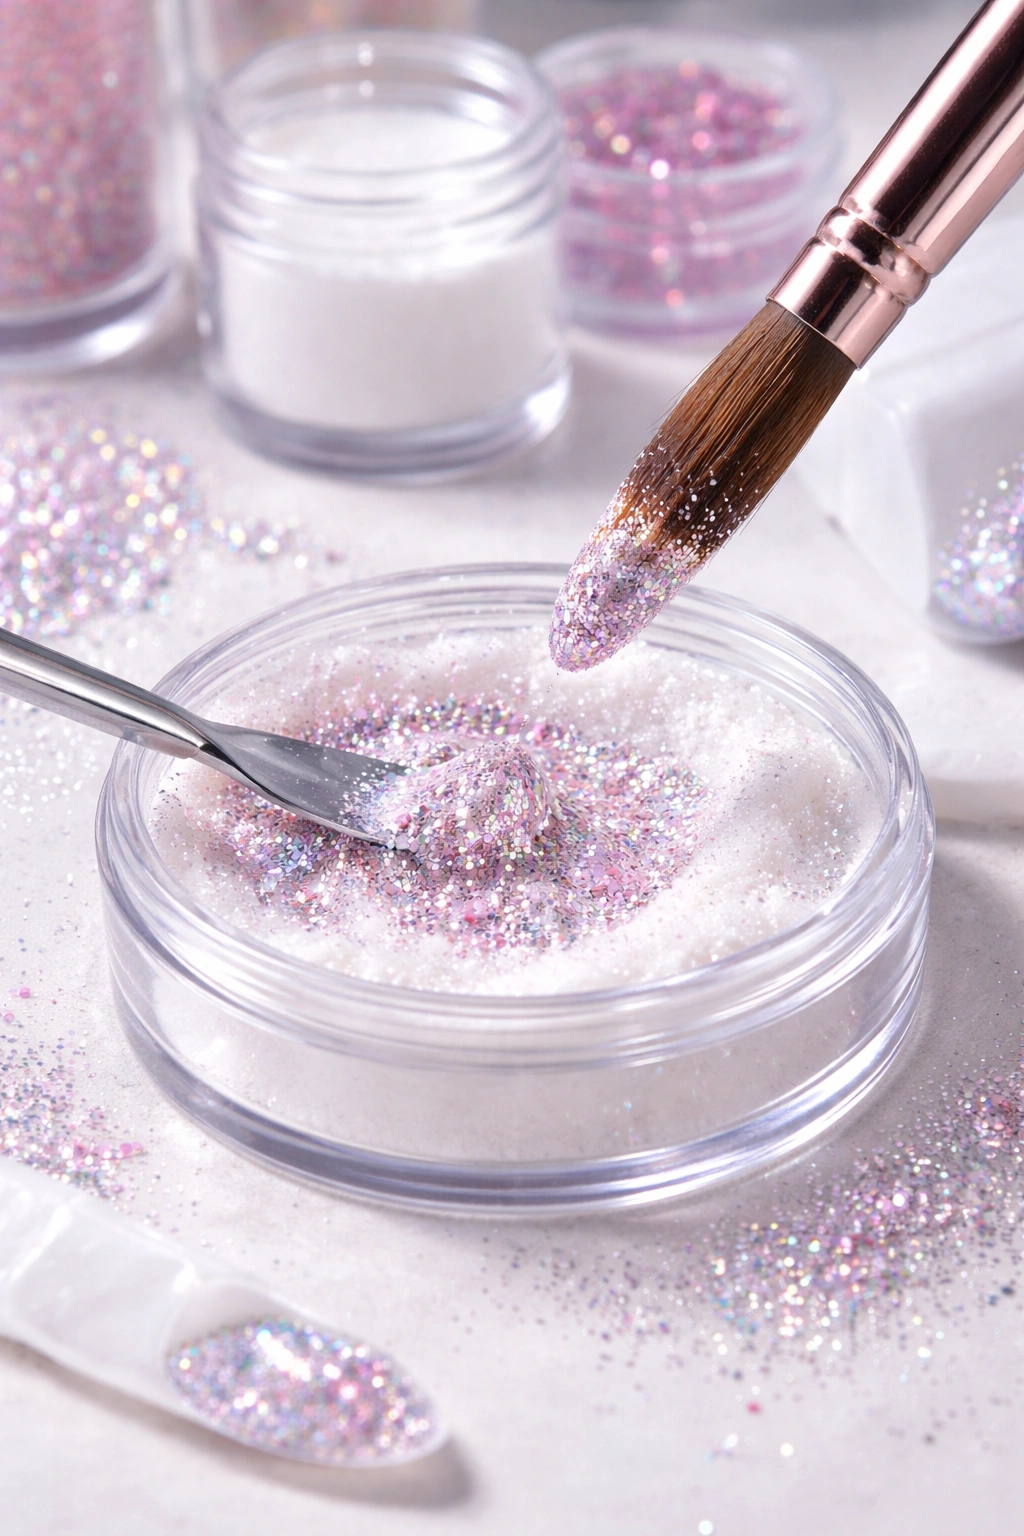
Getting glitter into acrylic requires some finesse. The most common method involves mixing loose glitter directly with clear acrylic powder before application. Start with small amounts—you can always add more, but you can’t take it away once it’s mixed. The ratio depends on your desired opacity, but generally, a 1:3 glitter-to-powder ratio gives you good coverage without compromising the acrylic’s integrity.
The sponge method offers another approach, especially for ombré effects. Dab loose glitter onto a makeup sponge, then press it onto wet acrylic. This packs the glitter densely while creating a gradient effect. Work quickly before the acrylic sets, building up layers gradually for the most seamless transition.
For encapsulated glitter designs, apply your glitter over a thin layer of acrylic, then seal it with clear acrylic on top. This creates a smooth surface while protecting your design. The key is making sure your sealing layer is thick enough to cover any texture from larger glitter pieces. If you can feel bumps after filing and buffing, you need another layer.
1. Classic Silver Holographic
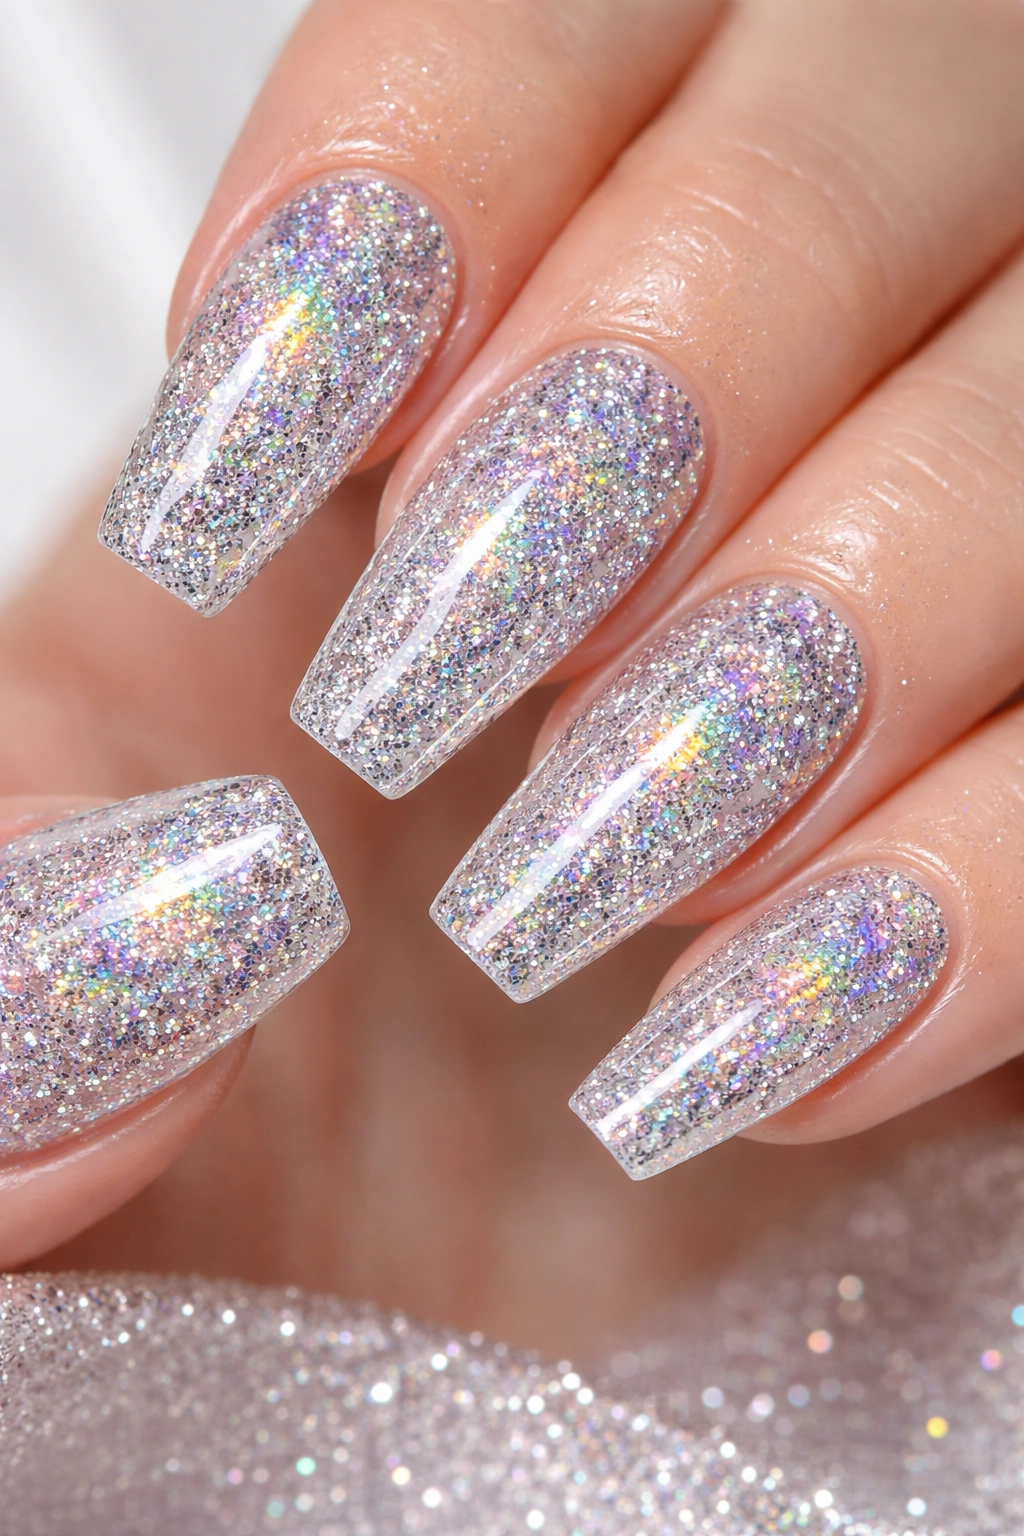
This design never goes out of style. Holographic silver glitter shifts between rainbow colors depending on the angle, creating that mesmerizing effect that makes you turn your hands constantly to catch different lights. Mix fine holographic glitter throughout clear acrylic for all-over coverage that’s blinding in the best way possible.
The beauty of holographic glitter is its versatility. It pairs with literally any outfit because it contains every color in the spectrum. Wearing all black? Your nails add interest. Rocking a colorful dress? They complement without clashing. This is the Swiss Army knife of glitter nails.
Apply two to three coats of the glitter-acrylic mixture for full opacity. You want complete coverage with no visible nail line peeking through. Finish with a high-gloss top coat to amplify that mirror-like shine. Under direct sunlight or bright indoor lighting, these nails practically glow.
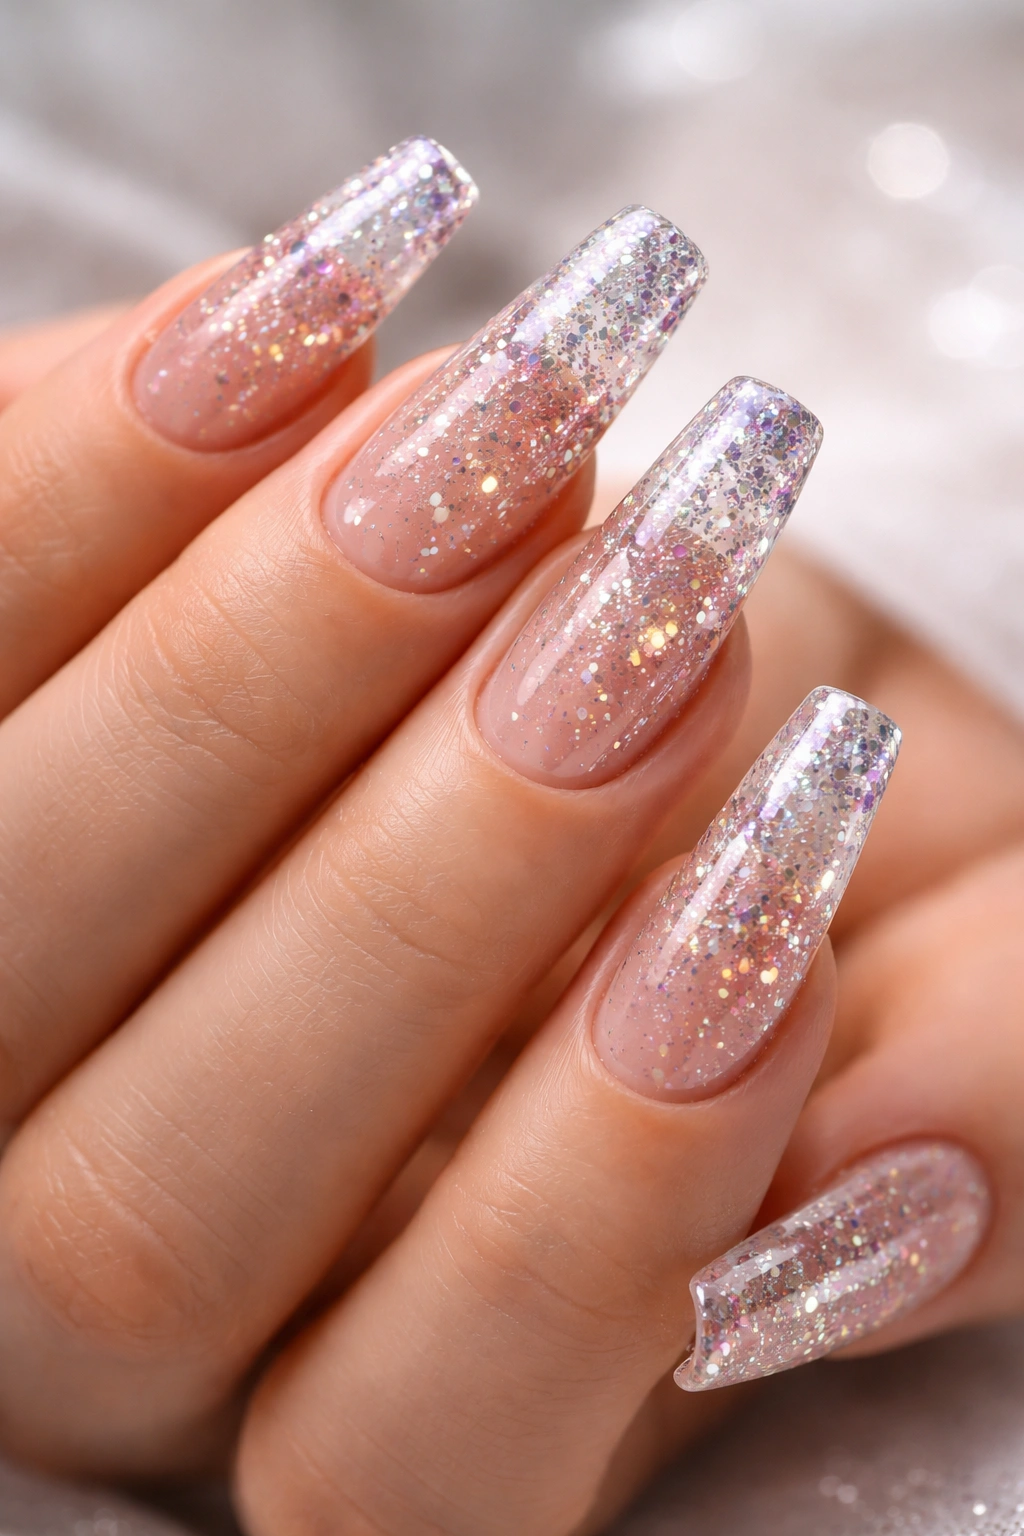
2. Rose Gold Gradient Glam
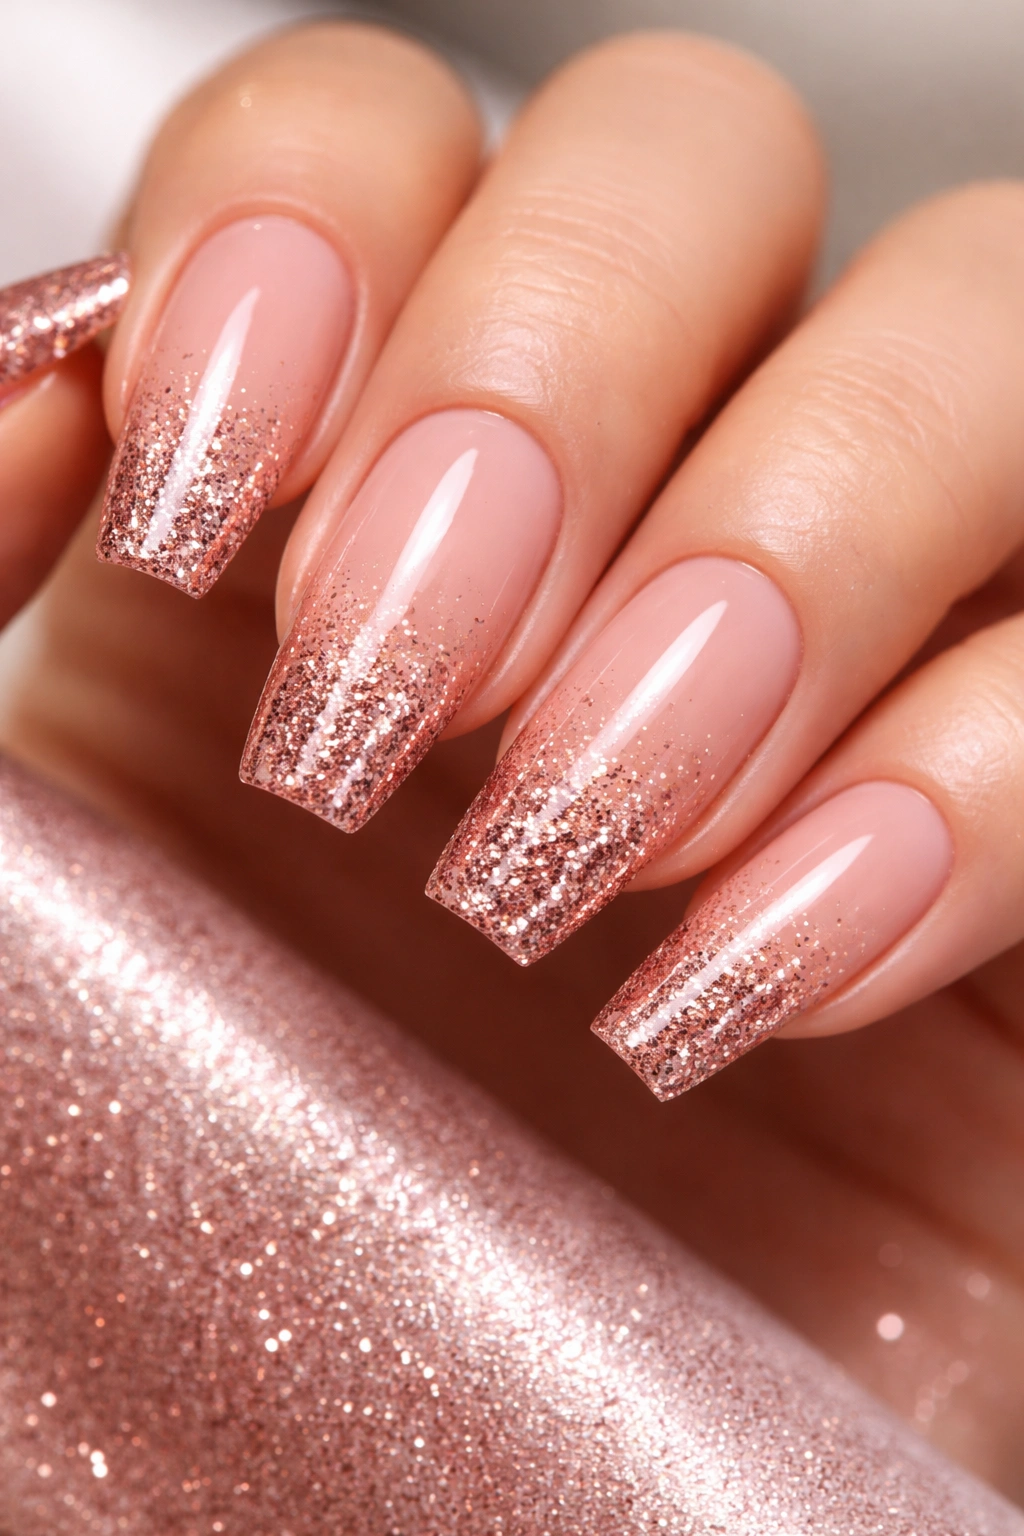
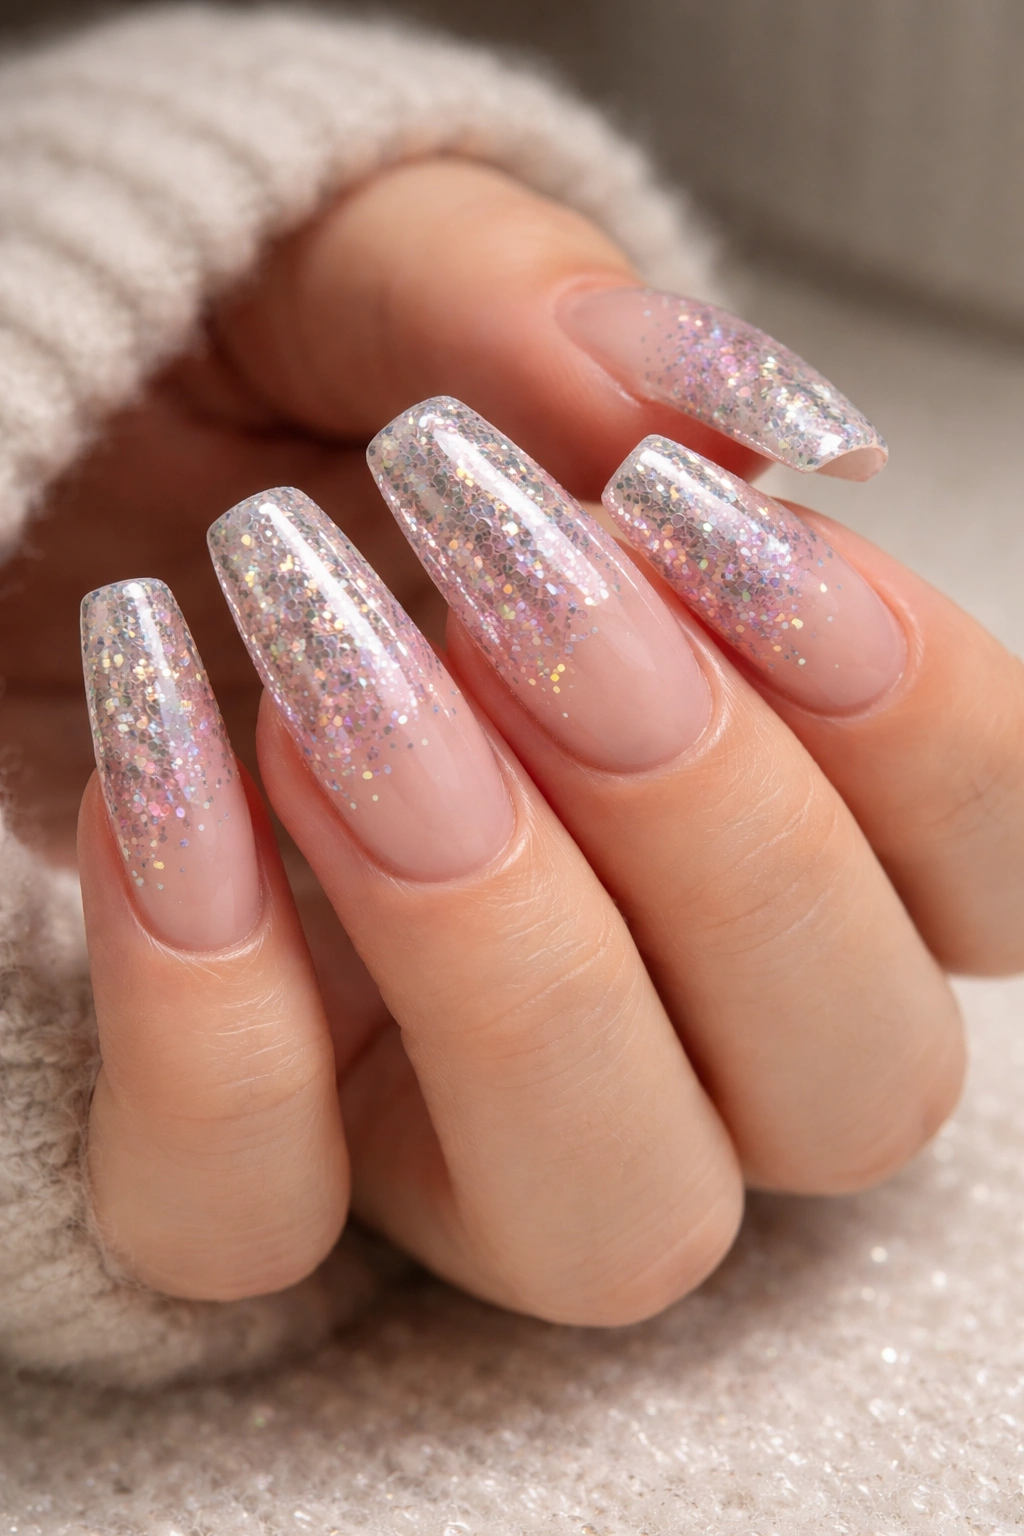
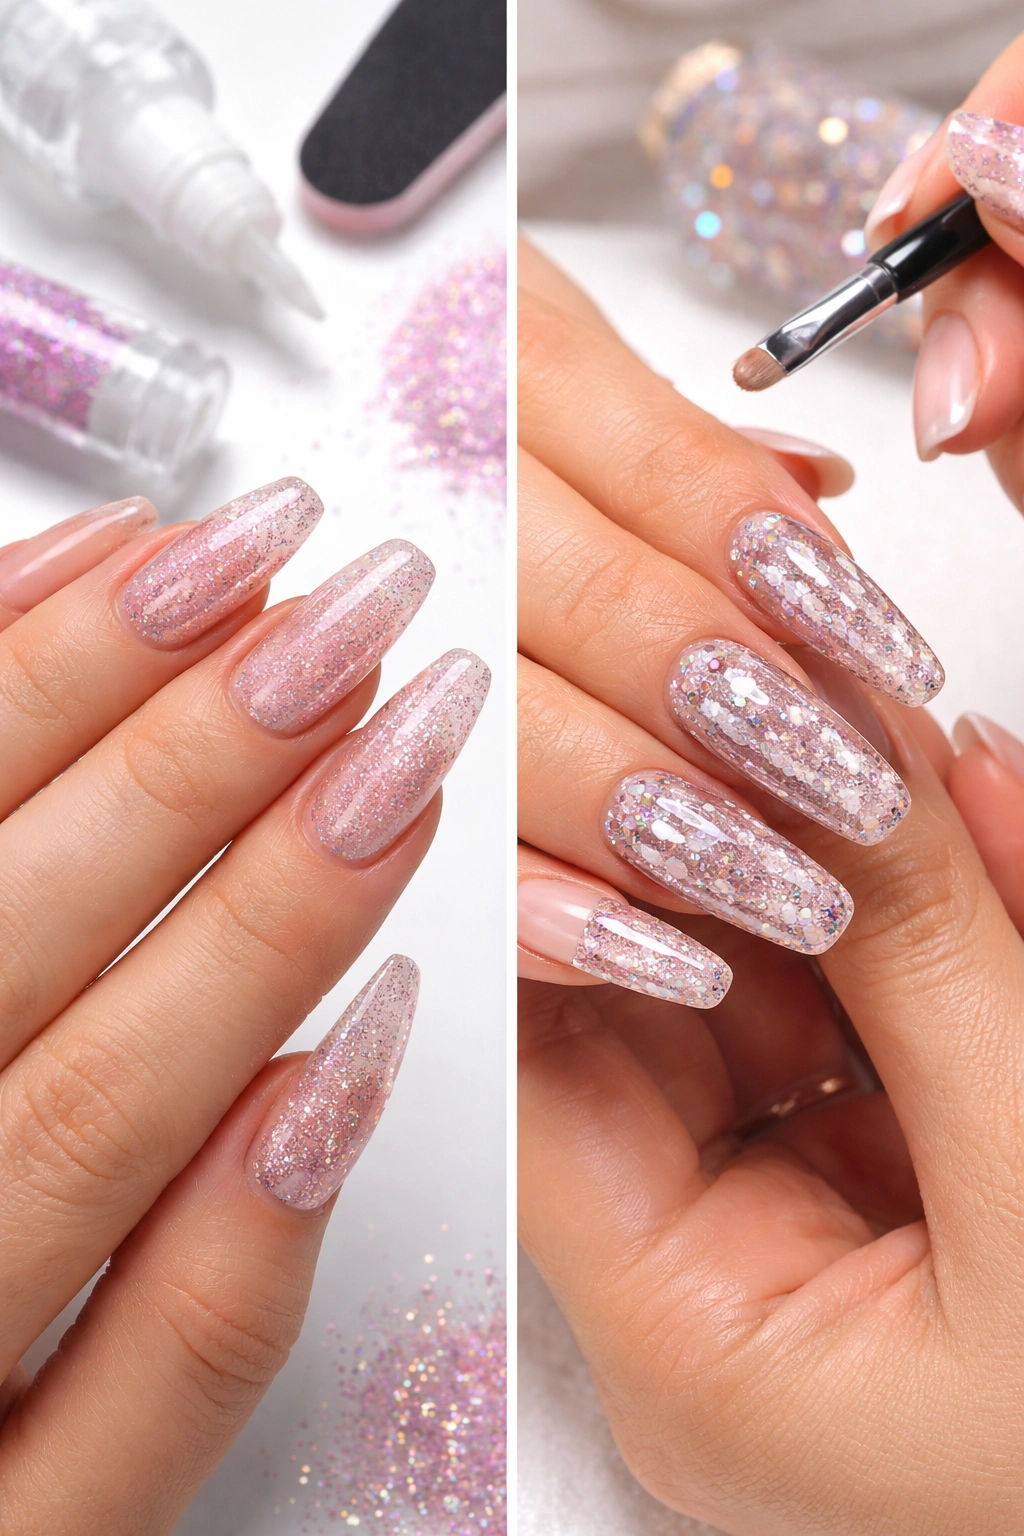
Rose gold hits that sweet spot between warm and cool tones, flattering virtually every skin tone. Create a gradient by concentrating rose gold glitter at the tips and fading it toward the cuticle. This ombré effect elongates your fingers while keeping things sophisticated enough for any setting.
Start with a nude or pale pink acrylic base. While it’s still wet, press rose gold glitter onto the tips using a small brush or sponge. Work the glitter upward about two-thirds of the way, using less product as you approach the cuticle. The fade should be gradual and natural, not abrupt.
Seal everything with clear acrylic, then shape your nails. Almond or coffin shapes work particularly well with gradients, as they draw the eye along the length of the nail. Buff until smooth and finish with gel top coat for extra durability and shine.
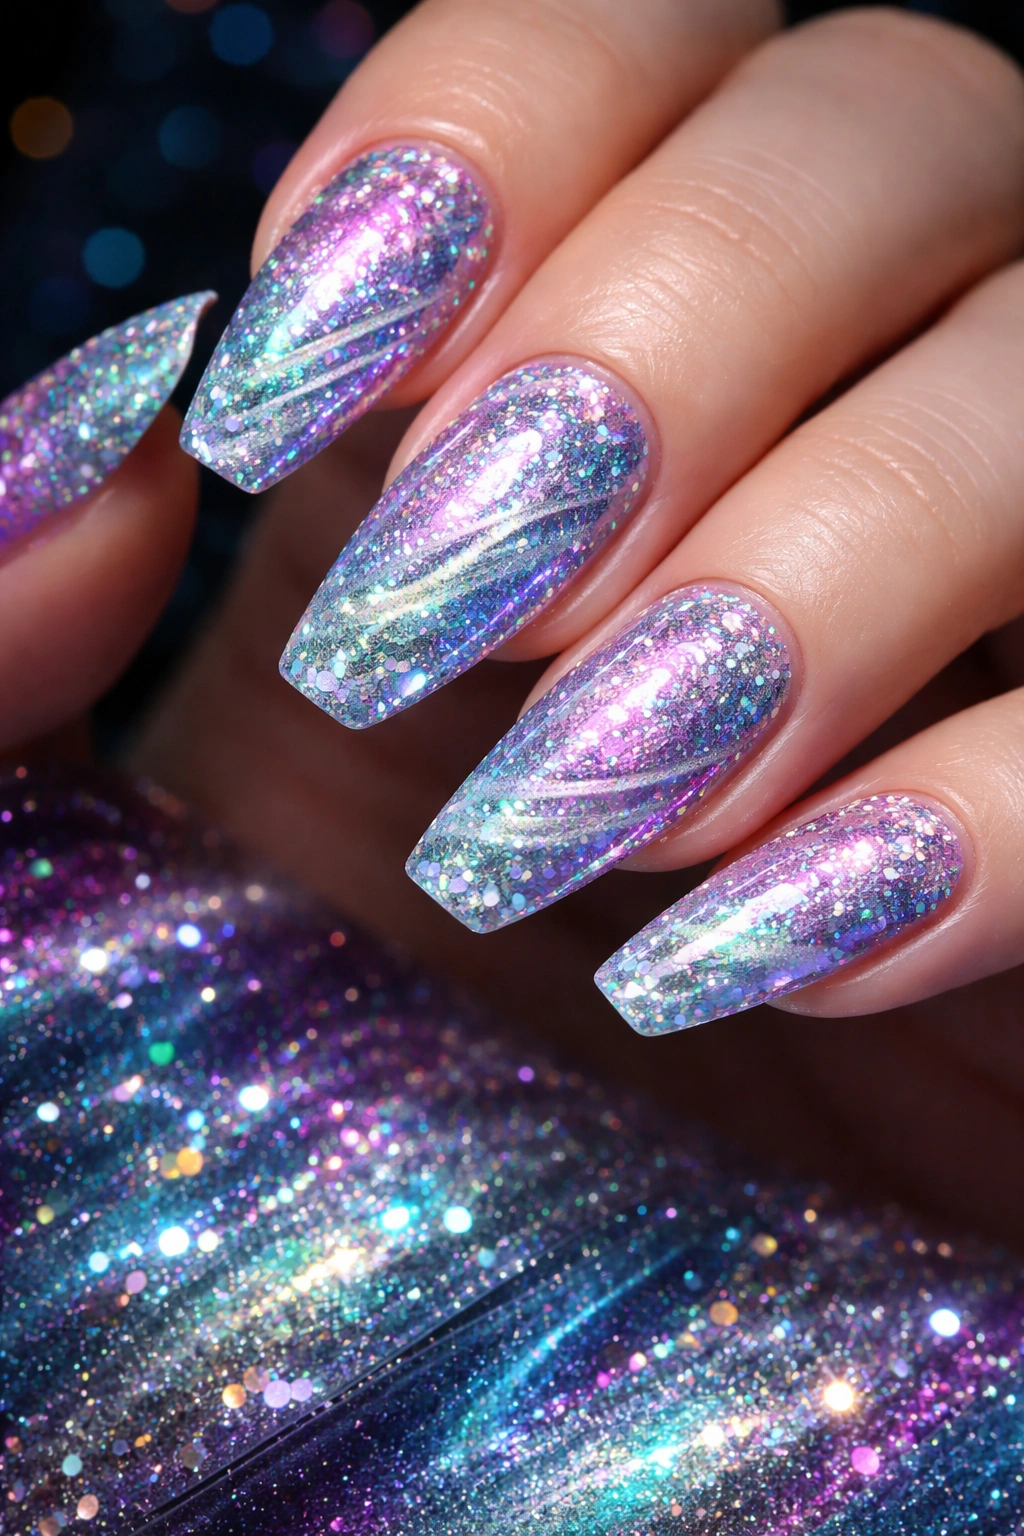
3. Galaxy Nails with Mixed Glitter
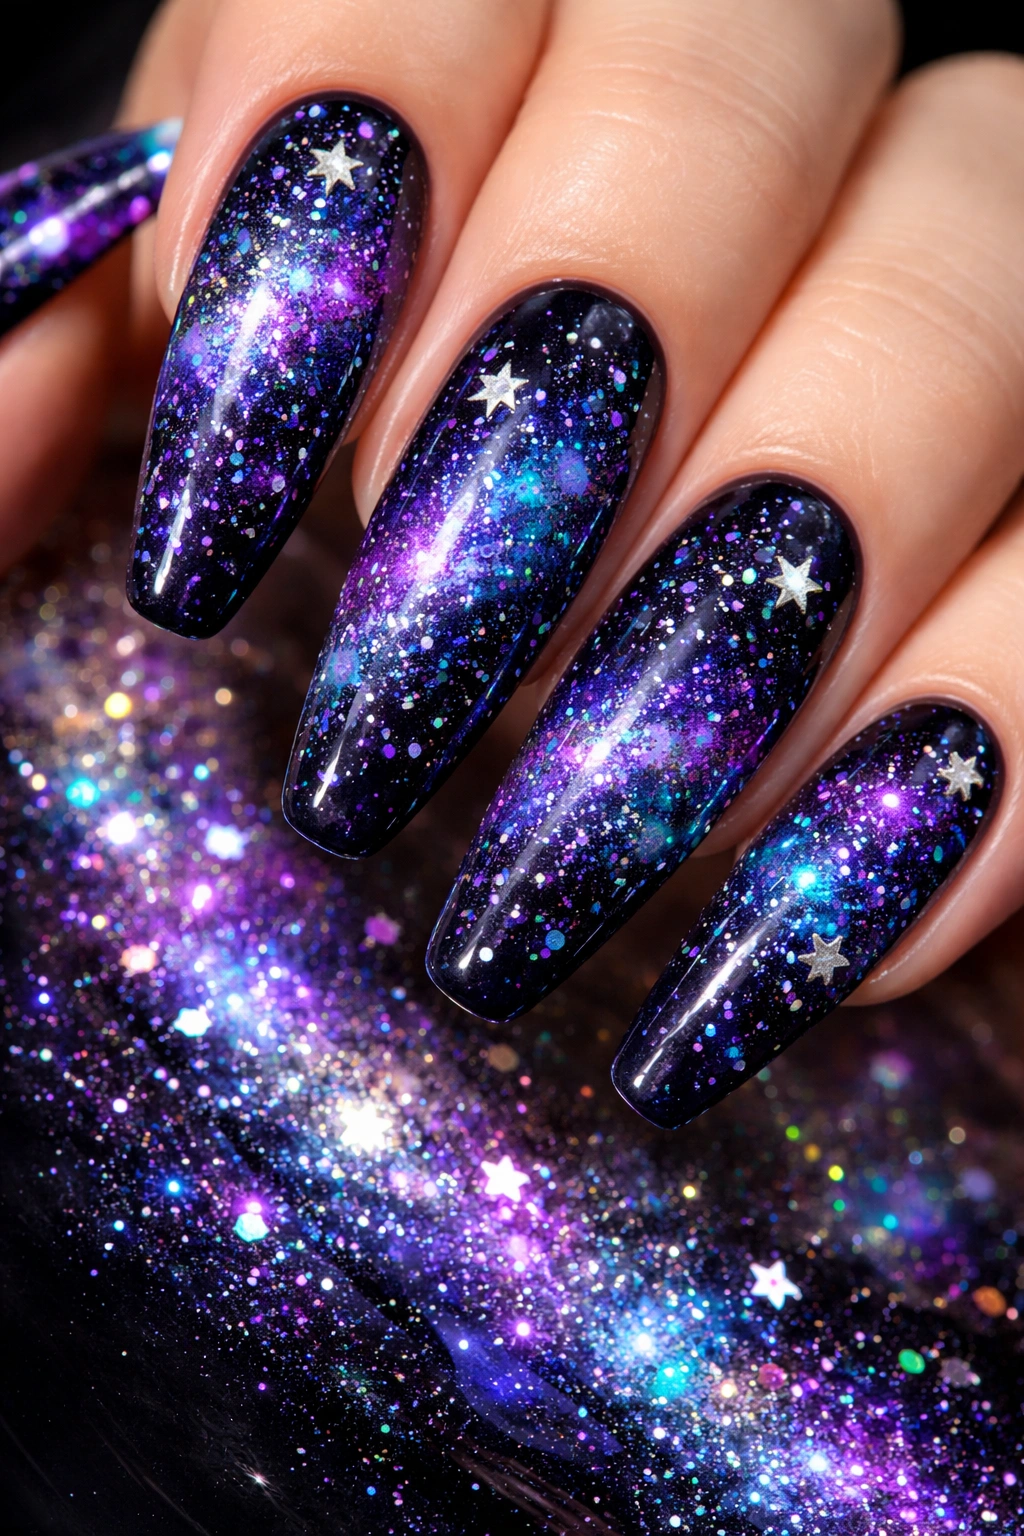
Channel your inner cosmic queen with this multidimensional design. Start with a deep navy or black acrylic base, then layer multiple glitter colors—purple, blue, silver, and holographic work beautifully together. The dark base makes the glitter pop like stars against a night sky.
This design benefits from variety in glitter sizes. Use fine glitter as your “stardust” base layer, then add medium and chunky pieces as focal “stars.” You can even incorporate star-shaped glitter pieces if you’re feeling extra celestial. The randomness of the placement actually works in your favor here—galaxies aren’t uniform, so don’t stress about perfect symmetry.
Some nail artists add chrome powder over sections for a nebula effect. Rub purple or blue chrome onto specific areas before sealing, creating those swirling, gaseous clouds you see in space photos. The combination of glitter, dark base, and chrome creates serious depth.
4. Champagne Bubbles
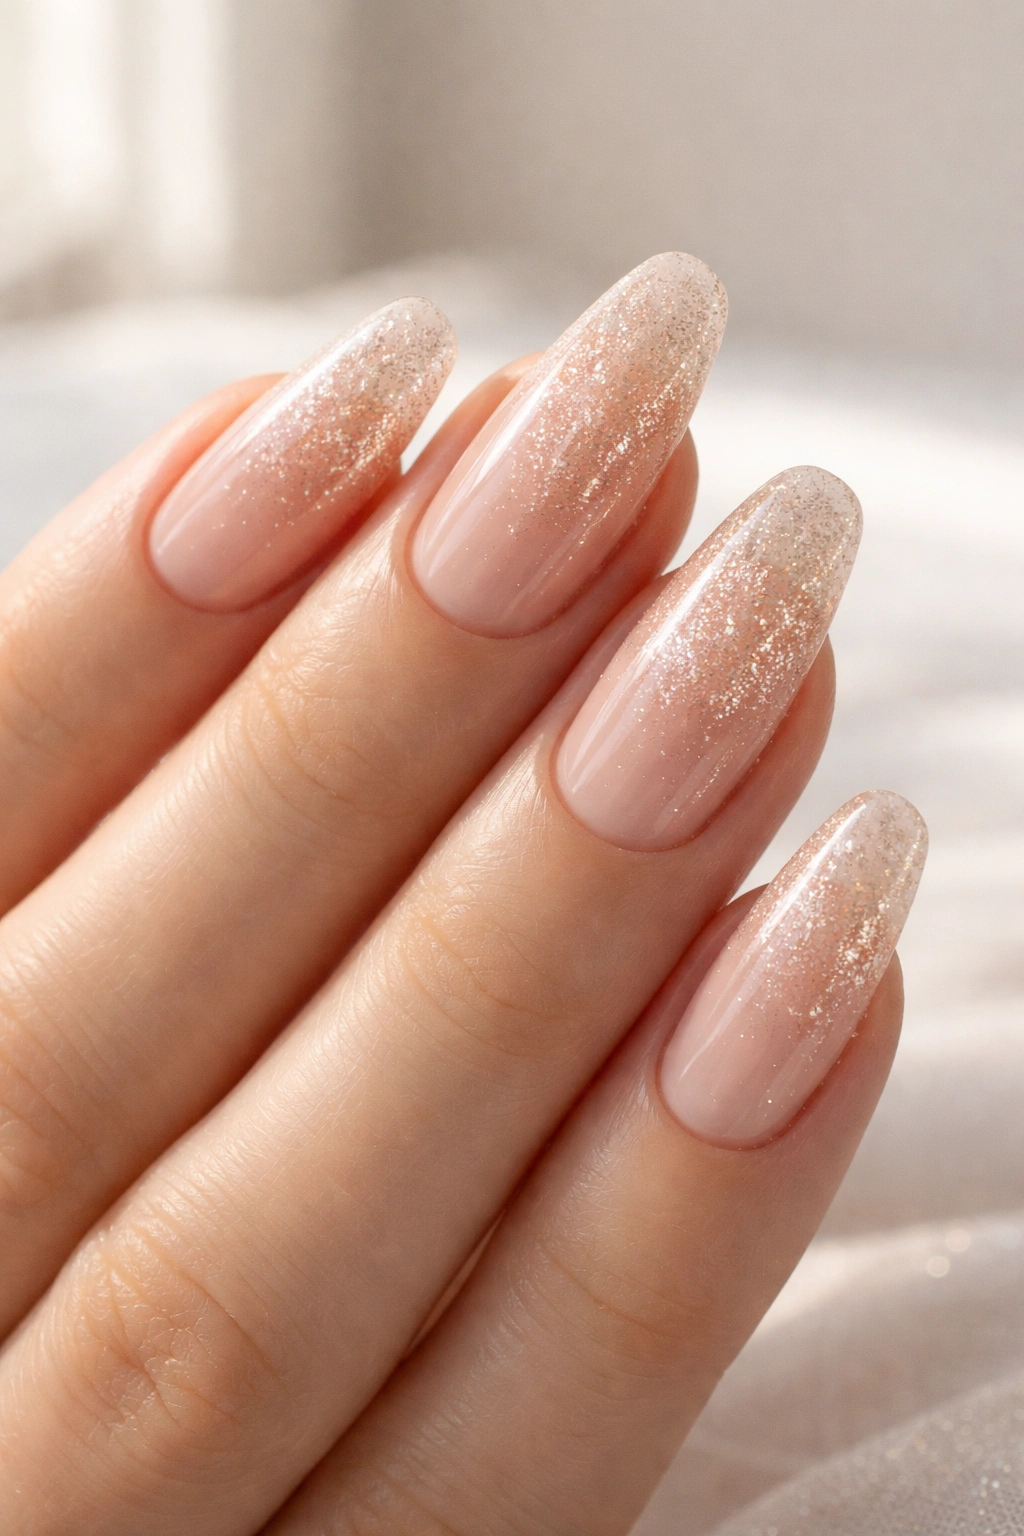
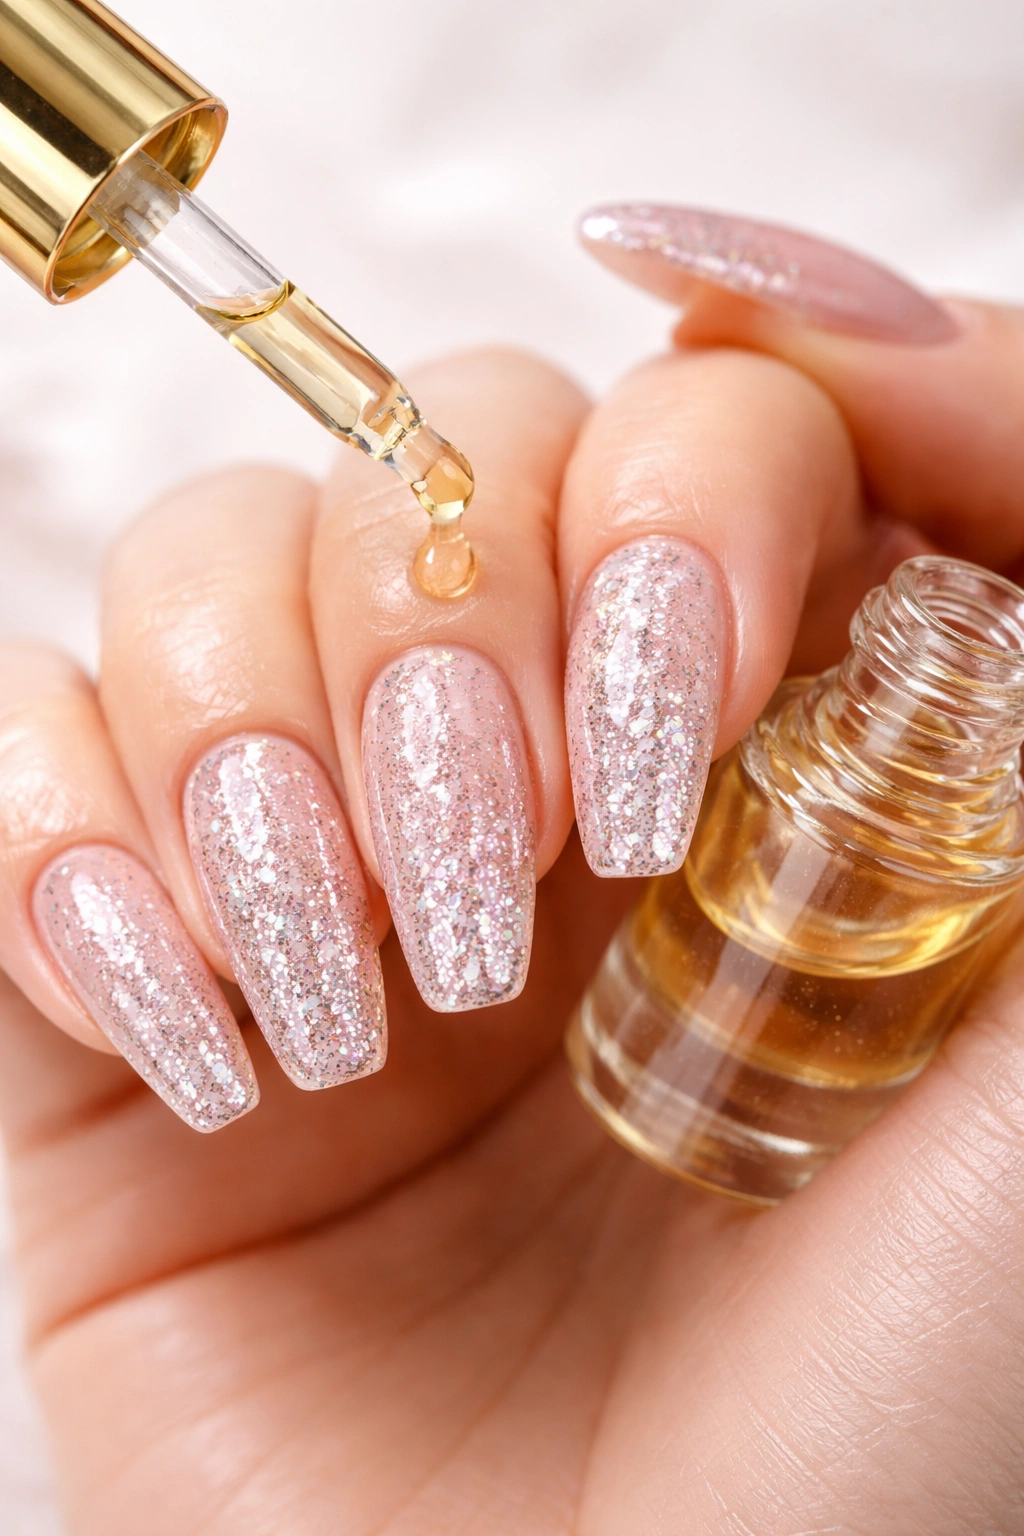
This subtle, sophisticated look uses champagne-colored fine glitter mixed throughout a sheer nude or beige acrylic. The effect is understated elegance—your nails look polished and refined with just enough sparkle to keep things interesting. Perfect for anyone who wants glitter but works in a conservative environment.
The sheer base is key here. You want to see a hint of your natural nail through the acrylic, creating that “jelly” effect. Mix in just enough champagne glitter to catch light without overwhelming the delicate base color. Think “sun-kissed” rather than “disco ball.”
This design ages incredibly well throughout the wear period. Because it’s subtle to begin with, any slight grown-out sections blend seamlessly. You can often stretch these to four weeks without them looking obviously overgrown, making them budget-friendly despite their luxe appearance.
5. Chunky Gold Glitter Tips
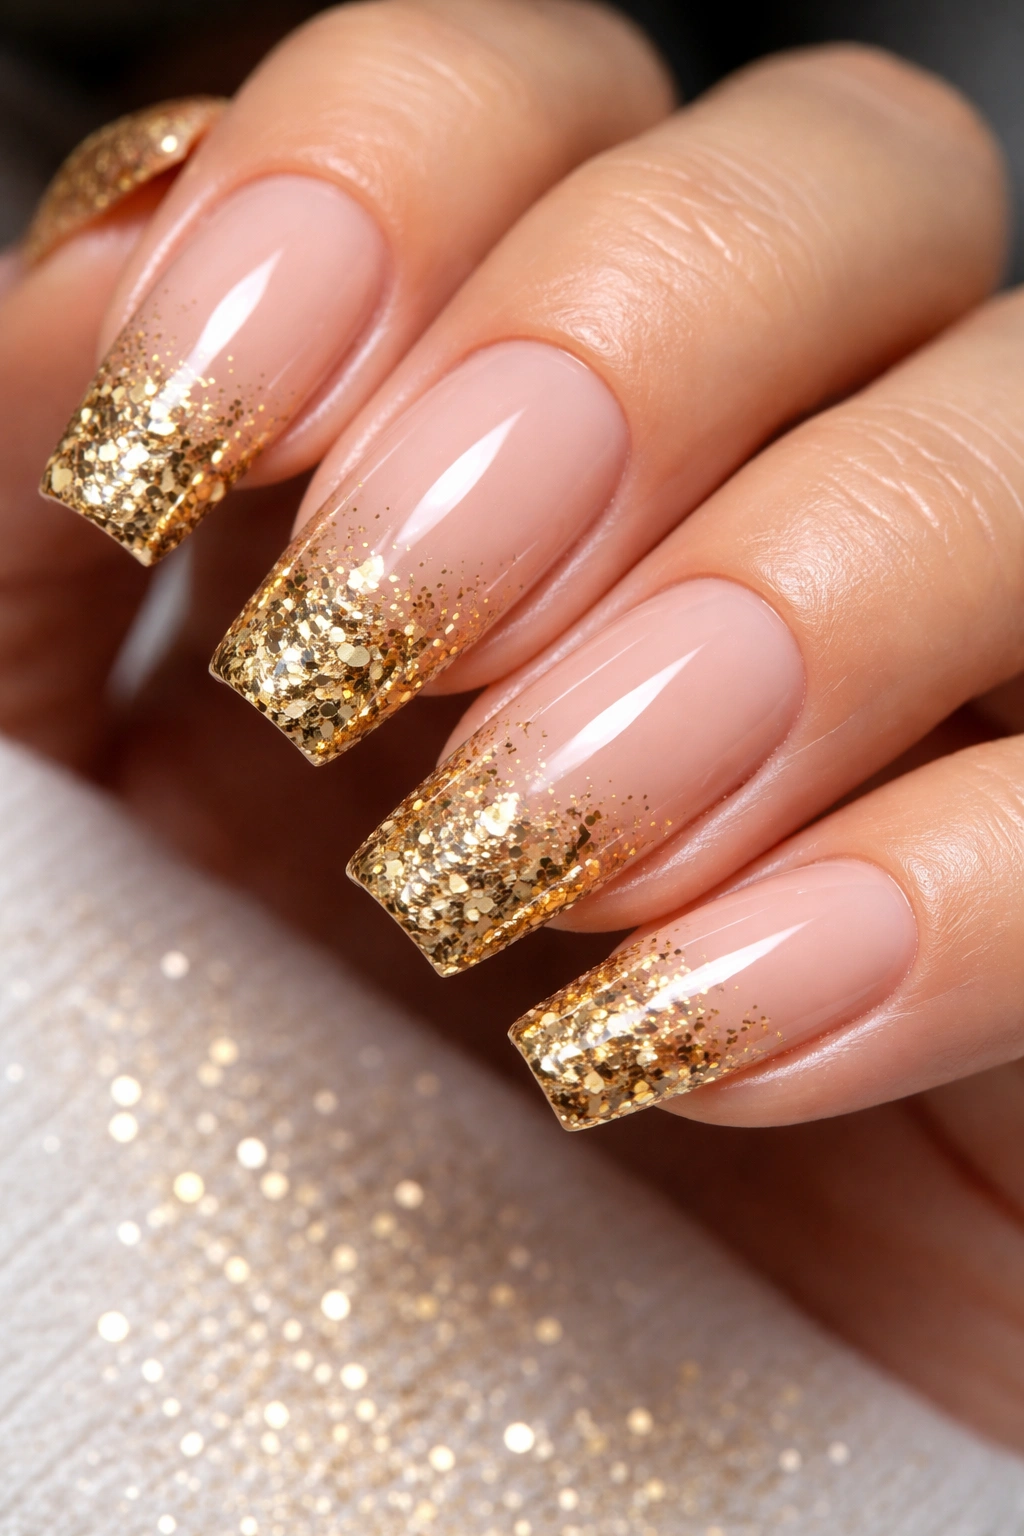
Modernize the classic French manicure with chunky gold glitter concentrated at the tips. This takes the traditional French from basic to bold while maintaining that clean, tip-focused design. The nude base keeps things grounded, while the gold tips add just enough personality to stand out.
Apply your nude acrylic base first, shaping and smoothing as usual. Then mix clear acrylic with chunky gold glitter pieces—hexagons work particularly well for this design. Apply this mixture to just the tips, creating a smile line similar to a French manicure but filled with sparkle instead of white.
Before sealing, press a few extra-large gold glitter pieces along the smile line for emphasis. This creates a gradient within the glitter itself, transitioning from solid sparkle at the very tip to scattered pieces where it meets the nude base. Seal everything thoroughly with clear acrylic to eliminate any texture from those chunky pieces.
6. Mermaid Iridescent Mix
Iridescent glitter in aqua, purple, and pink creates that mythical mermaid scale effect. These colors shift dramatically in different lighting, sometimes appearing blue-green, other times showing more purple or pink. Mix all three colors together in your acrylic for a truly magical finish.
The key to mermaid nails is layering different glitter finishes. Start with fine iridescent glitter mixed throughout your acrylic base. While that’s still workable, sprinkle larger iridescent flakes on top. The combination of sizes creates that scale-like texture that’s essential to the mermaid vibe.
Consider adding a magnetic cat-eye effect over sections before sealing. The magnetic particles create flowing lines that mimic water, enhancing the underwater fantasy. This extra step takes the design from pretty to absolutely stunning, especially when light hits those magnetic swirls alongside all that iridescent sparkle.
7. Black Glitter Ombré
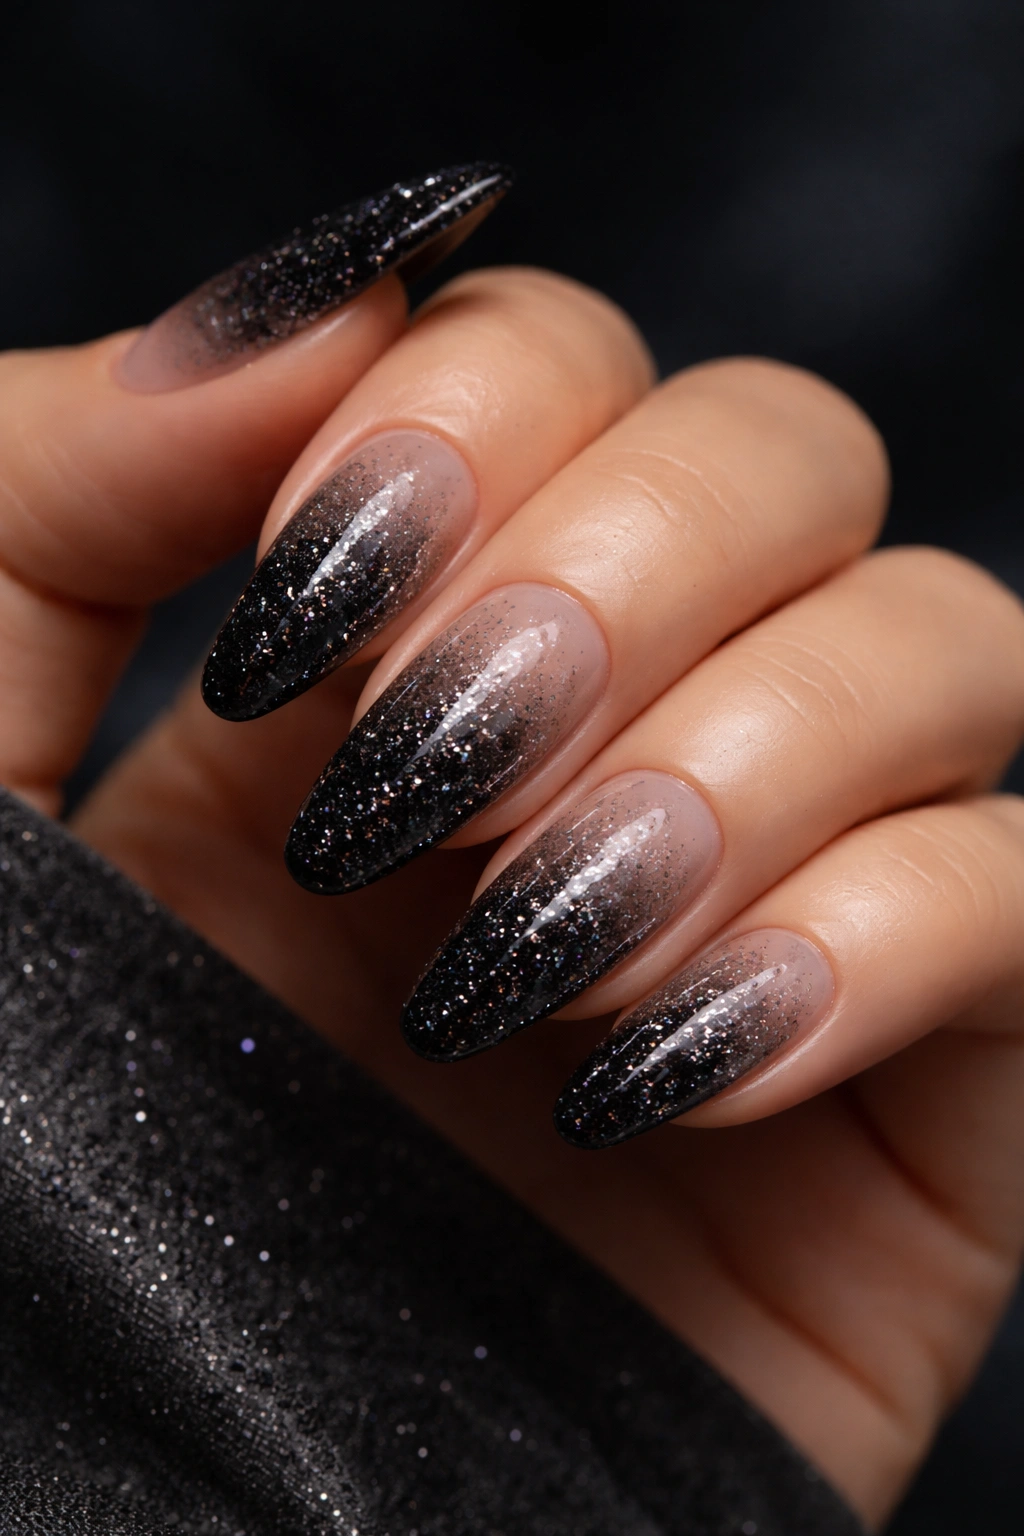
Yes, black glitter exists, and it’s edgier than you’d think. The dark sparkle creates a gothic, mysterious vibe that’s perfect for those who love glitter but want something more moody. Start with solid black glitter at the tips, fading up to clear or very light smoky acrylic at the cuticle.
Black glitter has different undertones—some lean more gunmetal gray, others have hints of deep purple or blue. Choose based on your overall aesthetic. The cooler-toned black glitters feel modern and industrial, while warmer ones with subtle color shifts feel more romantic and vintage.
This design looks incredible on longer nails, particularly stiletto or coffin shapes. The dark ombré creates a dramatic elongating effect, making your fingers appear miles long. Seal with a matte top coat for serious edge, or keep it glossy for more traditional glamour.
8. Cotton Candy Pink and Blue
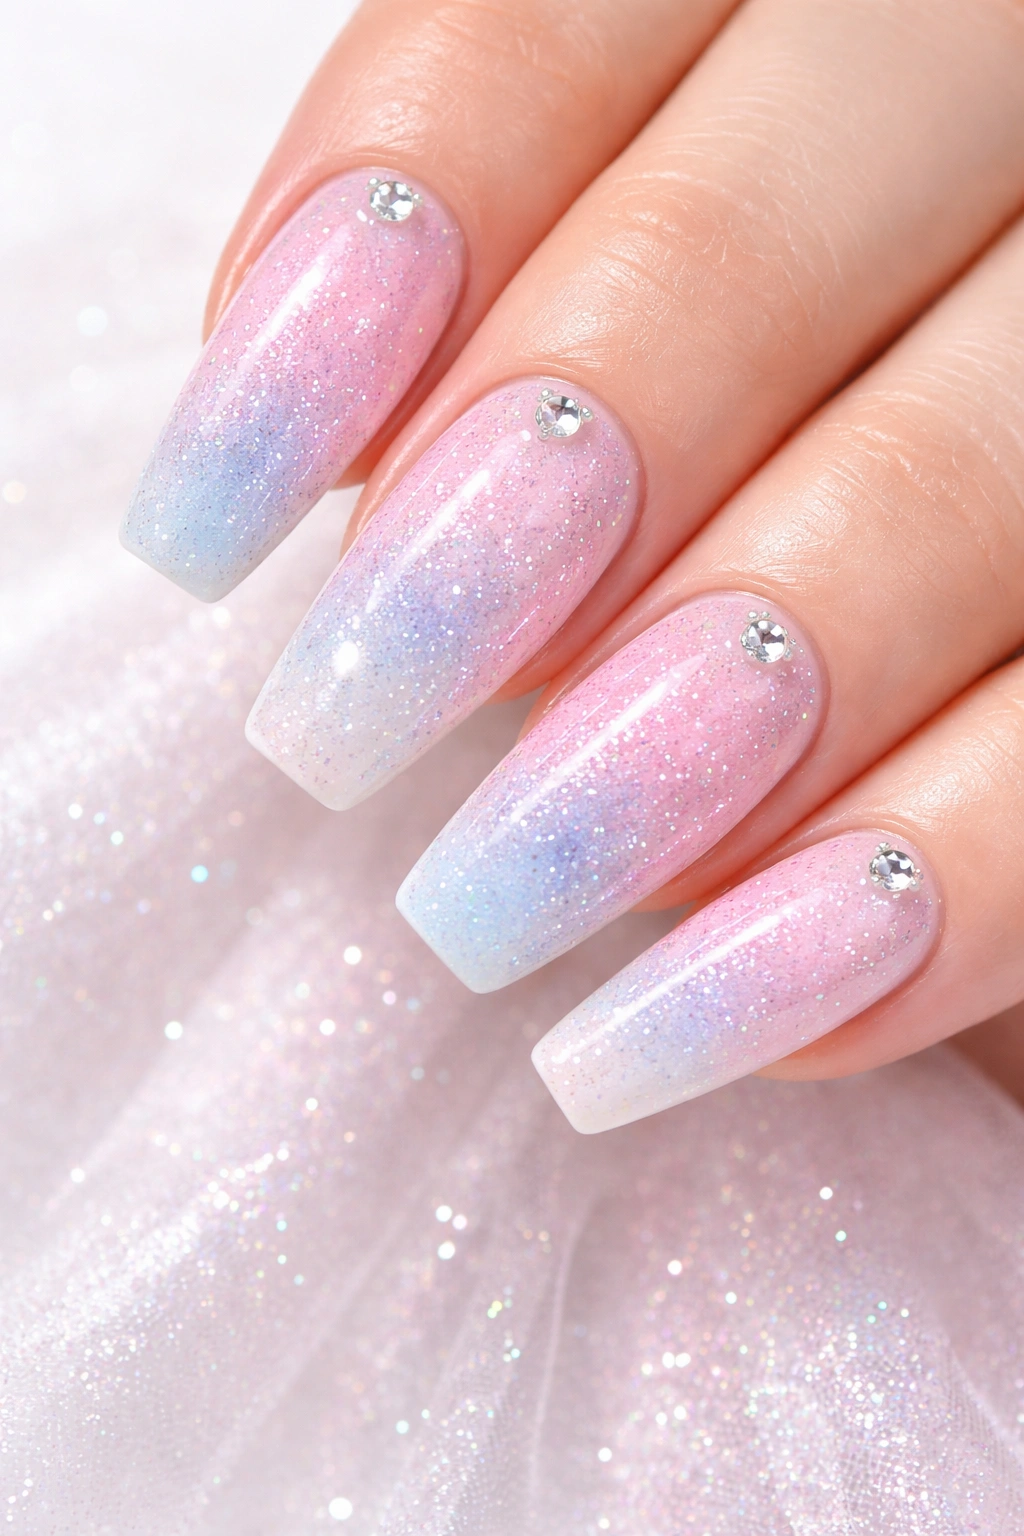
Mix pastel pink and blue fine glitters for a sweet, whimsical look that’s perfect for spring and summer. Apply the two colors randomly across each nail, letting them blend where they meet. The result looks like spun sugar, delicate and fun without being overly juvenile.
These softer glitter shades work best over a white or very pale acrylic base. The light background allows the pastel sparkles to show their true colors instead of getting muddied against a darker base. Apply the glitter generously—pastels need full coverage to avoid looking washed out.
Add a few strategically placed gems or rhinestones for extra sweetness. Small clear or opalescent stones at the cuticle or along one side of each nail enhance the fairy-tale vibe. Just don’t go overboard—three to five stones across the entire set is plenty.
9. Emerald Green Jewel Tone
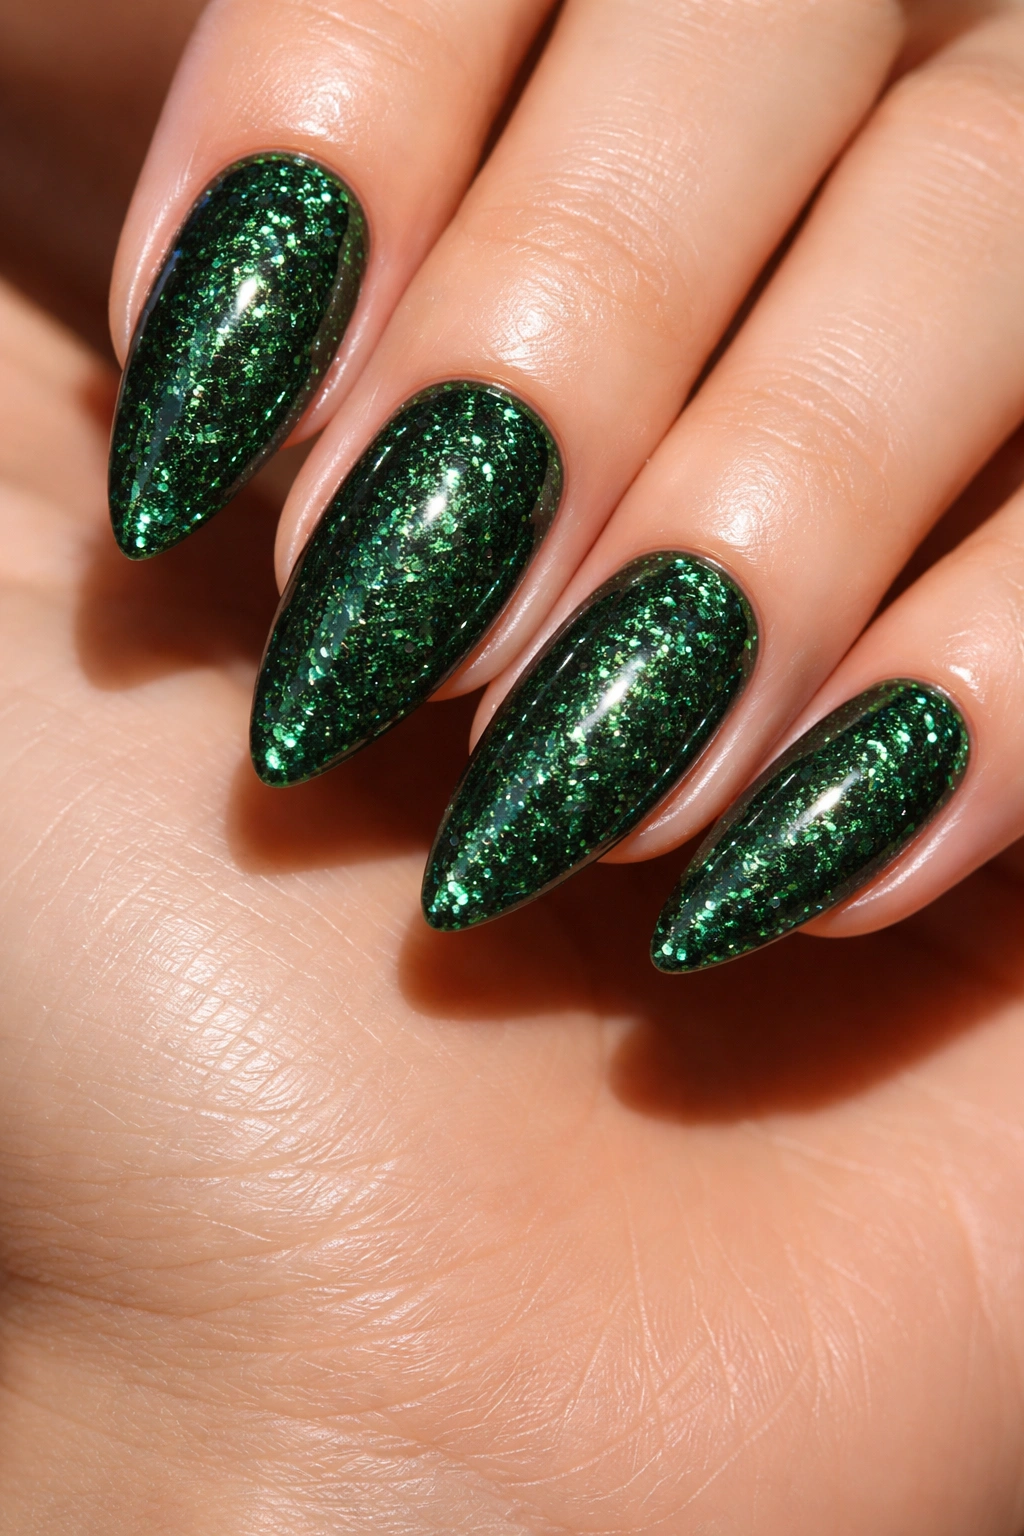
Rich, deep emerald green glitter feels luxurious and opulent. This isn’t your average green—it’s the color of expensive gemstones and velvet evening gowns. Mix chunky emerald glitter throughout your acrylic for full coverage that’s unapologetically bold.
Emerald works beautifully during fall and winter, complementing the season’s deeper color palette. It pairs surprisingly well with gold jewelry and warm-toned clothing. The color has enough depth to feel sophisticated rather than childish, making it appropriate for professional settings despite its intensity.
Shape these nails into classic almond or oval shapes to enhance the jewel-like quality. Sharp stiletto points can look too aggressive with such a saturated color, while softer shapes feel more refined. Buff to a high shine—emerald glitter needs that glossy finish to truly sparkle like the gem it’s imitating.
10. White Glitter French Tips
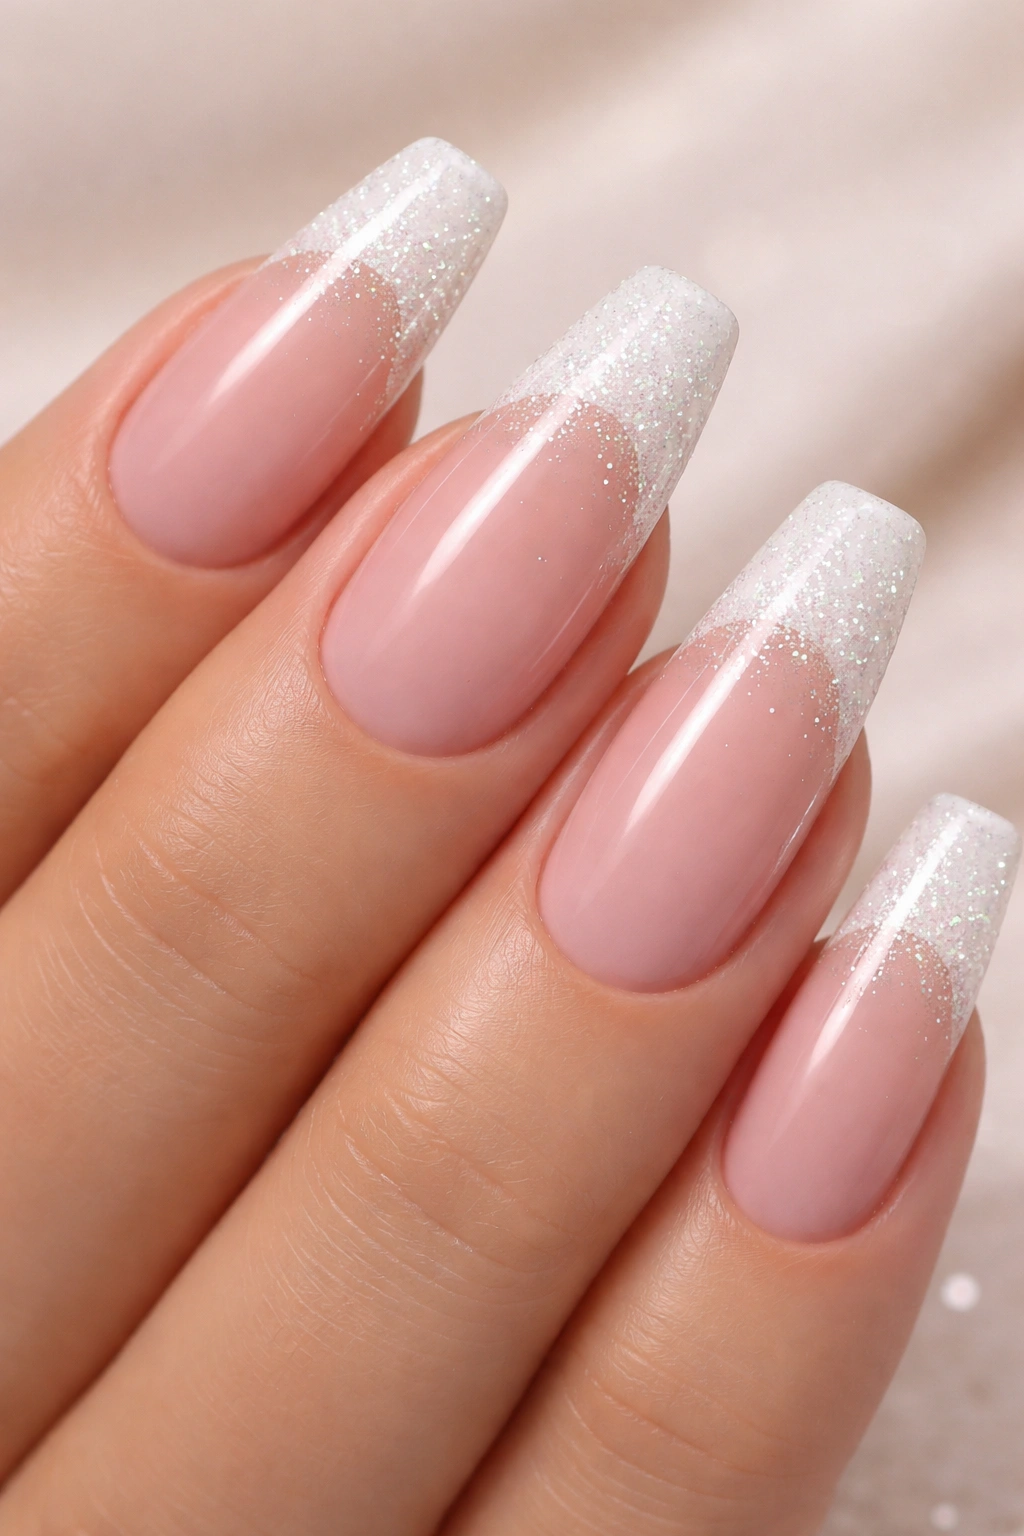
Brighten up the traditional French with white glitter instead of solid white tips. This keeps the clean, classic feel of a French manicure while adding texture and dimension. The white glitter catches light in ways that solid white never could, making your tips sparkle without looking over-the-top.
Use fine to medium white glitter for this design—chunky pieces can look more silver than white from certain angles. Apply over a sheer pink or nude base, creating that familiar French smile line but filled with sparkle. The tips should be opaque enough that you can’t see through to the base color.
This design is perfect for brides who want something special without straying too far from traditional wedding nail aesthetics. It photographs beautifully, showing texture and detail in close-up shots while still looking clean and bridal in wider photos.
11. Rainbow Confetti Party Nails

Go full celebration mode with multicolored glitter in every shade imaginable. This playful design incorporates red, orange, yellow, green, blue, and purple glitter in various sizes, creating a confetti effect that’s pure joy. Perfect for festivals, parties, or anyone who refuses to choose just one color.
Start with a clear or nude acrylic base so the rainbow colors show true. Mix all your glitter colors together before application, ensuring random distribution rather than color blocking. You want the effect to look like someone scattered confetti across your nails and it magically stuck.
Balance is important here—too much glitter becomes overwhelming and muddy, while too little looks sparse. Aim for about 70% glitter coverage, leaving small gaps where the base color peeks through. These negative spaces give your eyes places to rest, preventing the design from becoming visually exhausting.
12. Copper Penny Sparkle
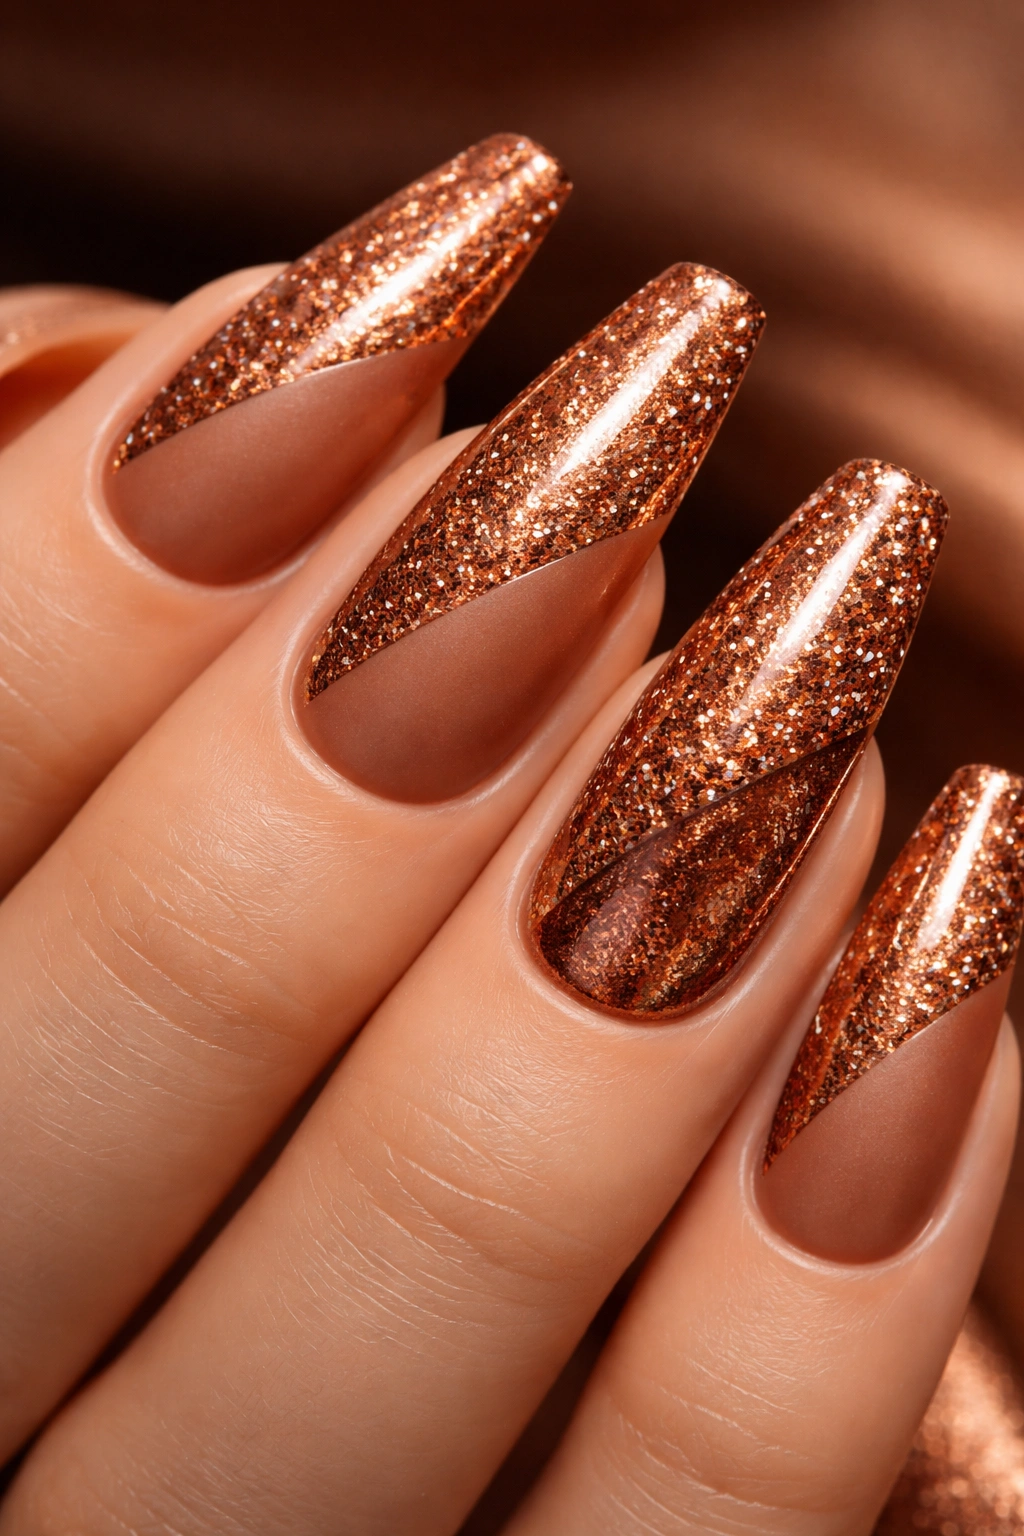
Copper glitter brings warmth and earthiness while still delivering serious sparkle. This color feels particularly appropriate for autumn, complementing rust, burgundy, and olive green wardrobes perfectly. Mix fine copper glitter throughout your acrylic for a penny-bright finish that glows like a sunset.
Copper works beautifully on deeper skin tones, where the warm metallic creates gorgeous contrast. It’s also flattering on cool-toned skin, adding warmth that balances out pink or blue undertones. Basically, everyone looks good in copper—it’s one of those universally flattering shades that just works.
Consider adding a matte top coat over half of each nail, leaving the rest glossy. This creates visual interest and lets you see how different the same glitter looks with varied finishes. The matte sections feel sophisticated and modern, while the glossy parts deliver traditional sparkle.
13. Lavender Dream Shimmer
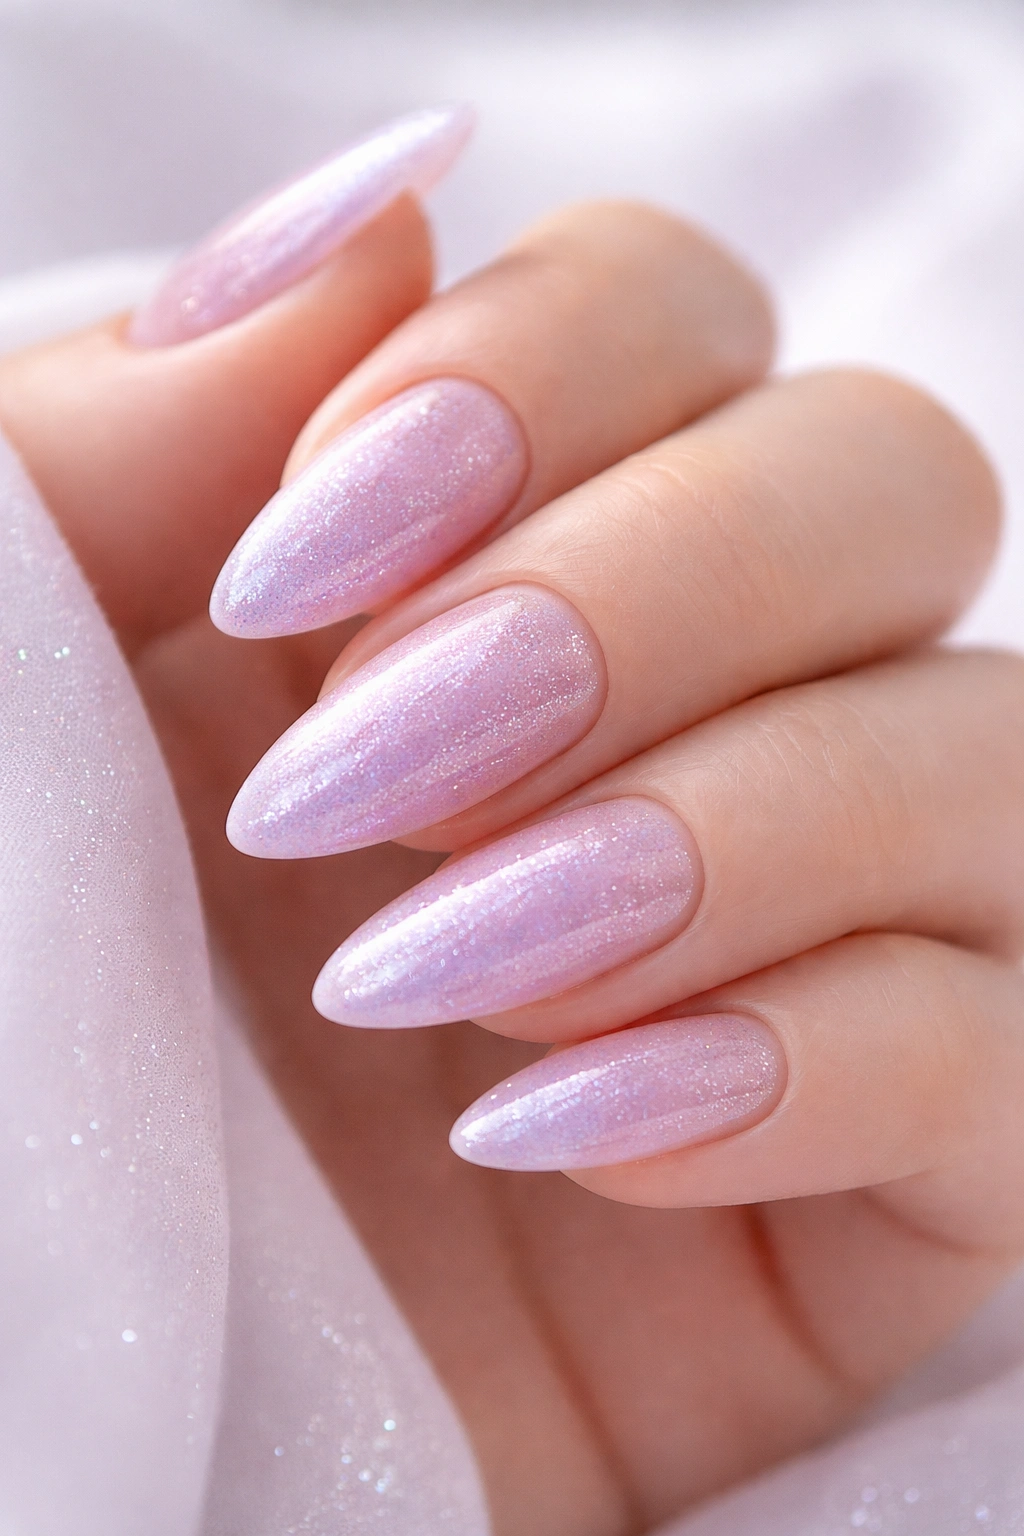
Soft lavender glitter creates a dreamy, romantic look that’s perfect for spring or anyone who loves purple. Use fine shimmer rather than chunky pieces for this design—you want ethereal and delicate, not bold and brash. The effect should be subtle enough to make people lean in for a closer look.
Mix your lavender glitter into a sheer lilac or clear acrylic base. The transparency is important here; solid, opaque lavender can look too Easter egg-ish, while sheer allows complexity and depth. You should see layers of shimmer suspended in the acrylic, creating dimension.
Pair this with an almond nail shape for maximum elegance. The tapered point elongates fingers while feeling softer than stiletto. Keep your nails at a moderate length—these don’t need to be super long to be beautiful. Sometimes restraint makes a design even more impactful.
14. Electric Blue Sparkle
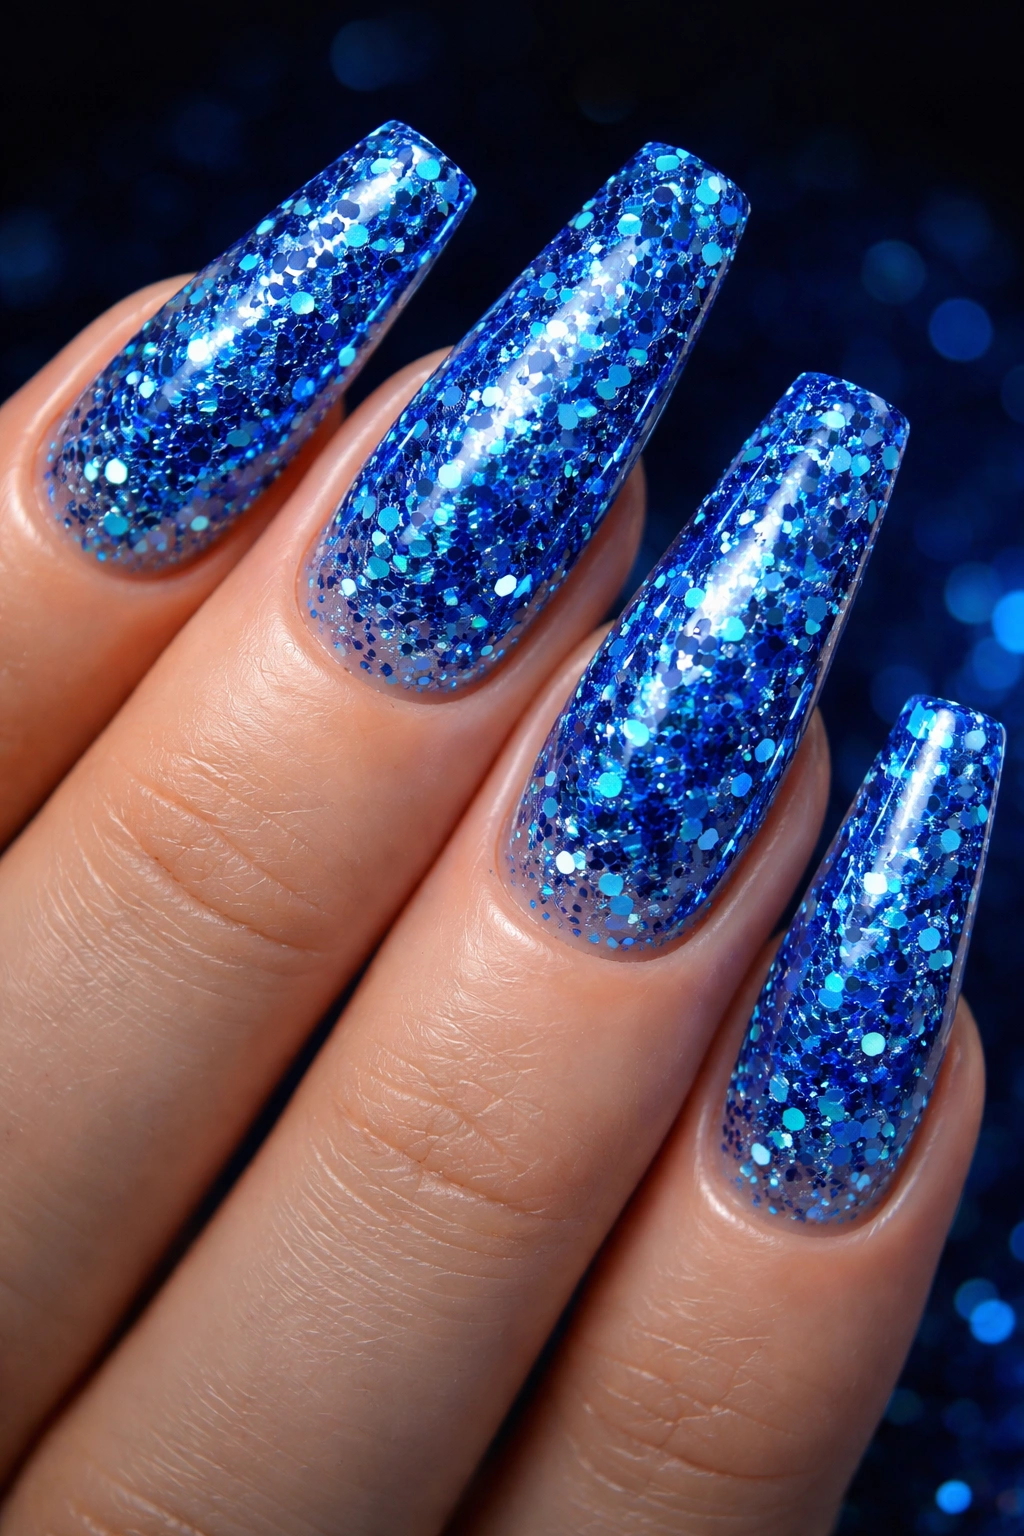
Bold blue glitter makes a statement. This isn’t shy or subtle—it’s a vibrant, in-your-face blue that demands attention. Mix chunky blue glitter pieces into your acrylic for maximum impact, creating a look that’s impossible to ignore. Perfect for summer or anyone who’s never met a bold color they didn’t love.
Electric blue works especially well for festivals, concerts, and nighttime events where dramatic lighting makes the blue sparkle truly shine. Under blacklight, certain blue glitters actually glow, adding an extra element of wow to your nails. Check whether your glitter is UV-reactive if you’ll be in environments with blacklights.
Balance the intensity with a neutral outfit, or lean into the boldness with other bright colors. There’s no wrong way to style these—they’re versatile despite their vibrancy. Shape them into short squares for a modern, edgy vibe, or go long and coffin-shaped for full drama.
15. Nude Pink with Gold Accent
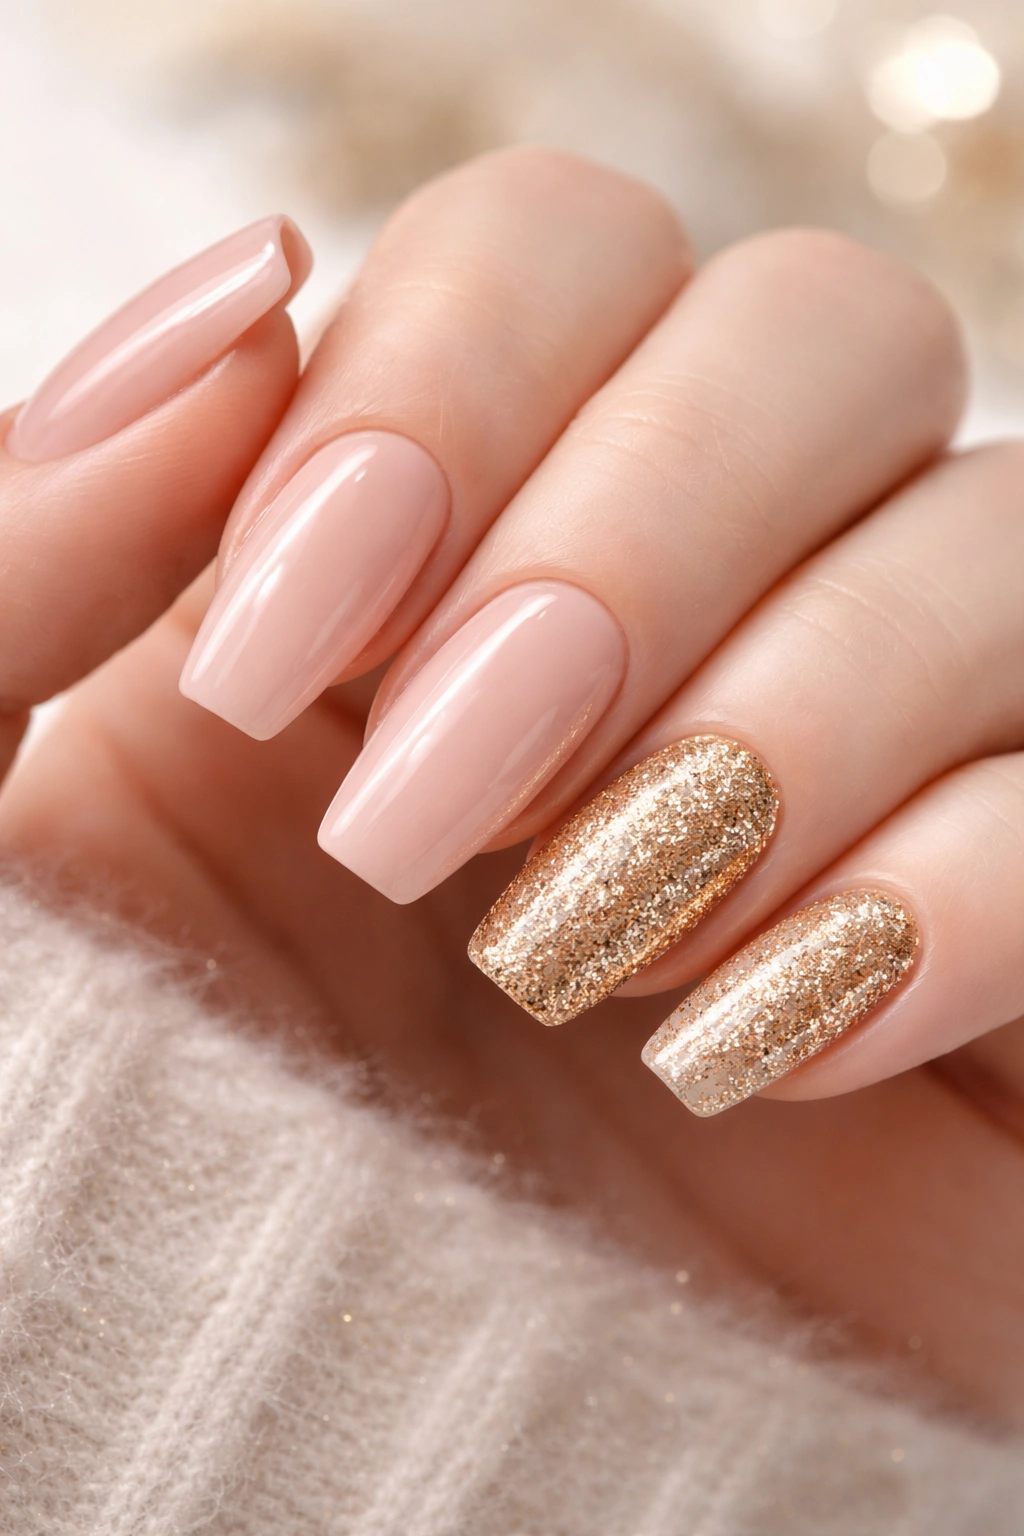
This elegant design keeps most of your nails in a subtle nude pink shimmer while featuring one or two accent nails in solid gold glitter. The contrast between understated and bold creates visual interest without overwhelming your hands. It’s the perfect balance for people who want sparkle but not on every single finger.
Choose your ring finger and middle finger for the gold accent nails—this placement frames your hand nicely when viewed palm-up. Keep the other fingers in that barely-there pink shimmer, mixing just enough fine glitter into nude acrylic to catch light gently. The accent nails should be packed with gold glitter for full coverage.
This design transitions seamlessly from day to night. The predominantly nude nails keep things work-appropriate, while those gold accents add enough personality to carry you through evening events. You won’t need to change your nails between your office job and your Friday night plans.
16. Silver Glitter French with Rhinestones
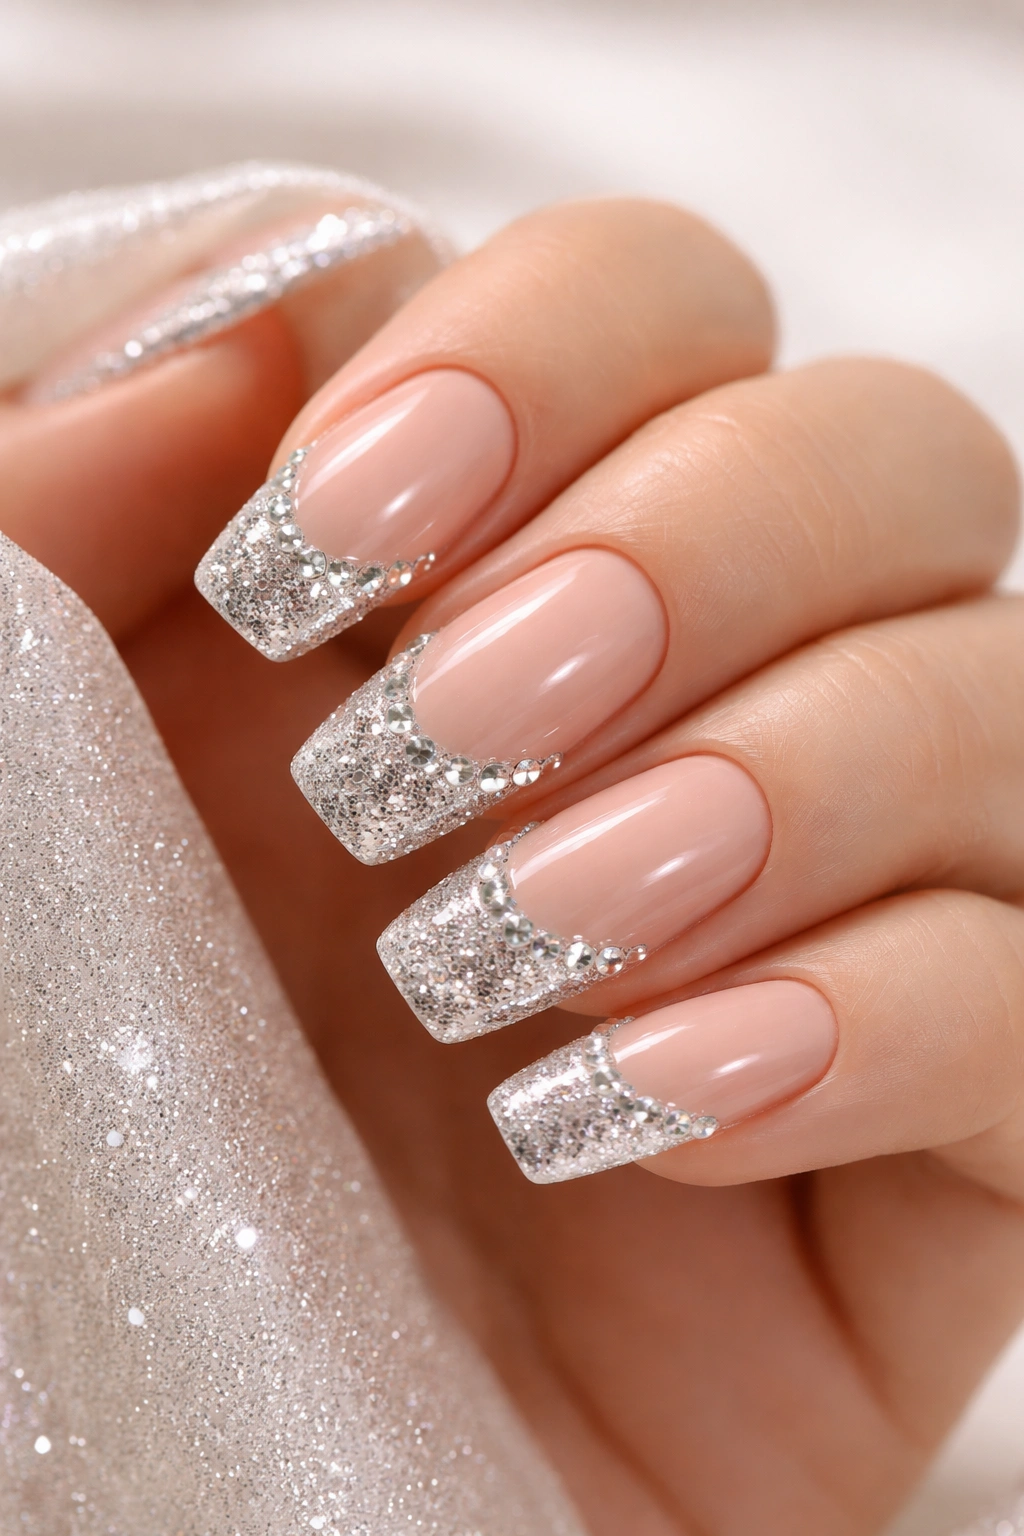
Upgrade your glitter French tips by adding rhinestones along the smile line. Start with silver glitter tips over a nude base, creating that classic French shape. Then, before sealing, press small clear or silver rhinestones right where the glitter meets the nude base, following the curve of your smile line.
The rhinestones add a jewelry-like quality that elevates the entire design. They catch light differently than glitter, creating sparkle that reads as more dimensional and expensive-looking. Use small stones—1.5mm to 2mm—for the most elegant effect. Bigger stones can overwhelm the nail and throw off the balance.
This design is special-occasion-worthy. Think New Year’s Eve, weddings, formal galas—events where you want your nails to feel as dressed up as the rest of you. The combination of glitter and rhinestones delivers maximum sparkle without relying on complex nail art skills.
17. Burgundy and Gold Glitter Ombre
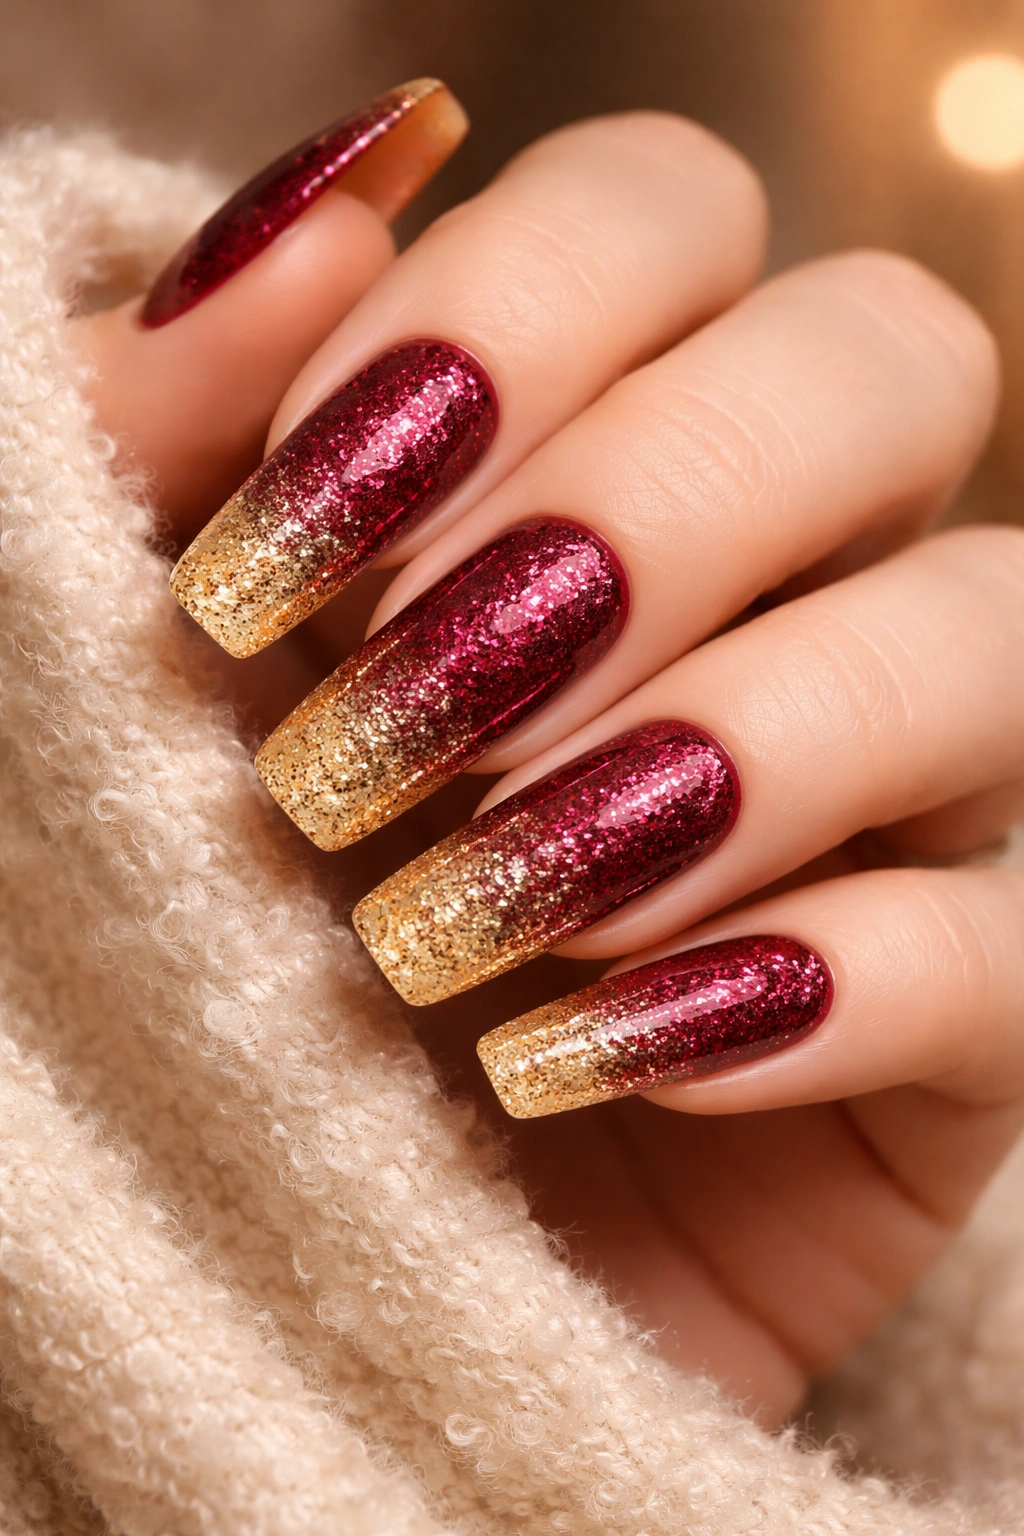
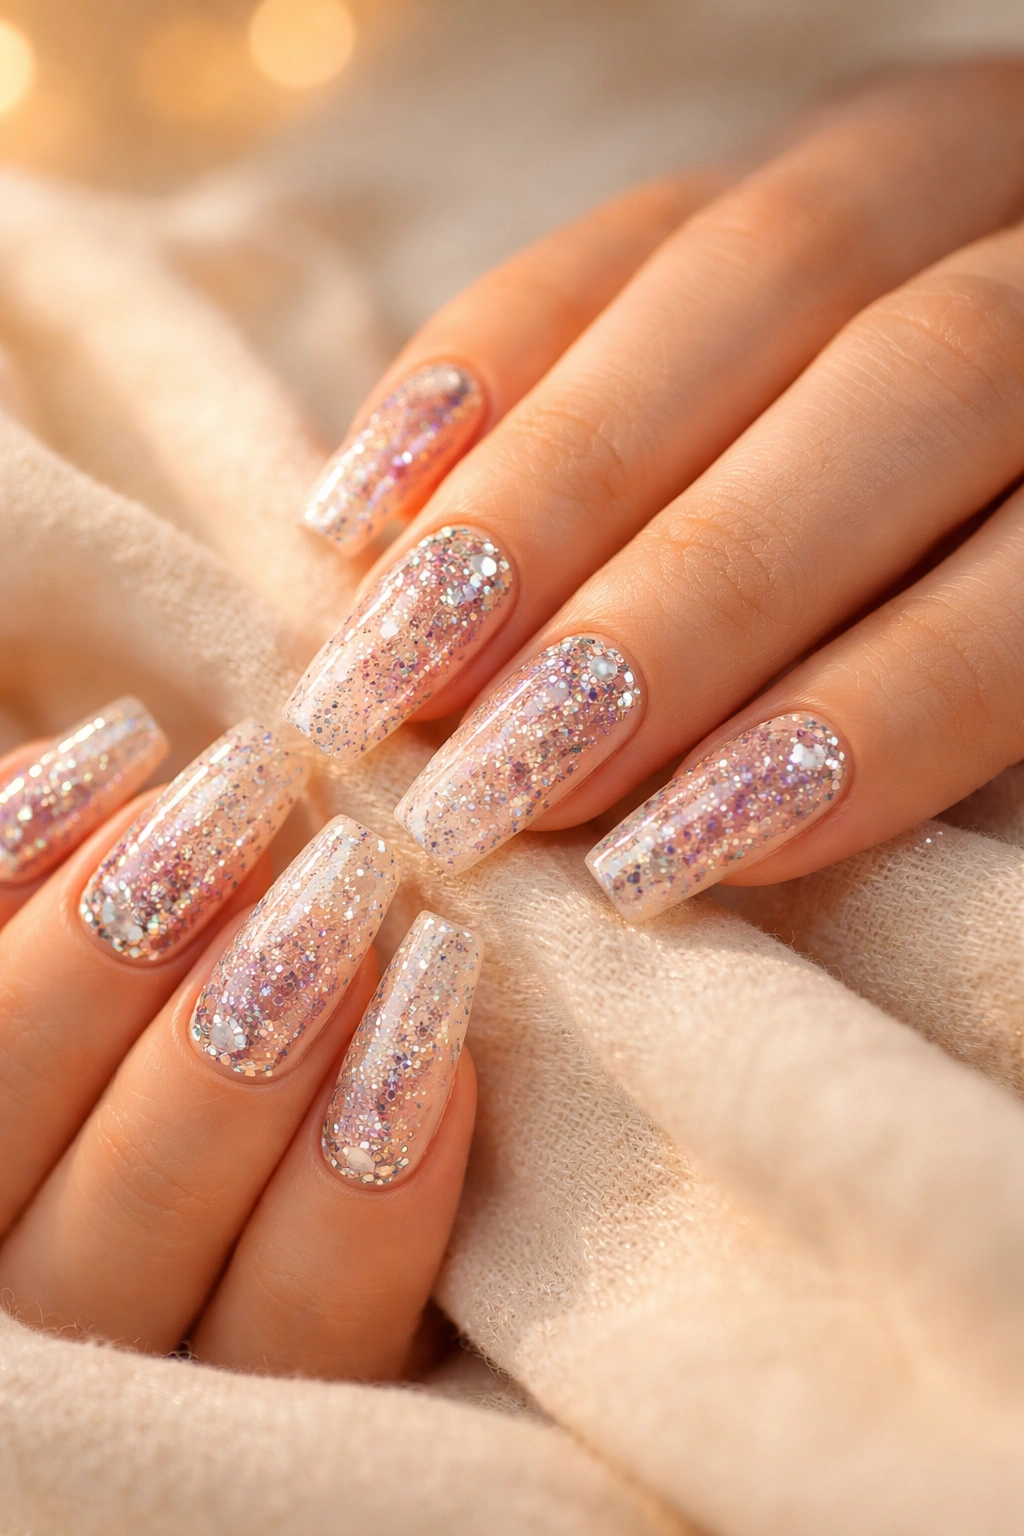
Blend deep burgundy glitter into gold glitter for a rich, warm ombré that’s perfect for fall and winter. Start with burgundy at the cuticle, transitioning to gold at the tips. The gradient should be gradual, with the two colors blending in the middle to create a bronzy-copper transition shade.
This color combination feels expensive and luxurious. The deep burgundy adds drama while the gold brings warmth and light. Together, they create depth that single-color glitter nails can’t match. The ombré effect also elongates your nails visually, making fingers appear longer and more elegant.
Work quickly when creating the gradient—acrylic sets fast, so you need to blend the colors while everything’s still workable. Use a small brush to feather where the two colors meet, creating that soft transition. If you end up with a harsh line, add more glitter in the transition zone to diffuse it.
18. Holographic Unicorn Magic
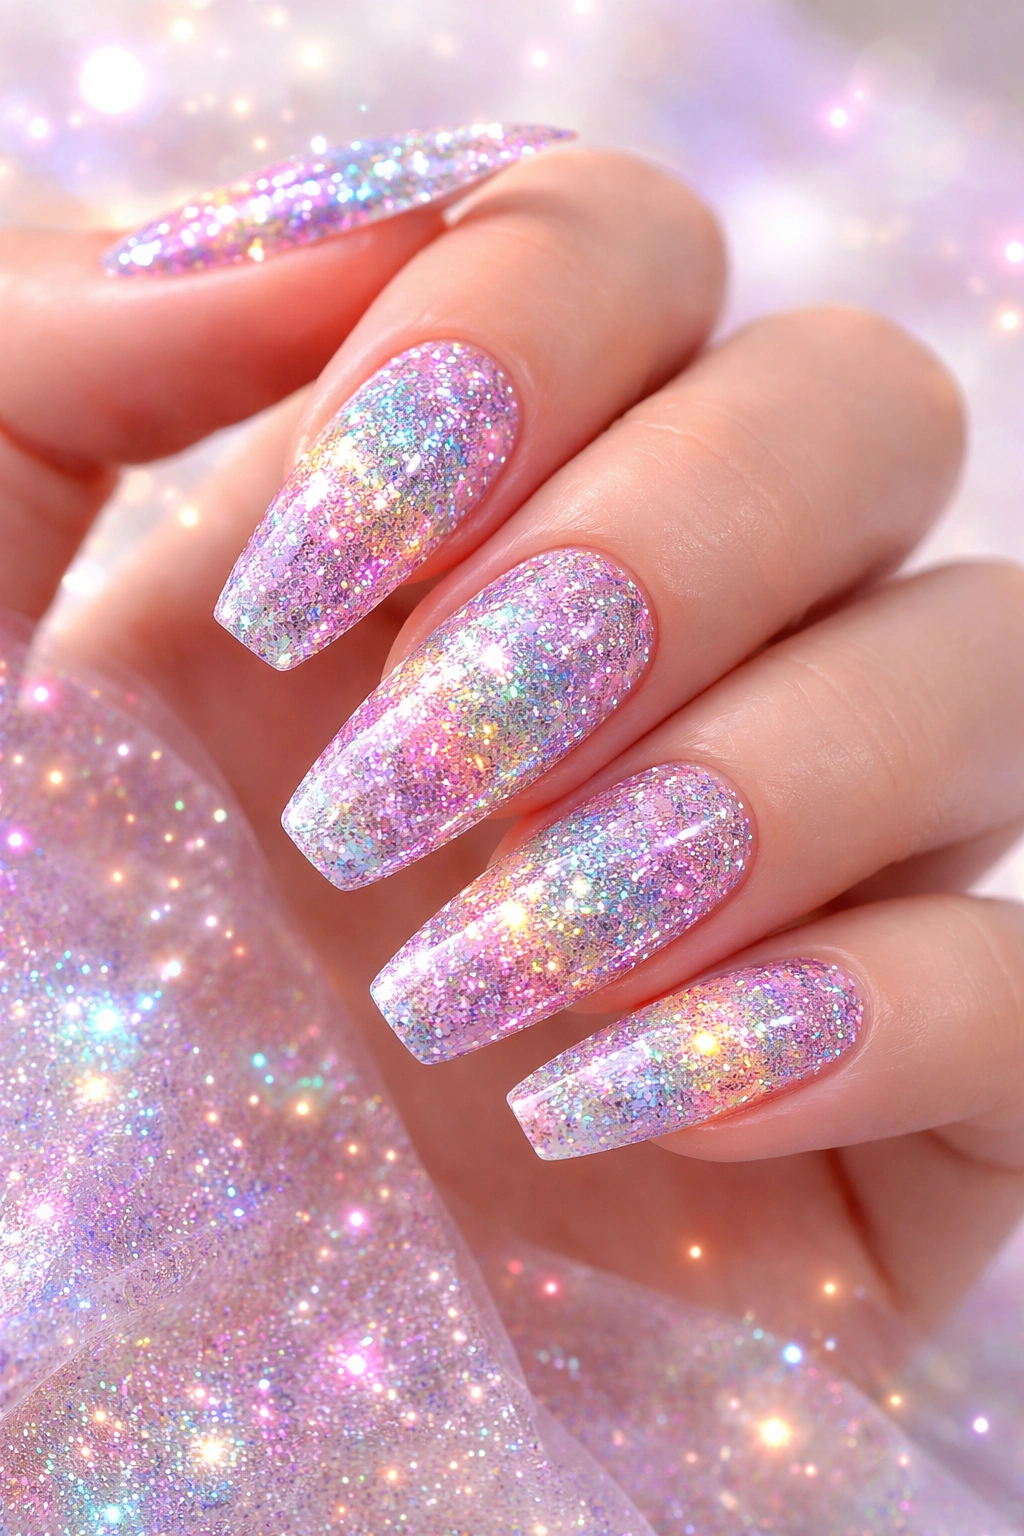
Combine multiple holographic glitters in different colors for a unicorn-inspired design that shifts and changes constantly. Mix holographic pink, purple, blue, and silver glitters together, applying them over a white or iridescent base. The effect is maximalist magic—pure fantasy brought to life on your fingertips.
Holographic glitter already shifts colors on its own, so combining multiple holo shades creates almost overwhelming sparkle. These nails will look different in every photo you take, depending on the angle and lighting. That’s part of the charm—they’re endlessly interesting because they’re never quite the same twice.
Add some opalescent flakes or aurora powder before sealing for even more dimension. These materials create soft color shifts that complement the sharper sparkle of the glitter. The combination feels ethereal and otherworldly, exactly what you want for a unicorn-themed design.
19. Turquoise and Purple Galaxy
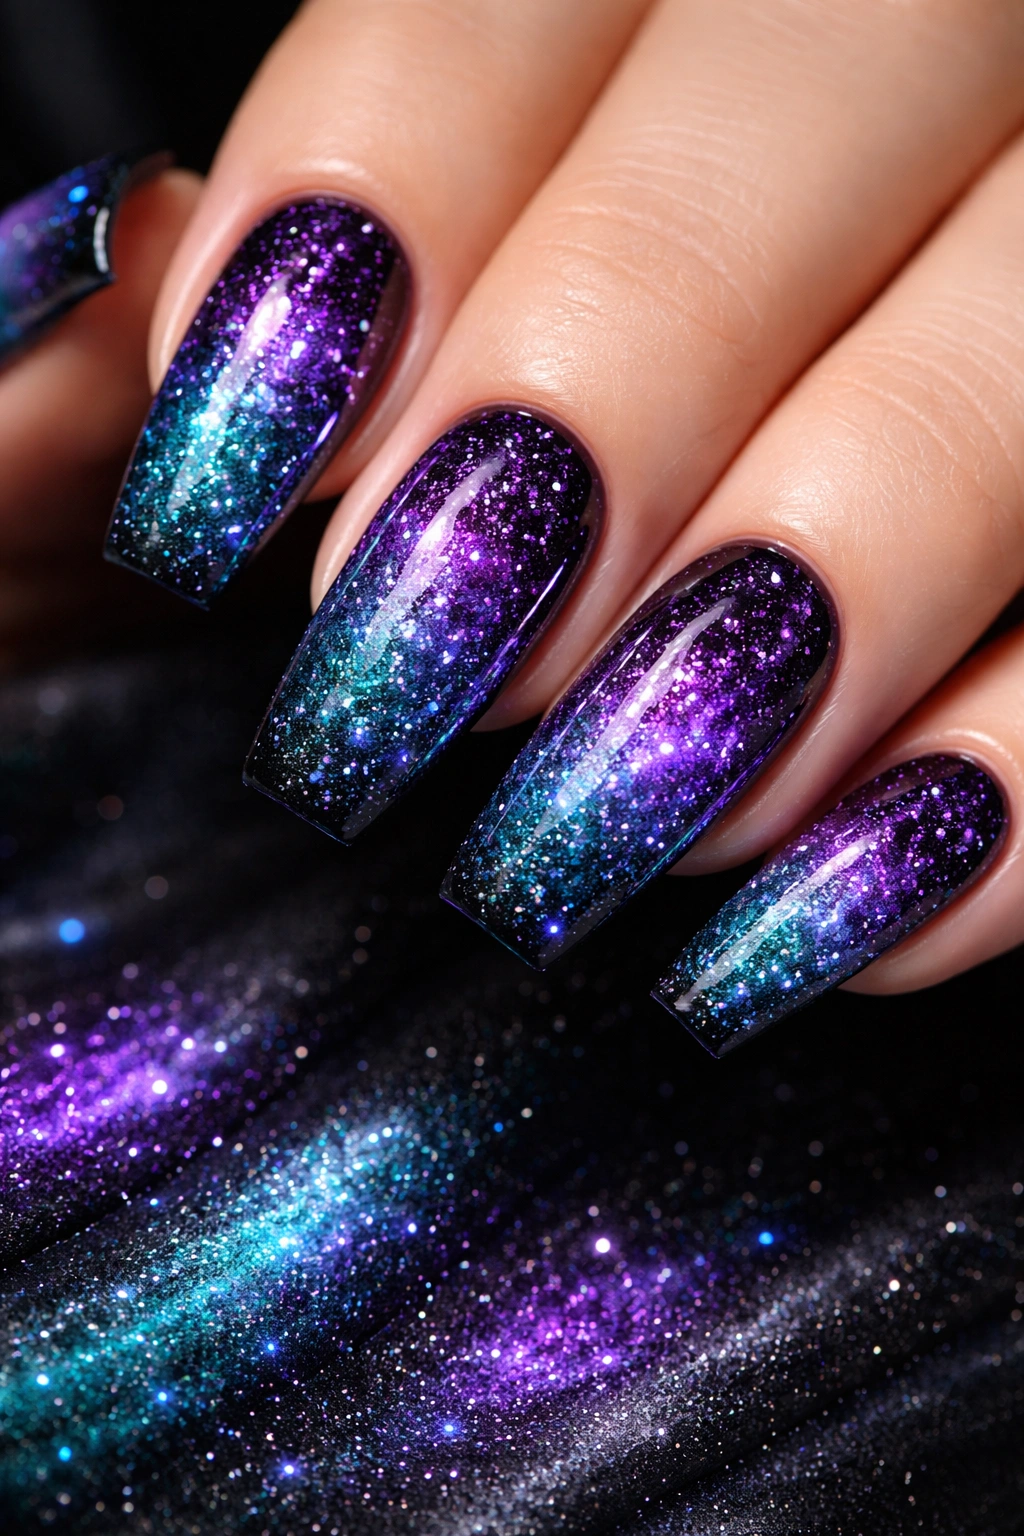
Create an underwater galaxy vibe by mixing turquoise and purple glitters over a deep blue or black base. These colors create that mysterious, deep-sea feeling while still delivering cosmic sparkle. Add some silver glitter to represent stars (or bubbles?), and you’ve got nails that work for both mermaid and space enthusiasts.
Layer the colors strategically rather than mixing them together. Apply purple glitter more heavily on some nails, turquoise on others, and a mix on the remaining fingers. This creates variety across your set while maintaining color cohesion. Each nail becomes its own little galaxy with a unique glitter distribution.
Magnetic gel polish can enhance this design beautifully. Before applying your glitter-filled acrylic, add a magnetic gel layer in deep blue or purple. Use your magnet to create swirling patterns, then apply glitter on top. The magnetic base shows through in areas where glitter is less dense, creating extra depth.
20. Blush Pink Glitter with White Tips
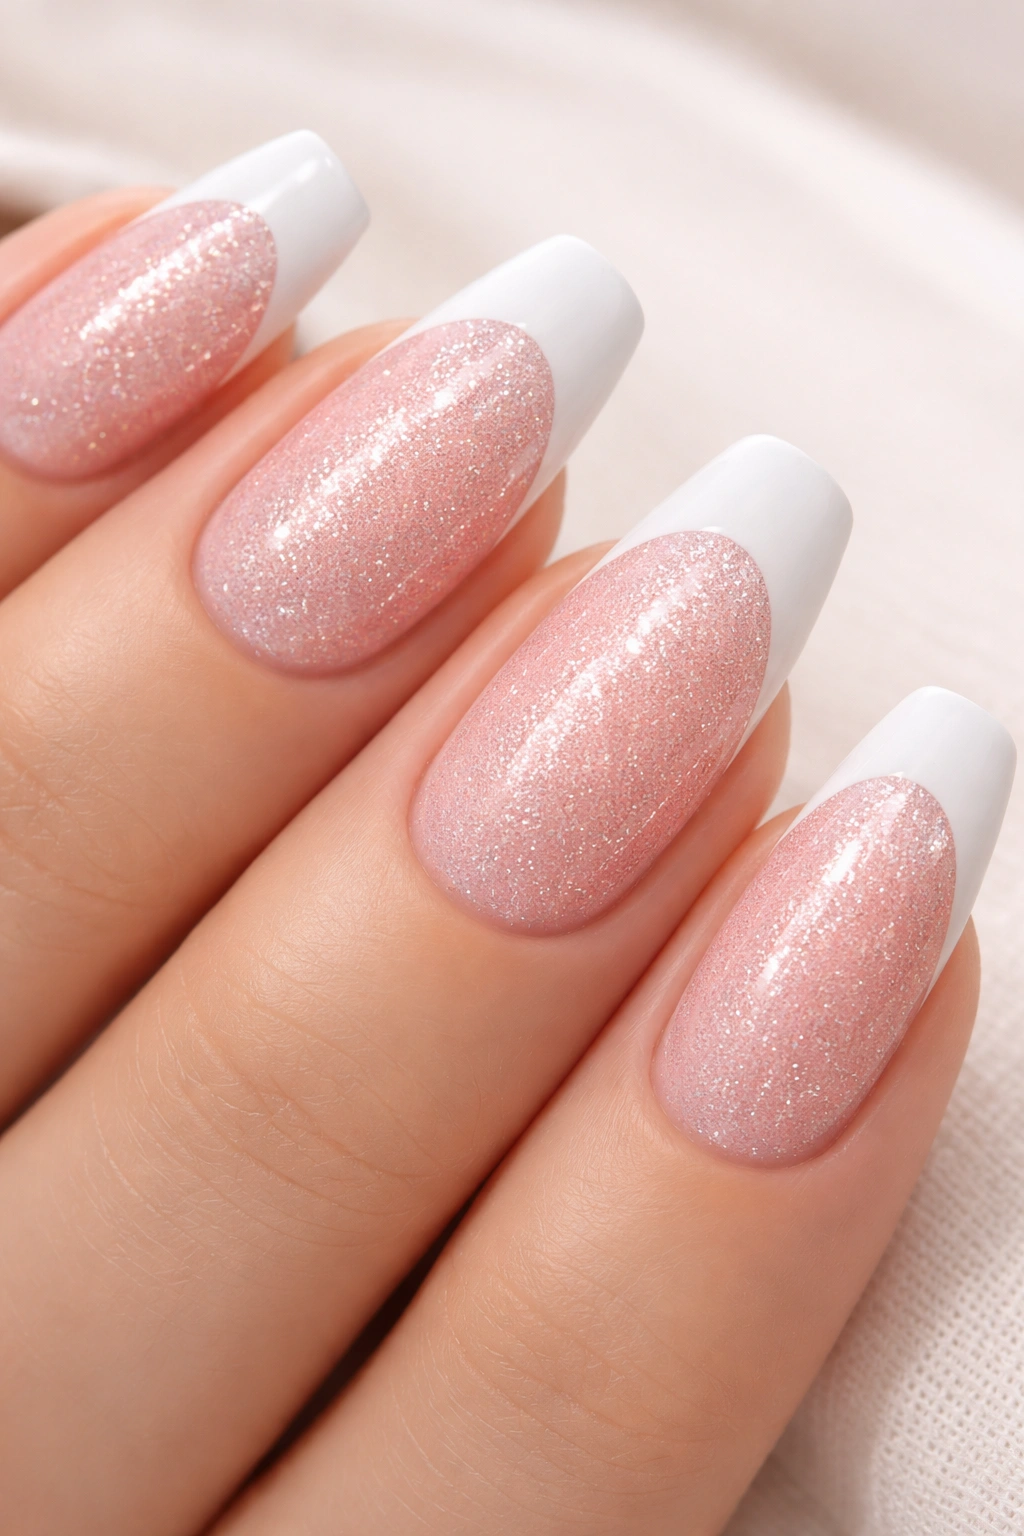
This sweet, romantic design combines blush pink glitter across the nail bed with clean white tips. It’s like a glittery French manicure but reversed—the sparkle is the main event, with white tips providing a clean finishing edge. The look feels fresh and youthful without being too cutesy.
Apply your blush pink glitter-filled acrylic across most of the nail, stopping about 2-3mm from the tip. Then create a thin white tip using either solid white acrylic or densely packed white glitter. The white line should be uniform and clean, providing contrast against all that pink sparkle.
This design works beautifully for everyday wear. It’s interesting enough to feel special but not so bold that it limits your outfit options. The pink and white color combination is universally flattering and appropriate for virtually any setting.
21. Clear with Scattered Star Glitter
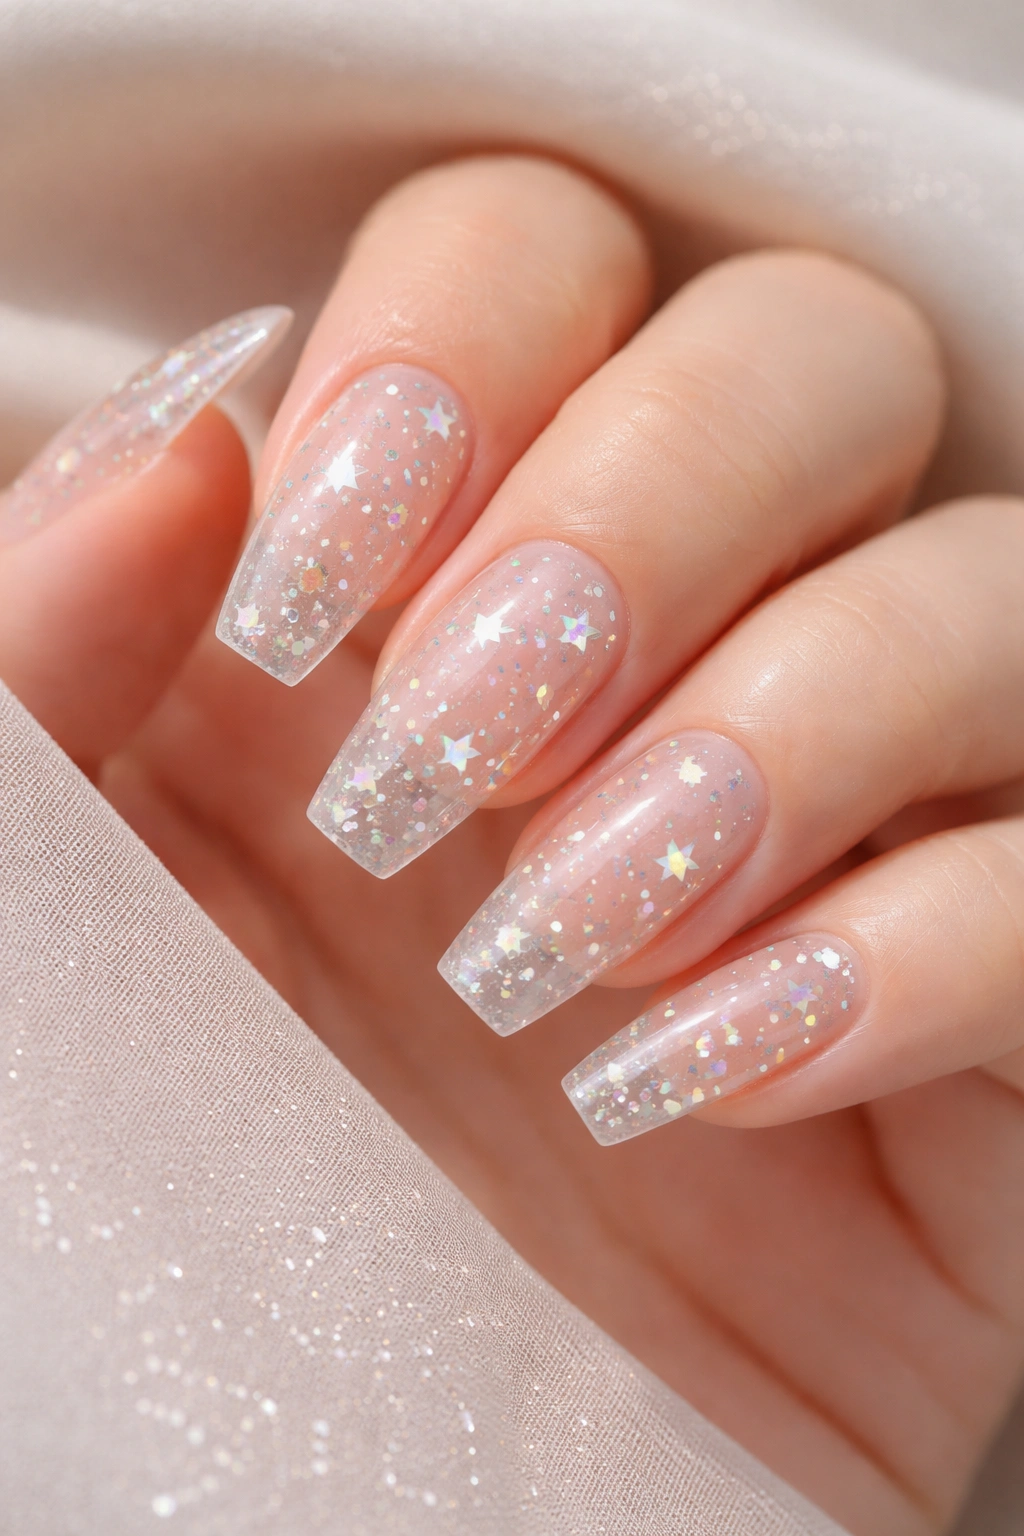
For a minimalist sparkle approach, mix star-shaped glitter pieces into clear acrylic. The stars float in the transparency, creating a constellation effect that’s subtle but magical. Use various sizes of star glitter—some tiny, some larger—for the most realistic scattered effect.
Clear base nails elongate your nail bed visually while keeping things appropriate for any setting. The scattered stars add personality without overwhelming the clean aesthetic. You can see your natural nail through the clear acrylic, which some people prefer for a more “natural but better” vibe.
Place a few stars strategically rather than mixing them completely randomly. Position one or two on each nail where they’ll be most visible—typically the center or slightly off-center. Too many stars makes the design feel cluttered; a few carefully placed ones feel intentional and artistic.
22. Champagne Gold with Rose Gold Accent
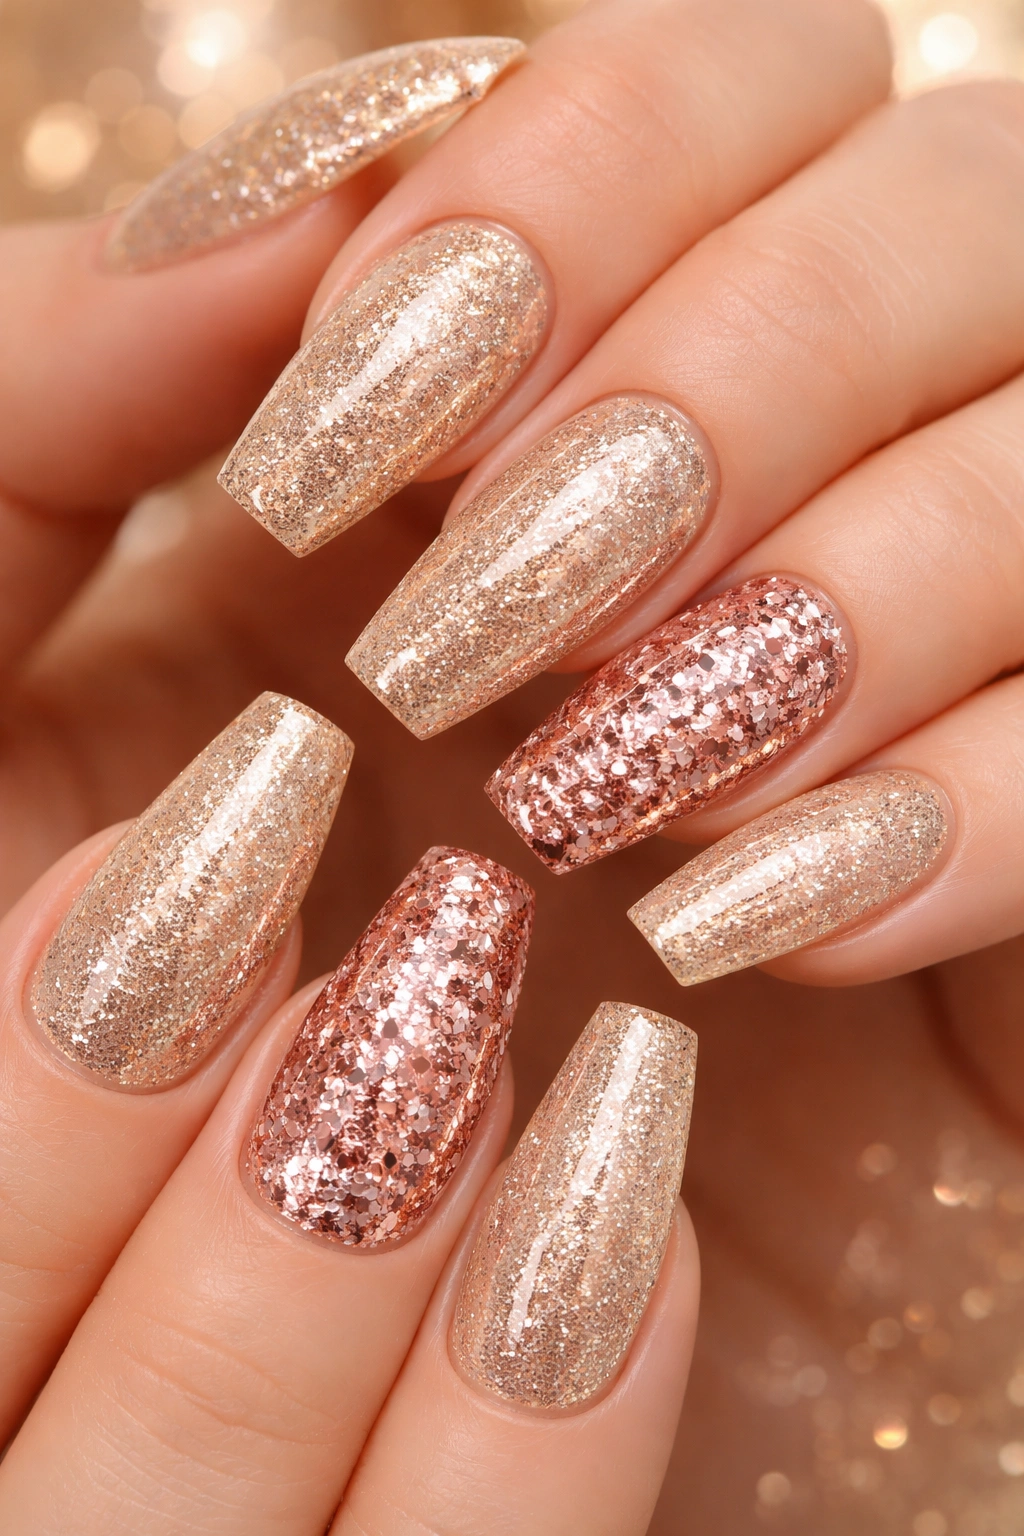
Mix champagne gold glitter on most nails with one or two rose gold glitter accent nails. These two metallics are different enough to create contrast but similar enough to feel cohesive. The warmth of both shades means they complement rather than clash, creating an elegant, expensive-looking finish.
The champagne gold should be fine to medium glitter, packed densely for full coverage. The rose gold accents can feature slightly chunkier glitter to differentiate them from the base color. This textural difference, combined with the color variation, creates visual interest without needing complex nail art.
These colors work year-round but feel particularly appropriate for fall and winter. They pair beautifully with warm-toned clothing in rust, camel, chocolate brown, and cream. Gold jewelry obviously complements them perfectly, but they also look surprisingly good with silver accessories.
Caring for Your Glitter Acrylic Nails
Maintenance is simpler than you’d think. Treat your glitter acrylics like any other acrylic set—moisturize your cuticles daily, wear gloves for harsh cleaning, and don’t use your nails as tools. The glitter itself doesn’t require special care since it’s sealed within the acrylic, protected from the elements.
Schedule fills every 2-3 weeks to maintain the look as your nails grow. Your technician will file down the grown-out area and apply fresh acrylic at the cuticle, blending it with your existing glitter. If you had an ombré or French design, they can recreate the pattern during the fill, keeping your nails looking fresh.
When it’s time for removal, never pick or peel your acrylics off. This damages your natural nail bed and can cause weakness and peeling for months. Instead, soak them properly in acetone. The glitter doesn’t affect removal time—it comes off just like regular acrylic once the product breaks down.
Making Your Glitter Last
A quality top coat is non-negotiable. Even though the glitter is encapsulated in acrylic, you need a thick, glossy top coat to seal everything and create that mirror-like finish. Reapply top coat every few days at home to maintain shine and add extra protection.
Avoid prolonged water exposure when possible. While acrylics are water-resistant, excessive soaking can cause lifting at the cuticles. Wear gloves for dishes and lengthy baths. Your glitter will last significantly longer if you keep moisture infiltration to a minimum.
Hand cream is your friend. Dry, cracked cuticles make even the most beautiful glitter nails look neglected. Apply cuticle oil daily and hand cream multiple times throughout the day. Well-moisturized hands frame your glitter nails perfectly, making the entire package look polished and intentional.
DIY vs. Salon: What Works Best
Salon application guarantees professional results, especially for complex designs like ombré or galaxy nails. Experienced techs can work quickly, ensuring proper application before the acrylic sets. They also have access to professional-grade glitters and can mix custom colors you won’t find in retail stores.
Press-on glitter nails offer a fantastic middle ground. Brands now make incredibly realistic glitter press-ons that look salon-quality but apply at home in minutes. They’re perfect for special occasions when you want glitter nails temporarily, or for testing out bold colors before committing to a full acrylic set.
True DIY with acrylic requires practice and the right supplies. If you’re comfortable with acrylic application, adding glitter is straightforward—just mix and apply as usual. However, getting a smooth finish with no texture from glitter pieces takes skill. Your first few attempts might feel bumpy, but you’ll improve with practice.
Final Thoughts
Glitter acrylic nails offer endless possibilities for self-expression. Whether you prefer barely-there shimmer or full-coverage sparkle, there’s a glitter design that fits your aesthetic. The durability of acrylics means you can enjoy your sparkle for weeks without worrying about chips, peels, or fading.
Don’t be afraid to experiment with different glitter sizes, colors, and application techniques. What works for someone else might not be your style, and that’s perfectly fine. Your nails are personal—they should reflect your personality and make you happy every time you glance at your hands.
The beauty of glitter is that it never truly goes out of style. Trends come and go, but sparkle remains eternally appealing. Investing in a good glitter acrylic set means investing in nails that make you smile, catch light beautifully, and add just a little extra magic to your everyday life. That’s not frivolous—that’s self-care with serious sparkle.
