

Sheer, clean nails that somehow look more polished than a full nail art set — that’s the quiet power of minimalist short almond nails, and getting them right takes more thought than most people expect.
Minimalism is deceptively demanding. When there’s no pattern, no layered gradient, no glitter catching the light, every detail counts twice. The shape has to be clean. The cuticles need to be pushed back. The polish finish — whether glossy, matte, or barely-there — has to be applied without streaks or pooling at the edges. Most nail art forgives small errors because the design drowns them out. A single-coat sheer nail exposes every single one.
Short almond is the smartest shape for this aesthetic. The tapered sides and softly rounded tip create a naturally elegant silhouette that adds the impression of length without adding actual length — which matters for anyone who needs to keep nails short for daily life. Stubby square nails can look abrupt next to a minimal design. Coffin shape feels too fashion-forward for truly understated work. Almond sits between them: structured, organic, proportional.
The 15 designs below cover the full spectrum of minimalist nail aesthetics — from barely-there sheers to deliberate geometric lines. Some are achievable at home with one steady hand and the right polish. Others are worth requesting at the salon the next time you’re in the chair.
Why Short Almond Nails Are the Best Canvas for Minimalism
Not every shape lets minimalism breathe. Wide, flat nails — square or squoval — can make negative space look accidental rather than intentional. Long stiletto nails draw so much attention through shape alone that a clean design almost feels wasted on them. Short almond finds the sweet spot: the tapered tip creates a focused, upward-pointing visual line that the eye follows naturally. A single thin stripe or a delicate half-moon at the base reads with actual impact instead of getting visually lost.
Length-wise, “short almond” means the free edge extends roughly 2–4mm past the fingertip. That’s enough to show the shape clearly, enough to give a design room to breathe, and short enough that daily tasks stay comfortable. Most people can maintain this length on natural nails without gel or acrylic overlays — which matters, because minimalism reads best on healthy, well-conditioned natural nails.
Filing the Shape Correctly
Getting the almond shape right comes down to filing angle. Start at each sidewall and file inward toward the center at roughly 45 degrees, using smooth strokes in one direction only — never back and forth. The free edge should taper to a gently rounded tip: not sharp like a stiletto, not flat across like a squoval. A glass or crystal file works better here than a standard emery board because the smoother grit creates a cleaner edge, which matters when that tip is the focal point of the entire design.
If one nail ends up slightly pointier than the others, a few light strokes across the very tip will soften it without ruining the taper.
Prep That Actually Changes the Result
Push cuticles back with an orange wood stick after soaking your hands in warm water for 2–3 minutes. Don’t cut them unless you’re confident doing it — ragged cuticle lines are far more visible on a clean, single-color nail than on anything decorative. Buff lightly with a 180-grit buffer to smooth surface ridges, then wipe the nail plate with a cotton pad dampened in rubbing alcohol before any polish goes on. That final wipe removes oils that cause early lifting and extends wear by 2–3 days on its own.
What Separates a Minimalist Design from Just a Plain Nail
Worth addressing before the list, because there’s a real difference between “minimalist” and “unfinished.”
A plain nail with a random swipe of whatever polish was within reach is not a minimalist nail. A minimalist nail is an intentional choice — a specific finish, a specific color relationship with the nail and skin, a specific level of opacity or transparency. The deliberateness is the design.
Three things distinguish a true minimalist nail:
- The color is chosen, not defaulted to — a sheer that’s slightly too yellow looks dirty rather than clean; one that matches your undertone looks like healthy skin, amplified
- The finish is decided, not accidental — matte and glossy communicate entirely different aesthetics, and choosing one deliberately changes the whole read
- The application is clean — no polish on the skin, no visible brush strokes, no pooling at the cuticle line
That last point is what separates a salon-quality minimalist nail from a rushed home job. On a complex nail art look, messy edges go unnoticed. On a single-coat sheer nail, they’re the first thing you see.
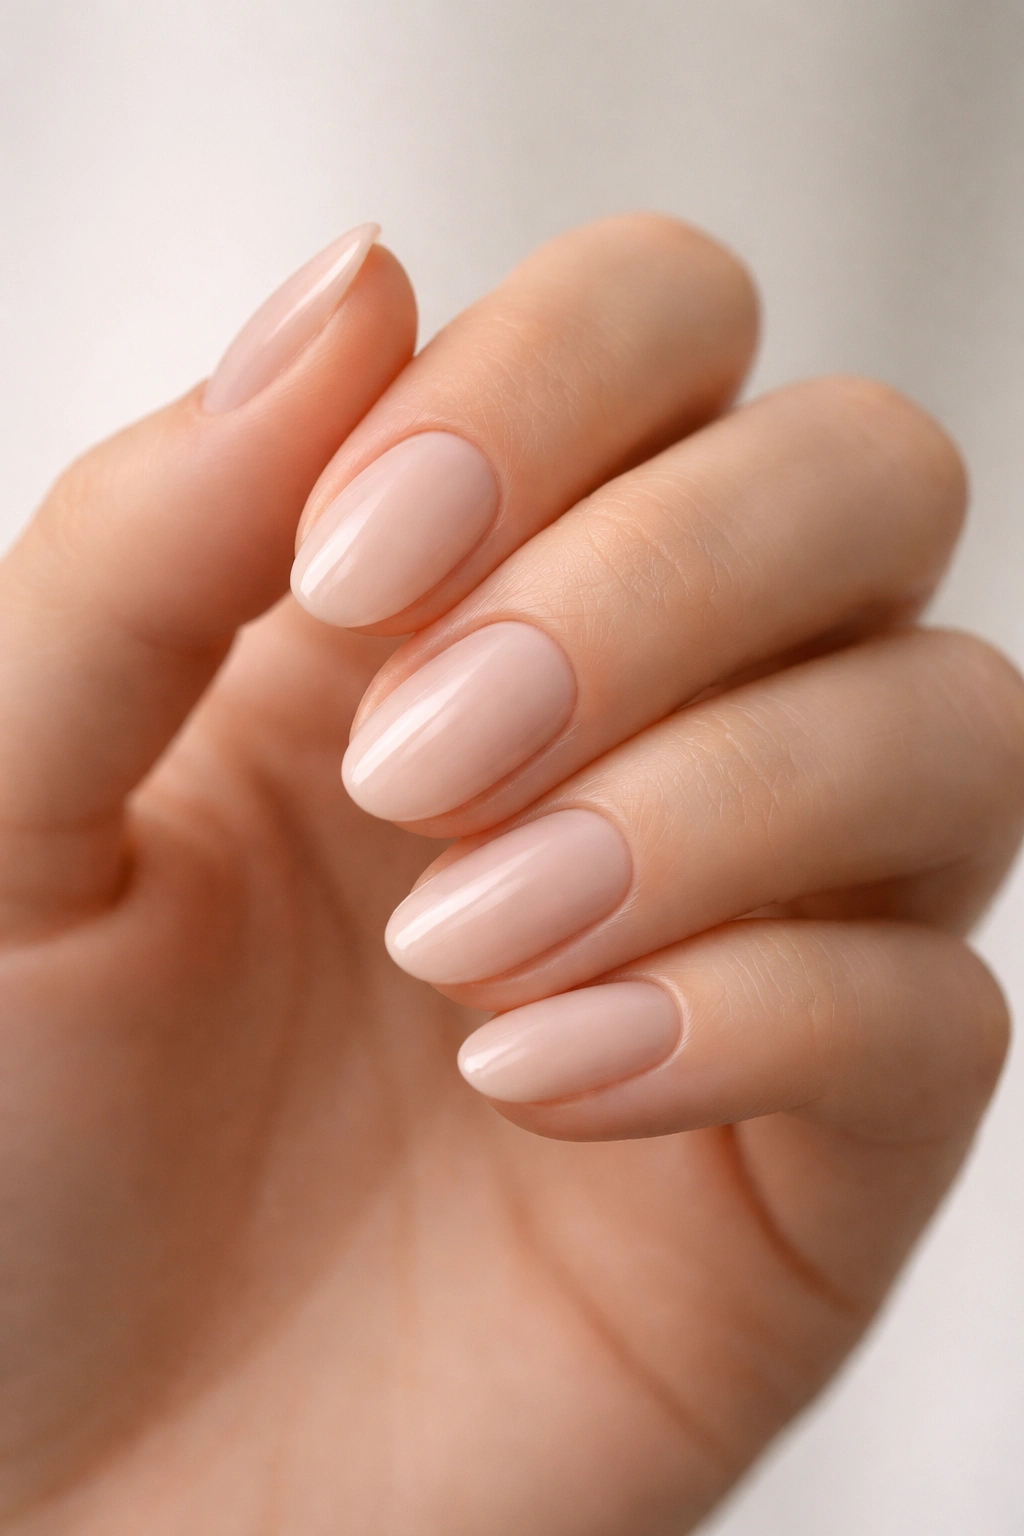
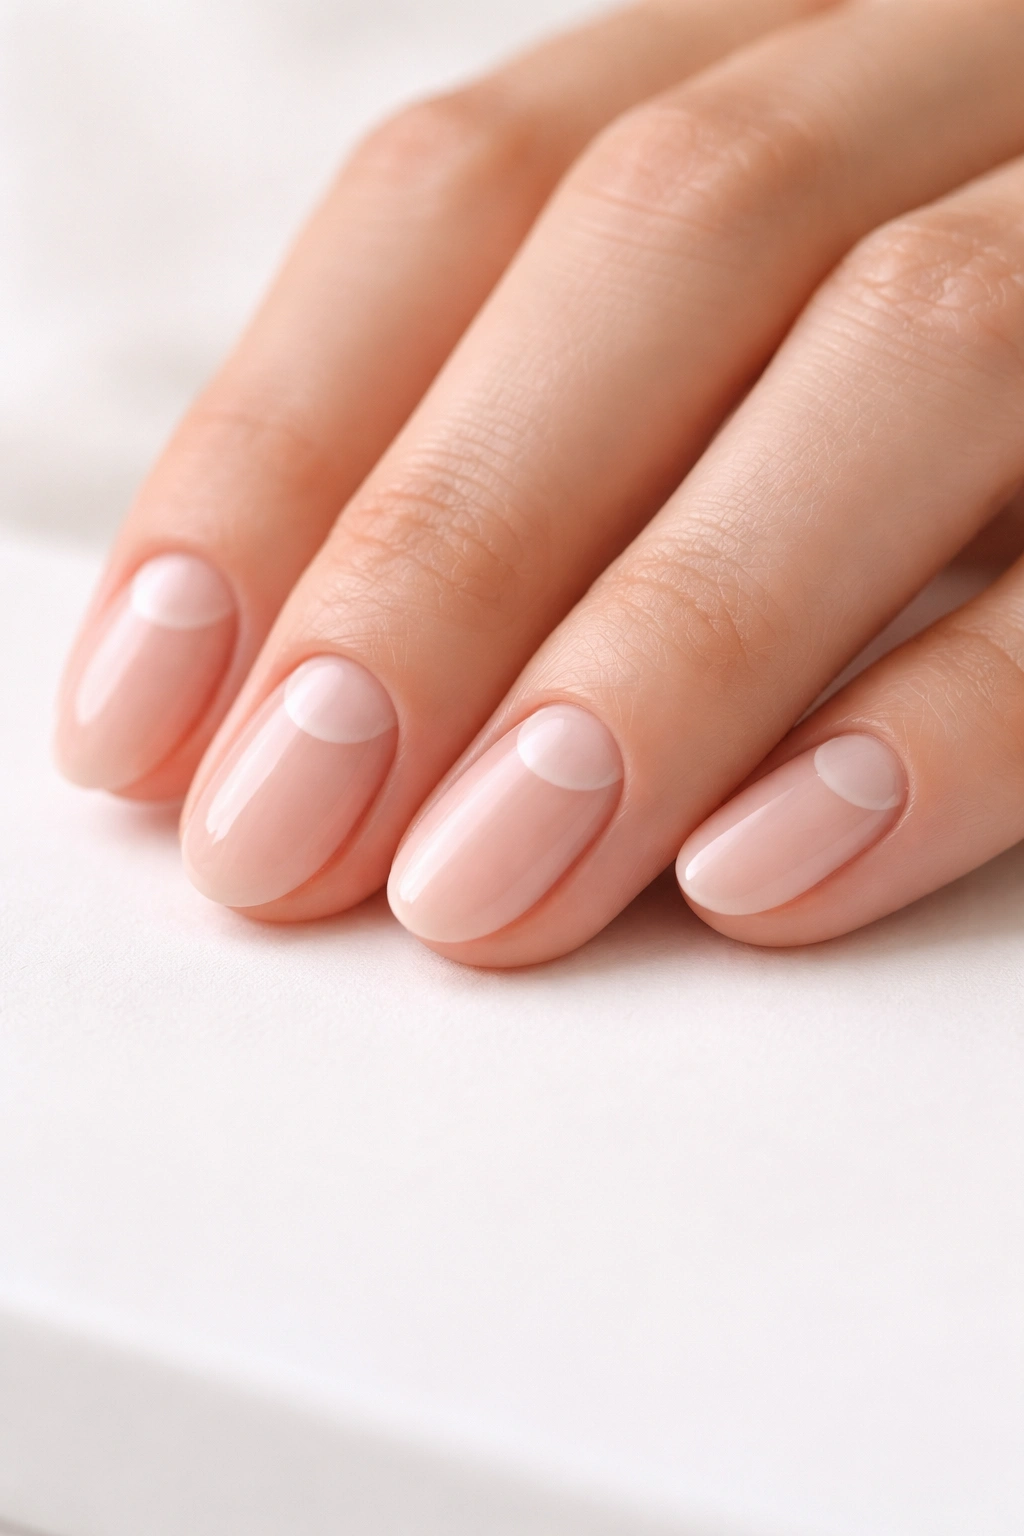
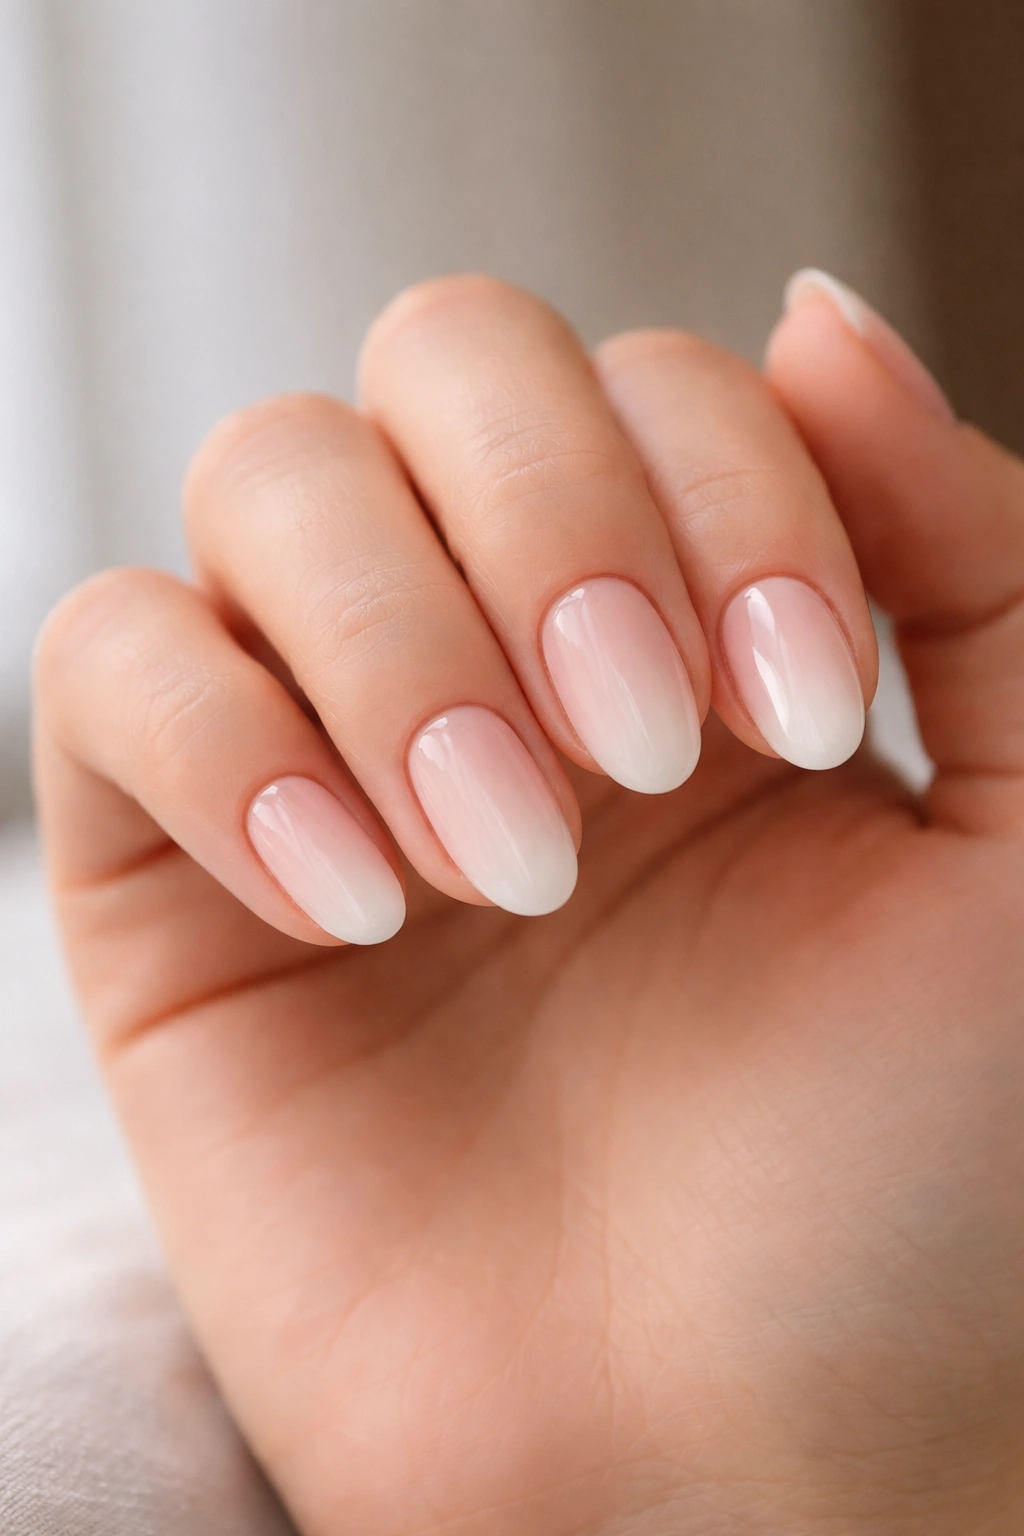
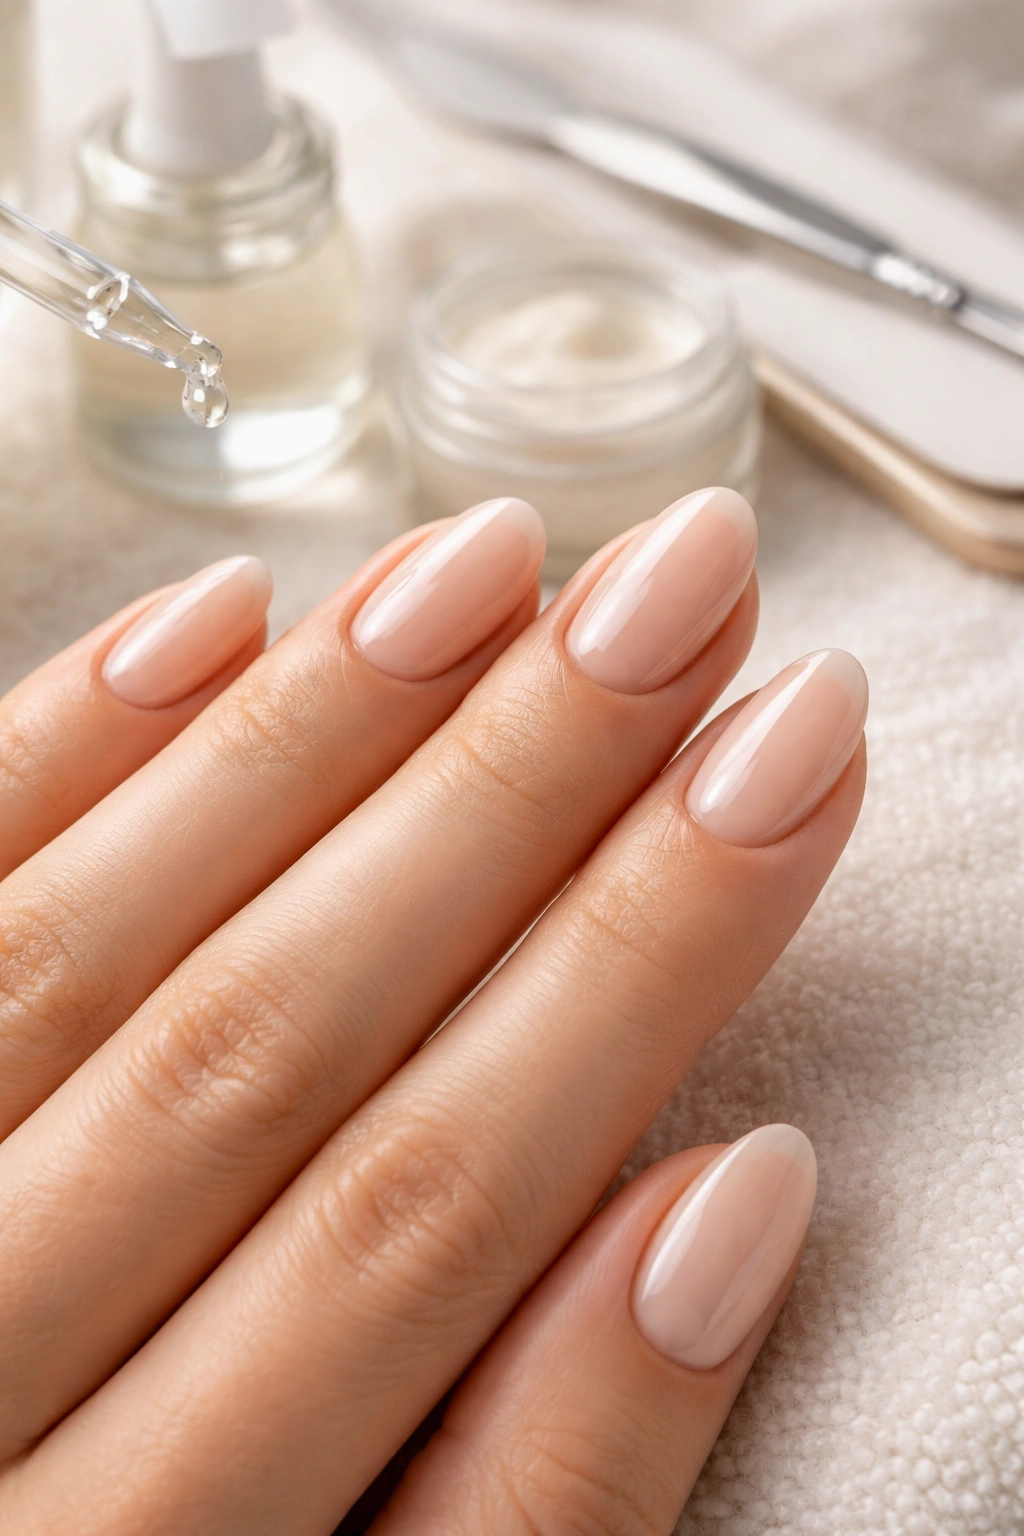
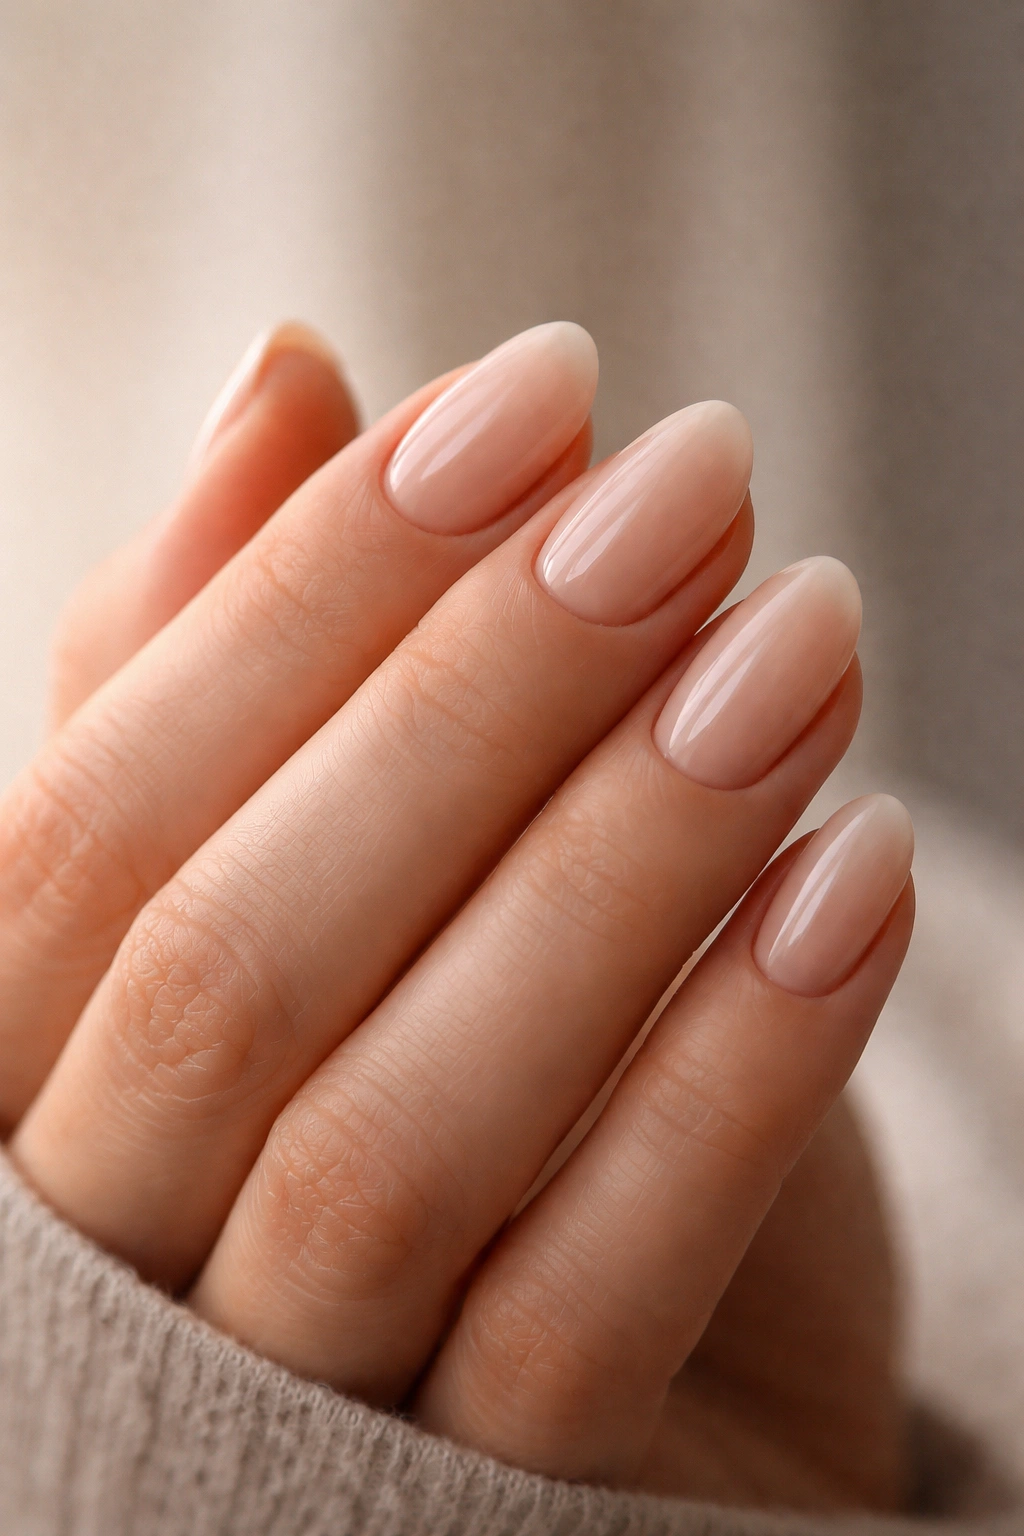
1. Sheer Nude Overlay
There are very few nail looks that age better than this one. A sheer nude overlay — sometimes called a “naked nail” look — is a thin, translucent coating in a color close to your natural nail, polished to a clean high-gloss finish. Worn short and almond-shaped, it reads as effortlessly put-together in a way that more elaborate designs rarely match.
Why the Shade Choice Matters Here
This is the one design on this list where undertone selection is foundational, so pay close attention here. If your skin runs warm — golden, peachy, or olive — choose a sheer with a slight pink-peach or warm caramel base. If your undertone is cool or neutral, a pale pink or rosé-tinted sheer sits better. Choosing the wrong direction makes the nail look grayish or muddy rather than clean. The ideal sheer is 1–2 shades lighter than your natural nail bed, which brightens the nail without reading as a full opaque color.
Application Method
Apply a thin base coat and let it dry for 60 seconds. Then apply two thin coats of sheer polish, waiting 90 seconds between each. For a subtle depth effect, apply a third coat down the center of the nail only — skip the sides on that third pass. This creates a very gentle tonal variation that a flat two-coat application doesn’t have. Small difference, but noticeable.
Quick details:
- Coverage target: 30–50% opacity — the nail should still be visible through the polish
- Finish: high-gloss top coat, applied before the polish fully cures
- Wear time: 5–7 days on natural nails with proper prep
Pro tip: Apply a thin bead of clear top coat along the free edge after your final color coat. This “tip sealing” step significantly reduces early chipping at the edge.
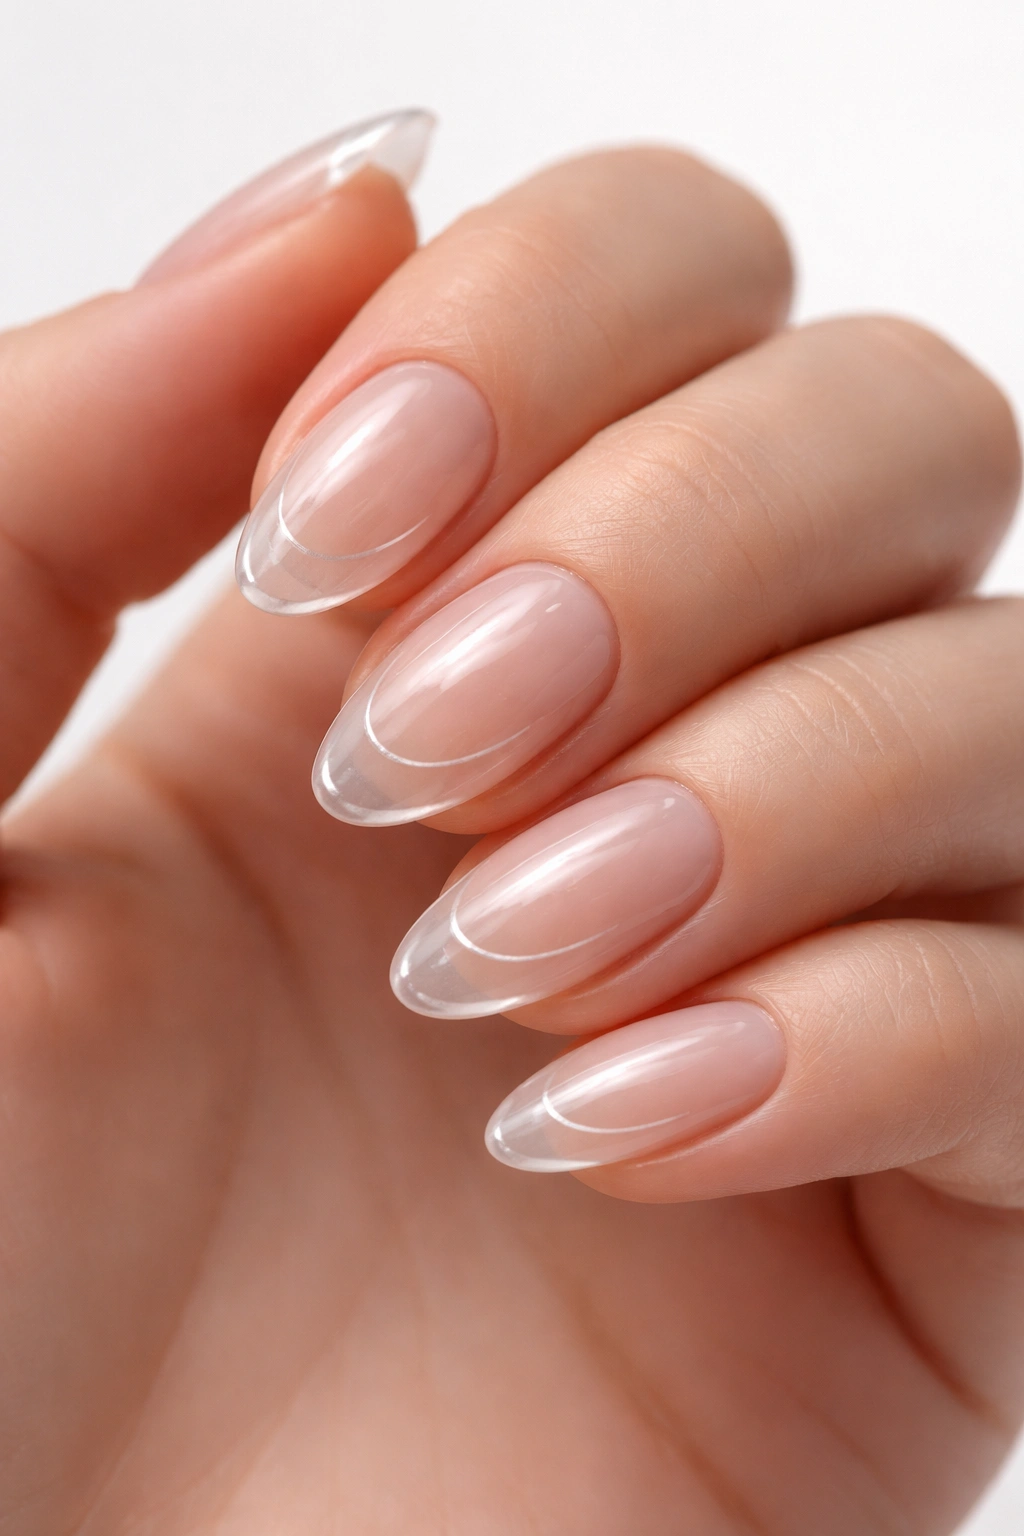
2. Ultra-Thin White French Tip
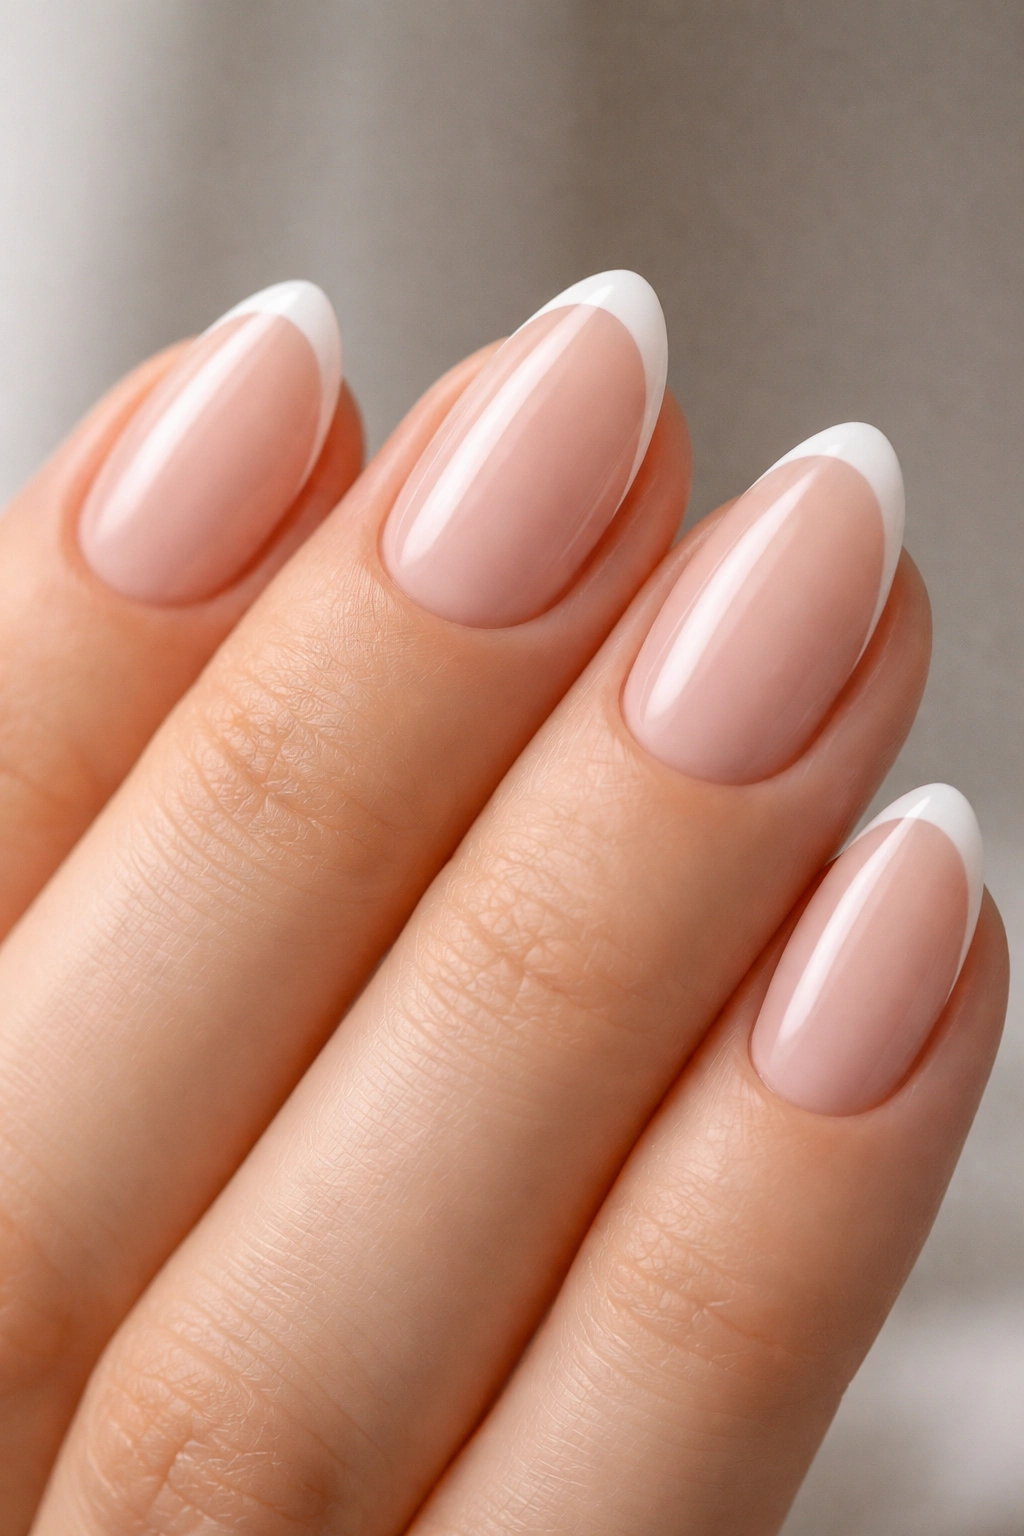
Not the classic thick, bold white arch — the kind you’d find on every acrylic set in a traditional nail salon. The minimalist version of a French tip is barely there: a 1–2mm strip of white or off-white following the natural curve of the free edge, and nothing more.
The difference in width sounds minor but looks completely different in person. A classic French tip is declarative and graphic. This version looks as though your nail just happens to have the most perfectly clean free edge imaginable. On short almond, the curved tip of the shape naturally mimics the arch of a French smile line, so the white strip follows a curve that already exists in the silhouette. There’s an inherent harmony between the design and the shape.
For color, skip pure white — it can look harsh against skin at this fine width. A creamy off-white or soft ivory reads more skin-friendly and sits naturally at 1.5mm. Anything wider than 2mm starts to look like a classic French, which is a different aesthetic entirely.
The cleanest way to apply this is with a fine liner brush rather than striping tape. Hold the brush still, load it with very little product, and rotate your wrist in a small arc to draw the smile line in a single curved motion rather than dragging the brush across the nail. It takes a few attempts to get smooth, but the result looks more natural than tape-guided lines. A sheer pink base underneath ties the look together and keeps the white tip from looking stark or isolated against bare nail.
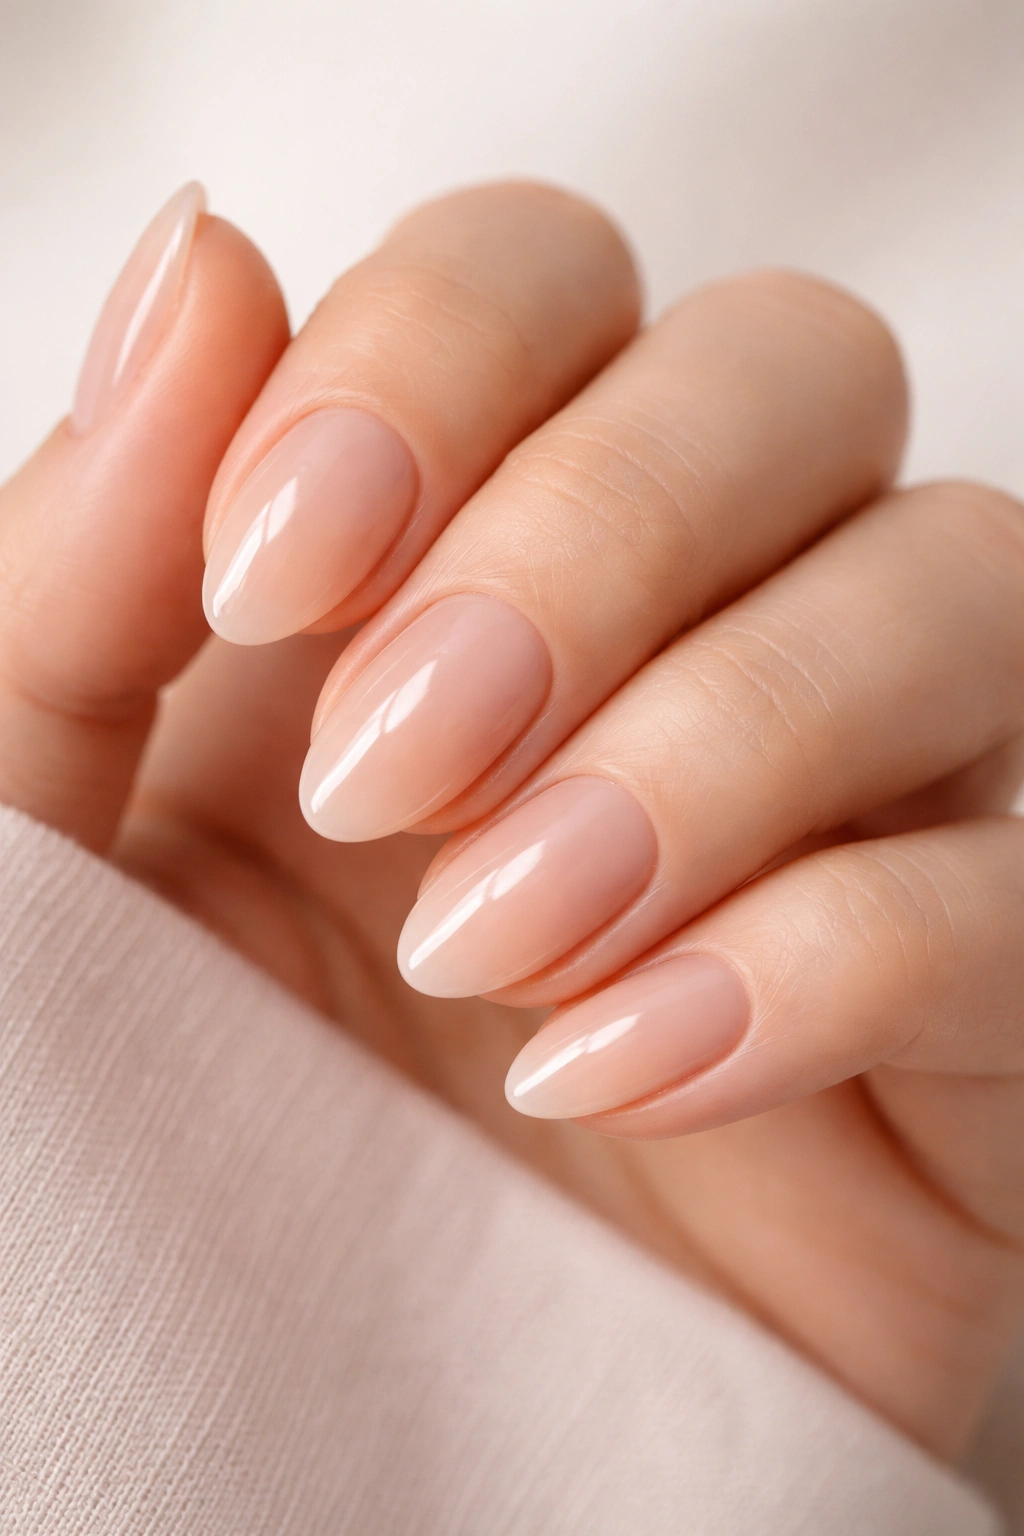
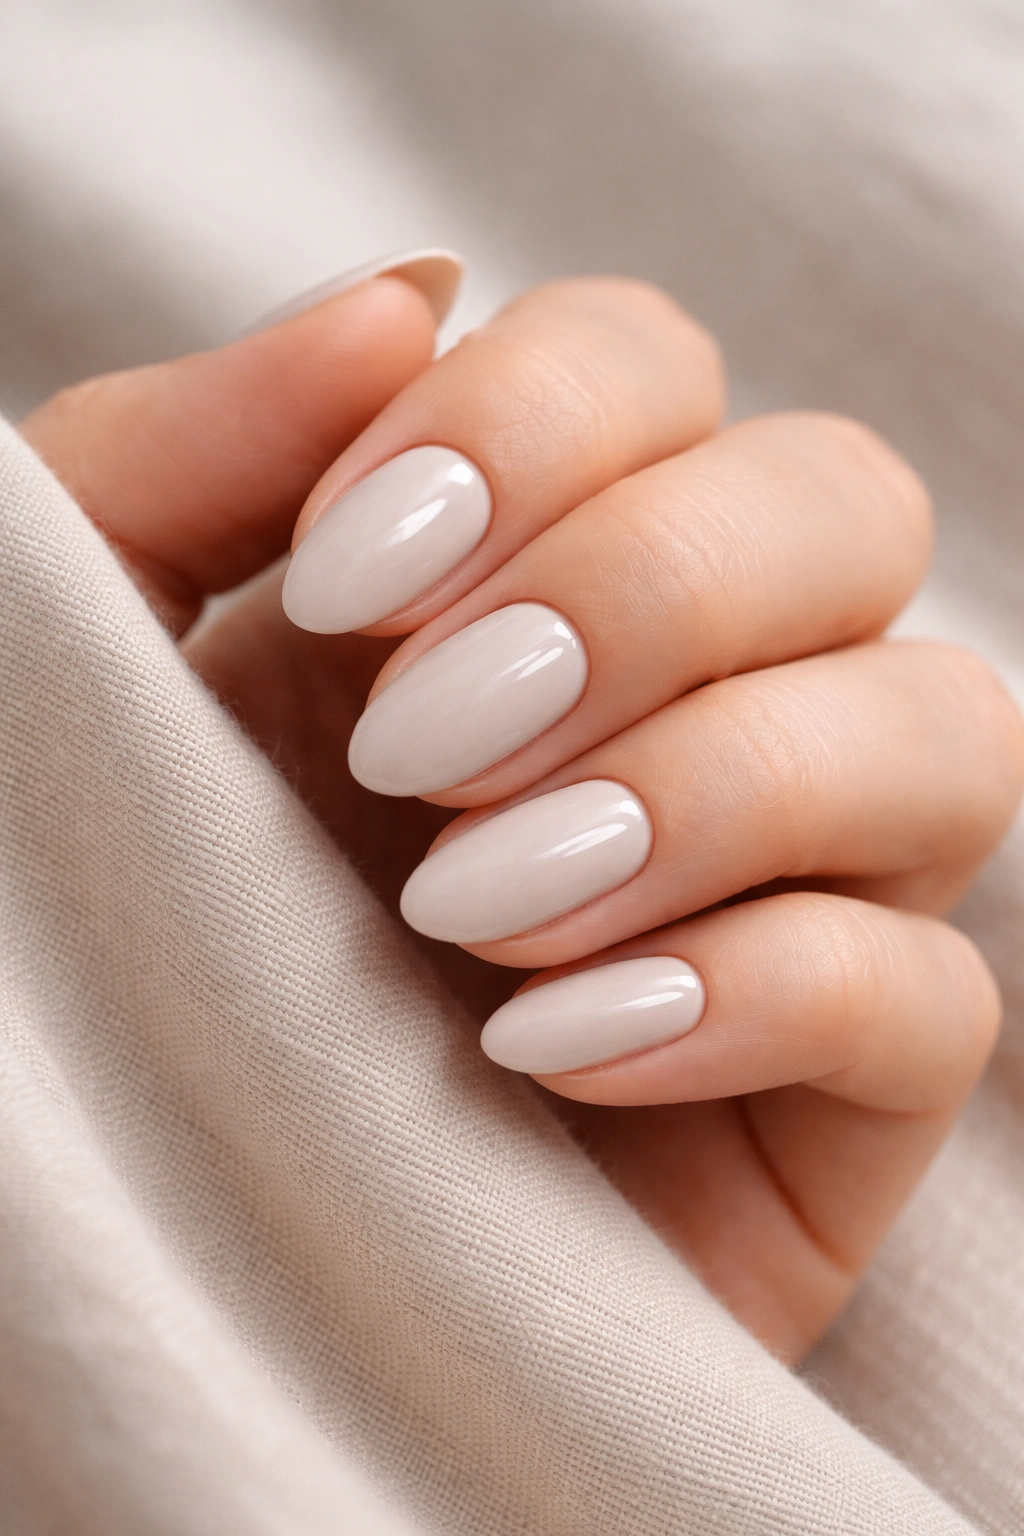
3. Milky Jelly White
Here’s what a milky jelly finish actually does that plain white polish doesn’t: it gives the nail a glowing, lit-from-within quality. Opaque enough to make a quiet statement, translucent enough that the nail shows through in the right light. The effect is closer to frosted glass than painted enamel, and on short almond nails it looks genuinely striking without announcing itself.
This finish has developed a dedicated following among minimalist nail enthusiasts — and it earns that loyalty. The look comes from a polish or gel that lands between a sheer and a full cream in terms of coverage. Most brands label this as “jelly,” “milky,” or “glass” finish. If a product description says high-shine with luminous or translucent quality, that’s the right direction.
Three coats is the sweet spot. Two coats looks underbuilt and streaky in the wrong light. Four coats moves into full-opacity territory and kills the jelly quality — the luminous, see-through quality disappears entirely. Three thin, even coats give you the milky depth without going opaque.
Glossy top coat is not optional on this design. Matte finish kills the luminous effect completely and turns it into a flat, chalky white. The high-shine surface is what makes the color read the way it does.
Because milky white covers the nail in a bright, clean tone, every imperfection in the almond shaping is visible. File the shape with more precision here than with almost any other design on this list — without a clean taper, the design just looks like plain white nails.
Color variations that keep the minimalist quality intact:
- Pure milky white (the foundational version)
- Milky soft pink (warm, baby-pink jelly)
- Milky lavender (a whisper of purple in the same jelly formula)
4. Matte Blush Pink
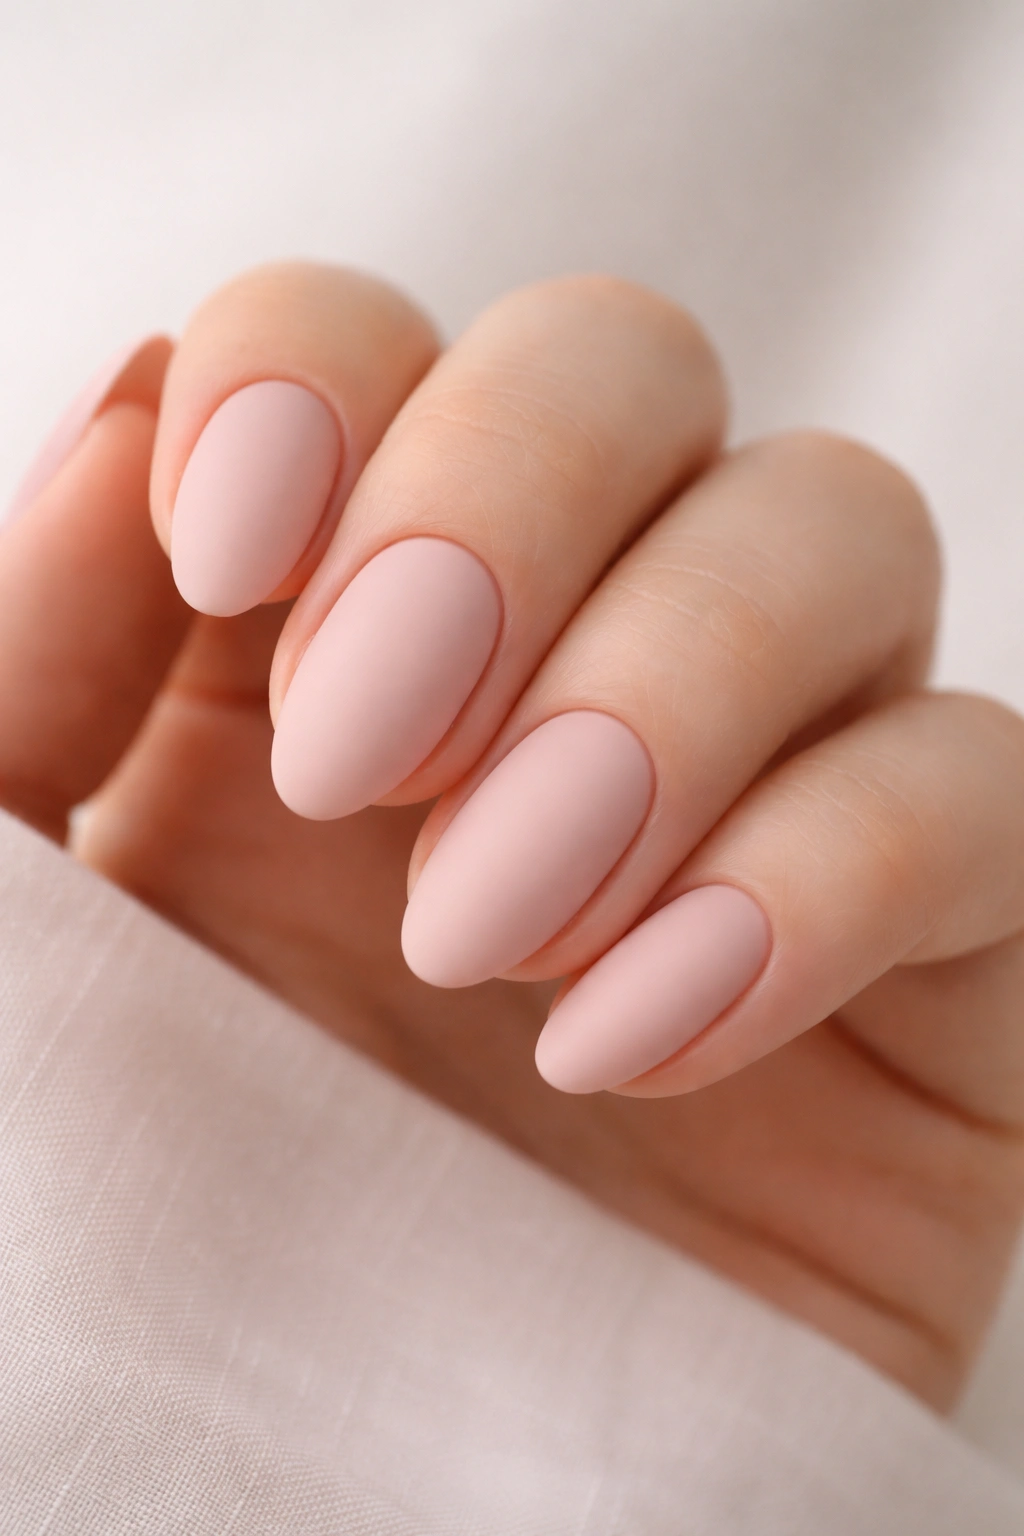
Matte finish changes everything about a nail color. Apply the same blush pink in glossy versus matte and you have two completely different aesthetics — glossy reads feminine and traditional, matte reads deliberate and editorial. On short almond nails, matte blush pink is one of the most sophisticated choices in this entire list.
The catch: matte is less forgiving of uneven application than glossy, because there’s no light reflection to smooth over brush marks. Streaks show more clearly, not less. Apply two thin, even coats of a cream blush polish first — wait until each coat is about 80% dry before applying the next. Then seal with a matte top coat as the final layer. Using a matte top coat over regular cream polish gives you more control than buying a dedicated matte formula, and tends to dry faster.
Picking the Right Blush Shade
Blush spans a wide range — from warm peach-pink to cool dusty rose to almost-nude pink — and not all of them convert to matte equally. Warm peach tones can look slightly muddy when matted down. Cool and neutral pink-rose shades convert cleanly and stay fresh-looking throughout the week.
Making It Last
Matte polish chips faster than glossy. A thin touch-up coat of matte top coat applied every 2 days extends the manicure without needing to rebuild anything. One light swipe across each nail is all it needs, and it buys 2–3 additional days of clean wear.
5. Negative Space Half-Moon
The half-moon design is one of those minimalist techniques that sounds more complicated than it is. A crescent shape at the base of the nail — near the lunula, that whitish arc just above your cuticle — is left bare or covered in a soft contrasting tone, while the rest of the nail carries a neutral color. The natural nail showing through creates the visual interest. No pattern, no art, no additional decoration — just a clean geometric break.
The sticker method makes this nearly foolproof. Press a small hole-reinforcement sticker (the paper rings used to reinforce binder paper) onto the base of each nail before applying color. Paint over the exposed upper portion, let it dry for a full 2 minutes, then peel the sticker away slowly in one continuous motion. The result is a perfectly curved crescent line every single time, without artistic skill required. The sticker follows the shape of the lunula naturally, so the crescent looks organic rather than painted.
What makes this work at its best:
- Keep the color contrast subtle for a minimalist result. Navy against white is striking but not minimalist — try nude over a sheer base, or off-white against a warm beige. The contrast should be a whisper, not a shout.
- The crescent should measure about 3–4mm at its widest point. Wider and it becomes the design’s whole focus; narrower and it disappears against the cuticle line.
- Apply a glossy top coat over the entire nail — including the bare crescent portion — to seal the edge cleanly and unify the finish.
Short almond is especially good here because the tapered sidewalls naturally frame the half-moon at the base, giving the crescent room to breathe without feeling compressed.
6. Single Fine Stripe Down the Center
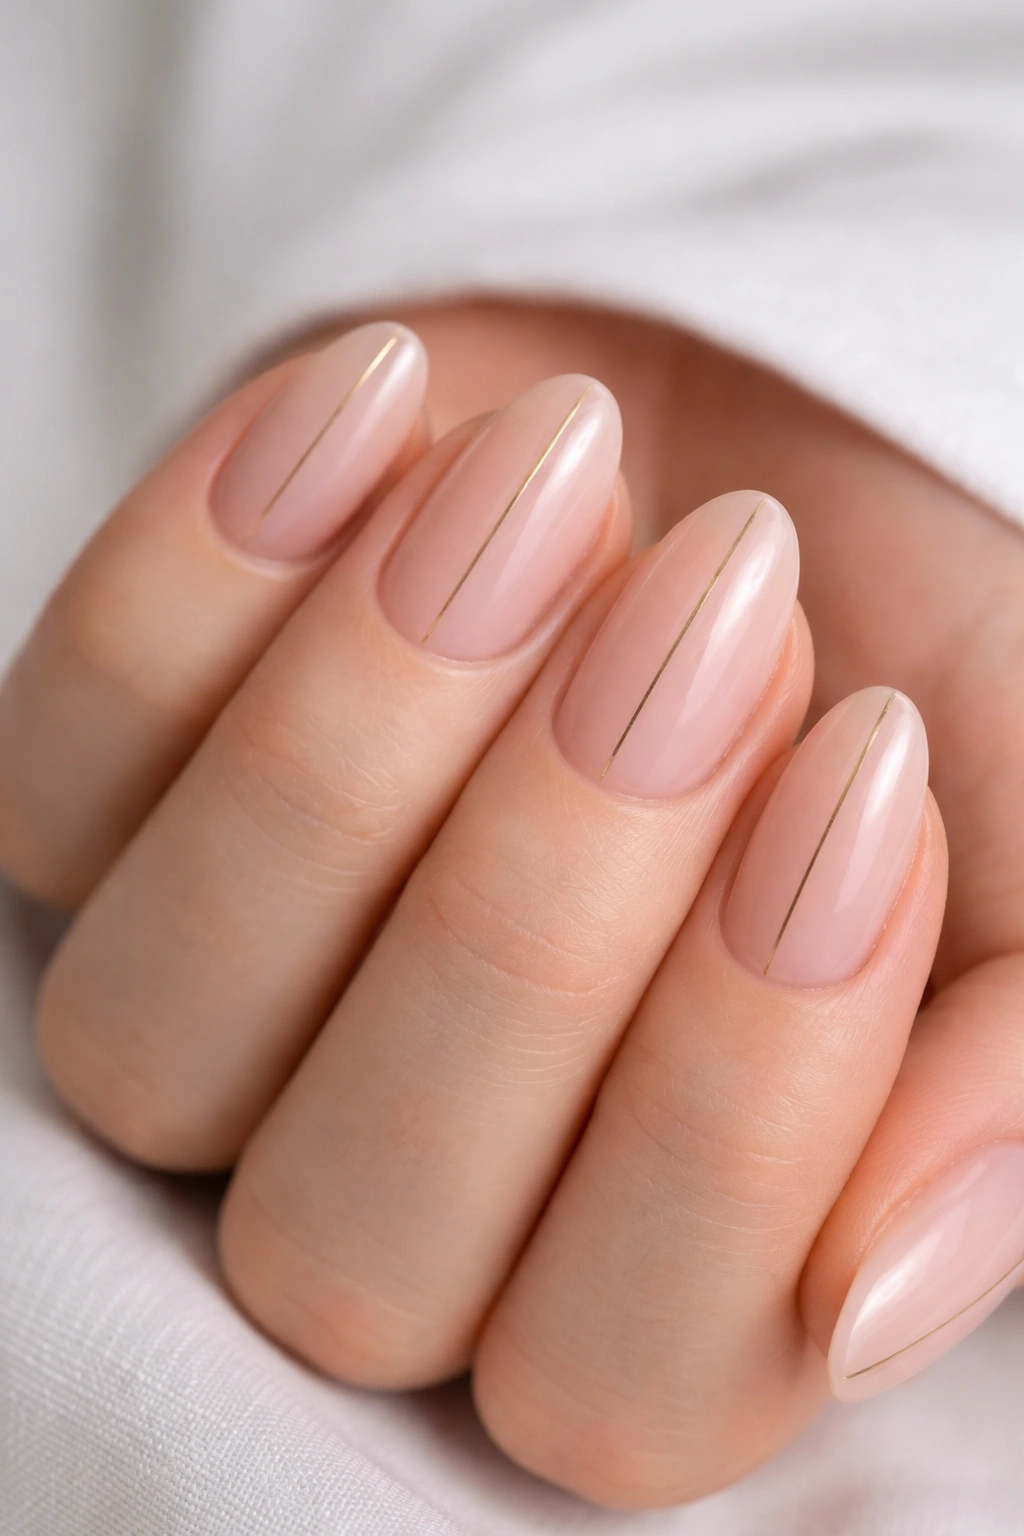
Place one hairline-thin stripe running from the cuticle to the tip, dead center on the nail.
That’s the design. The whole design.
Logically, it shouldn’t command much attention. But this look gets more second-glances than you’d expect precisely because it’s so stripped back. On a short almond nail, a vertical line creates a visual elongation — the eye reads the stripe as extending the nail’s length, making the finger look more refined than it actually is.
Getting the Line Right
Striping tape is the most consistent tool here. Apply your base color and let it dry fully. Lay a strip of striping tape down the center of the nail, pressing firmly at both ends. Apply your accent color in one thin coat over the tape, wait 60 seconds, then peel the tape off cleanly in one smooth motion. Sharp, even line, no wobbling.
For freehand application, use a striper brush with bristles no wider than 0.5–1mm. Load it with very little product and draw from cuticle to tip in a single continuous stroke. Stopping mid-nail and restarting creates a visible hesitation mark that reads worse than a slightly uneven line.
Color Combinations That Work
- Warm nude base + thin gold stripe: the most universally wearable pairing
- White milky base + thin black stripe: graphic but clean
- Sheer pink base + fine rose gold stripe: soft definition without harsh contrast
The base and stripe need to be clearly different in value. If the colors are too similar, the stripe reads as a nail flaw rather than a deliberate detail — and that undermines the whole look.
7. Soft Greige Cream
Greige — a gray-beige blend — is one of those nail colors that makes hands look put-together without any apparent effort. It doesn’t compete with what you’re wearing, doesn’t require any coordination with jewelry or outfit color, and reads equally clean in professional and casual settings. On short almond nails with a glossy finish, it’s one of the most reliable choices in this list.
A good greige shouldn’t read as either gray or brown when applied. It should sit right between the two, with a slightly cool temperature that keeps the color from going muddy. If the nail looks brown after application, the shade runs too warm. If it reads like charcoal, it’s gone too dark. The target is that middle range where you can clearly see both the gray and the beige coexisting without either one winning.
One coat of most greige polishes looks streaky and thin. Two thin coats looks intentional. Three is rarely necessary unless the formula runs particularly sheer.
Glossy finish is the right call here, not matte. The slight sheen lets the subtle cool-warm tension in the color read clearly — matte greige tends to flatten that tension into something that just looks ashy. Glossy, greige has a depth that plain beige or straight gray don’t have alone.
Because greige is so clean and neutral, the nail shape carries most of the visual weight. This is one of the designs where filing precision matters most — without the almond taper reading clearly, a greige nail is just a plain nail. The shape is what turns it into a considered choice.
8. Foil Accent on the Ring Finger
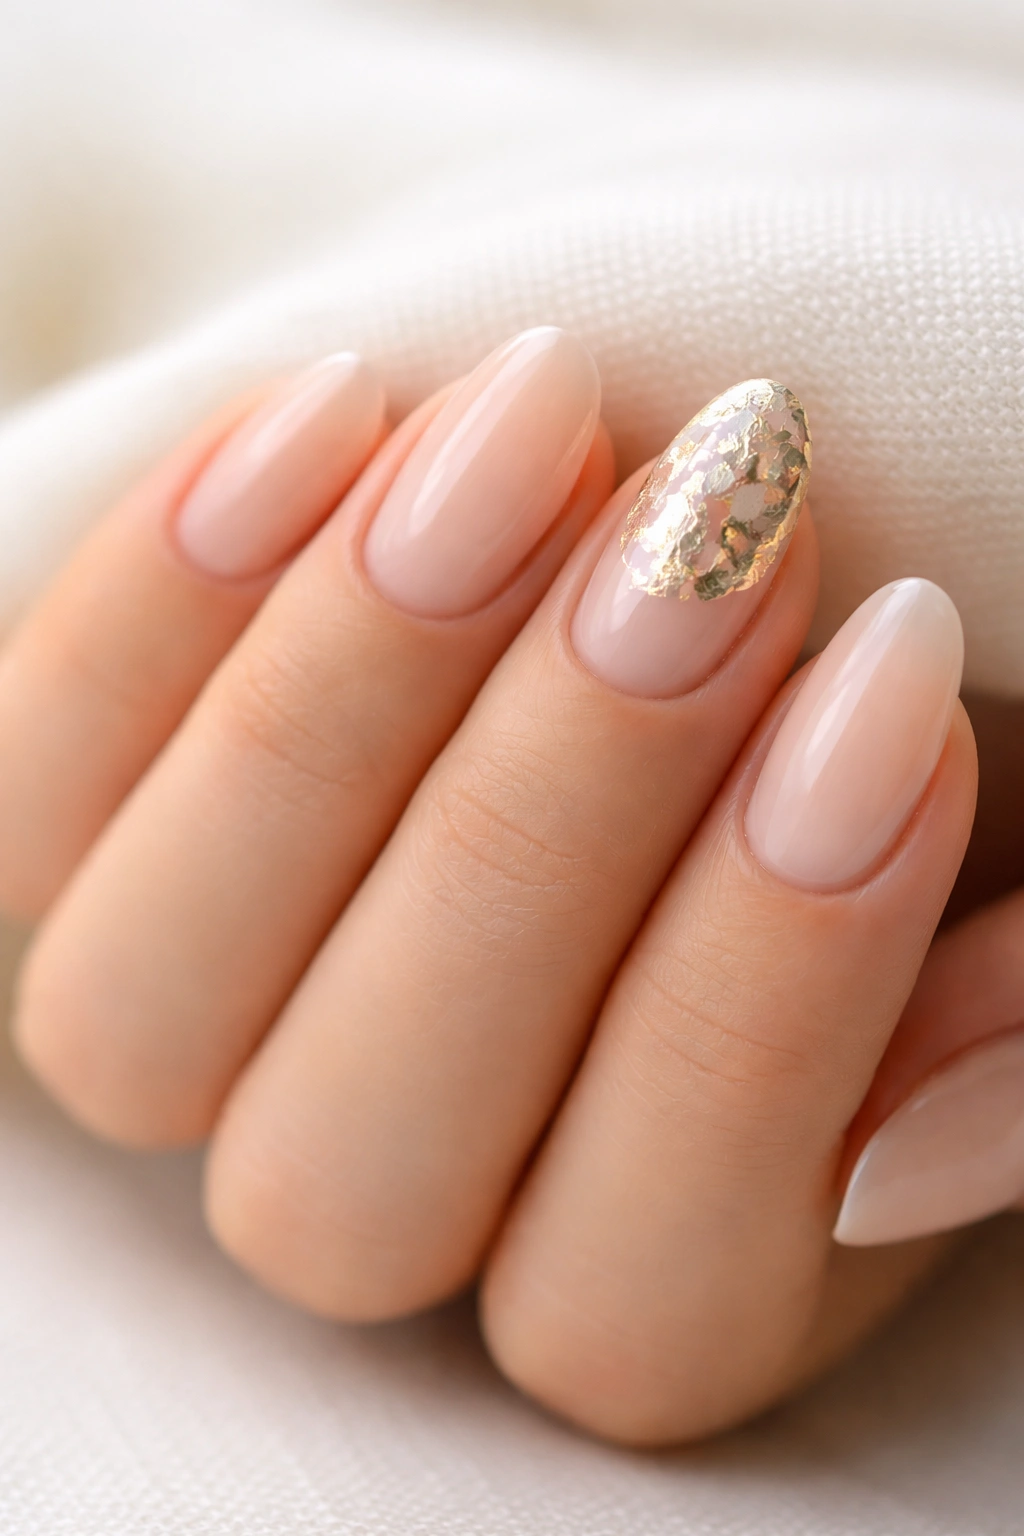
Single-nail accent designs have a complicated reputation, and in most cases that skepticism is fair. An old-school glitter accent nail doesn’t hold up as a minimalist choice. But a foil accent done with restraint is genuinely different — and short almond is one of the shapes that carries it best.
What This Looks Like
Four nails in a clean nude or soft cream polish. The ring finger (or the index — both work) in a thin, partial foil application that looks like metallic leaf rather than a full chrome coating. The foil doesn’t cover the whole nail: it sits in an organic, slightly irregular patch covering about 60% of the surface, leaving some base color visible at the edges. Those organic, uneven edges are what keep it from looking like a mirror nail — that imperfection is the style.
The Foil Application Method
Apply your base color to all five nails and let it dry fully. On the accent nail, apply a thin layer of nail foil glue — it goes on white and dries to a clear, tacky film. Wait until it’s fully transparent before applying the foil, about 60–90 seconds. Press a piece of metallic foil against the nail, hold it firmly for a few seconds, then peel it away in one quick motion. The foil adheres where the glue sits.
For the partial effect, apply the glue only to the center and tip of the nail, leaving the base and edges bare.
- Gold foil on warm nude: rich and grounded
- Silver foil on cool white: clean and high-contrast
- Rose gold foil on blush: soft but defined
Wait a full 2 minutes after the foil sets before applying top coat — dragging a brush over fresh foil pulls it across the nail and ruins the patchy organic effect you’re going for.
9. Clean Black Line Art
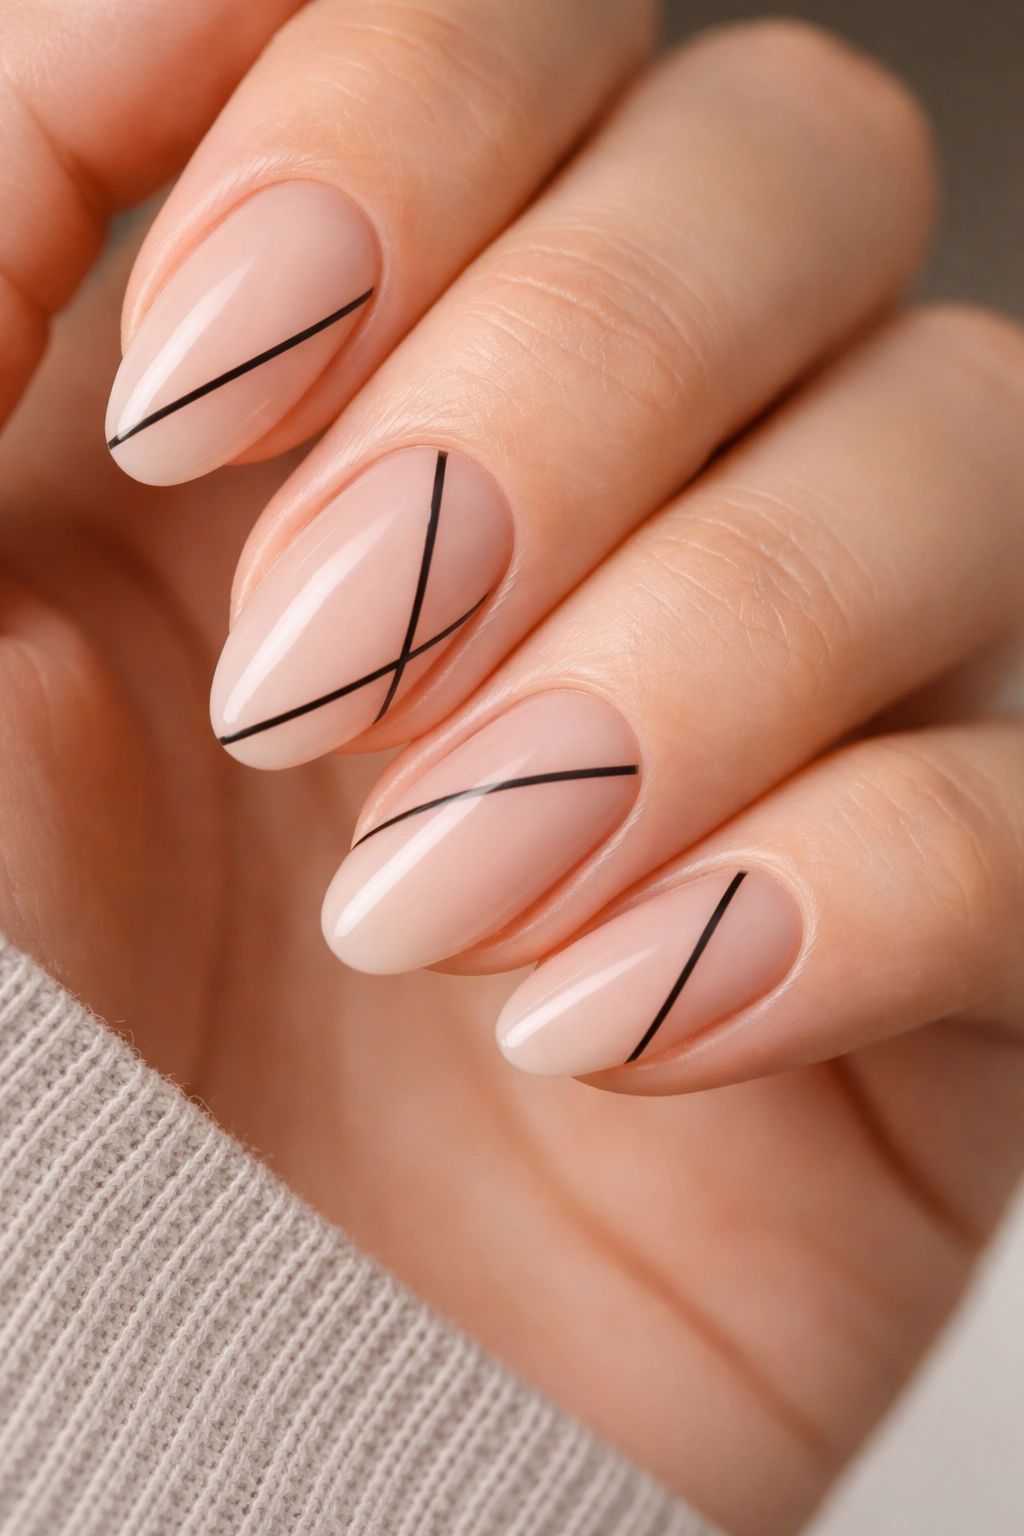
Isn’t black nail art the opposite of minimalism? Not when it’s executed at this scale.
A single clean geometric line drawn in black nail art pen, placed on a sheer or nude base, reads as graphic design rather than edge. One line, possibly two if they meet at a right angle. The most common version: a diagonal line drawn from one corner of the nail to the midpoint of the opposite edge. On a short almond nail, this creates an abstract, deliberate quality — graphic without being decorated, which is exactly what makes it work.
A nail art pen with a 0.3–0.5mm tip is the only practical tool for this. A regular brush loaded with acrylic or gel paint gives wobbly results unless your hands are rock-steady. The pen offers something closer to fine-tip marker control, which is what you need for something this pared back.
Apply the line on fully dry polish. Let it sit for a full 2 minutes before touching anything — nail art pen ink dries faster than polish but smears badly if rushed. Then seal with a glossy top coat applied in one smooth stroke across the entire nail to avoid dragging the ink line.
One approach that works particularly well on short almond: a single horizontal line across the middle of the nail, parallel to where a French smile line would sit. It divides the nail into two sections and creates a quiet geometric look that’s easier to execute consistently than a diagonal, especially if you’re doing this at home.
10. Stone Gray Matte
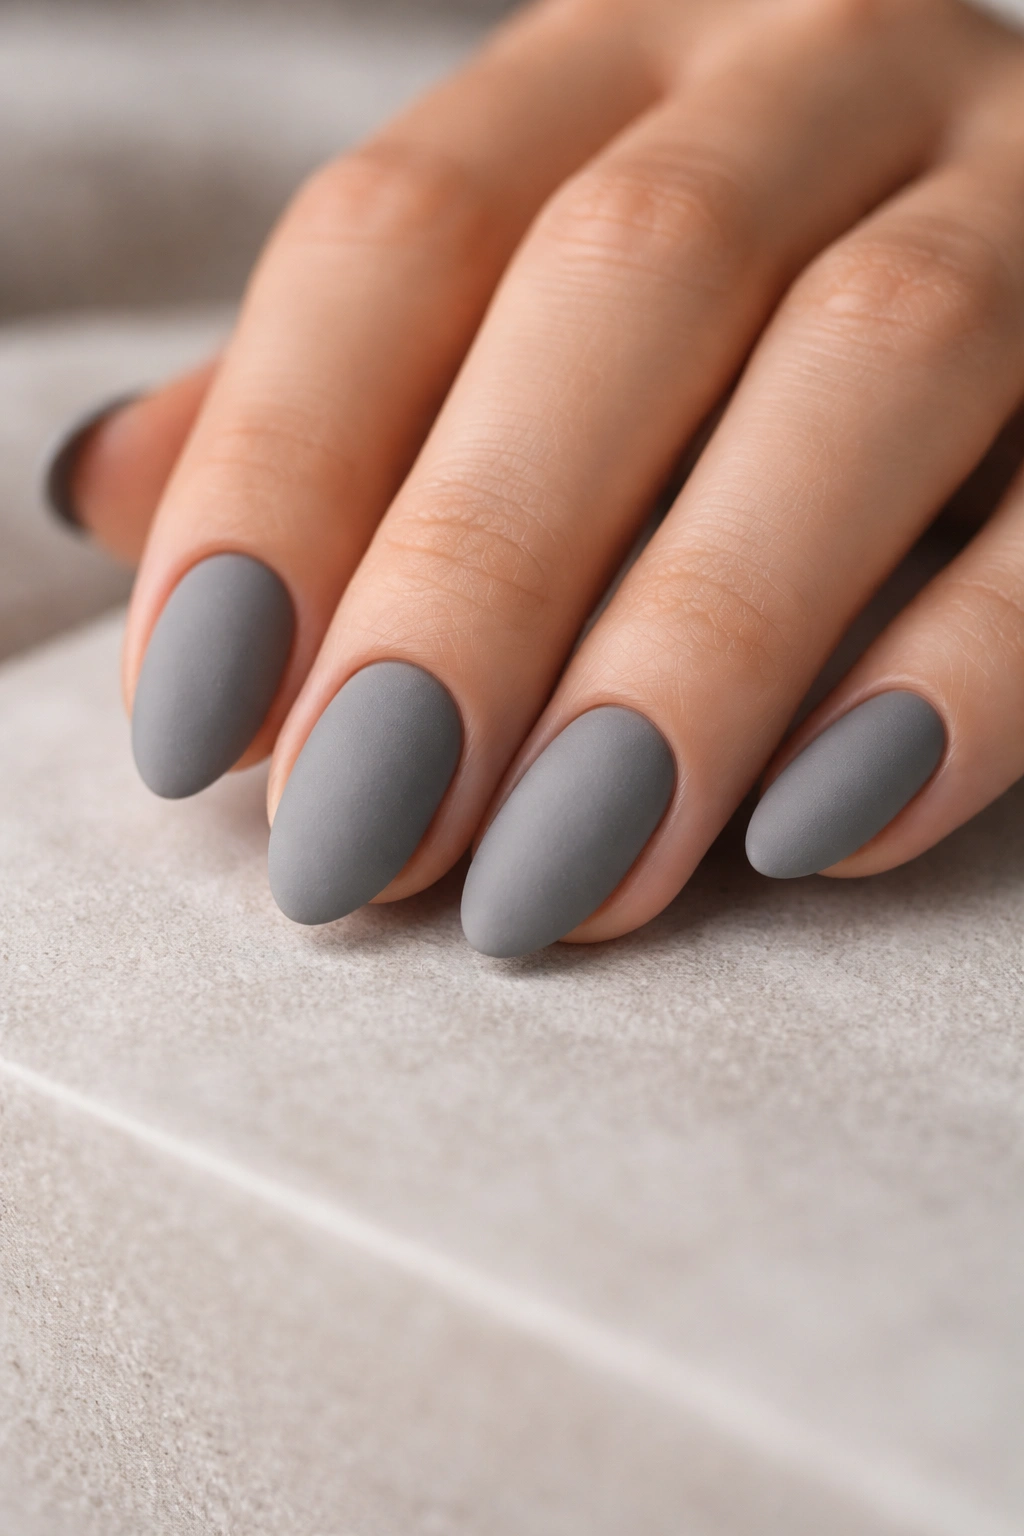
How a color reads depends entirely on finish. Stone gray — a medium gray with a cool, slightly blue-toned base — looks professional and polished in glossy form. Switch the same shade to matte, and it suddenly reads like brushed concrete: modern, architectural, quietly bold.
This is one of the more statement-making designs on this list, despite being technically minimal. Matte stone gray on short almond nails signals something considered. There’s a deliberate quality to it that glossy gray just doesn’t have.
Color depth is the main decision here. Go too light and the result is a dusty lavender-gray that looks indecisive rather than clean. Go too dark and you’re in charcoal territory — a different aesthetic entirely. The sweet spot is a medium gray in the range of warm sidewalk or raw cement, with enough warmth that it doesn’t read cold or stark.
Application works best by building two smooth cream coats first, then applying the matte top coat while the final polish coat is still slightly tacky — not wet, not fully dry, but at that in-between stage. The tacky surface gives the matte top coat something to grip, which prevents the slight pooling that can happen on fully-dry polish. Seal the free edge too, since that’s where wear starts earliest on matte finishes.
One small note: this design pairs naturally with cool-toned silver jewelry. Warm gold fights with it slightly — not disastrously, but it’s worth knowing before you get dressed.
11. Translucent Base with a Single White Dot
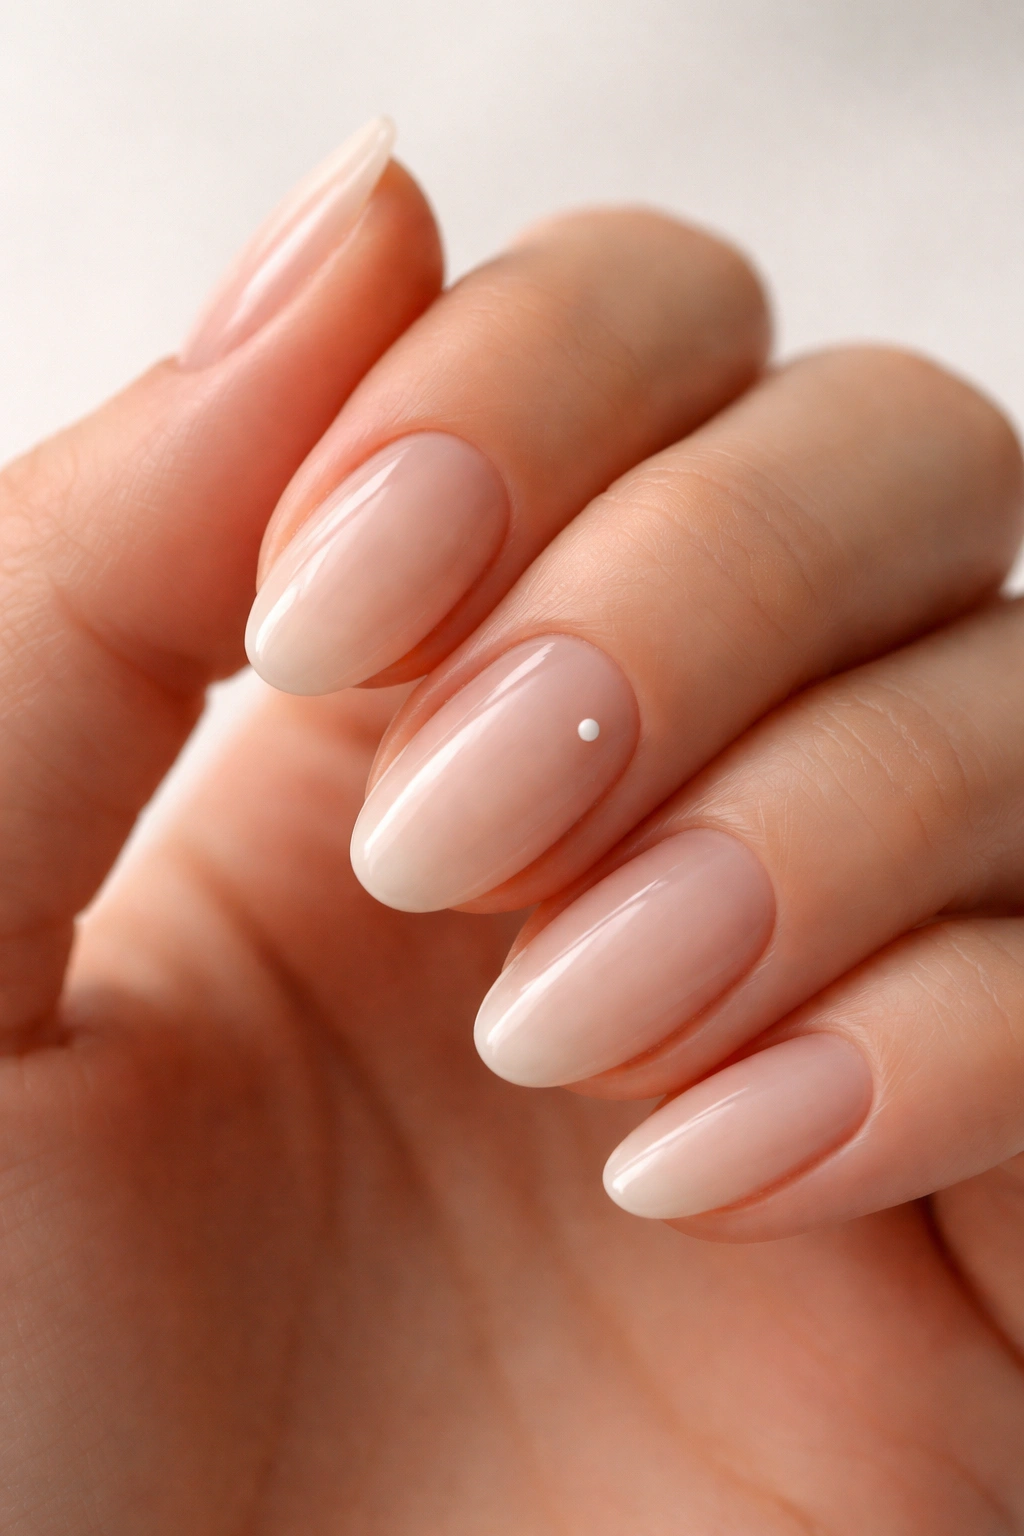
One nail. One dot. That’s it.
Apply a sheer or translucent base — milky, jelly, or barely-there pink — across all five nails. On one nail, place a single small white dot near the cuticle, slightly off-center toward one side. The dot should be small: 2–3mm in diameter, applied with a dotting tool or the flat end of a bobby pin dipped in white polish.
Placement changes the read more than you’d expect. A dot directly in the center looks clinical and planned. Slightly off-center near the base curve looks organic — like a detail that rewards someone looking closely rather than something designed to announce itself. That quietness is the whole point of the look.
Restraint is non-negotiable here. If the dot is larger than 3mm, it becomes a feature rather than a detail. If there are multiple dots, the minimalism breaks. One small dot on a clean sheer base is the complete concept — adding anything else dilutes it immediately and turns it into a different kind of nail design entirely.
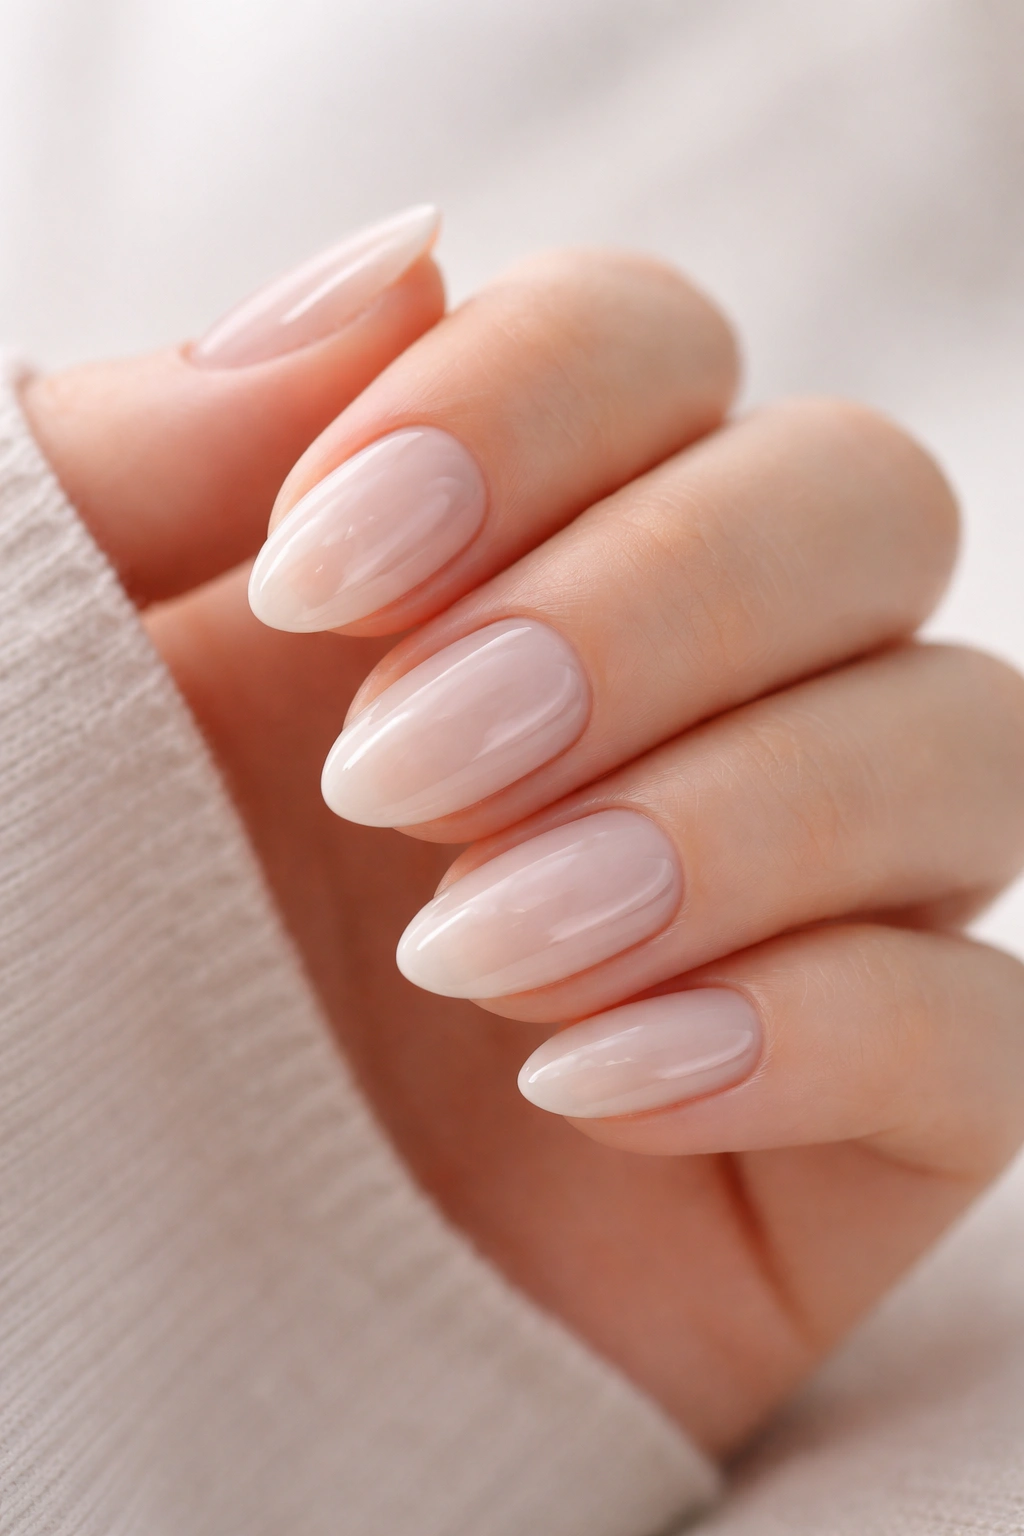
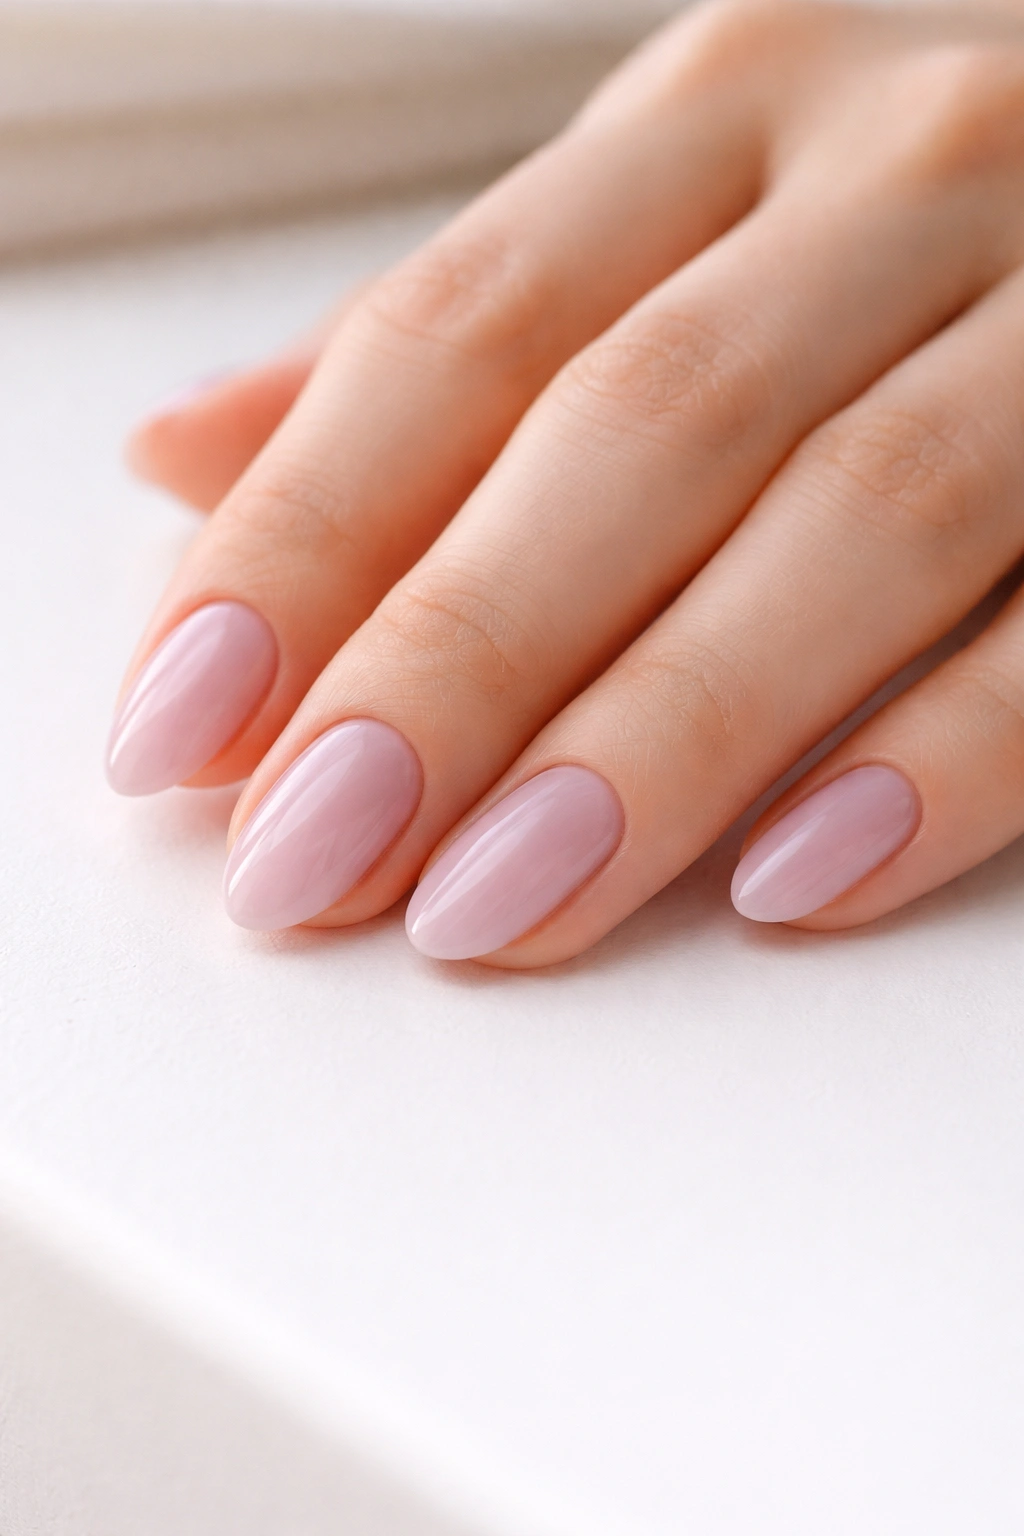
12. Soft Blended Pink-to-White Ombre
Ombre on nails usually suggests drama: bold gradients, high contrast, glitter at the transition point. The minimalist version works on an opposite principle — a pale pink at the nail base blending into an almost-white tip, both within the same pink family, applied so gently that the transition is felt rather than clearly seen.
Getting this right takes a makeup sponge and patience. Apply one coat of pale pink base across the whole nail and let it dry completely. Mix your lighter tip color — one or two shades lighter in the same pink family, or a warm white with a pink cast — and stipple it onto the upper third of the nail using a small piece of torn sea sponge, pressing in a blotting motion rather than wiping. Build the gradient in 3–4 thin passes rather than one heavy application, which blends more naturally and avoids the splotchy look a single heavy pass creates.
The two colors should be close enough in tone that the transition isn’t a dramatic shift. The goal is a nail that looks like your natural nail coloring has been subtly enhanced, not like a visible gradient was deliberately applied. Think of it as the difference between morning fog and a hard line of color.
A high-gloss top coat pulls the sponged texture together and softens any rough surface the sponge leaves behind. Clean up any stray polish on the skin with a small brush dipped in remover before the top coat goes on — on light ombre nails, any skin staining reads clearly against the pale base.
13. Warm Swiss Almond Beige
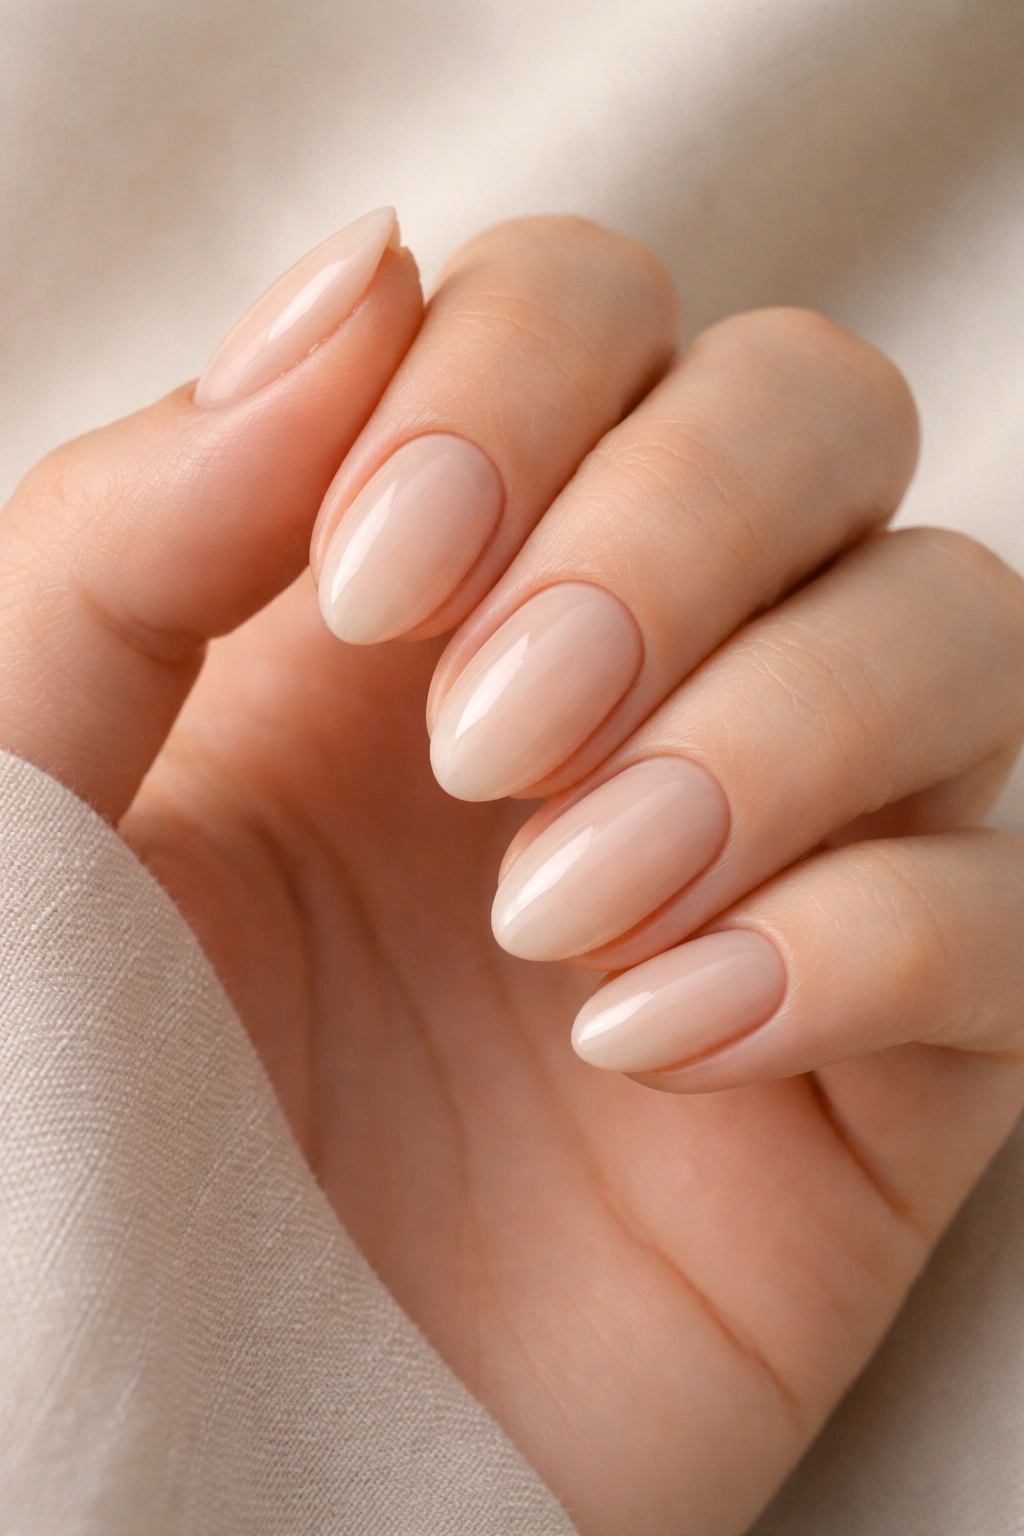
Swiss almond is the color nail professionals reach for when a client says “something natural, but not boring.” It’s a creamy, warm beige with a slight yellow-pink undertone — think pale sand or the inside of a raw almond — that sits against skin in a way that feels like enhancement rather than contrast.
Unlike cooler-toned nudes, which can sometimes read stark or slightly clinical, Swiss almond has enough warmth to look like an extension of the hand itself. That quality — looking like skin but better — is what makes it a go-to for professional environments, where nails should read as polished without drawing attention.
The formula to look for is: warm beige, cream finish, semi-opaque coverage. Two coats is usually enough for full, even coverage. A third coat applied down the center of the nail (and only the center) adds a subtle depth that makes the color look slightly richer without going opaque.
This is the design to choose when:
- You want the nail to look clean and polished without any color reading at a glance
- You’re attending something formal or professional and want nails that won’t distract
- Your wardrobe leans warm or earthy and you want the nails to sit in harmony with it
The short almond shape and the warm beige tone work together to create a cohesive result: deliberate, groomed, understated. It’s the kind of manicure that makes hands look taken care of rather than decorated.
14. Pale Lilac Wash
Most purple nail colors are opaque, saturated, and eye-catching. A pale lilac wash works on an opposite principle: one or two coats maximum of the softest, sheerest lavender imaginable, sitting on the nail like a thin layer of color rather than a coat of paint. The nail shows through clearly. The purple is a presence, not a statement.
Done right, this design occupies an interesting perceptual space. Most people will register that your nails look clean and considered without immediately identifying the color as purple. The sheer translucency blurs the color enough that it reads as a healthy tonal quality rather than a clearly applied nail shade. That ambiguity is the point — and it’s what makes this a minimalist design rather than just a light purple manicure.
What makes this design fragile — in a good way — is its resistance to over-application. Three or four coats of the same lilac sheer turns it into a regular opaque lavender nail, which is a completely different look. The wash quality lives in that first or second coat. Go past it and the whole effect shifts into something bolder than intended.
Finish matters here more than people expect. Glossy reads bright and spring-like — the translucency gets amplified by the shine. Matte lilac wash reads quieter, slightly more wearable in cooler-toned outfits, and with a texture that suits people who find glossy nails too traditional. Both work, and neither is wrong. The choice comes down to whether you want the nail to glow slightly or to sit quietly.
One practical note: pale sheers show tip wear earlier than opaque colors. A thin seal of top coat along the free edge, reapplied every few days, extends the manicure without rebuilding the whole design.
15. Glossy Clear with a Raised Gel Detail
Every other design on this list uses color to create the visual interest. This one uses texture and dimension instead.
The base is fully clear and glossy — a clean top coat with nothing underneath except the natural nail (or a thin nude layer if the nail surface is uneven). On top of that, a single raised gel element: a fine horizontal arc, a small raised dot, or a single curved stroke near the tip, applied in clear or white gel. The raised element is the design. It catches light differently from the flat nail surface, creating a micro-shadow and depth that reads as artful even though no color is involved whatsoever.
This requires gel rather than regular polish to hold the raised shape. Apply a base coat, then use a fine nail art brush loaded with clear or white hard gel to draw the detail. Cure under a lamp for just 20–25 seconds rather than the full cure time — a partially cured surface holds the raised shape better than a fully liquid one. Apply top coat over everything and cure fully.
The result is a nail that looks like glass with a single engraved line. It’s arguably the most editorial look on this list — the kind of detail you’d see in a high-fashion shoot — but because the overall nail stays completely transparent and neutral, it functions equally well in an office setting. The texture does the work without the color making any demands.
Short almond is the right shape for this design because the tapered silhouette gives the raised detail something to frame it. On a square nail, a single gel line in the center can look lost or accidental. On almond, the shape and the detail work together.
Getting the Most From Any Minimalist Manicure
Minimalist nail designs live or die on execution. When there’s nothing to distract the eye, prep quality and ongoing maintenance matter more here than with almost any other nail style.
Start with hydrated, conditioned nails. Dry, peeling nail edges undermine any minimal design immediately. A few drops of cuticle oil applied before bed — massaged into the base of each nail and the surrounding skin — keeps the nail plate and cuticle line in the condition that these clean looks actually require to land correctly.
The quality of your top coat is arguably the single most impactful product in a minimalist manicure. A high-shine, high-build top coat smooths surface imperfections, deepens the color slightly, and adds 2–3 days of chip resistance. Apply one thin swipe of top coat every 2 days to maintain the shine and protect the design — that one maintenance habit alone extends most minimalist manicures from 5 days to 9 or 10.
One thing most people overlook: the overall presentation of the hand matters as much as the nail itself. If the skin around the nails is rough or the knuckles are dry, the clean impression of the design gets diluted before anyone even looks at the color. A thin layer of hand cream applied after washing your hands keeps everything cohesive. At these minimal design levels, that context is part of the look — the nail doesn’t exist in isolation from the hand it’s on.
Final Thoughts
Short almond nails and minimalist design belong together in a way that becomes obvious once you see it. The shape creates elegance. The designs amplify it without competing with it. The result is a manicure that looks cared for without looking contrived.
Work through this list by starting with the two or three designs that genuinely appeal to you and wearing each one for a full week before deciding. Nail looks often feel different in person than they do on screen — a pale lilac wash that reads as too subtle in a photo might be exactly right on your actual hands.
The most useful thing to hold onto: minimalism isn’t about doing less. It’s about doing what’s there with full attention. A sheer nude applied carelessly isn’t a minimalist nail — it’s just a plain nail. The same sheer, applied with clean edges, the right color choice, and a proper top coat, is one of the cleanest looks in contemporary nail aesthetics. That’s the whole difference, and it’s entirely within reach.
