

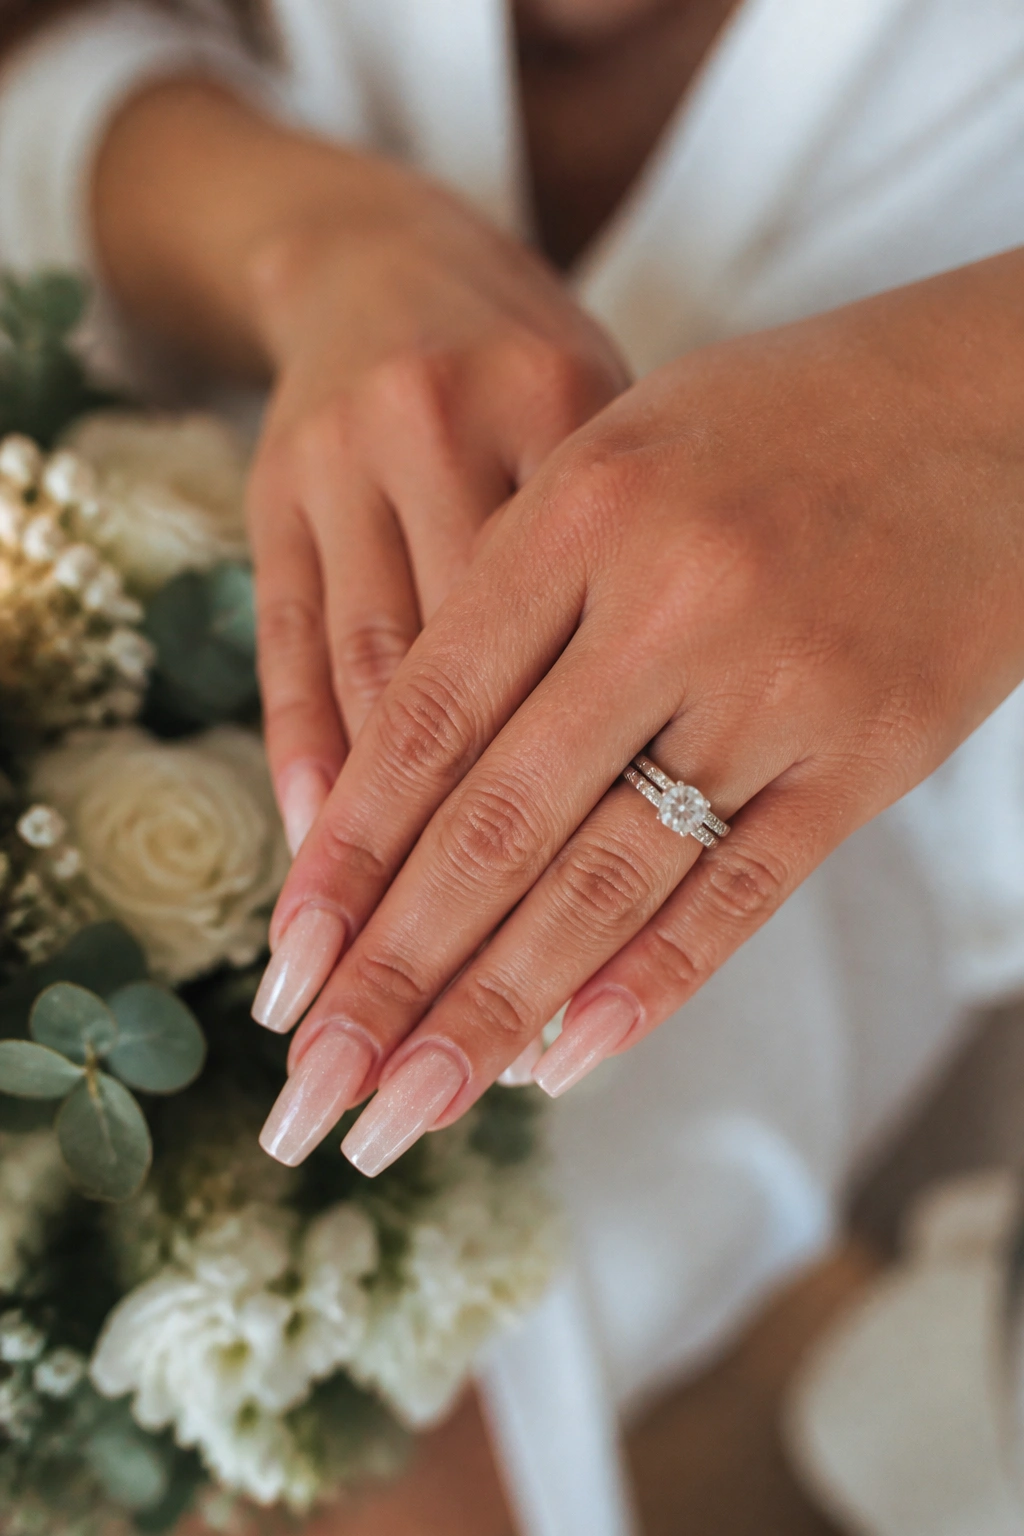
The ring photo lasts longer than the cake, the flowers, and half the tiny details you spent weeks choosing. Your hands are in the flat-lay shot, the bouquet shot, the close-up with the band, the candid toast, the moment you smooth your dress, and the last dance when someone finally remembers to take a flash photo from three feet away. Coffin nails for your wedding day matter more than people admit.
A bridal manicure has a strange job. It needs to look polished in close-up, stay out of the way when you button a sleeve or hold a champagne flute, and still feel like you when all the other wedding details are trying to push you toward a version of yourself that feels a little too styled. That’s why I keep coming back to coffin nails for weddings: the shape has enough structure to feel intentional, yet it can still read soft, clean, and quiet in photos if the design is handled well.
Shape is only half of it, though. Length, finish, color temperature, and nail art scale all change the mood. A milky nude on a medium coffin shape gives one effect. A bright white chrome on a long coffin tip gives another. Even the top coat matters more than most people think—gloss catches flash, matte can make color look powdery, and pearl finishes sit somewhere in the middle with a softer reflection.
Pick the right design and your hands look composed without trying too hard. Pick the wrong one and the nails pull focus from the ring, the dress fabric, and your skin tone. That’s the part worth getting right.
Choosing the Right Coffin Nail Length for Ring Shots and Bouquet Photos
Short-to-medium coffin nails usually make the most sense for a wedding day. I’m talking about roughly 4 to 7 millimeters past the fingertip, enough length to show the tapered sidewalls and flat edge, but not so much that you struggle with clasps, zipper pulls, veil combs, or the tiny buttons that seem to appear on every wedding dress sleeve. You can go longer, sure, though long coffin nails ask more from you physically.
Your ring matters here too. A slim solitaire or pavé band can get swallowed by heavy nail art or extra-long tips. A larger halo setting, vintage cluster, or emerald-cut center stone can handle more nail presence. That balance is easy to miss until you see your hands in a close-up shot.
A quick rule I use:
- Delicate rings pair well with milky nudes, French tips, sheer pinks, and shorter coffin shapes.
- Bold rings can carry chrome, shimmer, lace art, crystals, and a slightly longer length.
- Long nail beds often make medium coffin shapes look elegant without extra extension length.
- Shorter nail beds can still wear coffin nails well, though the taper should stay soft so the nails do not look boxy.
Hands look different under flash, candlelight, and daylight near a window. Test your manicure in all three. Hold your bouquet. Hold your phone. Slip your ring on and off. Those small checks tell you more than staring at a salon swatch wall ever will.
Timing Your Bridal Manicure So Your Coffin Nails Still Look Fresh at the Reception
Book a trial set if you’re changing shape, length, or finish. I’d do that 3 to 6 weeks before the wedding, especially if you rarely wear extensions. Coffin nails feel different from round or almond when you type, button clothes, open cans, or grip a steering wheel. Better to learn that on a random weekday than on the morning of the ceremony.
A booking window that works in real life
For gel polish on your natural nails, 1 to 3 days before the wedding is a safe window. For acrylic, hard gel, or builder gel extensions, the same timing works if the set is fresh and you trust the tech. If you need a fill, book it close enough that the cuticle growth still looks tidy in macro photos.
Regular polish is the weak link. It can look lovely for a dinner party; weddings are tougher. You’re dressing, packing, carrying bags, dealing with steam, hair products, makeup remover, and nerves. One chip on your right thumb will annoy you all day.
What to test before the big day
Wear your trial nails through ordinary tasks.
- Button a shirt with small buttons.
- Put in contact lenses if you wear them.
- Fasten jewelry.
- Pick up a credit card from a table.
- Text with both thumbs.
- Open a car door and a soda can.
If one nail shape keeps catching fabric or the corners feel too sharp, ask for a softer coffin taper and a slightly rounded edge. Coffin does not need to look blunt to read as coffin.
Cuticle prep matters more than art. Dry skin around the nail plate shows up fast in close-up photos, especially against white flowers and polished metal. Start using cuticle oil once or twice a day in the week leading up to the appointment, and stop trimming hangnails with random scissors. That never ends well.
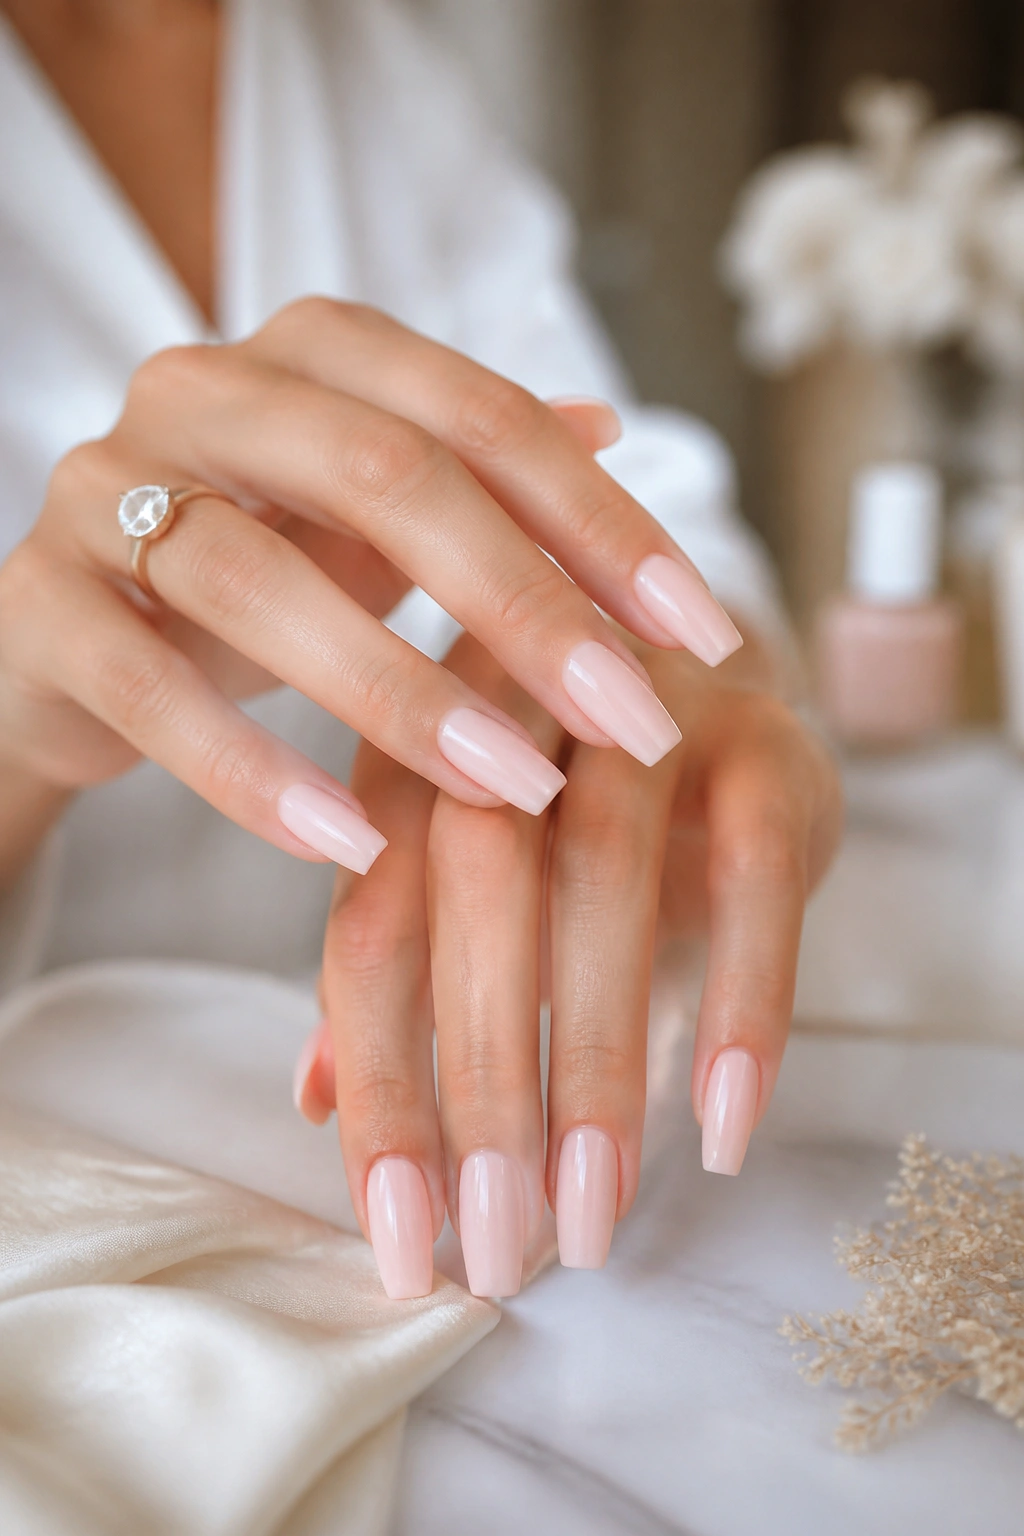
1. Milky Nude Coffin Nails with a Soft Gloss Finish
If I had to name one bridal coffin manicure that almost never lets anyone down, this would be it. Milky nude coffin nails sit in that sweet spot between clean and dressed. They make the fingers look longer, they flatter most dress fabrics, and they don’t fight with a lace veil, pearl earrings, or an ornate ring.
The key is the milkiness. A flat beige can look dead under flash. A pink nude can turn candy-like if it’s too bright. What you want is a semi-sheer blend—usually a nude with a whisper of white mixed through it—so the nail still has depth when the light hits.
Why it works so well in wedding photos
A soft glossy top coat keeps the nails looking hydrated and fresh. That matters in macro shots, where chalky color and dry cuticles make even expensive work look tired. Medium coffin length is strongest here, usually size medium or about 5 millimeters past the fingertip.
Quick details worth asking your nail tech about
- Ask for a jelly-milky finish, not a solid beige cream.
- Keep the free edge thin so the tips do not look bulky from the side.
- Use a nude with a pink-beige or neutral-beige base, depending on your skin tone.
- Stick to one or two coats of milky color over a sheer base rather than one dense opaque layer.
My advice: if your dress has heavy beading, dramatic sleeves, or a detailed bodice, milky nude nails keep your hands polished without piling on one more visual element.
2. Thin French Tip Coffin Nails with a Crisp White Edge
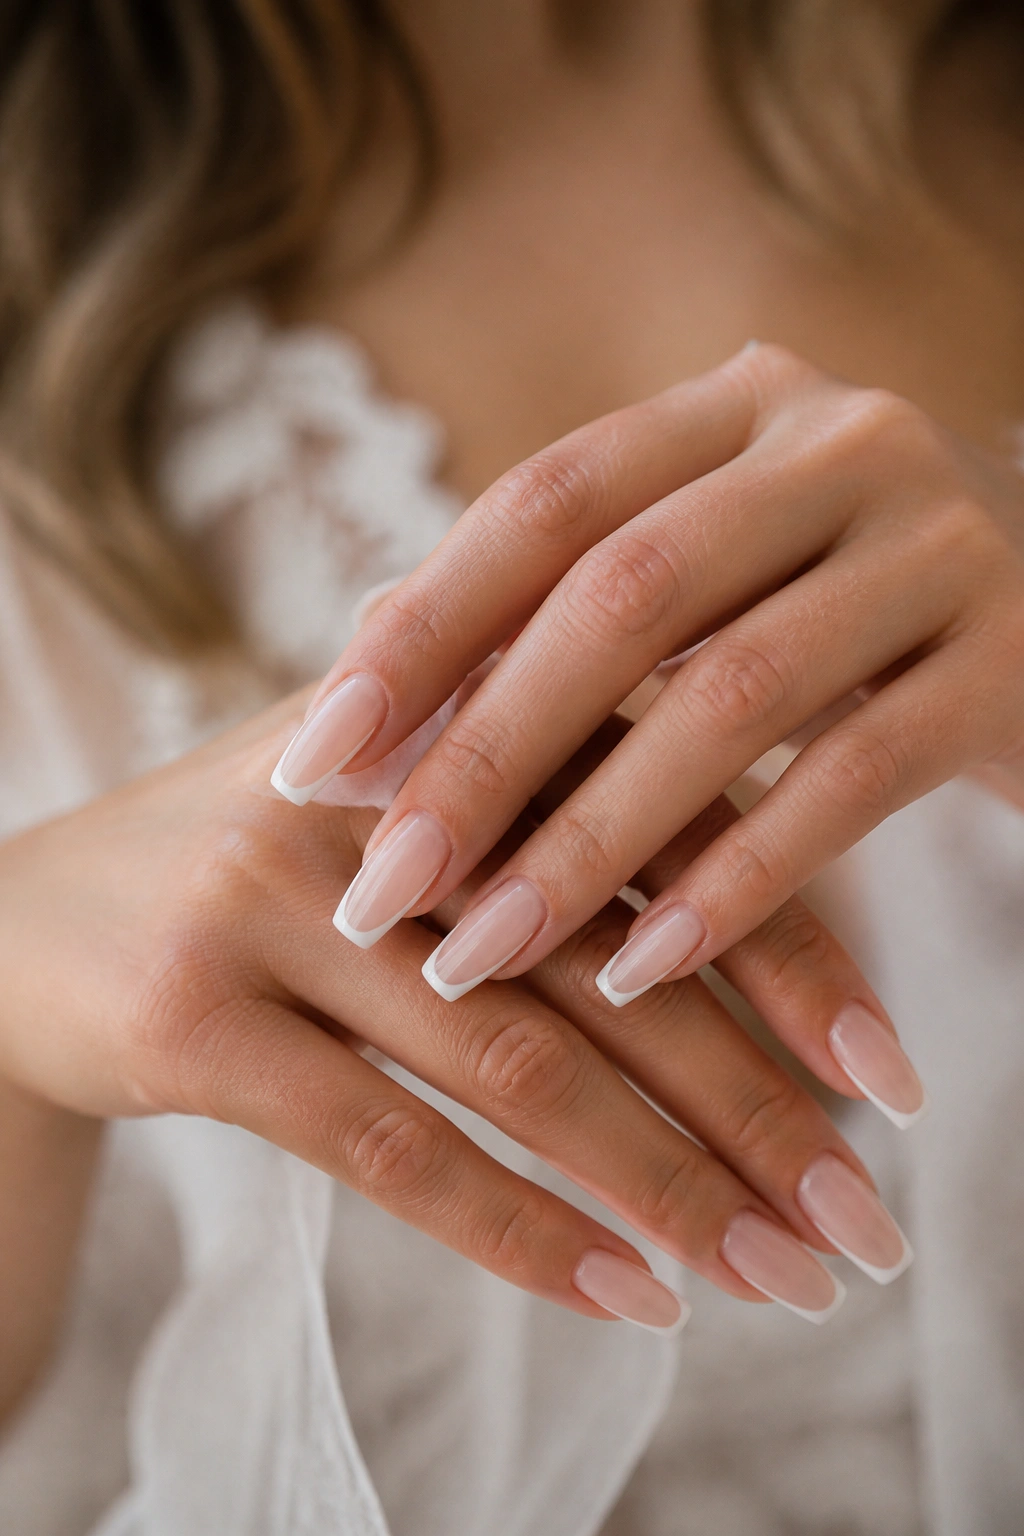
French tips can go wrong fast. Too thick, and they start to look harsh. Too bright, and the white edge steals attention from the ring. Too wide, and the nails feel dated in a way bridal beauty never recovers from. A thin French tip on a coffin shape, though, is still one of the sharpest choices you can make.
Keep the smile line narrow—about 1 to 2 millimeters at the center—and use a base color with some translucency. That single decision changes the whole manicure. The contrast softens, the nail bed looks longer, and the hand stays elegant instead of severe.
I also prefer this design on a medium coffin rather than a long one. Long coffin French tips can edge into editorial territory, which is fun for a fashion shoot and less helpful if your wedding style leans classic, garden, church, or black-tie. Medium length gives you structure without turning the nails into the whole conversation.
Flash photography is where this set earns its keep. The thin white line frames the tip cleanly, so the fingers look neat and deliberate, especially when you’re holding the bouquet stems or the base of a champagne coupe. White satin, crepe, mikado, and silk all work with it.
One more thing: ask for the white to be soft white, not correction-fluid white. There’s a difference. Soft white feels cleaner against skin.
3. Sheer Pink Coffin Nails with Tiny Pearl Accents
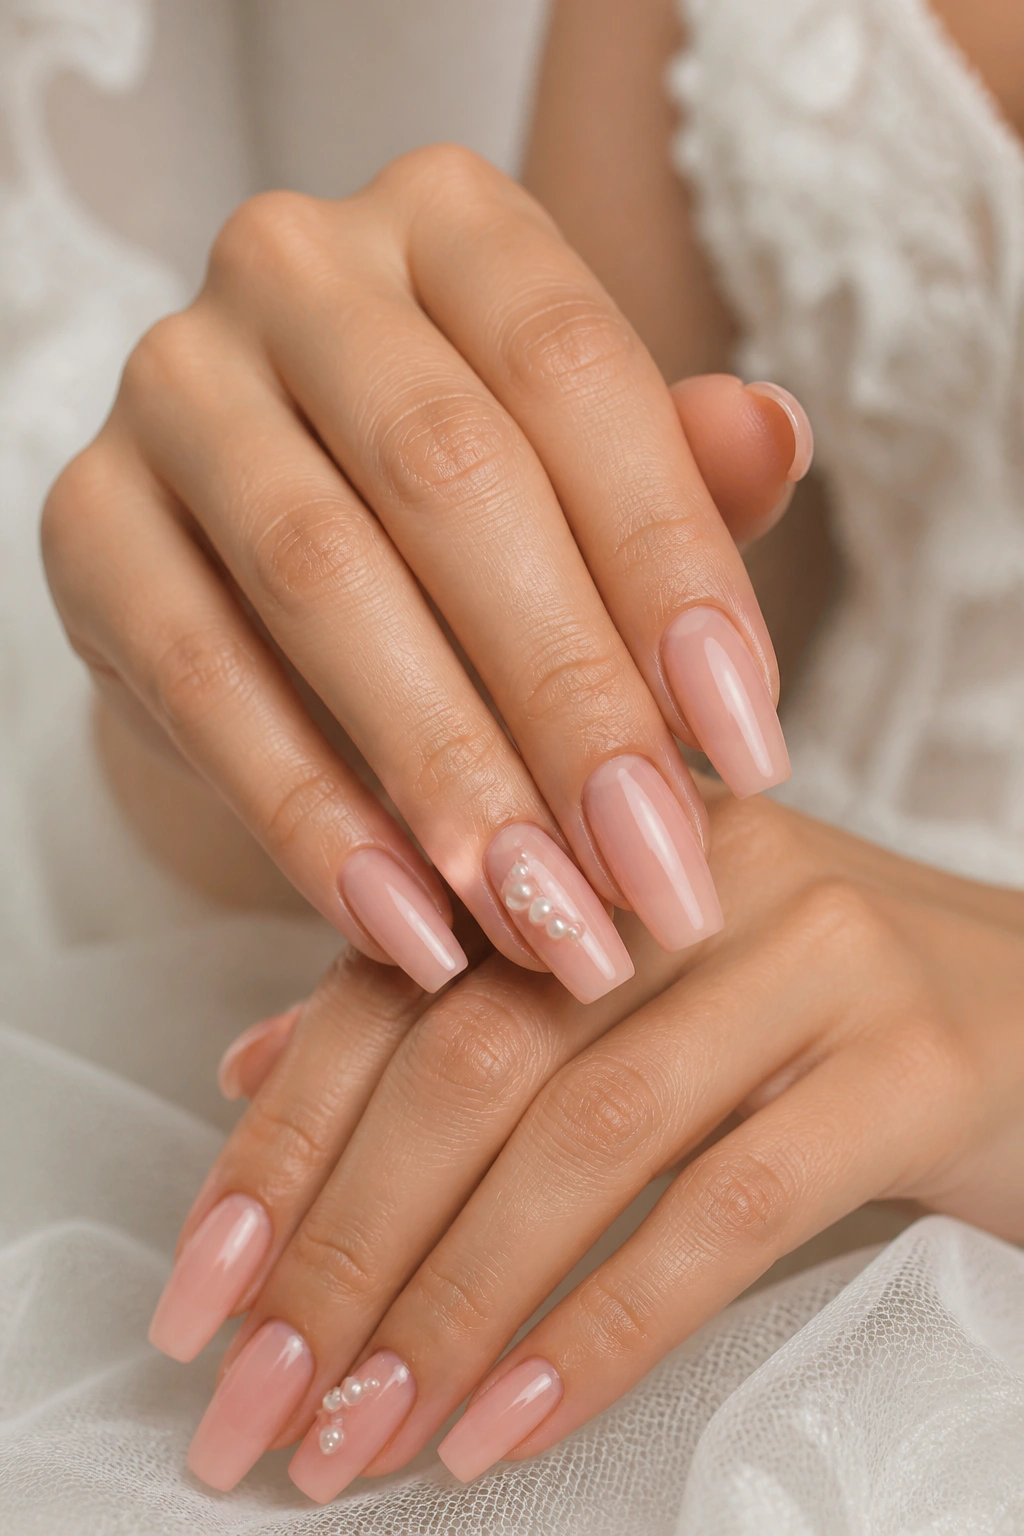
Do pearls on nails feel too bridal? Sometimes. Do they work when the scale is right? Absolutely.
A sheer pink base with micro pearl accents—think one accent nail per hand, or two tiny pearls near the cuticle on the ring fingers—can look delicate without turning your manicure into costume jewelry. The pearls need to be small. I mean 1.5 to 2 millimeters, not chunky half-pearls that sit high and snag lace.
Where pearl accents make sense
Pearls pair especially well with satin gowns, drop-pearl earrings, cathedral veils, and softer hair styling. If the dress already has pearl beadwork, keep the nail pearls sparse so the effect echoes the dress instead of trying to imitate it line for line.
Placement matters more than people think. A pearl near the cuticle reads refined. A pearl cluster in the middle of the nail can make the design look busy, and busy is the enemy of ring shots.
How to keep this look light
Use a jelly pink base rather than an opaque baby pink. Then limit embellishment with a firm hand:
- One accent nail on each hand, or a single pearl pair on both ring fingers
- Flat-backed pearls only
- Medium coffin length, not extra long
- High-gloss top coat around the pearls so the surface still looks smooth
A small pearl detail gives you bridal texture without needing glitter, foil, crystals, or hand-painted art. That restraint is the whole point.
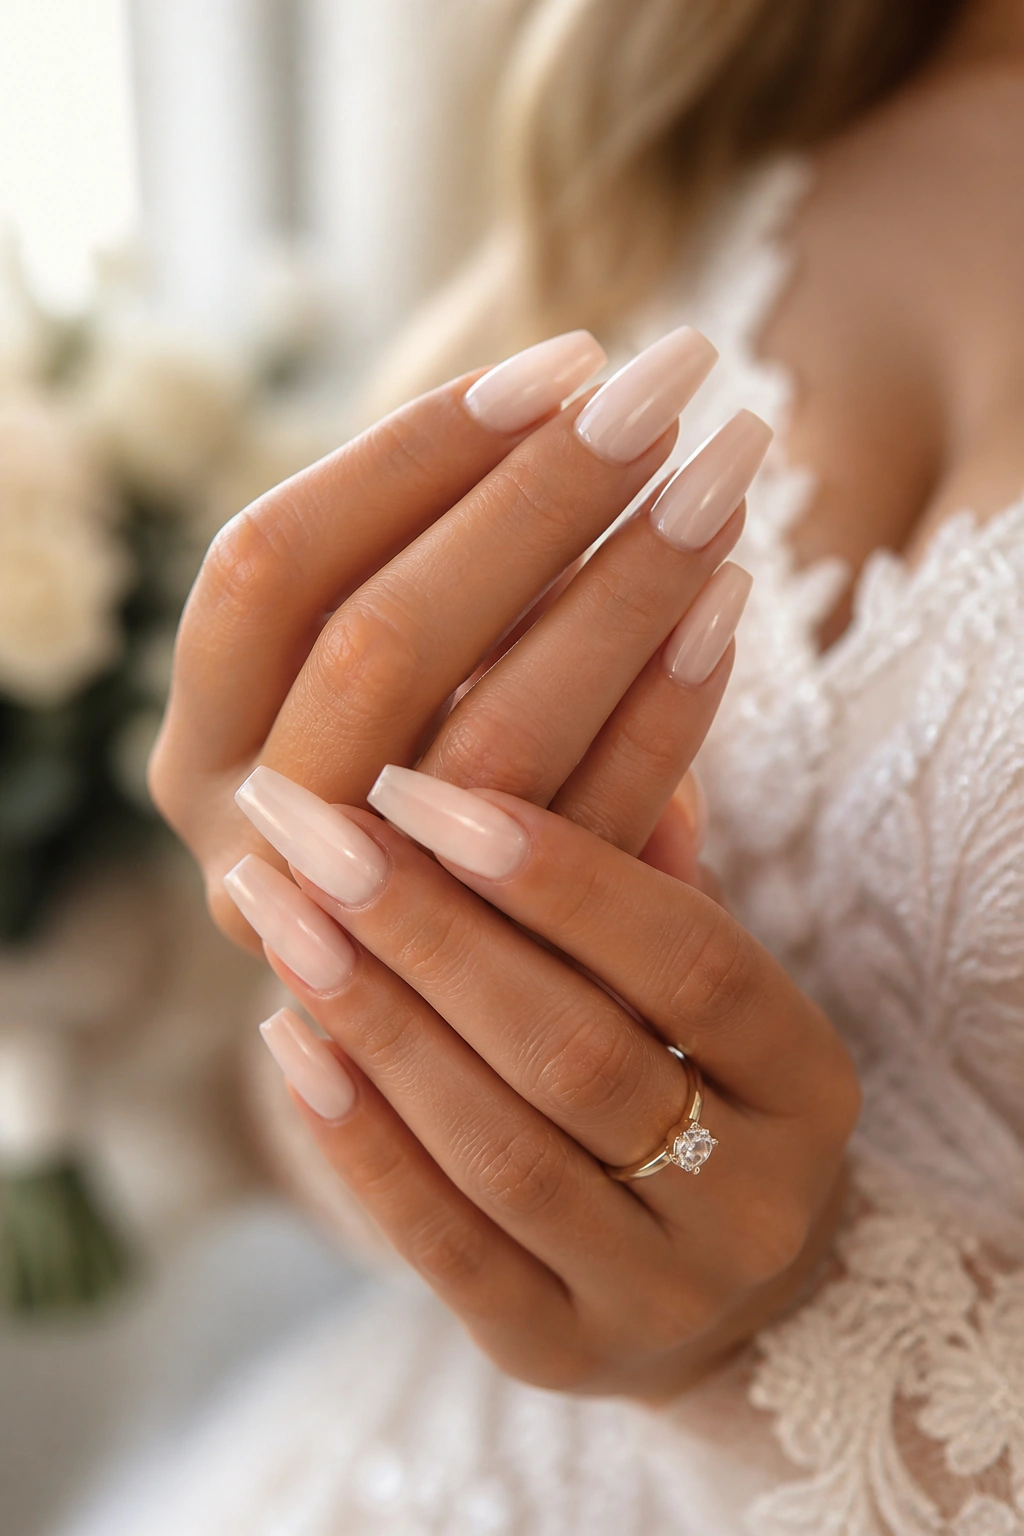
4. Ivory Ombré Coffin Nails with a Seamless Fade
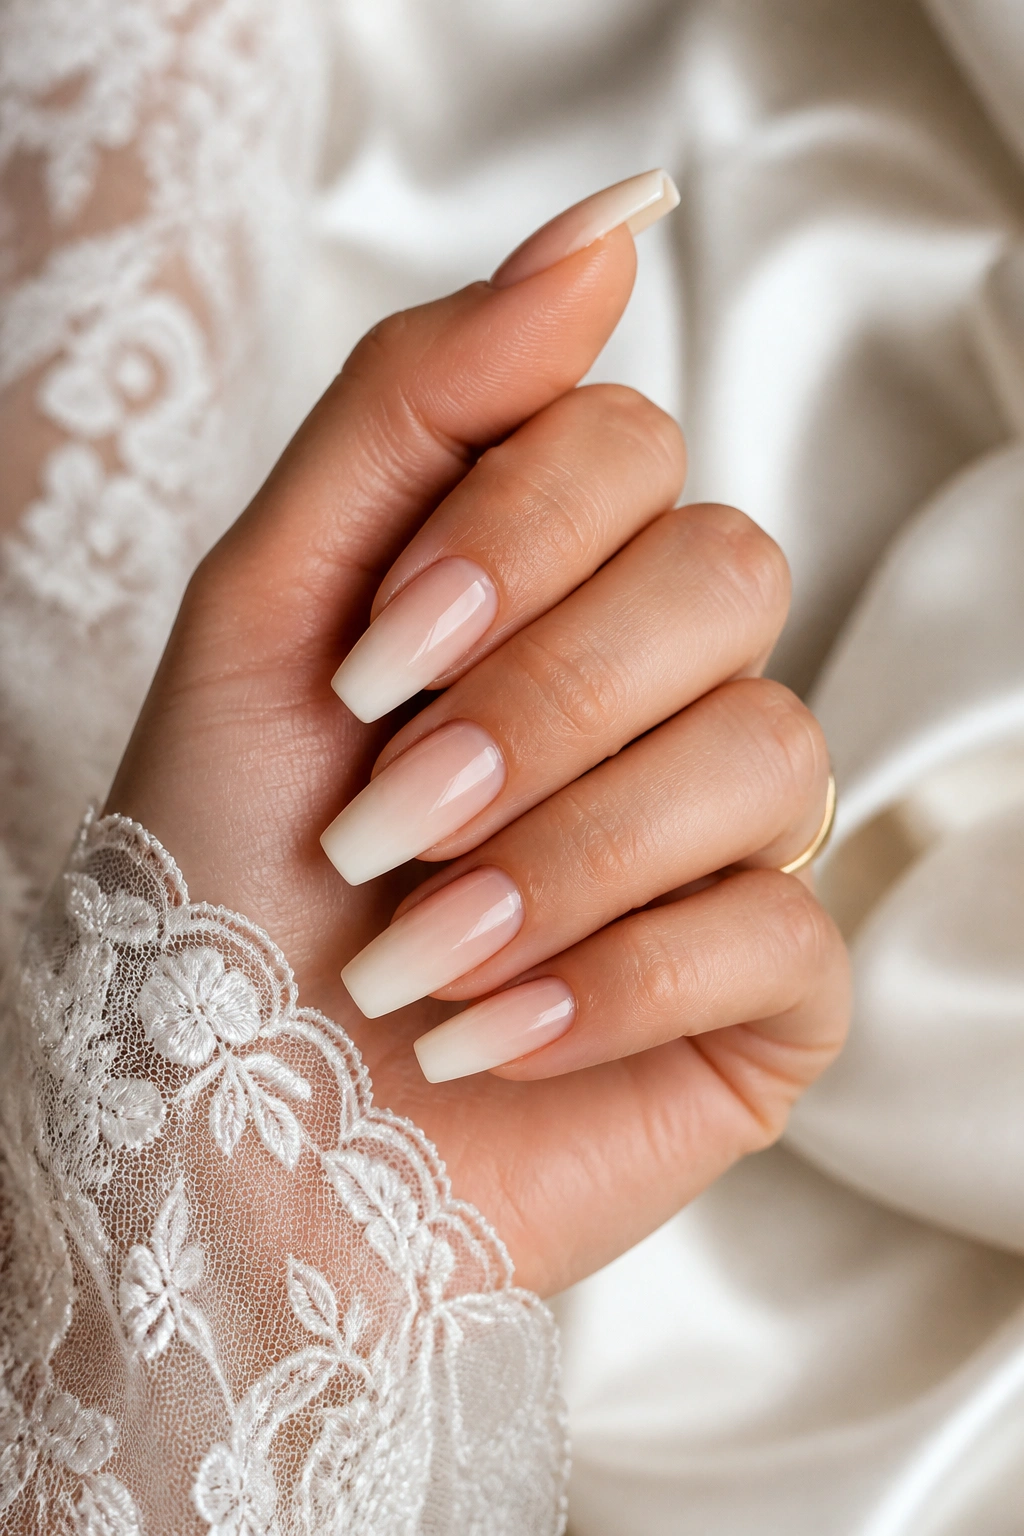
Picture the moment you wrap both hands around a bouquet of white ranunculus or roses. A hard color line can look abrupt there. Ivory ombré coffin nails avoid that problem by fading from a soft nude or blush base into a cloudy ivory tip, which feels gentle in close-up and rich in person.
This style only works when the blend is smooth. A visible stripe across the center of the nail ruins the effect. Ask your tech for an airbrushed ombré, sponge fade, or gel-blended fade with the white concentrated at the last third of the nail rather than starting at the midpoint.
You also need the right white. Bright paper white can look cold next to skin and cream dress fabrics. Ivory, soft white, or off-white usually sits better beside lace, tulle, and warmer metals like yellow gold.
A few checkpoints help:
- Keep the base sheer enough that the nail bed still shows through slightly.
- Ask for the ombré to begin around two-thirds down the nail, not halfway.
- Use a glossy top coat for depth.
- Skip extra art unless it is a single crystal or a faint shimmer wash.
I like this look for brides who want white nails without the blunt feel of a full white set. It gives you bridal color, but with more softness around the edges—literally.
5. Satin White Coffin Nails with No Nail Art
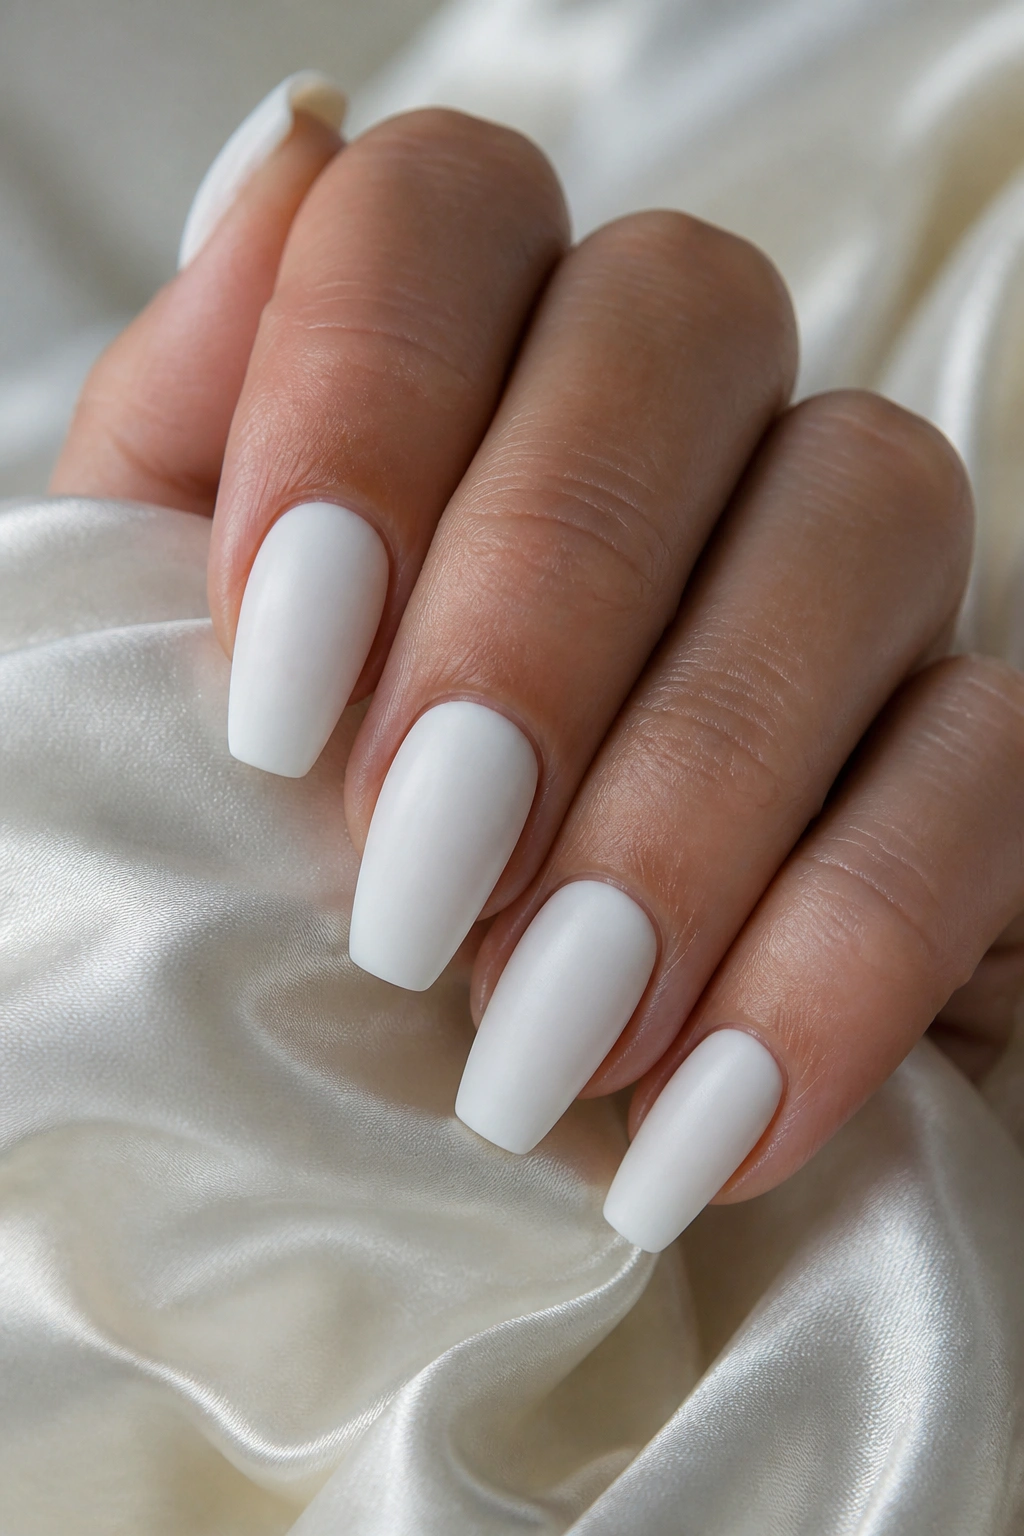
Plain white nails sound easy. They are not. White can look fresh and expensive, or it can look thick, streaky, and a little plastic. The trick is finish. Satin white coffin nails—somewhere between full gloss and matte—have a soft surface that keeps white from glaring under light.
No gems. No chrome. No florals. No swirl art.
That restraint is why this works. A satin finish lowers the shine enough that the white reads like fabric rather than enamel, which makes it sit well beside a structured dress, sharp tailoring, or a sleek bridal look with clean lines. If you’re wearing crepe, silk faille, or a minimal column gown, this manicure can feel dead right.
Length matters more here than with milky nude. Go too long and the nails start to feel stark. Short-medium coffin is safer, especially if your dress has pockets, glove details, or fitted sleeves.
There is one downside, and I always mention it because pretending otherwise is silly: white polish shows flaws. Any bump in the product, any dry patch around the cuticle, any uneven shaping at the sidewall will show faster than on sheer pink or nude. Your nail tech needs a steady hand, and the prep needs to be clean.
If your style leans pared-back and architectural, this is one of the few bridal manicures that can feel modern without looking cold.
6. Nude Coffin Nails with a Single Crystal at the Cuticle
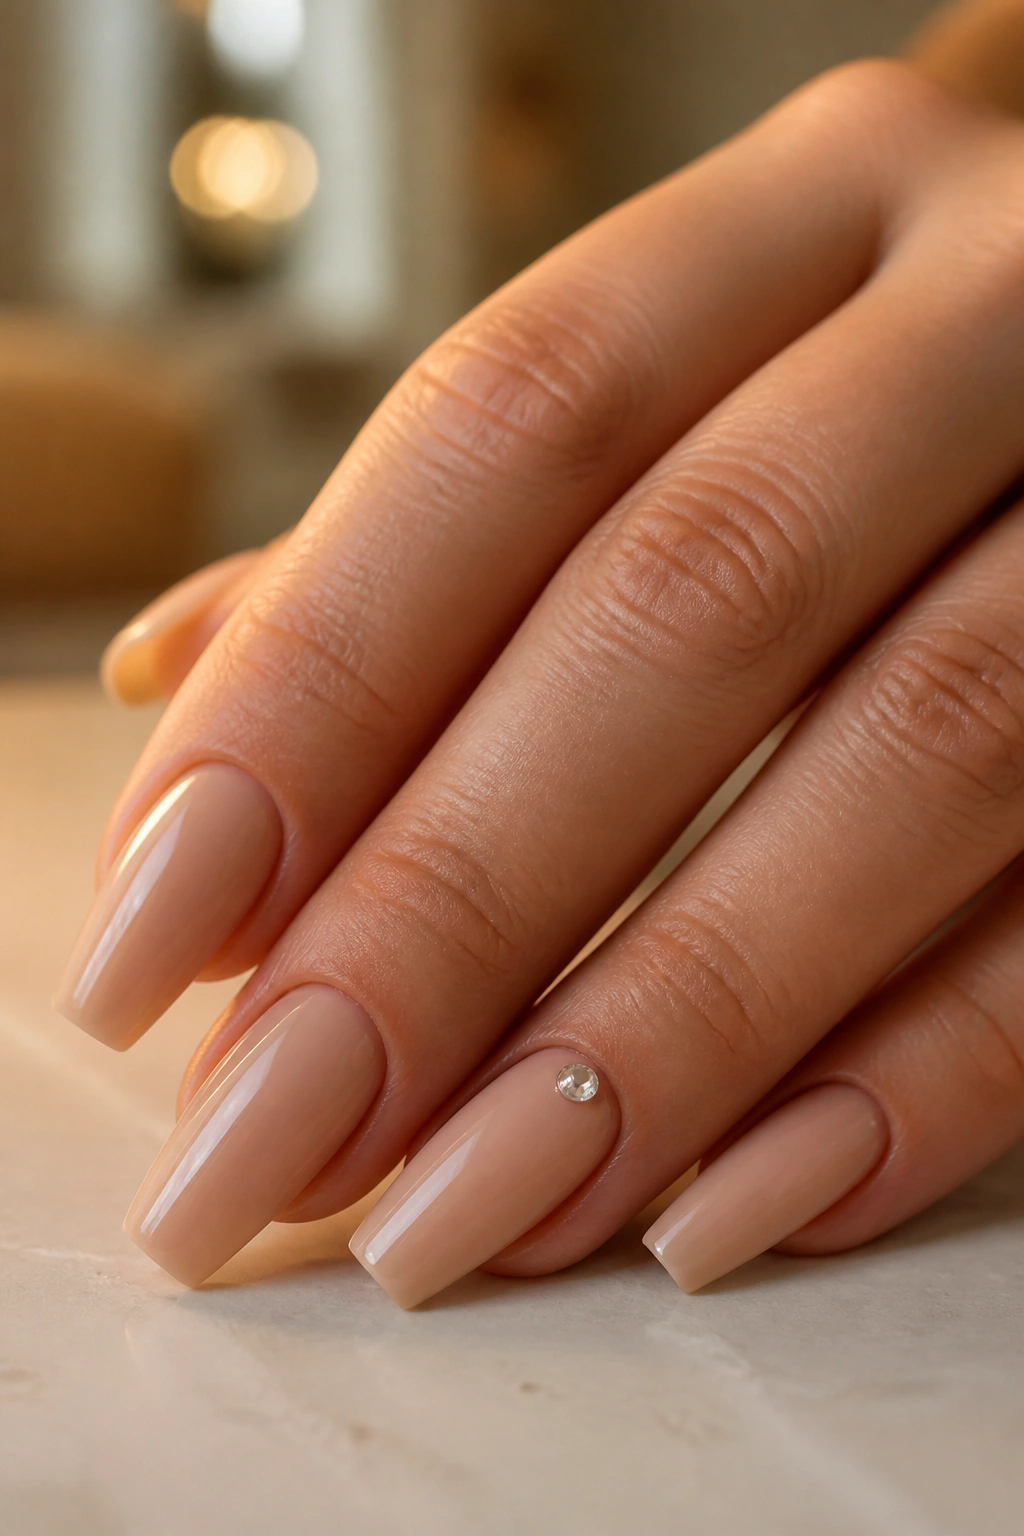
Unlike a full rhinestone design, one crystal placed at the cuticle gives you light without weight. That’s why I like it for weddings. You get a small point of shine near the base of the nail, which catches candlelight and movement, while the rest of the manicure stays clean and easy to wear.
Use a nude or blush base that matches your skin depth closely. Then add a single flat-back crystal—usually SS3 to SS5 size, small enough to sit low—on one or two accent nails. Ring fingers make sense. Thumbs can work if you want the detail to show in bouquet photos. All ten nails? No.
This design looks especially good when your jewelry is already doing enough. Think a diamond engagement ring, pavé wedding band, slim tennis bracelet, or crystal hairpins. The nails do not need to repeat every sparkle source in the room.
Who gets the most from this one?
- Brides who want one polished detail, not full nail art
- Anyone wearing a cleaner dress silhouette
- People who like neutrals but do not want their manicure to vanish in photos
- Anyone nervous about textured embellishments catching lace or chiffon
Ask your tech to cap the crystal well and keep it close to the cuticle line, not floating in the center. Placement decides whether the look feels intentional or random.
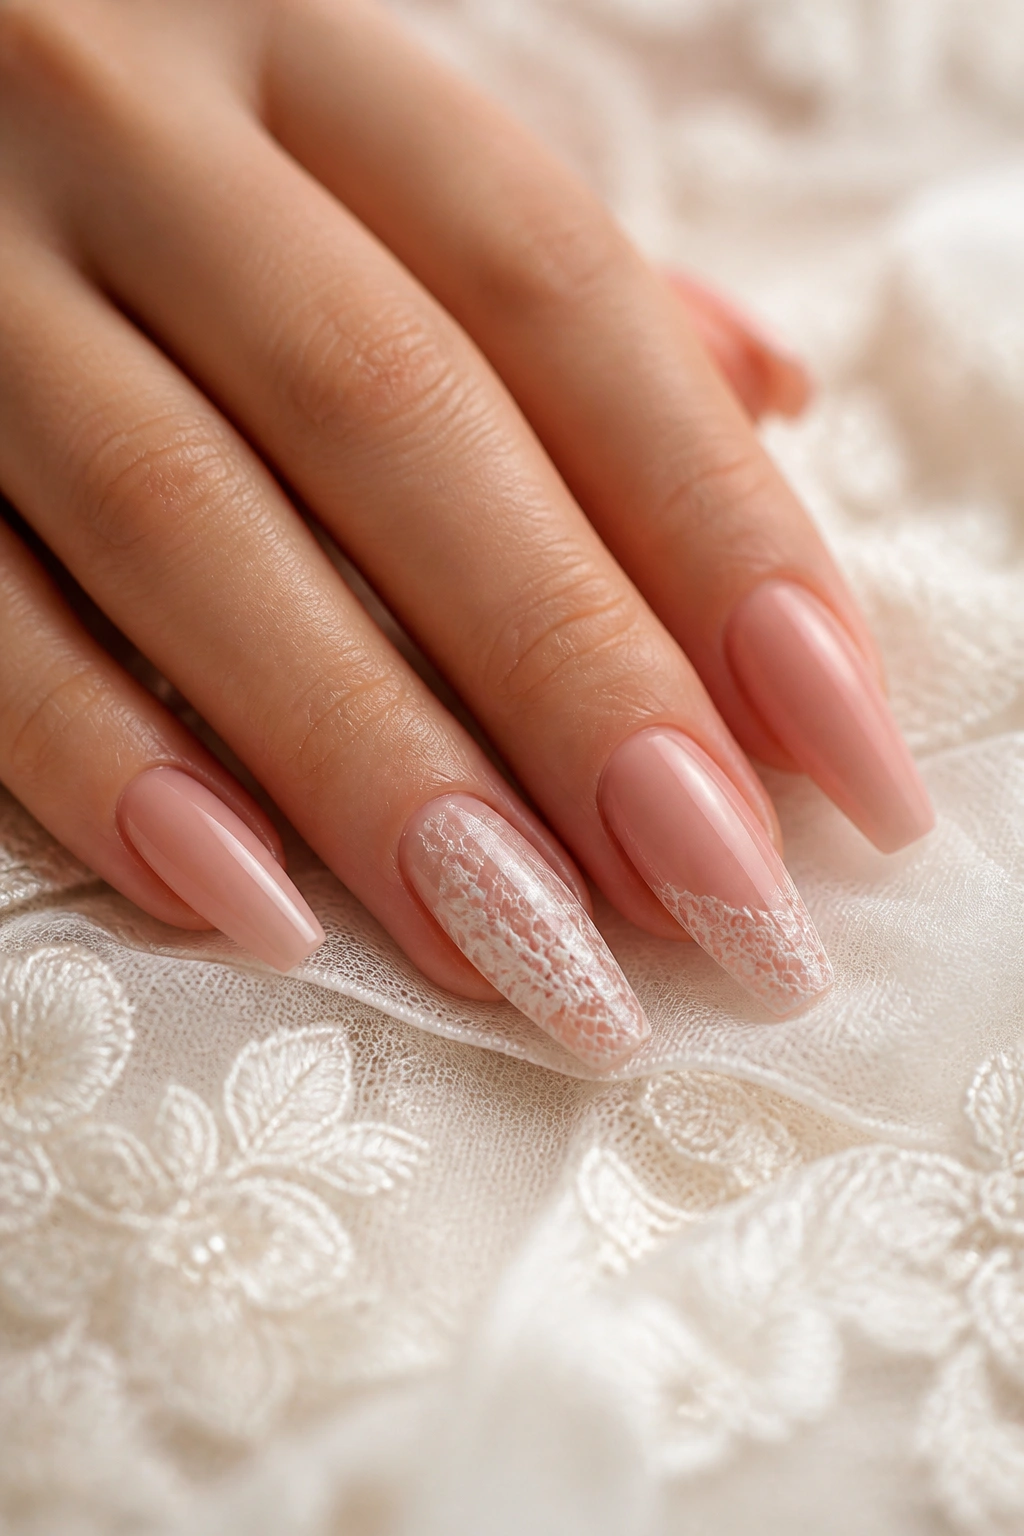
7. Blush Coffin Nails with Hand-Painted Lace Details
Hand-painted lace can look incredible—or a little crafty. There isn’t much middle ground.
When it’s done well, though, blush coffin nails with a lace accent echo the dress in a way decals and stamped art rarely manage. You want fine line work, not thick white loops. A pale blush or nude-pink base gives the art something warm to sit on, and one or two accent nails per hand is enough. More than that, and the manicure starts competing with the gown.
I’d pair this style with actual lace on the dress, not with a plain satin gown that has no texture anywhere else. Repeating a motif works when there is something to repeat. Reaching for lace art because it sounds “bridal” without any lace in the look can feel forced.
Ask for lace placement that hugs one side of the nail or trails from the cuticle corner rather than covering the whole plate. Small floral mesh, scalloped edging, and net-like detail all read better at wedding scale than giant appliqué-style patterns. White gel paint should be thinned enough to draw a crisp line. Thick paint turns puffy and heavy fast.
A good nail artist can even borrow from your dress detail. Bring a close-up photo of the fabric. Not the full gown on a hanger. A macro shot of the lace pattern tells them what shape the loops, petals, and mesh should follow.
8. Champagne Shimmer Coffin Nails for Evening Light
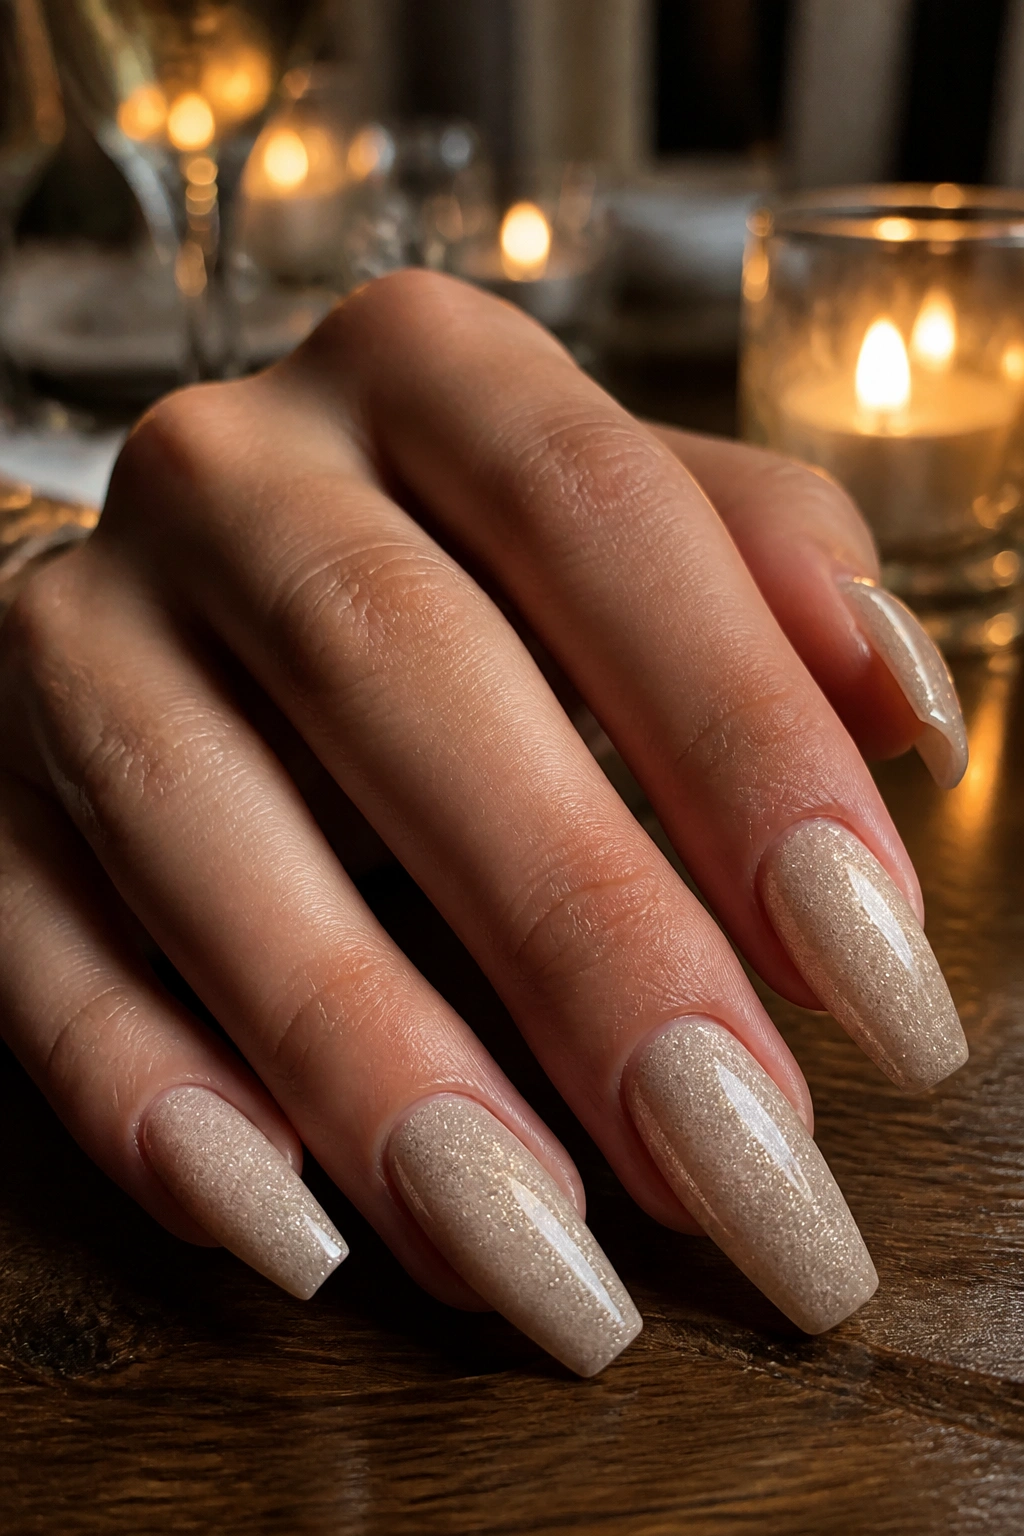
Some wedding nails look better after sunset than they do at noon. Champagne shimmer coffin nails are in that camp. Under warm indoor light, they glow in a low-key way that flat cream shades cannot quite manage, especially during dinner, speeches, and dancing.
The key word is champagne, not gold glitter. You want a fine pearl or micro-shimmer suspended in a beige-pink, soft taupe, or warm ivory base. Chunky glitter is a hard no for most bridal settings unless the whole event leans theatrical.
What makes shimmer work here
Fine shimmer blurs surface imperfections and gives the nails movement when your hands are in motion. It also pairs well with gold jewelry, candlelight, bronzy makeup, and reception spaces with darker walls or warm wood.
Use it without tipping into party nails
- Choose micro-shimmer, not hex glitter.
- Keep the base sheer-to-medium coverage.
- Stay in the champagne family: beige-gold, rosé gold, soft ivory shimmer.
- Limit extra art. The shimmer already does the work.
I especially like this manicure on winter weddings, candlelit venues, and black-tie receptions where a flat nude can disappear by evening. There’s enough reflection to keep your hands alive in low light, but not so much that the nails feel detached from the rest of the bridal styling.
9. Pearl Chrome Coffin Nails with a Smooth Mirror Sheen
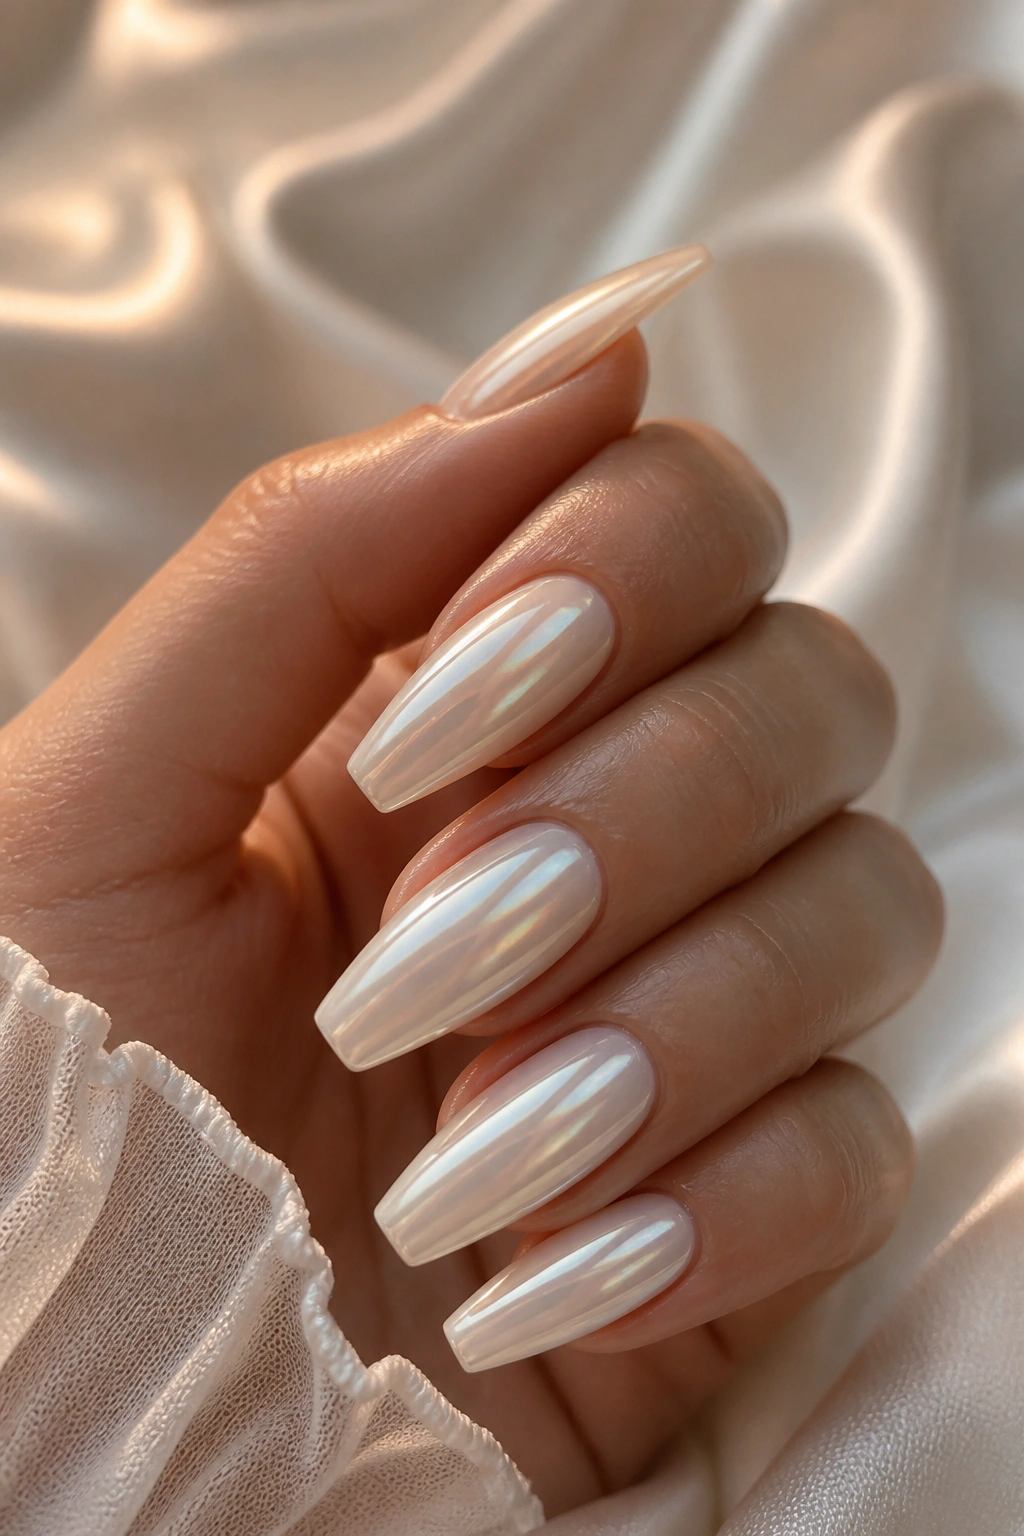
Chrome gets dismissed in bridal beauty because people picture icy silver mirror nails from social media. That’s not the version worth considering here. Pearl chrome on a coffin shape can be soft, creamy, and almost shell-like when it’s layered over the right base.
Use a milky white, pale pink, or neutral nude underneath. Then apply a pearl chrome powder with a translucent finish rather than a metallic silver one. The result should shift softly as your hand moves, not bounce back a harsh mirror reflection from across the room.
Long length can make this look too editorial for some weddings. I prefer medium coffin tips with a slim side taper. That keeps the effect refined and makes the chrome read like a finish instead of a statement piece. Flash photos love this manicure, though again, the base color has to be chosen well. A cool white pearl on warm skin can feel icy.
One caution. Chrome shows surface shape. Any lumps, ridges, or uneven apex work become more obvious under the reflective finish. This is not the manicure to get from someone who rushes through prep or leaves bulk at the tip. Ask for a smooth side profile before the chrome goes on.
If you want one word for this set, I’d call it sleek. Not soft, not playful, not ornate. Sleek.
10. Taupe Coffin Nails with a Fine Gold Outline
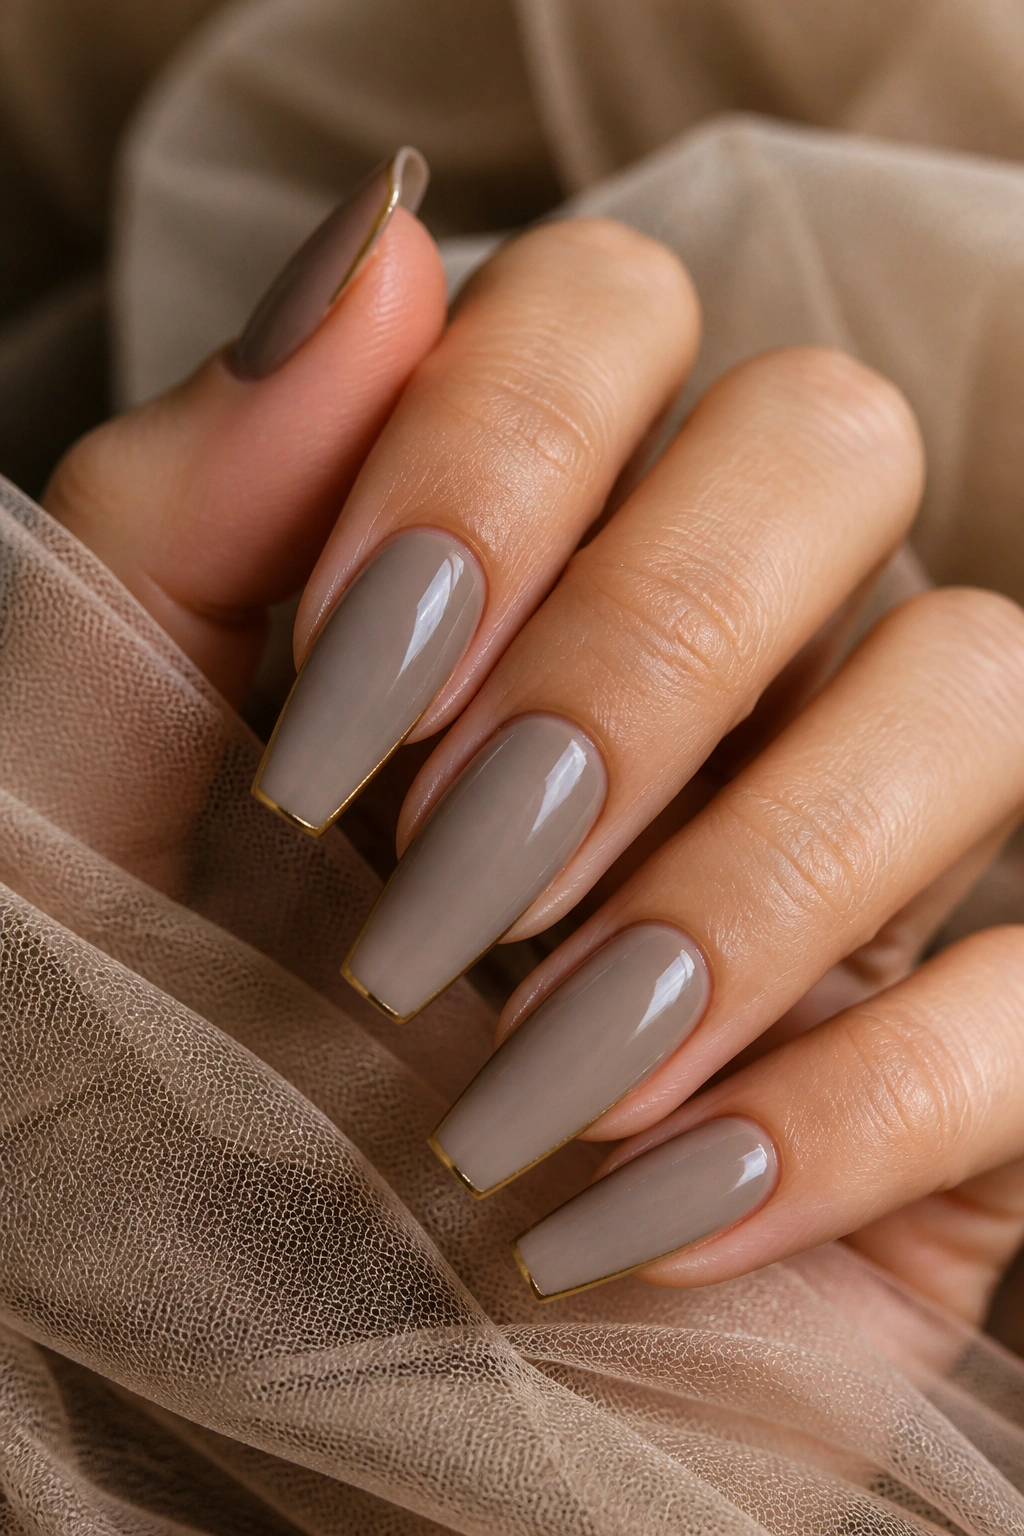
Bridal nails do not have to be pink or white to feel right. A soft taupe coffin nail with a whisper-thin gold outline can look grown-up, polished, and a little unexpected without drifting off-theme.
Think of a sheer mushroom-taupe or rosy taupe base—nothing muddy, nothing flat—then a hairline metallic gold tracing the outer edge, the cuticle arc, or a slim French tip. The line should be tiny. About 0.5 to 1 millimeter is enough. Thicker than that and you lose the elegance of the design.
Why this works better than full gold nail art
Gold liner frames the nail without making it heavy. It ties in with yellow-gold rings, heirloom jewelry, gold-embroidered veils, and warm candlelight. Full metallic nails can feel too hard beside bridal fabrics; a fine outline keeps the metal presence controlled.
This design also suits brides who wear neutral makeup and tailored dresses. It has a cleaner, more adult mood than blush florals or crystal accents. Not everyone wants their wedding nails to look sweet.
A useful caution
Skip this if your gold jewelry is already loud and your dress has dense beading. The outline can start to look like one more trim line in a look that already has enough edges. Clean styling makes this manicure sing.
11. Floral Coffin Nails with Pressed-Petal Accent Fingers

Pressed-petal nails can go from romantic to cluttered in about ten seconds. The version worth wearing on a wedding day uses tiny dried petals or painted pressed-flower effects on one or two accent nails, not a botanical collage across all ten fingers.
Why does this design work when so many floral manicures do not? Scale. Tiny florals read as texture. Big florals read as theme decor.
A clear or milky base keeps the look airy. Soft petal colors—cream, dusty rose, pale mauve, muted lavender—usually sit well in bridal styling. Bright red, neon pink, or dark plum petals push the manicure into fashion territory. If that is your style, go for it. If your goal is cohesion with a wedding dress and bouquet, softer tones make more sense.
How to keep floral accents from taking over
- Use florals on ring fingers only, or ring finger plus pinky on one hand
- Keep petal pieces tiny and flat
- Pair them with plain nude, blush, or milky nails on the other fingers
- Seal with a smooth top coat so the surface does not feel raised
This look pairs best with garden weddings, outdoor ceremonies, and dresses with floral lace or appliqué. It can also be sweet with a hand-tied bouquet that looks a little loose and organic rather than tightly formal. Just resist the urge to match every flower in the bouquet nail by nail. That way lies trouble.
12. Barely Peach Coffin Nails for Golden and Olive Skin Tones
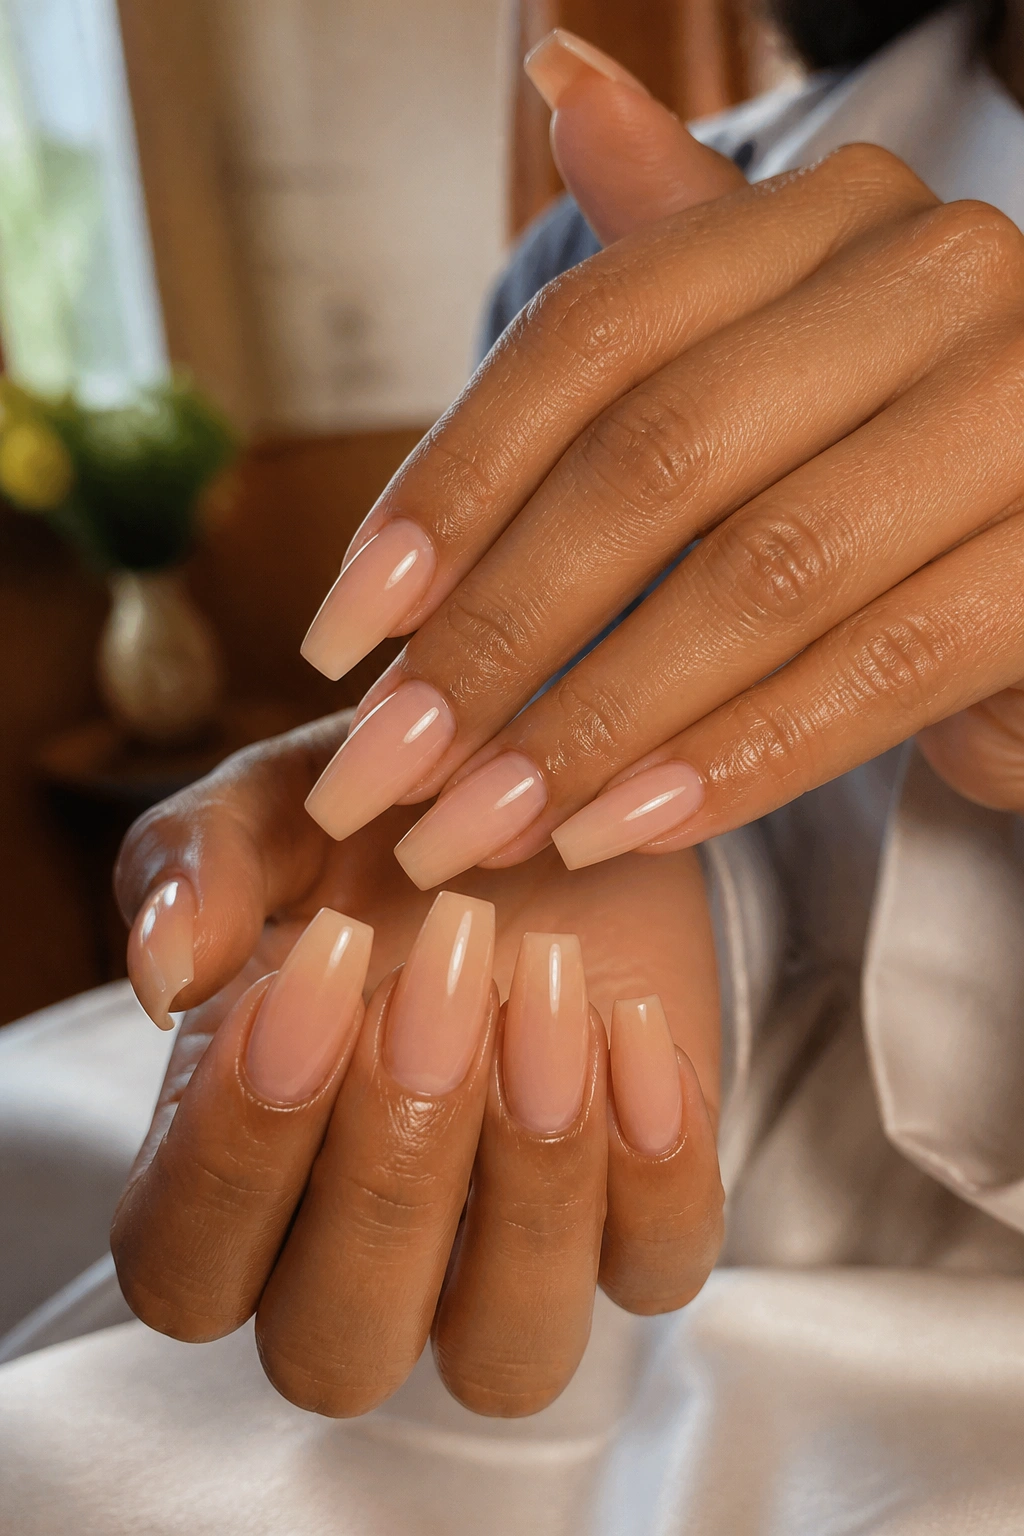
Unlike cool pinks, which can sometimes turn chalky against warmer skin, barely peach coffin nails bring warmth into the hand without reading orange. That tiny shift matters. On golden, olive, and deeper warm skin tones, peach-beige often looks healthier and more expensive than pale ballet pink.
The color should stay sheer or semi-sheer. Once peach goes opaque, it can start looking cosmetic in the wrong way—almost like concealer on the nails. You want translucency and a little life under the surface. A glossy top coat helps keep the shade looking fluid.
This set is also useful when the bouquet and venue styling lean warm: cream roses, toffee ribbons, terracotta details, antique gold frames, warm wood chairs. Bright white nails can feel disconnected there. Peach-beige keeps the hand in the same family without matching every detail directly.
Who should think twice? Brides wearing cool silver jewelry, icy white satin, blue-based makeup tones, or a very crisp monochrome palette. In those cases, a neutral pink, ivory ombré, or soft French tip may line up better.
If your skin warms up in photos and pale pinks always look a touch gray on you, this might be your answer.
13. Sculpted Pink-and-White Coffin Nails with a Clean Smile Line

A traditional pink-and-white sculpted set has more structure than a painted French manicure, and you can see the difference up close. The smile line looks sharper, the white tip has body, and the nail itself feels more architectural. On a wedding day, that can be either exactly right or a little too polished, depending on your taste.
I like this design for brides who already wear acrylic or hard gel and want a manicure that looks intentional from every angle, not only from straight on. Because the white is built into the structure, the set often stays crisp longer than a painted French tip, especially if you’re tough on your hands.
What makes a sculpted version look expensive
Ask for a deep but not dramatic smile line, thin sidewalls, and a slim free edge. Bulk is the killer here. Thick pink-and-white sets look dated fast, and coffin shape only magnifies that problem. A skilled tech will build the apex for strength without leaving the nail chunky.
Who it suits best
- Brides used to wearing enhancements
- Anyone who wants a sharper, cleaner nail profile
- Dresses with strong lines, fitted silhouettes, or more formal styling
- Rings that can stand up to a more defined manicure
There’s a commitment here. Sculpted sets are less forgiving than a sheer nude if the shaping is off, so do not book this style with someone whose coffin nails always look wide at the tip. One glance at their portfolio tells the story.
14. Matte Rosy Nude Coffin Nails with a Shorter Length

Matte bridal nails are divisive, and I get why. They don’t catch light like gloss, and some matte top coats can make the color look dusty by the end of the night. Still, a matte rosy nude on a short coffin shape can look clean and expensive when the rest of the bridal styling is sleek and modern.
Shorter length is the part I would not skip. Matte long coffin nails can start to feel heavy because the finish absorbs light instead of reflecting it. A shorter shape keeps the nails neat and gives the color room to do its work.
Rosy nude is better than flat beige here. The little bit of pink keeps the hand from looking dry. Choose a shade with enough warmth that the matte finish doesn’t drain the skin. You’ll also want diligent cuticle oil until the appointment, because matte polish puts texture around the nail into sharper focus.
There is a tradeoff. Matte marks more easily. Makeup residue, body lotion, and small scuffs show up faster than on glossy nails. If you know you’ll be touching bronzer, hauling garment bags, or helping set up décor, glossy is safer. If your event style is clean-lined, fashion-forward, and low-shine, matte can look striking in the best way.
15. Custom Coffin Nails That Echo Your Dress Beading
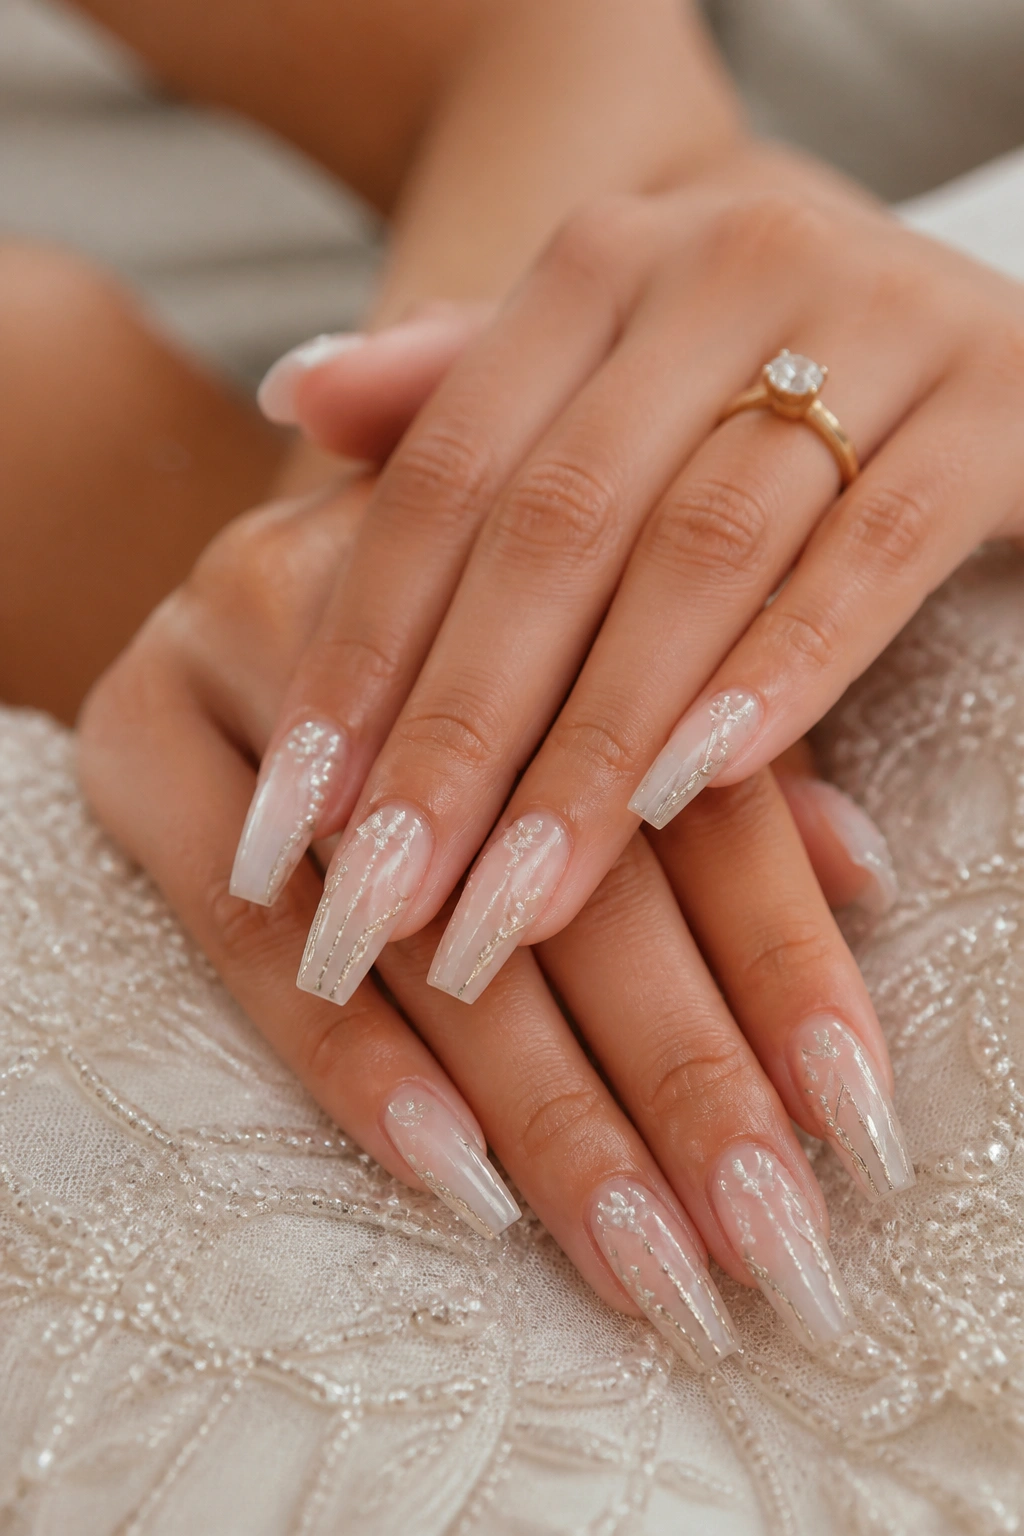
Custom bridal nails can be brilliant. They can also become too literal, too busy, and too expensive for what they add. The sweet spot is using your dress as a reference point, not a blueprint.
A custom coffin set works best when the artist pulls one or two repeating ideas from the gown—maybe a bead shape, a vine line, a scalloped edge, or a tiny embroidered leaf—and translates them onto a few nails with restraint. If your dress has silver thread, mirror that with a slim chrome accent. If the bodice has pearl clusters, echo one pearl grouping on a ring finger. If there’s floral embroidery, use just the curve or petal shape rather than recreating the full pattern.
Bring these to the appointment:
- A close-up photo of the fabric detail
- A full-body dress photo for context
- A photo of your ring
- Swatches of bridesmaid dresses or bouquet ribbon if color matters
- Notes on metal tone: silver, gold, rose gold, mixed
Custom work pays off when the artist understands scale. Dress embroidery can be rich because it sits across several feet of fabric. Nails have maybe 1.5 to 2 square centimeters of visible space on each plate. Tiny translation beats direct copy almost every time.
If you want the manicure to feel deeply personal, this is the one. Keep the edit tight and it lands.
Final Thoughts
Wedding nails live in close-up. That’s why coffin nails can work so well for a bridal manicure: the shape gives structure, but the design can still stay soft, polished, and in step with the ring, the dress, and your skin tone. Length, finish, and scale matter more than piling on more detail.
If you want the safest choice, milky nude, thin French tips, ivory ombré, and soft peach tones rarely miss. If your style has a sharper edge, pearl chrome, satin white, taupe with gold lining, or a matte rosy nude can feel more like your own taste and less like a default bridal template.
One last practical note, because this part gets ignored: take a photo of your hands in daylight after the manicure is finished. Hold your ring box. Hold your bouquet mock-up if you have one. Those quick checks tell you whether the nails are reading the way you hoped—before the camera, the ceremony, and the small details start moving fast.
