

Brown coffin nails represent an underrated elegance in the nail design world. While everyone gravitates toward reds, pinks, and nude tones, brown offers a sophisticated, versatile base that works across seasons and settings. The elongated coffin shape—that distinctive squared-off point with tapered sides—pairs beautifully with brown because it amplifies the glamorous, high-fashion aesthetic that brown nail art naturally conveys. Whether you’re drawn to minimalist designs or intricate embellishments, brown coffin nails provide a canvas that’s both chic and surprisingly forgiving for creative expression.
Long coffin nails demand intentional design choices. The extended length gives you real estate to work with, meaning simple solid colors can feel boring while complex patterns actually shine. Brown’s depth and warmth make it the perfect anchor color for layering textures, adding metallics, playing with negative space, and incorporating accent details that transform a basic manicure into something genuinely striking. The key is understanding which brown undertones flatter your skin, how to balance visual weight across the nail surface, and which design elements photograph well (because let’s be honest, a manicure that looks stunning in real life but flat in photos doesn’t serve your vibe).
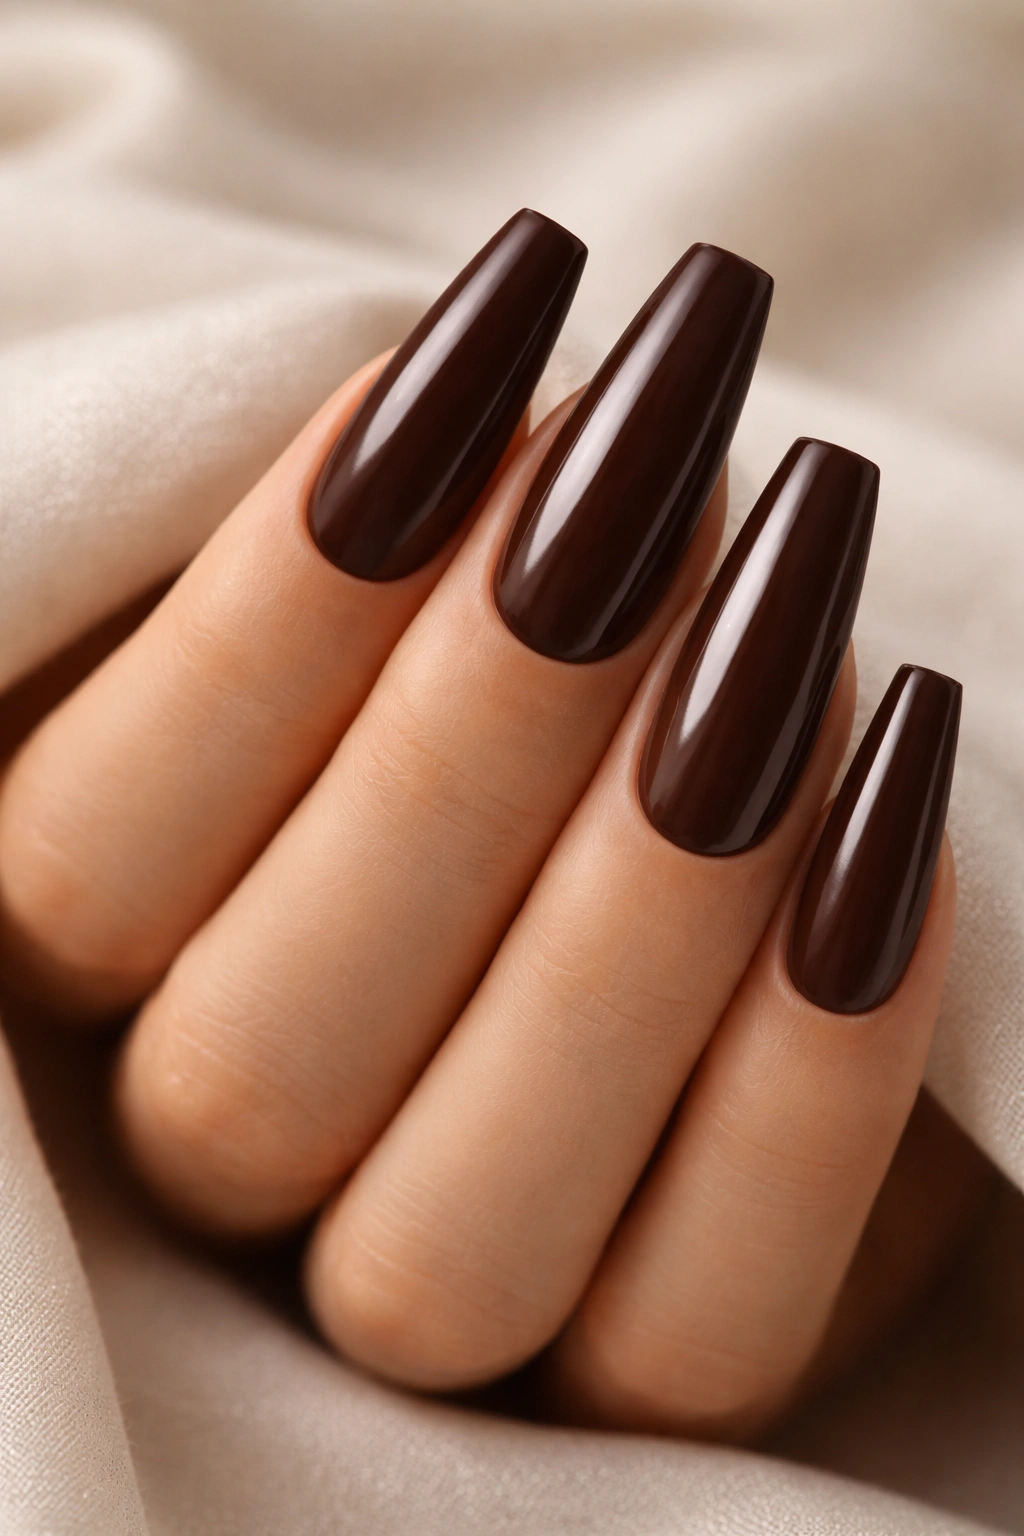
1. Solid Deep Brown Coffin Nails
There’s something quietly powerful about a flawless solid brown manicure on long coffin nails. This isn’t a boring base—it’s a statement of intentional minimalism. Deep espresso or chocolate brown in a cream or satin finish creates an immediate impression of sophistication. The coffin shape elongates the nail bed visually, and a uniform brown tone emphasizes that elegant length without competing visual elements.
Why This Design Stands Out
A solid brown manicure works because it’s endlessly compatible with every outfit and occasion. Unlike trendy neon or pastel colors that demand coordination, brown blends seamlessly with your wardrobe while still feeling intentional and polished. The monochromatic look creates an optical illusion where the shape takes center stage—and on long coffin nails, that’s exactly what you want. Brown also doesn’t show dust, residue, or minor imperfections the way lighter shades do, meaning your manicure stays flawless longer between touch-ups.
Application and Maintenance Tips
- Apply two thin coats rather than one thick coat—this prevents visible streaking and gives you better control over opacity
- Invest in a high-quality brown formula; budget brands often have yellow or red undertones that muddy the color instead of delivering that clean, sophisticated finish you’re after
- Seal with a top coat designed to prevent chipping; longer nails experience more daily wear on the edges and tips
- For longevity, keep your nails well-moisturized with cuticle oil—dry cuticles and nail beds cause brittleness that leads to breaks on extended lengths
Pro tip: Pair a matte brown finish with nude or tan cuticles using a nude liner pencil—this visually extends your nail bed and makes the overall look feel even more refined.
2. Brown Marble Veining with Gold Accents
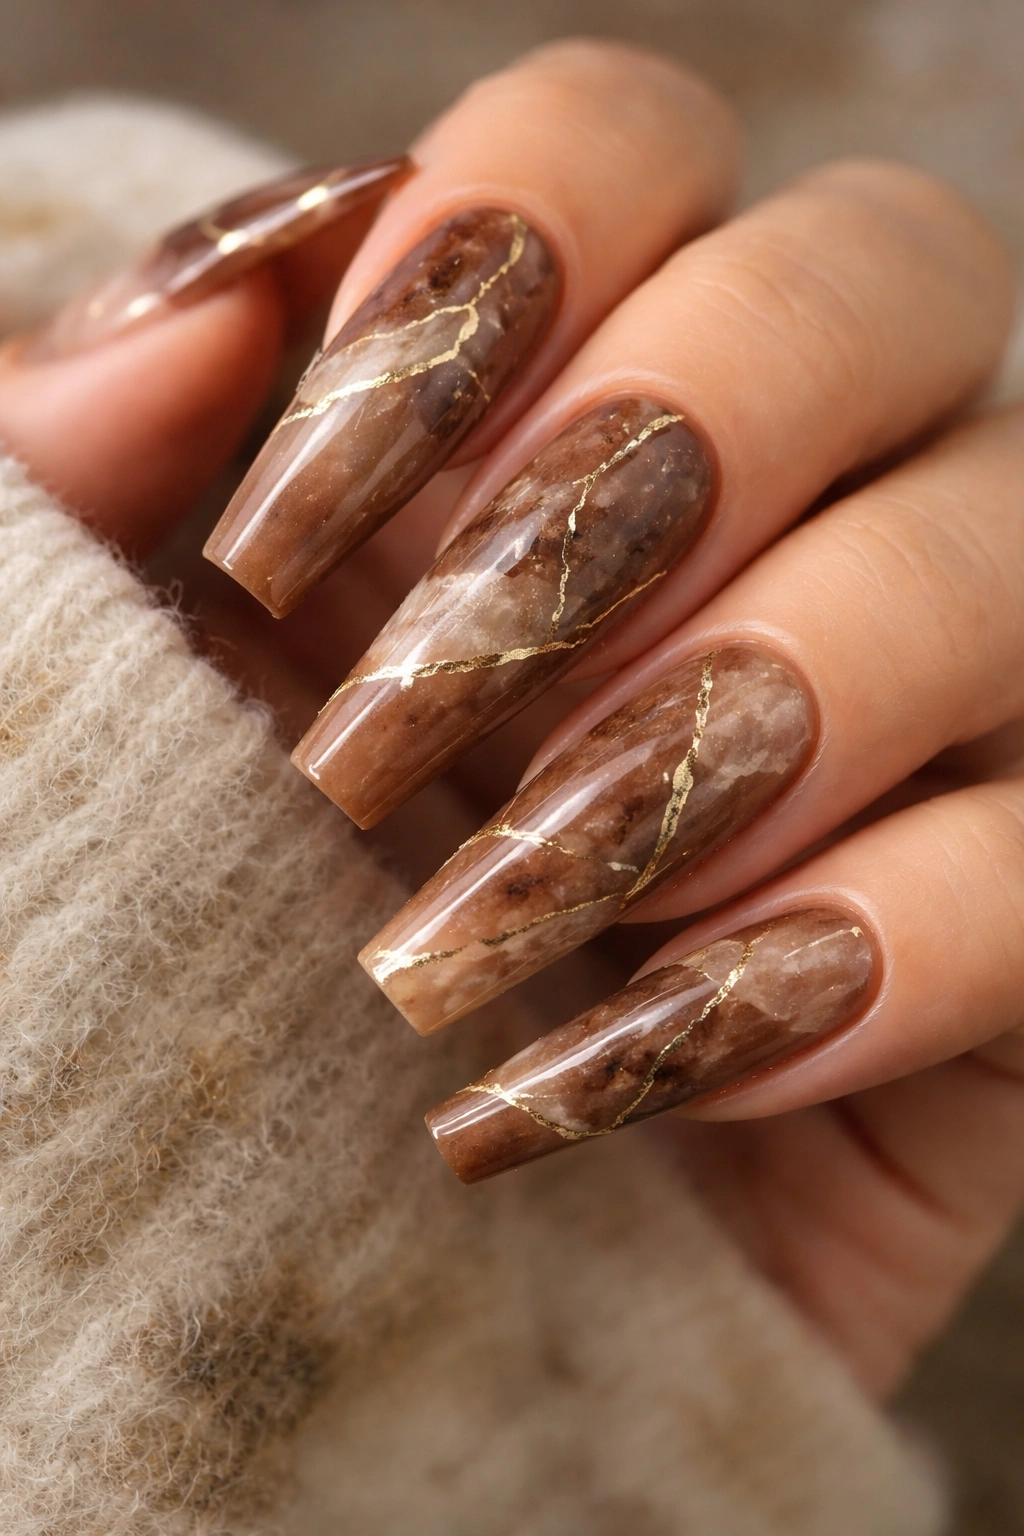
Marble patterns elevated brown from straightforward to artistic. This design combines a warm brown base (typically a medium to light caramel tone) with delicate veining created using white, cream, or gray polish. Gold accents—whether applied as thin lines following the veining or as strategic corner details—add luxury and dimension. The result feels like you’re wearing tiny pieces of polished marble and metal on your fingertips.
Why It Captures Attention
The genius of brown marble is that it reads as both natural and glamorous. You’re not working with a busy, chaotic pattern; instead, you’re creating an organic aesthetic that mimics real stone. The veining draws the eye without overwhelming the design, and the gold catches light, making your nails glitter subtly from different angles. On long coffin nails, the extended surface area lets you develop more detailed veining without the design feeling cramped or overwhelming.
How to Execute It
- Start with a base coat and your chosen brown shade—let it dry completely
- Use a very fine detail brush or thin liner brush dipped in white or gray polish to create veining lines; don’t overthink the pattern—natural stone isn’t symmetrical
- Allow the white veining to dry, then use an ultra-fine brush with gold polish to trace along portions of the veining or create accent lines in the corners
- Seal everything with a glossy top coat, which amplifies the polished marble effect
Worth knowing: If fine-line detail work isn’t your strong suit, you can achieve a similar effect using marble nail stickers or water decals—they’re surprisingly realistic and remove the pressure of freehand design.
3. Ombre Brown to Nude Gradient
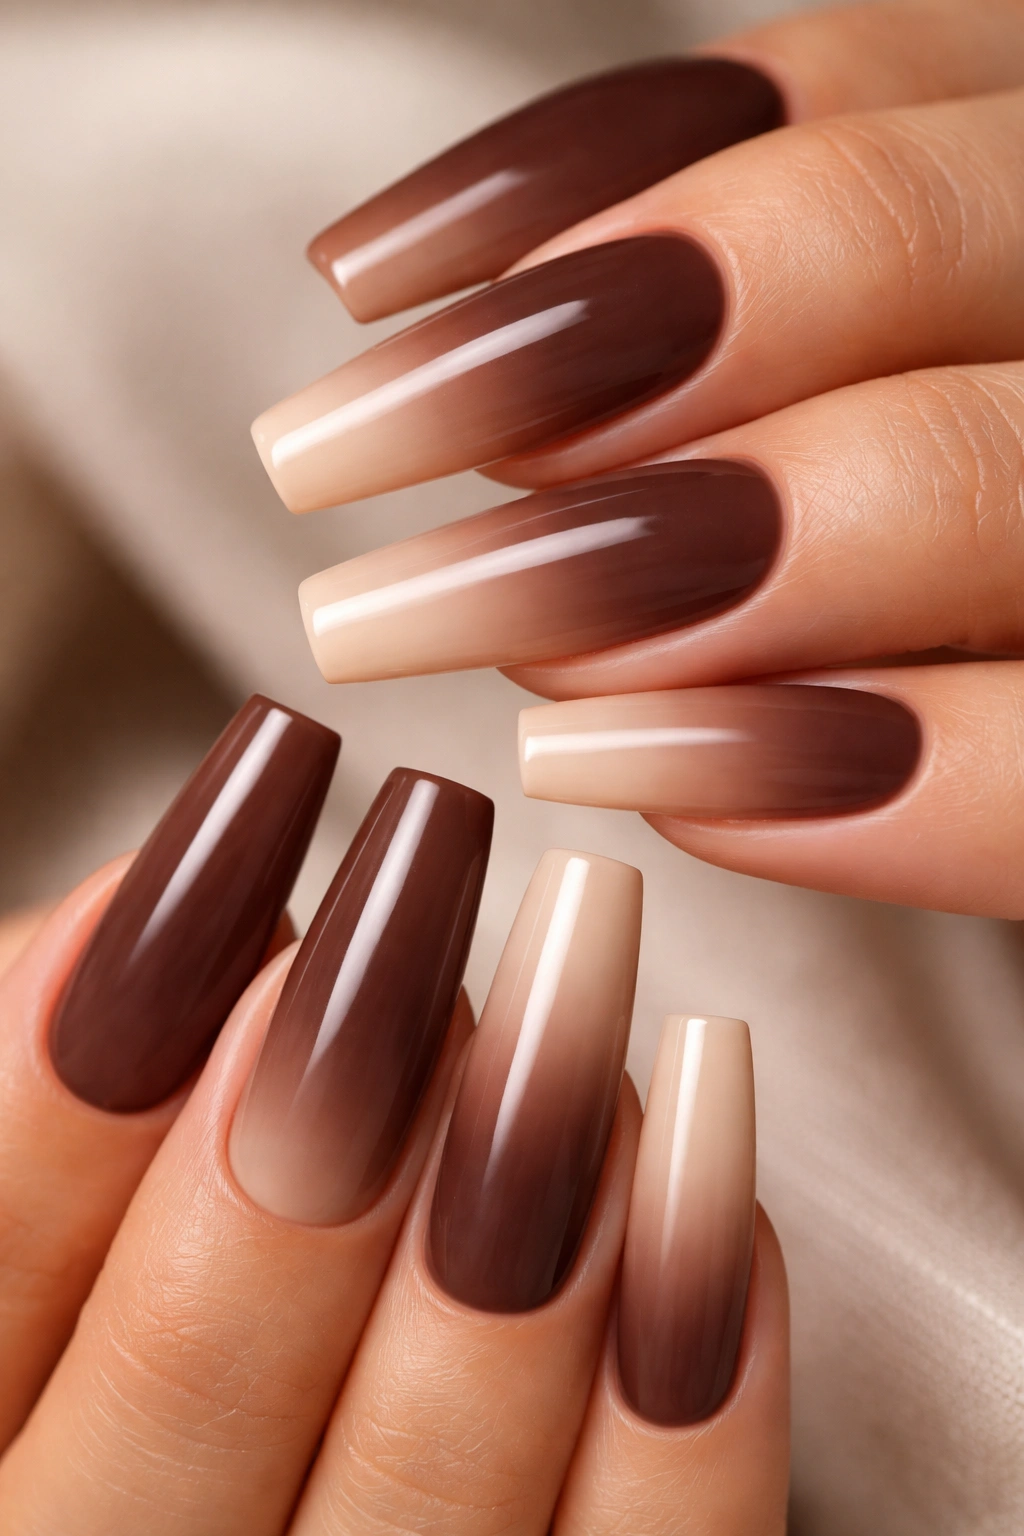
An ombre that flows from deep chocolate brown at the base to soft beige or nude at the tip creates a chic gradient effect that’s both subtle and transformative. This design relies on smooth color transitions rather than sharp lines, resulting in a polished, almost airbrushed appearance. Long coffin nails give you plenty of vertical space to develop an elegant, gradual fade.
Why This Design Works So Well
Ombre nails have staying power because they’re inherently flattering—the darker color at the nail bed creates visual depth while the lighter tip elongates your fingers. The brown-to-nude combination is especially effective because both colors appear in your skin tone naturally, creating a harmonious look that feels intentional but not matchy-matchy. This design works across seasons and never clashes with your clothing.
Creating a Flawless Ombre
- Use a makeup sponge cut into a small rectangle—this is your ombre tool, not a brush
- Paint horizontal bands of your two colors (and any in-between transitional shades) directly onto the damp sponge
- Press the sponge gently onto the nail starting at the base, allowing the wet polish to transfer
- Repeat 3-4 times, rebuilding colors on the sponge between applications, until you achieve an even gradient
- Clean up the edges and apply a glossy top coat to blend any remaining color lines
Pro tip: Adding a very thin line of champagne or gold shimmer down the center of your nail after the ombre dries catches light beautifully and adds subtle dimension.
4. Brown Tortoiseshell Pattern
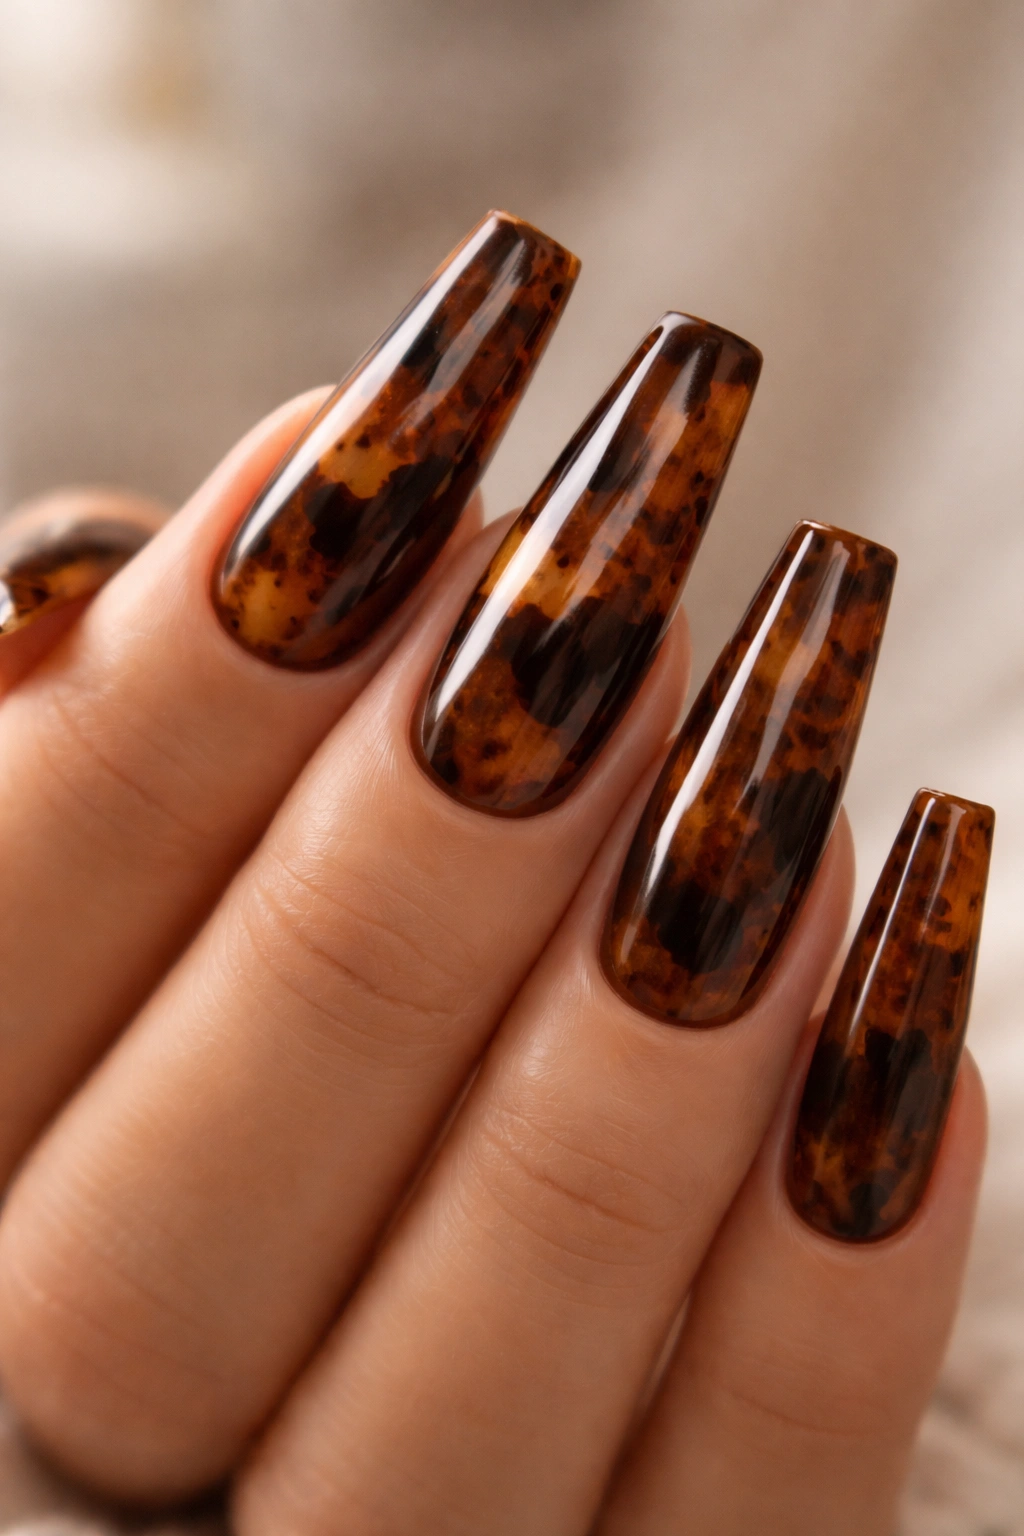
Tortoiseshell brings animal print sophistication to brown coffin nails. This design combines multiple shades of brown, amber, tan, and sometimes black to create the signature tortoiseshell mottled effect. The pattern is unpredictable and organic—no two nails look identical, which is exactly why it works. It’s visual texture without actual texture, and long nails display the intricate pattern magnificently.
What Makes Tortoiseshell Special
Tortoiseshell never feels boring because the pattern inherently contains movement and complexity. You can’t see the whole design at once; it reveals itself as light hits different angles and areas. Brown tortoiseshell specifically avoids the kitsch that sometimes accompanies animal prints because brown reads as sophisticated rather than playful or costume-y. The pattern also has impressive longevity—small chips or wear on the tips are less noticeable because the irregular pattern naturally disguises imperfections.
Technique for Tortoiseshell Effect
- Paint a cream or tan base coat and let it dry completely
- Drop tiny dots and irregular patches of dark brown, medium brown, amber, and charcoal onto each nail using a dotting tool or thin brush
- While the polish is still wet, use a dry sponge to tap and blend the colored patches, creating softer edges rather than defined shapes
- The result should look like overlapping, semi-transparent patches rather than a precise pattern
- Finish with a high-shine top coat, which makes the dimensional effect even more apparent
Insider note: Tortoiseshell designs photograph exceptionally well in natural light, so this is the design to choose if you want nails that genuinely look better in person than in most other styles.
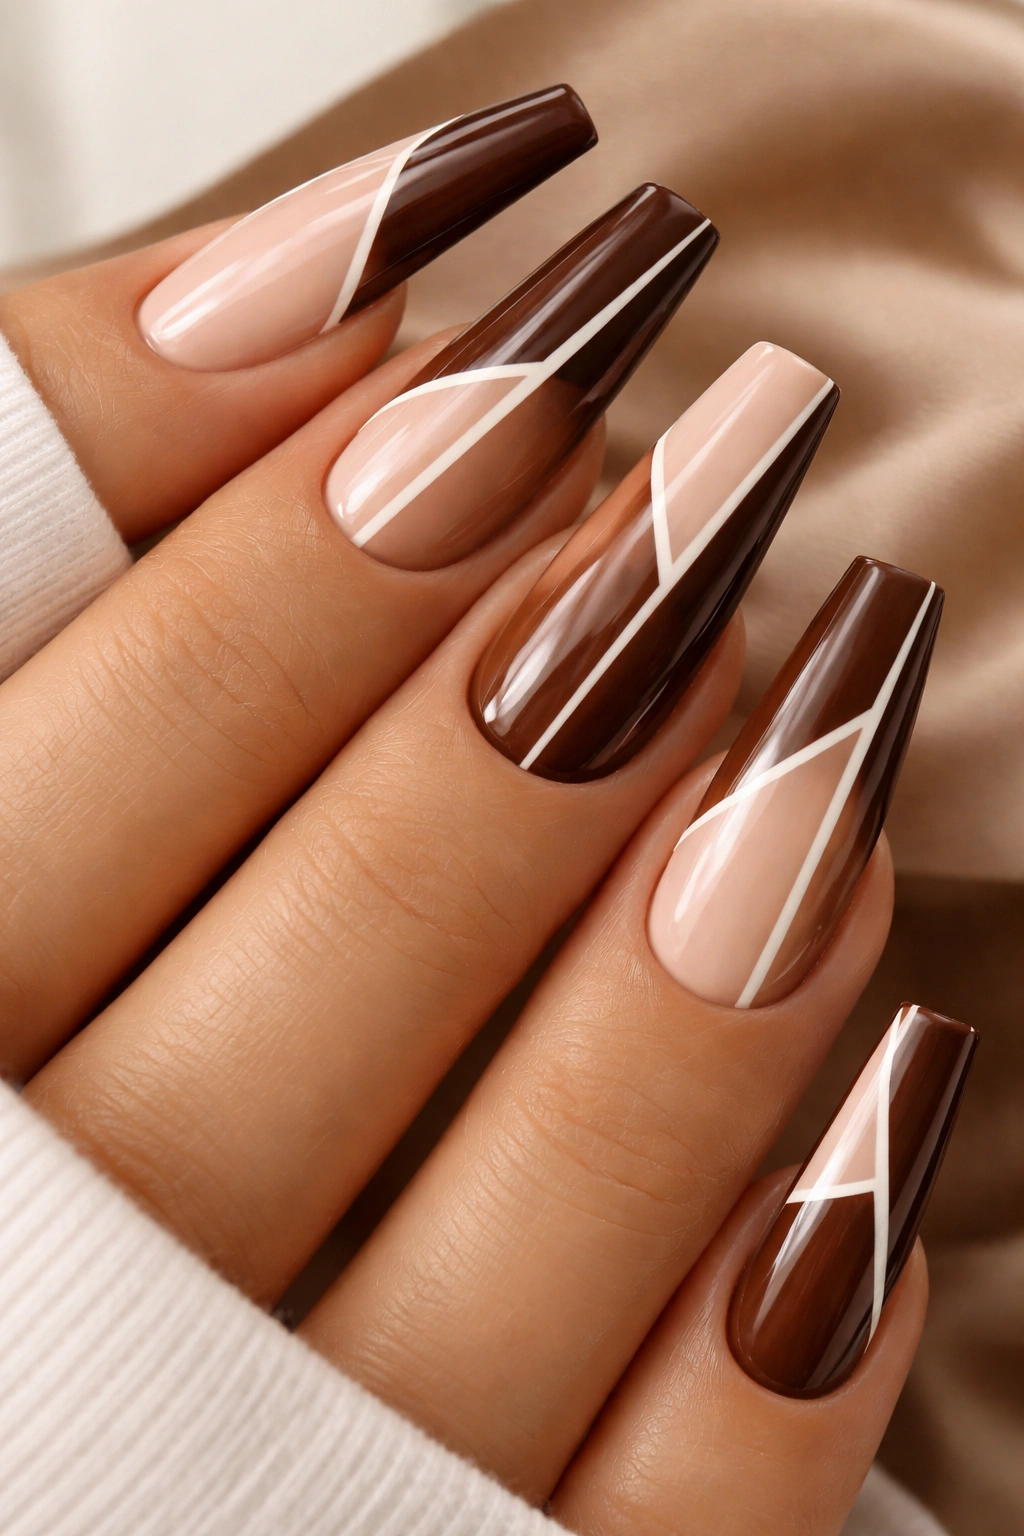
5. Chocolate Brown with White Fine Lines
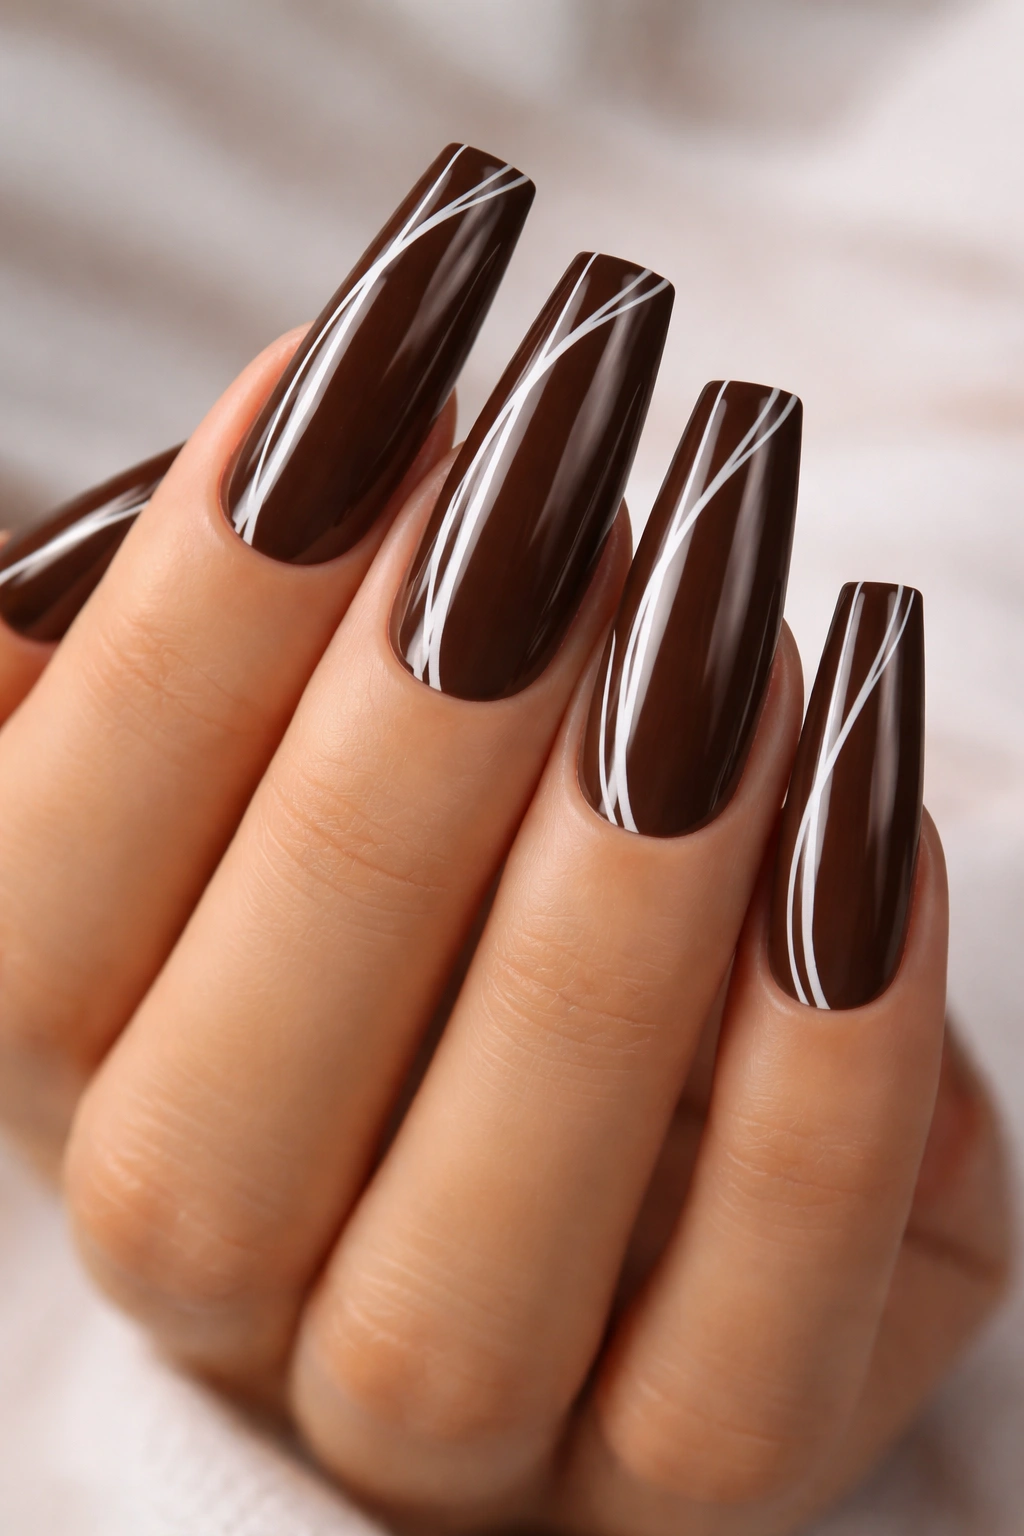
Minimalist meets sophisticated in this design, where crisp white lines overlay a rich chocolate brown base. The lines can be geometric (thin rectangles, triangles, or abstract shapes), or they can follow the natural ridges of the nail. The contrast between warm brown and bright white creates visual interest without overwhelming the design, and the precision required makes it feel intentionally curated rather than casually thrown together.
Why Precision Lines Elevate Brown Nails
Thin white lines on brown create an almost architectural quality—they’re structural elements that draw the eye and create visual movement. The design reads as modern and intentional, appealing to people who love minimalist aesthetics. Unlike ornate patterns that demand attention, this design whispers sophistication. It’s the manicure equivalent of wearing a perfectly tailored outfit with minimal jewelry—everything is exactly where it should be.
Creating Clean Lines
- Paint your base coat of rich chocolate brown in two thin layers; precision lines require a perfectly smooth base
- Use a ruler or nail guide stickers to keep white lines straight, or freehand if you have a steady hand
- Apply white polish with an ultra-fine liner brush; thin, precise lines require a quality brush with excellent control
- Consider varying line thickness slightly—one thick line with two thin ones creates more visual interest than uniform lines
- Seal with a glossy or matte top coat depending on the mood you’re aiming for (glossy feels sleeker, matte feels more modern)
Worth knowing: If perfectly straight lines stress you out, diagonal or slightly curved lines are actually more forgiving and feel similarly intentional.
6. Brown Glitter French Tips
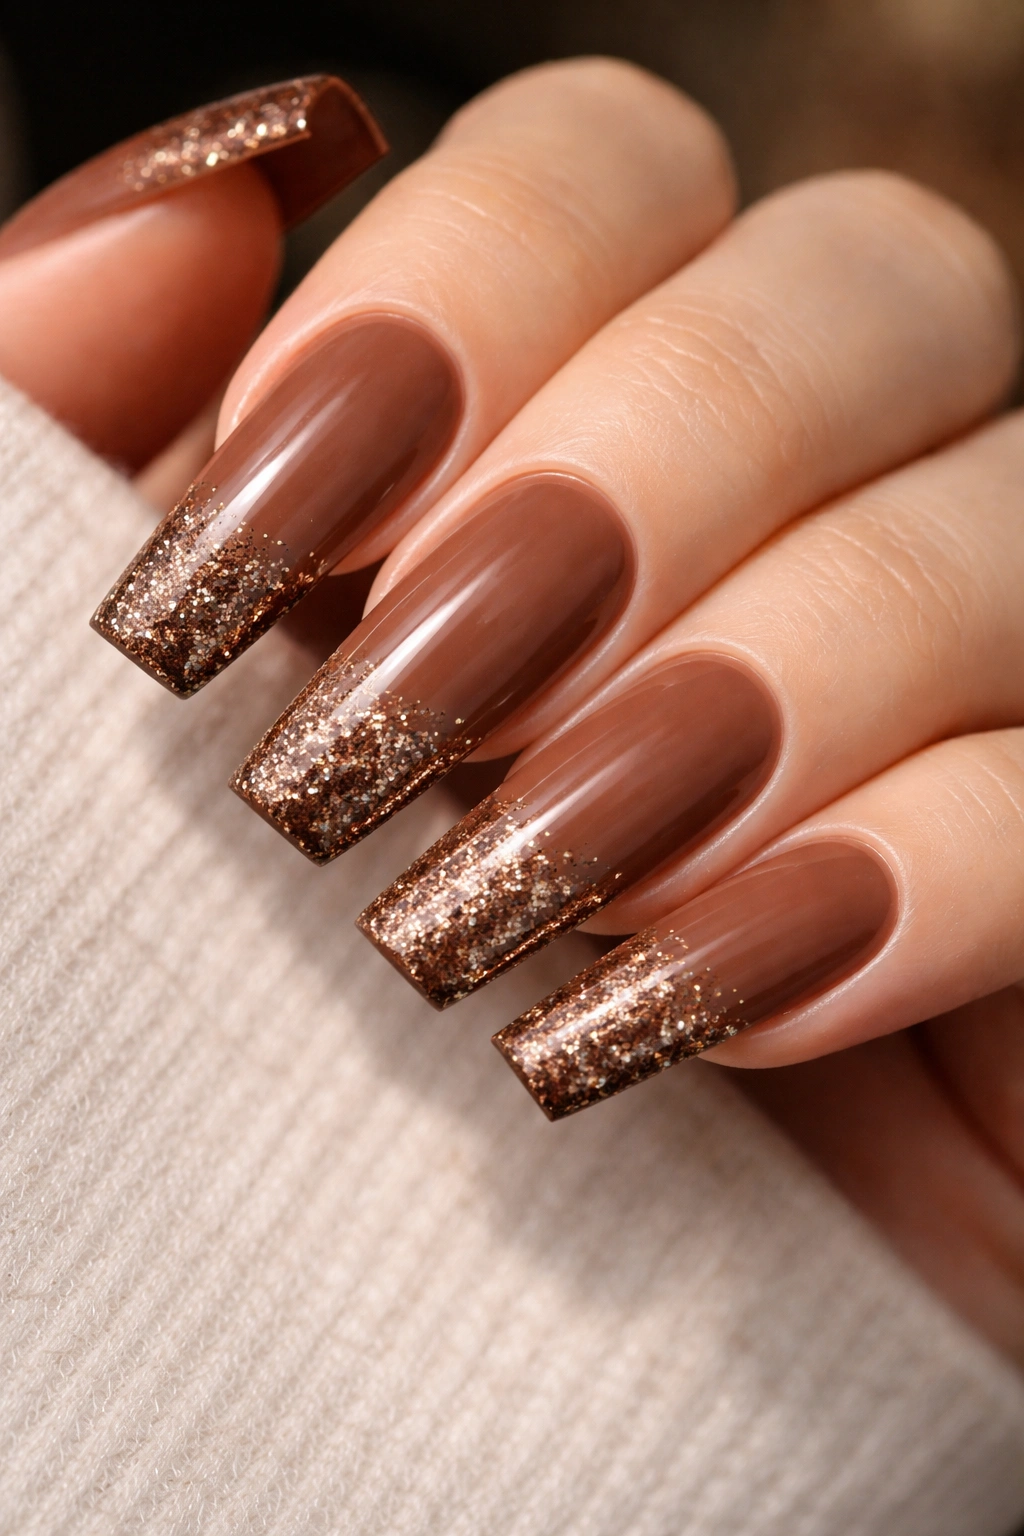
This design applies a classic French manicure concept to coffin nails with an unexpected twist. The base is warm brown (usually medium or caramel), and the tips feature a glitter gradient that transitions from subtle shimmer to full sparkle as it reaches the edge. It’s elegant where standard French tips feel traditional, and it adds celebration without screaming “party nails.”
Why French Tips Work on Coffins
The French tip shape emphasizes the elongation of coffin nails beautifully—the white or shimmery area frames the nail tip and draws attention to that squared-off point that makes the coffin shape distinctive. Adding glitter transforms French tips from boardroom-appropriate to genuinely glamorous. The brown base keeps it wearable for professional settings, while the glitter satisfies the desire for something special.
Executing Glitter French Tips
- Apply your brown base color in two coats, extending it fully to the free edge
- Apply a clear base coat on the tip area (roughly the upper third of the nail)
- While the clear base is slightly tacky, press fine glitter into it using a sponge, concentrating more glitter toward the actual edge
- Alternatively, apply a pre-mixed glitter ombre (these come in small bottles ready to apply like polish) over the clear base
- Seal with a thick top coat to keep glitter particles locked in place
- Clean up the edge line with a thin brush dipped in acetone or a nail art pen
Pro tip: Use mix warm gold or rose gold glitter rather than clear sparkle—this complements brown’s warm undertones and feels more cohesive than silver or cool-toned glitter.
7. Brown Metallic Chrome Finish
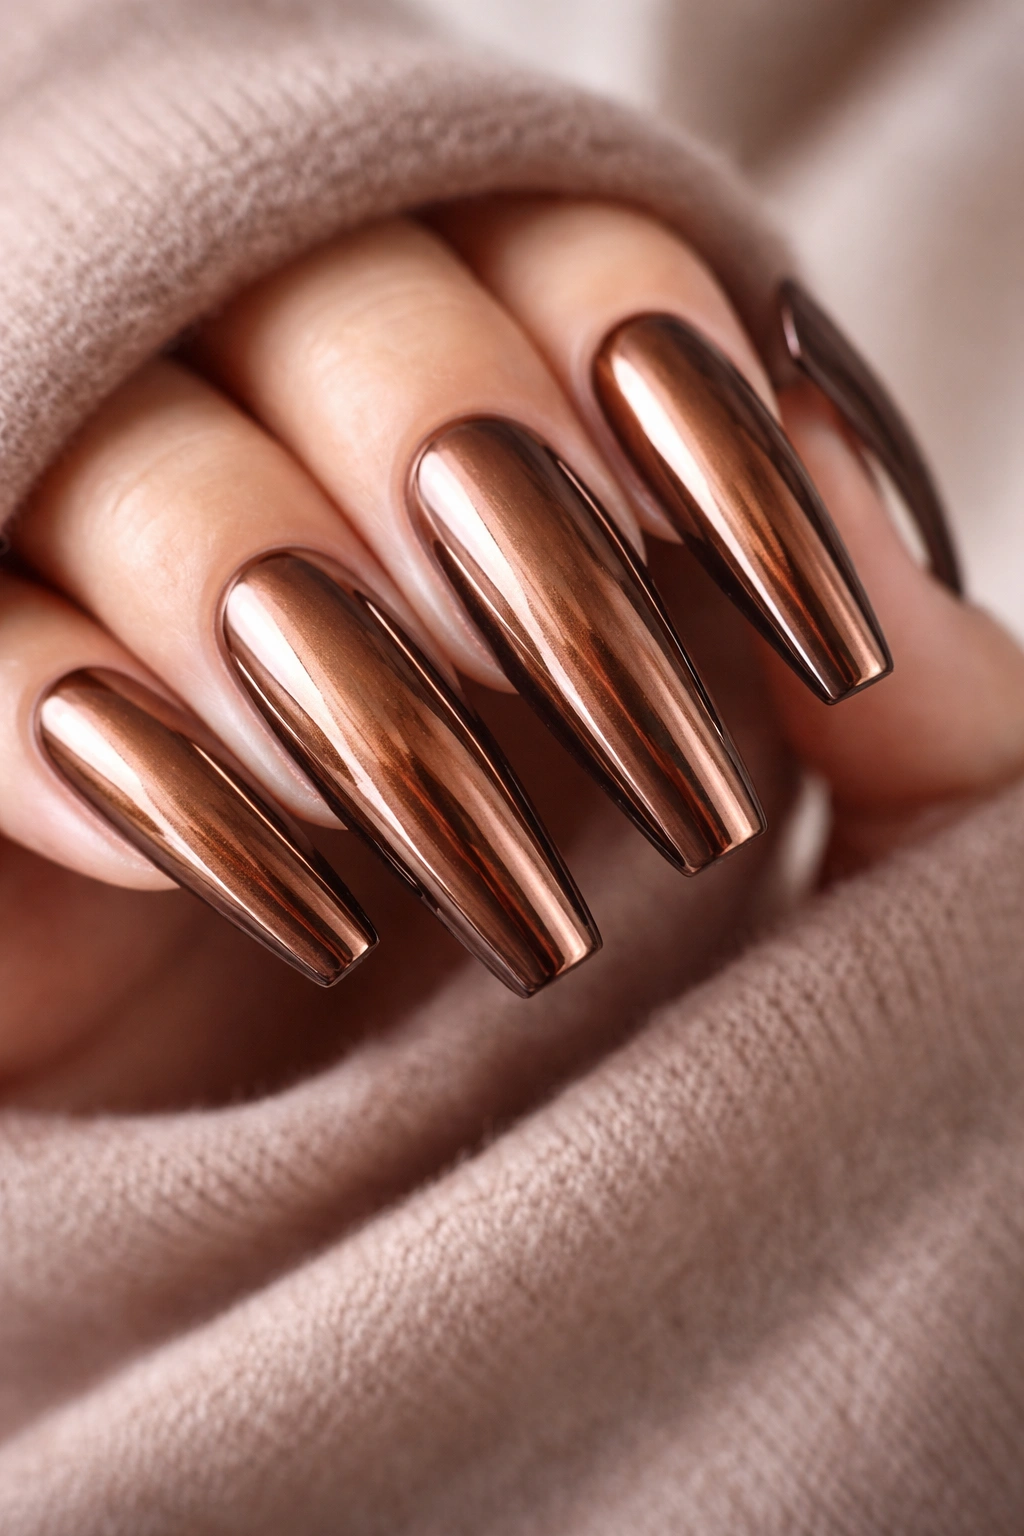
Chrome nails represent the cutting edge of manicure technology, and brown chrome is an unexpected twist on the usual rose gold or silver. This design uses specialized chrome powder applied over a brown base, creating a reflective, almost mirror-like finish that shifts and shimmers with movement. On long coffin nails, the effect is absolutely mesmerizing—your nails literally change color and appearance depending on how you move them and where light hits them.
What Makes Chrome Brown Unique
Brown chrome reads as futuristic and artistic rather than trying to mimic real metal the way silver chrome does. It’s the manicure choice for people who want to stand out deliberately. The reflective quality creates depth on the nail surface—it doesn’t look flat or two-dimensional like most nail art. The effect is impossible to capture properly in photos, which means your nails look even more impressive in person than they do in pictures.
Achieving a Chrome Finish
- Chrome requires a sticky base coat (usually labeled as a “chrome base” or “builder gel”)
- Apply your brown base color over the sticky layer
- Using a damp application brush or applicator, apply chrome powder in a dabbing motion; the powder clings to the sticky surface
- Build up the powder slowly—you’re aiming for an even, opaque finish without bald spots
- Brush away excess powder gently with a soft brush
- Seal with a super glossy top coat designed specifically for chrome nails
- Chrome finishes typically require professional application or at-home gel equipment due to the specialized products involved
Worth knowing: Chrome powder can stain nail beds if it gets on skin, so be very careful during application. Work slowly and deliberately.
8. Matte Brown with 3D Embellishments
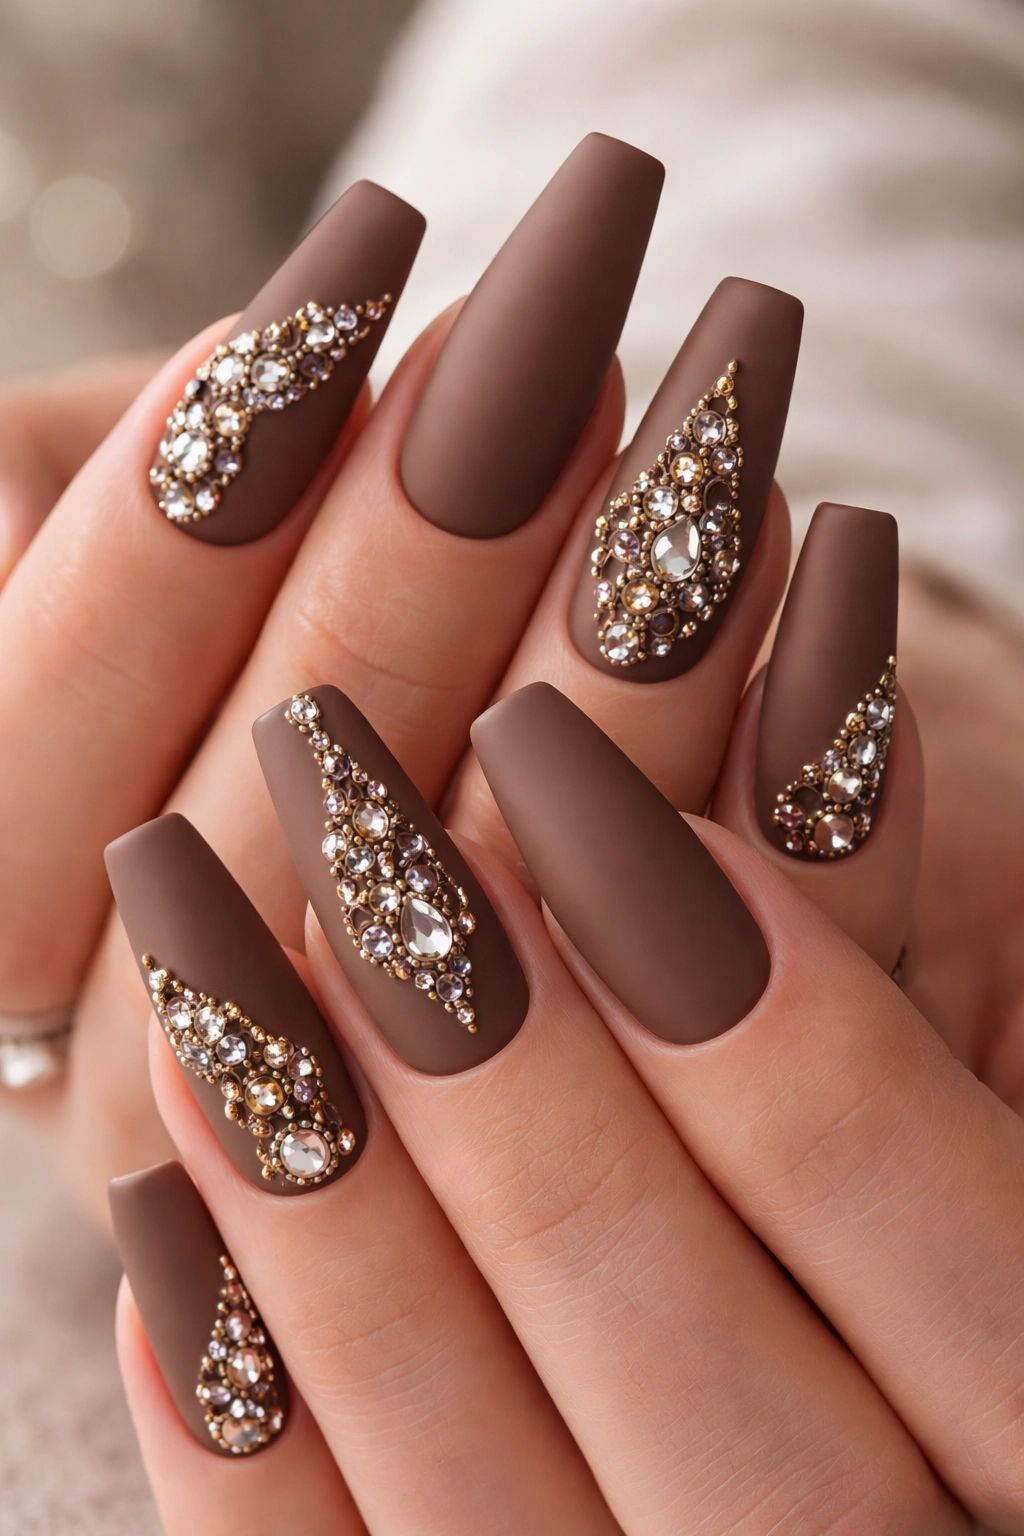
Matte finishes make a statement, and pairing matte brown with three-dimensional embellishments—like small crystals, studs, tiny beads, or hand-sculpted details—creates a textural manicure that’s genuinely unique. The embellishments catch light and create visual interest that draws attention while the matte base keeps the overall effect sophisticated rather than costume-y. On long coffin nails, there’s enough surface area to place embellishments thoughtfully rather than cramming them all over.
Why Matte Plus 3D Reads as Luxury
Most people expect shiny polish, so matte creates an immediately distinctive look. Adding three-dimensional elements elevates matte from simple to intentional. The contrast between the flat matte surface and the reflective, dimensional embellishments is what makes this design work—it’s the unexpected juxtaposition that catches eyes. You’re not trying to make nails look shiny or flashy; you’re creating texture and depth through thoughtful placement.
Application Tips for 3D Elements
- Paint your matte brown base in two coats and let it dry completely
- Apply a thick, clear builder gel or a specialized adhesive designed for nail embellishments to areas where you’ll place crystals or studs
- Press embellishments firmly into the wet adhesive using tweezers; hold each piece for a few seconds to ensure it sets
- For hand-sculpted details (like a raised line or small shape), use acrylic powder and monomer to build texture directly on the nail before sealing
- Seal everything with a matte top coat that’s designed to work with embellished nails—regular top coats can slide over beads instead of locking them down
- The result should feel secure; any embellishment that wiggles when you tap it needs more adhesive
Pro tip: Place embellishments strategically rather than covering the entire nail—one small crystal on each nail or a vertical line of studs down three nails creates more impact than a chaotic scattering.
9. Brown Nude Mix with Geometric Lines
This design layers sophistication by combining warm brown with nude or tan shades, then adding geometric structure through precise lines and shapes. Think negative space, blocked color sections, and clean divisions between shades. The result is modern, visually interesting, and somehow works for both casual and formal occasions because the geometric precision reads as intentionally designed rather than trendy.
Why Geometric Design Elevates Brown
Geometry automatically makes any design feel more sophisticated because it requires intention and precision. You’re not just applying color—you’re creating structured composition on your nails. The brown-to-nude transition looks cohesive because both shades exist in your natural skin tone, while the geometric shapes add the visual interest that prevents the design from feeling boring. Long coffin nails provide the perfect canvas for geometric composition.
Creating Geometric Patterns
- Sketch your design lightly on paper first so you know exactly where lines and color blocks will go
- Apply your base coat and let it dry
- Use nail art tape to create clean divisions between color zones—tape sticks to nails temporarily and prevents polish from bleeding
- Apply your first color, let it dry, then remove the tape and apply the next color
- For lines without tape, use a ruler and a high-quality liner brush; very thin lines look more modern than thick ones
- Consider using negative space (areas of the nail left unpainted to show your natural nail) as a design element
- Seal with a glossy top coat, which makes geometric lines look sharper and cleaner
Worth knowing: Geometric designs look best with a glossy finish; matte finishes can make the lines feel less defined.
10. Deep Espresso Brown with Pearl Details
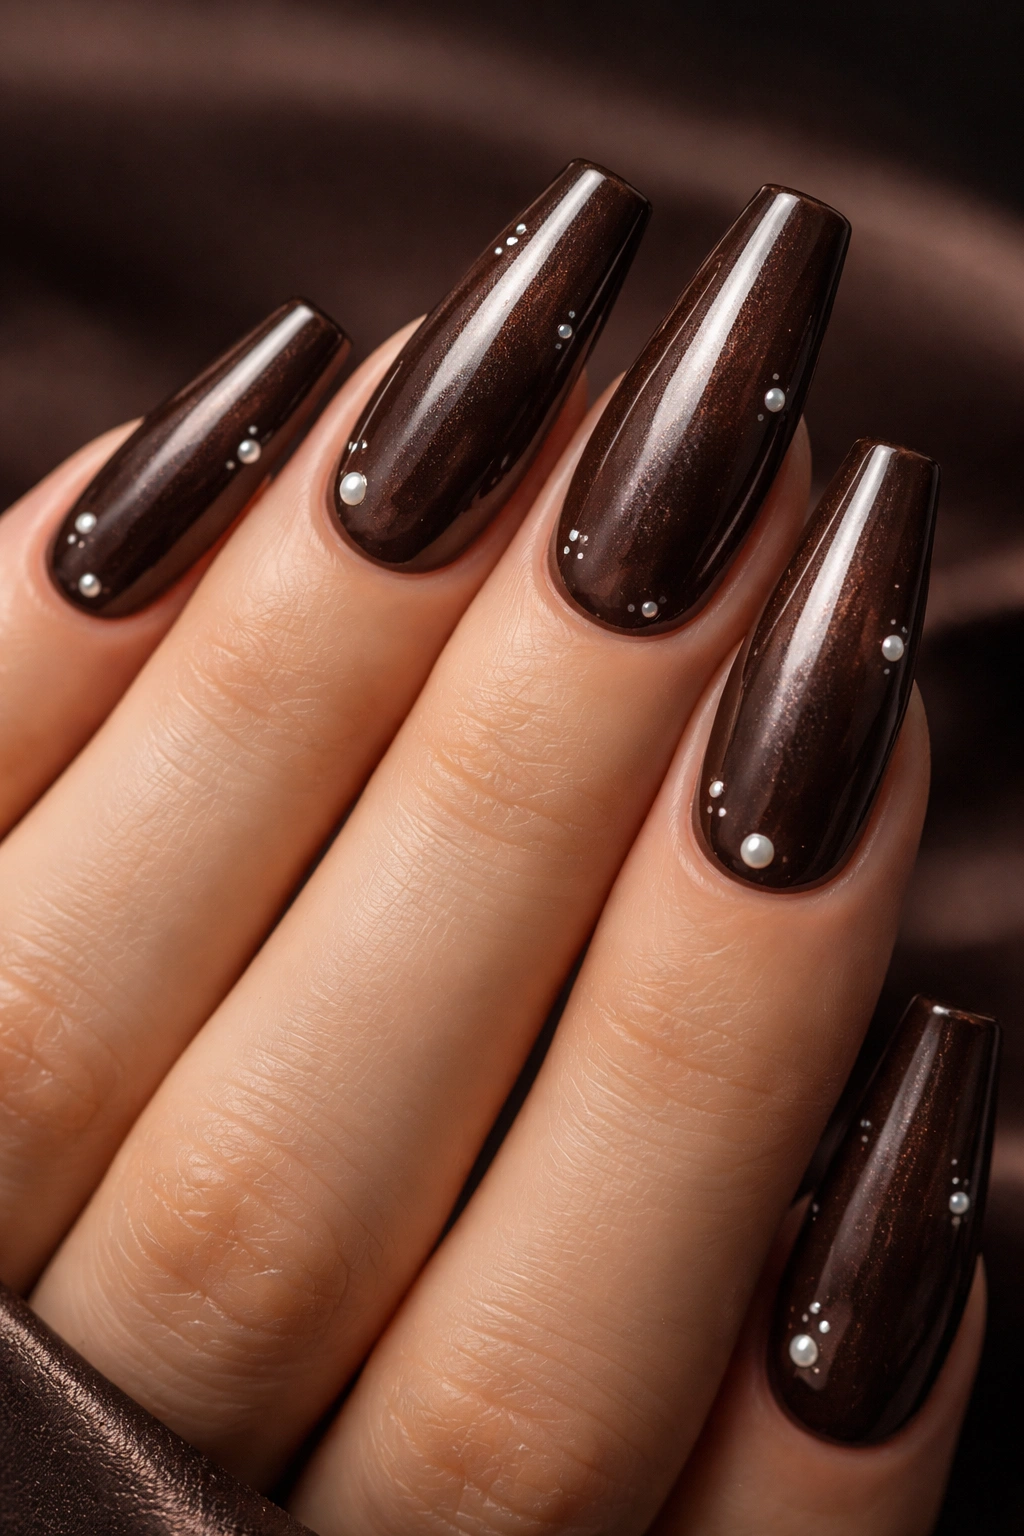
This design combines an almost-black espresso brown with subtle pearl accents, creating a manicure that’s sophisticated, wearable, and surprisingly versatile. The pearls can be embedded directly into the polish, applied as small pearl studs on select nails, or created using pearl-finish top coats that give an opalescent sheen. The effect is romantic without being girly, elegant without being formal, and interesting without demanding constant explanation.
Why Espresso Plus Pearl Works So Well
Espresso brown is dark enough to feel luxurious and serious while still being distinctly brown—you’re not sliding into black-nail territory. Pearls add femininity and sophistication without adding color. Together, they create an understated luxury aesthetic that works year-round and across every setting imaginable. The pearlescent shimmer catches light subtly, creating dimension that keeps the design from feeling flat, while the deep brown keeps it grounded and wearable.
Applying Pearl Details
- Paint your espresso brown base in two coats, ensuring full opacity
- For embedded pearls: mix tiny pearl beads into your clear top coat, then apply over the brown base; the pearls will be suspended in the shiny layer
- For pearl studs: allow your brown base to dry completely, then apply a small amount of clear adhesive to areas where you want pearls and press them in gently
- For a pearlescent top coat: apply a specialized pearl or opalescent finish over your brown base; these products are designed to create the pearl effect
- Seal everything with a final glossy layer to lock pearls in place and create a unified finish
- If using studs, ensure they’re secured firmly—wiggling means they need more adhesive
Pro tip: Place pearls on only one or two nails per hand rather than all ten—this creates a deliberate, curated look rather than an over-decorated appearance.
Final Takeaway
Brown coffin nails represent freedom to experiment while maintaining sophistication. Each of these designs demonstrates that brown isn’t a limiting color—it’s a canvas that accommodates everything from minimalist precision to dimensional luxury. The coffin shape gives you length to work with, and that extended surface area means even simple designs read as intentional and impressive.
Your choice between these designs ultimately depends on your lifestyle and personal aesthetic. If you love minimal elegance, go solid or add fine geometric lines. If you’re drawn to visual texture and movement, marble, tortoiseshell, and chrome finishes deliver that without being chaotic. For people who want luxury with wearability, pearls and metallic accents offer sophistication that doesn’t demand constant attention or maintenance.
The most important consideration is choosing a brown shade that flatters your skin tone. Warm undertones in your skin look stunning with caramel, chocolate, and espresso browns. Cooler undertones might prefer deeper espresso or even taupe-leaning browns. Experiment with trying on different brown shades in natural light before committing—what looks right in the salon lighting might feel off in daylight. Once you find your perfect brown, you’ll return to it again and again because it’s that fundamentally flattering and versatile.
