

A clear set can look cheap faster than a red one. Transparency shows every filing mark, trapped bubble, and bulky sidewall, which is why clear ballerina nails either look clean and intentional or miss the mark almost immediately.
That sharp, tapered coffin shape does half the work. The rest comes from product choice—hard gel gives a glassy finish, acrylic gives a firmer edge—and from knowing how little detail a minimal manicure needs before it stops feeling minimal.
I keep coming back to clear nails when I want length without color noise. They let your rings, watch, and skin tone do more of the visual heavy lifting, and they move from office clothes to denim to a black dress without asking for attention. They also show scratches, yellowing, and cloudy product fast, so the design has to be tight.
Small details make the difference here. A 1-millimeter French line, a milky veil, a frosted topcoat, a single stone placed low near the cuticle—those tiny moves change the whole feel of the set.
Why Clear Ballerina Nails Work for a Minimal Look
The ballerina shape already has structure built in. You get tapered sidewalls, a straight free edge, and a longer visual line through the fingers, so even a bare transparent set reads as finished. Almond nails feel softer. Square nails feel flatter. Ballerina nails give you architecture, which is exactly why they pair so well with clear product.
Length matters more than color here.
A short-to-medium ballerina—about 6 to 12 millimeters past the fingertip—usually looks cleaner than an extra-long set if you want that stripped-back look. Once the free edge gets much longer than that, clear nails can start leaning futuristic, which can be beautiful, though not always minimal.
Product thickness is the next thing. On a clear set, a bulky apex or a fat tip stands out right away. I think the best clear ballerina nails have a visible apex near the stress area, then a thin, crisp free edge you can almost see through from the side. If the underside looks lumpy, the whole manicure loses that clean-glass effect.
A few design choices tend to work best with transparent nails:
- Soft milky overlays when you want more forgiveness than fully water-clear product gives.
- Micro details like a thin French line, one crystal, or a tiny metallic accent.
- Jelly tints in blush, beige, or pale taupe when your natural nail line needs blending.
- High-shine or matte finishes, but not both at once unless the contrast is deliberate.
That last point matters. Clear nails have no pigment to hide behind, so the shape, surface, and finish become the design.
How to Keep Clear Ballerina Nails Looking Glassy Instead of Cloudy
Cloudy clear nails usually come from one of four things: dusty prep, over-filed product, yellowing topcoat, or scratched surfaces. None of that is glamorous, though it decides whether your manicure looks expensive on day one and day ten.
Ask for clear hard gel, builder gel, or a high-clarity acrylic if your salon offers more than one option. Some clear powders dry with a faint haze, and on nude or colored sets you might never notice. On a transparent ballerina shape, you will.
Cuticle work deserves some restraint. Dermatologists are picky about torn cuticles for a reason: broken skin around the nail fold can get sore fast, and it also makes a fresh set look rough around the edges. A gentle push-back, a clean trim only where skin is already lifted, and cuticle oil twice a day usually beats aggressive cutting.
If you want the set to stay clear, a few habits help more than people expect:
- Use gloves for cleaning products, especially anything with bleach or strong degreasers.
- Rub in cuticle oil morning and night so the nail folds stay smooth instead of frayed.
- Wipe sunscreen off the nails after application if your topcoat tends to yellow.
- File tiny snags under the free edge early instead of waiting for them to catch fabric.
- Book fills before the apex drifts too far forward, usually around the 2- to 3-week mark, depending on growth.
One more thing. Bring side-angle photos to the salon, not only top-down inspiration shots. Clear ballerina nails live or die from profile view.
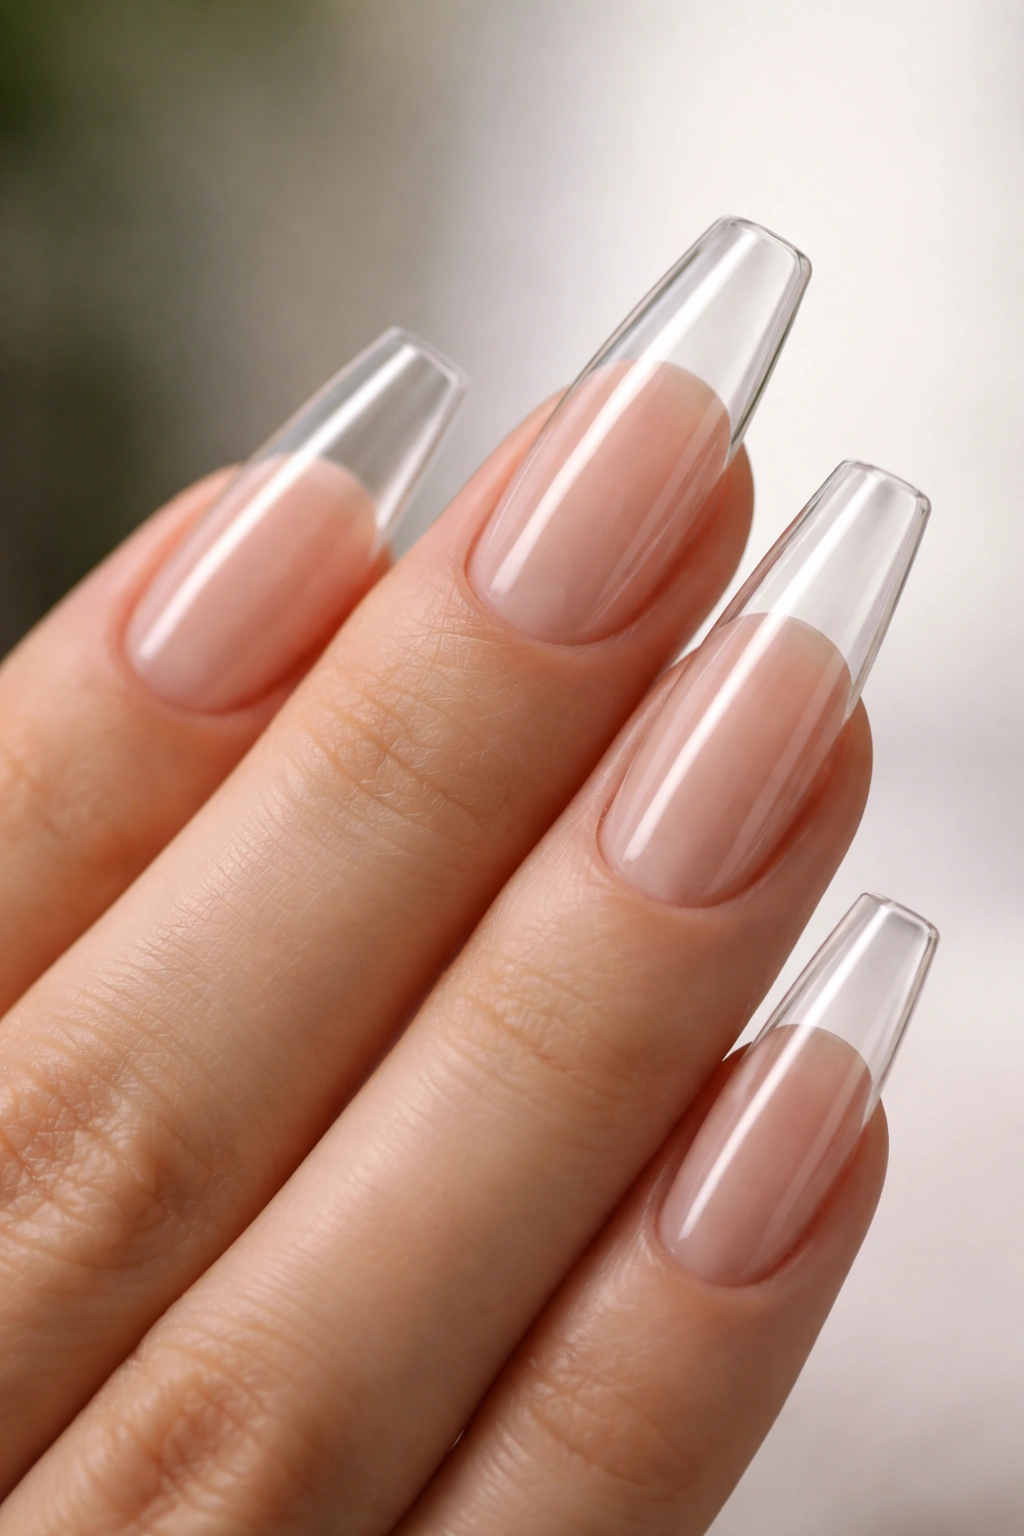
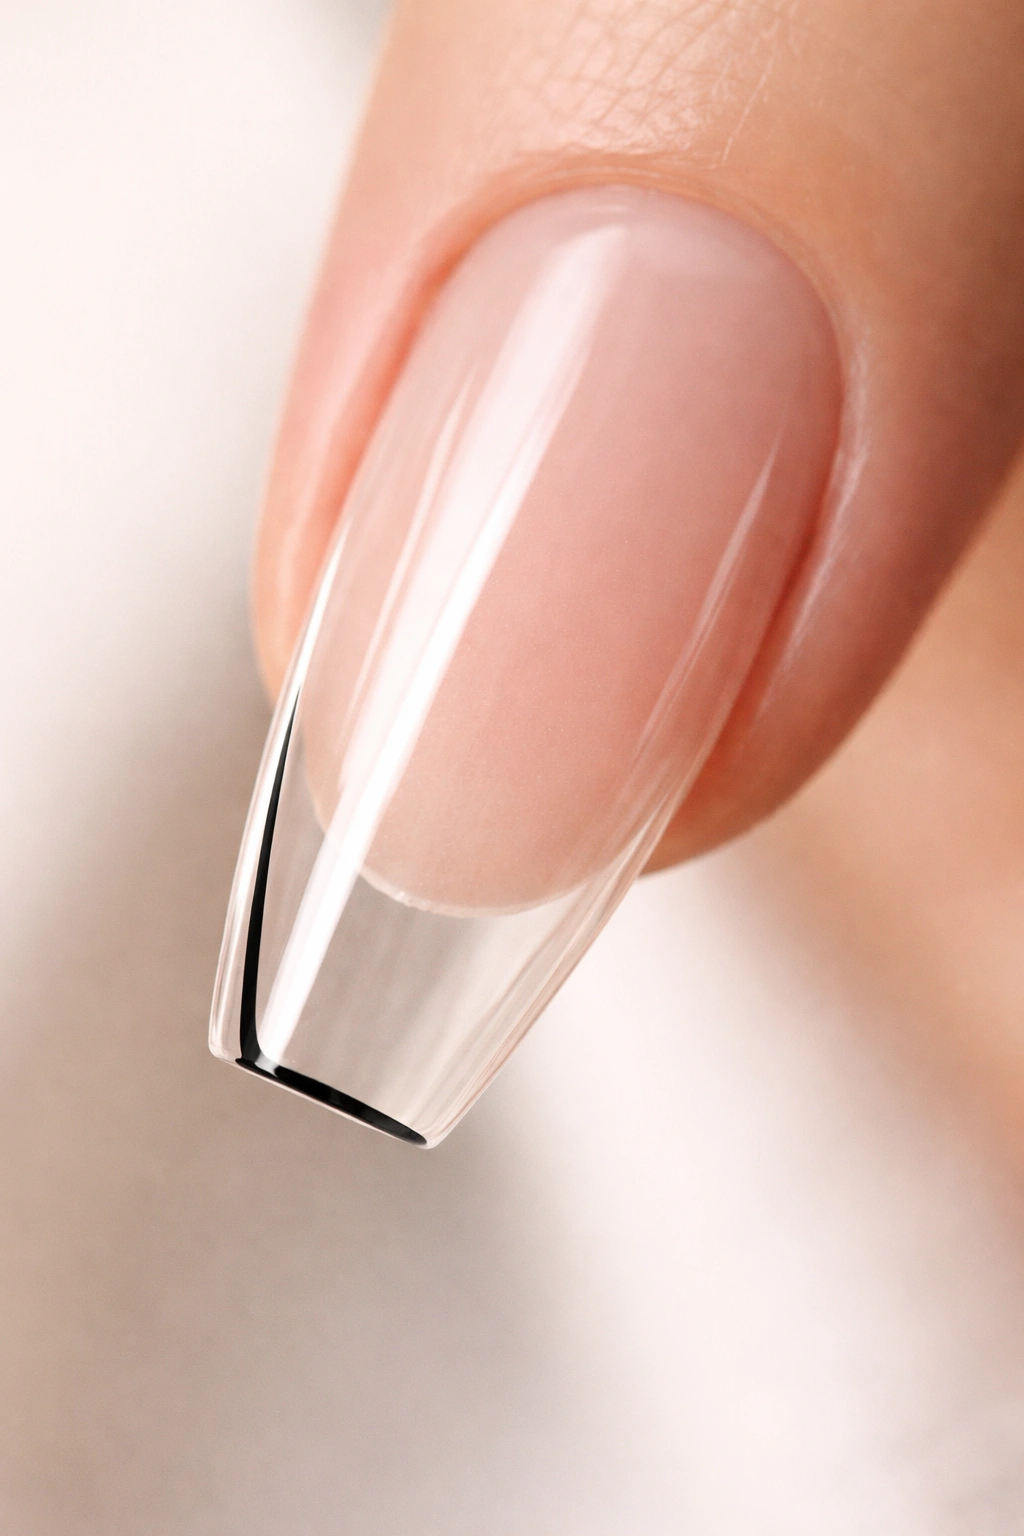
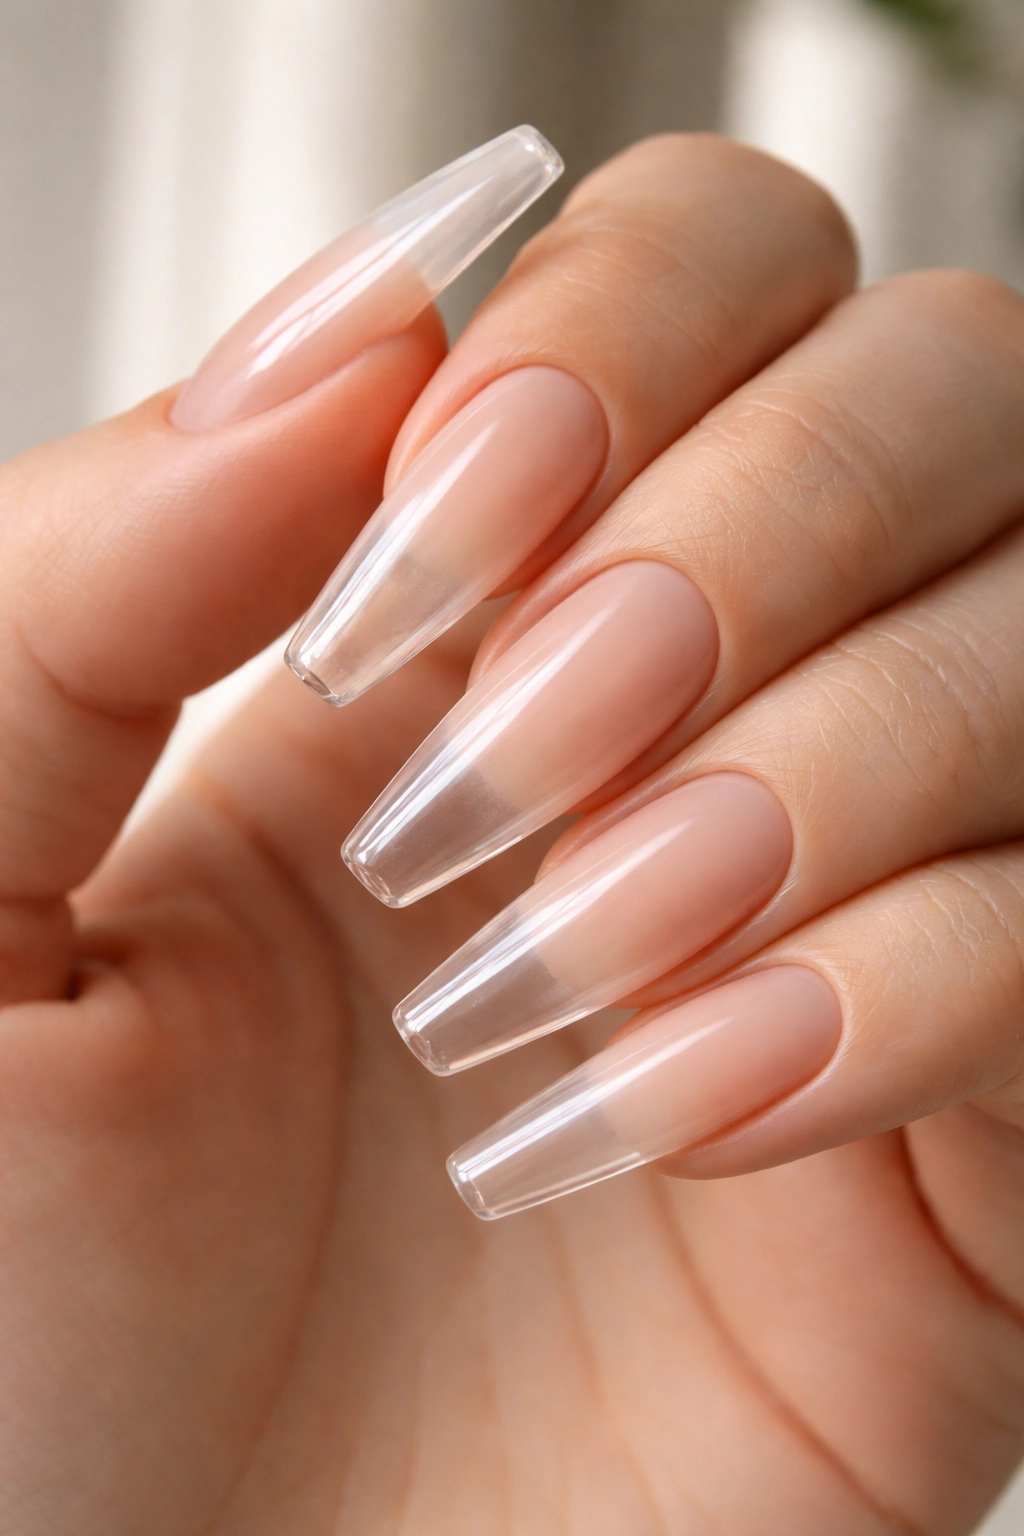
1. Water-Clear Full-Length Ballerina
The cleanest clear set is the one with the best file work. A fully transparent ballerina manicure has nowhere to hide, which is exactly why it can look so good when the shaping is sharp and the product stays thin through the tip.
I like this look best at a medium-long length, usually 12 to 16 millimeters past the fingertip. Shorter than that, it can read a little unfinished. Longer than that, the mood shifts from minimal to sculptural, which is a different lane.
What makes it work
The key is clarity and proportion. You want crisp sidewalls, a narrow but stable apex, and a free edge that looks clean from the front and the underside. If the tip is too wide, the shape turns blocky. If the taper is too aggressive, the nail loses that ballerina balance and starts looking more like a triangle.
Quick details that matter
- Best finish: High-gloss topcoat with UV protection.
- Best product: Clear hard gel or a clear acrylic known for low yellowing.
- Best length: Medium to long, with a visible taper.
- Maintenance note: Surface scratches show faster on full-clear nails than on milky sets.
My tip: ask your tech to file the underside after curing or setting. That little cleanup makes the nail look lighter and sharper.
2. Short Clear Ballerina With Soft Corners
Short length changes the whole mood. A clear ballerina set with only 4 to 8 millimeters of free edge feels more polished, more practical, and much easier to wear every day than the long glass-claw version people often picture first.
The trick is in the corners. If they stay too square, short ballerina nails can look boxy. If they get rounded too far, you drift into squoval territory. I prefer a softly blunted edge with a light taper through the sides, enough to suggest the ballerina shape without forcing it.
This style works well if you type all day, use your hands a lot, or want a transparent manicure that doesn’t pull focus from jewelry. It also grows out in a cleaner way. A short clear set with a tidy apex often looks presentable for longer than an extra-long transparent design, since scratches and lifting are less dramatic.
Skip heavy art here. Short clear nails look best when the surface stays bare or nearly bare, maybe with one small detail on two fingers at most. The beauty is the restraint.
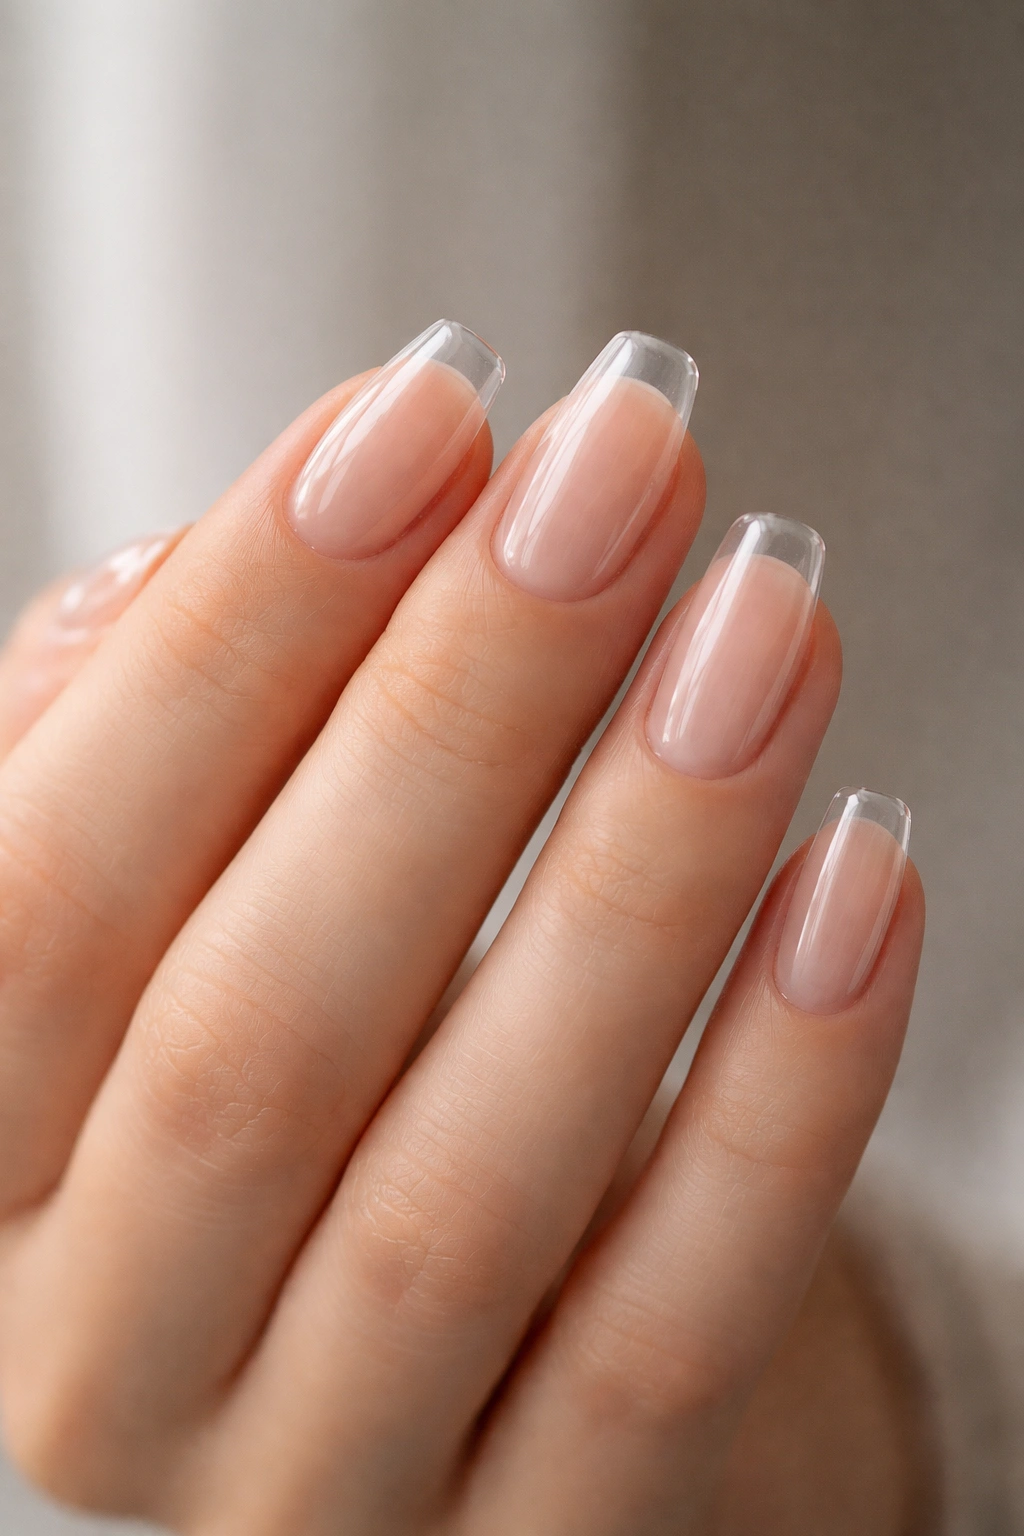
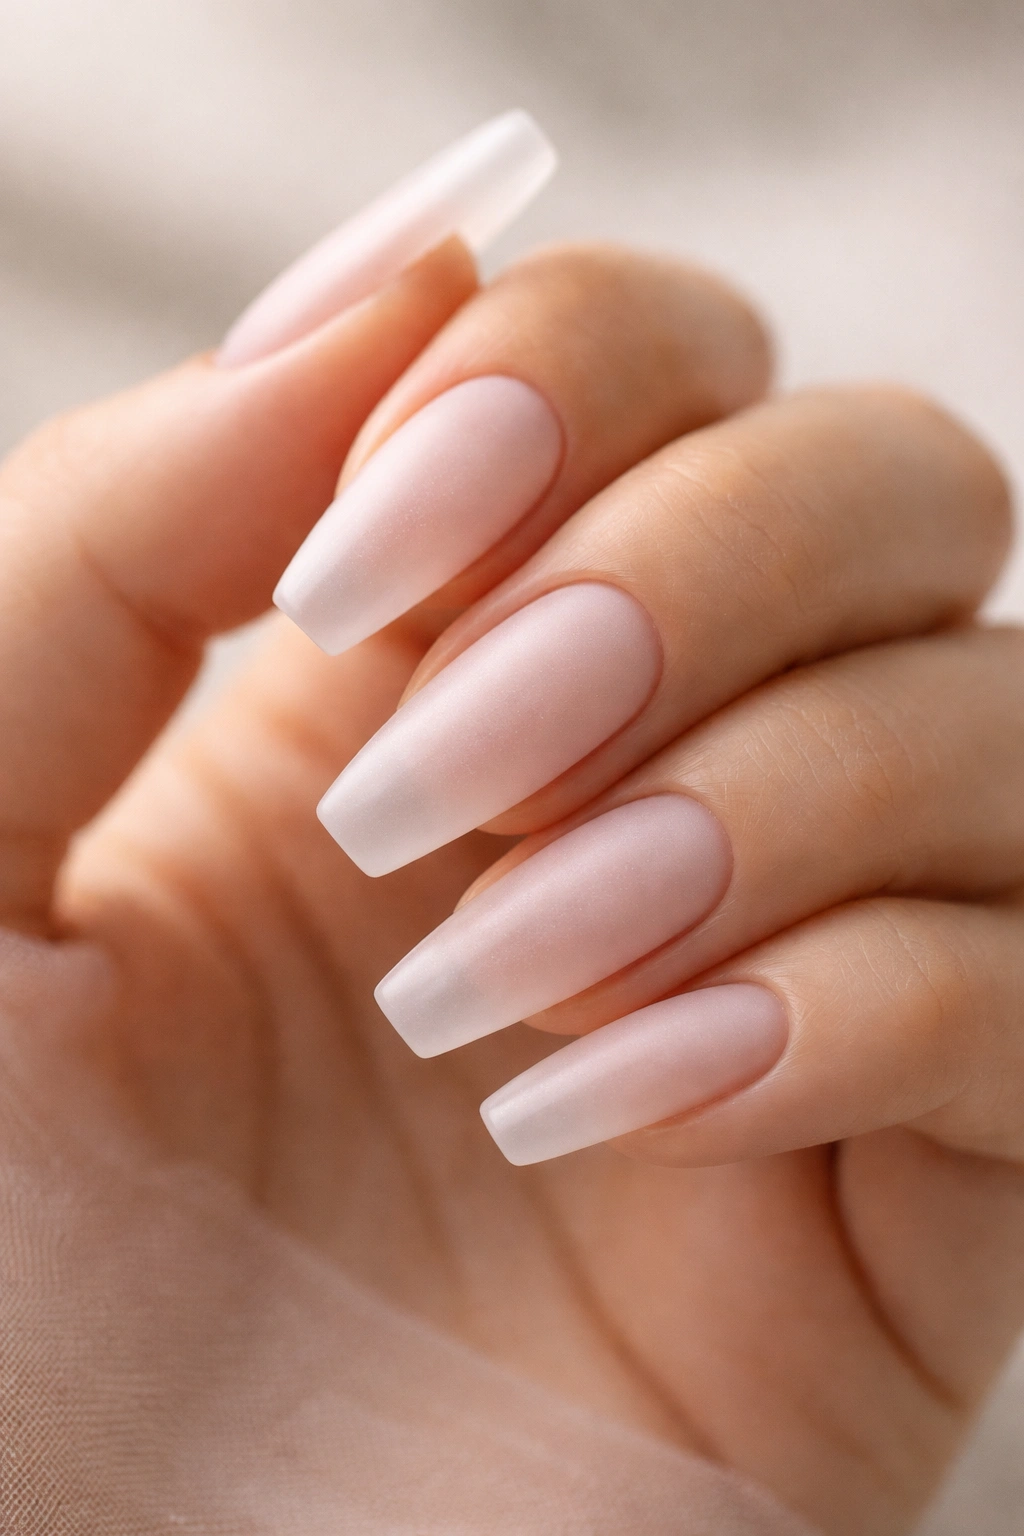
3. Milky Clear Ballerina With a Sheer White Veil
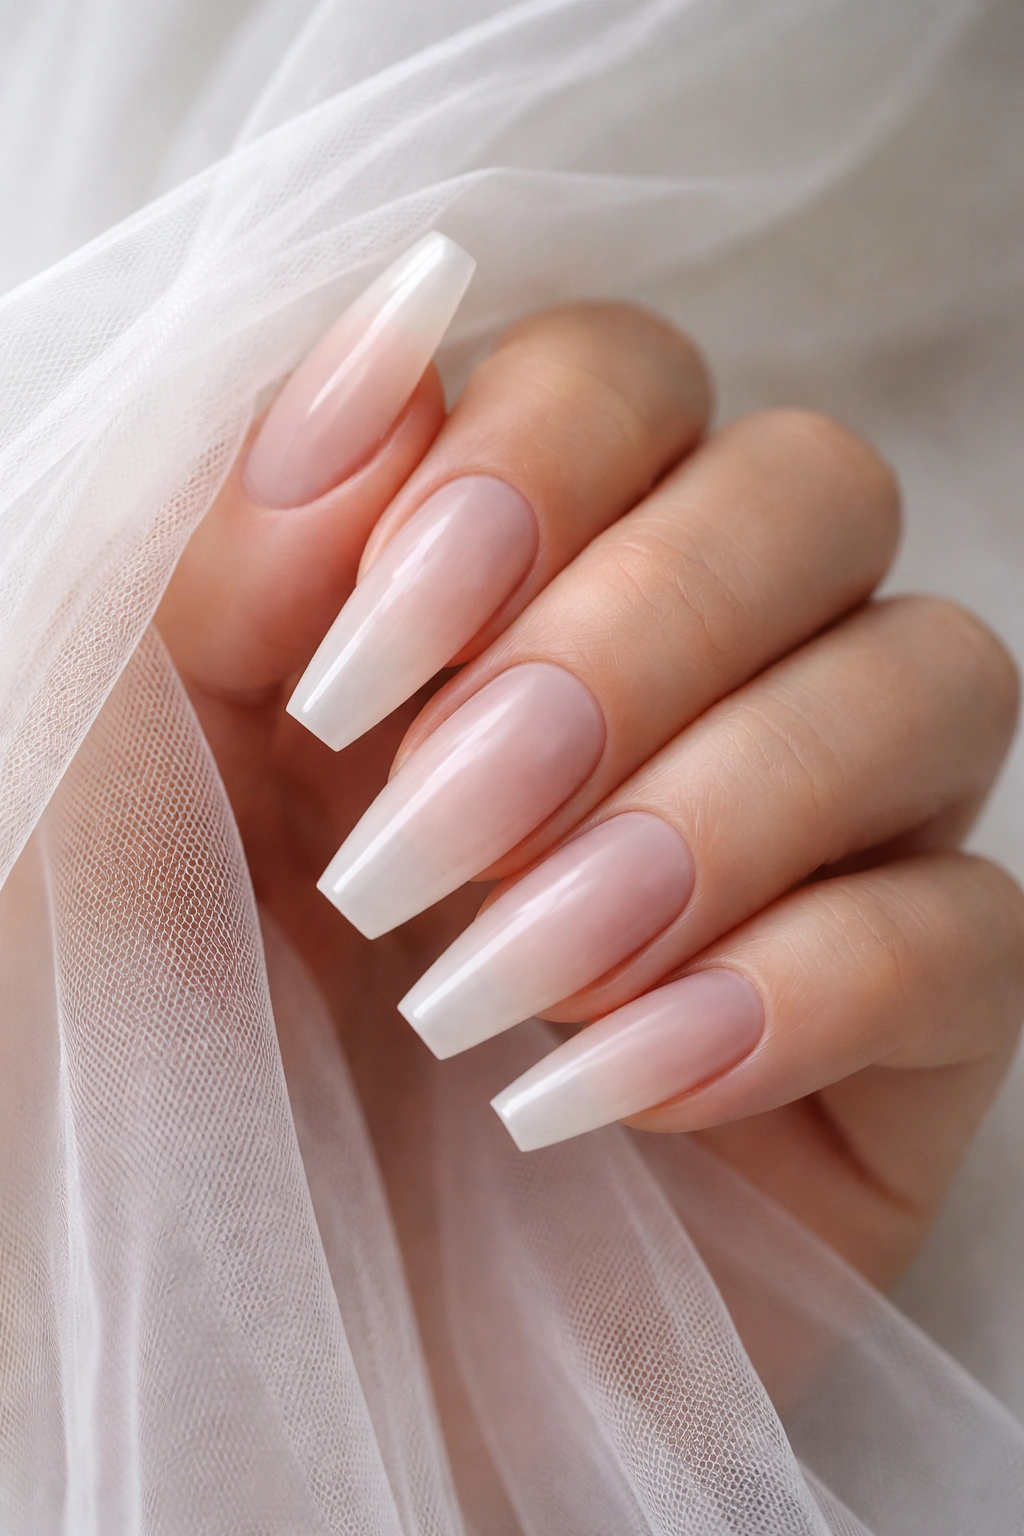
Want clear nails without that hard plastic look? A milky clear finish solves that in one move.
Instead of using fully transparent product from cuticle to tip, your tech adds a soft wash of sheer white into the clear base, enough to blur the natural nail line and soften the overall look. You still get transparency, though the effect lands closer to frosted glass than plain acrylic.
That haze matters more than people think. It hides tiny imperfections, smooths out the look of the nail bed, and makes regrowth less harsh. If your natural nails have strong smile lines, ridges, or uneven free edges under enhancements, a milky clear set often looks more refined than a full water-clear set.
How to ask for it
Ask for a sheer milky overlay, not an opaque white. Those are two different manicures. The finish should still let light through, and from a few feet away the nail ought to read as translucent, not painted.
If I had to pick one clear design for someone trying ballerina nails for the first time, this would be close to the top. It is forgiving. That counts.
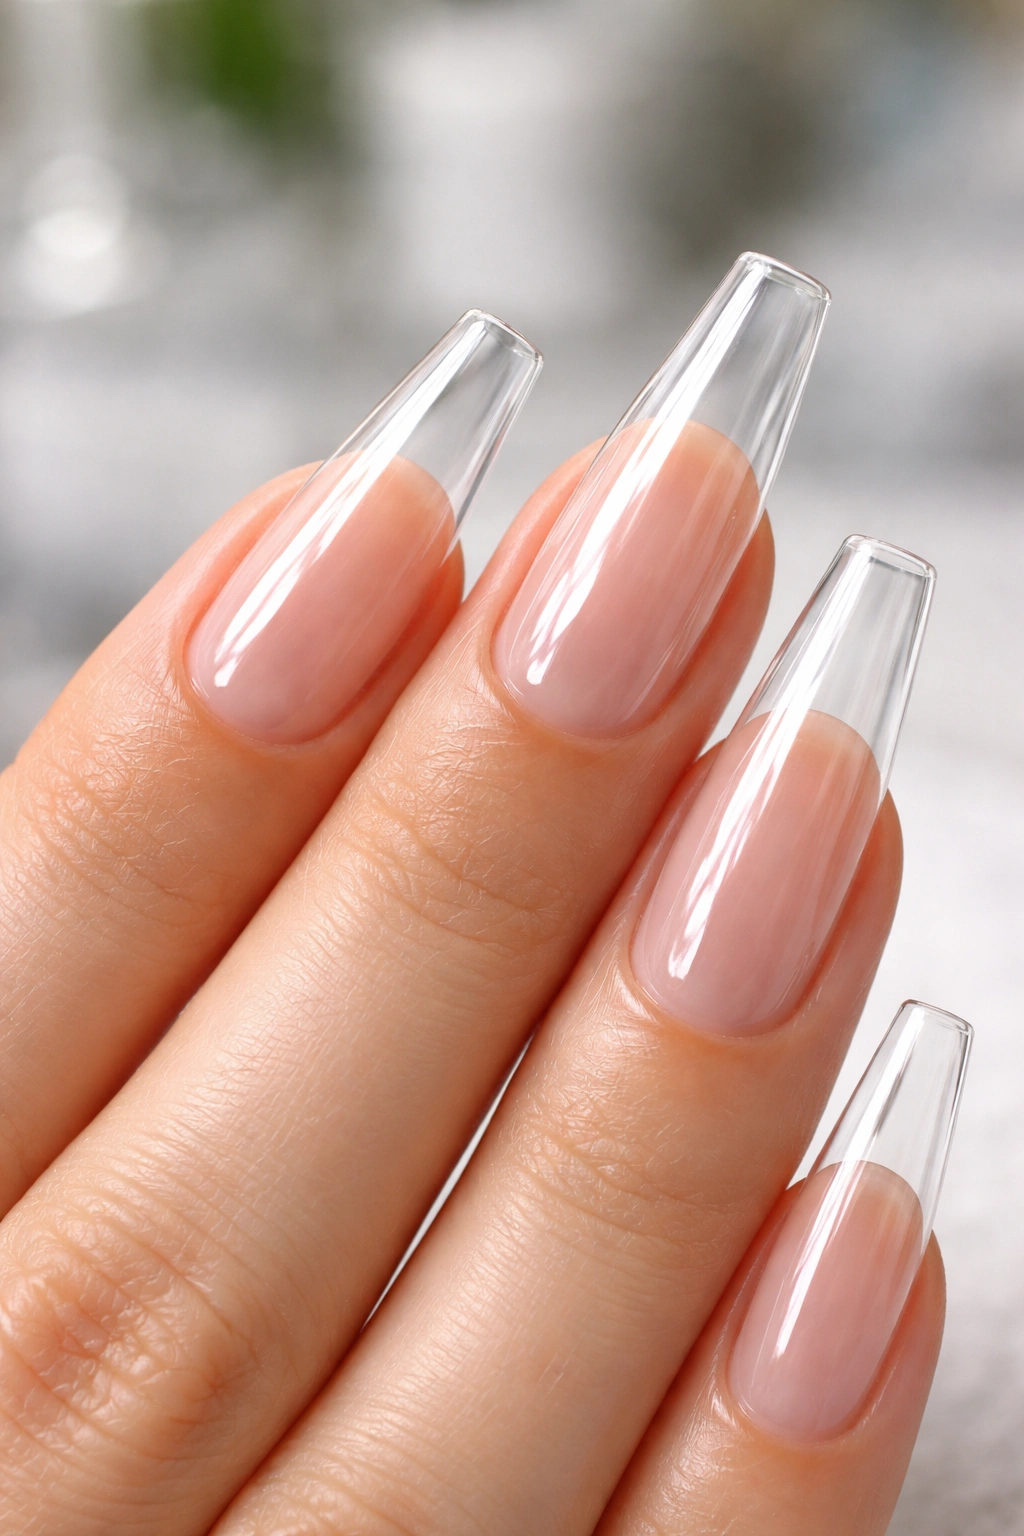
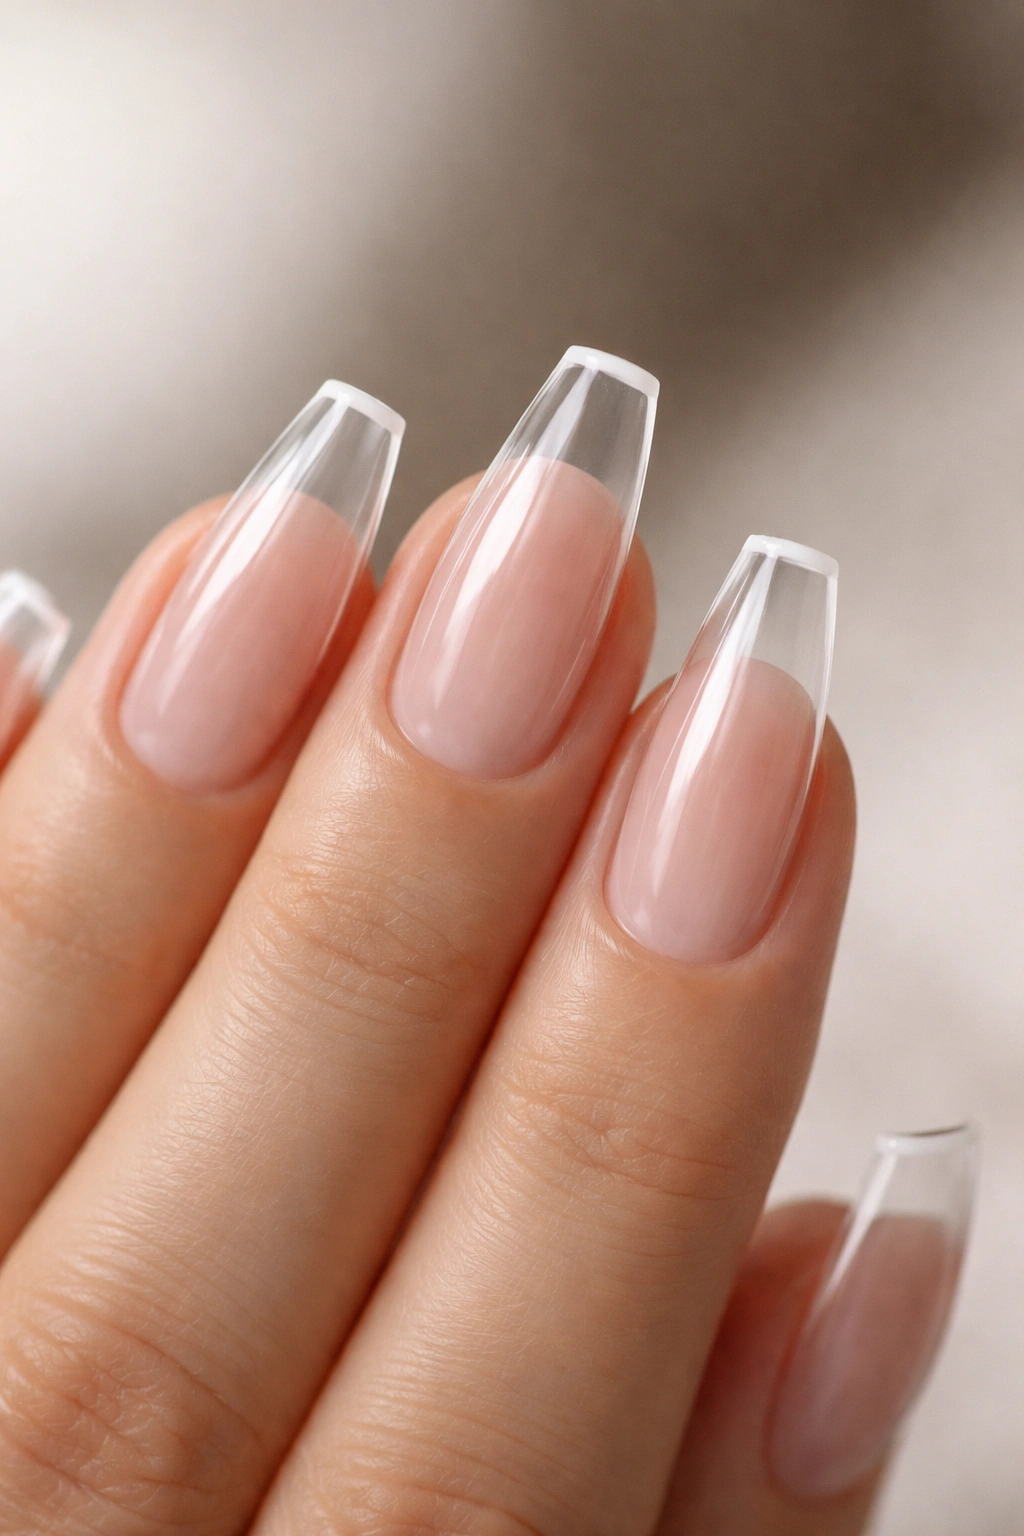
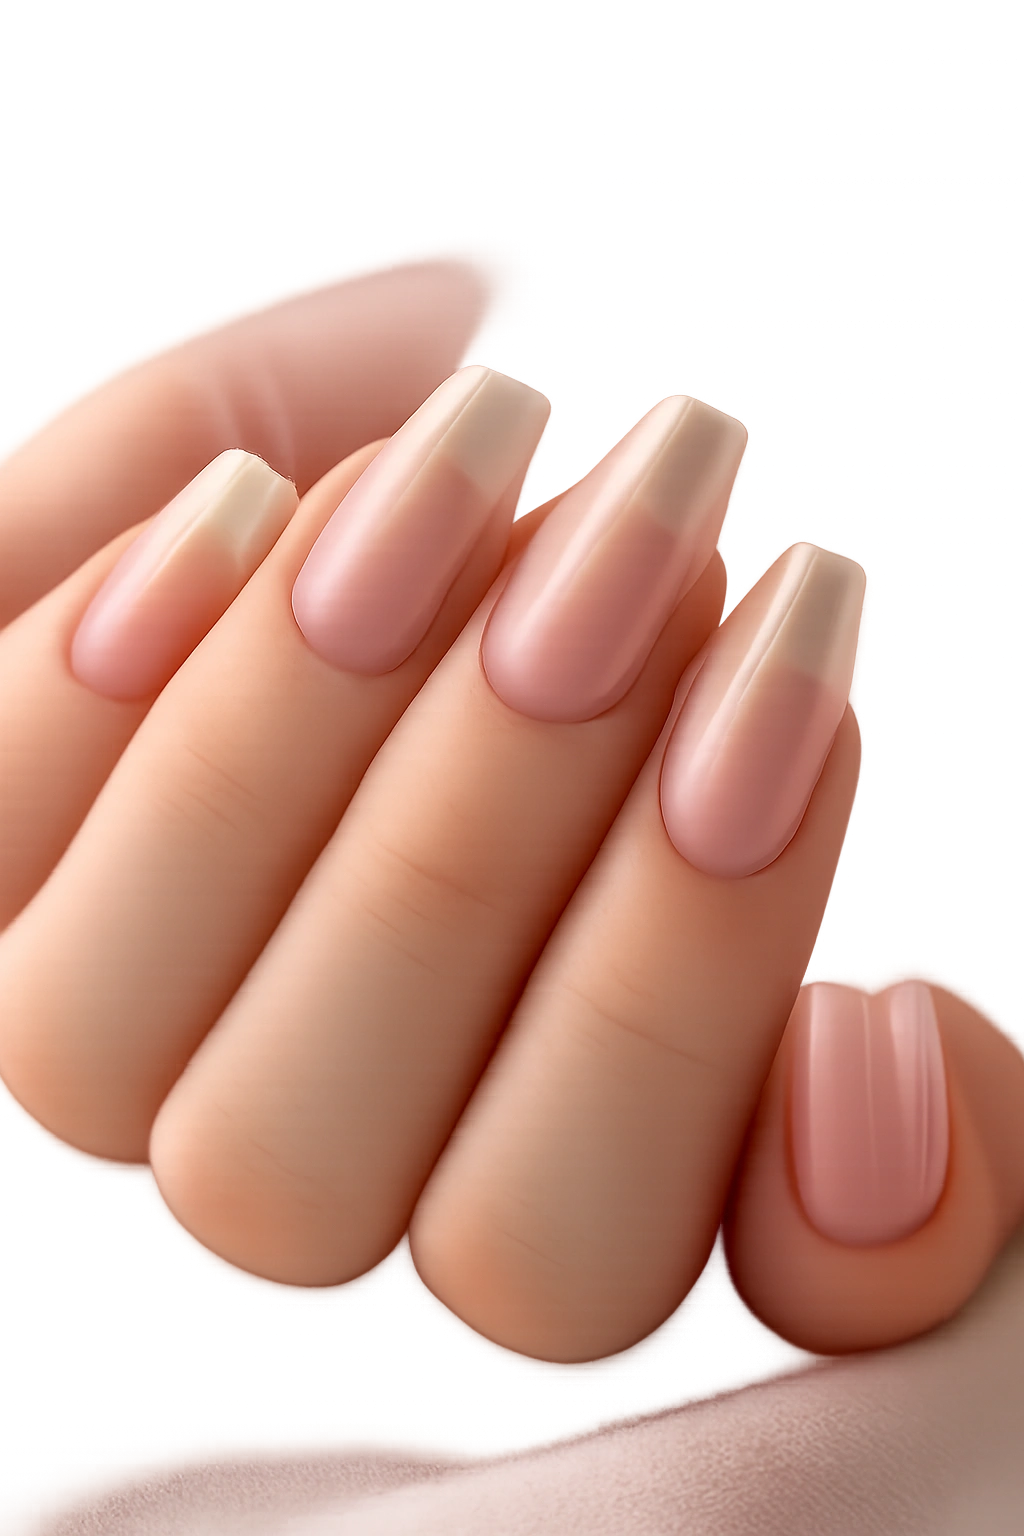
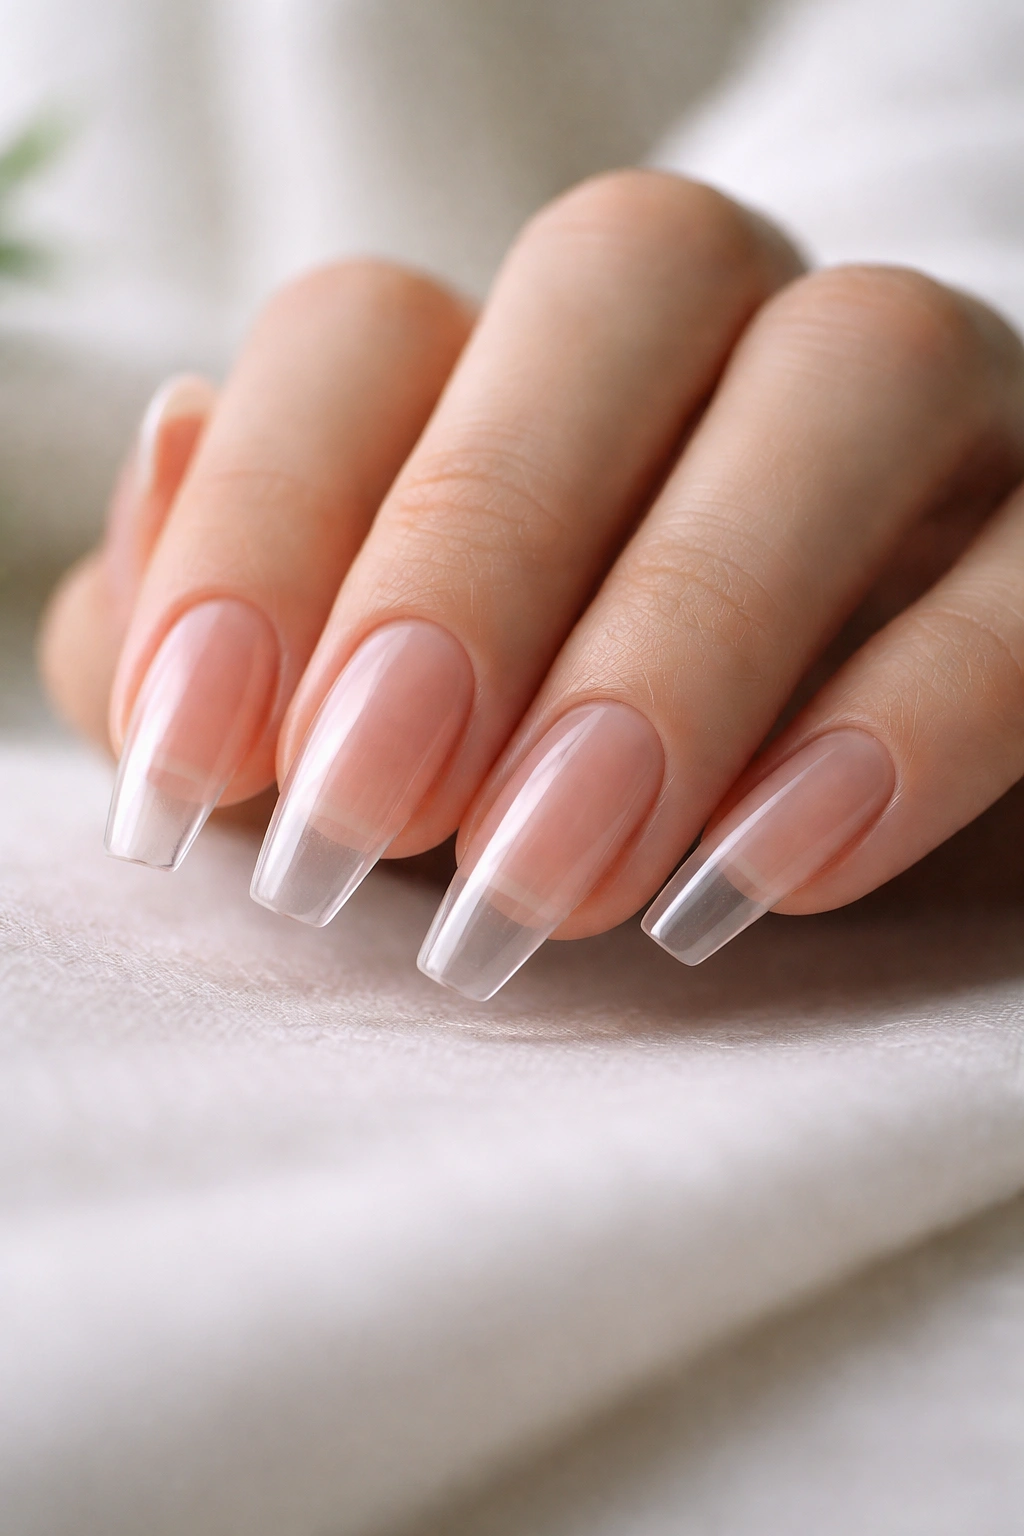
4. Sheer Pink Base With Transparent Tips
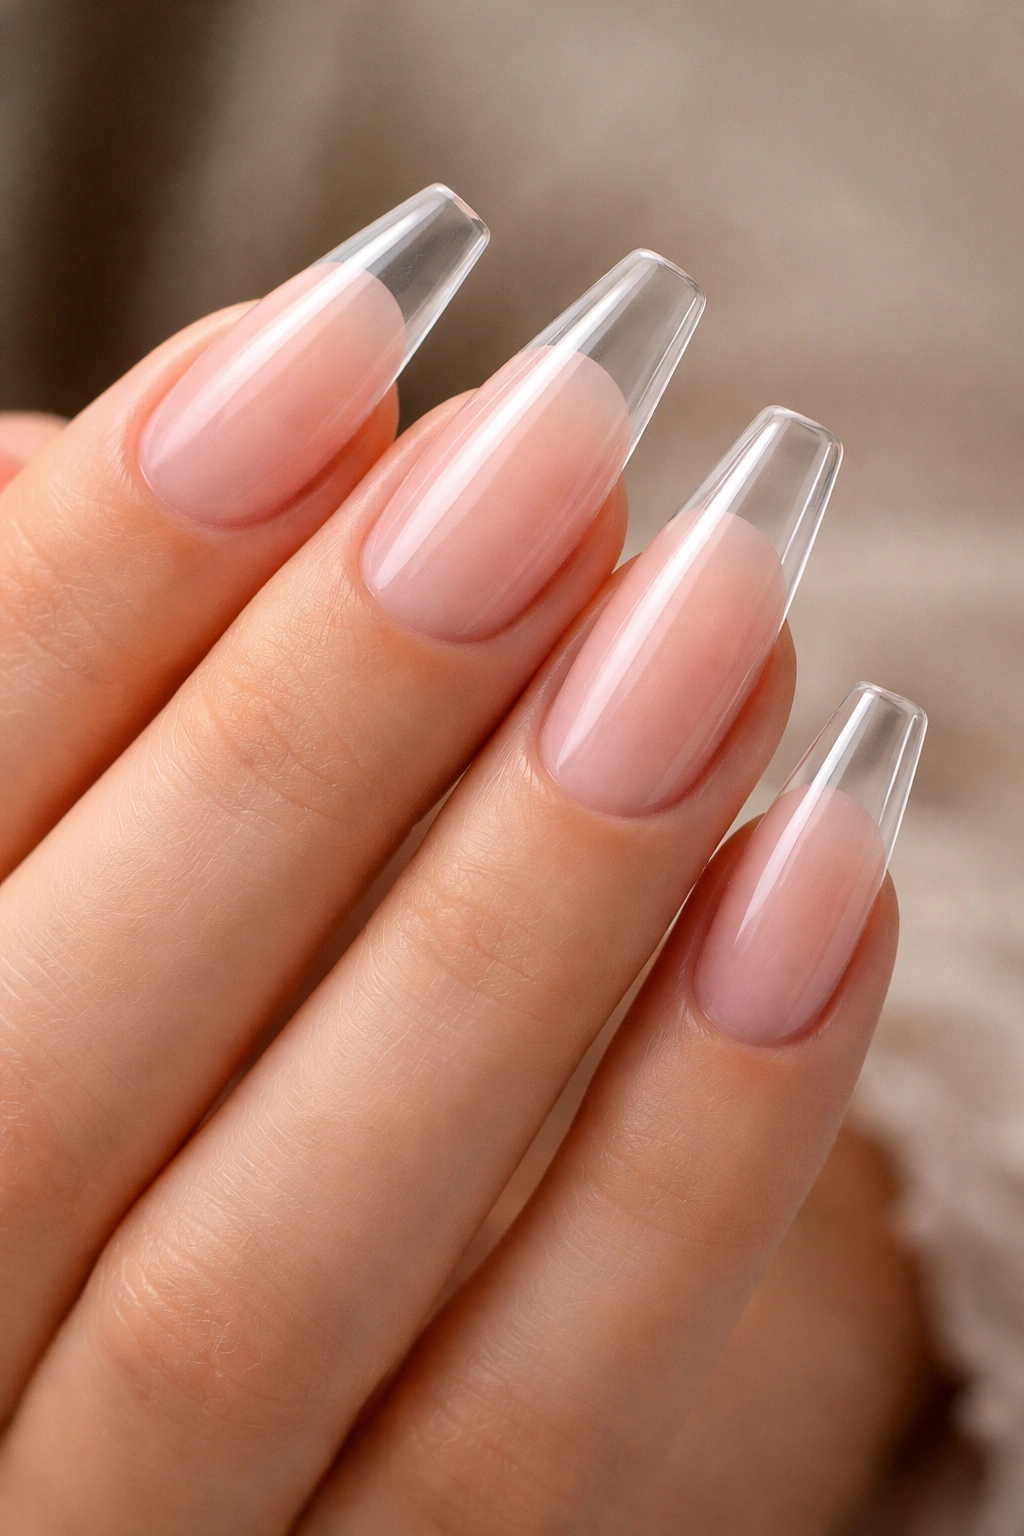
Picture a soft blush near the cuticle that fades into a fully clear tip. You still get the airy look of transparent nails, though the base has a little warmth, which makes the whole hand look fresher.
This style works because the eye reads the nail bed first. A jelly pink or sheer rose-toned base makes the growth area look healthy and neat, then the transparent tips keep the manicure light. It feels cleaner than a full nude set and softer than a stark clear one.
A salon can build this with builder gel, acrylic, or full-cover clear tips plus a sheer tint over the lower half. The fade should be gradual, not a hard line parked in the center of the nail.
A few reasons this design stays useful:
- It flatters more skin tones than cool milky white, which can look chalky on some hands.
- It hides grow-out better than full-clear nails because the base already carries color.
- It works on medium lengths without needing dramatic shape.
- It still reads minimal even with glossy topcoat and jewelry.
You’ll see this design called a baby boomer variant in some salons, though the clear tip changes the feel. Less bridal, more clean and modern.
5. Micro White French Edge
A micro French line is where restraint pays off. On a clear ballerina shape, the white edge should look more like a whisper than a band—about 0.5 to 1 millimeter thick on most nail lengths.
Anything chunkier and the design stops feeling minimal. That is the whole danger with French tips on transparent nails. A thick line steals the shape. A fine line sharpens it.
I especially like this on medium-length sets because the straight edge of the ballerina tip gives the white line a crisp finish without needing extra decoration. The contrast between clear body and narrow white tip also makes the nails look cleaner from a distance. You notice the outline first, then the transparency.
There is one catch. Precision matters here more than with a standard French manicure. On an opaque nude base, a tiny wobble can disappear into the color. On a glass-clear nail, that line is exposed. If your tech hand-paints French tips, ask to see one nail before the whole set gets finished.
A bright cool white gives a sharper, more editorial look. A soft ivory reads gentler and pairs better with gold jewelry.
6. Nude Sidewall Frame
Unlike a standard French tip, a nude frame doesn’t sit across the whole edge. It traces the sidewalls and tip perimeter with a hair-thin beige, taupe, or blush outline, leaving the center of the nail transparent.
That small change gives you two things at once: structure and negative space. The outline sharpens the ballerina silhouette, while the clear center keeps the design open and light. If you want your nails to look longer without adding more length, this is one of the smartest choices in the bunch.
I love this design on medium nails because it creates definition without looking busy. It also plays well with different undertones. A peach-beige frame warms the hand. A cooler taupe line feels quieter and more graphic.
Who gets the most from it?
- Someone who finds full-clear nails a little stark
- Someone who wants a French effect without a solid white tip
- Someone whose nail tech is good with fine line work
- Someone who wears neutral clothes and wants the manicure to echo that
Ask for the frame to stay ultra-thin and pulled tight to the perimeter. If the outline gets thick, the nail starts reading outlined rather than refined.
7. Frosted Matte Clear Ballerina
Matte topcoat on a clear nail sounds wrong until you see it. Then it makes complete sense.
A frosted matte ballerina nail looks like sea glass or etched acrylic—soft, diffused, a little cool. You lose the wet shine of a standard clear set, though you gain texture and mood, which can make the manicure feel more deliberate than plain gloss.
Where it looks best
This finish shines on medium or long nails with a clean apex, because matte surfaces show lumps and uneven filing even faster than glossy ones. The surface has to be smooth before topcoat goes on. No shortcuts.
What to watch for
- Matte clear nails can pick up makeup, self-tanner, and denim transfer more easily than glossy sets.
- The finish may wear shiny at the tips first, especially if you type or open cans with your nails.
- A soft milky base underneath often looks better than a fully transparent base with matte on top.
My take: if glossy clear nails feel too bare to you, matte is one of the fastest ways to add personality without adding art.
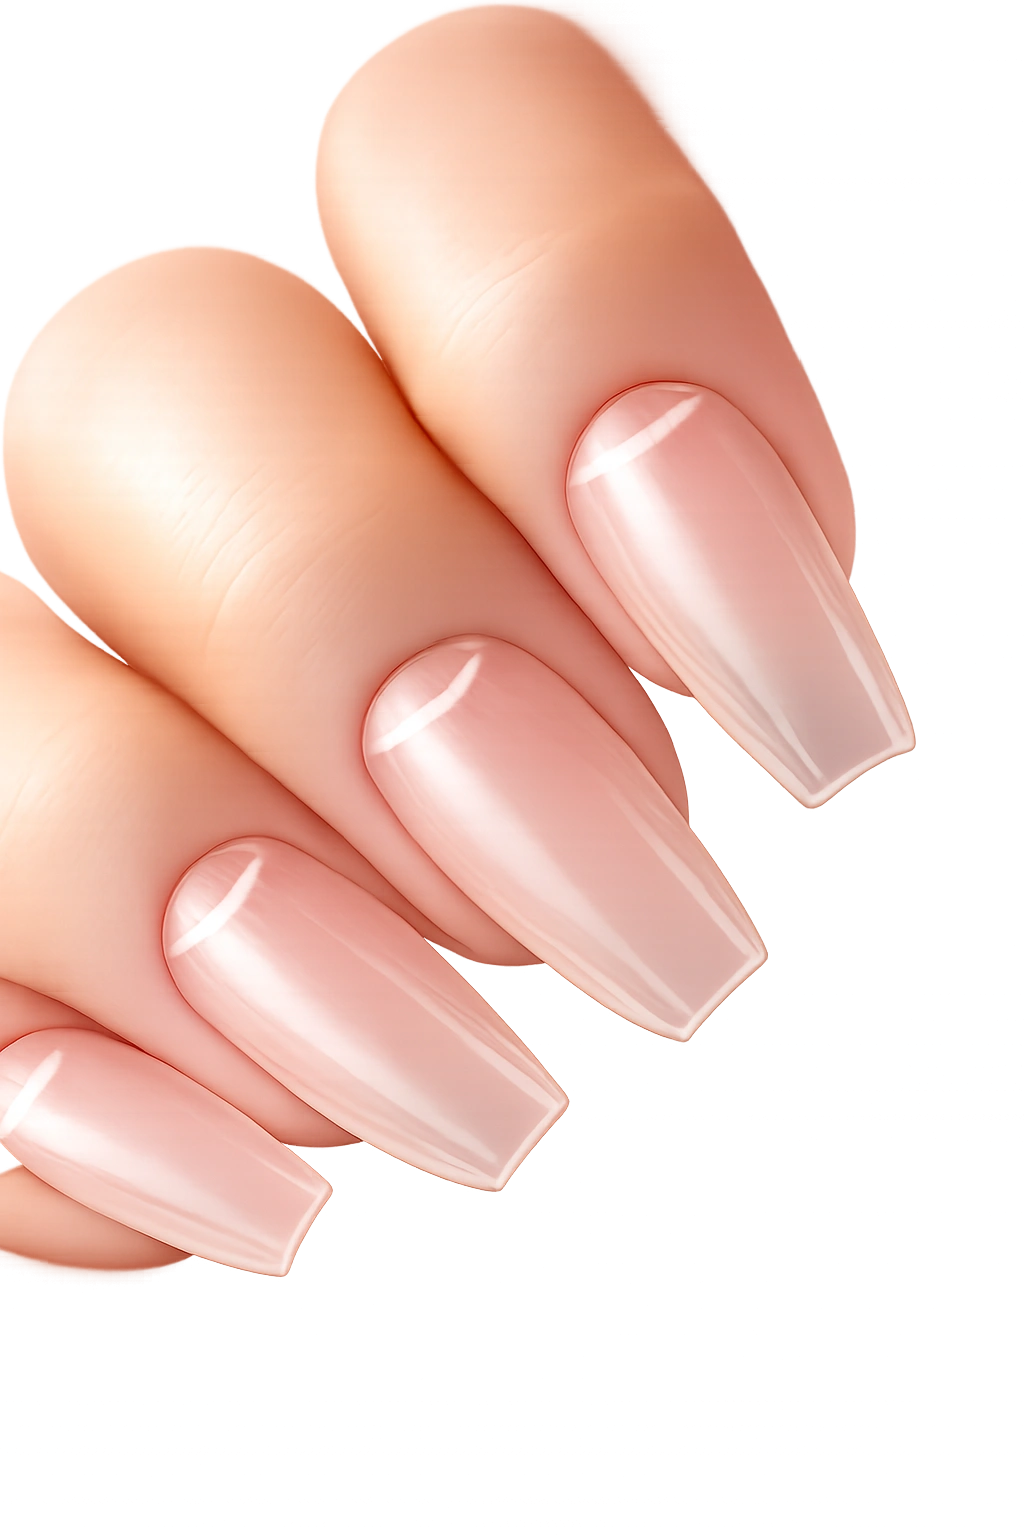
8. Clear Jelly Nude Wash
One coat of jelly beige can warm up transparent nails in seconds. That is the whole charm of this style.
Instead of leaving the enhancement fully clear, you float a sheer nude tint over the entire nail, enough to soften the transparency while still showing light through the tip. Think tinted lip balm, though for nails. The effect is cleaner than a full nude polish because the natural depth stays visible underneath.
I like this choice on shorter ballerina shapes and natural-looking extensions. It smooths the look of the nail plate, tones down any bluish or gray cast that some clear products can show on cooler skin, and it makes the manicure feel finished even without art. If your hands tan unevenly through the year or you switch jewelry colors often, a jelly nude is easier to live with than a strong pink.
The color matters. Beige with a drop of peach suits warmer skin. Rosy beige can look better on pink or neutral undertones. Going too opaque ruins the point, so ask for one translucent coat, then stop unless the first pass disappears completely.
Sometimes less polish gives you more manicure. This is one of those times.
9. Negative-Space Half-Moon Cuticle Detail
Why does a tiny half-moon near the cuticle make a manicure look sharper? Because it creates intention at the base, which is where clear nails often feel unfinished.
A negative-space half-moon leaves a small crescent of pure transparency or bare-looking product at the cuticle area, while the rest of the nail gets a milky wash, jelly tint, or fine outline. It is subtle from far away. Up close, it gives the set structure.
This design also handles grow-out well. Since the cuticle area already has visual separation, the new growth doesn’t crash into the design the way it can with a dense base color. On a ballerina shape, that little moon pairs nicely with the straight tip because both create clean geometry.
Best way to wear it
Use the half-moon with one other restrained detail only—maybe a milky base, maybe a fine French edge, maybe a chrome glaze. Stack too many elements onto it and the manicure loses that crisp, airy feel.
The half-moon should stay small, usually 2 to 3 millimeters deep at the center, and it should follow your natural cuticle curve. If the curve is too wide or too flat, it looks pasted on.
10. Single Crystal Accent on the Ring Finger
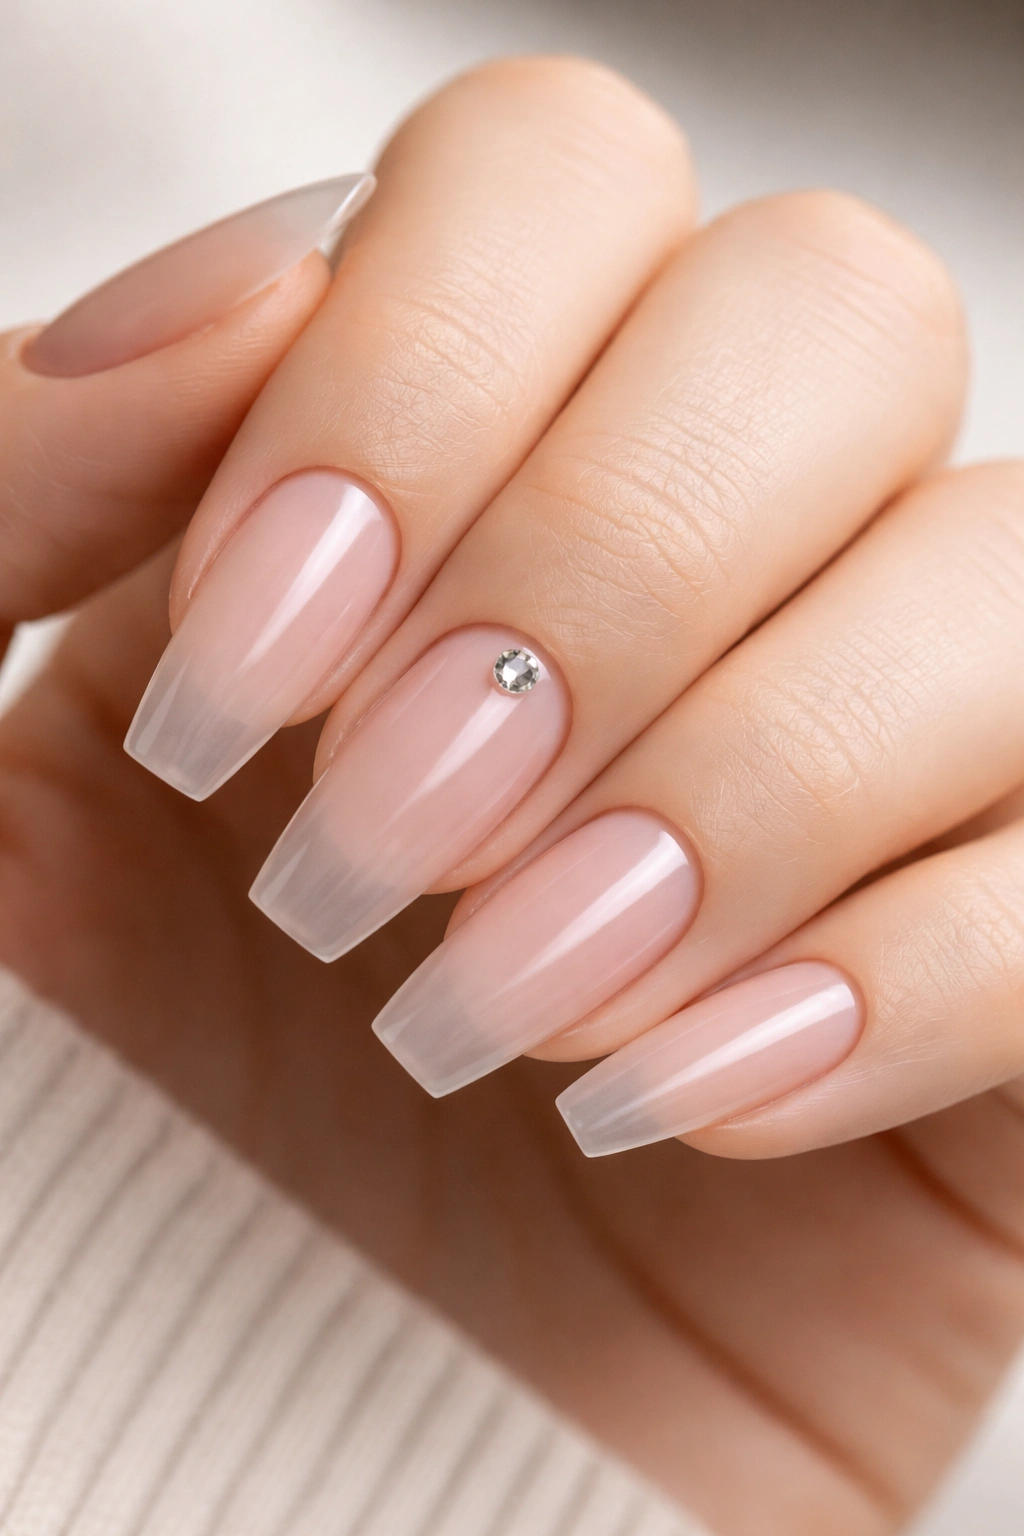
I used to think tiny crystals had no place on minimal clear nails. Then I saw how good one stone per ring finger can look on a bare glassy set.
Placement is everything. The crystal should sit low near the cuticle or slightly off-center, not floating in the middle of the nail. A single 2- to 3-millimeter stone adds a small point of light without turning the manicure into event nails.
This works best when the rest of the set stays almost empty. No foil, no chunky French, no marbling. The clear base does the quiet work, and the stone acts like jewelry built into the manicure.
A few practical notes:
- Round crystals look softer than square ones on clear nails.
- Clear or pale champagne stones tend to blend better than colored gems.
- Flat-back placement near the cuticle snags less than center placement.
- Two accent nails are usually enough. Ten starts looking busy.
There is a downside, and it is worth saying out loud: stones can pop off if the application is sloppy or the topcoat floods the edges instead of anchoring them. Good placement beats extra decoration every time.
11. Encapsulated Fine Silver Dust
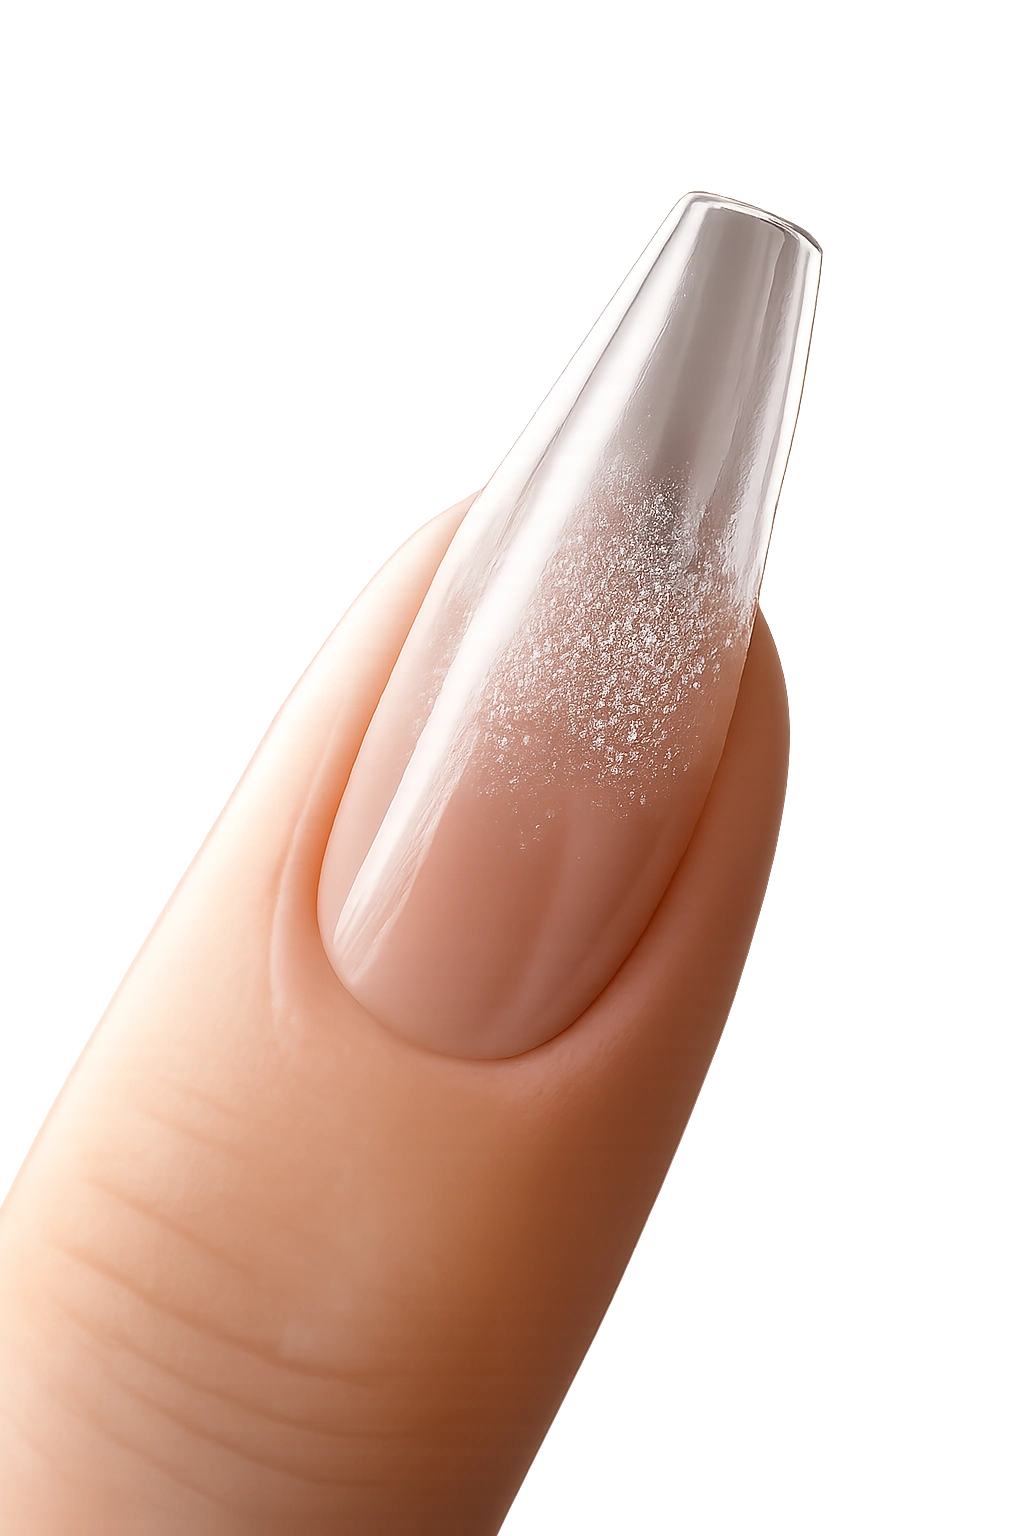
Fine silver dust works only when you hold back. Use too much and the nail turns glittery. Use a trace and it looks like light caught inside the enhancement.
That is why I prefer this design to chunky foil on clear ballerina nails. The sparkle sits inside the product, not on top of it, so the surface stays smooth and the minimal mood stays intact. Usually the best placement is toward the tip or scattered lightly through the upper third of the nail.
The size of the shimmer matters. You want micro-fine reflective particles, not hex glitter and not chunky flakes. Those larger pieces interrupt the transparency and can make the set look heavier than the shape wants.
This style tends to look strongest under evening light or in natural daylight near a window, where the silver reads as cool depth rather than obvious sparkle. Gold dust can work too, though silver keeps the result cleaner and more neutral. If you wear mostly white metals, silver is the easier choice.
I would not pair this with crystals or a thick French line. The dust already gives the eye something to chase.
12. Ice-Chrome Sheen Over Clear Nails
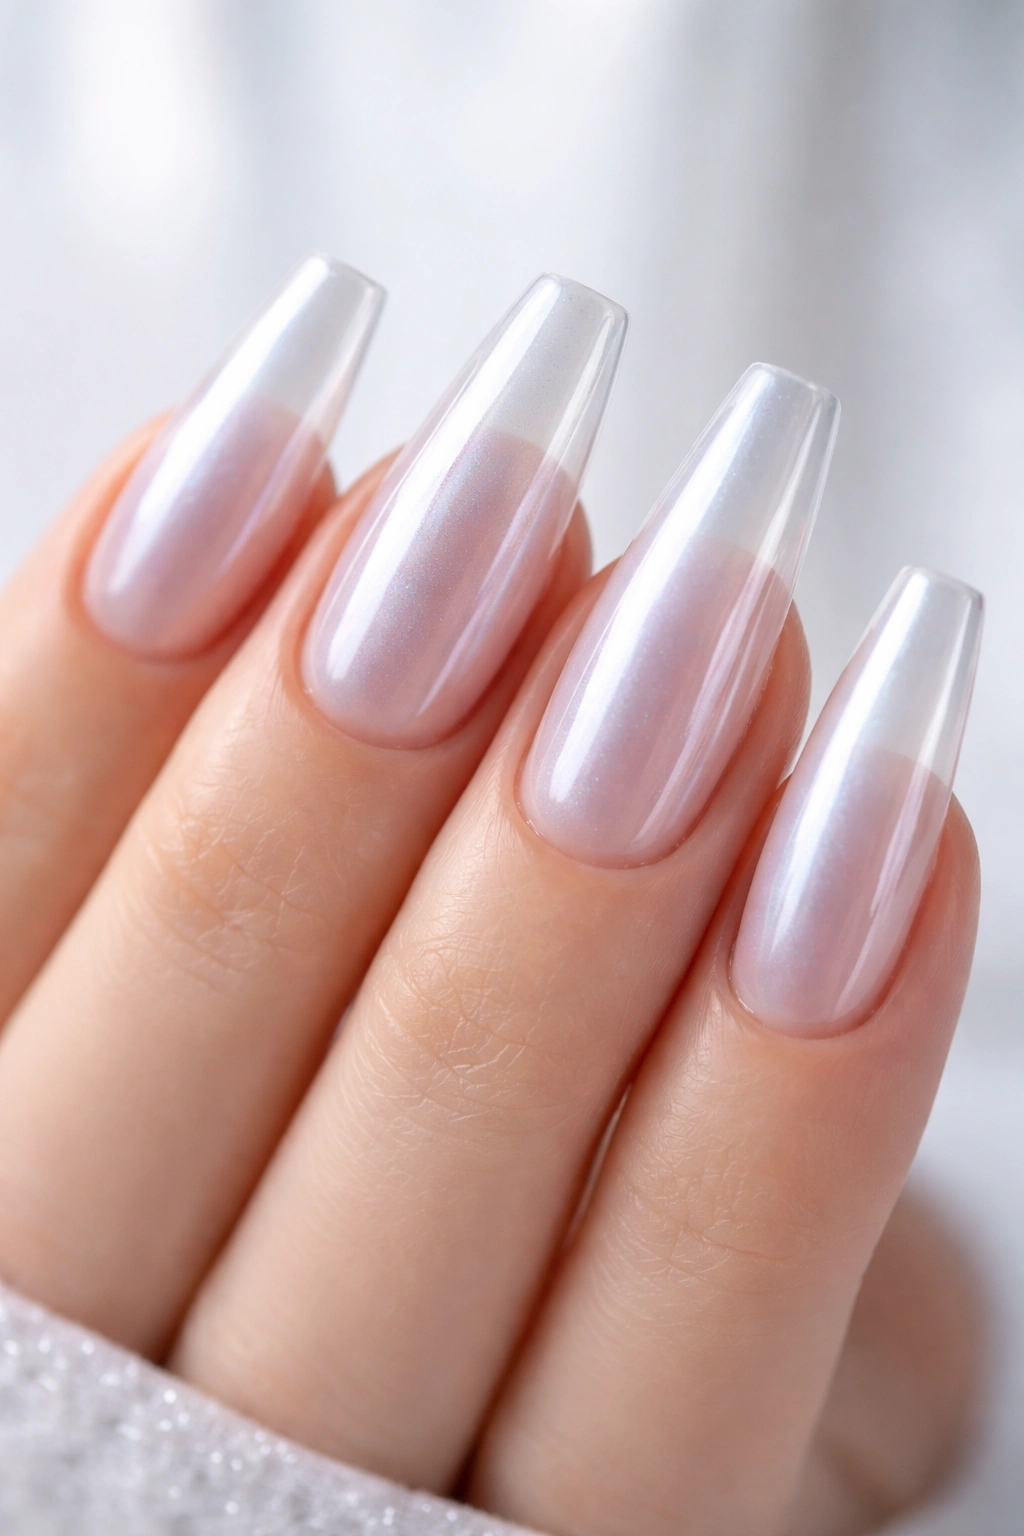
Compared with mirror chrome, an ice-chrome finish whispers instead of shouting. You still get reflection, though it lands as a sheer pearl glaze over a transparent base rather than a full metallic surface.
That distinction matters. Mirror chrome can overpower a ballerina shape fast, especially on longer clear extensions. Ice chrome stays lighter. It looks almost wet in some angles, icy in others, and on a good day it gives the nail a faint lilac or blue cast without reading colorful.
I think this design works best on a clear or milky-clear base with no extra art. Let the surface do the talking. A micro French can work, though anything more starts fighting the sheen.
Who should pick this one?
- Someone who likes plain clear nails but wants a finish with more life
- Someone who wears silver jewelry and cooler neutrals
- Someone who prefers long ballerina shapes with a crisp, slim profile
Ask for a thin chrome layer rubbed over a non-wipe topcoat, then sealed again. If the chrome gets packed on too heavily, you lose the transparency that makes the design interesting in the first place.
13. Ultra-Thin Black Micro Line
A black line this thin can change the whole set. Not a thick stripe. Not graphic art all over the nail. One narrow black detail—across the tip, down the center, or hugging one sidewall—turns a plain clear ballerina manicure into something sharper.
The reason it works is contrast. Clear nails can sometimes drift into “unfinished plastic” territory if the shaping is only average. A single black line under 1 millimeter thick adds definition fast and gives the eye a clean anchor point.
Ways to place it
- Across the tip for a stripped-down French effect
- Vertically off-center to lengthen the nail visually
- Along one sidewall for an asymmetrical, graphic look
My preference
I like the off-center vertical line best on medium-length ballerina nails. It feels modern and a little severe—in a good way—without asking for much else. Pair it with a high-gloss topcoat and leave every other detail alone.
Black detail needs a steady hand. If the line has bumps or changes thickness halfway through, the manicure loses the minimal precision that makes this design worth doing.
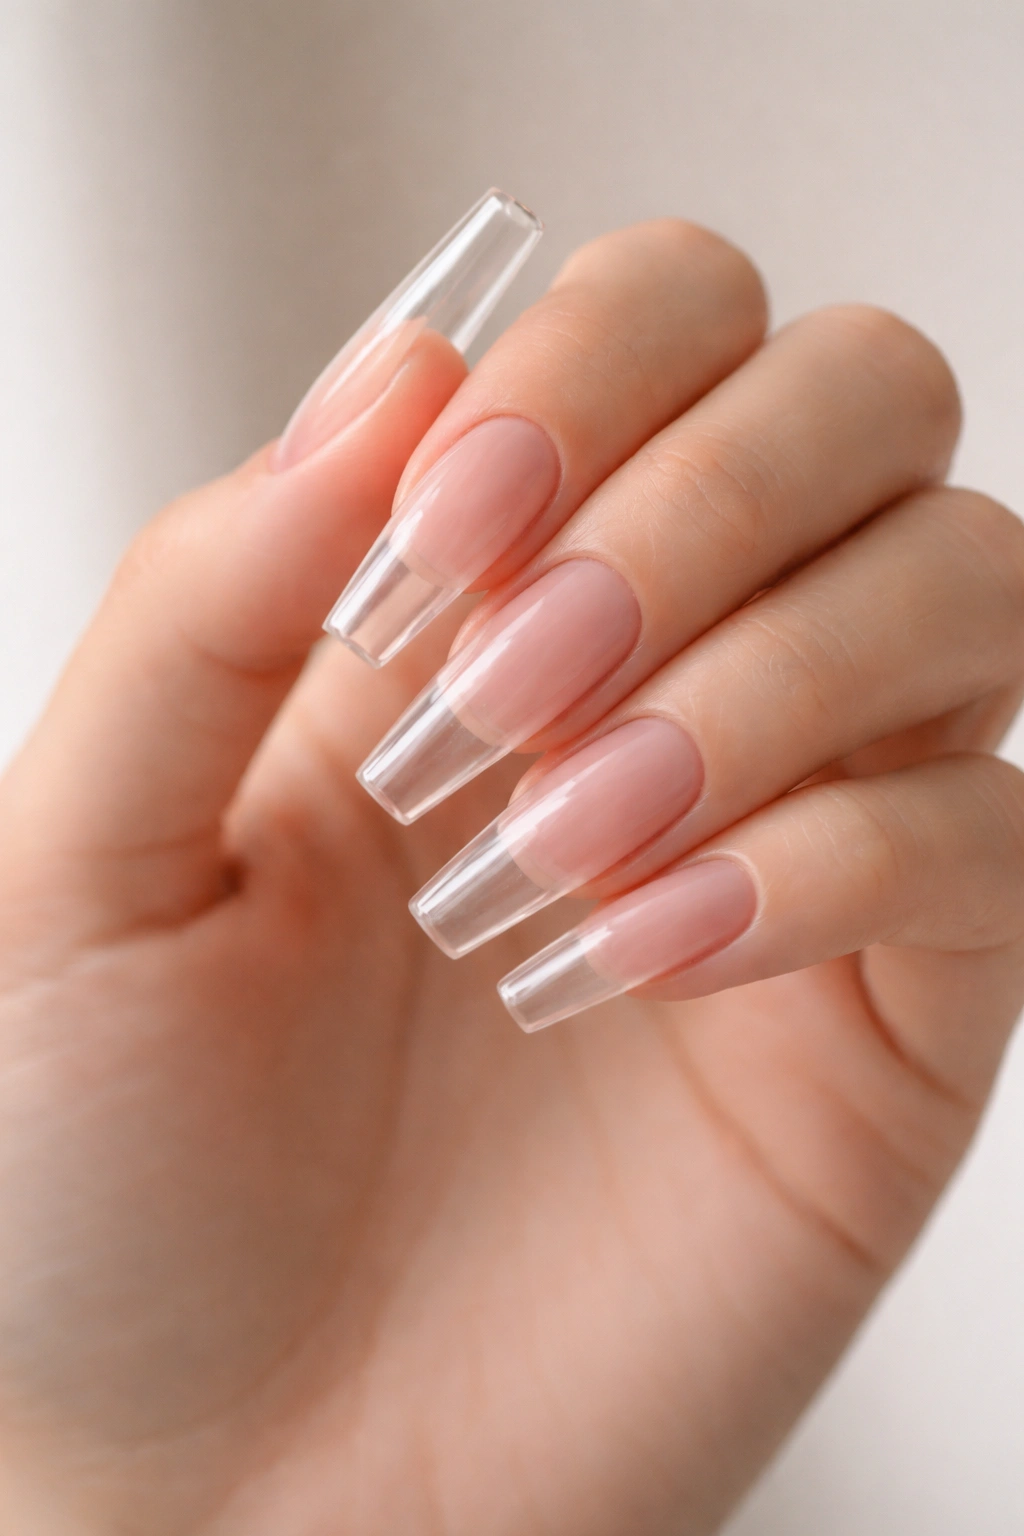
14. Bare Clear Ballerina Overlay on Natural Nails
Not everyone wants extensions. Fair enough.
A bare clear overlay keeps your natural nail length or adds only 2 to 4 millimeters of free edge, then builds a slim ballerina shape with clear builder gel or hard gel on top. The look is quiet, clean, and much easier to wear than a sculpted long set if you spend most of the day typing, cooking, lifting boxes, or dealing with kids.
I’m a fan of overlays for clear manicures because they often look more believable than long transparent extensions. Your own nail bed still shapes the base, the product layer stays thin, and the manicure moves with your real growth pattern instead of sitting like a separate object on top of the hand. That sounds small. It changes everything.
This option does ask for some natural length to start. If the nails are bitten down or the sidewalls are uneven, the ballerina shape can get hard to balance without adding extensions first. Once you have enough edge to file into a soft taper, though, an overlay can look cleaner than a full set and usually feels lighter too.
If your goal is “minimal” in the strict sense—not quiet glam, not bridal shimmer, not editorial chrome—this is one of the strongest picks on the list.
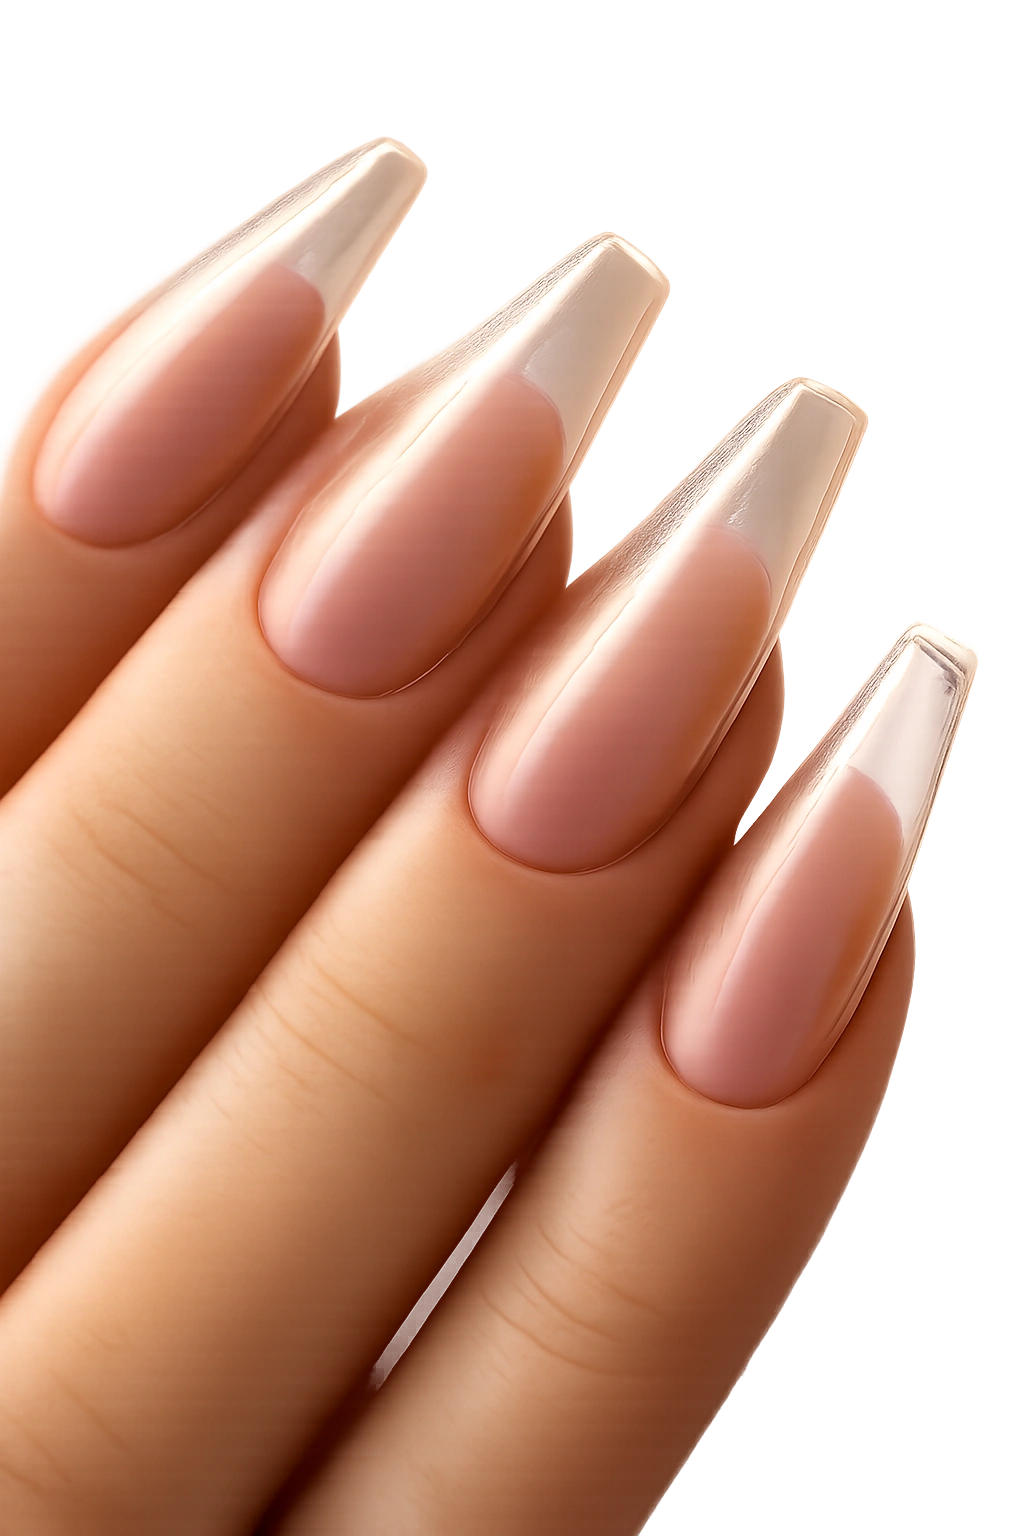
15. Clear Ombré With a Soft Nude Apex
Clear ombré with a nude apex solves two problems at once. It keeps the transparent, airy feel at the tip while giving the base enough color to make regrowth less obvious.
The fade starts around the stress area and melts outward, leaving the upper half or upper third of the nail mostly clear. On a ballerina shape, that gradient works beautifully because the straight edge catches the light while the nude apex grounds the design. It looks polished without looking painted.
A good version of this manicure needs a smooth transition. No stripe in the middle. No chalky cloud parked above the apex. The blend should feel like the nail clears up as it moves forward.
Why this one earns repeat appointments
- It stretches fill timing visually because the base already carries soft color.
- It flatters shorter fingers by creating depth through the nail plate.
- It suits both gloss and matte finishes, though gloss shows the clear tip best.
- It leaves room for one extra detail, like a tiny stone or chrome glaze, without crowding the design.
If full-clear nails feel too stark and full nude sets feel too safe, this middle ground is hard to beat.
Final Thoughts
The strongest clear ballerina nails are not the ones with the most going on. They are the ones with the cleanest shape, the clearest product, and one detail that earns its place.
If I had to narrow this list down for real life, I’d start with three: a milky clear veil, a sheer pink base with transparent tips, or a bare clear overlay on natural nails. Those designs stay wearable, photograph well without trying too hard, and forgive the little things—tiny scratches, soft regrowth, normal day-to-day wear.
Bring reference photos from the side, ask for thin tips, and do not let anyone talk you into extra art you did not ask for. Clear nails reward restraint. That is what makes them good.
