

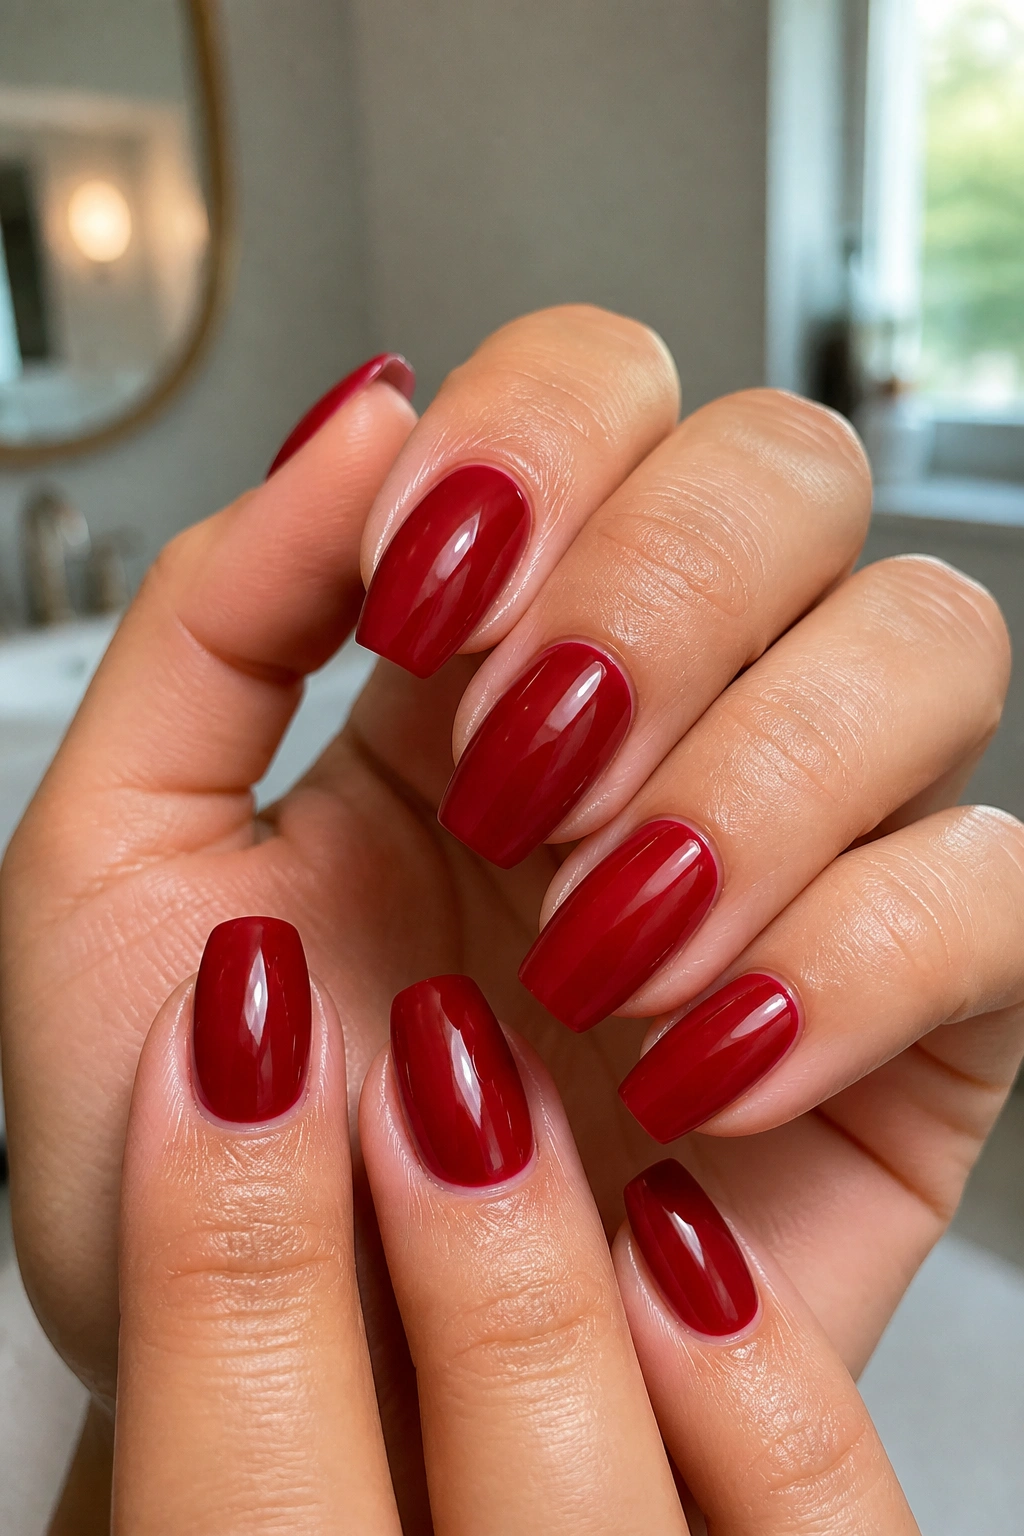
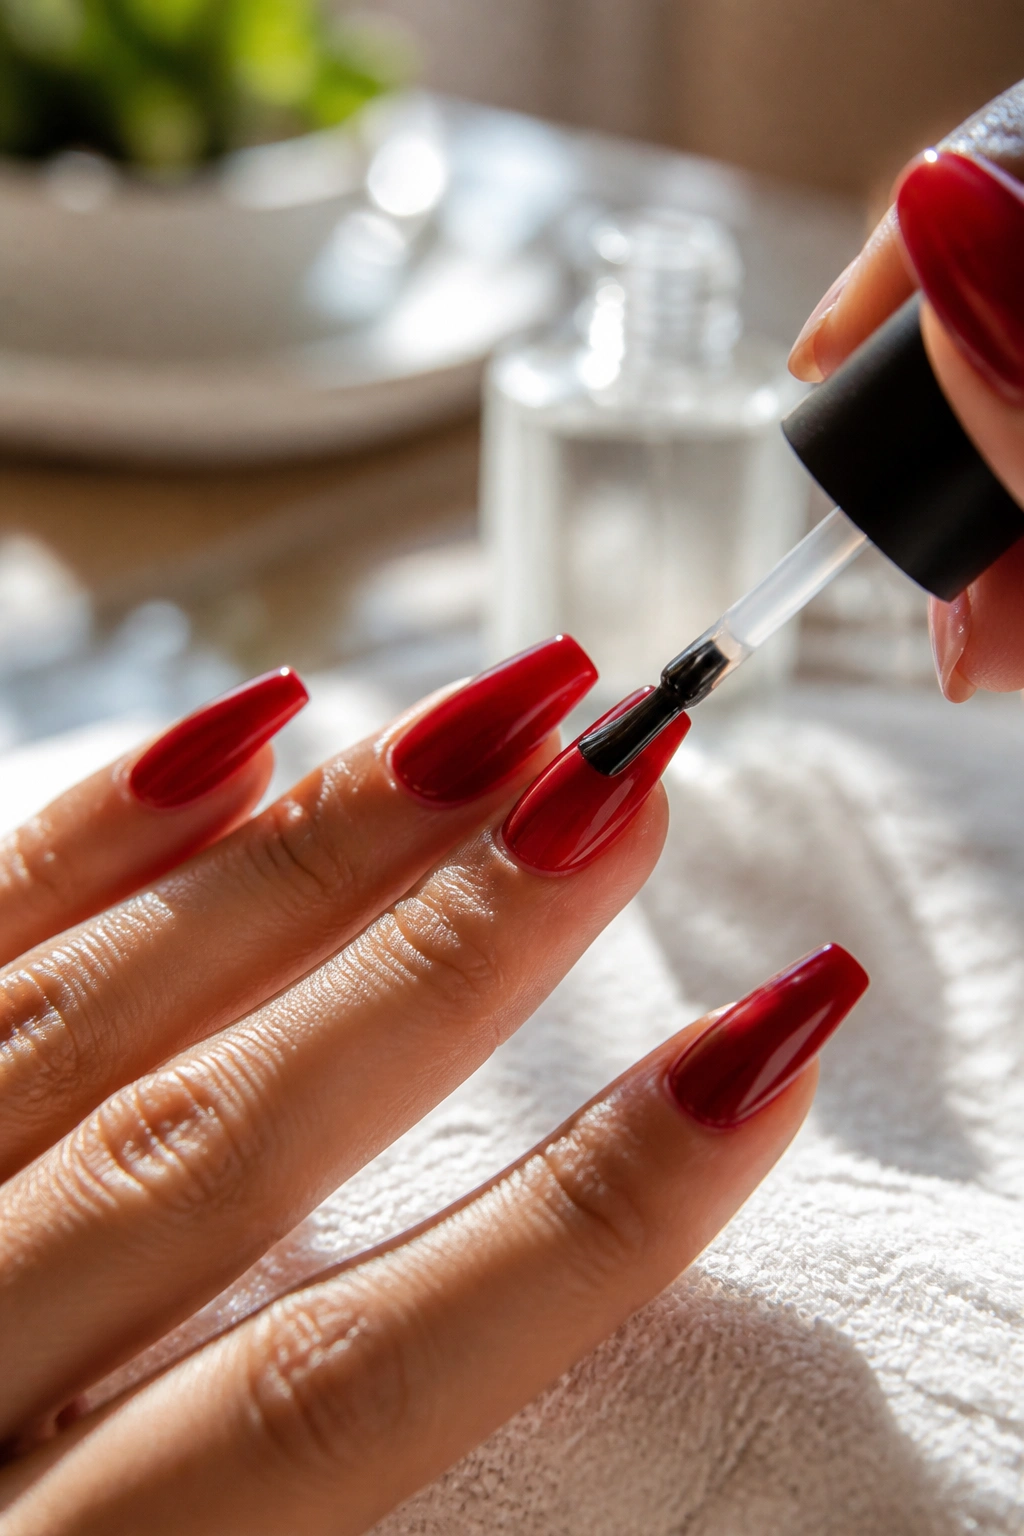
Red polish tells on you. The wrong red shows every streak, every dent, every sloppy cuticle line; the right one makes your hands look sharper the second you reach for a coffee cup. That’s why cherry red coffin nails keep earning their spot in salon chairs and saved-photo folders: they hit that sweet spot between playful and polished, juicy and a little dangerous.
Cherry red sits in a useful middle lane. It is deeper than candy apple, brighter than oxblood, and less orange than tomato red. On a coffin shape—straight sidewalls, softened square tip, enough length to feel deliberate—it has room to do its job. You get color, shape, and attitude all at once.
I’ve always thought red manicures are less forgiving than nudes, which is exactly why they’re worth doing well. A tiny flood into the sidewall can make the whole set look thicker than it is. One heavy coat can wrinkle under the lamp. Two thin coats and a crisp cuticle margin, though, and the result looks clean from every angle.
If you’re in the mood for a manicure that doesn’t disappear into the background, this is the one.
Why Cherry Red Coffin Nails Work So Well With the Coffin Shape
Some colors need nail art to stand out. Cherry red does not. On coffin nails, the shape itself becomes part of the design, and that matters more than people think. The straight edges make red look cleaner, while the tapered tip keeps the color from feeling heavy or blocky.
There’s also a proportion thing happening here. Coffin nails give red polish a longer canvas than a round or squoval shape, so the color reads as sleek instead of stubby. Even a medium length—about 1/4 inch past the fingertip—can make fingers look longer when the sidewalls are filed evenly and the tip is not too wide.
Shade matters too. Cherry red usually has a blue-neutral base, which tends to flatter more skin tones than orange-heavy reds. If your hands pull pink, a true cherry keeps them from looking flushed. If your skin has golden or olive tones, that same depth helps the manicure look rich rather than loud.
And there’s a practical upside. Coffin nails hold detail well. A thin French line, a half-moon, a chrome finish, one crystal arc—those touches have enough room to breathe here, which is why this shape can carry both plain color and art without looking crowded.
How to Choose the Right Length, Finish, and Red Tone Before You Sit Down
What trips people up is not the color. It’s the combination.
A cherry red set that looks balanced on a short coffin can feel harsh on an extra-long tip if the red is too dark or the side taper is too severe. On the flip side, a syrupy jelly finish may look airy on medium nails but can seem unfinished on a cropped shape unless the tech builds enough structure underneath.
Pick your length first
If you type all day, open cans with your own hands, and don’t want to relearn basic life, ask for short-to-medium coffin nails. That usually means the free edge extends 3 to 6 millimeters past your fingertip. You still get the shape, though you lose some room for complex art.
Long coffin nails give you more drama and more space. They also need better balance. Ask for a visible apex—the highest point in the nail—so the set does not feel flimsy.
Then decide on finish
Finish changes the whole mood of cherry red.
- Glossy cream looks crisp, classic, and sharp in photos.
- Jelly or syrup finishes let light pass through the color, which feels lighter and softer.
- Matte top coat turns bright cherry into something moodier and more velvety.
- Chrome or magnetic finishes add movement, which helps if you want red with a little more edge.
What to say at the salon
A few words make the appointment go better.
- Ask for straight sidewalls with a soft coffin tip, not a wide square edge.
- If you want a clean red, mention that you prefer a tight cuticle line with no flooding.
- For long wear, ask for builder gel or a structured overlay under gel color.
- If your nail beds are small, request a slightly slimmer tip so the red does not look bulky.
Tiny changes. Big payoff.
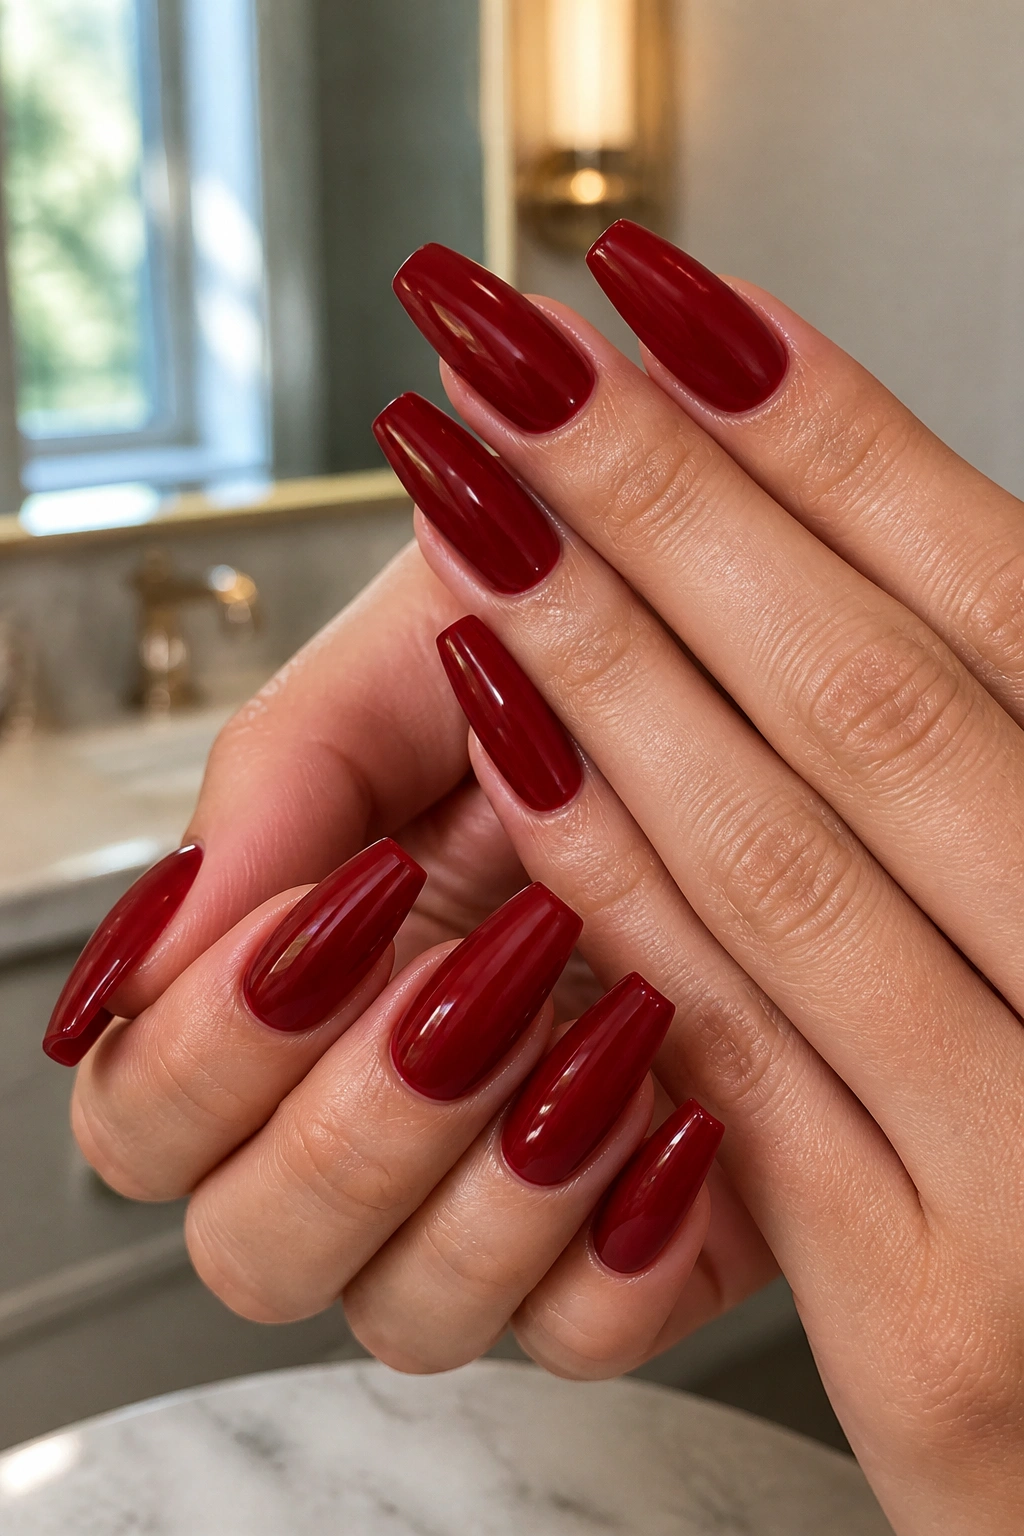
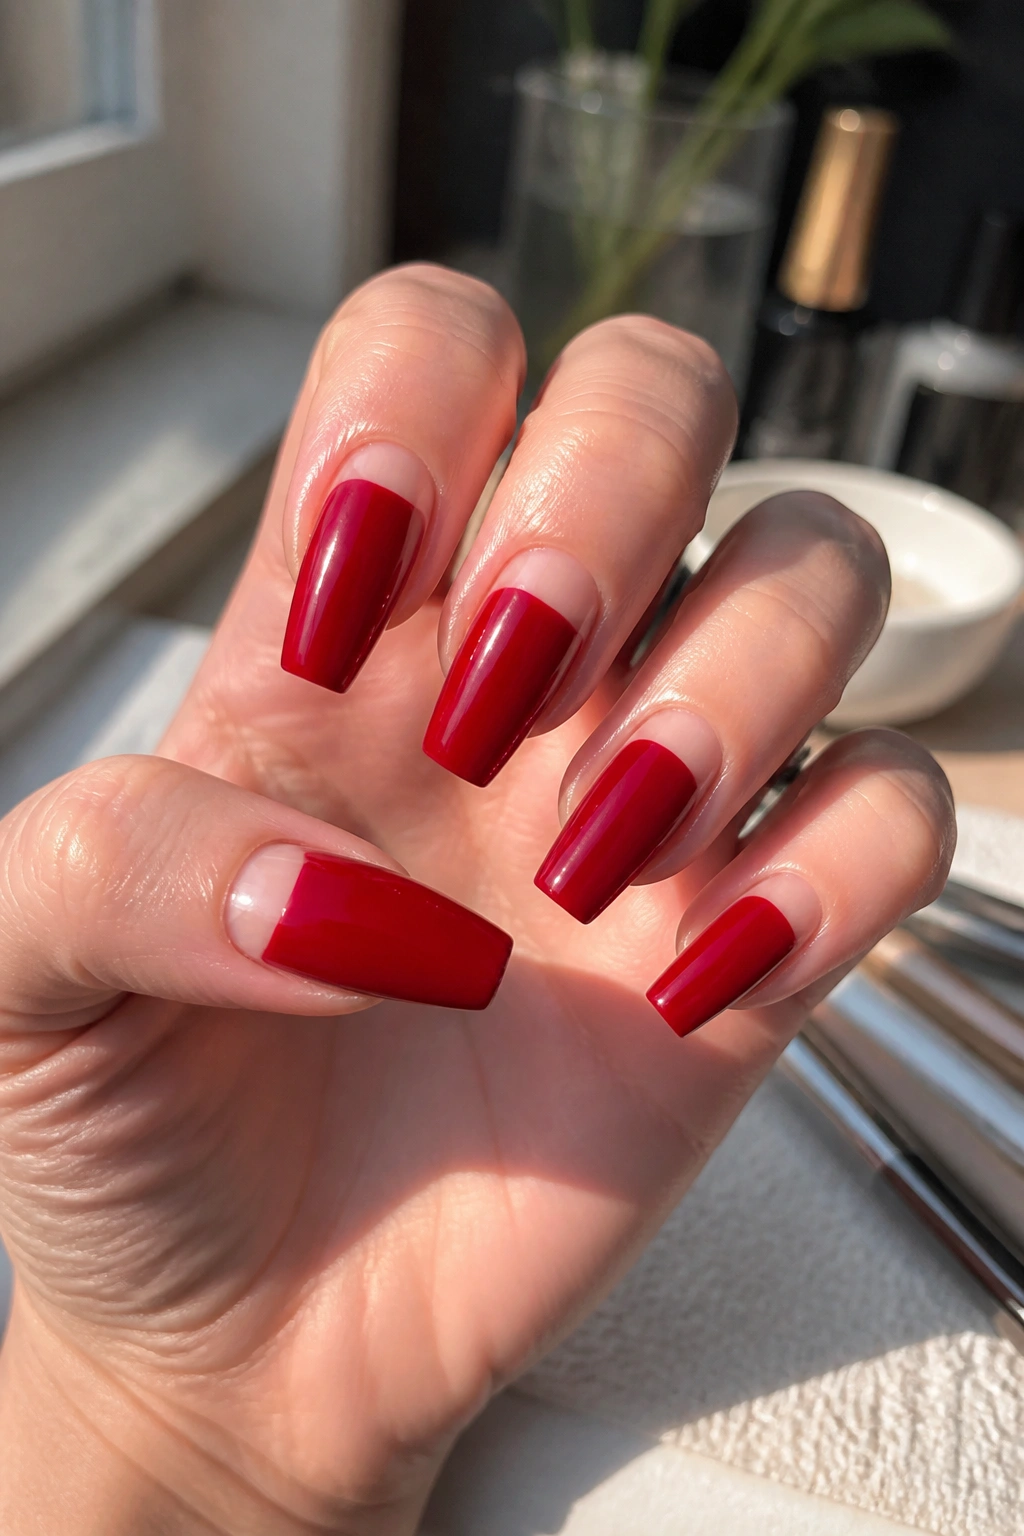
1. Classic High-Gloss Cherry Red Coffin Nails
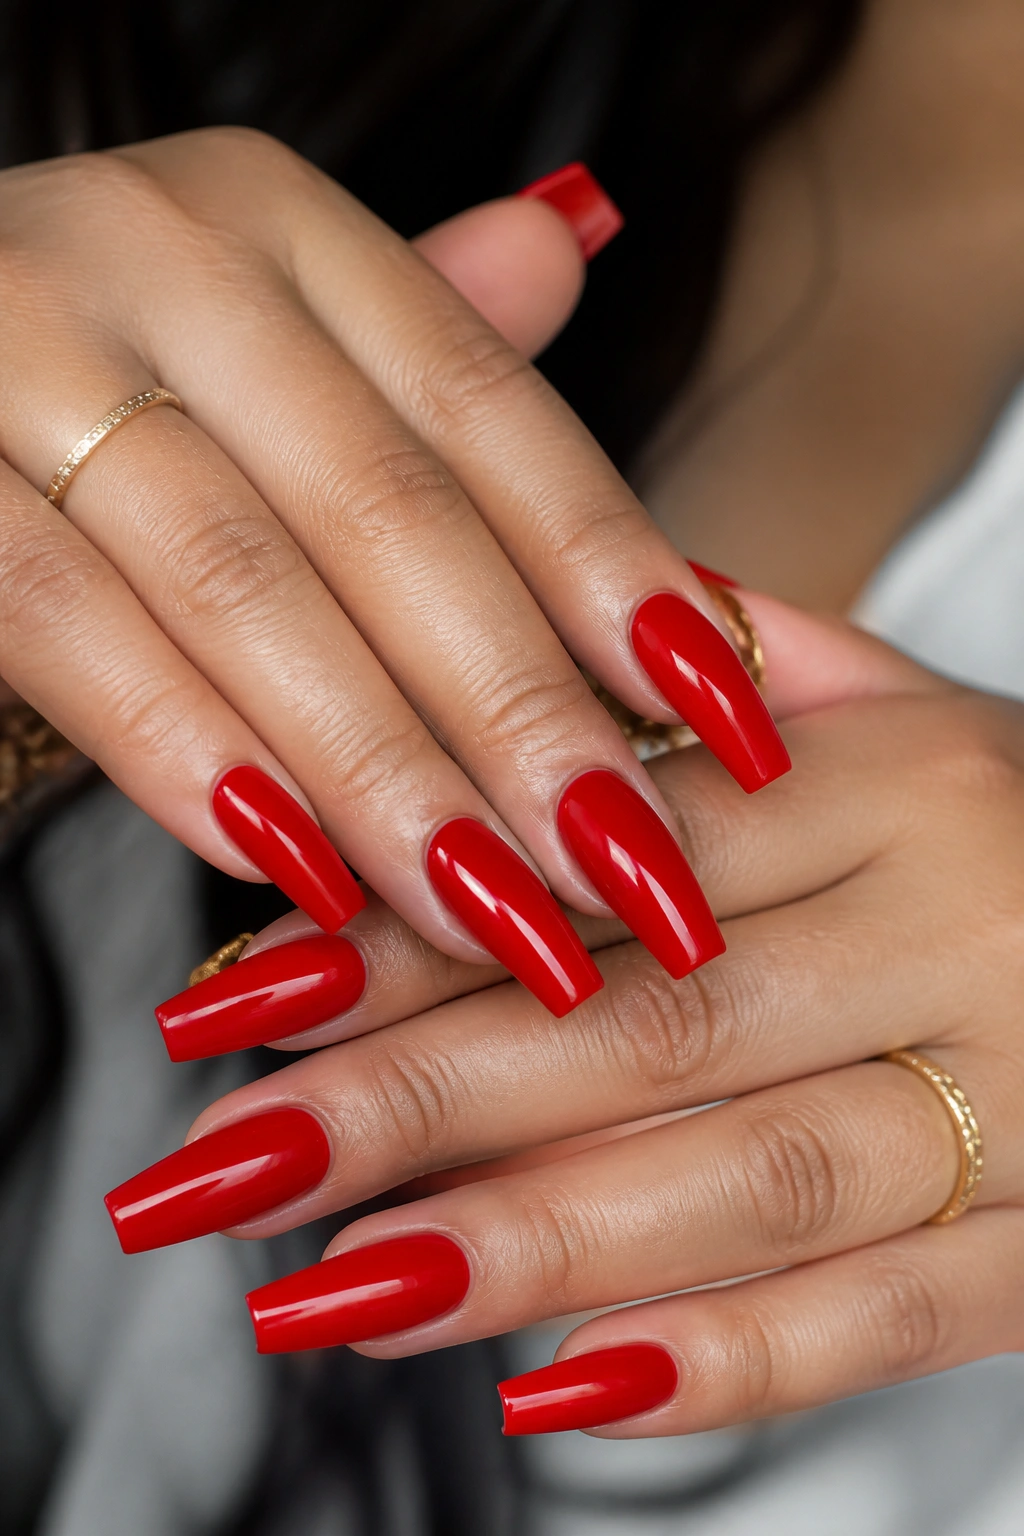
Nothing beats a full set of glossy cherry red when the shape is done right. No gems, no foil, no accent finger trying to steal the spotlight. Just saturated red from cuticle to tip and a glassy top coat that makes the color look almost wet.
This style works because coffin nails already have built-in structure. The straight edges give the color a tailored feel, and the shine keeps the red lively instead of flat. I’d choose this on a medium coffin length first. You get enough space for the color to stretch out, but not so much length that the manicure starts wearing you.
Application matters more here than in almost any other red design. You want two thin coats, not one thick one, and the free edge needs to be capped so the tips do not chip on day three. If you’re doing gel, a high-shine top coat with a hard finish holds the look longer than a softer, flexible one.
There’s also something nice about how direct this set feels. It goes with denim, tailoring, gold jewelry, silver rings, bare skin, a full face, no makeup. You do not have to style around it. It becomes the sharpest thing on your hand and stays there.
If you want one red manicure that never feels like a compromise, start here.
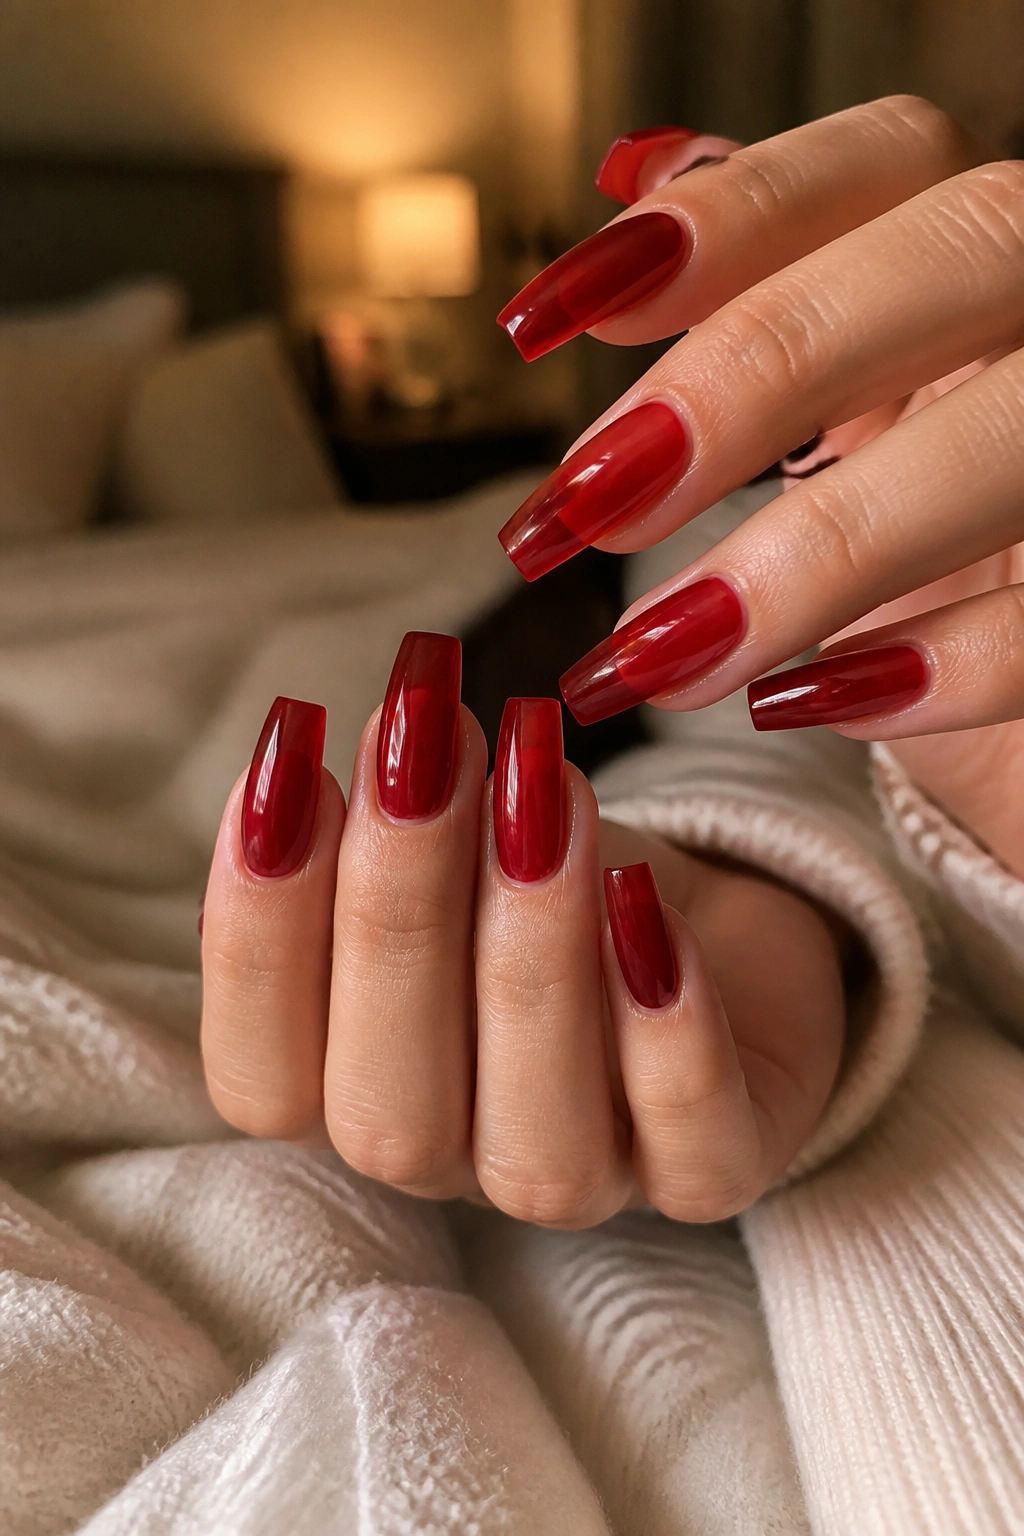
2. Soft Jelly Cherry Red With Glassy Tips
Want red without the weight of an opaque cream finish?
A jelly cherry red gives you that syrupy, translucent look where light slips through the nail instead of bouncing off a solid wall of pigment. On coffin nails, that softness keeps the shape from feeling too severe. You still get color, but it feels lighter, almost like stained glass.
Why the jelly finish works
Jelly reds are best when the shade stays rich in two to three sheer coats. One coat can look patchy. Four coats can kill the whole point. The sweet spot is enough pigment to read as cherry from arm’s length, with a faint peek of structure underneath.
This is also a smart choice if you like your nails a little less formal. Glossy cream red can look dressed up even with a T-shirt. Jelly red relaxes the mood.
What to ask for
Tell your nail tech you want a transparent cherry gel, not a milky red and not a stained-glass shade that pulls pink. If your natural nails have ridges, ask for a smooth overlay first—jelly finishes show texture more than opaque polish does.
One warning: chips and scratches stand out on sheer finishes because the surface catches light differently. A fresh top coat after 5 to 7 days helps.
3. Cherry Red Micro French on a Milky Nude Base

A micro French in cherry red is one of the smartest ways to wear red if you like clean nails but still want color. You get that narrow hit of red at the tip, which makes the coffin shape look extra precise, while the milky nude base keeps the whole set airy.
The line needs to stay thin. On most hands, 1 to 2 millimeters is enough. Any thicker and the manicure starts sliding into a standard French, which can look heavier on a coffin tip.
What makes this design click
The contrast is the point. A soft nude base smooths the nail bed, then that cherry edge does all the visual work. Because the red lives at the tip, the nails often grow out more gracefully than a full-color set.
Ask for these details
- A sheer pink-beige or milky nude base that matches your nail bed, not one that turns gray on your skin.
- A crisp smile line with equal thickness across all ten nails.
- Coffin tips that are slim at the free edge, so the French line looks neat, not chunky.
- A high-gloss top coat to keep the red edge looking sharp.
Salon note: this design looks strongest on medium or long coffin nails, where the tip line has room to show.
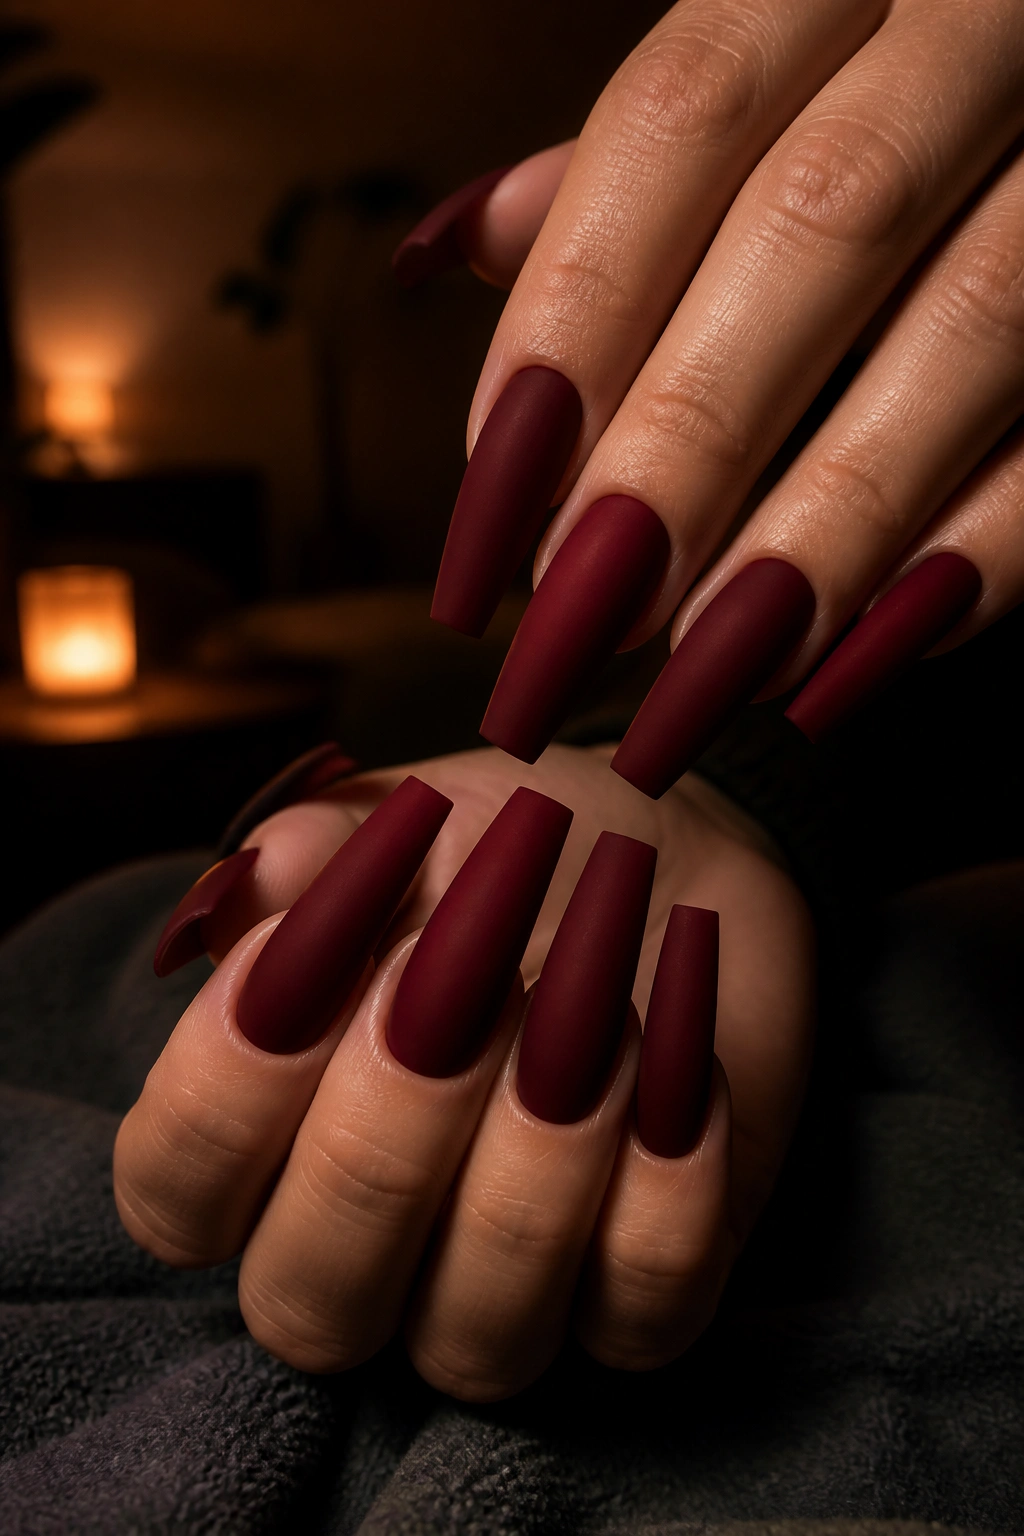
4. Matte Dark Cherry Red With Sharp Coffin Ends
Matte red is fussier than glossy red—and that’s exactly why it can look so good.
A matte dark cherry set shifts the color away from candy and toward velvet. The shine disappears, the depth comes forward, and the coffin shape looks a little stricter. If glossy cherry feels too polished for your taste, matte often lands in a better place: quieter, moodier, less sweet.
Prep has to be on point. Matte top coat does not hide dents, lint, or uneven filing. It broadcasts them. The surface needs to be smooth before color goes on, and the cuticle area needs a clean sweep because dull finishes make rough edges easier to spot.
I like this look best on longer coffin nails with a narrow taper. Matte absorbs light, so a short wide nail can lose definition fast. Give the shape enough length and the effect changes; the nails start looking carved instead of painted.
Skip cuticle oil right before photos if you want that powdery, velvety finish to read clearly. Oil makes matte turn patchy at the edges. Wear the oil at night, clean the surface in the morning, and the set looks better.
5. Cherry Red Half-Moon Nails With a Bare Cuticle Crescent
Picture an old-school manicure cleaned up for a coffin shape. That’s the half-moon version: a bare or pale crescent near the cuticle, then cherry red covering the rest of the nail.
This design has two things going for it. First, it looks intentional in a way full-color red sometimes doesn’t; the negative space breaks up the pigment and gives your eye a place to rest. Second, it grows out better than you’d expect because that open area near the cuticle softens the regrowth line.
A half-moon needs balance. Too large, and the nail starts looking short. Too tiny, and it seems like a mistake instead of a design choice. On most coffin nails, a crescent that sits 2 to 3 millimeters deep near the cuticle works well.
Quick details that make it cleaner:
- Match the moon shape to your natural cuticle curve, not a random circle.
- Keep the cherry red opaque and glossy so the contrast feels sharp.
- Use this on medium lengths if you want the design to stay polished at work and still feel fun after hours.
I have a soft spot for this one because it nods to vintage manicures without looking costume-y.
6. Cherry Red Chrome Mirror Finish
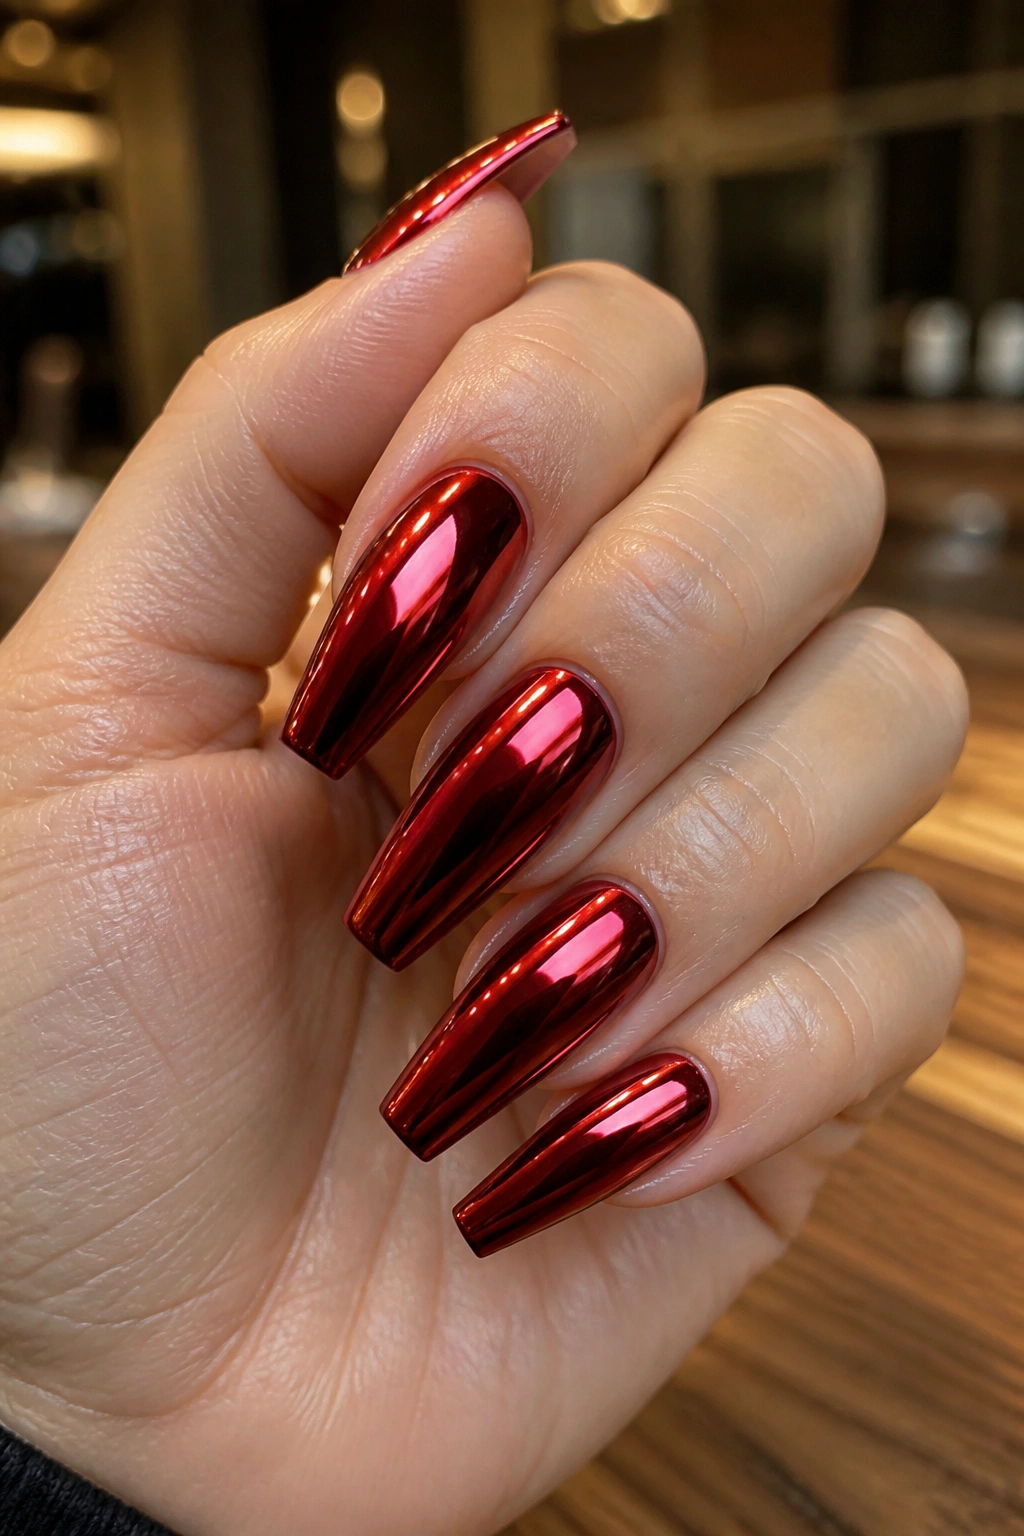
Unlike silver chrome, which can turn cold fast, red chrome keeps warmth in the manicure. You still get that reflective metal look, but the cherry base stops it from feeling robotic or flat.
The best red chrome sets start with a deep cherry gel base, cured smooth, then finished with chrome powder rubbed over a no-wipe top coat. If the layer underneath is streaky, the chrome will tell on it. Every lump shows. Good prep is the whole game here.
This design works well when you want a red set with a harder edge. It catches light from every angle, which makes the coffin silhouette look more dramatic than plain gloss. Short coffin nails can pull this off, though medium length gives the mirror finish more room to flash.
There is a catch. Chrome shows smudges, tiny scratches, and tip wear faster than a cream red does. If you are rough on your hands, ask for an extra top coat sealed carefully around the free edge. And if your salon uses cheap chrome powder, skip it. A rough, grainy chrome finish looks dull within days.
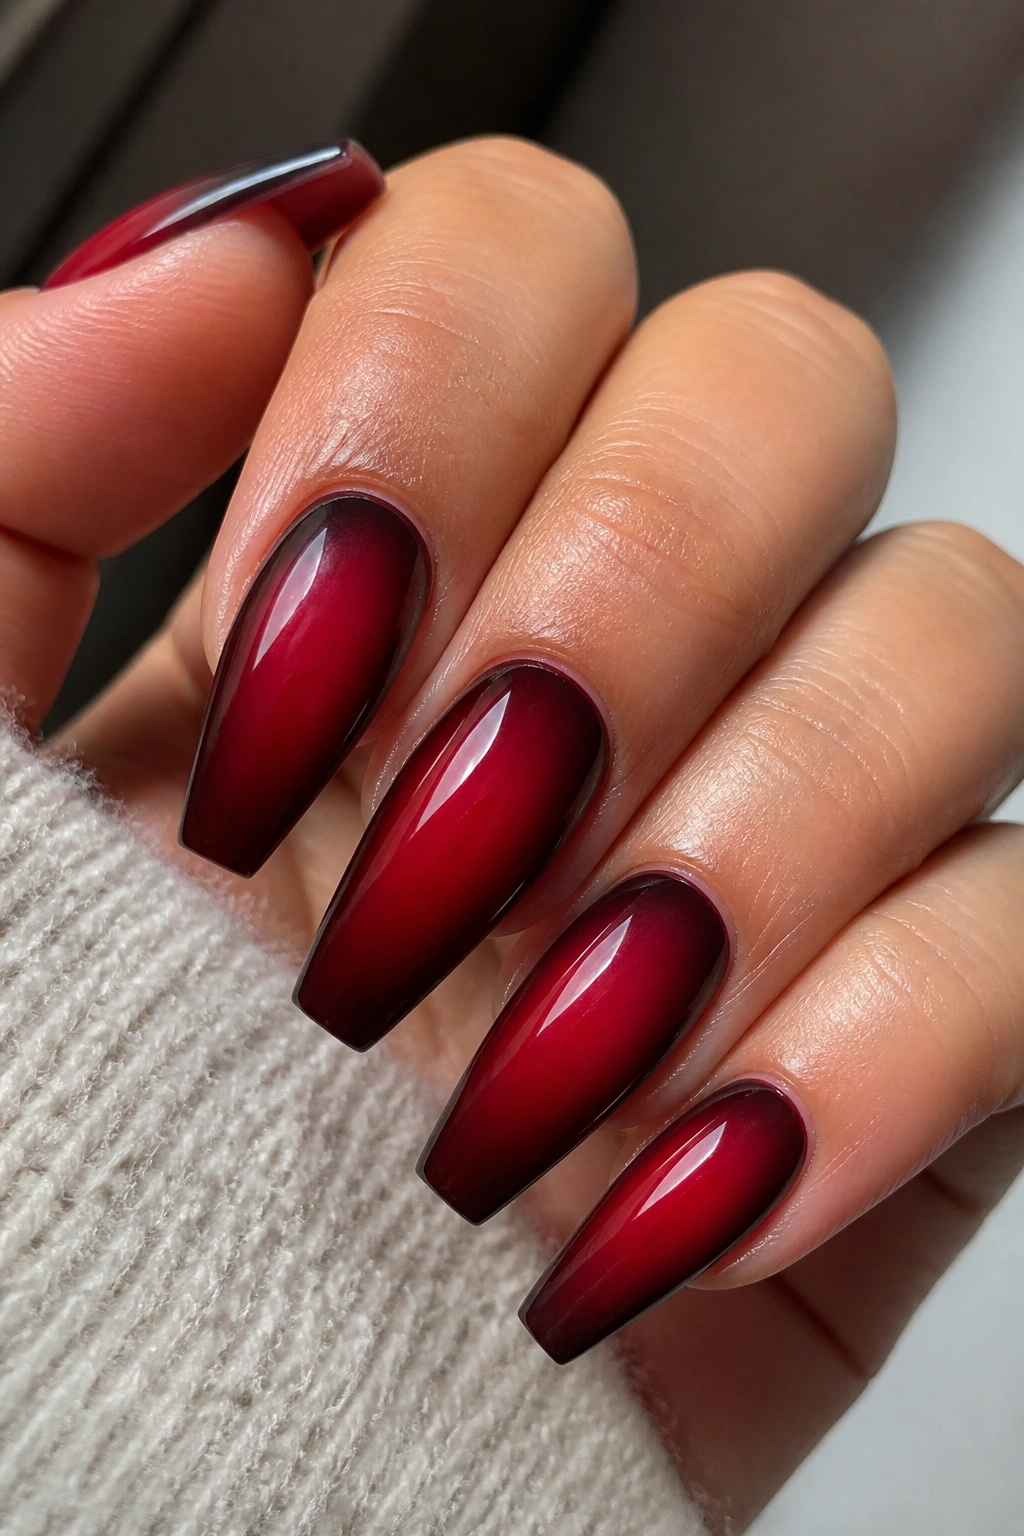
7. Ombre Cherry Red Fading Into Sheer Pink
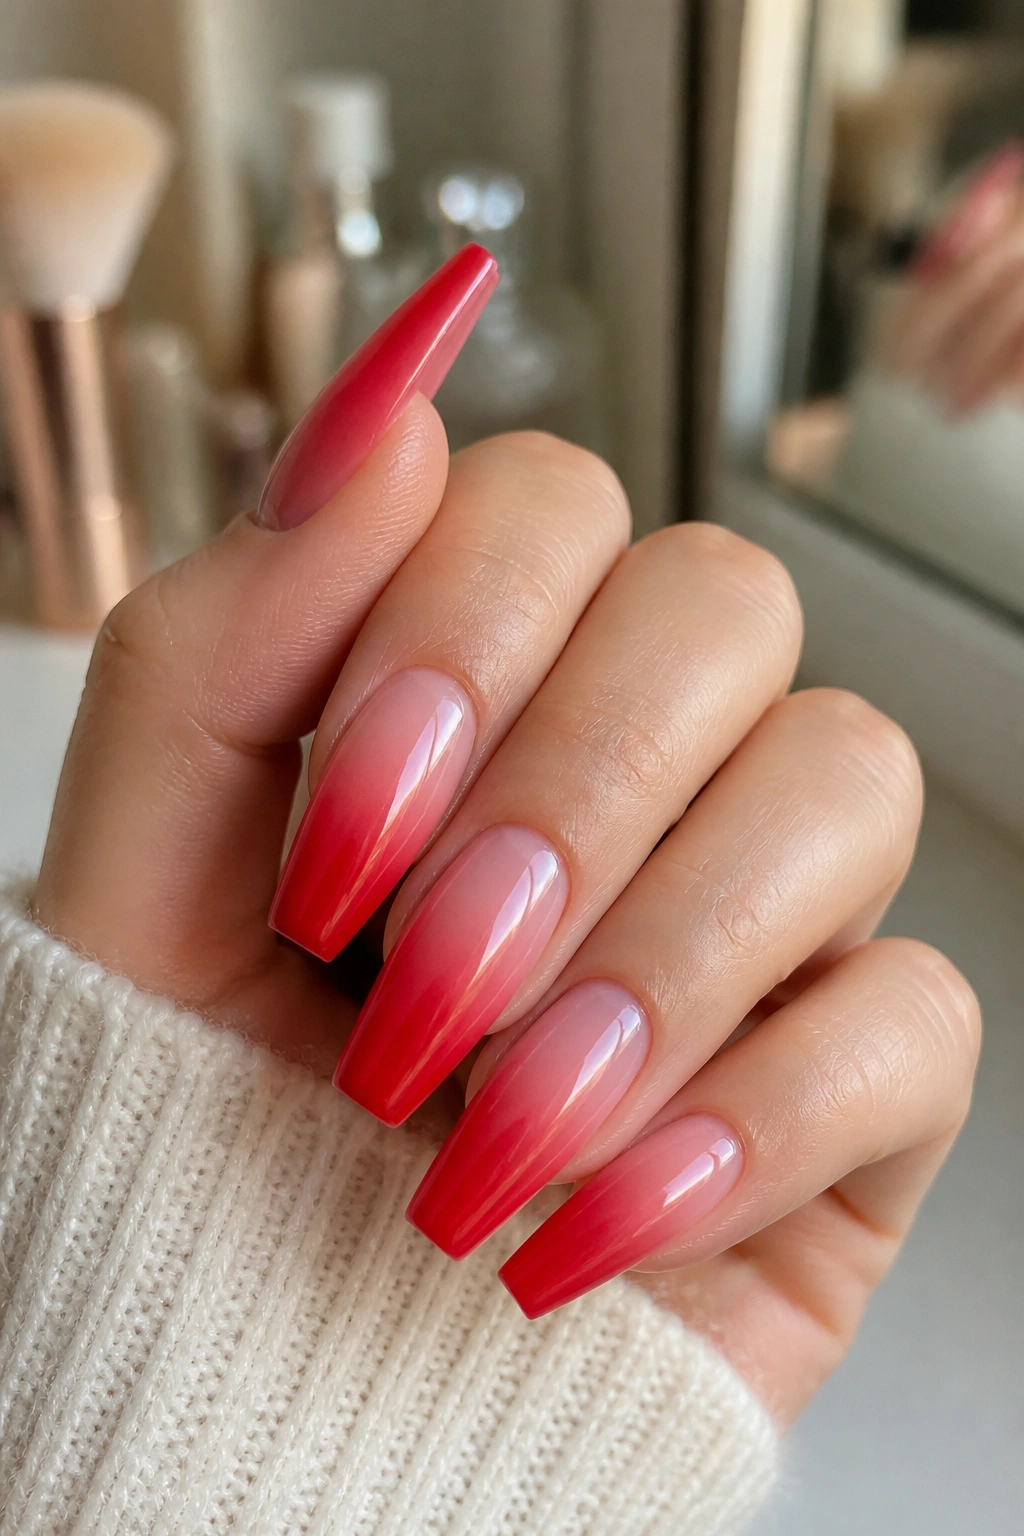
A red fade is kinder to grow-out than solid red. That alone makes it worth a look.
With cherry red ombre, the strongest pigment sits near the tip and softens as it travels toward a sheer pink or nude base. On coffin nails, the shape helps guide the fade so the manicure looks elongated and smooth rather than abrupt.
This style needs a soft hand. If the blend line is obvious, the design loses its point. Airbrushing gives the cleanest fade, though a skilled sponge blend can still look polished when the colors are close in depth. I’d avoid pairing a bright, candy red with a gray nude here. You want the two shades to meet gently.
The best version of this set uses structured gel or acrylic underneath because the soft transition looks cleaner on a smooth surface. Any dents or thick spots near the apex can interrupt the fade.
What I like most about this design is its flexibility. It feels softer than full-color red, though it still gives you that red hit from across the room. If you’ve wanted cherry red coffin nails but keep backing away from solid color, this is the bridge.
8. Cherry Red Nails With Fine Gold Foil Accents
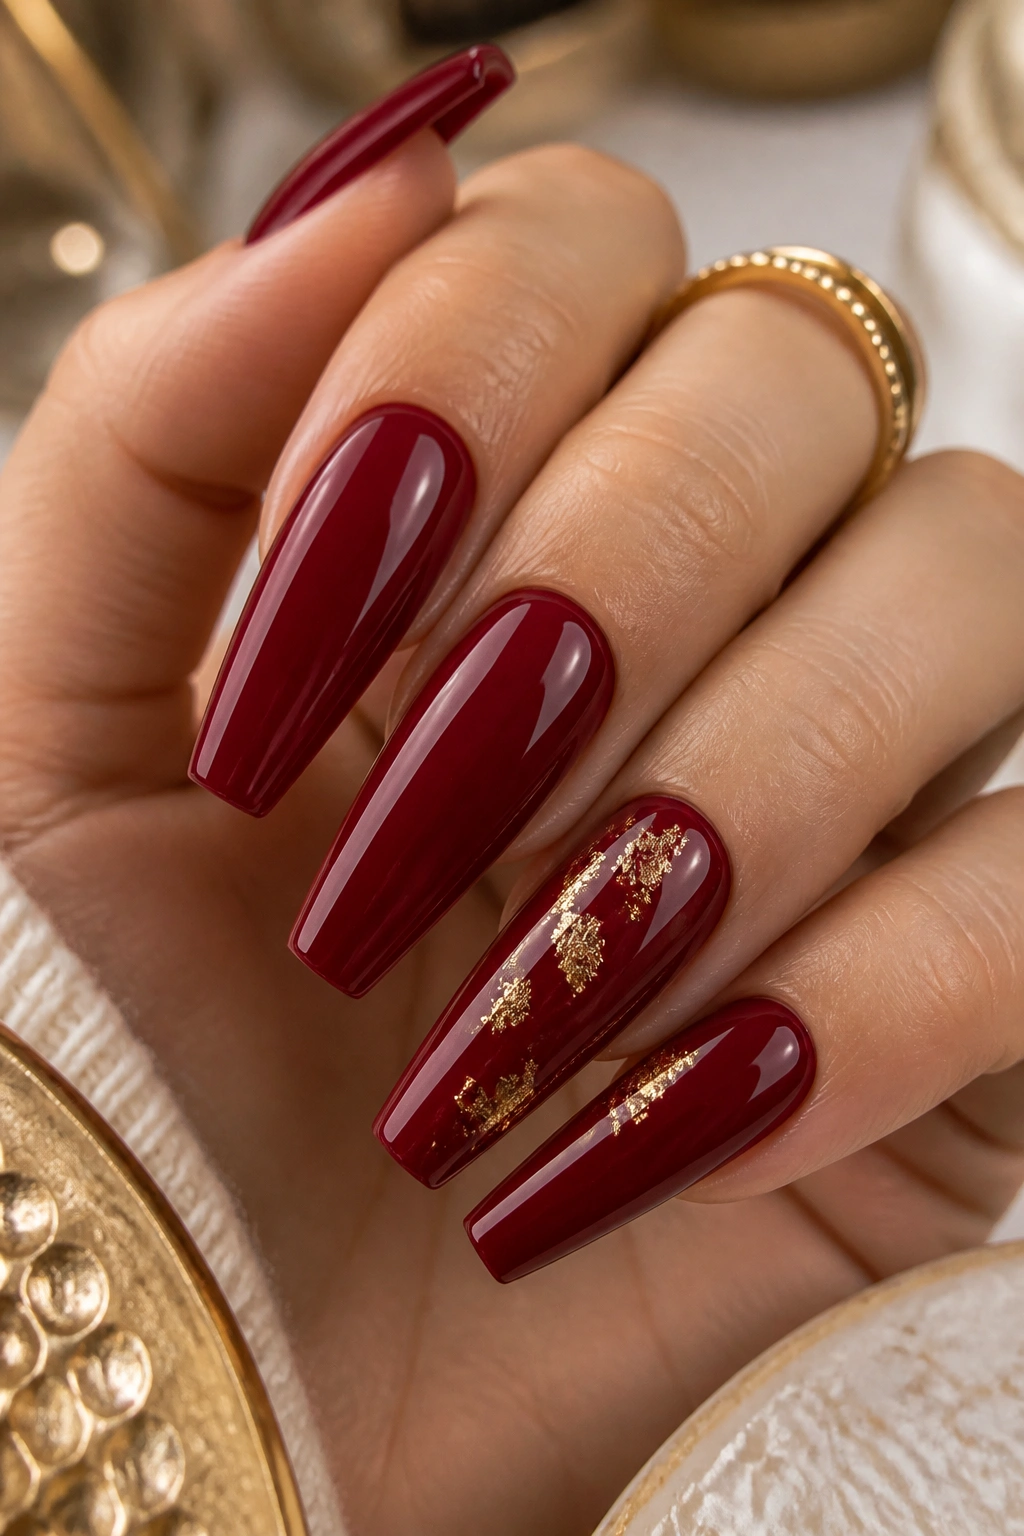
Gold and cherry red can go wrong fast. Too much foil, and the nails start looking busy. Too little planning, and the gold lands like random confetti. But when the foil is placed with restraint, the set feels rich and finished.
Where gold foil works best
Use foil on one or two nails per hand, not all ten. A torn strip along one sidewall, a soft patch near the lower third of the nail, or a broken edge over a nude accent nail usually looks cleaner than full coverage.
I prefer this design with a deep cherry cream base, not jelly. Opaque red gives the metallic flakes enough contrast.
Placement ideas that hold up well
- A thin vertical foil trail on the ring finger
- Broken foil pressed into the lower corner of one accent nail
- A nude accent nail with red at the tip and foil at the center
- A tiny foil fragment sealed near the cuticle on the thumb
Use encapsulation if you can. Foil sealed under builder gel stays smoother than foil trapped under a thin top coat.
My take: if you love jewelry, this design makes the most sense. The red and gold play off rings in a way plain polish does not.
9. Velvet Cherry Red Cat-Eye Coffin Nails
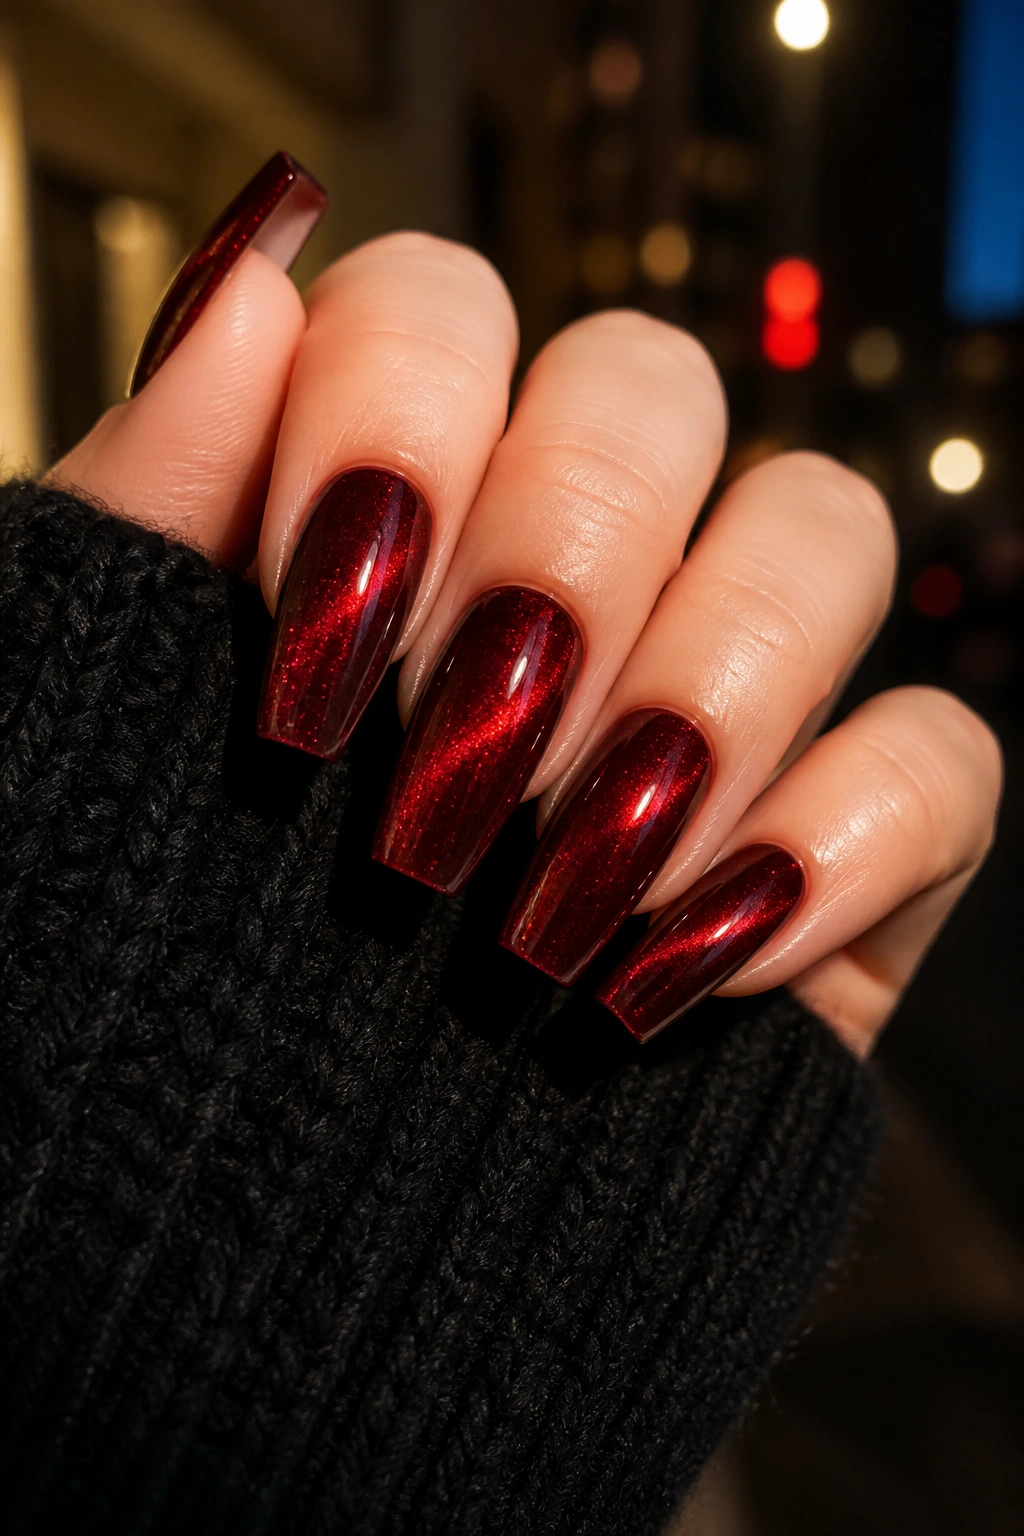
Tilt your hand under a lamp and this set shifts. That’s the charm.
A cat-eye cherry red manicure uses magnetic gel to pull shimmer into a narrow line or soft halo, giving the surface that velvet, lit-from-within look. On coffin nails, the straight shape helps the light effect read more clearly because the magnetic pull has a longer lane to travel.
The trick is choosing the right base. If you want depth, start with a blackened cherry or burgundy-red undercoat, then layer the magnetic red on top. If you want a brighter finish, use a true cherry base instead. Both work; they just land in different moods.
Magnet position changes everything. A nail tech who holds the magnet at one angle for 8 to 10 seconds per nail can create a tight diagonal beam. Move it higher and the glow shifts. Bring it closer to the center and the manicure starts looking softer, almost smoky.
I’d wear this on a night-out set or anytime you want movement without stones or chrome. It’s flashy, yes, though not in a loud way. More like a low light flickering across velvet.
10. Cherry Red Flames Over a Nude Base
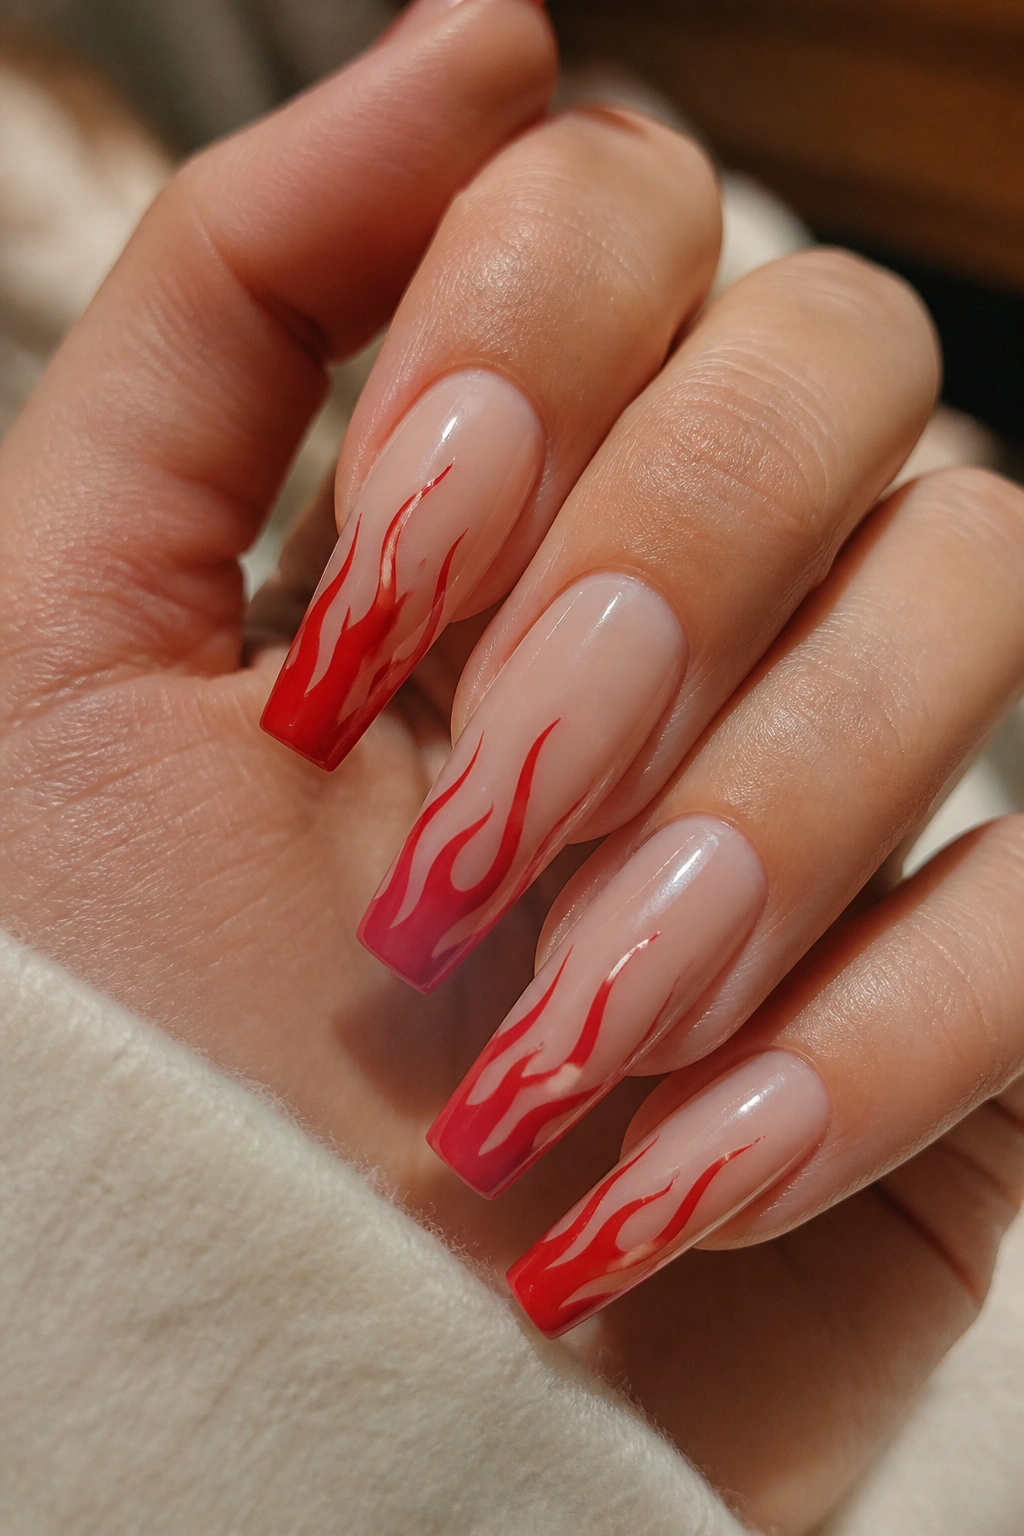
Want cherry red coffin nails with bite? Flames do that.
A nude base with thin cherry red flame tips takes the familiar red manicure and gives it speed. The coffin shape helps because the tapered end already points forward, so the flame art looks like it belongs there instead of sitting awkwardly on top.
What makes flame art work on coffin tips
The flames need to stay narrow and uneven. Identical flames on every nail can look stamped on. Better to vary the height and let two or three points rise from each tip, with some flames leaning slightly left or right.
This set usually looks strongest on medium-long to long coffin nails. Short coffin tips do not give the artwork enough runway.
Ask for a clean version, not a crowded one
- Use a milky nude base rather than a stark pink.
- Keep the flames cherry red only, or add a hairline black outline on one or two nails at most.
- Let two nails go full red if you want the set to feel anchored.
Flame designs can cross into costume territory fast. A lighter hand keeps them sharp.
11. Cherry Red Swirl Accent Set
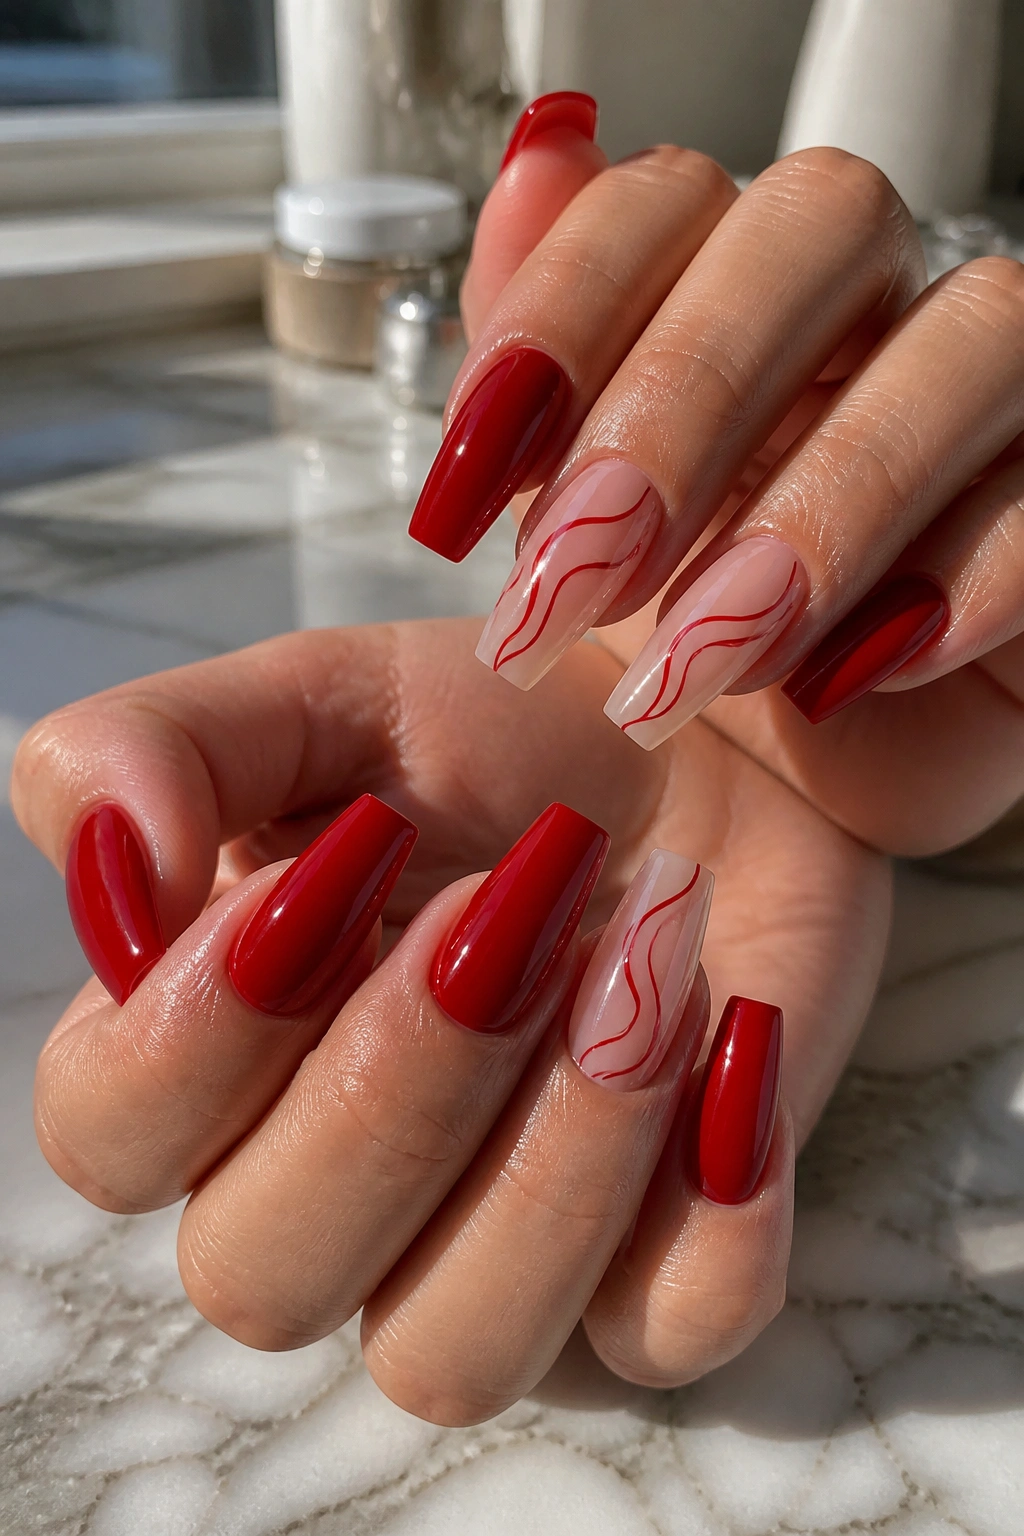
This is the set I mention when someone wants nail art but does not want every finger doing backflips.
A cherry red swirl set usually mixes full red nails with a couple of accent nails painted over a sheer nude or milky base. The swirls can be thin ribbons, loose S-curves, or layered lines that move diagonally across the nail. On coffin tips, those curves break up the straight shape in a useful way.
There’s room to play with the recipe. One solid layout I like uses six full cherry nails and four accent nails. Another uses eight solids and two swirls if you want the art to stay subtle. What matters is line quality. Thick, shaky swirls look childish. A fine liner brush and steady spacing fix that.
A few details make this set sharper:
- Use two line widths, not one, so the art has rhythm.
- Keep the base sheer enough that the red lines stand out.
- Let the curves follow the nail length instead of cutting hard across the middle.
It feels a little lighter than a full art set, and that’s the point.
12. Deep Cherry Red With One Crystal Cuticle Arc
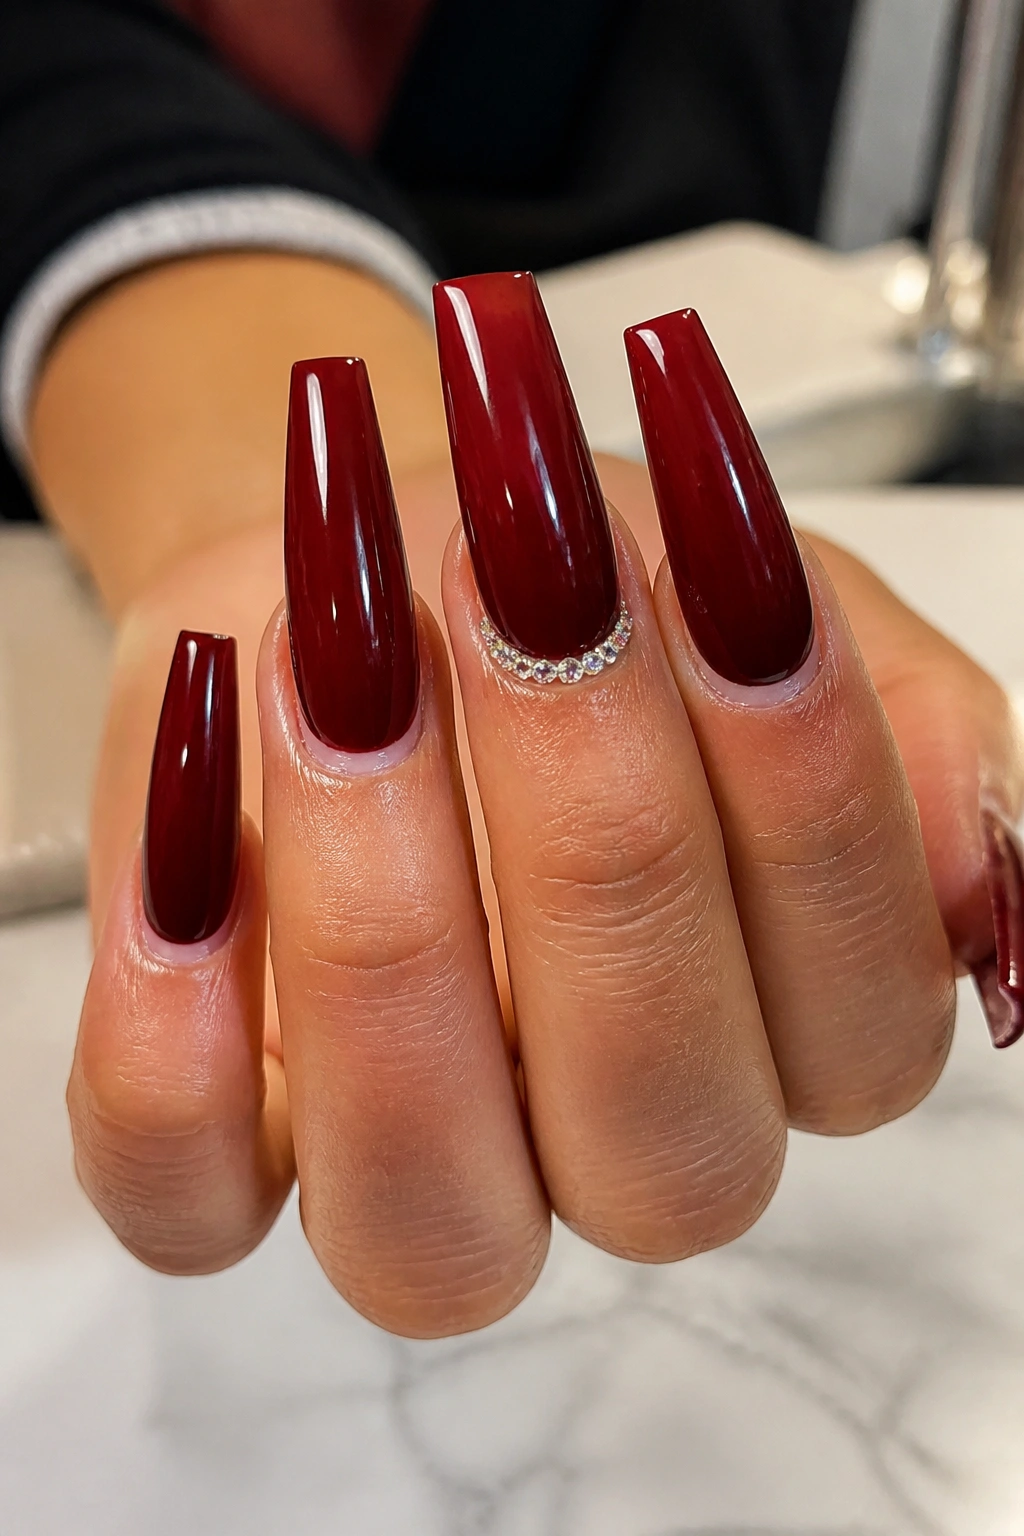
One crystal arc beats ten scattered stones. Every time.
A deep cherry red set with a single cuticle arc gives you sparkle without turning the manicure into jewelry storage. Place small crystals—think ss3 to ss5 size—along the cuticle line of one or two nails, and let the rest of the set stay plain. The red does the heavy lifting. The stones just punctuate it.
I like this design most for events, dinners, or any week when you want your nails to look dressed without reaching for a full rhinestone set. The placement matters. A curved line that hugs the cuticle looks polished; random stones dropped in the center of the nail do not.
Ask your tech to secure the crystals with gel adhesive or builder gel, then float top coat around them, not over them. Top coating the surface of stones dulls their sparkle and can make them look cloudy.
Long coffin nails carry this design well, though a medium length works if the stones stay small. Bigger gems can throw off the balance fast.
13. Cherry Red Hearts on a Gloss Nude Base
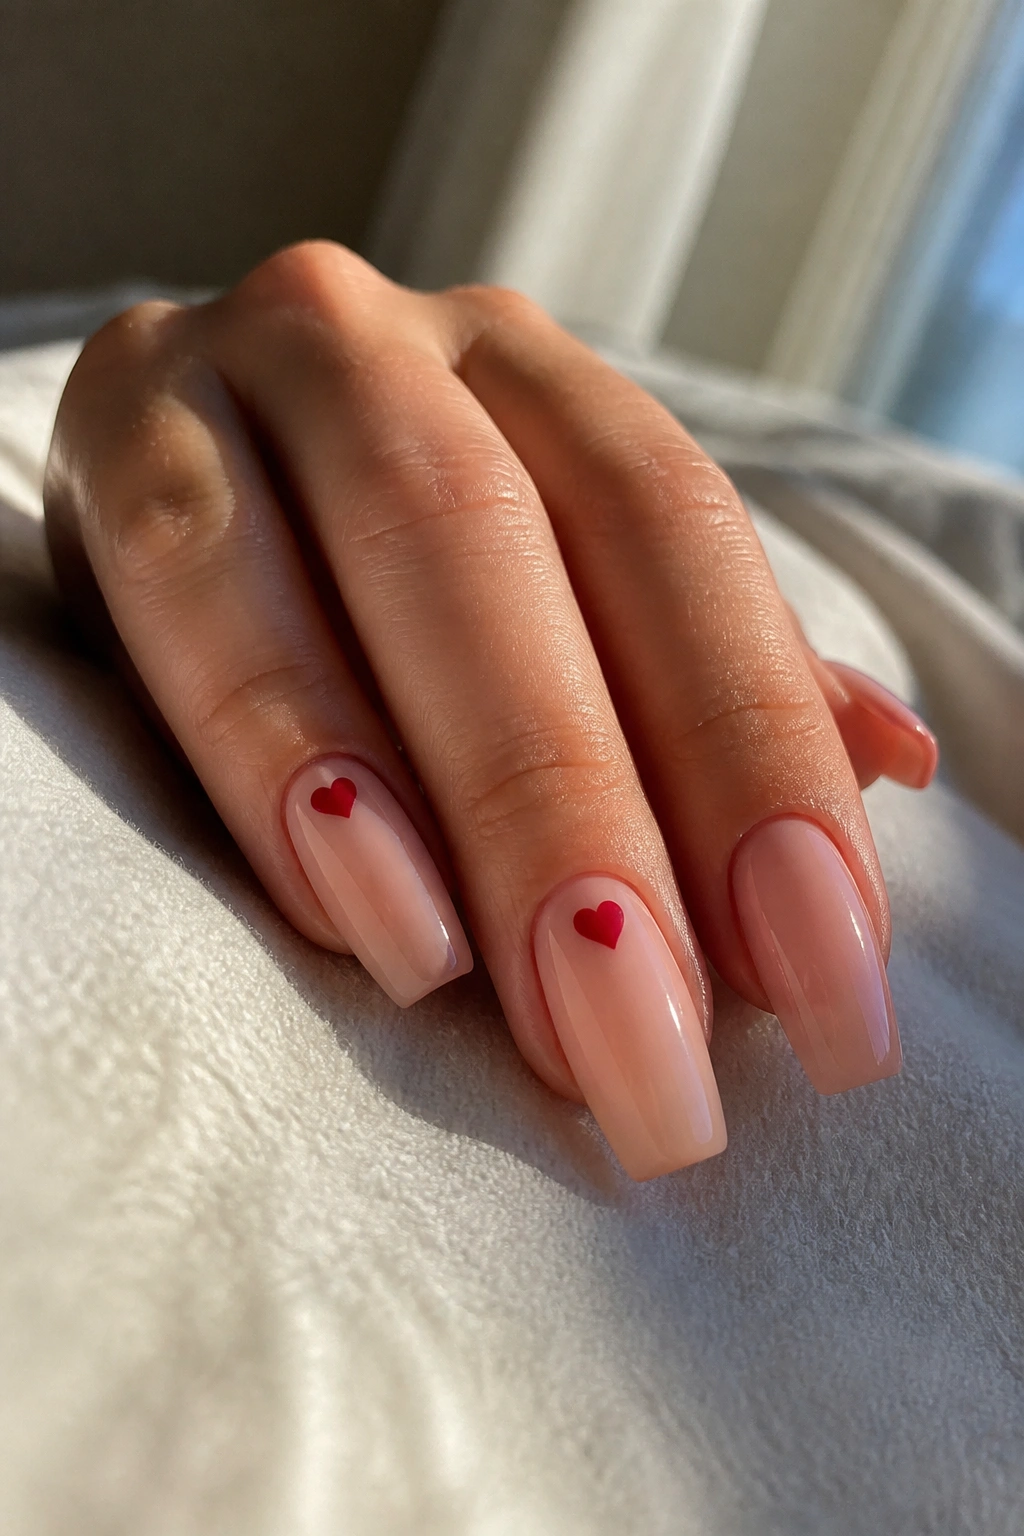
I like heart nail art more when it stays tiny.
A gloss nude base with small cherry red hearts can look sweet without drifting into cartoon territory, especially on a coffin shape that keeps the set feeling grown. The hearts should be neat, sharp at the bottom point, and limited to one or two nails per hand unless you want a full theme set.
Placement that feels polished
A single heart near the side of the cuticle works well. So does a heart floating slightly off-center on the ring finger. Tiny double hearts can work too, though they need breathing room.
Color matters here
Use the same cherry red shade for both the art and any solid accent nails in the set. Mixing one bright red with one dark red makes the manicure look mismatched fast. A milky nude background helps the hearts stand out without the contrast turning harsh.
You can take this design in a softer direction with micro hearts and short coffin nails, or push it toward drama with long tips and a few full red accent nails. I would skip glitter in this set. Hearts already bring enough personality on their own.
14. Black-Lined Cherry Red Side-Swipe Nails
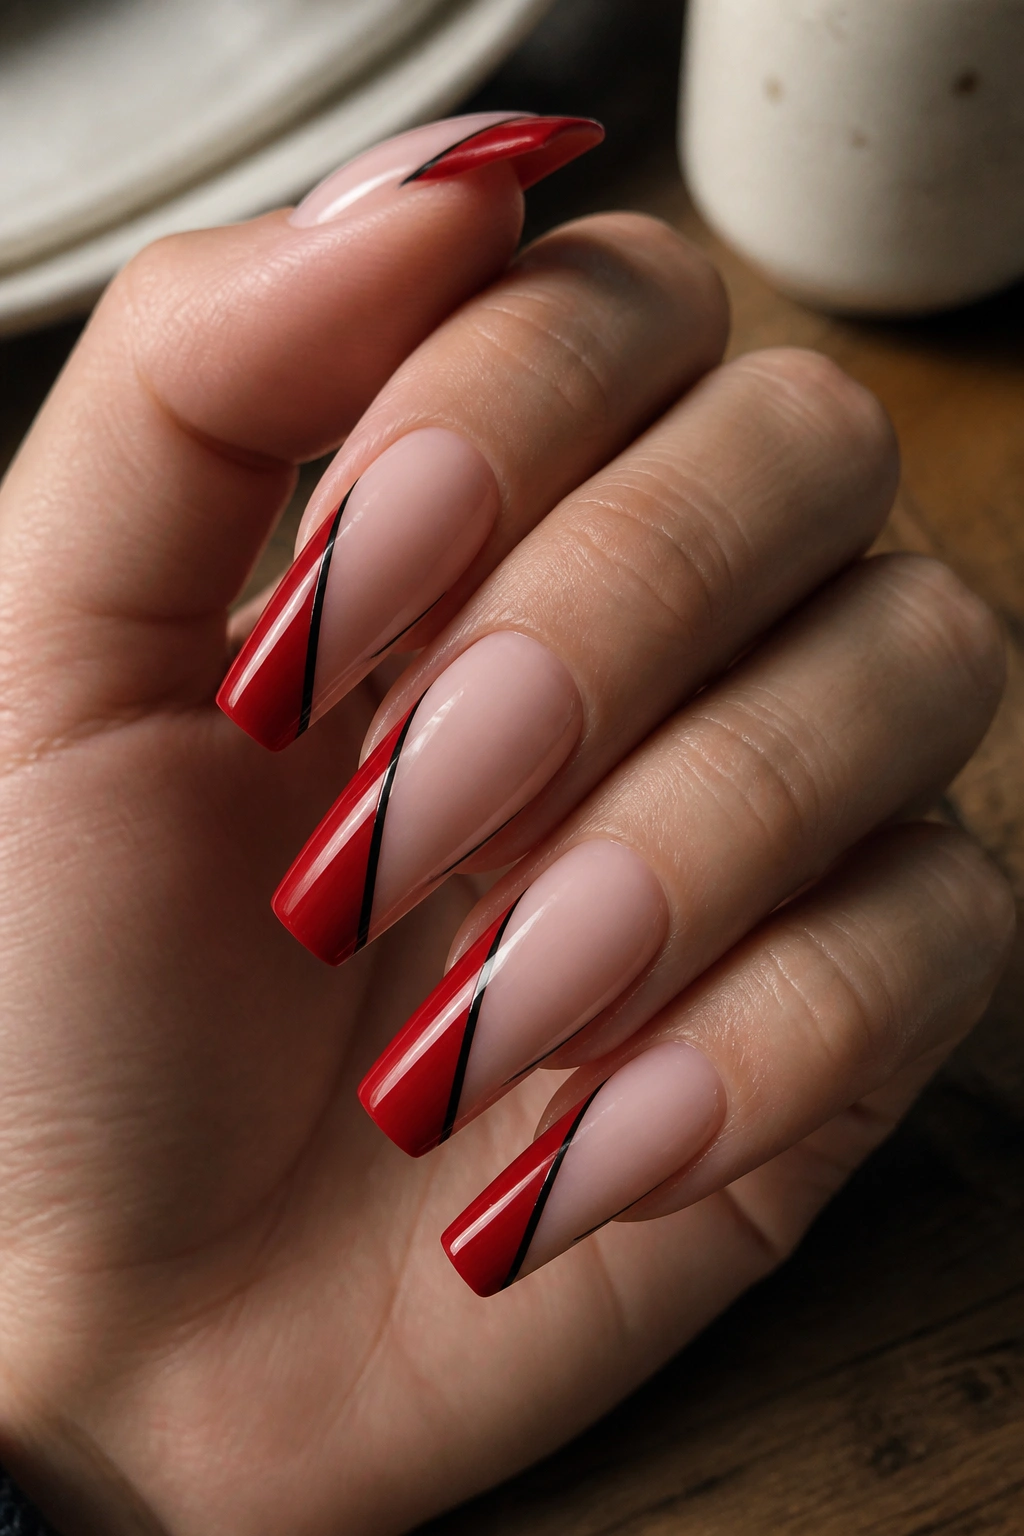
Unlike full black-and-red color blocking, a side-swipe design feels leaner. One diagonal panel of cherry red sweeps across the nail, then a razor-thin black line traces the border. The rest of the nail stays nude or sheer.
That thin line is the magic. It sharpens the red, makes the shape look longer, and gives the whole set a graphic edge without covering too much surface. On coffin nails, the diagonal line can start near the lower sidewall and travel to the opposite tip, which flatters the shape more than a straight horizontal block.
This look asks for precision. The black stripe should stay hairline thin, almost like eyeliner. If it gets thick, the set turns heavy. The nude base also needs to suit your skin tone, since half the nail stays exposed.
I’d put this design on someone who wants red nails with a little structure and contrast but does not want chrome, gems, or obvious art. It feels crisp. A little severe, maybe—but in a good way.
15. Cherry Red Aura Coffin Nails With a Darker Halo
Aura nails can look soft. In cherry red, they look moodier.
A cherry red aura set places concentrated color in the center of the nail, then diffuses it outward into a sheer or darker border. You can also flip it: darker edges, glowing cherry center. On a coffin shape, that gradient has enough space to spread, which keeps the effect smooth instead of blotchy.
This is not the same as ombre. Ombre travels from one end of the nail to the other. Aura radiates from the middle, more like a halo or blush of color. Airbrushing gives the cleanest result, though a sponge can work if the pigment is applied in thin layers.
For a stronger look, use a darker cherry outline with a brighter center. For something lighter, float the red over a milky pink base and keep the edges soft. Gloss top coat is the move here. Matte can flatten the aura and kill the glow.
I like this set when plain red feels too straightforward but detailed art feels like too much. It lands right in the middle—still bold, though less literal.
How to Keep Cherry Red Polish Looking Fresh for More Than a Few Days
Red nails pay you back when you treat them like they matter.
The first thing is tip wear. Cherry red shows chips at the free edge faster than beige or pale pink, so ask your tech to cap the edge with color and top coat. If you do your nails at home, run the brush lightly across the tip after each coat. Tiny move. Huge difference.
Cuticle care helps more than people give it credit for. Dry skin around a bold red manicure makes the set look older, even when the polish is still intact. A drop of cuticle oil twice a day keeps the edges softer. If you’re wearing matte red, wipe the nail surface clean after oiling so the finish stays velvety.
A few habits stretch wear time:
- Wear gloves for dishes and cleaning.
- Do not use your nails to pop open cans, scratch labels, or pry at boxes.
- If the shine dulls, add a fresh layer of clear top coat around day 5 or 6 on regular polish.
- Book fills or removals before lifting starts. Red staining under lifted product is a mess.
And one more thing—remove cherry red carefully. Dark pigment can smear around the cuticle during soak-off, which makes the nails look bruised for a minute. Saturate the pad, press, hold, then wipe downward in one pass.
Final Thoughts
Cherry red works because it does not need help, though coffin nails give it a better stage. That shape makes plain color look sharper, and when you do add art—a micro French, a crystal arc, a side-swipe, a magnetic finish—the extra length gives the design room to breathe.
If I had to narrow the list, I’d point most people toward high-gloss classic cherry, micro French, and ombre into sheer pink first. Those three cover the clean, the polished, and the softer side of red without asking you to commit to a full dramatic set.
Then again, nails are allowed to be a little impractical. If your hand keeps hovering over the chrome, the cat-eye, or the flame tips, that’s probably your answer.
