

Red coffin nails have become a signature statement in nail art, and for good reason. The elongated coffin shape paired with bold red polish creates an instantly sophisticated, edgy look that works for everything from everyday wear to special occasions. What makes red such a powerful choice is its versatility — it can be glamorous, rebellious, minimalist, or intricate depending on the design you choose.
If you’ve been scrolling through nail inspiration boards and feeling overwhelmed by the endless possibilities, you’re in the right place. Red coffin nails are incredibly forgiving to customize because the rich color acts as a stunning canvas for virtually any design technique. Whether you’re drawn to geometric patterns, glittery embellishments, negative space designs, or detailed nail art, red provides the perfect backdrop to make every style pop.
The beauty of this particular combination is that red coffin nails work across all seasons and occasions. They’re confident enough for a night out, polished enough for professional settings (depending on the design), and fun enough for casual everyday wear. Plus, the coffin shape itself elongates the nail bed and creates visual elegance that complements virtually any hand shape or skin tone.
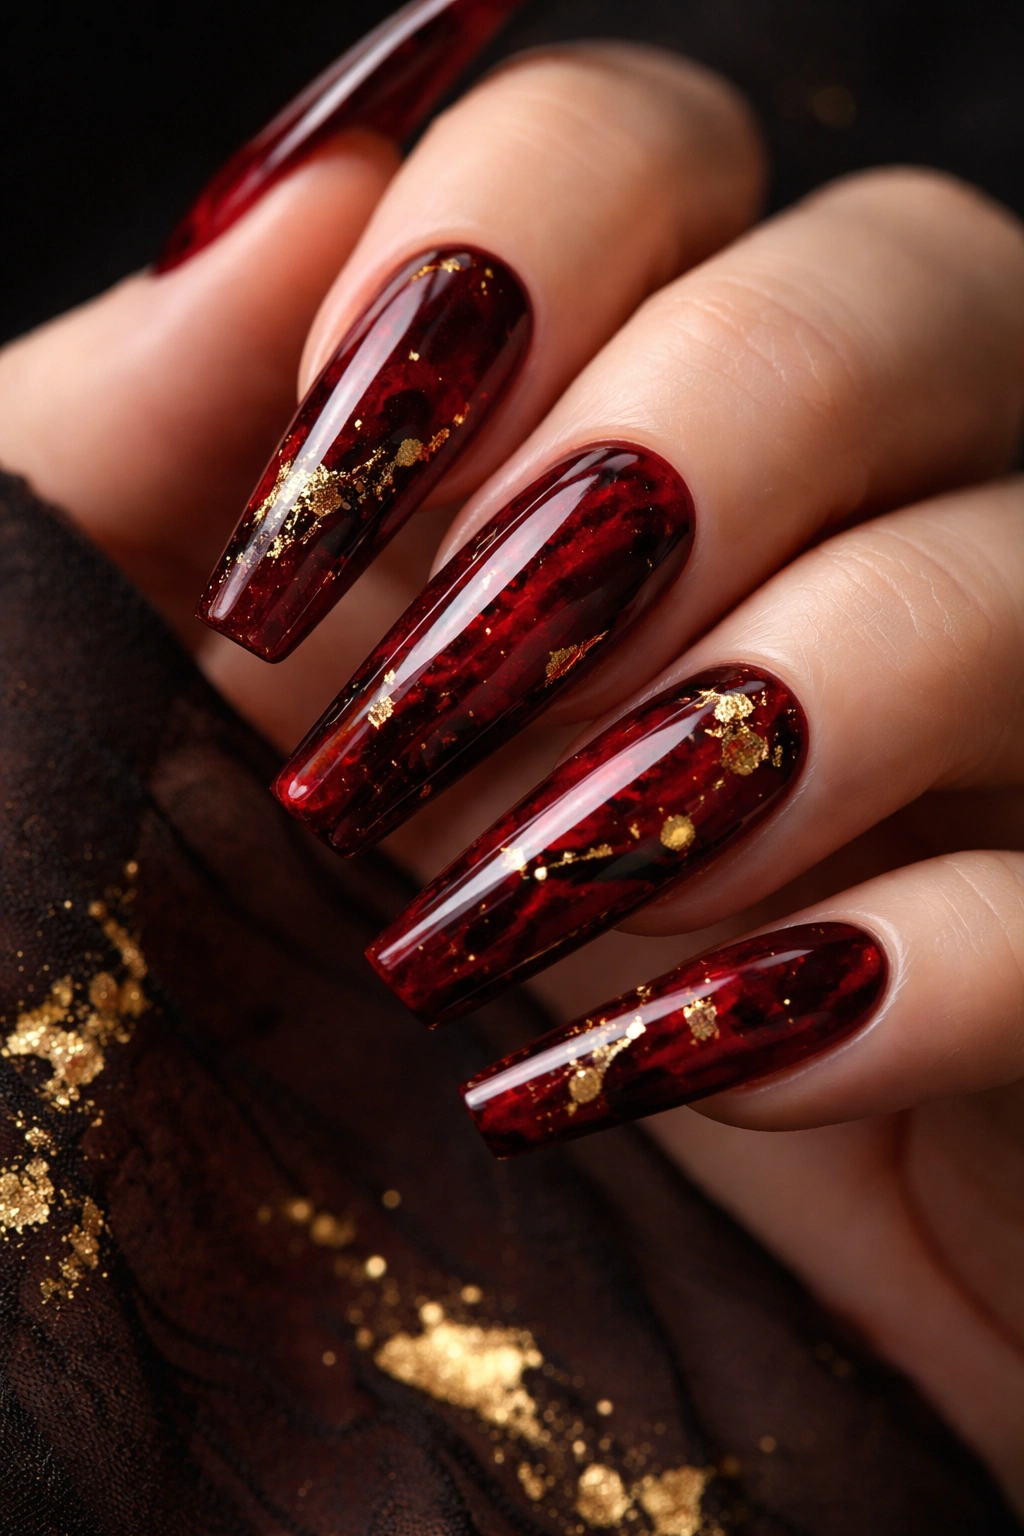
1. Deep Red Marble with Gold Leaf Accents
Deep red marble nails bring an artistic, luxurious feel that looks like wearable art. Start with a dark, rich red base — think burgundy or deep crimson — then use a thin brush or thin black line to create marble-inspired veining across the surface. The key is keeping the veining organic and irregular rather than perfectly controlled, which gives it that authentic stone texture.
Why This Design Commands Attention
Marble patterns on coffin nails create visual interest without feeling chaotic, and the dark red base keeps everything sophisticated rather than playful. Gold leaf accents scattered across the marbled areas catch light beautifully and add a luxury element that elevates the whole design. This combination works because each element — the deep color, the veining, and the metallic accents — plays a supporting role rather than competing for attention.
Design Details That Make It Work
- Use a deep wine red or burgundy as your base for maximum contrast with black veining
- Keep marble lines thin and graceful — thick lines read as sloppy rather than artistic
- Apply gold leaf to 2-3 nails in the set rather than every nail for balanced visual impact
- Seal the entire design with a glossy top coat to make the marble pattern appear polished and refined
- This design works beautifully with matte top coats too if you prefer a more sophisticated, less reflective finish
Pro tip: If freehand marble feels intimidating, use a thin nail art brush and practice on a test nail first. Or try a marble water decal, which gives you a flawless pattern with zero stress.
2. Classic Fire Ombre Gradient
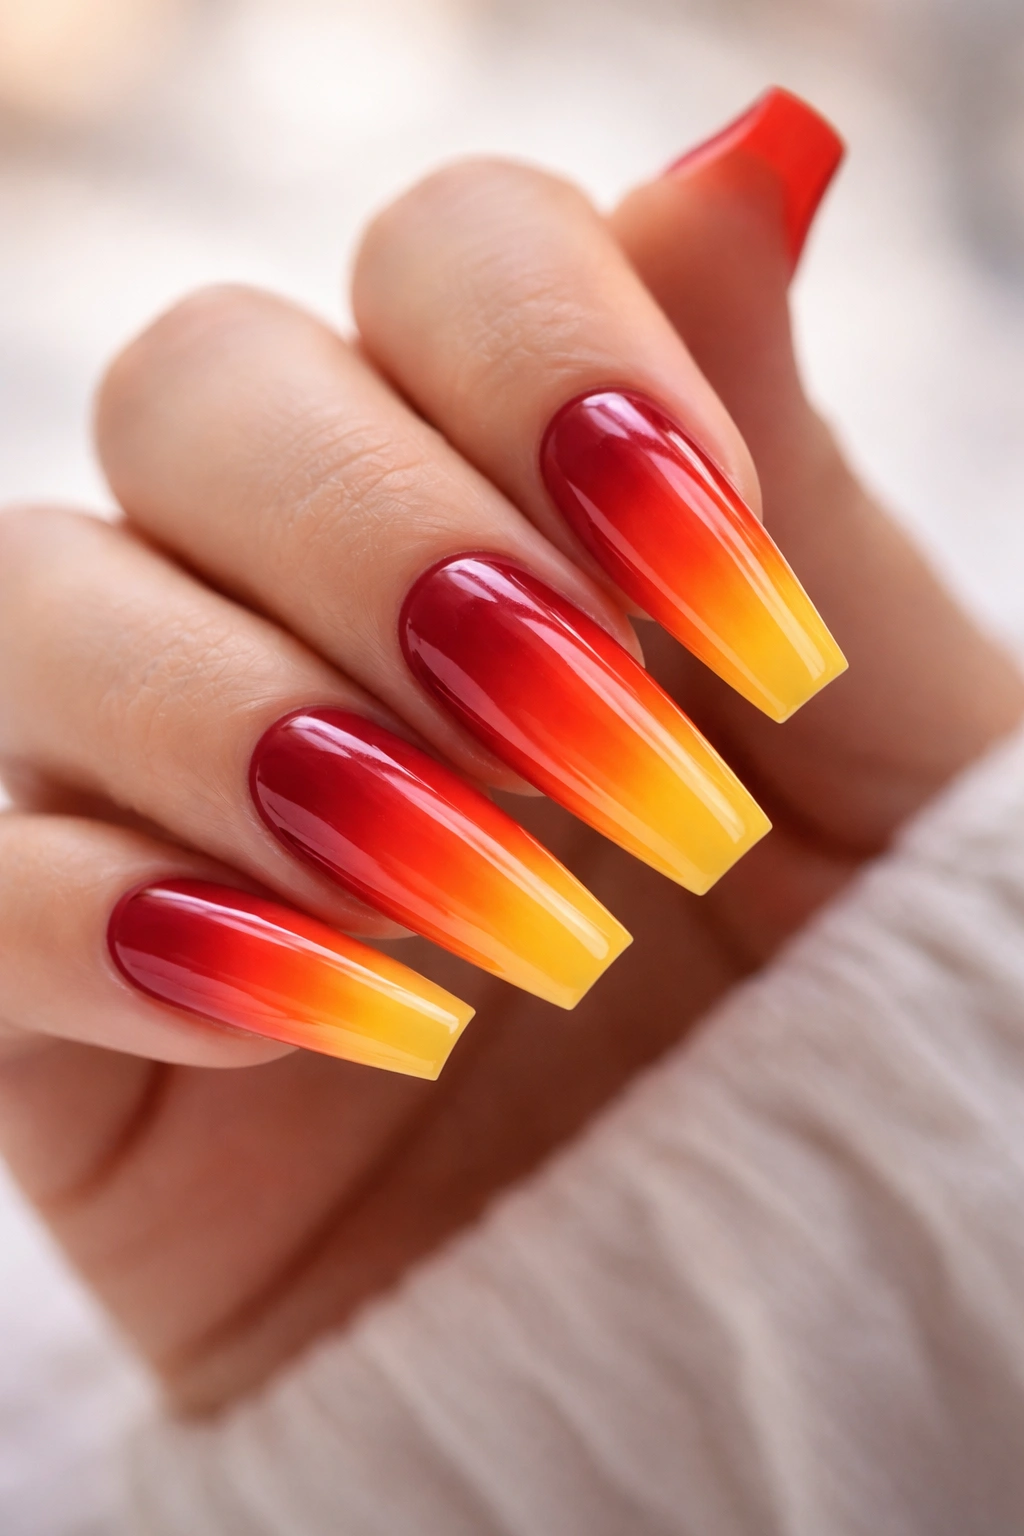
Fire ombre combines red with orange and yellow tones to create a gradient that looks like flames licking across your nails. This design sits at the intersection of bold and elegant — it’s eye-catching without being over-the-top, and it photographs beautifully under any lighting.
How to Achieve the Gradient Effect
The gradient effect works because the colors transition smoothly from warm red to vibrant orange to sunny yellow, creating movement and depth across the nail surface. On coffin nails, this gradient naturally draws the eye from the base (deep red) toward the tip (bright yellow), which elongates the nail visually and makes the coffin shape even more dramatic. The color transition should be subtle enough that there’s no harsh line between shades.
Creating a Professional Fire Gradient
- Apply your red base coat and allow it full drying time before adding the gradient
- Use a makeup sponge to dab orange and yellow colors across the tip and mid-nail area
- Blend the colors together using a clean makeup sponge with gentle dabbing motions
- Layer each color gradually rather than applying heavy amounts at once — multiple light layers blend better than one thick layer
- Finish with a glossy top coat that makes the gradient glow and appear seamless
Pro tip: Keep a damp cotton ball nearby while creating the gradient. If the blend looks too harsh, lightly dab the harsh line with a barely-damp cotton ball and blend again. This trick saves countless nail art attempts.
3. Minimalist Red with Thin Gold Striping
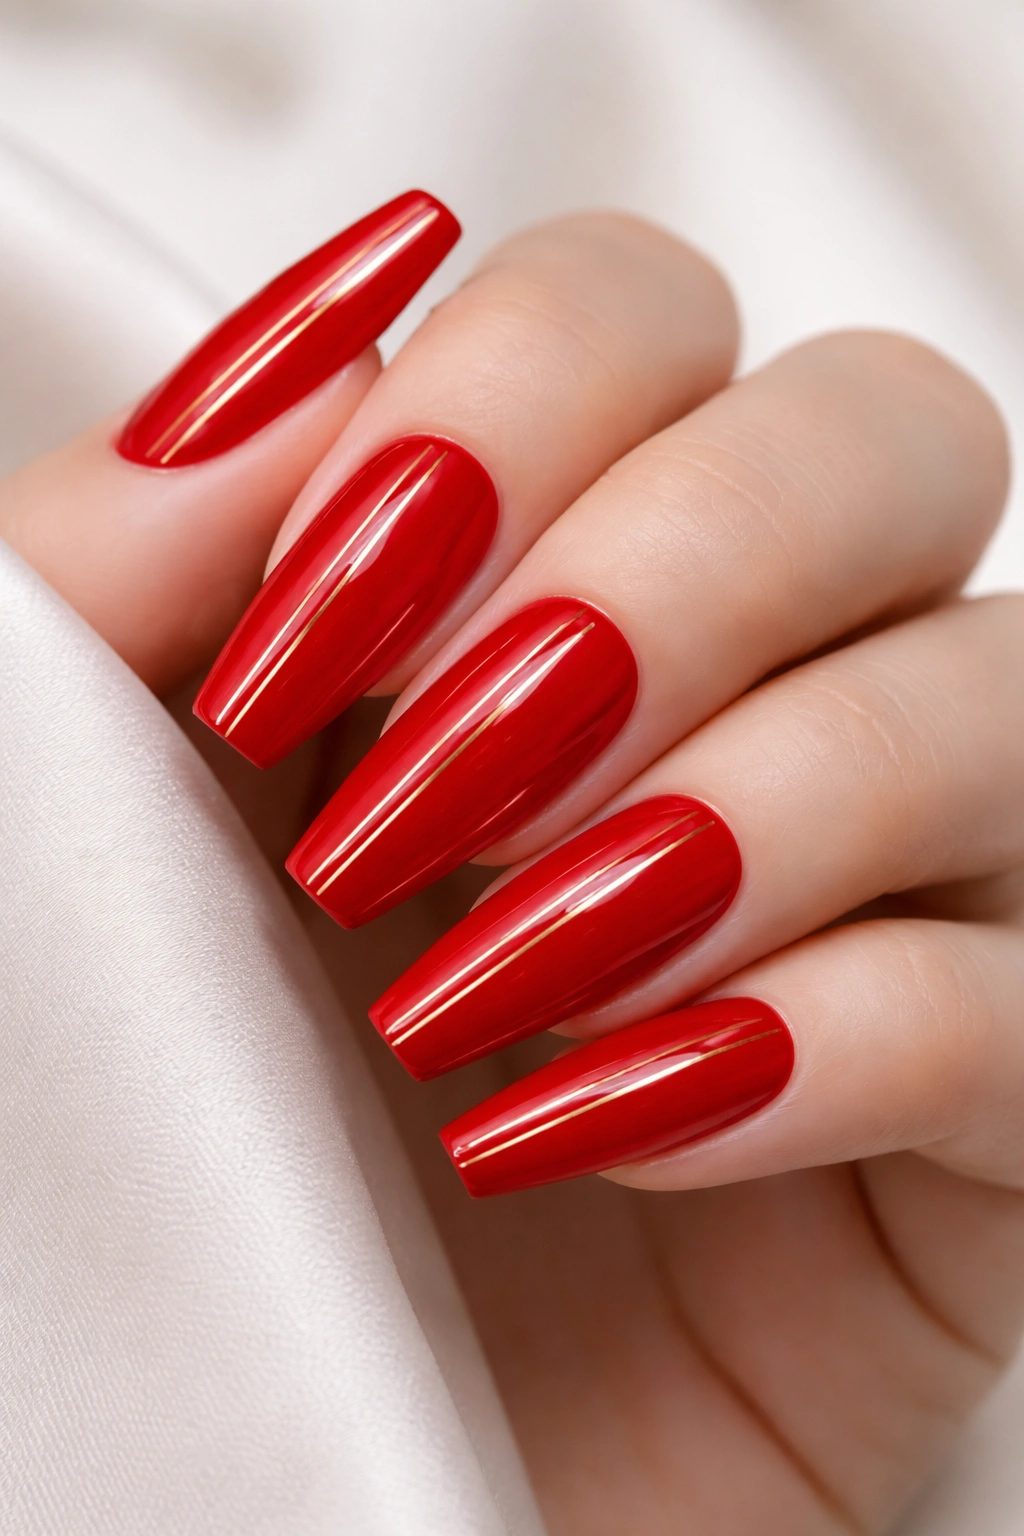
Sometimes less is more, and this design proves it. A solid red coffin nail with delicate gold striping down the center or along the sides creates an understated elegance that suits professional settings and casual occasions equally well. The coffin shape gives this simple design room to breathe visually, making the gold lines feel intentional rather than sparse.
Why Simplicity Hits Harder Here
Minimalist designs on coffin nails work because the shape itself is a statement. You don’t need elaborate patterns to capture attention — the elongated silhouette does that work for you. Adding one or two thin gold lines creates visual interest without overwhelming the design, and the metallic contrast against the red base adds just enough personality to feel curated rather than plain.
Executing the Striping Technique
- Apply two thin coats of bright red to ensure even color coverage
- Use a gold striping polish or a thin nail art brush with gold polish for precision
- Create perfectly straight lines by resting your brush hand on the table and moving the nail, not your hand
- Keep gold stripes thin — between 1-2 millimeters wide for maximum elegance
- Apply striping to every nail the same way for symmetry, or vary placement on each nail for a more artistic feel
Pro tip: If you’re not steady with a thin brush, try gold striping tape instead. Peel it off after applying your top coat for perfectly straight lines every single time.
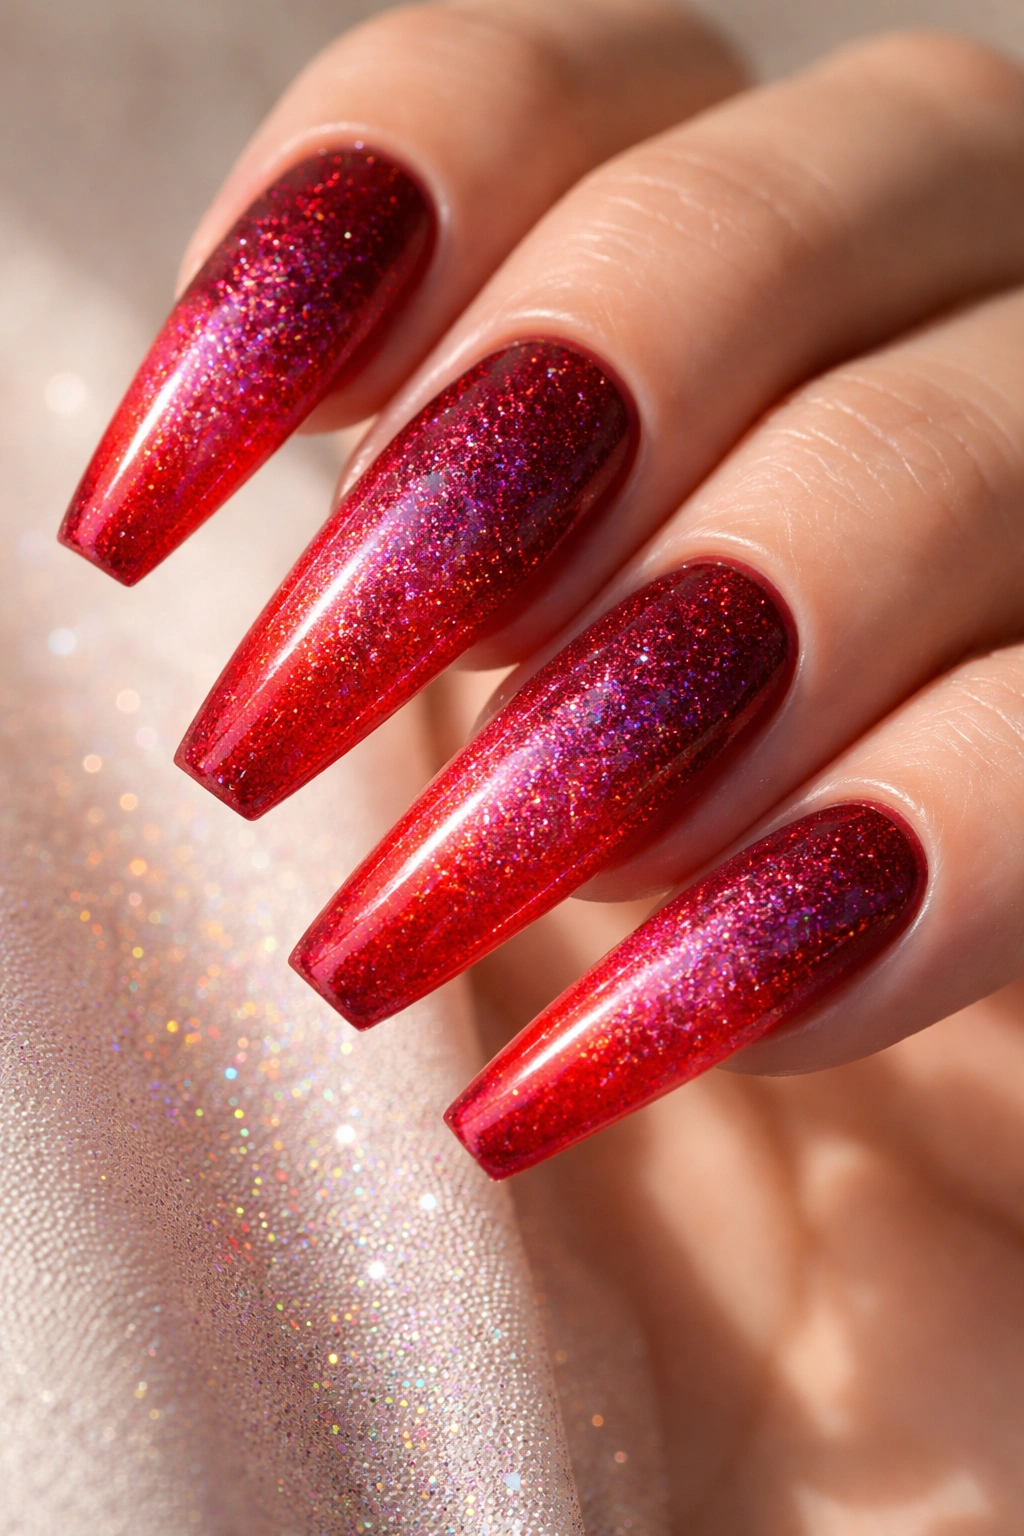
4. Glitter Fade Red Ombre
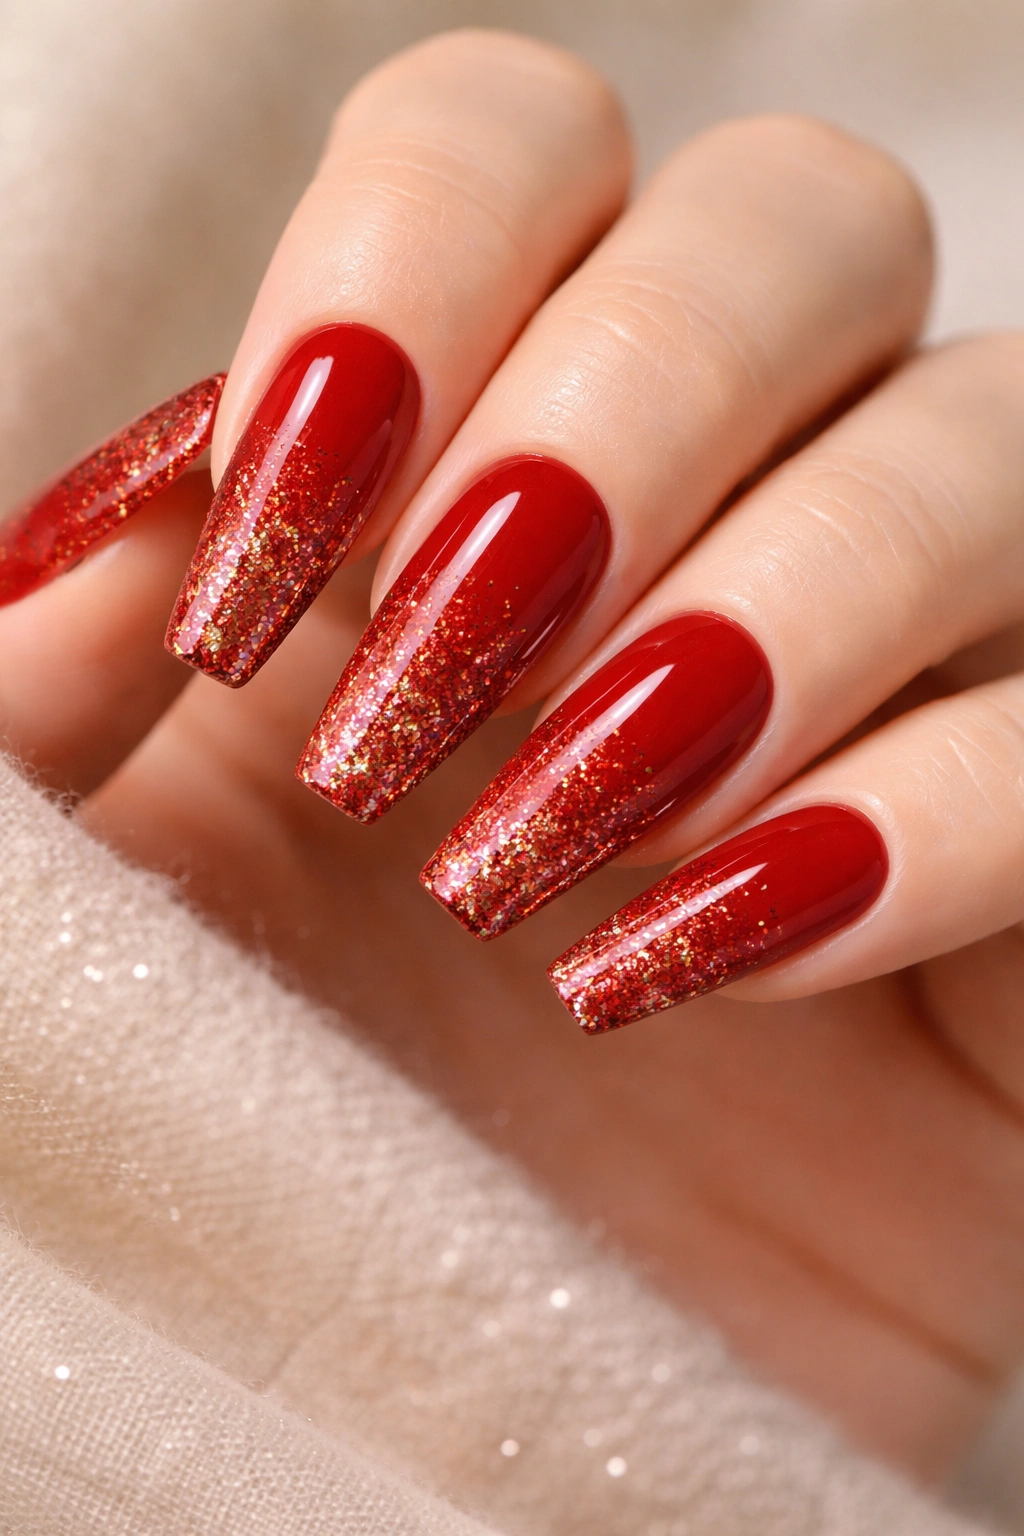
A glitter fade design starts with solid red at the base and gradually incorporates more and more glitter as you move toward the tip, creating a sparkly gradient that’s fun and sophisticated. This design works beautifully on coffin nails because the elongated shape gives you plenty of room for the glitter to build gradually without feeling cramped.
Building the Perfect Glitter Gradient
The glitter fade works visually because it creates movement and draws the eye naturally toward your fingertips. Starting with solid color and adding glitter allows your nails to look polished at the base while feeling fun and celebratory at the tips. This balance makes the design feel intentional rather than like you simply covered your nails in sparkle.
Layering Glitter for Maximum Impact
- Start with a solid, even red base color that matches or complements your glitter shade
- Apply a thin layer of clear or red-tinted glitter polish to the top third of each nail
- Apply a thicker layer of glitter to the top quarter, creating concentration at the tip
- Use a narrow glitter brush or sponge to control exactly where glitter lands
- Seal everything with a thick layer of glossy top coat to smooth out any texture and make glitter shine
- For extra dimension, use two different glitter shades — larger flakes at the base, smaller microglitter at the very tip
Pro tip: If your glitter polish is too thin and doesn’t show up well, apply it over a slightly sticky base layer (don’t fully cure your red polish under the lamp before applying glitter). This helps glitter particles grab and stay put.
5. Negative Space Red with Geometric Lines
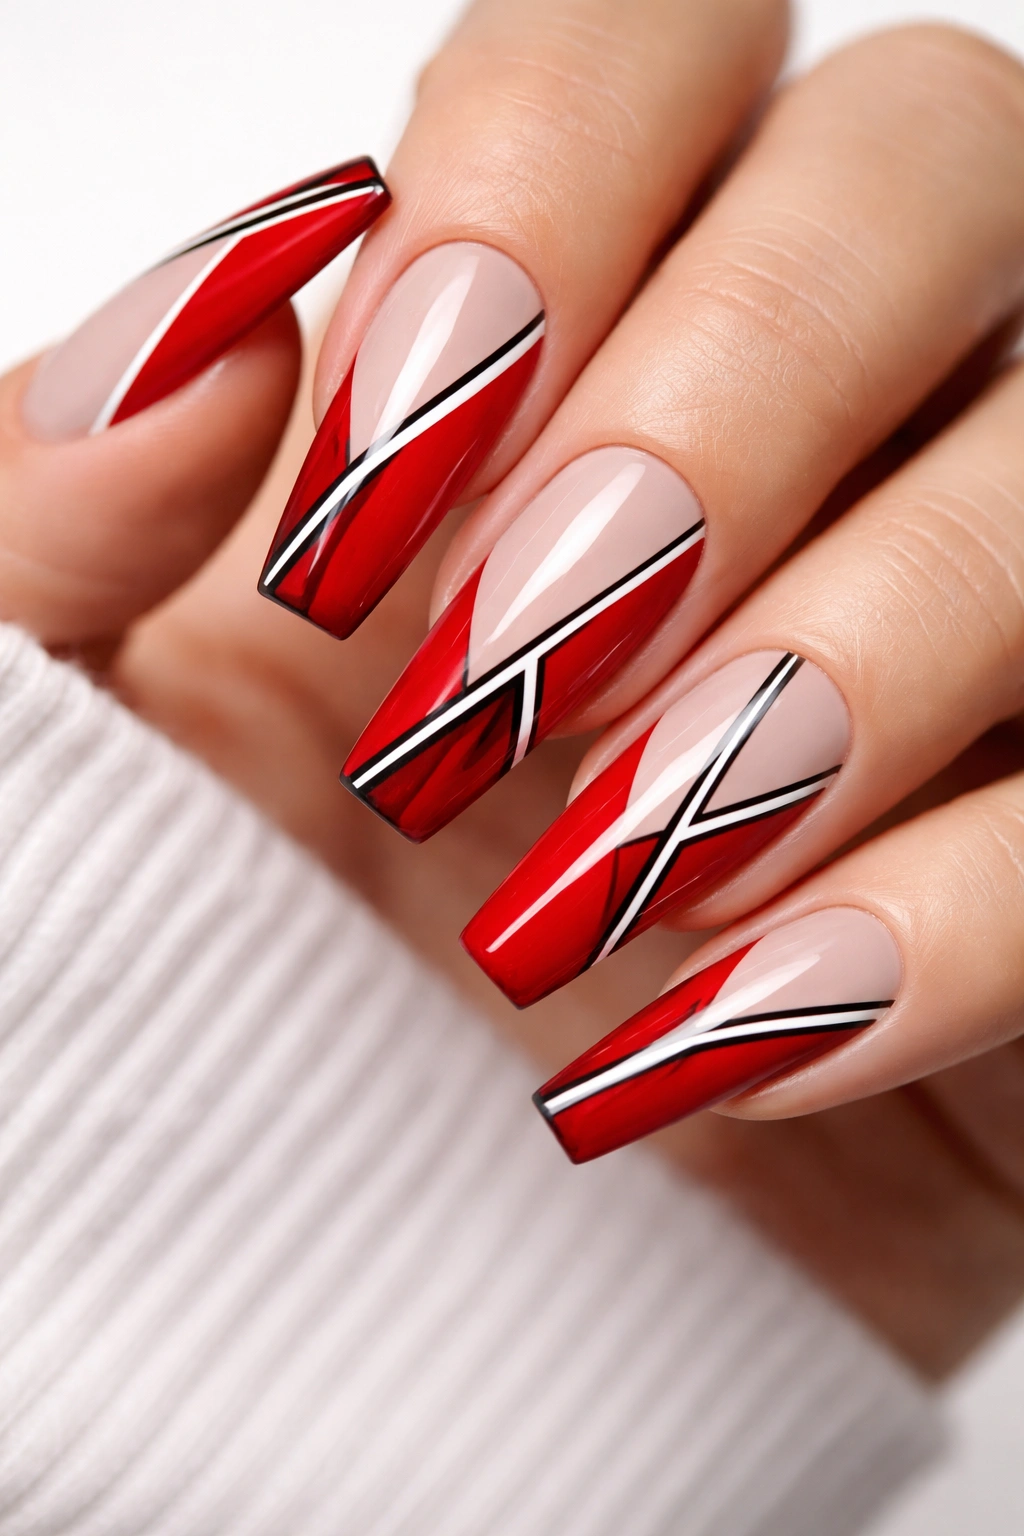
Negative space designs create visual intrigue by intentionally leaving parts of the nail bare or revealing the nail bed. Combining red sections with bare nail space and geometric black or white lines creates a modern, artistic look that feels very 2020s despite being completely timeless.
The Art of Strategic Emptiness
Negative space works on coffin nails because the elongated shape gives you more canvas to play with — you can create interesting geometric patterns without the design feeling too busy or overwhelming. The contrast between solid red, bare nail, and thin linear elements creates visual sophistication that makes this design feel intentional and curated.
Building a Geometric Negative Space Design
- Paint solid red on one half or one section of each nail, leaving the other side bare
- Add thin black or white geometric lines connecting the red sections or framing the bare space
- Keep lines perfectly straight by using thin striping brushes or nail art tape for precision
- Consider complementary shapes — triangles, diamonds, or clean linear patterns — for cohesive visual impact
- Apply negative space to every nail the same way for symmetry, or alternate patterns on different nails for visual interest
- Finish with a matte or glossy top coat depending on whether you want the bare nail to feel matte or reflective
Pro tip: Use painter’s tape to create perfectly straight geometric lines. Apply tape, paint over it, then remove the tape while the polish is still slightly tacky for crisp edges.
6. Red Coffin Nails with Crystal Embellishments
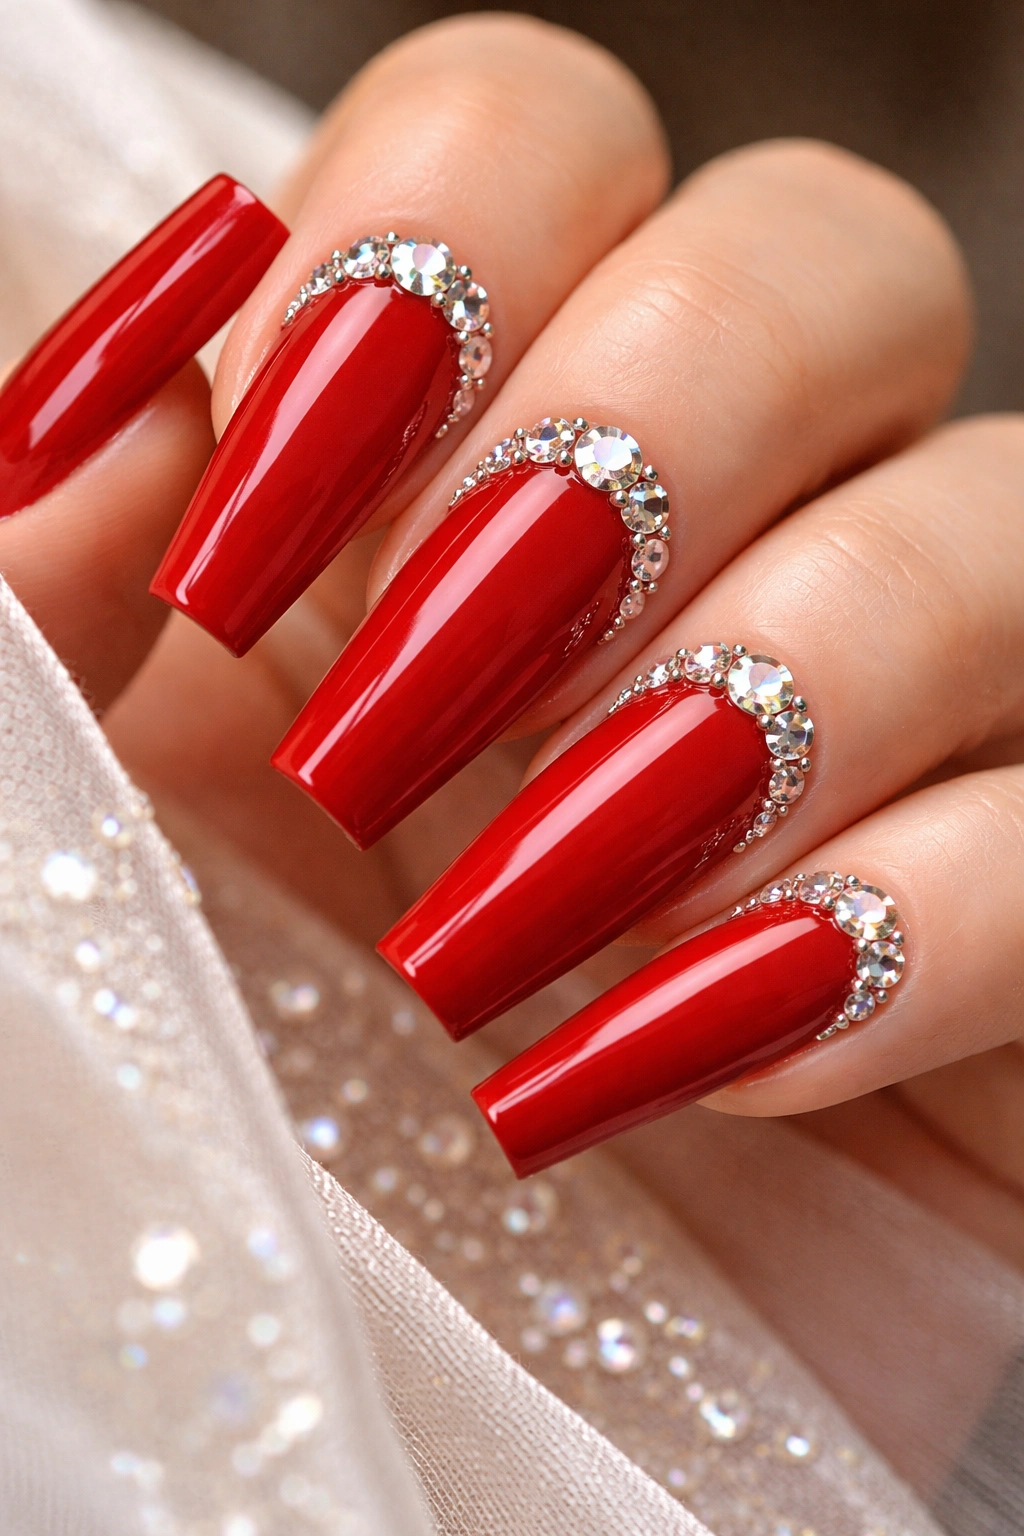
Crystals and rhinestones elevate red nails into luxury territory instantly. Strategically placing crystals along the cuticle line, creating a crystal gradient, or adding them as accent details turns your manicure into actual jewelry for your hands. On coffin nails, the elongated space gives you room to create intricate crystal patterns without overwhelming the design.
Why Crystals Command Luxury Vibes
Crystals catch light and create sparkle that photographs beautifully and draws real-world attention instantly. On red nails, crystals add texture and dimension that elevates the look from a simple manicure to statement nail art. The coffin shape complements crystal designs because the broad nail surface gives crystals room to shine without competing for visual space.
Placing Crystals Like a Professional
- Apply a sticky base layer to your red polish (don’t fully cure it) so crystals have something to grip
- Use a dotting tool or crystal-picking pen to position each crystal precisely
- Create patterns like horizontal lines, diagonal gradients, or concentrated clusters at cuticles
- Mix crystal sizes for visual interest — larger stones as focal points, smaller crystals as accents
- Allow the sticky base to fully cure with crystals in place, then seal with a thick, shiny top coat
- For maximum sparkle and durability, use professional-grade nail crystals rated for nail art rather than craft crystals
Pro tip: Crystals last longest when you seal them under a thick layer of top coat rather than just placing them on tacky polish. The top coat acts as a protective seal that keeps crystals firmly attached and prevents snagging.
7. Red with White Negative Space Tips
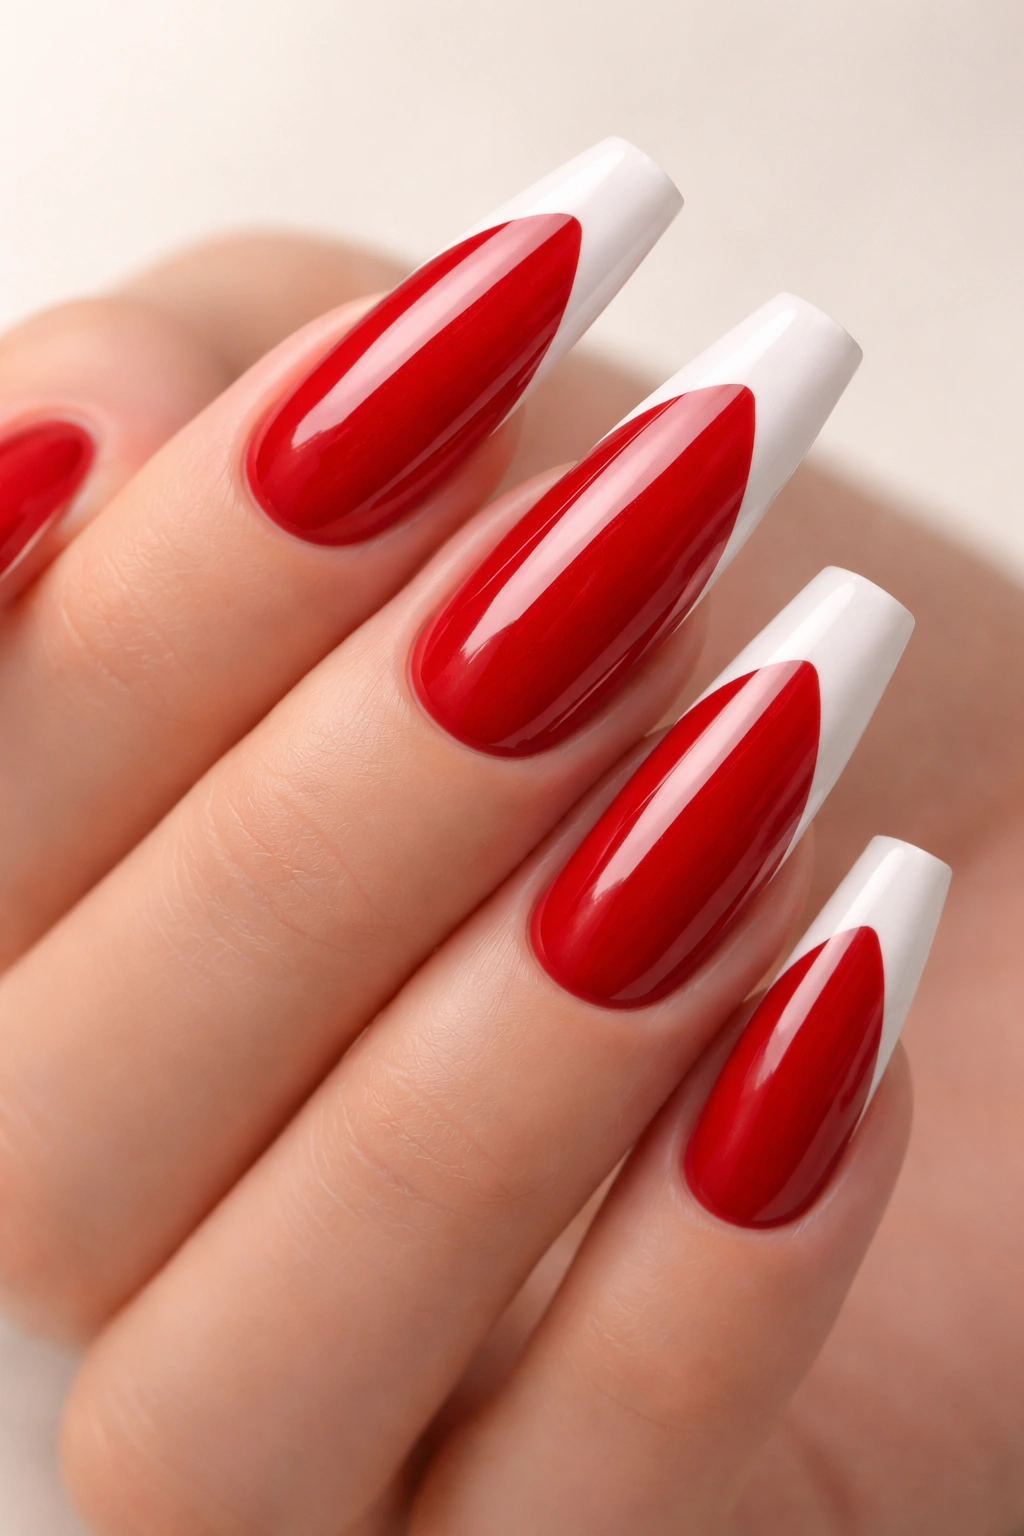
This design combines classic elegance with a modern twist — your coffin nails feature solid red through most of the nail, but the very tip remains bare or features white polish creating a color-block effect. This creates a French manicure-adjacent look that feels fresh and current rather than traditional.
The Modern French Manicure Approach
The white tip against red creates striking contrast that makes your fingertips appear even longer and more elegant. On coffin nails, this design works because the negative space at the tip frames the coffin point beautifully, drawing attention to the nail shape itself. It’s sophisticated without feeling boring, and versatile enough for any occasion.
Creating Perfect Negative Space Tips
- Apply solid, even red polish to your entire nail first
- Once red is fully dry, use painter’s tape or a negative space stencil to mark where you want white to begin
- Apply white polish only to the tip area above your marked line
- Keep the white line sharp and clean — use a thin brush or angled edge for precision
- For a softer look, blend the red and white where they meet using a thin brush with a bit of clear polish
- Remove any tape while polish is slightly tacky for the cleanest possible edge
- Seal with glossy top coat to make both colors pop
Pro tip: If you mess up the line between red and white, don’t panic. Let the nail dry completely, then use a thin brush with red polish to carefully correct and sharpen the edge.
8. Bold Red with Black Spider Web Design
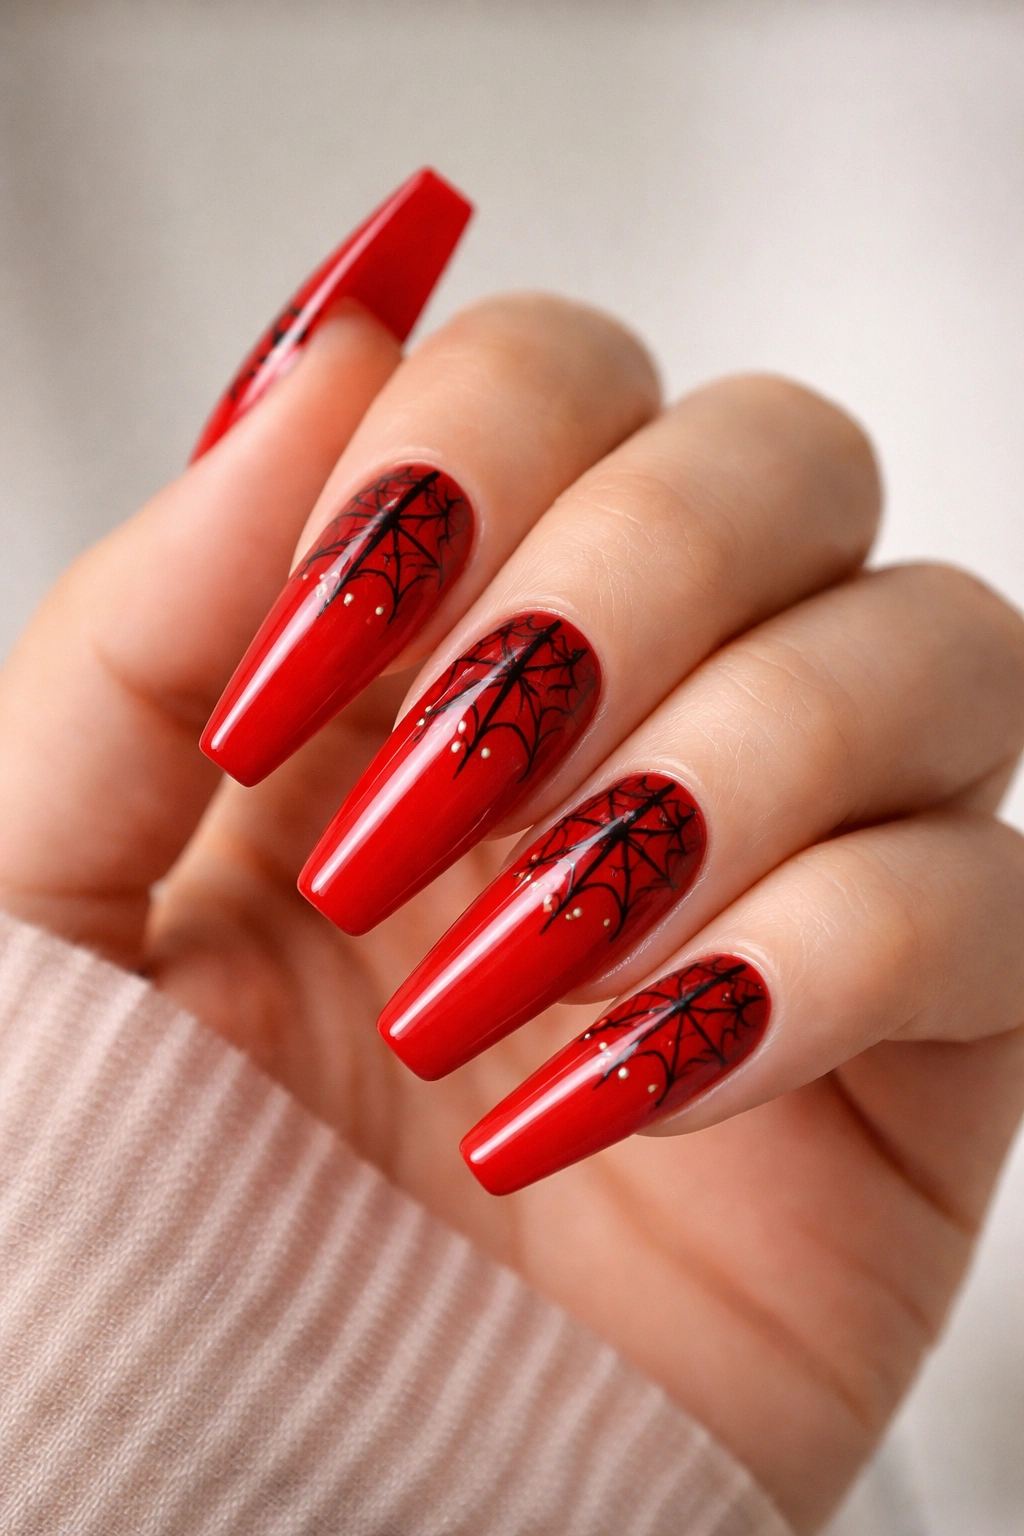
Spider web designs add an edgy, slightly rebellious vibe that suits coffin nails perfectly. Using thin black lines to create delicate spider web patterns across red polish creates intricate-looking nail art that’s actually easier to execute than it appears. The contrast between the bold red base and thin black webbing creates visual drama without feeling chaotic.
Creating Intricate Web Patterns
Spider web designs work on coffin nails because the elongated surface gives you plenty of room to create web patterns without them feeling crowded. The coffin shape naturally draws the eye toward the point, and webbing patterns look especially striking radiating from the tip area.
Drawing Spider Webs with Precision
- Start with two coats of bright, bold red as your base — the darker and richer the red, the more your black webbing stands out
- Use a thin black nail art brush or striping tool to create the basic web structure
- Start with one vertical line down the nail center, then add diagonal lines creating a web-like pattern
- Add horizontal connecting lines to complete the spider web effect
- Keep lines thin and even for a professional appearance
- Web patterns can be concentrated at the tip, spread across the entire nail, or featured on just one or two accent nails
- Seal with glossy top coat to make the black lines appear sharp and defined
Pro tip: Practice spider web patterns on a nail wheel or practice nail before committing to your actual nails. This design requires a steady hand, but once you get the pattern down, it becomes quick and easy to repeat.
9. Red Velvet Matte Finish with Metallic Accents

Matte red nails have a softer, more sophisticated feel than glossy red — they read as elegant and expensive rather than bold and playful. Adding metallic accents like gold or silver lines, dots, or geometric shapes on a matte red base creates contrast that makes the design feel intentional and curated.
Why Matte Red Feels Different
Matte polish absorbs light rather than reflecting it, which creates a velvety, refined appearance that feels more luxurious than glossy versions. On coffin nails, matte red has a sophisticated elegance that works beautifully for professional settings and formal occasions. Metallic accents create just enough shine to prove the design is intentional without overwhelming the matte aesthetic.
Building the Matte with Metallic Combo
- Apply two coats of red polish in your preferred shade, making sure coverage is completely even
- Apply a matte top coat over the entire nail and allow full drying time
- Use metallic polish in gold, rose gold, or silver to add delicate accents
- Metallic accents work beautifully as thin lines, small dots scattered across the nail, or geometric shapes outlined in metallic
- Keep metallic coverage minimal — about 20-30% of the overall nail should feature metallic shine to avoid overwhelming the matte aesthetic
- Seal metallic accents with a clear glossy top coat for durability and to make metallics shine even more
- This creates a beautiful contrast between matte and glossy finishes on the same nail
Pro tip: If applying matte top coat feels heavy-handed, try a matte wax instead. Matte wax gives you the velvet appearance with more control and easier application.
10. Red Ombre with Holographic Dust
Holographic dust creates an iridescent shimmer that shifts color depending on how light hits it — think rainbow sparkle that changes from pink to blue to gold as you move. Layering holographic dust over a red ombre creates a dynamic, eye-catching design that feels almost magical and definitely conversation-starting.
The Magic of Holographic Effects
Holographic dust works especially well on ombre designs because the color gradient gives the holographic shimmer something interesting to dance across. On coffin nails, the elongated surface becomes a canvas for light-shifting sparkle that looks different from every angle. This design feels expensive and complex while being surprisingly straightforward to create.
Layering Holographic Dust Correctly
- Create an ombre gradient from deep red at the base to bright red or pink at the tips using the sponge method
- Once ombre is fully dry, apply a thin layer of clear polish as an adhesive for the holographic dust
- Sprinkle holographic dust generously across the entire nail while the clear polish is still slightly tacky
- Press the dust gently into place and allow it to fully cure
- Tap off any loose particles once everything is dry
- Seal with a thick, glossy top coat that will smooth down the dust particles slightly and create a glass-like finish
- The holographic shimmer will show through the top coat beautifully
Pro tip: Holographic dust can feel gritty if you don’t seal it properly. Apply your top coat generously and allow extra drying time to ensure the dust is fully encased and smooth.
11. Deep Red with Minimalist Line Art Design
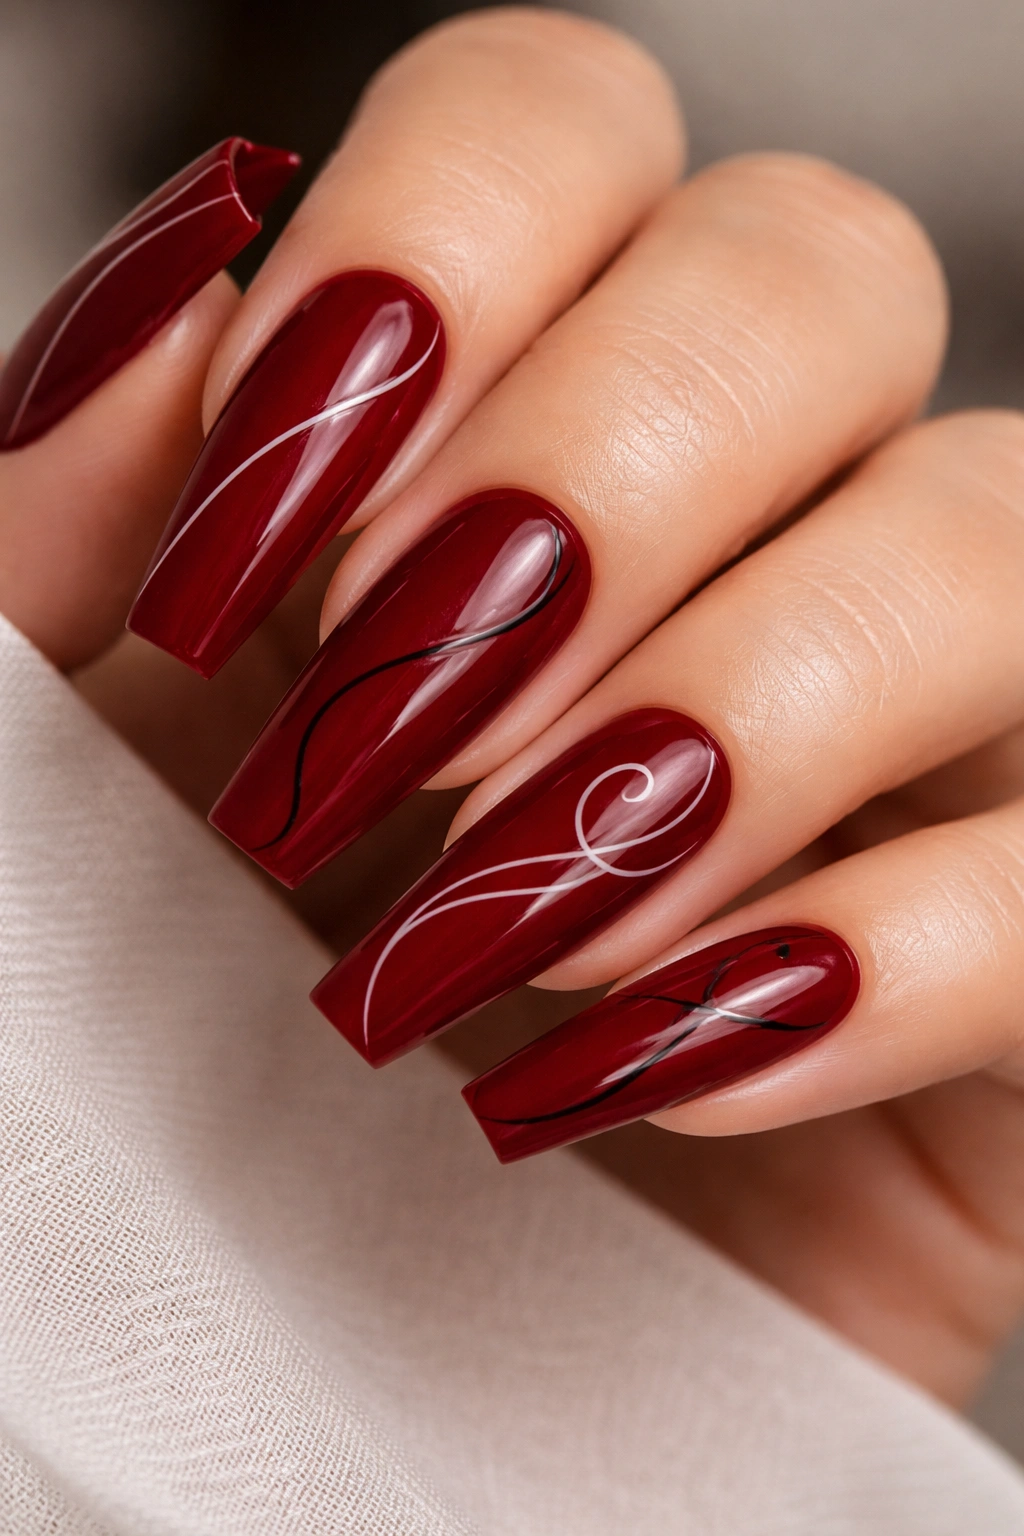
Line art designs featuring simple illustrations like flowers, faces, or abstract patterns create artistic, sophisticated nail art that feels gallery-quality. On deep red coffin nails, minimalist line art in black, white, or contrasting colors reads as intentional and elegant rather than busy or chaotic.
Creating Art That Reads on Small Canvas
Line art works beautifully on coffin nails because the elongated shape gives you enough vertical space to feature a complete illustration without feeling cramped. The deep red background makes thin black or white lines pop with clarity, and the nail becomes a tiny canvas for genuine artistic expression.
Executing Line Art with Precision
- Apply solid, deep red as your base — rich burgundy or dark crimson works beautifully with black or white line art
- Use a thin nail art brush and black or white polish to sketch your design onto the nail
- Line art works beautifully as simple line drawings — a single continuous line forming a face, a delicate floral stem, abstract geometric patterns, or minimalist nature scenes
- Keep your design to one or two illustrations per nail rather than filling every inch with detail
- Consider featuring different line art on each nail rather than repeating the same image across your entire hand
- Seal with your preferred top coat — glossy emphasizes line clarity while matte creates a more artistic, less reflective finish
- This style works especially well for accent nails featuring unique designs while other nails stay solid red
Pro tip: If you’re not confident in your freehand drawing ability, use thin nail art decals or stamping plates featuring line art designs, then add your own personal touches with a thin brush if desired.
Final Thoughts
Red coffin nails represent the perfect intersection of bold and elegant, and these eleven designs prove that red is endlessly versatile. Whether you gravitate toward minimalist sophistication, glittery glamour, artistic detail work, or edgy patterns, there’s a red coffin nail design that matches your personal style and mood.
The beauty of coffin-shaped nails is that the elongated silhouette itself is a statement, which means you can elevate even simple designs through the shape alone. Pair that natural elegance with red’s universal flattering quality, and you’ve got a foundation for endless creative expression.
Pick a design that speaks to you, gather your polish and tools, and don’t be afraid to experiment. Nail art improves with practice, and the stakes are low enough that trying and learning is genuinely fun. Your red coffin nails are waiting to become the statement piece that completes your whole look.
