

Short squoval nails hit that sweet spot perfectly—flattering enough for everyday wear, practical enough that you’re not constantly repairing broken tips, and surprisingly versatile when it comes to design possibilities. The squoval shape itself is doing heavy lifting here: it’s softer and more elegant than a sharp square, yet sturdier and more modern than a rounded oval. Add dip powder to the equation, and you’ve got a manicure that lasts three to four weeks without chipping, peeling, or that awkward regrowth phase that polish-only nails suffer through.
What makes dip powder especially perfect for squoval nails is how it actually enhances the shape. The thick, smooth finish that dip creates emphasizes clean lines and color saturation in ways that regular polish simply can’t match. A design that might look flat or underwhelming in regular lacquer suddenly feels dimensional and intentional when applied in dip. You get better color payoff, longer-lasting results, and that professional salon finish that makes people ask “where did you get your nails done?”
The challenge with short nails, though, is getting a design that doesn’t feel cramped or overwhelming. Certain patterns and color combinations just work better on a smaller canvas. That’s why I’ve put together this list of twelve designs that are specifically chosen to look stunning on short squoval nails—not trying to be something they’re not, but celebrating what makes this shape and length so wearable and chic.
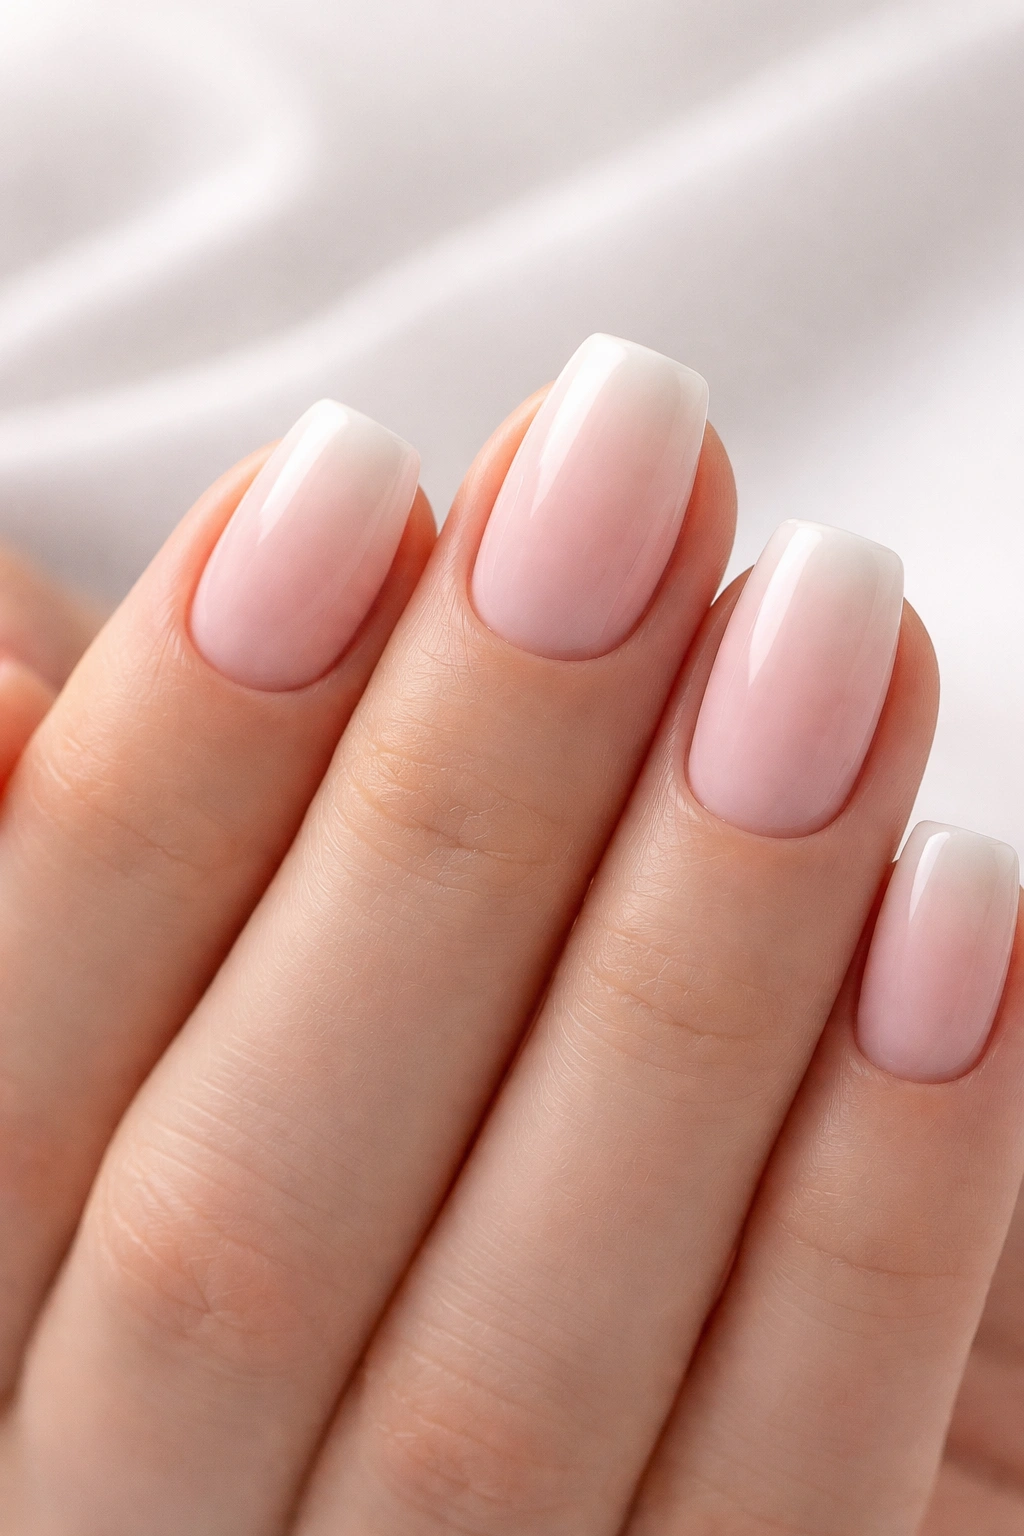
1. Soft Nude with Ombre Cloud Effect
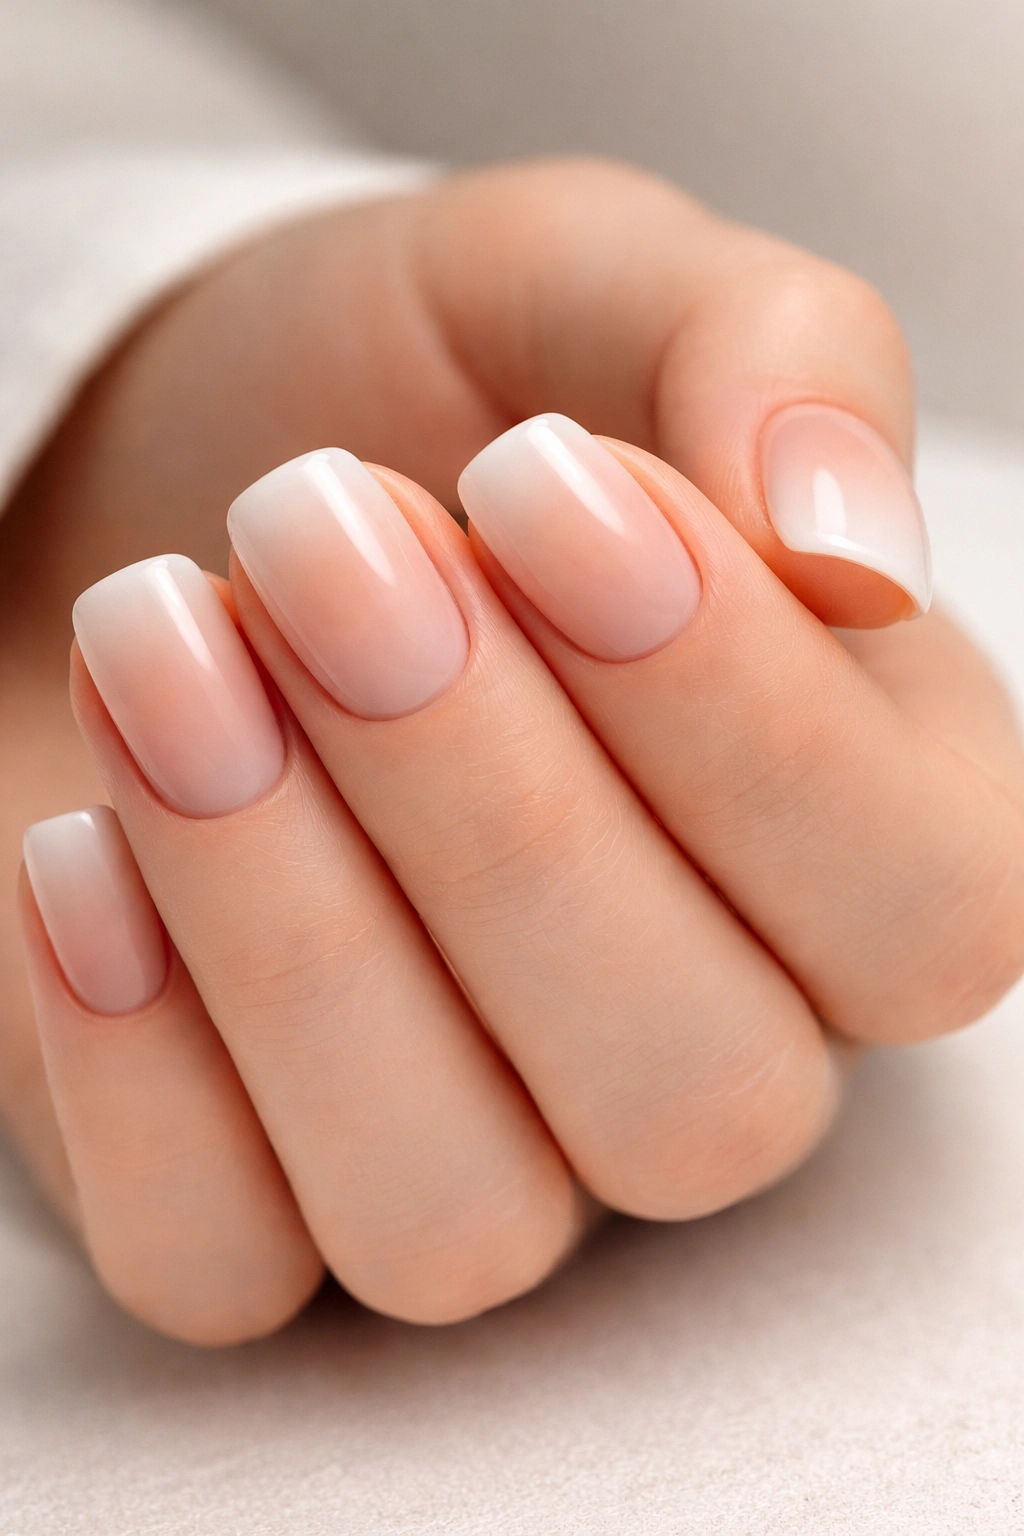
A soft nude base with an ombre cloud effect represents one of the most universally flattering designs you can choose. This isn’t your grandmother’s nude—it’s a carefully layered blend that starts with a warm beige at the base and gradually shifts to a soft peachy-pink or translucent white at the tips, creating a cloud-like diffusion that feels both elegant and modern.
Why This Works So Well for Short Squovals
The beauty of this design is that it creates an optical lengthening effect. By placing the lightest color at the tip, your fingers look slightly longer than they actually are, and the color gradient draws the eye upward along the nail. On short nails, this trick is genuinely game-changing. The soft, blended transition also feels less harsh than a crisp French manicure would, making it appropriate for professional settings while still being interesting enough to catch compliments.
How to Layer the Ombre
- Start with your base color—a warm neutral like “Sand Castle” or “Soft Beige”
- Apply your second dip powder color at the halfway point (something peachy or milky white)
- Use a soft fan brush to blur and blend the line where the two colors meet
- Build up thin layers rather than one thick coat so the blend looks seamless, not striped
- Add a final top coat designed for ombre effects to seal and smooth the finish
Pro tip: If you’re going for this look at home, invest in a quality makeup sponge—it’s perfect for dabbing and blending dip powder colors together on the nail before fully curing.
2. Marble Effect with Gold Veining
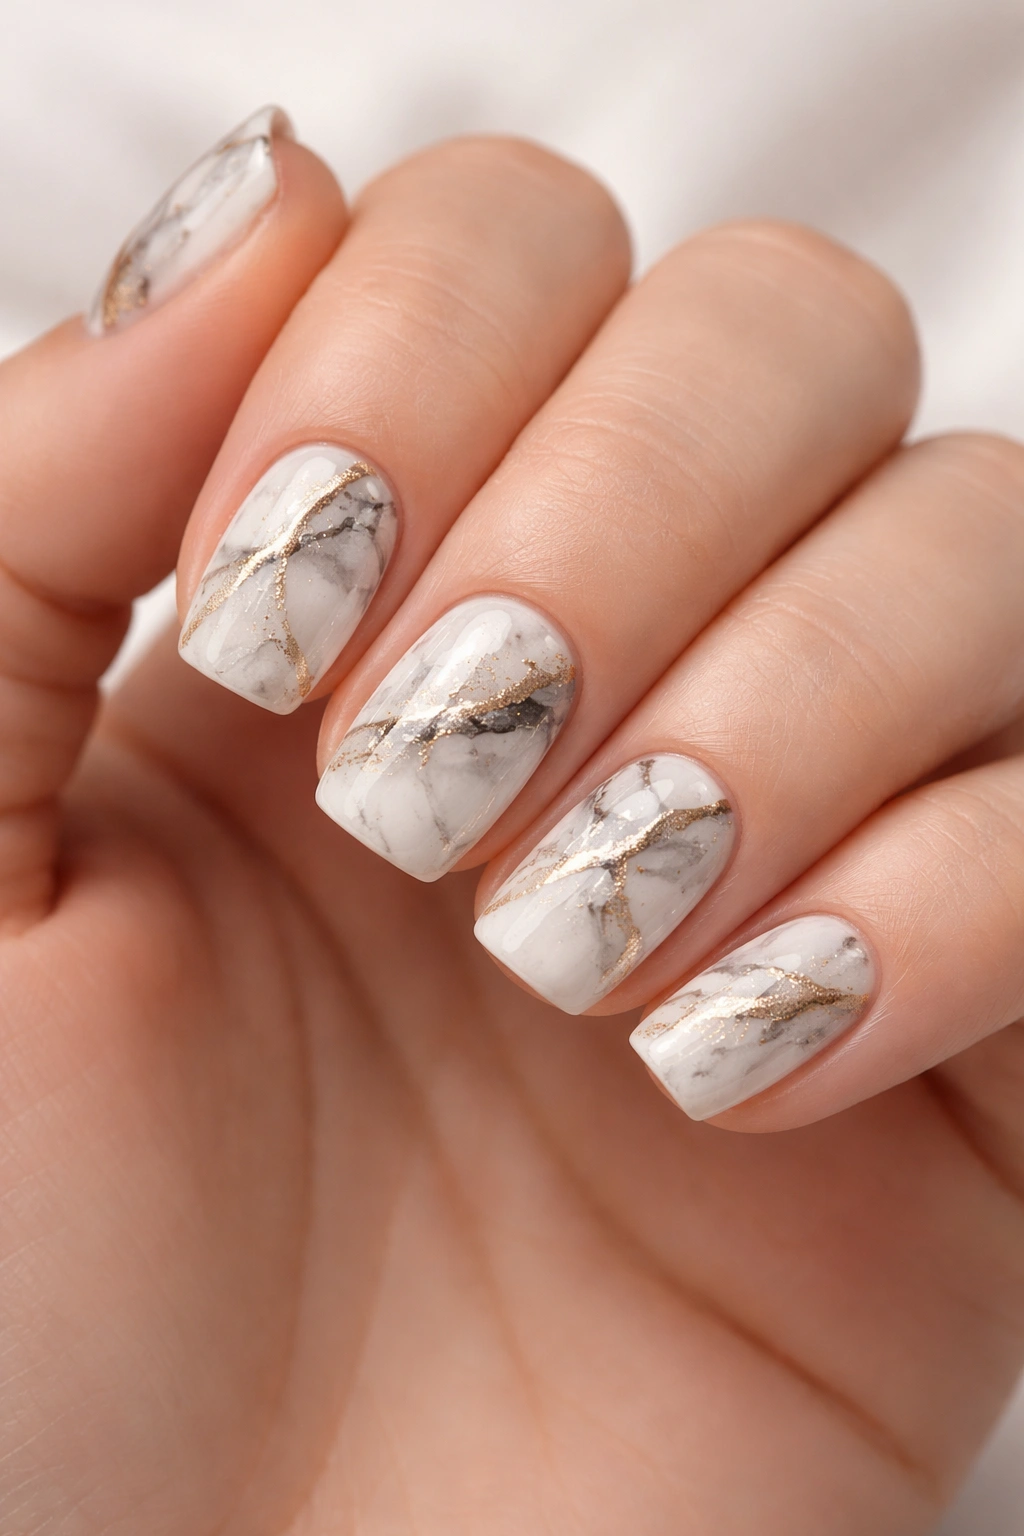
Marble designs have this timeless elegance that works across seasons and occasions. When you execute a marble effect on short squoval nails using dip powder, you get a sophisticated, high-end aesthetic that looks like you paid serious money for a custom design—even though it’s surprisingly achievable.
The Technique Behind Marble Dip
The marble effect works differently with dip powder than it does with regular polish because of how the powder adheres. You’re essentially creating organic, branching lines using a combination of multiple colors and a fine detailing brush. A white or cream base gets delicate black or gray lines applied with a thin brush in irregular, vein-like patterns. The key is embracing imperfection—actual marble has organic, unpredictable patterns, so your nail art should too.
Building Your Marble Design
- Apply a crisp white or pale gray dip base and cure
- Use a very fine detailing brush with black, charcoal, or dark gray dip powder to create irregular lines
- Let these lines branch naturally—don’t overthink placement
- Add occasional gold leaf or gold pigment along some of the veins for luxury appeal
- Seal with a glossy top coat to enhance the stone-like appearance
Worth knowing: The thinner your detailing lines, the more refined and expensive your marble will look. Practice your brush control on paper first if this is your first time attempting detailed work.
3. Chrome Metallic with Matte Edges

Chrome dip powder finishes are genuinely futuristic-looking, and pairing chrome with matte creates an unexpected textural contrast that feels incredibly modern. The combination of high-shine mirror-like chrome in the center of the nail with a velvety matte finish at the edges creates visual dimension that’s perfect for the limited real estate of short nails.
Why the Two-Texture Approach Works
This design is smart because it gives you the best of both worlds. Chrome alone can feel a bit one-note, while matte alone might not have quite the impact you’re looking for. By blending them on the same nail, you create visual interest and depth. The matte edge also serves a practical purpose—it frames the nail and makes the chrome appear even more reflective and prominent by contrast.
Application Strategy
- Start with a base color that coordinates with your chosen chrome finish (silver, rose gold, or gunmetal typically work best)
- Apply chrome dip powder to create a solid chrome layer and cure fully
- Carefully apply matte powder to just the outer edges, creating a clean border around the shiny chrome center
- You can be precise with a clean line, or you can let them blend slightly for a more artistic effect
- Finish with a matte top coat over everything for cohesion
Insider note: Chrome powders look even more spectacular under bright or natural light. If you’re wearing this design somewhere with good lighting, the effect is absolutely stunning.
4. French Ombre Gradient Blend
The French manicure gets a modern update when you combine it with ombre dip powder techniques. Instead of that traditional stark white tip, you create a gradient that transitions from your base color smoothly into white at the very tip, creating a sophisticated, elongated look.
The French Ombre Advantage on Short Nails
Traditional French tips can sometimes look slightly dated or too dramatic on very short nails. The ombre version softens the look while keeping the elegance and elongating effect intact. It’s formal enough for business settings but contemporary enough that it doesn’t read as “basic.” The gradient approach also is more forgiving than a hard line—small imperfections blend right into the design.
Creating the Perfect Transition
- Choose a soft base color—blush, nude, or a barely-there pink
- Apply this as your foundation color and cure
- At the nail tip, begin applying white dip powder, but don’t go all the way to the edge
- Create a layered transition zone where white gradually replaces the base color
- Use blending techniques with a soft brush to make the colors meld naturally
- The result should look like the white is fading into the base, not two separate sections
Pro tip: This design photographs beautifully and looks equally stunning in person. It’s an excellent choice if you want to be photographed frequently or just appreciate how it looks from multiple angles.
5. Matte Black with Minimalist Gold Geometric Lines
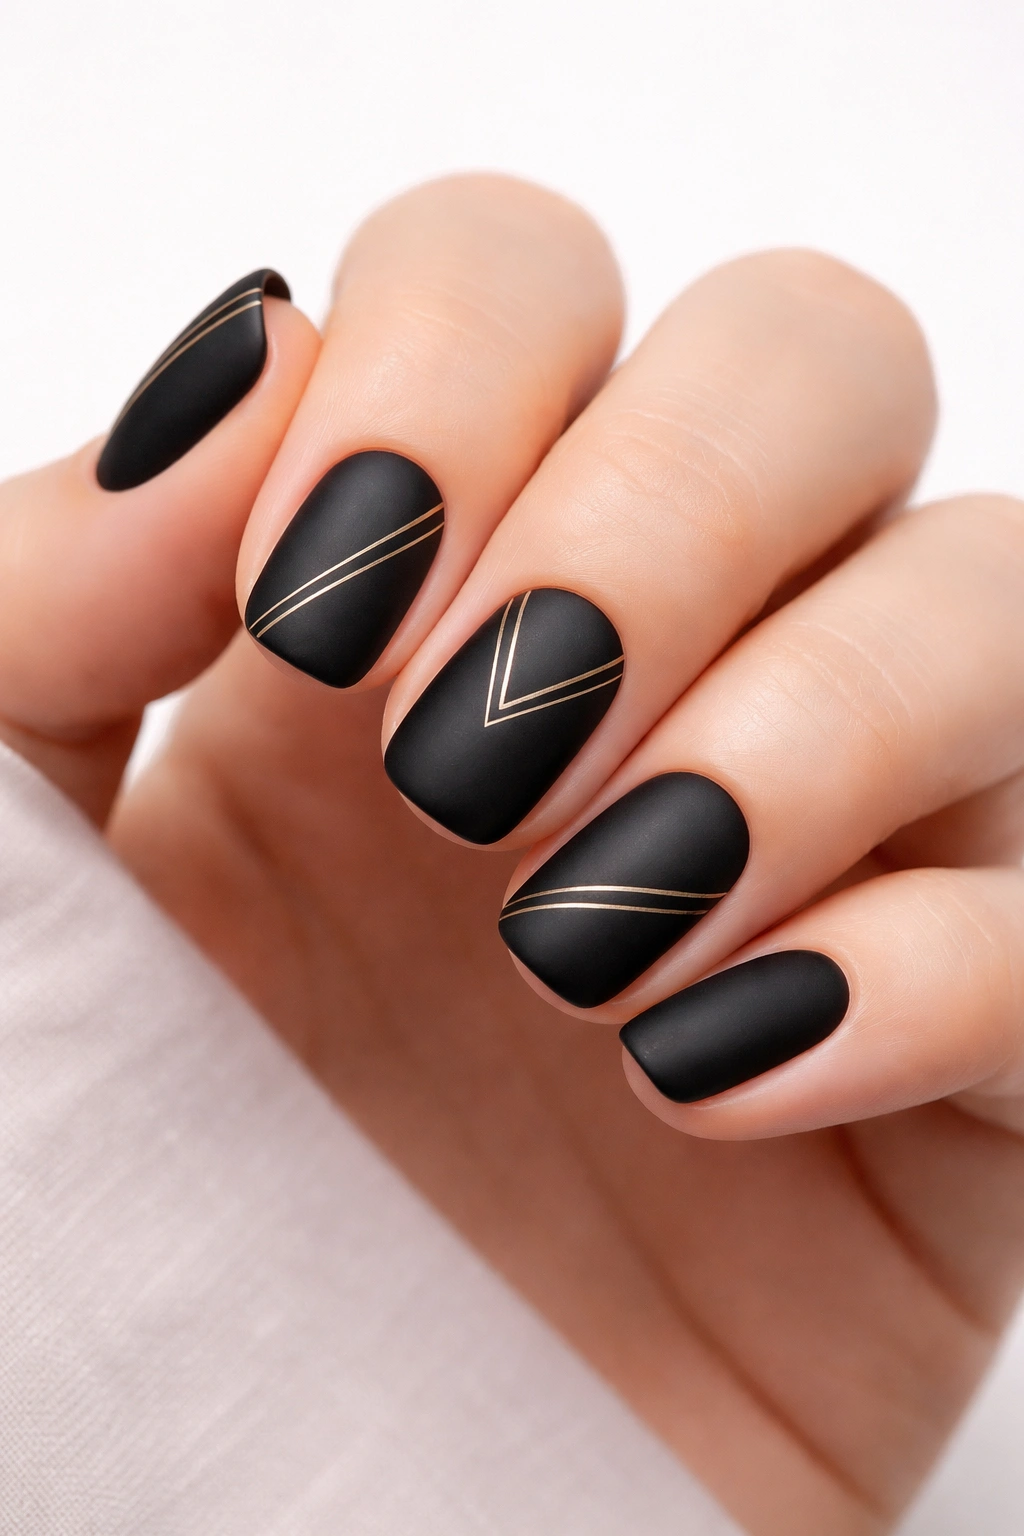
Matte black dip powder creates a serious, sophisticated vibe, and when you add geometric line work in gold, you get editorial-level nail art. This design thrives on short squoval nails because the geometric shapes actually enhance the nail’s natural proportions rather than fighting against them.
Why Minimalism Shines on Short Nails
The temptation with short nails is sometimes to overcompensate with busy, complicated designs. Paradoxically, the designs that look best on shorter nail beds are often the simplest ones. Minimalist geometric work—clean lines, maybe a small gold circle or triangle, or parallel stripes—creates impact through clarity rather than complexity. On a short nail, one well-executed gold line is more striking than ten competing elements.
Executing the Geometry
- Apply matte black dip powder as your base and cure completely
- Using a very fine detailing brush or even a thin striping pen, apply gold dip or gel to create clean lines
- Geometric options: a single vertical line down the center, parallel lines running horizontally, a small triangle at the corner, or a minimal abstract shape
- Keep any design element to just one area of the nail—don’t scatter elements all over
- Seal with a matte top coat to preserve the sophisticated non-shine finish
Worth knowing: Matte finishes can sometimes feel plain to people accustomed to glossy nails, but the contrast of the matte black with shiny gold actually creates more visual interest than you might expect.
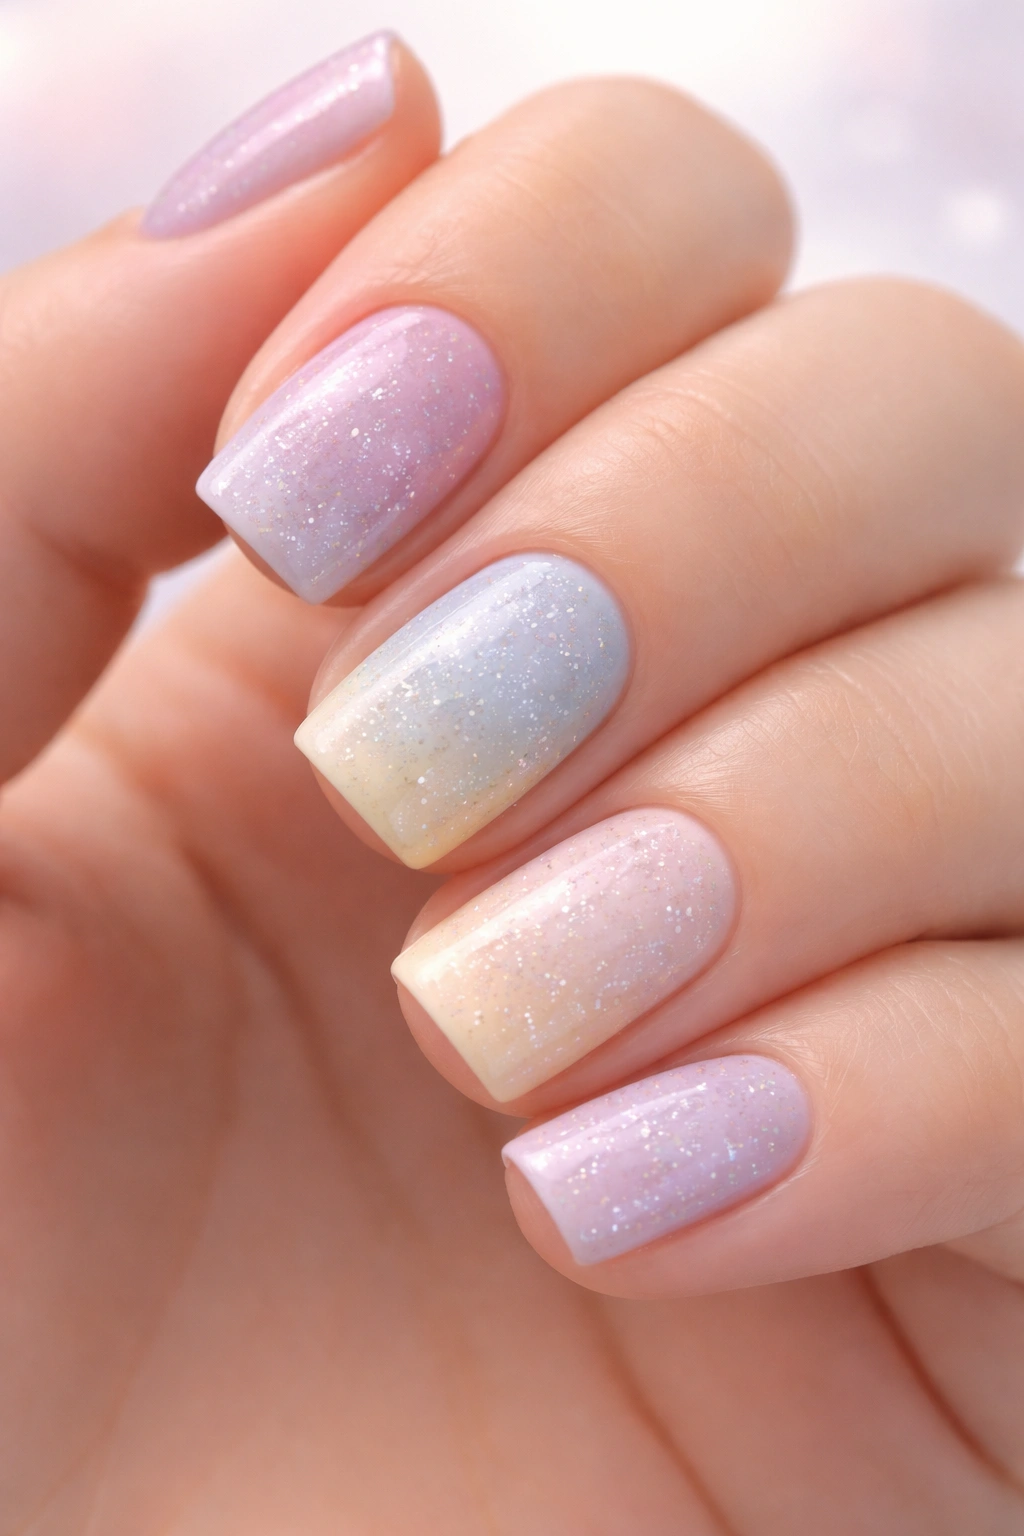
6. Pastel Gradient with Speckle Accent
Pastels are having a major moment, and gradient dip powder in soft pastels creates an aesthetic that’s both playful and sophisticated. Adding speckling (tiny dots in a contrasting or complementary color) gives dimension without requiring advanced technical skills.
The Appeal of Pastel Gradients
Pastel colors have this inherent soothing quality, and when you layer them in a gradient on short squoval nails, the effect is refined rather than childish. Moving from a soft lavender at the base through powder blue to barely-there white creates a dreamy, color-blocked aesthetic that feels intentional and trendy without being overly trendy.
Building Your Pastel Gradient
- Select three pastel shades that transition beautifully together (lavender → blue → cream, or blush → peach → champagne)
- Apply your darkest pastel shade as the base color
- Move into your middle shade halfway up the nail
- Finish with your lightest shade at the tip
- Blend the transitions gently using a soft brush to avoid harsh lines
- Add fine speckling using a thin brush with white, gold, or even a slightly deeper shade for contrast
- The speckling should be sparse—think stars, not confetti
Pro tip: If you’re worried about blending, you can also skip the perfect gradient and embrace a more color-blocked look where each section is clearly defined. It’s actually quite chic and arguably easier to execute.
7. Geometric Minimalist with Negative Space
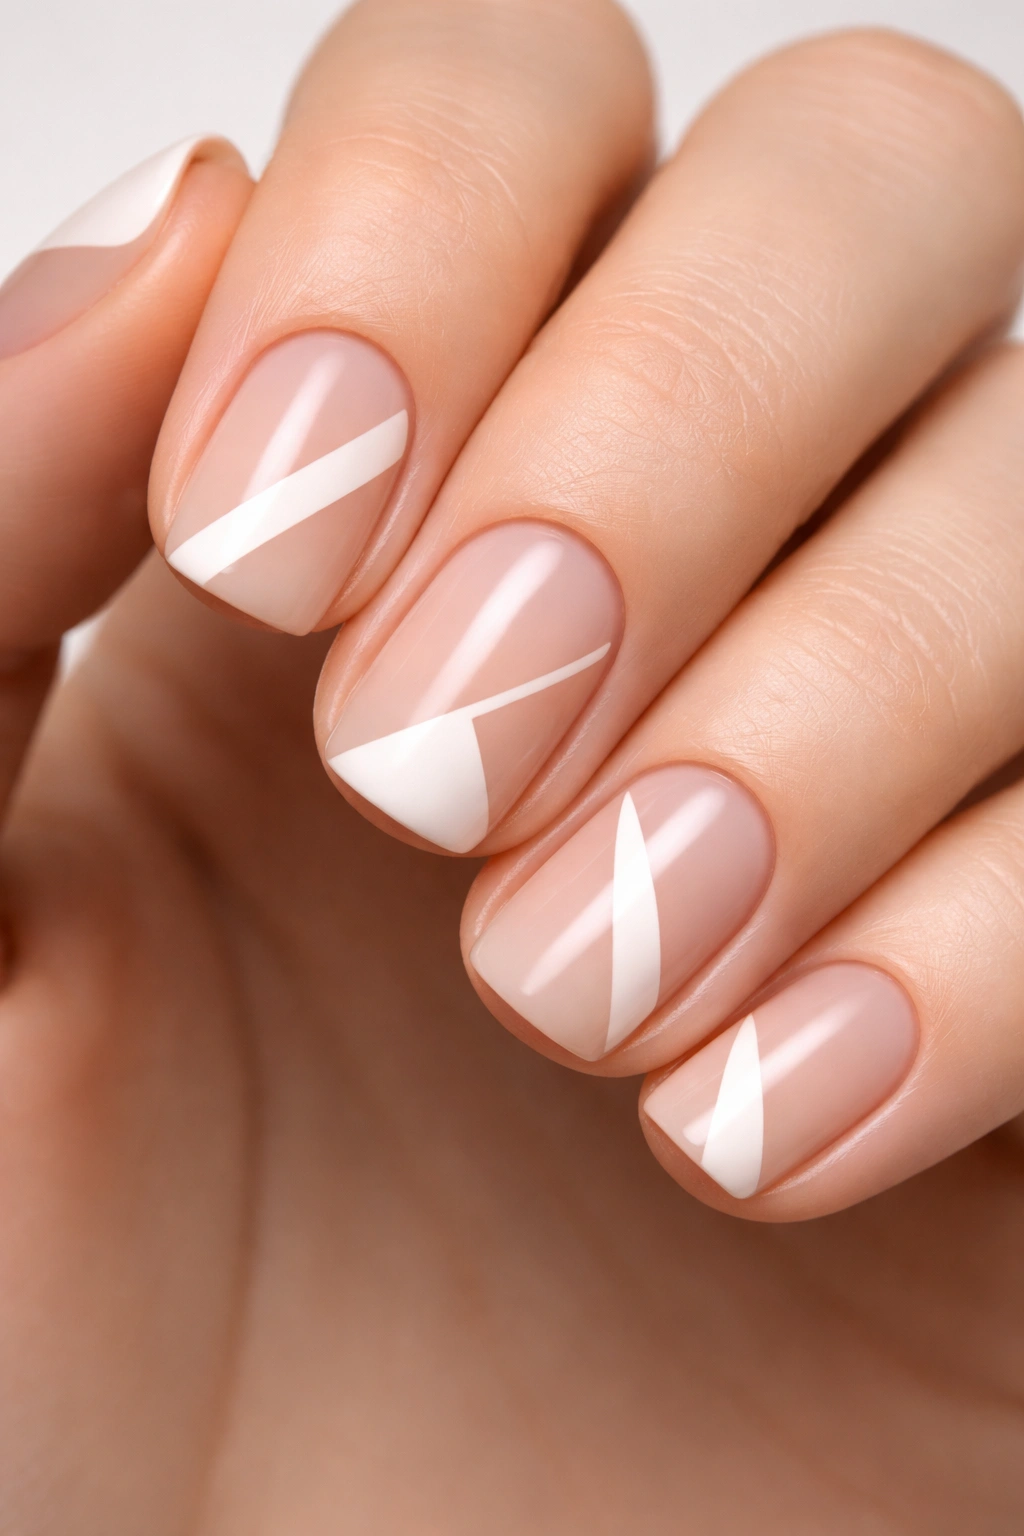
Negative space designs—where you intentionally leave part of the nail unpainted to show the natural nail underneath—create an incredibly modern, artistic feel. On short squoval nails, negative space designs work particularly well because they don’t crowd the nail bed and actually create interesting optical effects.
How Negative Space Creates Impact
By removing part of the design area, you make the colored portions stand out more intensely. A half-painted nail, a nail with a geometric cutout shape, or even just a thick colored stripe down one side creates visual tension and sophistication. The eye is drawn to the contrast between the dip powder color and the natural nail, creating interest without additional embellishment.
Designing with Negative Space
- Start with a clear base or just clean, buffed natural nails
- Use striping tape to create clean lines and define which areas will be painted
- Apply dip powder to only the areas you’ve marked out
- The unpainted areas create the “negative space” part of the design
- Popular negative space options on short nails: a diagonal stripe, a thick border around the edges, a triangular shape, or a side-to-side block
- Keep the design symmetrical for maximum impact
Worth knowing: This approach actually makes manicures last a bit longer since less nail surface is being coated, and there’s less stress on the edges where chipping typically starts.
8. Glitter Gradient with Fading Effect
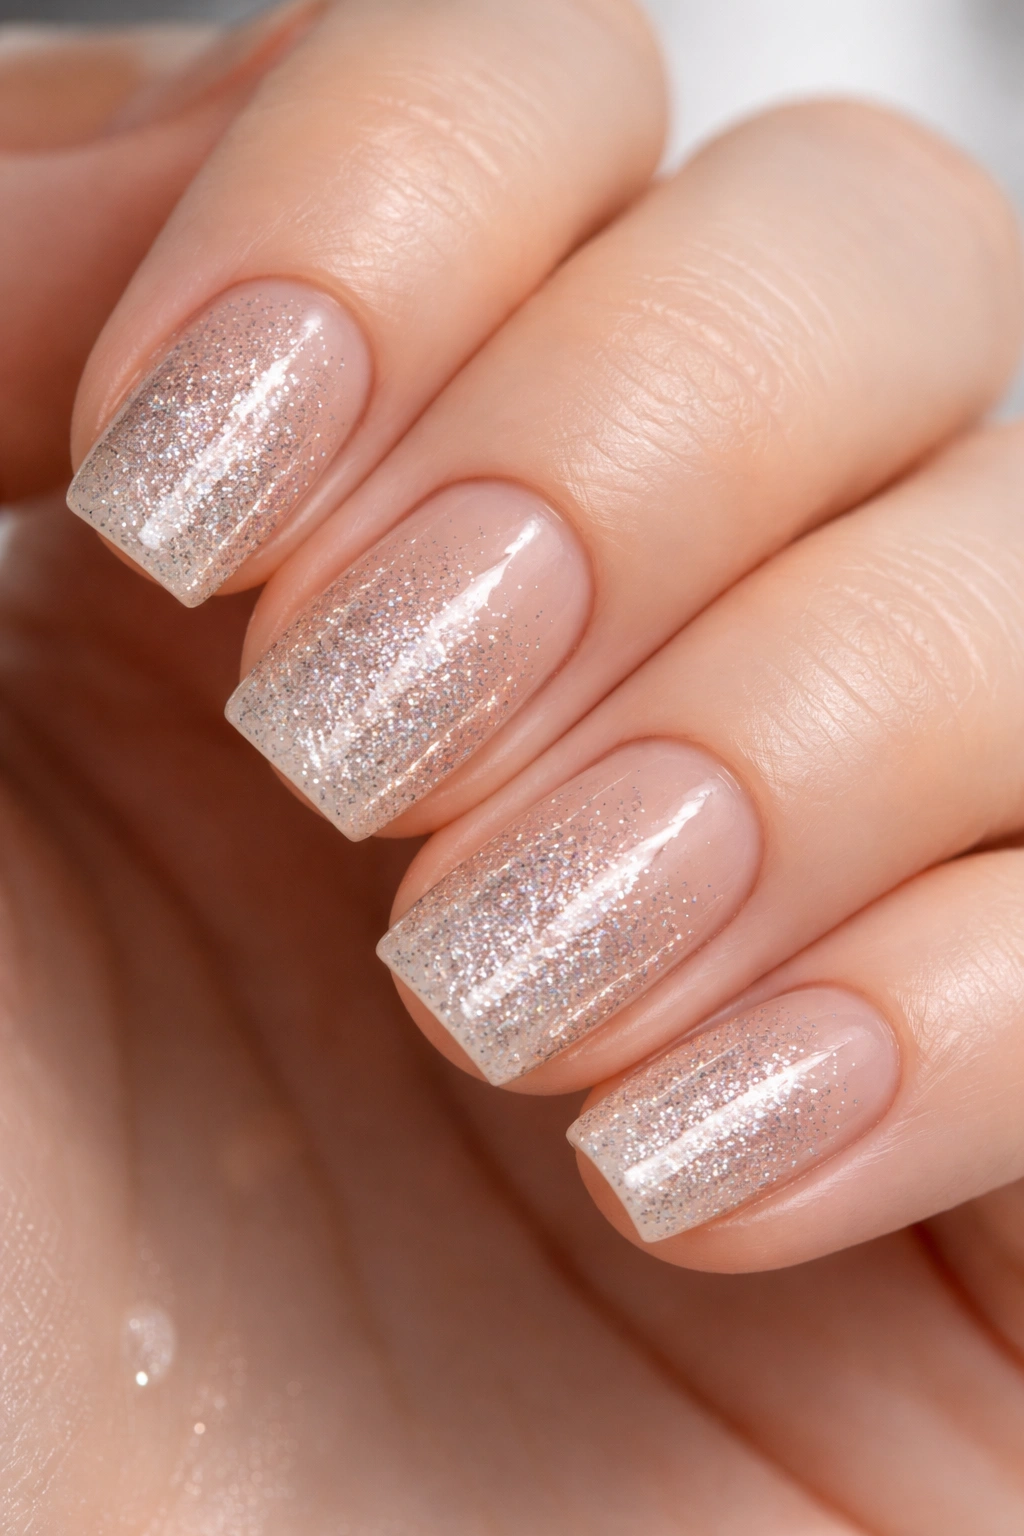
Glitter dip powder creates sparkle and dimension, but full glitter nails can sometimes feel overwhelming, especially on short nail beds. The solution? A glitter gradient that starts opaque at the base and fades to sparse glitter at the tips, then disappears entirely into a clear or neutral shade.
The Sparkle-to-Nothing Transition
This design is inherently flattering because it guides the eye upward and outward—the brightest, most decorative part is at the base of the nail, while the tips stay relatively clean and unencumbered. It creates visual length and elegance while still delivering the fun, celebratory vibe that glitter provides.
Creating the Fade
- Start with a base color or nude dip powder
- Apply a generous amount of glitter dip at the base of each nail
- Moving up toward the tip, apply progressively less glitter powder with each layer
- Eventually transition to either clear dip or your base color with no glitter
- The gradient should look intentional, like the glitter is dissolving as it moves toward the tip
- Finish with a glossy top coat that seals all the sparkle in place
Insider note: If you want maximum sparkle without it being overwhelming, this gradient approach is genuinely the sweet spot. It’s festive enough for special occasions but not so intense that you’ll get sick of it after a day or two.
9. Two-Tone Colorblock with Contrasting Accent Nail
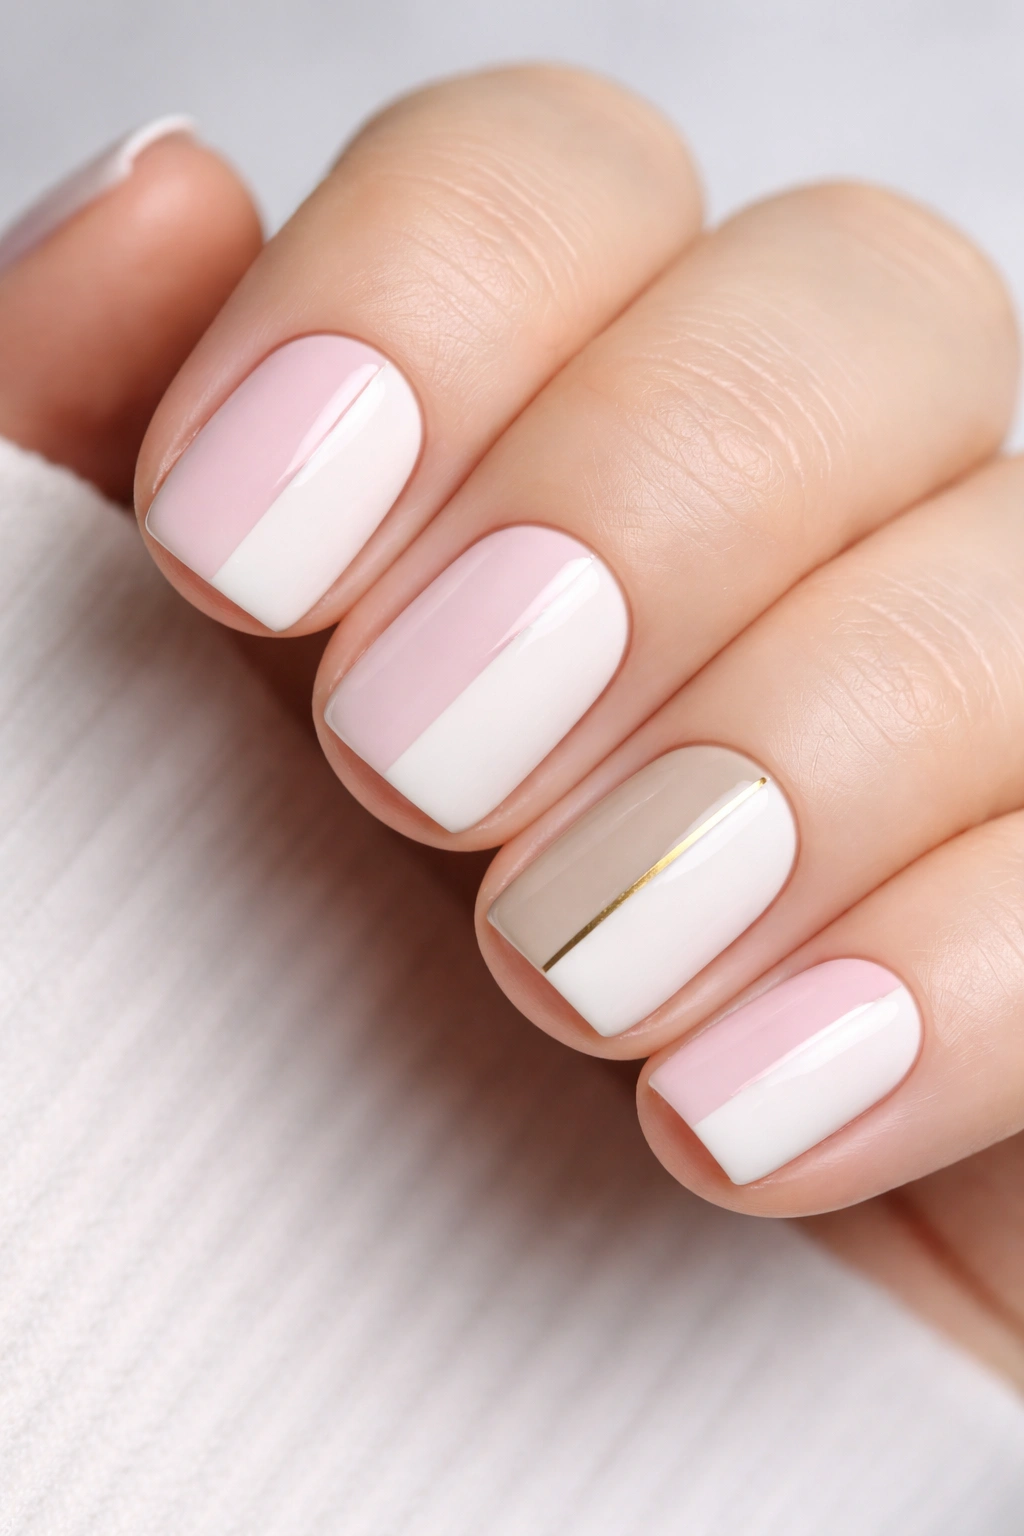
Colorblocking is a graphic design principle that works beautifully on nails when executed with intention. By dividing each nail into two distinct color zones, then picking one accent nail to be slightly different, you create a cohesive look that’s modern and intentional without being complicated.
Why Colorblocking Works on Short Nails
The clean lines of a colorblock design actually emphasize the shape of your short squoval nails rather than fighting against them. A vertical split of deep teal and mustard yellow, for instance, creates striking contrast while celebrating the nail’s natural proportions. Adding an accent nail—maybe with a thin gold dividing line or a third color—adds sophistication without overwhelming the design.
Executing Colorblock Perfection
- Plan your color combination before you start (consider whether you want bold contrast or complementary tones)
- Use striping tape to create a precise dividing line—this is essential for a clean look
- Apply your first dip color carefully within the taped boundary
- Remove the tape and apply your second color in the remaining area
- For the accent nail, either create a variation of the same split or introduce a gold line, third color, or subtle pattern
- Seal everything with a glossy or matte top coat depending on your color choices
Pro tip: The most stunning colorblock combinations are ones where the two colors have different undertones. A warm mustard with a cool teal creates more visual excitement than two colors from the same temperature family.
10. Speckled Confetti with Metallic Dust
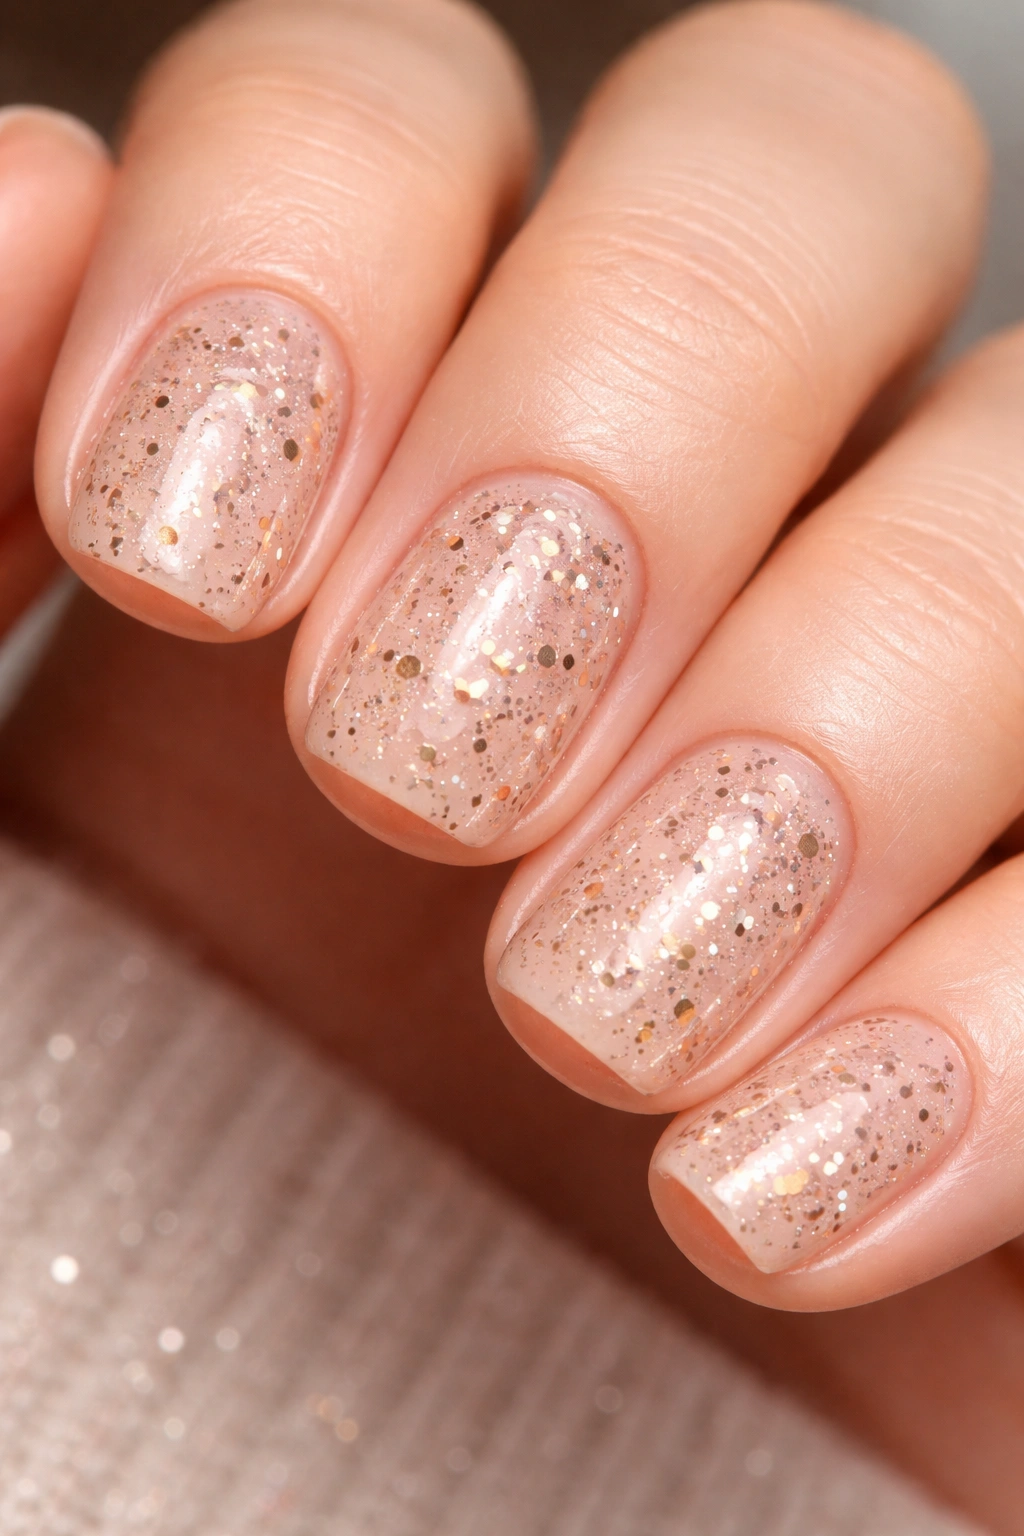
Speckled designs have that playful, artistic quality that feels less formal than many other nail art options. By applying speckles in various metallic colors—rose gold, champagne, bronze, and silver—over a neutral or jewel-tone base, you create a design that’s visually interesting without being busy or chaotic.
The Charm of Controlled Randomness
Even though speckles appear random, they’re actually quite controlled—you’re placing each tiny dot intentionally, which gives the design coherence while maintaining that organic, effortless appearance. On short nails, this works particularly well because the smaller surface area means the speckles don’t feel scattered or disorganized.
Building the Speckle Design
- Start with a base color—this works beautifully with jewel tones like emerald, sapphire, or burgundy, or with neutrals like taupe or soft gray
- Using a fine stippling brush or even a toothpick, apply tiny metallic speckles across the nail
- Vary the metallic colors you’re using so the speckles have dimension and visual interest
- The placement should feel somewhat random, but make sure you’re covering the nail fairly evenly—don’t cluster all speckles in one area
- Each speckle should be tiny and distinct, not blurred together
- Finish with a glossy top coat that makes the metallic elements pop
Worth knowing: This design actually hides imperfections beautifully. If your application isn’t perfectly neat, the speckles create visual interest that distracts from any tiny mistakes.
11. Brushstroke Abstract Art in Jewel Tones
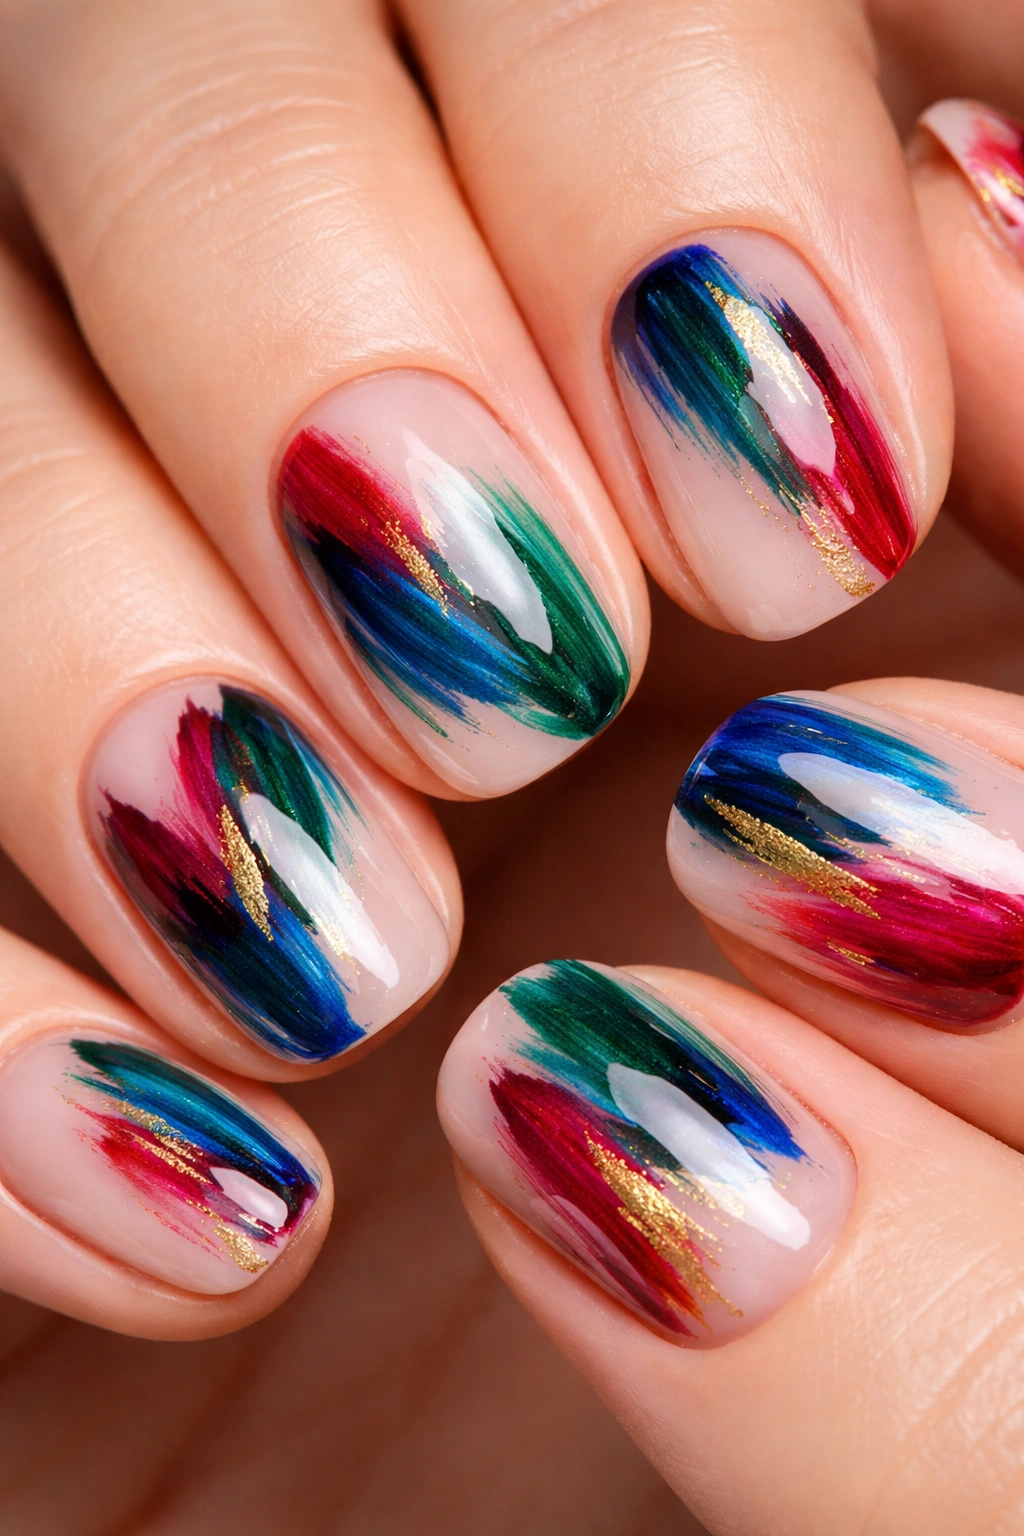
Abstract brushstroke designs feel artistic and intentional while requiring significantly less technical skill than other forms of nail art. Bold, gestural strokes in rich jewel tones create a design that feels gallery-worthy and completely unique.
The Beauty of Embracing Imperfection
Abstract art is, by definition, forgiving. Your brushstrokes don’t need to be perfect; they just need to be confident and intentional. On short squoval nails, bold abstract brushwork in two or three coordinating jewel tones (like sapphire and emerald, or ruby and gold) creates impact without feeling overwrought.
Executing Brushstroke Art
- Choose a base color—typically something neutral or a lighter jewel tone
- Using a medium-width flat brush, apply bold, confident strokes in your second color
- Let these strokes flow across the nail in different directions—diagonal, curved, geometric, organic
- Add a third color in some strokes for additional dimension
- The strokes should overlap slightly and create visual interest through composition, not perfection
- Seal with a glossy top coat that makes the jewel tones rich and dimensional
Pro tip: If you’re nervous about free-hand brushwork, practice on paper first. The hand motions will feel more natural when you actually apply them to your nails.
12. Holographic Dream with Iridescent Finish
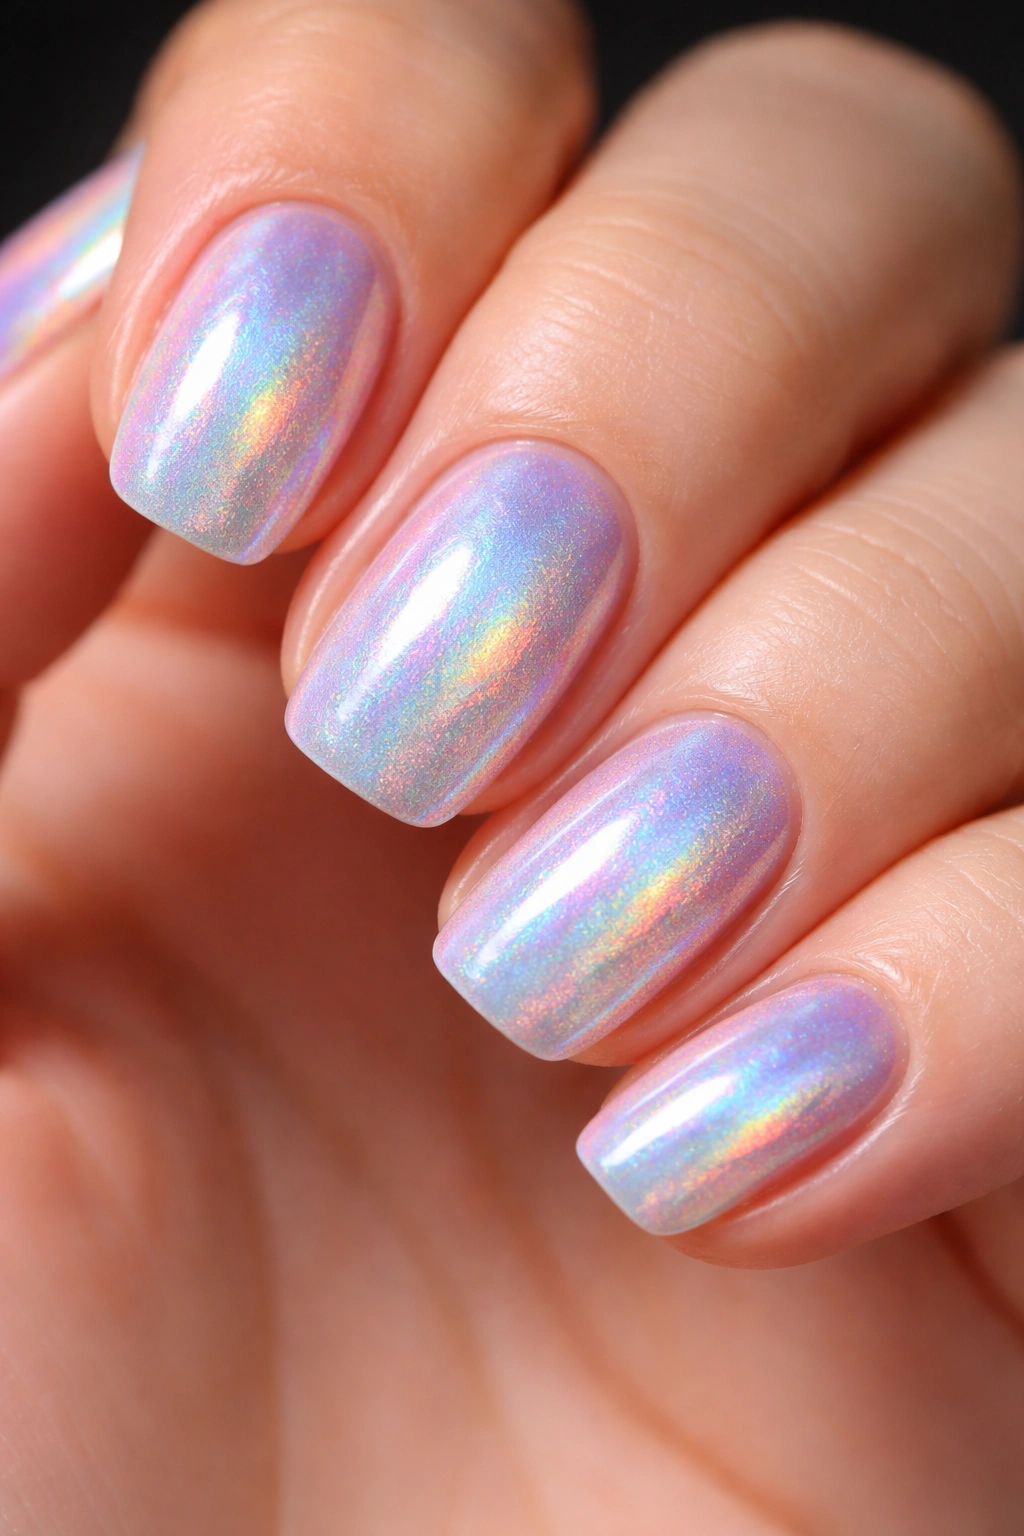
A holographic finish dip powder creates nails that shift color depending on the angle and light, making them genuinely mesmerizing. The iridescent quality means the design is never the same twice—it’s constantly showing different colors and moods depending on how you move your hands.
The Magic of Color-Shifting Finishes
Holographic dip powders are as close as you can get to wearable magic. In one moment your nails are blue, shift your hand and they’re purple, move again and they’re pink. This inherent visual interest means you don’t need additional design elements—the finish itself is the entire appeal. On short squoval nails, a solid holographic finish is sophisticated rather than gaudy.
Achieving the Holographic Look
- Select a high-quality holographic dip powder system—this is not the place to skimp, as cheaper products often don’t have true color-shifting properties
- Ensure your nails are perfectly shaped and buffed before application
- Apply two thin coats of holographic powder, curing between each layer
- The more even your application, the better the holographic effect will display
- Finish with a glossy top coat designed to work with iridescent powders—this is important, as the wrong top coat can dull the effect
- Cure fully and enjoy your color-shifting manicure
Insider note: Holographic nails look absolutely stunning in natural sunlight and under bright indoor lighting. If you’ll be photographed, this is the design to choose—the movement and color-shift creates incredible visual impact.
Final Thoughts
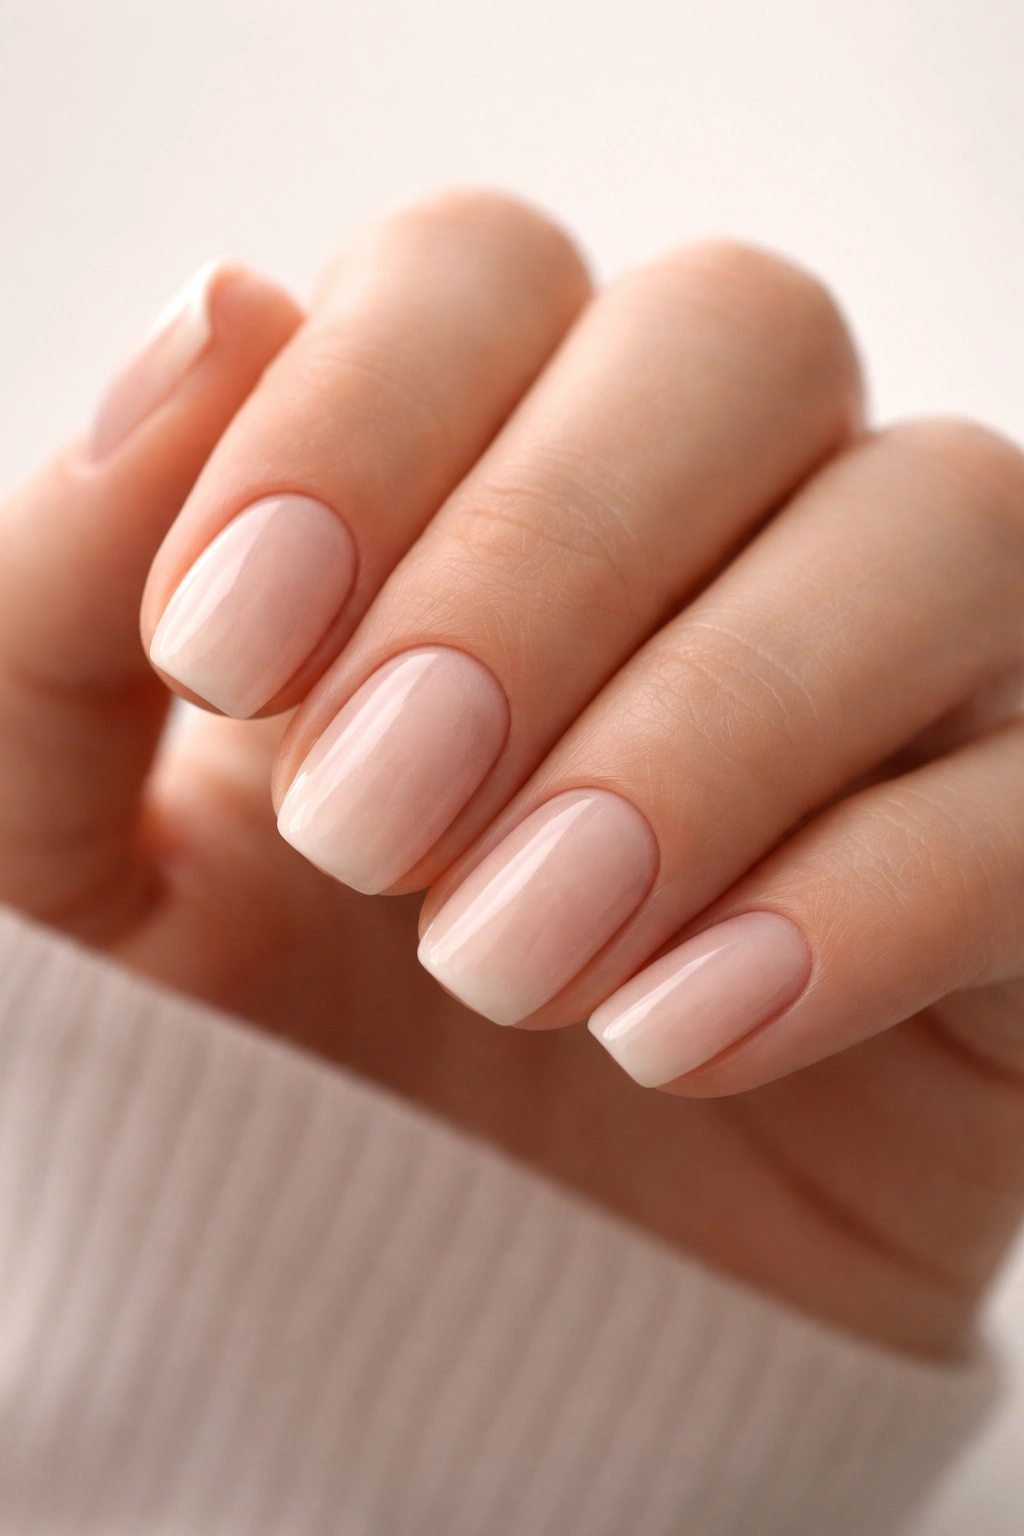
Short squoval nails are genuinely one of the best shapes you can choose if you’re looking for something that’s both practical and beautiful. They’re sturdy enough for daily activities, flattering enough that they elongate your fingers, and modern enough that they work with contemporary design trends. Pair that shape with dip powder’s durability and rich color payoff, and you’ve got a manicure that looks expensive and lasts for weeks.
The designs in this list were chosen specifically because they actually work on shorter nails—they don’t feel cramped, they don’t require extensive technical skill, and they deliver serious visual impact without complexity. Whether you’re drawn to soft pastels or bold jewel tones, minimalist lines or playful sparkle, there’s a short squoval dip powder design that fits your aesthetic perfectly.
The beauty of short nails is that they’re low-pressure. If you don’t love a design after a couple of days, you’re only investing a few more weeks before you can try something completely different. Use that freedom to experiment. Try the marble effect. Go bold with the colorblock. Embrace the abstract brushstrokes. The shape and formula you’re working with is forgiving enough that you’re almost guaranteed to end up with something you’ll love wearing.
