

Short squoval acrylic nails have become a go-to choice for anyone who wants a polished, practical manicure that actually works with real life. Unlike long stilettos or sharp almond shapes, squovals strike that perfect balance—they’re sophisticated enough for professional settings, comfortable enough for daily tasks, and genuinely flattering on most hand shapes. The “squoval” shape itself is exactly what it sounds like: a square nail with gently rounded corners, giving you the clean geometry of a square with the softened edges of an oval.
What makes short squoval acrylics especially appealing is their versatility. They’re long enough to showcase nail art and color, but short enough that you can actually use your hands without constantly worrying about breaking a nail or struggling with basic tasks. Whether you prefer minimalist designs, soft pastels, bold geometric patterns, or glittery finishes, the squoval canvas adapts beautifully to nearly any aesthetic. Plus, acrylics in this shape tend to be remarkably durable—the squared edges with rounded corners distribute stress more evenly than purely pointed nails, which means fewer breaks and longer-lasting manicures.
The beauty of keeping your squoval designs simple is that simplicity often reads as more elegant and refined. A single accent nail, a clean gradient, a tiny line design, or a solid color with dimension—these understated approaches tend to age better than intricate nail art and photograph beautifully in everyday life. Whether you’re heading into the office, out for a night out, or just want to refresh your current look, here are 15 stunning short squoval acrylic nail ideas you can actually pull off.
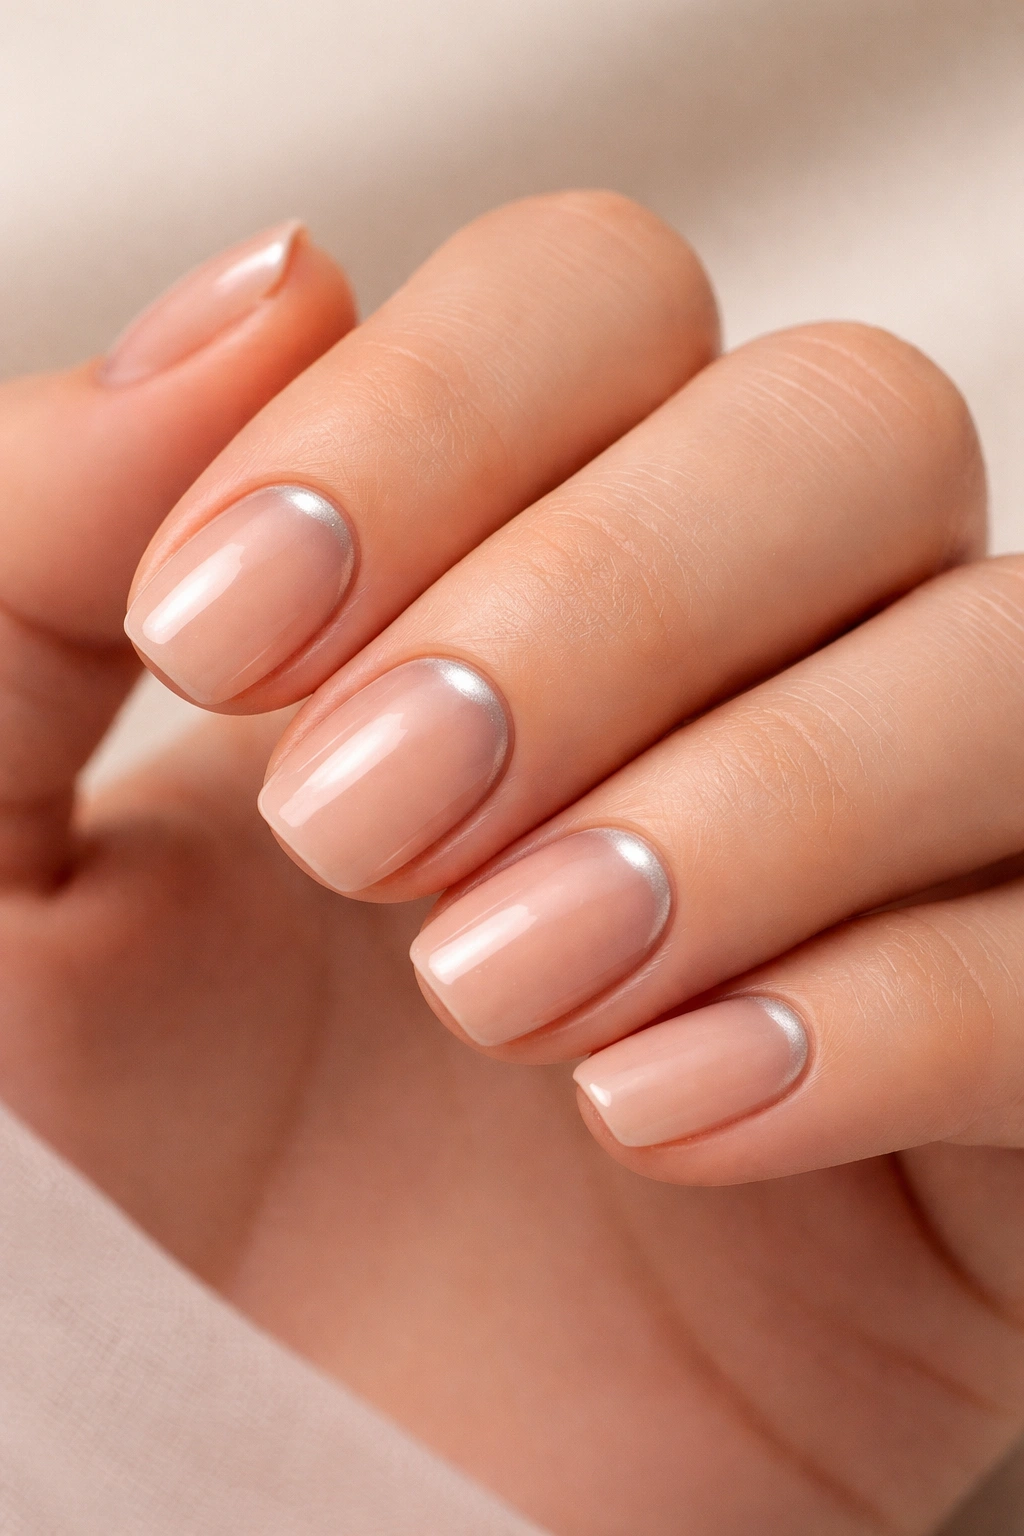
1. Classic Cream with Subtle Shimmer
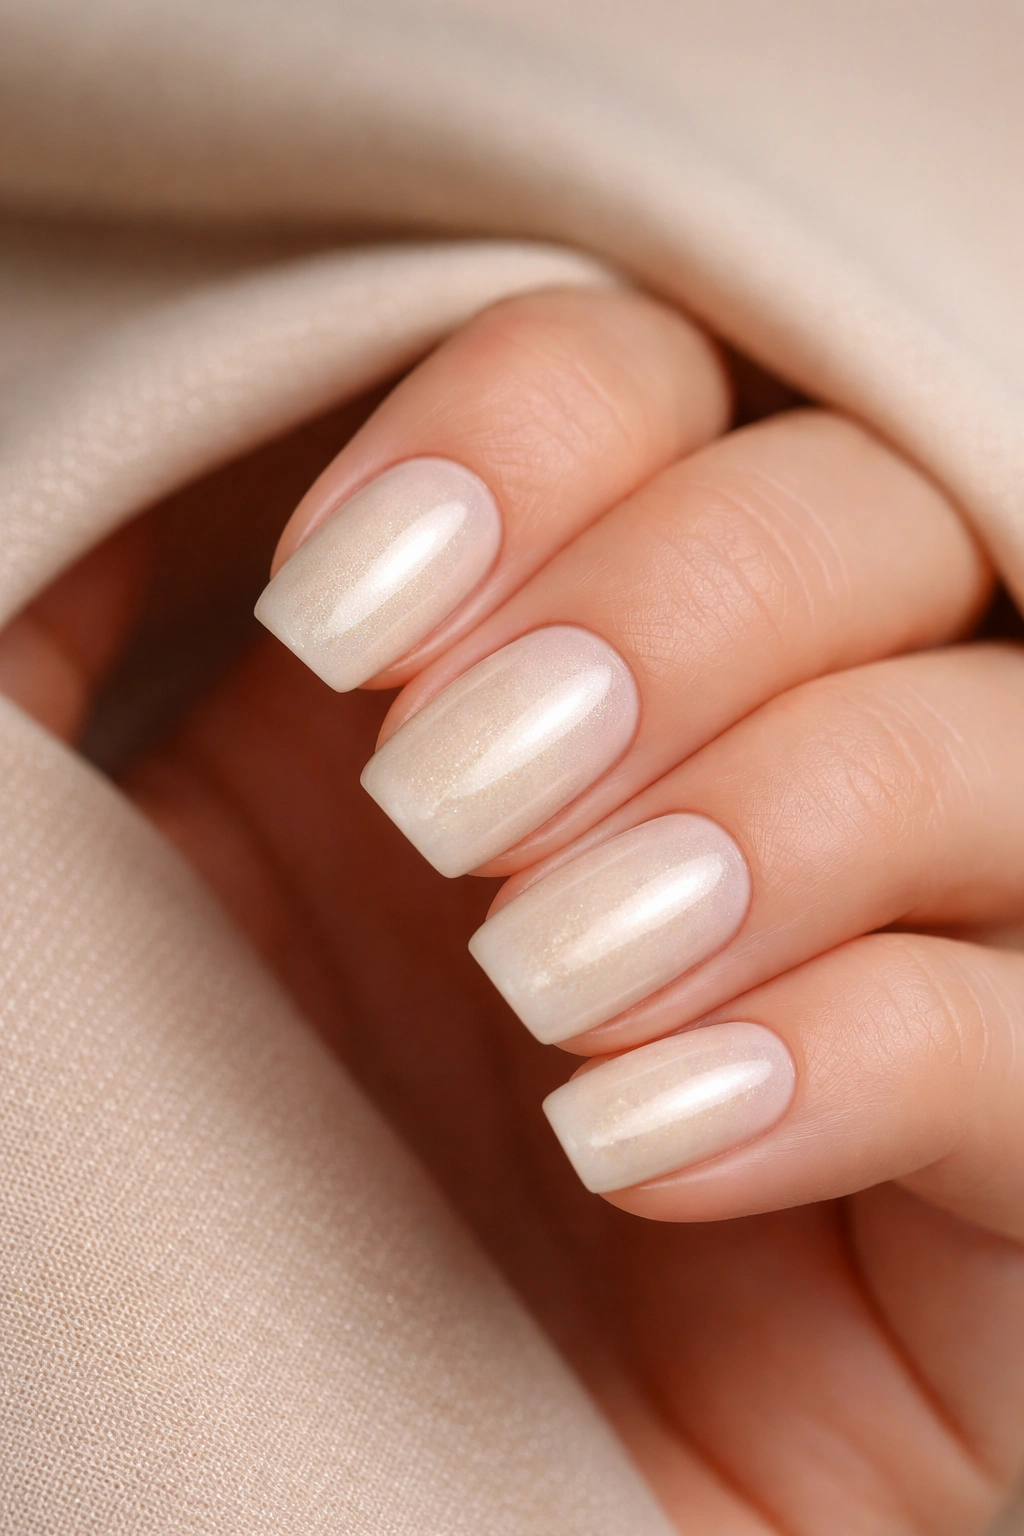
Cream is the quiet luxury of nail colors—it’s clean, calming, and feels intentional in a way that translates to sophistication. A soft warm cream on short squoval acrylics creates an elongated appearance while remaining completely wearable for any occasion. The key is choosing a cream shade with just enough warmth that it complements most skin tones without looking stark or clinical.
Why This Timeless Look Works
Cream nail polish on short acrylics hits that sweet spot between “barely there” and “intentionally polished.” It catches the light subtly, gives your hands an elevated appearance, and pairs with virtually every outfit in your wardrobe. The shade reads as understated confidence rather than a bold statement—which is exactly why it’s remained a favorite for decades.
How to Elevate the Design
- Add a barely-there champagne or pearl shimmer to the cream base for dimension without drama
- Apply a glossy topcoat that makes the cream appear almost creamy and luminous
- Consider a slightly warmer cream (think vanilla or ivory) if you have deeper skin tones
- Keep the finish soft and satin-like rather than super matte, which can feel flat on short nails
- Pair with a neutral or nude lip for a cohesive, pulled-together look
Pro tip: Ask your nail artist for a cream with slight iridescent flakes mixed in—you’ll get shimmer that only shows up in certain lighting, which feels more sophisticated than obvious glitter.
2. Soft Blush Pink with Rhinestone Accent
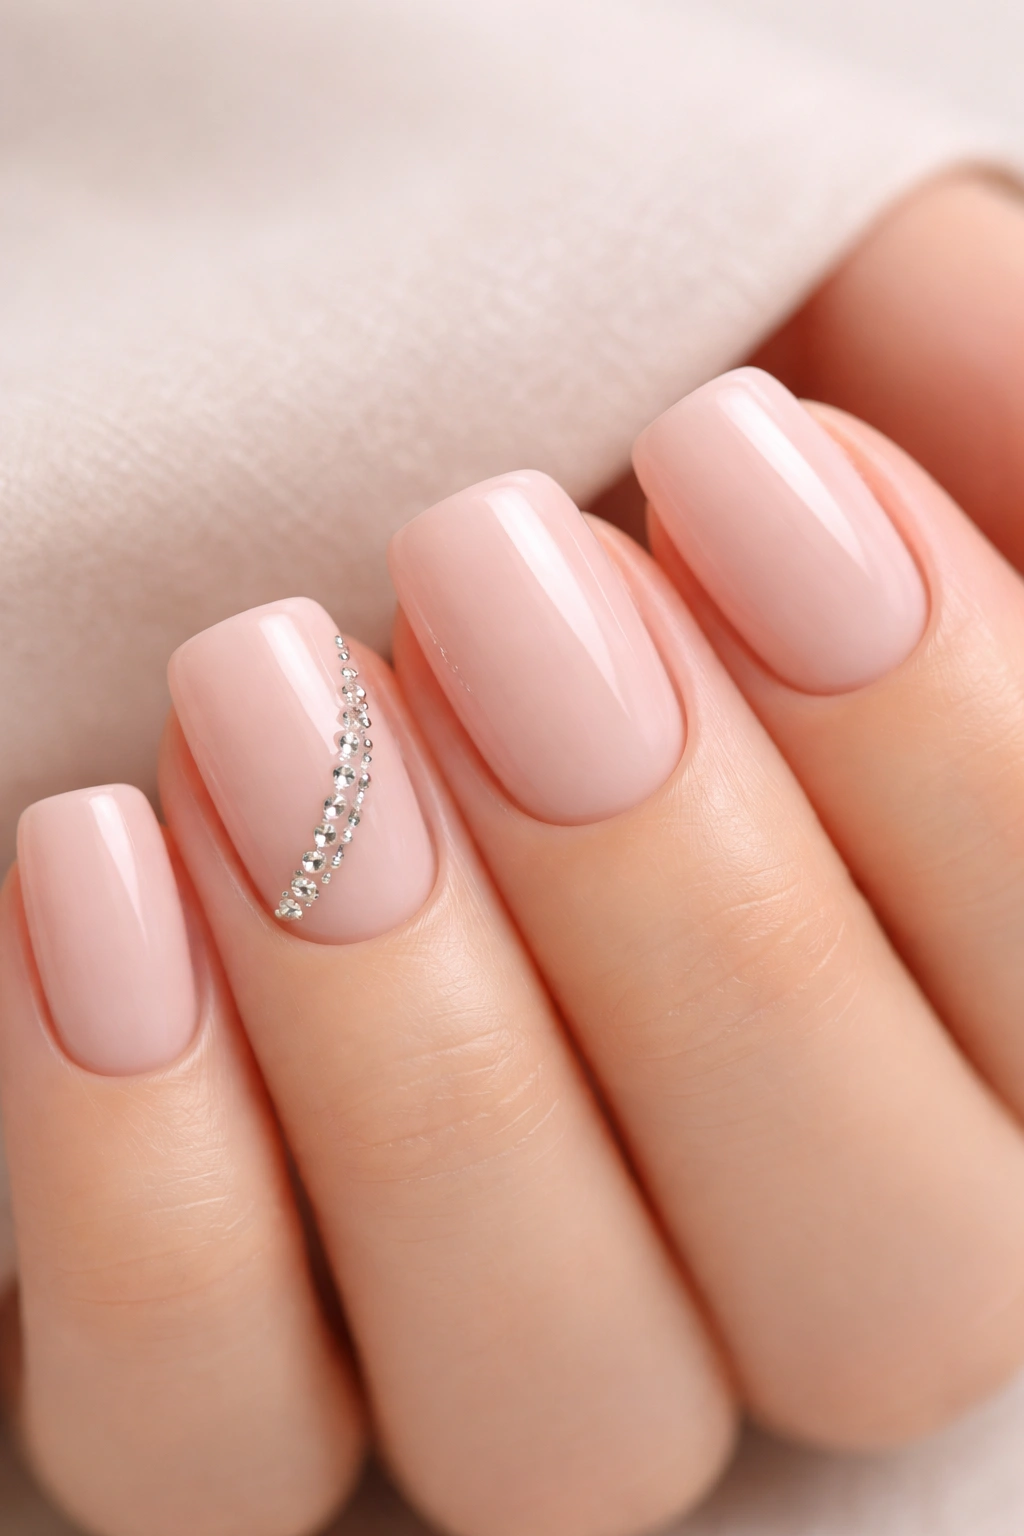
Blush pink is having a permanent moment in the nail world, and for good reason—it’s flattering, trendy without being trendy-looking, and works on every skin tone with the right undertone. On short squoval acrylics, blush pink feels romantic without being juvenile, modern without trying too hard. Add a single accent nail decorated with strategically placed rhinestones, and you’ve got a manicure that catches light beautifully.
Why This Design Feels Elevated
Blush pink occupies that magical space between neutral and colorful. It’s substantial enough that people notice your nails, but not so bold that it dominates your overall aesthetic. The addition of rhinestones—especially if they’re clustered on just one accent nail rather than scattered everywhere—adds glamour without crossing into costume territory.
Application Tips for Perfect Rhinestone Placement
- Choose one nail (usually the ring finger) as your accent nail
- Arrange rhinestones in a curved or diagonal line pattern rather than filling the entire nail
- Use larger rhinestones (3-4mm) mixed with smaller ones (1-2mm) for visual interest
- Apply rhinestones while the topcoat is still slightly tacky so they adhere securely
- Seal everything with a final layer of glossy topcoat to keep rhinestones locked in place
Pro tip: Ask for a mix of crystal clear and rose gold rhinestones on your blush accent nail—the combination gives depth and catches light differently depending on the angle.
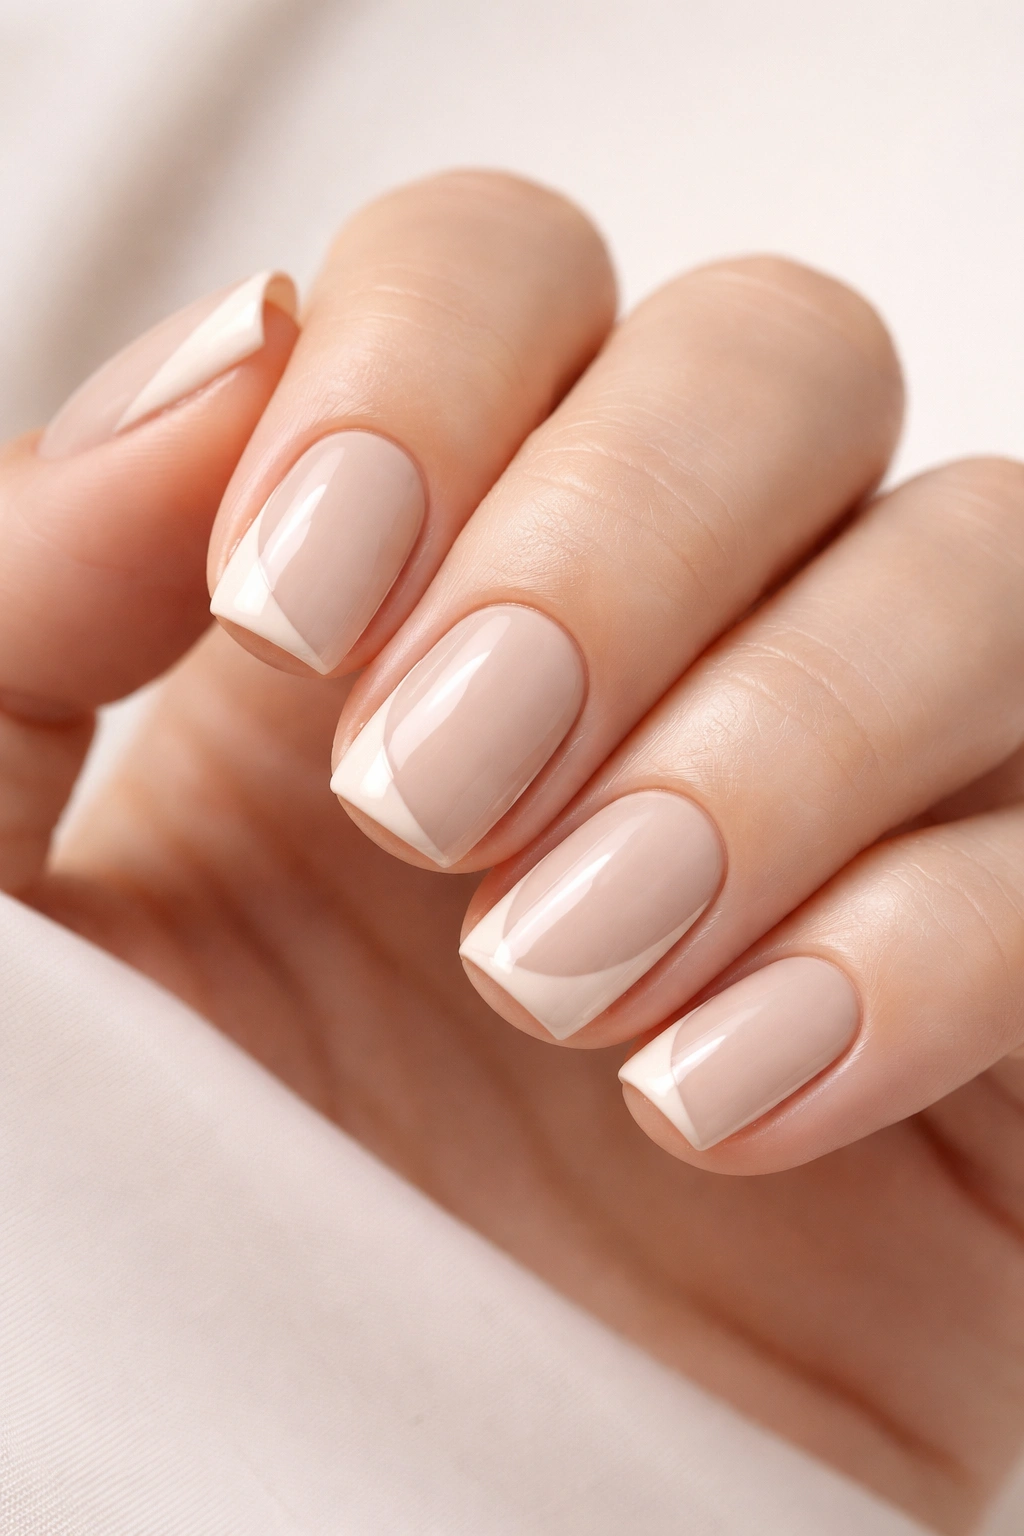
3. Nude Ombre with Gradient Fade
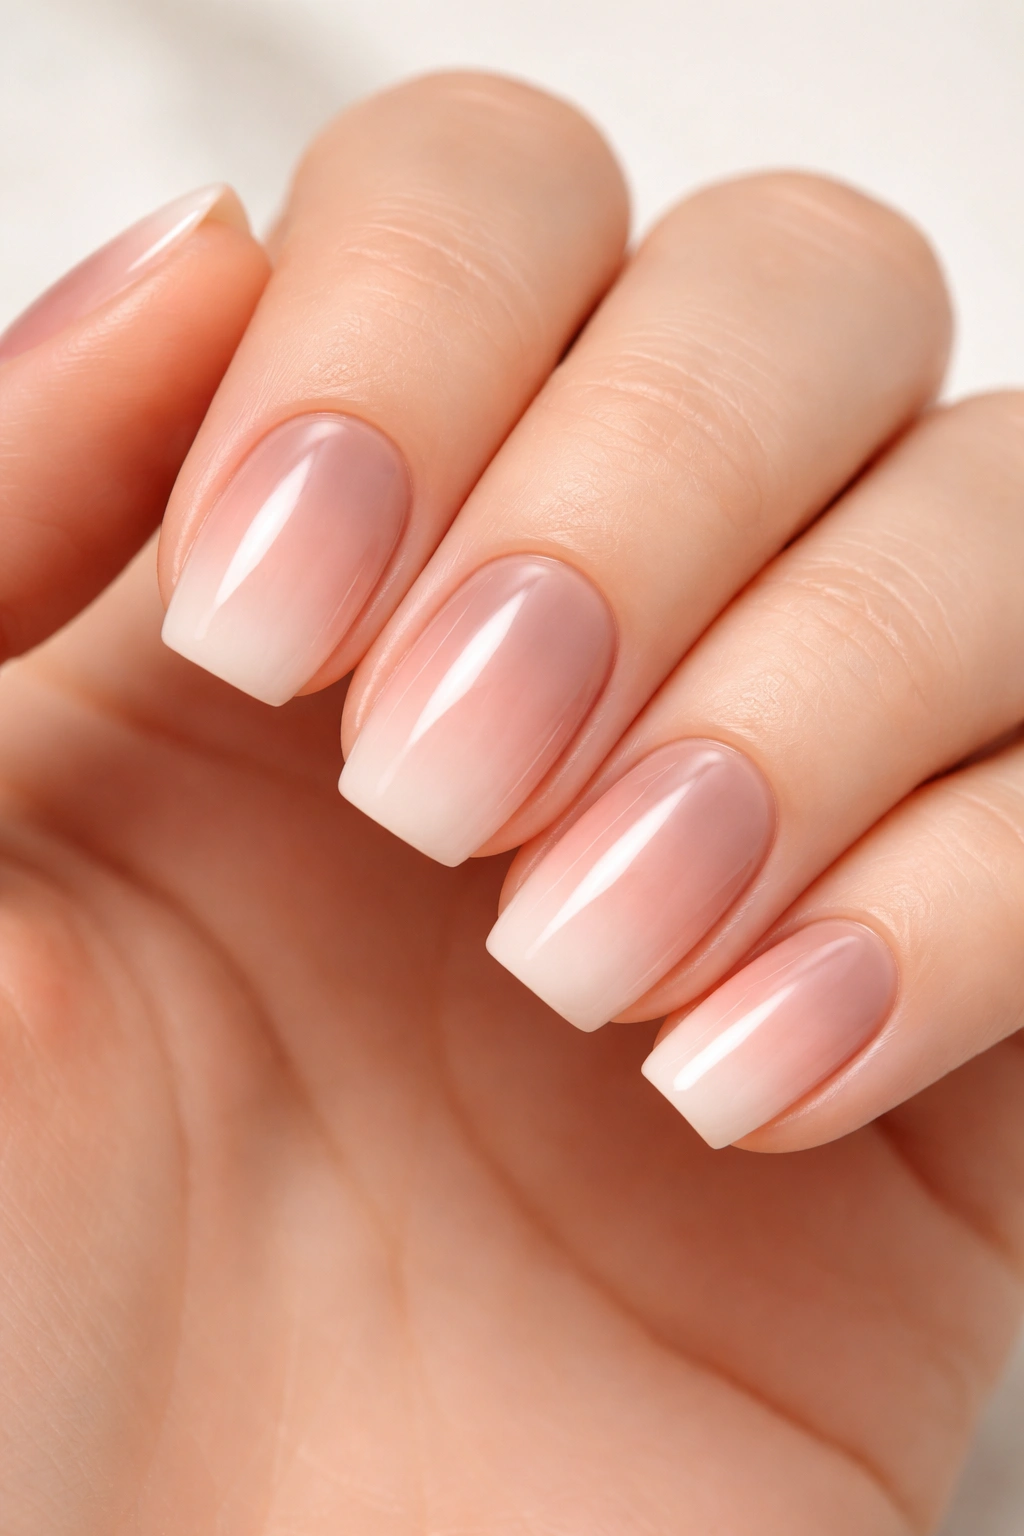
Ombre nails have transcended trend status and become a classic technique, especially on the squoval shape. A nude ombre—where the color gradually fades from a deeper shade at the base to a lighter shade near the tip—creates the illusion of longer nails while remaining subtle and professional. It’s the kind of manicure that looks effortlessly expensive.
The Gradient That Works Best
The most flattering nude ombre moves from a warm taupe or beige at the base to almost white or pale pink at the tips. This direction elongates your fingers visually and creates a soft, cohesive look. The gradient should be smooth and blended, not showing obvious striping—that’s where a skilled nail artist really makes the difference.
How to Make Your Ombre Last
- Ask your artist to use gel or acrylic colors specifically mixed for gradient work
- Request a topcoat between color applications to prevent the shades from muddying together
- Keep your nails slightly shorter and squoval to show off the fade without it looking overwhelming
- Maintain with a fresh topcoat every 2-3 weeks, as the shine fades before the color does
- Avoid hot water and harsh chemicals for at least 24 hours after application
Pro tip: An ombre works even better on squoval nails if your nail tech uses a sponging technique rather than hand-painting the gradient—sponging creates a more seamless, professional fade.
4. White Tips with Minimal Gold Line
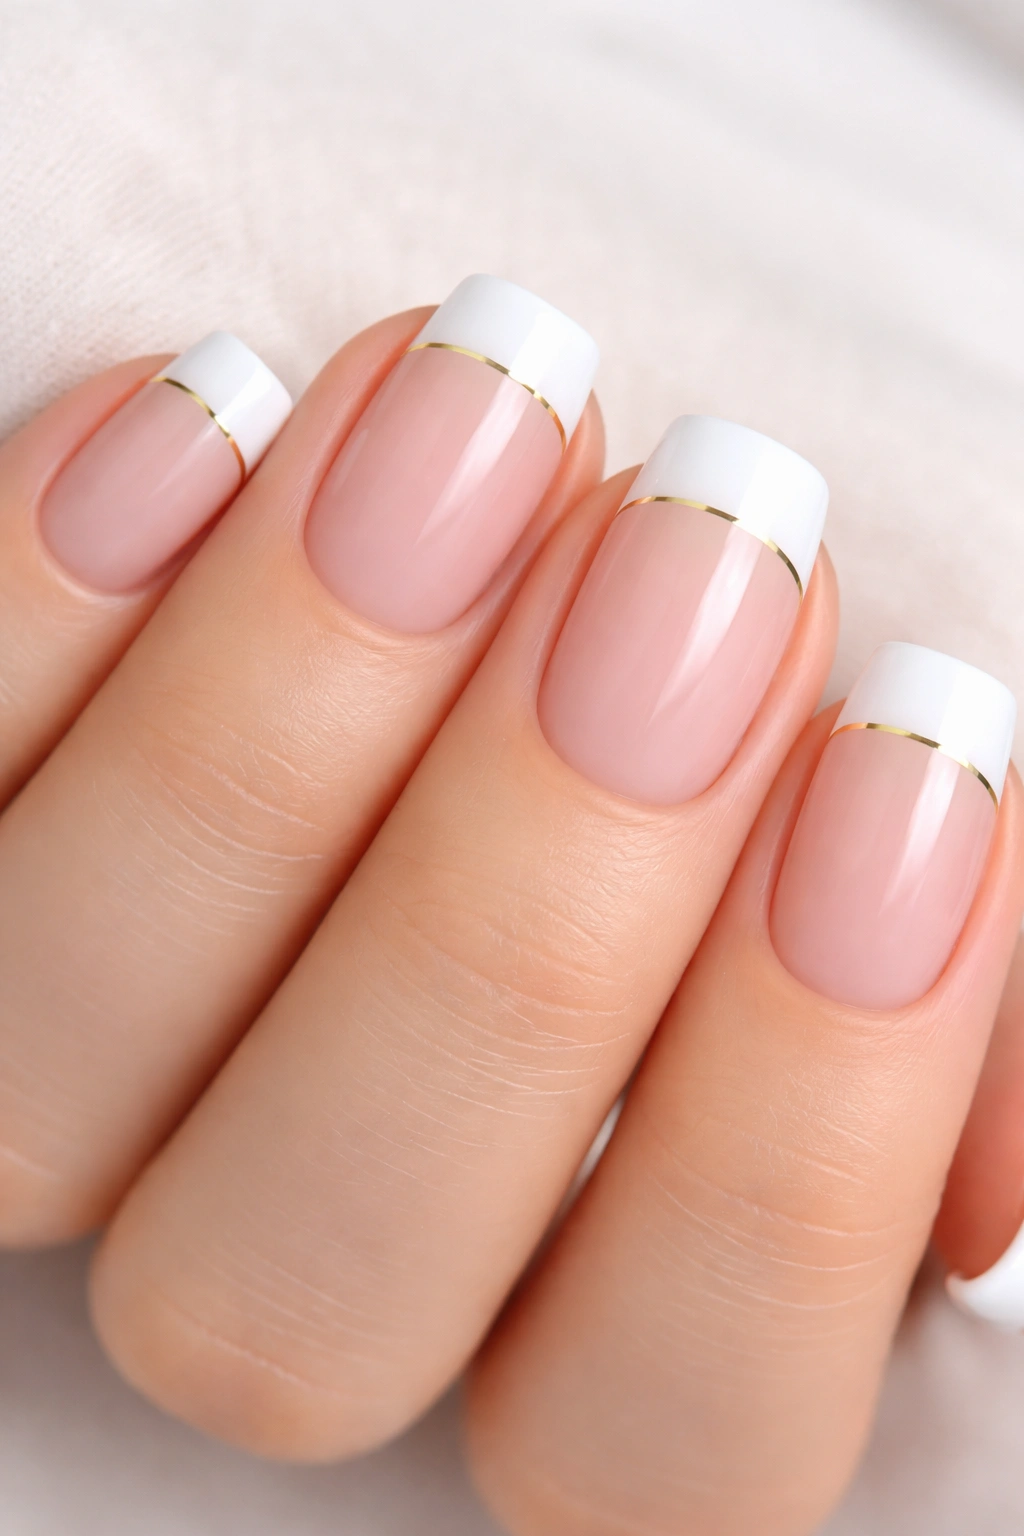
The French manicure never actually goes anywhere, but a modern take on the classic keeps things fresh and interesting. Instead of a stark white tip and pink base, try a whiter-than-white tip on a pale nude or champagne base with a hair-thin gold line separating them. On short squoval acrylics, this subtle geometric element feels contemporary without abandoning the timeless appeal of the French manicure.
Why This Updated Approach Feels Current
A traditional French manicure can look dated or costume-y depending on execution. Adding a metallic line—thin enough that it reads as intentional rather than accidental—elevates the whole look into something modern and intentional. The squoval shape shows off this fine detail perfectly, unlike longer nails where thin lines can get lost.
Application Precision Matters
- Use a thin gold striping brush or a ultra-fine liner for the dividing line between tip and base
- Keep the gold line as narrow as possible—thicker than a toothpick’s width and it looks less refined
- Ensure the white tip is perfectly opaque and pristine (this takes patience and sometimes two coats)
- Use a glossy topcoat that amplifies the metallic line without making it feel garish
- Keep the overall manicure extremely clean and precise—sloppiness shows immediately
Pro tip: Use rose gold instead of yellow gold if you have cooler undertones, or champagne gold for a softer, more subtle effect than bright yellow gold.
5. Deep Burgundy with Matte Finish
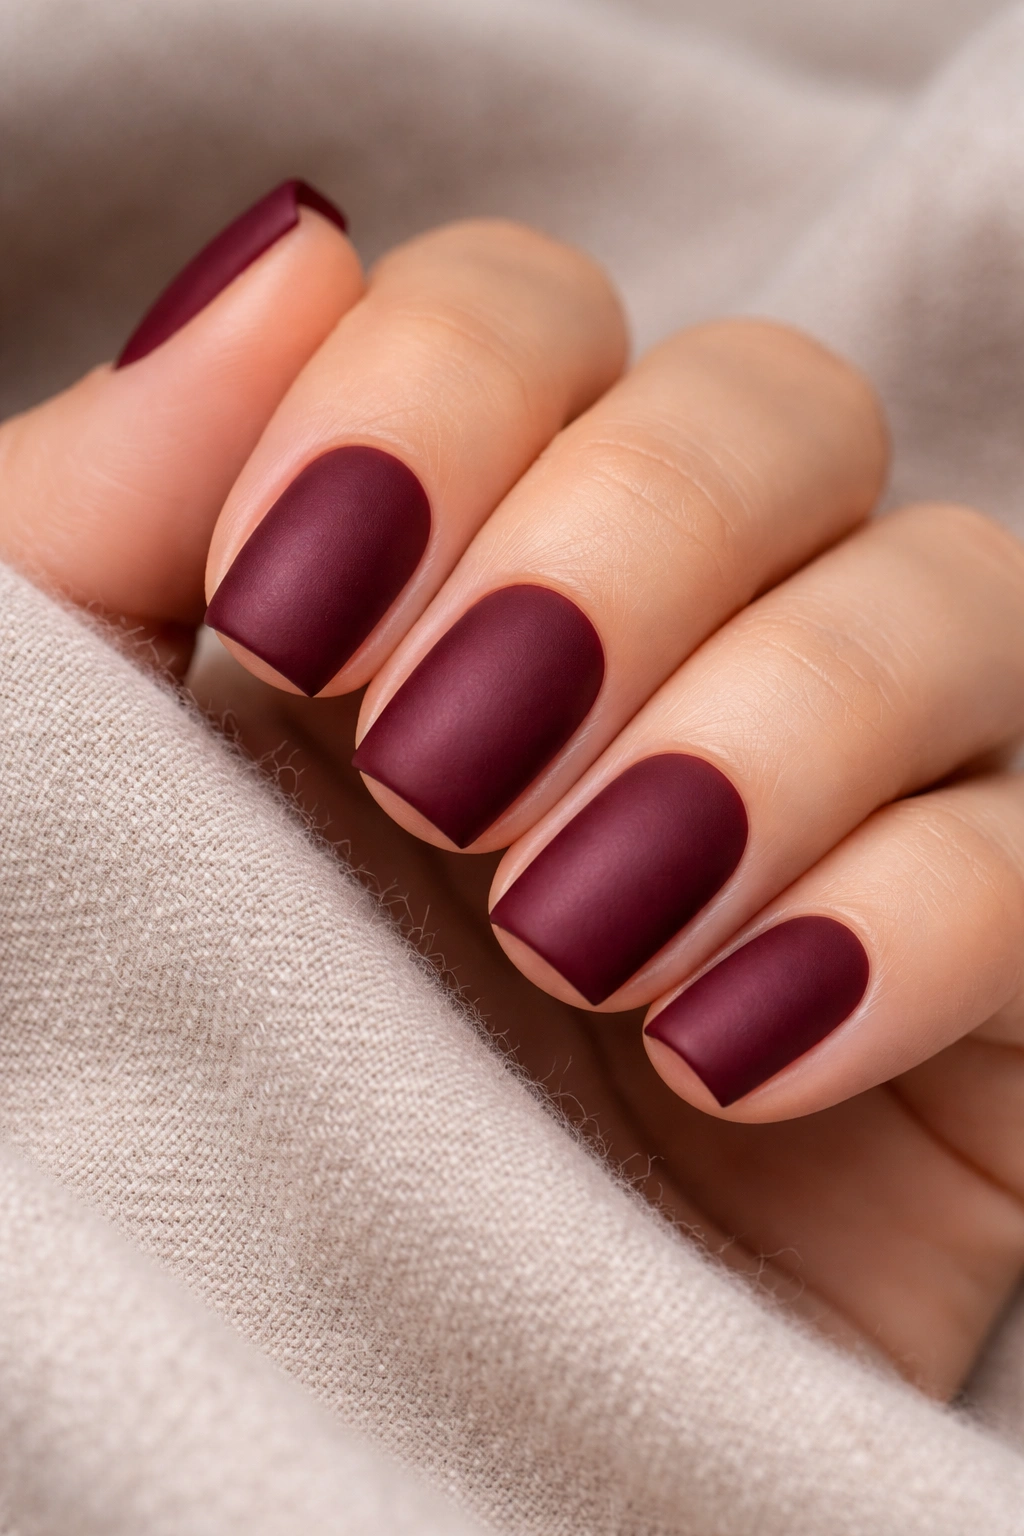
Burgundy is the thinking person’s red—it has depth, sophistication, and works across seasons and occasions in ways that pure red sometimes doesn’t. A matte burgundy on short squoval acrylics feels luxurious and modern, especially if you choose a shade that leans slightly cool. Matte finishes make darker polishes appear more velvety and three-dimensional, which is why this combination feels so expensive.
Choosing Your Burgundy Shade
Not all burgundy polishes are created equal. Look for a shade that has slight depth to it rather than appearing flat and muddy. A burgundy with slight shimmer can work beautifully, though the shimmer should only show up up-close and not dominate the overall appearance from a distance.
Making Matte Burgundy Work
- Start with an extremely smooth base or the matte finish will show every minor imperfection
- Apply matte topcoat carefully and evenly to avoid streaking (some matte topcoats are notoriously challenging)
- Seal matte polish with a glossy topcoat if your matte becomes dull too quickly
- Pair with warmer undertones in your wardrobe since burgundy can be slightly cool-toned
- Retouch manicures more frequently—matte finishes sometimes show wear before glossy ones do
Pro tip: Ask for a very light shimmer or satin finish mixed into your matte burgundy instead of a dead-flat matte—it photographs better and feels slightly less austere while maintaining that luxurious depth.
6. Soft Peach with Tiny Floral Detail
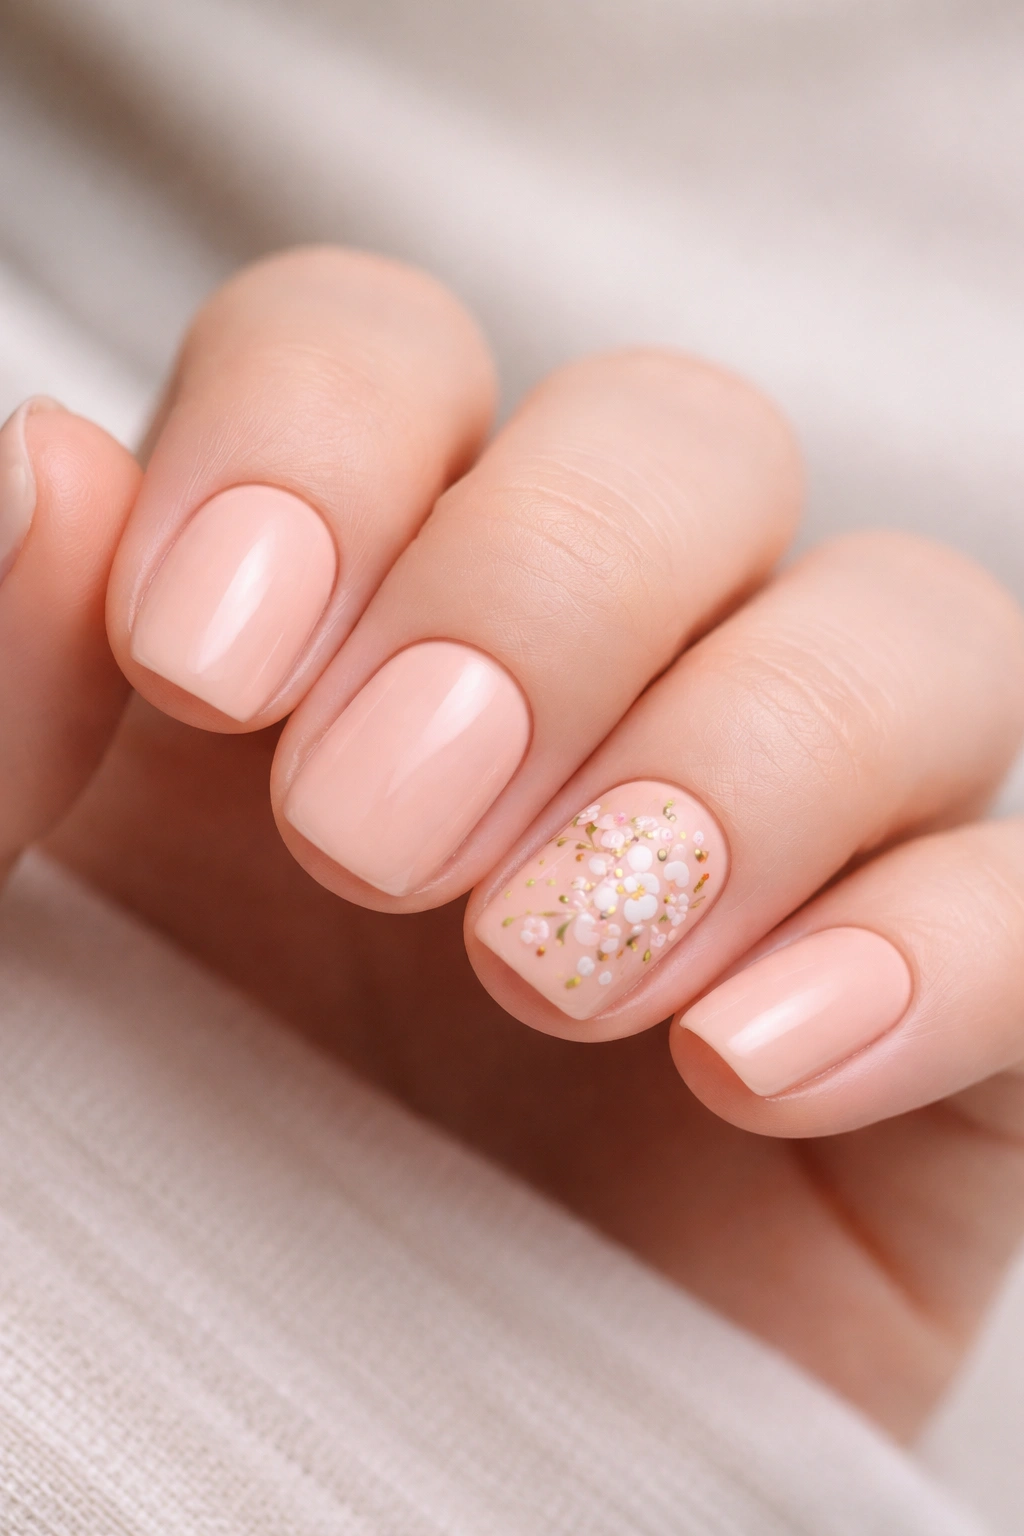
Peach is flattering on virtually every skin tone and reads as both summery and sophisticated depending on how you style it. Short squoval acrylics in a soft peachy tone provide the perfect canvas for minimal floral details—think tiny painted flowers on just one or two nails rather than an entire garden. This design sits at the intersection of “has character” and “remains professional.”
Creating Simple Floral Designs
Even if you don’t consider yourself artistic, tiny florals are surprisingly forgiving on short nails. A single small flower with a thin stem and a couple of leaves reads as intentional and charming. Use a very fine brush and thin acrylic paint, and remember that imperfection actually adds to the charm—perfectly precise tiny flowers can feel sterile.
Nail Art Techniques for Beginners
- Choose just one nail (often the ring finger) for your floral detail
- Use thin brushes meant for detailed work, not regular nail polish brushes
- Paint the stem first (a straight or slightly curved line), then add petals around the top
- Add two to three tiny leaves along the stem for a finished look
- Seal with topcoat to protect your handiwork
Pro tip: Use a toothpick dipped in gel paint to create tiny dots for flower centers instead of trying to paint them—it’s much easier and looks surprisingly professional.
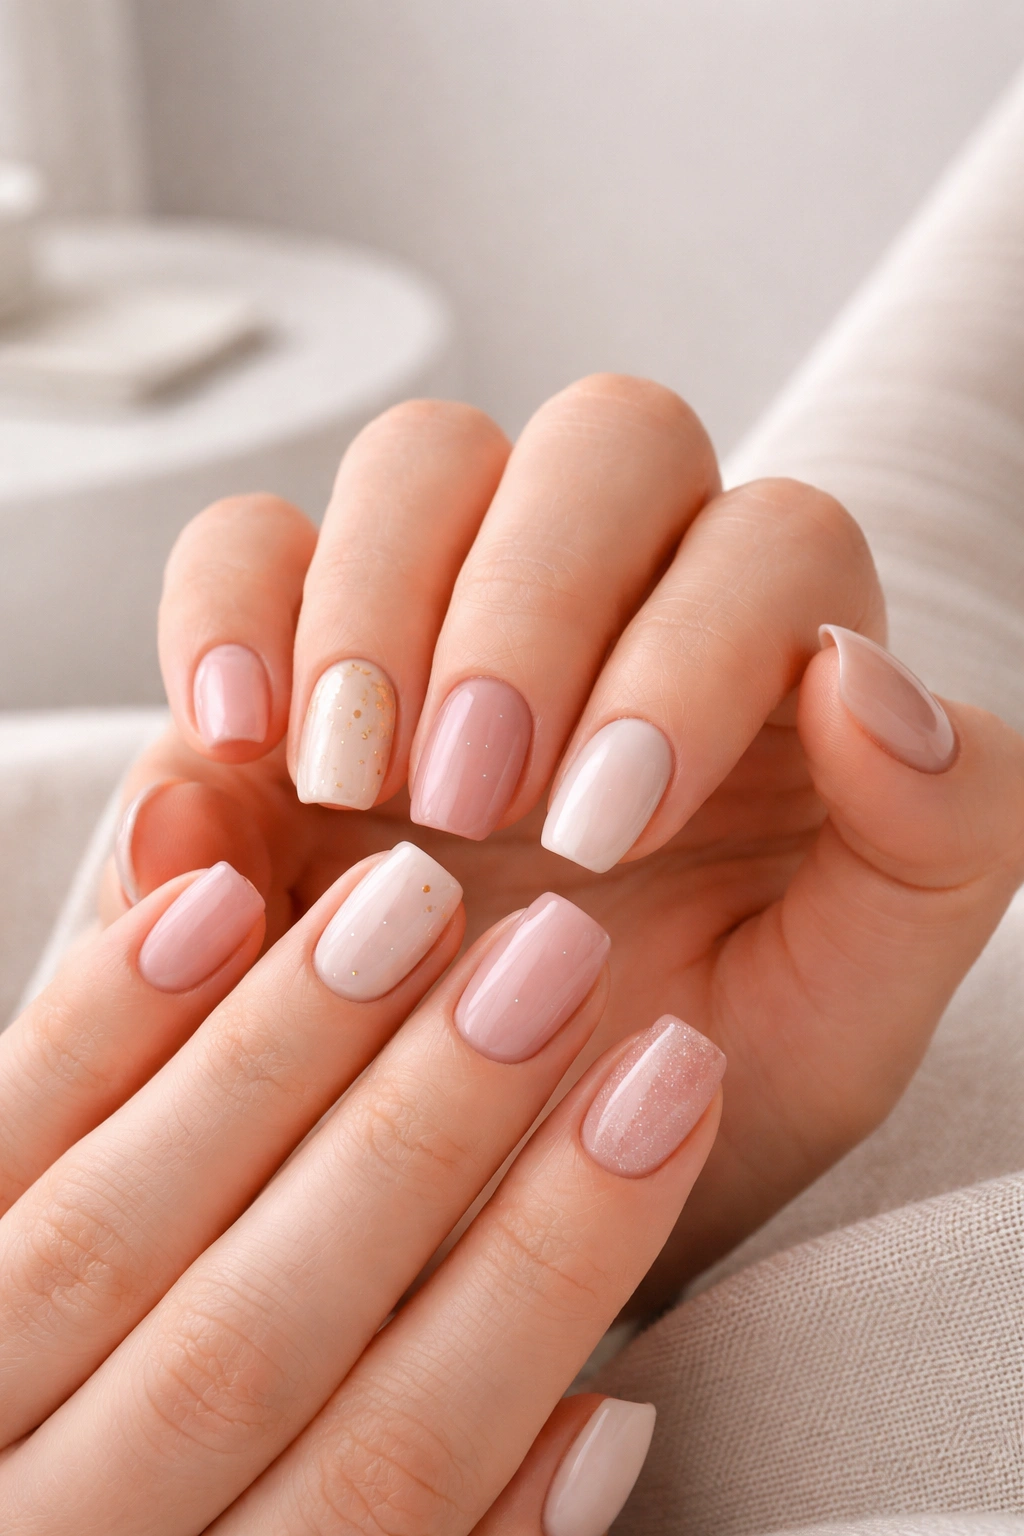
7. Milky White Base with Sheer Overlay
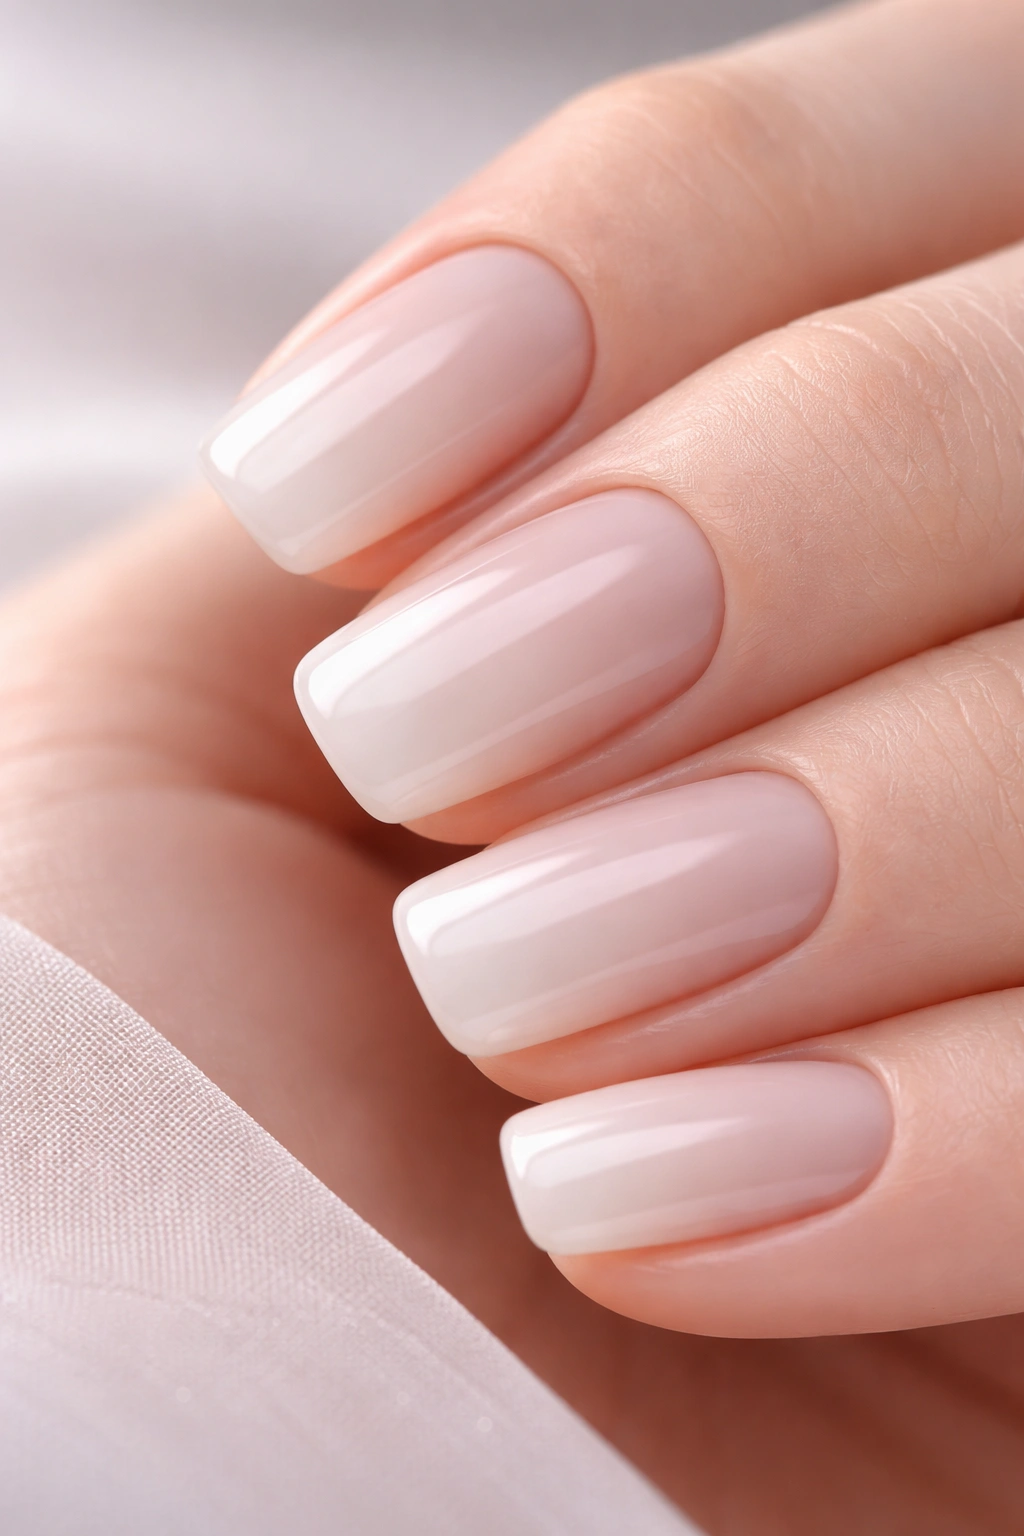
This design sounds simple because it is, but don’t let that fool you—it’s also incredibly chic. A milky white or opaque nude base with a sheer nude or peachy gel overlay creates a three-dimensional effect that reads as both intentional and elevated. The technique works beautifully on short squoval acrylics because it creates the illusion of length without actually adding length.
The Magic of Layered Opacity
The visual interest in this design comes entirely from the interplay of different opacity levels. The opaque base reads as solid and clean, while the sheer overlay adds depth and dimension. This creates a subtle ombre or gradient effect without actually doing an ombre—much easier to maintain and less noticeable when it grows out.
Achieving the Perfect Layering
- Use an opaque white or pale nude as your full base coat
- Apply a sheer nude, peach, or even sheer pink as a thin overlay, particularly focused on the tips
- Ensure the sheer layer is thin enough that you can see the white base through it
- Seal with a glossy topcoat that makes the white appear creamier and more sophisticated
- Keep everything perfectly clean around the cuticle area
Pro tip: Ask your nail tech to apply the sheer overlay more heavily toward the tips and barely dust it on near the cuticle—this creates a subtle gradient effect that reads as very intentional.
8. Classic Red with Perfect Geometry
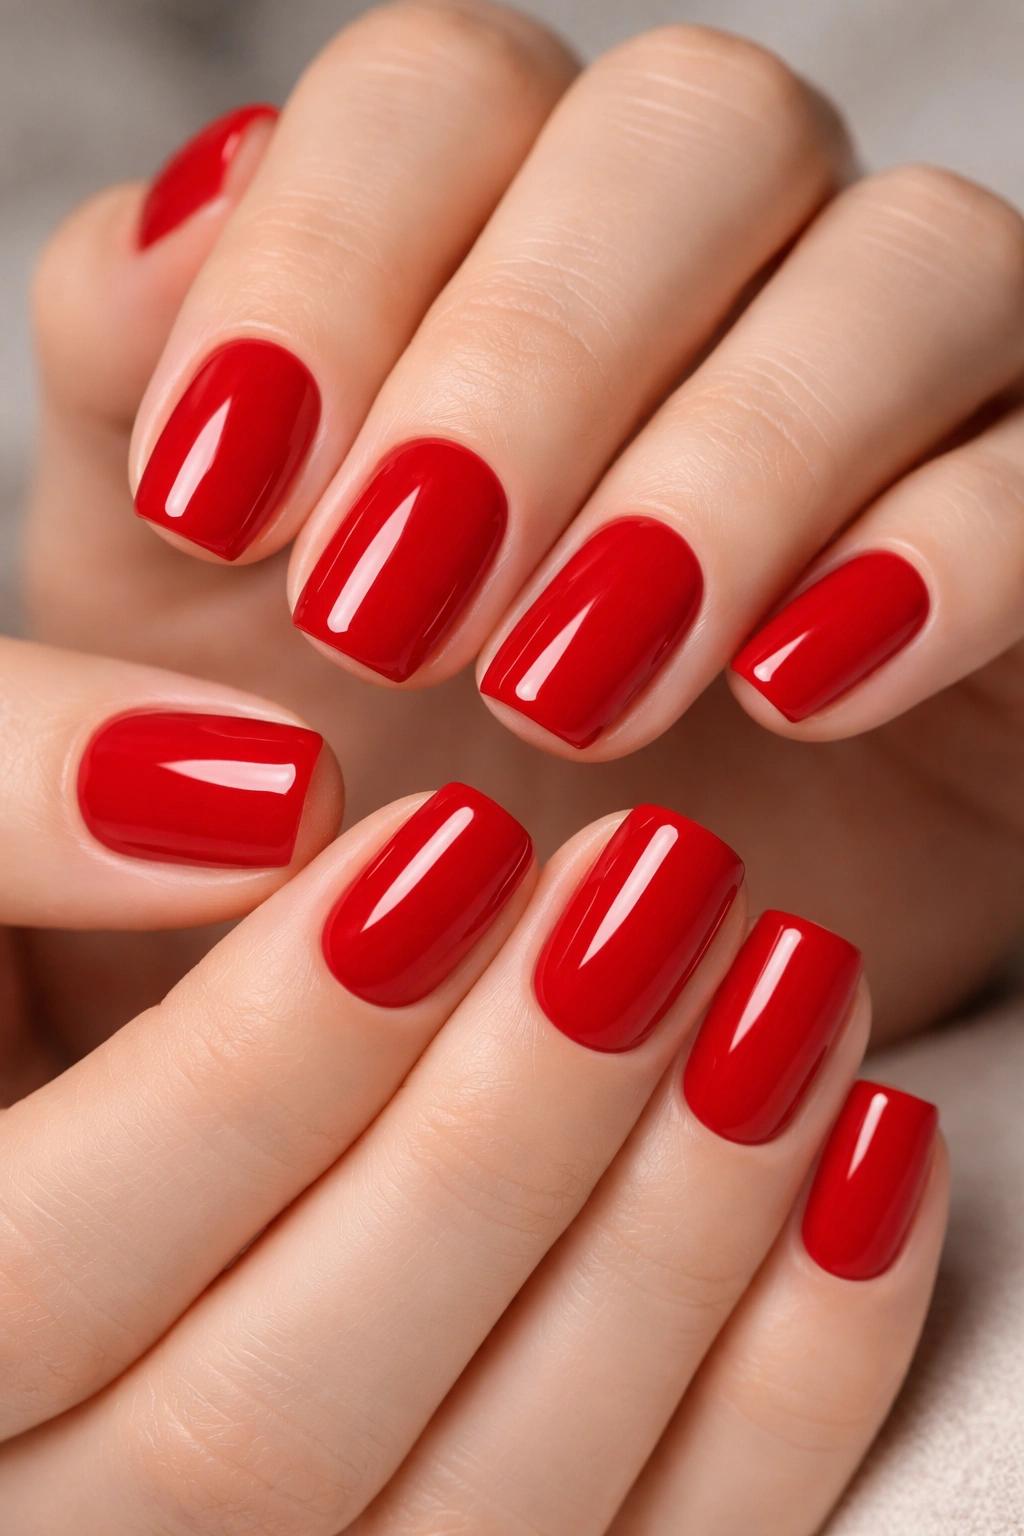
Red on short squoval acrylics is bold but still professional, especially if you choose a true red rather than an orange-red or blue-red. The geometry of the squoval shape—clean lines with soft edges—actually complements a bold red beautifully. Keep everything else simple: pristine shape, glossy finish, and impeccable cleanliness around the cuticle.
Why Red Works on Short Nails
Many people assume red only looks good on long nails, but that’s actually not true. A red nail appears just as bold and intentional on a short squoval as it does on length—maybe even more so because the focus stays on the quality of the manicure rather than relying on length for impact. Short red nails read as confident and put-together.
Executing Red Nails Perfectly
- Choose a true red rather than red with strong orange or blue undertones—true red is most versatile
- Apply red polish in thin, even layers (usually 2-3 coats) to ensure perfect opacity
- Pay extreme attention to cleanup around the cuticle area—any stray red polish reads as sloppy
- Use a high-shine topcoat that makes the red appear almost lacquered
- Retouch manicures before the color noticeably chips
Pro tip: Ask for a gel-based red rather than regular polish—it applies more smoothly, appears more vibrant, and lasts significantly longer without chipping.
9. Pale Lavender with Minimalist Line Detail
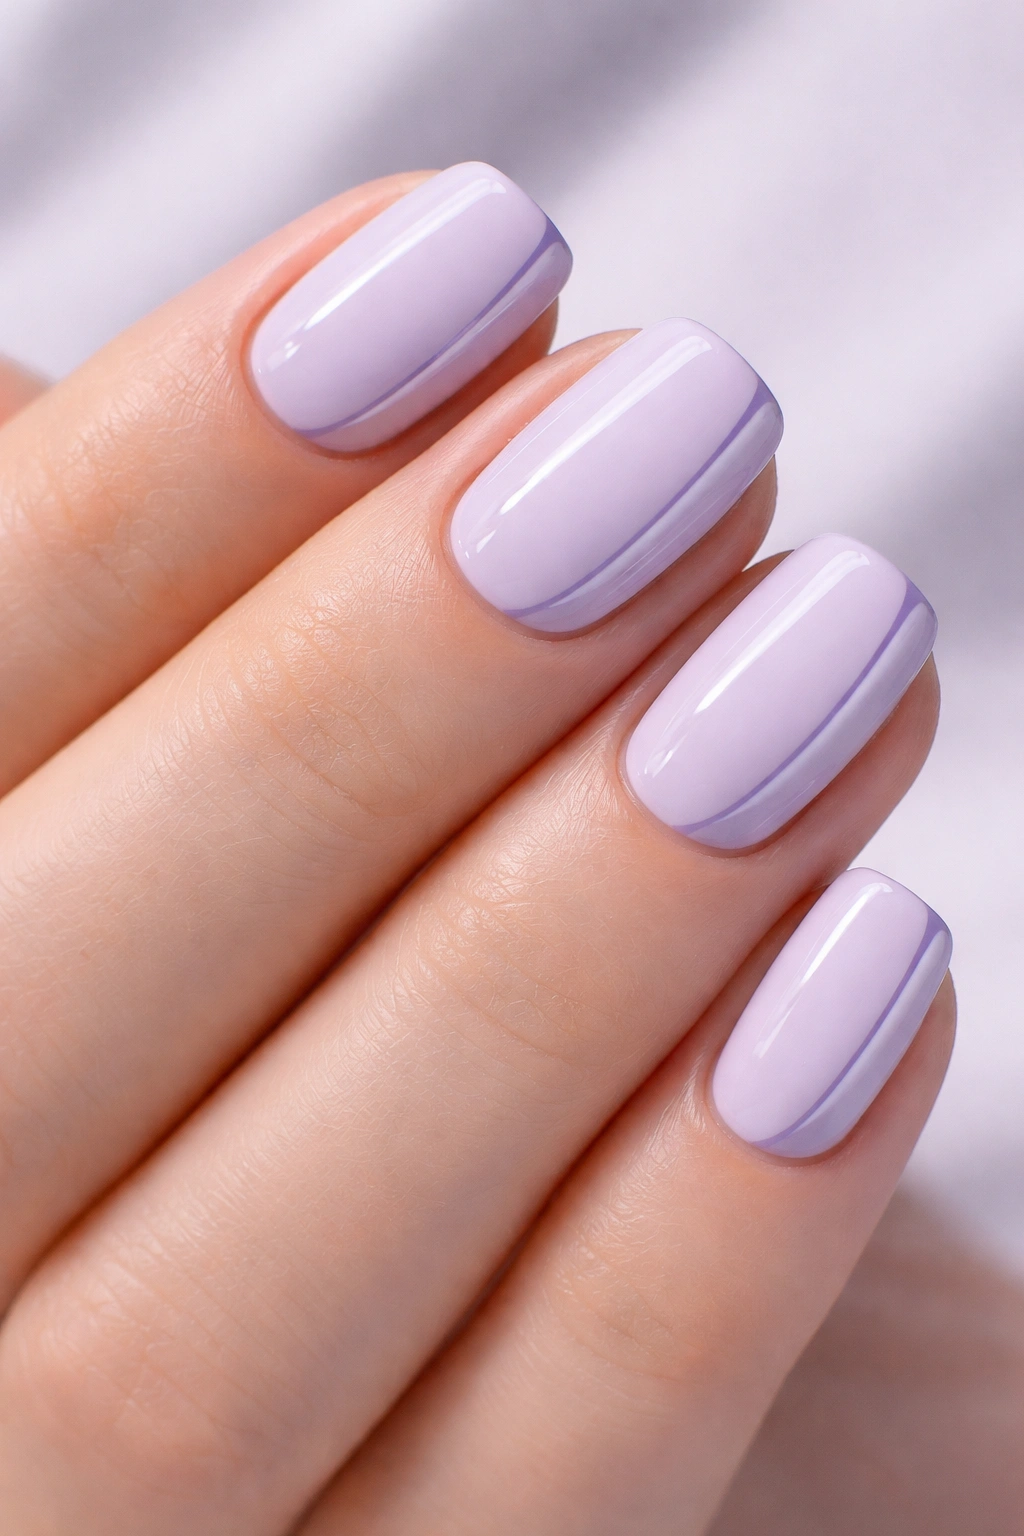
Lavender occupies a unique position in the color spectrum—it’s cool-toned without being icy, colorful without being demanding, and surprisingly wearable for both everyday and special occasions. A pale lavender on short squoval acrylics provides an unexpected pop of color that still reads as sophisticated. Add a single minimalist line detail in a darker lavender or purple, and you’ve created something with genuine personality.
The Appeal of Lavender Manicures
Lavender is flattering on most skin tones when you choose the right undertone. Warmer lavenders (slightly more pink) work beautifully on deeper skin tones, while cooler, purer lavenders suit fair skin. Pale lavender specifically—barely-there, almost like the color is a whisper—feels modern and intentional in a way that stronger purples sometimes don’t.
Creating a Minimalist Line Design
- Use a thin striping brush and a darker shade of purple or lavender to create a single clean line
- Place the line along the side of your nail or as a thin band near the tip
- Keep it as simple as possible—a single straight line is more striking than something overcomplicated
- Ensure the line is perfectly straight (ask your nail tech to use tape as a guide if needed)
- Seal everything with glossy topcoat
Pro tip: Create the line detail on all five nails, but vary its placement slightly—on one nail it might be along the left edge, on another near the tip—for a cohesive but not-identical look.
10. Neutral Beige with Negative Space Design
Negative space designs—where you leave parts of the acrylic bare to show the natural nail beneath—create visual interest without relying on color. On a neutral beige base with strategic negative space cutouts, this technique reads as modern and sophisticated. The key is ensuring the negative space areas are perfectly clean and shaped intentionally rather than appearing accidental.
Why Negative Space Works on Short Nails
Because short squoval nails don’t have excessive length, the space you can work with is limited but impactful. A geometric cutout near the tip or along the side of the nail creates a design element that draws the eye and adds personality without relying on color complexity. It’s minimalist but never boring.
Creating Perfect Negative Space
- Plan your design before your nail tech applies the full base coat (much easier to execute this way)
- Ask for geometric shapes—triangles, rectangles, or linear patterns—rather than organic shapes
- Ensure the edges of the negative space are perfectly smooth and sealed so they don’t catch or snag
- The negative space should show clean nail tip or nail bed, not look like polish is missing
- Consider doing this on all nails or just one or two for visual interest
Pro tip: File the exposed nail areas smooth and seal them with a clear topcoat to protect them from breaking—the acrylic around the negative space is the only thing holding that area together.
11. Soft Pink with Delicate Dot Pattern
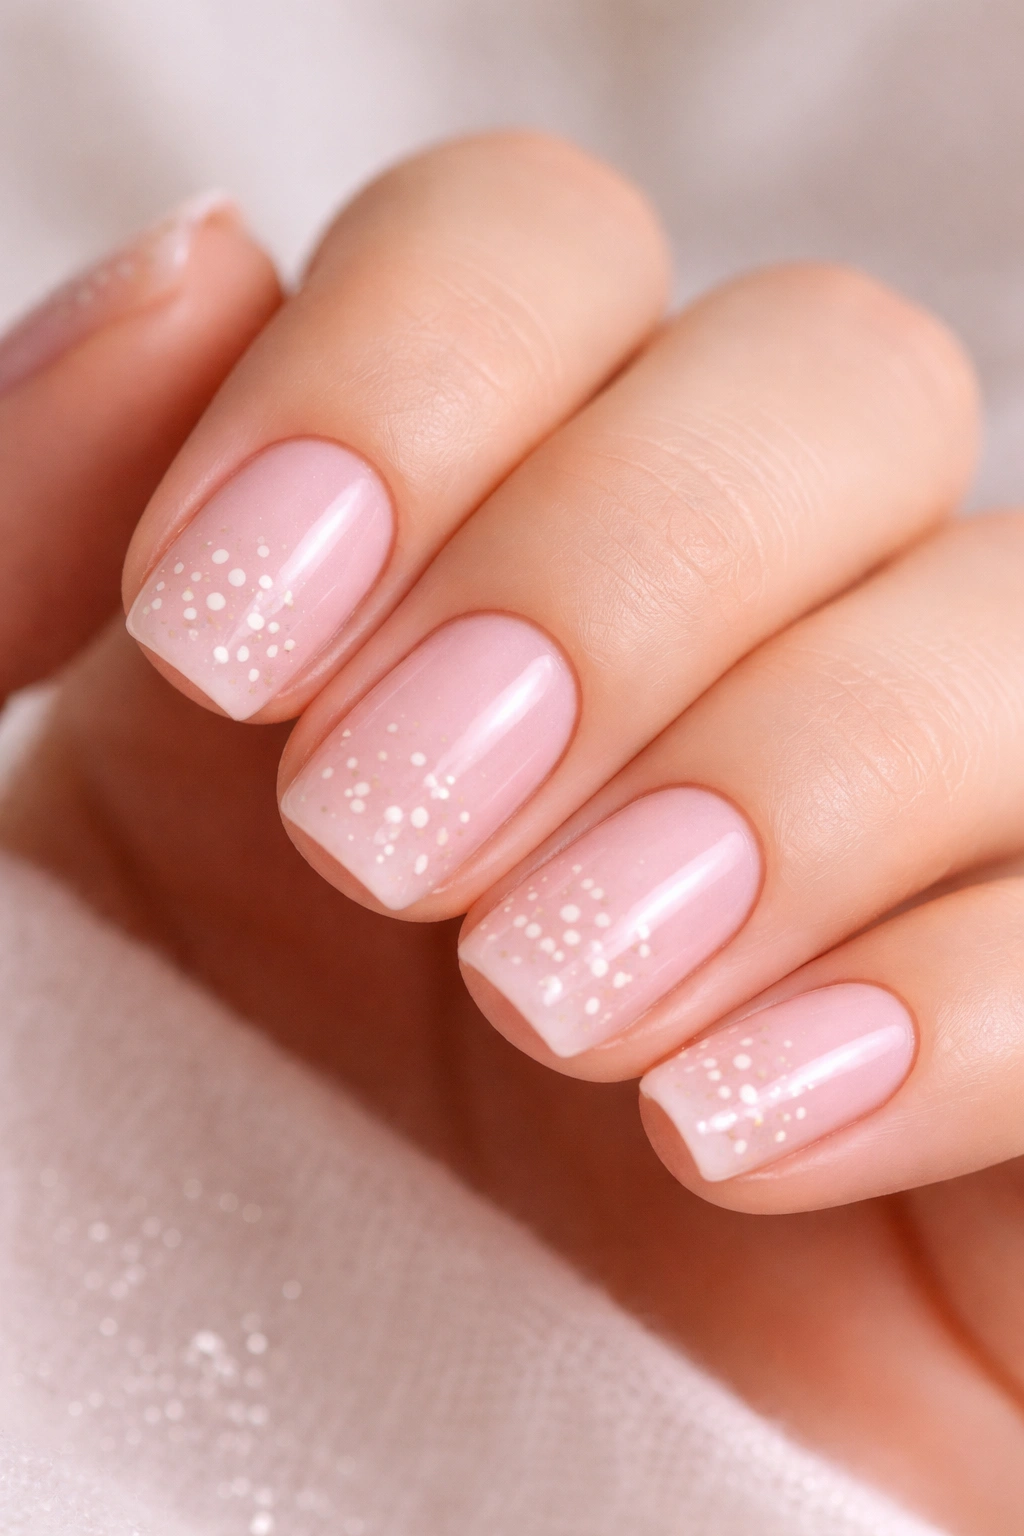
Dots are one of the easiest nail art patterns to execute, yet they read as charming and intentional when done well. A soft pink base with a scattered pattern of delicate dots in white or champagne creates movement and visual interest without feeling busy. On short squoval acrylics, a dot pattern feels playful but still polished.
The Charm of Polka Dot Manicures
Polka dots have that timeless quality that works whether they’re trendy at the moment or not. They’re nostalgic without being costume-y, fun without being juvenile. A soft pink base keeps everything refined, while the dots add personality.
Creating Delicate Dot Patterns
- Use a dotting tool (a thin stick with a small ball at the end) rather than trying to paint dots freehand
- Create dots in varying sizes for visual interest—mix medium-sized dots with a few smaller ones
- Space dots somewhat randomly rather than in a perfectly organized grid (randomness feels more modern)
- Keep the overall quantity moderate—scattered dots rather than completely covering the nail
- Seal with topcoat before the dot polish completely dries
Pro tip: Dip your dotting tool into the dot polish, then practice on a paper towel first to ensure you’re applying the right amount and getting perfectly round dots.
12. Creamy White with Geometric Accent
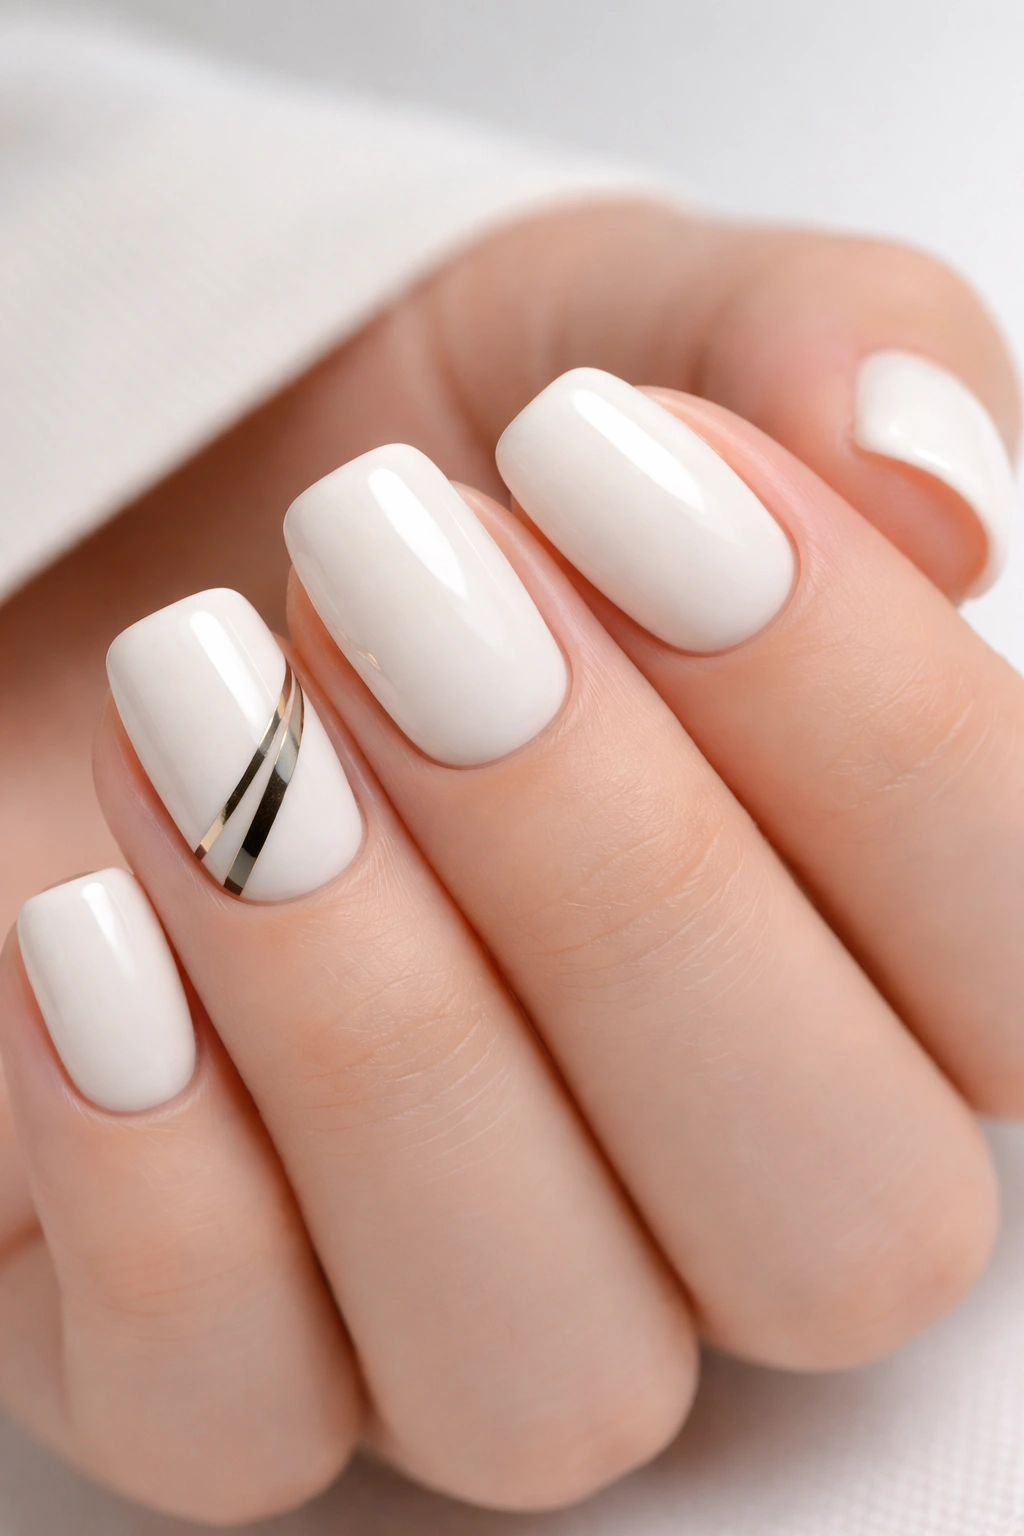
White on short squoval acrylics is fresh, clean, and deceptively elegant. Add a single geometric accent—perhaps a small triangle or rectangle design on one nail in gold or black—and you’ve created something with intentional modern flair. The contrast between the creamy white and the geometric accent is what makes this design feel sophisticated rather than childish.
Choosing Your Accent Color
The accent color should have enough contrast that it reads clearly against the white base. Gold works beautifully for a warm, luxurious feel. Black provides stark, modern contrast. Even a dark navy or deep teal can work if those colors complement your personal style.
Creating Geometric Accents
- Keep the geometric shape simple—a single triangle, rectangle, or line rather than complicated patterns
- Place it on just one nail (usually the ring finger or accent nail) for visual focus
- Ensure the shape has perfectly clean, sharp edges (tape can help achieve this)
- Use gel polish or acrylic paint for the accent, not regular polish, so it lasts as long as the white base
- Seal everything with topcoat
Pro tip: Create the geometric accent vertically (pointing toward the tip) rather than horizontally—this creates an elongating effect that makes short nails appear slightly longer.
13. Warm Nude with Subtle Chrome Effect
Chrome accents on nails have evolved from garish and overwhelming to subtle and luxurious. A warm nude base with just a touch of chrome—perhaps a chrome line near the cuticle or a soft chrome gradient at the tips—adds dimension without dominating the look. This technique requires a skilled nail tech but the results are incredibly sophisticated.
Understanding Chrome Nail Effects
Chrome powder is applied over specially prepared gel polish to create a reflective, metallic finish. When done subtly on part of the nail rather than the entire surface, it creates a nuanced, expensive-looking manicure. The key is restraint—a little chrome is chic, while covering the whole nail in chrome reads as costume-y.
Getting Chrome Right
- Start with a perfectly smooth base of warm nude gel polish
- Request a light hand with the chrome application—just enough to catch the light
- Chrome works best along the cuticle area, creating a halo effect, or as a thin tip accent
- Follow your nail artist’s care instructions carefully as chrome finishes are somewhat delicate
- Avoid excessive buffing or aggressive topcoat application over chrome areas
Pro tip: Combine chrome with other subtle details like a thin glitter stripe or a barely-there glitter ombre for a manicure that looks different under different lighting conditions.
14. Baby Blue with White Cloud Design
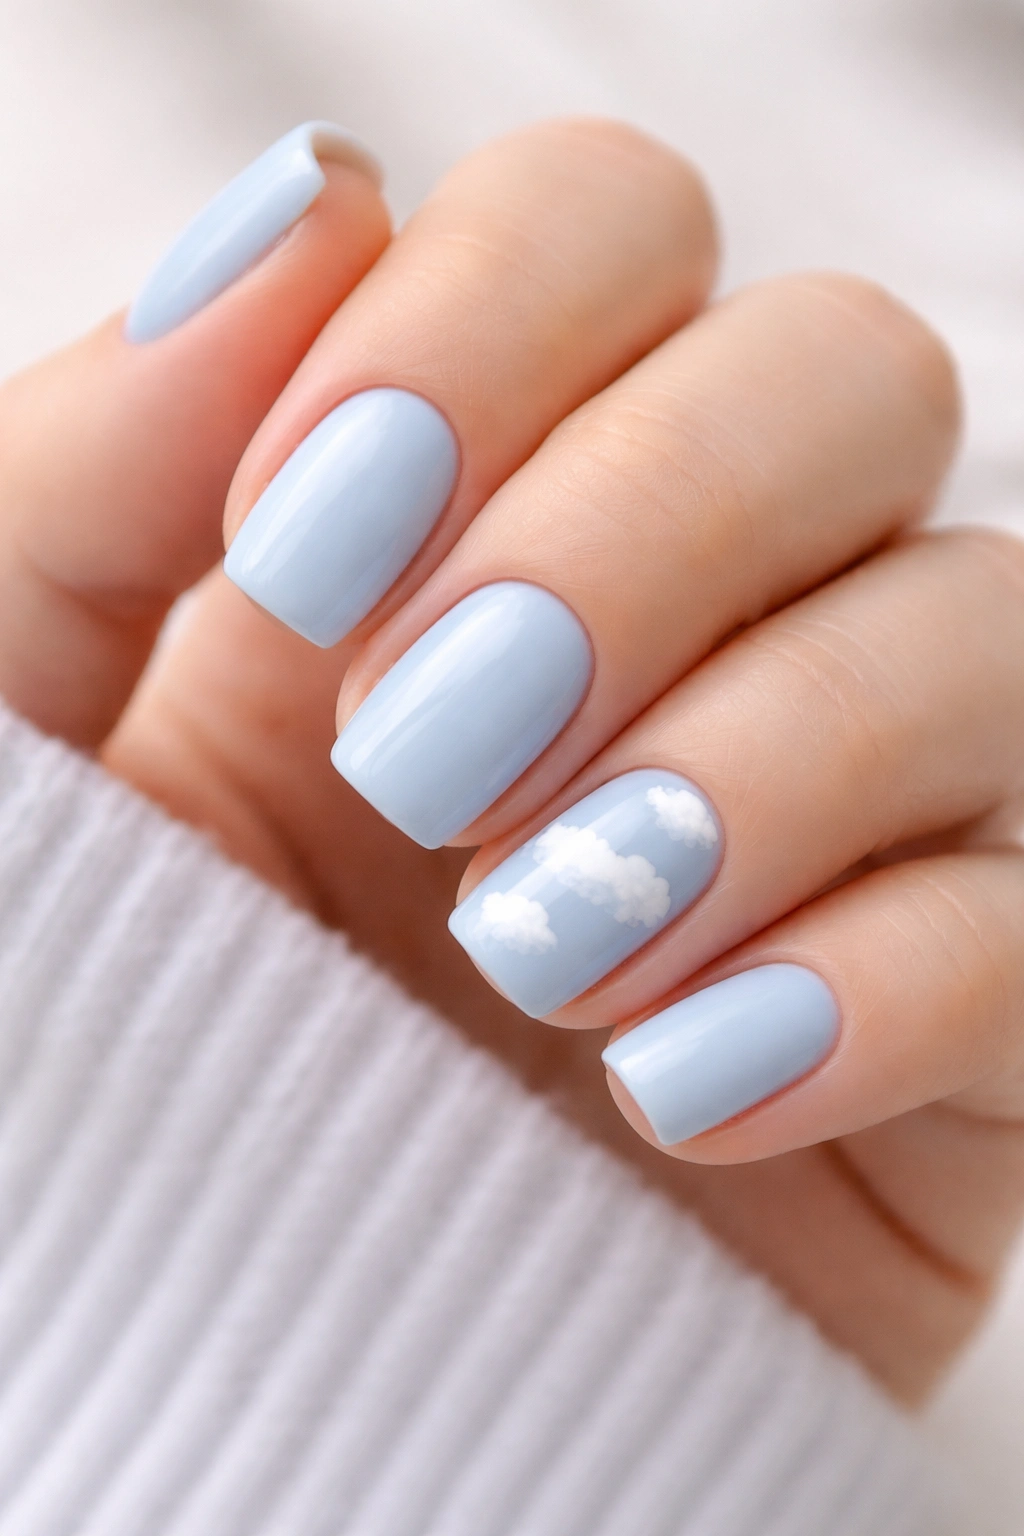
Baby blue is a color that feels calming and wearable without being bland. Short squoval acrylics in a soft baby blue with a delicate white cloud design on one accent nail creates a manicure that feels whimsical but still put-together. The clouds add personality without requiring precise or realistic painting.
Why Baby Blue Works Seasonally and Timeless
Baby blue reads as soft and approachable, yet it’s sophisticated enough for professional settings. It’s the kind of color that works in any season—not just summer—because it’s more about undertone than literal seasonal relevance. Paired with cloud imagery, it feels lighthearted without being juvenile.
Painting Simple Cloud Designs
- Use white gel polish or acrylic paint and a small, rounded brush for cloud painting
- Clouds should be organic and slightly imperfect—painting them freehand rather than using stencils
- Create clouds by painting overlapping, puffy round shapes, leaving small gaps between them
- Add a touch of pale gray or light blue shading between the clouds for dimension
- Seal your cloud design with topcoat before moving on
Pro tip: Add a tiny dab of the baby blue color to some of the white clouds so they blend with the base—this creates a more cohesive, unified look than pure white clouds.
15. Champagne with Sparkle Gradient
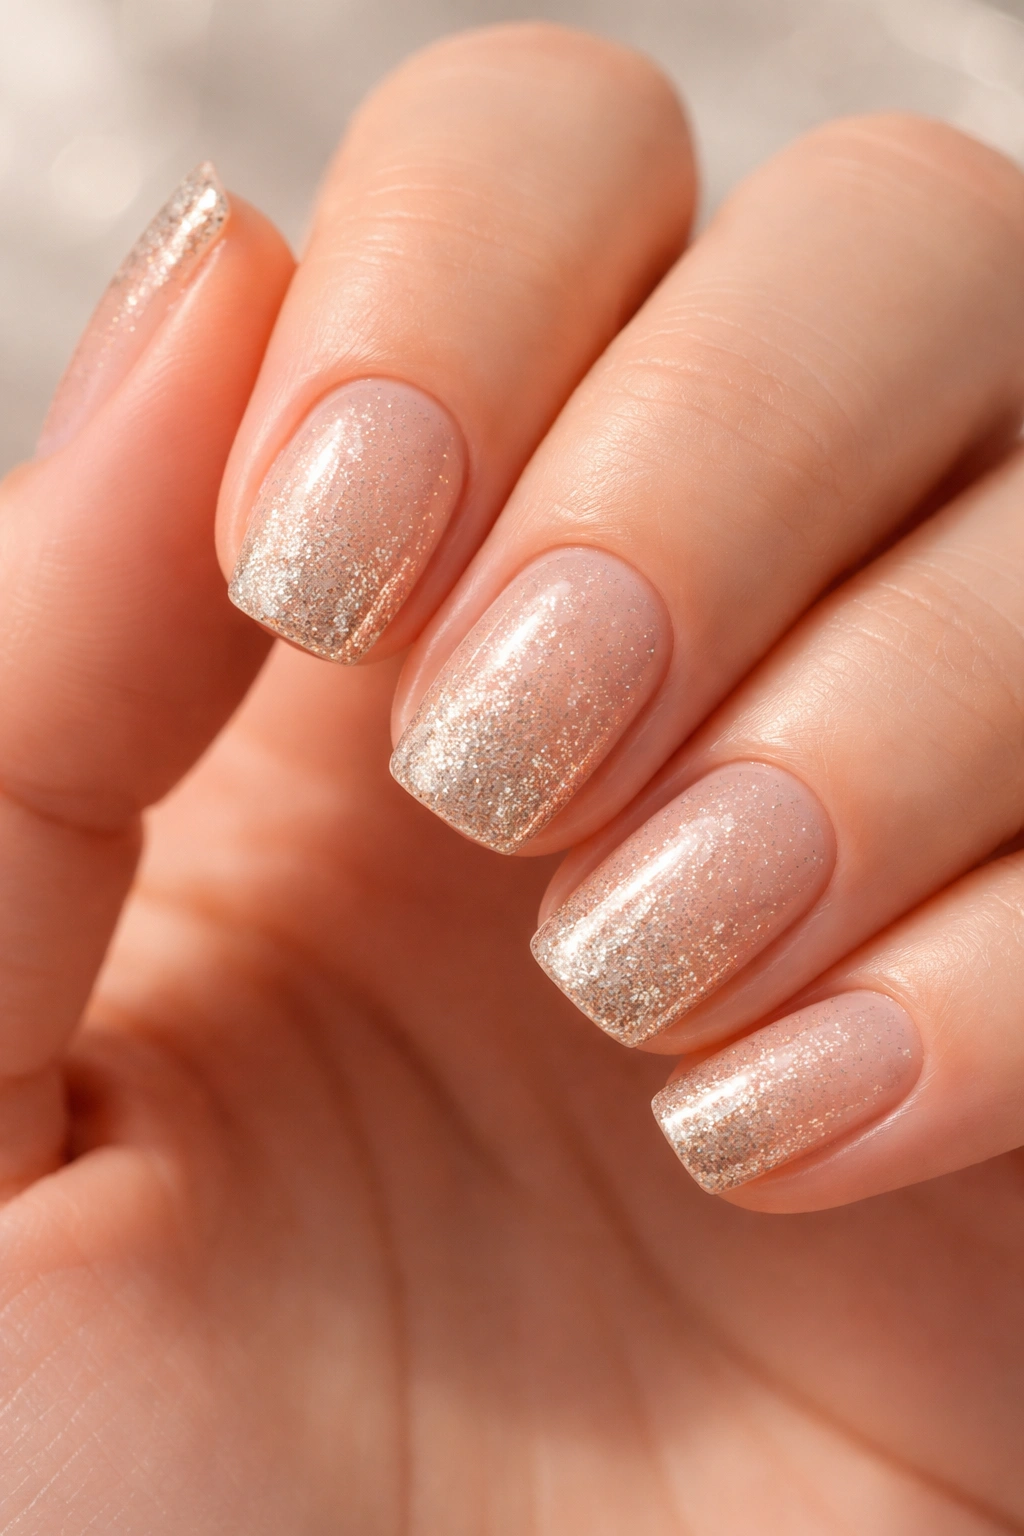
Champagne is the celebratory color—it feels fancy without trying too hard. A champagne base that gradually transitions to clear or sheer pink at the tips, with increasing amounts of fine glitter, creates a sparkle gradient that catches light beautifully. On short squoval acrylics, this effect reads as elevated and intentional rather than trying-too-hard.
Why Sparkle Gradients Feel Luxurious
A gradient effect—especially one where opacity and sparkle increase together—creates visual movement and depth. The champagne base provides richness and warmth, while the increasing sparkle toward the tips adds celebration and glamour. It’s the kind of manicure that looks stunning in person but photographs even better.
Creating a Flawless Sparkle Gradient
- Start with a full nail of champagne-colored gel polish
- Apply clear or sheer pink gel to the tips, feathering it out so it blends with the champagne
- Mix fine glitter into the clear or sheer polish before applying it—this creates the gradient effect
- Apply more glitter-infused polish concentration toward the very tips
- Seal with a non-sticky topcoat so the sparkle remains visible and doesn’t appear muddy
Pro tip: Use champagne-colored glitter mixed with clear multi-colored microglitter for a more interesting sparkle effect—the champagne glitter matches your base while the rainbow microglitter catches light differently.
Final Thoughts
Short squoval acrylic nails offer something special: the durability and longevity of acrylics combined with the practicality of shorter length and the flattering geometry of the squoval shape. Whether you gravitate toward subtle neutrals or unexpected colors, minimal designs or delicate details, there’s a short squoval option that aligns with your lifestyle and aesthetic.
The designs featured here represent just the beginning of what’s possible on this versatile canvas. The true magic of short squoval nails is that they’re equally at home in boardrooms and casual settings, in professional environments and creative spaces. They look polished without appearing high-maintenance, intentional without feeling fussy.
When you’re ready to book your next manicure appointment, bring reference photos of the designs that speak to you and discuss customization options with your nail artist. The best manicure is one that makes you feel confident and looks appropriate for your life. A skilled nail technician can help you adapt these ideas to match your personal style, skin tone, and day-to-day needs. Whether you choose cream and shimmer or champagne sparkle, your short squoval acrylics will serve as a daily reminder that understated elegance never goes out of style.
