

There’s something undeniably magical about glitter nails when the clock strikes midnight. As champagne glasses clink and confetti falls, your fingertips deserve to shine just as bright. Glitter transforms an ordinary manicure into a celebration, catching the light with every gesture and adding that extra sparkle to your festivities.
The beauty of glitter nail designs lies in their versatility. You can go full-on glamorous with wall-to-wall sparkle, or keep things refined with strategic placement and subtle shimmer. Whether you’re dancing until dawn at a black-tie gala or hosting an intimate gathering at home, glitter nails work for every kind of celebration.
What makes glitter particularly perfect for this occasion is how it photographs. Those midnight selfies and group photos will capture every glittering detail, creating memories that sparkle as much as the moment itself. Plus, glitter has this way of making you feel instantly festive—one glance at your hands and you’re in party mode.
We’ve rounded up twelve stunning glitter nail ideas that range from understated elegance to show-stopping drama. Each design brings its own personality to the party, so you can find the perfect match for your style and celebration plans. Grab your favorite glitter polishes and let’s make your nails the star of the show.
1. All-Over Gold Glitter Nails
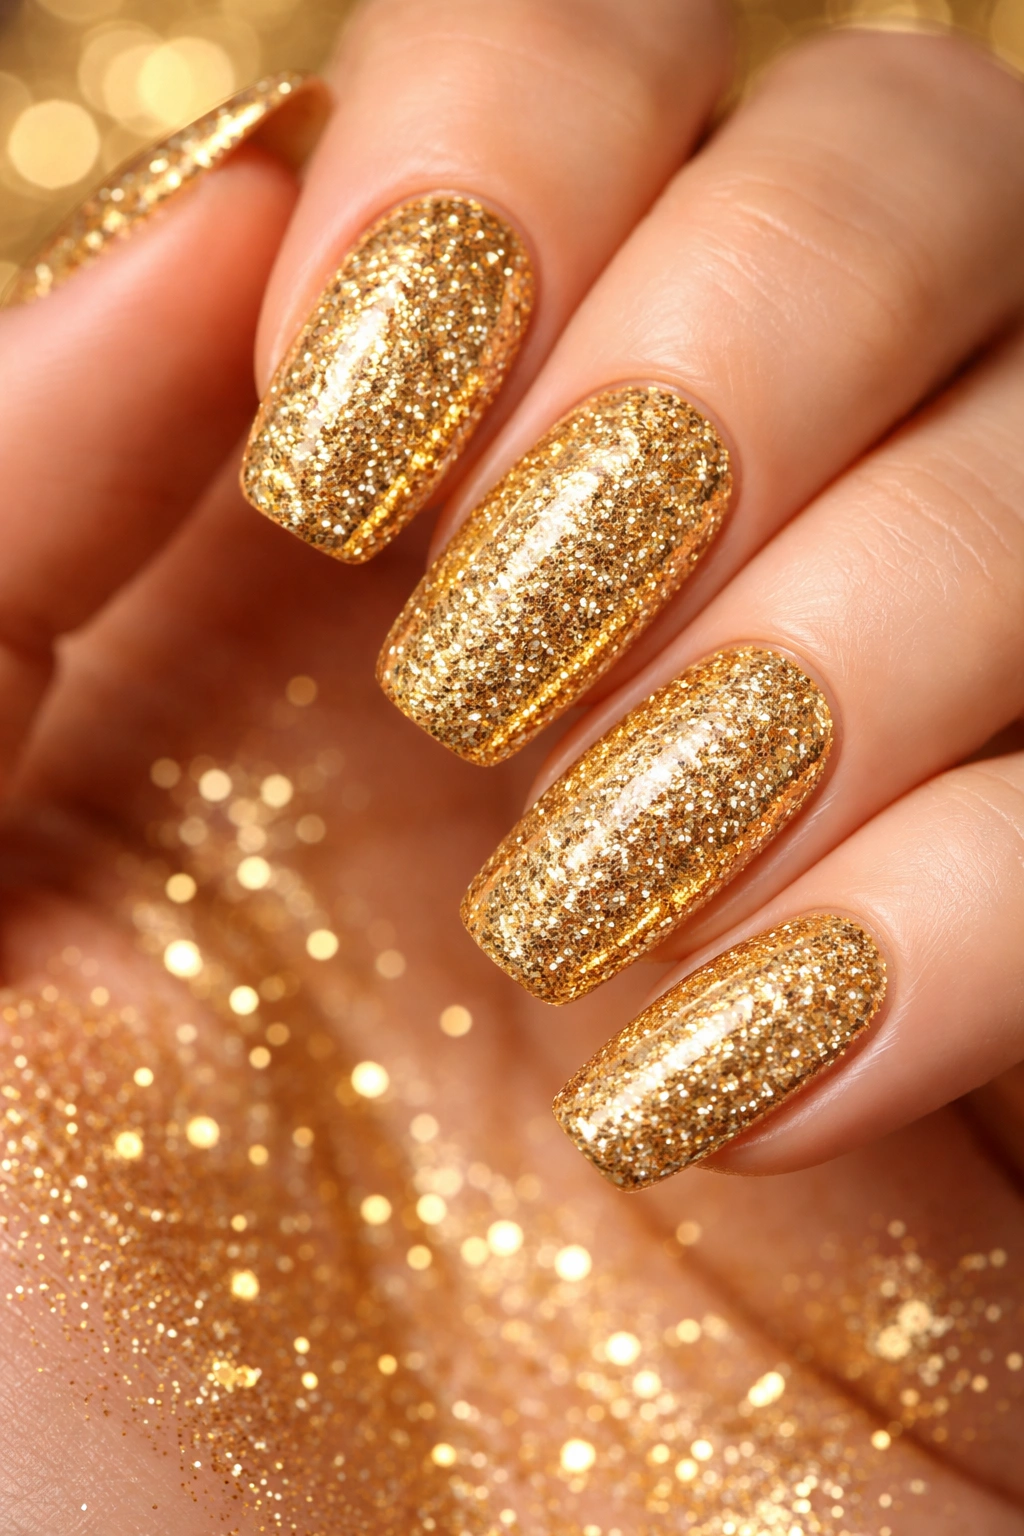
Nothing screams celebration quite like nails drenched in gold glitter from base to tip. This maximalist approach to sparkle makes an unapologetic statement that’s impossible to ignore.
The key to pulling off this look is choosing the right gold tone. Warm, rich golds complement deeper skin tones beautifully, while champagne and rose gold shades flatter fair complexions. Consider your jewelry and outfit when making your selection—you want everything to work together harmoniously.
Why This Look Works
Gold glitter reflects light from every angle, creating a mesmerizing effect that changes as you move. The densely packed sparkle means you don’t need any additional nail art or embellishments. Your nails become the statement piece all on their own.
This design also photographs incredibly well. Whether you’re taking close-ups of your champagne toast or posing for group shots, gold glitter catches the light and creates that professional, polished effect without any special filters.
Application Tips
- Apply two thin coats rather than one thick coat for even coverage
- Use a generous layer of top coat to seal in loose glitter pieces
- Consider a glitter base that suspends larger particles for added dimension
- Let each layer dry completely before moving to the next
Pro tip: If you want even more impact, layer a fine gold shimmer polish over chunky gold glitter for a multi-dimensional effect that really pops.
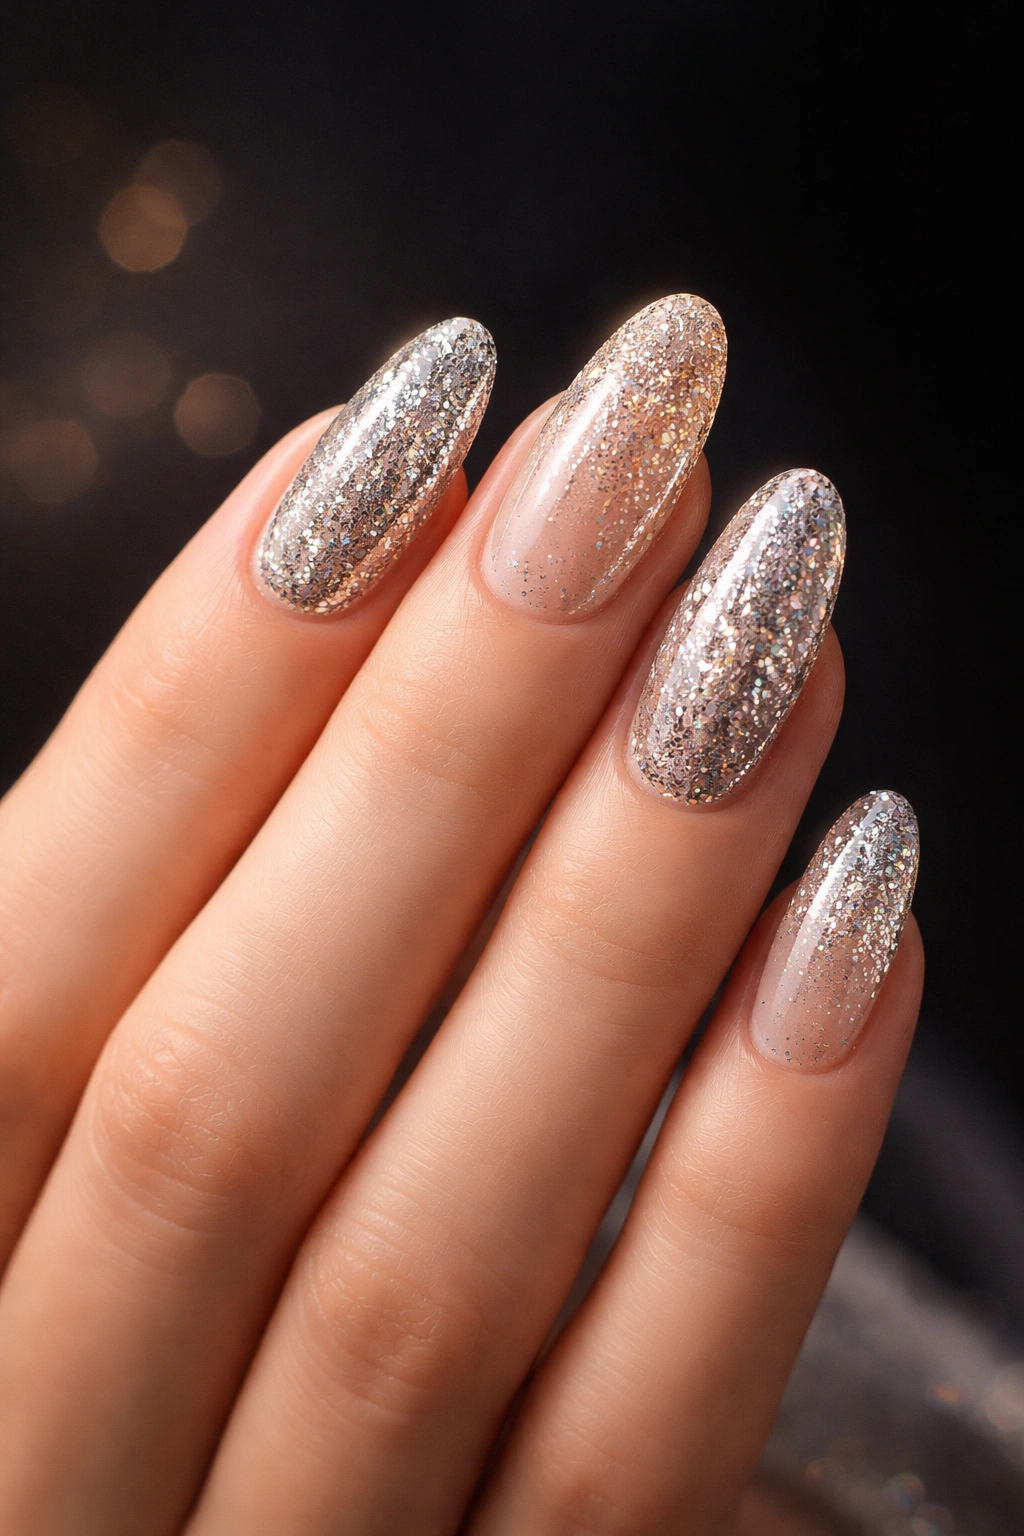
2. Silver Sparkle French Tips
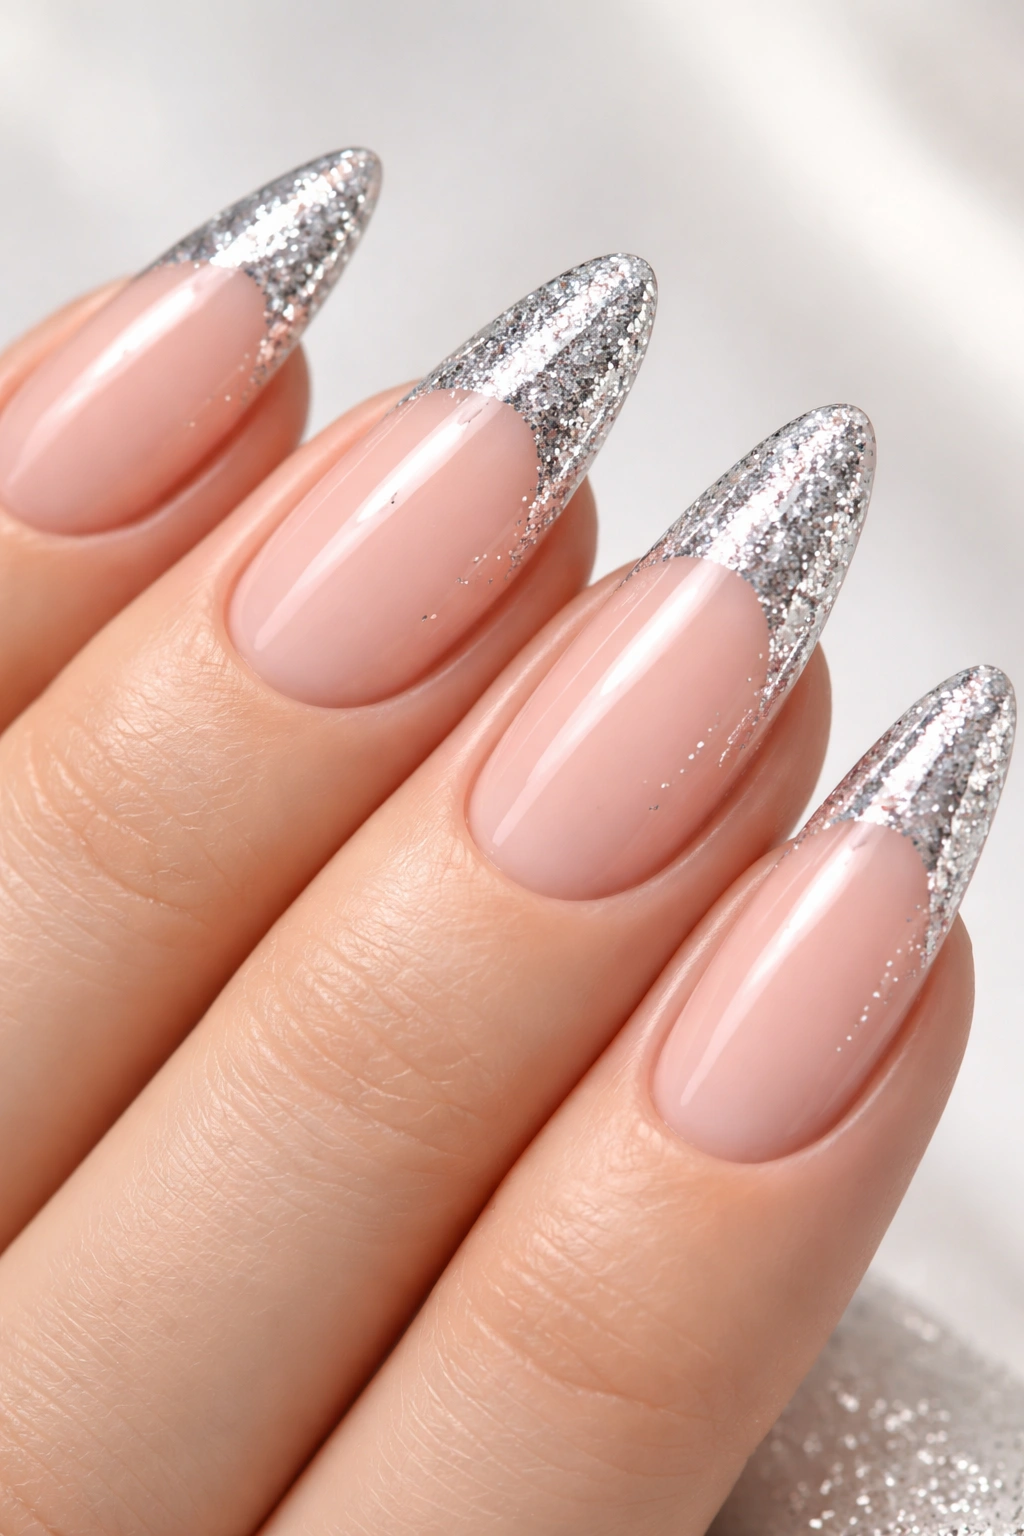
The classic French manicure gets a festive upgrade when you swap white polish for dazzling silver glitter. This look strikes the perfect balance between timeless elegance and party-ready glamour.
Silver glitter tips work with any nail shape, from short and practical to long and dramatic. The design elongates your fingers while keeping things sophisticated enough to wear beyond the holiday season.
Creating the Perfect Tip
The beauty of glitter French tips is that they’re more forgiving than traditional versions. Glitter naturally blurs harsh lines, so you don’t need to stress about creating perfectly crisp edges. A slightly organic, hand-drawn line actually adds to the charm.
You can adjust the thickness of your tips based on your preference. Thicker tips feel bold and modern, while ultra-thin tips offer subtle sparkle that’s almost demure. Play around with what feels right for your style.
Styling Variations
- Try an angled tip instead of the traditional curve for a modern twist
- Add a thin line of silver glitter around the base of your nail as well
- Use different sizes of glitter particles for texture
- Mix silver with hints of holographic glitter for extra dimension
Fun fact: Silver glitter reflects cool-toned lighting beautifully, making it ideal if you’ll be in venues with LED or blue-tinted lights.
3. Champagne Bubble Effect
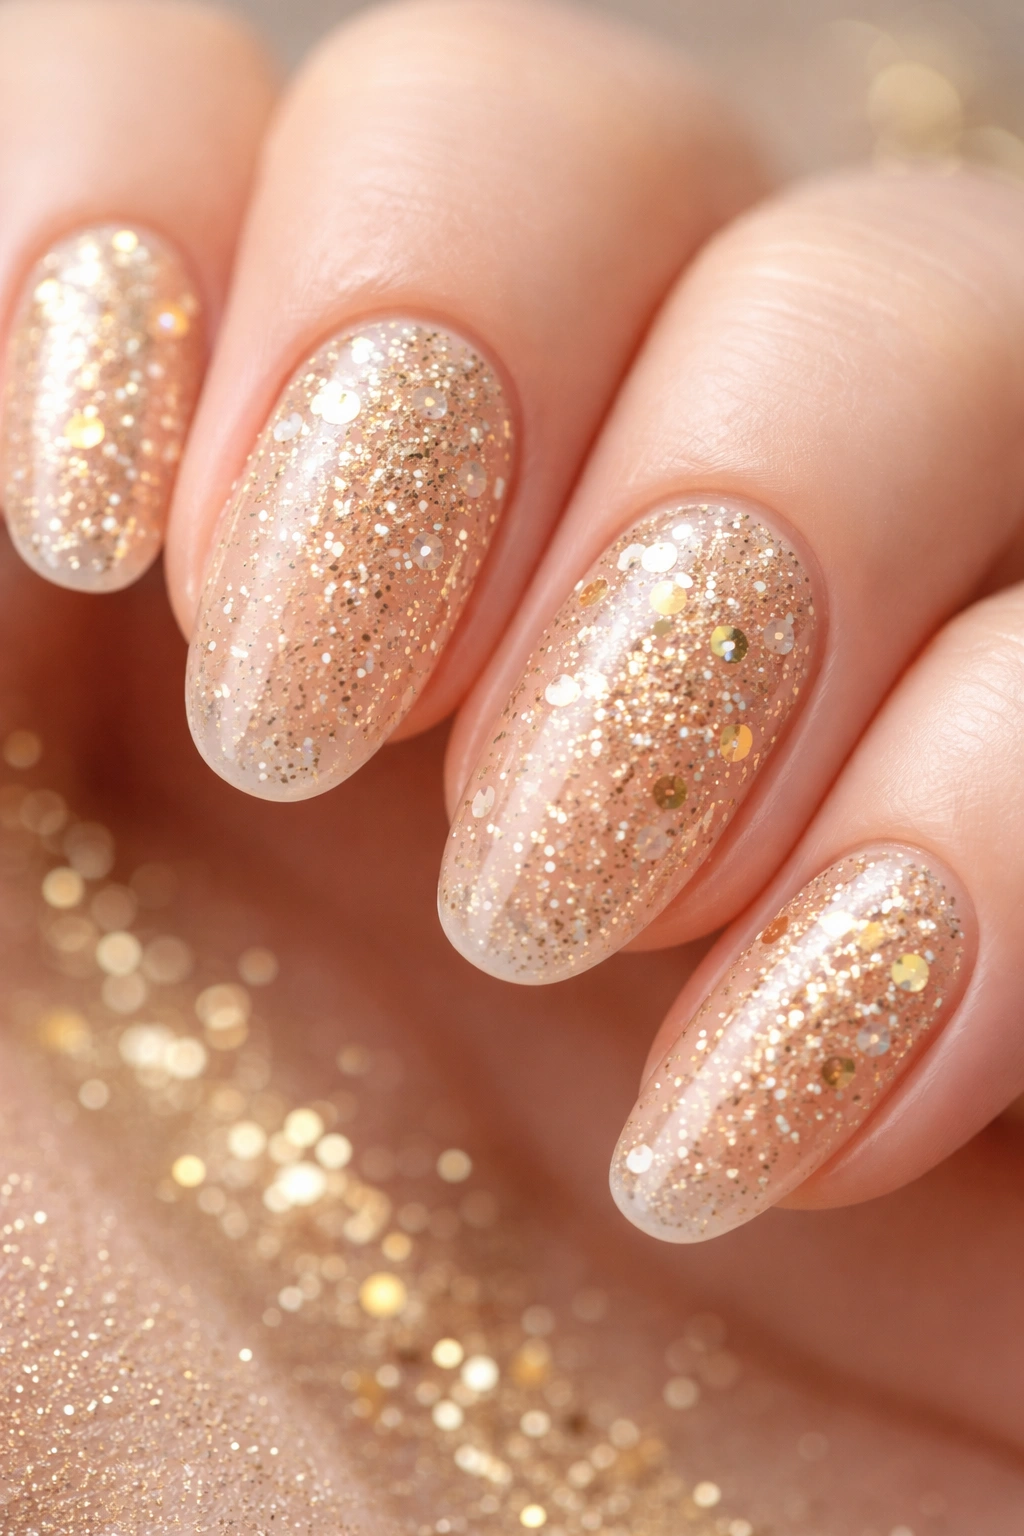
Inspired by your midnight toast, this technique creates the illusion of tiny bubbles rising through champagne-colored glitter. It’s whimsical, elegant, and totally unique.
The champagne bubble effect combines a sheer or nude base with scattered gold and cream glitter in varying sizes. The result mimics the effervescent quality of actual champagne, with sparkle that seems to float within the polish.
How to Achieve the Bubble Effect
Start with a sheer peachy-nude base that resembles the color of champagne. While it’s still slightly tacky, gently dab on gold glitter in random patterns, focusing more concentration toward the tips. The uneven distribution creates that organic, bubbly appearance.
Finish with a glossy top coat that has slight amber tones. This seals everything together while maintaining that champagne-inspired color story. The gloss is crucial—it creates the illusion of liquid and makes those glitter pieces look like they’re suspended in the polish.
What Makes It Special
This design feels celebratory without being over-the-top. It’s refined enough for formal events but fun enough to show you’re ready to celebrate. The nude base also means it complements virtually any outfit color.
- Works beautifully on shorter nails where busy designs can feel cramped
- Easy to touch up if a chip occurs
- Looks elegant in natural daylight and party lighting alike
Pro tip: Use a mix of fine champagne shimmer and larger gold hexagon glitter for the most authentic bubble effect.
4. Black and Gold Glitter Gradient
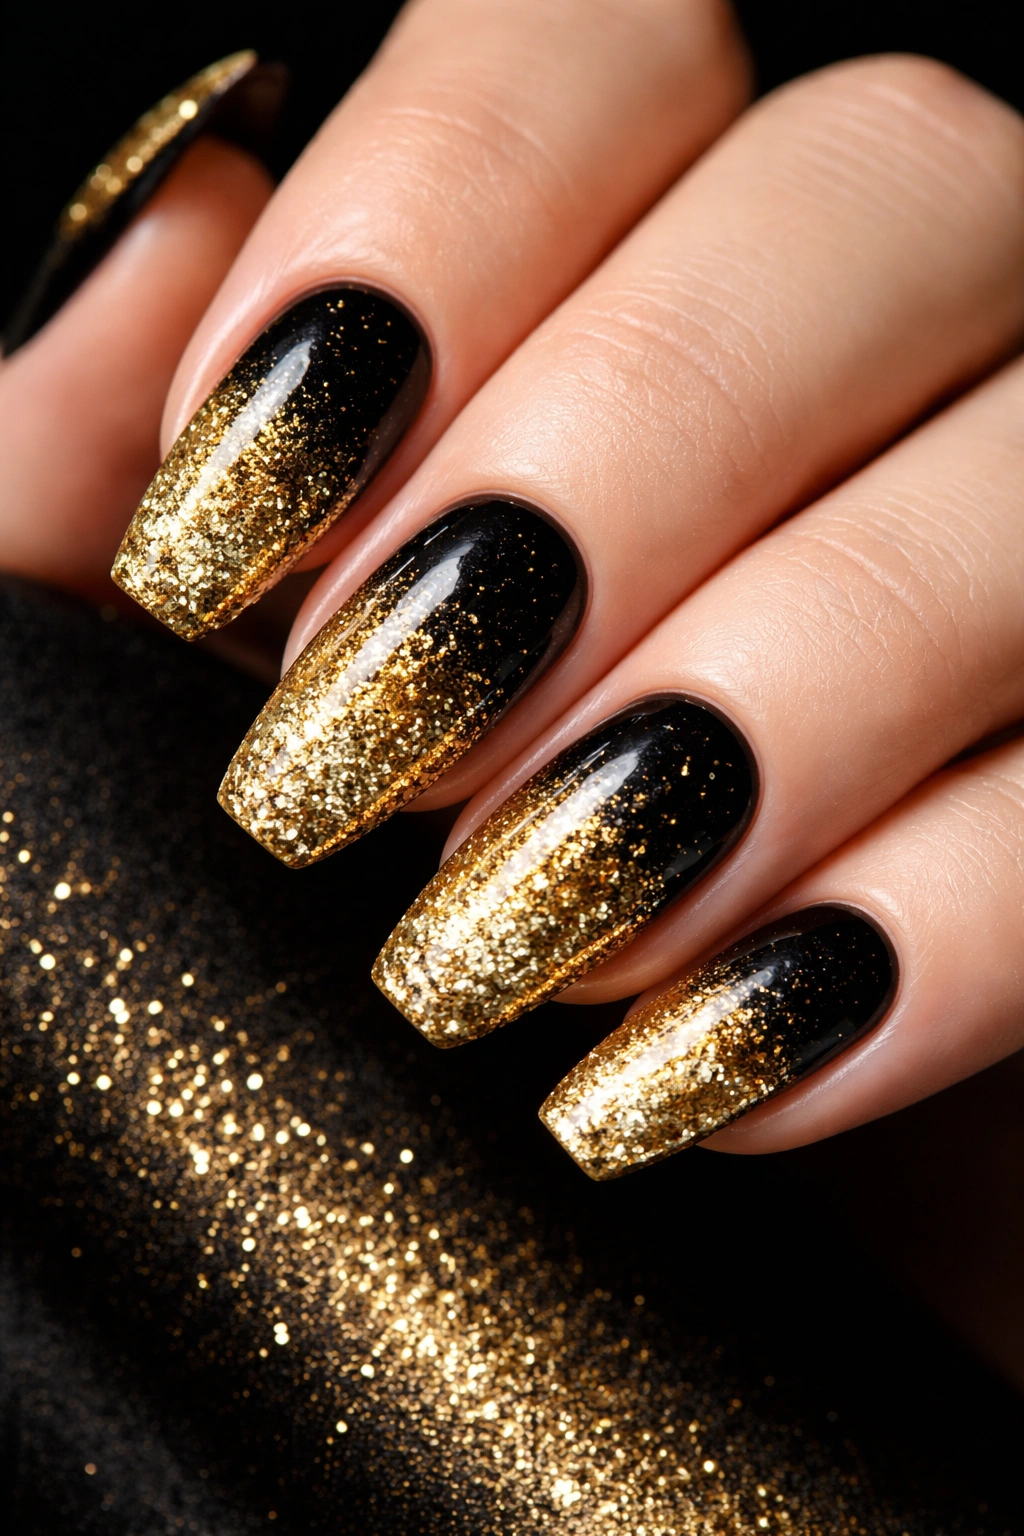
Drama meets sophistication in this stunning gradient that transitions from deep black to glittering gold. This design channels Old Hollywood glamour with a modern, edgy twist.
The contrast between matte or glossy black and sparkling gold creates visual interest that’s hard to look away from. This color combination also happens to be incredibly flattering on all skin tones.
Creating the Gradient
Begin with a black base on your entire nail, applying two coats for full opacity. While the second coat is still slightly wet, use a makeup sponge to dab gold glitter polish from the tip downward, creating a fade effect.
The key is working quickly and building gradually. Start with a light application of glitter and add more layers until you achieve your desired intensity. The gradient should feel seamless, with no harsh line where black meets gold.
Why Choose This Design
Black and gold is the ultimate power color combination. It’s bold without being flashy, elegant without being boring. This design works equally well with a sequined party dress or sleek black evening wear.
The dark base also means the glitter really stands out. Instead of competing with lighter colors, the gold sparkle absolutely pops against that black background.
Finishing Touches
- Seal with a thick gel-like top coat for a smooth surface
- Consider adding a single rhinestone at the base of your ring finger nail
- Use a small brush to clean up any glitter fallout around your cuticles
- Let everything dry thoroughly—this design has multiple layers
Remember: Glitter gradients look best when the transition happens over about two-thirds of your nail rather than just at the very tip.
5. Rose Gold Chrome with Glitter Accent

Rose gold remains one of the most universally flattering metallic shades, and when you combine a chrome finish with strategic glitter placement, you get pure magic.
This design features rose gold chrome on most nails with one or two accent nails covered in coordinating rose gold glitter. The mix of finishes creates depth and interest while maintaining a cohesive color story.
Getting the Chrome Effect
Chrome powder gives that mirror-like, reflective finish that looks expensive and high-end. You’ll need a gel polish base to achieve true chrome—traditional polish won’t work for this technique. Apply your rose gold chrome powder over a cured gel base, then buff it in gently until you achieve that signature shine.
For your accent nails, skip the chrome and instead apply rose gold glitter polish in two coats. The contrast between the smooth chrome and textured glitter makes both finishes stand out more.
Best Placement for Accent Nails
Most people choose their ring finger for the glitter accent, but don’t feel limited by this convention. Some prefer doing both ring fingers, while others like alternating every other nail. Your thumb is another great option for an accent nail since you see it constantly.
- Ring finger accents feel classic and sophisticated
- Alternating nails create a playful, modern vibe
- Thumbs and ring fingers together balance the design
Pro tip: Use a rose gold glitter that has slightly larger particles than your chrome finish for maximum textural contrast.
6. Holographic Glitter Ombré
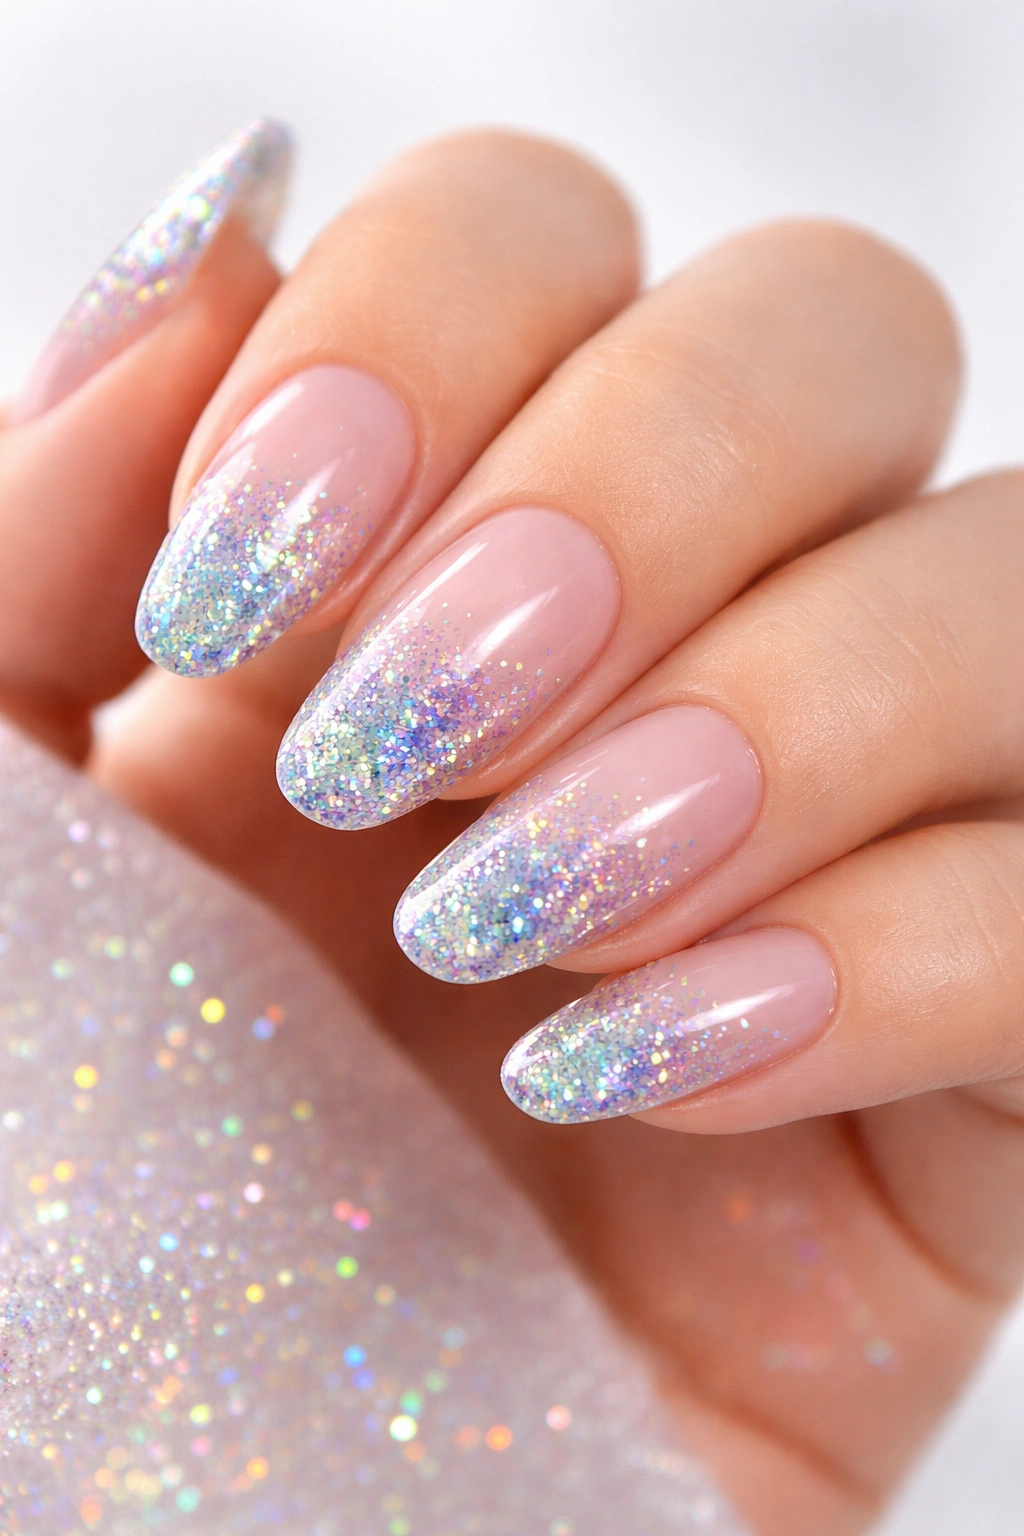
Holographic glitter shifts colors as you move, creating a rainbow effect that’s absolutely mesmerizing. An ombré application makes this futuristic finish feel soft and wearable rather than overwhelming.
The beauty of holographic glitter lies in its complexity. What appears silver in one light might flash pink, blue, or green in another. This chameleon quality means your nails will look different in every photo and lighting situation.
Creating the Perfect Ombré
Start with a sheer opalescent or white base—this gives your holographic glitter something to shine against. Using a makeup sponge, pat holographic glitter polish heavily at your tips, then gradually lighten the application as you work toward your cuticles.
The goal is a subtle fade where you can still see hints of your base color near the cuticle, transitioning to dense holographic sparkle at the tips. Build this effect slowly with multiple light layers rather than trying to achieve it in one heavy application.
Why Holographic Works for Celebrations
There’s something inherently festive about rainbow sparkle. Holographic glitter captures the joyful, magical feeling of celebration better than any single-color option. It’s playful without being childish, bold without being garish.
This finish also eliminates the stress of color matching. Since holographic glitter contains every color, it works with absolutely any outfit or accessory choice.
Application Essentials
- Use a gel top coat to prevent the holographic effect from dulling
- Apply in natural daylight to see the true color-shifting effect
- Allow extra drying time between coats
- Consider a white gel base for the brightest holographic shine
Fun fact: Holographic glitter was originally developed for security applications and only became widely available in cosmetics within the last decade.
7. Glitter French Manicure
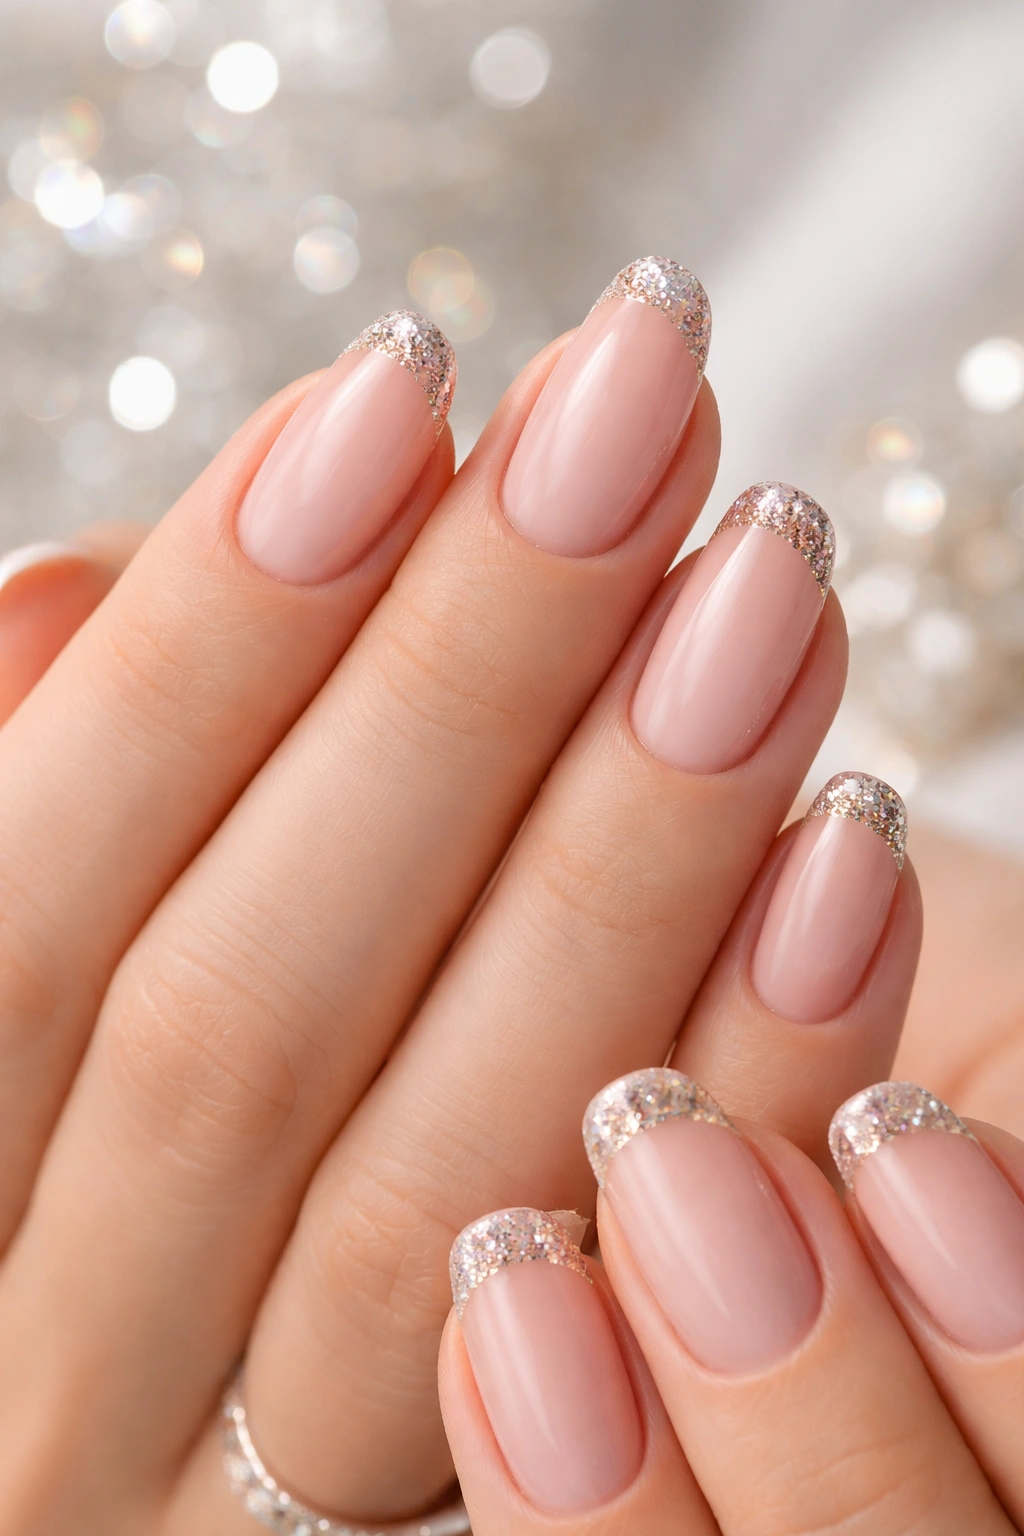
The traditional French manicure transforms into something spectacular when you replace that classic white tip with any color of glitter you love. This updated version maintains the elegant silhouette while adding celebratory sparkle.
What makes this design so appealing is its versatility. You can go subtle with a fine silver shimmer or dramatic with chunky multi-colored glitter. The French tip shape provides structure while the glitter adds personality.
Choosing Your Glitter Color
Silver and gold are the obvious choices, but don’t overlook other options. Deep burgundy glitter creates a moody, romantic effect. Navy blue glitter feels sophisticated and unexpected. Even multi-colored confetti glitter can work if you keep the tips thin and precise.
Consider your skin tone when selecting your shade. Warm-toned glitters (gold, copper, bronze) complement olive and deeper skin beautifully. Cool-toned options (silver, gunmetal, icy blue) flatter fair and cool-toned skin.
Getting Clean Lines
The trick to crisp glitter French tips is using nail guides or tape to mark where you want your glitter to begin. Press the tape down firmly, apply your glitter polish, then carefully remove the tape while the polish is still slightly wet.
If you get glitter where you don’t want it, dip a small cleanup brush in acetone and carefully erase any mistakes. Working with precision takes patience, but the polished result is worth the extra effort.
- Use reinforcement stickers as guides for perfect curves
- Clean up edges before adding your top coat
- Consider a matte top coat on the base with gloss just on the tips
- Keep tips thinner for a modern, updated look
Pro tip: Apply glitter polish in thin layers, letting each dry completely. Thick glitter coats never fully cure and can stay tacky underneath.
8. Rainbow Confetti Glitter

Multi-colored confetti glitter brings an instant party atmosphere to your nails. This playful design features glitter in various shapes, sizes, and colors suspended in a clear or sheer base.
The random scatter of colorful sparkle mimics actual confetti falling, making it the perfect visual representation of celebration. No two nails look exactly alike, giving the design an organic, joyful quality.
Creating the Confetti Effect
Apply a clear or sheer pink base to your nails first. This provides a clean canvas for your confetti glitter to shine against. While your base is still wet, use a toothpick or dotting tool to place individual pieces of glitter exactly where you want them.
Alternatively, you can use a pre-made confetti glitter polish and apply it strategically—heavier at the tips and lighter near the base for a gradient effect, or concentrated on just one or two accent nails for a subtler approach.
Making It Wearable
Confetti glitter can easily veer into childish territory if you’re not careful. The key to keeping it sophisticated is restraint. Don’t overload every nail with maximum glitter. Leave some breathing room and let your base color show through.
Pairing rainbow confetti with a nude or soft pink base keeps things elegant. A white or black base creates more contrast and feels bolder. Choose based on your personal style and the formality of your celebration.
Styling Tips
- Focus confetti placement near the tips for a French-inspired look
- Use larger hexagon confetti mixed with fine glitter for dimension
- Seal everything under a thick, glossy top coat
- Balance busy nails with simpler jewelry choices
Remember: True confetti glitter polishes contain actual shaped pieces (hearts, stars, dots) rather than just standard glitter particles.
9. Burgundy Glitter Fade
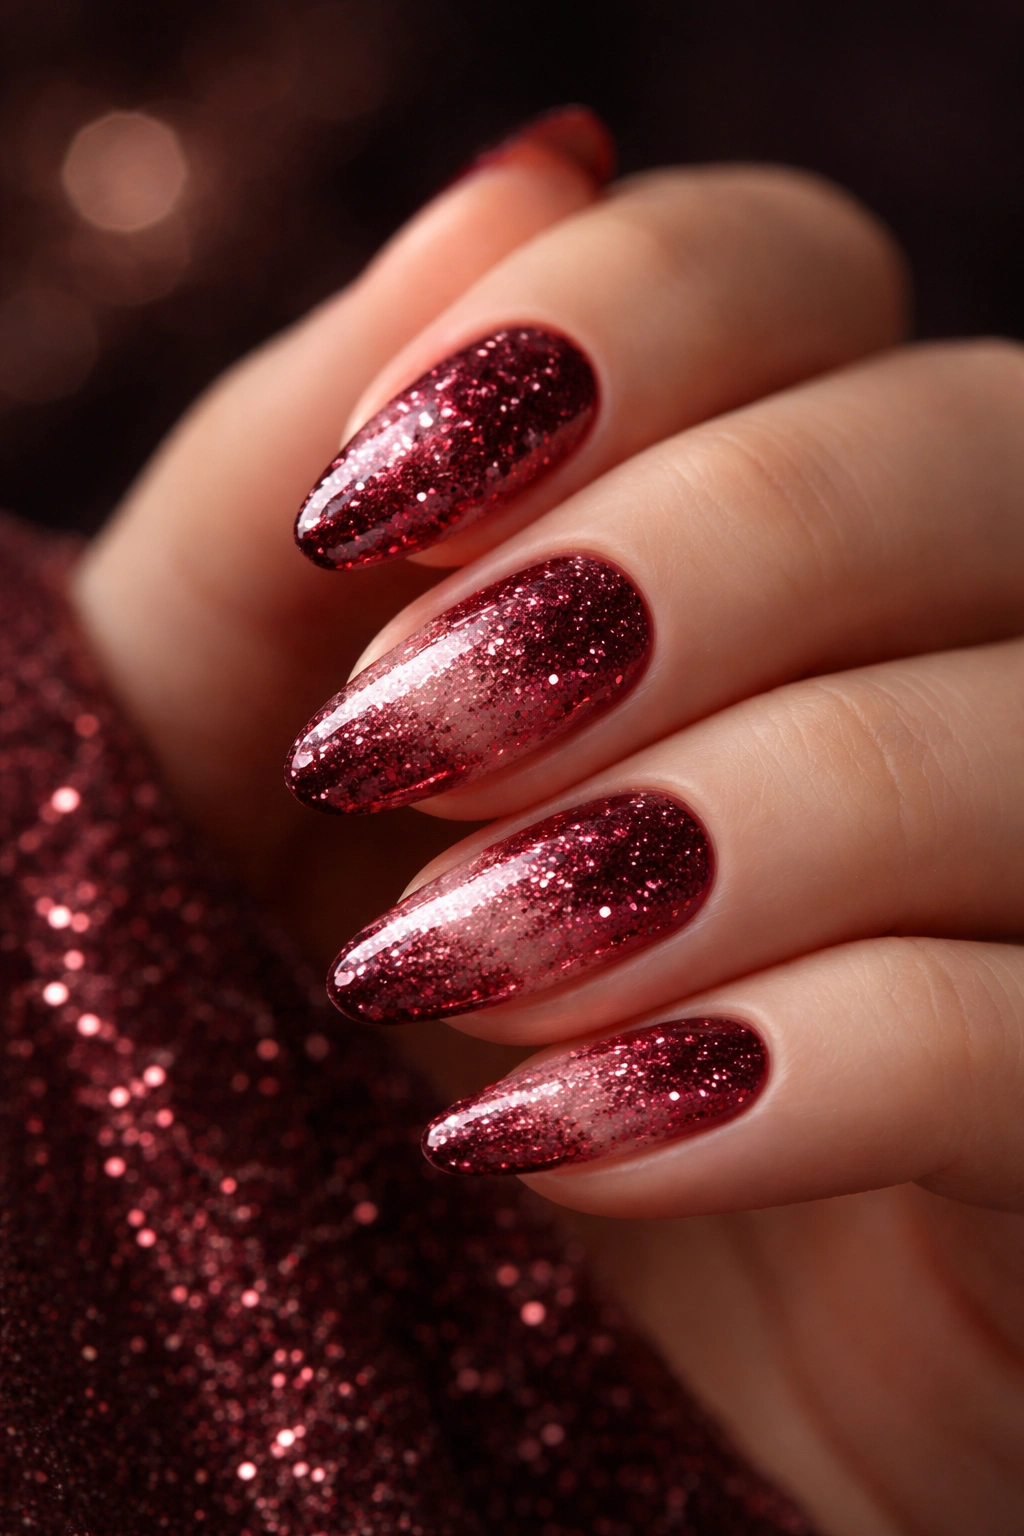
Deep, wine-colored burgundy glitter offers a sophisticated alternative to traditional gold and silver. The rich tone feels luxurious and grown-up while still delivering plenty of sparkle.
This design works particularly well as a fade, where burgundy glitter is concentrated at the tips and gradually disperses toward a sheer or nude base. The effect is moody and romantic with just enough sparkle to feel festive.
Why Burgundy Glitter Stands Out
While everyone else reaches for classic metallics, burgundy glitter makes you stand out from the crowd. It’s unexpected but still totally appropriate for celebration. The deep red undertones also complement the winter season beautifully.
Burgundy glitter is incredibly flattering on deeper skin tones, where it creates gorgeous contrast. On fair skin, it provides a pop of color that feels elegant rather than overwhelming. The versatility makes it a winner across the board.
Application Technique
Start with either a sheer nude base or a solid burgundy cream polish, depending on how intense you want the final look. Using a makeup sponge, dab burgundy glitter polish from your tips toward the center of your nail.
Build the fade gradually with multiple light applications. The glitter should be densest at the tips and become increasingly sparse as you move toward your cuticles. This creates a sophisticated gradient that doesn’t feel heavy or overdone.
Pairing Suggestions
- Works beautifully with gold jewelry and accessories
- Complements velvet and satin party dresses
- Pair with a classic red lip for coordinated glamour
- Add a single gold rhinestone at the base for extra luxury
Pro tip: Mix a tiny bit of burgundy cream polish with your glitter to deepen the color and help the sparkle stand out even more.
10. Silver Star Glitter Scatter
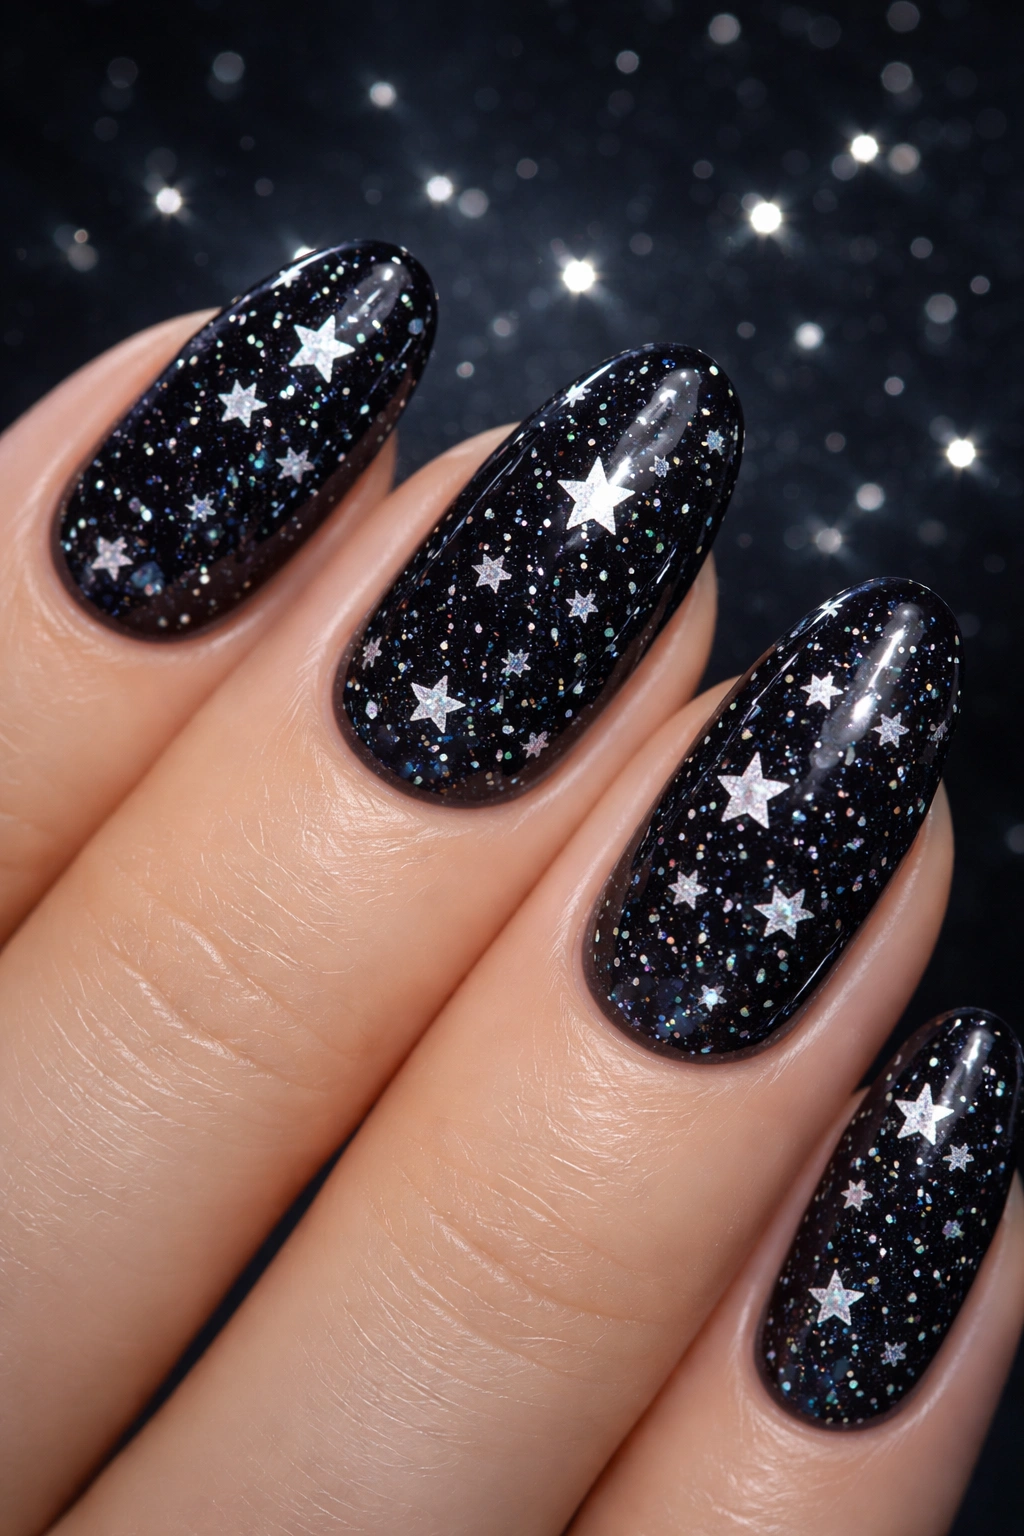
Tiny silver star-shaped glitter pieces create a celestial design that’s perfect for ringing in the new year. This whimsical look captures the magic of celebration without going overboard on sparkle.
Star glitter comes in various sizes, from micro stars that look like distant constellations to larger statement pieces. Mixing sizes creates the most interesting, dynamic effect.
Creating the Starry Night Effect
Apply a deep navy, black, or midnight blue base to represent the night sky. Once dry, use a toothpick or small nail art brush to place individual star glitter pieces across your nails. Vary the density—some nails can have more stars while others have just a few.
Secure each star with a tiny dab of clear polish or nail glue before applying your top coat. This prevents them from shifting or falling off as you go about your evening.
Making It Special
The beauty of star glitter is its symbolism. Stars represent wishes, dreams, and new beginnings—all perfect sentiments for welcoming a new year. This design tells a story beyond just looking pretty.
You can enhance the celestial theme by adding tiny dots of silver polish between stars to represent distant planets or additional sparkle. A glossy top coat makes everything shine like actual celestial bodies.
Placement Ideas
- Concentrate stars near the tips for a subtle approach
- Scatter them randomly across all nails for a whimsical look
- Create a constellation pattern if you’re detail-oriented
- Use stars as accent details on just one or two nails
Fun fact: Star-shaped glitter reflects light differently than round glitter, creating more dramatic sparkle with less coverage.
11. Copper Metallic with Fine Glitter
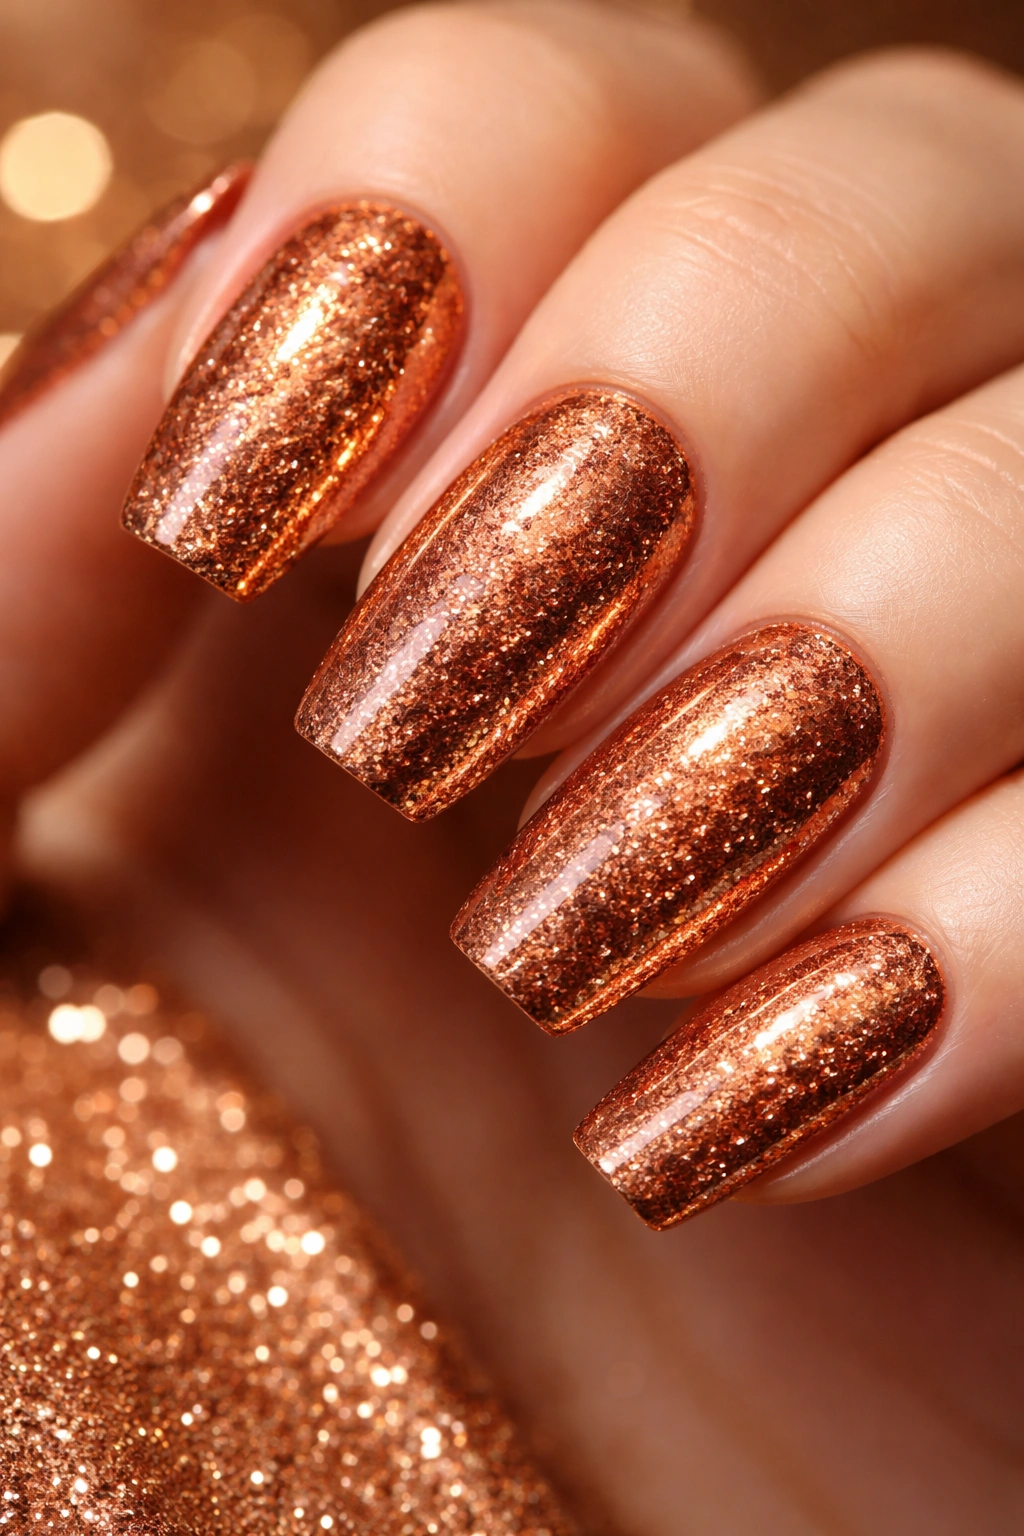
Warm, glowing copper offers a refreshing alternative to the usual gold and silver options. When you layer fine copper glitter over a copper metallic base, you get incredible depth and richness.
This monochromatic approach to glitter creates a cohesive, polished look that feels expensive and intentional. The warm tones are particularly stunning on medium to deep skin tones, where the copper seems to glow from within.
Layering for Dimension
Start with a copper metallic polish as your base—this gives you full color coverage and a slight sheen. Once completely dry, apply a copper glitter polish that contains fine, almost dust-like glitter particles over the top.
The key is using glitter that’s the same color family as your base but in a different finish. This creates dimension without looking busy or chaotic. The metallic base provides structure while the glitter adds texture and sparkle.
Why This Combination Works
Copper sits in that perfect sweet spot between gold and rose gold. It has warmth without being yellow-toned, and it has pink undertones without being too rosy. This makes it exceptionally wearable and flattering.
The tone-on-tone approach also feels more sophisticated than mixing multiple glitter colors. It’s cohesive and intentional, showing that you put thought into your design rather than just throwing sparkle everywhere.
Finishing Details
- Use a gel-effect top coat for maximum shine and durability
- Consider copper foil accents on one nail for added interest
- Pair with bronze or gold jewelry for a harmonious look
- Apply three thin coats rather than two thick ones for the smoothest finish
Pro tip: Copper glitter looks especially stunning in warm, golden lighting like candlelight or Edison bulbs—perfect for intimate celebrations.
12. White Glitter Snowflake Design
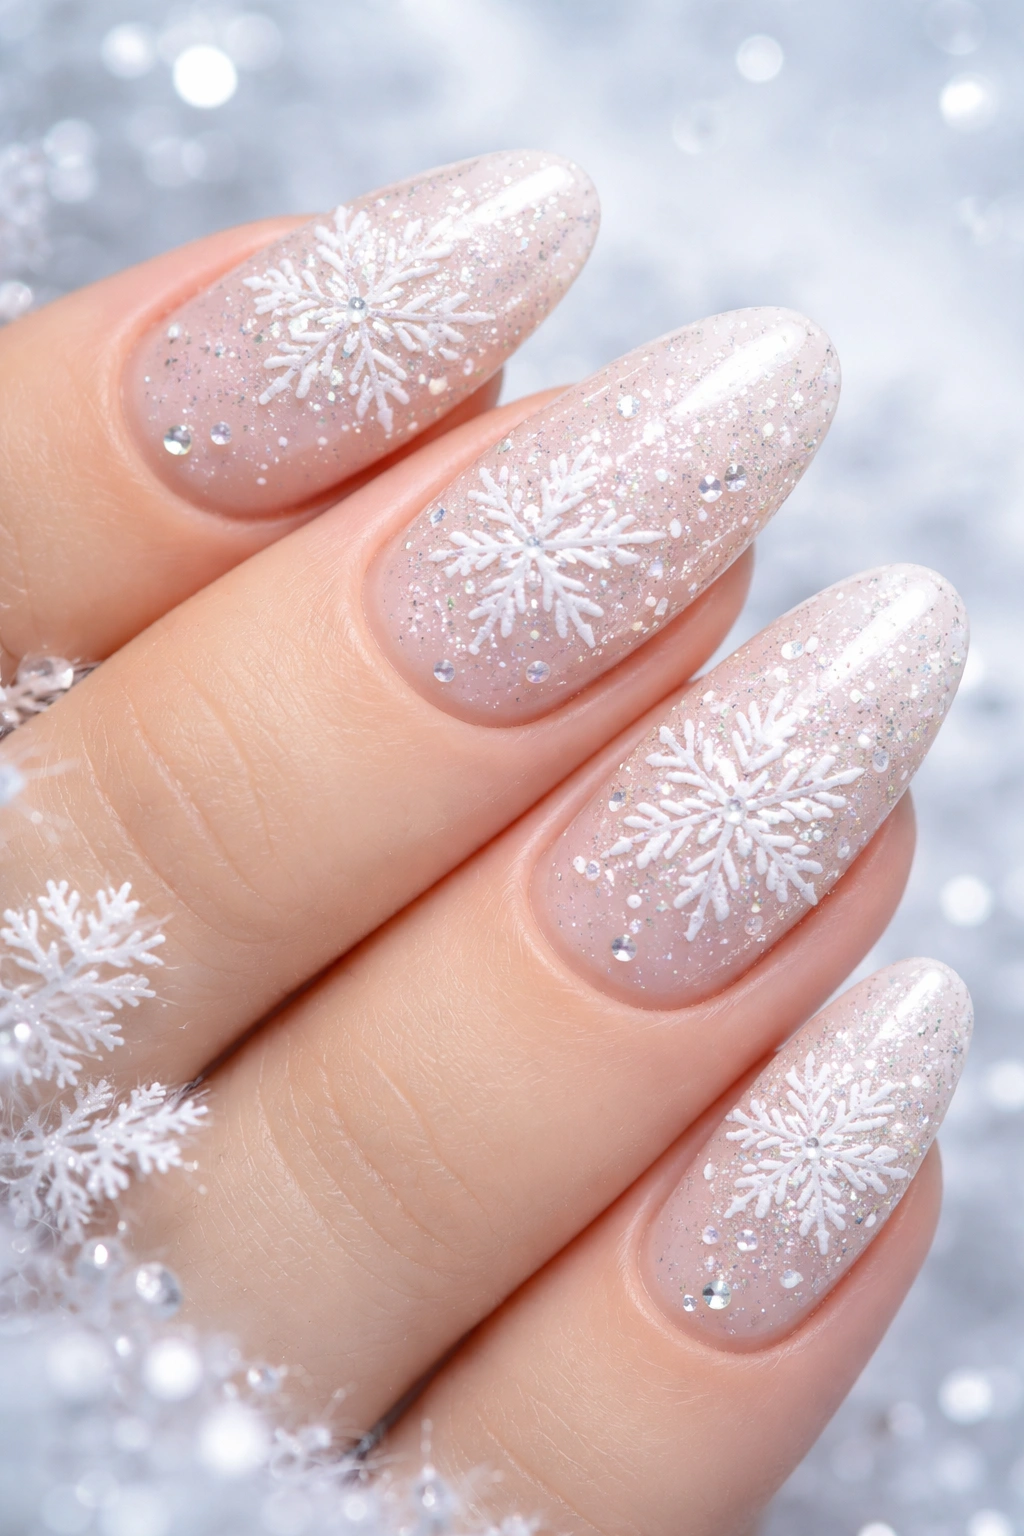
Nothing captures the magic of the season quite like delicate snowflakes rendered in white glitter. This winter-inspired design works beautifully for celebrations while remaining elegant and refined.
The beauty of snowflake nail art is that each snowflake can be unique, just like in nature. This gives you artistic freedom while maintaining a cohesive overall design.
Creating Glitter Snowflakes
Apply a base color of your choice—pale blue, silver, nude, or even deep navy all work beautifully. Once dry, use a fine nail art brush or a dotting tool to create snowflake shapes with white glitter polish.
Start with a center dot, then draw six lines radiating outward. Add smaller branches off each main line, and place dots at the ends. The glitter catches light beautifully and makes each snowflake seem to shimmer.
Making It Festive Yet Sophisticated
Snowflake designs can easily look Christmas-y rather than New Year’s Eve appropriate. The key is keeping your color palette sophisticated—avoid traditional Christmas red and green combinations.
Stick to whites, silvers, icy blues, and metallics. These colors feel winter-inspired without being tied to any specific holiday. They’re celebratory enough for the occasion while remaining timeless.
Design Variations
- Place one large snowflake on each nail as the focal point
- Scatter tiny snowflakes across nails in varying sizes
- Combine snowflakes with subtle glitter gradient
- Use different shades of white and silver glitter for dimension
Remember: Real snowflakes are six-sided, so keep that symmetry in mind if you want an authentic look.
Conclusion
Glitter nails bring that extra dose of celebration to your festivities. Whether you prefer understated shimmer or maximum sparkle, there’s a design here that matches your style perfectly. The best part? You’ll catch glimpses of your gorgeous nails all night long, reminding you to embrace the joy of the moment. Here’s to sparkling your way into the new year with confidence and style.
