

There’s something about Valentine’s Day that makes us want to wear our hearts on our sleeves—or in this case, on our fingertips. Red and pink nails have become as much a part of the holiday as chocolates and flowers, and honestly? They’re a lot more fun to show off.
But here’s the thing: Valentine’s Day nails don’t have to scream “cupid” from across the room. You can absolutely lean into the romance of the season without going full conversation-heart mode. Whether you’re planning a date night, a Galentine’s celebration with your crew, or just treating yourself to something pretty, the right manicure sets the mood.
Red and pink are the foundation, but the possibilities? Endless. From chrome finishes that catch the light to delicate heart details that make you smile every time you glance down, these color combos work for every style and skill level. Some of these looks you can DIY at home with a steady hand and a little patience. Others might call for a trip to your favorite nail tech—and that’s part of the fun.
We’ve rounded up ten Valentine’s Day nail ideas that range from subtle and sophisticated to full-on romantic. Each one brings its own energy, so you can pick the vibe that feels right for how you want to celebrate. Let’s get into it.
1. Pink Chrome Heart Nails

Chrome nails have taken over, and pairing that futuristic shine with Valentine’s Day vibes? Chef’s kiss. A soft pink chrome base gives you that mirror-like finish that shifts in the light, and when you add a few carefully placed red hearts, the look goes from trendy to totally on-theme.
The chrome powder creates a smooth, reflective surface that feels luxe without being over-the-top. It’s shiny, but not glittery—there’s a sophistication to the finish that works whether you’re headed to brunch or dinner.
Why This Look Stands Out
Chrome finishes photograph beautifully, which makes these nails perfect for anyone who loves posting their manicure. The pink base keeps things soft and feminine, while the red heart accents bring just enough Valentine’s energy without feeling costume-y. You can place the hearts wherever you want—near the cuticle, at the tip, or scattered across accent nails.
This design works on any nail length, but longer nails really show off that reflective quality. If you’re DIYing, apply your base color, cure it, then rub chrome powder over the tacky layer before sealing with a no-wipe top coat.
What You’ll Need
- Pink chrome powder or polish
- Red gel polish for heart details
- Dotting tool or small brush
- Clear top coat to seal
Pro tip: Chrome powder shows every imperfection, so make sure your base layer is smooth and fully cured before applying the powder.
2. Red French Tips With Tiny Hearts
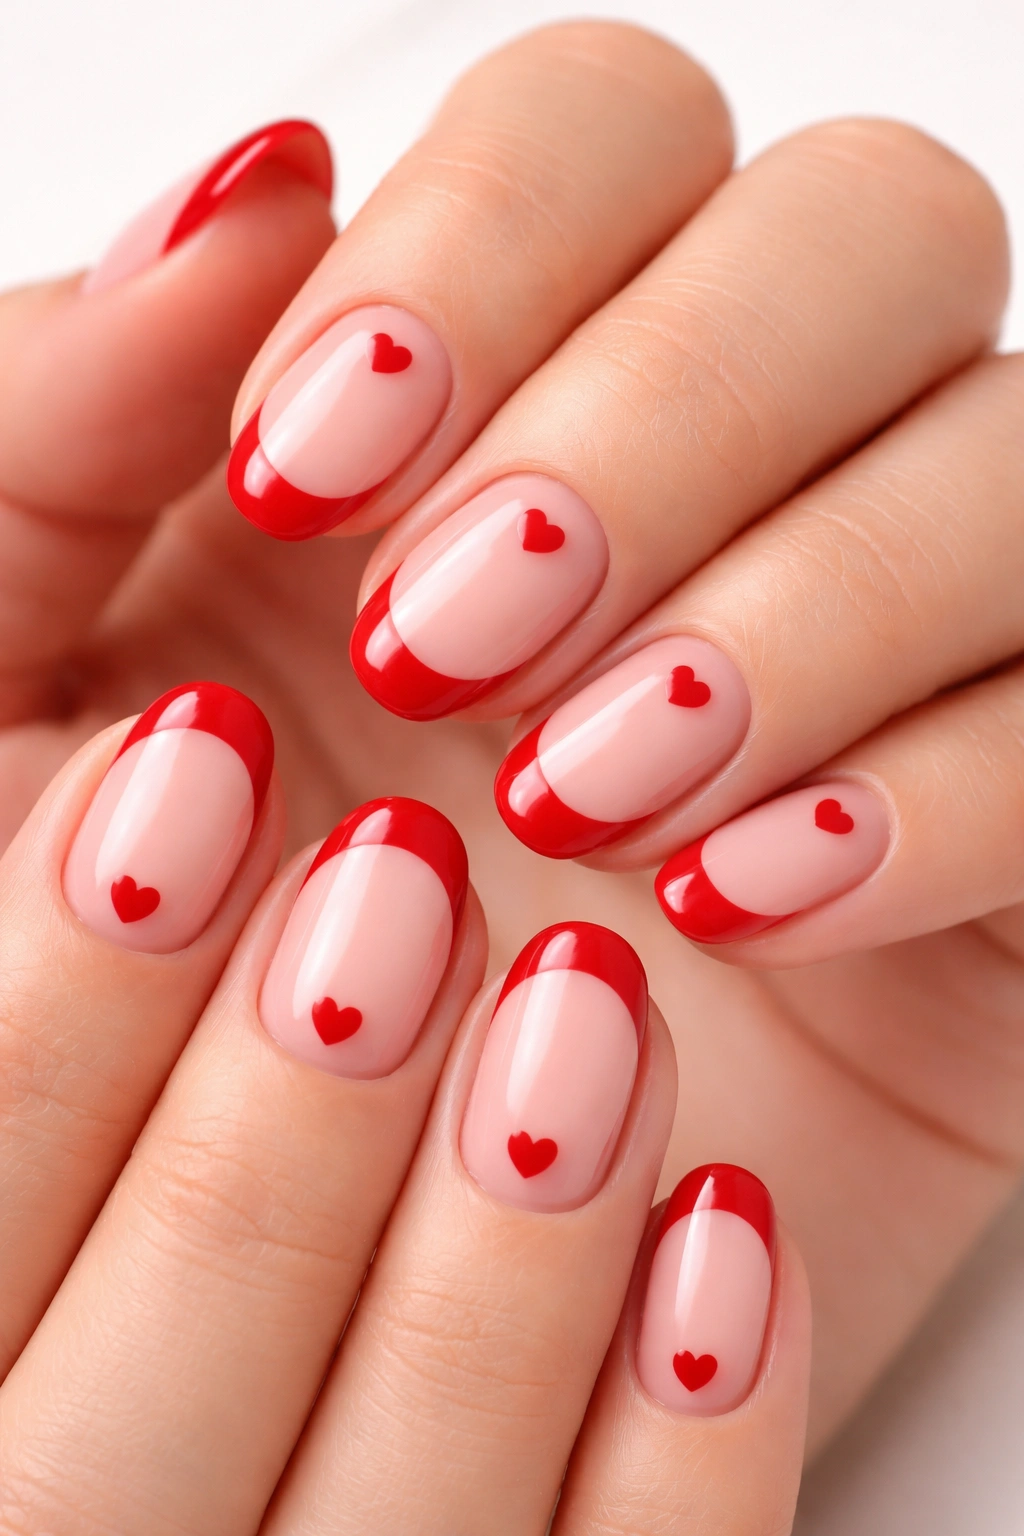
French manicures never go out of style, but swapping the classic white tips for a bold red instantly makes them Valentine’s-appropriate. Add a tiny heart near the base of each nail, and you’ve got a look that’s polished, romantic, and way more interesting than a standard mani.
The red tips create a clean line that elongates your fingers, while the small heart detail keeps things playful. It’s the kind of design that works for someone who wants to nod to the holiday without going full pink-and-red explosion.
How It Works for Any Occasion
This design walks the line between everyday chic and holiday festive. You could wear these to the office, out with friends, or on a romantic date—they fit everywhere. The red French tips feel classic and sophisticated, while the heart adds just a touch of whimsy.
If you’re doing this at home, tape off your tips or freehand them with a thin brush. Once the red is dry, use a dotting tool to create your hearts. Place two small dots close together, then drag the polish downward to form the point.
Quick Facts
- Best on short to medium nails for a subtle effect
- Works with any red shade from cherry to burgundy
- Easy to customize by changing heart placement
- Can be done with regular or gel polish
Fun fact: French tips got their name because they were designed to look clean and natural—like the nails of Parisian women.
3. Pink and Red Polka Dot Nails
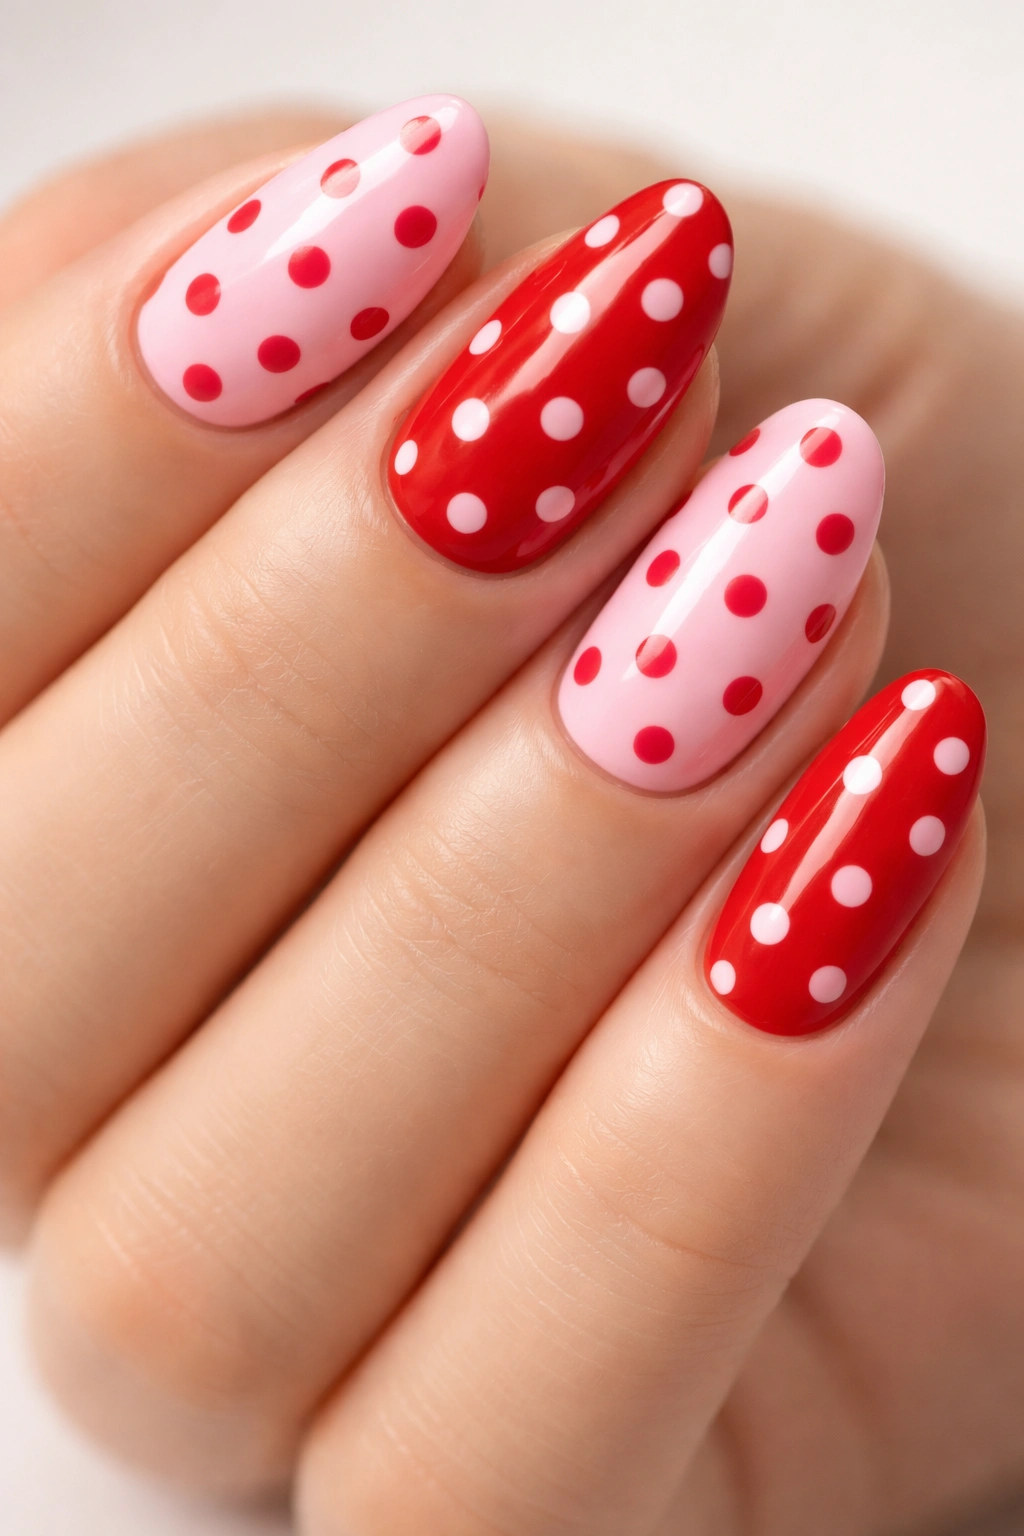
Polka dots are having a moment, and they’re surprisingly easy to create at home. For Valentine’s Day, paint each hand a different color—one pink, one red—then use the opposite shade to dot across each nail. The result is playful, graphic, and totally Instagrammable.
The beauty of this design is in its simplicity. You don’t need any fancy tools or advanced skills, just two polish colors and a dotting tool (or even a toothpick works). The dots can be perfectly spaced or more random and organic—both looks are cute.
What Makes It Special
Polka dots bring a retro, vintage vibe that feels fresh when done in Valentine’s colors. The alternating pink and red base creates visual interest before you even add the dots. When you do add them, you get this fun contrast that makes the whole set pop.
You can space your dots evenly around the edges of your nails for a framed effect, or scatter them randomly across the entire nail for a more modern look. Some people like to vary the dot sizes for added texture.
Key Benefits
- Super beginner-friendly design
- Takes less than 30 minutes to complete
- No special tools required
- Easy to fix mistakes before polish dries
Pro tip: Let your base color dry completely before adding dots, or you’ll drag the color and create smudges instead of clean circles.
4. Burgundy Velvet Cat-Eye Nails
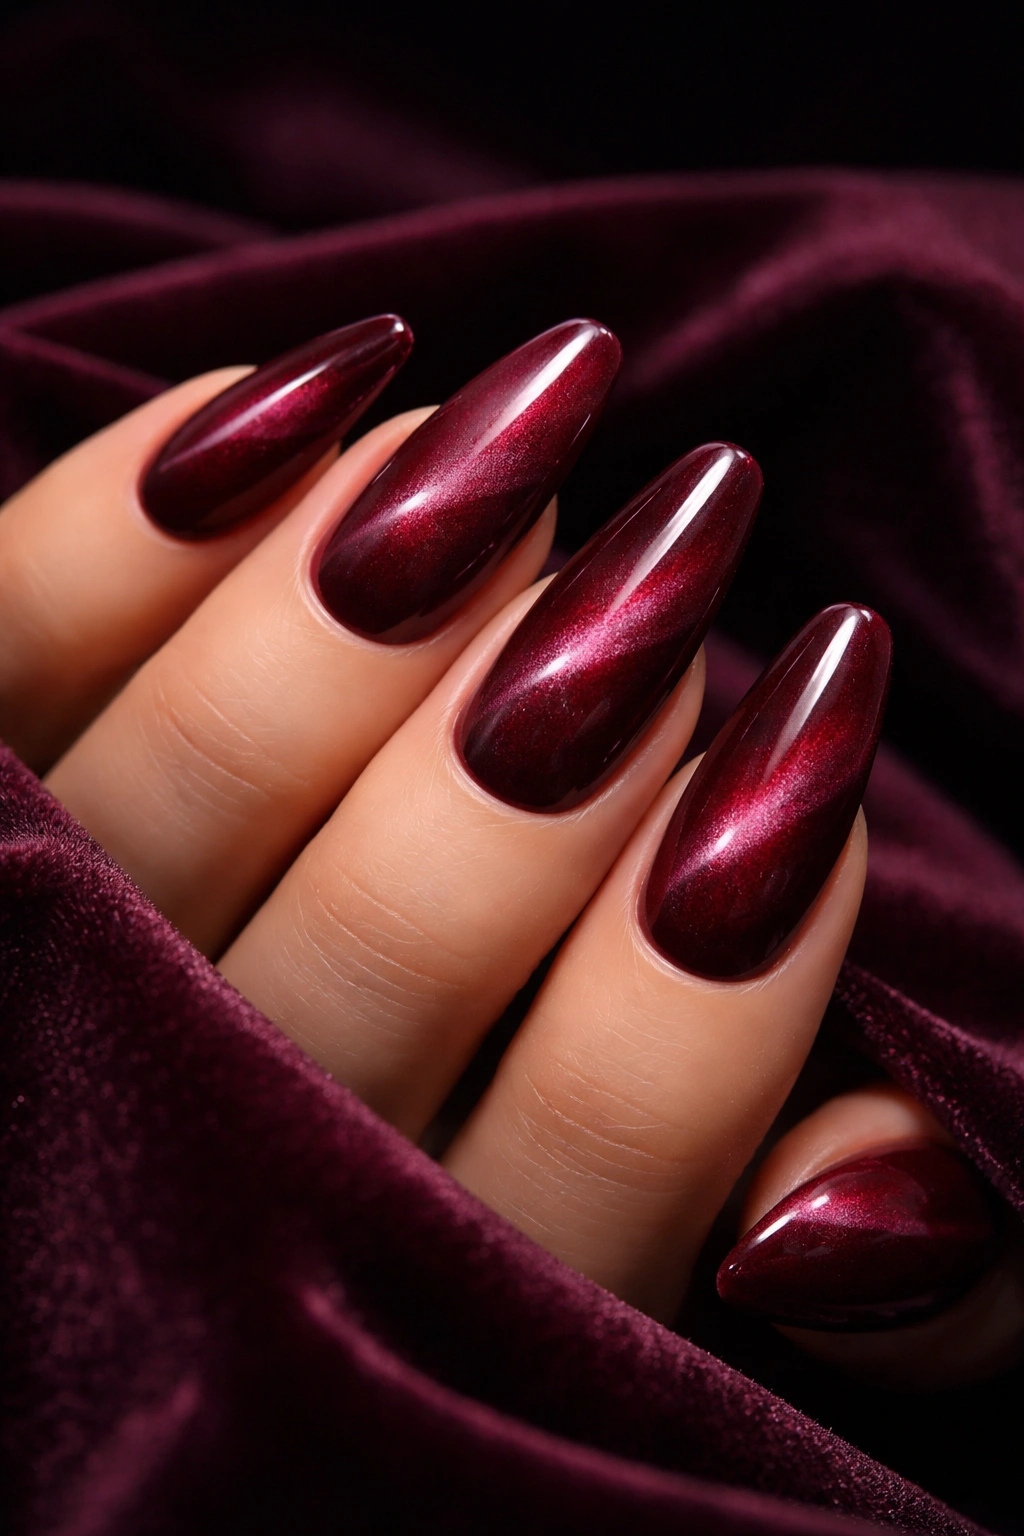
Cat-eye nails create that mesmerizing stripe of light that moves across your nail when you shift your hand. Do it in a deep burgundy shade, and you’ve got a Valentine’s Day look that’s moody, romantic, and totally captivating. This finish has depth and movement that flat polish just can’t match.
The magnetic particles in cat-eye polish respond to a magnet, creating that signature shimmer stripe. In burgundy, it looks rich and luxurious—like crushed velvet or wine in candlelight.
Why It’s Worth Trying
Cat-eye polish does all the work for you. You don’t need to freehand any designs or worry about steady hands—the magnet creates the effect. Once you apply the polish and hold the magnet over your nail for a few seconds, that gorgeous light stripe appears.
Burgundy hits that sweet spot between red and purple, giving you Valentine’s vibes without looking too literal. It’s sophisticated enough for a fancy dinner but interesting enough to get compliments everywhere you go.
How to Get the Look
- Apply your base coat
- Paint on cat-eye gel polish in burgundy
- Hold a magnetic wand over the nail before curing
- Cure under LED or UV lamp
- Seal with glossy top coat
Fun fact: The magnet can be held at different angles to create various effects—horizontal stripe, diagonal, or even a starburst pattern.
5. Negative Space Heart Design

Negative space nails use your natural nail or a sheer base as part of the design, and it creates this cool, minimalist effect. For Valentine’s Day, paint your nails in a sheer pink, then use a deeper red to create heart outlines that let the pink show through. It’s artsy without trying too hard.
This design feels modern and fresh. Instead of solid, opaque hearts, you get these delicate outlined shapes that have breathing room. The contrast between the sheer base and the bold outline creates dimension.
What Sets This Apart
Negative space designs always look more expensive than they actually are to create. There’s something about that intentional “unfinished” quality that reads as editorial and cool. When you add Valentine’s colors to the mix, you get romance with an edge.
You can create the hearts with nail vinyls or stickers as guides, or freehand them if you’re feeling confident. The key is letting that sheer base do some of the heavy lifting—you’re not covering every inch of your nail, which keeps things interesting.
What to Know
- Works best on short to medium nails
- Sheer pink base keeps things subtle
- Red outline can be thin and delicate or bold
- Perfect for minimalist nail lovers
Pro tip: If you mess up a heart outline, use a small brush dipped in acetone to clean up the edges before the polish fully dries.
6. Glitter Pink Ombre French Tips
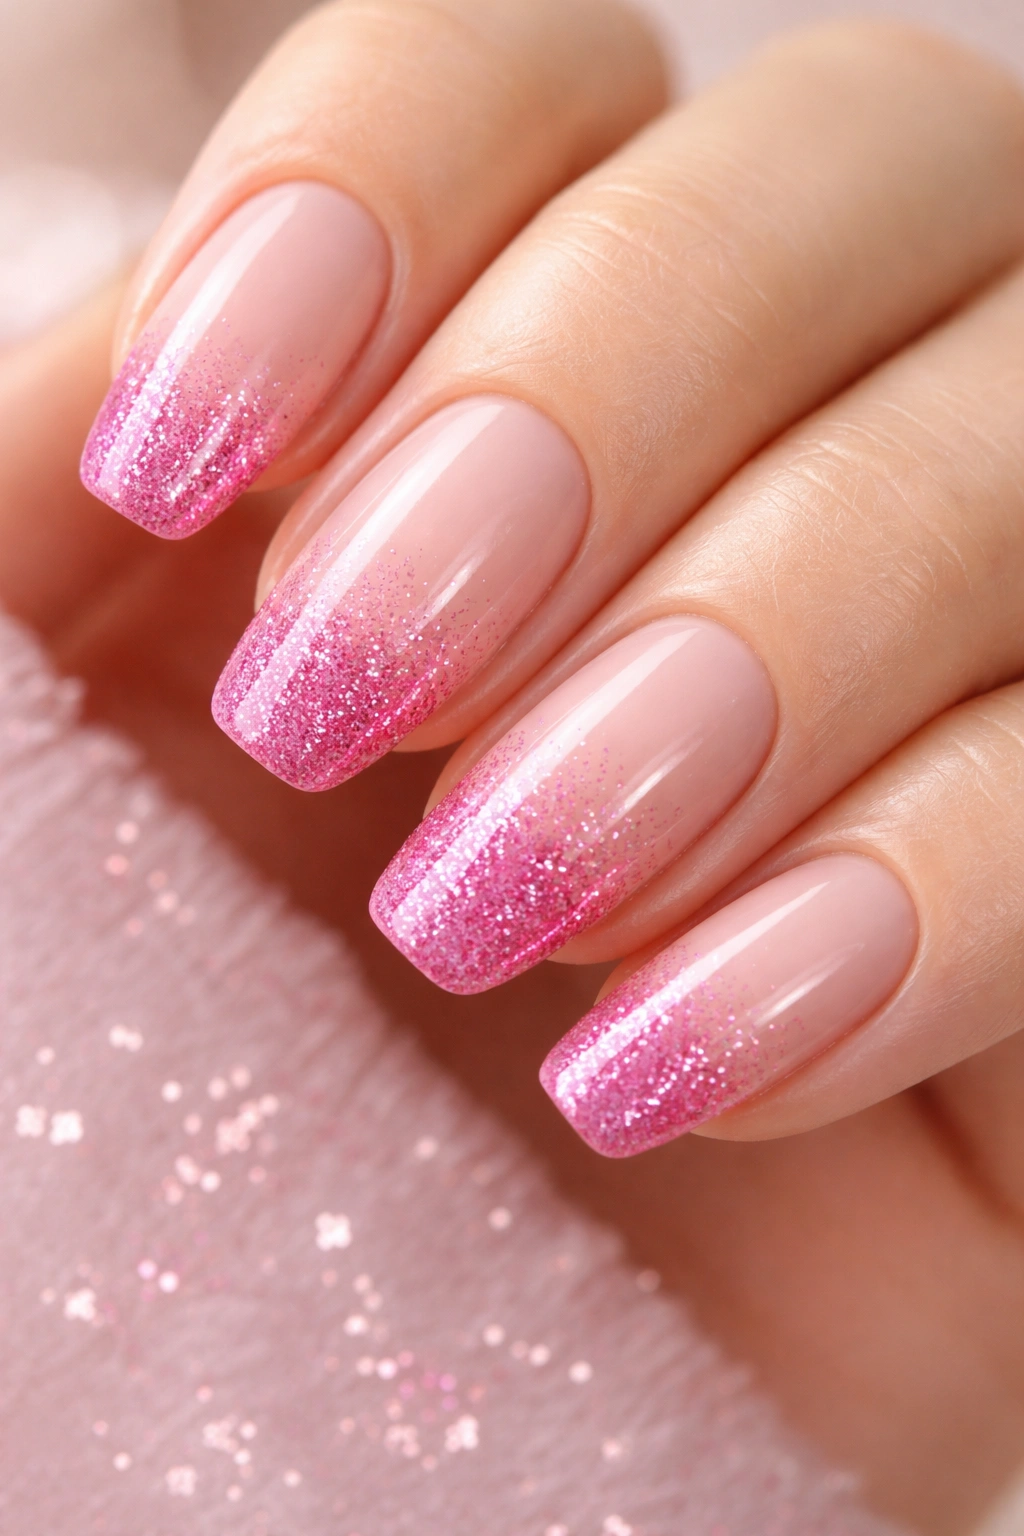
Ombre never gets old, especially when you add sparkle to the mix. Start with a nude or light pink base, then create a gradient toward the tips using a glittery hot pink. The result is a mani that sparkles without being over-the-top, and the ombre effect makes it wearable beyond Valentine’s Day.
The gradient gives you that soft, blended look where one color melts into another. When that color happens to be filled with glitter, your nails catch the light every time you move your hands.
Why This Combo Works
Glitter automatically makes everything feel celebratory, which is perfect for a holiday. But instead of covering your entire nail in sparkle (which can feel like too much), the ombre concentrates it at the tips. You get the glamour without sacrificing sophistication.
The technique works with a makeup sponge—dab your glitter polish onto the sponge, then gently press and roll it onto your nail tips. Build up the color gradually for that seamless fade.
Quick Details
- Creates the illusion of longer nails
- Easy to customize with different pink shades
- Glitter adds texture and dimension
- Works with gel or regular polish
Fun fact: Ombre comes from the French word meaning “shaded,” and the technique has been popular in hair and nails since the early 2000s.
7. Red Velvet Matte Nails With Glossy Hearts
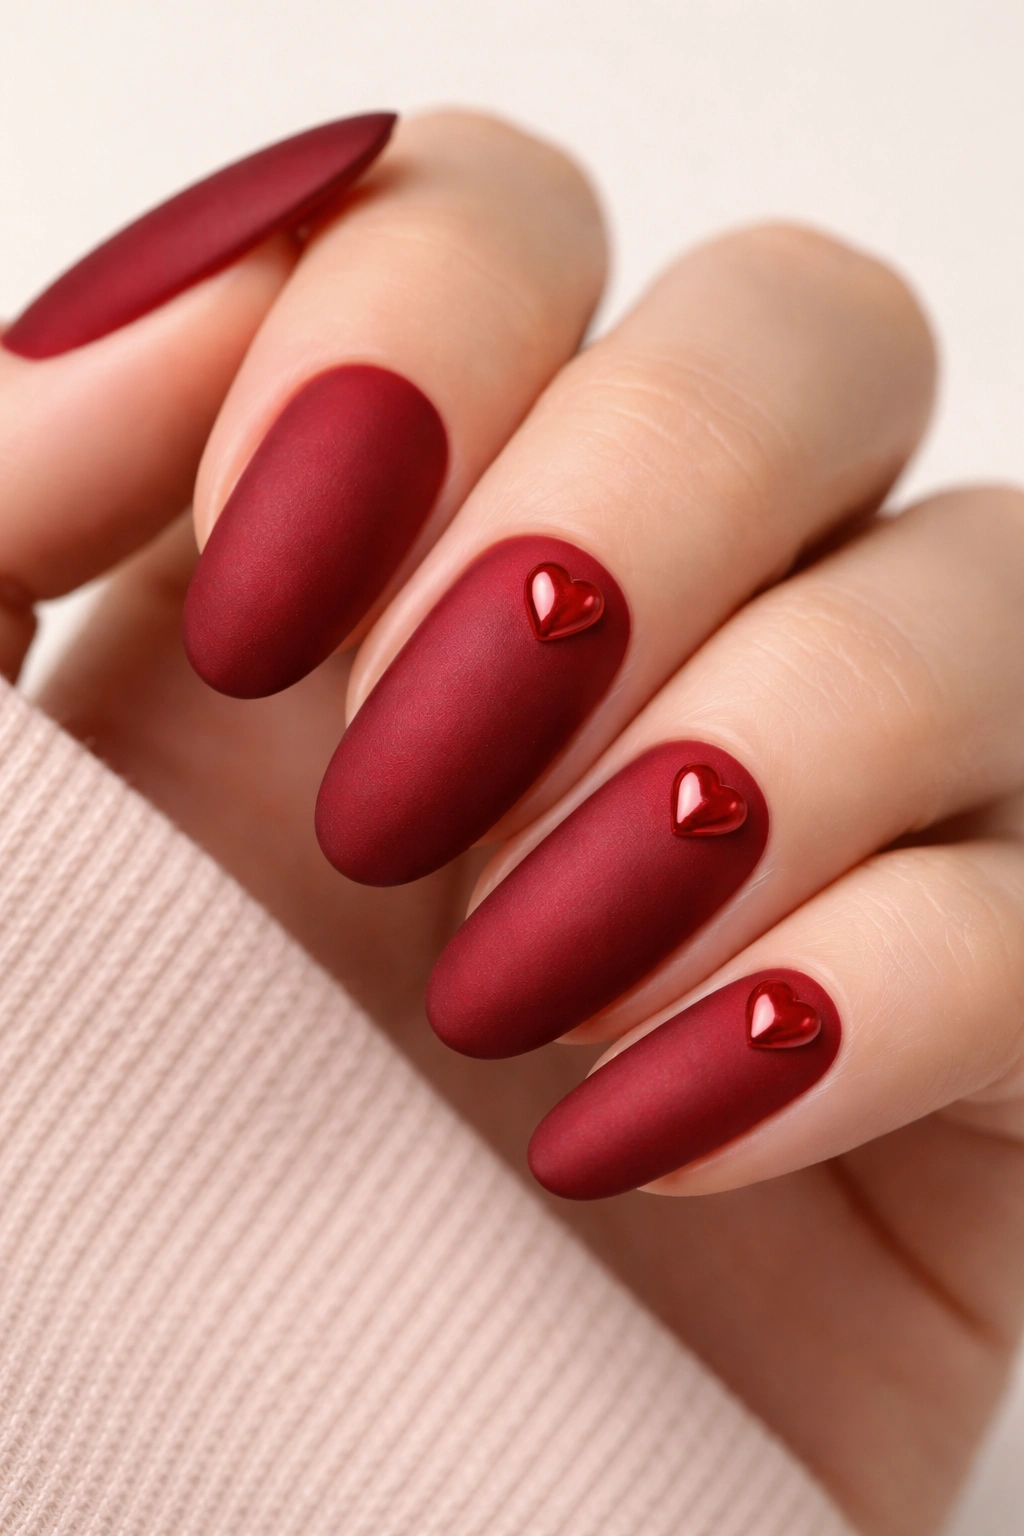
Mixing finishes is one of those tricks that instantly elevates a manicure. Paint your nails in a matte red that looks like velvet, then add small glossy hearts as accents. The contrast between the two textures makes both elements stand out, and it’s way more interesting than a single-finish mani.
Matte polish has this soft, almost powdery appearance that feels luxe and modern. When you place shiny, glossy hearts on that base, they practically glow by comparison.
What Makes It Unique
Most people stick to one finish per manicure, so when you intentionally mix matte and glossy, it shows you know what you’re doing. It’s a subtle detail that makes people look twice. The matte red feels moody and sophisticated, while the glossy hearts bring that Valentine’s sweetness.
You can create the hearts with a dotting tool or small brush using regular glossy polish over your matte base. Or, apply a matte top coat everywhere except where you want your hearts, leaving those spots shiny.
Key Points
- Works on any nail length
- Cherry red or wine red both look stunning
- Hearts can be tiny and scattered or bold and centered
- Easy to DIY at home
Pro tip: Matte top coat can make any polish matte, so you don’t need special matte polish—just transform your favorite red with the right top coat.
8. Pink Aura Nails With Heart Accents
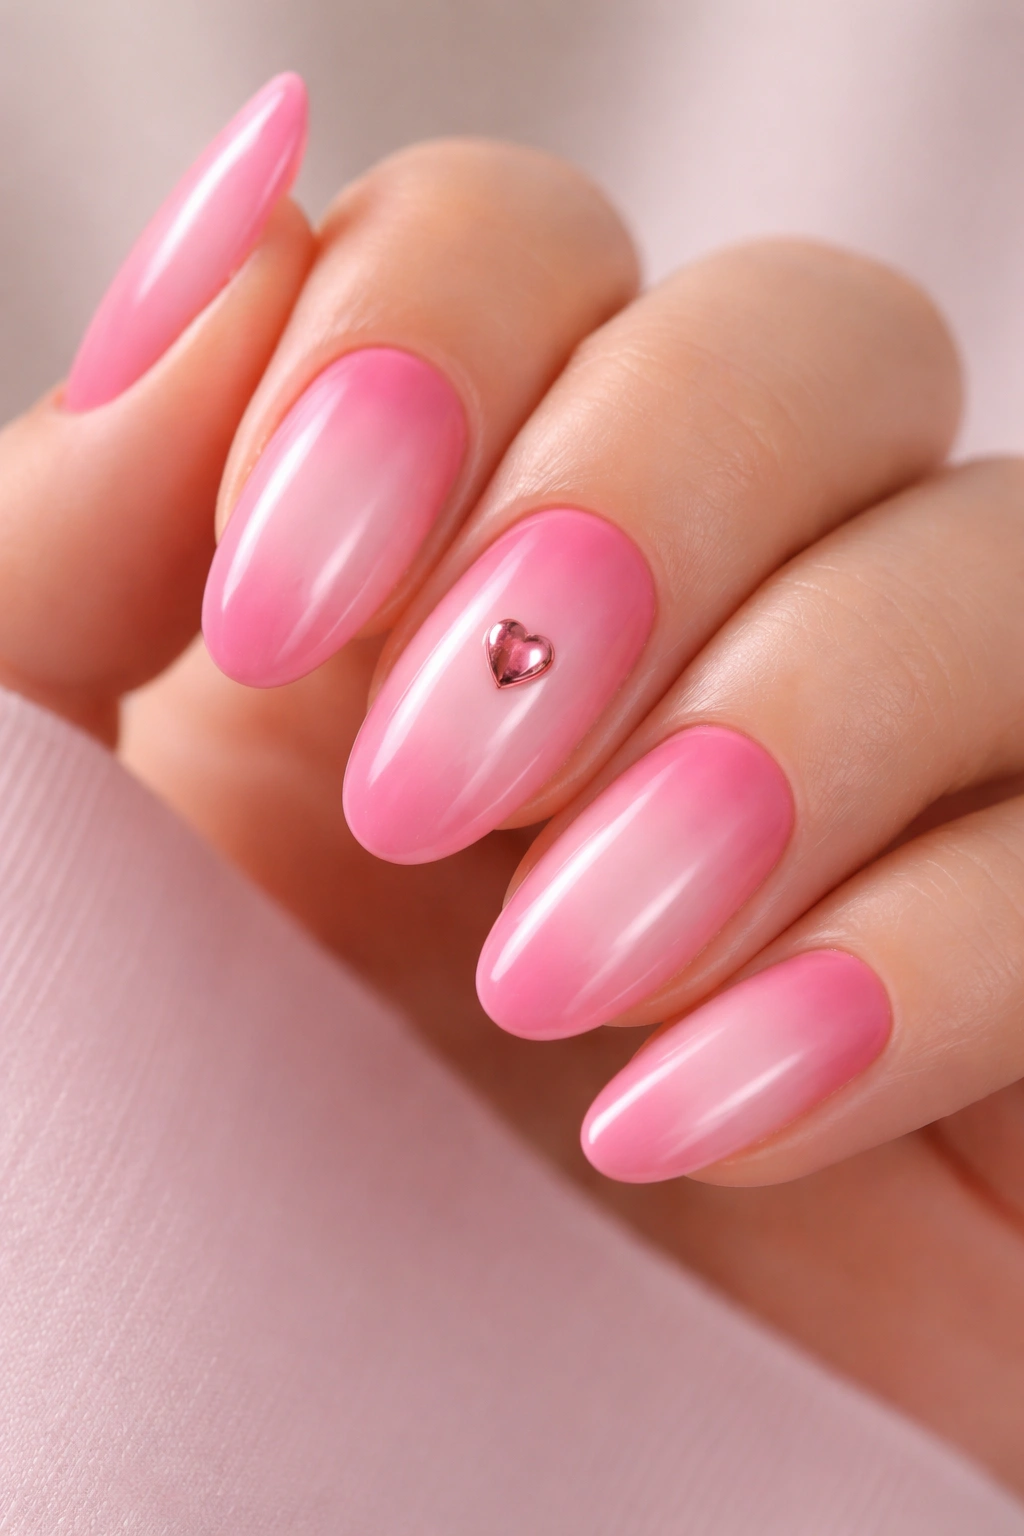
Aura nails create a soft, diffused gradient that looks like light glowing from the center of your nail outward. Use a darker pink or red at the edges and a lighter pink in the middle, then add a small metallic heart in the center for a focal point. It’s dreamy, romantic, and totally on-trend.
The airbrush effect of aura nails gives them an ethereal quality. The colors blend so seamlessly that it looks like your nails are literally glowing.
How This Look Captures Romance
Aura nails have this soft, watercolor-like quality that feels inherently romantic. The way the colors fade into each other creates depth without any harsh lines. When you place a delicate heart in the lightest part of the gradient, it becomes this little surprise that draws the eye.
You can create the aura effect with a makeup sponge and two or three shades of pink and red. Dab the darker shade around the edges, then blend the lighter shade in the middle, layering until you get that smooth transition.
What You’ll Love
- Creates a 3D illusion of depth
- Works with any color combination
- Heart can be painted or applied as a decal
- Looks complex but is achievable at home
Fun fact: Aura nails became popular on TikTok and Instagram as an alternative to traditional ombre, with beauty creators showing how to achieve the look using household sponges.
9. Strawberry Milk Pink With Red Cherry Details
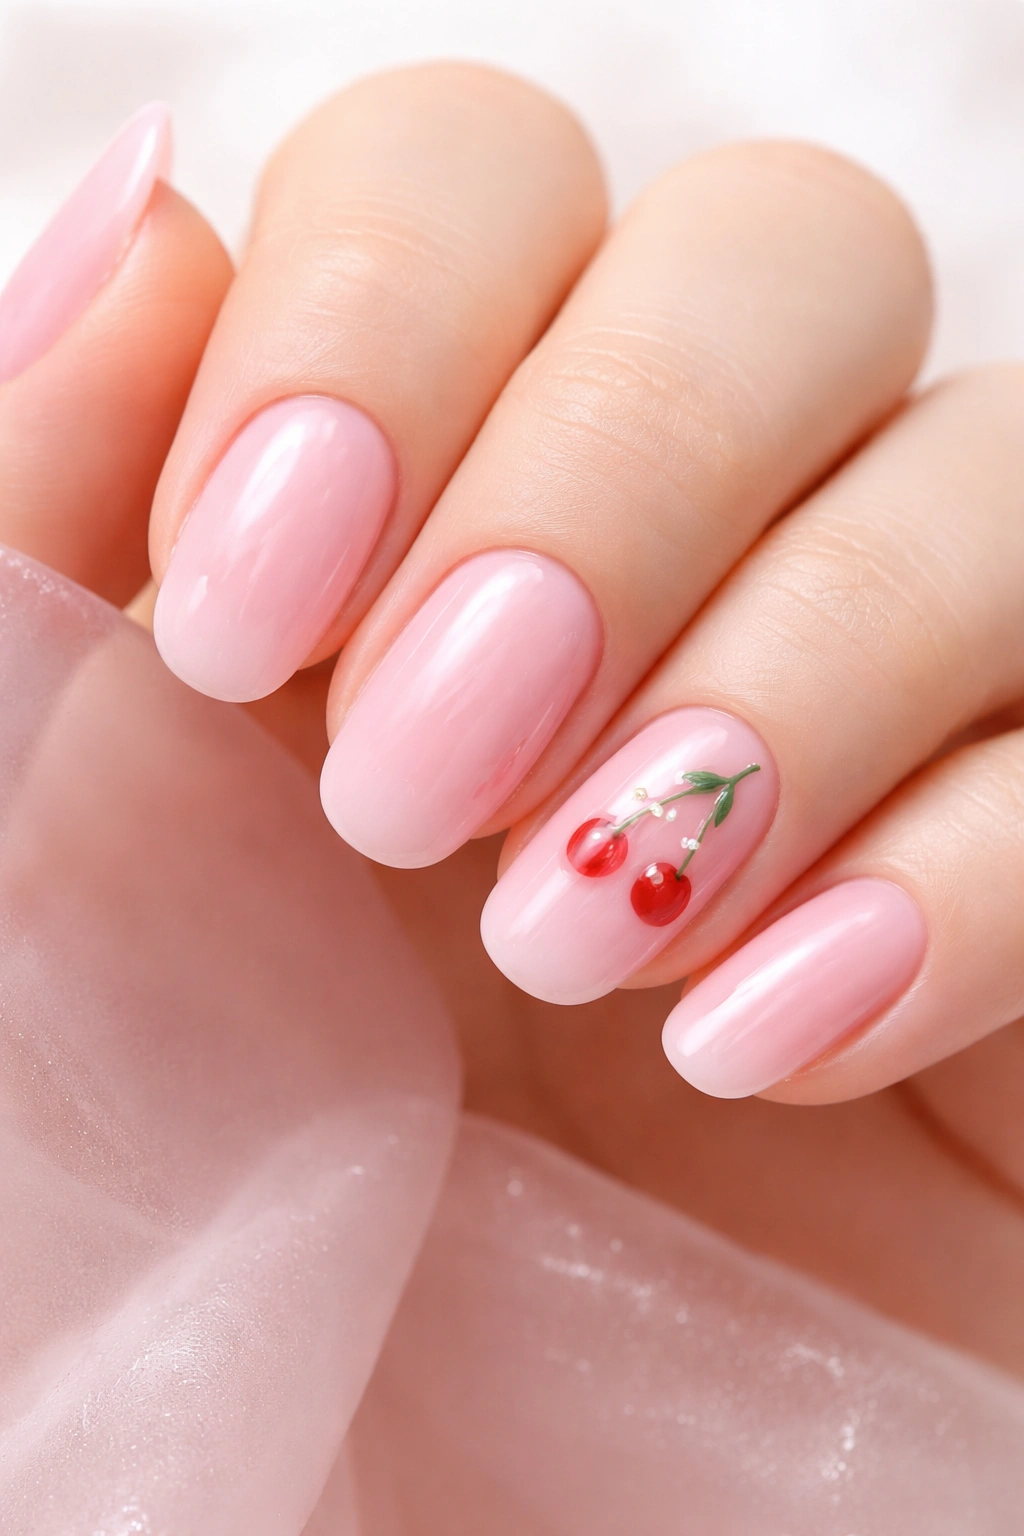
This design is as sweet as it sounds. Paint your nails in a milky, translucent pink that looks like strawberry milk, then add tiny cherry details on one or two accent nails. The overall vibe is soft, cute, and perfect for anyone who wants Valentine’s nails that aren’t too serious.
Jelly or sheer pink polish gives you that translucent quality that’s been everywhere. It’s not quite opaque, which gives your nails this delicate, barely-there look that still has color.
Why It’s Perfectly Valentine’s
Strawberry milk pink is soft and sweet—basically the nail equivalent of a love note. The cherry details add a playful touch without overwhelming the look. Cherries have this vintage, retro feel that brings personality to an otherwise simple manicure.
You can paint little cherries freehand with a thin brush, or use nail stickers if you want the look without the effort. Either way, keep them small and place them on just one or two nails so they feel like a fun surprise.
Quick Facts
- Best for short to medium nails
- Sheer finish requires 2-3 coats
- Cherry details can be red or dark burgundy
- Perfect for a casual Valentine’s brunch
Pro tip: Layer your sheer pink over a white base to make the color more vibrant while keeping that jelly-like translucency.
10. Checkered Pink and Red Pattern Nails

Checkered patterns bring a retro, playful energy that works surprisingly well for Valentine’s Day. Alternate pink and red squares across your nails for a look that’s bold, graphic, and way different from typical heart-heavy designs. It’s fun, it’s eye-catching, and it shows you’re not afraid to try something different.
The checkered pattern has a 60s mod vibe that feels fresh when done in Valentine’s colors. Instead of soft and romantic, you get energetic and fun—perfect if that matches your personality better than delicate hearts.
What Makes This Design Special
Checkered nails require precision, which makes them feel impressive when you pull them off. Each square should be roughly the same size, and the pattern should flow across all your nails for a cohesive look. It takes patience, but the payoff is huge.
You can create the checks by hand-painting with a thin brush, or use striping tape to block off sections and fill them in. Start by mapping out your grid lightly with a toothpick, then fill in alternating squares with your two colors.
Key Details
- Works best on medium to long nails
- Requires steady hands or tape for clean lines
- Can be done with two pinks, two reds, or one of each
- Makes a bold statement
Fun fact: Checkered patterns in fashion and beauty have roots in the mod movement of the 1960s, when bold geometric shapes and contrasting colors were everywhere.
Wrapping Up
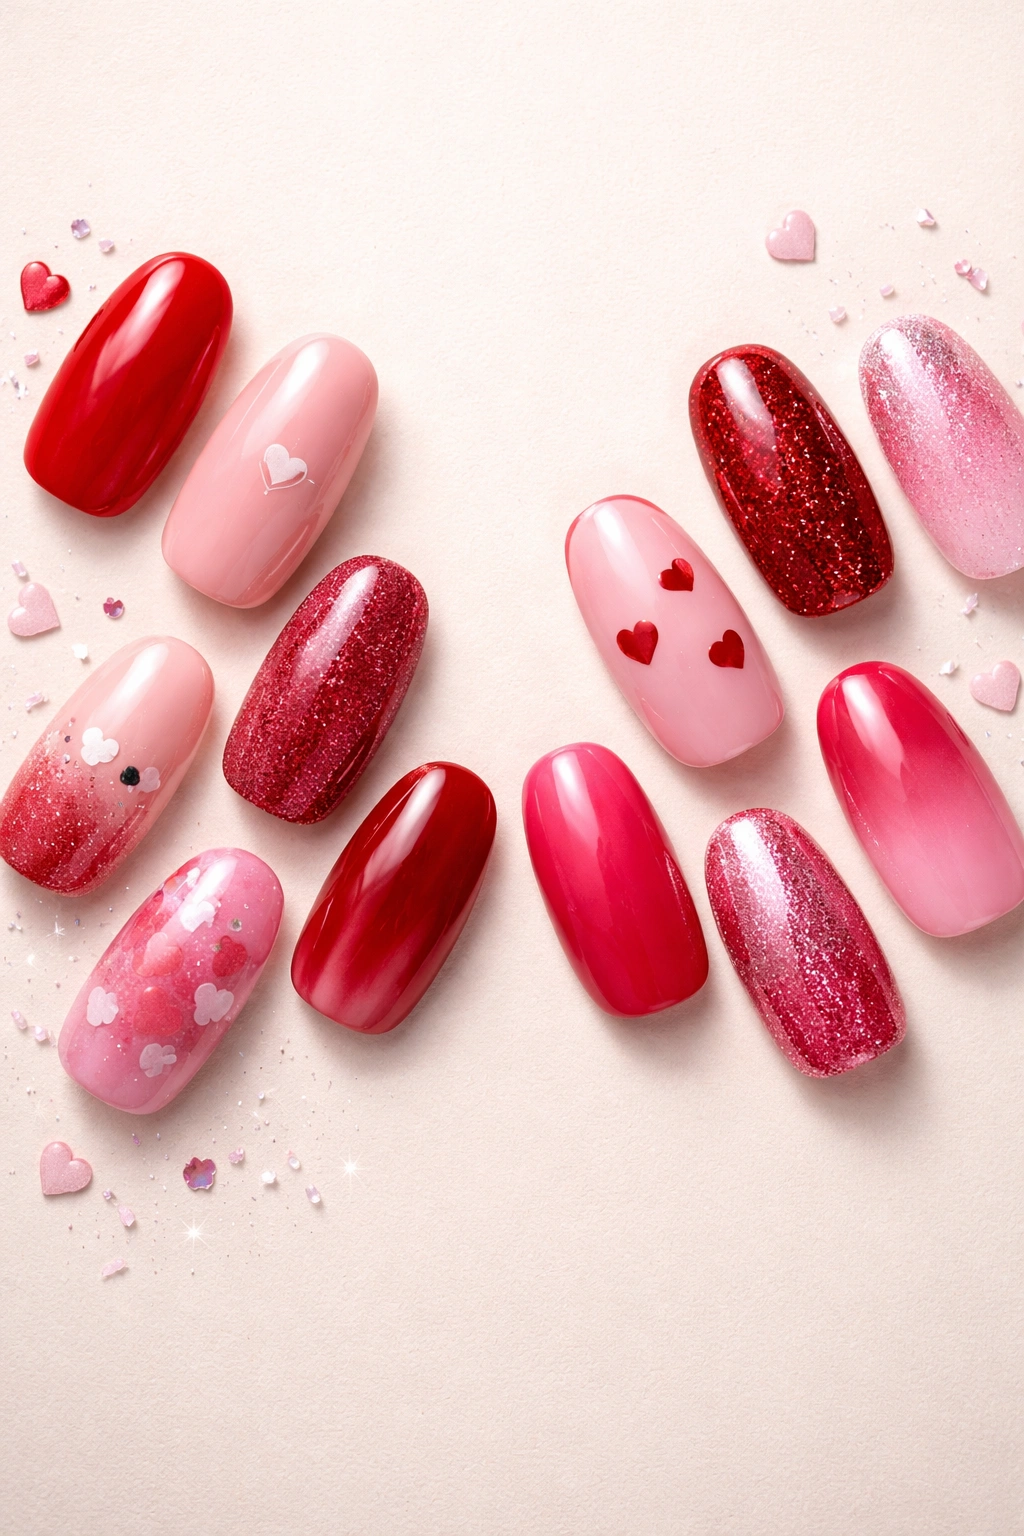
Valentine’s Day nails in red and pink give you so many ways to express your style, whether you’re into bold statements or subtle nods to the holiday. From chrome finishes and cat-eye effects to playful polka dots and checkered patterns, there’s a design here for every mood and skill level.
The best part? You don’t have to wait for February 14th to wear these. Many of these looks transition beautifully beyond Valentine’s Day, especially the ones that play with texture and finish rather than literal hearts. Pick the design that makes you smile, gather your supplies (or book that salon appointment), and get ready to fall for your own nails this season.
