

The holiday season usually brings a chaotic mix of gift wrapping, cookie baking, and endless social gatherings. Amidst the hustle, taking an hour or two for a festive manicure feels like a necessary act of self-care. It’s one of the few accessories you don’t have to take off when you walk indoors, and let’s be honest, gripping a mug of hot cocoa just looks better when your fingertips are dressed for the occasion.
Whether you are a die-hard DIY enthusiast with a steady hand or someone who prefers to sit back in a salon chair, the options for holiday nails have evolved far beyond simple red polish. We are seeing a shift toward textures like velvet, intricate but subtle art like micro-bows, and nostalgic throwbacks to vintage wrapping paper. The goal is to find a design that sparks joy every time you look down at your hands, whether you’re typing an email or toasting with champagne.
The Modern Red French Tip With a Twist
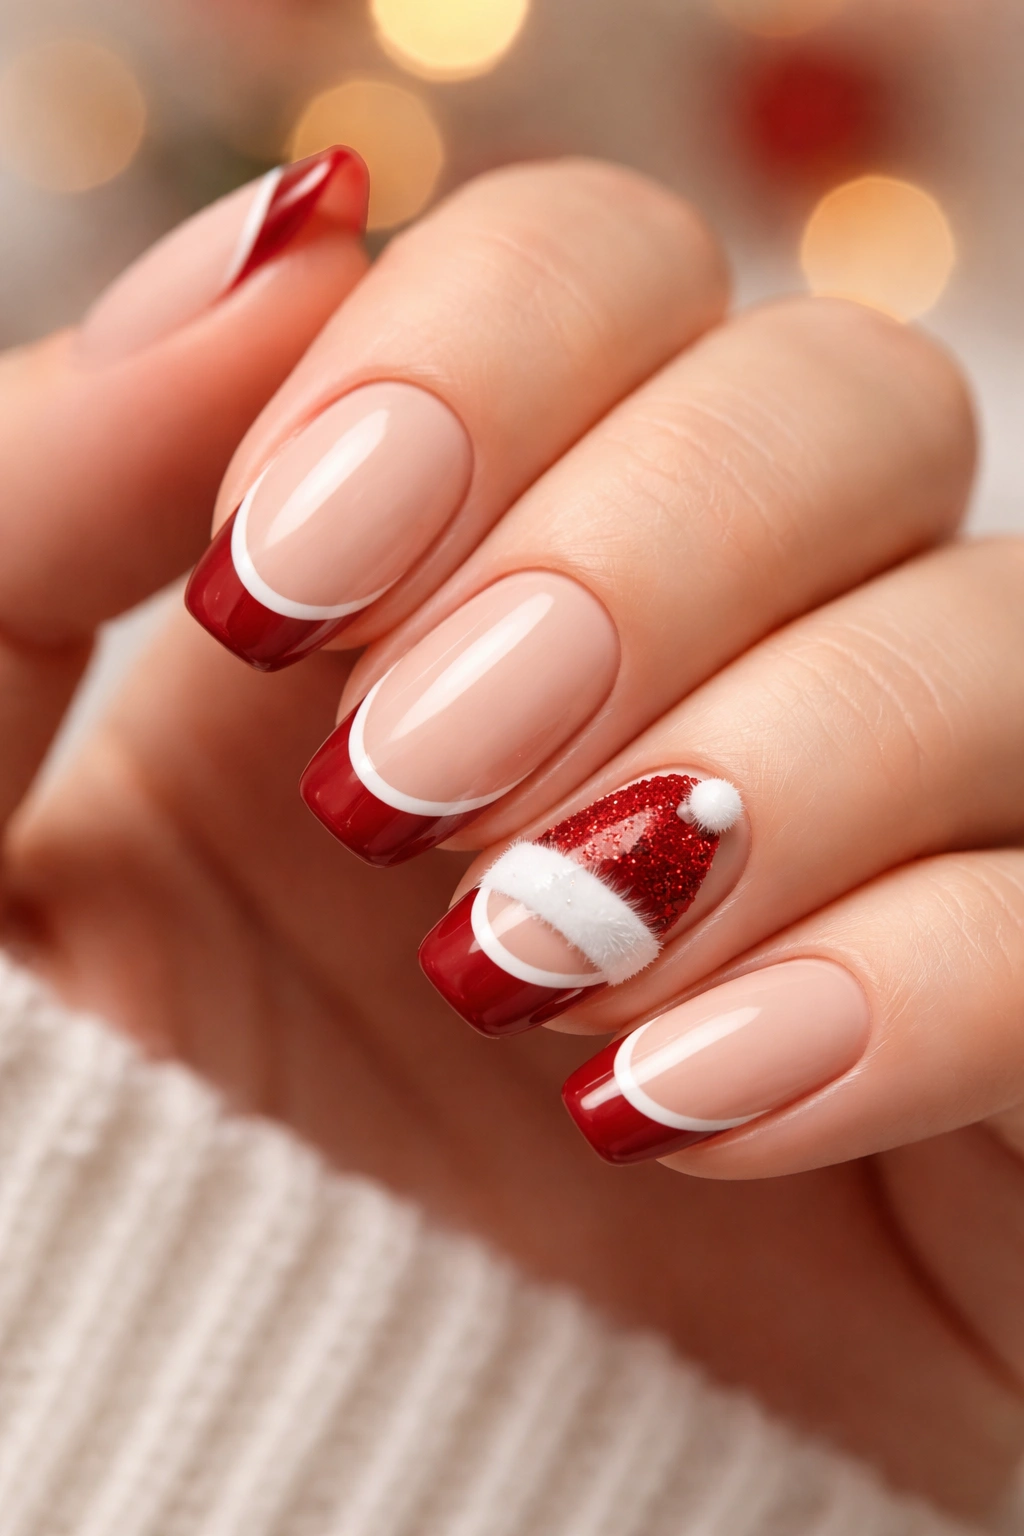
The classic French manicure has been a staple for decades, but during the holidays, it gets a vibrant makeover. Instead of the traditional stark white tip, we are seeing deep ruby reds, bright cherry shades, and even sparkling glitter tips. This style bridges the gap between sophistication and festivity. It’s perfect if you want something that acknowledges the season without screaming “Christmas” too loudly.
One particularly charming variation is the “Santa Hat” tip. This design transforms the standard red arch into a playful nod to St. Nick. By adding a tiny dot of white fluff (using textured polish or a small pearl) to the corner of the red tip and lining the bottom with a thin white strip, you create a subtle Santa hat effect. It’s whimsical but keeps enough negative space on the nail to feel clean and modern.
How to Achieve This Look:
- Prep the Base: Start with a sheer nude or milky pink base coat. This “your nails but better” foundation is crucial because it makes the red pop and hides any regrowth if you plan to wear the manicure for a few weeks.
- Paint the Tip: Using a fine liner brush, paint the free edge of your nail with a high-pigment red polish. If you aren’t confident in your freehand skills, use a silicone stamper. Paint the red on the stamper and gently press your nail tip into it.
- Add the Details: For the Santa hat variation, use a dotting tool dipped in white polish to create the “pom-pom” on one side of the red tip. Drag a very thin line of white across the smile line (where the red meets the nude) to mimic the hat’s trim.
- Seal It In: Finish with a high-gloss top coat. This protects the design and levels out the ridges created by the nail art, giving you that glass-like salon finish.
Velvet and Cat-Eye Textures
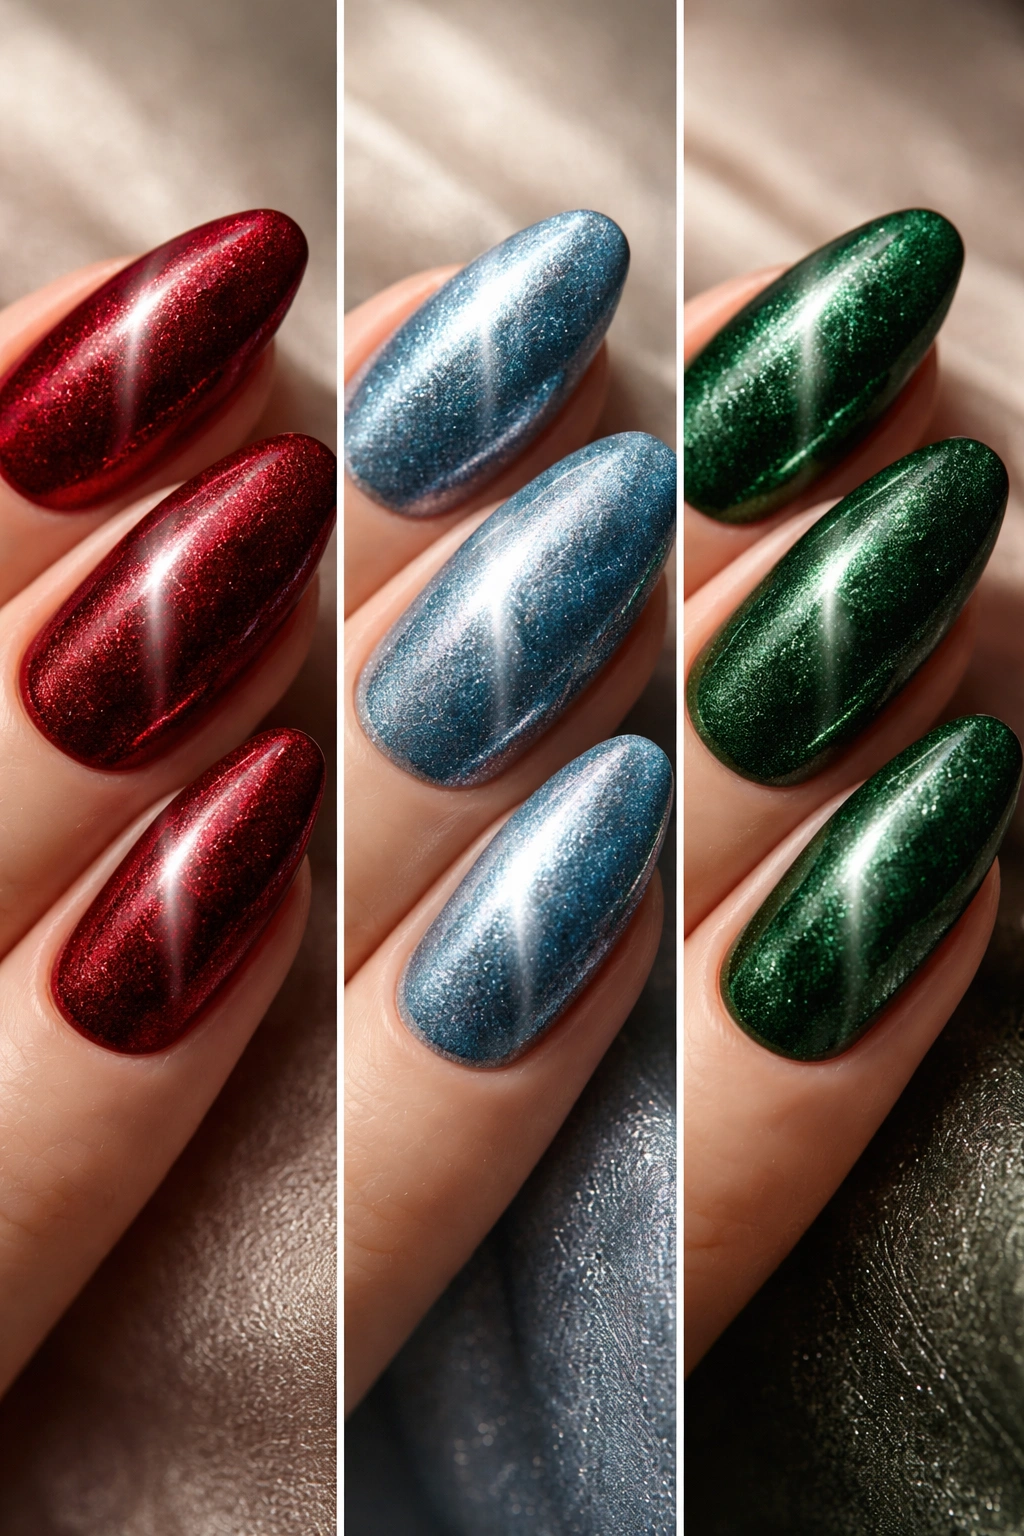
If you haven’t tried the velvet nail trend yet, the holidays are the absolute best time to dive in. This isn’t actual fabric, of course, but a visual trick created using magnetic polish. The result is a multidimensional shimmer that looks soft and fuzzy, like velvet, but feels smooth to the touch. When light hits these nails, the pigments shift and dance, creating a luxurious depth that flat flat crème polishes just can’t match.
Red velvet nails are obviously a hit for December, mimicking the plush fabric of a holiday dress. However, icy blues and deep forest greens are equally stunning. The “cat-eye” effect adds a level of opulence that feels expensive and intricate, yet the application process is surprisingly fast if you have the right tools. It’s a texture that does all the talking, meaning you don’t need to add extra gems or stickers to make a statement.
The Magnetic Method Explained:
- Apply the Magnetic Polish: After your base coat, apply a generous layer of magnetic gel or lacquer. Do not cure or let it dry yet. You need the polish wet for the physics to work.
- Use the Magnet: Take the specialized magnet wand that usually comes with these polishes. Hold it close to the nail (about 3-5 millimeters away) for 10-15 seconds. You can hold it diagonally for a slash effect or around the edges for that “aura” velvet look.
- Watch the Magic: You’ll see the shimmer particles rush toward or away from the magnet, creating the 3D illusion.
- Lock It Down: Once you have the design you want, immediately cure it (if using gel) or let it dry without moving. If you wait too long before drying, the particles will drift back to their original places.
Minimalist Gift Wrap Bows
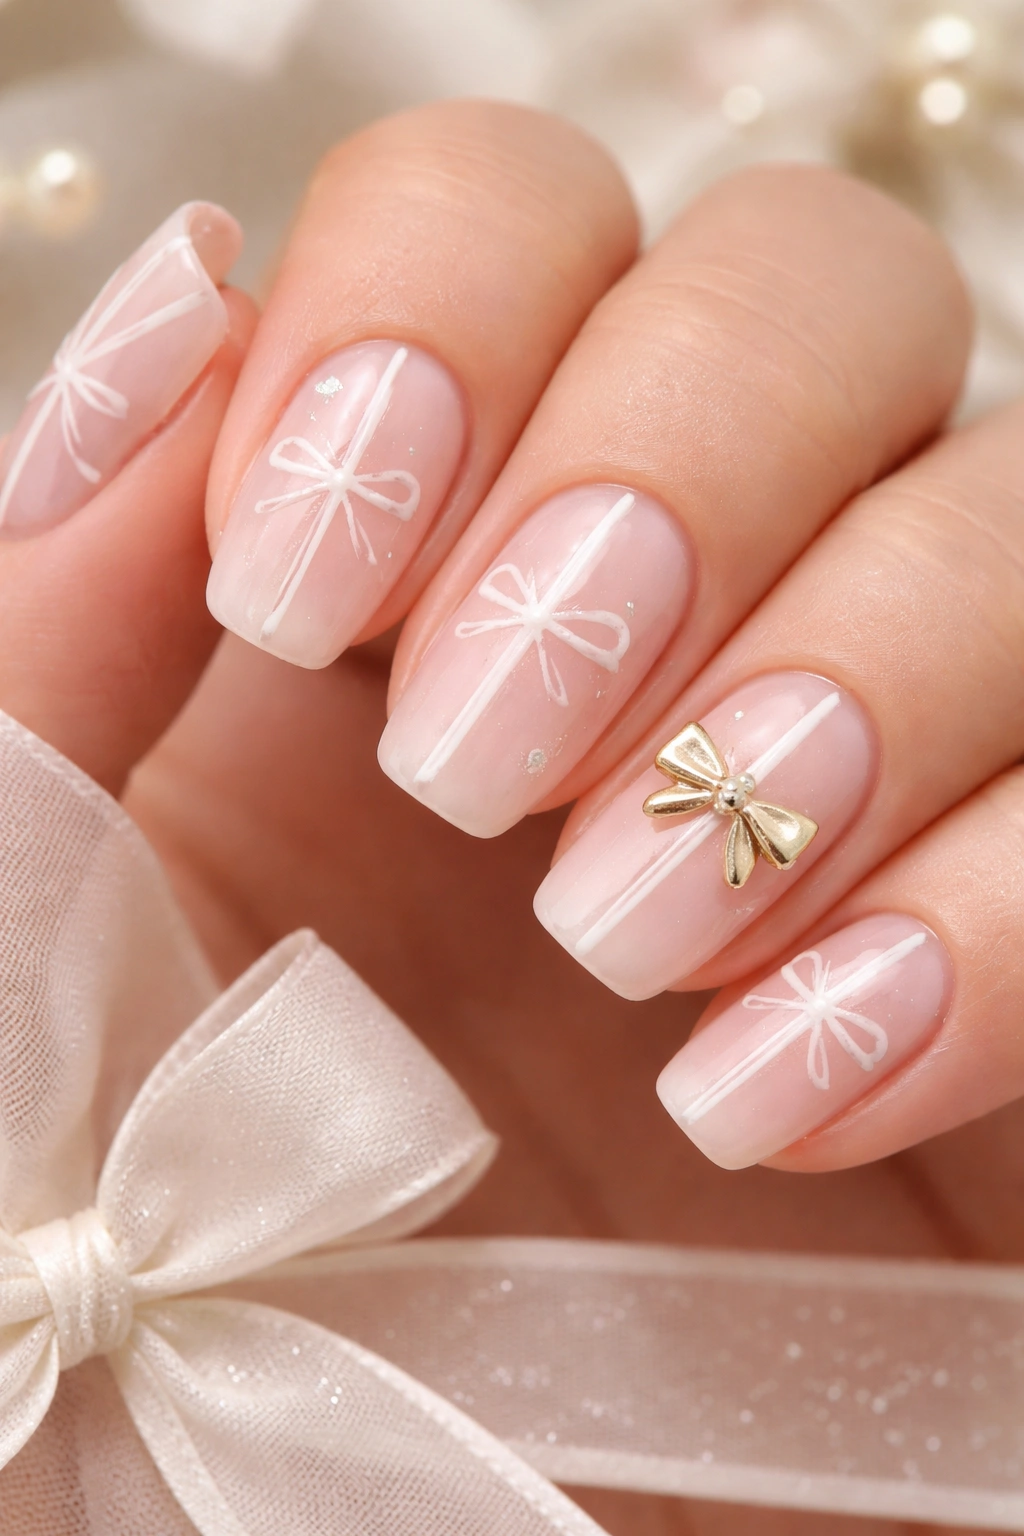
The “coquette” aesthetic has brought bows to the forefront of fashion, and they have naturally migrated to fingertips. This trend is inspired by the delicate ribbons used on high-end gift wrapping. The look typically involves a sheer, milky pink or glazed donut base, accented by dainty, hand-painted ribbons or 3D bow charms. It’s incredibly feminine and photogenic.
What makes this design so versatile is that it can be as loud or as quiet as you like. You might place a single, tiny red bow on your ring finger as an accent, or paint thin “ribbons” across every nail as if your fingers themselves are the presents. Combining this with a pearl finish or a soft shimmer creates a “balletcore meets Christmas” vibe that is incredibly popular right now.
Creating the Perfect Bow:
Actually, drawing a bow can be tricky if your hands are shaky. Here is a cheat code: use two triangles.
- The Loops: Paint two tiny triangles meeting at a center point. These represent the loops of the bow.
- The Center: Place a small dot of polish or a tiny rhinestone in the middle where the points meet.
- The Tails: Draw two curved lines flowing down from the center dot. Keep them loose and flowy, not stiff.
- The 3D Option: If painting feels too difficult, you can buy nail stickers or tiny resin bow charms. Apply a drop of nail glue or thick top coat, place the charm with tweezers, and you are done. Just be aware that 3D charms can catch on hair, so seal the edges well.
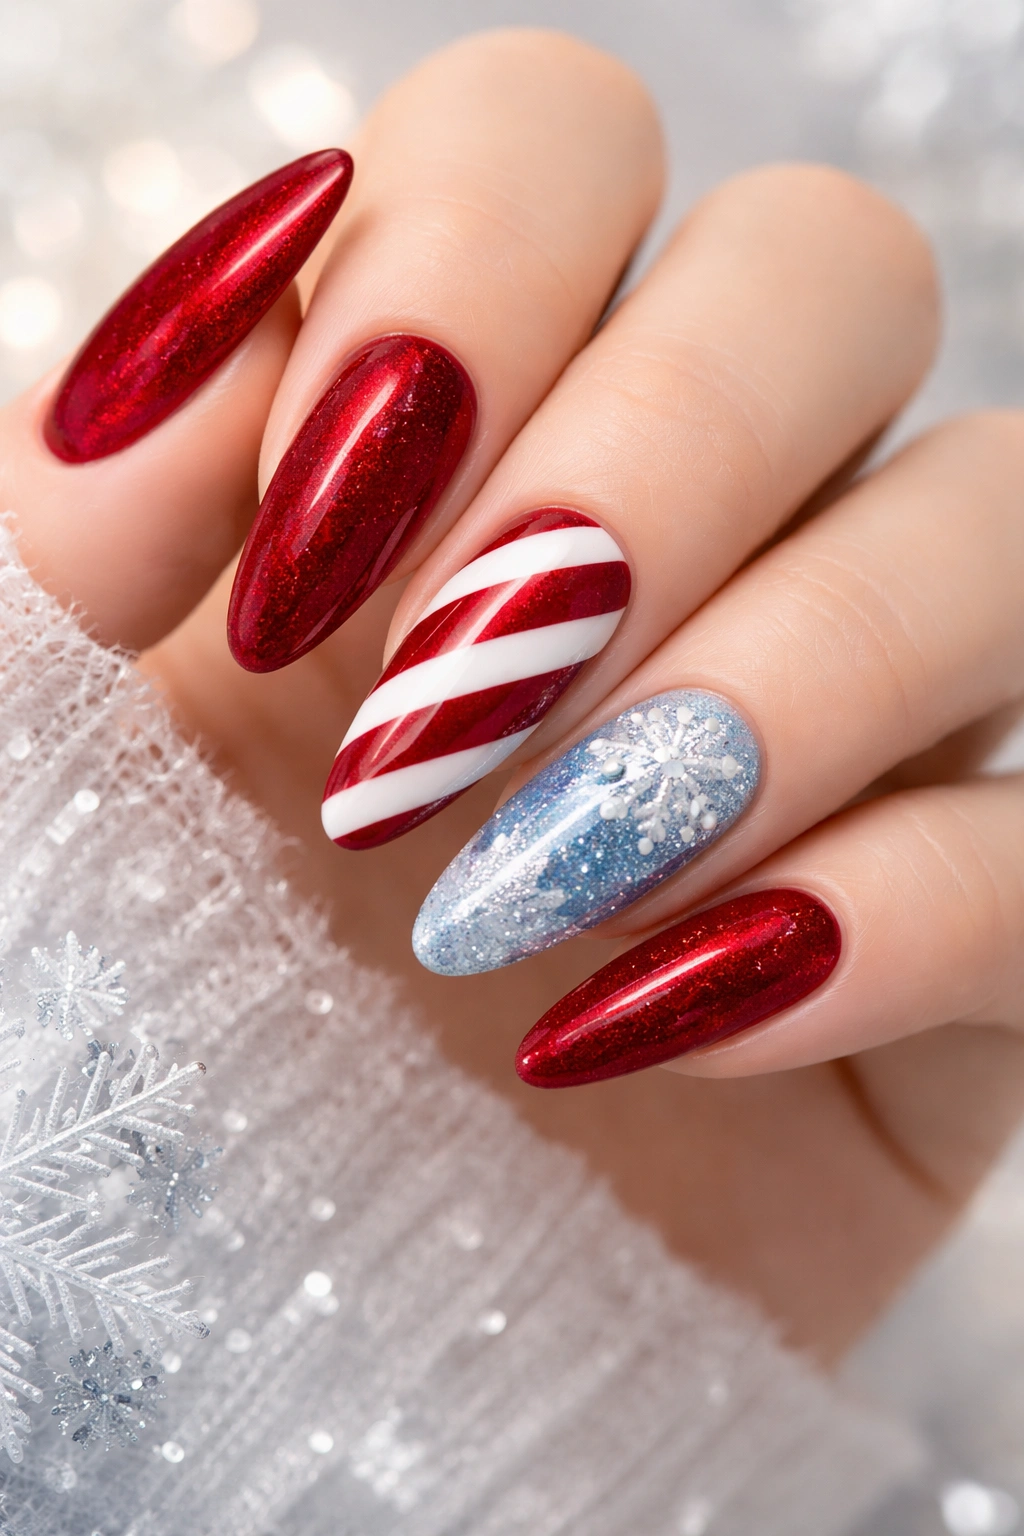
Candy Cane Lane Stripes
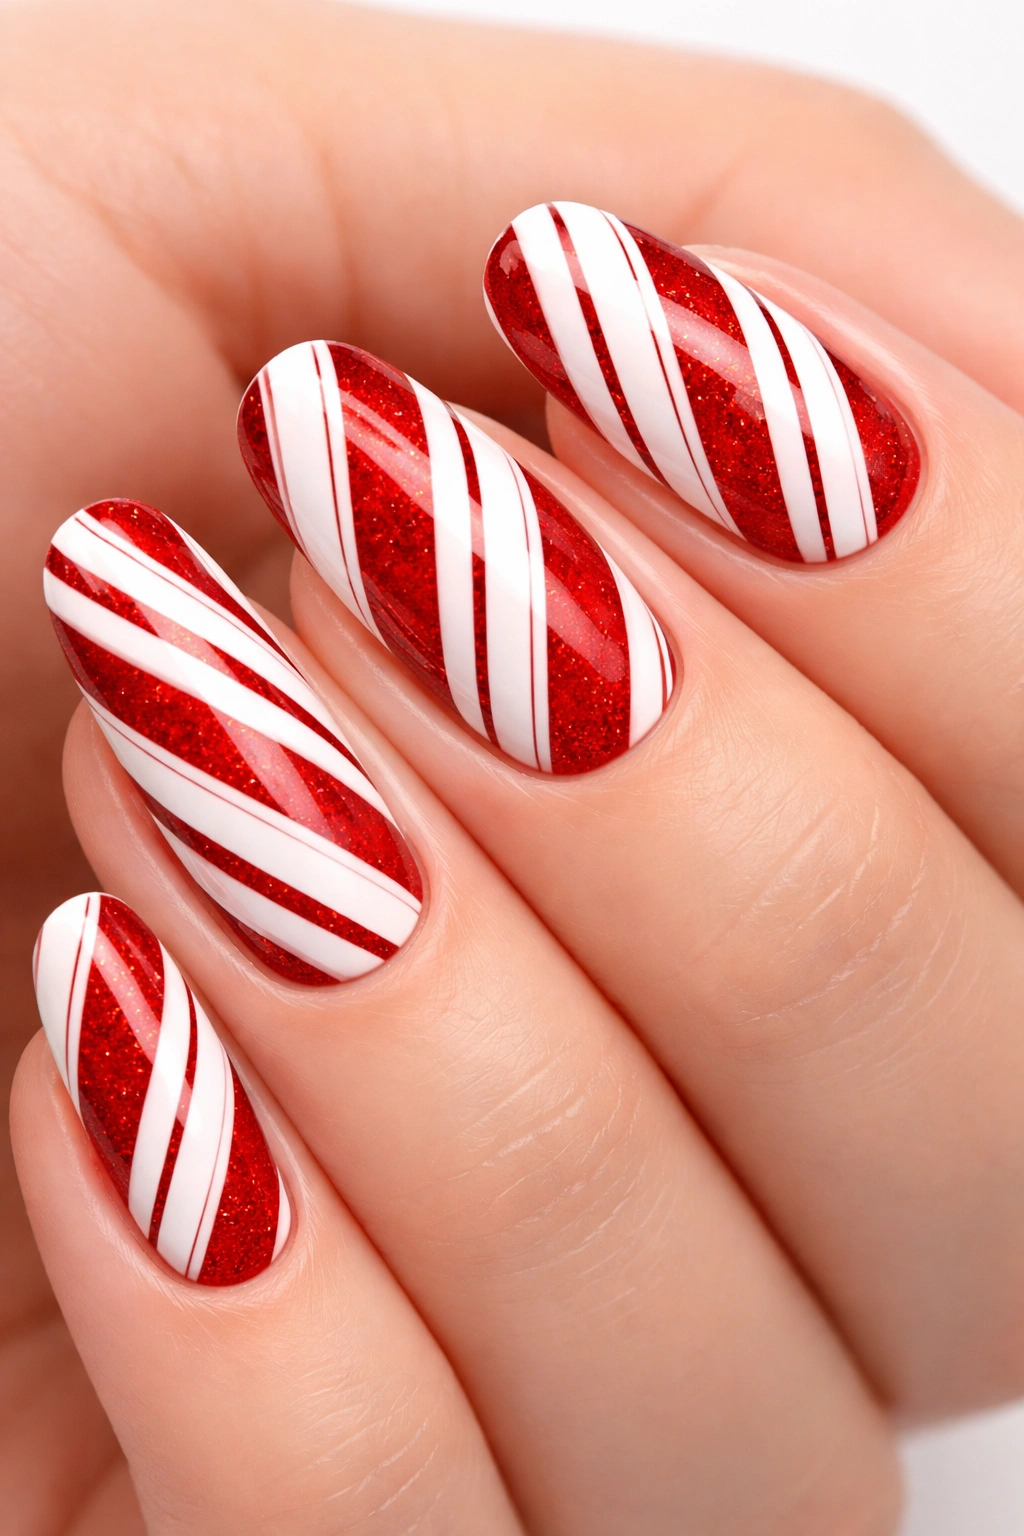
There is something undeniably nostalgic about candy cane stripes. It instantly brings to mind peppermint bark and childhood excitement. While the traditional red-and-white diagonal stripe is a classic, modern iterations have softened the look. We are seeing pink and red combinations that feel sweet and playful, or “deconstructed” candy canes where the stripes are used as a French tip rather than covering the whole nail.
This design works exceptionally well as an accent nail. You might paint four of your nails a solid “Big Apple Red” and save the ring finger for the candy cane pattern. It breaks up the monotony and adds a graphic element to the manicure. Plus, vertical or diagonal lines can actually help elongate the appearance of shorter nails.
Tips for Crisp Lines:
- Striping Tape is Key: Don’t try to freehand this unless you have the steadiest hands in the world. Apply your white base color and let it dry completely (seriously, 100% dry).
- Tape Placement: Place thin striping tape diagonally across the nail. Press it down firmly at the edges.
- Paint and Peel: Paint your red polish over the entire nail, covering the tape. While the red polish is still wet, carefully peel off the tape. This leaves behind perfect, crisp white lines.
- Glitter Accent: For extra flair, trace one of the white lines with a thin silver or gold glitter polish to mimic the sugar coating on a real candy cane.
Deep Forest Greens and Wreaths
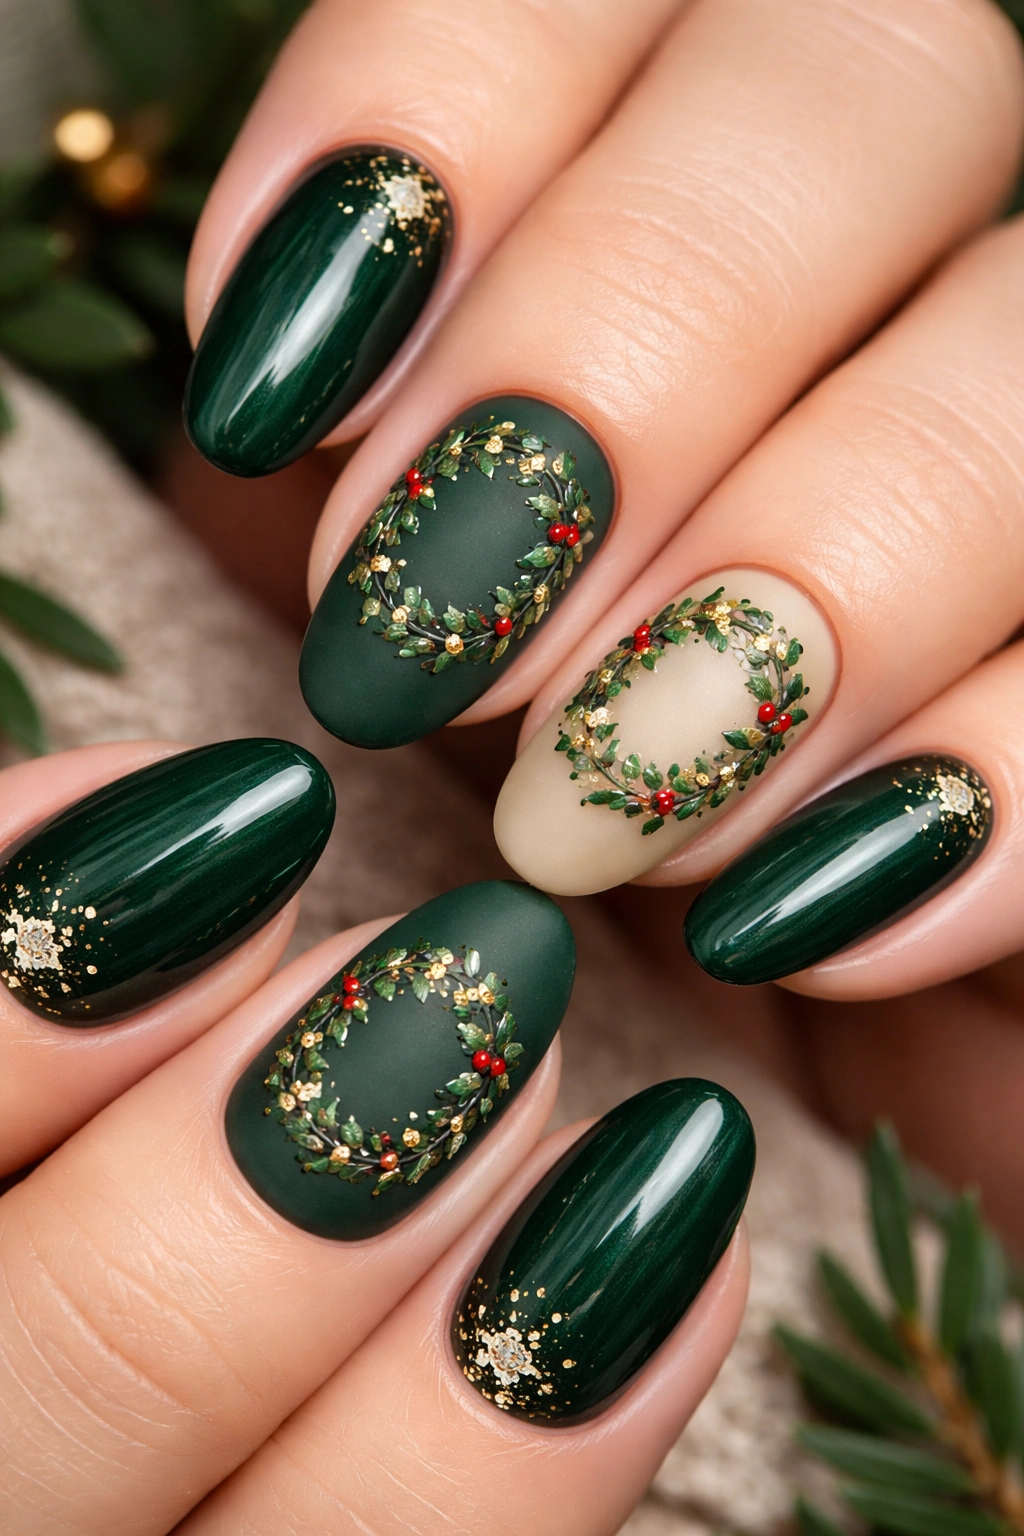
Red gets a lot of attention, but green is the unsung hero of holiday nails. specifically, deep emerald, hunter green, and mossy tones. These shades feel earthy and grounded. They pair beautifully with gold jewelry and chunky knit sweaters. A popular way to wear this color is through botanical nail art—think delicate holly leaves, pine branches, or miniature wreaths painted on a nude base.
This style leans more towards the “cottagecore” aesthetic. It’s less about bright neon lights and more about walking through a winter forest. A matte top coat can transform a forest green manicure into something that looks like velvet or expensive suede, while a glossy coat makes it look like a shiny glass ornament.
How to Detail a Wreath:
- Dotting Method: You don’t need to paint individual leaves. Dip a small dotting tool into green polish and create a circle of dots on your nail.
- Connect the Dots: Use a needle or a very fine brush to drag the wet polish from dot to dot, creating a rough, leafy texture.
- Add Berries: Once the green is dry, add three tiny red dots in a cluster at the bottom or top of the wreath.
- The Gold Touch: Add a spec of gold foil or a gold stud in the center of the berries for a bit of sparkle. This design looks best on a “negative space” or sheer beige background so the green really stands out.
Icy Blue Winter Wonderland
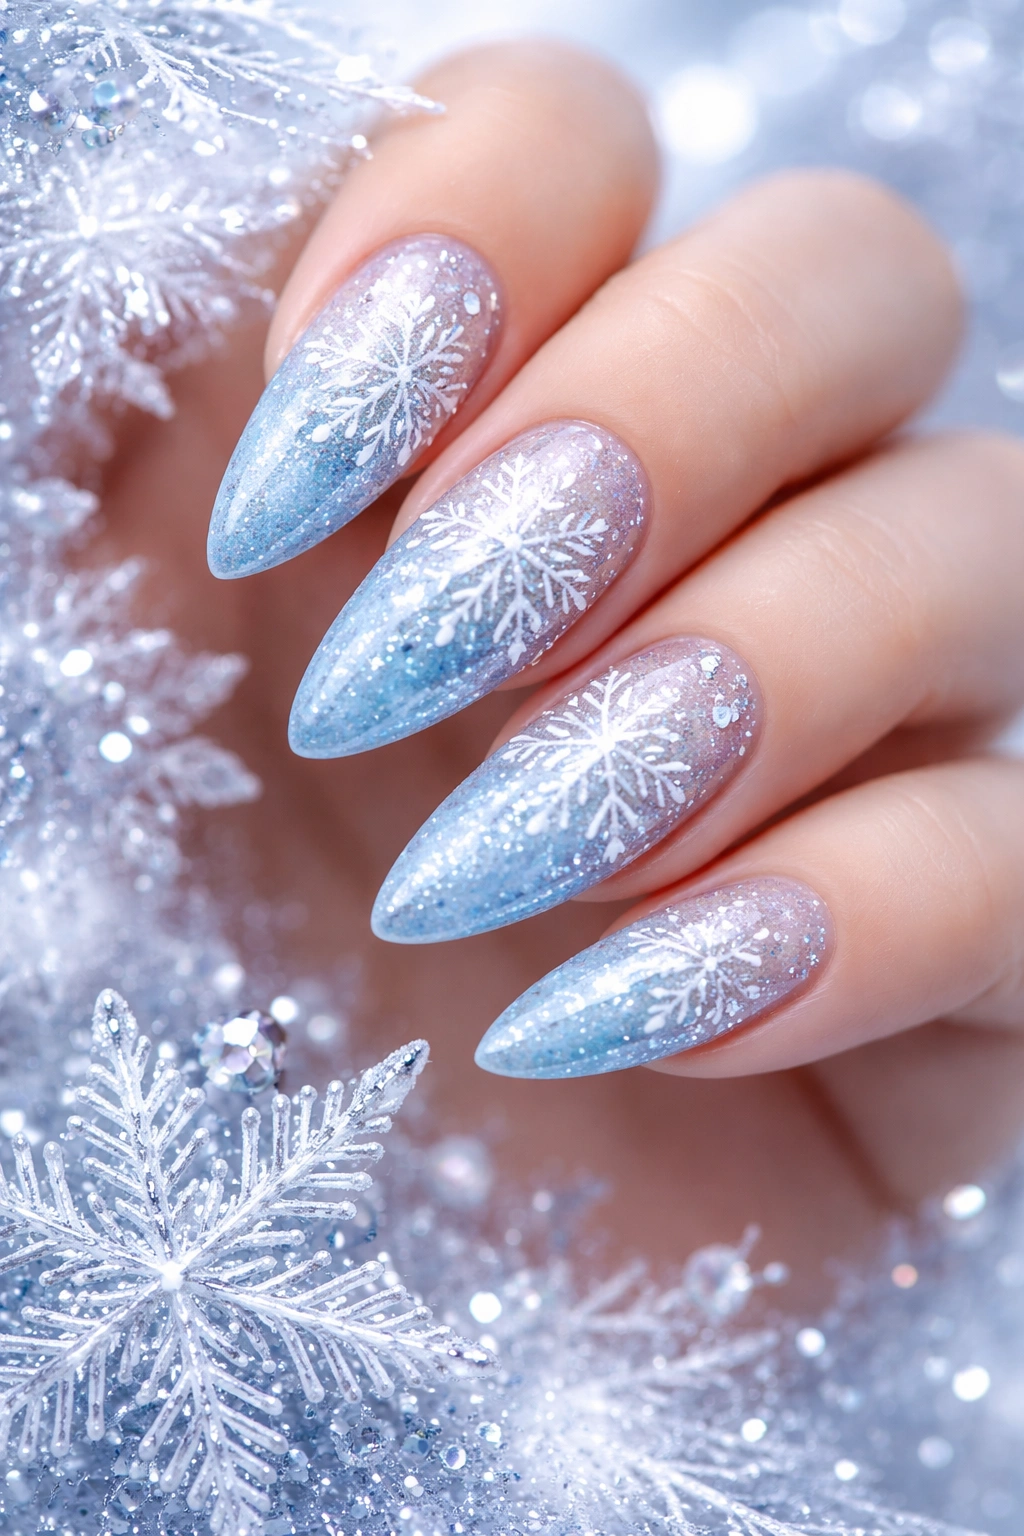
Not everyone loves the traditional red and green palette. For those who prefer a cooler tone, icy blues and silvers are a refreshing alternative. This look channels the “Ice Queen” vibe—think frozen lakes, frost on windowpanes, and crisp winter mornings. From pale baby blues to deep midnight sapphires, the blue spectrum is surprisingly festive when paired with white snowflakes or silver glitter.
Snowflake nail art is the centerpiece of this look. It’s timeless and can be worn well into January, extending the life of your manicure past the 25th. The contrast of crisp white intricate snowflakes against a metallic blue background is striking and elegant.
Stamping vs. Stickers:
Real talk: painting a symmetrical snowflake by hand is a nightmare for most people.
- Stamping Kits: These are metal plates with designs etched into them. You put polish on the plate, scrape it, pick it up with a silicone stamper, and roll it onto your nail. It creates salon-quality detail in seconds.
- Decals: Water-activated decals lie flatter than stickers. You soak them in water, slide them off the backing, and position them on the nail. They look almost painted on once you apply a top coat.
- Placement: Don’t put a snowflake in the center of every single nail. Place a half-snowflake coming off the side of one nail, a small one at the cuticle of another, and a large one on the ring finger. Asymmetry looks more artistic.
The Gingerbread Aesthetic
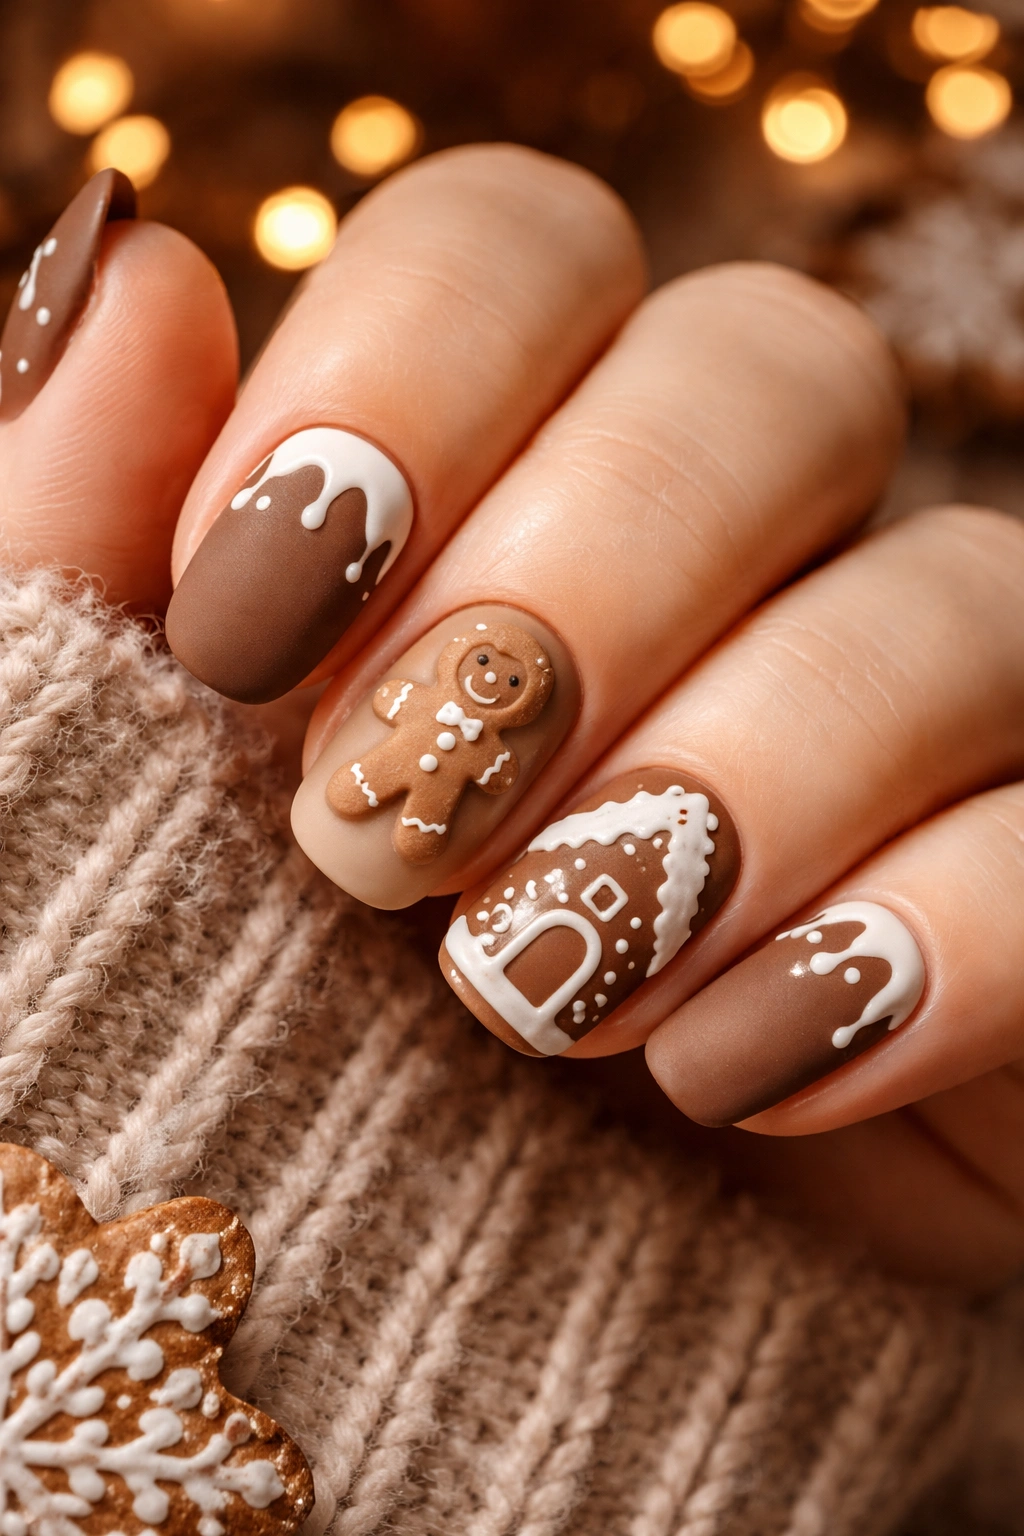
Brown and neutral nails have been having a major moment lately (hello, “latte makeup” trend), and this transitions perfectly into gingerbread themes for the holidays. Think warm, toasted tans, rich chocolate browns, and spicy cinnamon shades. This palette is cozy and comforting.
You can go literal with this by painting tiny gingerbread men faces, or keep it abstract with “icing” details—white squiggles and dots painted over a tan base to mimic a decorated cookie. It’s a playful, sweet look that feels very down-to-earth. It’s also a great option if you have a wardrobe full of neutrals and creams, as it won’t clash with your outfits.
Getting the “Cookie” Texture:
- Matte Finish: Gingerbread cookies aren’t shiny. To sell the effect, use a matte top coat over your brown base.
- The Icing: Use a white gel polish or acrylic paint for the details. Acrylic paint is actually easier to work with for fine lines because if you mess up, you can wipe it off with water before it dries without ruining the polish underneath.
- The Buttons: Use tiny colored rhinestones or dots of red and green polish to create the “gumdrop” buttons on your gingerbread figures.
Mixed Metal Chrome
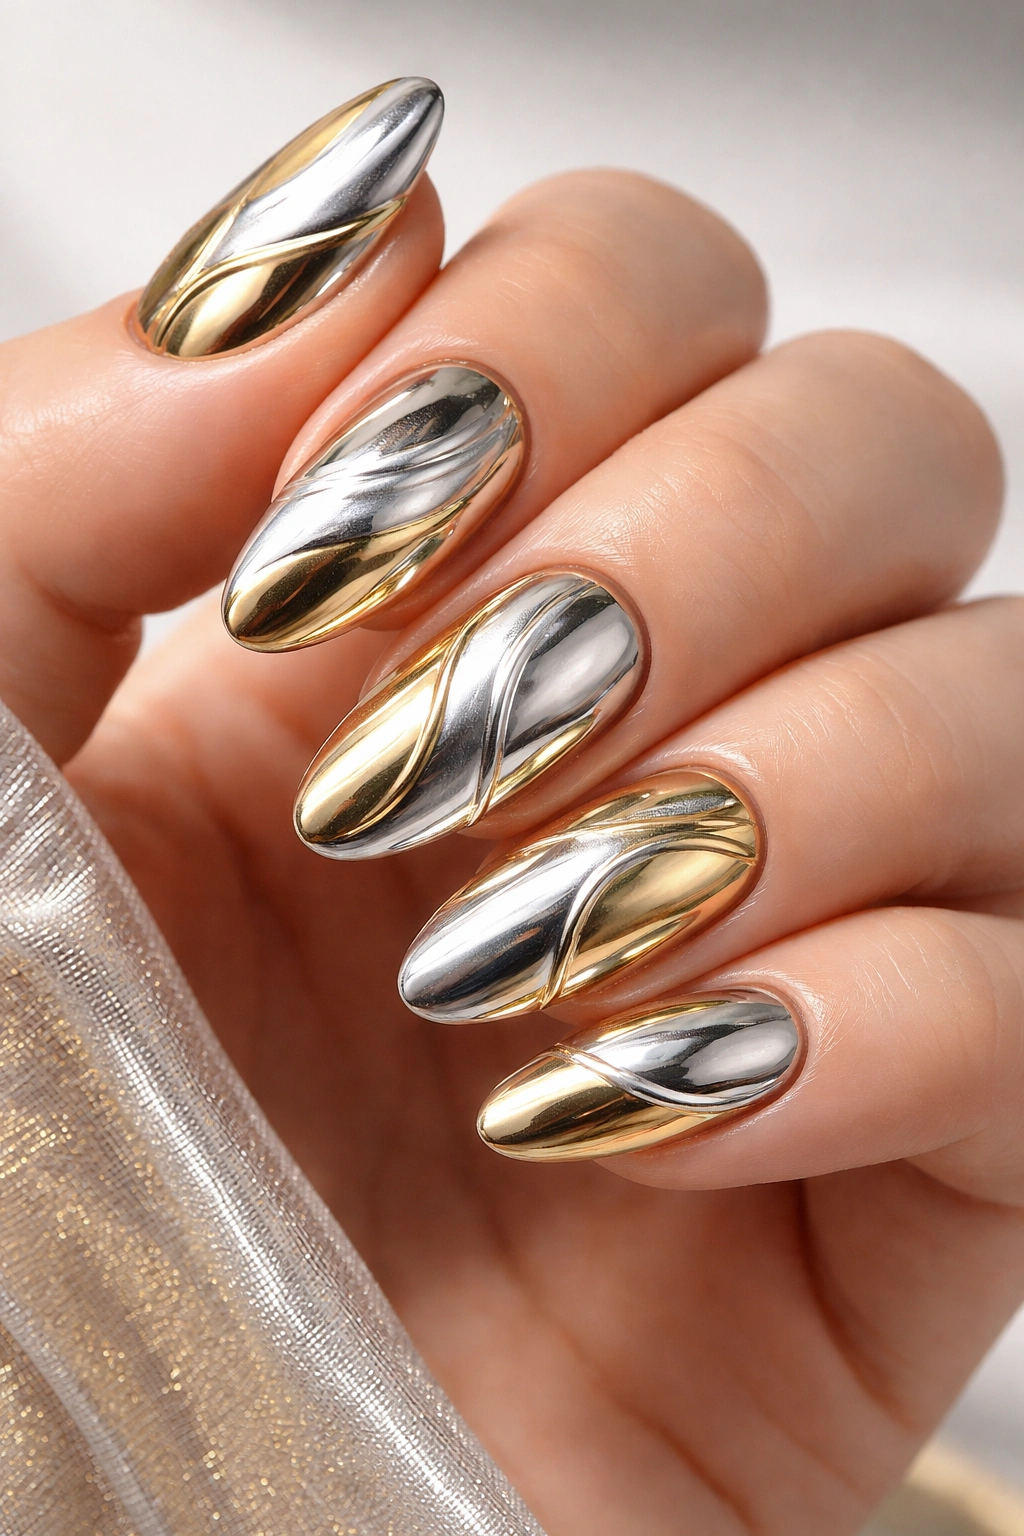
Metallics are a neutral in their own right during the festive season. Gold, silver, rose gold, and champagne chrome offer a high-shine, mirror-like finish that reflects the twinkling lights of the season. The trend right now isn’t just choosing one metal, but mixing them. Silver tips with gold abstract lines, or nails that alternate between gold and silver chrome, feel modern and edgy.
This is the ultimate “party girl” manicure. It works for the office holiday party, Christmas dinner, and is perfectly suitable for New Year’s Eve, meaning you get more mileage out of a single salon visit.
Using Chrome Powder:
- The Base: Apply a “no-wipe” gel top coat and cure it. Chrome powder needs a specific surface to adhere to—if it’s too sticky, it looks glittery; if it’s too dry, it won’t stick.
- The Rub: Use an eyeshadow sponge applicator to rub the chrome powder onto the warm nail. Buff it in until you see your reflection.
- The Seal: You must seal chrome with a water-based top coat first (if using regular polish) or a gel top coat, otherwise, the metallic finish will dull or crack instantly.
Plaid and Tartan Vibes
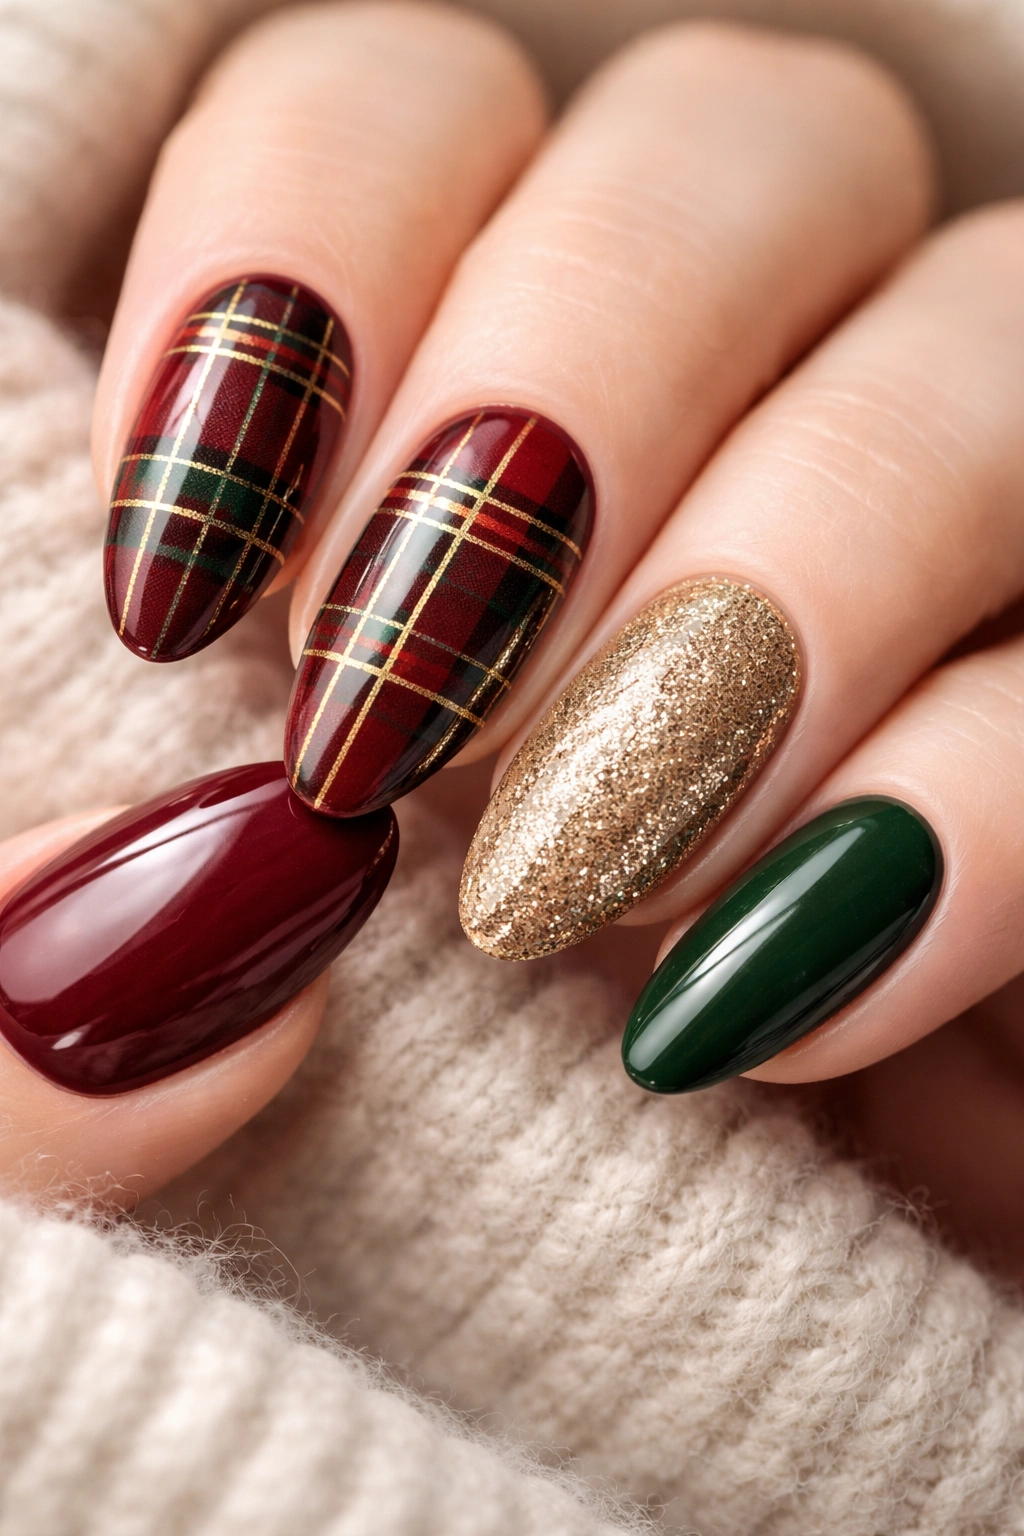
Nothing says “cozy winter night” quite like flannel pajamas, and transferring that pattern to your nails is a fun challenge. Plaid nails, often utilizing deep reds, blacks, greens, and gold stripes, give off a distinct “Ralph Lauren holiday” energy. It’s preppy, traditional, and adds a lot of visual interest.
Because plaid is busy, it often works best as an accent nail paired with solid colors. For example, a thumb and ring finger in plaid, with the rest of the nails in a solid hunter green or deep burgundy.
Layering the Lines:
This is all about layering.
- Base Color: Start with your lightest color (usually red or green).
- Thick Stripes: Paint a thick vertical stripe and a thick horizontal stripe in a darker shade. The intersection creates a new, darker square.
- Thin Detail: Use a metallic gold or silver striper to draw very thin lines through the center of the thick stripes. This hint of metallic is what makes it look like holiday gift wrap rather than just a picnic blanket.
Dark Starry Nights
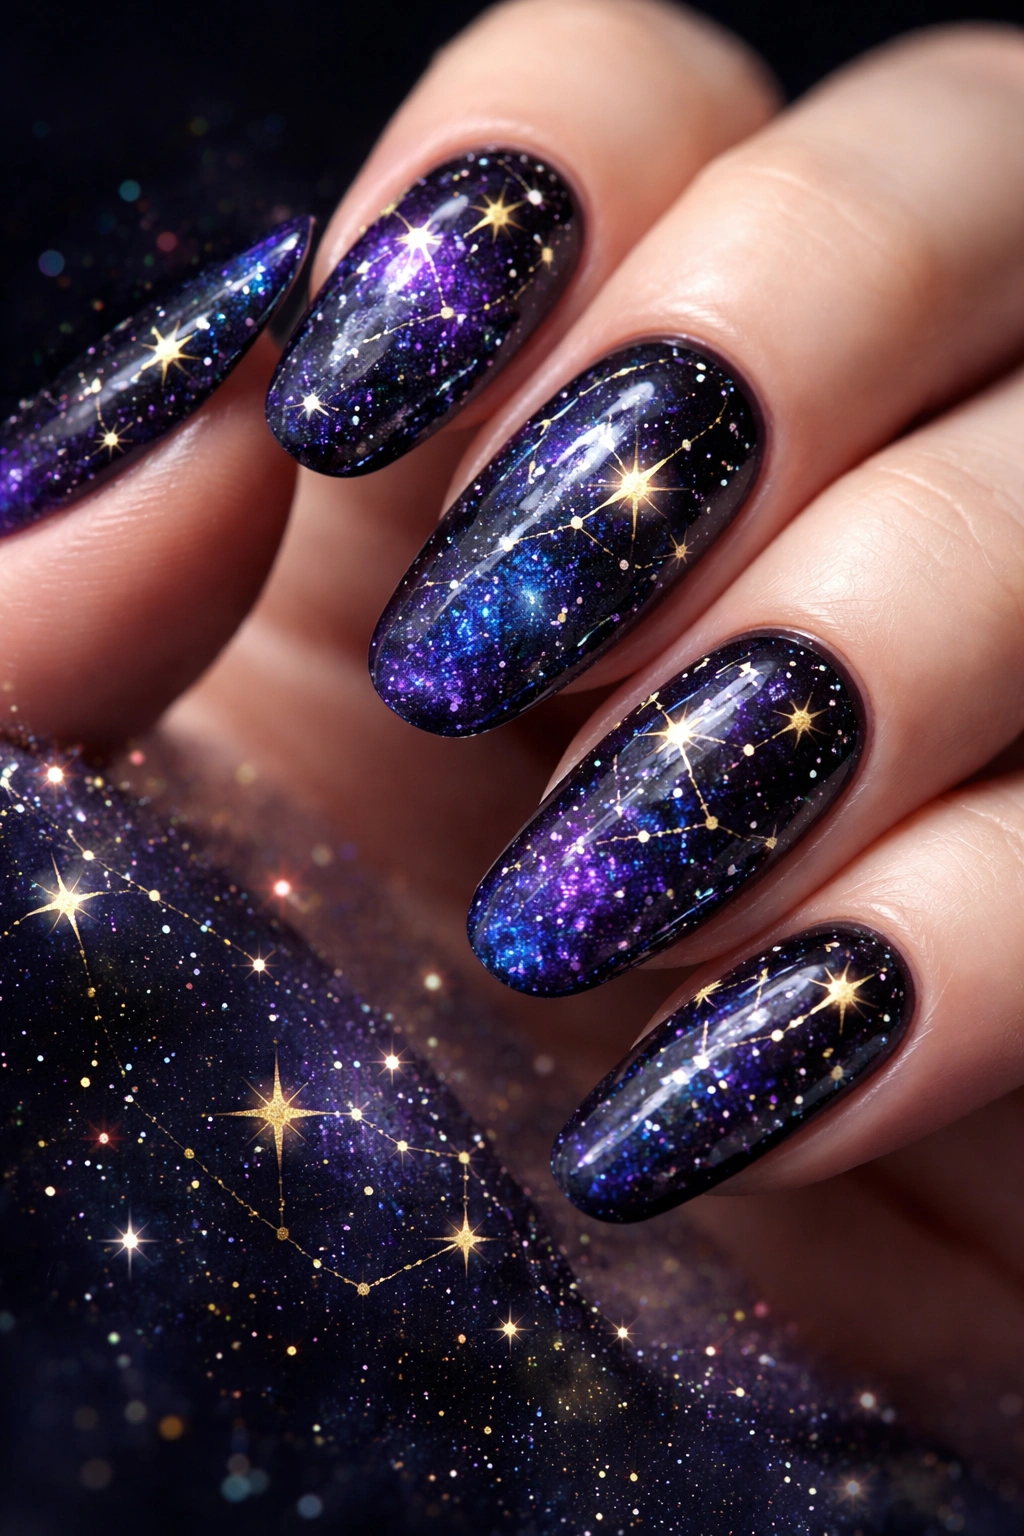
For a look that captures the magic of Christmas Eve, look to the sky. Midnight blue, deep purple, and black polishes flecked with shimmer create a galaxy or “starry night” effect. It’s sophisticated and a bit mysterious. This is a great alternative to the bright, cheery colors of standard Christmas décor.
This design often incorporates gold foil stars or hand-painted constellations. It’s reminiscent of the Three Wise Men story or simply the clear, crisp winter sky. It’s elegant enough for a black-tie event but fun enough for casual wear.
Adding Depth:
- Jelly Sandwich: To make the stars look like they are floating in space, use the “jelly sandwich” technique. Apply a layer of sheer dark blue, add some glitter or gold flakes, then apply another layer of sheer blue on top. The glitter between the layers looks suspended and adds incredible depth.
- The North Star: Use a thin brush to paint a four-pointed star (a cross with tapered ends) in white or gold on one accent nail to serve as your “North Star.”
In Summary
The beauty of holiday nail designs lies in their ability to set a mood. Whether you opt for the tactile luxury of velvet nails, the nostalgic sweetness of candy cane stripes, or the cool elegance of icy blue snowflakes, your manicure is a personal celebration of the season.
Remember, the best design is one that makes you smile. Don’t stress too much about perfection—Christmas is about joy, not precision. If a line is a little wobbly, call it organic art. Grab your favorite polish, maybe a glass of eggnog, and give your hands the festive treatment they deserve.
