

Long rounded square nails have become the go-to choice for anyone who wants a modern, sophisticated look without committing to the drama of stilettos or the edginess of sharp coffin nails. This shape strikes the perfect balance—strong and architectural with softened corners that feel wearable and elegant. The challenge isn’t finding the shape itself; it’s discovering the designs, colors, and finishes that actually look stunning on long rounded square nails rather than fighting against them.
The best nail designs for this shape enhance its natural geometry while playing to its strengths: the elongated canvas, the clean lines, and the versatility that comes from having both length and softness. Whether you’re drawn to minimalist aesthetics, bold statements, or intricate art, rounded square nails offer enough real estate to showcase your style without the maintenance headaches of sharper shapes that catch on everything.
What makes a design “actually work” on rounded square nails comes down to proportion, color psychology, and how the visual weight of the design interacts with the nail’s proportions. A design that looks perfect on a coffin nail might feel cramped on a rounded square, while something that seems minimal on an almond might transform into something striking on this shape. Let’s explore 12 designs that bring out the absolute best in long rounded square nails.
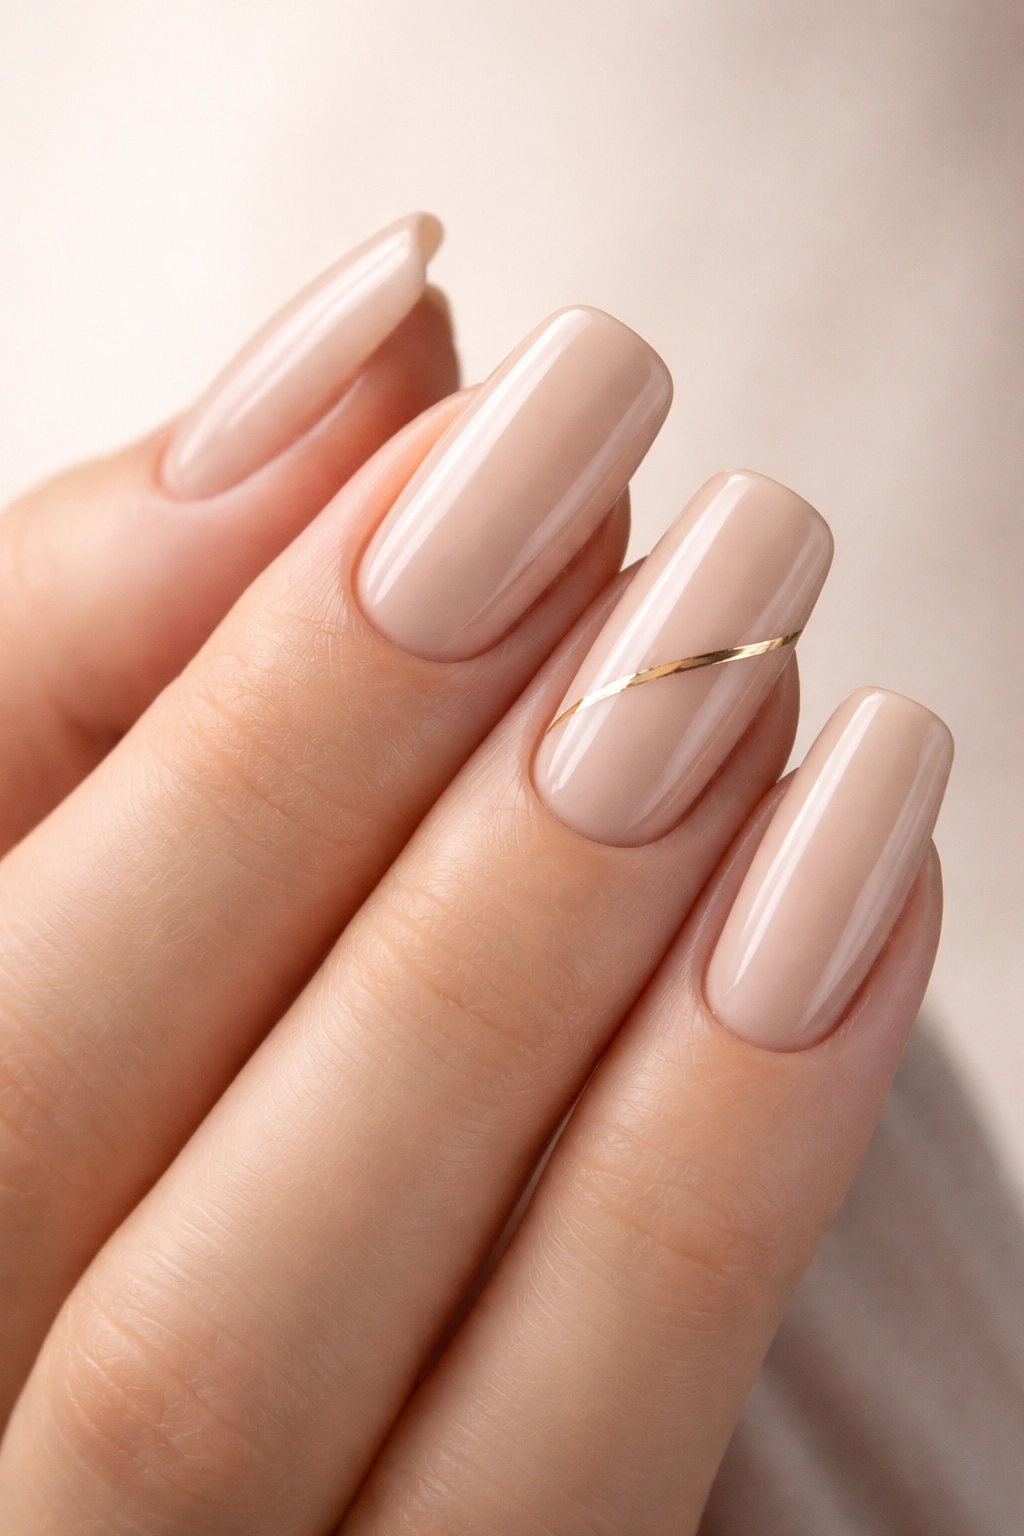
1. Soft Nude with Barely-There Gold Accents
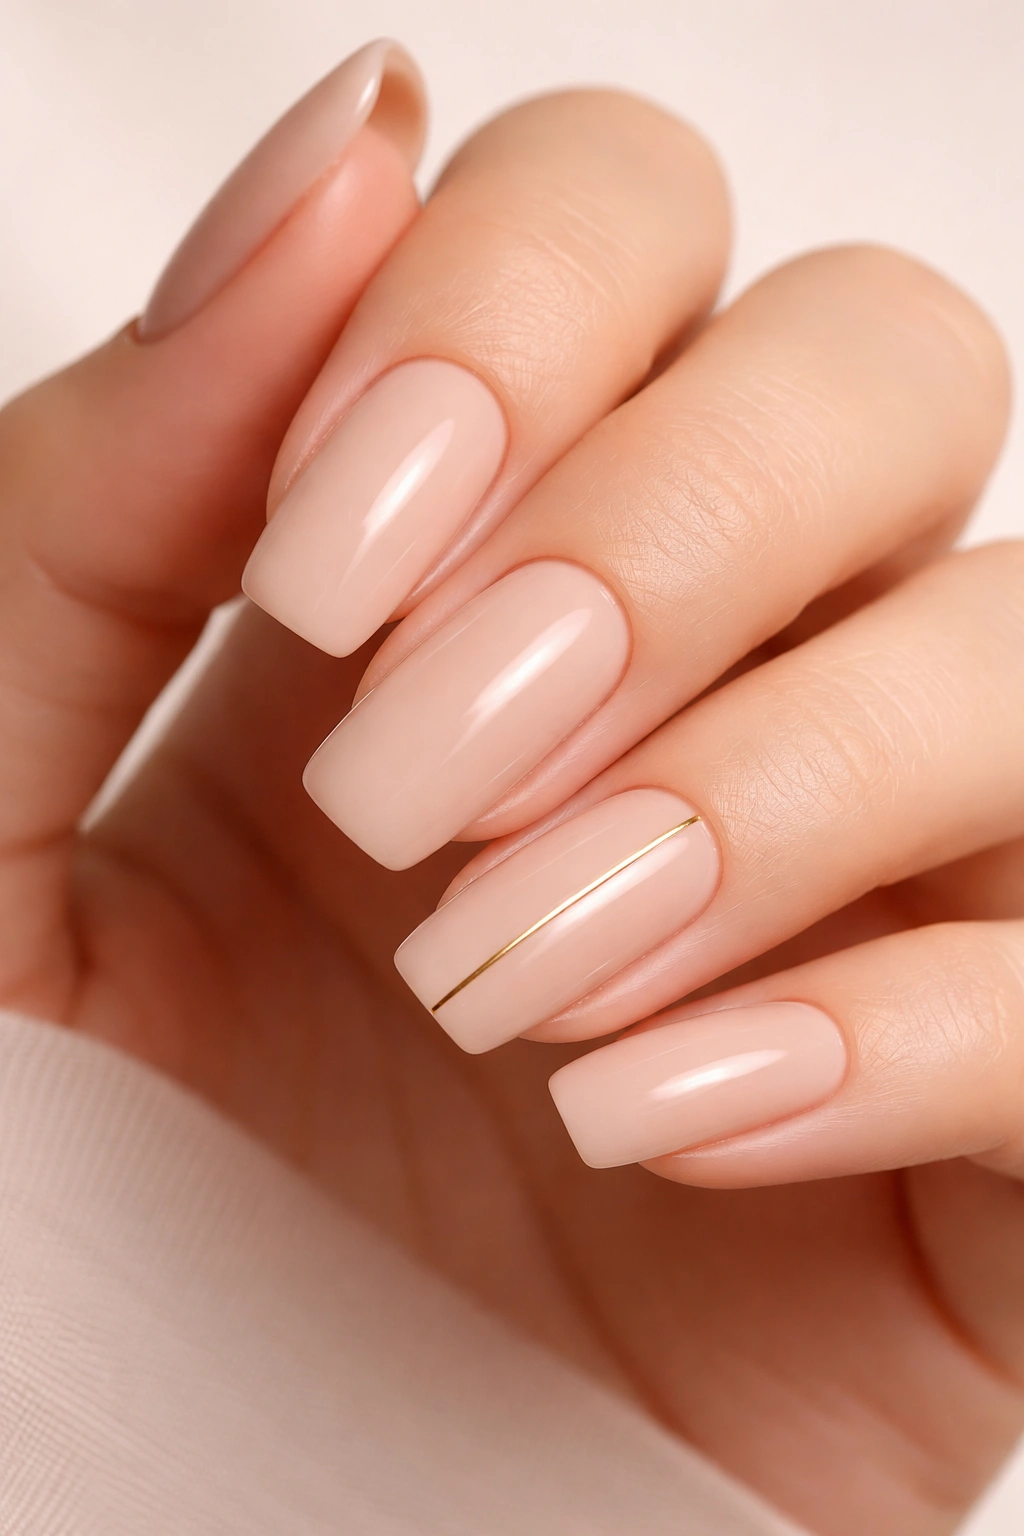
Nude nails represent timeless elegance, and when you pair them with long rounded square proportions, you get a sophisticated foundation that works for literally any occasion. The magic happens when you add whisper-thin gold lines running vertically down the center of one or two accent nails—just a single brushstroke in metallic that catches the light.
Why This Works Beautifully
The nude base maximizes the visual length of your nails without any competing color. Your fingers naturally look longer and more refined when the nail color blends with your skin tone, and this effect is amplified on a rounded square where you’ve got the length advantage already. The gold accent adds a touch of intentional design without overwhelming the shape, and the vertical line actually reinforces the elongation of your nail.
How to Execute It Perfectly
- Use a nude shade that’s exactly one to two shades lighter or darker than your actual skin tone (not the generic “one nude for everyone” shade that exists in every collection)
- Apply two thin coats for opacity that still feels natural, not chalky
- Using a thin striping brush or the tip of a detail brush, paint a single vertical gold line down the center of your ring finger and pinky, stopping about 1mm from the cuticle and tip
- Seal with a glossy topcoat that makes the gold appear more dimensional
Pro tip: This design actually hides imperfections better than it has any right to—minor ridges or unevenness in the nail bed virtually disappear under the nude, while the gold line draws the eye to intentional design rather than any flaws.
2. Deep Emerald Green with Chrome Accents
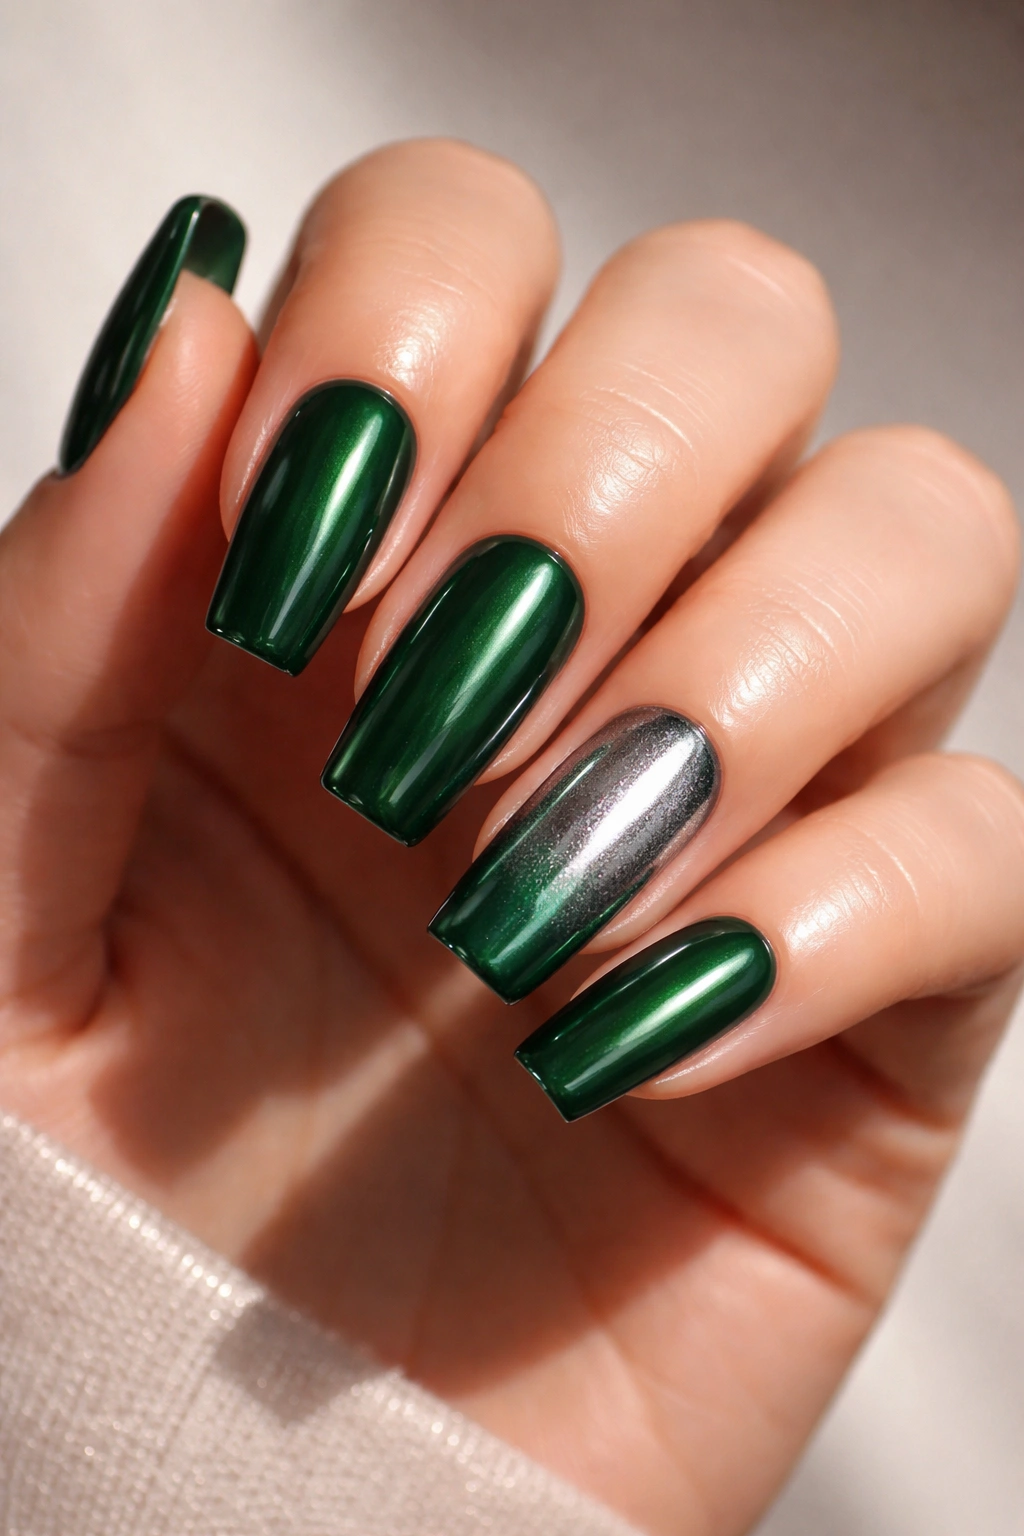
Emerald represents luxury in nail color, and the richness of green against long rounded square nails creates an almost jewelry-like effect. When you add chrome powder to one accent nail, you’re creating a design that feels editorial and deliberately curated rather than trendy.
The Psychology of This Color Combination
Green naturally commands attention without appearing aggressive, which is exactly the vibe long rounded square nails communicate. The color reads as sophisticated rather than playful, and chrome (when applied strategically rather than covering the entire nail) acts like a precious metal detail that ties back to the elegant architecture of the shape itself.
Building the Look
- Apply emerald green (a deep, jewel-toned variety, not a bright lime) as your base on all ten nails with two coats
- On your ring finger or middle finger, apply a chrome powder after the green base dries—use a small amount rubbed with a velvet applicator over just the center half of the nail for a gradient effect
- The chrome should fade from concentrated in the middle to lighter toward the edges, creating dimension rather than a flat metallic finish
- Top everything with a matte topcoat to slightly mute the chrome and prevent excessive shine that can look cheap
Worth knowing: Emerald paired with the softness of rounded corners actually prevents the nails from looking severe or intimidating—the softened corners keep the look refined rather than harsh.
3. Classic French Manicure (Modern Interpretation)
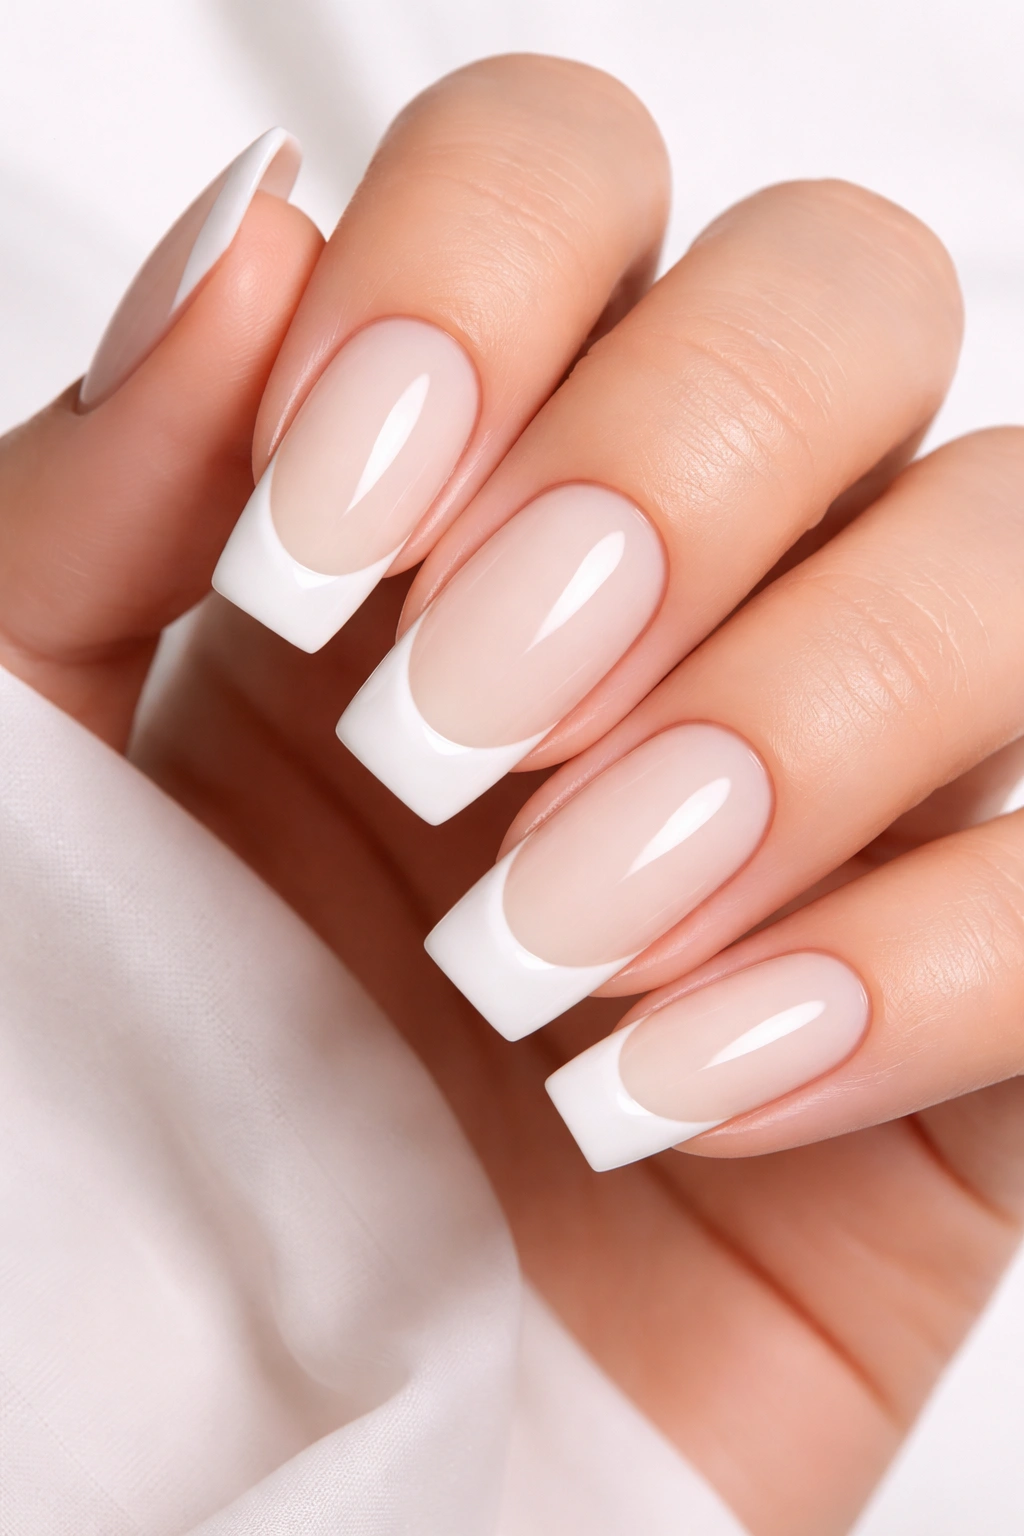
The French manicure has never actually left—it’s evolved. Instead of the thin white tip line of the 1990s, modern French on long rounded square nails uses a thicker, slightly asymmetrical white smile line that feels intentional and contemporary. Some versions even introduce a soft cream or ivory base rather than stark white.
Why This Endures for This Nail Shape
The rounded square shape is actually the ideal canvas for French manicure work because the proportions are balanced—not too elongated like a stiletto (which can make the white tip look disproportionately large) and not too short (which can make the white tip disappear entirely). On rounded square nails, the tip-to-base ratio feels harmonious, and the design automatically reads as groomed rather than dated.
The Execution That Feels Fresh
- Use a soft cream or pale ivory base coat rather than pure white—something like champagne or off-white feels more current
- Create your white tip line using a thin brush or striping tool, but instead of a perfectly straight line, allow it to be slightly thicker in the center and taper toward the edges
- The line should follow the natural curve of your nail edge, not fight against it—this is what makes it look intentional rather than imperfectly done
- A glossy topcoat is essential here; it catches light and prevents the look from feeling flat
Insider note: Many nail artists now add a single thin line of champagne or nude right at the transition between the base and white tip—it creates a subtle gradient that feels much more polished than a harsh white line.
4. Soft Blush Pink with Minimal Line Work
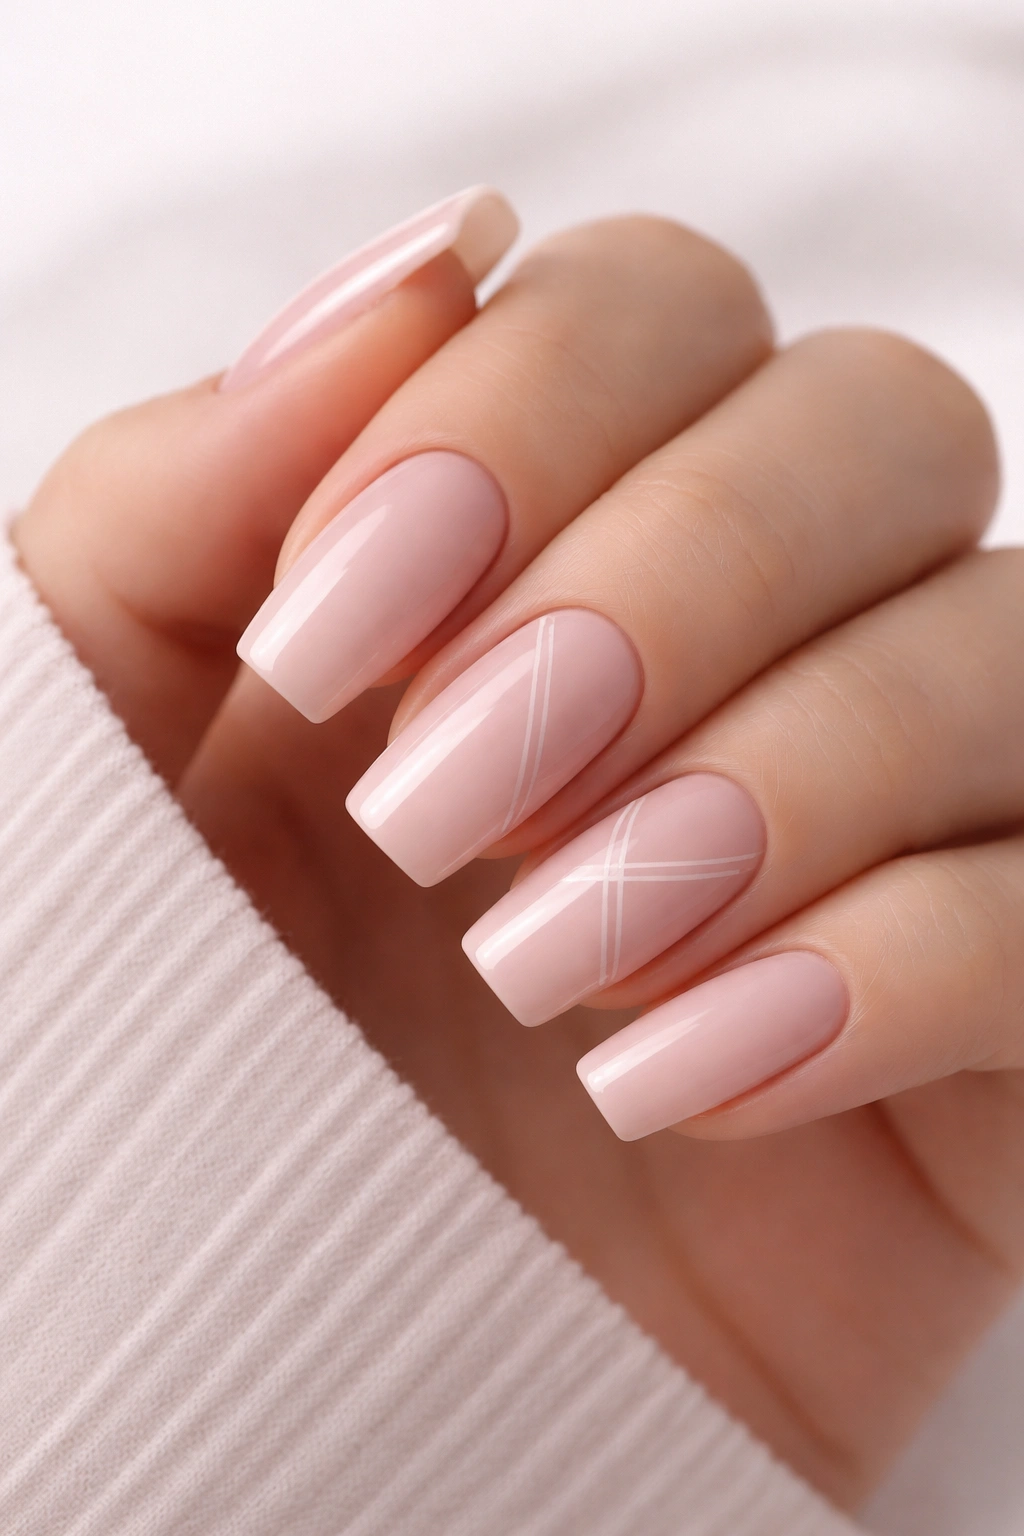
Blush pink is the nail color equivalent of a white t-shirt—universally flattering and appropriate everywhere—but it’s also deceptively boring if there’s no design element to anchor it. On long rounded square nails, minimal line work in white or nude creates visual interest without overwhelming the subtle base color.
The Impact of Minimalism on This Shape
Long rounded square nails are almost architectural in their cleanliness, so minimal designs feel intentional rather than incomplete. A single geometric line, a small negative-space detail, or a minimalist accent nail works perfectly because the shape itself already carries visual weight. You don’t need busy designs to make this shape work; sometimes less proves more compelling.
Creating the Minimal Design
- Apply blush pink (a soft, barely-there shade) as your full-nail base with two coats
- On two or three accent nails (typically ring finger and pinky, or just one ring finger), use a thin white or nude line to create a simple geometric shape—a thin vertical stripe down the center, a simple triangle in the corner, or a delicate line along the side
- The design should take up no more than one-third of the nail space to maintain the minimalist aesthetic
- A glossy topcoat enhances the cleanliness of the design
Pro tip: The beauty of this design is how it photographs—those clean lines and soft colors create sharp definition in photos, making your nails look intentional and polished even from a distance.
5. Burgundy and Nude Two-Tone Split
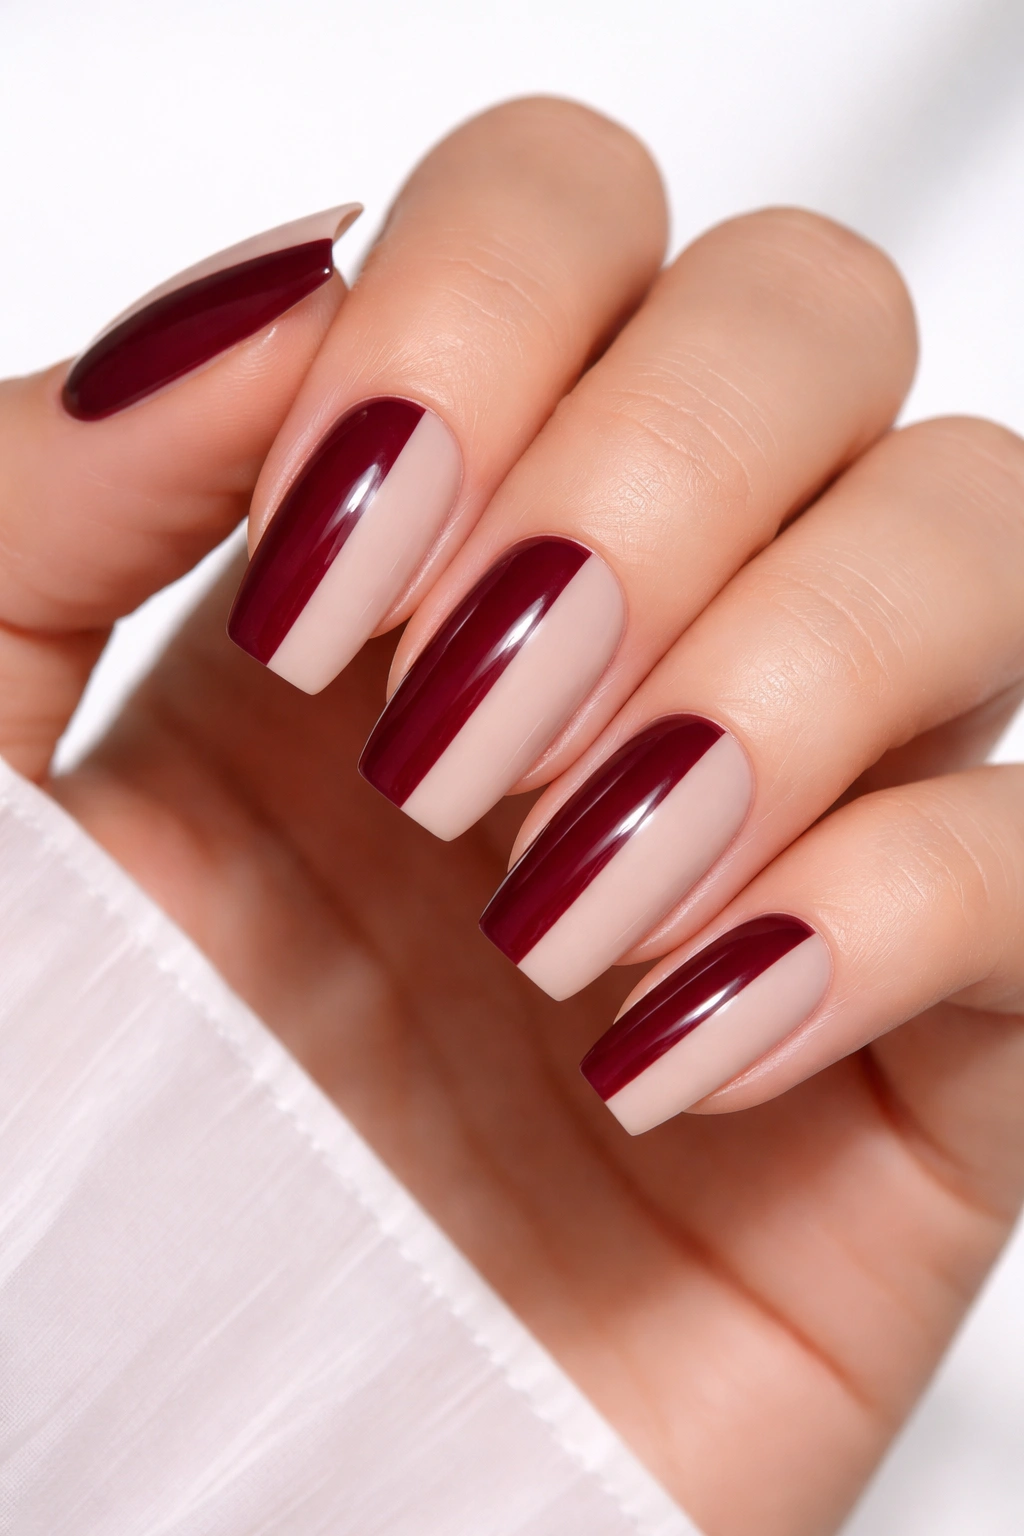
A color-blocking design works surprisingly well on rounded square nails because the proportions allow you to divide the space clearly without either color dominating awkwardly. Burgundy and nude create a sophisticated, slightly edgy look that feels high-fashion without being risky.
Why Two-Tone Works on This Shape
The geometric nature of rounded square nails—clean sides and softened corners—actually creates natural division points for color-blocking. You can split the nail vertically down the middle with different colors, or create a horizontal division that feels intentional rather than accidental. The shape’s balanced proportions mean neither color overwhelms the design.
How to Execute the Split
- Paint half of each nail burgundy (typically the inner half or left half) with two coats of rich, deep burgundy
- Paint the remaining half nude or beige with two coats, making sure the line between colors is as clean as possible
- Use a thin striping brush or the edge of a regular brush to define the division line—it doesn’t need to be perfectly straight; a slightly angled line actually feels more contemporary
- Topcoat everything to ensure the colors maintain their depth and the division line remains crisp
Worth knowing: This design photographs exceptionally well and actually looks more expensive than it is—the two-tone effect suggests careful curation and design intent.
6. Deep Navy with Delicate Pearl Inlay
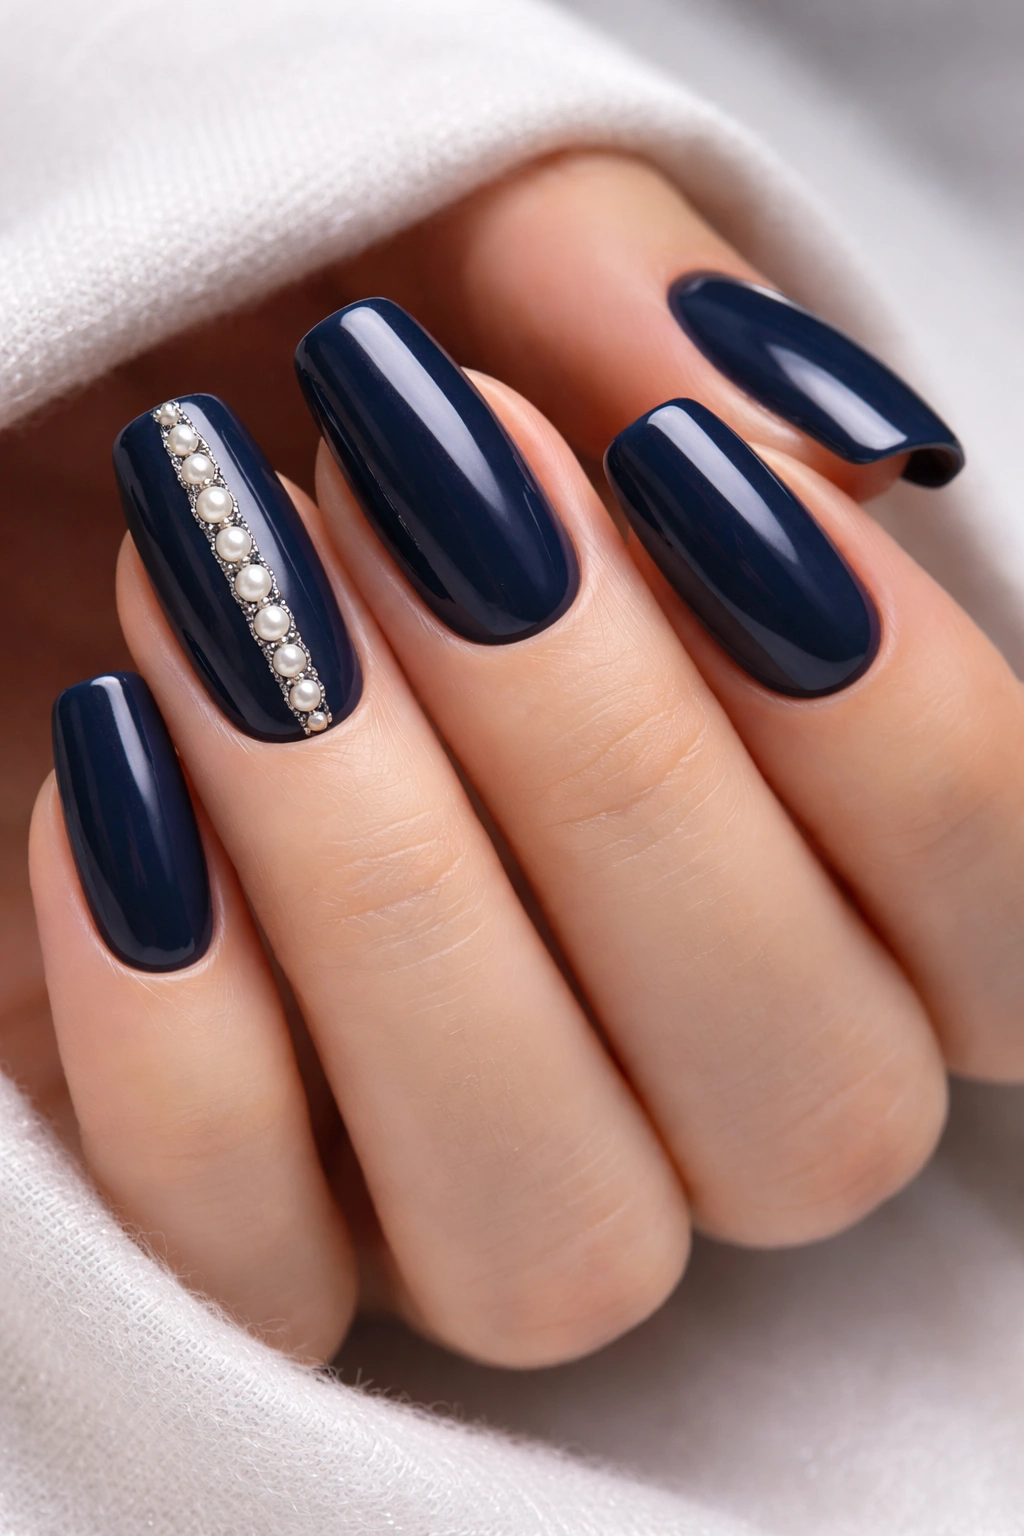
Navy feels sophisticated without the heaviness of black, and when paired with pearl inlay accents, it creates a design that reads as deliberate luxury. On long rounded square nails, this combination feels expensive and refined rather than overly decorated.
The Elegance of Restraint
Navy actually makes your nails appear longer because the dark color creates contrast against your skin. Adding pearl accents—just a few small pearls or a single line of them—draws the eye without creating visual clutter. The softened corners of the rounded square shape make this design feel elegant rather than harsh.
Building This Design
- Apply two coats of deep, true navy (not black-navy, but a rich ocean blue) as your base
- Allow the base to dry completely
- Using nail glue or a dedicated nail jewel adhesive, place small pearl beads or flat-backed pearls in a line down the center of one or two accent nails, or create a small cluster in the upper corner
- Seal everything with a glossy topcoat that holds the pearls securely in place
- Make sure pearls are placed on top of the polish, not embedded in it—the dimensional quality is part of what makes this look expensive
Pro tip: If loose pearls feel too committed, try polish with pearl flecks already suspended in it—you get the luxury effect without the application challenge.
7. Cream Base with Negative-Space Geometric Lines
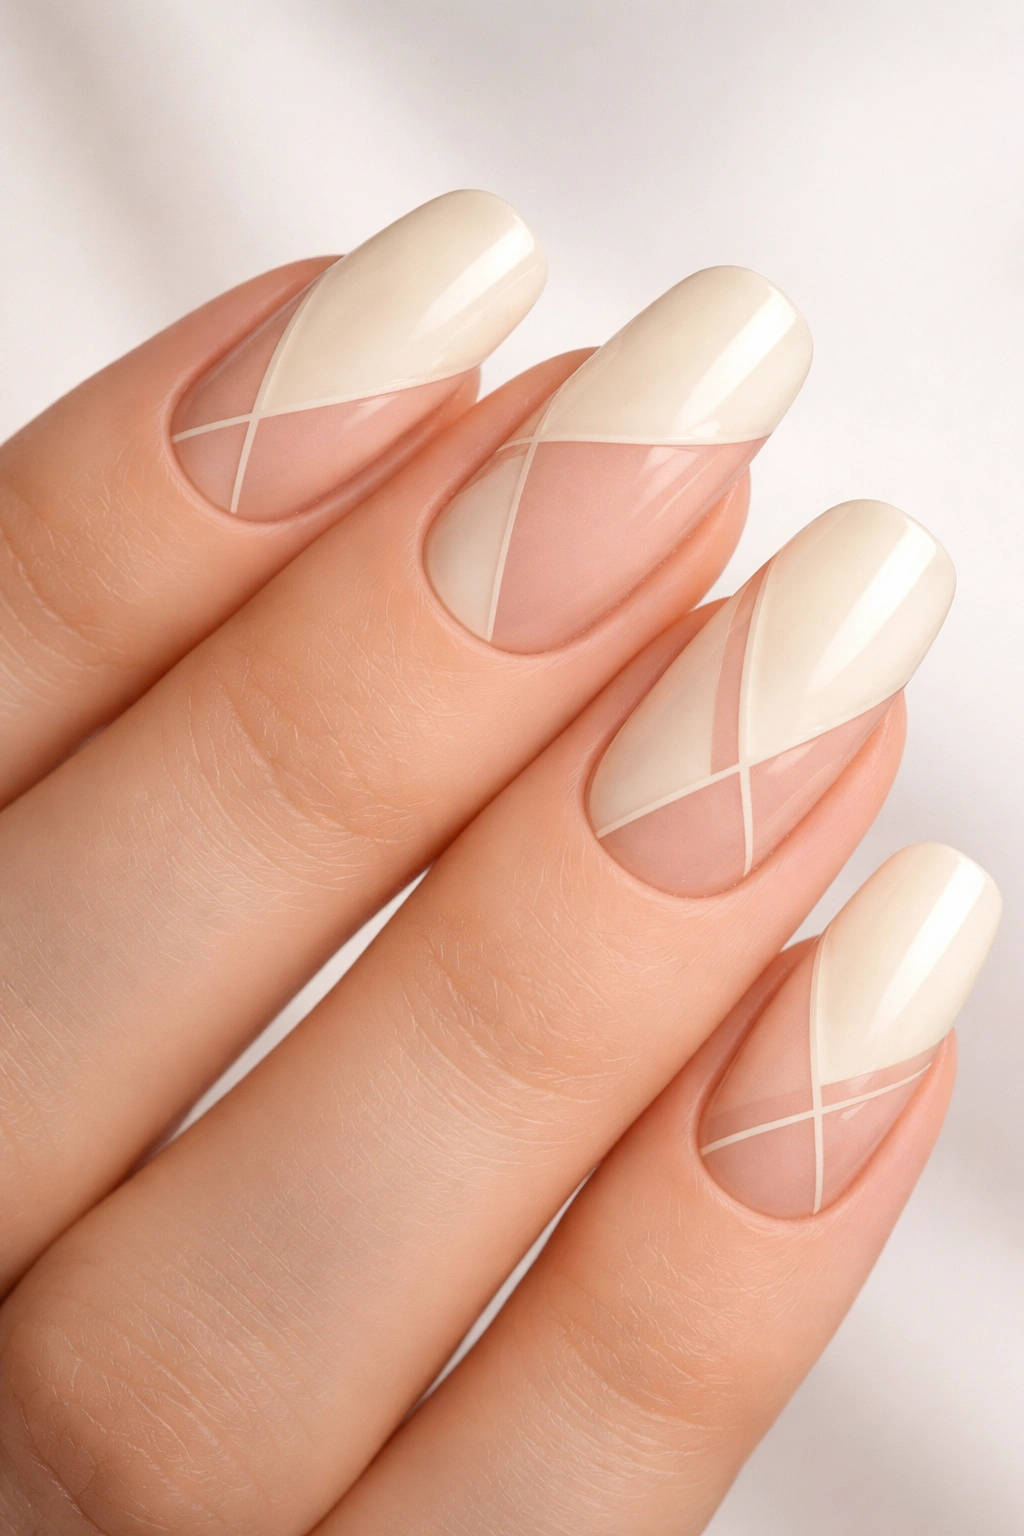
Negative space—where you leave the nail bare to show the nail bed underneath—creates striking visual interest on long rounded square nails because the natural nail color provides unexpected contrast. A cream base with geometric negative-space lines feels modern and intentional.
Why Negative Space Flatters This Shape
The clean edges of rounded square nails actually showcase negative-space designs better than more ornate shapes. Your eye can follow the lines clearly, and the design feels architectural rather than accidental. The softened corners prevent negative-space designs from feeling too sharp or angular.
Executing Clean Negative Space
- Apply a cream or very pale yellow base coat with two coats for opacity
- Using thin striping tape or a steady hand with a thin brush, create geometric lines where you’ll leave the nail bare—thin vertical stripes, a triangle in the corner, or simple horizontal bands
- Carefully paint around these lines with your cream base color to define them sharply
- The negative space should show your actual nail bed—this is what creates the striking contrast
- Topcoat everything except the negative-space areas (seal just the painted portions) to keep those areas clear and dimensional
Insider note: This design works particularly well if you have naturally pink nail beds—that natural color becomes part of the design itself.
8. Soft Taupe with Rose Gold Flakes
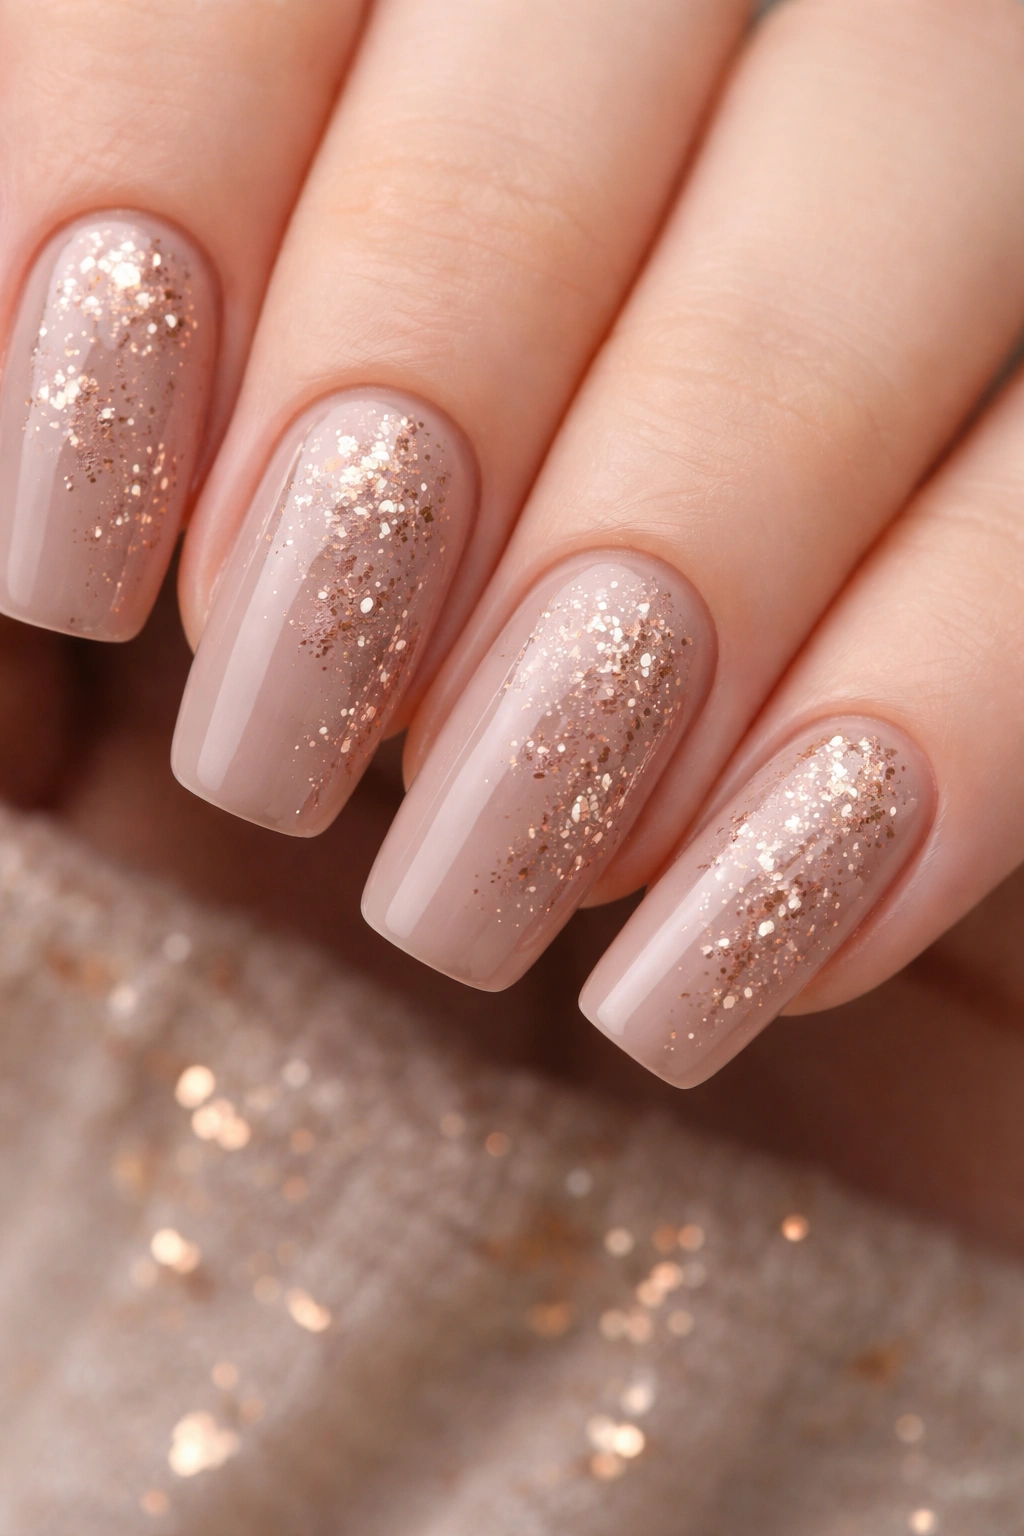
Taupe is the sophisticated cousin of nude—it adds a bit more depth and interest while maintaining that elongating effect. When you sprinkle rose gold flakes across the surface, you’re creating a design that feels luxe without being over the top, and the warmth of rose gold complements the cool-neutral taupe beautifully.
The Subtlety That Stands Out
This design works because it’s understated but catches light beautifully. The rose gold flakes don’t cover the entire nail (which would make it feel cheap), but scattered across the taupe they create movement and dimension. On long rounded square nails, this scatter effect actually enhances the sense of length because your eye travels the length of the nail following the flakes.
How to Apply Rose Gold Flakes
- Apply two coats of soft taupe as your base
- While the second coat is still slightly tacky (just slightly wet, not fully cured), use a detail brush or specialized flake applicator to scatter rose gold flakes across the nail surface
- The flakes should be random, not perfectly organized—organic distribution looks intentional and elegant
- Allow the base to fully cure with the flakes in place
- Seal with a glossy topcoat that holds the flakes secure and adds dimension
Pro tip: If you can’t find pre-made flake products, create the same effect by using rose gold dust mixed with a clear gel or a rose gold shimmer polish applied in small dabs across the taupe.
9. Ballet Slipper Pink with Ombré Glitter Fade
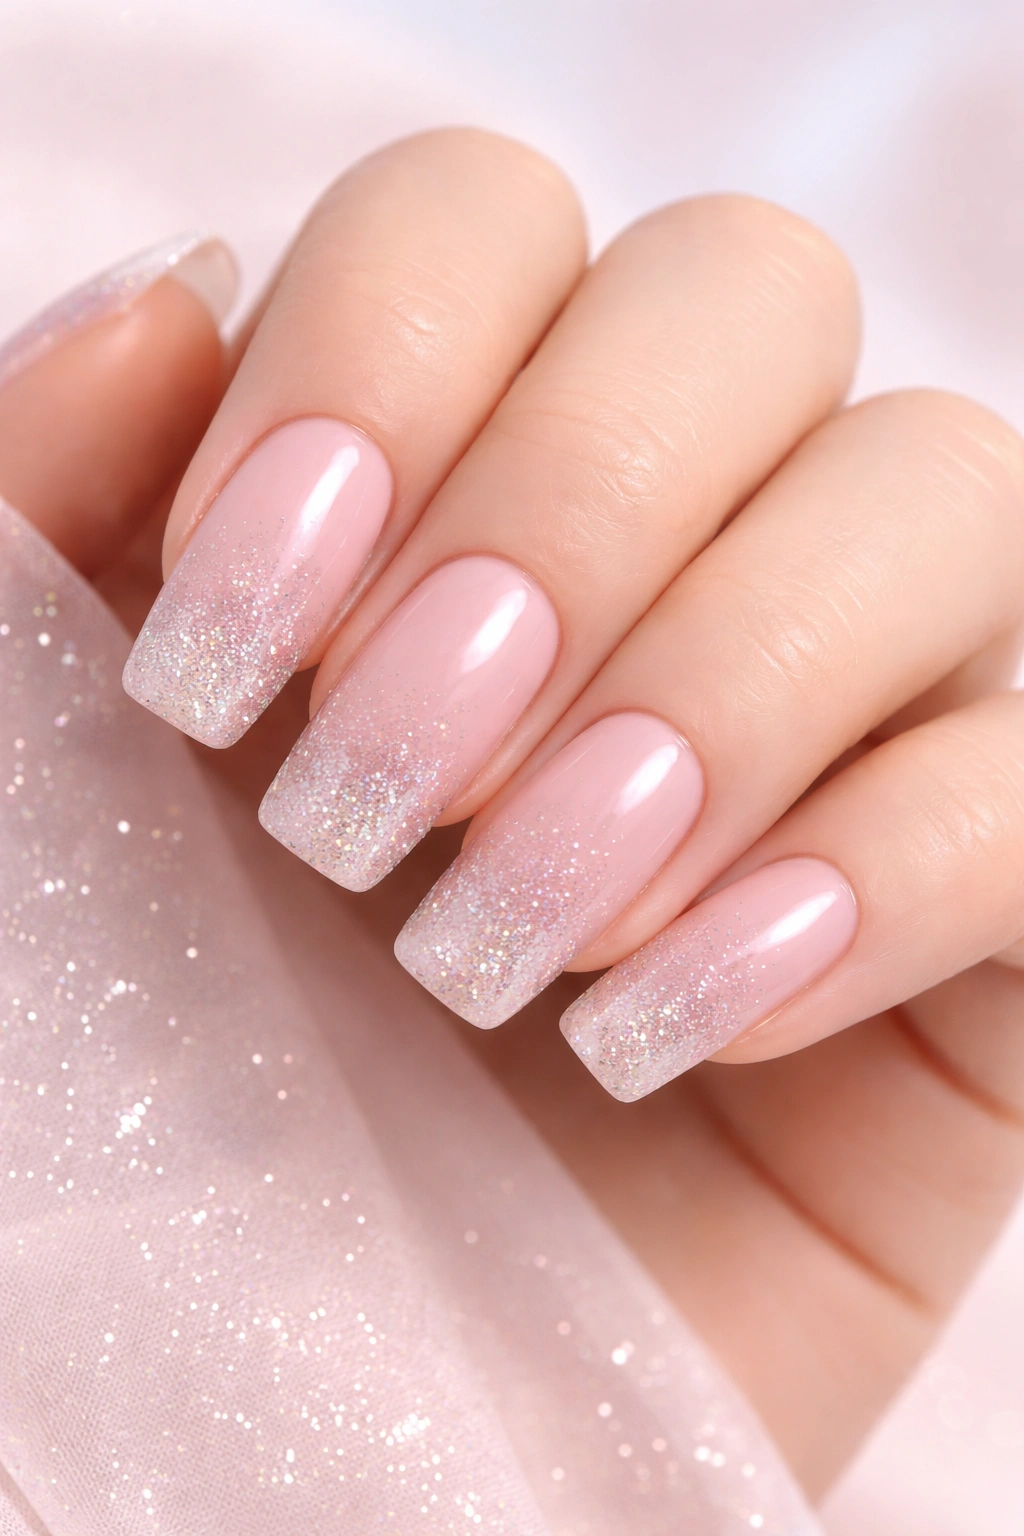
Ombré effects work beautifully on long rounded square nails because you have the vertical canvas to create a gradient. Starting with ballet slipper pink and fading to glitter creates movement and visual interest without feeling busy.
The Movement Factor in Ombré Design
An ombré effect—where color gradually transitions to another—creates the illusion of even more length on already-long nails. Your eye follows the gradient from base to tip, and on rounded square nails, this visual journey feels intentional and design-focused. The glitter fade adds sparkle without committing your entire nail to shine.
Creating the Ombré Glitter Effect
- Apply two coats of ballet slipper pink as your base on all nails
- Using a sponge applicator or makeup sponge, dab glitter polish (choose one with fine or medium-sized glitter particles) onto the tips of your nails in thin layers
- Layer the glitter in stages, building intensity from tip backward—start at the very tip with light glitter, then add a slightly thicker layer moving backward about one-third of the nail, then add more coverage moving further back
- The goal is a gradient where the tip is heavily glittered and the base is nearly clean ballet slipper, with a smooth transition between
- Seal with a shiny topcoat that blends the layers slightly and adds dimension
Worth knowing: This design reads as more refined than full-glitter nails and gives you the sparkle factor without the commitment of glitter on removal (since it’s only concentrated at the tips).
10. Black with White Minimalist Art
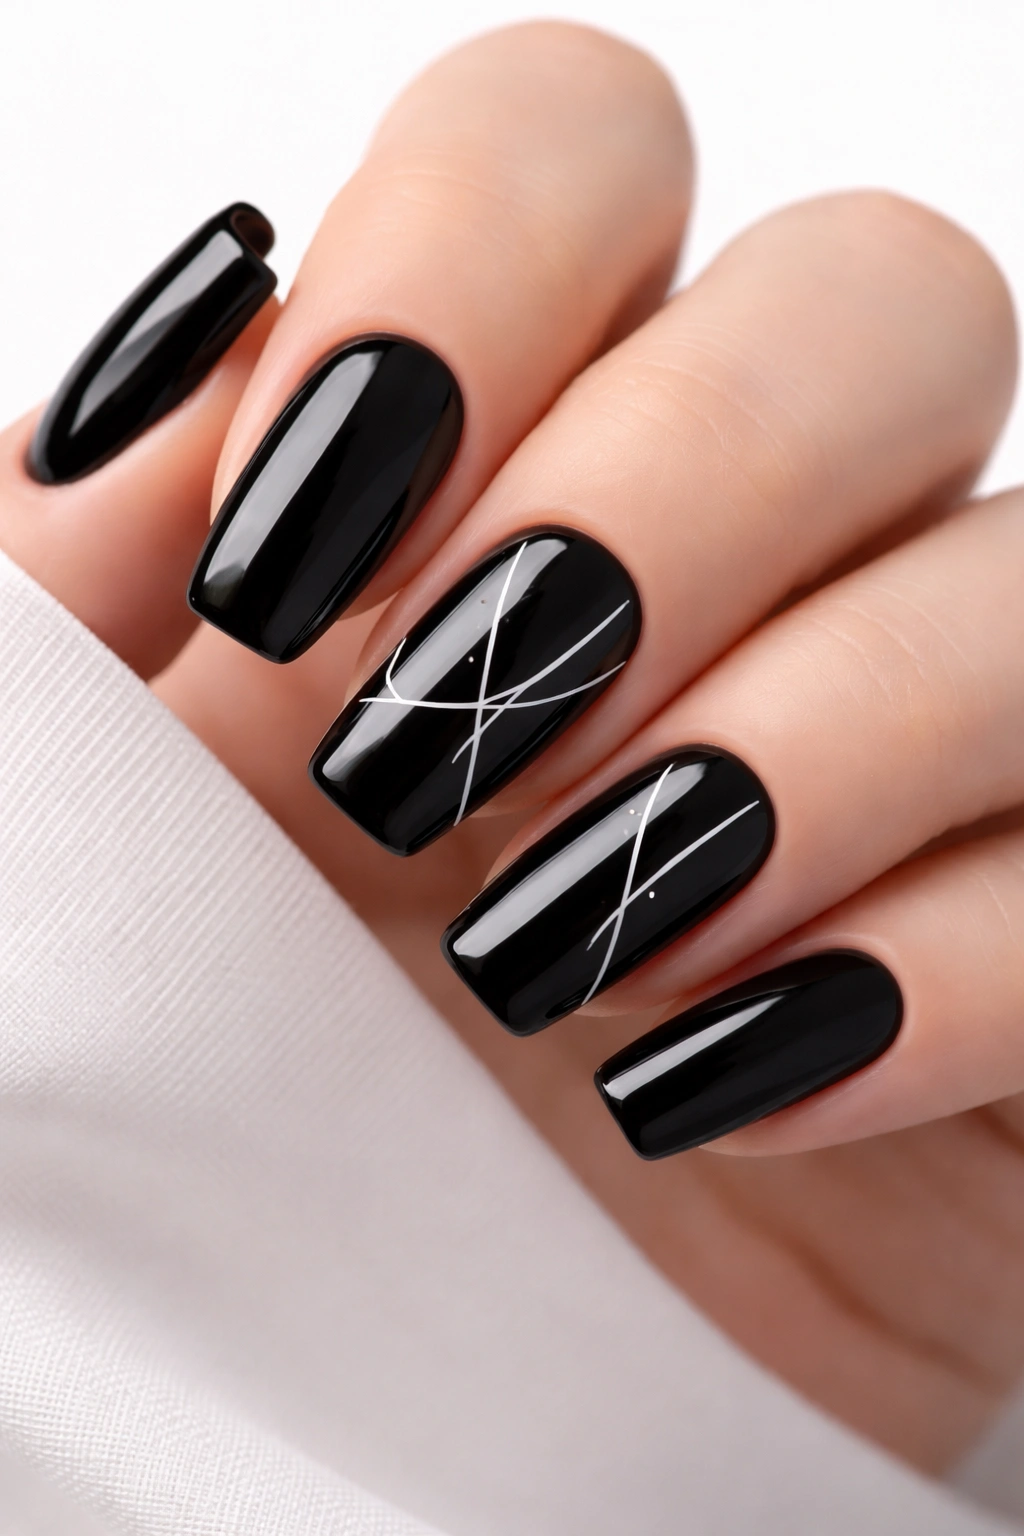
Black nails on long rounded square shapes feel bold but elegant—the softened corners prevent the look from feeling severe or gothic. Adding simple white line art creates a design that feels intentional and artistic rather than stark.
Why Black Elongates Rather Than Shortens
Conventional wisdom says dark polish shortens nails, but on long rounded square nails, the length is already established. Black actually creates a recessing effect that makes your nails appear even longer because the nail bed isn’t visible. The contrast between black and any accent color becomes the focal point, not the length issue.
Creating Minimalist White Art
- Apply two to three coats of true black (not dark gray, but rich black) as your base
- Using a thin white brush, create simple line art on one or two accent nails—think simple geometric patterns, a delicate line drawing, abstract strokes, or minimalist symbolic shapes
- The white should be opaque and clean, creating stark contrast against the black base
- Keep the design on just one or two nails; the rest remain solid black to maintain sophistication
- Topcoat with a glossy finish that makes the white pop against the black
Pro tip: If freehand white art feels intimidating, use nail decals or stickers instead—the effect is identical and the execution is much easier.
11. Warm Honey Gold with Matte Topcoat
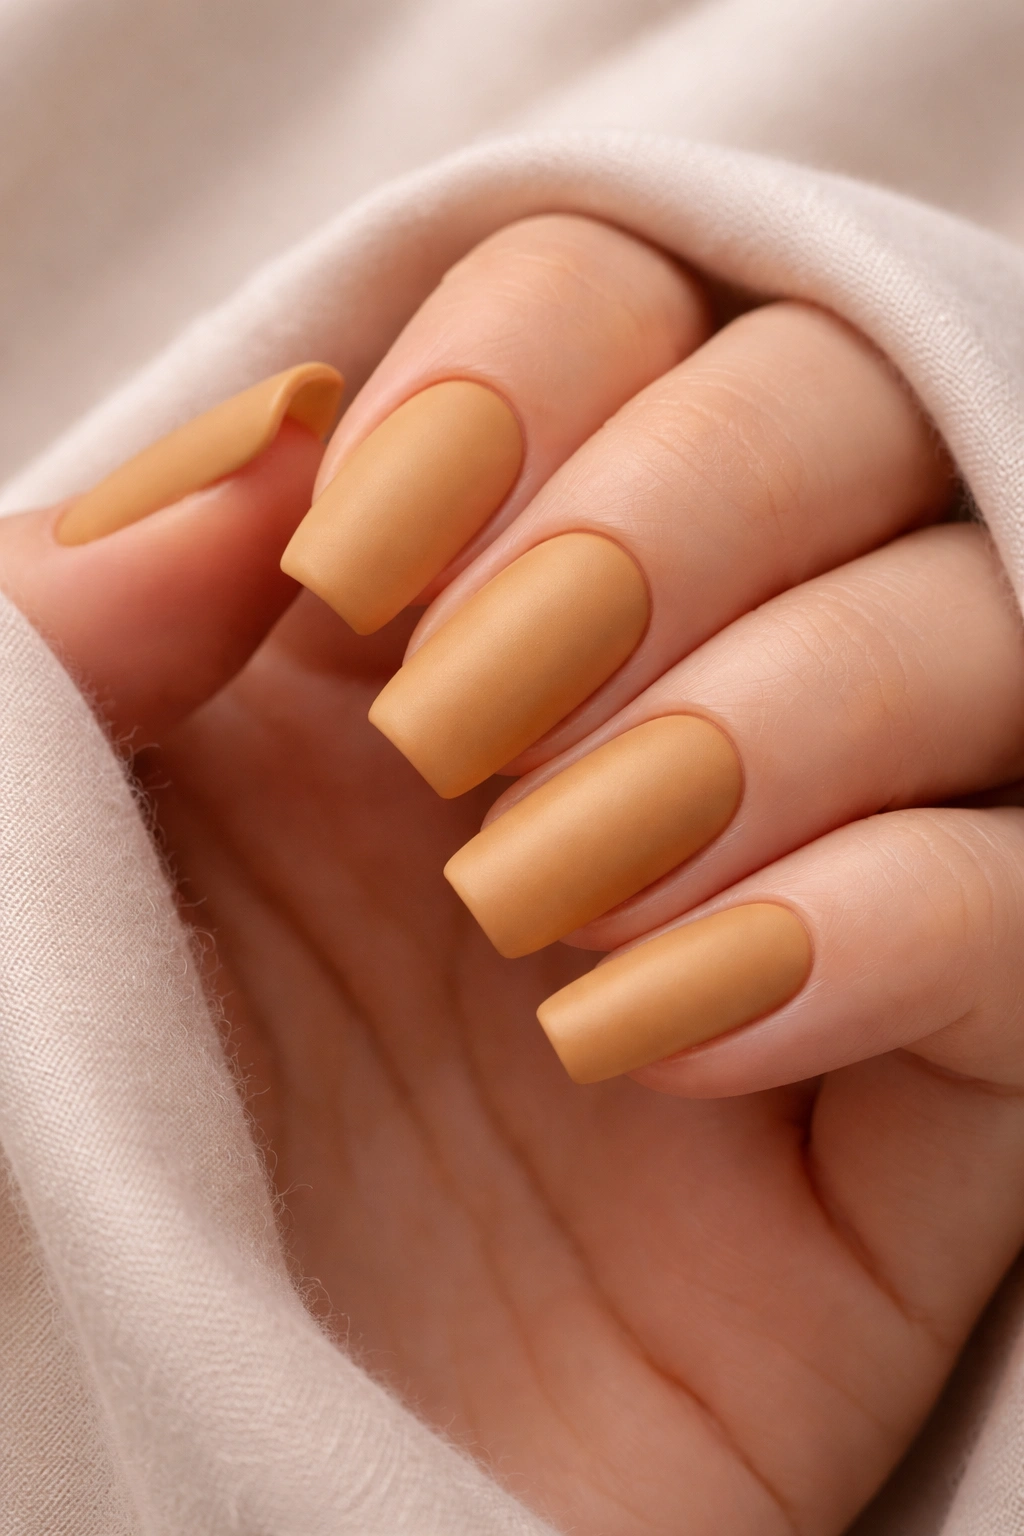
Warm honey gold is a shade that flatters almost every skin tone and hand shape, and on long rounded square nails, it creates an elegant, slightly luxe effect. The matte topcoat prevents it from feeling too shiny or costume-like, instead creating a sophisticated finish that feels intentional.
The Luxury of Matte on Metallics
Matte finishes on metallic colors create a premium effect—that’s why high-end jewelry often features matte metal finishes. On nails, a matte honey gold reads as more sophisticated than glossy because it suggests intentional design choice rather than just applying standard topcoat. The softness of the matte finish balances the boldness of the warm gold color.
Achieving the Perfect Matte Honey Gold
- Choose a honey gold shade that has warmth and depth, not a flat bright gold
- Apply two coats for full opacity and richness
- Use a matte topcoat instead of glossy—it transforms the shine into a subtle, sophisticated finish
- Make sure the matte topcoat is quality; cheap matte topcoats can look dusty or uneven
- One coat of matte is usually enough; two can make it look chalky
Insider note: This design is particularly flattering if you have warmer undertones in your skin—the honey gold creates harmony that reads as intentional rather than random color choice.
12. Blush Pink with Delicate Foil Accents
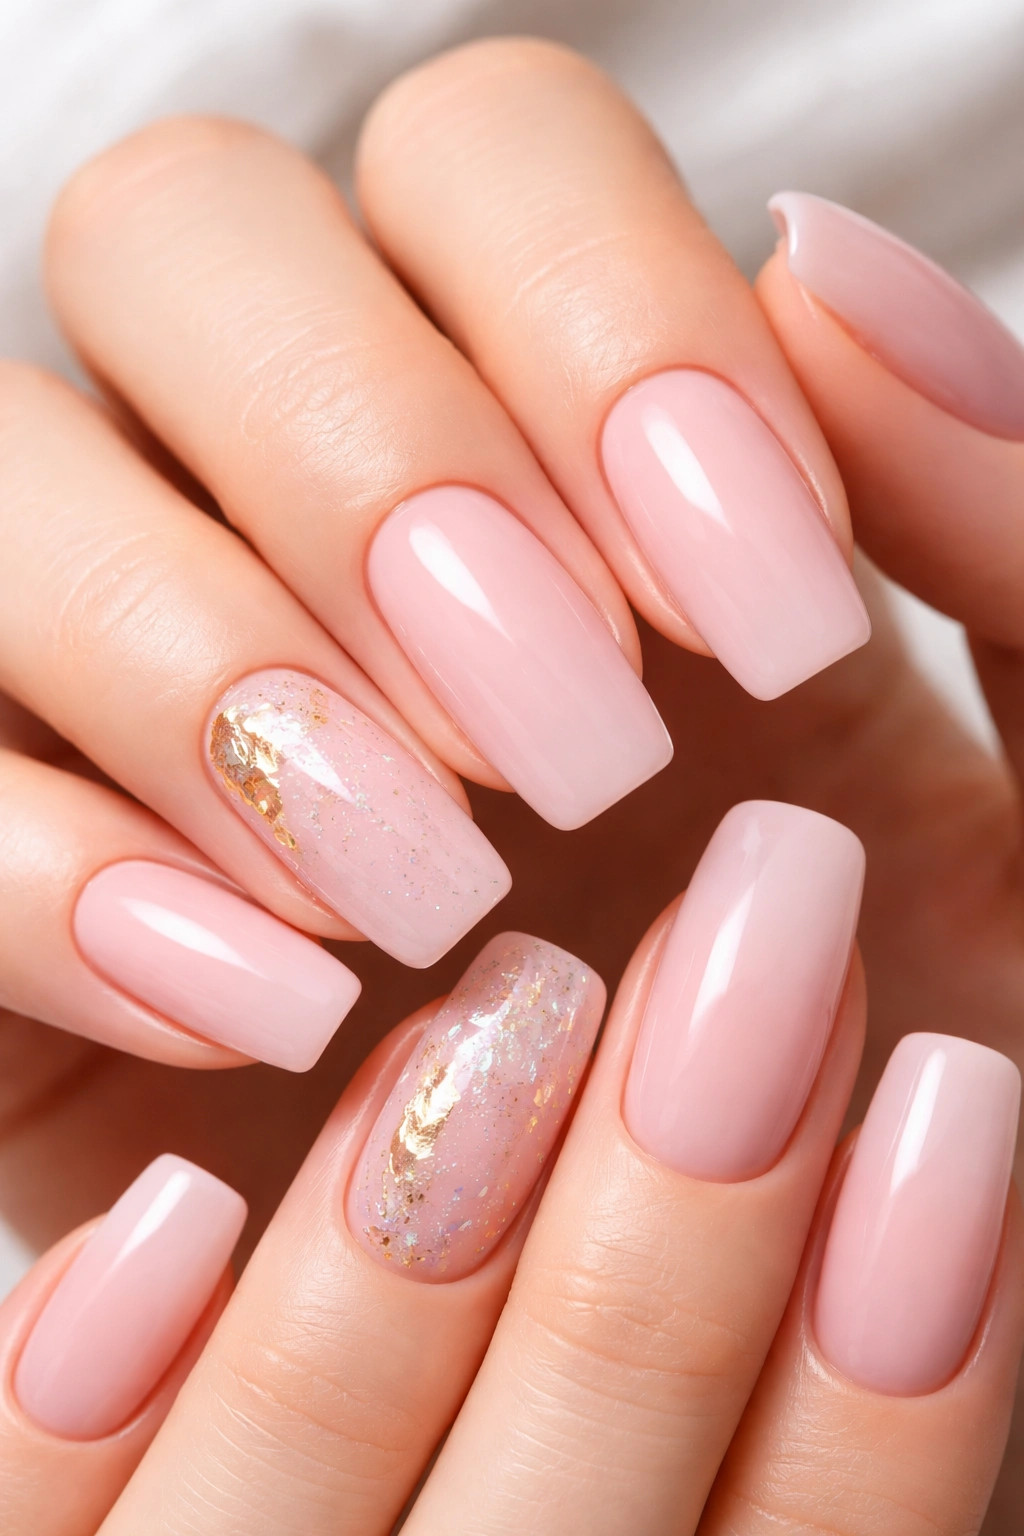
Foil accents create dimension and light-catching detail without the commitment of full glitter. On long rounded square nails, tiny foil fragments scattered across a blush pink base create a subtle luxury effect that reads as high-fashion nail art.
The Sophistication of Strategic Foil
Foil catches light differently than glitter—it’s more refined and less sparkly, which actually makes it feel more luxe. When used strategically on just one or two accent nails against a soft blush base, foil creates jewelry-like detail that suggests professional application rather than DIY. The softened corners of your rounded square nails prevent the design from feeling sharp or overly decorated.
Applying Foil for Maximum Impact
- Apply blush pink base with two coats on all nails
- On one or two accent nails (typically ring finger and pinky), apply a thin layer of foil adhesive polish or a sticky topcoat on the areas where you want foil to adhere
- Gently press small pieces of nail foil (available in various colors—rose gold, champagne, or holographic work beautifully) onto the sticky areas using a small tool or tweezers
- Pat the foil gently to ensure secure adhesion
- Seal everything with a clear topcoat that holds the foil in place
Pro tip: Buy a foil set specifically designed for nails rather than general craft foils—nail foils are thinner and more flexible, which means they adhere better and feel more refined on finished nails.
Final Thoughts
Long rounded square nails offer remarkable versatility because they balance visual impact with wearability—you get the length advantage without the maintenance headaches of sharper shapes, and the softened corners keep any design feeling elegant rather than aggressive. The designs that work best on this shape are those that respect the nail’s natural proportions rather than fighting against them. Whether you’re drawn to minimal elegance, bold color statements, or intricate detailing, rounded square nails provide the perfect foundation.
The most successful nail designs focus on quality execution rather than complexity. A perfectly applied nude with a single gold line will always outshine a busy, hastily applied design, and the softened corners of your rounded square shape actually enhance this principle—they reward clean, intentional design work. Consider your skin tone, your personal style, and the occasion when choosing which design to commit to, but know that with long rounded square nails, you’re already working with one of the most flattering and versatile shapes available. The foundation is strong; your job is simply choosing the design that makes you feel most like yourself.
