

There’s something about squoval nails that just works—that perfect sweet spot between the softness of an oval and the structure of a square. They’re modern without being edgy, elegant without demanding months of growth, and honestly? They’re incredibly forgiving to maintain. Now add a French ombre to that mix, and you’ve got something that feels sophisticated, blends beautifully from tip to base, and looks fresh every single time you look at your hands. The beauty of short squoval French ombre is that it reads polished and intentional without the commitment of long nails, and the gradient French tip creates this seamless visual flow that somehow makes your fingers look longer even at shorter lengths.
I’ve spent more time than I should admit scrolling through nail inspiration, testing different color combinations, and watching nail technicians work their magic with ombre techniques. What I’ve discovered is that the magic isn’t in having the longest nails or the fanciest salon—it’s in understanding how certain color transitions work with the squoval shape, which shades blend naturally, and which designs actually hold up in real life. The following ten designs are ones I keep coming back to, both because they photograph beautifully and because they’re genuinely wearable for everyday life.
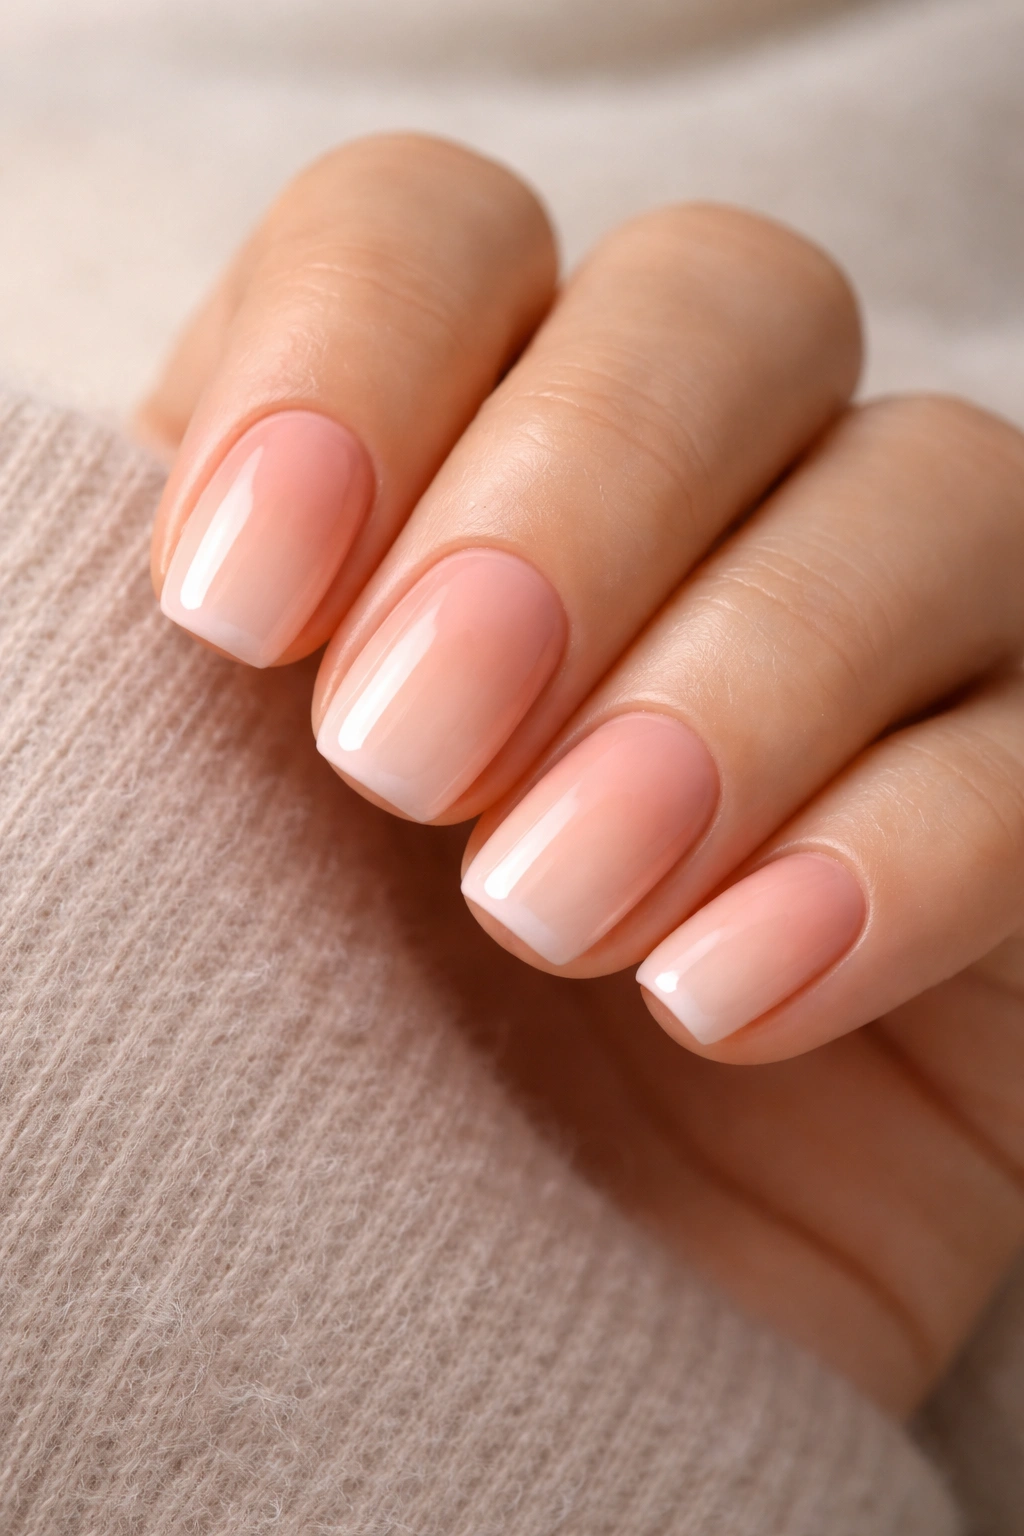
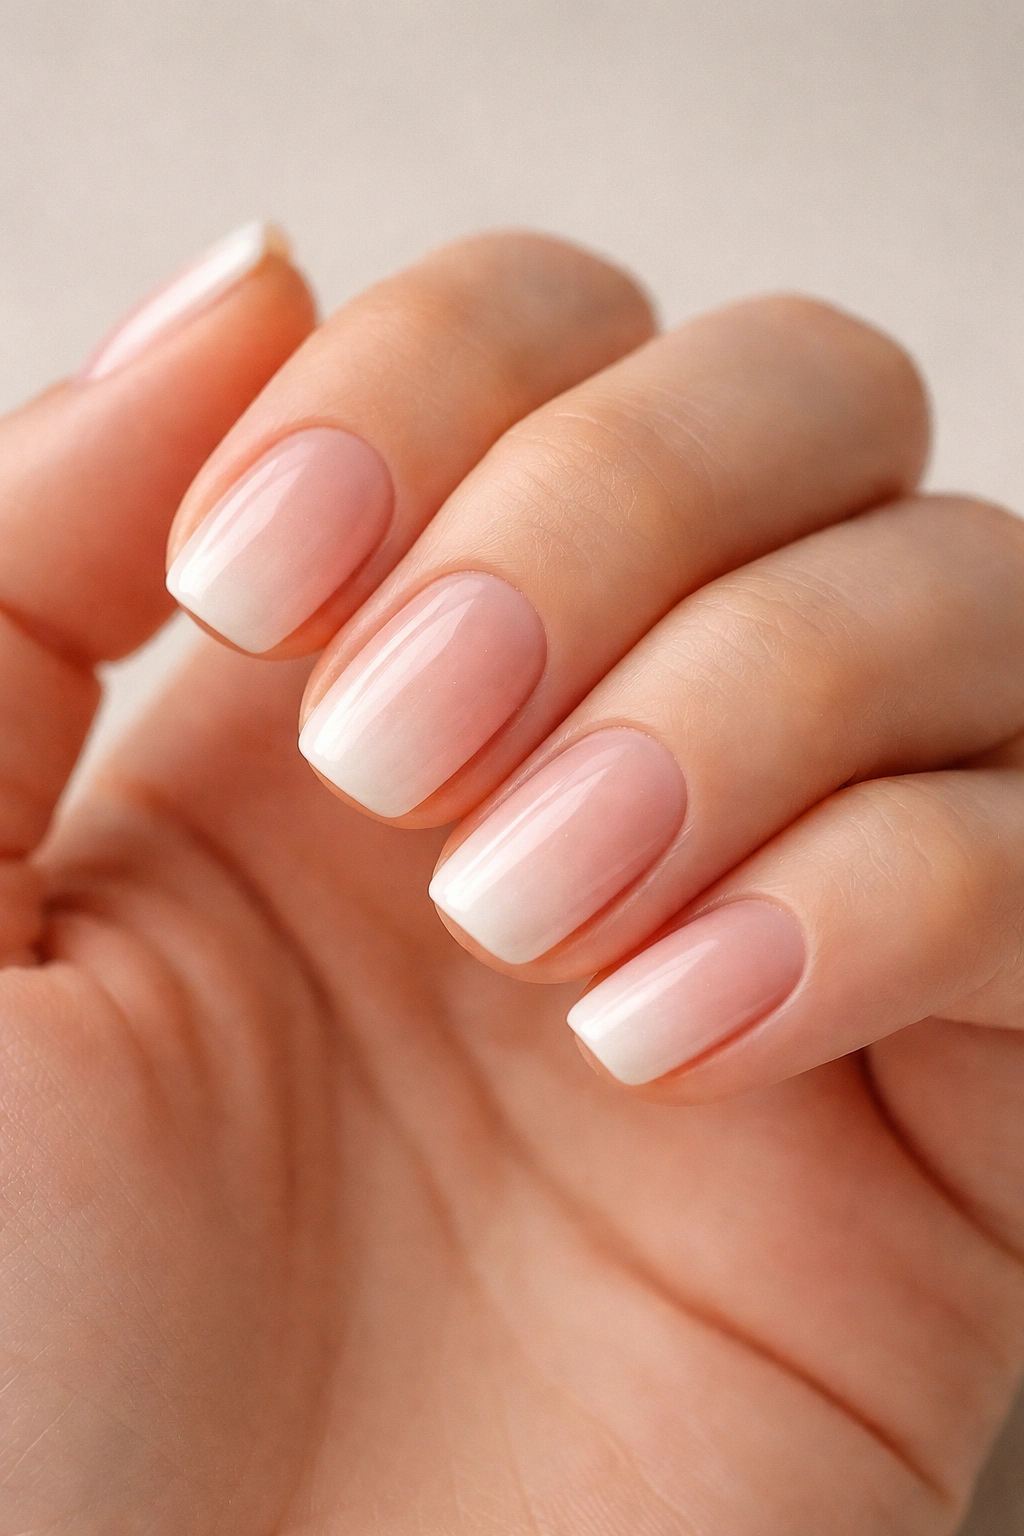
1. Soft Peachy Nude Gradient with Micro French Fade
Start with a base coat on clean, shaped nails, then apply a pale nude-pink shade across the entire nail. This should be your foundation—something close to your skin tone but with just a whisper of warmth. Once that’s dry, mix a slightly deeper peachy-nude shade (think the color of a peach with a hint of brown) and apply it only to the tips. The key here isn’t a sharp line but a feathered transition using a damp cosmetic sponge. Press gently, tap repeatedly with a light hand, and let the colors meld together where they meet.
The French ombre aspect comes from keeping the very tip a touch more saturated than the middle zone. A final coat of clear top coat brings everything together and creates that signature glossy finish. This design works because peachy tones are universally flattering and the gradient is so subtle that it reads more like a natural nail variation than a deliberate design. If you’re going for something professional that still feels intentional, this is your baseline.
Why This Works for Short Nails
Shorter nails benefit from horizontal color transitions because they elongate the nail visually. The gradual shift from light to slightly warmer keeps the eye moving across the nail rather than down its length, which tricks the eye into seeing more space.
Application Pro Tips
Use a sponging motion rather than stamping. Three to four light taps with the sponge beats one heavy press—you’ll build the color gradually and get a softer blend. Let each layer dry completely before going in with the next shade or you’ll muddy the colors.
2. Cool-Toned Ombré with Barely-There Shimmer French
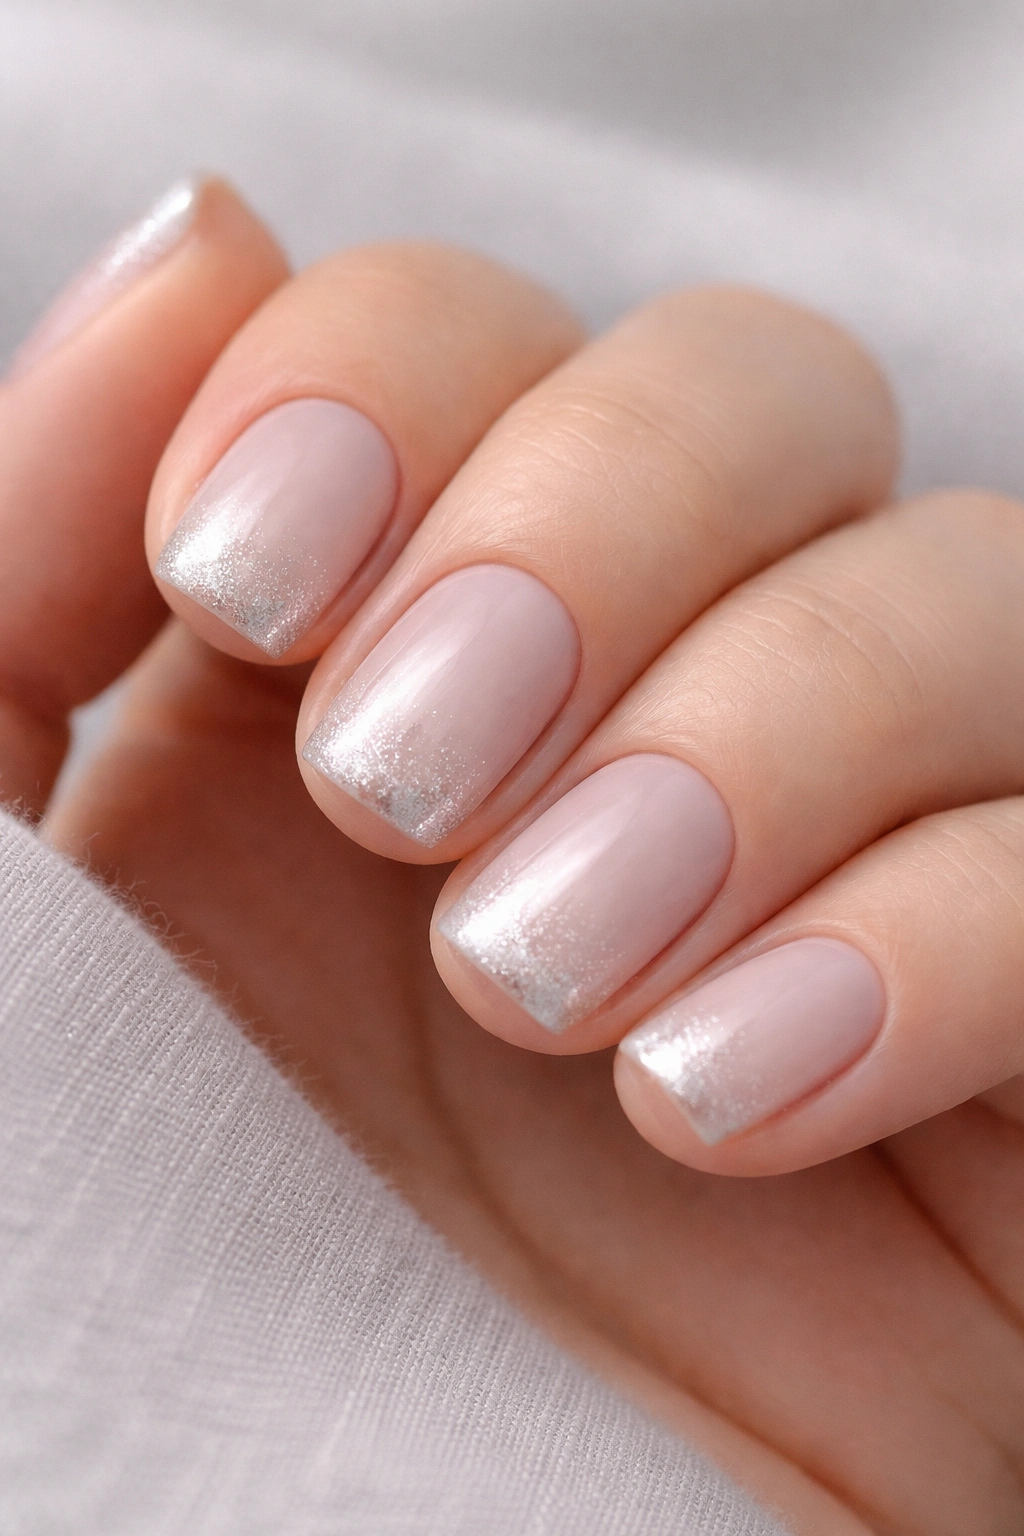
This design plays with the contrast between matte and shimmer. Begin with a cool, pale gray-pink base—the kind that makes warm-toned skin look even more radiant. The gray undertones keep it feeling modern and slightly edgy, which prevents it from reading as boring even though it’s relatively neutral.
Build your ombre using a slightly deeper gray-pink shade mixed with the tiniest amount of shimmer powder. When you sponge this onto the tips, the light-catching particles create this subtle sparkle effect that catches the eye without screaming for attention. The micro French element comes from keeping that shimmer concentrated right at the very edge of the nail, so only the tip catches the light when your hands are in motion.
This particular design works beautifully for people who love minimal jewelry or who want their nails to feel elegant rather than fun. It’s the kind of manicure that makes you feel put-together without requiring a style statement.
The Shimmer Question
Not all shimmer products work equally. Use a fine, high-quality shimmer dust mixed into your top coat rather than a thick glitter. The difference is night and day—proper shimmer particles are microscopic and catch light like a satin finish, while chunky glitter reads as costume-y.
Application Sequence
Build your base. Let it set. Sponge your deeper shade onto tips using a bouncing motion—not a rolling motion, which can disrupt the base color. Once that’s dry, mix your shimmer with a tiny amount of clear top coat and apply only to the very edge. Seal everything with a clean topcoat to create that glass-like finish.
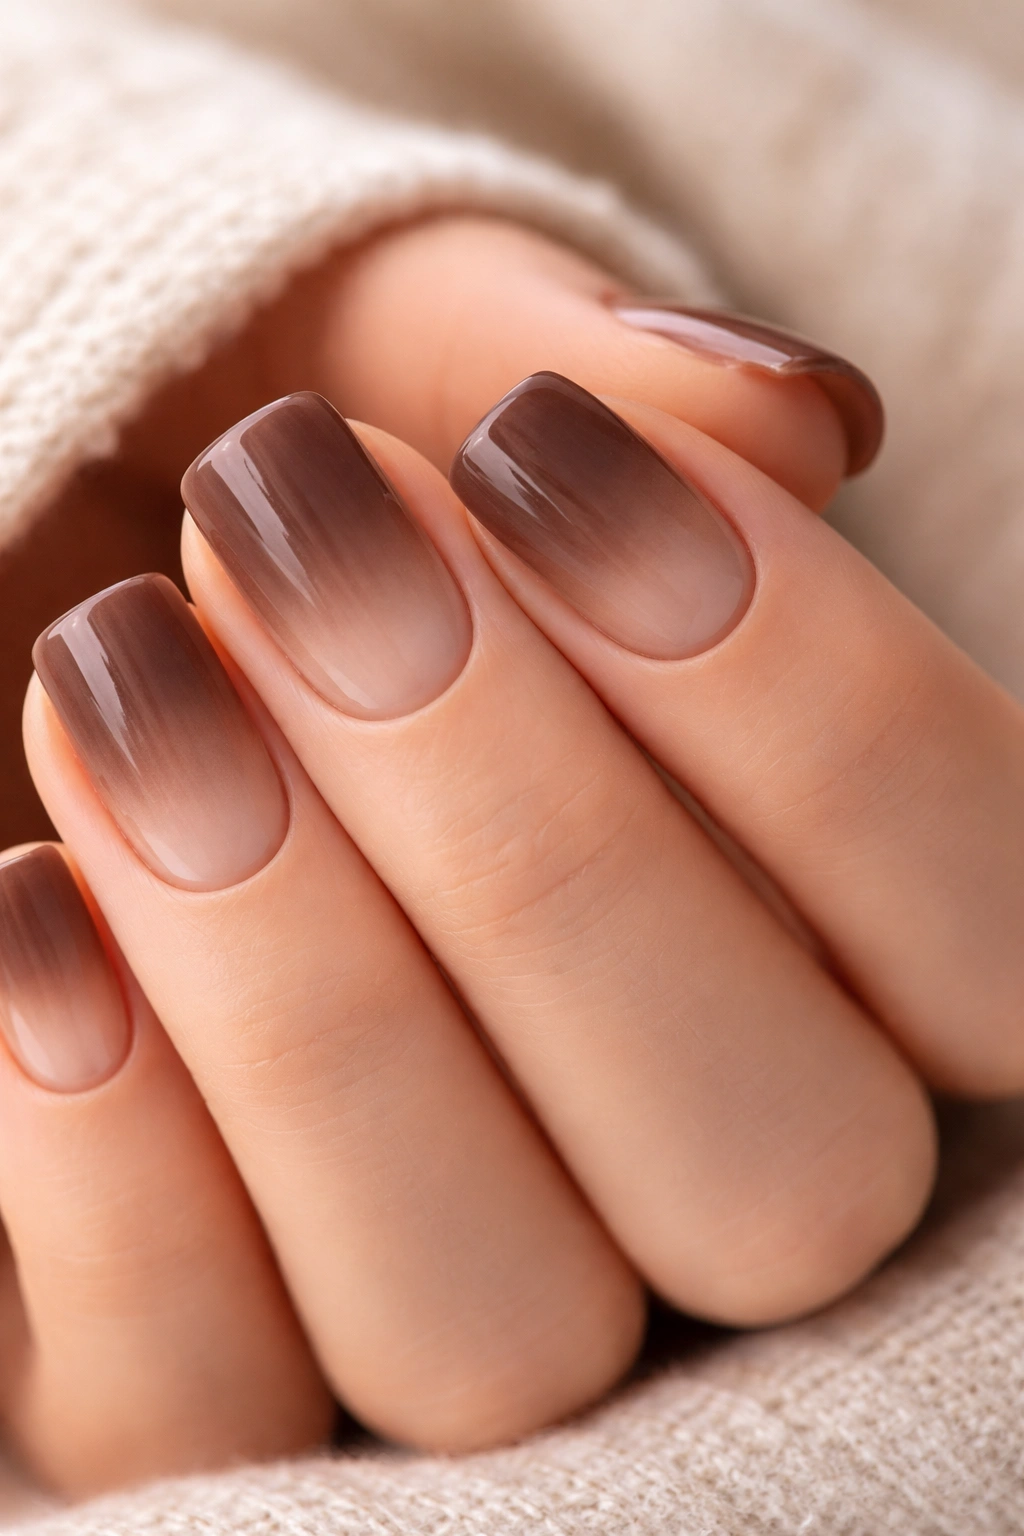
3. Warm Caramel to Deep Chocolate French Ombré
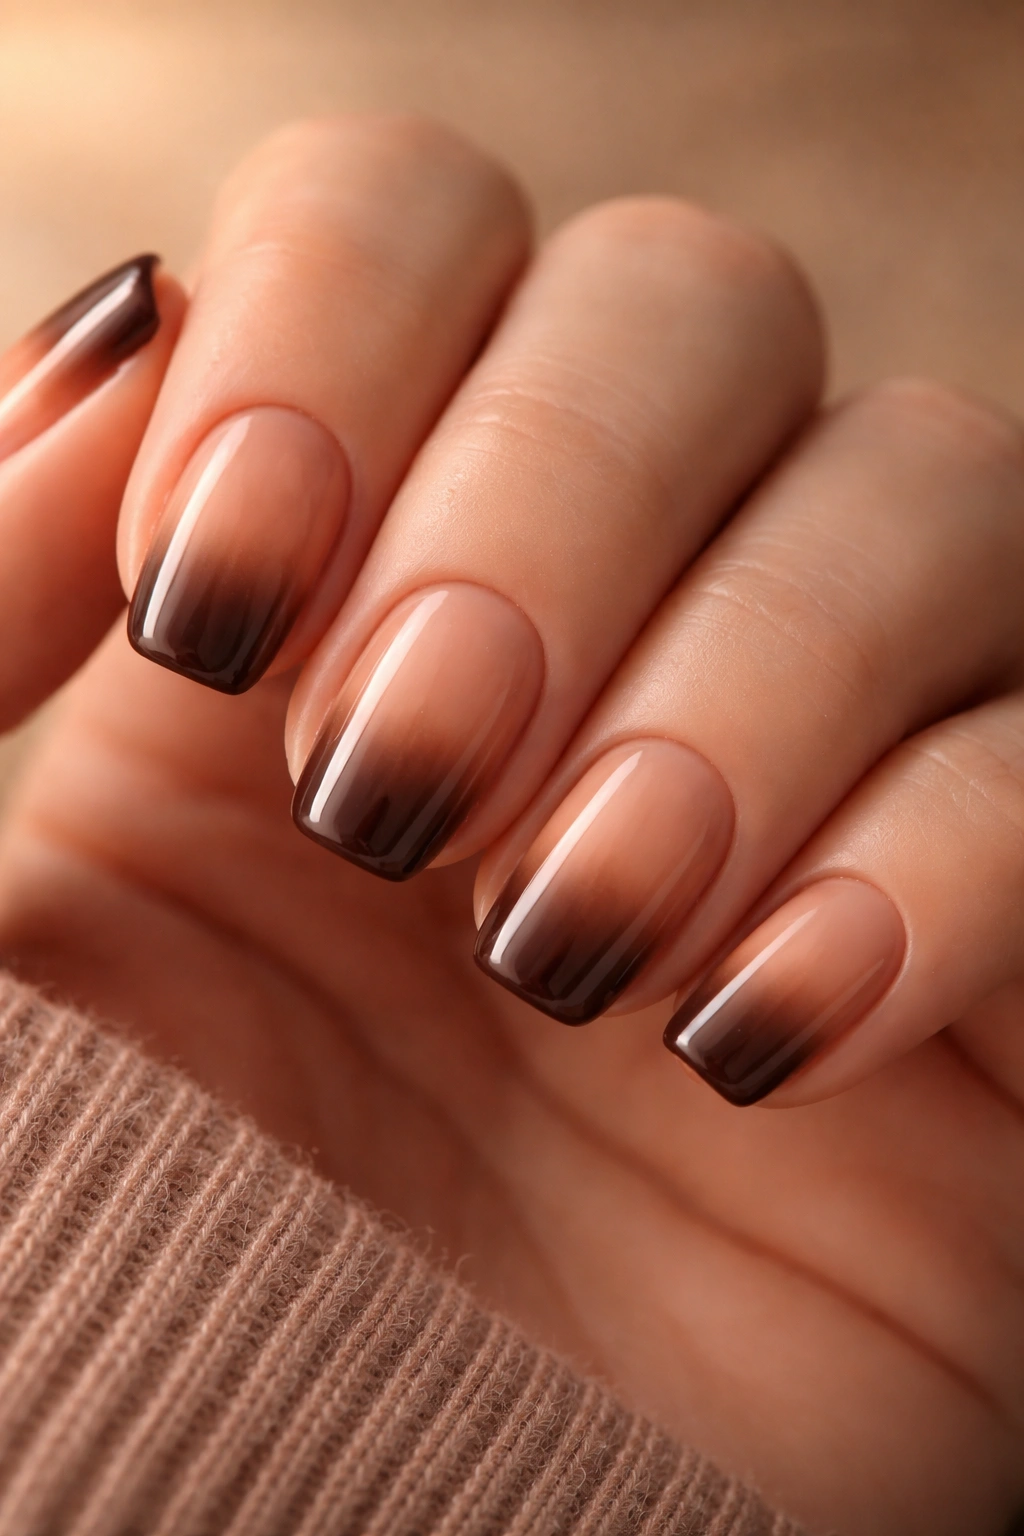
This is the design for people who love warmth and depth. Start with a caramel shade—the color of coffee with a generous pour of cream—as your base. It’s rich enough to feel intentional but light enough that it doesn’t visually shorten your nails. The sponging should be even and opaque by the second coat.
Your French ombre comes from gradually introducing a deep chocolate brown shade that’s only just barely darker than rich espresso. This shouldn’t feel like a stark line; it’s more of a shadowing effect. Sponge this color onto the tips using three to four light passes, building it gradually. You want the deepest concentration of brown in the very last millimeter of your nail, with the transition zone being a blended caramel-to-chocolate middle ground.
What makes this design sing is that both colors are in the same warm family, so the transition feels natural rather than designed. It reads like your nails caught in interesting light rather than like you deliberately created an ombre—which, of course, you did, but the best designs feel effortless.
Keeping Warm Tones Looking Fresh
Warm colors can read muddy if the shade balance is off. The trick is using true caramel (not orange-leaning) and true chocolate (not red-leaning) so they complement rather than clash. Test on a swatch first if you’re buying products you haven’t used before.
Why This Works on Short Nails
Caramel and chocolate together create the illusion of dimension, which makes nails feel more three-dimensional even at shorter lengths. The color progression draws the eye across the nail in a way that’s visually satisfying.
4. Pale Pink to Rose Gold French with Metallic Edge
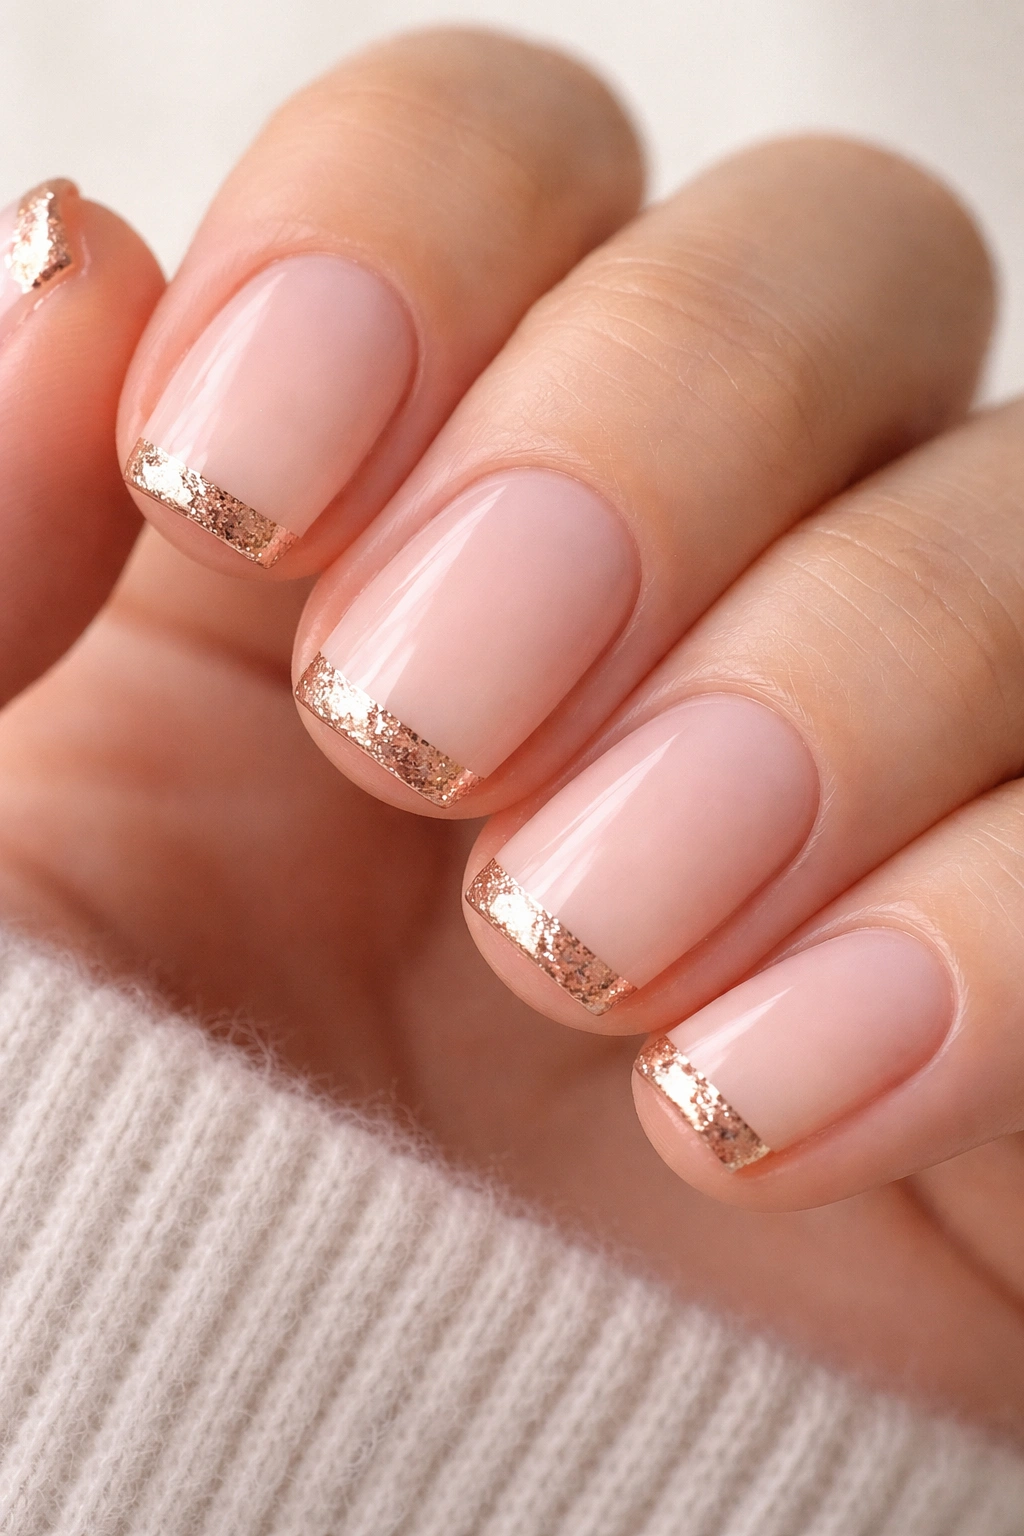
Begin with a barely-there pale pink base—so light it’s almost white, but with just enough pink pigment to feel intentional rather than naked. This shade should feel like the inside of a seashell. Once your base is set, create your ombre using a soft rose-pink that’s maybe two shades deeper. Sponge this onto the tips as your middle gradient zone.
The French element here comes from adding a genuine rose gold metallic accent at the very tip. This isn’t shimmer—it’s actual metallic color. You can achieve this with a rose gold chrome powder, a rose gold foil, or a rose gold gel. Apply this only to the last two millimeters of the nail where your ombre is darkest. It creates this beautiful metal-catching-light moment that makes the nail feel dimensional and intentional.
The reason this design works is that rose gold bridges the gap between warm and cool tones, so it complements almost any skin undertone. On short nails, that metallic edge acts like a visual anchor point.
The Metallic Finish
If you’re using a chrome powder, apply a thin base coat of the rose-pink shade, then dust the powder onto the wet topcoat before it sets. Press gently with a soft brush. If you’re using foil, lay it carefully onto a tacky base coat and seal it immediately with topcoat. The foil method creates sharper definition; the powder method is softer and more gradient-friendly.
Maintenance Reality
Metallic finishes show fingerprints. Embrace it as part of the design—it means the finish is working and catching light. Buff gently if smudges bother you, but know that some marking is inevitable with this finish.
5. Lavender to Mauve Ombré with Soft French Fade
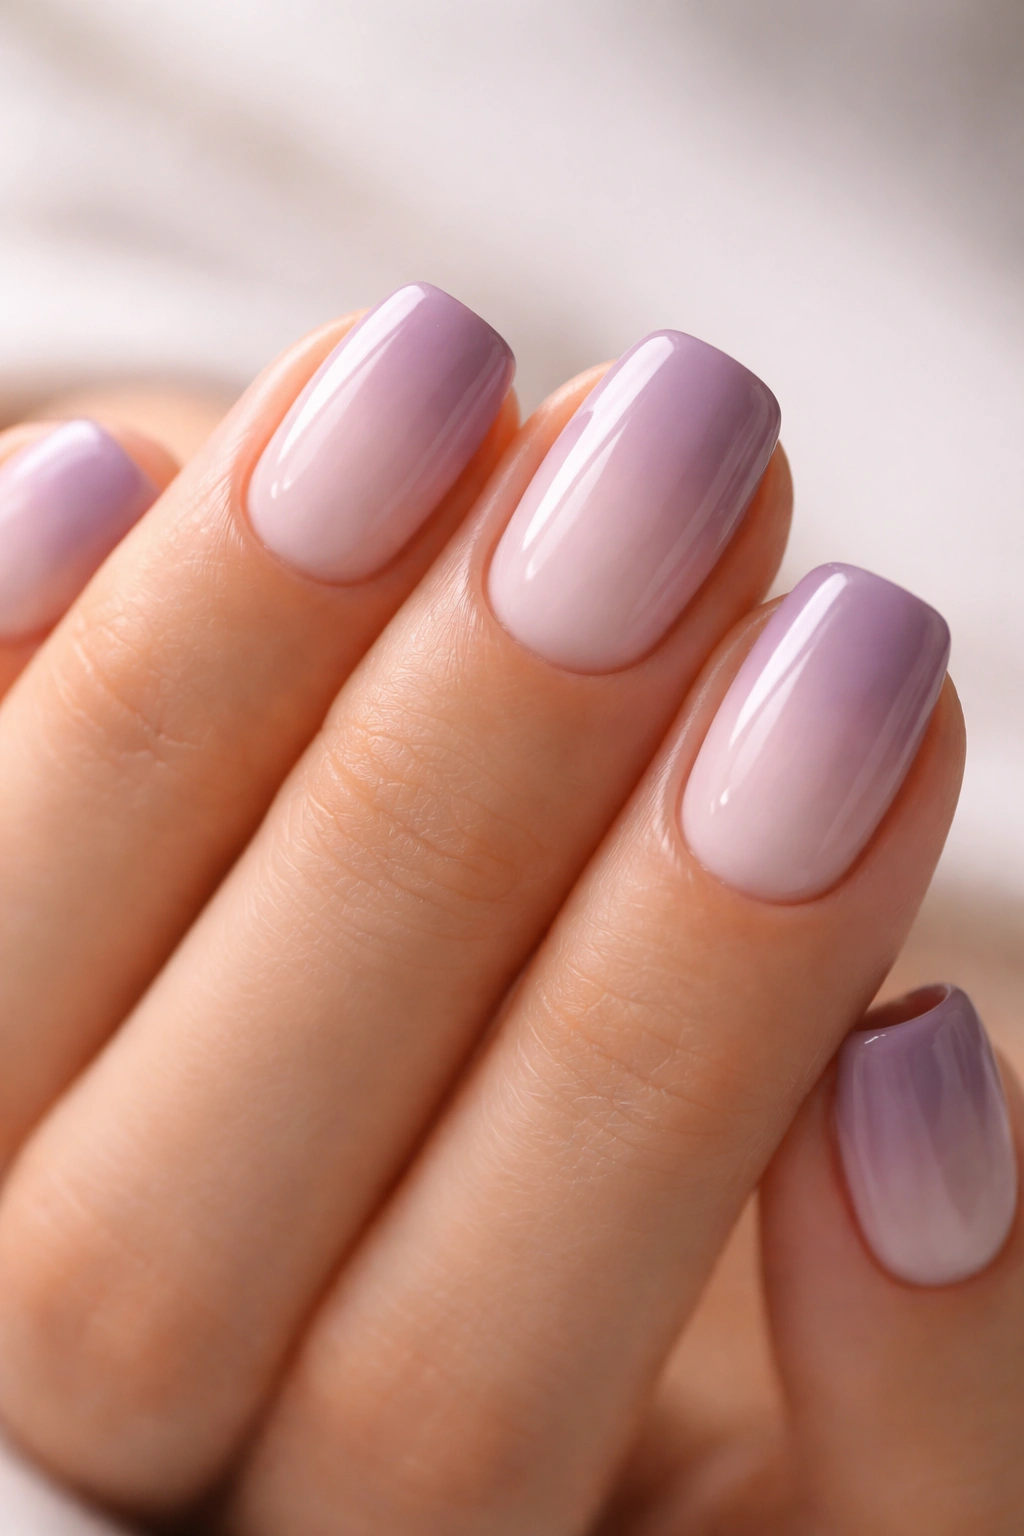
This design is pure softness. Start with a pale lavender base—not blue-leaning, but genuinely purple-tinged. Lavender reads as calming and slightly romantic without being costume-y. Once your base is opaque, introduce a deeper mauve shade—richer and slightly more muted than your starting point. The transition should be seamless enough that someone glancing at your hands might not immediately clock it as deliberate.
The French element isn’t a sharp line or a metallic accent; it’s simply that the very tip is noticeably more saturated mauve while the rest of the nail transitions gradually from lavender to that deeper shade. Sponge using the same light tapping method, building in layers rather than trying to accomplish everything in one pass.
Lavender-to-mauve works because both shades are cool-toned and sophisticated. They don’t read as trendy or seasonal—they feel timeless. On short nails, this gradient creates visual interest without the business of a highly saturated design.
Lavender Shade Selection
There’s a difference between lavender, lilac, and purple. For short nails, true lavender (with more gray undertone than blue) photographs best and feels most wearable. Lilac reads younger; purple reads heavier on shorter nail beds.
The Sponging Technique
Dab your sponge into the mauve shade. Instead of pressing it on the tip, dab it about a third of the way down the nail first, creating your gradient zone. Then blend upward into the lavender and downward toward the tip. This inside-out approach gives you more control over where colors are darkest.
6. Warm Taupe to Chocolate with Nude French Gradient
Taupe is having a moment, and for good reason—it’s neutral but with enough personality that it doesn’t disappear on your nails. Start with a warm taupe base, one that leans slightly peachy rather than gray. This is your foundation, and it should be completely opaque and even.
Layer a deeper chocolate-brown shade onto the tips using your sponge, but here’s the twist: don’t stop at an obvious ombre line. Let the chocolate extend almost to the middle of the nail, creating a more pronounced gradient than some of the other designs. Then, once this is dry, add the French element by applying a barely-there nude shade—something between your taupe and the chocolate—to just the very tip. This creates a three-zone gradient: light taupe at the base, deeper chocolate in the middle, and that subtle nude edge at the tip.
It sounds complicated, but it’s actually just building layers. The nude creates this beautiful soft edge that feels refined without being obvious.
Why Three Zones Work
Rather than fighting against the natural nail shape, three-zone gradients work with it. They create visual complexity on short nails without making them look busy. The eye has something to follow through the gradient without getting bored.
Execution Details
Make sure your first two layers are completely dry before adding the third. Wet layers on top of wet layers create muddy colors rather than distinct zones. Use a fresh cosmetic sponge for each color application or rinse your sponge between colors to avoid mixing shades.
7. Soft Coral to Peach with Barely Pink French
Coral can read summery or cheap depending on execution. The trick is choosing a soft coral—more peachy-coral than true coral—and keeping the gradient subtle. Start with a warm peachy base that’s almost cream-colored. This is your anchor. It should be fully opaque.
Introduce a soft coral shade that’s just noticeably warmer and slightly more saturated than your base. Sponge this onto the tips, building gradually. You want the deepest concentration of coral right at the nail edge, with a beautiful blended transition zone. The French element comes from a final micro-application of barely pink—something between your peach base and coral tip—applied only to the very last millimeter.
This design works because it’s warm and alive without being loud. On shorter nails, these peachy-coral-pink family shades create a cohesive look that feels intentional rather than random.
Coral That Works
Avoid orange-leaning corals on short nails—they can read costume-y. Stick with peachy-coral shades that have more pink than orange in the undertone. If you’re unsure, look for corals labeled “coral blush” or “peachy coral” rather than just “coral.”
The Barely Pink Top Layer
This top layer is optional, but it transforms the design from “nice ombre” to “thoughtfully layered.” It’s so subtle that most people won’t consciously notice it—they’ll just know the nail looks refined.
8. Cream Base with Champagne and Nude Gold French Progression
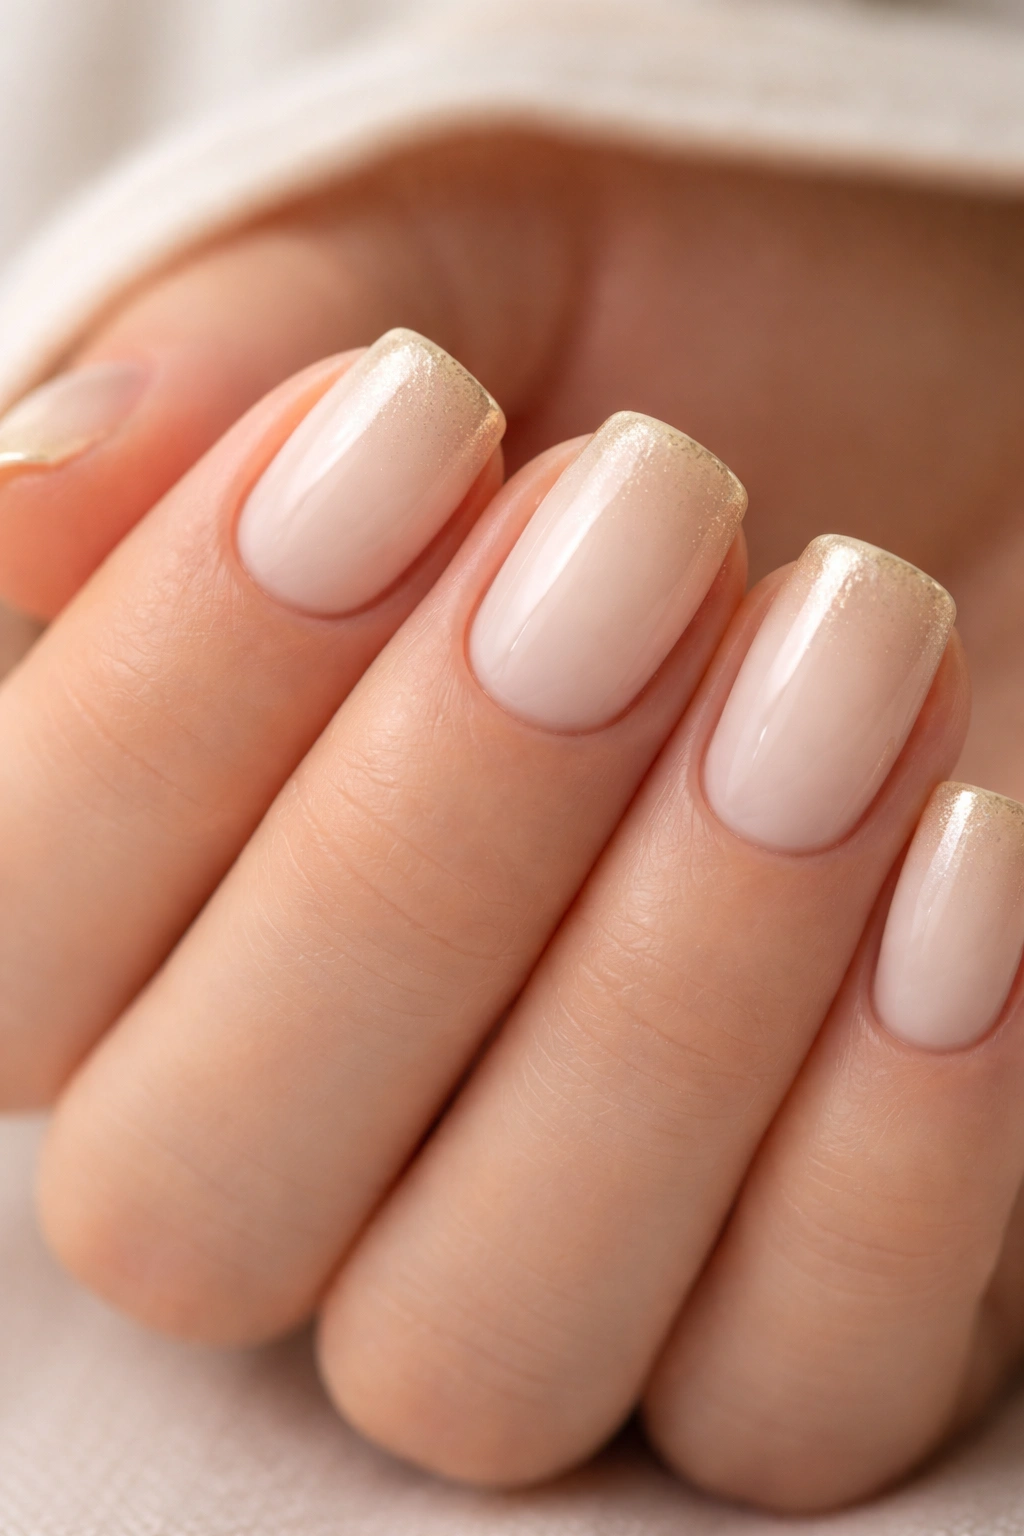
This is the design for everyone who loves elegant but subtle nail art. Begin with a creamy off-white base—not stark white, but a warm cream that feels slightly soft. Once that’s set, sponge a soft champagne shade (barely-there gold) onto the tips, building it gradually. The champagne should be pale enough that it reads as a tint rather than a color.
The French element comes from a final layer of nude gold applied only to the very tip. This is where your light-catching moments happen—the gold catches the light just enough to create dimension without any sparkle or flash. The result is nails that feel luminous rather than decorated.
What makes this work on short nails is restraint. Nothing here is loud. Everything builds on what came before it. The eye moves from cream to champagne to gold in a natural progression that feels like it happened accidentally rather than intentionally—which is the hallmark of great design.
Champagne Shade Sources
You can find champagne shades in regular polishes, but gel formulas tend to capture that light-catching quality better. If you’re using regular polish, choose one with a subtle shimmer rather than flat matte.
Application Precision
These subtle shades require even application because any streaks or unevenness will be visible. Use thin coats and build gradually. Three thin coats of base is better than two thick ones when you’re working with subtle colors.
9. Blush Pink to Berry Wine French Ombré with Gloss Finish
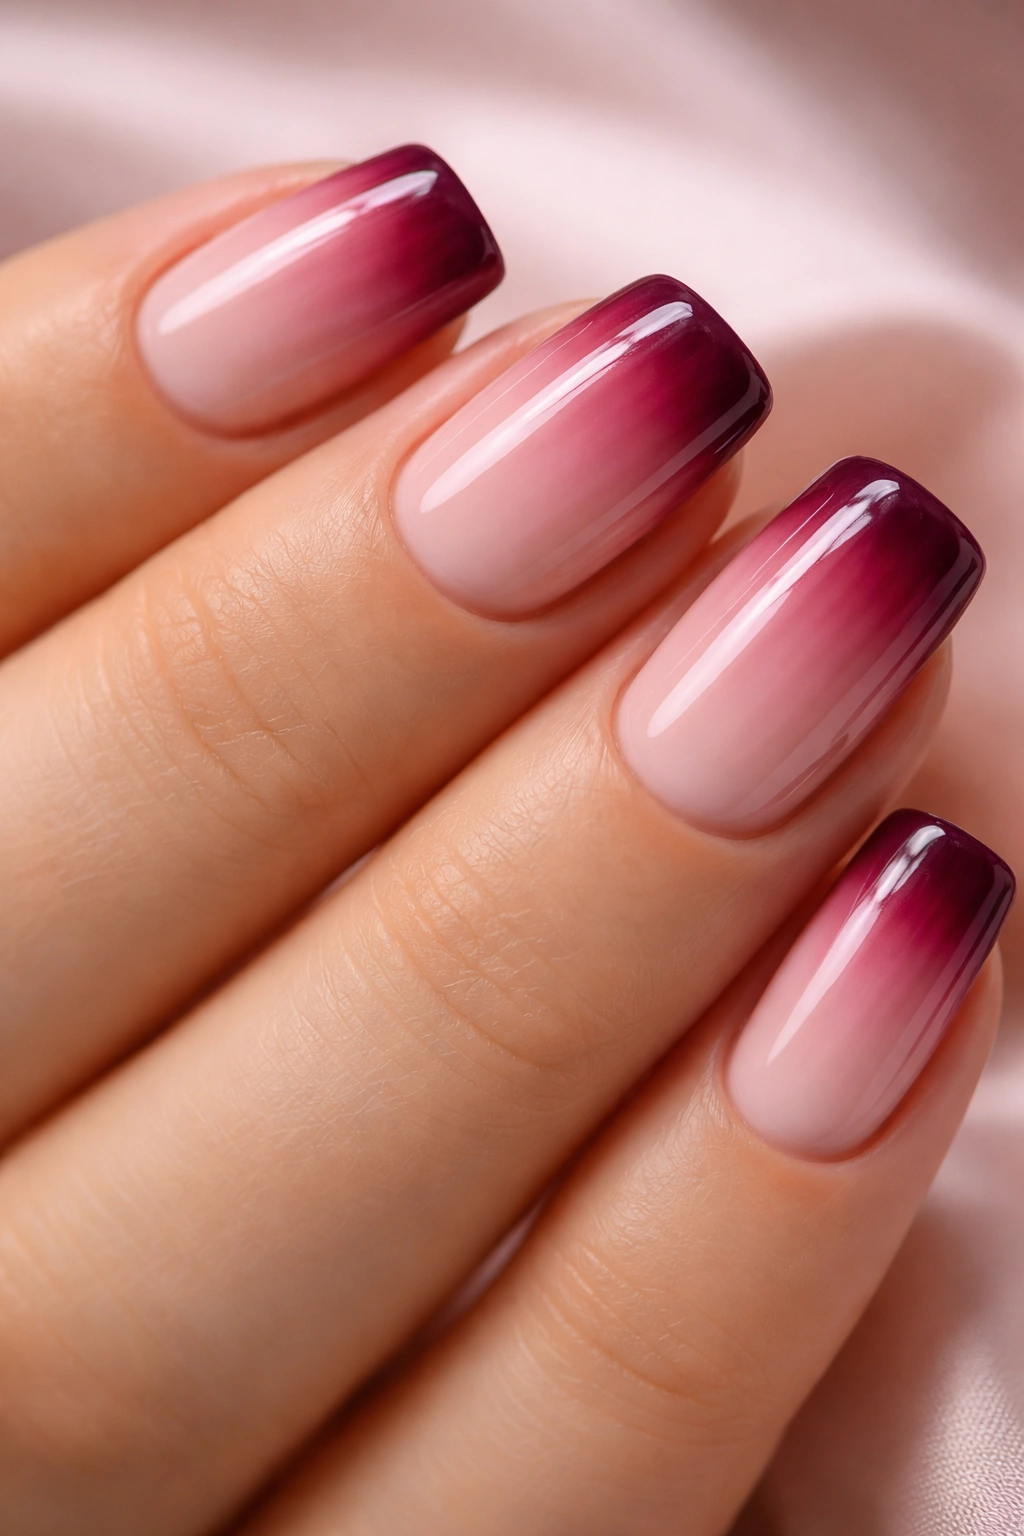
Start with a blush pink base—soft, romantic, and universally flattering. This shade should feel like the inside of a flower petal. Keep your base completely even and fully opaque. Once it’s set, introduce a berry wine shade that’s significantly deeper and slightly more saturated. Wine shades have enough depth that even on short nails, they create real visual impact.
Sponge this deeper shade onto the tips, building from the very edge inward. You want the wine to be most concentrated at the tip, with a beautiful blended transition zone where it meets the blush pink. The contrast between the soft pink and deep wine creates drama while the gradient transition keeps it feeling refined rather than harsh.
After your ombre is complete and fully set, apply a high-gloss topcoat. The glossiness elevates this design from pretty to polished. That reflection bounces off the curved squoval shape beautifully, making the nail feel dimensional.
Berry Wine for Every Skin Tone
Wine shades work on all skin tones—warm-leaning berries for warm skin, cool-leaning wines for cool skin. The key is finding a wine shade that feels rich rather than muddy. If it looks burgundy or brownish in the bottle, it’ll look muddy on your nails.
The Gloss Component
This is one design where gloss makes a genuine difference. It’s not just about shine—the reflection off the curved nail shape helps sell the gradient dimension. Matte topcoat would flatten the effect.
10. Soft Gray-Green to Deep Pine with Barely-There Jade French
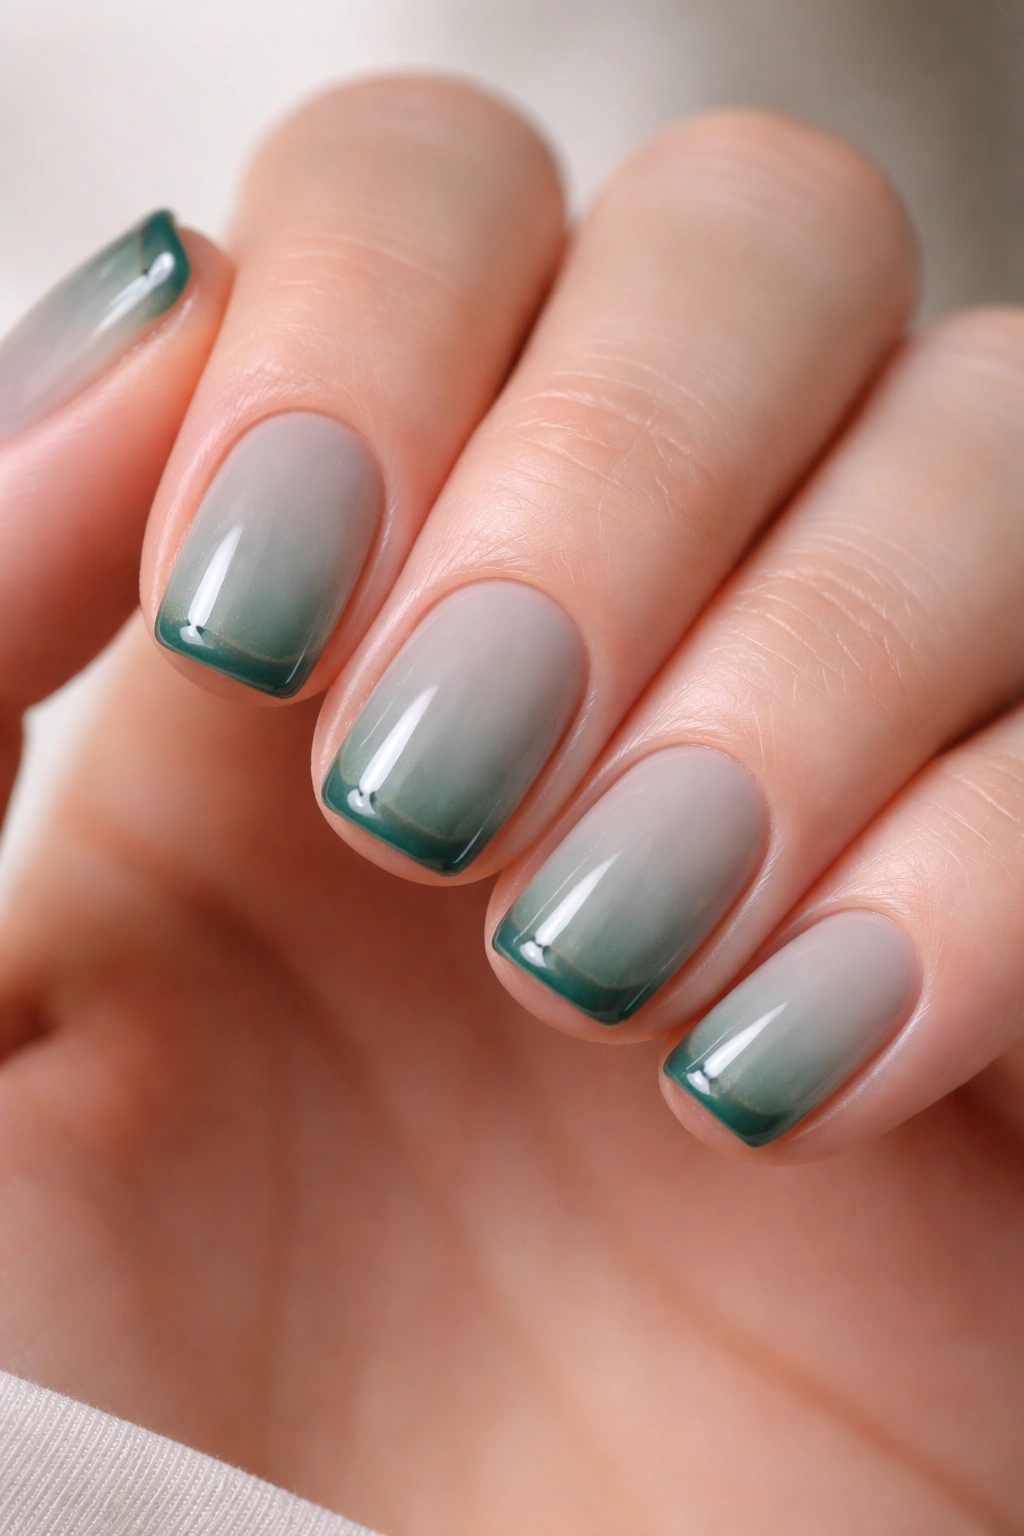
This design is for people who want something unexpected but wearable. Start with a soft gray-green base—not teal, not sage, but genuinely gray-green. It’s sophisticated in a way that feels modern and slightly artistic. The base should be fully opaque and evenly applied.
Introduce a deeper pine shade (think dark evergreen) onto the tips using your sponge. This shade is rich enough to feel intentional without being dark enough to overwhelm short nails. Build the gradient gradually, creating that blended transition zone. The French element comes from a barely-there jade shade—something between your gray-green base and pine tip—applied only to the very edge.
What makes this work is the entire color palette. Gray-green-pine-jade are all connected through their cool, slightly muted undertones. They create visual interest without clashing. On short nails, this color story reads as curated and thoughtful.
Gray-Green Placement in Your Collection
Gray-green is subtle, which means it photographs differently in different light. In natural light, it looks sophisticated. In warm indoor light, it looks slightly different but still wearable. If you’re choosing this shade, test it in the lighting where you’ll see your nails most.
Finding These Specific Shades
Gray-green is less common than you’d think. Look for shades marketed as “sage gray,” “misty green,” or “greige-green” rather than searching for “gray-green” directly. Pine shades are more common and easier to find—any dark forest green works beautifully.
Final Thoughts
Short squoval French ombre nails hit that perfect balance between “I take care of myself” and “but I’m not precious about it.” They’re low-maintenance compared to longer nails, the ombre technique is genuinely doable at home with practice, and there’s a shade combination for literally every mood and skin tone. The French element—whether that’s a traditional tip, a metallic edge, a subtle nude layer, or just a concentration of color—gives these designs dimension that reads as sophisticated rather than trendy. The squoval shape itself is forgiving; it works with your natural nail shape rather than demanding a specific growth pattern or professional shaping every two weeks. Start with whatever color combination speaks to you, practice your sponging technique with patience, and remember that the most beautiful manicure is one you actually enjoy looking at.
