

Red round acrylic nails are the ultimate statement of elegance and boldness. There’s something undeniably powerful about the combination of a rich red shade, perfectly rounded edges, and a longer length that catches light with every gesture. Whether you’re drawn to classic minimalism or intricate nail art, red works as the perfect base—it’s versatile enough to adapt to any aesthetic while bold enough to make an immediate impression. The round shape, in particular, suits longer nails beautifully, creating a sophisticated silhouette that feels polished without leaning into sharp or edgy territory. If you’ve been considering a fresh manicure and want to explore what’s possible with red on an extended nail bed, you’re in for some genuinely gorgeous inspiration.
The beauty of longer acrylic nails lies in the canvas they provide. A longer length gives you room to play with dimension, gradient, glitter placement, and intricate details that would feel cramped on shorter nails. Round acrylics add a softness that longer lengths sometimes lack when they’re filed into coffin or almond shapes—there’s a timeless quality to the combination that translates across seasons, occasions, and personal styles. Red, too, has this remarkable staying power. It never feels dated, it photographs beautifully, and it works equally well for boardroom polish or evening glamour. The following designs showcase ten different approaches to red round acrylics on longer sets, each bringing its own personality and technique.
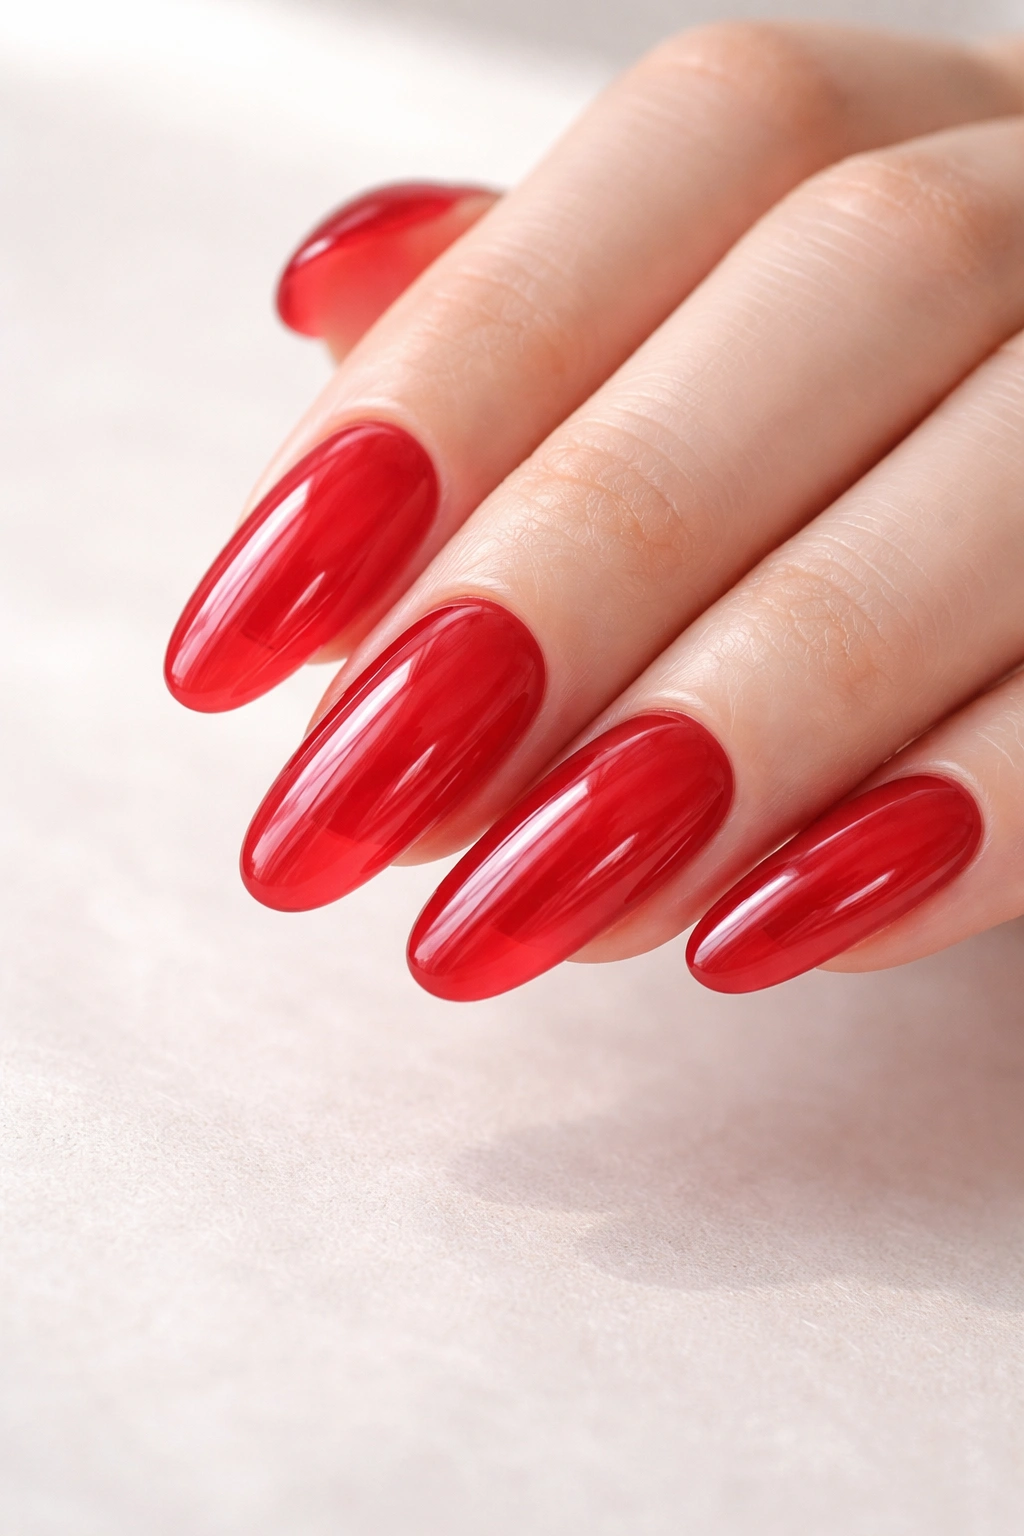
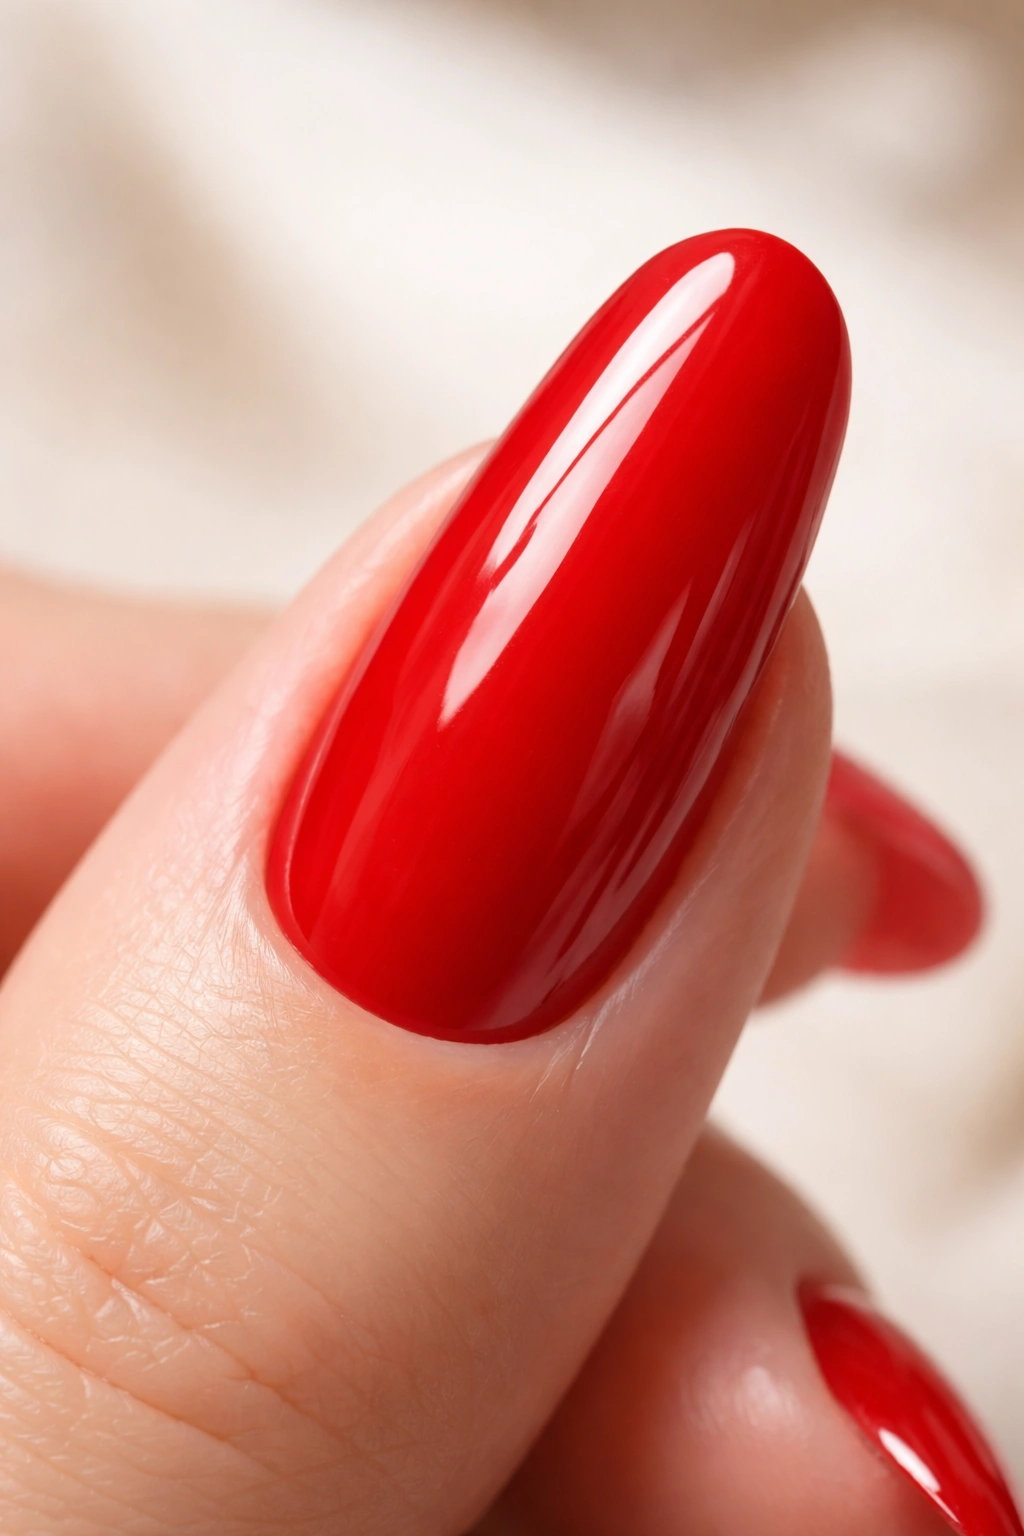
1. Classic Glossy Red with High Shine
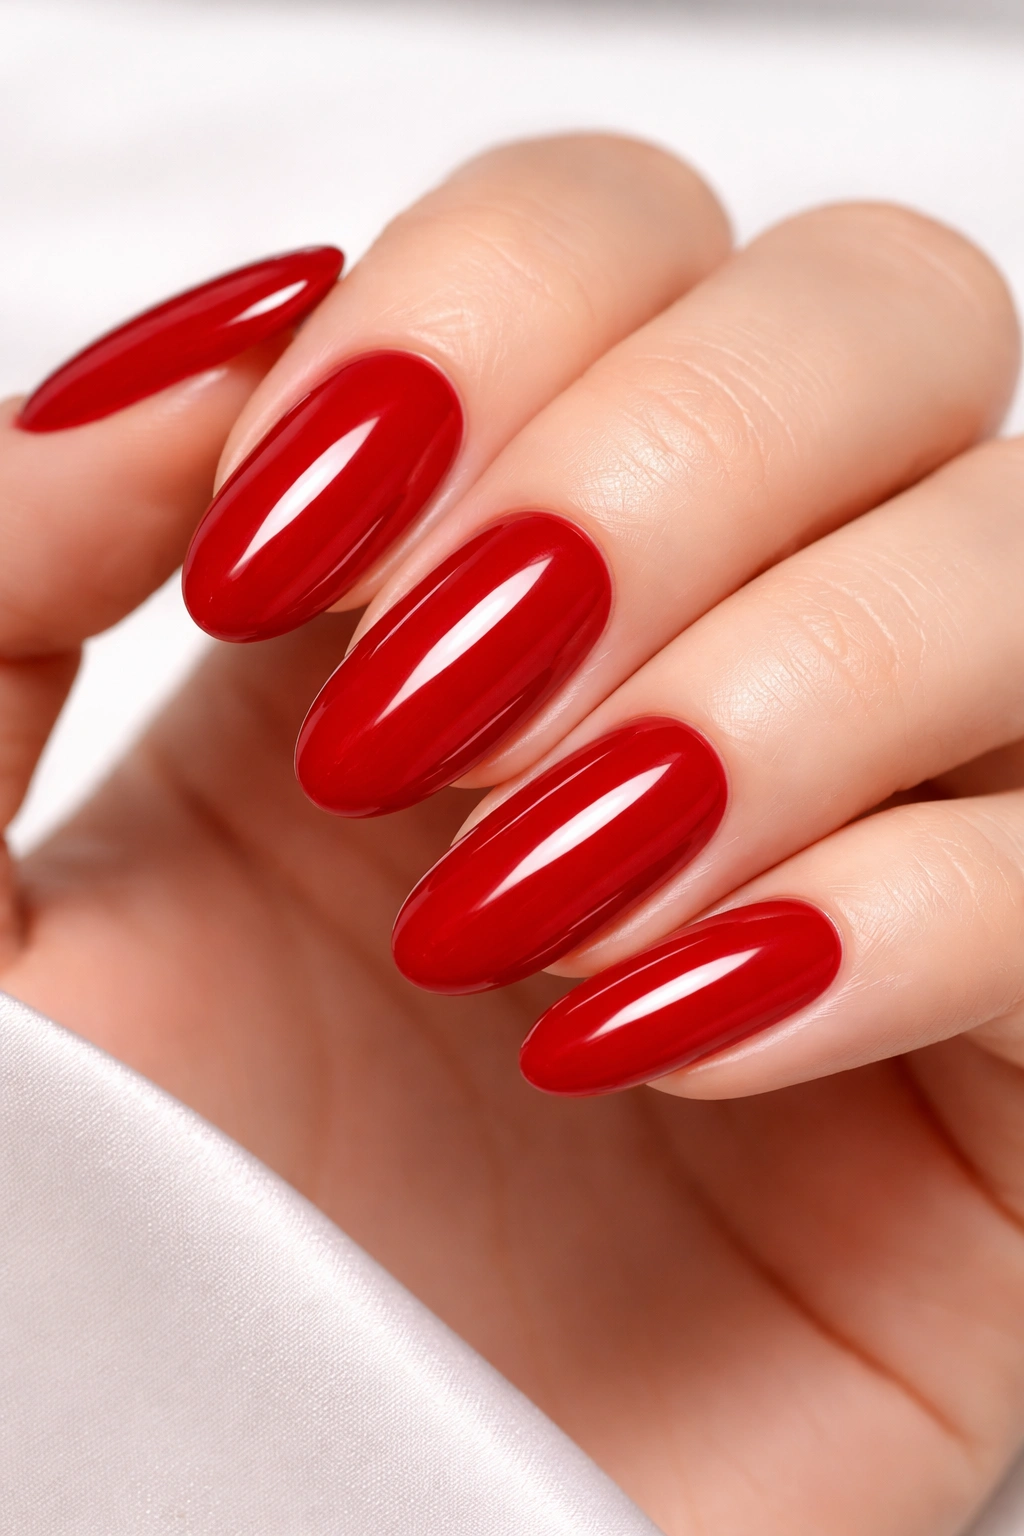
There’s a reason the classic glossy red has remained the gold standard of manicure design for decades—when executed perfectly, it’s absolutely unbeatable. A deep, true red with a flawless high-gloss finish on longer round acrylics creates an understated luxe look that reads as intentional and refined. The key lies in the quality of the polish and the precision of application; even a single imperfection becomes visible when you’re working with pure shine and a bold color.
Why This Design Endures
The glossy red works because it doesn’t try to do too much. On longer nails, a clean, polished base lets the shape and color speak for themselves. The shine amplifies the depth of the red, making each nail appear luminous and well-manicured. This is the design that works everywhere—client meetings, date nights, everyday wear—without requiring explanation or adjustment for context.
How to Nail the Perfect Finish
- Use a high-quality gel base coat to prevent staining and ensure a smooth foundation for color
- Apply red in thin, even layers rather than one thick coat; two thin coats provide better opacity and finish than one heavy layer
- A professional-grade glossy top coat makes all the difference—invest in one that’s designed for long-lasting shine and durability
- Keep cuticles pushed back and skin around the nail clean for a refined appearance that makes the color pop
- Schedule maintenance every two to three weeks to keep the shine pristine as the nail grows out
Pro tip: If your red chips easily, the issue is usually the base coat or top coat application, not the red itself—don’t blame the color for a technique problem.
2. Matte Red with Chrome Metallic Accent
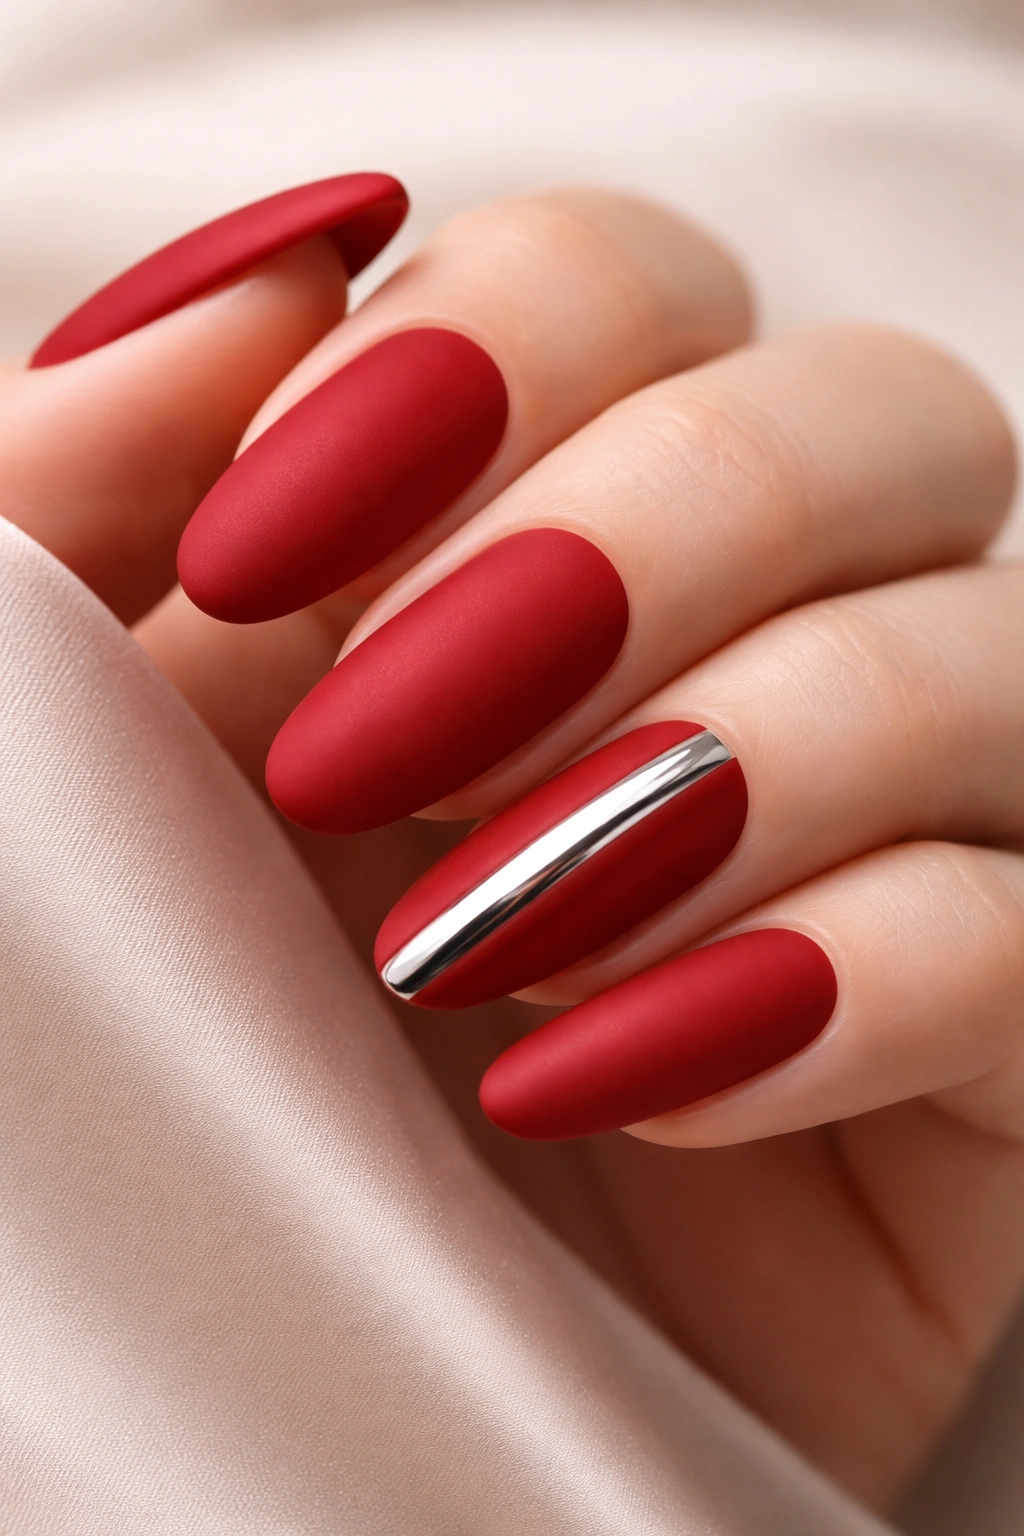
Matte finishes transform red into something more sophisticated and modern, stripping away the traditional glamour and replacing it with an understated coolness. When you add chrome metallic accents—perhaps on the ring finger or as a stripe detail—you create contrast that makes both finishes more striking. On longer round nails, the matte-and-metallic combination feels current without being trendy.
Why Matte Changes Everything
Matte red reads completely differently than glossy red, even when it’s the exact same shade. The finish removes shine and creates a velvety texture that feels more fashion-forward and editorial. Adding metallic elements breaks up the uniformity and introduces light in unexpected places, making the overall design feel intentional and curated rather than simply polished.
Design Options and Placement
- Run the chrome metallic as a thin vertical stripe down the center of one or two accent nails for an architectural look
- Create a horizontal metallic band across the middle or tip of the nail for a modern geometric approach
- Use chrome as a full accent nail (like your ring finger) to draw attention to specific fingers while keeping others matte
- Apply metallic powder to just the tip, blending it into matte for a subtle gradient effect
- Try chrome on the edge of the nail for an understated detail that catches light when your hands are in motion
Worth knowing: Matte acrylics require more careful daily maintenance since they show fingerprints and dust more readily than glossy finishes.
3. Deep Burgundy Ombre Red
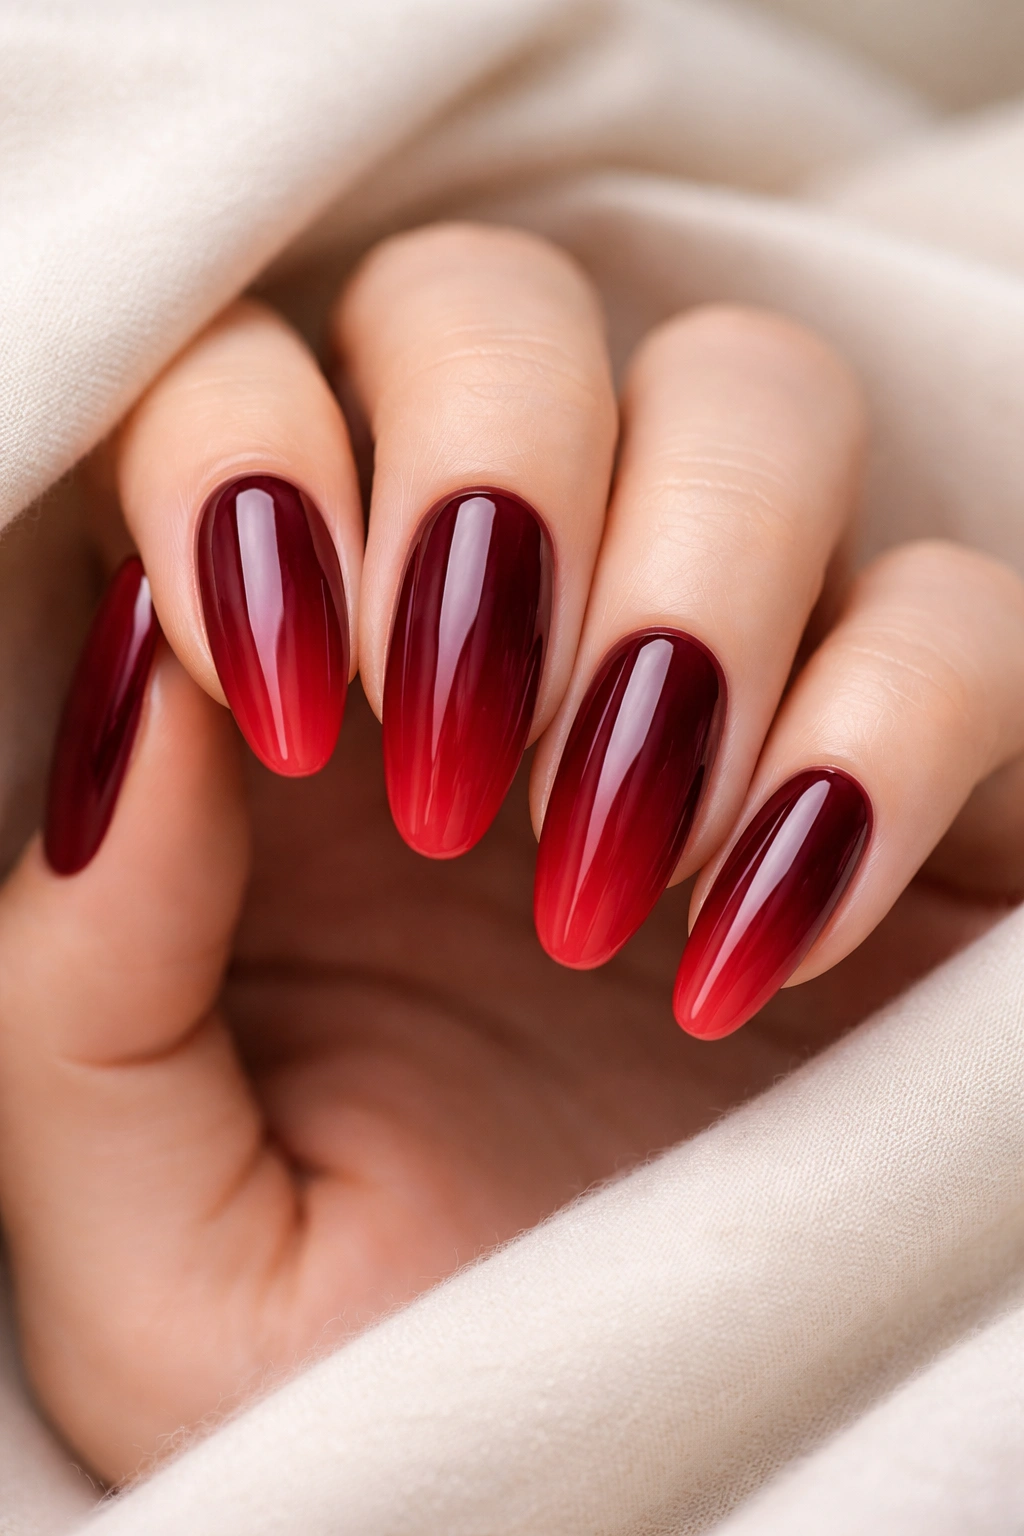
Burgundy ombre combines the richness of a deep wine red that fades into a lighter, almost peachy-red tone toward the tip. On longer round nails, the ombre effect creates depth and dimension, making the design feel more complex than a single-color manicure. The color gradient draws the eye down the nail in a way that’s flattering and visually interesting.
The Psychology of Ombre on Longer Nails
An ombre design works particularly well on longer nails because the extended surface gives the gradient room to breathe and transition smoothly. The shift from deep burgundy to a lighter shade doesn’t feel abrupt or cramped—it’s gradual and elegant. This design reads as more intentional than a single color while avoiding the busier feeling of full nail art.
Creating a Flawless Ombre Effect
- Use a sponge application technique rather than brush application for seamless color blending
- Start with the deeper shade as your base, then sponge the lighter shade onto the tip in overlapping motions
- Apply a glossy top coat to seal and even out the finish, which also makes the ombre appear more cohesive
- Practice the sponge dabbing motion on a test surface first—the angle and pressure directly affect how smooth the blend appears
- Consider adding a thin white or nude line at the very tip to separate the ombre and frame the nail shape
Pro tip: Don’t overthink the gradient—imperfect transitions actually look more natural and less artificial than overly smooth ones.
4. Red Round Nails with Gold Foil Detailing
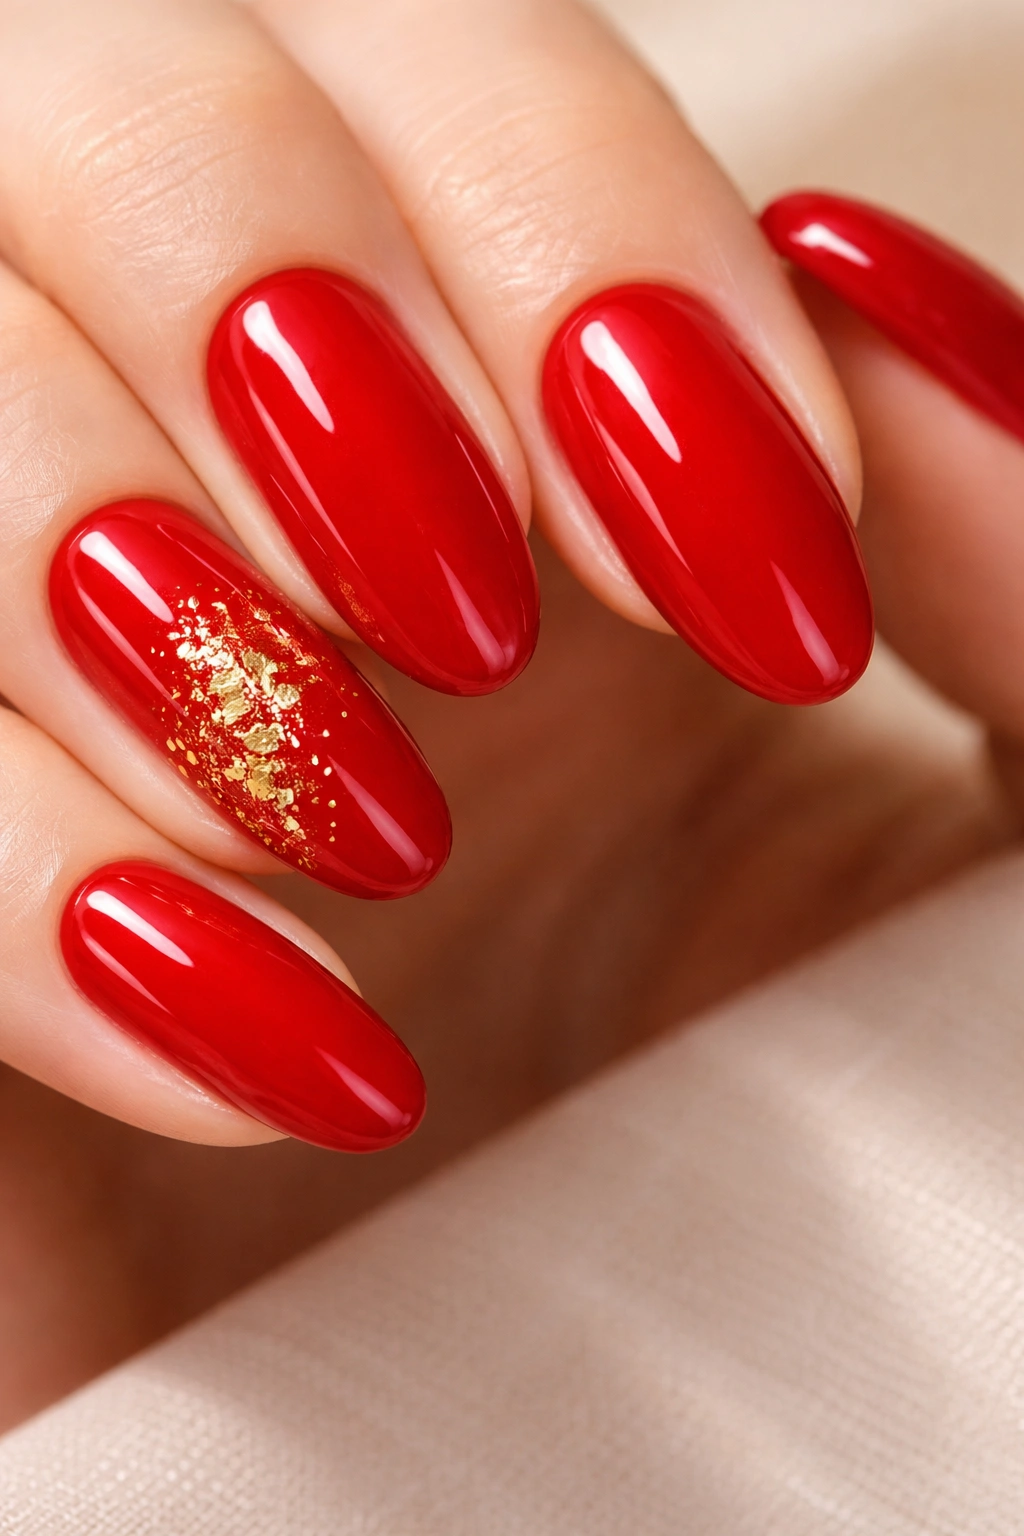
Gold foil creates an element of luxury and celebration that feels special enough for occasions but polished enough for everyday wear when used with restraint. Incorporating gold foil into red acrylics—whether as scattered flecks, a stripe, or concentrated on accent nails—adds sparkle and dimension without overwhelming the design. On longer round nails, the foil catches light beautifully and creates the illusion of movement.
Where to Place Gold Foil for Maximum Impact
- Create a vertical stripe of foil down the center of the nail for an elegant, linear look that elongates the finger
- Scatter small foil pieces randomly across the nail for a more playful, organic aesthetic
- Reserve foil for just one or two accent nails (typically the ring finger or thumb) to keep the design balanced
- Layer foil under a glossy top coat for a subtle, embedded appearance, or apply it on top for maximum sparkle and visibility
- Use foil as a thin line near the cuticle or tip for a framing effect that defines the nail shape
Why Gold Pairs Perfectly with Red
Gold and red are complementary colors that have been paired together for centuries in design and fashion. The warmth of gold amplifies the richness of red rather than competing with it. On longer nails, this pairing feels intentional and sophisticated—not matchy-matchy or overdone.
5. Jelly Red Translucent Acrylics
Jelly acrylics create a delicate, glass-like appearance where you can see the skin beneath the colored gel-like acrylic. Red jelly nails have a unique transparency that makes them feel lighter and less heavy than solid red, even though they’re technically longer and more substantial. The translucency creates a flattering, skin-like quality that works beautifully on longer round nails.
The Appeal of Jelly Nails on Extended Lengths
Longer nails can sometimes feel heavy or overdone on certain hand types, but jelly finishes counteract this by appearing almost ethereal. The semi-transparent quality makes the nails feel like a delicate enhancement rather than a bold statement, which is especially appealing for everyday wear. Red jelly nails also photograph beautifully in natural light, where the transparency becomes more apparent.
Application and Durability Considerations
- Jelly acrylics require careful color selection since the transparency changes how the shade reads
- Apply a thin nude or pink base layer first to enhance the jelly effect and add opacity where needed
- Build the color in thin layers rather than attempting full opacity in one application
- Seal with a super glossy top coat to enhance the glass-like, translucent effect
- Expect jelly finishes to show wear more visibly than solid colors, so plan maintenance accordingly
Worth knowing: Jelly acrylics sometimes feel less durable than fully opaque acrylics because they’re built thinner—use them when durability isn’t your top priority.
6. Red with Classic White French Manicure
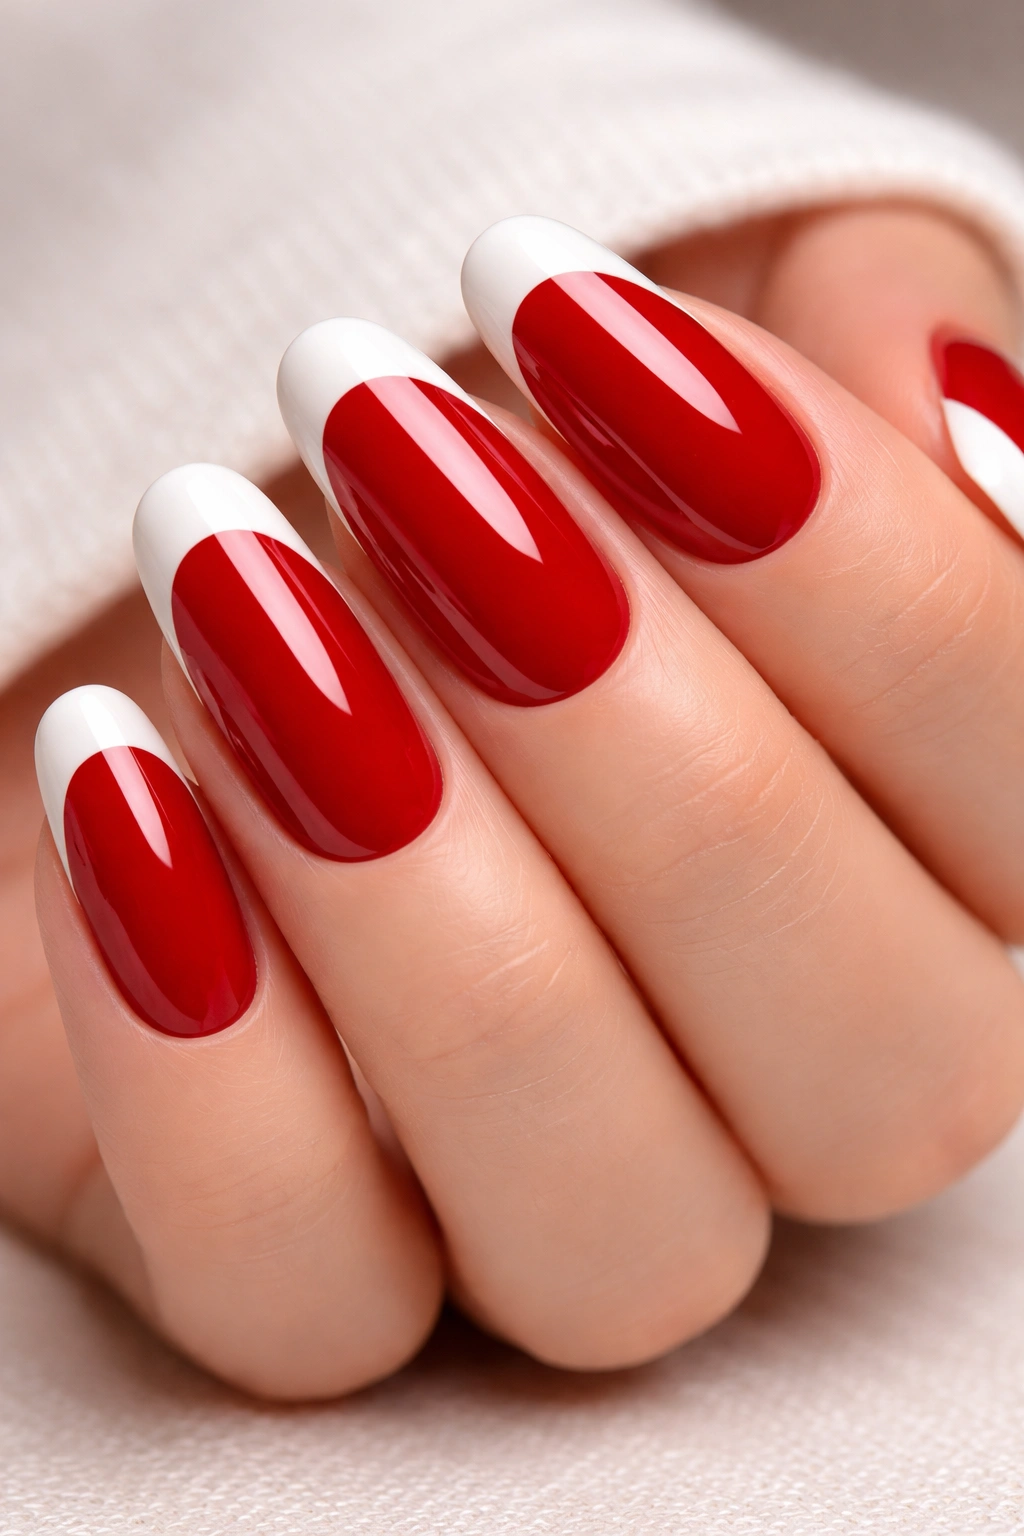
The white French tip never goes out of style, and when paired with a rich red base on longer round nails, it creates a crisp, clean aesthetic that feels both modern and timeless. The contrast between the deep red and bright white is striking without being busy, and the clean lines frame the rounded shape beautifully. This design works across every season and occasion.
Why French Tips Suit Longer Round Nails
On a longer nail, the white tip has more space to create visual interest without dominating the design. The rounded shape actually complements the French tip better than sharper shapes do—the curve of the round nail echoes the curve of the white line, creating harmony in the overall composition. The white also makes the nail appear longer by creating definition at the tip.
Variations on the Classic French Tip
- Keep the white line thick and bold for a modern, graphic look
- Use a thin, delicate white line for understated elegance
- Create a curved French line that follows the natural contour of the nail rather than a straight edge
- Add a thin red line between the white and red base for a trendy double-line accent
- Reverse the design with red tips and a white base for a completely different but equally chic vibe
Pro tip: The key to a perfect French tip is a steady hand and a quality white gel or acrylic—cheap polish will chip and peel quickly, ruining the clean aesthetic.
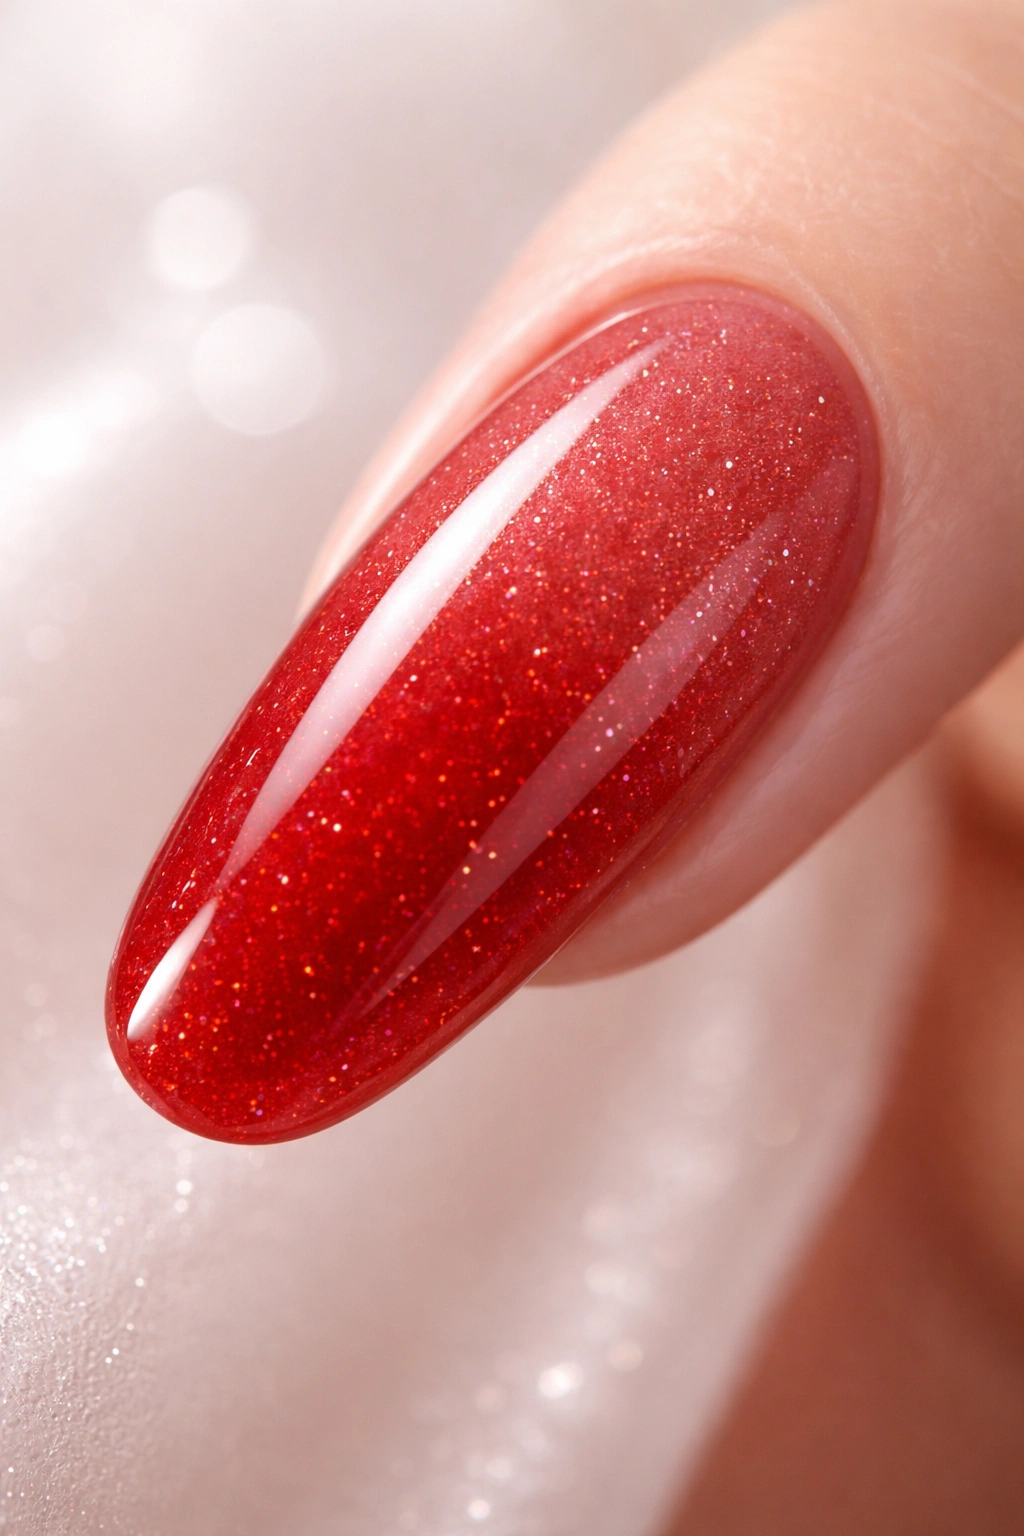
7. Red Glitter Gradient to Nude
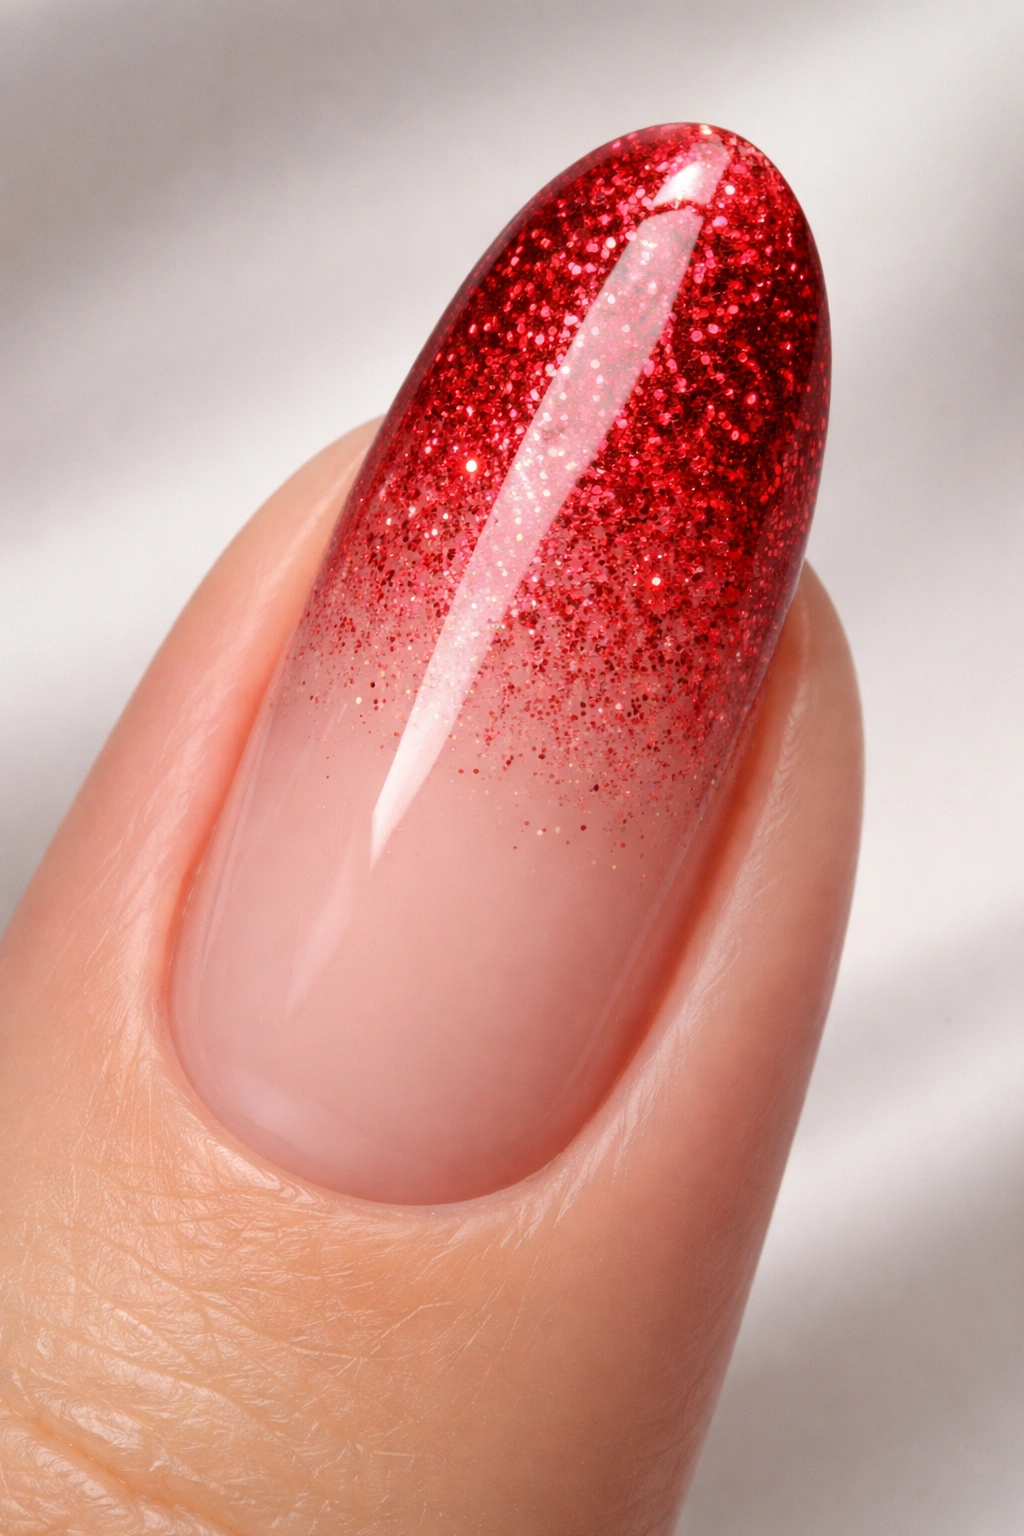
A glitter gradient that starts heavy with red glitter at the tip and transitions to nude or clear at the cuticle creates depth, dimension, and movement. On longer round nails, this gradient gives you the sparkle and fun of glitter without the maintenance headache of full glitter coverage. The nude-to-red-to-glitter transition is flattering and visually interesting.
Building the Perfect Glitter Gradient
- Start with a nude or clear base coat as your foundation
- Apply red glitter polish in concentrated amounts at the tip, using a sponge to press and distribute the flecks
- Gradually reduce the amount of glitter as you move toward the middle and cuticle area, creating a natural fade
- Blend the transition with a glossy top coat that helps marry all the layers together
- Consider adding extra sparkle to just the tip area with large glitter pieces for dramatic effect
Why Glitter Gradients Work on Longer Nails
A full glitter nail on a longer acrylic can feel heavy or overwhelming, but a gradient allows you to enjoy sparkle without committing your entire nail to texture and shine. The gradient also creates movement and visual interest that makes the longer nail length feel intentional rather than accidental.
8. Oxblood Red Blended into Nude
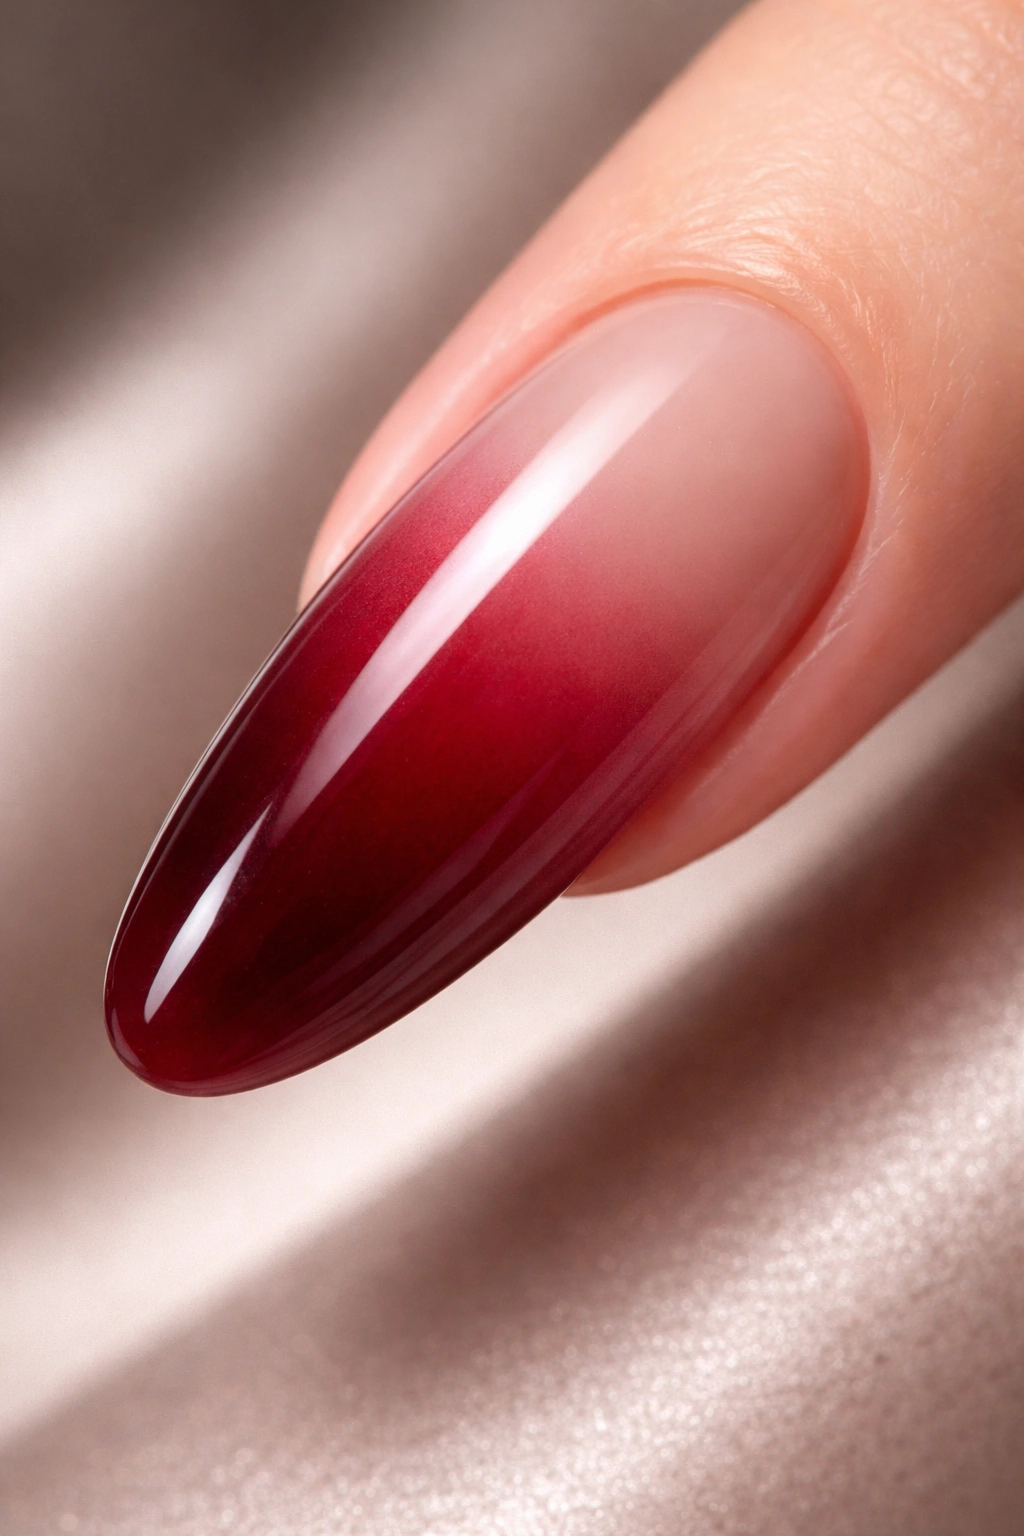
Oxblood is a deep, brownish-red that feels sophisticated and moody—it’s red for people who want the color but with more depth and earthiness. When you blend oxblood into nude or beige at the tip, you create an ombre effect that’s more subtle and mature than bright red but equally impactful. On longer round nails, this gradient reads as refined and intentional.
The Oxblood Color and Its Versatility
Oxblood red works across seasons, skin tones, and personal styles because it bridges red and brown—offering richness without the boldness of true red. Blending it into a lighter, warmer shade creates a gradient that’s flattering and dimensional. This design feels editorial and fashion-forward while remaining wearable.
Achieving a Smooth Oxblood-to-Nude Blend
- Use a sponge rather than a brush to create a seamless blend between colors
- Apply oxblood to the base and middle of the nail, then sponge nude or peachy-beige onto the tip with overlapping motions
- The blend should be gradual enough that you can’t pinpoint exactly where one color becomes the other
- Seal with a glossy top coat that helps the transition appear more cohesive and polished
- Practice on a test nail first—blending technique makes or breaks this design
Pro tip: If your blend looks too striped or harsh, it usually means you need to make more overlap passes with the sponge and use lighter pressure.
9. Sheer Red with Subtle Sparkle Embedded
Sheer red is even more translucent than jelly red—it’s barely there, a whisper of color combined with visibility of the skin beneath. When you add subtle sparkle by embedding small metallic flecks or using a shimmering top coat, you create a design that’s elegant, feminine, and understated. On longer round nails, the sheer quality makes the length feel organic rather than dramatic.
The Confidence Required for Sheer Designs
Sheer nails require that you feel confident in your nail beds and cuticles since they won’t be hidden by opaque color. The trade-off is a more natural-looking, refined appearance that feels current and intentional. The sparkle adds just enough dimension to prevent the design from feeling flat or plain.
Choosing the Right Sparkle to Complement Sheer Red
- Use fine glitter particles that blend seamlessly with the sheer finish rather than large glitter pieces that would look chunky
- Consider a shimmer or metallic top coat that catches light without being sparkly in an obvious way
- Apply sparkle throughout the nail for cohesion, or concentrate it on the tip for subtle interest
- The sparkle should feel like an accent that enhances the sheer base, not a competing element
- Test the shimmer in different lighting conditions before committing to the full manicure
Worth knowing: Sheer finishes require impeccable nail health and maintenance since they’re designed to showcase rather than conceal.
10. Red with Metallic Geometric Line Work

Geometric designs—thin metallic lines creating angles, triangles, or abstract patterns—add a contemporary edge to red round acrylics. On longer nails, geometric line work creates visual interest and sophistication without covering the entire nail surface. The contrast between the bold red and delicate metallic lines is striking and feels curated.
Designing Geometric Patterns on Longer Nails
- Create thin metallic lines that run vertically, horizontally, or diagonally across the nail
- Use gold, silver, or rose gold metallic polish for the line work depending on your preferred metal tone
- Design one complex accent nail with geometric line work while keeping the others solid red for balance
- Keep line work clean and precise—shaky or uneven lines read as accidental rather than intentional
- Consider using nail striping tape to create perfectly straight lines if freehand precision isn’t your strength
Why Geometric Detailing Works on Round Nails
The soft curves of round nails pair beautifully with sharp geometric angles—the contrast creates visual tension that makes both elements feel more striking. On a longer nail, you have room for line work that’s detailed without feeling cramped or busy. The metallic element adds luxury and contemporary edge to an otherwise classic design.
Execution Tips for Clean Geometric Work
- Use a thin metallic brush or a striping brush designed specifically for detailed work
- Work slowly and deliberately rather than trying to complete lines quickly
- If you make a mistake, clean it up immediately with a small brush and nail cleaner before the polish dries
- Practice the pattern on paper first to map out proportions and spacing
- Consider hiring a nail artist for geometric work if freehand isn’t your specialty—precision matters
Pro tip: Metallic striping polish is thicker and less forgiving than regular polish, so practice consistency and hand control before attempting detailed line work.
Final Thoughts
Red round acrylics on longer sets offer an incredible range of expression, from timeless classic polish to modern geometric and gradient designs. Each of these ten approaches brings something different to the table—whether you’re drawn to pure simplicity, textured details, color blending, or metallic accents, there’s a red nail design that matches your aesthetic and intention. The round shape remains flattering across hand types and personal styles, and the longer length gives you canvas to work with while still feeling wearable for everyday life.
The real key to any successful red acrylic design is maintenance and quality application. Red shows every smudge, chip, and imperfection more visibly than lighter colors, so choosing a skilled nail technician and committing to regular upkeep will make the difference between a design that looks expensive and intentional versus one that appears neglected. Schedule maintenance every two to three weeks, use quality products, and treat your acrylics with care—avoid using them to open things or apply heavy pressure that can cause lifting.
Red has an inherent confidence that translates through whatever design variation you choose. Whether you go minimal and glossy or geometric and detailed, the color itself makes a statement. Longer round nails amplify that confidence, creating a silhouette that’s both elegant and bold. Pick the design that speaks to you, find a technician you trust, and enjoy the satisfaction of red round nails done well—they never fail to make an impact.
