

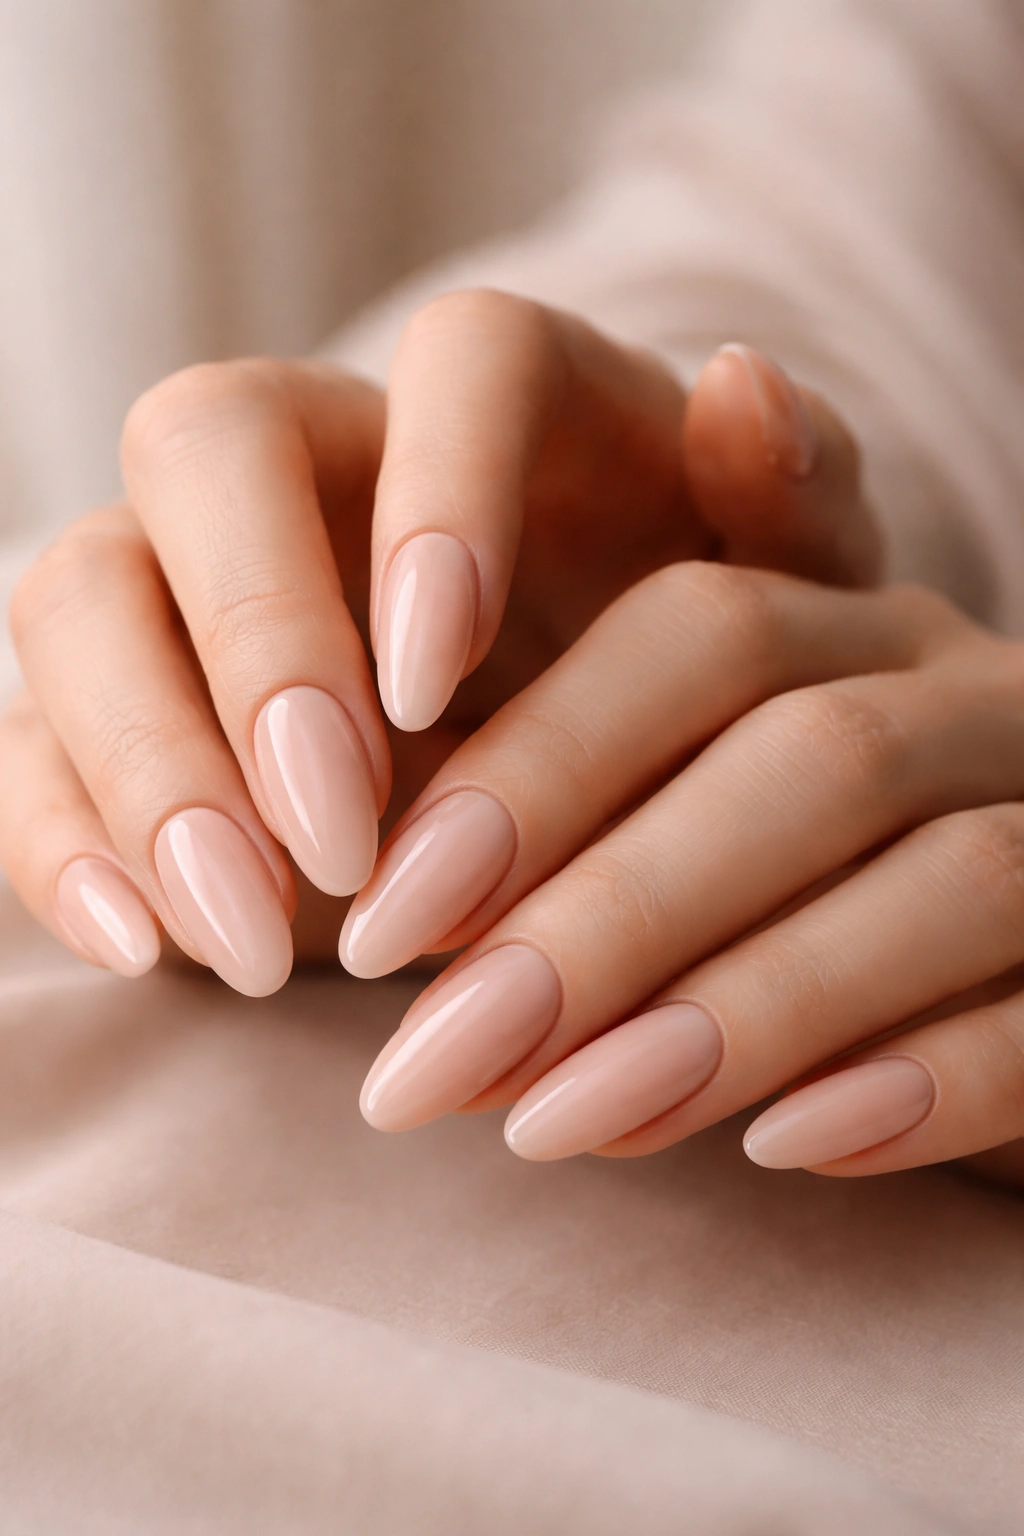
Oval nails are experiencing a major moment in the nail world, and there’s a genuinely good reason why. Unlike sharp stilettos or blunt square shapes, oval nails offer this perfect sweet spot between elegant and wearable—they elongate your fingers, feel comfortable to maintain, and work for literally every occasion from the office to a night out. When you extend an oval nail to longer lengths, you get a sophisticated canvas that screams confidence without being over-the-top.
The beauty of longer oval acrylic nails is that they hold polish and nail art beautifully for weeks without chipping at the tips or looking stubby. The extended length gives you real room to play with designs that might look cramped on shorter nails—think detailed ombre gradients, intricate line work, or bold color-blocking that actually has space to breathe. Whether you’re into minimalist aesthetics, sparkly statement designs, or something that leans into current design trends, longer ovals are forgiving and flexible enough to pull off almost anything.
What makes these designs special is that they work across different nail care comfort levels. If you’ve never worn long acrylics before, oval shapes feel less dramatic than coffins or almonds—they’re easier to navigate on your phone, less likely to snag on hair or clothing, and they maintain that polished appearance without requiring constant fill-ins. And if you’re already a long-nail devotee, these 25 designs should give you plenty of fresh inspo to take to your next appointment.
1. Classic French Ombre
The French ombre is basically a grown-up version of the French manicure that actually feels current and chic. Instead of a stark white tip, you’re creating a gradient fade from your natural nail color at the base into a soft white or nude at the tips, with a subtle blur in between that makes the whole thing feel airbrushed and seamless.
Why It Works for Long Ovals
This design plays beautifully with longer oval shapes because the gradient naturally elongates your fingers even more. The soft transition between colors is flattering and versatile—it works with literally every skin tone, outfit, and occasion. There’s something inherently sophisticated about the ombre effect that makes even basic nail beds look expensive.
How to Master the Look
Ask your technician to use a damp sponge to blend the polish colors at the tip, creating that feathered, soft edge rather than a hard line. The key is light layers—multiple thin coats of the white or nude shade, feathered progressively higher up the nail. If it looks too opaque on the first pass, that’s actually what you want. You’re building the gradient gradually, not creating a dramatic color block. Seal everything with a matte or glossy topcoat depending on your preference.
Pro tip: This design lasts incredibly well because there’s no exposed edge to chip—the gradient starts before the very tip, so minor wear blends right into the design.
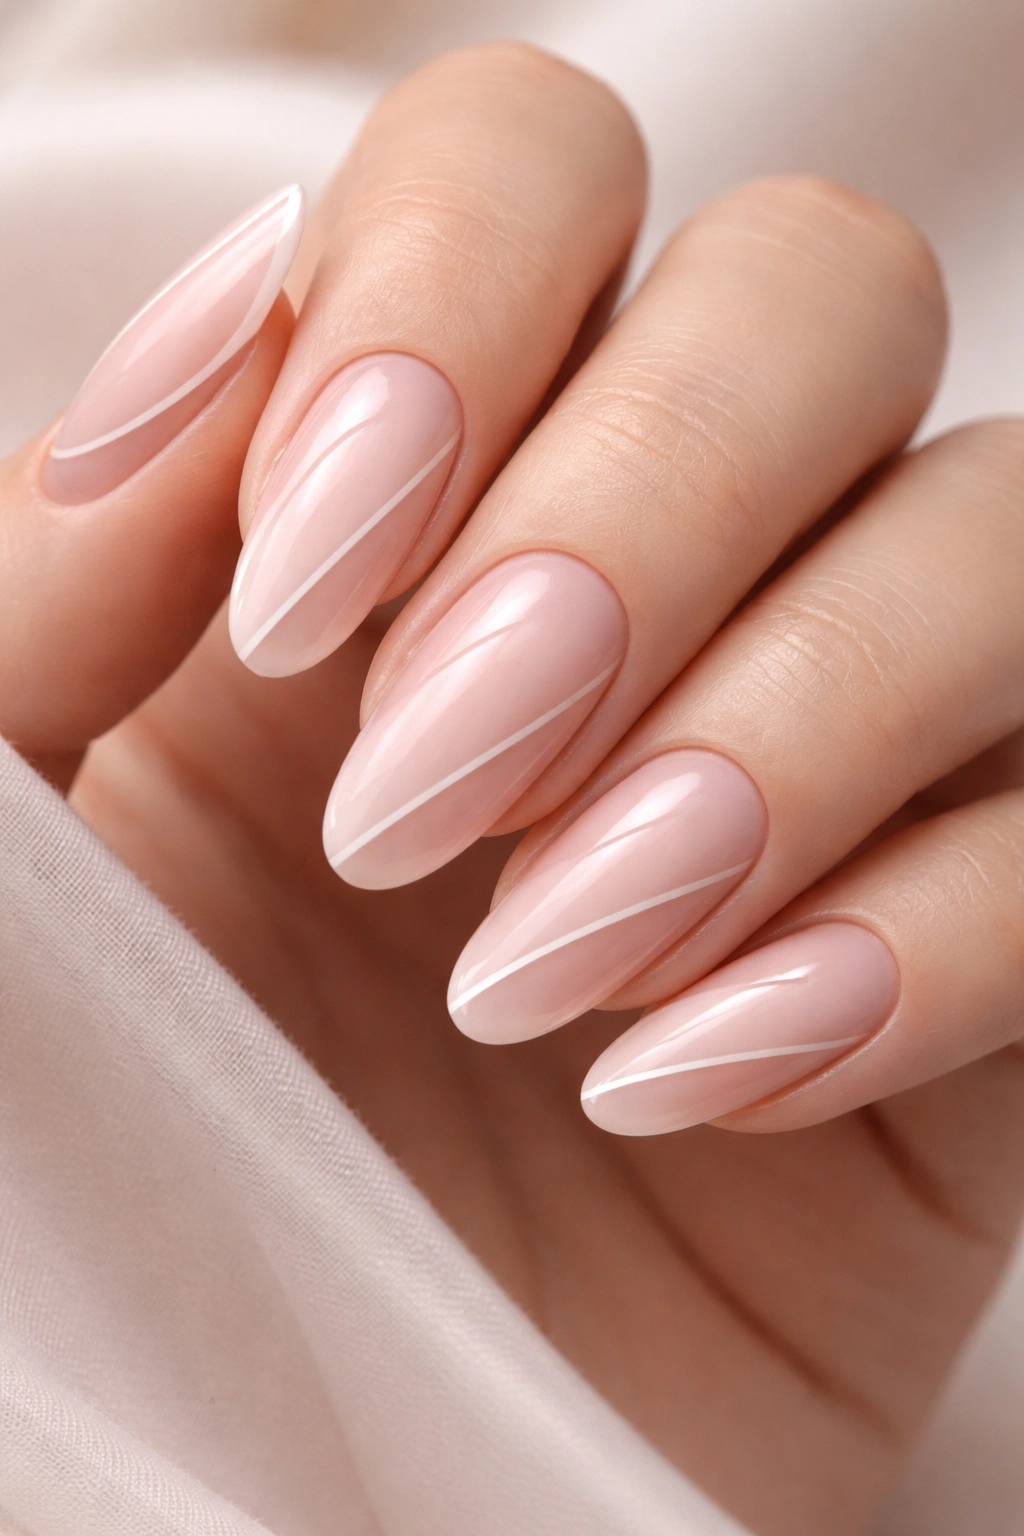
2. Minimalist Nude with Thin Gold Line
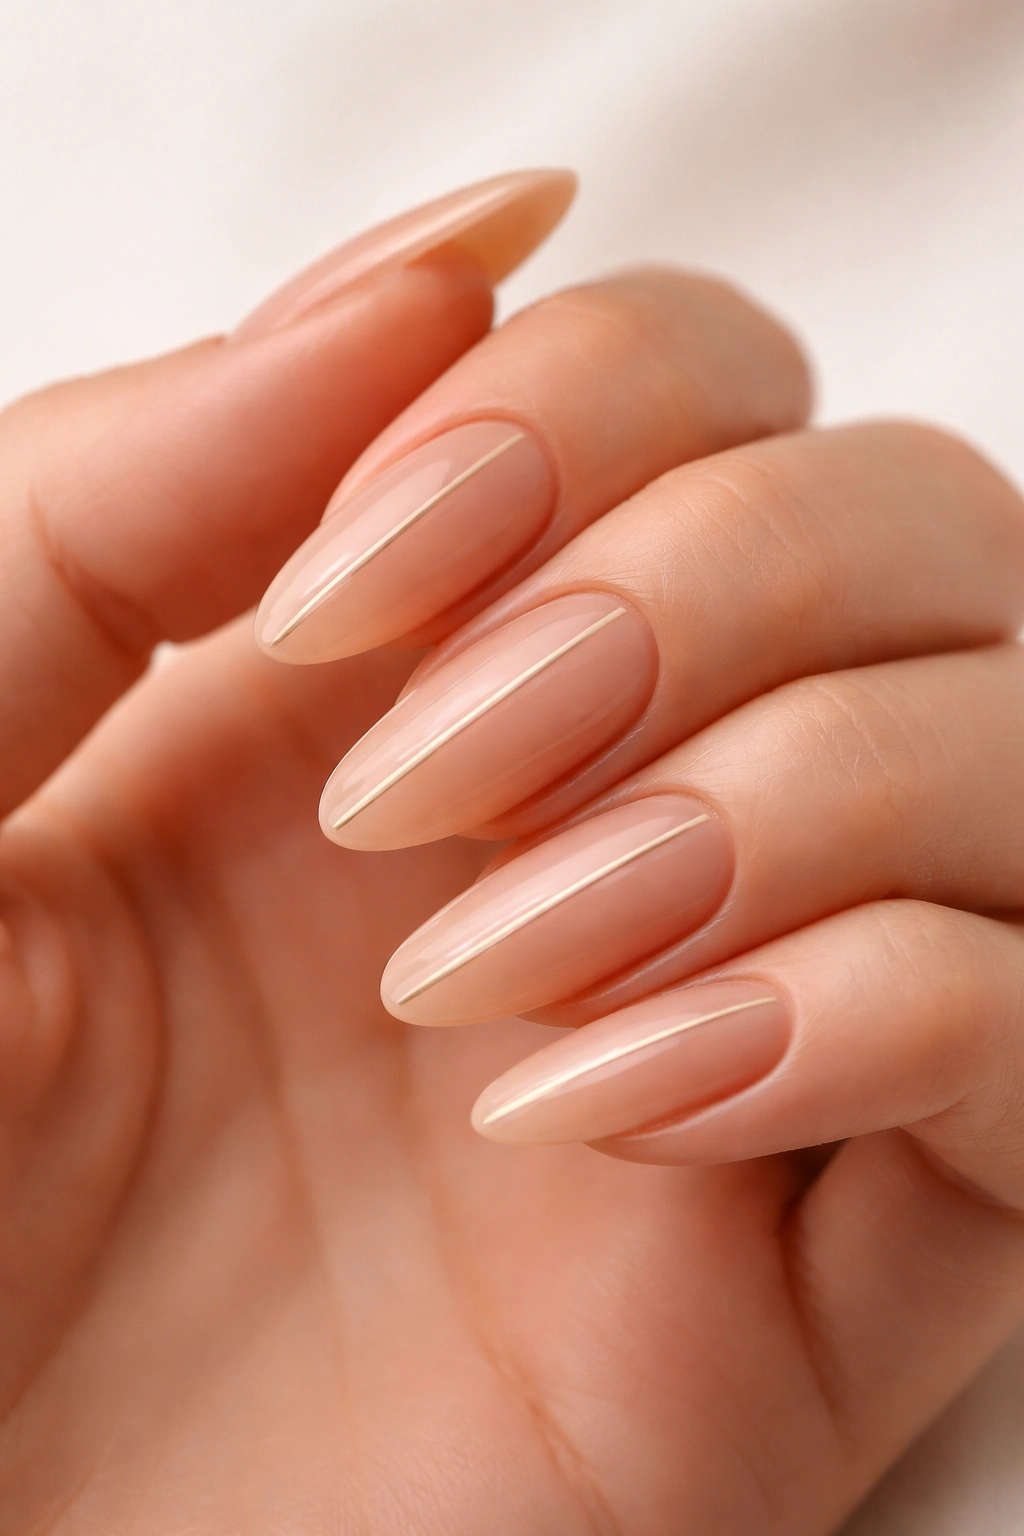
Sometimes the most impactful designs are the ones that know when to stop. A single thin gold line running vertically down the center of each nail against a warm nude base is the definition of “less is more”—it catches light without being loud, and it somehow makes longer nails look even more refined.
The Appeal of Simplicity
Minimalist designs let the shape and length of your oval nails do the talking. You’re not competing with busy patterns or multiple colors—you’re letting the elegant proportions of a well-shaped longer oval shine. The thin gold line adds just enough visual interest to keep the design from feeling flat, while the nude polish reads as incredibly polished and intentional.
Execution Tips
Use a thin striping brush or a toothpick dipped in gold gel polish to create your line. Practice on a practice nail first if you’re worried about precision—imperfect lines can actually look more organic and handmade, which is very on-brand for minimalist designs. Make sure your nude base is completely set before adding the gold detail to avoid smudging.
The hardest part of this design isn’t actually doing it—it’s resisting the urge to add more. If it feels too simple when you first see it, wear it for a day. The way it catches light and complements your skin tone will convince you it’s perfect.
3. Deep Burgundy with Rose Gold Flakes
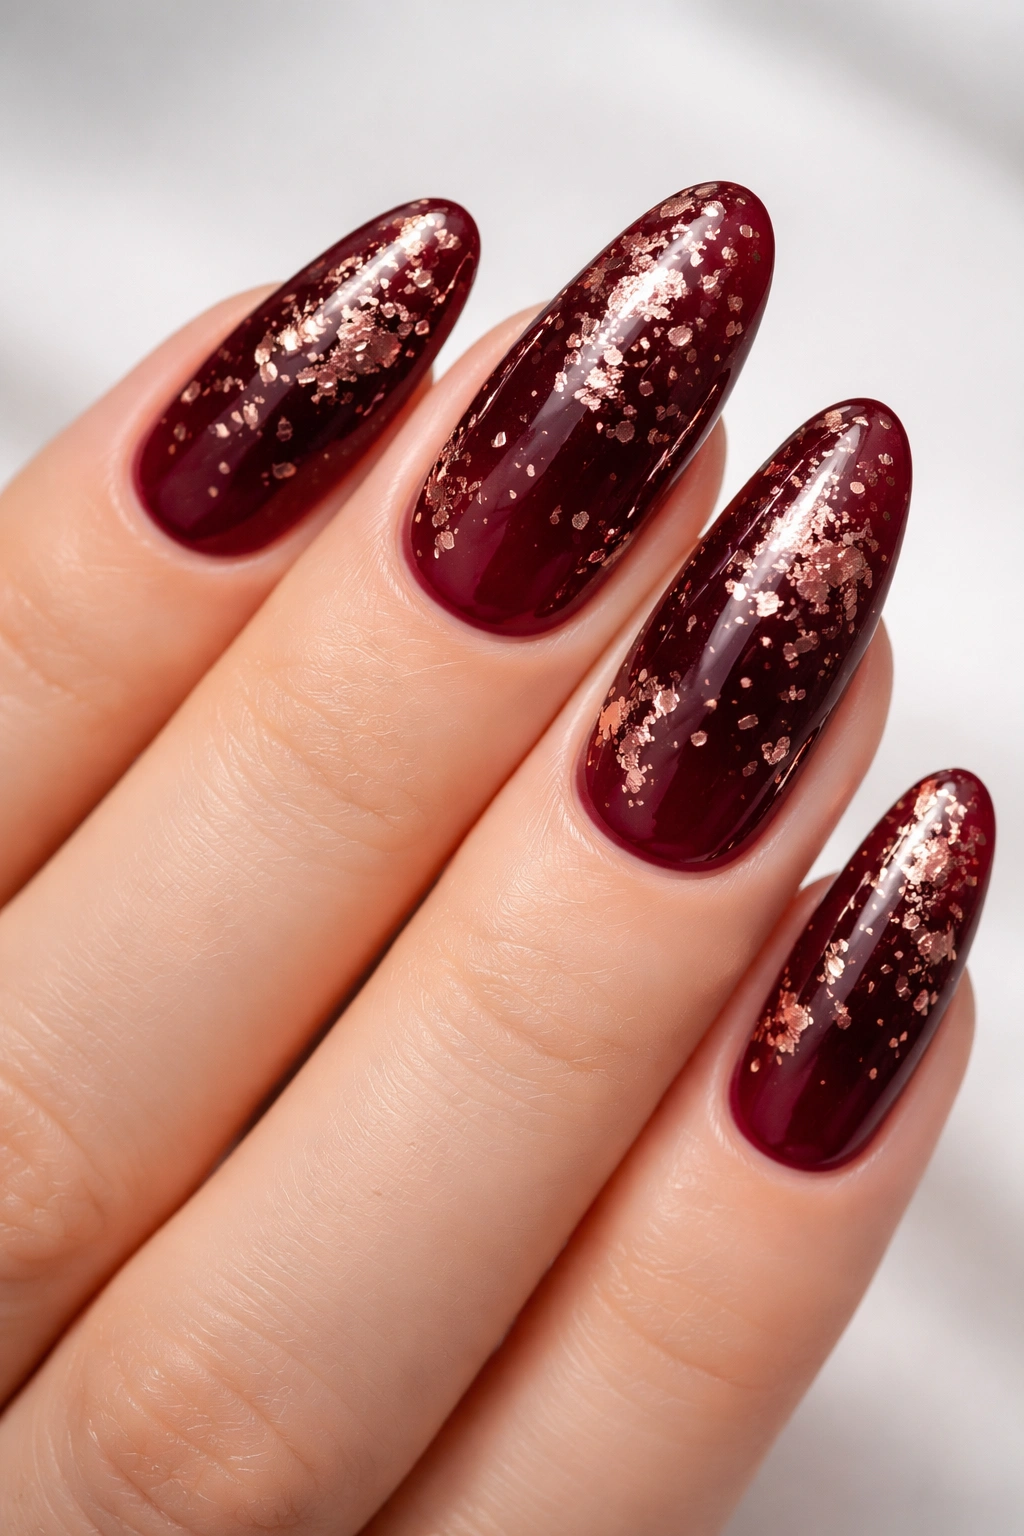
Burgundy is one of those colors that deserves to be in heavy rotation year-round, not just during fall and winter. When you pair it with rose gold flakes scattered across the surface, you get this moody, luxe vibe that feels expensive and intentional. On longer oval nails, the extra surface area lets you distribute the flakes in a way that feels balanced and not overdone.
Why This Color Combination Works
Burgundy is inherently elegant—it’s dark enough to feel sophisticated but warm enough to complement most skin tones. Rose gold adds just enough sparkle to elevate the look without pushing it into full glitter territory. The combination feels both timeless and current, which is exactly what you want from a design you’re committing to for several weeks.
Application Method
Start with your burgundy base—you’ll likely need two coats for full opacity. Once that’s set, use a small dotting tool or the end of a thin brush to place individual rose gold flakes or small sequins across the nail. Don’t cover the entire nail—aim for a scattered, almost organic pattern. You can concentrate more flakes on the tips and fewer near the base, or distribute them evenly. Whatever feels balanced to you is the right approach.
Worth knowing: Rose gold flakes sometimes shift in the topcoat, so seal this design carefully. Use a thick topcoat layer and let it cure fully to lock everything in place.
4. Soft White with Delicate Daisy Accents
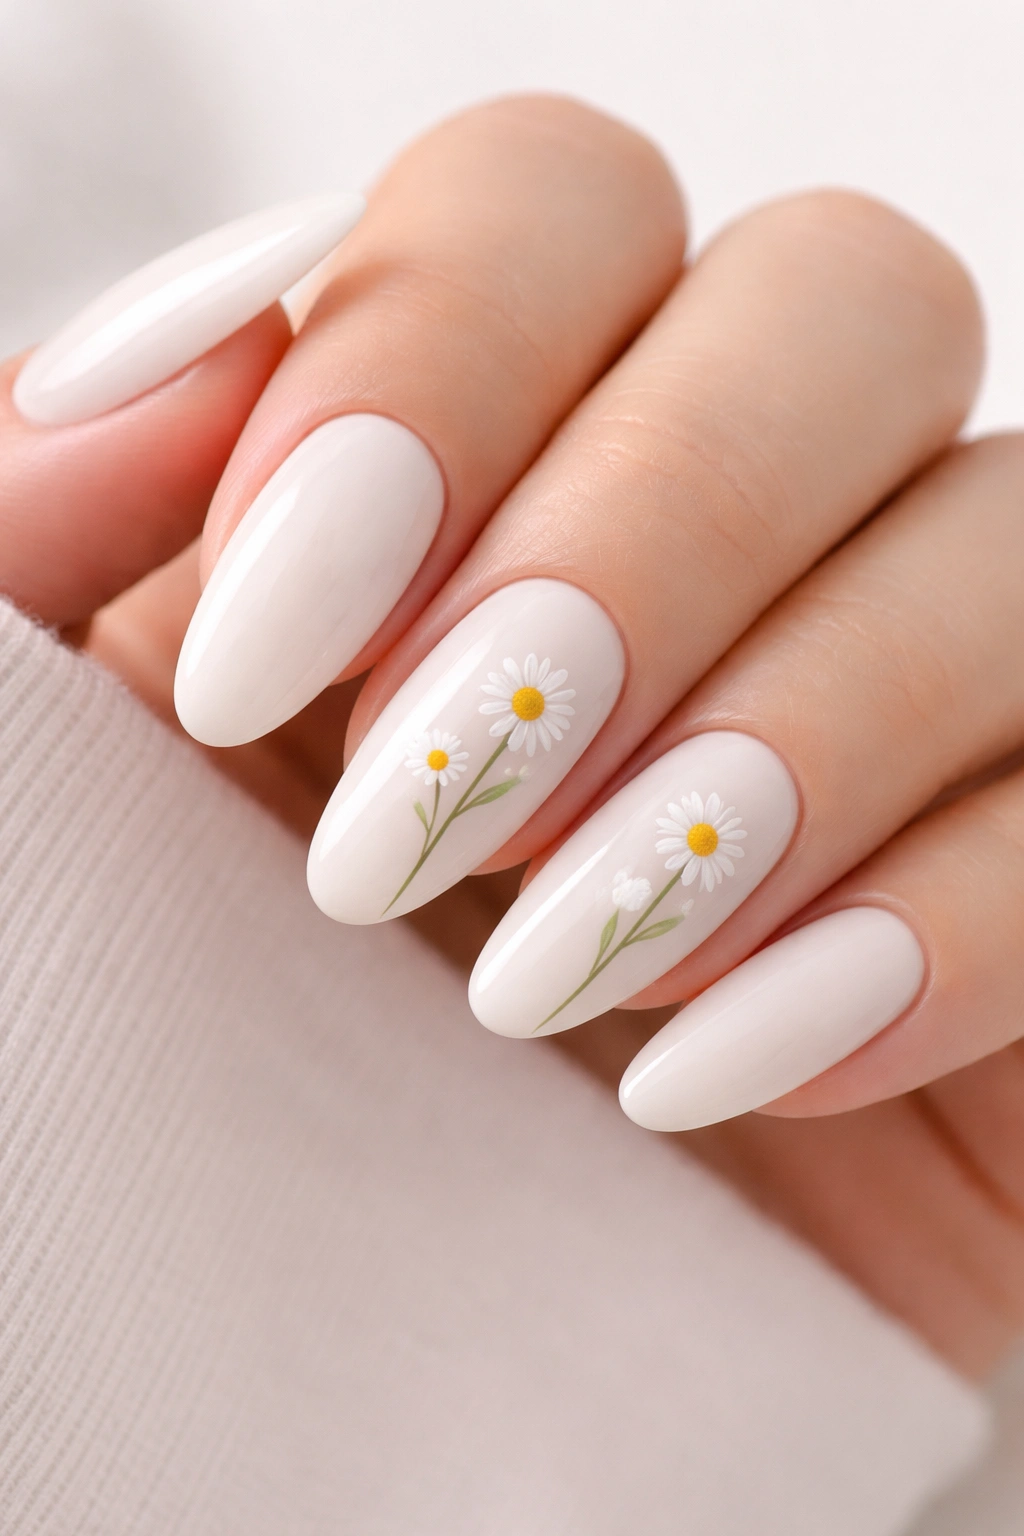
Daisies feel fresh and approachable, like you woke up and decided to be cheerful today without taking yourself too seriously. On a soft white base with longer oval nails, hand-painted daisies across one or two nails create this charming, almost cottagecore aesthetic that’s surprisingly sophisticated.
The Design’s Versatility
What makes this design work is that it feels equally at home in summer and winter—it’s not tied to a specific season. The white base keeps everything clean and bright, while the daisy details prevent it from feeling boring. On longer ovals, you have enough space to paint details like the little yellow centers and thin green stems without the design looking cramped.
Painting Your Daisies
You’ll need a very thin brush and a steady hand for this one. Start by lightly sketching where you want your daisies to sit—maybe on the ring and pinky finger of each hand. Paint white petals first (a simple dot in the center with smaller petals radiating out), then add a tiny yellow dot in the middle. Add delicate green stems if you’re feeling ambitious. The imperfect, slightly quirky look actually enhances the charm of this design.
This design is perfect for someone who wants something genuinely pretty without the commitment of super high-maintenance art.
5. Glossy Cherry Red Statement Nails
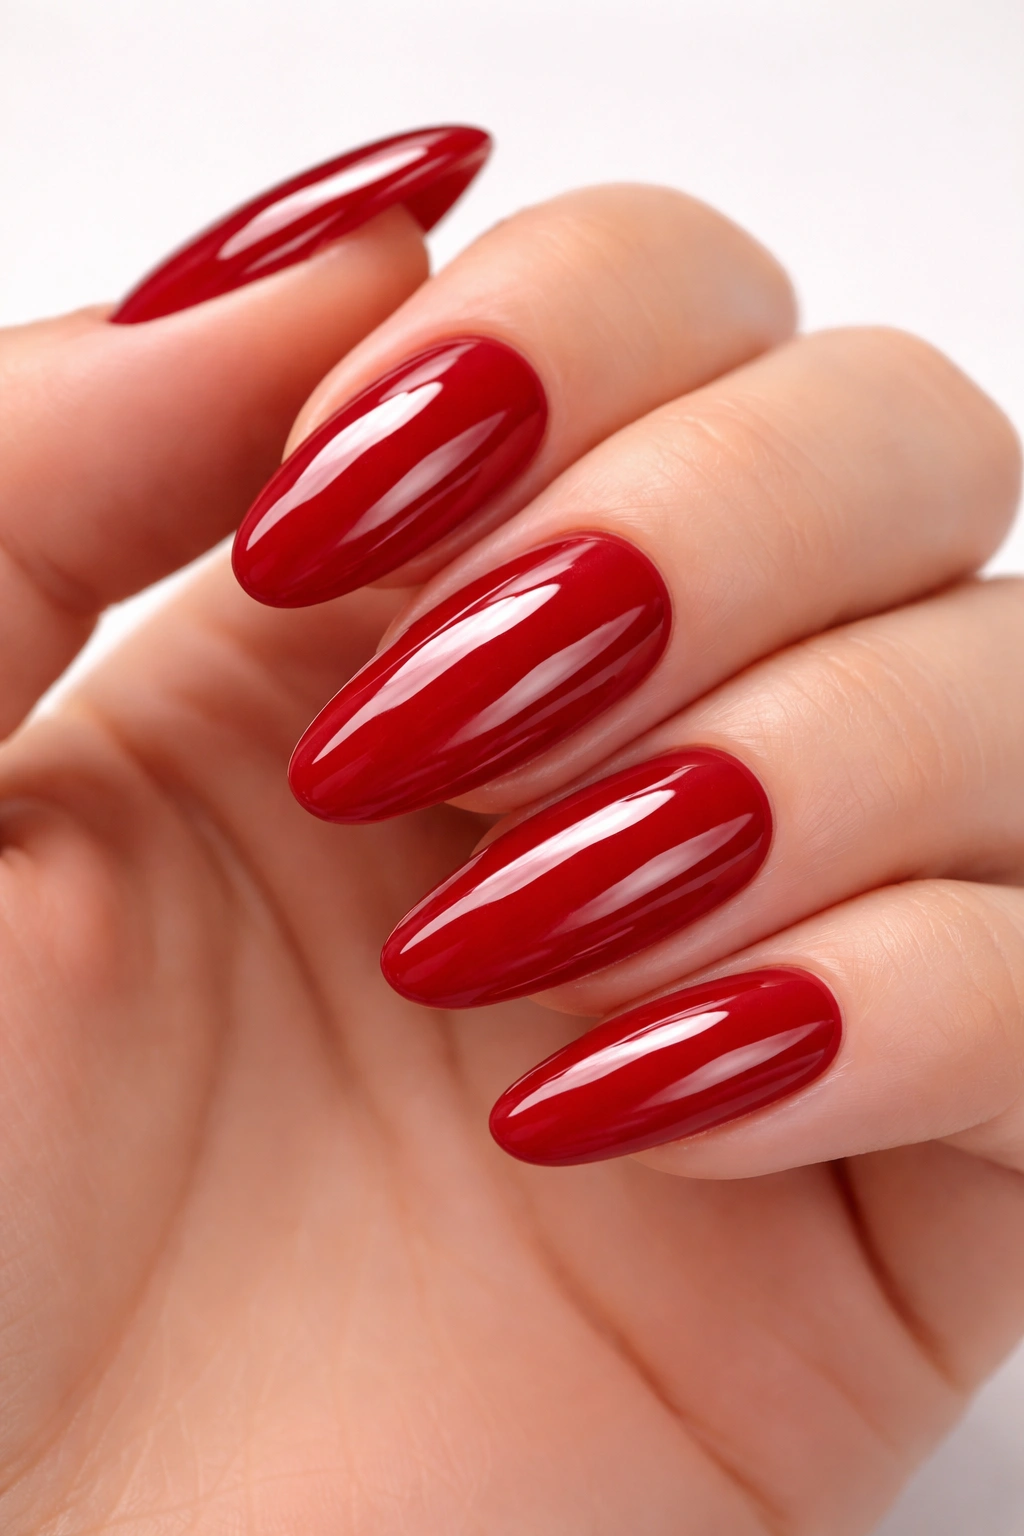
Sometimes you don’t need design complexity—you need color confidence. A high-shine cherry red on long oval nails is a statement piece on its own. The shape makes the red feel elegant rather than aggressive, and the glossy finish catches light in a way that makes your hands impossible to ignore.
Why Cherry Red Rules
This color works because it’s flattering on nearly every complexion and it reads as intentionally bold without being gaudy. Cherry red has been considered sophisticated for decades, which means it has serious staying power as a design choice. On longer ovals, the extended length gives the color more visual real estate, so it commands attention naturally.
Achieving Perfect Glossy Finish
The key to cherry red is application and topcoat. Use thin, even coats—you might need three coats to get full opacity without any streaking. Make sure each layer cures completely before adding the next. For the glossy finish, use a high-shine topcoat and apply it generously. The shine is literally part of the design here, so don’t skimp on the final step.
Pro tip: Cherry red looks even more stunning when paired with a slightly polished cuticle area. Ask your technician to ensure your cuticles are groomed and pushed back for maximum impact.
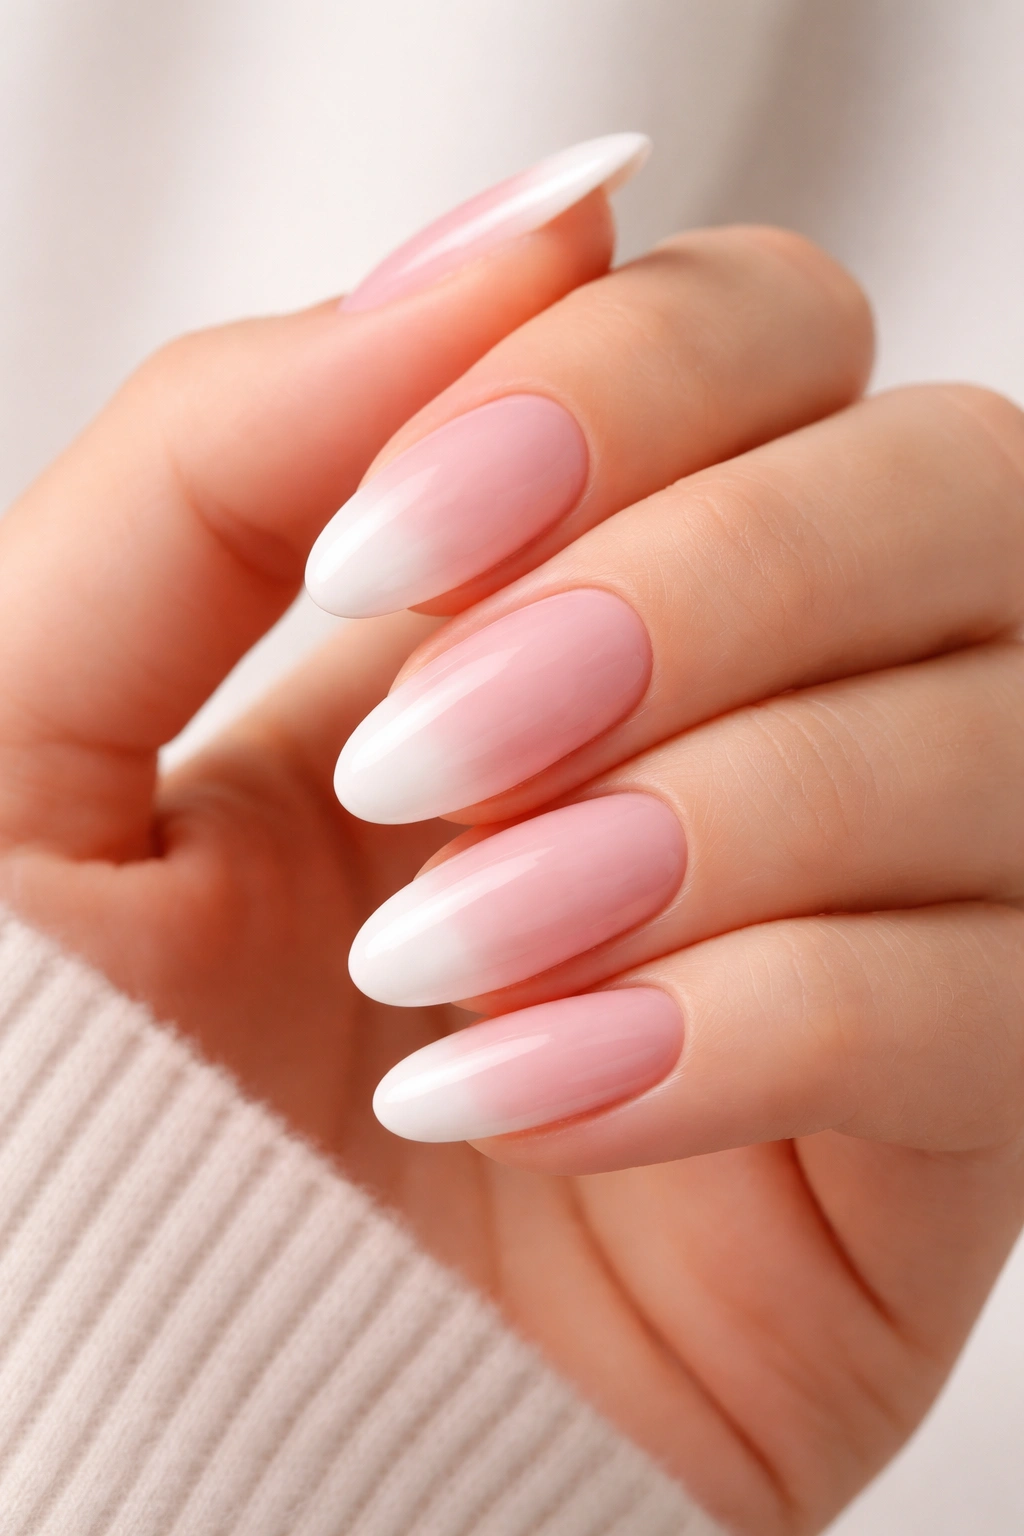
6. Soft Pink Ombre to White Gradient
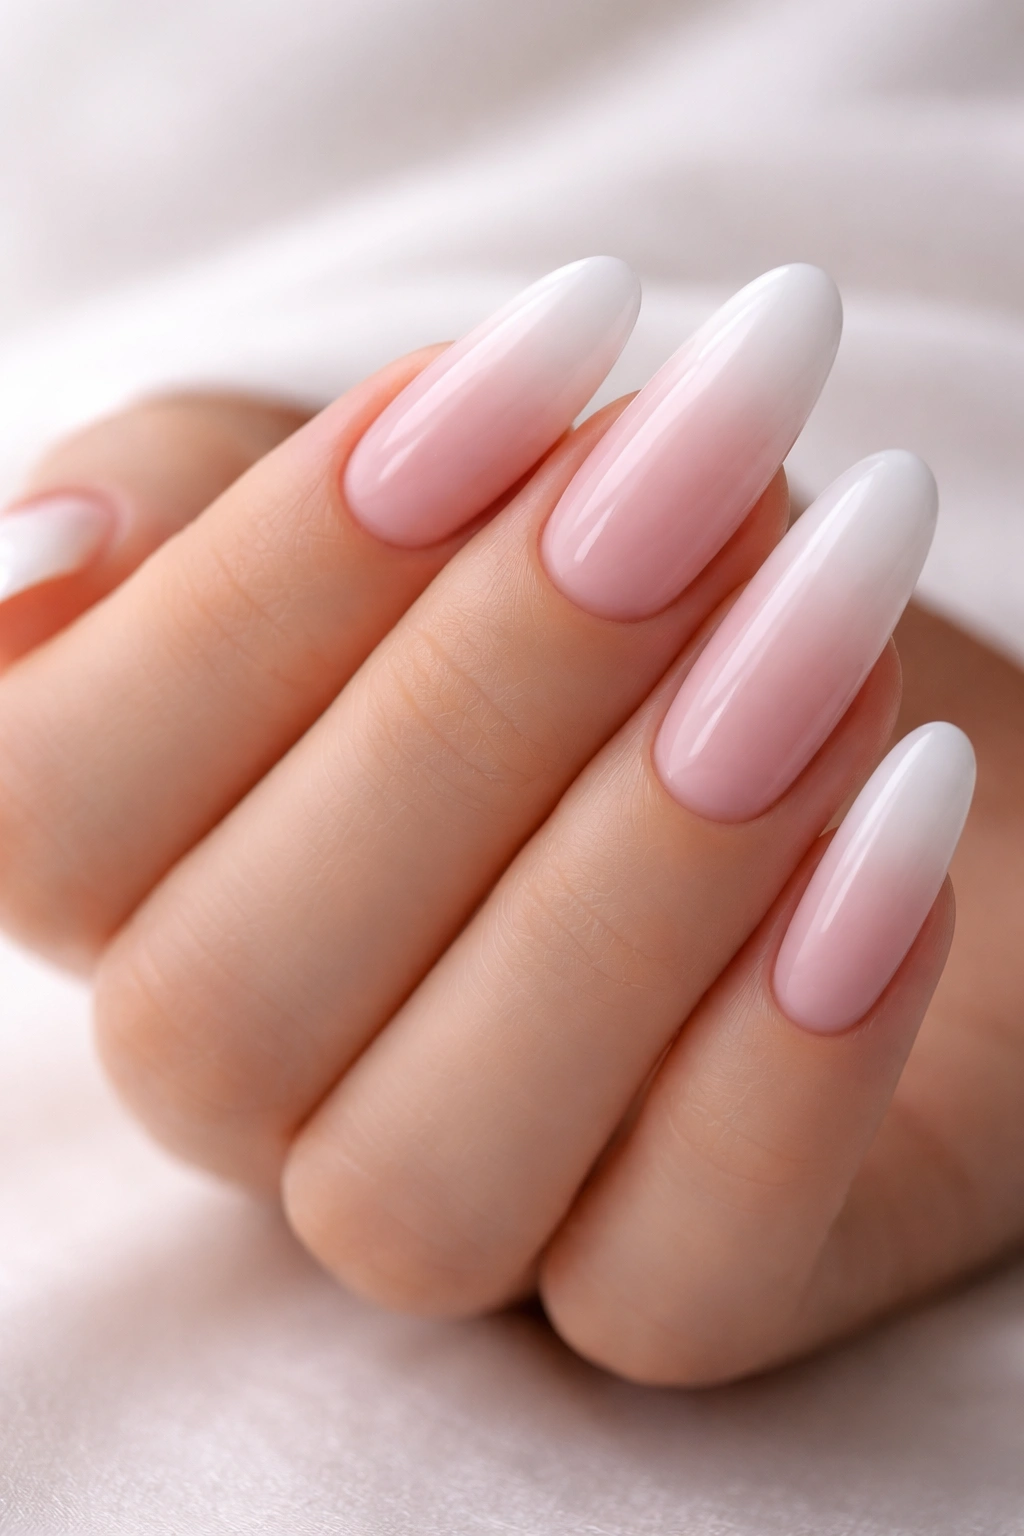
This design sits in that comfortable middle ground between bold and subtle. You’re starting with a soft pink base that gradually fades to white at the tips, creating this dreamy, almost ethereal effect. The longer oval shape means the gradient has plenty of space to transition smoothly without looking too busy.
The Psychology of Soft Pink and White
This color combination feels inherently calming and pretty without being childish. It works in professional settings, casual environments, and fancy events. There’s something about the ombre effect that makes your fingers look longer and more elegant—the eye follows the gradient, creating an elongating visual effect.
Creating the Perfect Gradient
You’ll need soft pink and white gels (or acrylics, depending on your preference). Apply the pink as your base coat, curing it completely. Then, using a damp sponge, carefully blend the white into the pink at the tip area, building up the white gradually toward the center. The sponge should have just enough moisture to pick up and blend the colors without making a mess. Cure between layers if needed.
The gradient doesn’t need to be perfectly symmetrical—a slight variation in each nail actually looks more organic and natural, almost like the ombre occurred naturally rather than being meticulously calculated.
7. Nude with Geometric Black Line Art
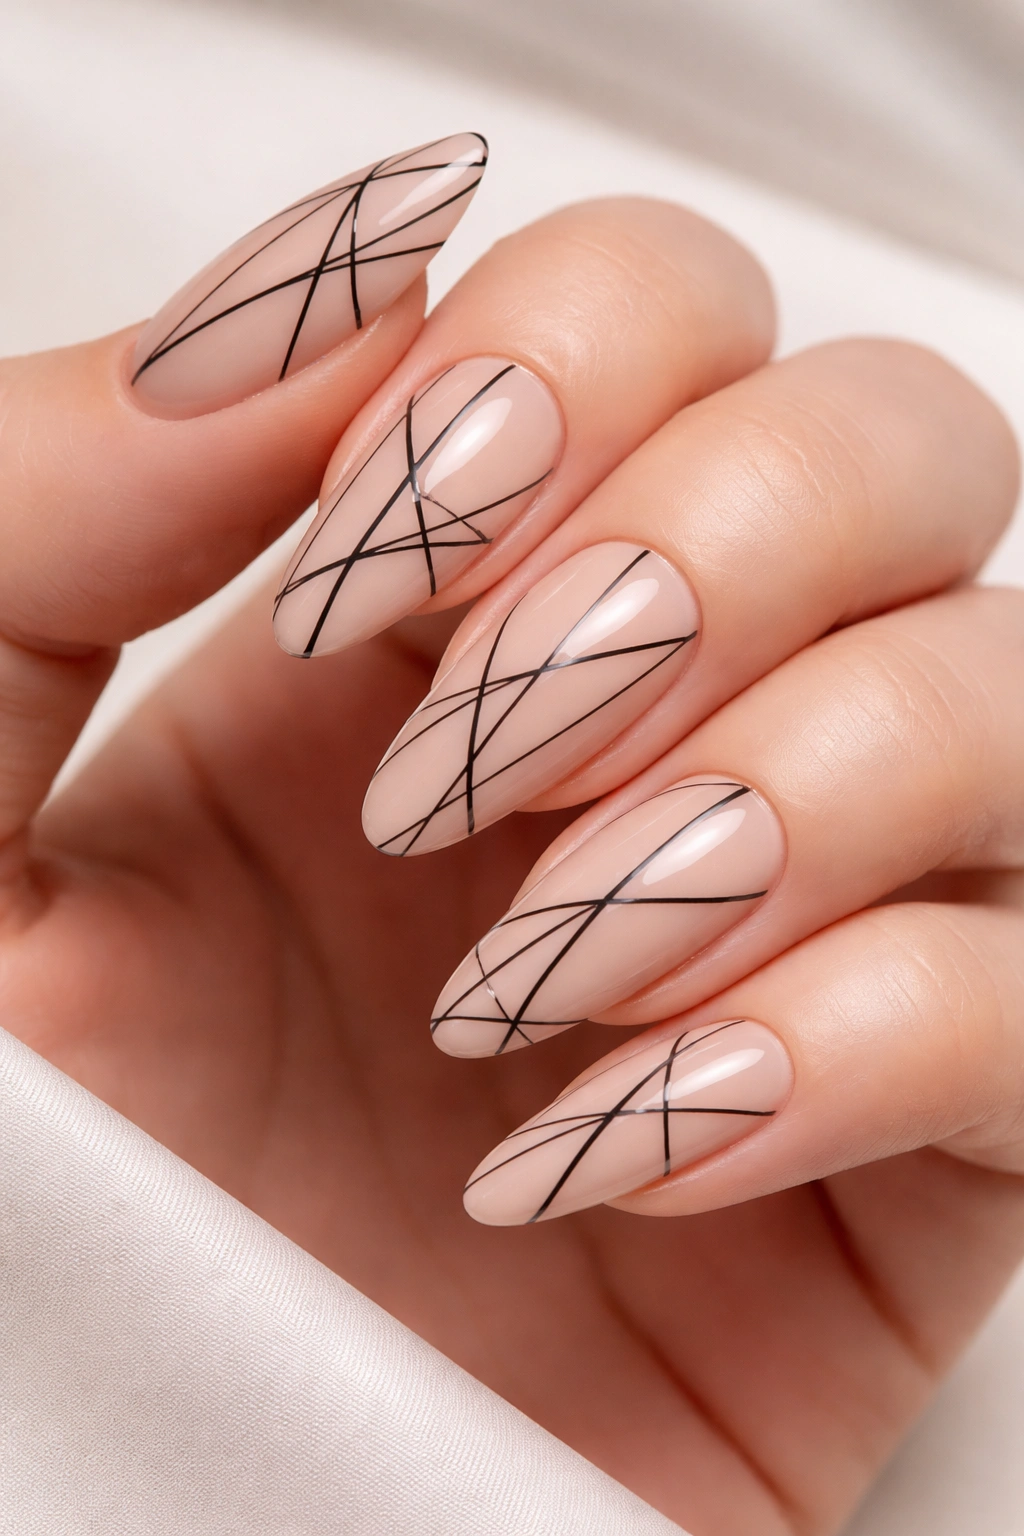
Geometric designs on longer nails hit differently than they do on shorter nails. When you add thin, clean black lines forming triangles, squares, or abstract shapes on a nude base, you’re creating visual interest through mathematics rather than decoration. It feels intentional and slightly edgy while still being work-appropriate.
Why Geometric Works on Longer Ovals
The length gives you actual space to play with proportions and negative space. You can create designs where the geometry intentionally breaks across the oval shape—a triangle starting at the cuticle and trailing toward the tip, or overlapping squares that create depth. The contrast between the clean, precise black lines and the soft curves of the oval shape is visually striking.
Execution Strategy
Use a thin striping brush and black gel polish to create your lines. If precision isn’t your strong suit, use nail tape to create straight edges and then remove the tape before curing. Start simple—maybe just one or two geometric shapes per nail—and build complexity as you get more comfortable. You can always add more lines next time.
Black lines also hide minor imperfections better than lighter colors, so this is a forgiving design to attempt if you’re new to nail art.
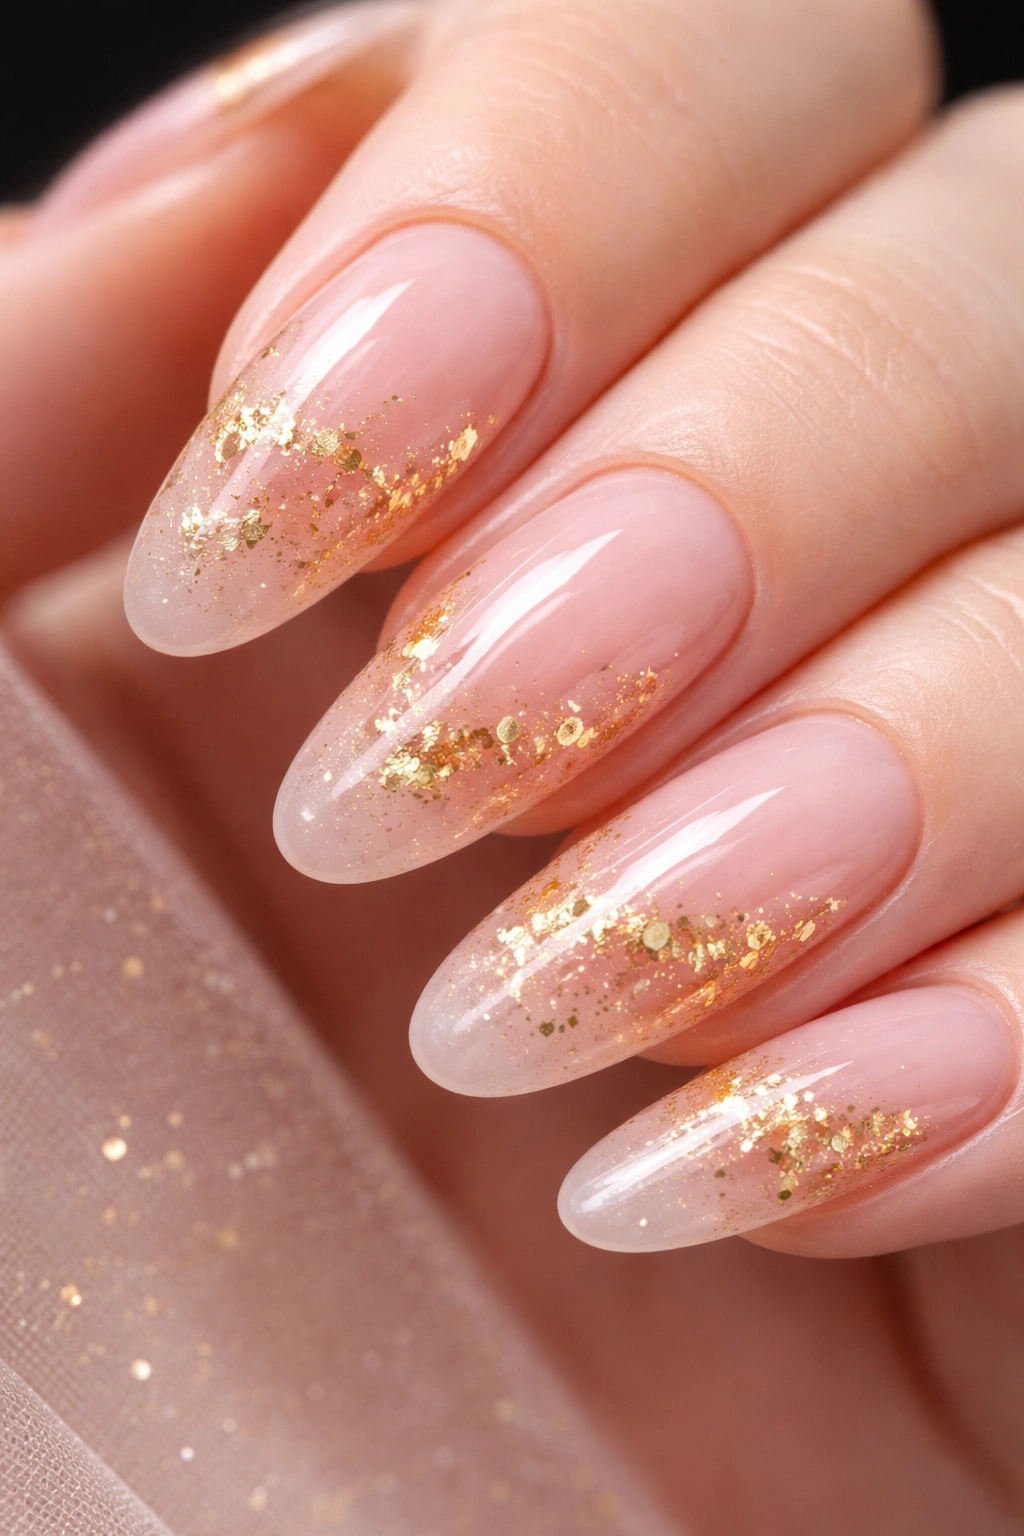
8. Champagne Glitter Gradient
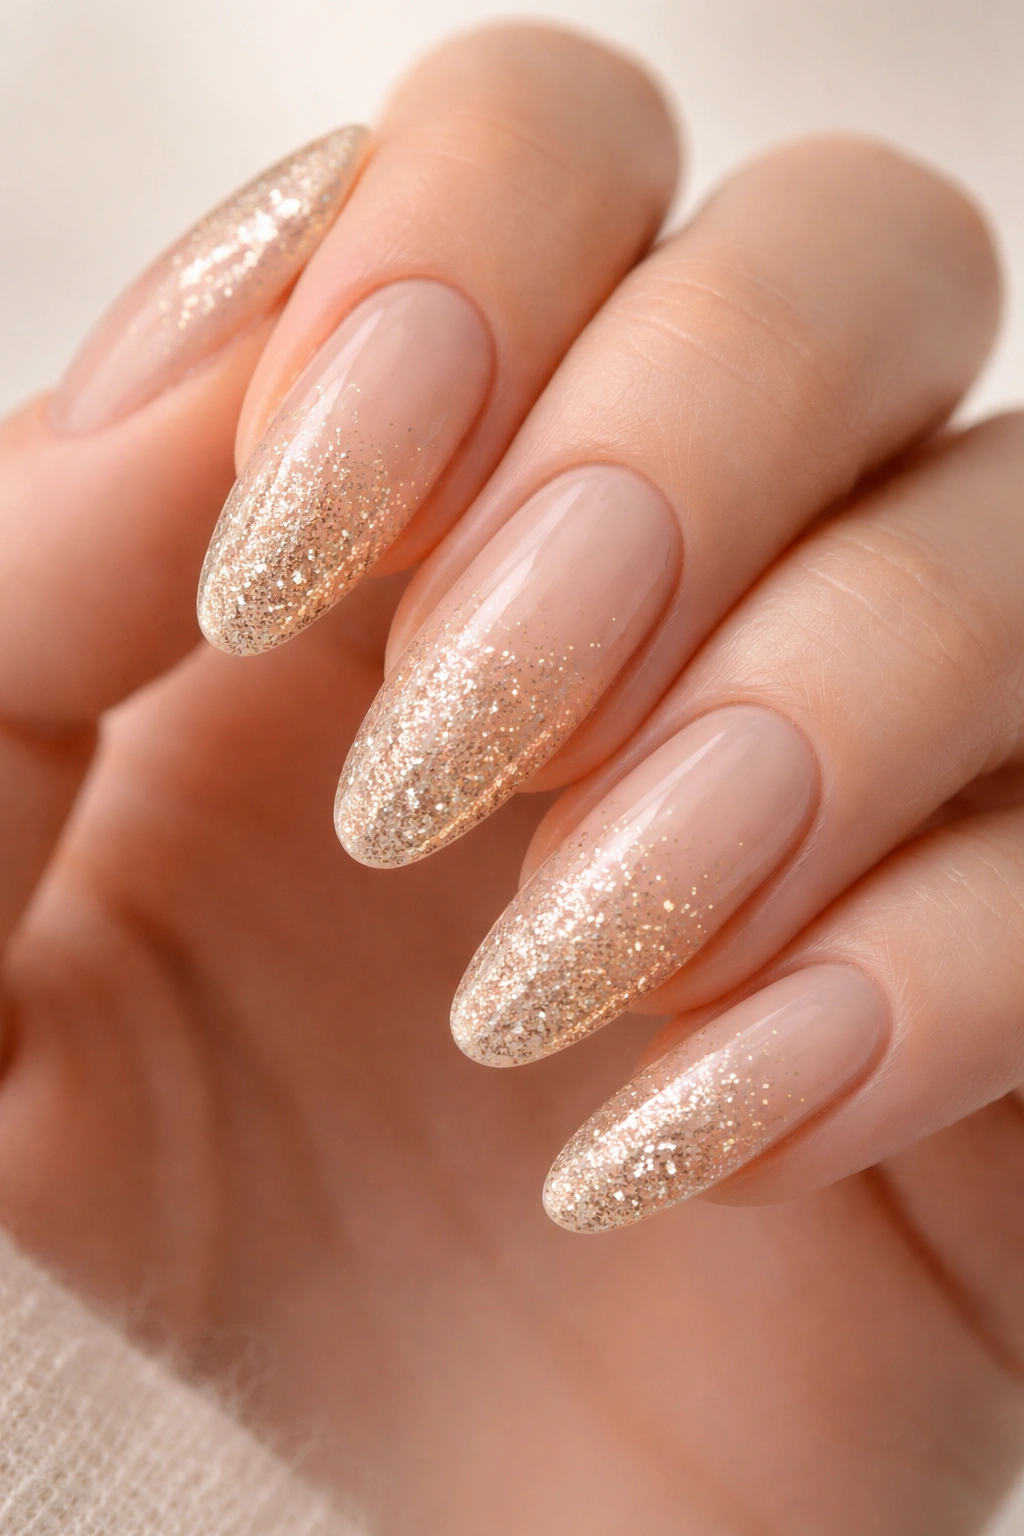
Champagne is the color of celebration, and champagne glitter takes that feeling and spreads it across your entire nail. The design features a sheer champagne base that gradually builds in glitter intensity toward the tips, creating an ombré effect made entirely of sparkle.
Why This Design Feels Luxe
Champagne glitter works because it’s universally flattering and it catches light in a way that makes your hands look expensive. The gradient effect means you’re not overwhelming your nail with sparkle at the base—you’re building toward it, which keeps the design feeling intentional rather than random.
Building the Gradient
Start with a sheer champagne base coat—this should be very translucent. Mix tiny champagne or gold glitter into clear gel and apply it sparingly to the tips, then gradually work it up the nail in successive layers, adding more glitter with each layer. The result should feel like the glitter is naturally concentrating toward the tips. Seal with a thick, shiny topcoat to lock all that sparkle in place.
This design pairs beautifully with anything from casual jeans to formal dresses—the understated elegance of champagne glitter works across the entire spectrum of occasions.
9. Navy Blue with Tiny Gold Stars
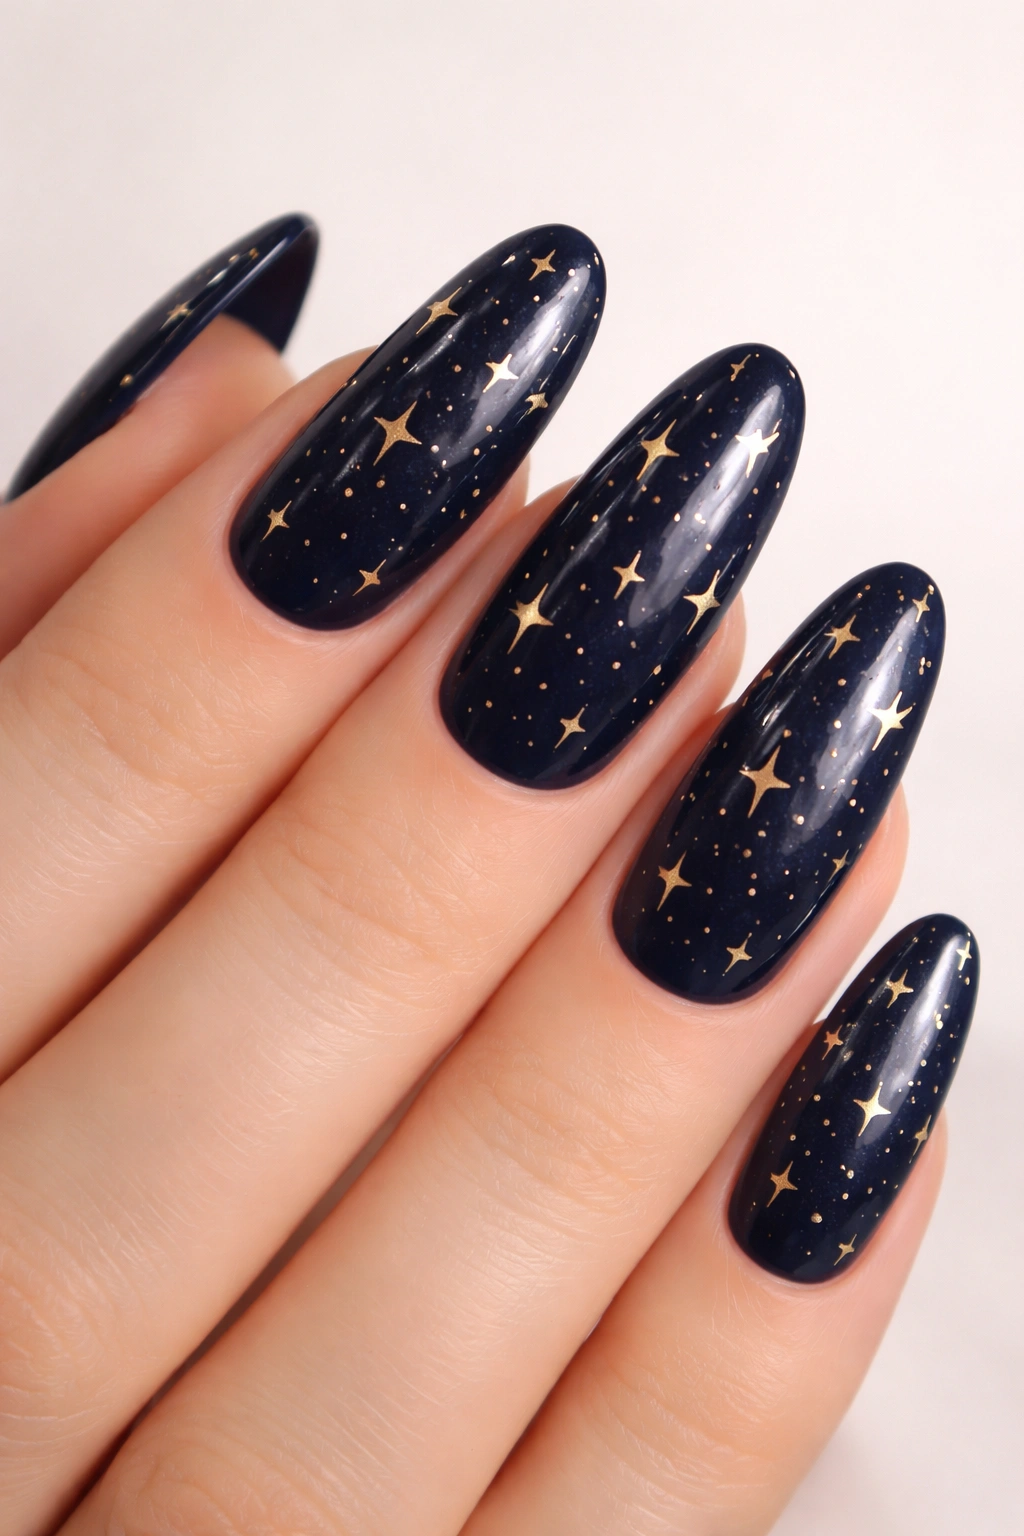
Navy blue is having a major moment as an alternative to basic black, and for good reason—it feels sophisticated and modern while still being versatile. Tiny gold stars scattered across a navy base add whimsy without sacrificing elegance. On longer ovals, the stars have room to breathe and create a balanced scattered pattern.
The Appeal of Navy and Gold
This combination feels both contemporary and timeless. Navy is clean and professional, while gold adds just enough luxury to make the design feel special. The size of the stars matters here—you want them small enough that they feel like an intentional accent rather than the main event.
Creating Your Star Pattern
After your navy base is set, use a thin brush and gold gel polish to paint tiny stars across your nails. You can create a constellation effect (clustered stars on one or two nails) or a scattered pattern across all nails. The beauty of hand-painted stars is that they don’t need to be perfectly symmetrical or identical—variation actually makes them look more organic and charming.
Quick fact: Navy and gold is a color combo that works equally well in summer and winter, making it perfect for anyone who wants a design with genuine longevity.
10. Peachy Nude with Thin White Stripes
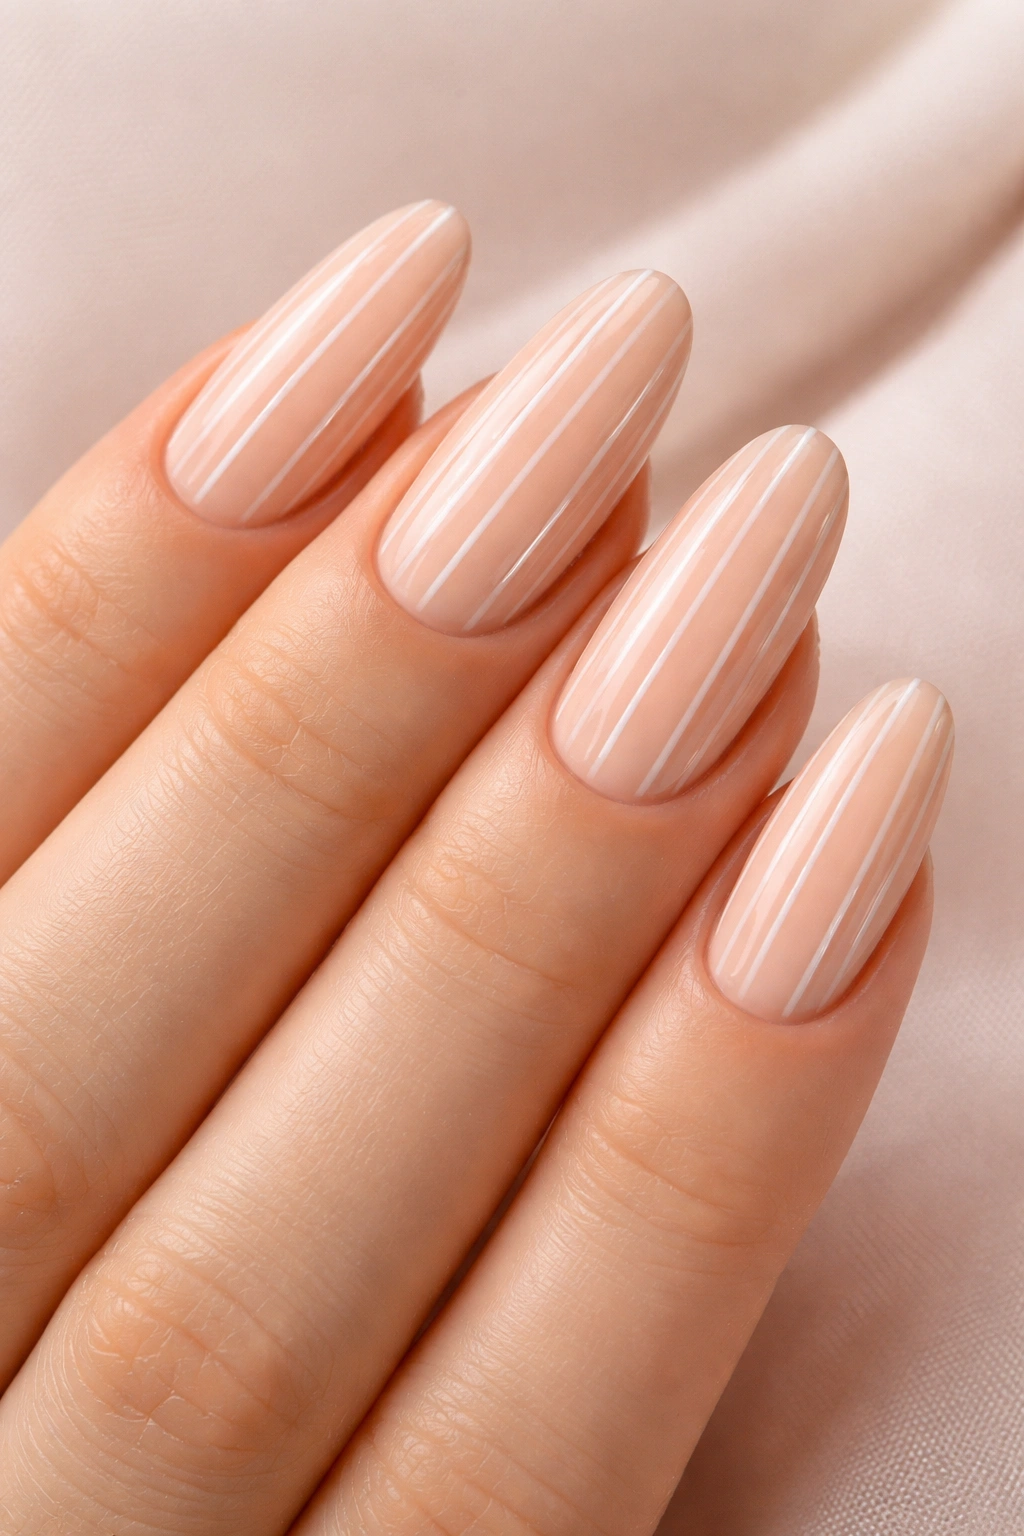
Peachy nude is one of the most forgiving base colors—it complements virtually every skin tone and feels fresh without being too bold. Add thin white vertical stripes and you’ve got a design that’s interesting without being complicated. The longer oval shape gives the stripes room to extend gracefully from cuticle to tip.
Why Stripes Elevate a Simple Base
Stripes add visual interest and movement without requiring complicated nail art skills. They’re geometric enough to feel intentional but simple enough that slight imperfections don’t undermine the whole design. The white against peachy nude creates just enough contrast to be noticeable without being jarring.
Stripe Application Method
Use a thin striping brush or nail tape to create your lines. If you’re using tape, apply it vertically to your nail before the base color is completely cured (just cured enough that the tape won’t lift the polish), and remove it before the final cure. Alternatively, freehand your stripes with a striping brush—they don’t need to be perfectly straight to look intentional.
The spacing of your stripes matters: wider spacing feels modern and clean, while narrower spacing feels more intricate. Choose whichever resonates with your aesthetic.
11. Deep Forest Green with Rose Gold Accents
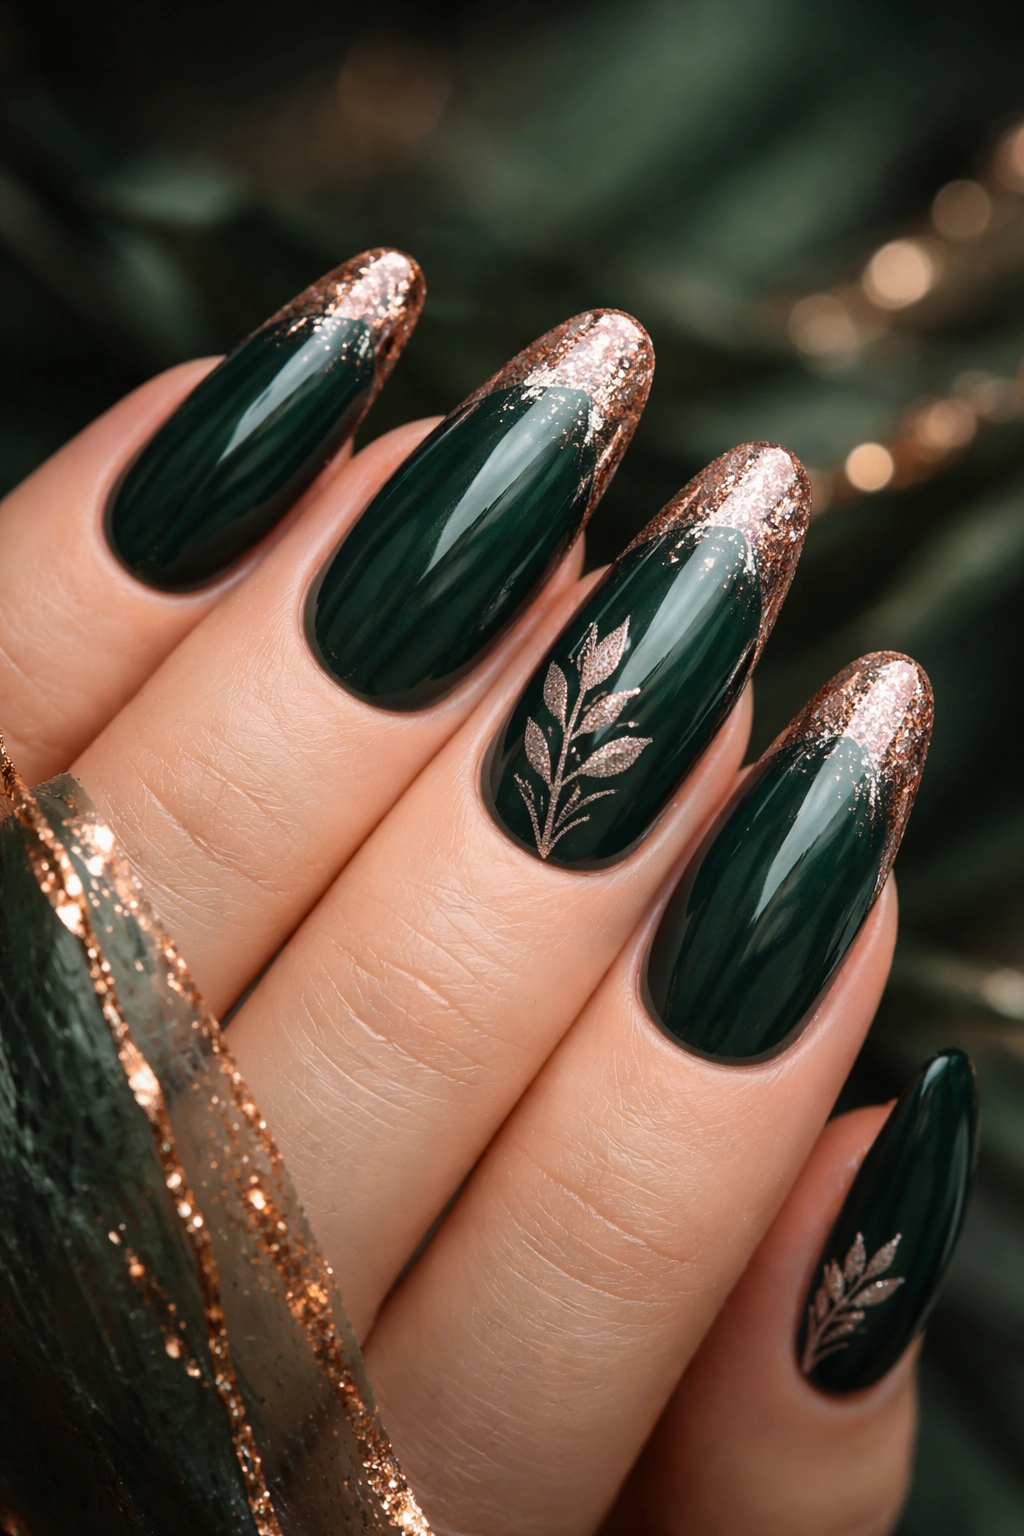
Forest green is a color that feels both moody and fresh, like a walk through a beautiful wooded area. Pair it with rose gold accents—maybe some rose gold leaf designs or a rose gold shimmer at the tips—and you’ve created something that feels nature-inspired but ultimately luxe.
Why Green and Rose Gold Complement Each Other
These colors exist in nature together—think sunrise hitting green leaves with golden light. The combination feels organic but elevated. Forest green is dark enough to feel sophisticated and dramatic, while rose gold adds warmth and prevents the look from feeling too heavy or gothic.
Design Application Options
You have several directions to go with this: a rose gold ombré at the tips that fades into forest green, hand-painted rose gold leaves on a forest green base, or a rose gold shimmer dust over the forest green polish. All of these approaches work beautifully on longer oval nails because you have the space to make the design feel balanced.
This is a design that genuinely impresses people—the color combo feels thoughtful and intentional, like you spent time considering what would work well together.
12. Classic White Tip with Pearl Accents

The white tip is a classic for a reason—it’s timeless, elegant, and flattering. When you add pearl accents (maybe along the side of the nail or scattered near the white tip), you’re elevating the classic design without completely reimagining it. Longer oval nails make this combination feel particularly refined.
The Modern Take on Traditional
This design feels both modern and traditional simultaneously. You’re honoring the elegance of French manicures and white tips while adding subtle luxury through pearl detailing. The pearls catch light in a way that makes your hands look polished and intentional.
Placement and Application
Pearl accents can be applied as small pearl beads mixed into your topcoat near the tips, or as hand-painted pearl details. If you’re using actual pearls, ask your technician to press them into a base layer and ensure they’re completely sealed with topcoat. If you’re painting them, use a slightly iridescent polish or gel that shifts in the light.
The key is restraint—you want pearls to feel like luxe accents, not the main event. A few strategically placed pearls feel more elegant than covering the entire tip.
13. Soft Blush with Negative Space Cutouts
Negative space designs have become increasingly popular because they look more complicated than they actually are. The concept is simple: instead of covering your entire nail with color, you’re leaving parts of the natural nail (or the base layer) visible, creating interesting shapes and negative space.
Why Negative Space Works on Longer Ovals
The oval shape is perfect for negative space because the curves are already interesting—you’re just enhancing that visual interest by adding intentional gaps. A soft blush base with small cutouts near the tips, along the sides, or even a geometric negative space section in the center creates visual movement without feeling busy.
Executing Negative Space
One approach: apply your blush polish to your entire nail, then use a thin brush and clear gel to “paint” areas where you want negative space, curing as you go. When you cure the clear gel over the blush, the areas where you’ve applied clear gel will pop as negative space. Alternatively, you can apply nail tape to create your cutout shapes before applying base color, and remove the tape after curing.
This design requires a steady hand and patience, but the result looks intricate and modern in a way that feels very current.
14. Black with Silver Confetti Effect
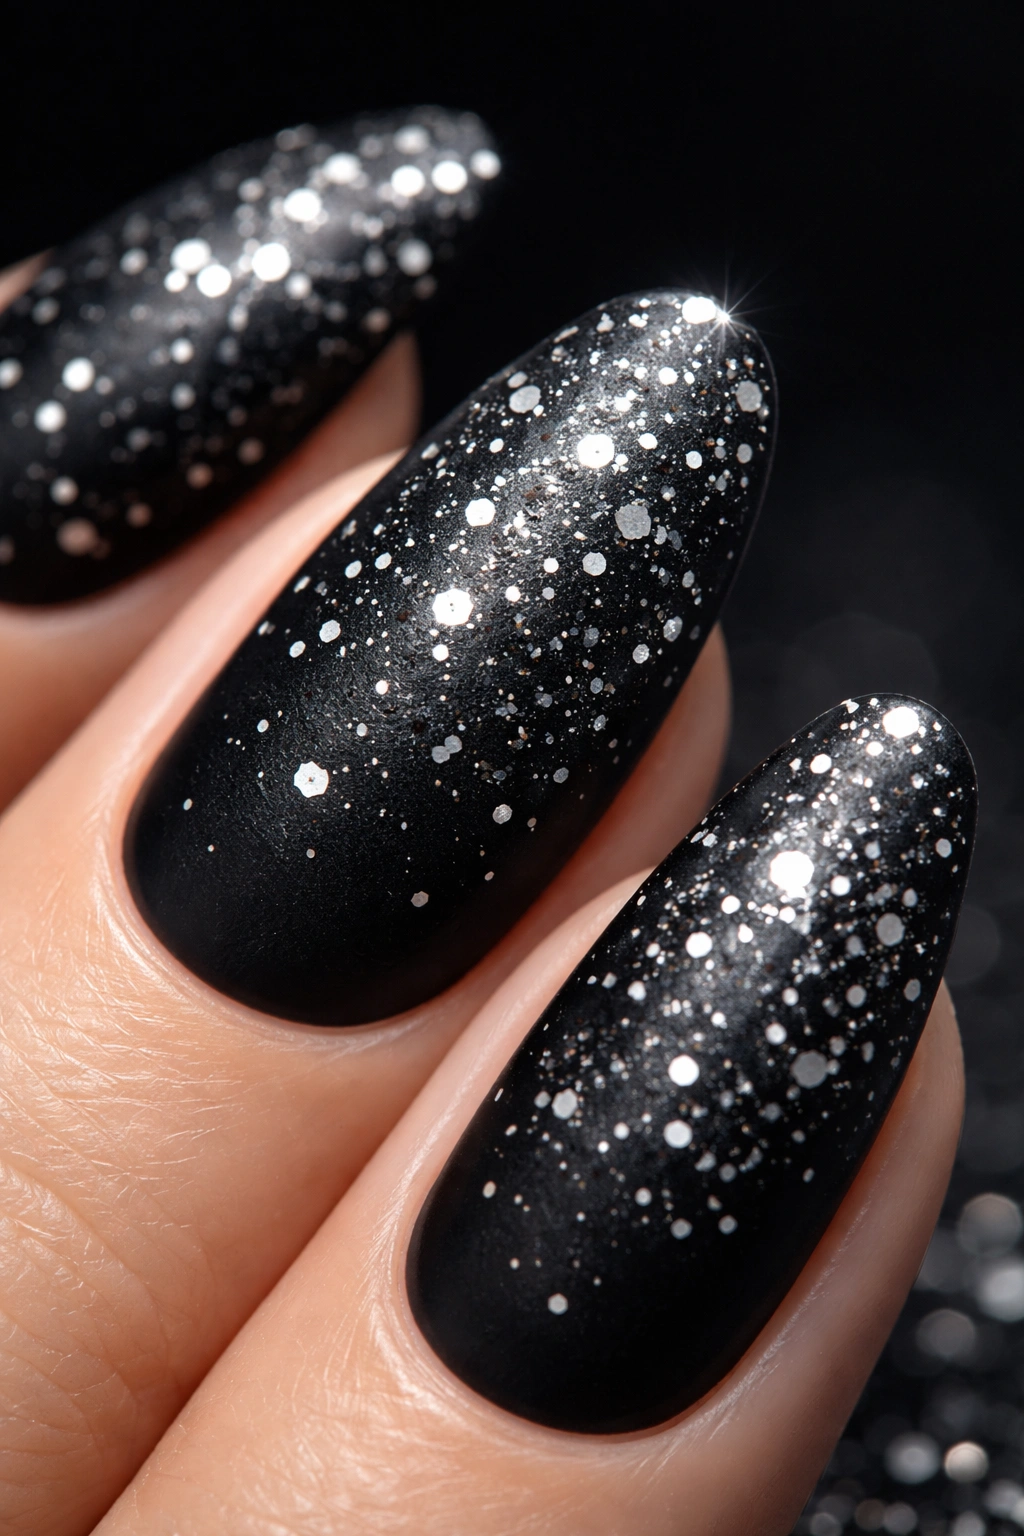
Sometimes you want something that’s genuinely fun and celebratory without being costume-y. A black base with silver confetti pieces scattered across it gives you that party energy in a sophisticated package. On longer oval nails, the confetti has room to spread out and create visual interest.
Making Confetti Look Intentional
The key to this design is the density and distribution of your confetti. You want enough that it’s clearly the design element, but not so much that your entire nail is covered. The black base provides contrast that makes the silver pop beautifully.
Application Method
You can use confetti that comes premixed with gel polish, small silver flakes, or even tiny rhinestones and sequins embedded in topcoat. Apply your black base first, let it cure, then apply a layer of topcoat mixed with your confetti pieces, working quickly before the topcoat cures so you can manipulate the placement. Seal with a final topcoat layer.
Quick tip: Silver confetti reads differently in different lighting—indoor light makes it sparkle subtly, while natural light makes it pop more dramatically. This design is versatile enough for nearly any occasion.
15. Dusty Rose with Intricate White Lace Design
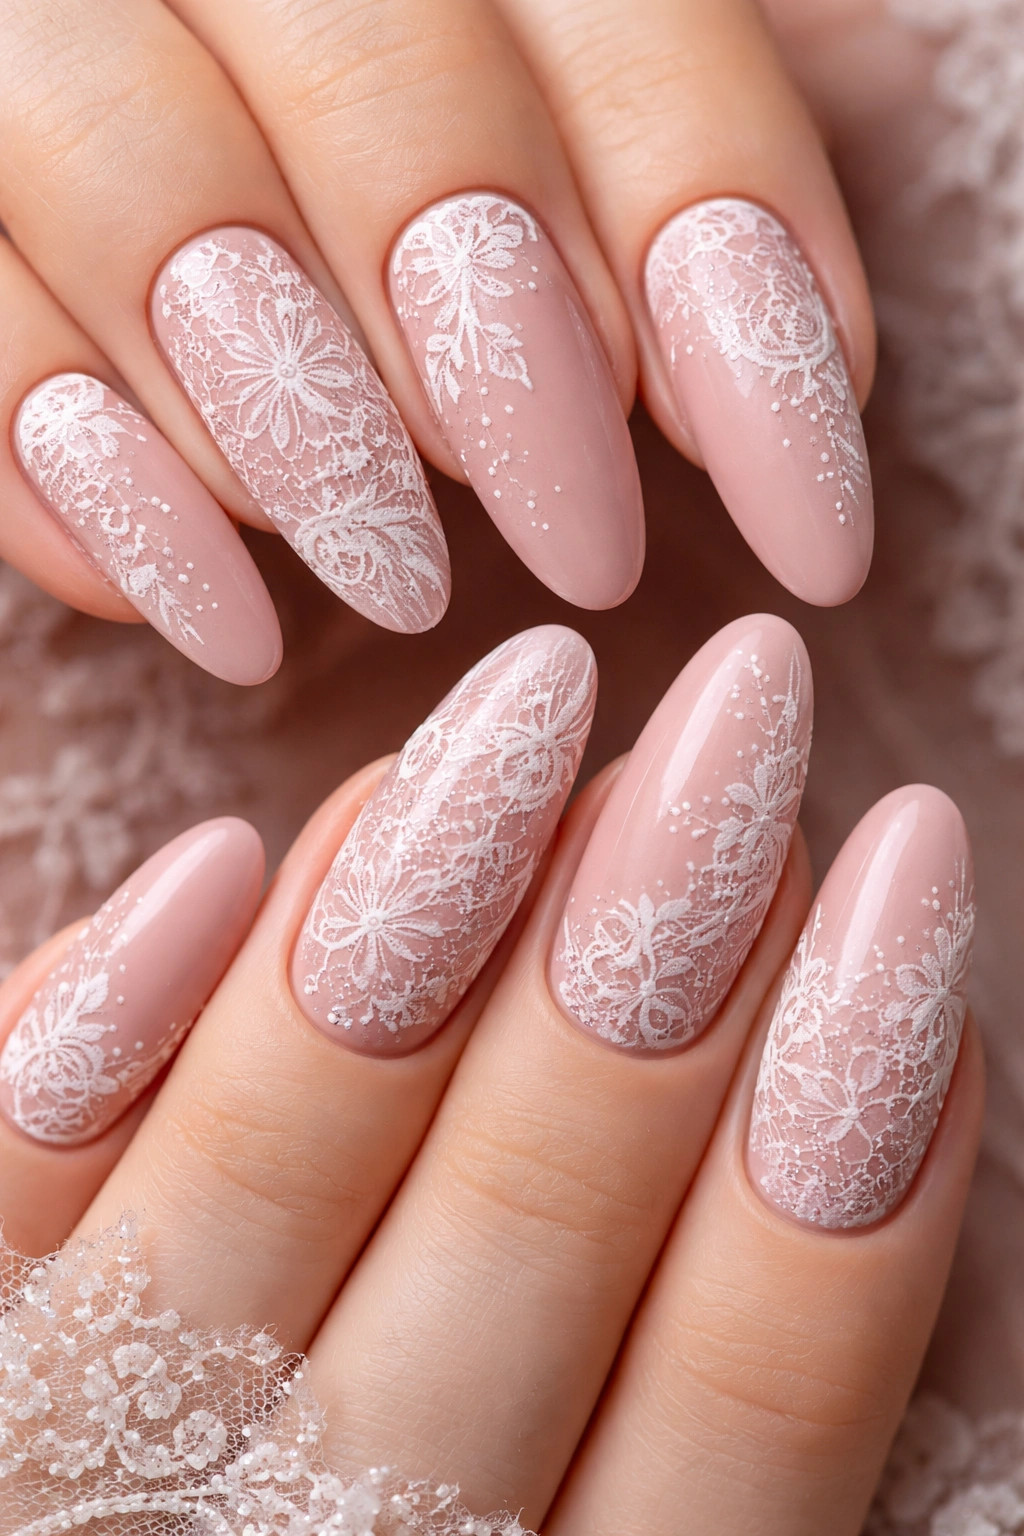
Lace designs feel delicate and intricate, like you’ve somehow transferred actual lace to your nails. On a dusty rose base, white lace details create this romantic, vintage-inspired aesthetic that still feels modern. Longer ovals give you enough surface area to create actual intricate patterns.
Why Dusty Rose and White Works
Dusty rose is one of the most romantic colors available—it’s soft without being babyish, warm without being peachy. White lace on dusty rose reads as both elegant and slightly vintage, which appeals to people who appreciate design complexity and thoughtfulness.
Creating Your Lace Pattern
This is one of the more involved designs on this list, but it’s not impossible. You can either freehand delicate white lines that mimic lace patterns, or use a lace pattern nail stamp to apply a pre-designed pattern. If you’re stamping, practice on a practice nail first to ensure proper placement. If you’re hand-painting, thin lines work better than thick ones—you want the lace to feel delicate and intricate.
Start with simple line patterns before attempting more complex designs. Even basic crossed lines can create a lace-like effect when you add small dots at the intersections.
16. Metallic Bronze with Thin Copper Stripes
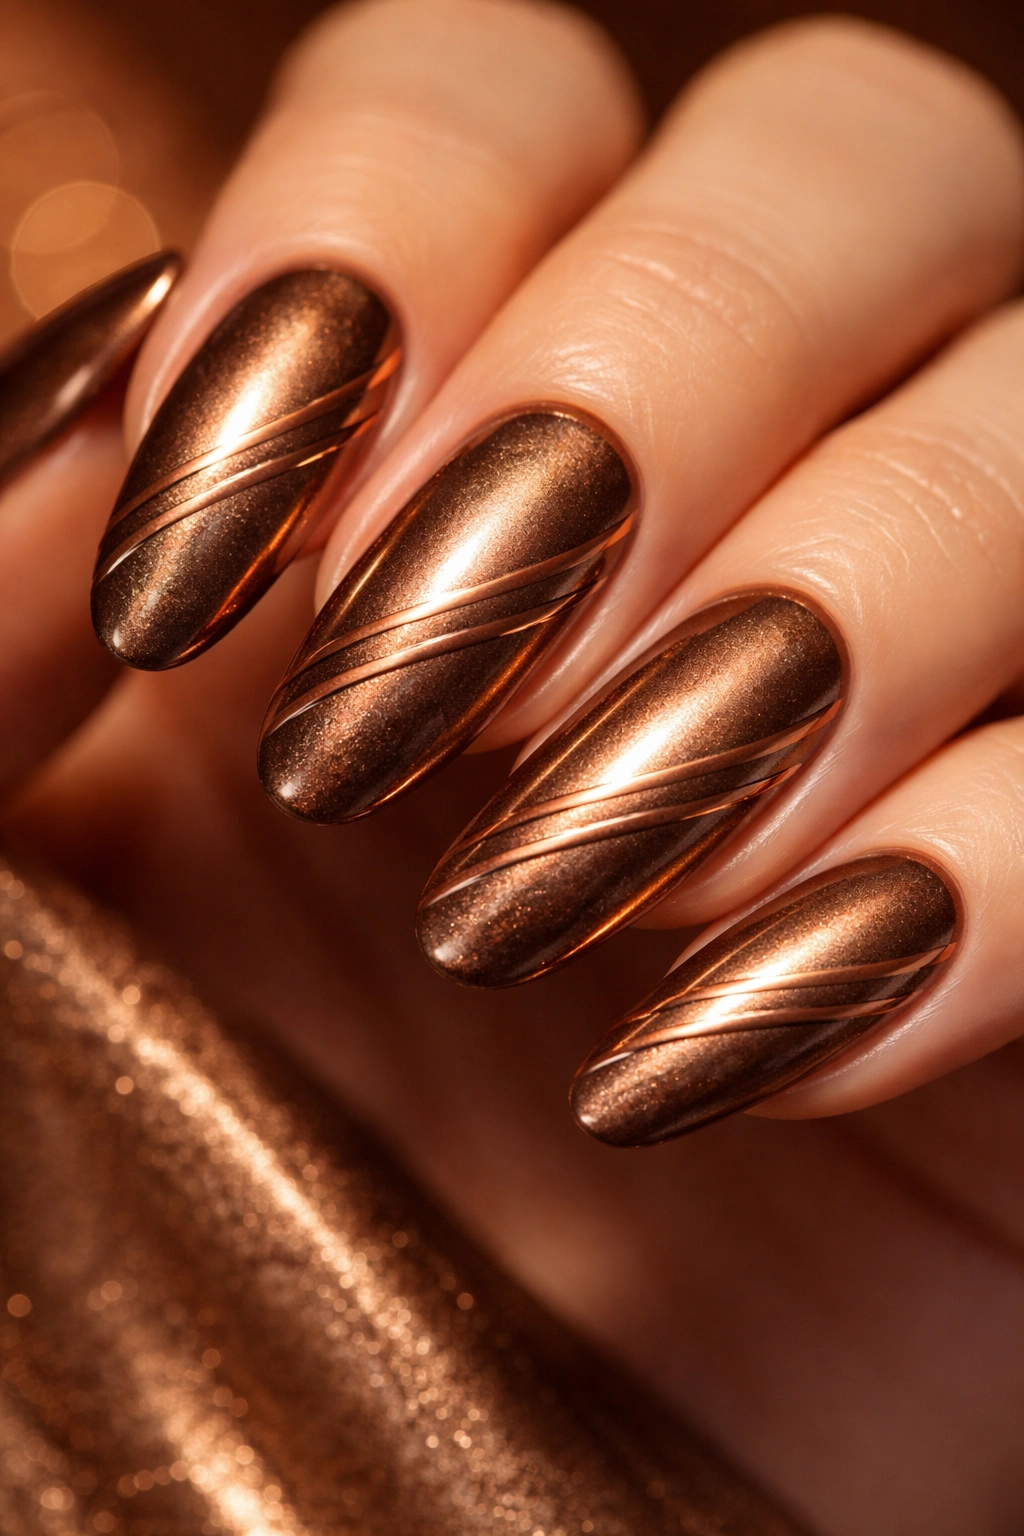
Bronze is having a major moment as a sophisticated alternative to basic gold, and there’s good reason why. It has depth and warmth without the “shiny” quality of gold. Add thin copper stripes for visual interest, and you’ve got a design that feels expensive and intentional.
The Warmth Factor
Metallic finishes work beautifully on longer nails because they catch light at different angles. The extended length means your hands are catching more light overall, which makes metallics shine even brighter. Bronze with copper stripes creates this warm, glowing effect that feels incredibly luxe.
Application Approach
Use a metallic bronze gel polish as your base—these often have a slightly sticky texture that lets you apply thin copper lines without them disappearing. Apply your bronze base, cure it, then use a thin striping brush and copper gel to add vertical or slightly curved lines. The stripes should be narrow enough to feel like accents rather than half the design.
Metallic designs benefit from a high-gloss topcoat, so make sure your final seal is shiny and thick.
17. Cream Base with Scattered Seed Pearls
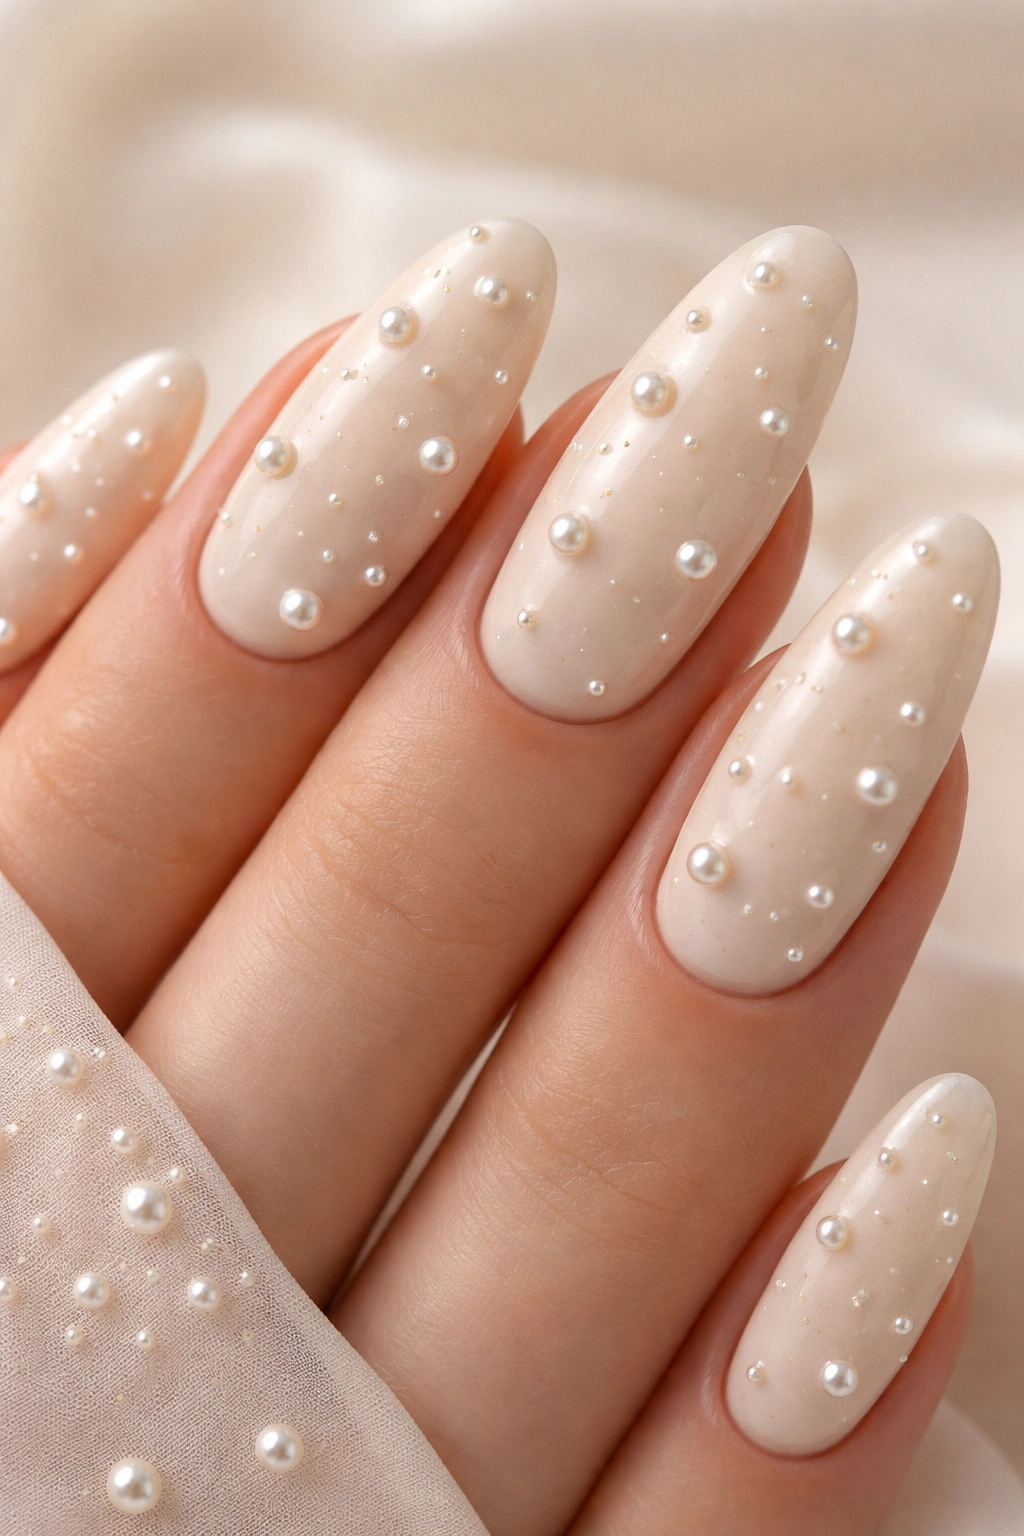
Seed pearls are tiny, lustrous beads that catch light in a subtle, sophisticated way. On a cream base, scattered seed pearls create an effect that feels both organic and intentionally luxe. The cream color keeps the focus on the pearls rather than the base color.
The Elegance of Simplicity
This design works because it’s visually interesting without being overwhelming. Each pearl is small enough that they feel like accents, but together they create a cohesive, clearly intentional design. On longer ovals, seed pearls scattered across the entire nail surface feel balanced and elegant.
Pearl Application and Securing
Seed pearls should be applied to a base layer of sticky gel (the uncured gel residue), positioned carefully, and then sealed with topcoat. Make sure each pearl is completely submerged in the topcoat so they’re durable and won’t snag on clothing or hair. The curing process should lock them in place permanently.
This is a design that genuinely looks like it belongs in a formal jewelry collection, which is exactly the vibe it creates.
18. Sheer Pink with Gold Foil Accents
Sheer pink is that universally flattering color that works on every skin tone. Gold foil accents create visual interest while maintaining an overall look of elegance. The transparency of the sheer pink means the foil really shines without competing with a heavy base color.
Why Sheer Works Better Than Opaque Here
Sheer pink reads as more delicate and sophisticated than opaque pink. It feels like your nail color is almost barely there, which creates a very modern, minimalist aesthetic. The gold foil becomes the design element, so it needs to be able to take center stage without visual competition.
Foil Application Method
Gold foil comes in sheets or as small flakes. If you’re using sheets, apply your sheer pink base, then carefully apply foil pieces to sticky gel (uncured gel residue) in whatever pattern feels balanced to you. If you’re using flakes, mix them into your topcoat or apply them to sticky gel. Seal everything completely with a final topcoat layer.
Gold foil has a dimensional quality that creates interesting light play—the foil literally reflects light back toward the viewer, making it impossible to ignore.
19. Sage Green with Delicate Gold Veining
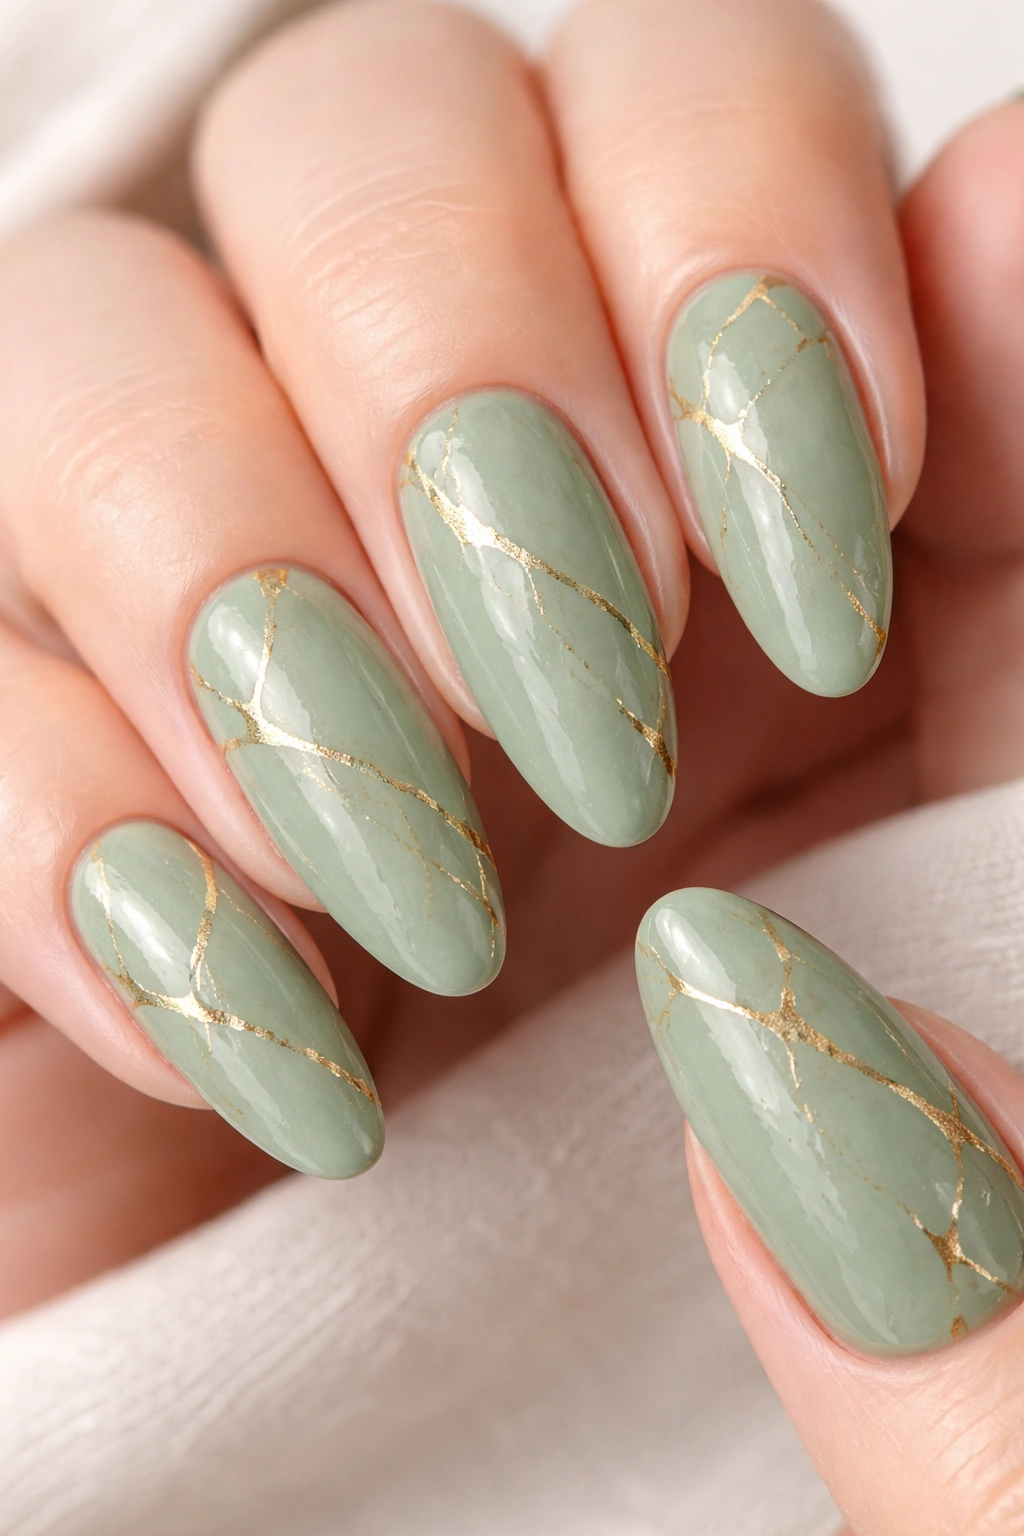
Sage green is a color that feels both modern and timeless, calm and sophisticated. Delicate gold veining creates the effect of marble or natural stone veining, transforming your nails into tiny works of art. On longer ovals, you have space to create actual detailed veining patterns.
The Marble Effect on Natural Nails
This design draws inspiration from marble and stone patterns found in nature—the veining looks organic but clearly intentional. Gold against sage green is a sophisticated pairing that feels current without being trendy. The veining adds visual interest without making the design feel busy.
Creating Natural-Looking Veins
Use a very thin brush and gold gel polish to paint irregular lines across your sage green base. The lines should be thin, varied in direction, and not perfectly symmetrical. Think about how actual marble or stone veining looks—it’s organic, flowing, and goes in multiple directions. Practice on a practice nail first to get a feel for the movement.
If freehand painting feels too intimidating, there are nail stampers designed specifically for marble and veining effects that can help you achieve this look with more precision.
20. Deep Purple with White Crescent Moon Details
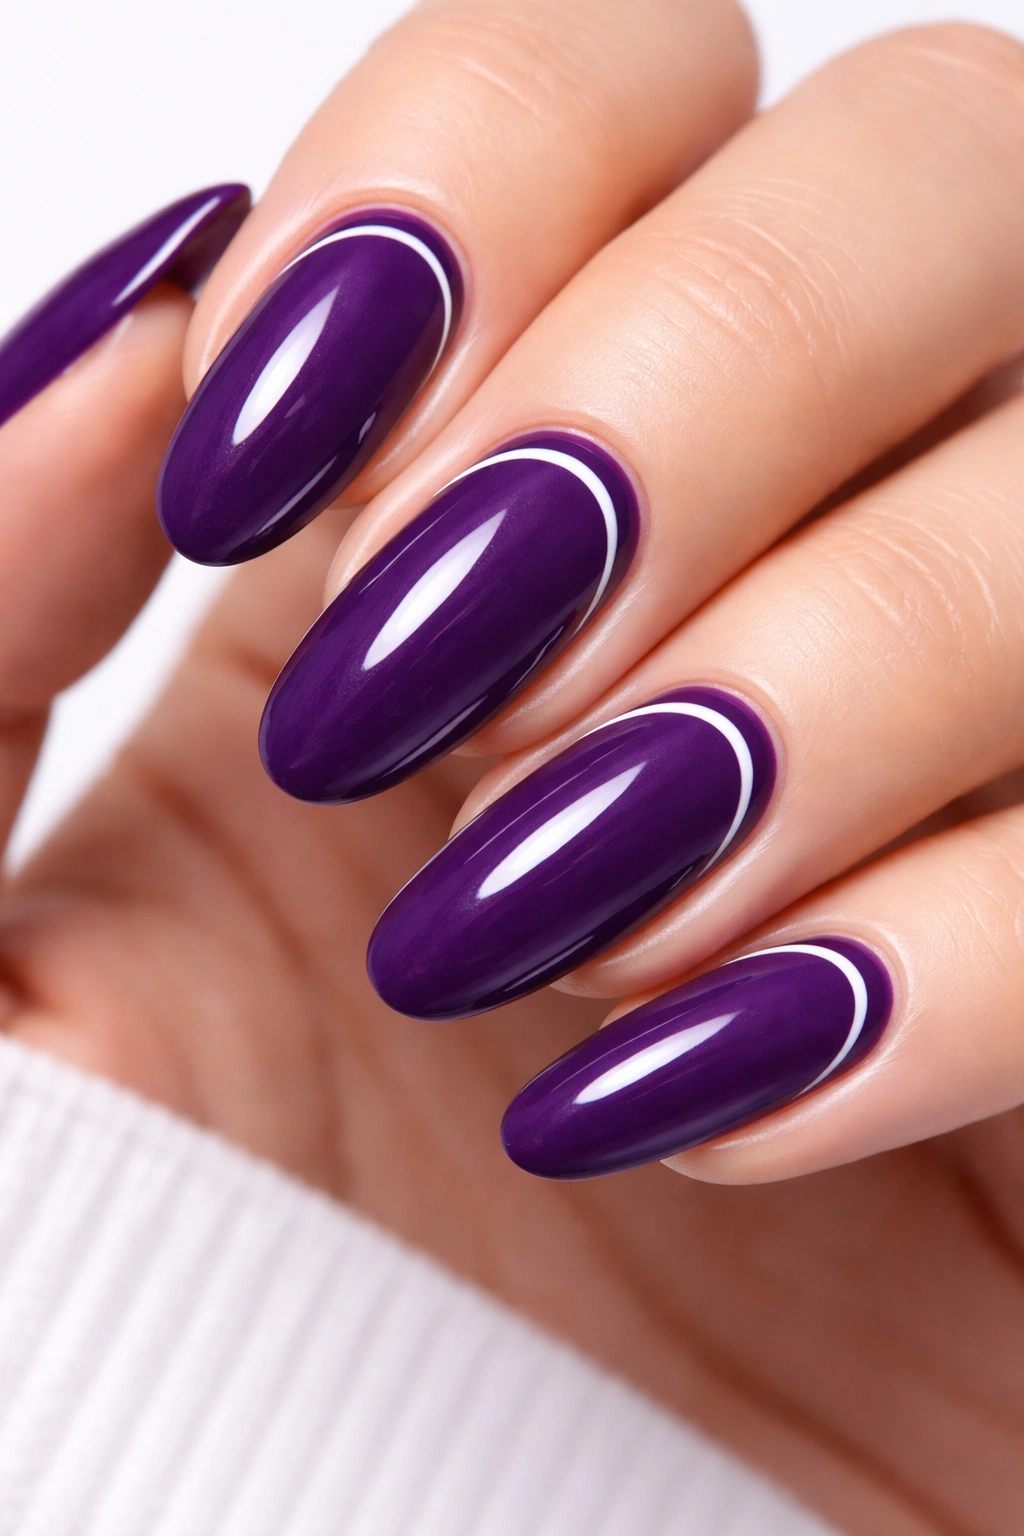
Purple feels mysterious and luxe, especially when it’s a deeper, richer shade. White crescent moon details create this celestial, slightly whimsical aesthetic that elevates the design. On longer ovals, you have room to paint actual detailed crescents that feel intentional rather than rushed.
The Magic of Celestial Designs
Celestial designs have become increasingly popular because they feel both mystical and modern. The combination of deep purple and white crescents creates a design that’s interesting to look at from multiple angles. The crescent shape naturally complements the curve of an oval nail.
Painting Your Crescent Moons
Start with a white base and paint a curved line that follows the shape of your nail tip, then fill in the crescent shape. Alternatively, you can outline multiple crescents at different sizes and positions across the nail. The imperfect, hand-painted quality actually enhances the celestial, mystical aesthetic.
White details on purple are high-contrast enough that minor imperfections don’t show—this design is more forgiving than you might think.
21. Warm Caramel with Chocolate Drip Effect
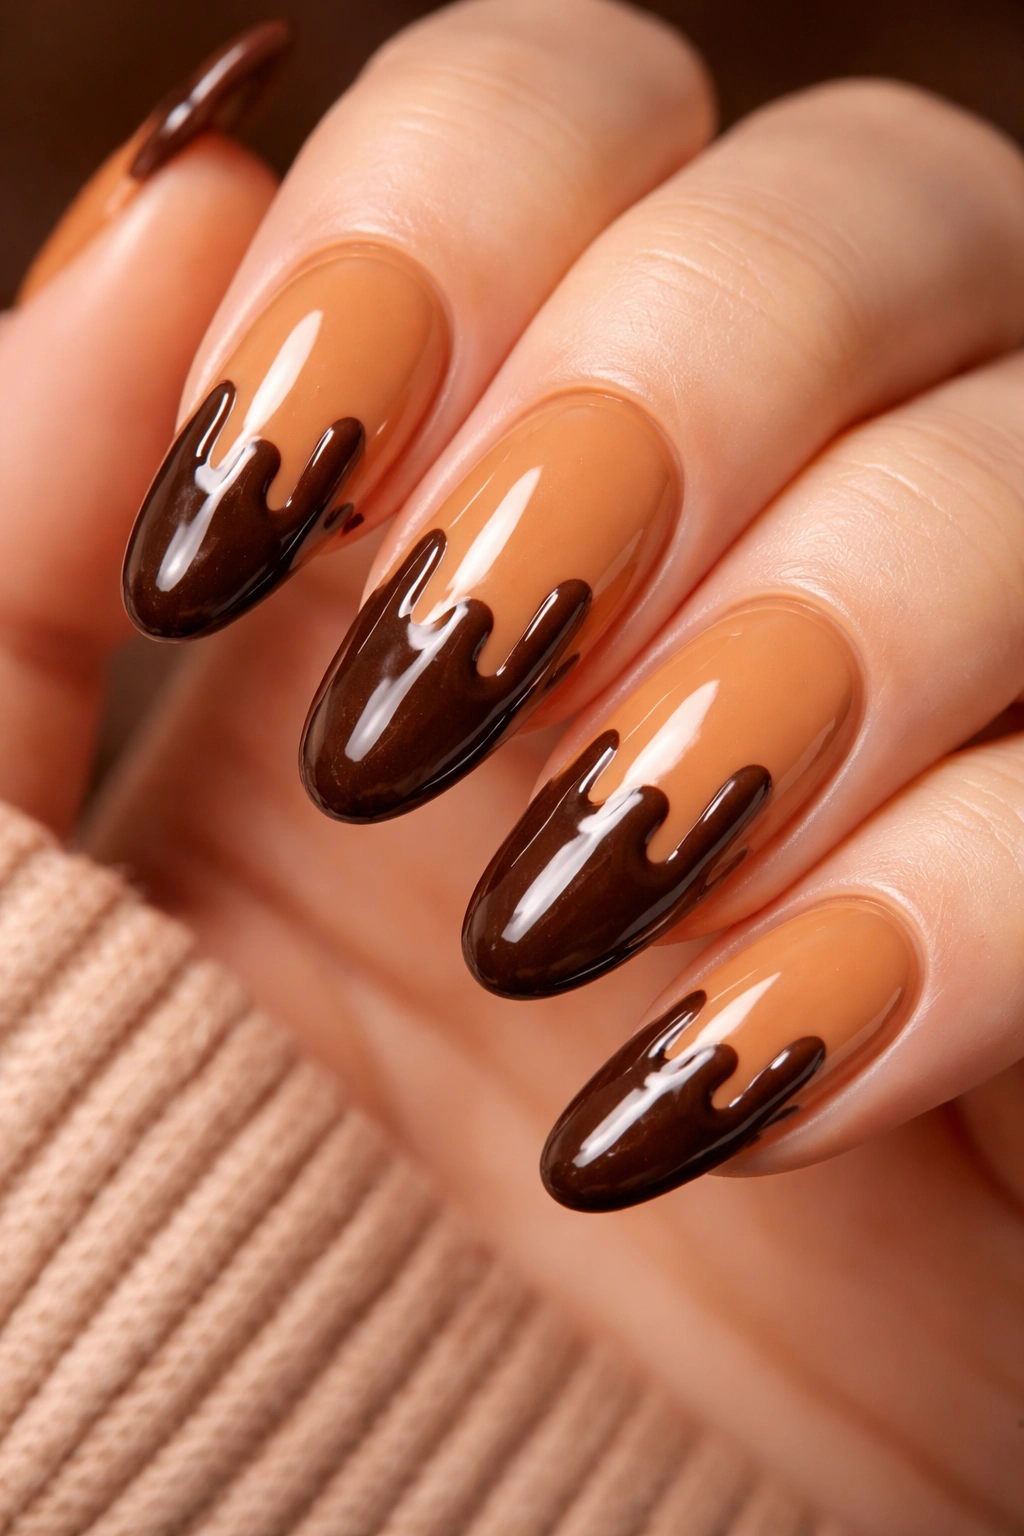
The drip effect has become iconic on nails, and for good reason—it looks playful and intentional. A warm caramel base with “chocolate” brown drips from the tip creates this dessert-inspired, slightly whimsical design. On longer nails, the drips have space to actually drip and flow naturally.
Why This Playful Design Works
The drip effect feels modern and fun without being juvenile. Caramel and chocolate are colors people instinctively find attractive, so this design automatically appeals to the eye. The color combination feels warm and cozy, almost edible in its appeal.
Creating Realistic Drips
Use a thin brush and dark brown or chocolate gel polish to paint drips that start at the tip and flow downward (or start from random points and flow in one direction). The drips should be irregular—some longer, some shorter, some curved, some straight. The imperfect quality makes it look more realistic and organic.
Make sure your topcoat is thick enough to seal the drips completely, and cure carefully to ensure nothing shifts before it’s completely hardened.
22. Icy Blue with Snowflake Accents
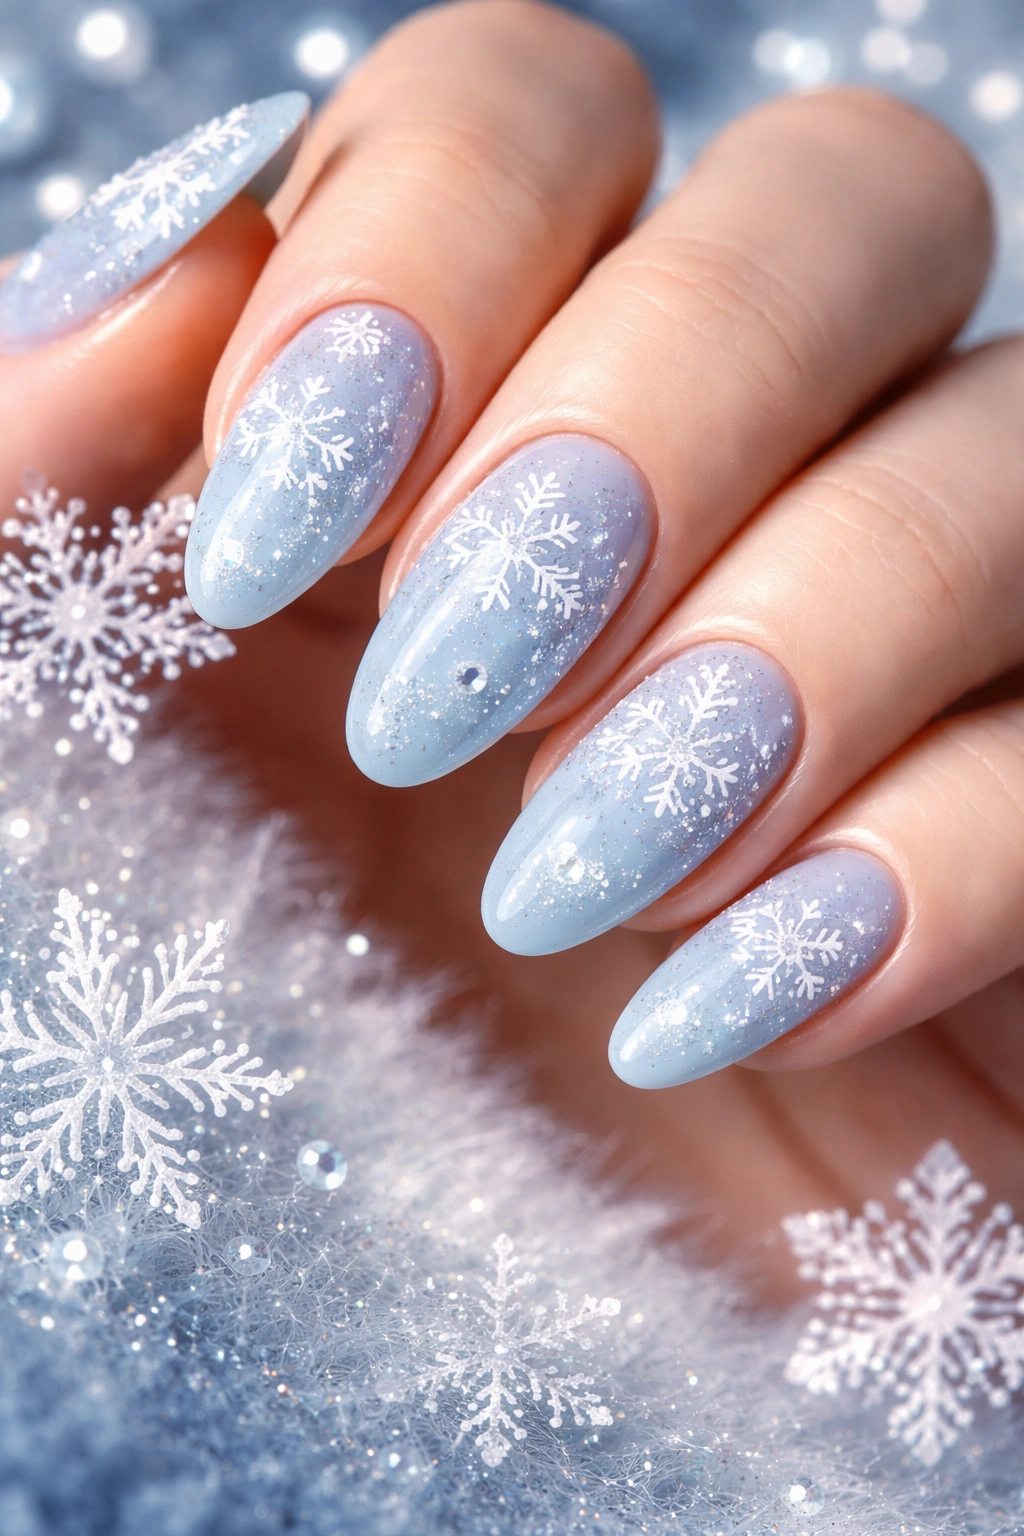
If you prefer designs that feel seasonal without being costume-y, icy blue with snowflake accents is your answer. Icy blue is a pale, cool-toned blue that feels fresh and calming. Snowflake accents create visual interest while maintaining an overall aesthetic of cool elegance.
Creating a Sophisticated Icy Look
Icy blue reads as sophisticated and modern rather than wintry or costume-like. It’s cool enough to feel intentional but not so bright that it feels loud. Snowflake accents can be tiny (dotted details) or more elaborate (actual detailed snowflake designs), depending on your preference.
Snowflake Design Options
Simple option: Use a thin brush and white gel to paint tiny snowflakes across your icy blue base. More elaborate option: Use a snowflake nail stamp to apply pre-designed patterns. The beauty of snowflakes is that they’re geometric enough that imperfections actually look like intentional variation—real snowflakes aren’t perfectly symmetrical either.
This design works year-round because icy blue doesn’t scream “winter” the way heavy winter themes do. It feels modern and cool without seasonal limitations.
23. Coral Nude with Geometric Gradient
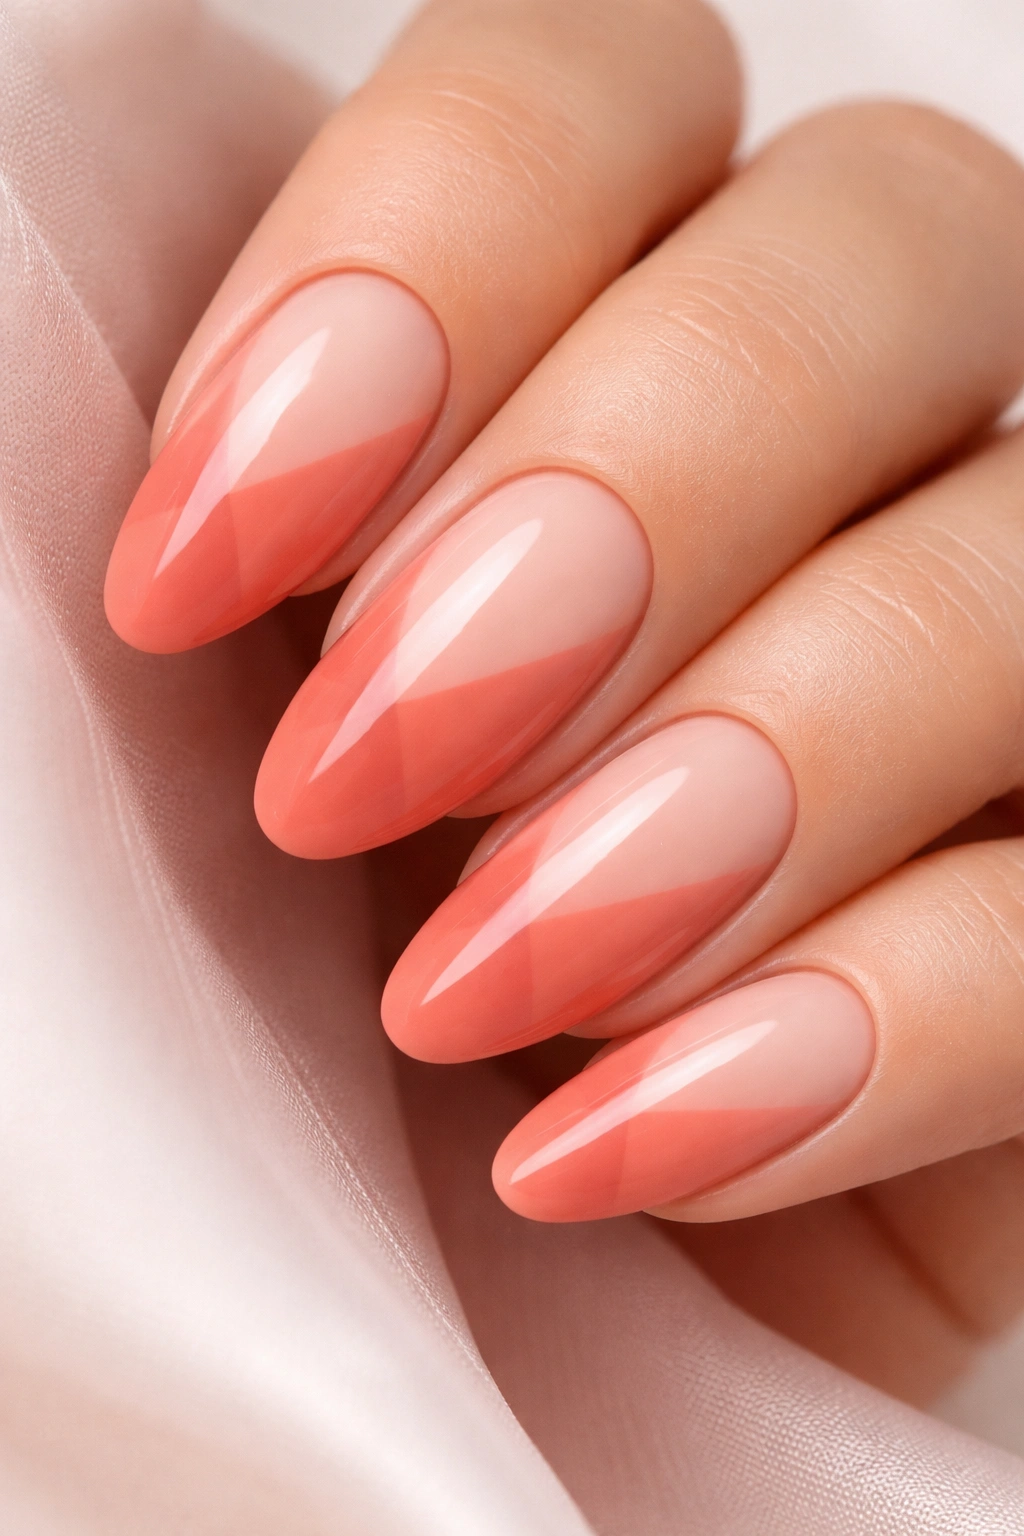
Coral nude is a warm, sophisticated base color that feels both earthy and elevated. Add a geometric gradient—perhaps a triangle that transitions from coral to nude—and you’ve created visual interest through shape and color. On longer ovals, the geometric shapes have room to breathe.
The Balance of Warm Tones
Coral and nude are both warm tones, so the combination feels cohesive without being boring. The geometric gradient adds movement and visual interest while maintaining overall sophistication. This design appeals to people who love color but prefer it applied thoughtfully rather than boldly.
Creating Your Gradient
You can create a gradient in multiple ways: use a sponge to blend coral and nude together, create a distinct triangle or other shape where colors meet, or use a tape method to create clean lines between coral and nude sections. The longer length of your oval nails gives you actual surface area to work with, so small gradient triangles feel balanced and intentional.
This design is more understated than some others on this list, which is exactly why some people love it—it’s elegant without demanding attention.
24. Charcoal Gray with Holographic Shimmer
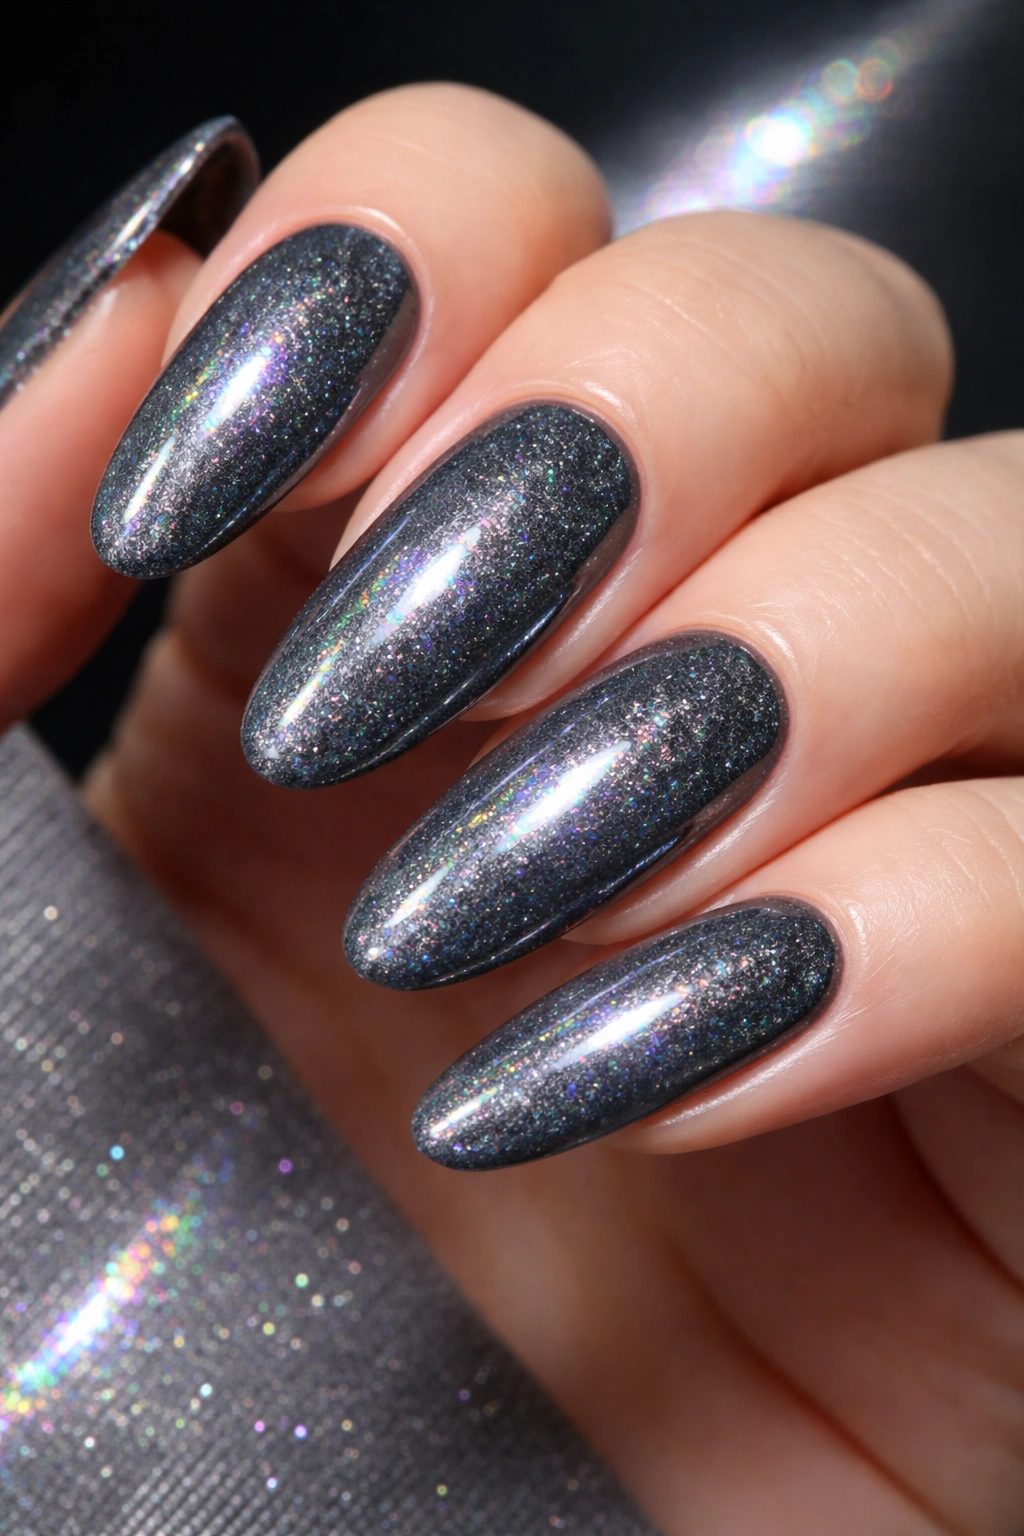
Charcoal gray is the grown-up alternative to black—it feels sophisticated and modern without being as heavy. Holographic shimmer adds a futuristic, almost otherworldly quality that catches light and shifts colors as you move. Together, they create a design that’s both sleek and magical.
Why Holographic Works on Longer Nails
Holographic finishes are most impressive when you have surface area to see the color-shifting effect. Longer nails mean more light reflection and more opportunities to see the full spectrum of the holographic effect. This design is genuinely impressive in person but also photographs beautifully.
Achieving the Holographic Effect
Holographic gel polishes are readily available and easy to apply—usually just one or two coats over your charcoal base. Some holographic polishes are best in natural light, while others pop more in artificial light. The effect is built into the polish itself, so you’re not adding extra elements or trying to create the effect from scratch.
This is a design that naturally attracts compliments because it’s visually interesting and catches light in unusual ways.
25. Soft Taupe with Delicate Silk Finish
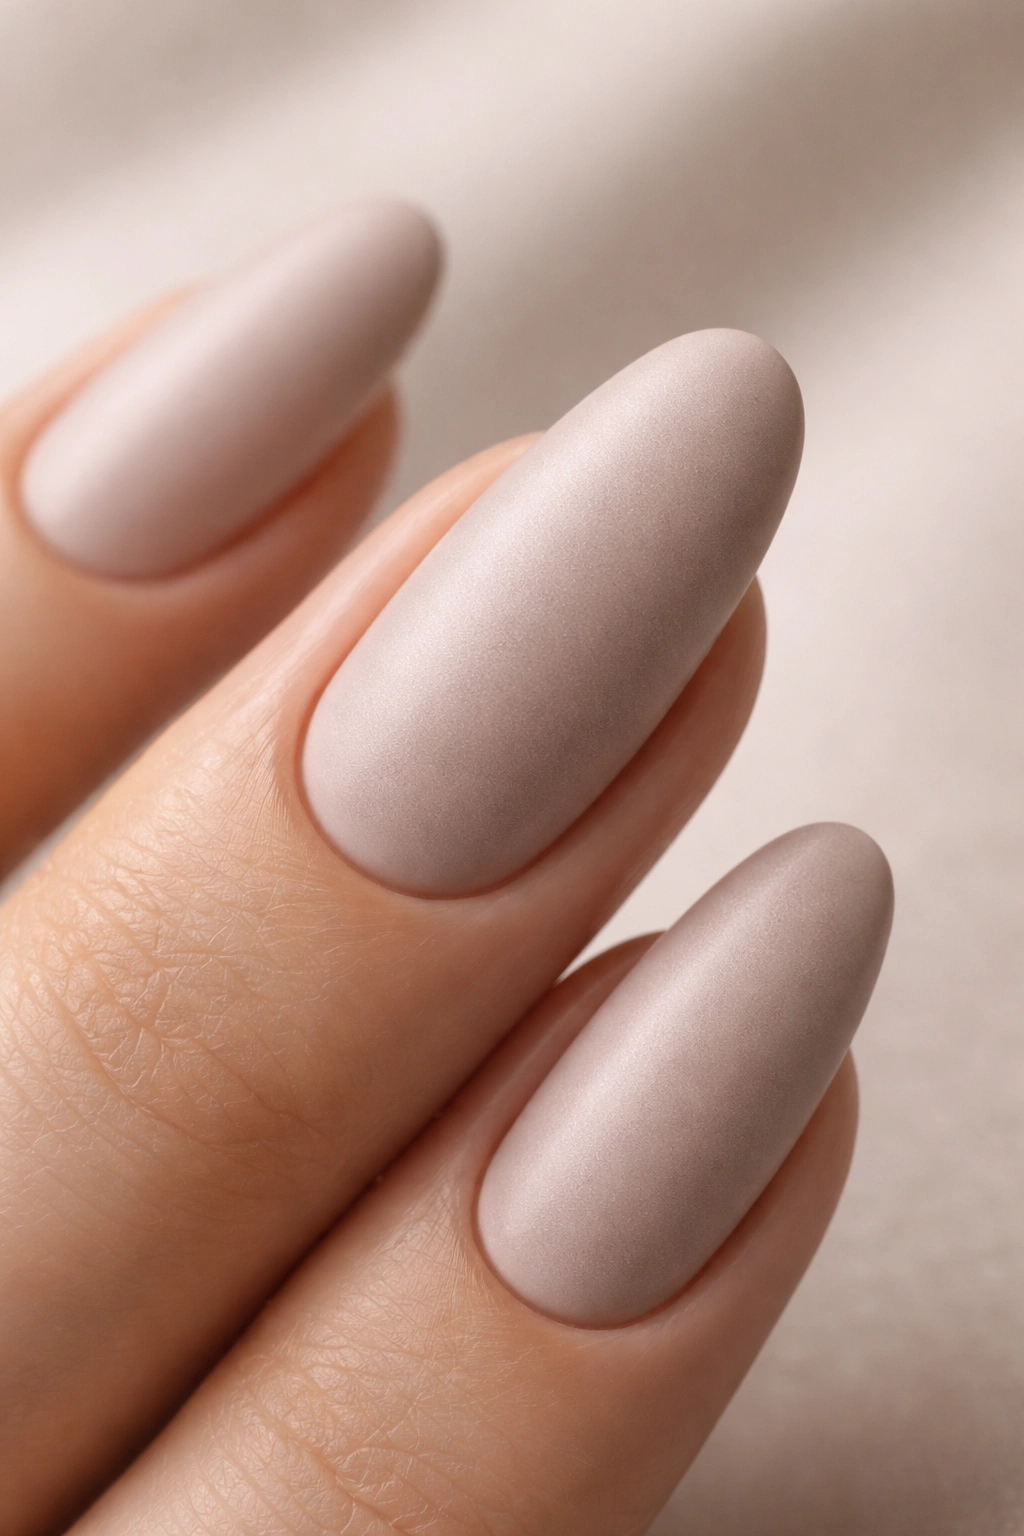
Sometimes the most sophisticated design is barely a design at all. A soft taupe base with a delicate silk finish (matte rather than glossy) creates this understated luxury that feels incredibly refined. On longer ovals, the focus is purely on the shape and the subtle texture of the finish.
The Power of Understated Elegance
This design works because it proves you don’t need complicated art or bold colors to make an impression. Taupe is inherently sophisticated—it’s neutral without being boring, warm without being yellow. The silk finish (matte topcoat) creates visual interest through texture rather than gloss or color intensity.
Creating the Perfect Silk Finish
Apply your taupe base and cure it completely. Then use a matte topcoat and apply it evenly across your entire nail. The matte finish creates a velvety texture that catches light differently than glossy finishes—it feels more tactile and intentional. One coat of matte topcoat is usually sufficient, but you can do two if you want extra texture depth.
This design is perfect for professional settings, formal occasions, or anyone who prefers understated elegance over obvious design statements. The longer oval shape does the visual heavy lifting, and the taupe and silk finish enhance that naturally elegant shape.
Final Thoughts
Longer oval acrylic nails offer you a beautiful canvas for experimenting with designs that range from minimalist and understated to bold and artistic. The shape itself is already elegant, so whether you choose a simple single-color design or something intricate like lace details or geometric patterns, you’re starting from a sophisticated foundation.
The key to feeling confident with any of these designs is remembering that your nail technician is your partner in bringing these ideas to life. Bring reference images, be specific about what you’re envisioning, and trust that longer oval nails are forgiving enough to support nearly any aesthetic you’re drawn to. The 25 designs here are just starting points—the combinations, color swaps, and personal tweaks you make are what transform them into something uniquely yours.
Most importantly, pick a design that makes you feel good when you look at your hands. Whether you’re drawn to sparkle, minimalism, bold colors, or delicate details, there’s a longer oval design on this list that matches your vibe. Book that appointment with confidence.
