

Short almond nails get underestimated constantly. People assume you need length to make a nail design work — that without the canvas, the art gets lost. Green French tips prove that idea completely wrong. On a short almond shape, a clean green tip at the free edge does something that long nails can’t quite replicate: it looks considered rather than dramatic. Intentional. Quietly sharp.
The almond shape has tapered sidewalls that naturally draw the eye toward the tip, which means whatever color lands at that free edge becomes the focal point of the entire nail. Put a wash of sage green there, and you get something that looks expensive without any effort. Put a stripe of neon lime, and the short length actually amplifies the boldness — it’s right there, compressed, impossible to miss.
Green is one of those rare nail colors that works across every skin tone without adjustment. Olive and moss shades warm up deeper complexions. Mint and pistachio look fresh against lighter skin. Forest green works across the board — no shade flattering one type while fighting another. That versatility, combined with the go-anywhere practicality of short almond nails, is why this combination has built such a devoted following.
The 20 designs below span the full range — from one-step minimalist looks to detailed art that needs a fine liner brush and patience. Some are weekend DIY projects. Some are nail tech territory. All of them are worth saving before your next appointment.
Why Short Almond Nails Make Green Tips Hit Harder
There’s a geometry argument here worth understanding. The almond shape — curved sidewalls that taper to a slightly pointed free edge — creates a natural upward V-form at the tip of every nail. When you add a French tip to that shape, especially a curved one following the natural smile line, the colored section appears longer and more defined than it actually is. On a truly short nail, this is a significant advantage. You get the visual impression of length without committing to actual length.
Green specifically benefits from the compression a short nail creates. Unlike pink or nude tips, which blend softly into skin tone and read as natural extensions of the finger, green creates clean visual contrast against whatever base sits underneath. On a longer nail, that contrast stretches across more surface area. On a short almond shape, it’s tight, concentrated, and punchy.
The color hits harder.
There’s also the practical argument — and it’s hard to overstate how much difference short nails make in daily life. No breaks while typing. No snagging on fabrics. No paranoid approach to opening packages. Short almond nails are the shape people return to after a long nail phase because they want their hands back. The green French tip does the aesthetic work while the nail stays completely functional underneath.
The sweet spot for “short” here is roughly 2–3mm of free edge past the fingertip. That’s enough for the almond taper to show clearly and enough for a French tip line to sit comfortably without looking like a sliver.
Getting the French Tip Line Crisp on a Short Nail
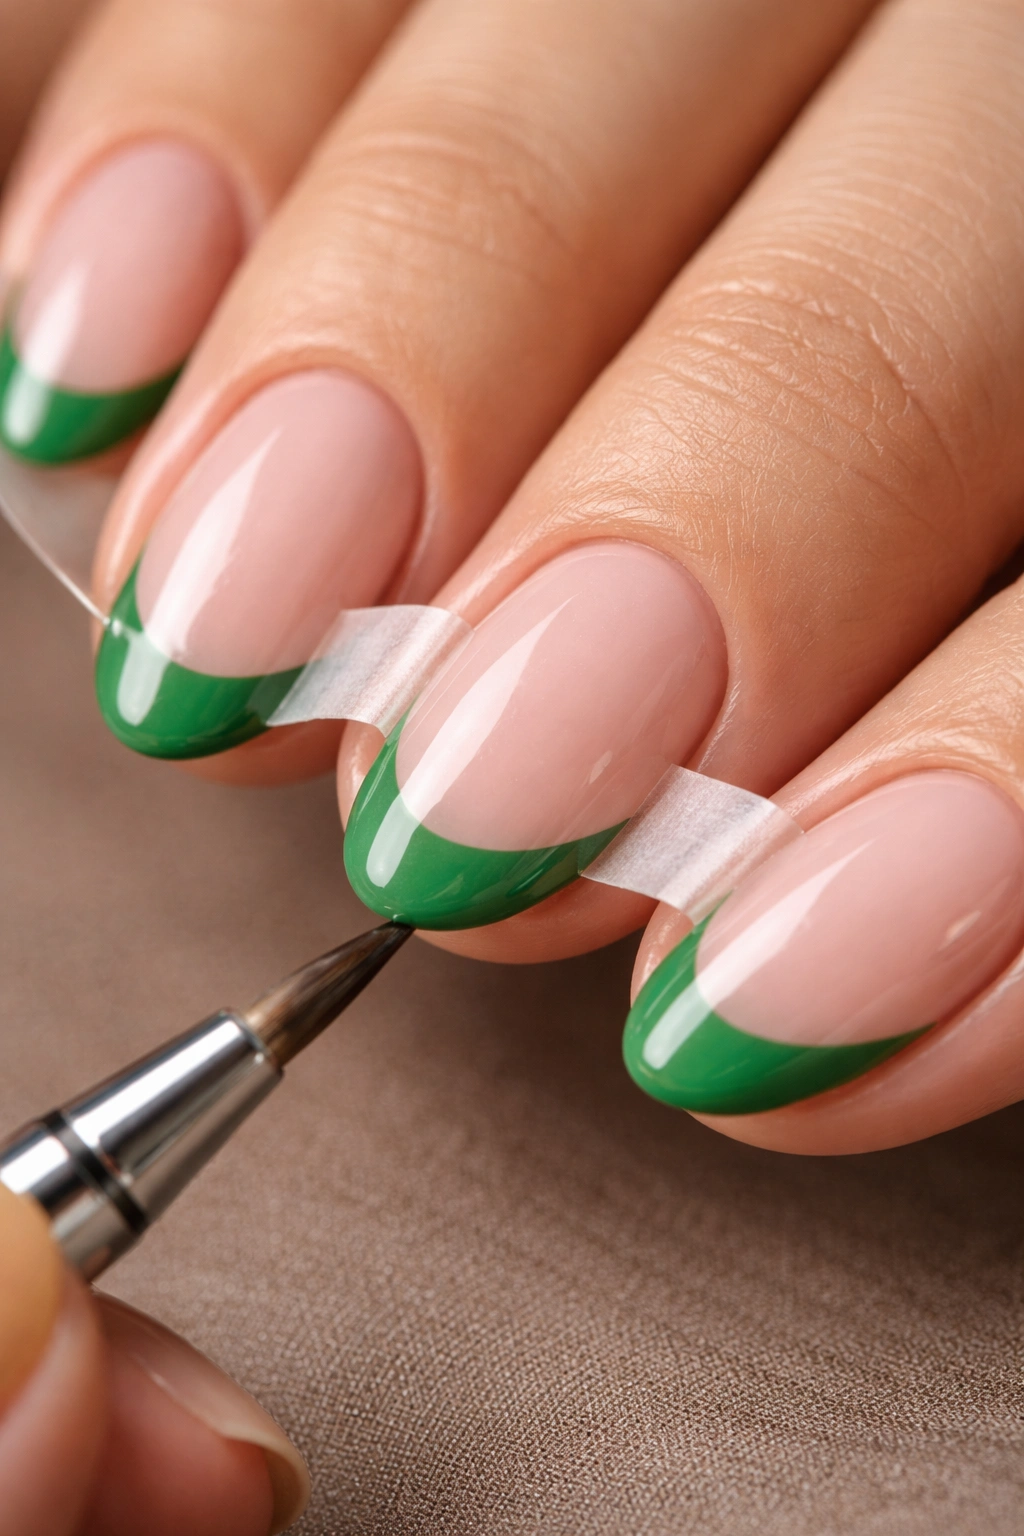
The French tip line on a short nail has to be precise. When there’s only 2–3mm of free edge to work with, a wobbly line or uneven placement is immediately visible in a way it wouldn’t be on longer nails. That sounds more intimidating than it actually is.
The most reliable method is the guide strip approach. Press a thin piece of nail tape or a French tip guide sticker just below where you want your smile line to sit, paint your tip color over the top, and peel immediately while the polish is still tacky. This produces a crisp, clean edge that would take years of practice to freehand consistently.
For gel applications, apply the green gel to the free edge and cure it uncapped first — meaning without sealing the edge right away — which keeps the color at the tip rather than flooding toward the cuticle. After curing, add a second, thinner layer to build opacity, re-cure, then cap with gel top coat.
Curved vs. Straight: Which Tip Line Works Better
On a short almond nail, a curved smile line almost always looks more polished than a straight horizontal band. The curve follows the natural shape of the free edge and makes the tip look like it was planned from the start. Aim for a soft arc that rises slightly at the outer corners — the midpoint of the tip should sit at the lowest point of the curve.
Some designs in this list deliberately use a straight or geometric line as a creative choice. When that straightness is intentional and perfectly executed, it comes across as modern and graphic. When it’s accidental, it just looks rushed. The difference is crisp edges and consistent line width across the whole tip.
Choosing Your Base Before Your Tip Color
Three base options cover almost everything in this list. A sheer nude makes green tips look lifted and skin-toned — the combination feels organic. A milky white creates a soft, diffused contrast that suits pastel and sage greens especially well. A clear base shows the natural nail, which only works if your natural nail has an even color — otherwise the look gets muddy under a colored tip.
Choose the base first. Let it guide your tip color selection, not the other way around.
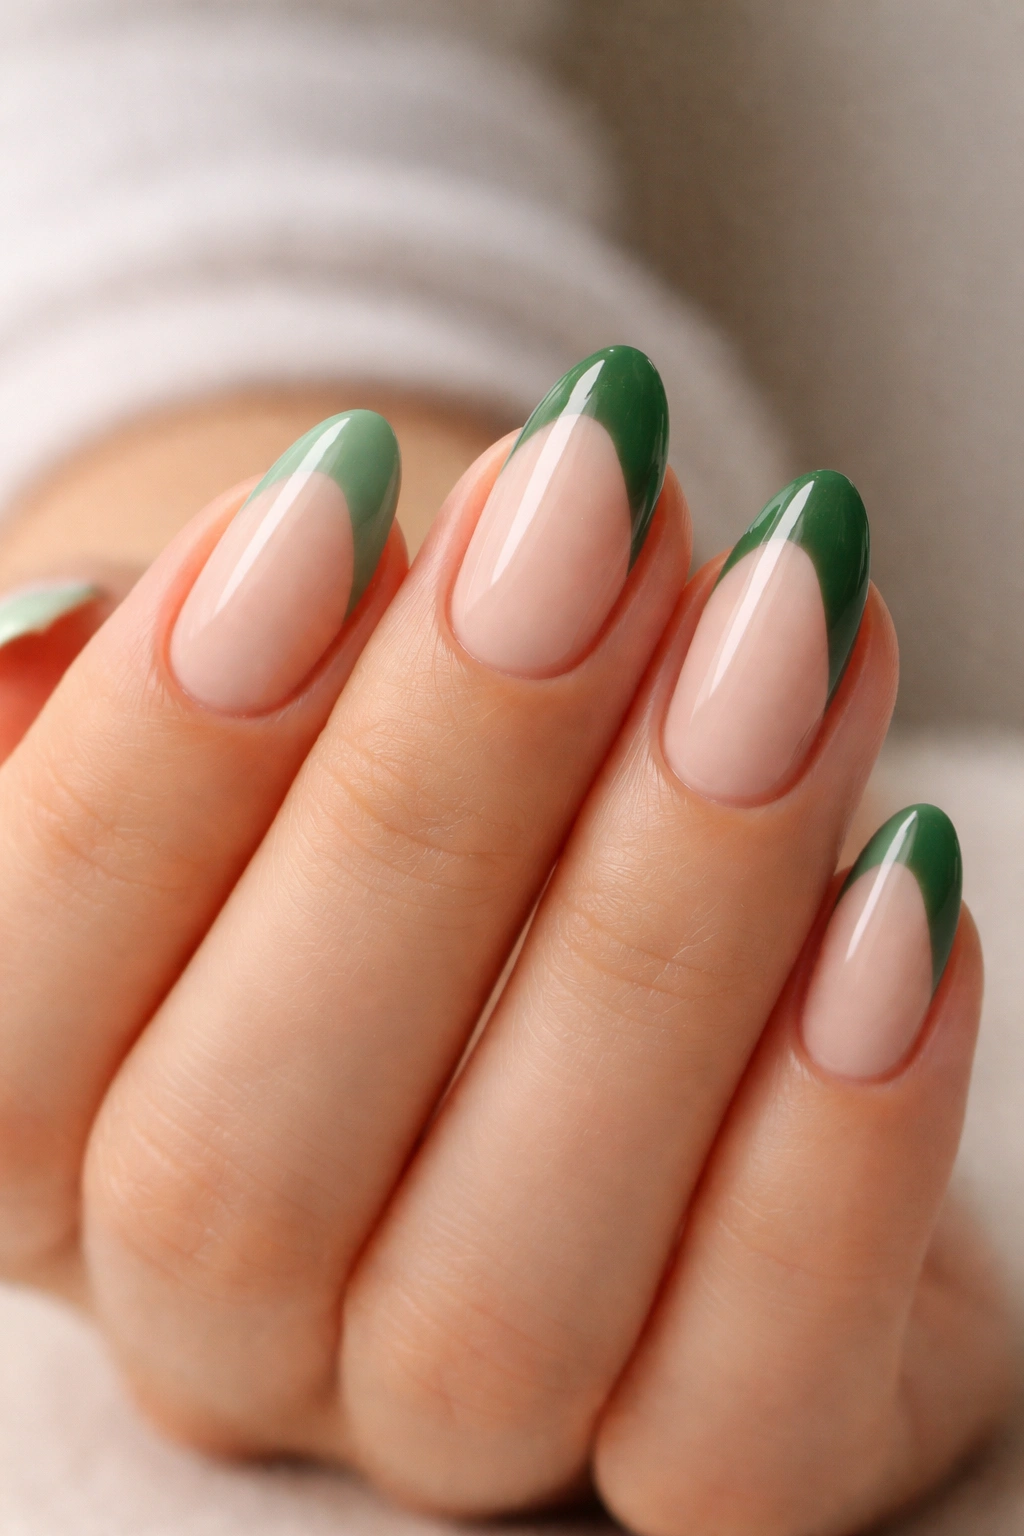
1. Classic Sage Green French Tips
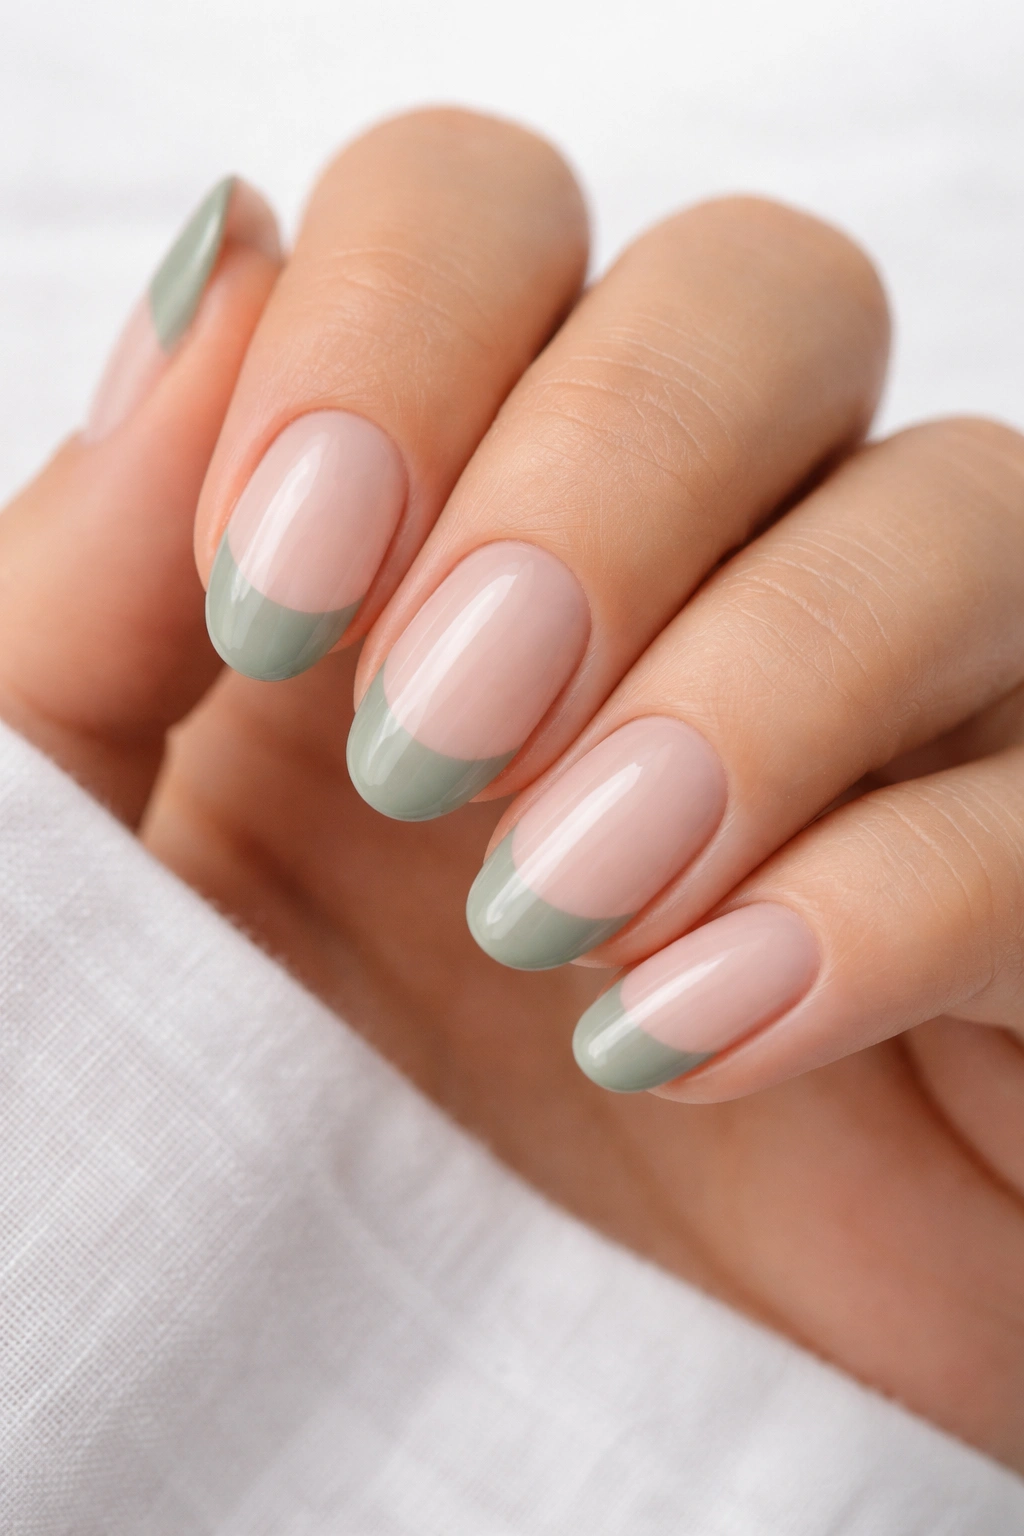
Sage green is the first shade most people think of when they want something wearable rather than bold, and on a short almond nail it’s nearly impossible to get wrong.
The shade itself — muted, grey-green, slightly dusty — reads as sophisticated in a way brighter greens don’t. Pair it with a sheer nude or natural pink base and the overall effect is clean and polished. Think linen fabrics, clean countertops, and considered personal style. It’s a complete aesthetic in itself.
Sage greens vary more in polish form than you’d expect. Some lean blue, which reads cool and mint-adjacent. Others lean yellow, pushing toward olive. The most flattering sage for French tips sits in the middle — grey-toned without leaning either direction too far. Swatch it on a white surface before committing. If it looks brown on white, it’s too yellow. If it reads teal, it’s too blue.
The curved smile line is the whole thing here. A soft arc applied with a thin liner brush after the base cures is what separates a polished result from one that looks slightly rushed. Take the extra minute on that step. Everything else follows naturally.
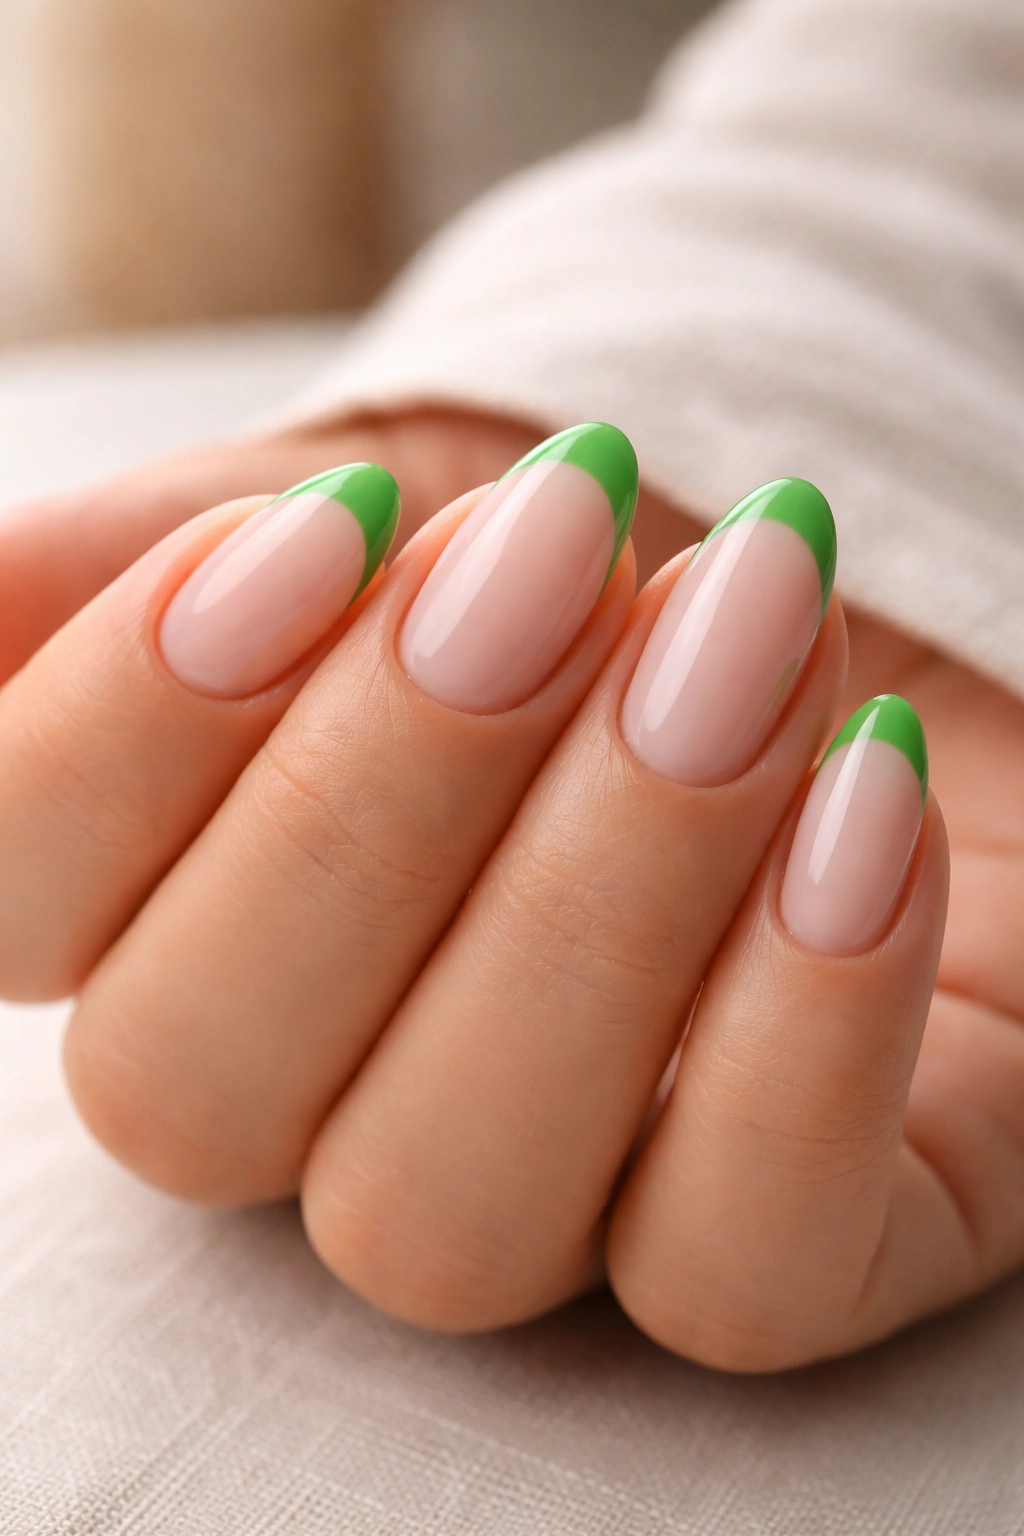
2. Neon Green French Tips on a Nude Base
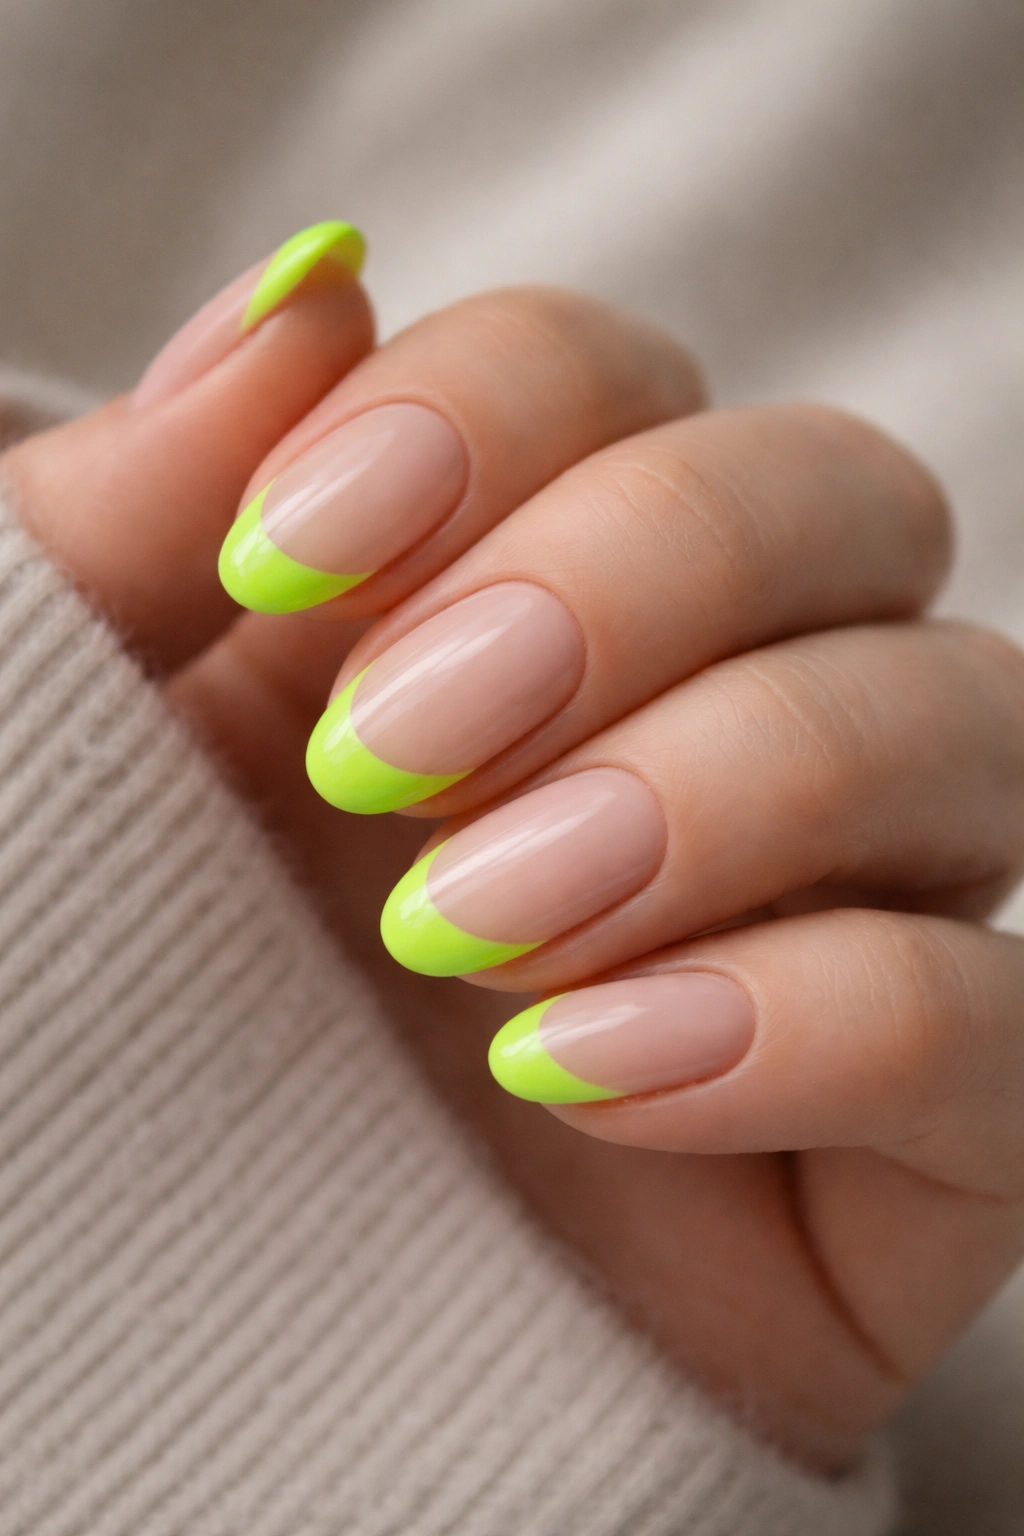
Bold isn’t always the enemy of elegant. On a short almond nail, neon green works because of the nail’s restraint — not in spite of it.
The short length keeps the neon from feeling overwhelming. There’s not enough of it to dominate. Instead, you get a tight, electric band at the free edge — sharp, graphic, and attention-grabbing in exactly the right way.
Pairing neon green with a true nude base is non-negotiable. A white base makes neon feel cartoonish. Clear makes it look unfinished. Nude grounds the color, gives the eye somewhere neutral to rest, and lets the tip carry all the visual weight without competition.
Neon green gel polishes tend to be thin in pigment, so plan on three coats minimum for full opacity, curing each layer completely. Going too thick too fast is how you get streaks that set under UV and simply won’t even out.
One finishing move: a thin layer of matte top coat over the neon tip only — leaving the base in high gloss — creates a split-finish effect that looks designed rather than default.
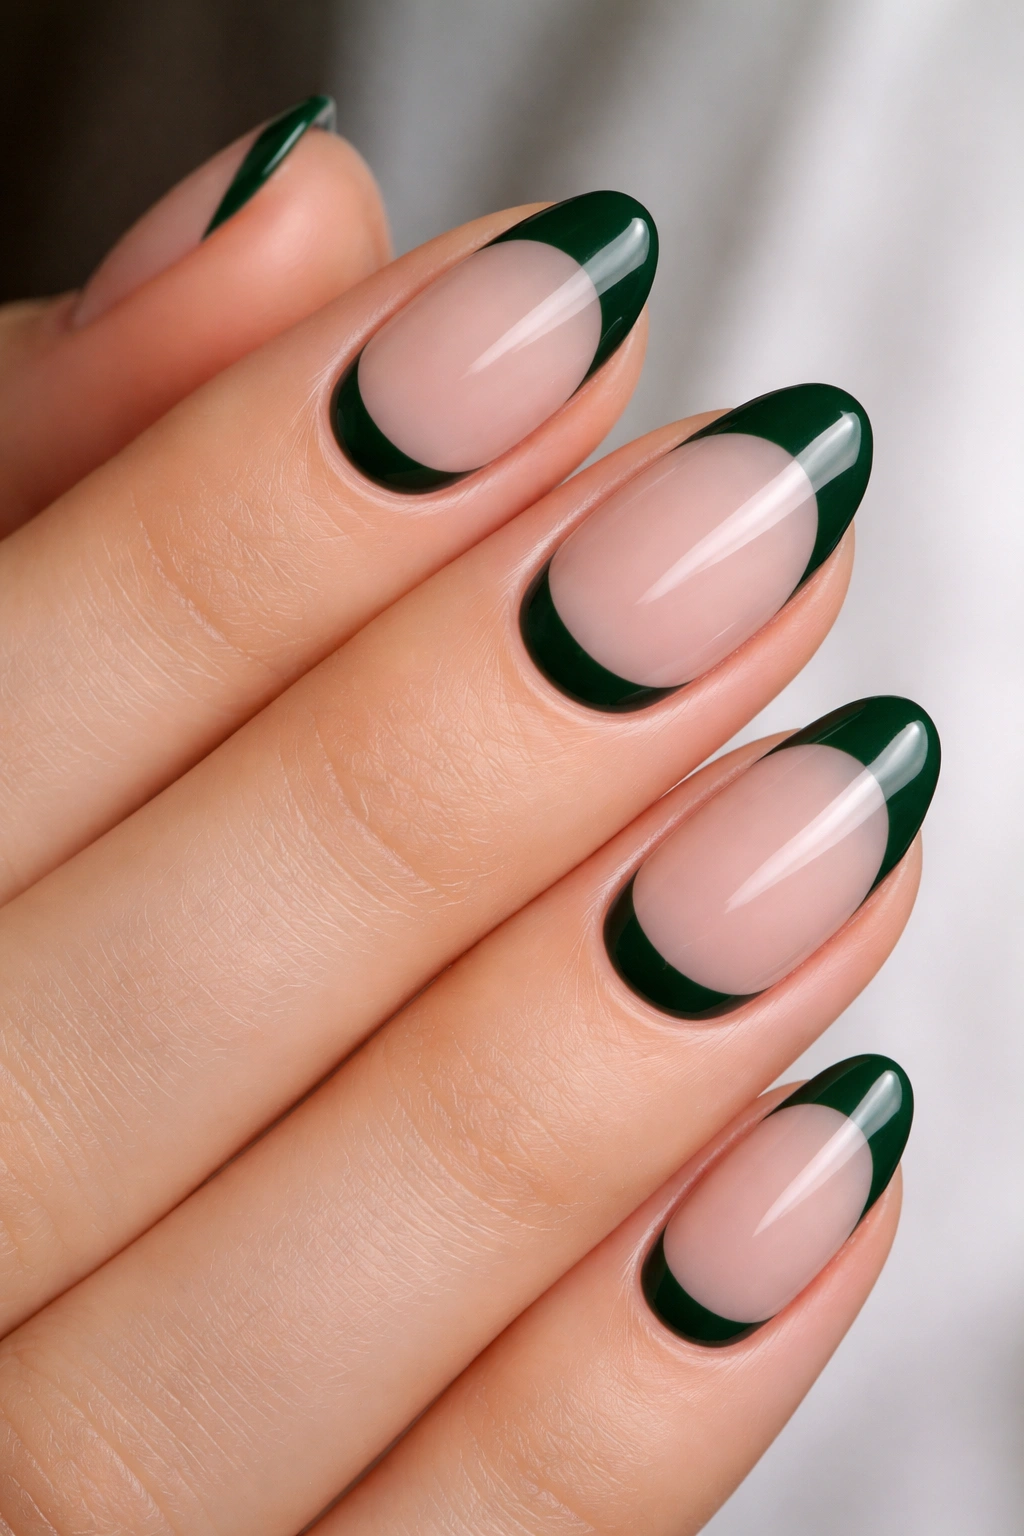
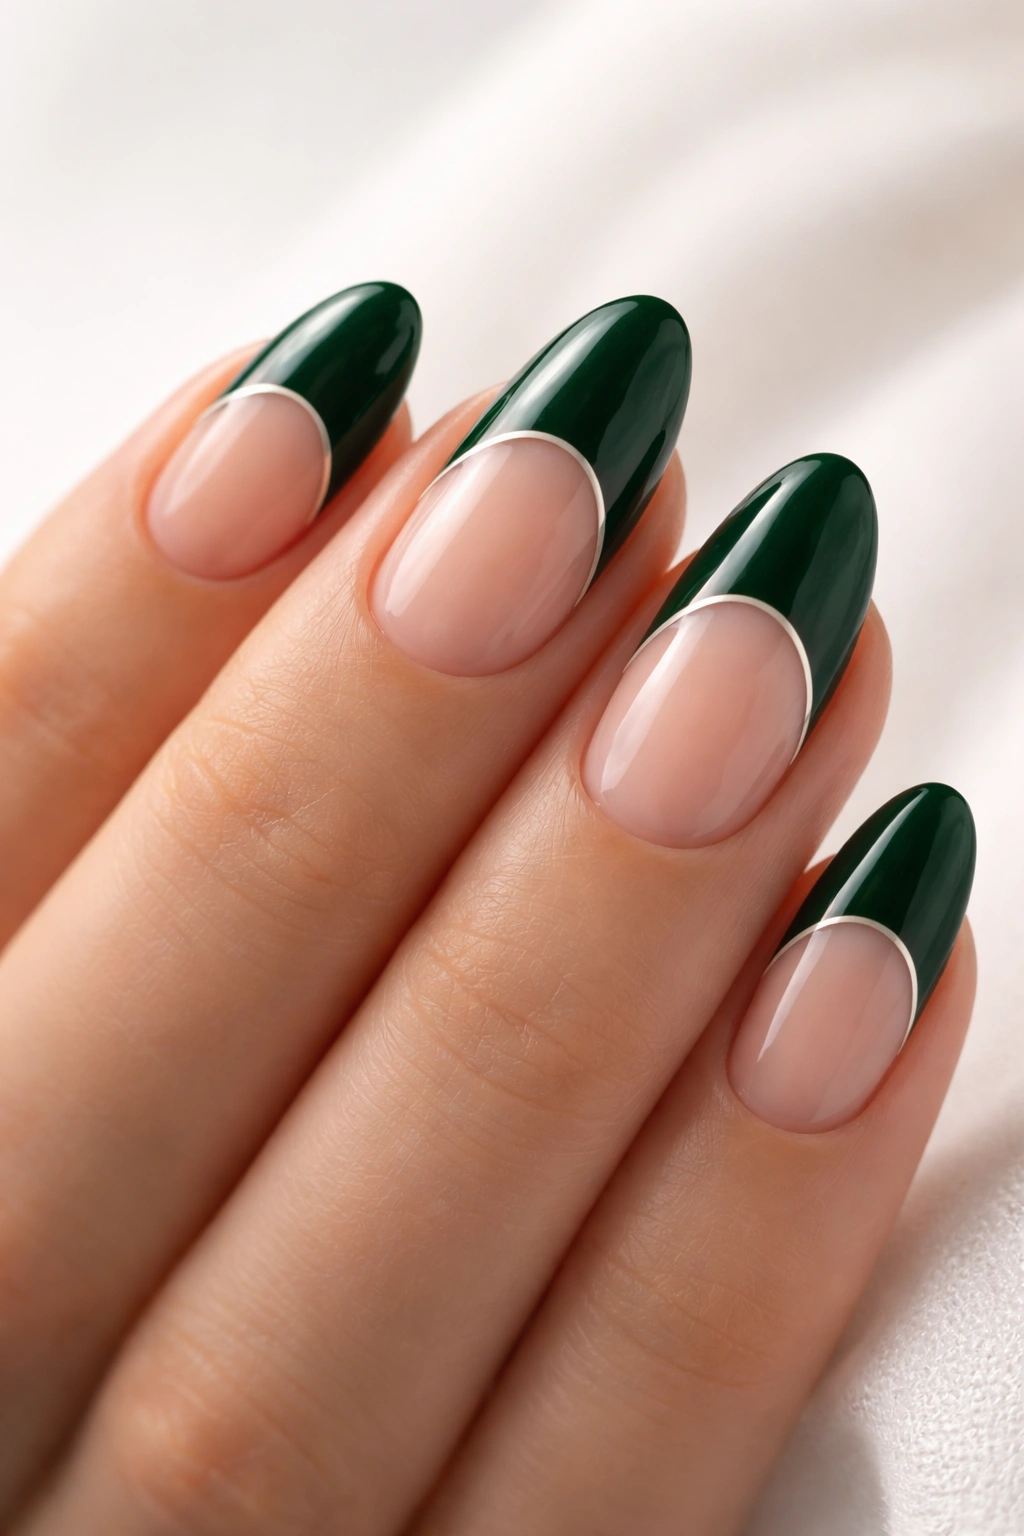
3. Forest Green Thick-Band French Tips

Where most French tips use a thin, delicate tip line, the thick-band version leans into the shape’s graphic potential. Forest green in a wide band covering nearly half the free edge stops being a traditional French tip and becomes something closer to a bold design statement.
Why the Wide Band Works Here
Color depth is the reason this works. Forest green is dark enough that a thick band looks like a deliberate choice rather than a smudged tip. Lighter colors in wide bands read as mistakes. Rich, saturated greens carry the format without apology.
Getting the Width Right
On a short almond nail, roughly 40–50% of the visible nail plate covered by the tip color is the sweet spot. More than that and the French tip effect disappears entirely — it just becomes a dark colored nail. Less than 30% and the thick-band quality gets lost completely.
- Gel formula works better here — even coverage over a thick band is harder to control with regular polish
- Two thin layers rather than one thick one prevents lifting at the edges
- A sheer milky white base makes forest green richer by adding visual depth underneath
- Finish with a no-wipe top coat for maximum shine and clean, defined edges
The result is bold without being frivolous. Wear it anywhere you want your hands noticed.
4. Mint Green Micro-Line French Tips
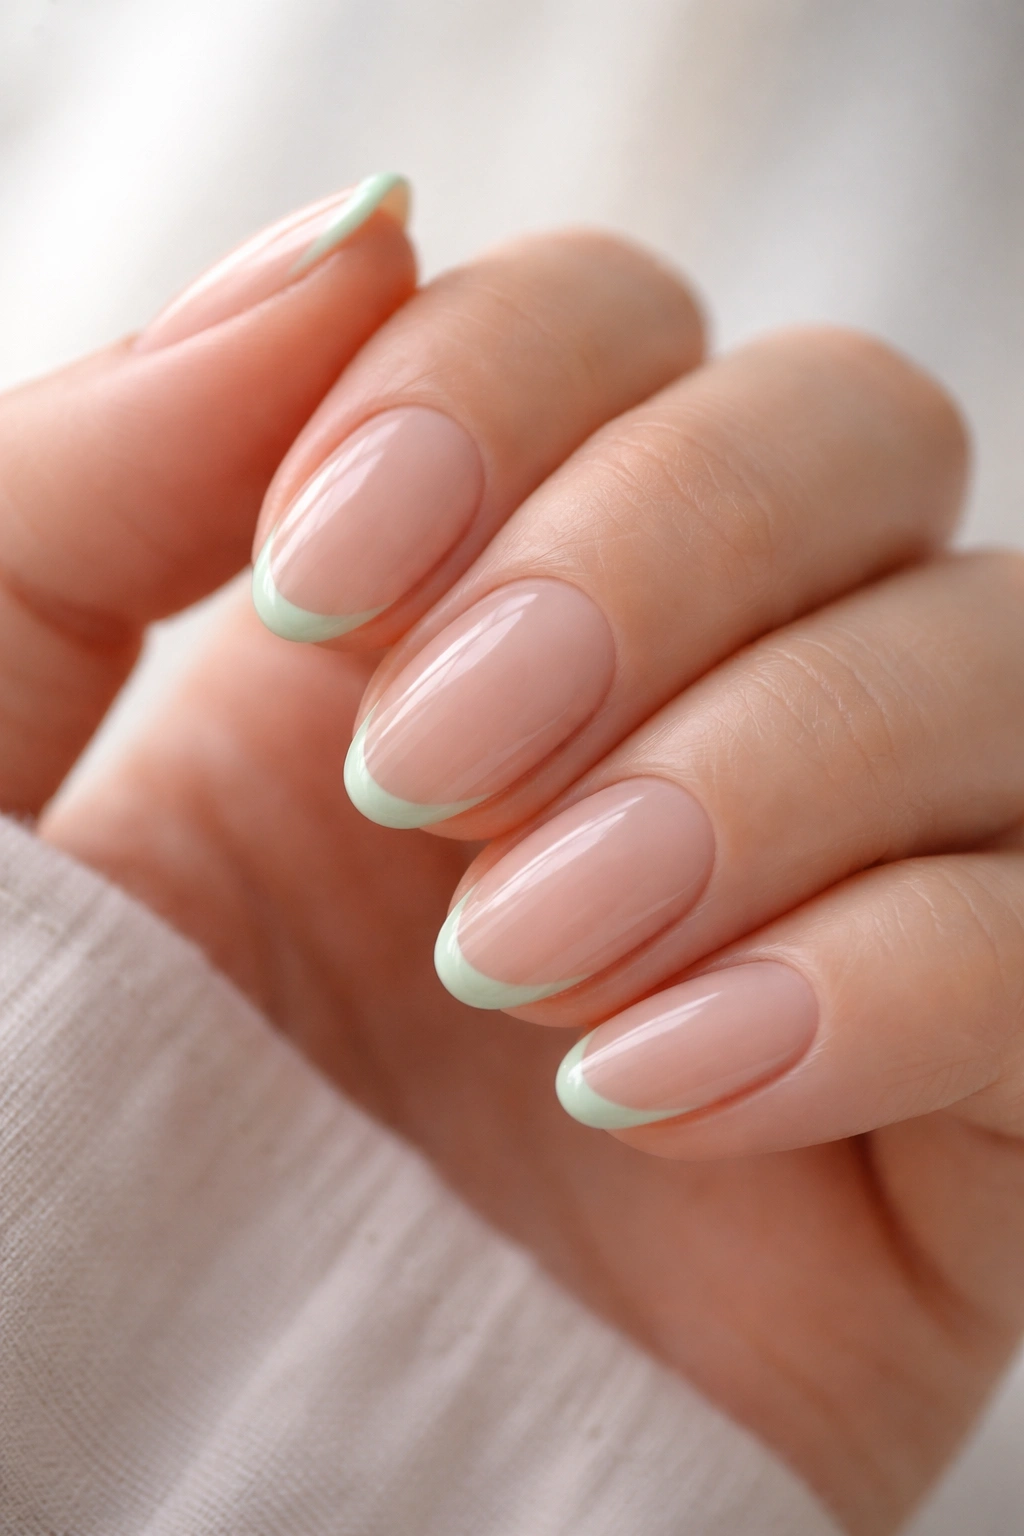
Micro-line French tips use the thinnest possible tip application — barely 1mm at the widest point. On a short almond nail, this creates something that reads more like a whisper of detail than a design.
Mint is the ideal color for this format. Light enough that a thin line registers without looking like a stray mark, soft enough in its blue-green quality that it feels delicate rather than stark. A micro-line mint tip on a clear or sheer base is, arguably, the most restrained nail in this entire list. It requires the most precision to execute, but it looks like it required none.
Compare it to a standard French tip covering 3–5mm of the free edge. The micro version covers 0.5–1mm. That compression changes the aesthetic register entirely — from “manicured” to “barely there but technically perfect.” For anyone who wants their nails to look done without looking conspicuously done, this is the option to reach for.
Apply with a nail art liner brush only — the precision is impossible any other way. One coat of mint is enough at this width; the line is too thin for layering without getting lumpy and uneven.
5. Olive Green French Tips with Gold Foil Accents

Picture something earthy and expensive at the same time. Olive green French tips with gold foil accents are exactly that — two elements that shouldn’t work together as well as they do.
The olive tone — earthy, yellow-leaning green — interacts with gold foil in a way cooler greens don’t. Teal against gold feels harsh. Sage against gold looks muted. Olive has enough warmth to make the gold feel like it belongs rather than like it was stuck on as an afterthought.
The foil transfer technique is straightforward. After your olive tip is cured (for gel, use the sticky uncapped layer; for regular polish, apply a foil adhesive first), press a small square of gold foil against the free edge and pull it away sharply. The foil transfers in an irregular, slightly patchy pattern — and that imperfection is exactly what makes it look considered. Perfect, solid foil coverage reads cheap. Rough, organic transfer reads like a deliberate design choice.
Concentrate the foil at the center of the tip and let it thin out toward the sides. This keeps the metallic detail from feeling too heavy on a short nail where everything competes for a small amount of space.
6. Emerald Green Tips with a High-Gloss Gel Finish
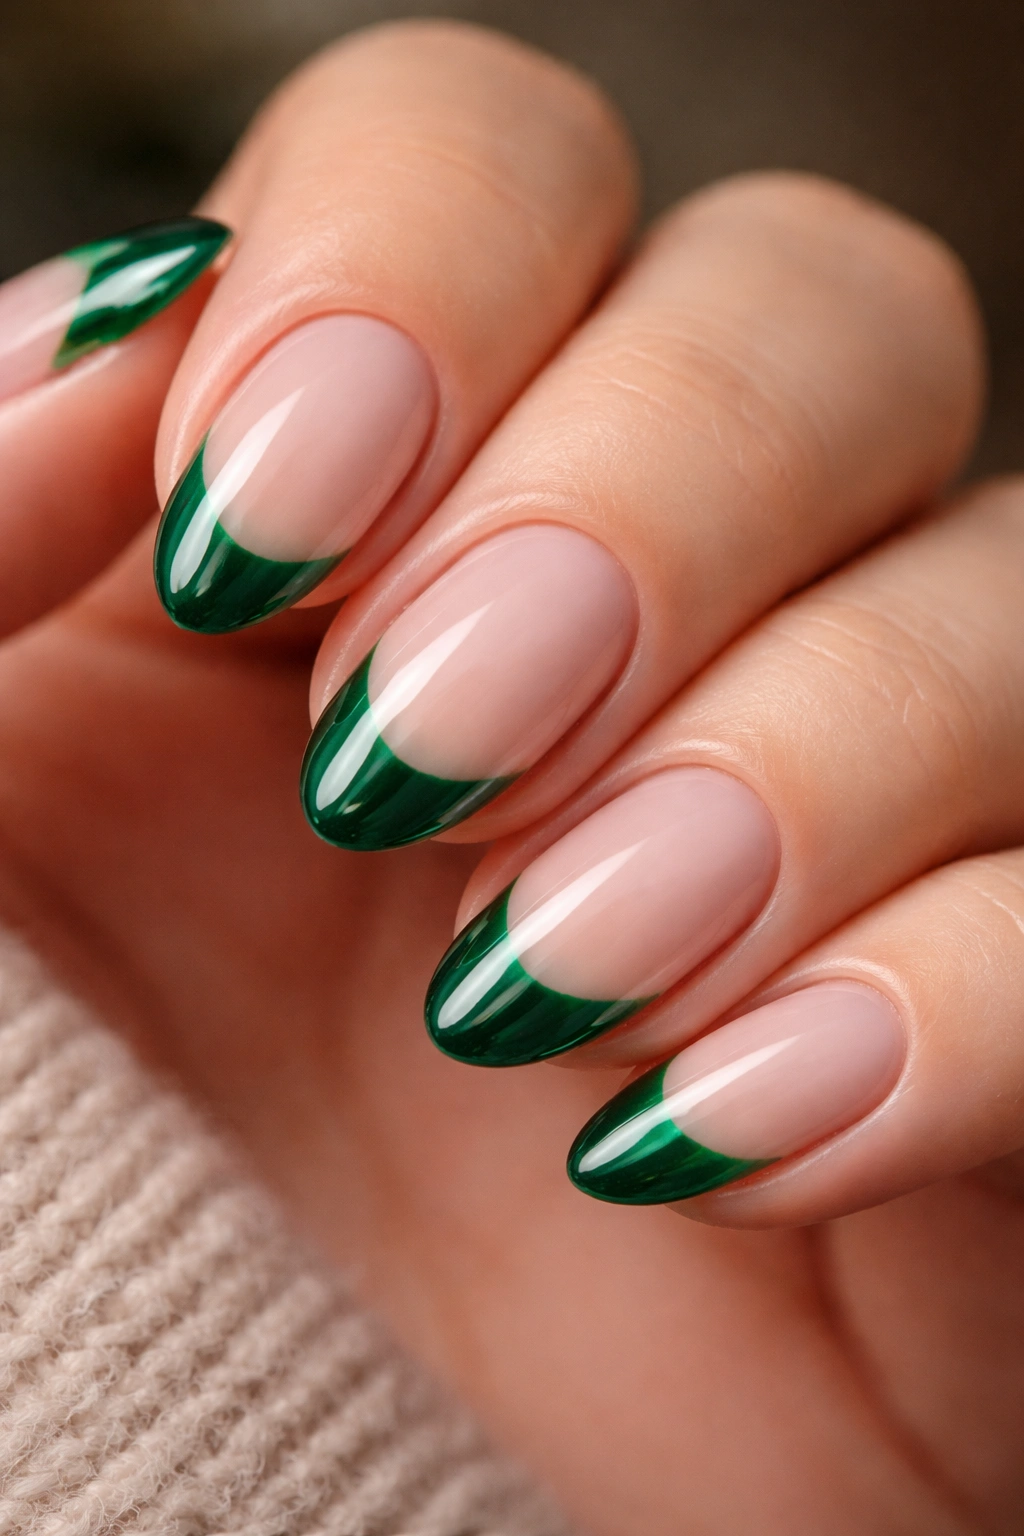
Why does emerald deserve its own entry when it could easily be grouped with “dark greens”? Because under a thick, glassy gel top coat, emerald does something other greens don’t — it reads almost like a gemstone. The depth of the pigment combined with a mirror-reflective surface creates a three-dimensional quality that looks like light is originating from inside the nail itself.
This is a gel-specific look. Regular polish top coat, even a high-quality one, does not produce the same mirror depth. You need a thick gel top coat marketed specifically as “glass finish” or “extreme gloss,” cured under UV. The finished surface should feel completely smooth with no drag at all when you run a fingertip across it.
Two base options work here. A clear base shows the natural nail and gives the emerald a jewel-in-a-setting quality. A creamy off-white softens the look and makes the green appear a shade richer and more saturated. Try both and see which one your skin tone responds to better.
Clean cuticles and sharp sidewalls matter enormously on this design. A high-gloss finish catches every imperfection with equal indifference.
7. Pistachio Green Tips on a Milky White Base
Pistachio green — a yellow-leaning pastel that reads creamier and warmer than mint — can look washed out on its own. On a milky white base, something clicks into place.
The milky white (semi-opaque, slightly cool rather than bright white) diffuses the contrast between tip and base so the transition feels soft rather than graphic. The pistachio tip and milky base sit close enough in value that the overall impression is tonal and dreamy — this is the quieter end of the green French tip spectrum, and it’s satisfying for exactly that reason.
Build the milky base in three coats for full opacity. Then apply the pistachio tip with a liner brush, keeping the smile line as smooth as possible — both colors are light enough that a wobbly edge shows immediately. A glass-finish top coat sharpens the design without altering the palette.
In natural light, this combination has a soft luminous quality. The milky base diffuses light gently while the pistachio tip adds a focused color note at the free edge. It rewards natural lighting more than most nail designs do.
8. Reverse French with Dark Green at the Cuticle Base
Flip the French tip placement entirely and something unexpected happens. Instead of color at the free edge, the dark green sits at the cuticle line — a crescent hugging the base of the nail while the free edge stays bare or sheer.
On a short almond nail, this is a genuinely surprising design choice. Most people don’t think of the cuticle end of the nail as an active canvas. Putting a deep hunter green or forest green crescent there creates something editorial — the kind of design you’d expect at a runway show rather than a standard nail appointment. Except it’s not complicated to execute.
Use a French tip guide sticker placed in reverse — position it above the crescent line you want, paint the green toward the cuticle, and peel while the product is still workable. The almond shape makes the crescent naturally taper at the sides, which fits the curve of the guide sticker almost perfectly.
Dark green is the right choice for this placement specifically because it creates enough contrast against the bare nail to make the crescent clearly legible. Medium or pastel greens blend too much with the natural nail color and lose their definition.
9. Matte Moss Green French Tips
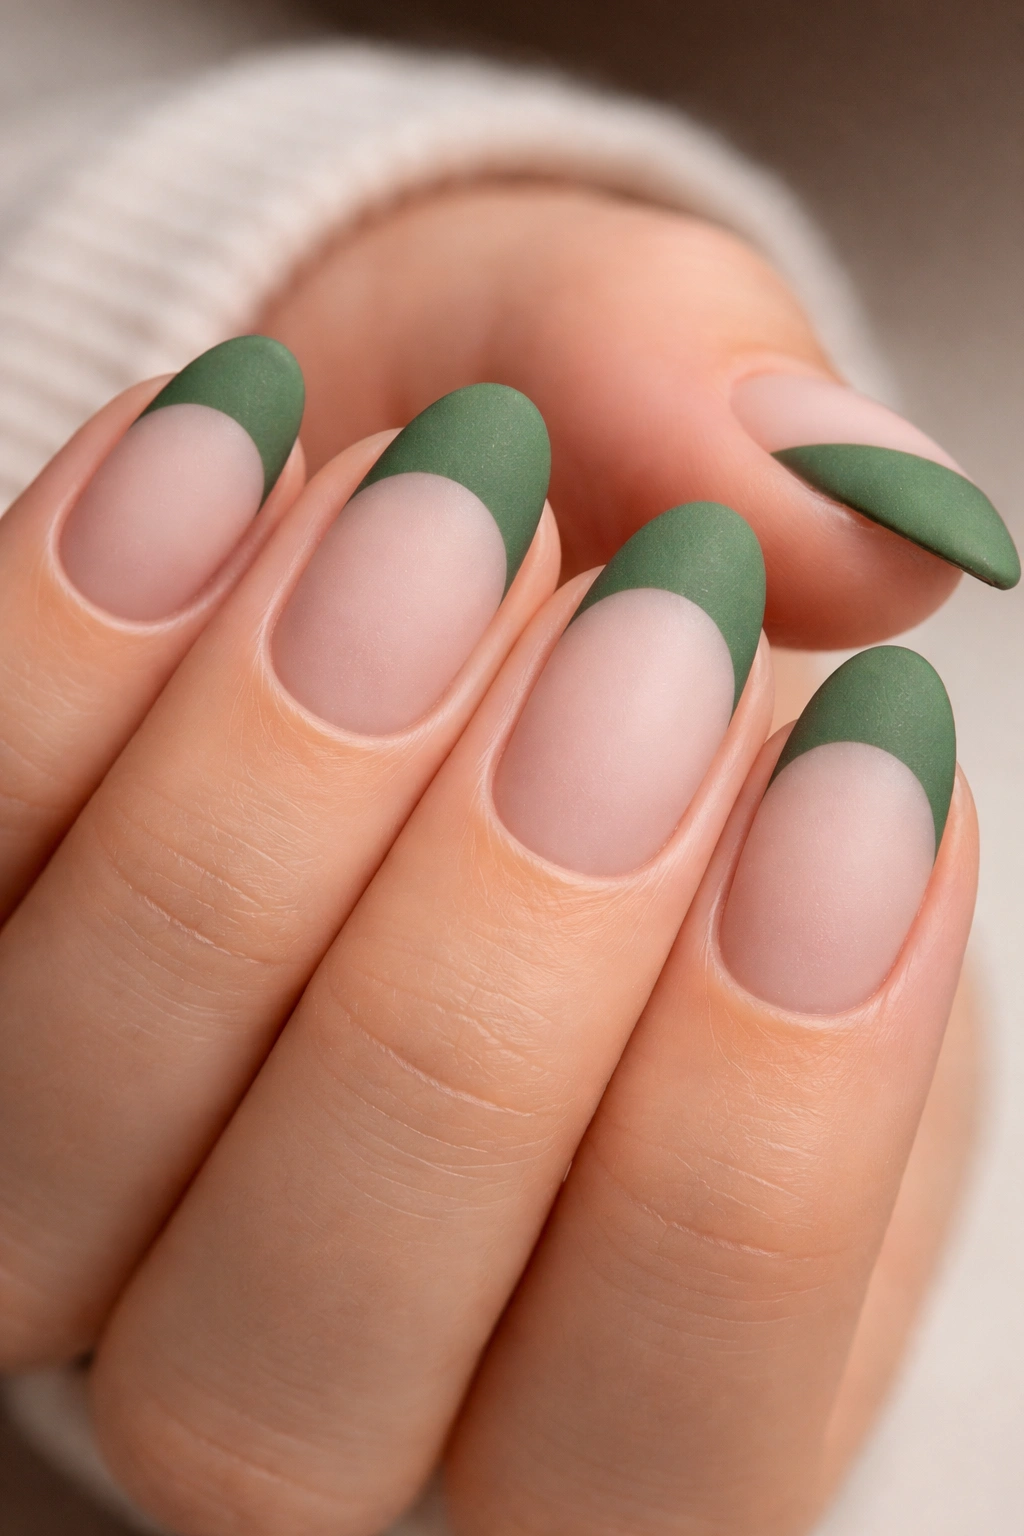
Moss green in a matte finish feels more like a texture than a color. Without shine, the green looks denser, almost fabric-like — as though the nail is covered in something natural rather than something painted on.
Building the Matte Finish
Two products, not one: a regular or gel moss green polish for the tip, then a dedicated matte top coat applied over the entire nail surface. The matte top coat needs to cover both the base and the tip evenly — patchy application creates areas that look more like wear than intentional matte effect.
Why Short Nails Carry Matte Better Than Long Ones
Longer nails in matte finish can start to look slightly unkempt because the flat surface catches every small imperfection across a large area. Short nails have less surface area, so the matte finish stays clean and purposeful for longer. Compact scale suits the format better than length does.
- Reapply matte top coat every 3–4 days — it wears faster than gloss finish
- Keep oil-based cuticle products away from the nail surface; they create shiny spots that ruin the effect
- Moss green matte pairs naturally with warm gold jewelry — the metal’s warmth counters the cool-grey undertone most moss shades carry
Nothing about this manicure shouts. That’s the appeal.
10. Chrome Sage French Tips
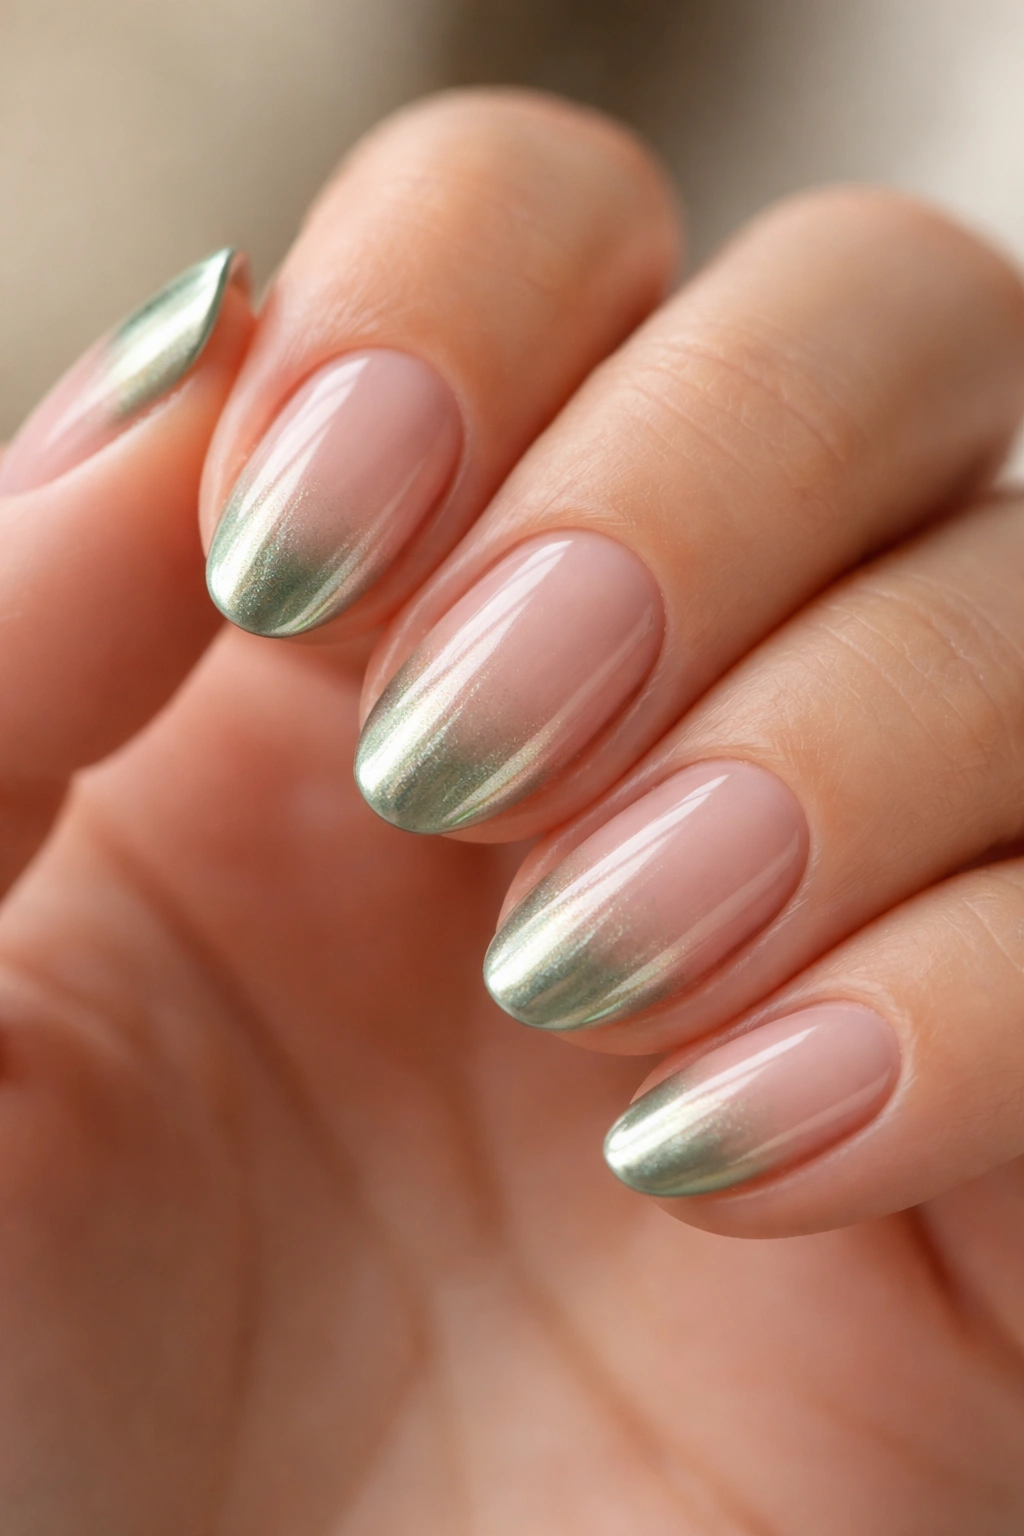
Chrome powder over a cured sage green tip produces a finish that belongs in its own category. It’s metallic, but softly so — not gold-bright or silver-cold. An iridescent shimmer that shifts between sage, grey, and pale gold depending on what angle your hand catches the light.
The process: apply the sage gel tip normally, cure fully, then rub chrome powder over the tip surface using a silicone applicator or dense felt tool. The powder bonds to the sticky layer left by the gel and creates the mirror effect. Seal everything under a gel top coat at the end — skipping this step means the chrome will wear off within days.
What separates chrome sage from flashier metallic options is restraint. It catches light without demanding attention. Under indoor lighting, the tip reads as a slightly luminous sage. Step outside into afternoon sun and the metallic quality becomes unmissable. On a short almond nail, the chrome tip has an almost liquid quality — contained shimmer that moves when the nail does.
Wear it when you want the right people to notice and everyone else to look twice without quite being sure why.
11. Holographic Green French Tips
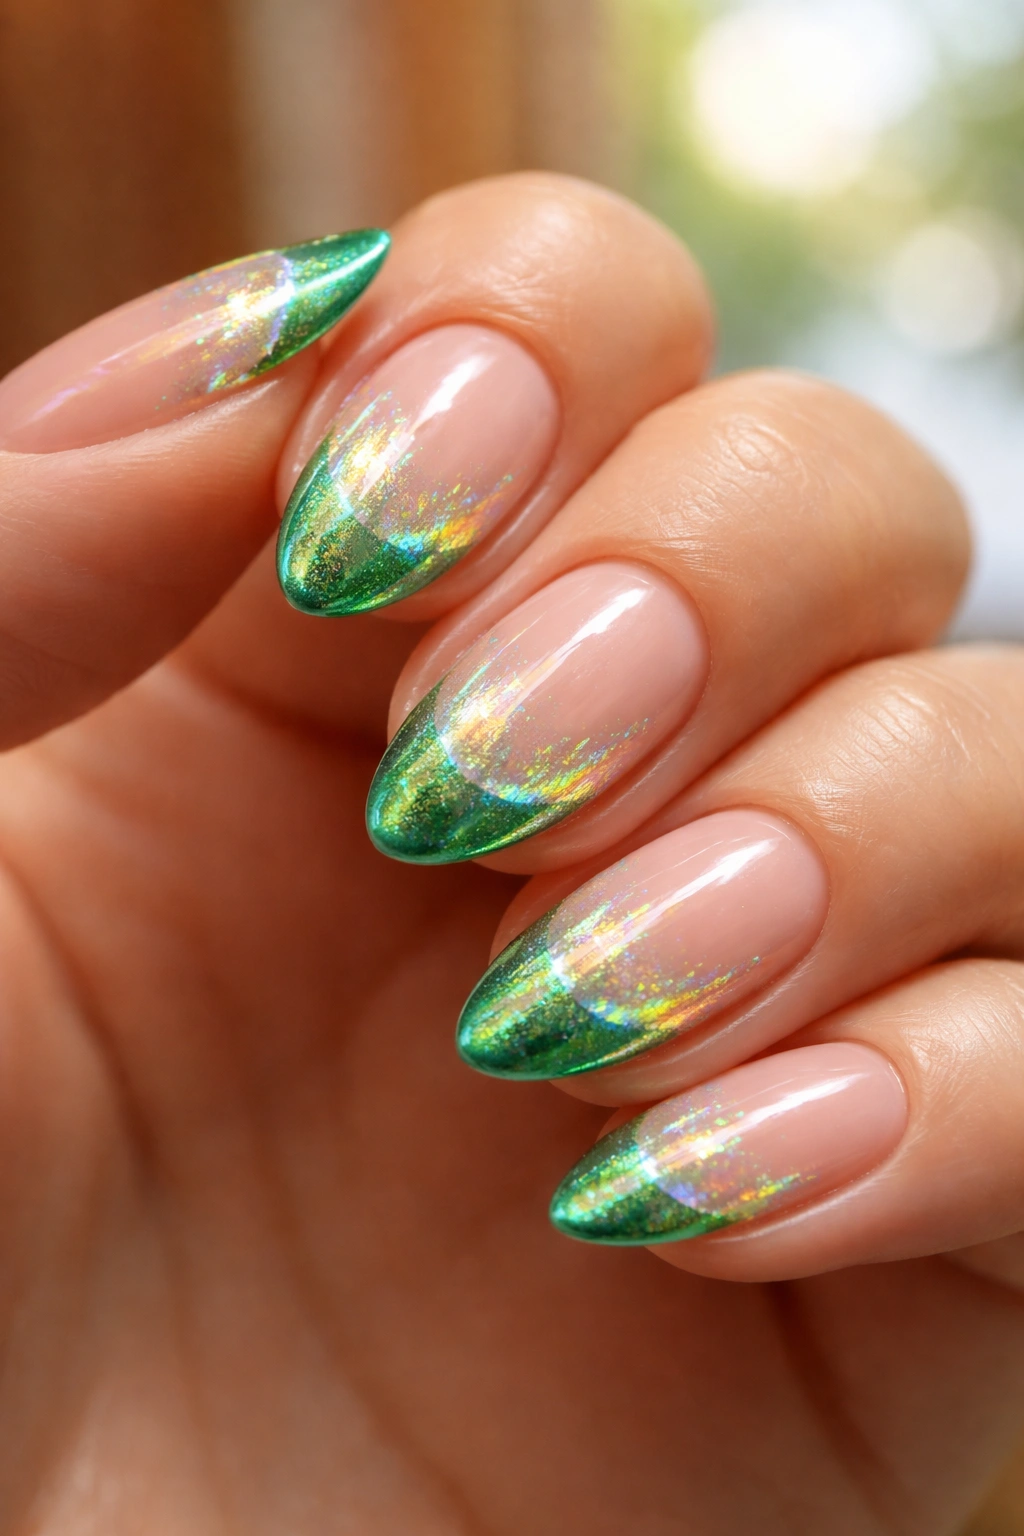
A holographic top coat transforms a green French tip entirely based on what light is hitting it. Indoors under warm light, the tip reads as a soft, slightly prismatic green. Step outside into direct sun and suddenly a full spectrum scatters across your fingertips.
The effect comes from a specialized holographic top coat — not glitter polish, not chrome powder, but a product containing microscopic prismatic particles aligned to scatter light into its component colors. Apply it over any cured green gel tip, then seal with one final layer of regular gloss top coat to lock it in.
For maximum impact, use a deep emerald or forest green underneath. The holographic scatter reads more clearly against a dark base because the prismatic flash has strong contrast with the underlying color. Over pastel greens the effect still shows, but it softens — more iridescent than full rainbow.
This is the one design in this list that’s genuinely better in person than in pictures. Photos register it as a glitter tip. In person, standing near a window, it looks like something that shouldn’t be physically possible to wear on your fingertips.
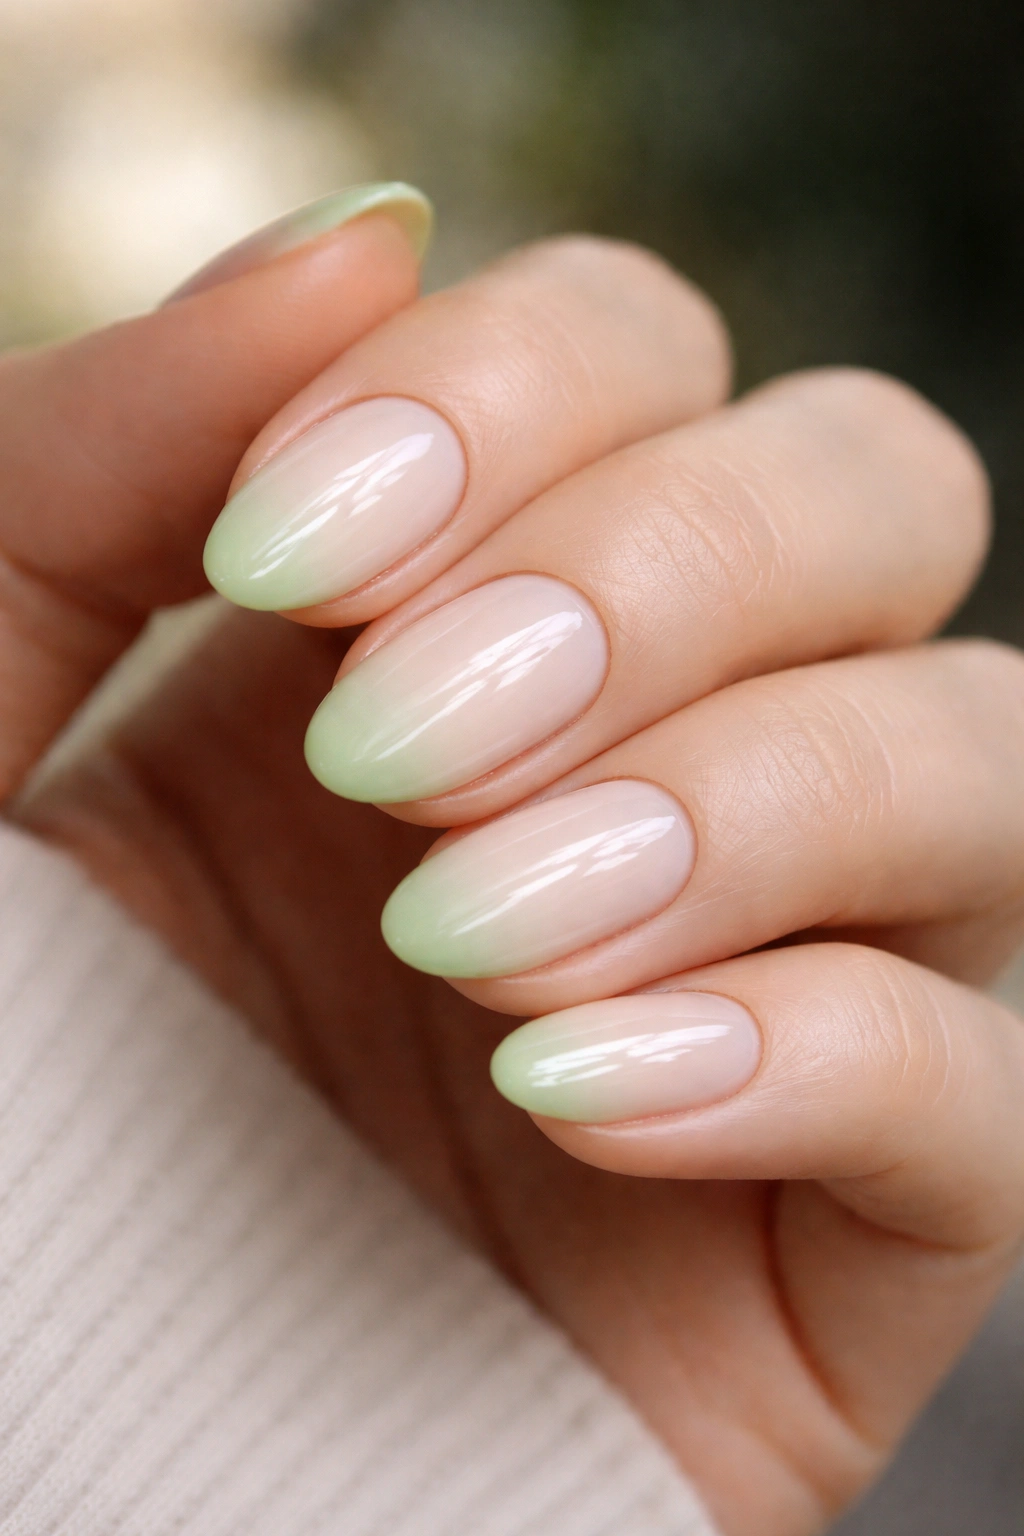
12. Green Gradient Ombré French Tips
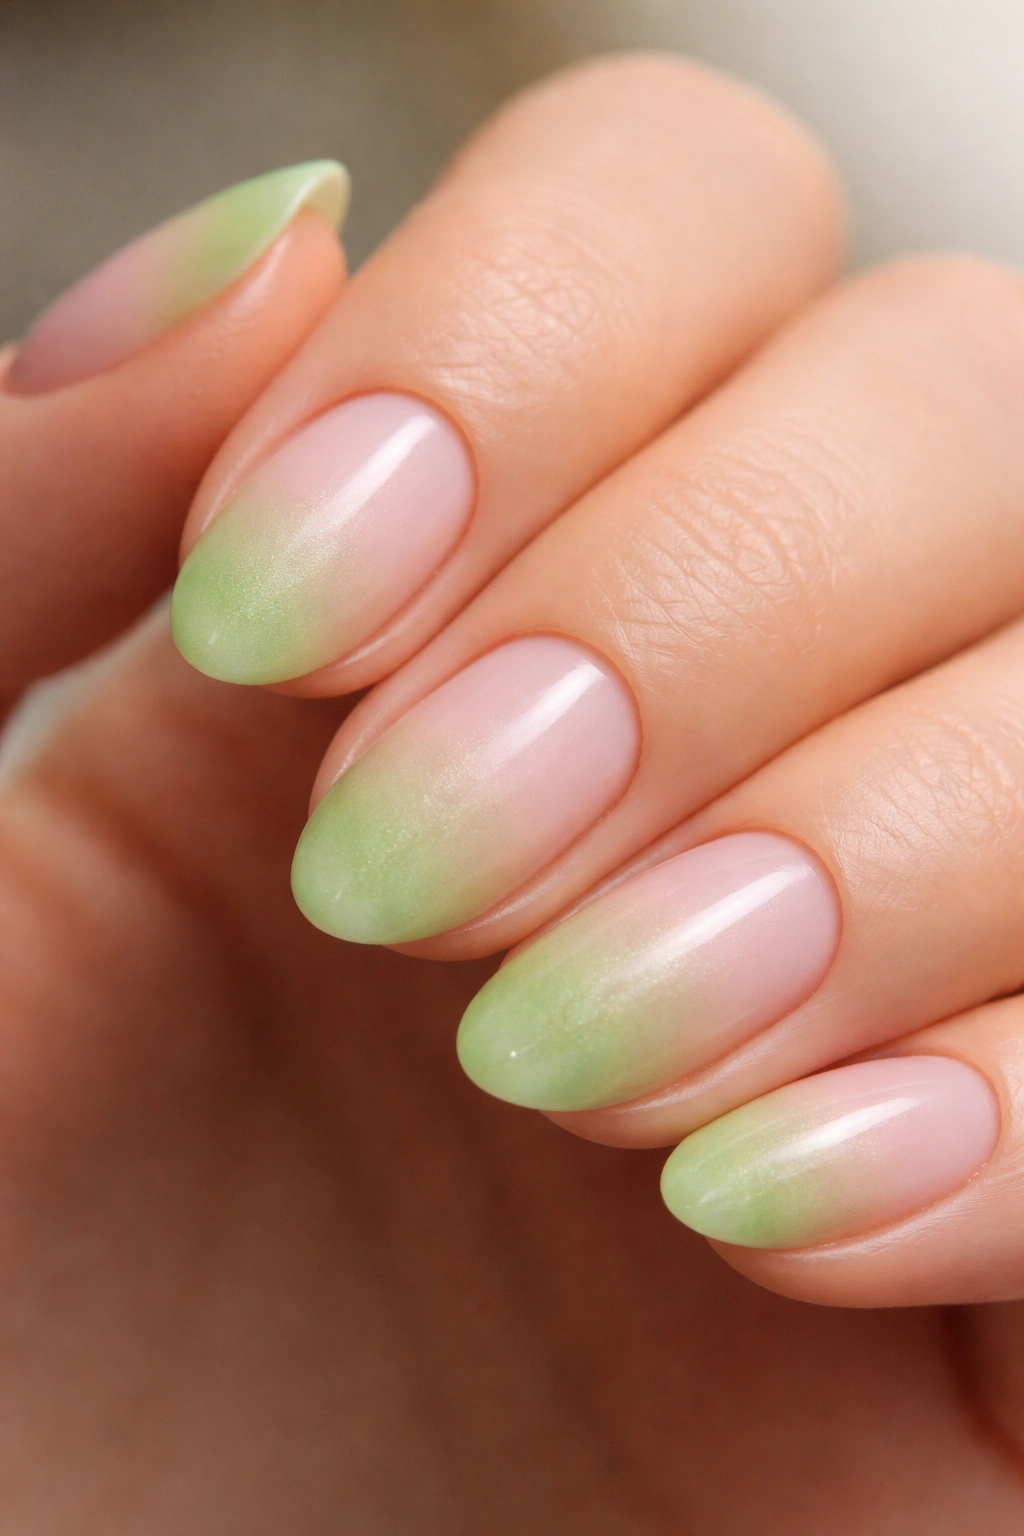
The ombré French tip transitions from the base color into the green gradually — no sharp line, just color that builds in intensity from the midpoint of the nail to the free edge.
On a short almond nail, the gradient has roughly 10–12mm to develop from first appearance to full saturation. A makeup sponge handles it better than any brush. Dab your green polish onto a small piece of sponge, stipple it onto the nail starting just past the midpoint, and build intensity over 3–4 passes, concentrating most heavily at the very tip. A thin layer of top coat then smooths the stipple texture into an even, smooth surface.
Mid-tone greens work best — sage, seafoam, mint. Dark greens in a stippled ombré can look patchy and uneven; very light greens diffuse too much to read clearly at this scale. The sweet spot is a green with enough pigment to show clear color buildup without every sponge mark becoming a distinct visible spot.
The finished result has a watercolor quality. Nothing harsh, nothing geometric. Just color that arrives quietly and fades.
13. Teal-Green French Tips with a Hair-Thin Silver Line
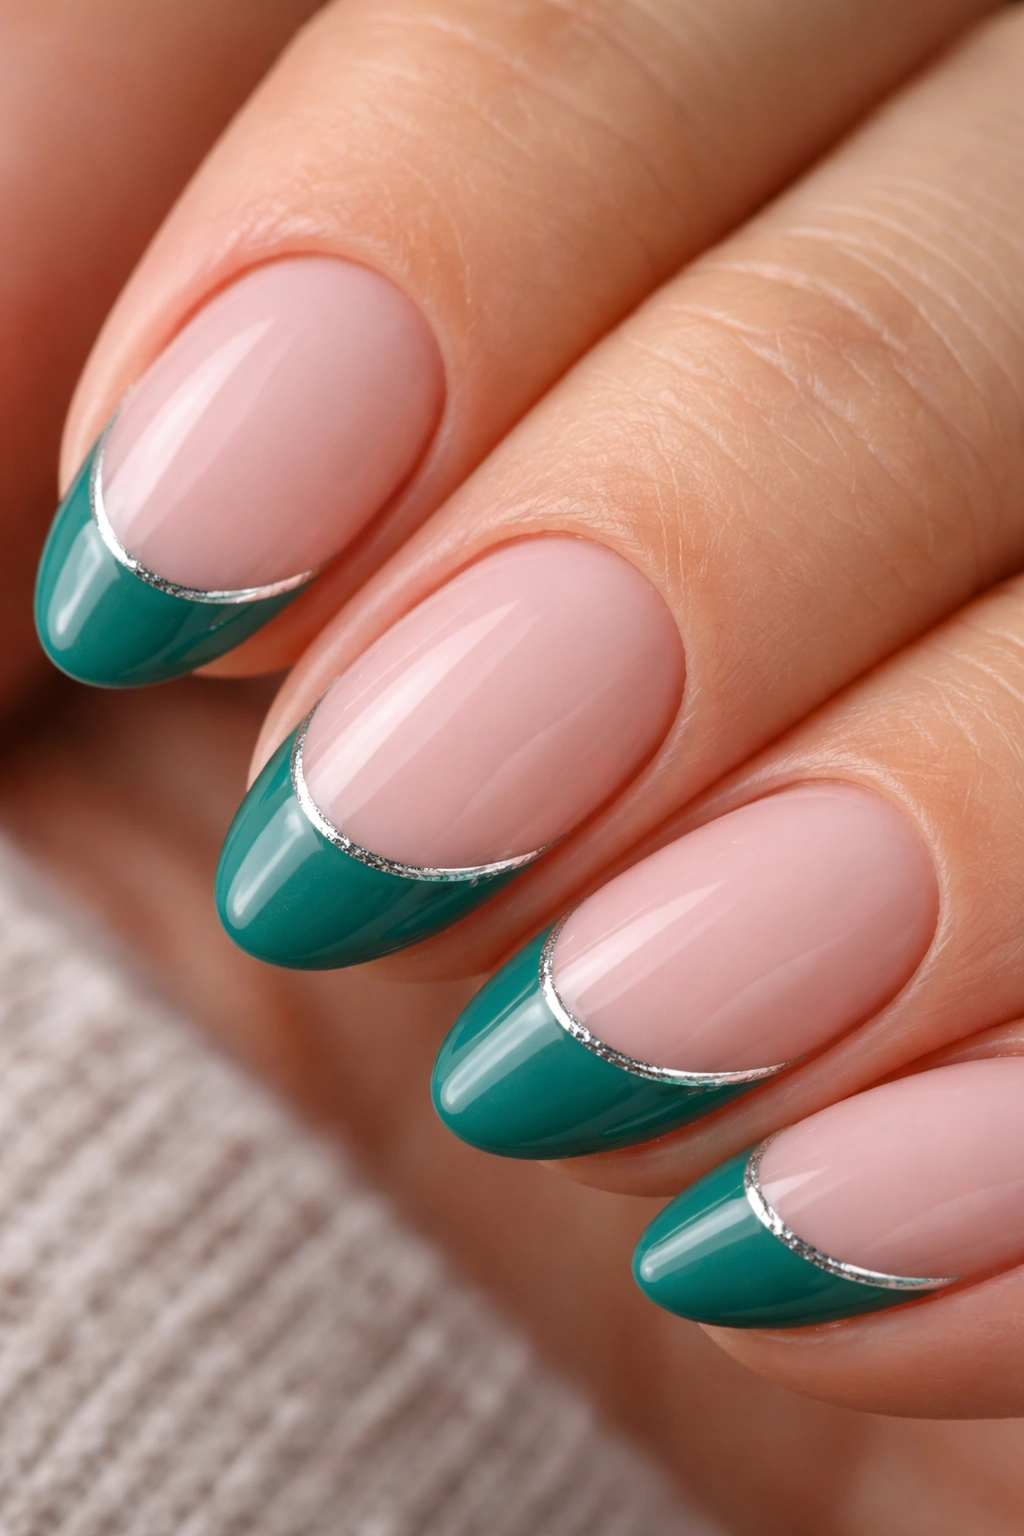
At the border between blue and green, teal holds its own — cool-toned, saturated, distinctly modern. A hair-thin silver line along the smile line separates the tip from the base with a boundary that gives the whole design a more architectural quality.
Apply the teal tip first and allow it to cure or dry completely. Then, using a striper brush — the finest available, ideally 0.5mm width — paint a single line of metallic silver along the smile line. One fluid stroke from one side to the other. No going back over it. Nail stripers reward commitment; any hesitation shows up as wobble that no amount of top coat will hide.
The silver line does two things simultaneously. It sharpens the edge between base and tip, and it adds a metallic detail that references fine jewelry without any actual embellishments. Against teal, silver reads cleaner than gold because the cool undertones are aligned. The combination has a precise, clean quality that suits a minimalist approach to personal style.
This one is nail tech territory for most people. The silver line is what makes the design — and a shaky application works against it entirely.
14. Lime Green Tips with a Black Outline
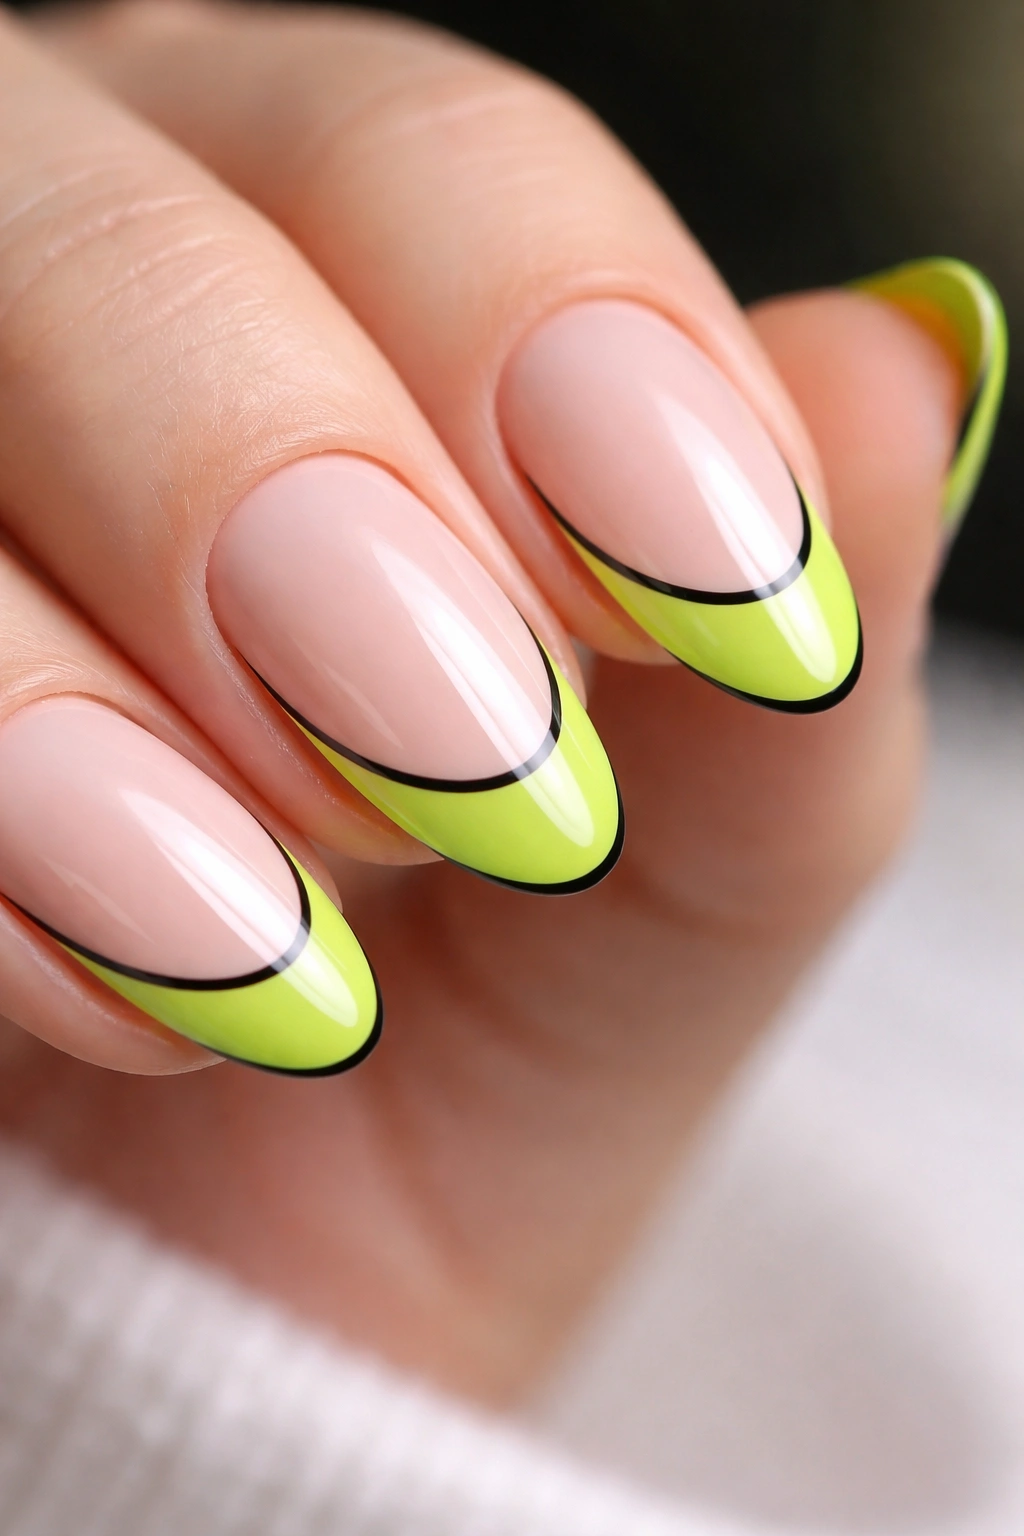
Not subtle at all.
Lime green — the most saturated, yellow-dominant green available — framed by a thin black outline along the smile line is a graphic design element sitting directly on your nail. It reads like a fashion week shoe, a limited-edition sneaker, or vintage aesthetic that’s been deliberately reclaimed.
The pairing of lime and black is high-contrast to a near-uncomfortable degree. On a short almond nail, the effect is compact and punchy — a bold punctuation mark, not an extended statement piece. It says what it needs to say in 2mm of nail space and leaves it there.
Apply the lime tip in two coats, cure or dry fully, then outline the smile line with a fine liner brush dipped in black gel or nail art paint. The outline should be roughly 0.5mm wide — visible without overtaking the tip color itself. Both edges of the outline need to be equally clean and sharp.
A clear or sheer base keeps all focus on the tip design. A nude base adds warmth without competing. Both work, but clear is the more graphic choice.
15. Sage Green Tips with Pressed Flower Details
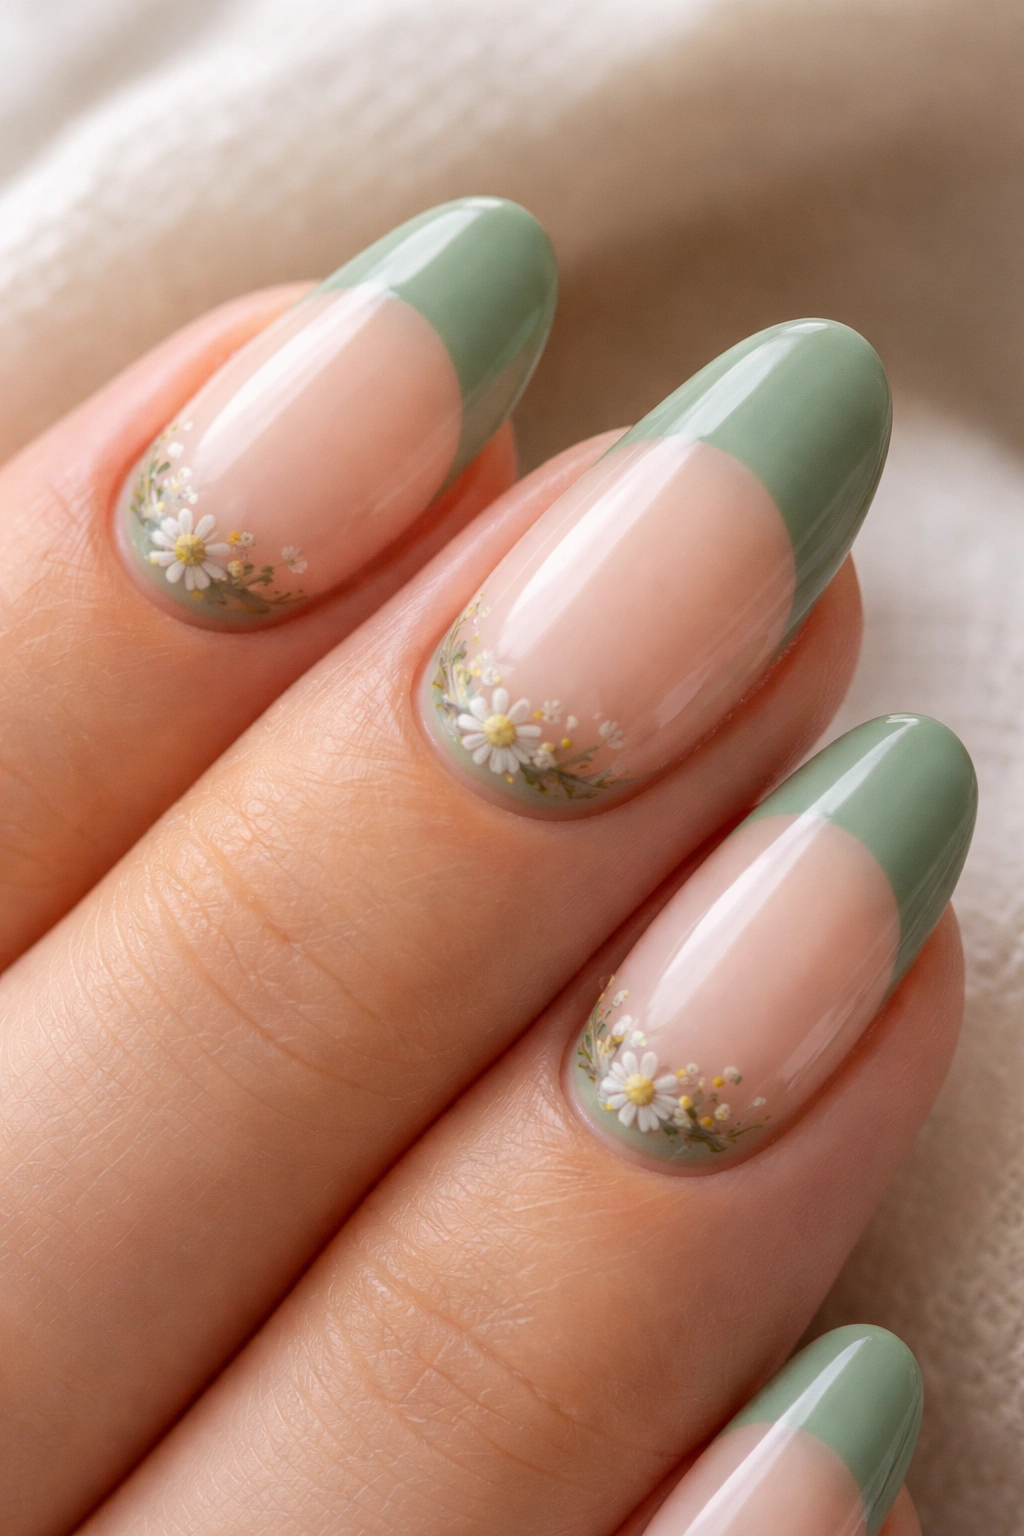
There’s a specific quality to this manicure — something between a botanical garden and a carefully considered styled photograph, but worn on your hand. Pressed flowers or high-quality nail decals that replicate the pressed botanical look, embedded under top coat, add organic texture that contrasts beautifully with the clean geometry of the French tip line.
Placement matters more here than in most other designs. A single tiny pressed flower or petal positioned at the corner where the sage green tip meets the base — right at the pivot point of the smile line — anchors the botanical detail to the most visually active part of the nail without crowding anything else.
Sealing Real Dried Botanicals
Actual pressed petals need a specific process to be both lasting and safe. Lay the petal onto the tacky layer of a cured gel base coat, press gently flat with a silicone tool, then encapsulate with 3–4 thin layers of gel top coat, curing between each layer. Fully sealed botanicals won’t lift, won’t catch on fabrics, and won’t discolor over time the way unprotected petals would.
The sage green tip and the dried plant material share a palette in a way that feels genuinely cohesive — the grey-green of the polish and the muted tones of dried flowers look like they came from the same source. That tonal harmony keeps the design from ever looking overcrowded.
16. Forest Green Tips with White Swirl Art
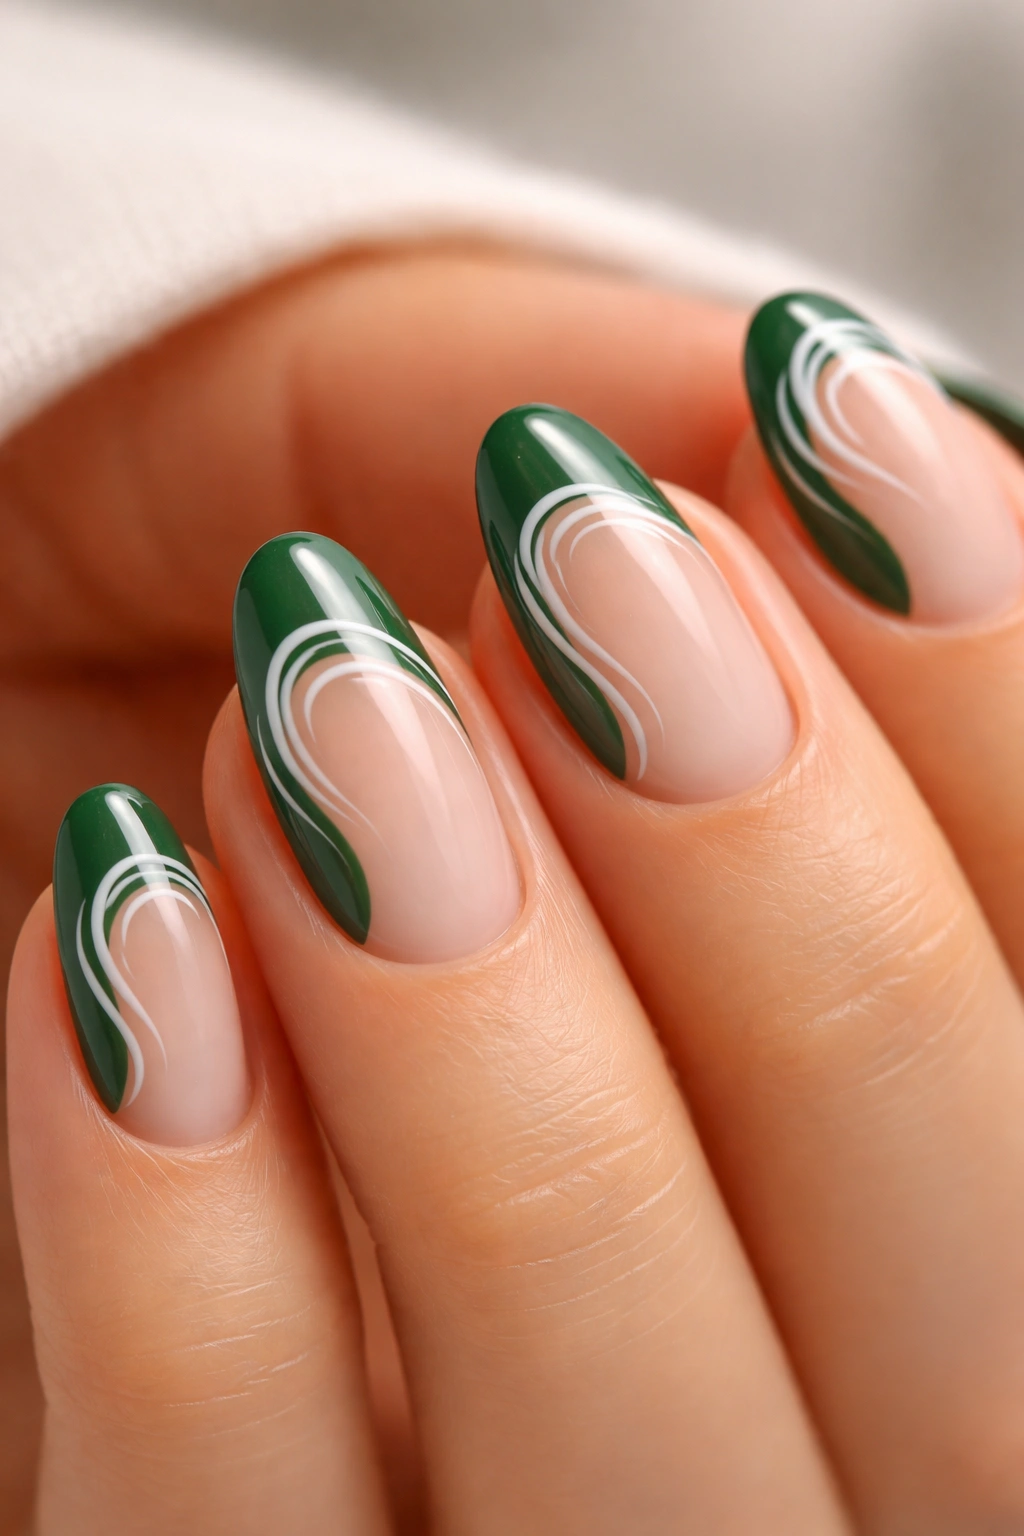
Movement. That’s what white swirls add to a forest green French tip — the deep, still quality of dark green given a flowing, gestural element that suggests something alive.
Executing the Swirl
Use a nail art liner brush and white nail art paint rather than white polish. Paint flows more freely at this scale and creates thinner, more natural-looking lines than polish does at fine detail size. The swirl should feel loose — brushstroke quality, not diagram quality. Leading the stroke with your wrist rather than your fingers produces looser, more organic curves. A few practice runs on paper before touching the nail will show you exactly what that feels like.
Where the Swirls Work Best
- One dominant swirl flowing from the center of the tip downward, with a smaller secondary curve breaking off one side
- Swirl detail on 2–3 accent nails only, leaving the remaining nails as clean forest green French tips
- A swirl that follows and extends the tip line itself, creating an organic frame rather than a floating element
Forest green and white create strong contrast — the swirls read clearly at any scale. A high-gloss gel top coat keeps the swirls sharp and defined. Matte top coat over this design flattens the white lines into the dark background and loses definition completely.
17. Chunky Glitter Green French Tips
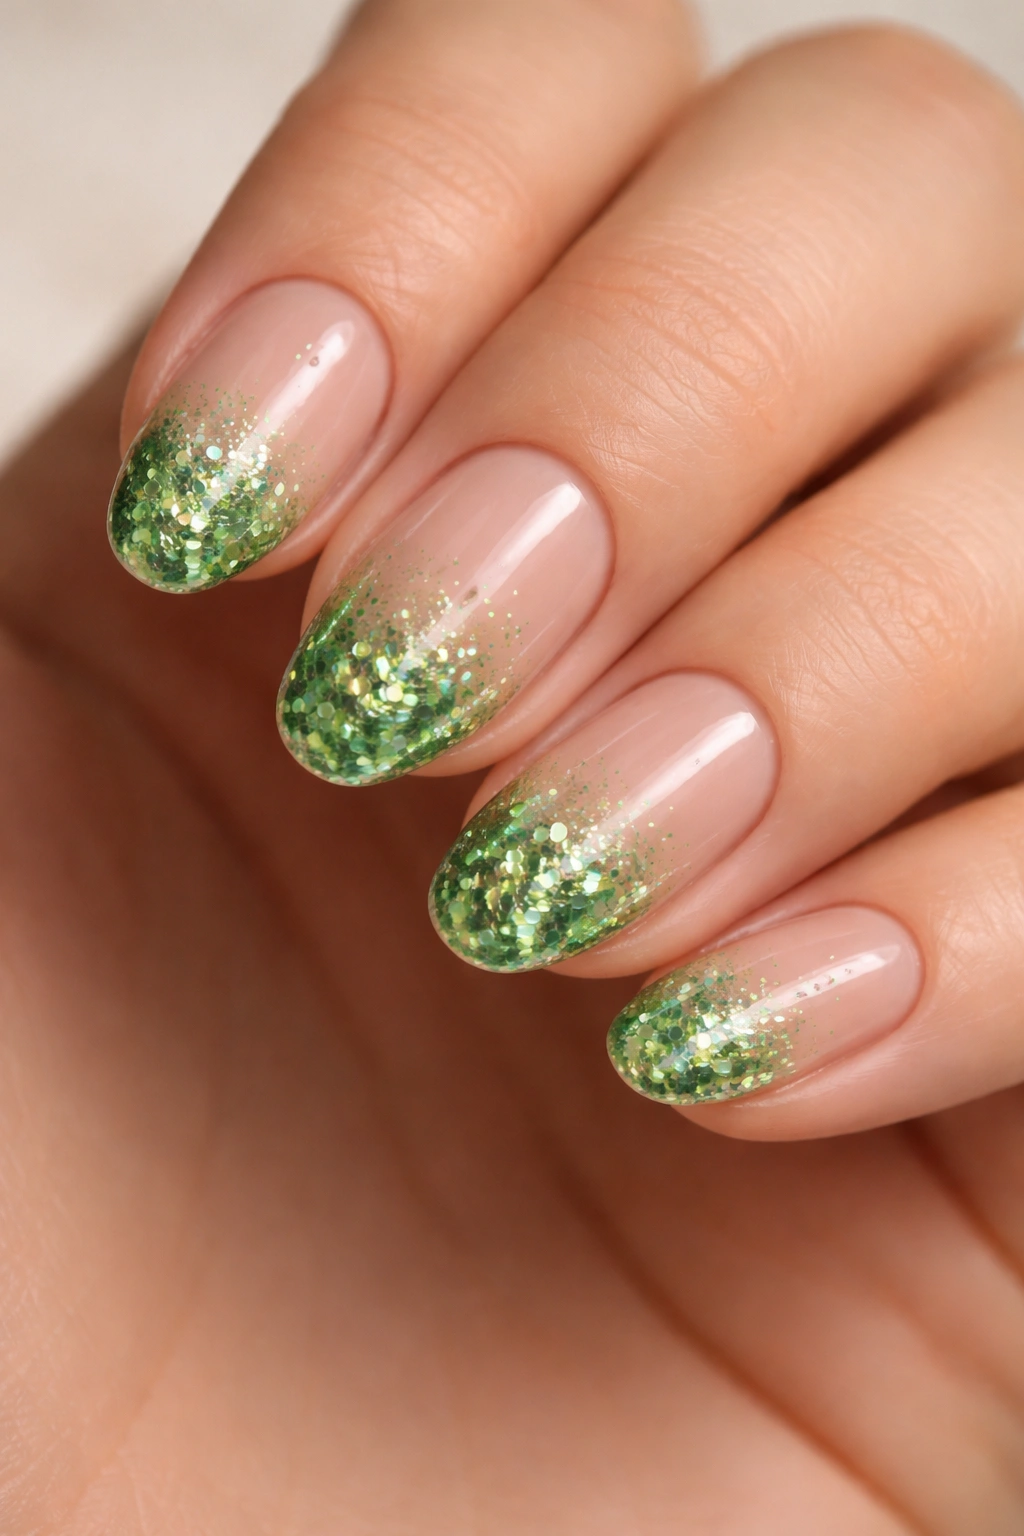
There’s something deeply satisfying about pressing chunky glitter into a wet surface and watching it catch light from every possible direction at once. This design leans into that completely.
The green comes from the glitter itself rather than a colored polish tip. Apply a clear or sheer nude base, then while the final clear layer is still wet, press the free edge into a pot of chunky green glitter. Apply firm, even pressure to ensure adhesion across the whole tip. Once set, apply 3–4 layers of thick clear top coat over the glitter to seal and smooth everything. Without enough top coat, chunky glitter feels rough and catches on fabric constantly. Run your fingertip across the finished nail — the surface should feel completely smooth with no texture at all.
Green glitter in mixed particle sizes reads most naturally. Combining large hexagonal pieces with fine iridescent dust creates depth and movement that uniform single-size glitter can’t replicate. Large pieces catch direct light. Fine dust catches reflected light. Together they make the tip shimmer from multiple angles simultaneously.
On a short almond nail, chunky texture stays concentrated enough to look purposeful. The compact scale of a short tip suits this kind of texture better than length does.
18. Dual-Tone Green French Tips with Two Shades in One Band
Instead of a single shade at the free edge, this design splits the French tip into two distinct greens — either side by side in the same band, or layered with partial overlap.
The side-by-side version is purely graphic. Apply tape down the vertical center of the free edge, paint one half sage, let dry completely, re-tape over the sage, and paint the other half forest green. The two greens meet at the natural V-point of the almond shape at the very tip of the nail — the geometry of the shape makes the colors converge in a way that looks designed, not divided.
The layered version is more painterly. Apply olive green as the full tip base first and cure completely. Then add a second layer of forest green covering roughly 60% of the tip, leaving the olive visible at the outer edges. Where the two overlap, the colors create an organic blend that reads as depth rather than a mistake.
Both approaches need a very light nude or completely clear base. Any base with its own strong color competes with the dual-tone tip and muddies the visual. Let the two greens own the entire design.
19. Geometric Gold Line Green French Tips
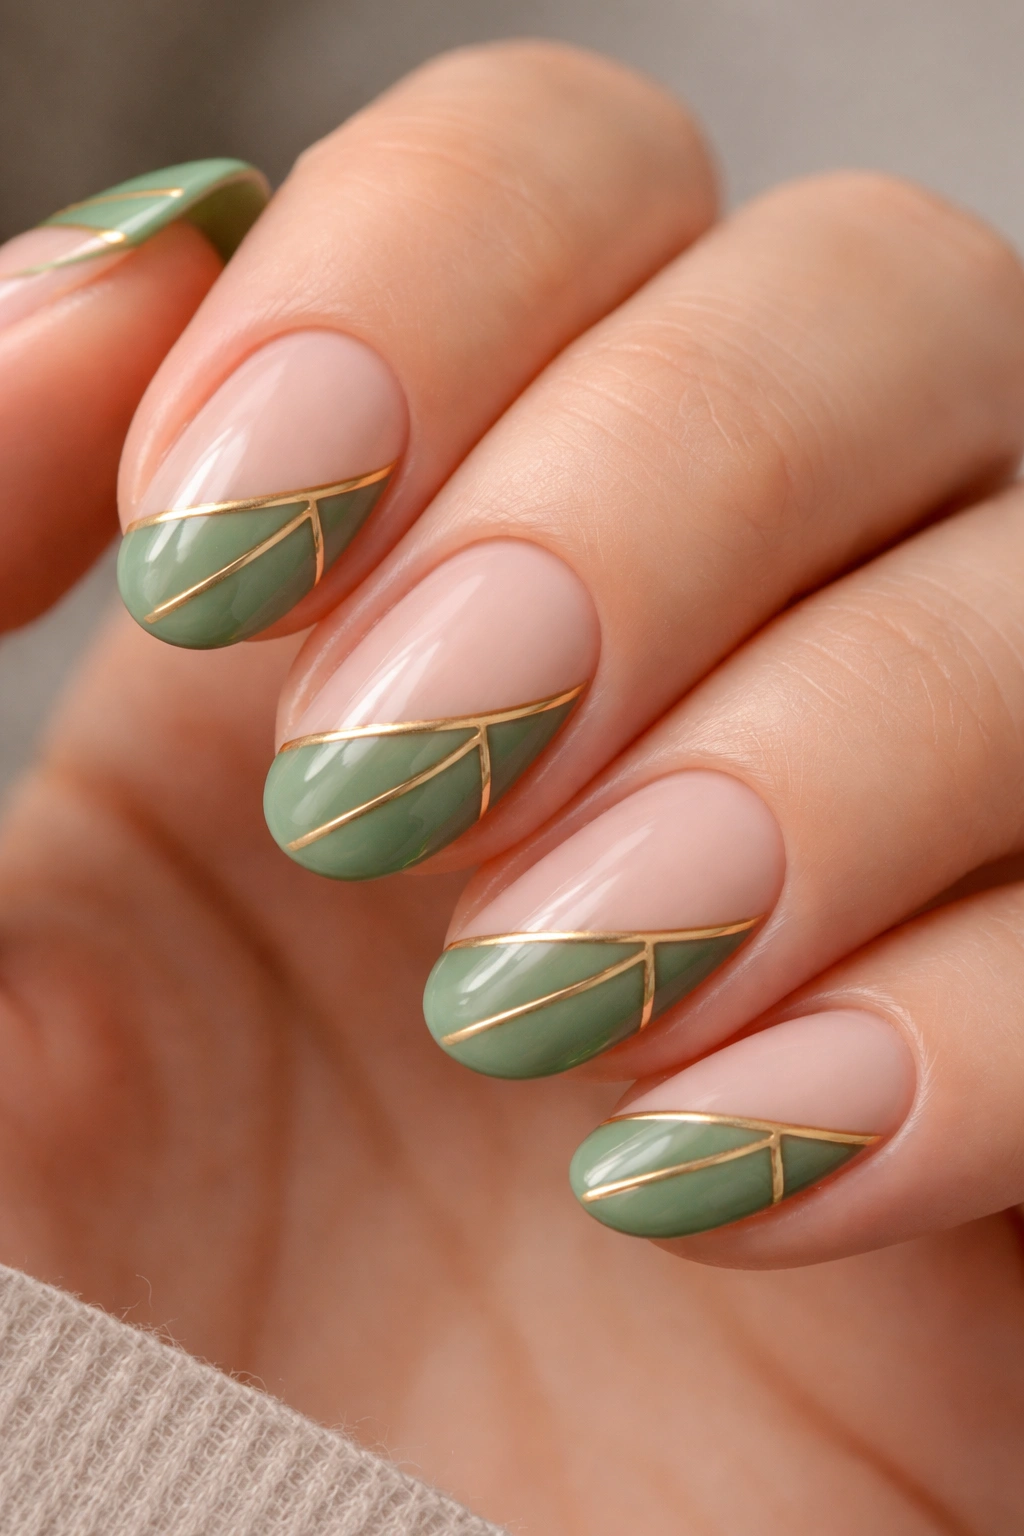
Gold nail striping tape — or freehand gold gel lines — applied over a green tip requires minimal tools while producing a result that looks far more technically involved than it actually is.
The approach: a classic sage or forest green French tip as the base, then two or three straight gold lines applied over the tip area. One line follows the smile line exactly. A second runs diagonally across the tip from one corner toward the center. A third connects a corner of the tip to a point on the adjacent sidewall. The result is a series of triangular sections within the tip area — some all-green, some bisected by a gold line — that create a mosaic quality.
Gold nail striping tape is the most approachable method. Press sections of tape over the cured tip, trim to length with nail scissors, and seal under top coat. Very minor variations in straightness look hand-drawn rather than imprecise. Freehand gold gel lines require a striper brush and considerably steadier hands but produce a more custom, one-of-a-kind result.
Against deep green, gold striping feels bold and maximalist. Against sage or mint, the same technique reads architectural and minimal. The shade choice does as much work as the geometry itself.
20. Dark Emerald Tips with a Negative Space Arc
The most structural look in this list.
A negative space arc — a curved section of bare or clear nail left exposed within the tip area — transforms a dark emerald French tip into something that reads more like fine jewelry than nail polish. The concept borrows from negative space ring design, where the absence of material carries as much visual weight as the material itself.
Apply the emerald gel to the full free edge and cure completely. Then, using a thin arc-shaped guide sticker or careful freehand work with a fine cleanup brush and acetone, clear a thin crescent from near the inner edge of the emerald tip. The exposed section reveals bare nail or clear base beneath, creating a moon-shaped curve of negative space floating between the colored tip and the base coat.
The visual result: the emerald tip appears to be a separate element, slightly detached from the nail surface below it. The negative space gap looks like a design decision — not missed coverage or an application error. On a short almond nail, the crescent shape follows the curve of the tip naturally and looks as though it was planned into the shape of the nail from the beginning.
Dark emerald is the right color here specifically because the contrast between the deep green and the pale bare nail is what makes the arc clearly visible. Lighter greens lack the contrast needed for the separation to land with any clarity.
Clean the perimeter edges of the emerald around the arc with care. The boundary needs to be crisp — easiest to achieve by using a fine cleanup brush dipped in acetone to sharpen any edges before the final cure.
Final Thoughts
Short almond nails with green French tips have considerably more range than the basic description suggests. The same shape and the same 2–3mm of free edge can land anywhere from quiet and restrained (sage, matte, clean smile line) to graphic and loud (neon, lime with black outline, chunky glitter) depending entirely on two variables: the specific shade of green and the finish you put over it.
The shade controls the mood. A grey-toned sage feels calm and considered. An electric neon feels like a deliberate announcement. An earthy olive feels grounded and warm. None of these are wrong choices — they just belong to different moments, different outfits, different states of mind.
If you’re new to green nails, sage on a nude base is the entry point that converts skeptics, including your own internal ones. From there, the list above has somewhere to take you whether you want to stay minimal or go completely off the rails.
One practical note worth closing on: almond shapes need reshaping every 2–3 weeks to keep the taper clean. Keep that in mind when deciding how involved your tip design is — the pressed botanicals or the negative space arc are worth the extra maintenance effort. A simple sage French tip can survive a full regrow before it starts looking grown-out. Match the complexity of your design to how often you’re willing to sit down for a touch-up, and you’ll always be happy with what’s on your hands.
