

Royal blue on an almond nail shape has a sharp little magic to it. The color is deep enough to feel polished, but not so dark that it disappears, and the tapered tip keeps the whole look from turning boxy. If you’ve ever looked at a flat navy manicure and thought it needed a little life, this is the sweet spot.
The trick is choosing the right finish. Gloss makes royal blue look lacquered and rich; matte turns it more velvety and moody; gold, silver, white, and sheer negative space all change the mood fast. On almond nails, even a tiny detail near the cuticle or across the tip can shift the whole design.
What I like about royal blue almond nail ideas is that they can lean elegant, sporty, arty, or downright dramatic without changing the base color. Same shade. Different story. And because almond nails already soften the hand, the blue can do the heavy lifting without feeling harsh.
1. High-Gloss Royal Blue Almond Nails
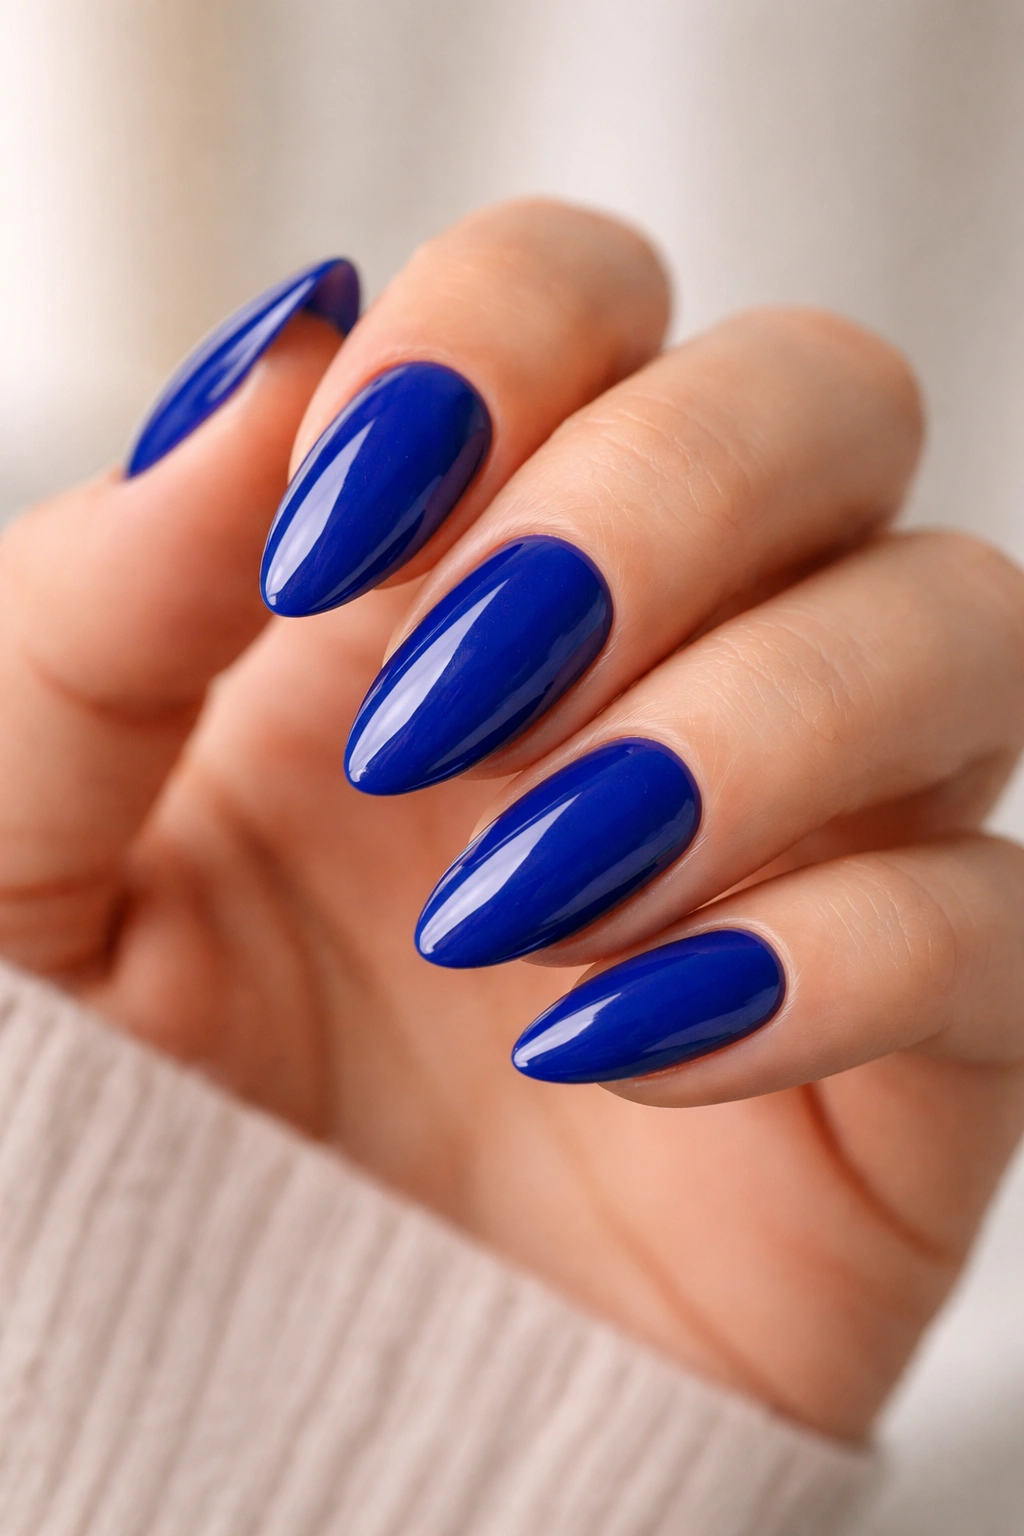
A single saturated blue is hard to beat. On almond nails, the shape gives the color room to breathe, so the manicure reads clean instead of heavy. That matters more than people think, especially when the polish is bold and opaque.
Pick a royal blue that sits between cobalt and navy. A brighter version looks crisp in daylight, while a slightly deeper shade feels dressed up under indoor light. I prefer a polish with full coverage in two coats, because patchy blue is the fastest way to ruin the effect.
A high-shine top coat is nonnegotiable here. It makes the blue look wet and smooth, and it also helps the edges stay sealed a little longer, which is useful because dark shades show tip wear fast. Keep the nails medium length if you want this to look sharp rather than costume-y.
This is the manicure I’d wear when I want color, but not extra fuss. It works with denim, black knits, crisp white shirts, and a plain silver ring.
2. Royal Blue Almond Nails with Gold Foil Flakes
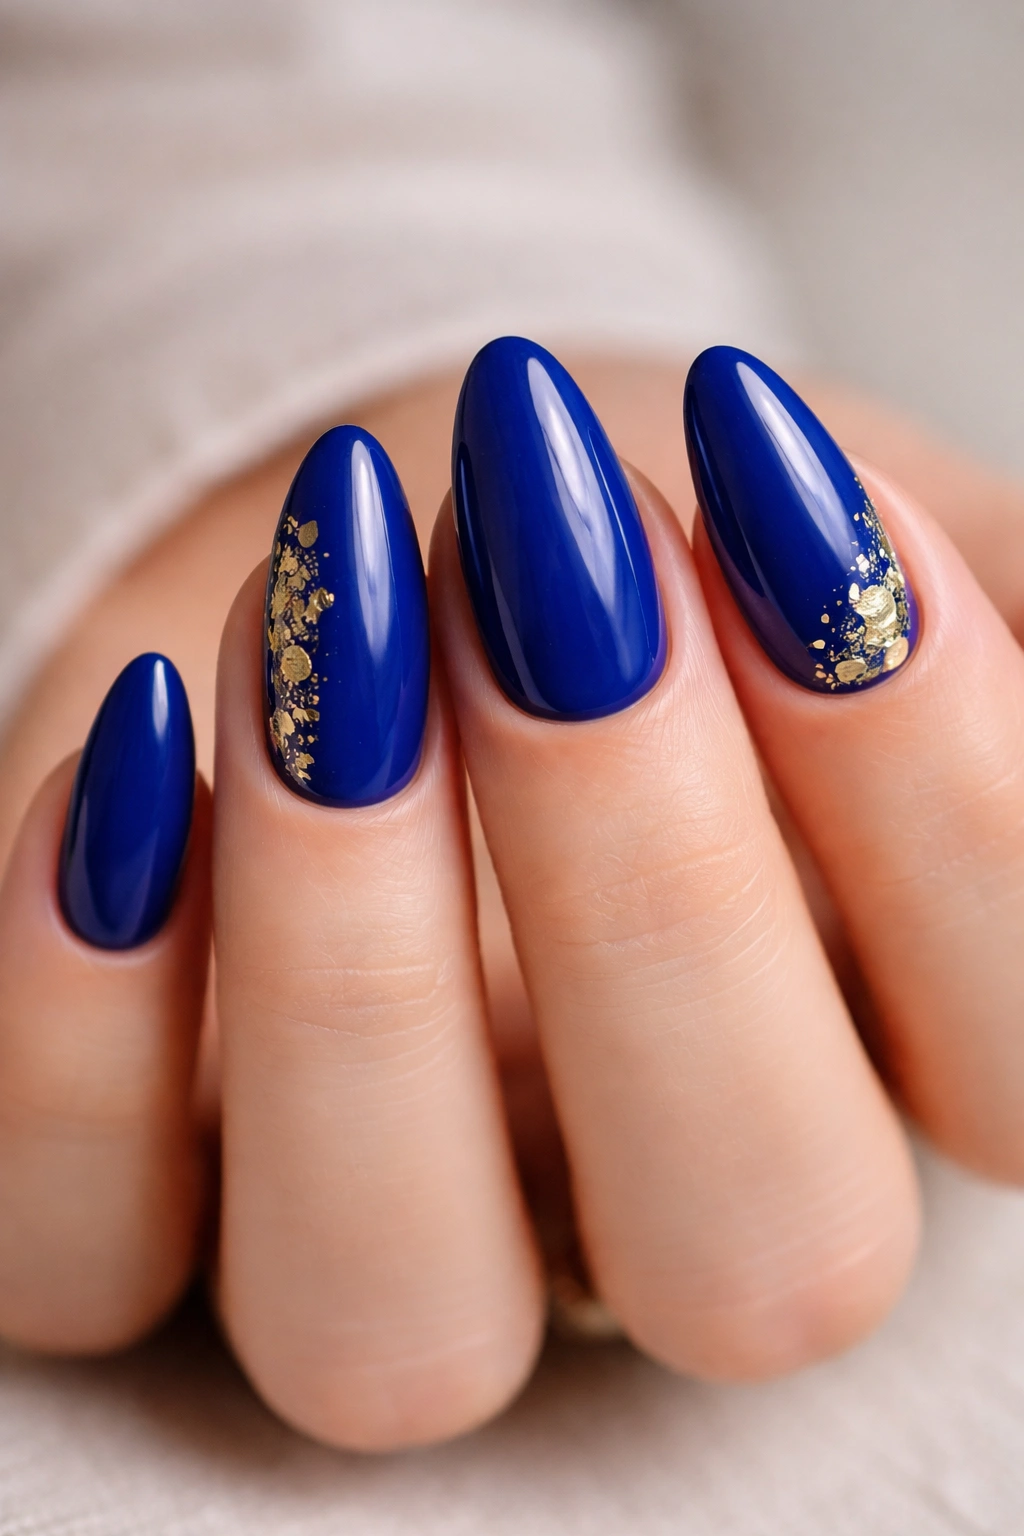
A little gold foil on royal blue can look expensive fast, but only if you keep it sparse. Think torn flecks near the cuticle, a few bits drifting across one side of the nail, or a thin cluster on just two accent nails. Too much foil turns muddy. A little goes a long way.
Where the Foil Should Sit
Put the foil on a tacky layer of polish or gel, then press it flat with a silicone tool or the tip of a cuticle pusher. Seal it carefully with top coat, because foil edges can snag if you rush that part. If you want the design to stay clean, keep the foil away from the free edge.
- Use foil on 2 to 4 nails, not all 10.
- Place it closer to the cuticle for a grown-up look.
- Match it with a glossy finish, not matte.
- Keep the rest of the nail plain so the foil has space.
Gold and royal blue are a strong pair for a reason: the warmth of the metal stops the blue from feeling cold and flat.
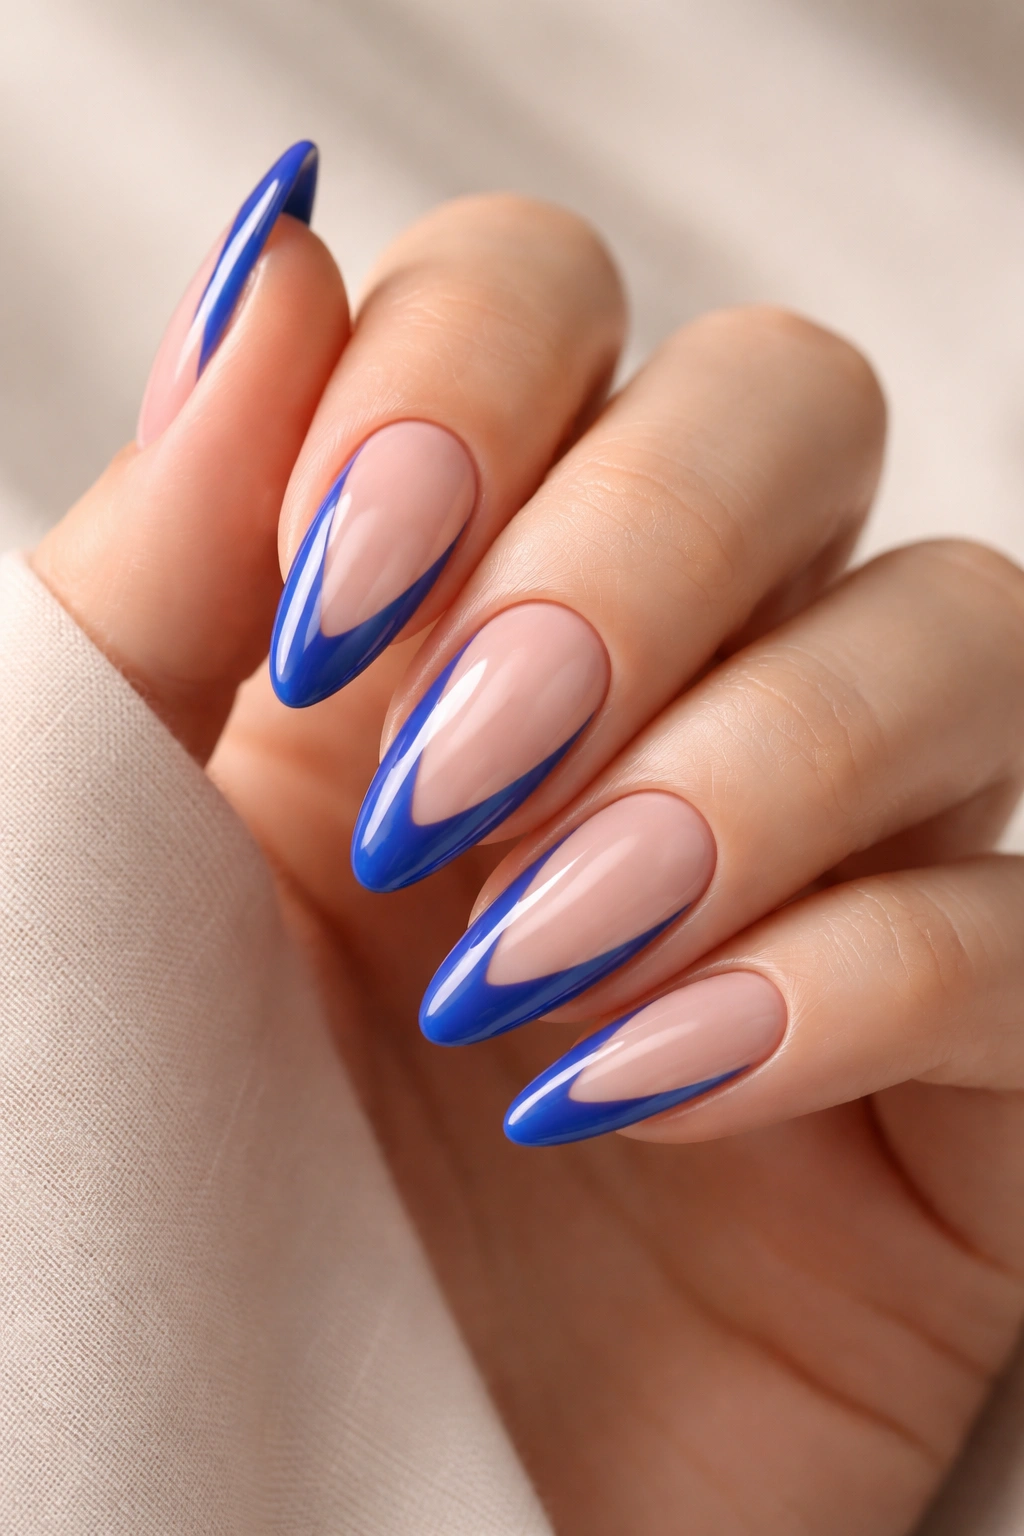
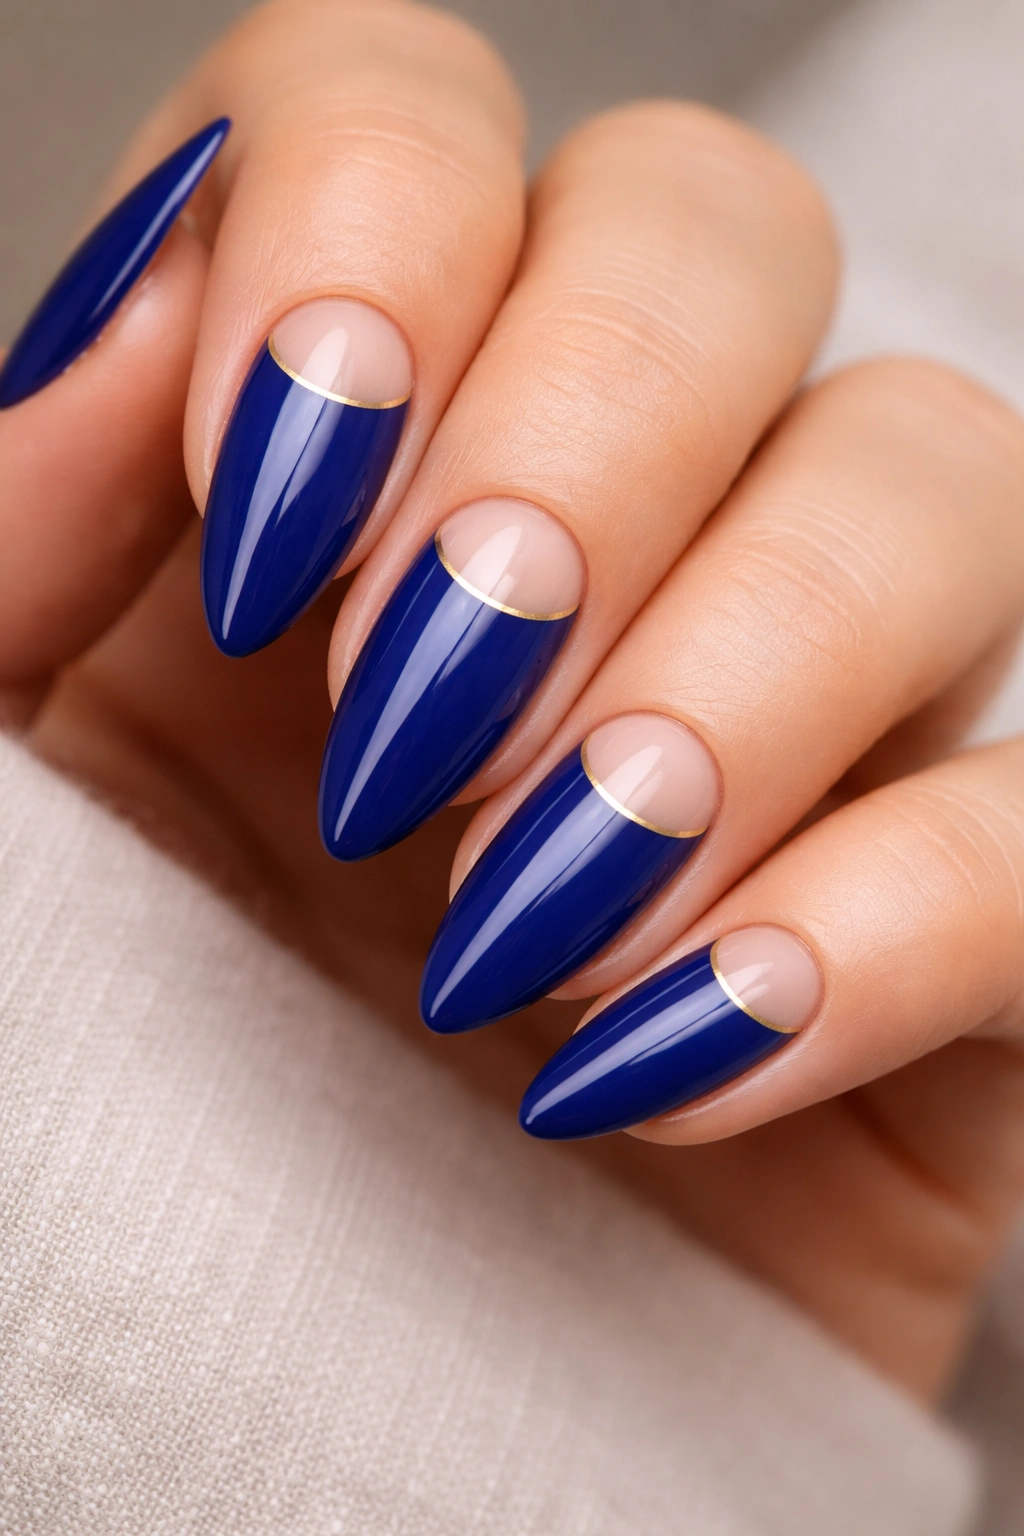
3. Royal Blue French Tips on Sheer Pink
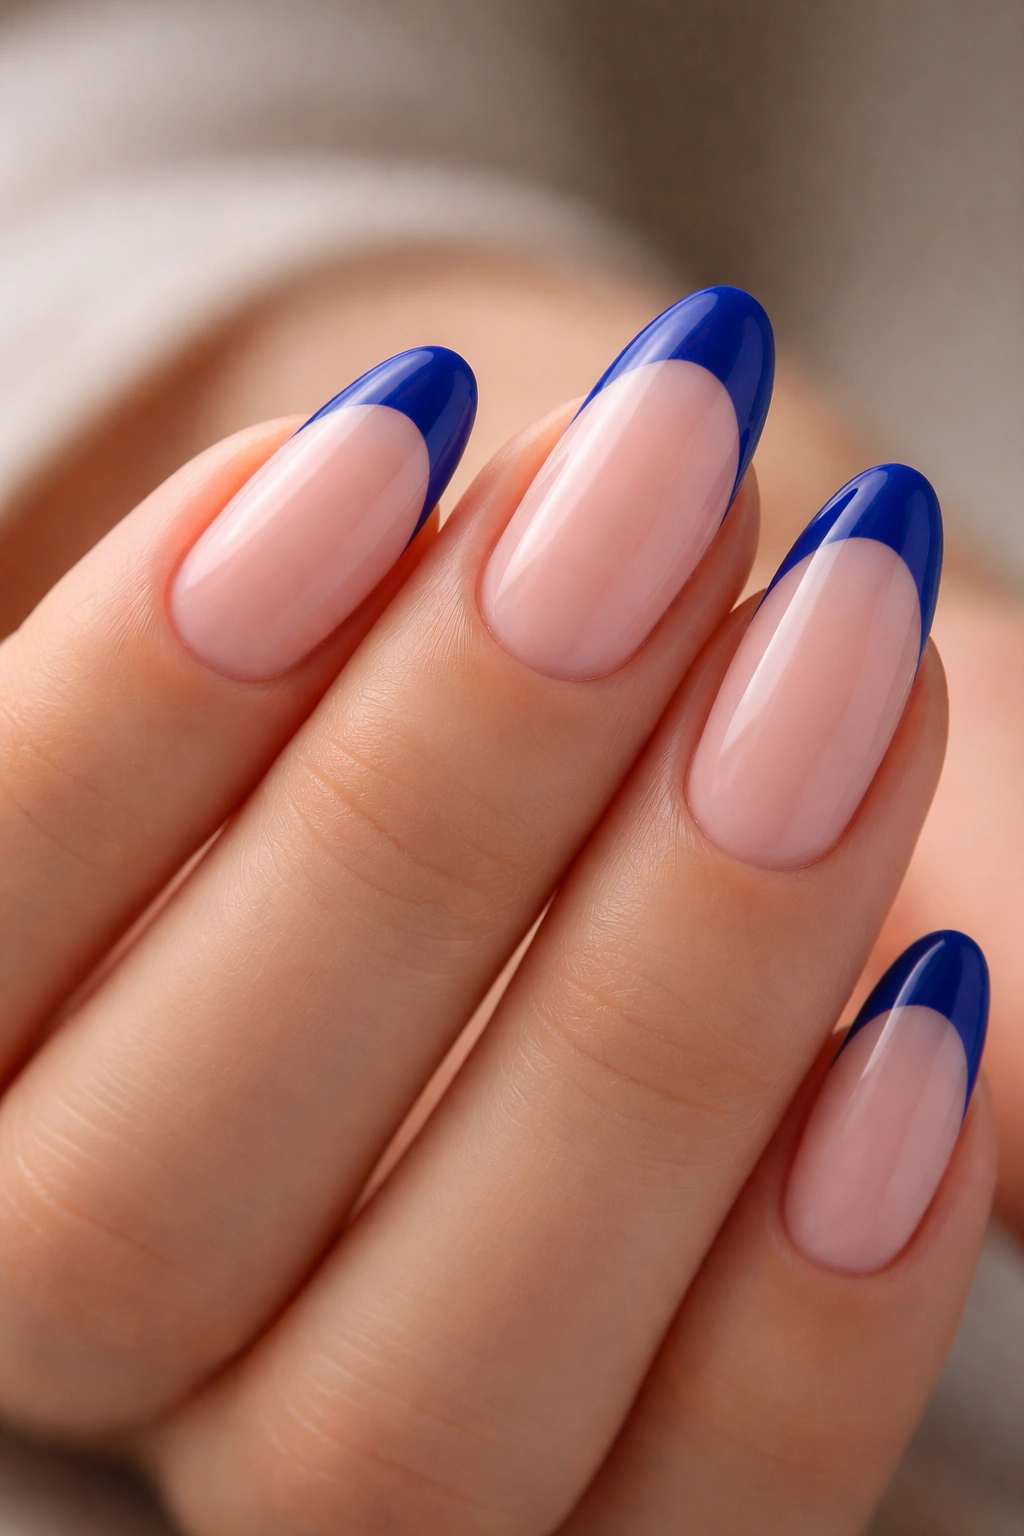
Why does this look so good? Because the almond shape gives the French line a long, graceful curve, and royal blue makes that curve feel sharper than a white tip ever could. It’s a cleaner, less expected version of the classic French manicure.
How to Keep the Line Clean
Use a sheer pink or milky nude base, then paint the tip with a thin liner brush. On medium almond nails, a tip that’s about 2 to 3 millimeters deep keeps the design delicate. If the nails are longer, you can push the blue tip a little thicker so it doesn’t vanish from a distance.
A blue French is one of those designs that looks fancy even when the application is simple. The trick is not to wobble the smile line. If freehand is shaky, use stickers or guide strips and take your time peeling them off before the polish fully hardens.
- Best with rounded almond tips
- Looks neat on short and medium lengths
- Works with gloss or a satin top coat
- Pairs well with tiny silver rings
There’s a reason people keep returning to French tips. They frame the nail instead of covering it.
4. Matte Royal Blue with Glossy Swirls
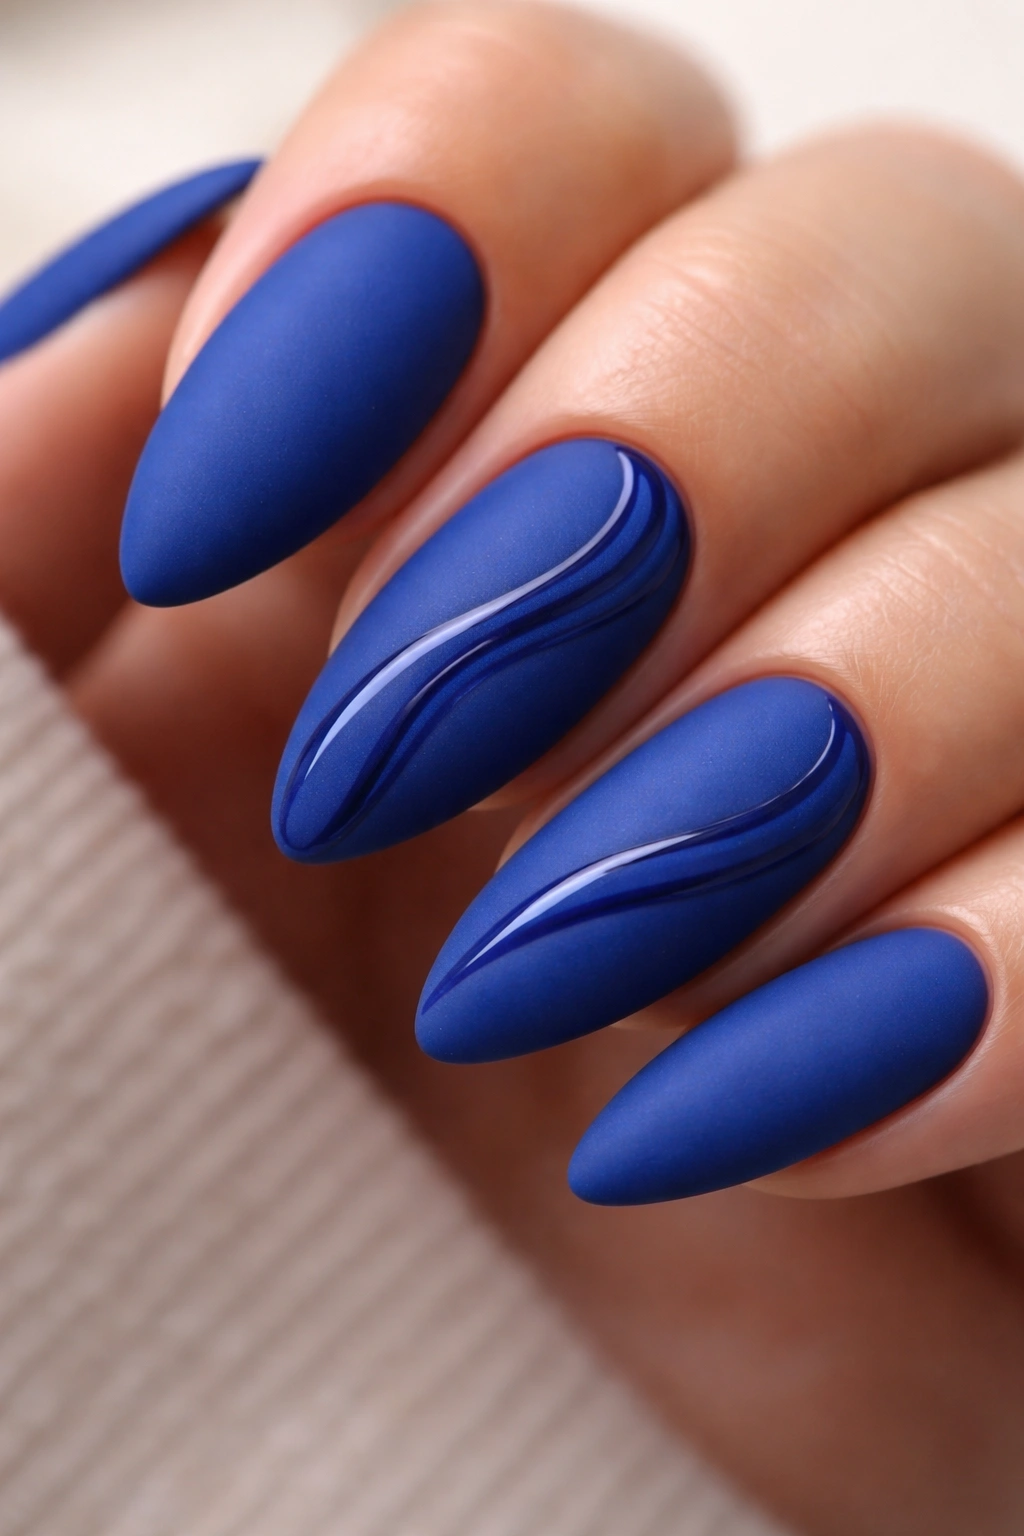
Matte royal blue looks surprisingly soft on almond nails. The finish takes the shine down and makes the color feel deeper, almost like velvet. Then you put glossy swirls over the top, and the whole design wakes up.
What I like about this one is the contrast. Same color, two finishes. The matte base can be a full royal blue coat, while the swirls are painted in the same shade but sealed with gloss top coat. Under light, the raised shine shifts as your hands move, which keeps the manicure from looking flat.
This is one of the better choices if you like nail art but hate busy nails. The swirls can be thin and loose, almost like ribbon trails, or thicker and looped toward the center of the nail. Either way, keep them on 2 to 4 nails so the design feels intentional rather than crowded.
Blue this deep can look heavy in matte form if the almond shape is too short and blunt. A little length helps.
5. Royal Blue Chrome Almond Nails

Chrome is louder than gloss, full stop. That’s the whole point. A royal blue chrome finish has a mirrored edge that catches every bit of light, and almond nails give it a sleek, almost liquid shape. If you like manicures that look polished from across the room, this is the one.
Unlike standard shimmer polish, chrome sits on top of a smooth base and reflects more like metal than glitter. That means prep matters. The nail surface needs to be even, the base color needs to be cured cleanly, and the chrome powder should be rubbed in with a soft sponge applicator until it looks like a uniform sheen instead of a dusty layer.
It works best on medium to longer almond nails because the curve makes the shine feel elegant instead of harsh. Short nails can handle chrome too, but the effect is punchier and less graceful.
I’d wear this with simple clothes and plain jewelry. Let the nails do the talking.
6. Negative-Space Royal Blue Cutouts
A negative-space manicure is one of the easiest ways to keep royal blue from feeling too solid. You leave part of the natural nail bare, then use the blue to outline, frame, or slice across the shape. On almond nails, that open space makes the taper look even cleaner.
The Best Places to Leave Bare
The cutout can run along one side of the nail, sit as a little crescent near the cuticle, or form a diagonal strip through the center. The key is keeping the shape crisp. Use striping tape or a thin detail brush if freehand lines tend to wobble.
- Leave 20 to 40 percent of the nail bare
- Use royal blue as the border, not the whole field
- Keep the lines thin and even
- Seal the design with a glossy top coat
This style is kinder to grow-out. Because part of the nail is clear or nude, the manicure can look intentional even after a couple of weeks, instead of screaming for a fill.
It’s a smart pick if you like modern nails but don’t want every finger fully covered.
7. Royal Blue Marble with White Veins
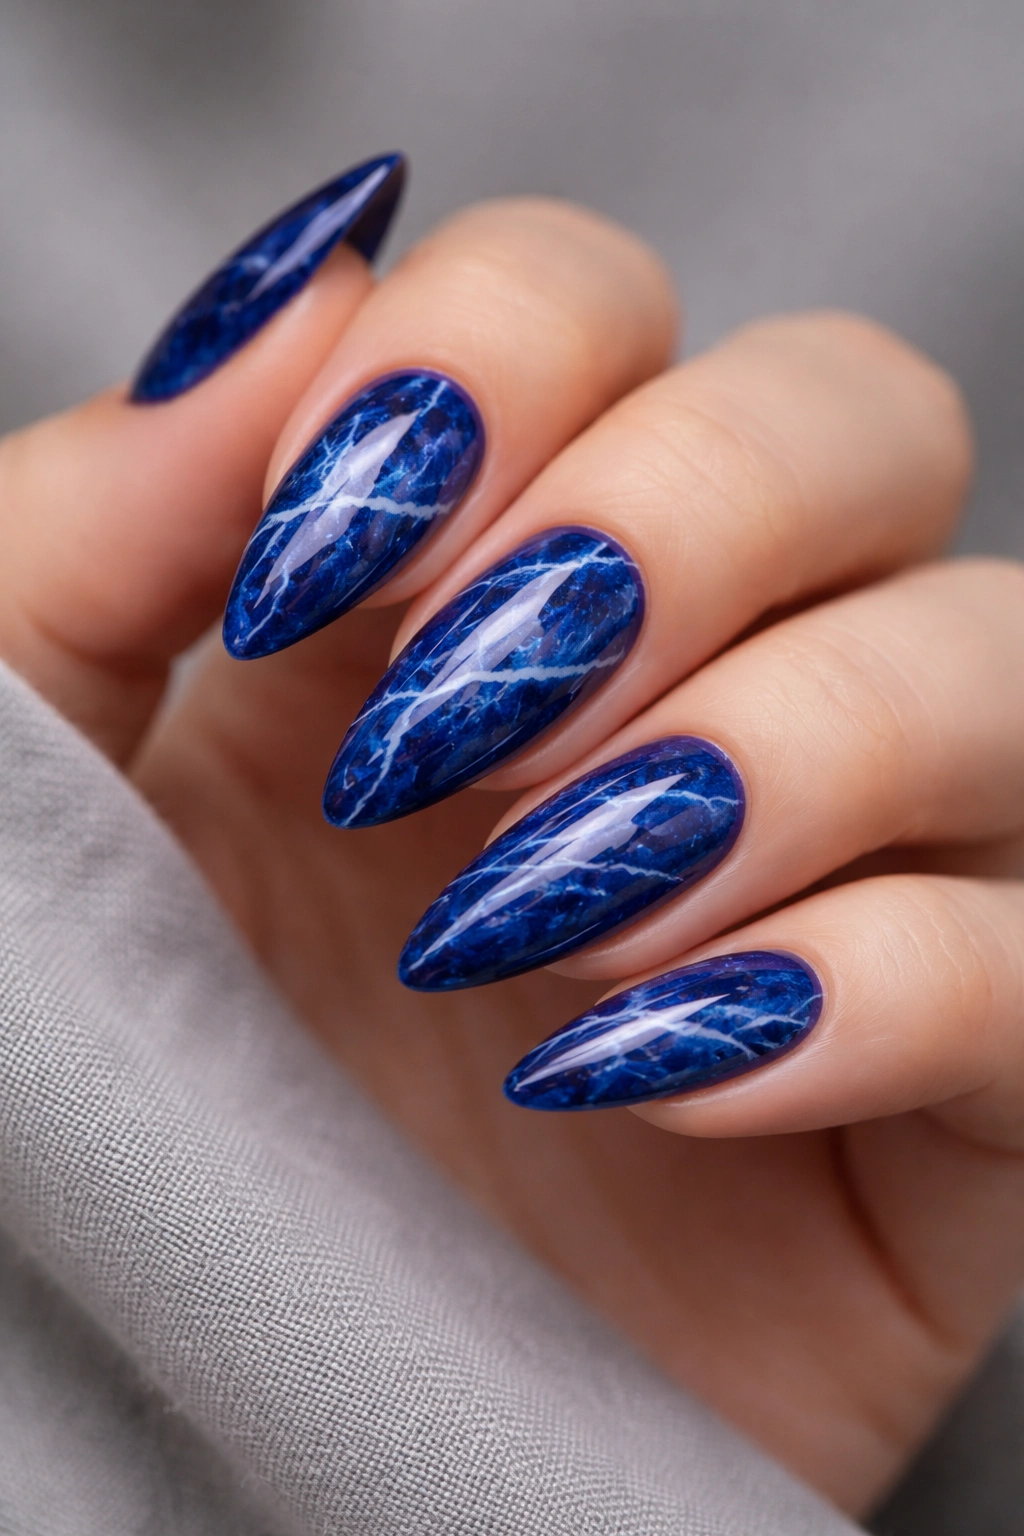
Royal blue marble can look rich and a little moody, especially on almond nails. The white veins break up the darkness and give the polish movement, like water streaked with ink. Done well, it reads artistic. Done poorly, it reads muddy. That gap is wide, so control matters.
Start with a royal blue base, then add thin white lines while the polish is still workable. A blooming gel can help the colors spread softly, but you do not need it if you’re patient with a fine brush and a steady hand. Keep the veins narrow and irregular. Real marble is never neat.
This design suits medium almond nails best because the shape gives the swirls room to travel. On shorter nails, the lines can feel cramped if you overcrowd them.
I like this more than a heavy glitter look when the goal is depth rather than sparkle. It has that expensive stone feel, but it still looks like nails, not a craft project.
8. Velvet Cat-Eye Royal Blue Almond Nails
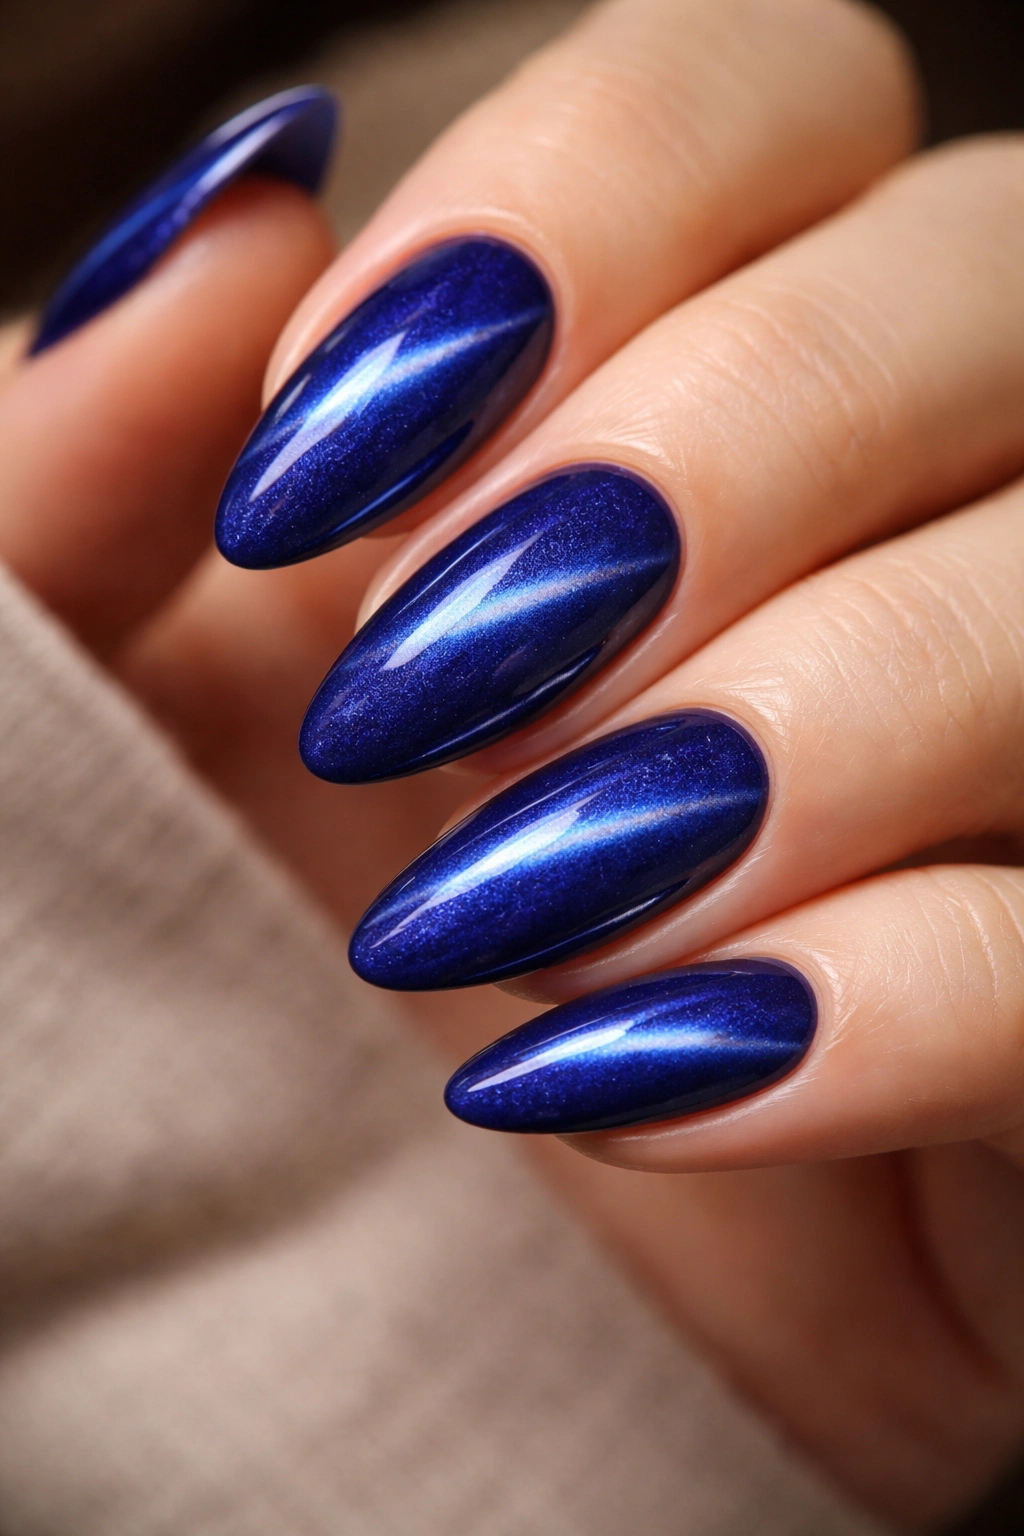
A cat-eye manicure uses magnetic polish to pull shimmer into a bright line or soft arc. On royal blue, that effect turns the nail into something that looks almost plush. Almond nails suit it well because the curve of the shape echoes the sweep of the magnetic line.
The trick is deciding where the highlight should sit. Straight down the center gives a long, clean look. Angled diagonally makes the nail feel a bit more dramatic. If you want the finish to look like velvet in motion, keep the magnetic line soft instead of overly sharp.
You’ll need a magnet tool and a polish made for cat-eye effects. Work one nail at a time, because the shimmer shifts fast. Once the line is where you want it, cure or dry immediately so it doesn’t blur.
- Best on medium-length almond nails
- Strongest under indoor light and flash
- Looks richest with a deep royal blue base
- Needs careful layering or the shimmer gets cloudy
This one has a little theatrical streak. I mean that in a good way.
9. Royal Blue Ombré Fade
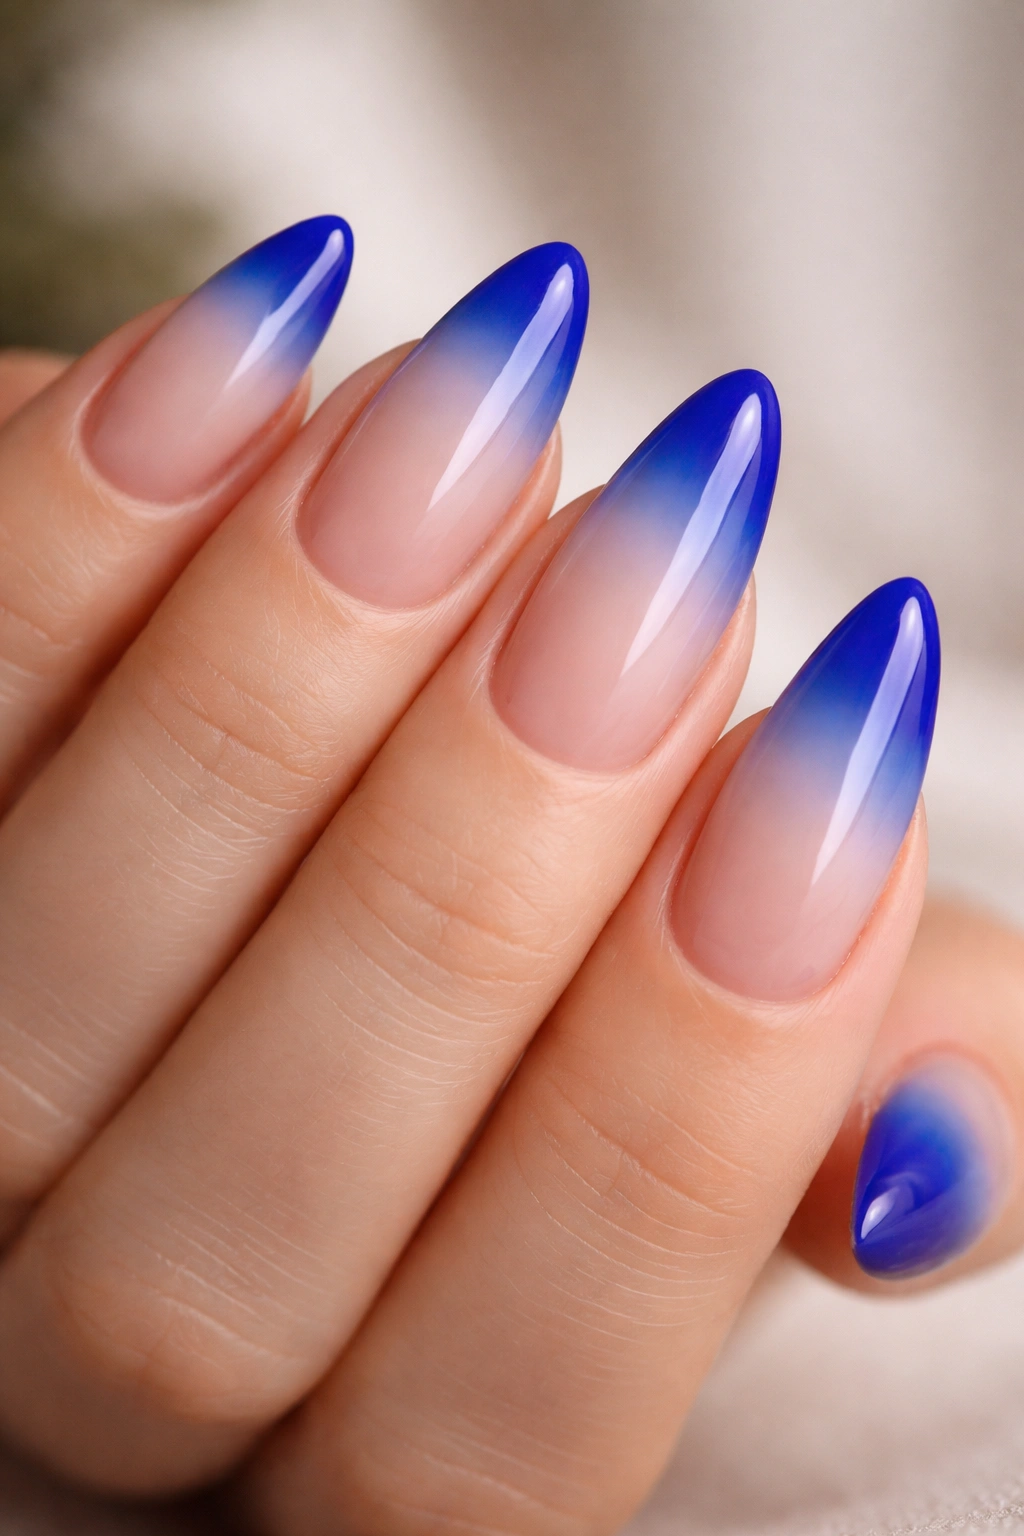
A royal blue ombré can go from sheer nude at the cuticle to deep blue at the tip, or it can fade from cobalt into navy across the whole nail. Either version works, but the nude-to-blue fade is the cleaner choice if you want something softer on almond nails.
How to Make the Fade Look Smooth
Use a makeup sponge or a soft ombré brush and build the color in thin layers. One heavy sponge pass usually leaves a hard line, and that is where people get frustrated. Two or three lighter passes give you the blur you actually want. Keep the blue strongest at the tip if you want the nail to look longer.
A good ombré has almost no visible border. You should be able to look at the nail and see the shift happen gradually, not as a stripe. If the transition looks choppy, add one more sheer layer of nude or blue and soften it again.
This style is nice when you want royal blue but do not want ten fully saturated nails. It feels easier on the eye, which makes it a good everyday pick.
10. Royal Blue Nails with Silver Micro-Glitter
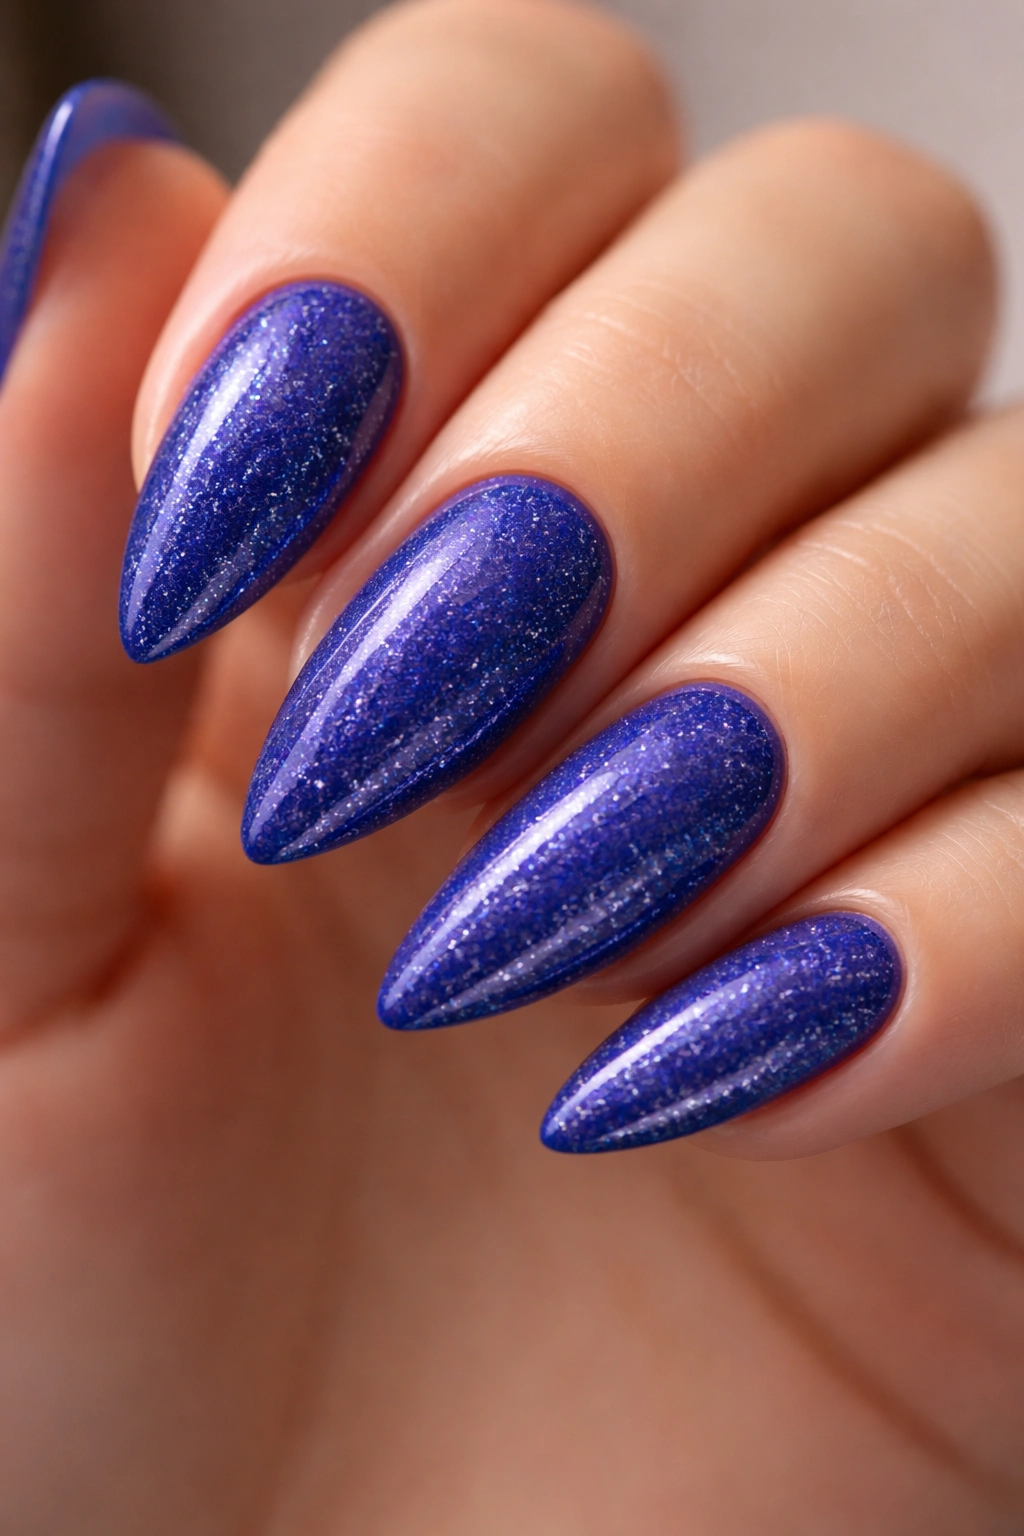
Silver micro-glitter changes royal blue in a useful way. It breaks the flatness, but it does not scream for attention the way larger glitter chunks do. On almond nails, that small sparkle looks especially neat because the shape already has enough elegance on its own.
What makes this version work is coverage. You want enough glitter to catch the light evenly, but not so much that the nail turns grainy. A fine shimmer polish layered over royal blue gives a smoother finish than dumping loose glitter into a thick top coat. That difference matters.
I like this style for people who want a blue manicure that can move from daytime to evening without changing anything else. It looks good with silver jewelry, obviously, but also with plain black clothing, where the tiny sparkles become more visible.
If you’re doing this at home, cap the free edge with top coat. Glitter tips chip in odd ways when they’re left open, and that ruins the neat finish fast.
11. Royal Blue Almond Nails with White Starburst Art
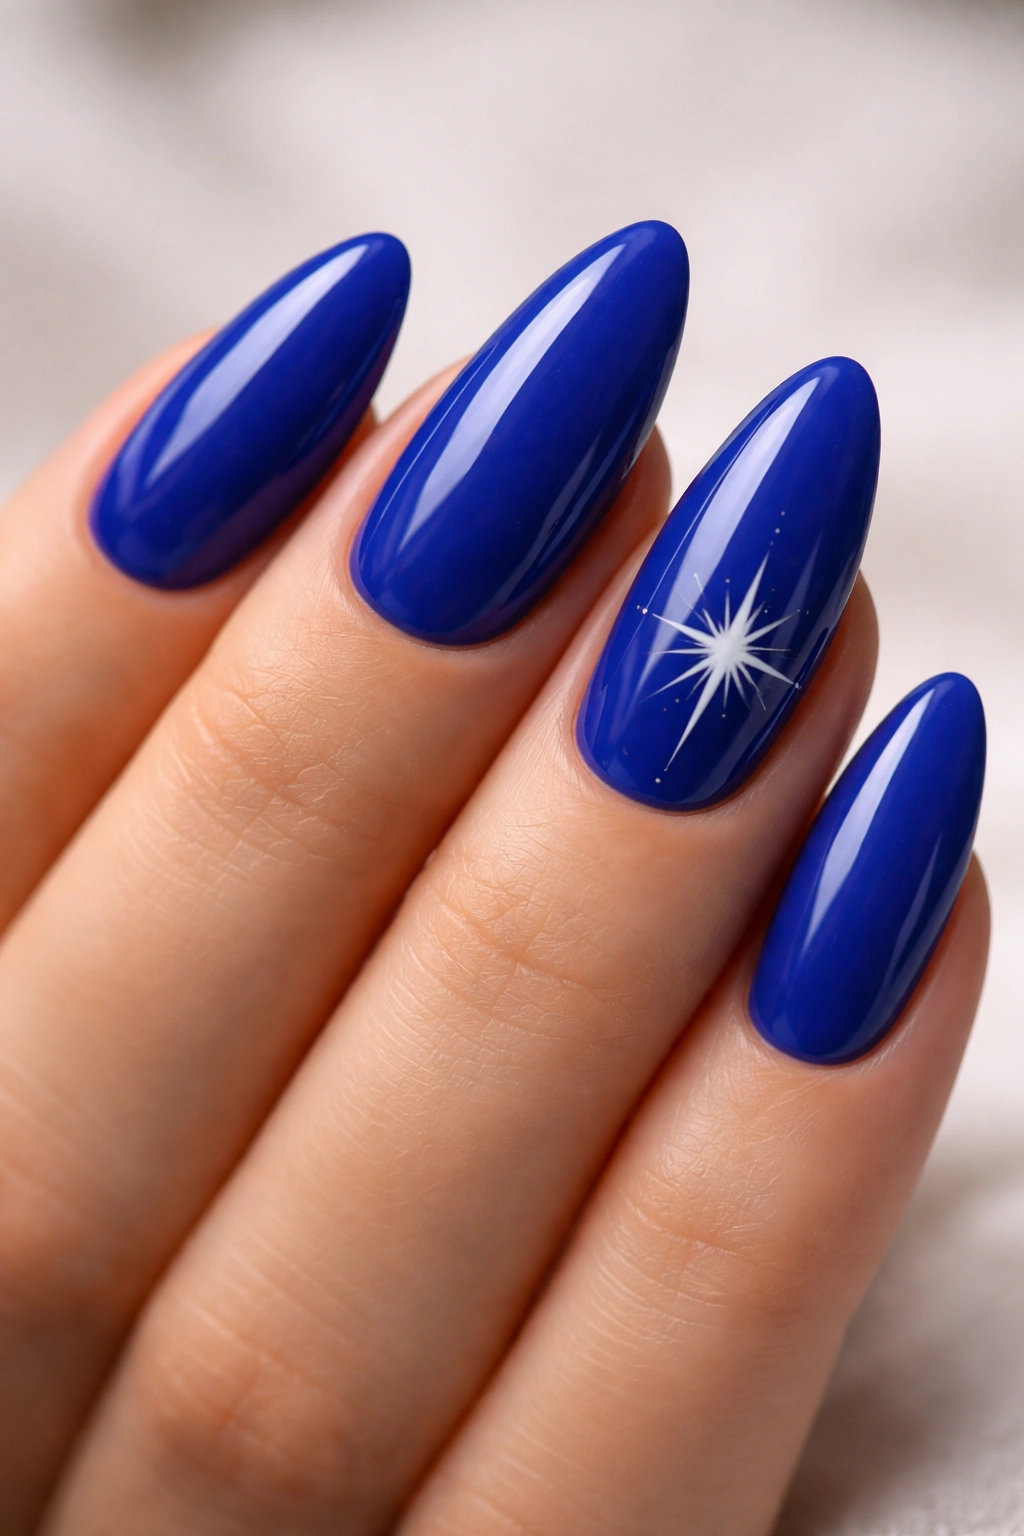
White starbursts on royal blue look crisp and a little playful. They can be tiny, like pinpoints with short rays, or bigger and more graphic if you want a stronger contrast. Almond nails are a good canvas because the long shape keeps the design from feeling cluttered.
Unlike scattered dots or random sparkles, starburst art has a clean focal point. That makes it easier to control the eye. Put one starburst near the tip of an accent nail, or center it slightly off to one side so the design feels less stiff. A very thin liner brush is the easiest tool here, and opaque white polish matters more than people expect.
This is a nice choice if you like celestial details but don’t want moons, clouds, and planets all crammed together. Keep the rest of the nails plain royal blue, and the single art element suddenly looks sharper.
I’d wear this one when I want a little personality, not a full themed set.
12. Royal Blue Almond Nails with Pearl Accents
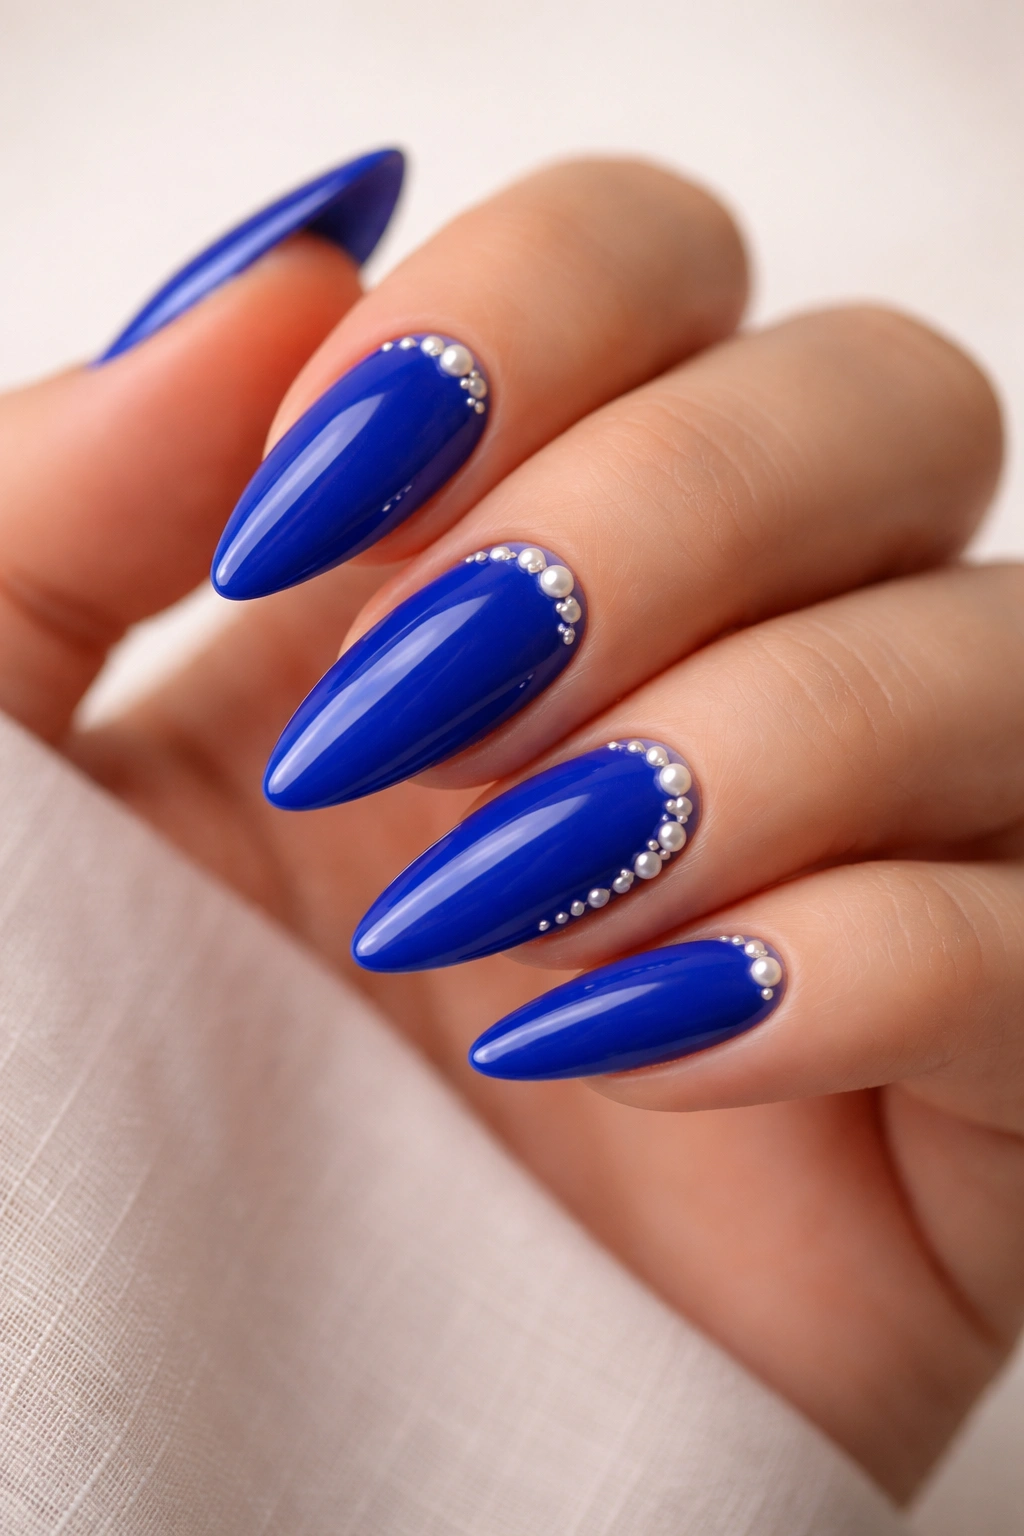
Pearls can look sweet, but on royal blue they get a cooler, cleaner edge. The contrast between the glossy blue and the soft white bead is what makes this manicure work. On almond nails, a small pearl near the cuticle or at the side of one accent nail keeps the look refined.
Where Pearls Work Best
Use tiny flat-back pearls, not oversized cabochons, unless you want a very formal look. A pearl at the base of the nail reads polished. A few tiny pearls tracing a curve along one side feels softer and more wearable. Too many pearls start competing with the blue, and the manicure loses its shape.
- Best on 1 to 3 accent nails
- Secure with builder gel or nail glue
- Keep other nails simple and glossy
- Choose small pearls for daily wear
The appeal here is texture. Royal blue is smooth and bold; pearls add a raised detail that gives your hand something interesting to look at up close.
This is the sort of manicure I’d reach for with dressier outfits, but it does not need to feel bridal or fussy.
13. Royal Blue Checkerboard Accent Nails
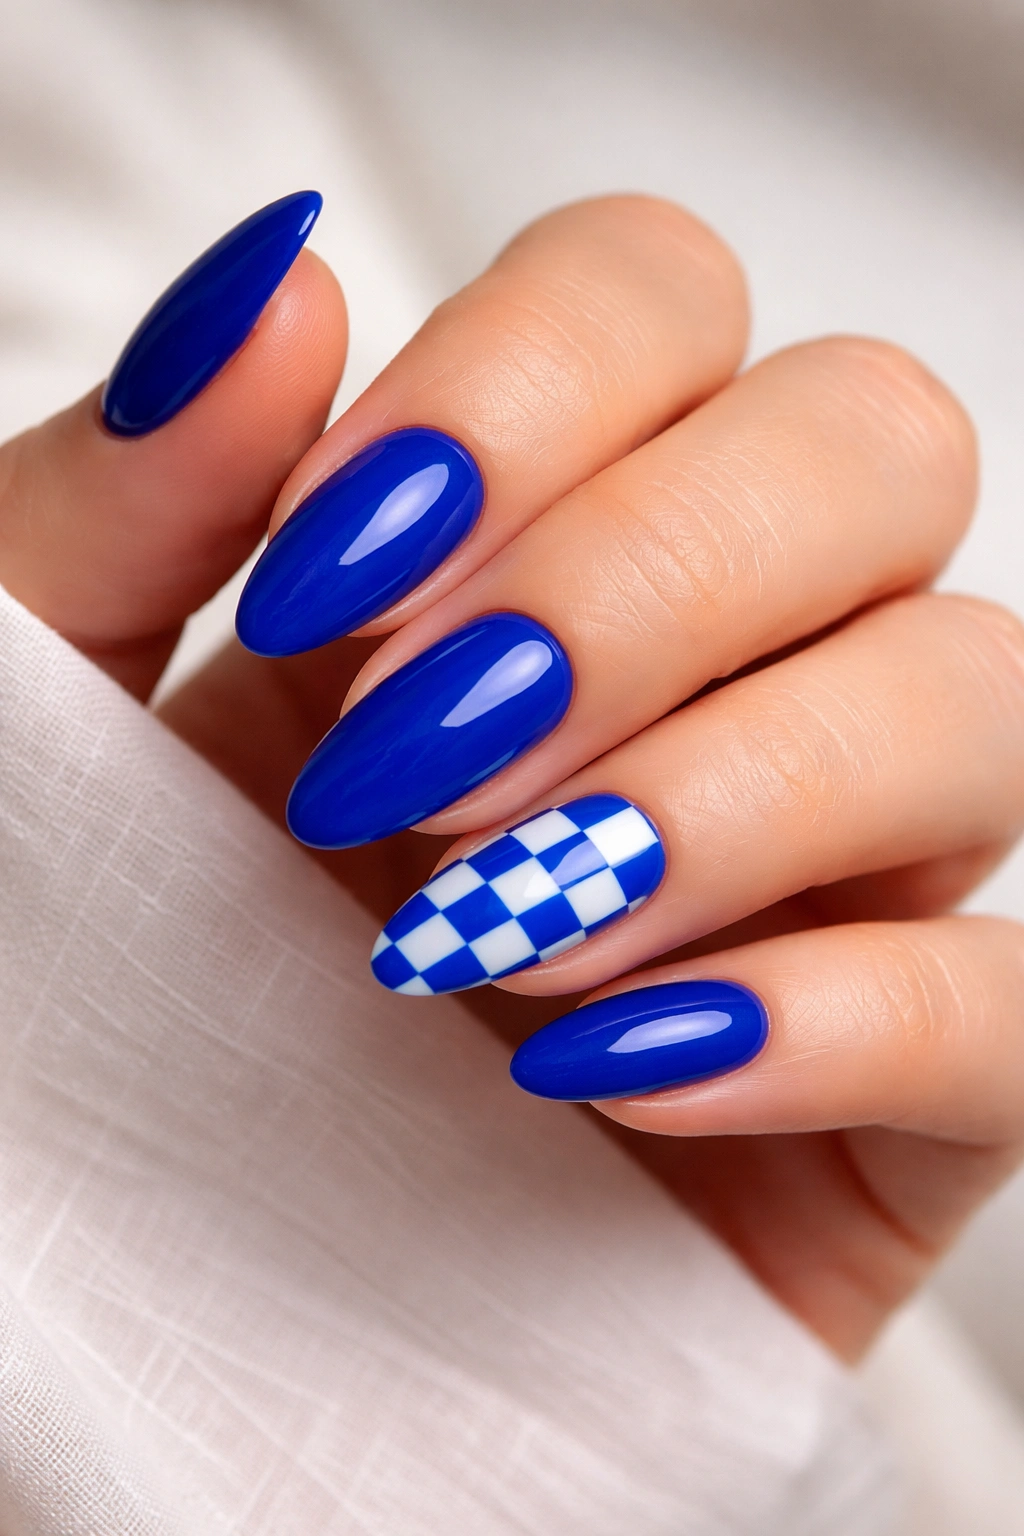
Checkerboard nails have a strong graphic feel, and royal blue keeps them from looking too loud. If you use the pattern on one or two accent nails and keep the rest solid blue, the whole manicure feels deliberate instead of busy. Almond nails help soften the hard squares a bit, which is useful.
The trick is scale. Tiny checkerboard squares can look cramped on a curved nail, while oversized squares may warp near the sides. A medium grid works best. You can do blue and white for high contrast, or blue and nude if you want something less punchy.
This design works well when you want a manicure that feels a little sporty. It also suits short-to-medium almond nails because the shape gives the pattern enough room to breathe. If every nail carries the checkerboard, though, the look gets repetitive fast. One accent nail usually does the job.
I like this when the rest of an outfit is plain. The nails become the detail.
14. Deep Royal Blue with Nude Half-Moons
A nude half-moon at the base of a royal blue nail creates a clean break in the color, and almond nails give the crescent room to curve nicely. It has a vintage edge, but the blue keeps it from feeling old-fashioned. That mix is what makes it interesting.
The half-moon can be left bare, painted in a soft nude, or outlined with a thin metallic line. On longer almond nails, the crescent shape looks especially sleek because there’s more space between the cuticle and the tip. On short nails, keep the moon thin so the nail doesn’t look chopped up.
This style is one of the better options if you like designs that grow out gracefully. The contrast between nude and blue softens the root area, so the manicure keeps its shape longer than a full solid color does.
A little gold line at the moon’s edge changes the whole thing. Small detail. Big difference.
15. Royal Blue and Black Smoke Nails
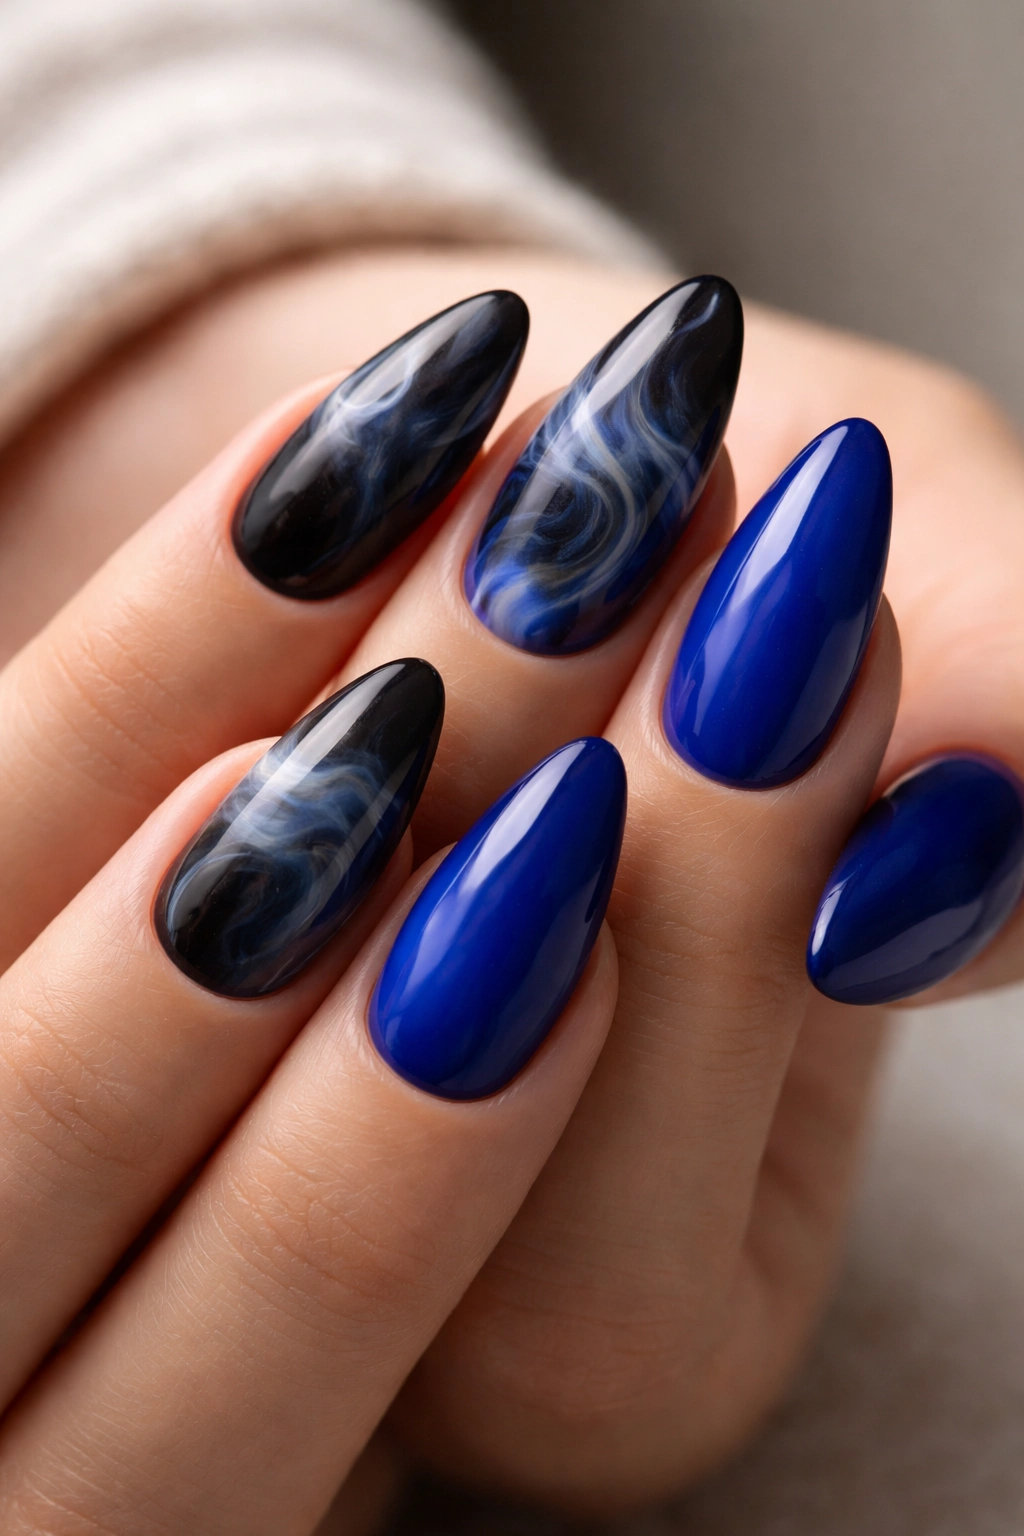
Royal blue smoke art on a black base, or black smoke over royal blue, has a darker, moodier feel than most of the other ideas here. It works because the almond shape keeps the swirls long and fluid instead of tight and messy.
Why does the smoky effect work? The colors blur into one another, so the eye reads motion instead of separate shapes. That’s good news if you like nail art that feels less patterned and more painterly. A blooming gel helps create the soft bleed, but you can also use a sheer layering technique and a very light touch with the brush.
I’d keep the smoke on just a few nails and leave the others solid royal blue. Too much movement on every nail can start to feel noisy. A balanced set lets the darker art nails act like punctuation.
This is a strong pick for evening wear, but it is not limited to that. Paired with a simple coat or leather jacket, it looks sharp.
16. Royal Blue Almond Nails with Thin White Linework
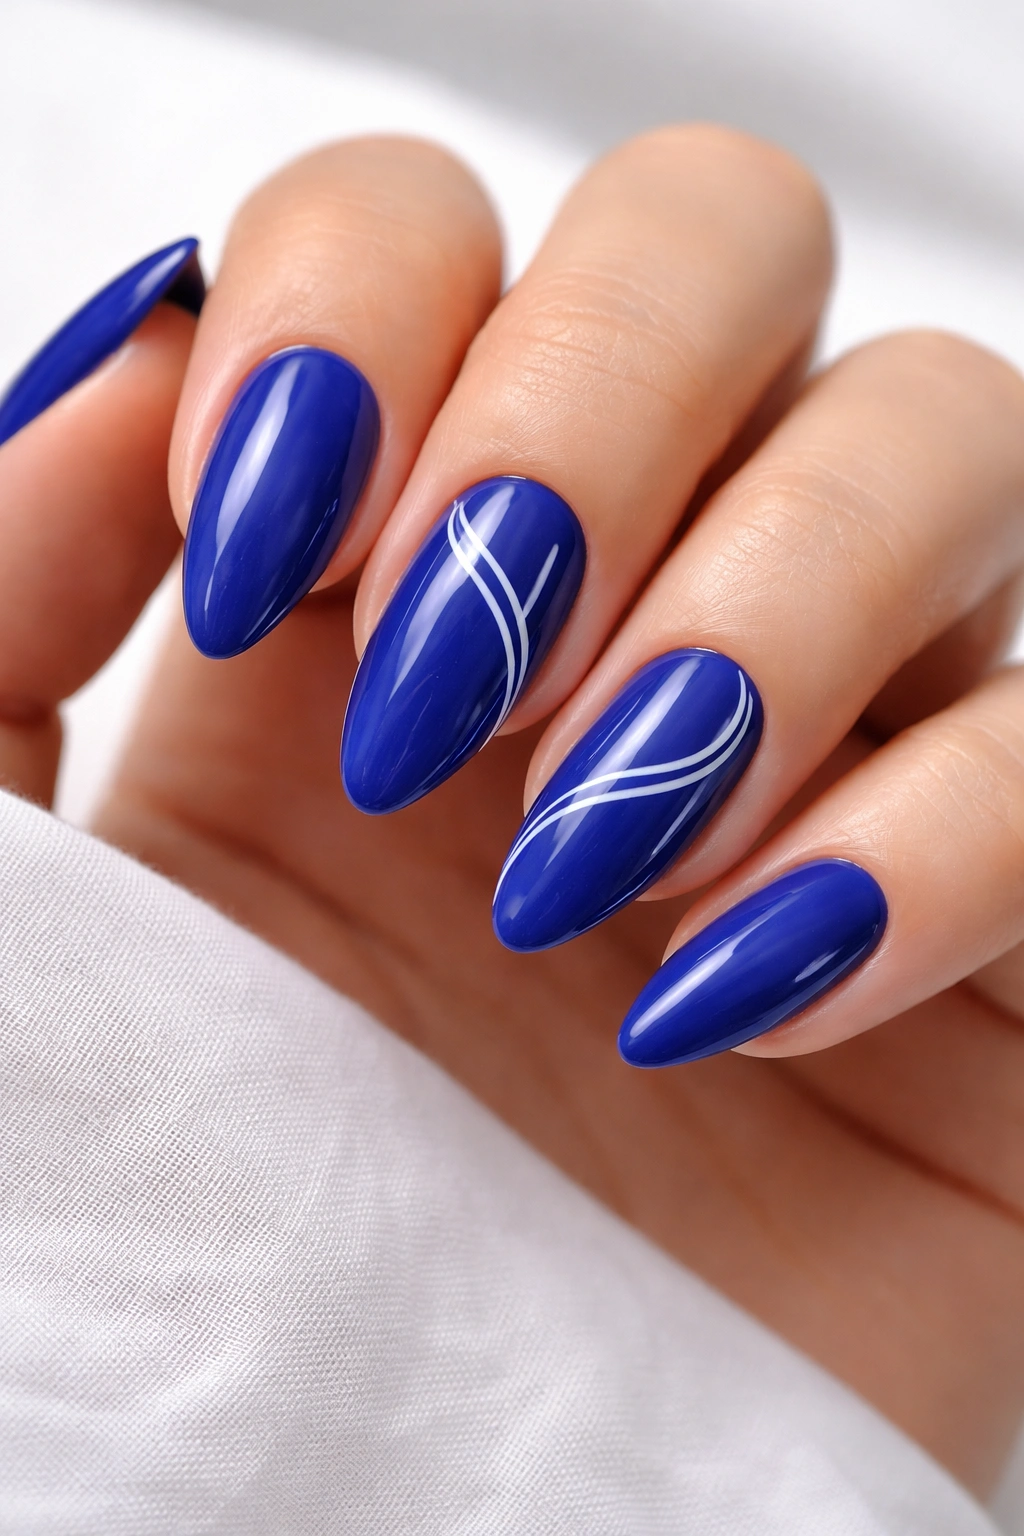
Thin white linework on royal blue gives you a clean, almost architectural finish. You can draw curves, arcs, tiny loops, or simple abstract lines, and the almond shape makes the whole thing look longer. This is one of those designs that seems simple until you try it. Then the spacing starts to matter.
A striping brush is the easiest tool, and a slightly thicker white polish gives you better opacity in one pass. Keep the lines deliberate and stop before they get crowded. A single line running from the cuticle area toward the tip can be enough on its own. If you want more, add one or two smaller echoes on the same nail.
I like this style because it does not fight the base color. The blue stays the main event, and the white just sharpens it. That is a better choice than cramming in too many elements.
If your wardrobe leans minimal, this one fits cleanly.
17. Royal Blue Glitter Gradient Tips
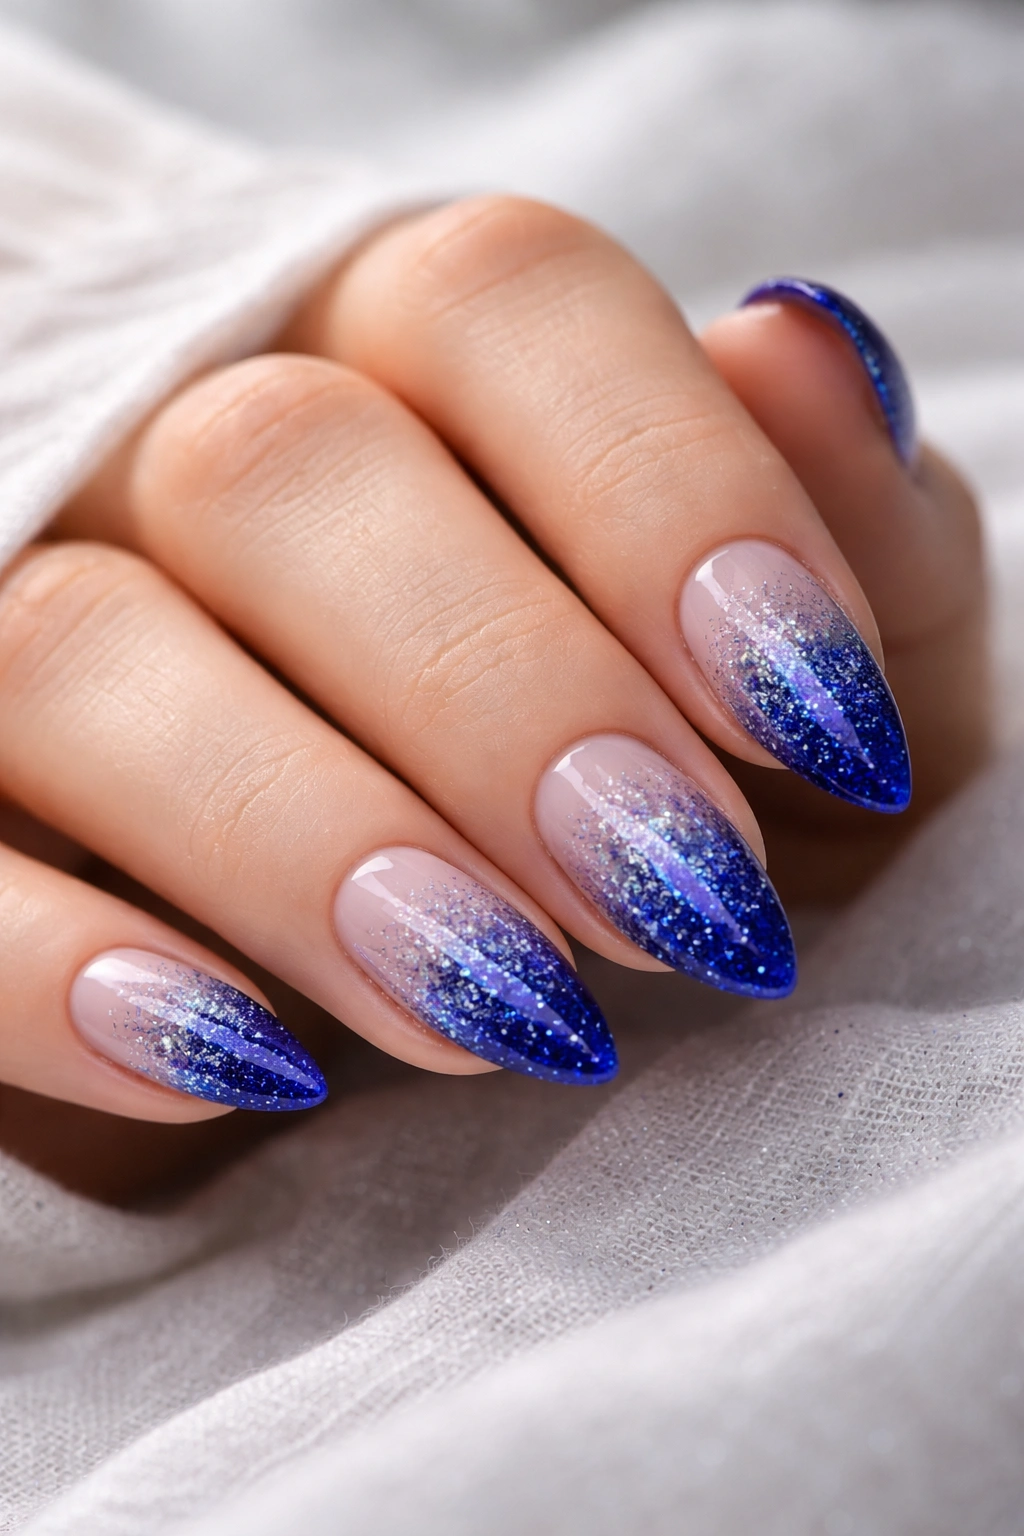
A glitter gradient at the tip gives royal blue almond nails a little lift without covering the whole nail in sparkle. The gradient can be silver, icy blue, or even a mix of both. It starts dense at the free edge and fades upward so the blue still shows through.
Unlike full glitter polish, a tip gradient keeps the base rich and solid. That matters if you want the color to stay the star. The easiest way to build it is with a sponge dab or a thin brush that deposits glitter only where you want the concentration. One heavy coat is too much. Two light passes give you better control.
This design is especially nice on almond nails because the taper makes the glitter feel like it’s trailing off naturally. On square nails, the same idea can look blunt. Here, it looks smooth.
It also hides tip wear well, which is a practical perk. Chips happen at the edge first. A glitter fade covers that problem before it starts.
18. Royal Blue Almond Nails with Gemstone Cuticle Cuffs
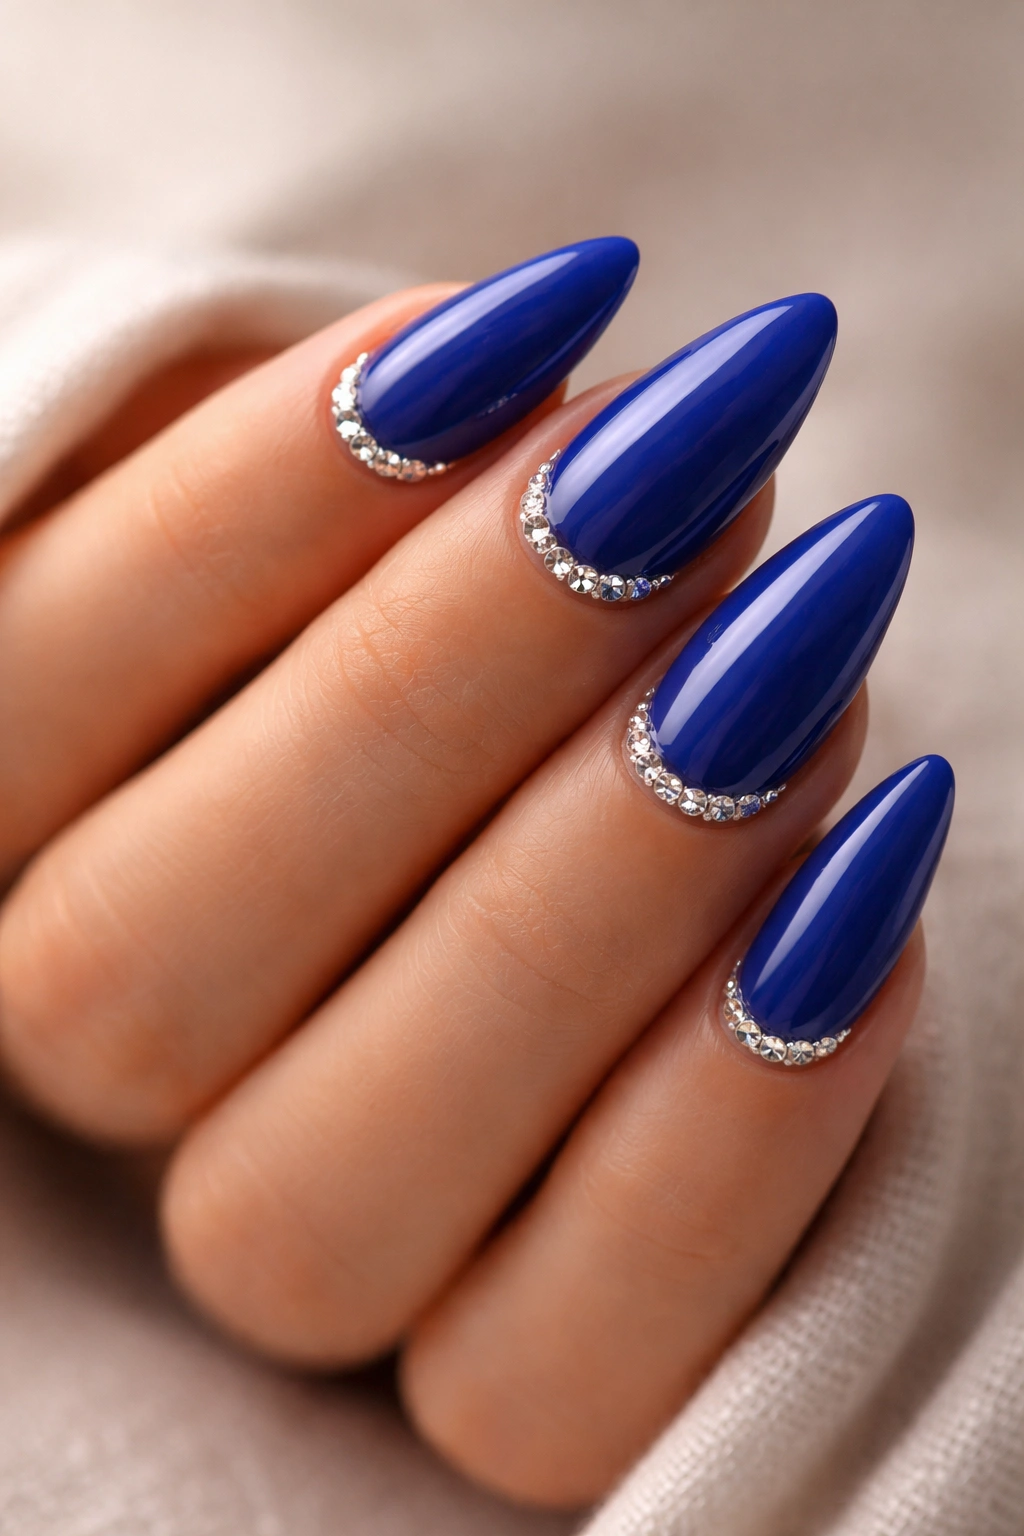
Gemstone cuticle cuffs can look a little extra, and I mean that in the good sense. A thin arc of crystals near the cuticle makes royal blue feel dressy fast, especially on almond nails where the curve echoes the nail shape. The key is restraint. A dense ring of stones on every finger usually looks clunky.
How to Place the Stones
Set the stones in a small arc, leaving a gap near the sidewalls so the nail still looks clean. Use builder gel or a strong nail adhesive to lock them in place, then cure fully if you’re working with gel. Tiny crystals, about 1 to 2 millimeters wide, are easier to wear than larger gems. They snag less and sit flatter.
- Use one accent nail if you want a softer look
- Choose clear crystals for a classic finish
- Try sapphire-toned stones if you want a deeper color story
- Keep the rest of the manicure smooth and glossy
The best part is the contrast. Soft almond shape, rich blue, hard little sparkle. That mix has some bite.
19. Royal Blue Abstract Wave Nails
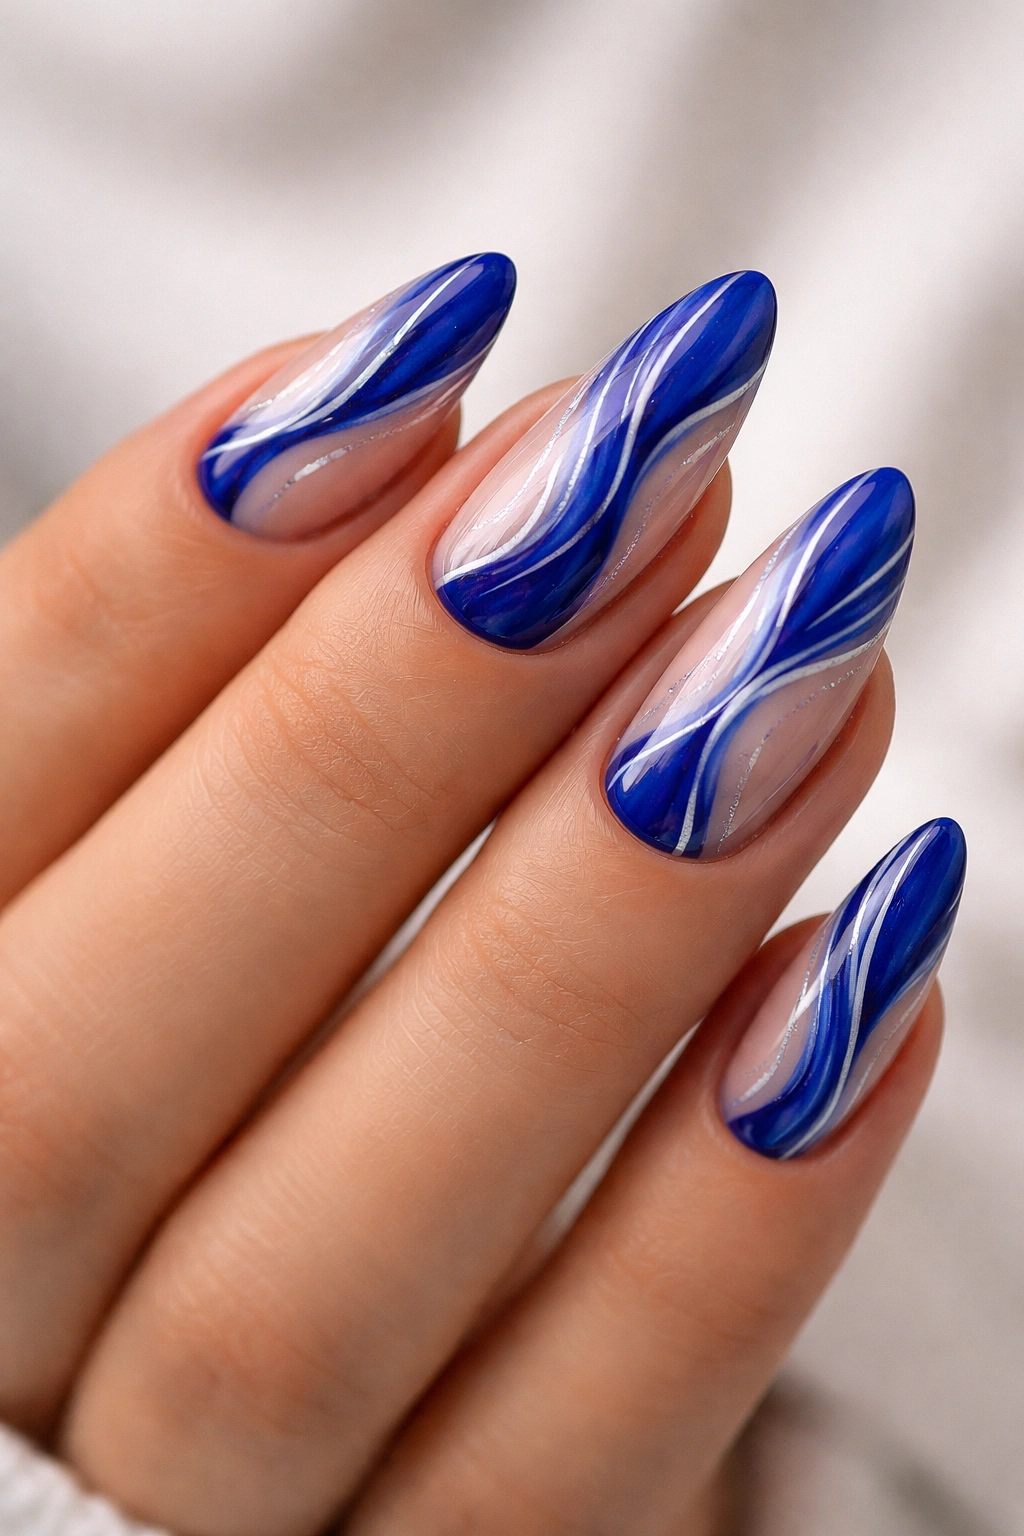
Abstract waves are one of the loosest, most forgiving ways to use royal blue. You can bend the color through nude space, layer a second blue over it, or add white and silver lines to make the movement stand out. Almond nails suit this because the curve of the nail already suggests motion.
I like this design because it does not need symmetry. If one wave sits higher than the other, the manicure still works. That makes it friendlier than rigid patterns like checks or borders. Use a thin brush and let the line taper naturally as you drag it across the nail. A wave that starts thick and fades at the end looks more polished than one with the same width the whole way.
This style is a good choice if you want something artistic but not fussy. It also gives you room to mix finishes: one glossy wave, one matte base, maybe a thin metallic line tucked between them. Keep the color story tight, though. Royal blue should stay the loudest note.
20. Royal Blue Almond Nails with Mixed Finish Accent
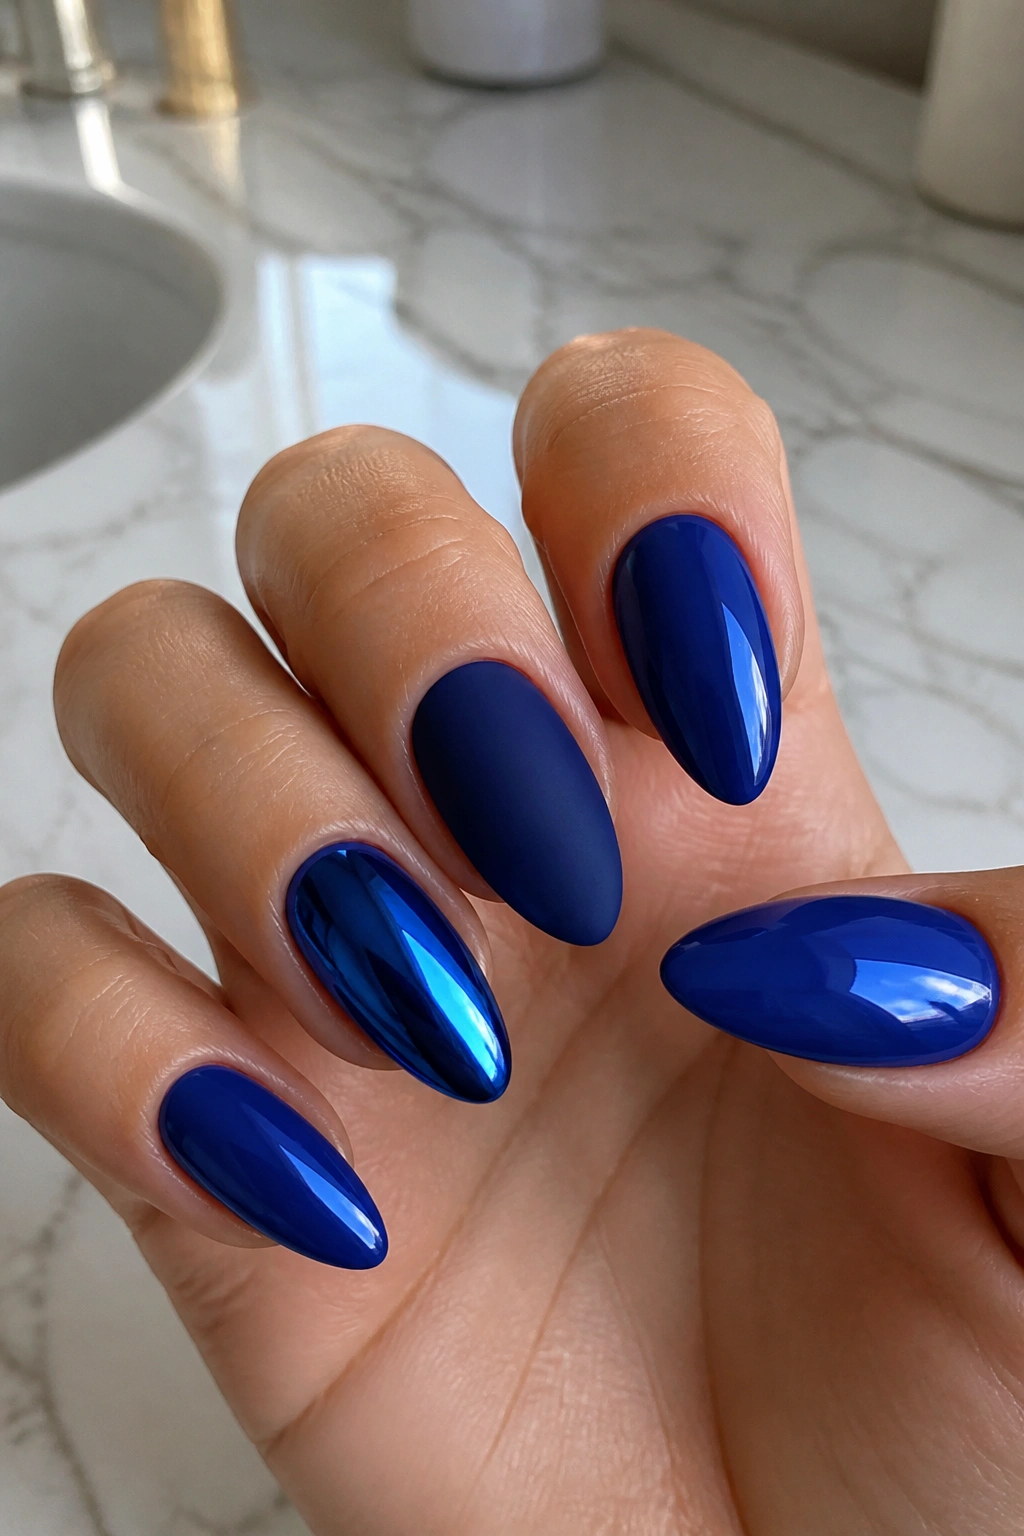
A mixed-finish set is the easiest way to keep royal blue from feeling repetitive across ten nails. Do most of the nails in glossy royal blue, then change one or two accents to matte, chrome, glitter, or a tiny piece of nail art. The almond shape helps the set feel cohesive even when the finishes shift.
What makes this work is rhythm. You want the eye to notice differences, but not so many that the manicure feels scattered. A solid blue thumb, a matte ring finger, and a chrome pinky can look intentional if the shades stay close and the shapes stay clean. If the blue tones start drifting too far apart, the set loses its snap.
I’d use this approach when I can’t decide between two designs. That happens a lot, honestly. One hand can hold a foil accent, a second hand can carry a micro-glitter fade, and the rest can stay plain and glossy. The common thread is the royal blue base.
It’s a smart way to get variety without losing the color story.
