

Almond nails and floral art have a sweet spot that square tips rarely hit. The shape gives petals room to breathe, and it keeps even tiny blossoms from looking crowded.
The best floral almond nail ideas in spring colors don’t try to paint a whole garden on every finger. They use sheer pinks, milky nudes, pale green stems, and one or two blooms where the eye naturally lands — near the cuticle, along the sidewall, or tucked into the tip. That balance matters more than piling on detail.
There’s also a practical reason this shape works so well. Almond nails already soften the hand, so you can play with blush, lilac, butter yellow, mint, peach, and sky blue without the whole set turning loud. Keep the flowers small, keep the lines clean, and the design reads polished instead of crowded.
A little restraint goes a long way here. And once you start mixing spring shades with floral placement, there are a lot of directions worth stealing.
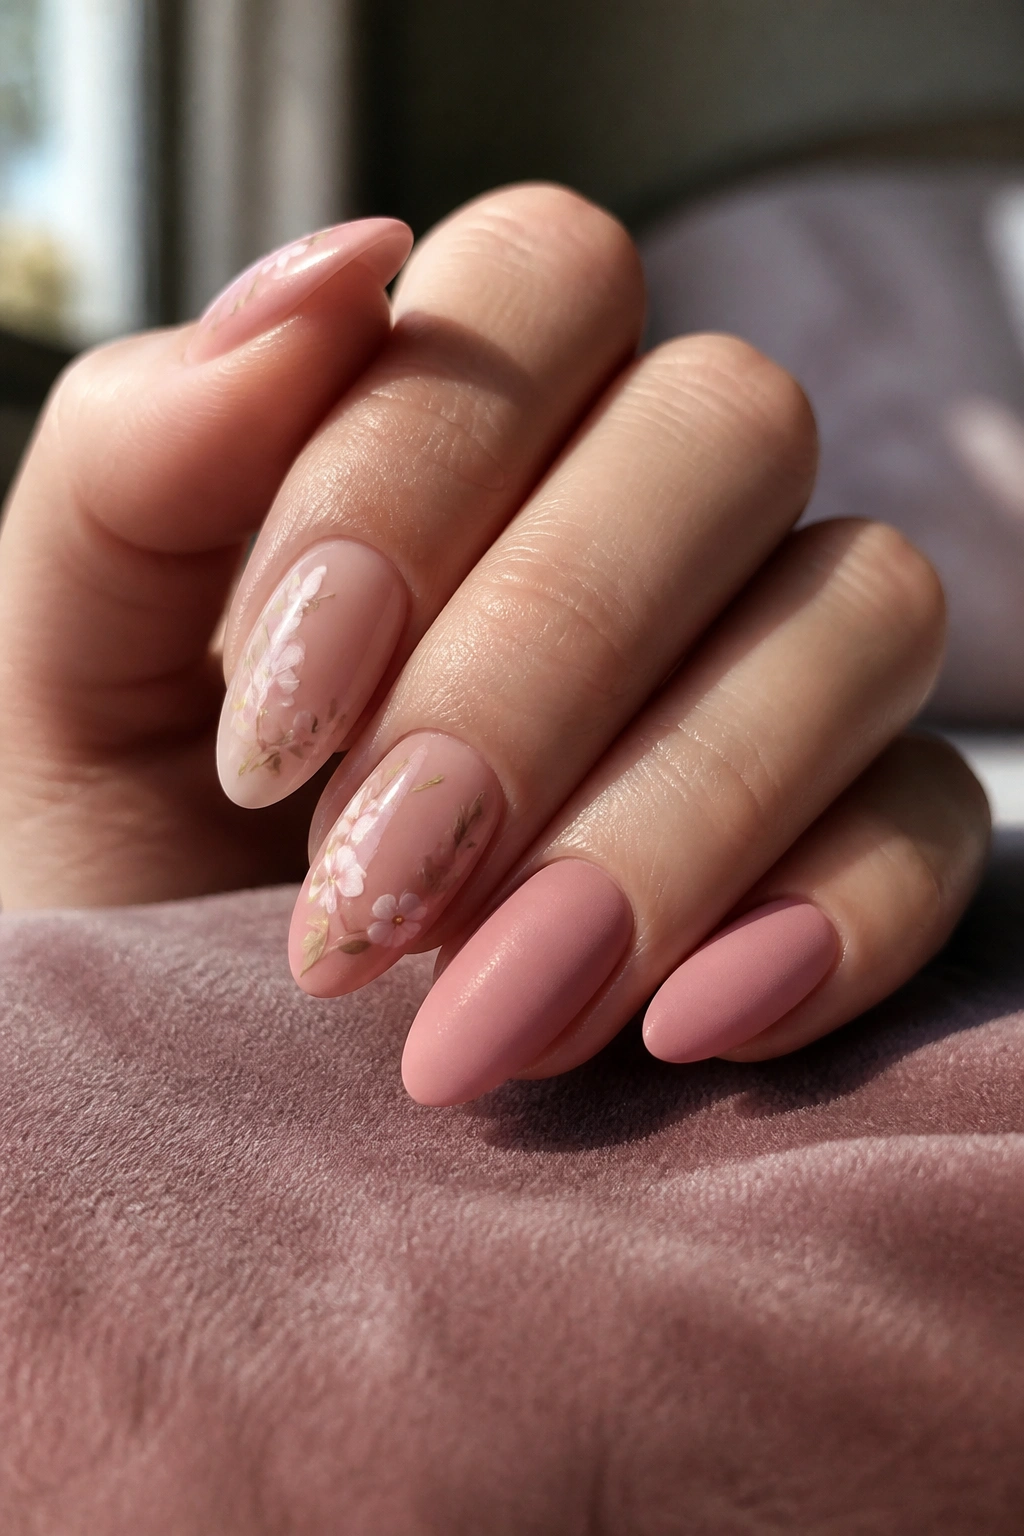
1. Soft Blush Daisies on Sheer Nude
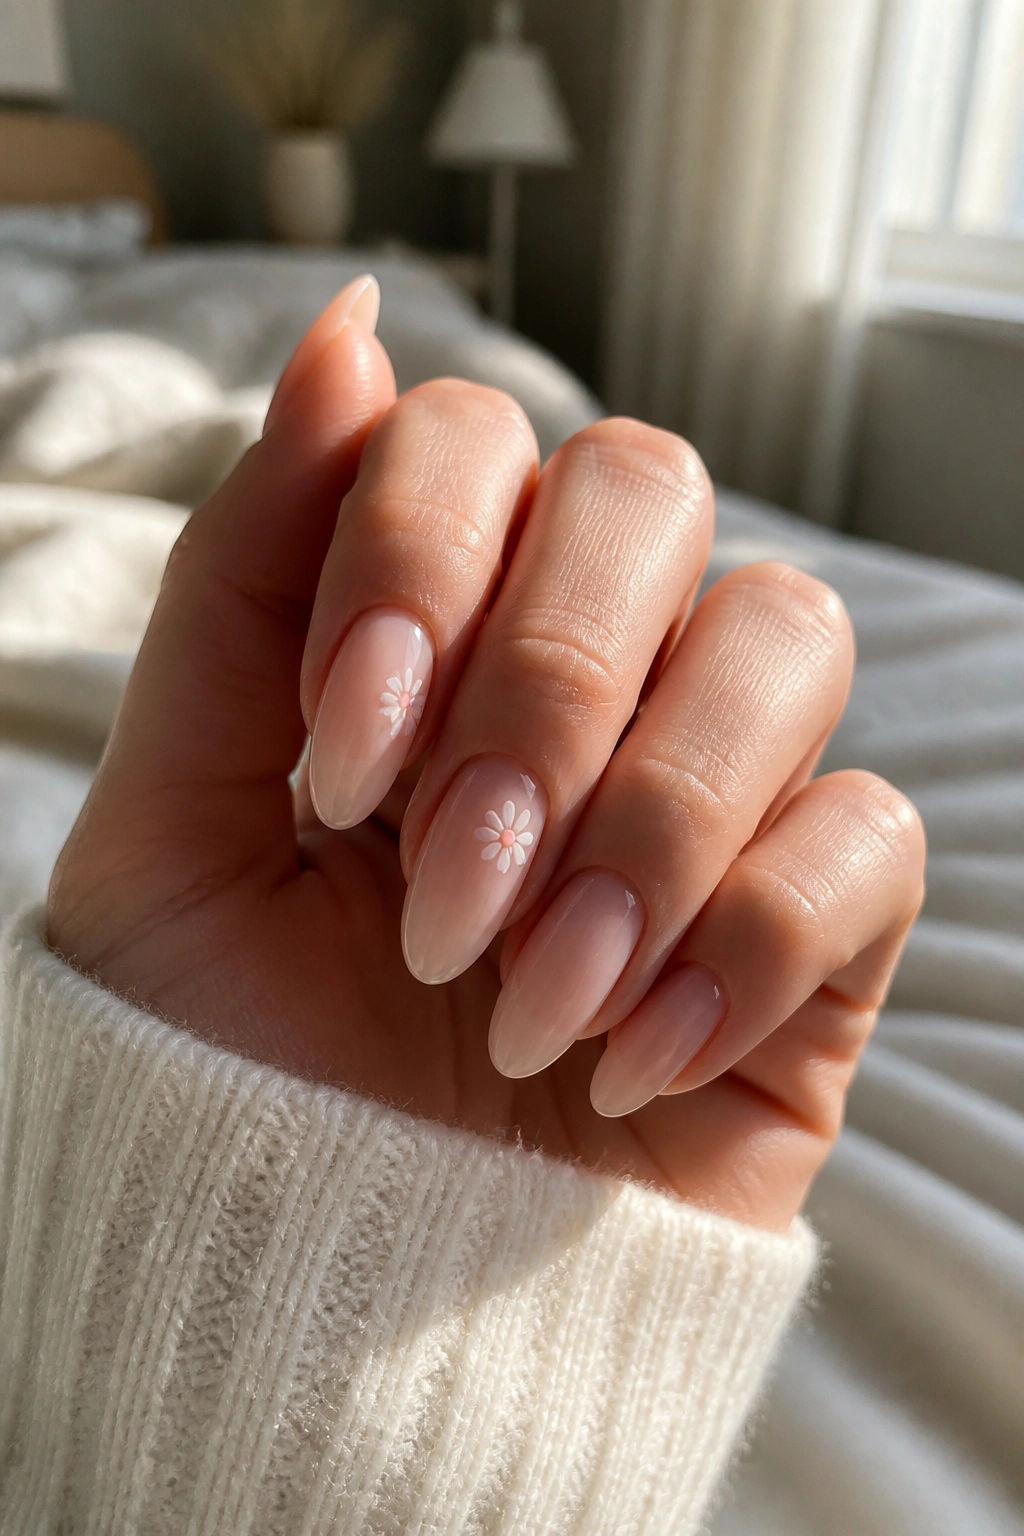
A sheer nude base with tiny daisies is one of those floral almond nail ideas that never looks fussy. The blush undertone keeps the set gentle, while the white petals give you enough contrast to notice the design from a normal distance.
Why It Works
The almond shape gives the flowers a soft frame, so the nail itself does half the styling work. I like this look best when the daisies stay small — about 4 to 6 mm across — and sit just off-center instead of dead in the middle. That tiny shift makes the set feel more natural.
A 1 mm dotting tool or a very fine liner brush keeps the petals crisp. If you paint the center in warm yellow rather than a bright lemon shade, the flower reads softer and more believable. It sounds minor. It matters.
- Choose a milky nude base with a pink cast, not a flat beige.
- Place one daisy on the ring finger and one on the index finger, then keep the other nails light.
- Keep the petals uneven by a hair so they don’t look stamped on.
- Finish with a glossy top coat to keep the petals sharp.
My favorite trick: offset each daisy by a few millimeters toward the sidewall. It feels less posed.
2. Lavender French Tips with Tiny White Blooms
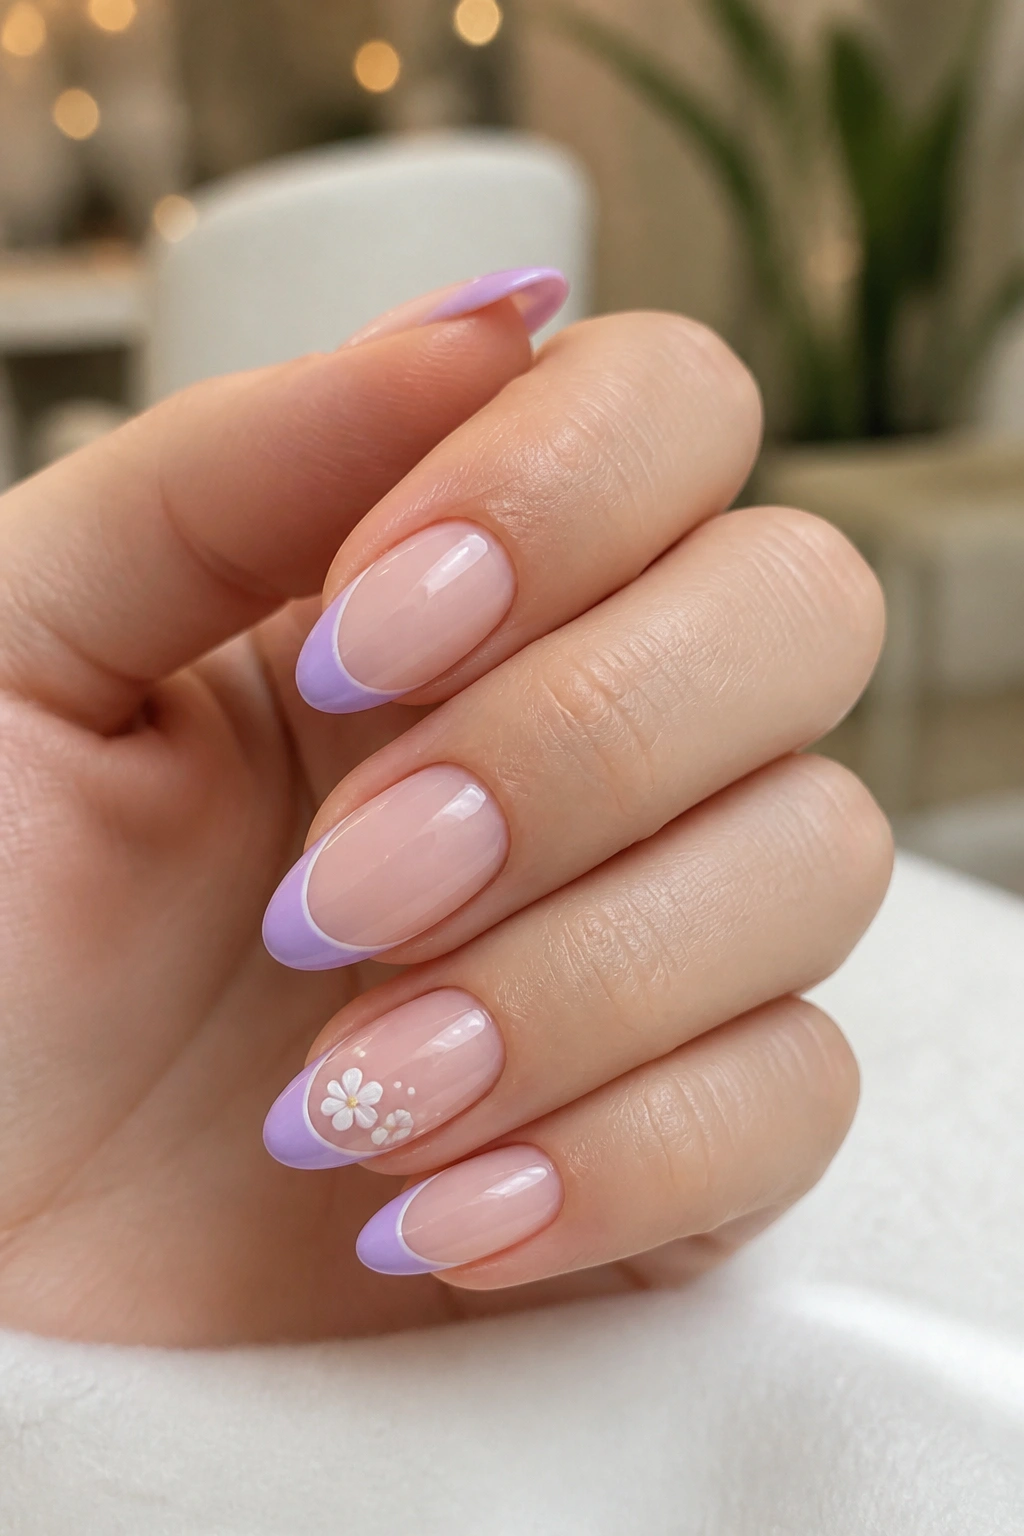
A lilac French tip does more for spring nails than a full-color wash. It gives the almond shape a clean edge, and that edge becomes the natural place for tiny white flowers to live.
A good version keeps the tip band narrow — about 3 to 4 mm — so the floral detail still has air around it. Then you tuck in one or two miniature blooms on the ring finger or pinky. White petals with a pale green stem read fresh, not sugary, and the lavender stops the whole set from leaning too sweet.
I’d choose this set for anyone who wants color without a busy surface. The flowers don’t need to cover much space; they only need to break up the French line. If you wear thin silver rings, the cool purple and the metal sit nicely together.
One more thing: keep the tip color soft and cloudy. Neon lilac is a different mood entirely.
3. Mint Stems and Baby Roses
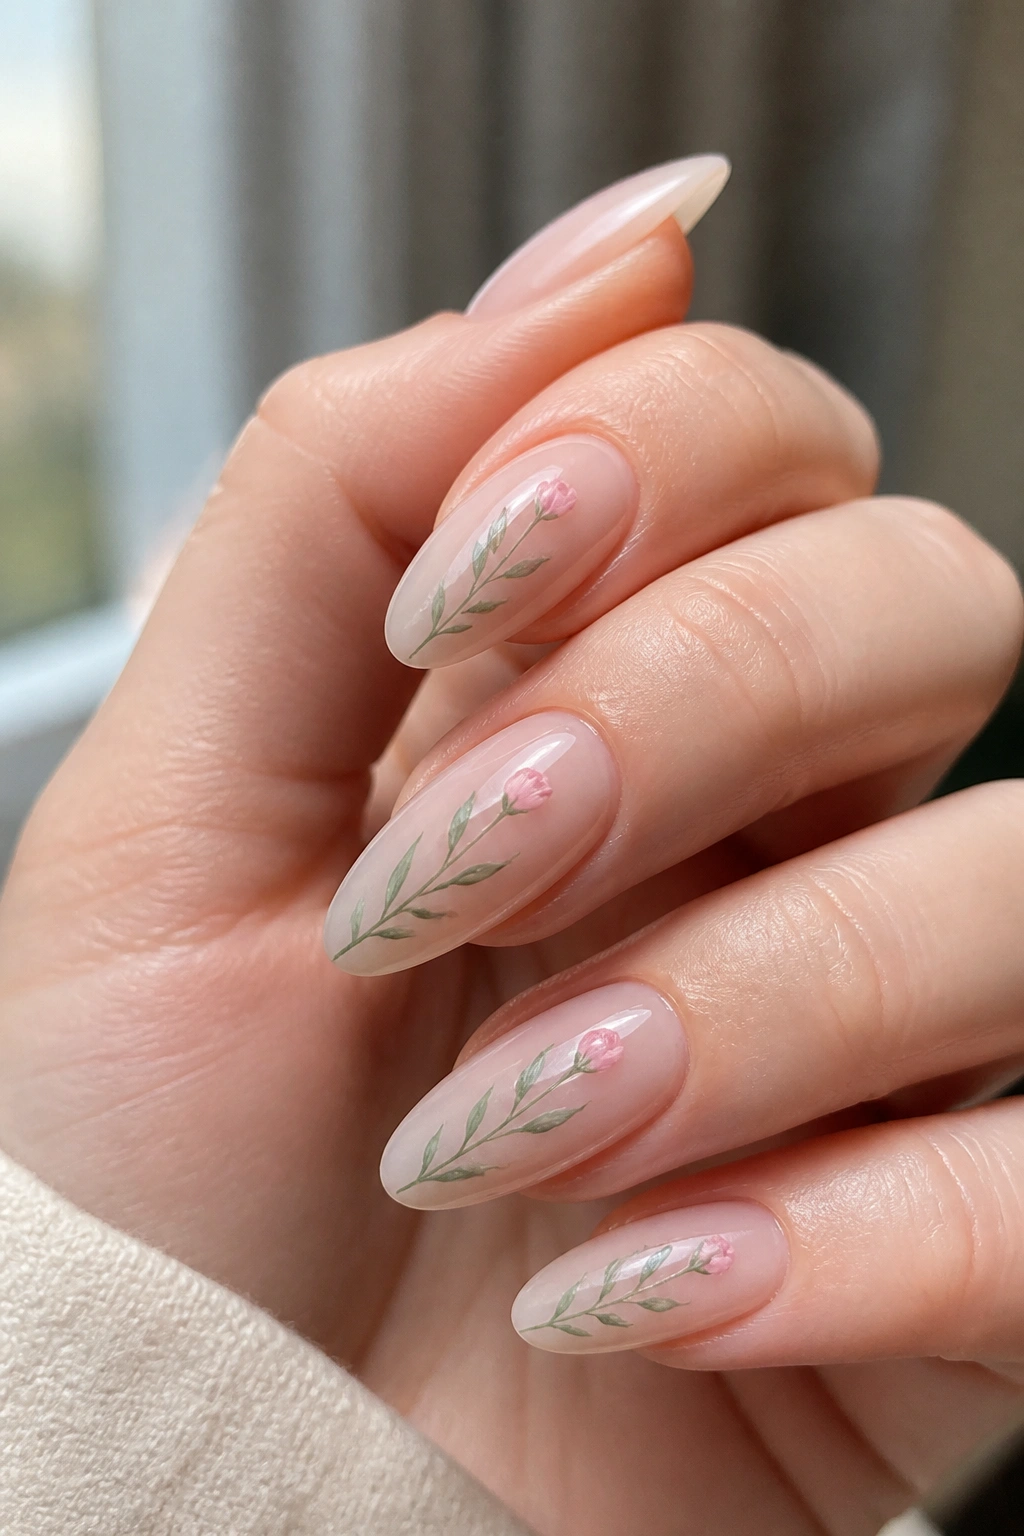
Why do sidewall florals look so polished? Because they follow the shape of the nail instead of fighting it.
A slim mint stem running up one side of an almond nail gives the eye a line to follow, and that line makes the nail look longer. Add a tiny pink rosebud near the upper third of the nail, and the whole thing suddenly feels intentional. The base should stay sheer nude or soft pink so the green has room to breathe.
How to Place It
Use a striping brush, not a chunky detail brush. You want the stem to be thin enough that you can still see the base color on both sides. Keep the flower itself no larger than 5 mm wide, and let one petal overlap the stem slightly. That tiny overlap makes the design feel hand-painted instead of traced.
This look is especially good on medium-length almonds. Too short, and the vine can feel cramped. Too long, and you can build a little more movement into the stem. Either way, the set reads neat from a distance and prettier up close.
4. Peach Blossom Fade with Petal Tips
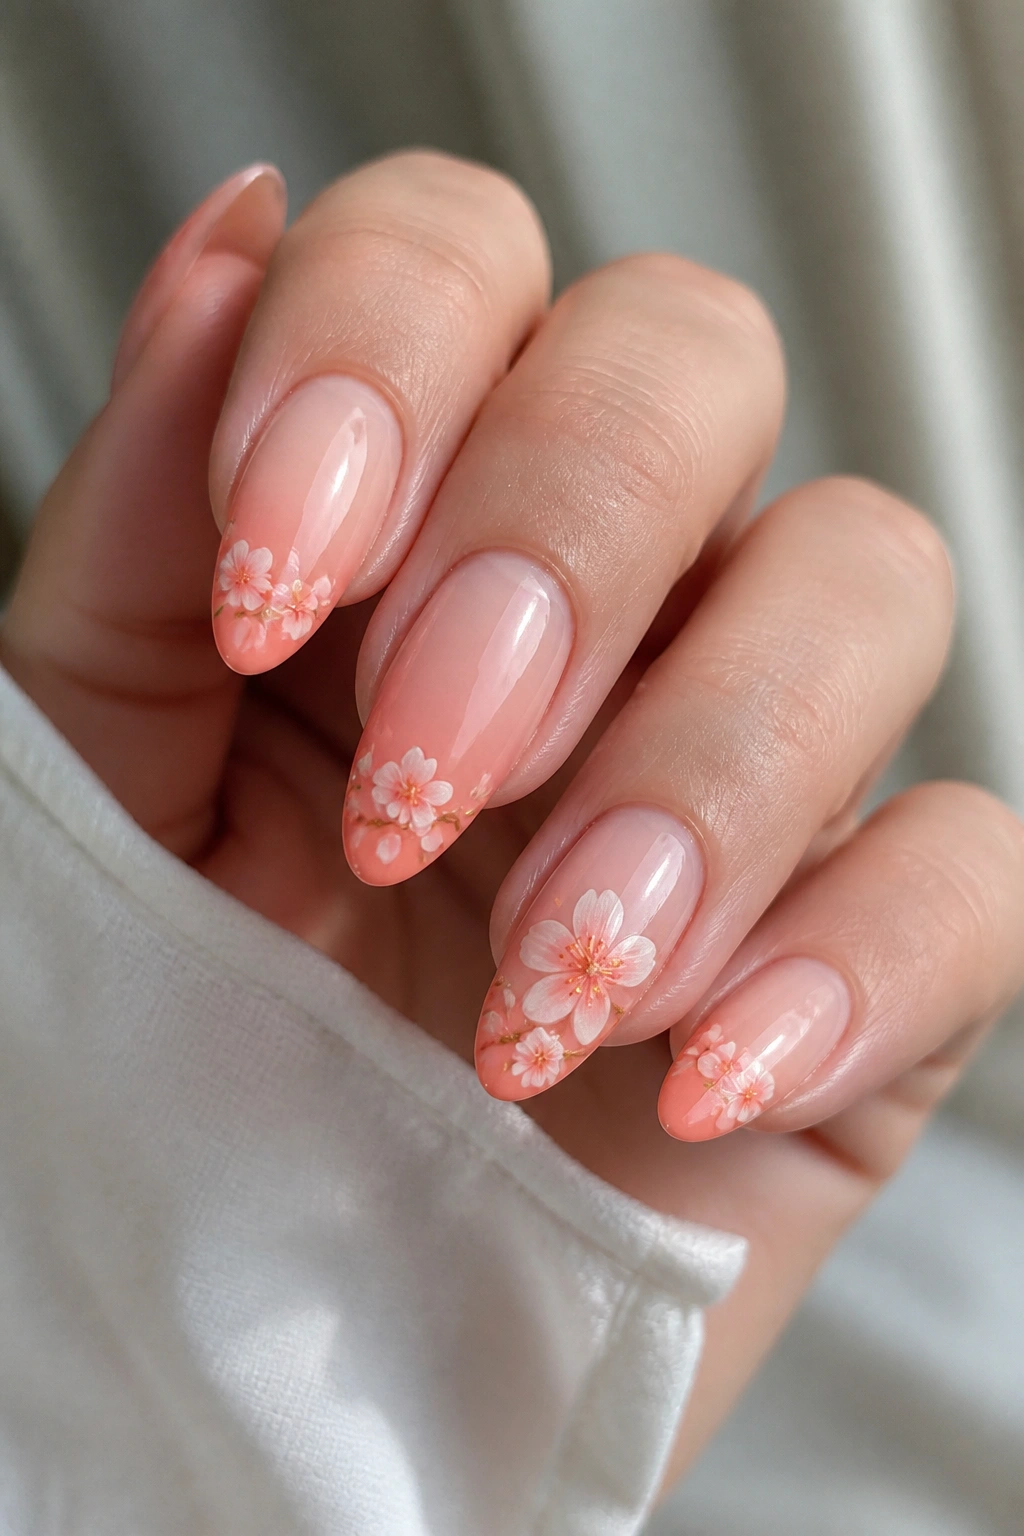
Picture a peach wash fading into nude, then a few blossoms gathered near the tip. That’s the whole idea, and it works because the gradient does the softening before the flowers ever show up.
The best version uses a sponge or a very sheer jelly formula to blur peach into the center of the nail. After that, you add blossom clusters in coral, white, and a touch of yellow at the free edge. It looks especially good when the petals stay loose rather than fully outlined.
- Keep the fade soft enough that the nude base still shows through.
- Put most of the florals on the outer third of the nail.
- Use one accent nail with a slightly larger blossom so the set has a focal point.
- Seal everything with a glossy top coat so the gradient doesn’t look dusty.
This is a good choice if you want color on every finger but not the same pattern everywhere. It’s lively without feeling packed.
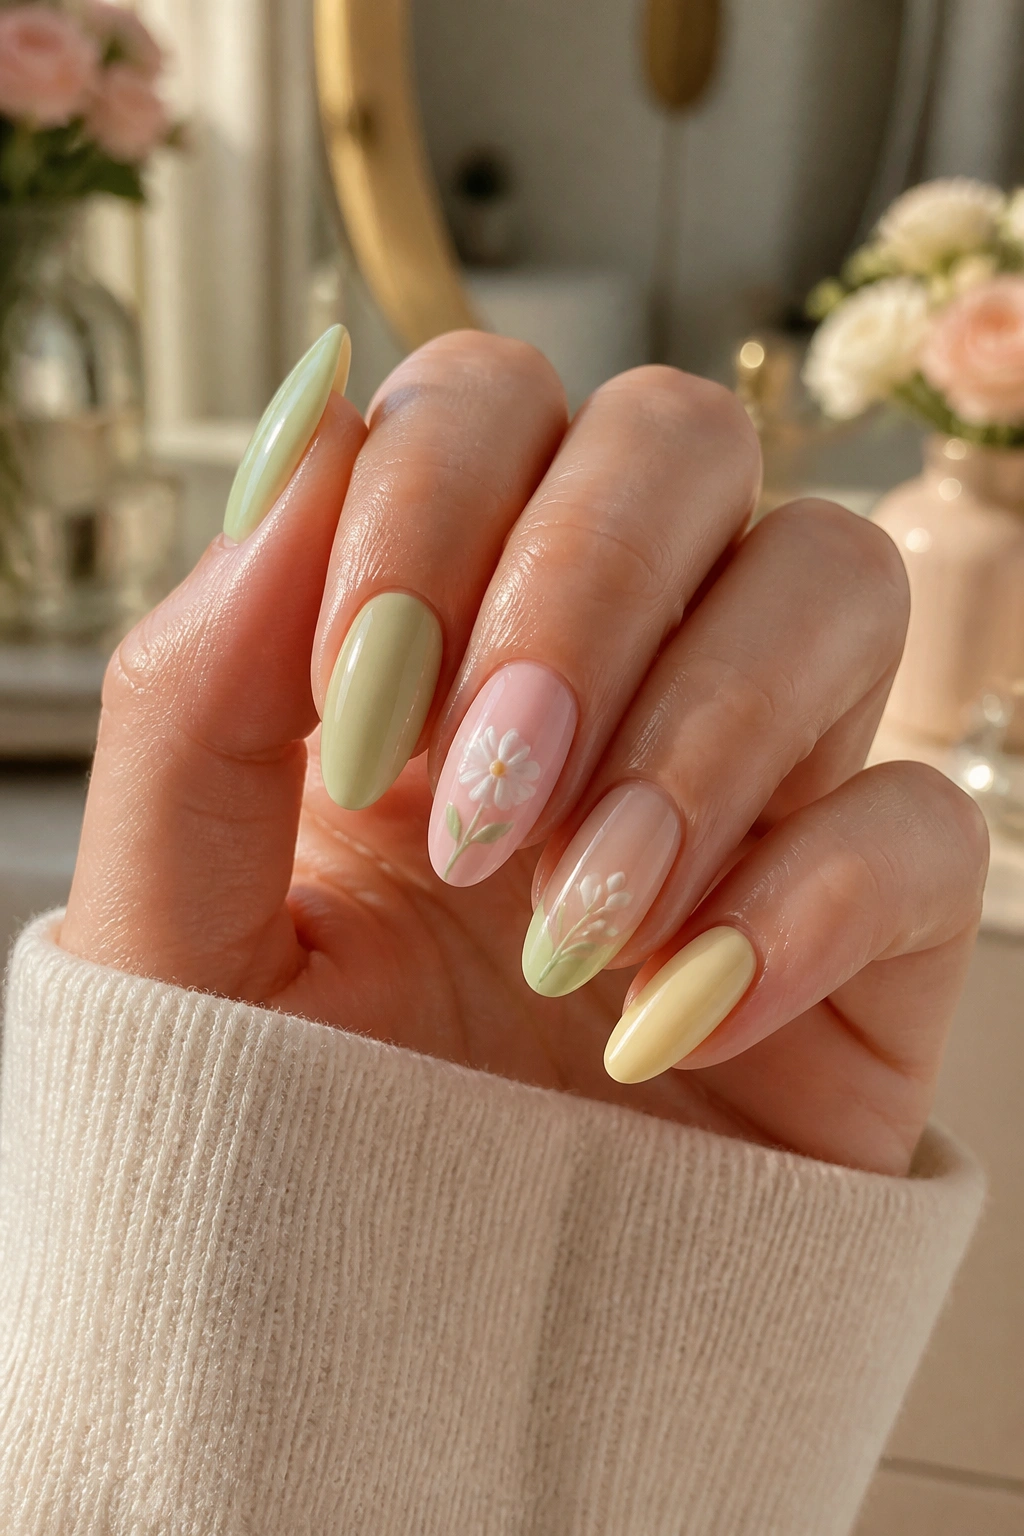
5. Butter Yellow Daisies with a Glossy Finish
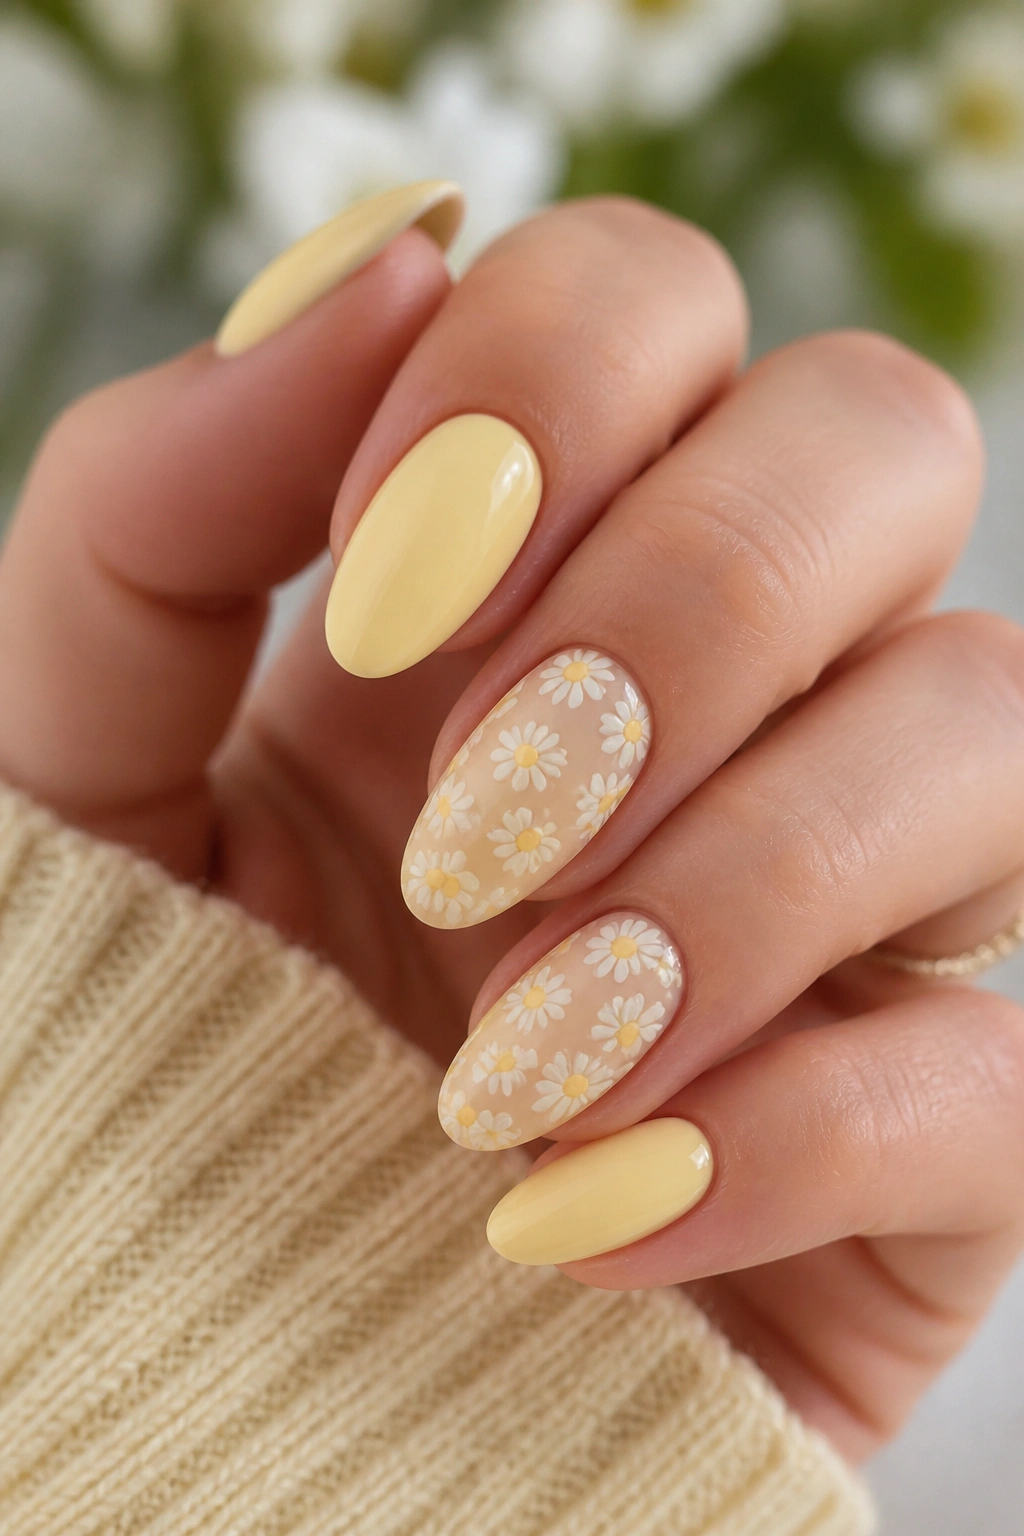
Yellow does not have to shout. On almond nails, a butter shade can look calm, even a little creamy, if the saturation stays low and the flowers are kept tiny.
I like this set because the color lives somewhere between lemon curd and pale custard. It feels springlike without turning bright. Add white daisies on two accent nails, then keep the rest of the hand in soft yellow or a yellow-tinted nude. The glossy finish matters here because it keeps the color from reading chalky.
If you’re doing this at home, use two thin coats instead of one thick one. A thick yellow coat tends to streak, and streaky yellow is a pain to fix. Better to build the shade slowly and keep the petals clean on top.
This is the set I’d pick for shorter almond nails. The color fills the shape nicely, and the little white flowers keep it from becoming a solid block.
6. Sky Blue and Daisy Chain
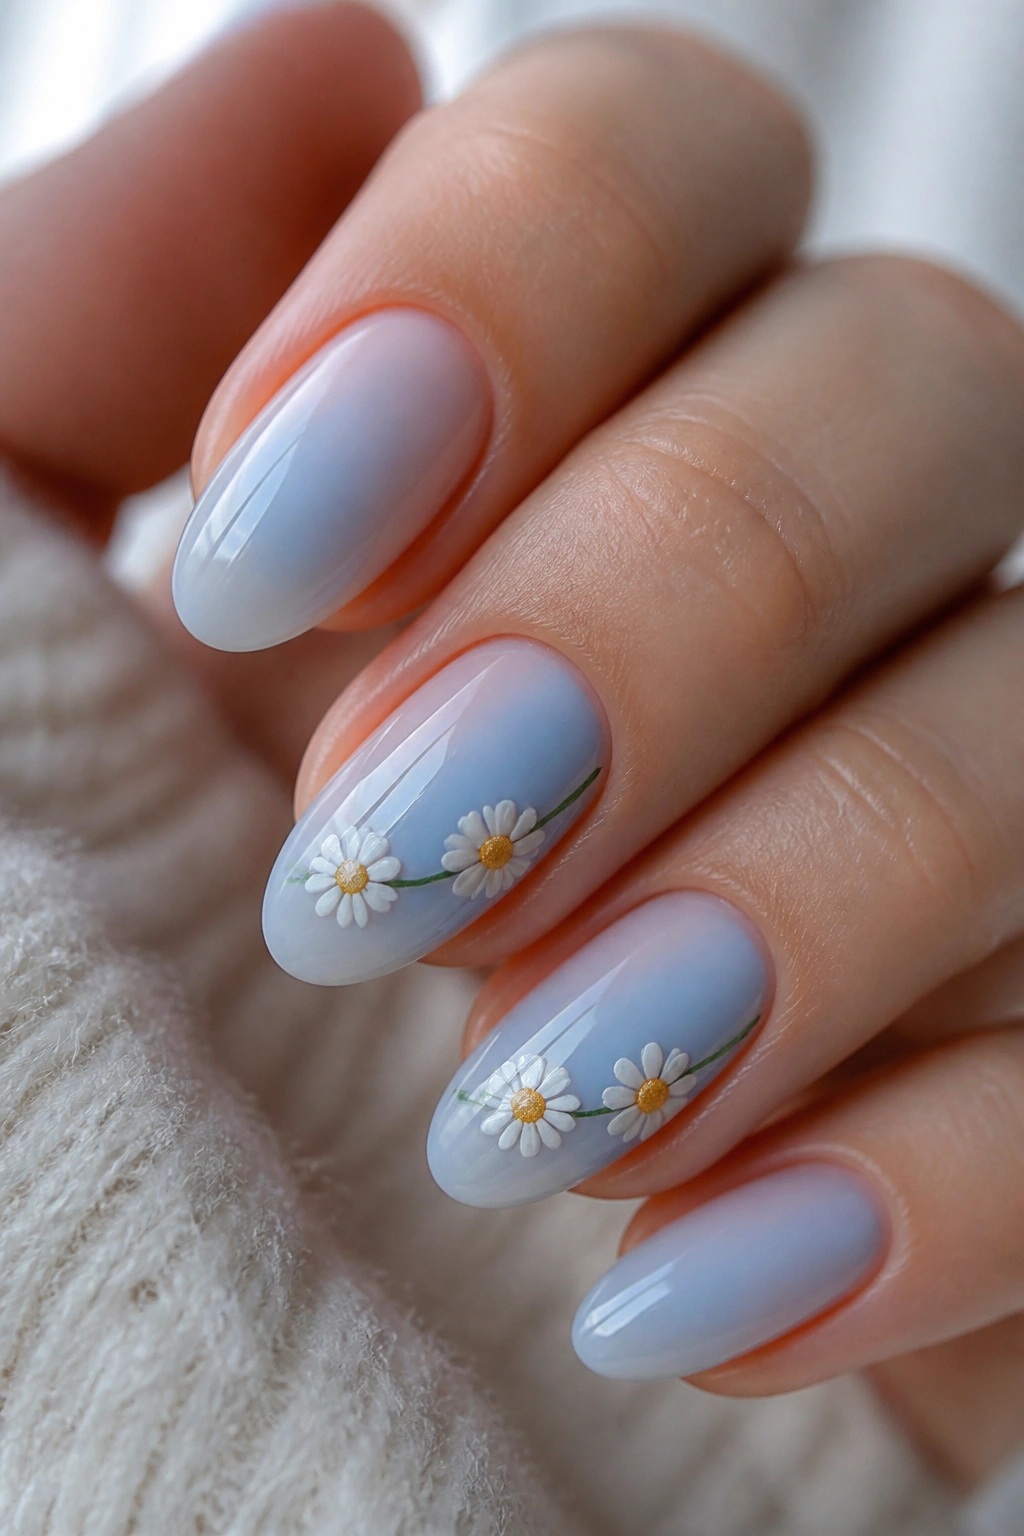
A sky-blue base changes the mood instantly. It feels lighter than pink, and when you add a daisy chain that drifts across two nails, the whole set starts to look like one connected line instead of five separate little canvases.
Use the blue as a sheer wash, not an opaque wall of color. That keeps the flowers readable and stops the nails from looking heavy. Then connect the daisies with a fine green stem that crosses from one nail to the next — a small detail, but it makes the whole hand feel designed rather than decorated.
The thing I like most here is the rhythm. One nail gets a full daisy, the next gets a half bloom, then the third gets a leaf or a tiny bud. It breaks up the set in a way that feels easy on the eyes.
If you want the look to last through grow-out, keep the flowers near the center and tip, not right at the cuticle.
7. Sage and Cream Pressed-Flower Effect
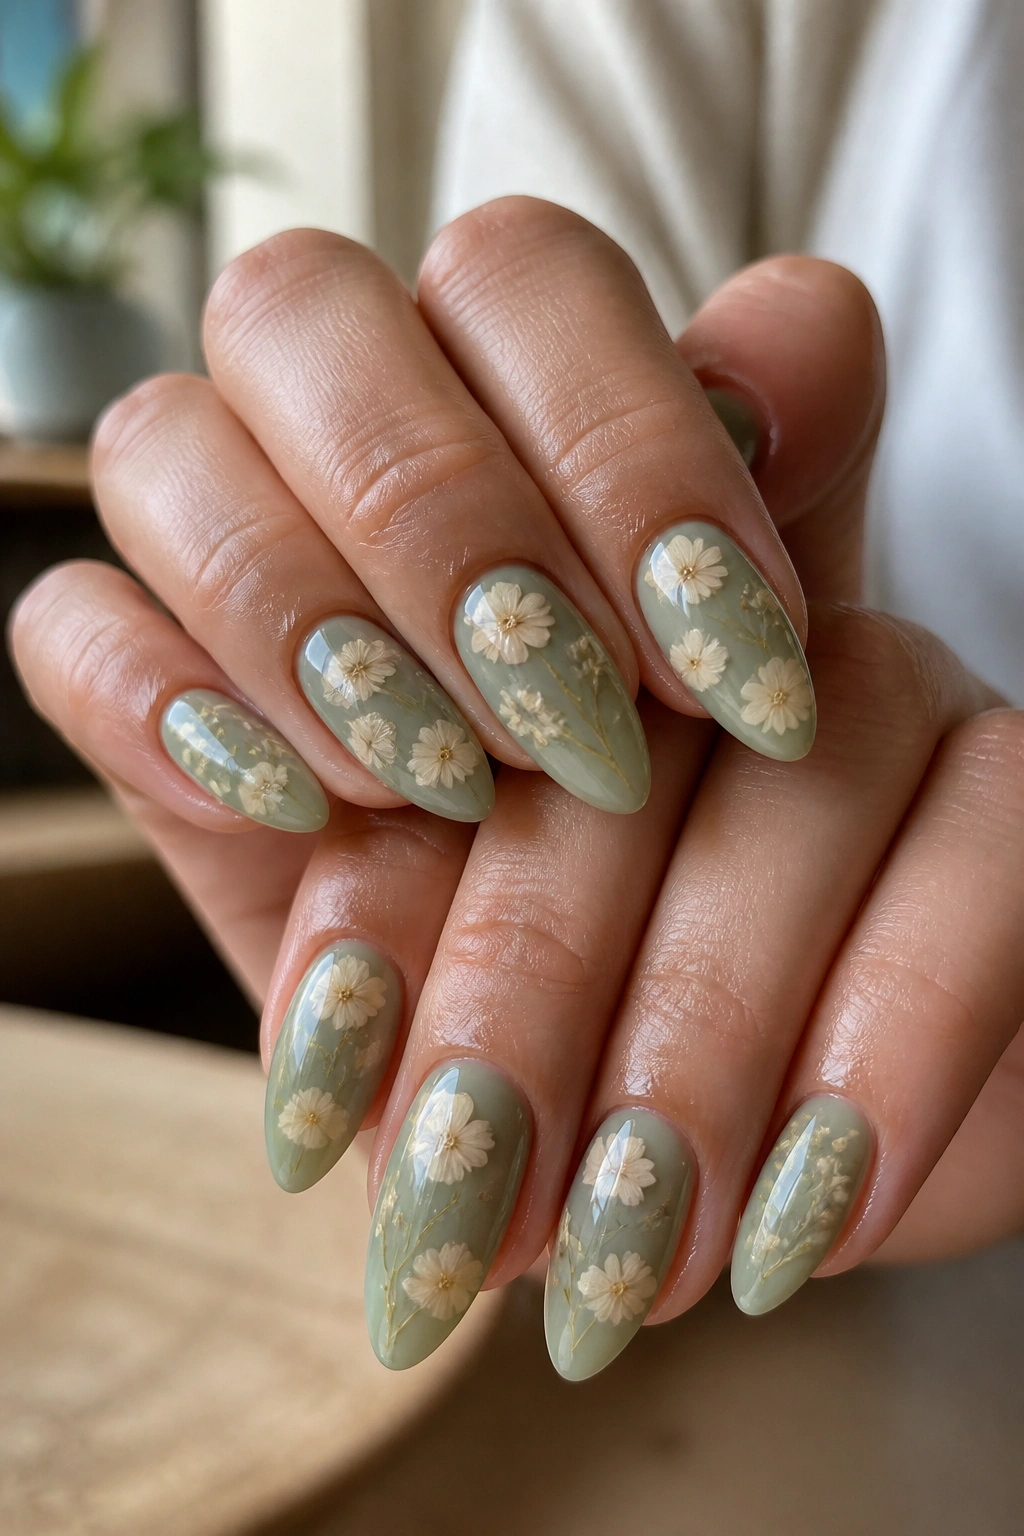
Sage nails can get muddy fast if the green is too gray, but a clean sage with cream florals stays crisp. The pressed-flower effect works because it layers small petals in a way that looks flat from far away and textured up close.
What to Ask For
If you’re in a salon, say you want thin petals sealed under a smooth top layer or a hand-painted version that mimics pressed flowers. For the hand-painted style, the artist should use pale cream petals, a dusting of soft green leaves, and a translucent base so the flowers don’t look pasted on.
This is one of the few floral looks that can handle a little density. You can place more detail on one nail and keep the others quieter, and the set still feels balanced. The key is edge control. If the petals start to blur into the cuticle area, the design loses that pressed look.
I’d keep this one glossy rather than matte. The shine gives the “pressed” effect a cleaner finish, like the flowers are sitting under glass.
8. Coral Ribbon Florals with Negative Space
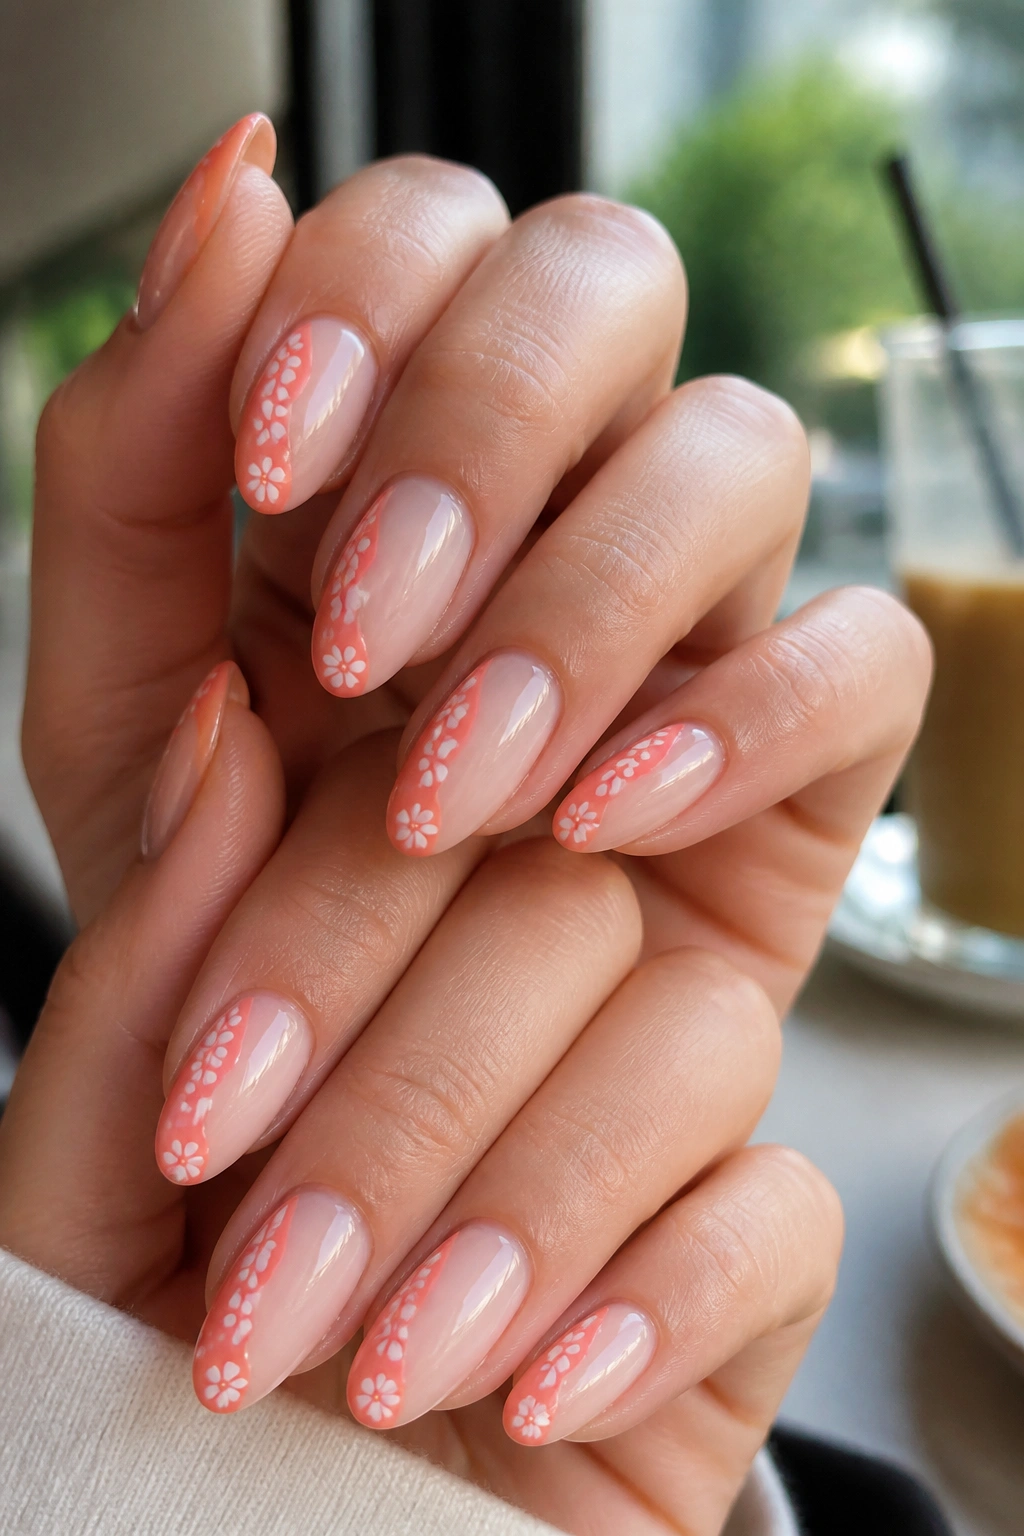
What happens when you move the flowers into narrow coral ribbons instead of filling the whole nail? You get something cleaner, sharper, and a lot easier to wear.
The coral should run in a thin arc along one side of the almond nail, leaving plenty of bare space in the middle. Then you tuck tiny white petals or a single blossom cluster into that ribbon so the flowers feel framed rather than scattered. A design like this only needs about 40 percent of the nail covered to read clearly.
- Keep the coral slightly translucent if you want the negative space to stay visible.
- Use one accent nail with a fuller bloom cluster and leave the rest more open.
- Add a thin green stem that bends with the almond curve.
- Avoid placing flowers right at the free edge, where they can get clipped during wear.
This look is good when you want something airy. It is not a maximalist set, and that’s the point.
9. Lilac Marble with Floating Violets
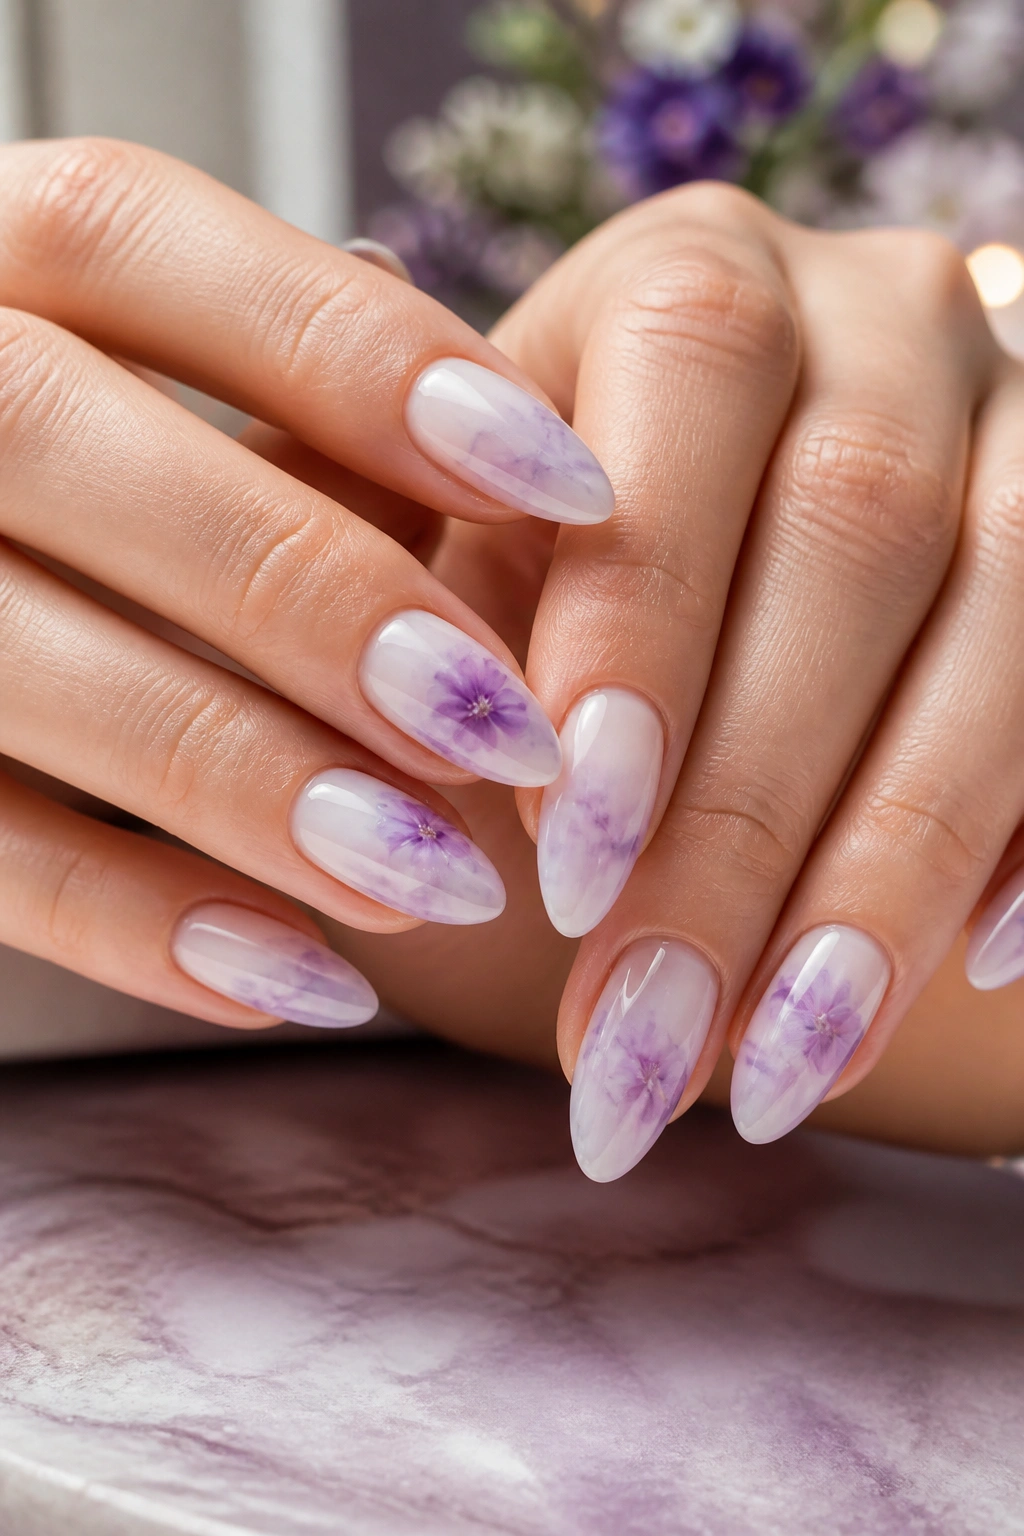
Marble does not have to be loud. If the veining stays faint and the violet flowers float on top instead of competing with the swirls, the whole set feels soft and grown-up.
Start with a milky white or pale lilac base, then drag in a second purple tone with a very thin brush or a damp sponge edge. Keep the marble lines cloudy, not sharp. After that, place one or two violets near the center or upper third of the nail, letting the petal edges stay slightly translucent.
The best part is how the marble gives the flowers movement. It feels like a watercolor sheet behind the blossoms, which is a much nicer effect than hard contrast. I’d keep the petals small and the stems almost invisible.
If you usually avoid busy nail art, this is a safer entry point. The flowers are there, but they don’t fight the eye.
10. Apricot Poppies with Glossy Finish
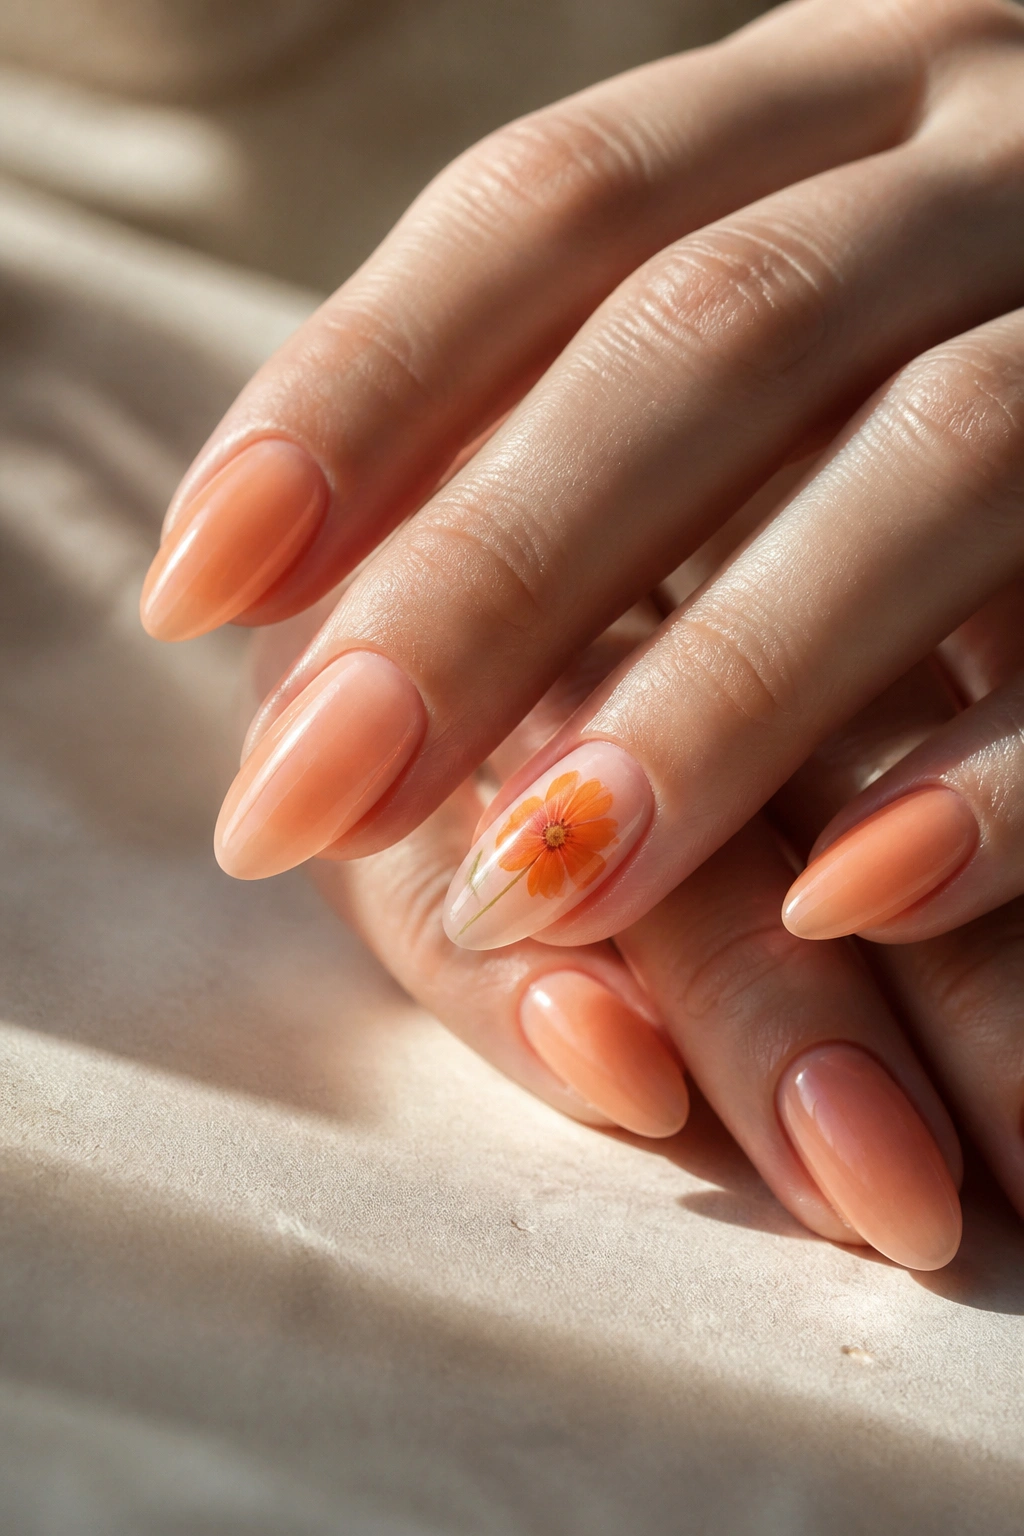
Apricot and poppy red belong together. The warm orange base softens the bloom, and the glossy finish makes the petals look rounded instead of flat.
Poppies work especially well on almond nails because the flower shape echoes the taper of the tip. A single poppy on each accent nail is enough. Use a deeper red-orange at the center, then fade the outer petals into softer apricot so the bloom doesn’t read cartoonish. A tiny black center dot gives it structure.
I’d keep the rest of the hand simple — maybe a sheer apricot wash or a nude base with one leaf cluster. Too many poppies can start to look crowded fast, and poppies are already expressive on their own. Let them breathe.
This one has a little more warmth than blush or lilac. If you want spring colors that lean toward sunset, this is the set.
11. Pink-Champagne Petal Outline Nails
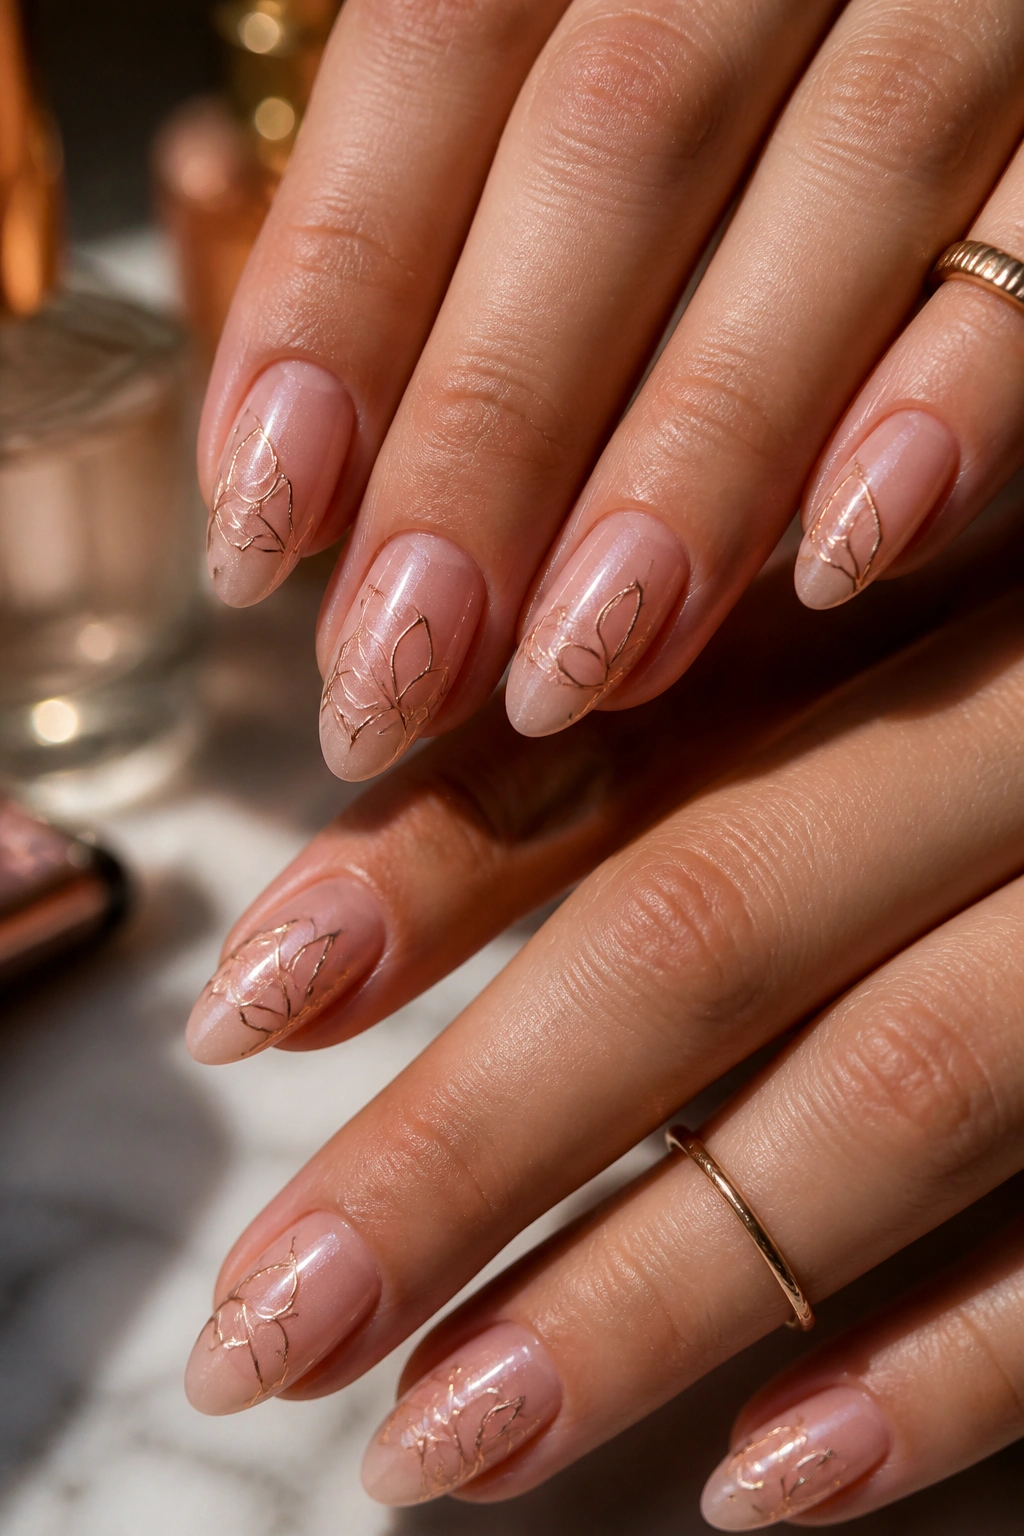
Outline florals are underrated. They give you the flower shape without covering the nail in color, which is useful if you like clean hands and just want a hint of art.
On a pink-champagne base, use a rose-gold or deeper pink liner to trace petals in a loose five-petal shape. Leave the center open. That empty space does a lot of work, because it keeps the nail from looking crowded and lets the almond shape stay visible underneath the art.
This look suits people who don’t want full blooms on every nail. It also grows out quietly, which is a bonus if you don’t visit the salon every couple of weeks. Keep the linework thin — around 0.5 mm to 1 mm — so it reads as drawing, not fill.
I like this with a glossy top coat. Matte can flatten the linework, and the whole point here is the fine detail.
12. Bluebell Reverse French with Tiny Vines
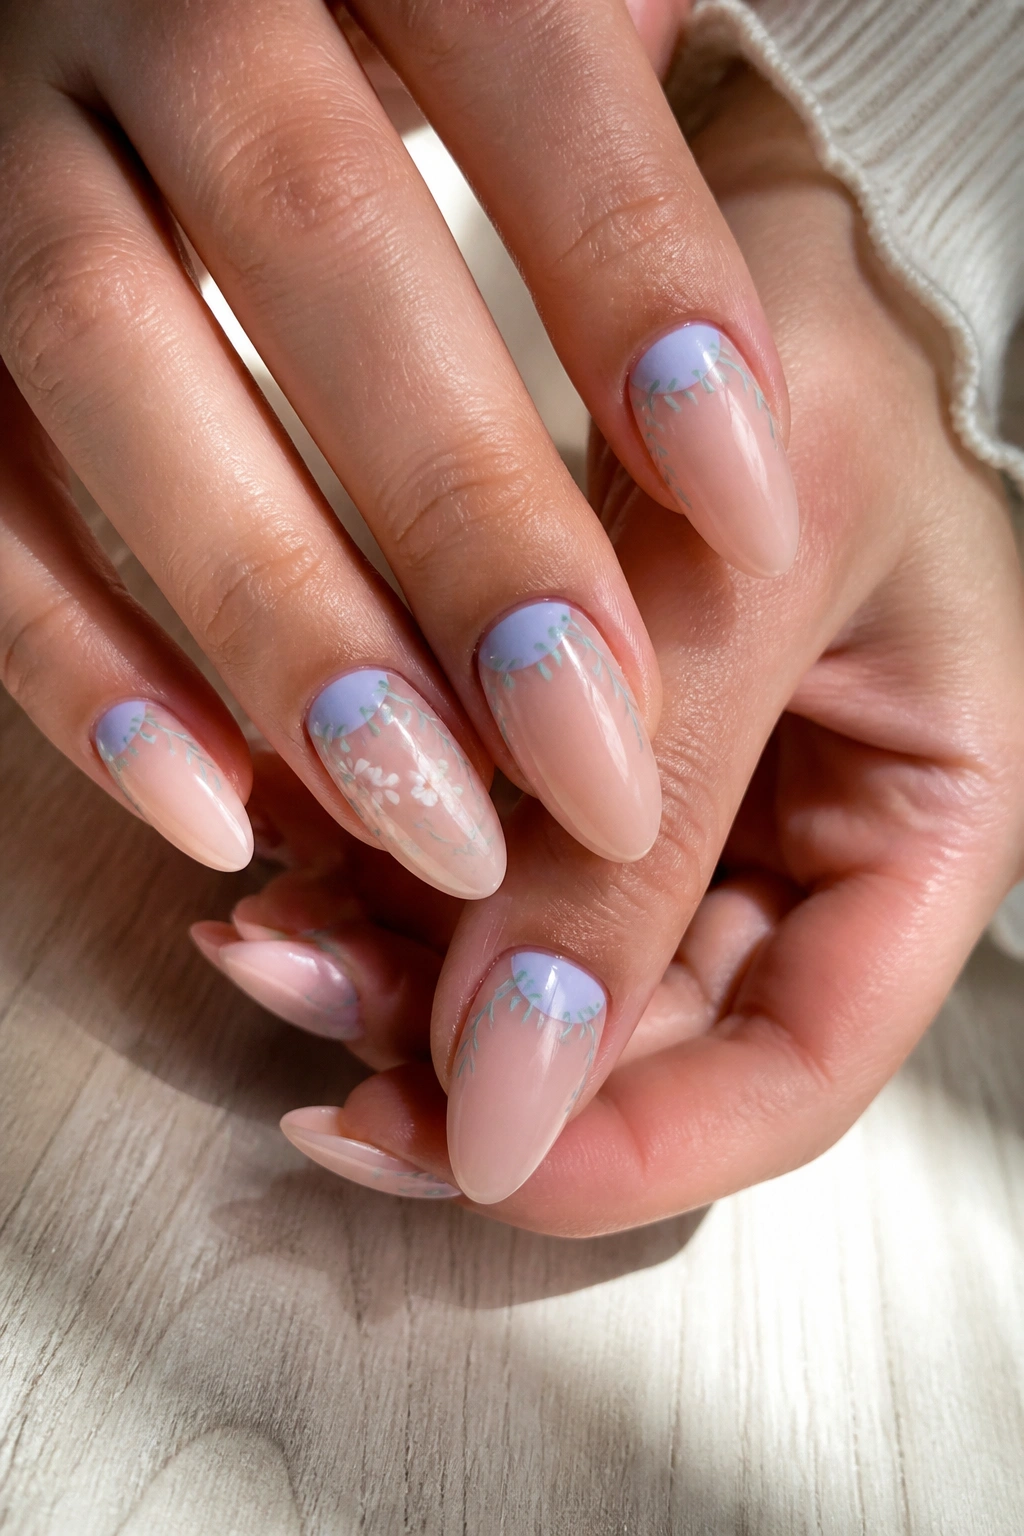
What happens when you move the flowers down toward the cuticle instead of the tip? The nail feels cleaner, and the grow-out is less obvious.
How to Use It
Paint a soft bluebell arc near the cuticle, leaving a 2 to 3 mm gap so the design doesn’t sit on the skin. Then draw tiny vines up each side of the almond nail, stopping before the free edge so the tip stays open. A reverse French shape like this gives the eye a strong anchor near the base, which is handy if your nails are on the longer side.
The color choice matters here. Bluebell needs to stay pale enough that the flowers remain readable against the nude or sheer pink base. Add one or two tiny white blooms on the ring finger, then keep the other nails mostly linework and leaf detail.
This is one of those sets that looks quiet from far away and detailed up close. That’s a nice place to be.
13. Pistachio and Blush Mix-and-Match Blooms
A mix-and-match set can go wrong fast if every nail tries to do the same job. The fix is to give each finger a different role and keep the palette tightly controlled.
I’d use pistachio, blush, cream, and a whisper of pale yellow. One nail gets a single daisy. Another gets a pistachio tip with two small dots. A third can hold a fuller bloom with soft blush petals. The variation gives the set energy without turning it chaotic.
- Thumb: sheer blush base with one white flower.
- Index: pistachio French tip with a tiny cream bud.
- Middle: nude base and a thin green stem.
- Ring: one larger blossom as the focal point.
- Pinky: a small dot flower or a single leaf.
This is a good choice if you want your hands to look decorated from every angle. It’s playful, but it still has a plan.
14. Watercolor Tulips on Milky Almond Nails
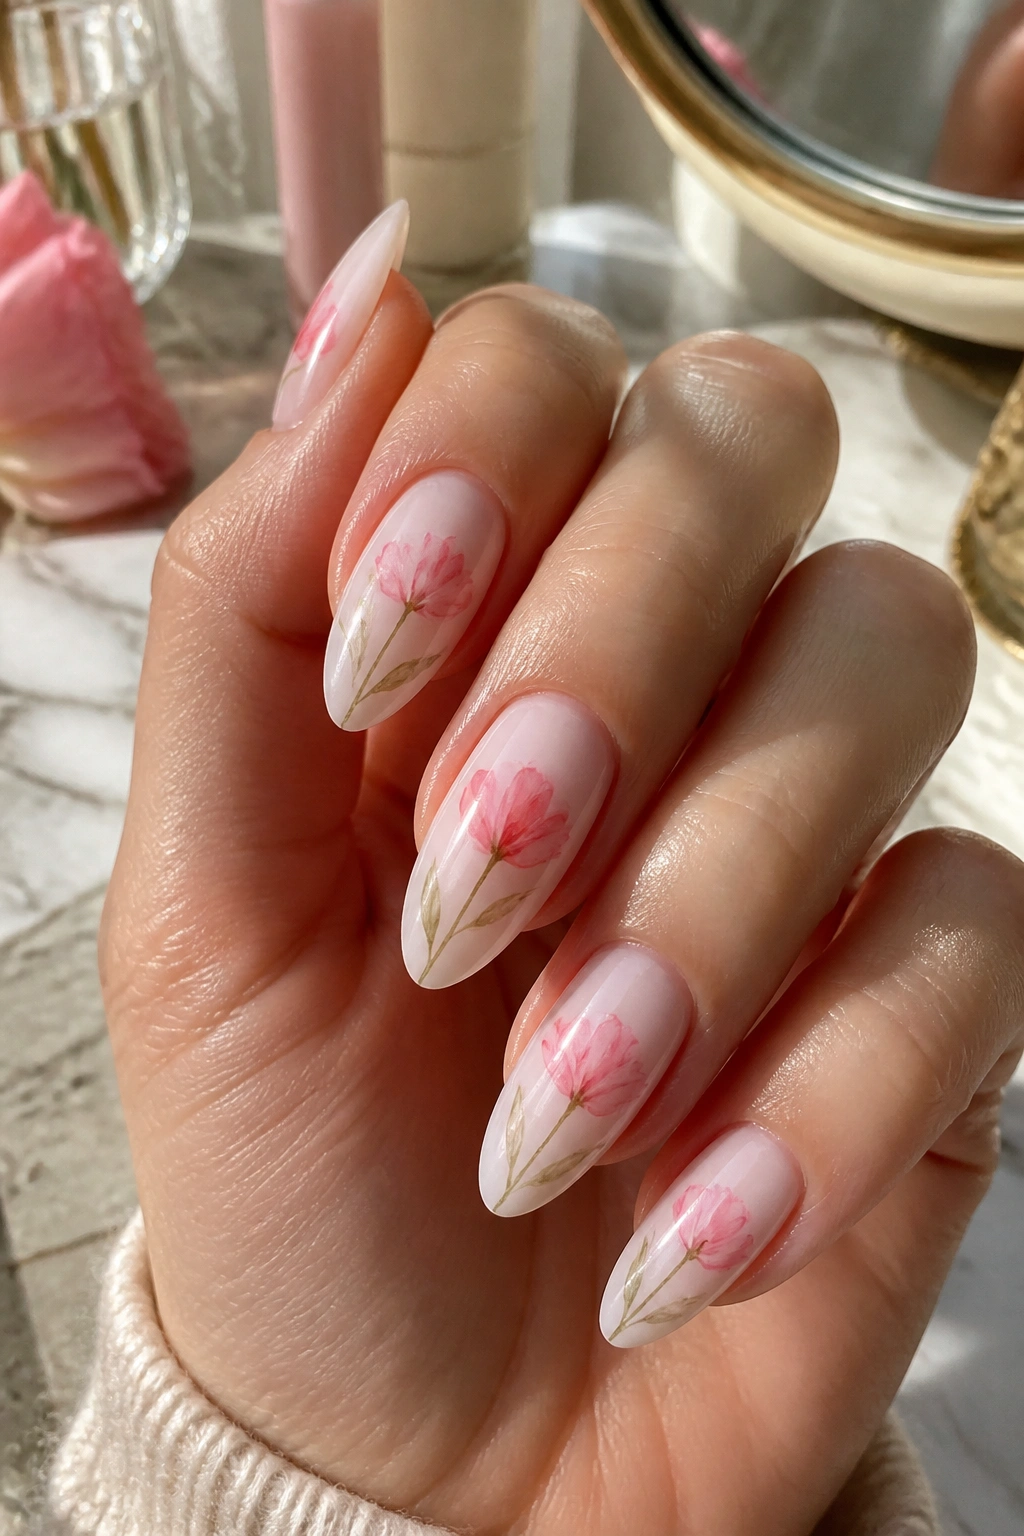
A milky base is the best background for watercolor tulips because it softens the edges before you even touch the brush. Tulips want a little blur. If you paint them too sharply, they lose that springy, lifted feel.
Use a diluted pink, coral, or soft red and sweep it into three rounded petal shapes about 8 to 10 mm tall. Then pull a thin green stem beneath each bloom. The trick is to keep the color sheer enough that the milky base still glows through the petals. If the polish looks opaque right away, it’s too heavy.
This set has a nice balance of structure and softness. Tulips have a clear shape, so they don’t need extra leaf clutter. Let the flowers stand on their own.
I’d wear this on medium-length almonds. There’s enough room for the bloom to stretch without swallowing the nail.
15. Mauve Garden Party Nails with Fine Linework

Not every floral set needs pastel sweetness. Mauve, dusty rose, and taupe can look more tailored, and that makes the flowers feel grown-up.
This version uses fine linework instead of big painted petals. Tiny blossoms sit near the tip, and the stems curve in a looser, almost sketch-like way. A matte base on one or two nails can make the flowers feel softer, but I would keep most of the hand glossy so the detail doesn’t disappear.
The reason this works is simple: muted color gives the linework a place to live. Bright pink flowers can fight with fine lines. Mauve doesn’t. It lets the design breathe.
If you wear a lot of black, cream, or denim, this is a strong choice. It still reads floral, but it doesn’t lean childish, which is a problem with some brighter spring sets.
16. Lemon Cream Raised 3D Petals
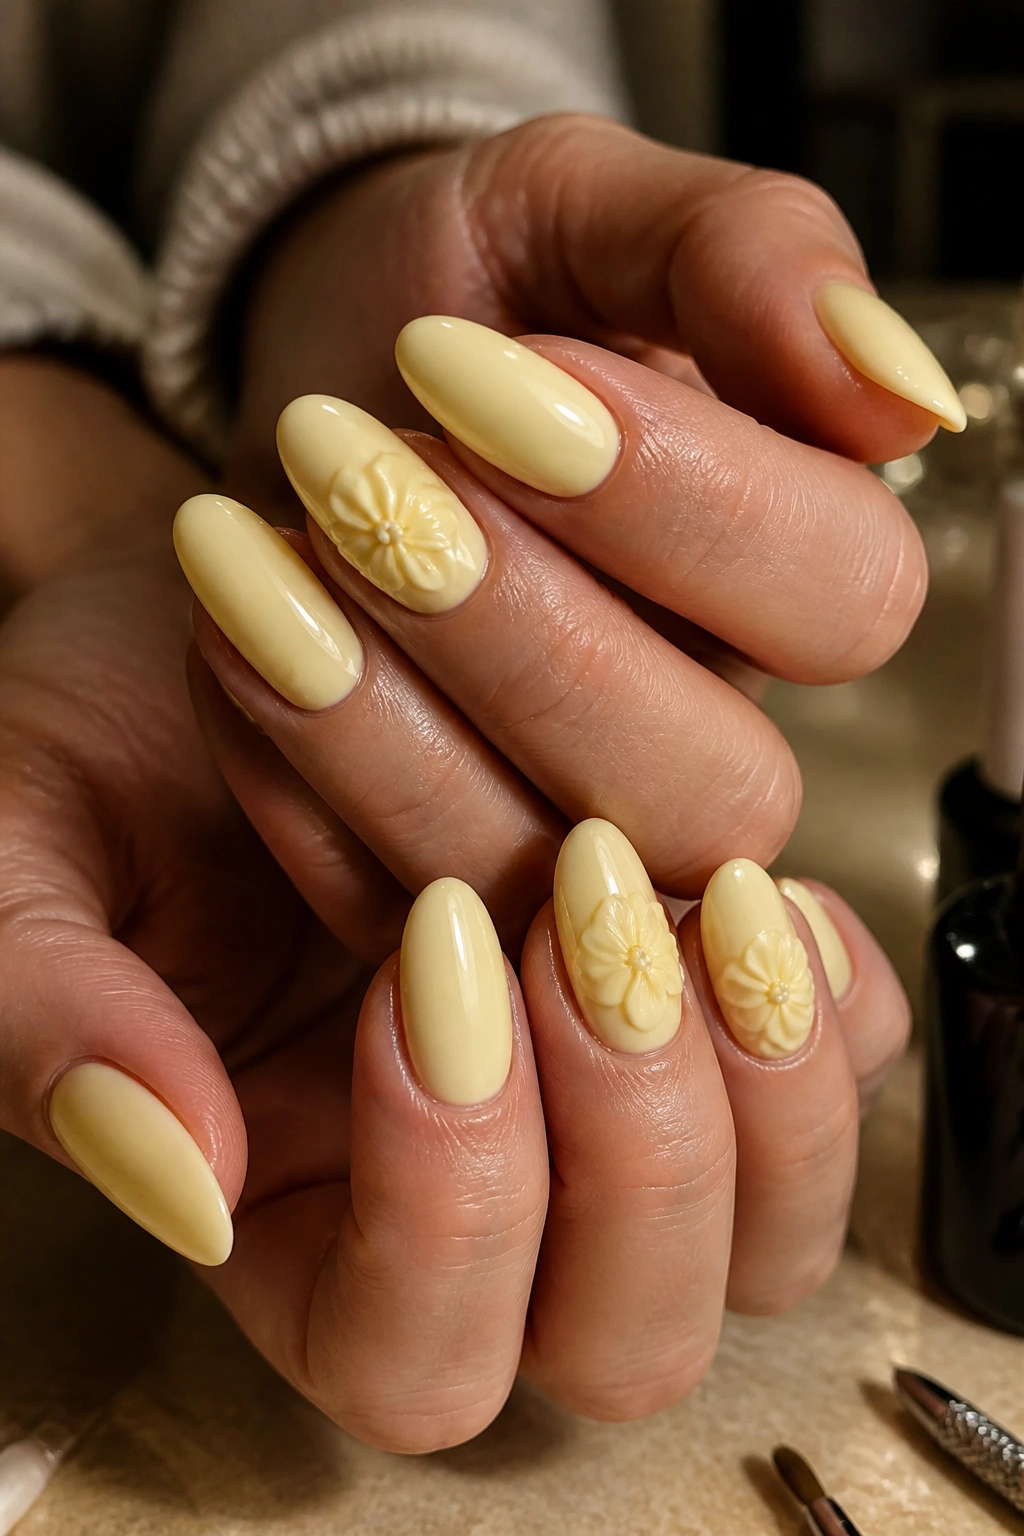
A raised floral design feels completely different from flat nail art. The petals cast a tiny shadow, and that small bit of height gives the set a more tactile look.
What to Ask for at the Salon
Ask for builder gel petals or soft sculpted floral details on one or two accent nails only. If every nail has raised work, sleeves and hair will catch on it. A little is enough. The petals should rise no more than about 1 mm above the nail surface, or the design starts to feel clunky.
Lemon cream is the right base here because it softens the sculpted edges. Add a white blossom or a pale peach center, then keep the rest of the nails simple so the texture has room to show. Glossy top coat on the flat nails and a careful seal around the 3D petals keeps the set neat.
This is not the easiest DIY look. It is worth paying for if you like nails that feel a little more crafted than painted.
17. Pastel Rainbow Bouquet on Clear Almonds
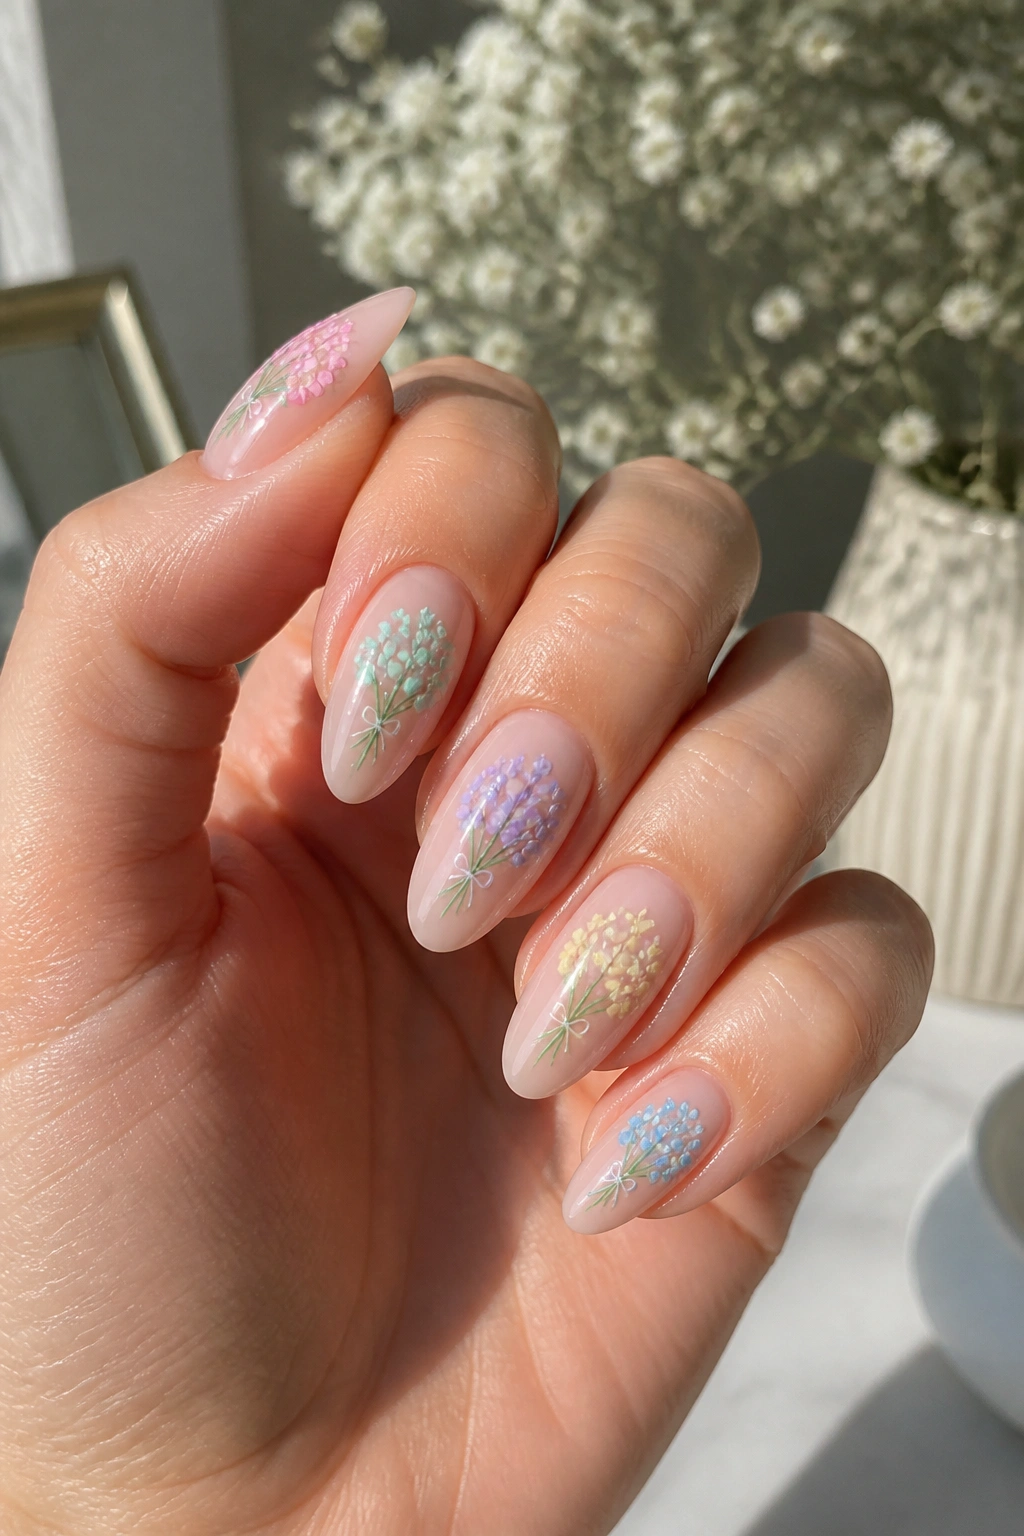
Can one hand hold five colors without turning messy? Yes, if the base stays clear and each flower gets its own space.
A clear or jelly-nude almond nail makes room for tiny bouquet-style blossoms in pink, mint, lilac, butter yellow, and baby blue. The trick is to keep each flower about 5 to 7 mm wide and give every nail one dominant color, not five at once. That keeps the set playful instead of noisy.
- Use one flower per nail as the anchor.
- Let the accent color change from finger to finger.
- Keep the stems thin and nearly transparent.
- Leave at least half of each nail open.
This is the set I’d pick if you want spring color in full view. It feels cheerful, but the clear background stops it from getting heavy.
18. Rose Quartz Florals with Matte Accent Nails
A rose quartz base changes the whole mood of floral art. It’s softer than pink, and when you mix glossy and matte nails in the same set, the flowers stop reading flat.
The best version uses three glossy nails and two matte accents. Put the matte finish on the ring finger and pinky if you want the florals to pop a little more. Then paint tiny cream blossoms and pale green leaves on the glossy nails, where the shine keeps the detail crisp.
- Keep the matte surface clean and free of thick art.
- Let the glossy nails carry the flowers.
- Use soft rose centers rather than bright red ones.
- Add one tiny gold dot only if you want a little warmth.
Matte can be tricky because it dulls color faster than people expect. That’s why I’d never cover every nail with it here. A little contrast does the job better.
19. Soft Green and Peach Meadow Nails
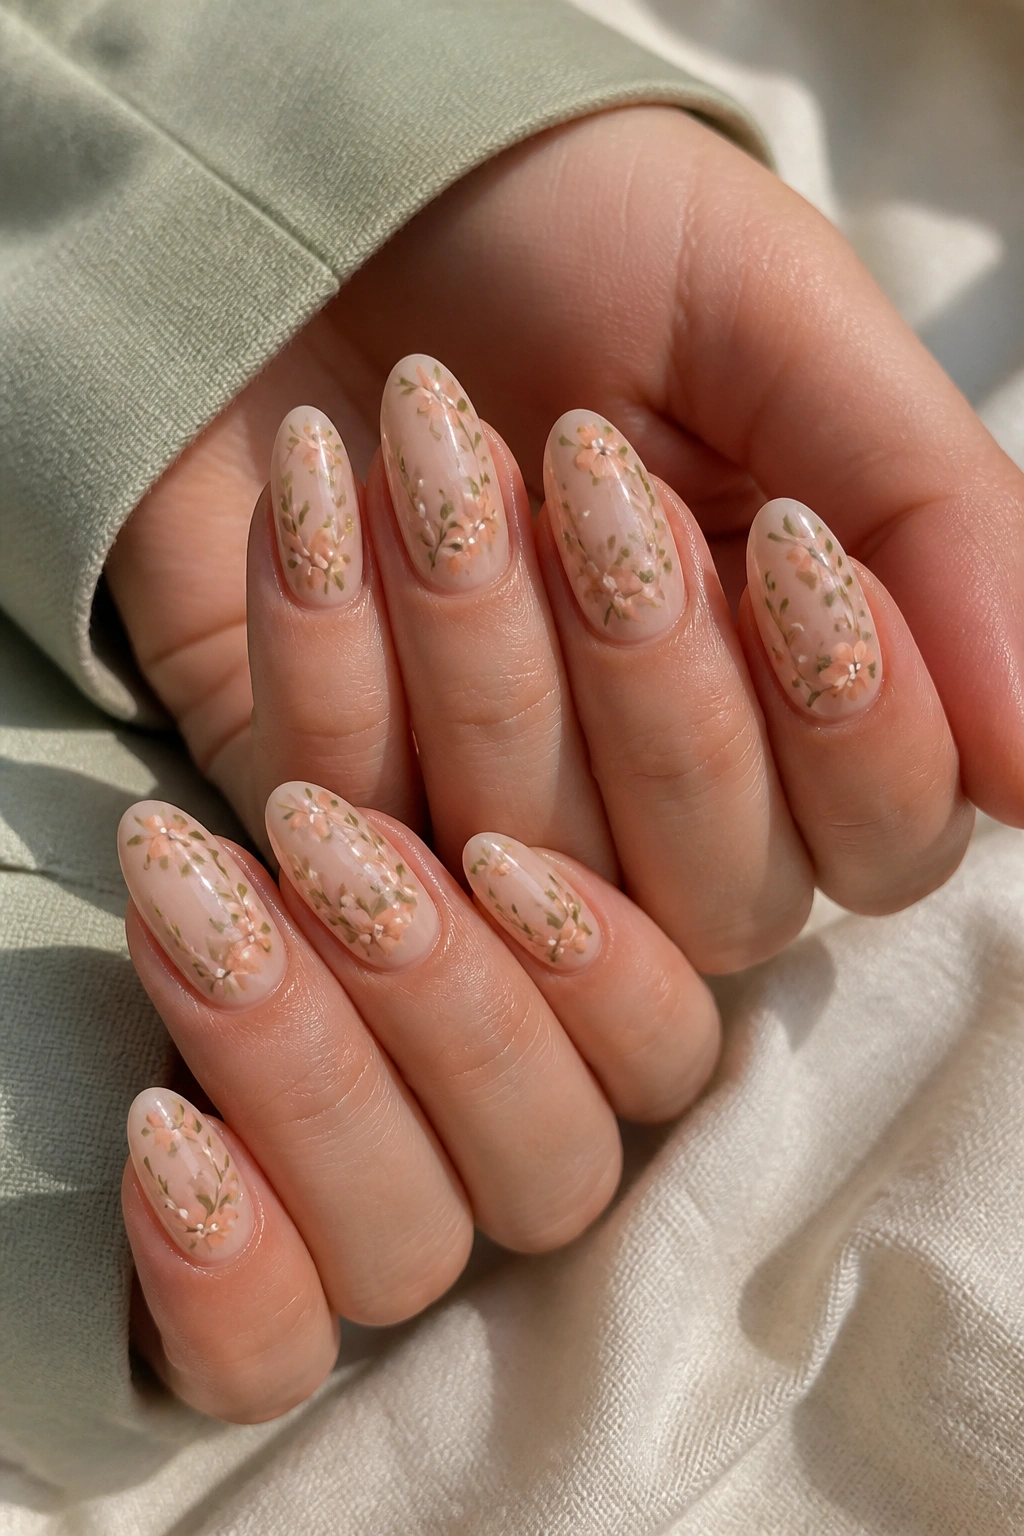
A meadow palette feels calmer than a bouquet palette. Instead of building one big flower, you scatter small blooms and leaf sprigs across the hand so the whole set reads like a field sketch.
Soft green is the anchor, and peach is the warm note that keeps the set from going flat. Put the flowers on a nude or sheer pink base, then use tiny off-white centers so the blossoms don’t disappear. The stems should follow the curve of the almond nail, not run straight up the middle. That curve is the secret.
I like this version because it works on shorter almonds too. You do not need long tips to make it land. Just keep the blooms small and the spacing loose, and the whole thing feels easy.
If you want a floral set that still looks restrained with a blazer or a linen shirt, this is a good place to stop.
20. Full Spring Bouquet on Each Fingertip
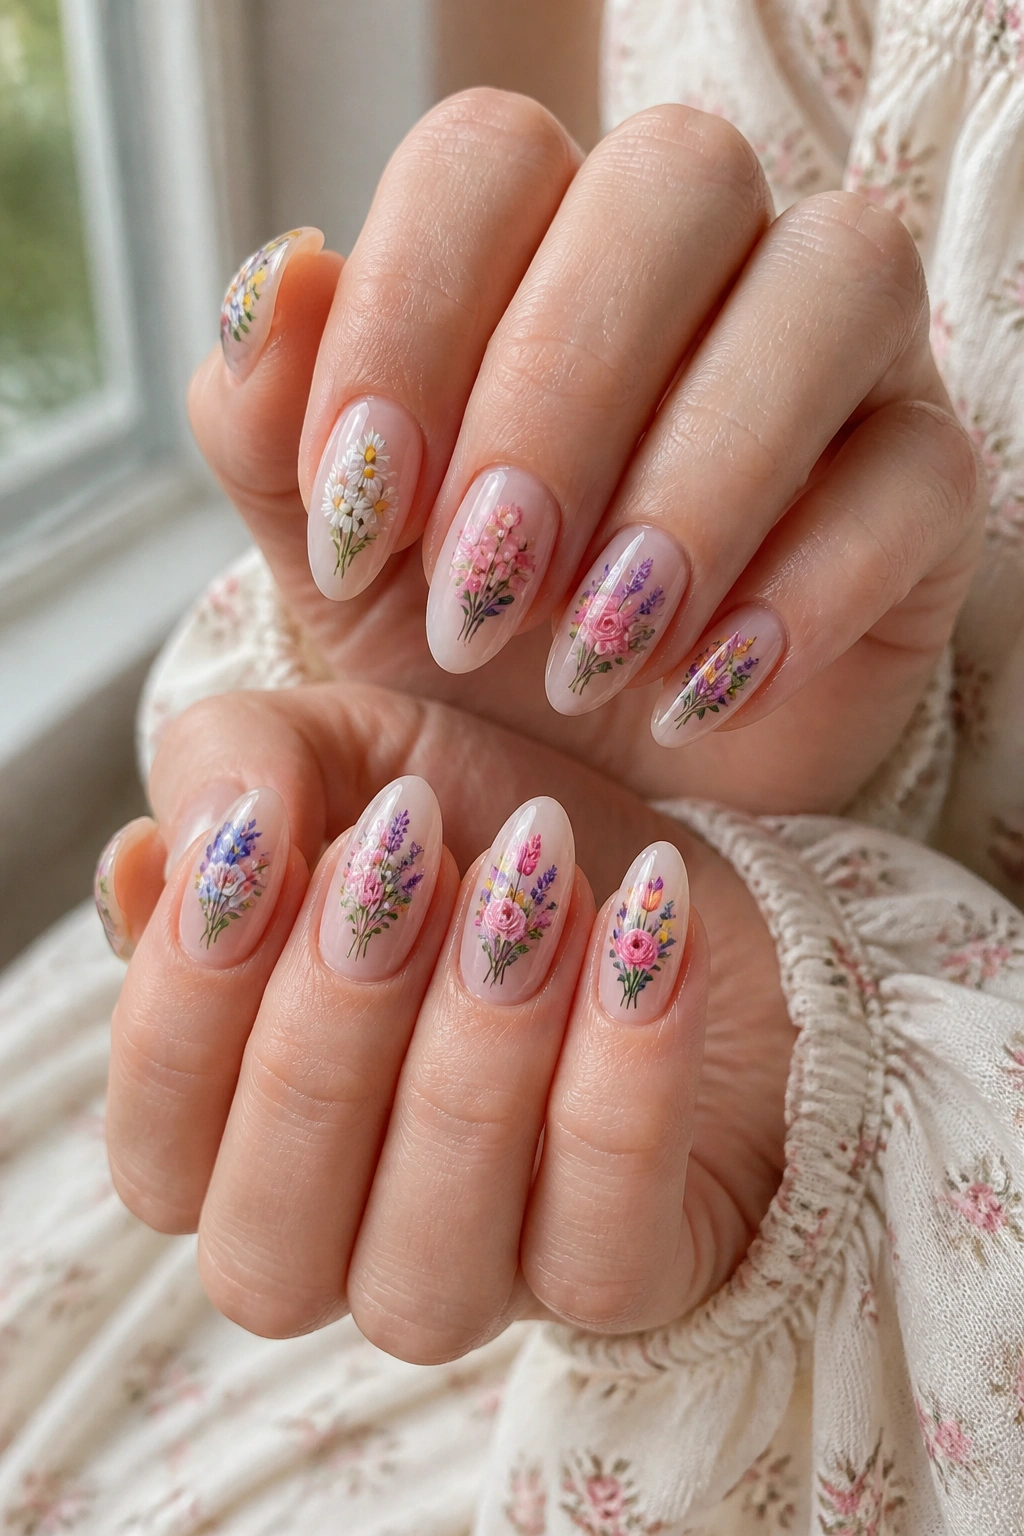
A full bouquet, but tidy.
This is the most playful version of the bunch: each nail carries a different flower, but the palette stays locked to soft spring shades. One finger gets a daisy, one gets a tulip, one gets a tiny rose, one gets a violet, and one gets a cherry blossom cluster. The almond shape helps here because it gives every bloom a little vertical room, which keeps the hand from looking overloaded.
The set works best on medium to long almonds with a sheer nude or milky base. If the base is too opaque, the flowers can start to feel pasted on. Keep one element consistent — the same stem color, the same background tone, or the same glossy top coat — so the variety feels intentional.
If you want this look to stay readable, don’t ask for five big flowers. Ask for five small ones. That’s the difference between a bouquet and a pile.
