

Floral almond nail ideas work because the shape does half the styling for you. Almond tips already look soft and lengthened, so a tiny daisy, a thin vine, or a single painted bloom can change the whole mood without needing a heavy design.
The smartest flower patterns on almond nails don’t cram every millimeter with detail. They leave room for the base coat to breathe, which matters more than people think. A sheer blush base reads airy. A milky nude base makes white petals look sharper. A deep color base turns the flowers into the star instead of the filler.
That balance is where this shape shines. Almond nails can carry tiny florals, full bouquet nails, botanical line art, and even raised gel petals without looking clunky. The taper of the nail gives petals a natural direction, almost like the design is already leaning forward before the brush ever touches the surface.
Some floral sets feel sweet. Some feel clean. A few lean almost painterly, like a tiny garden pinned to each fingertip. The 20 ideas below stay within that lane, but each one uses a different trick: scale, contrast, texture, placement, or finish.
1. Sheer Blush Floral Almond Nail Ideas With Tiny Daisies
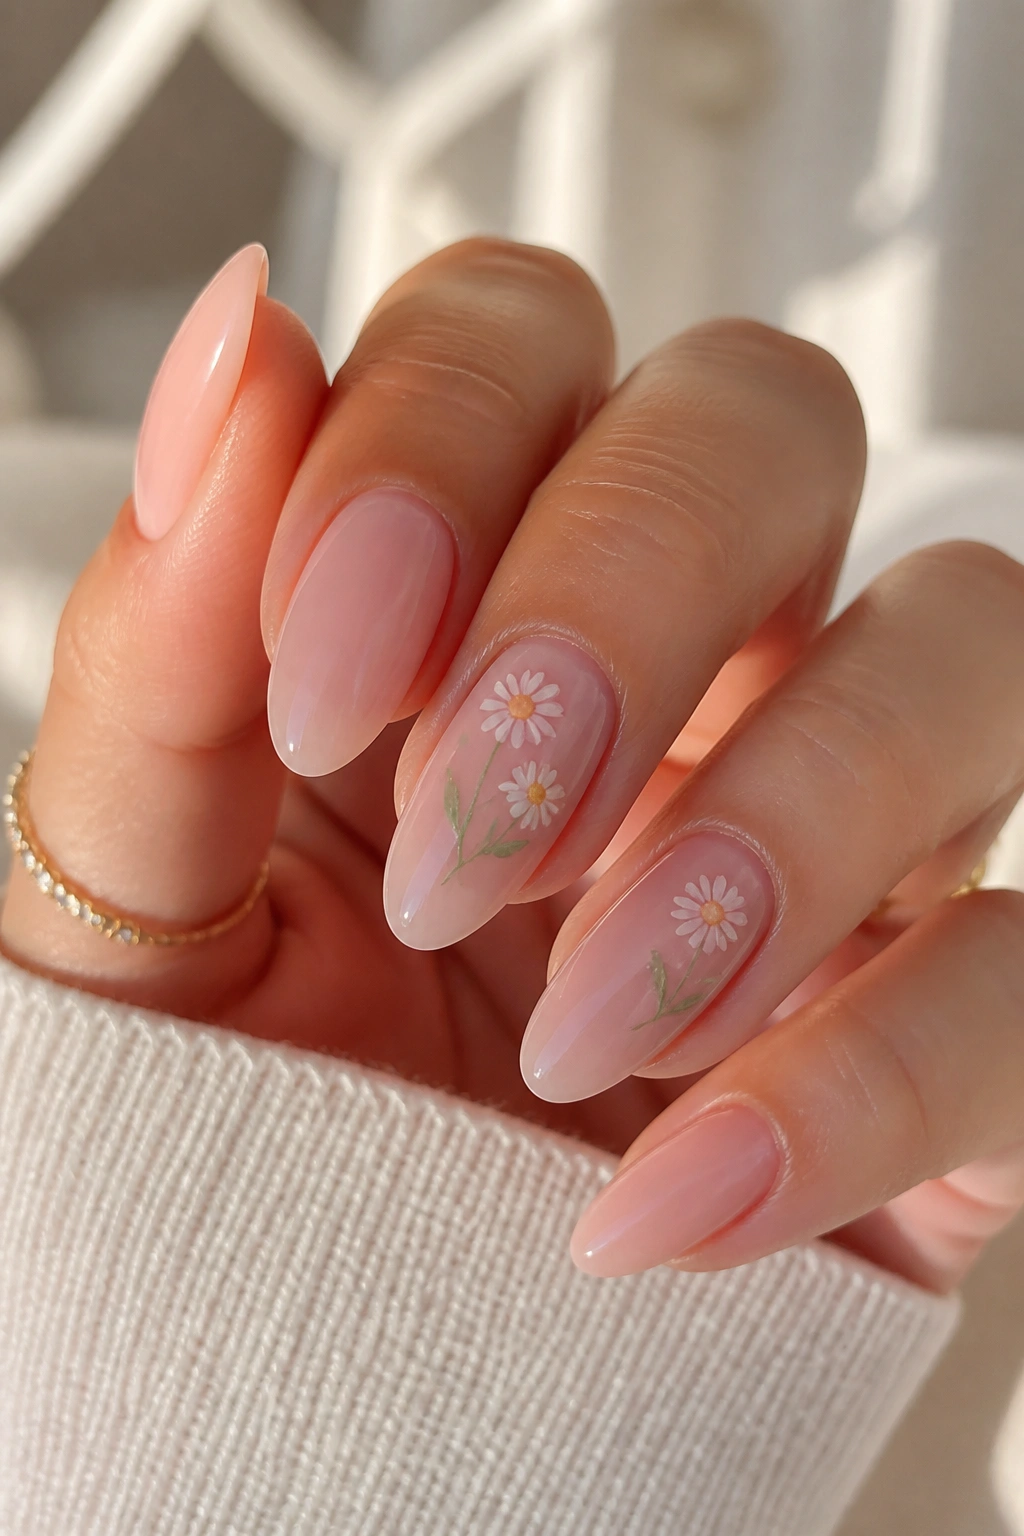
Tiny daisies are the easiest way to make floral almond nails look fresh instead of fussy. A sheer blush base gives the flowers room to show up, and the almond shape keeps the whole set from feeling too round or too young.
Why Tiny Daisies Work So Well
Daisies are forgiving. Their petals can be tiny and still read clearly, which makes them perfect when you want a floral pattern that feels neat from arm’s length and crisp up close. A single yellow center with six to eight short white petals is enough.
A good version places one bloom near the cuticle on two or three nails, then lets the rest of the set stay mostly bare. That little bit of restraint is what saves the look.
- Use a sheer pink or milky blush base so the nail still looks light.
- Keep the petals thin and evenly spaced; a fat petal makes the flower look heavy.
- Put the flower slightly off-center on at least one nail so the set does not feel too symmetrical.
- Add one tiny green leaf near the stem if the design needs balance.
Best trick: keep the flowers smaller than your cuticle width. That one choice keeps the set clean.
2. Pressed-Flower Almond Nails With Milky Jelly Bases

Pressed-flower nails are the easiest shortcut when you want the softness of real petals without painting every line by hand. A translucent jelly base makes the flowers look like they sit inside the nail instead of on top of it.
The effect is gentle, almost glassy. Pale pinks, soft corals, and faded lilacs work best here because they mimic the washed-out look of dried petals. On almond nails, that transparency feels elegant rather than crowded.
The key is spacing. One flower per accent nail is usually enough, and the other nails should stay simple. If the base gets too opaque, the whole look loses that floating, layered feel.
A thin glossy top coat is worth the extra effort. Matte can flatten the dried-flower effect, while gloss keeps the petals looking like they were pressed under glass. That tiny shine matters.
3. White French Tips Framed By Little Garden Blooms
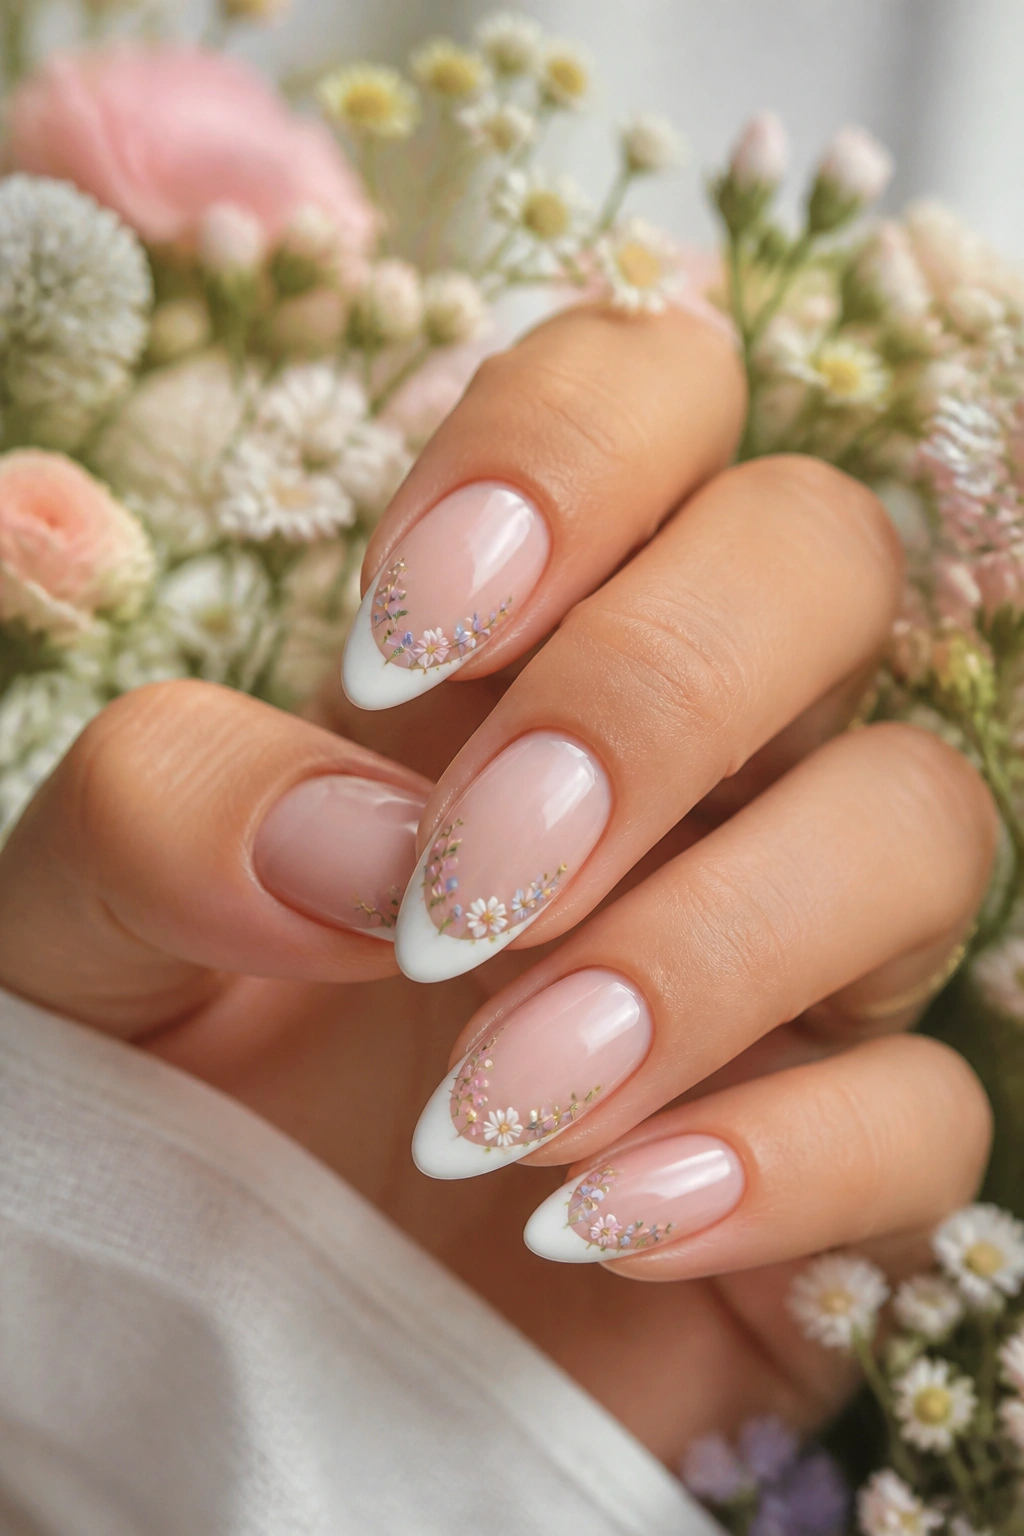
Why do floral French tips look so polished on almond nails? Because the tip already gives you a built-in frame. Once that curved white edge is in place, a few blossoms near the corners feel intentional instead of random.
The best versions keep the flowers where the tip begins or ends, not spread across the whole nail. Think of them as little accents that meet the French line, not a second full design. A pale nude base and a soft white tip make the flower colors easier to read.
How to Place the Flowers
- Put one micro flower on the outer corner of the ring finger.
- Add a second bloom near the inner curve of the thumb or index finger.
- Use a fine liner brush for stems so the line does not take over the tip.
- Keep the petals small enough that the French edge still feels like the main shape.
A tiny flower in the corner does more than a crowded cluster in the center. It follows the almond taper naturally, which is exactly why this layout works so well.
4. Pastel Bouquet Nails That Mix Four Soft Flower Patterns
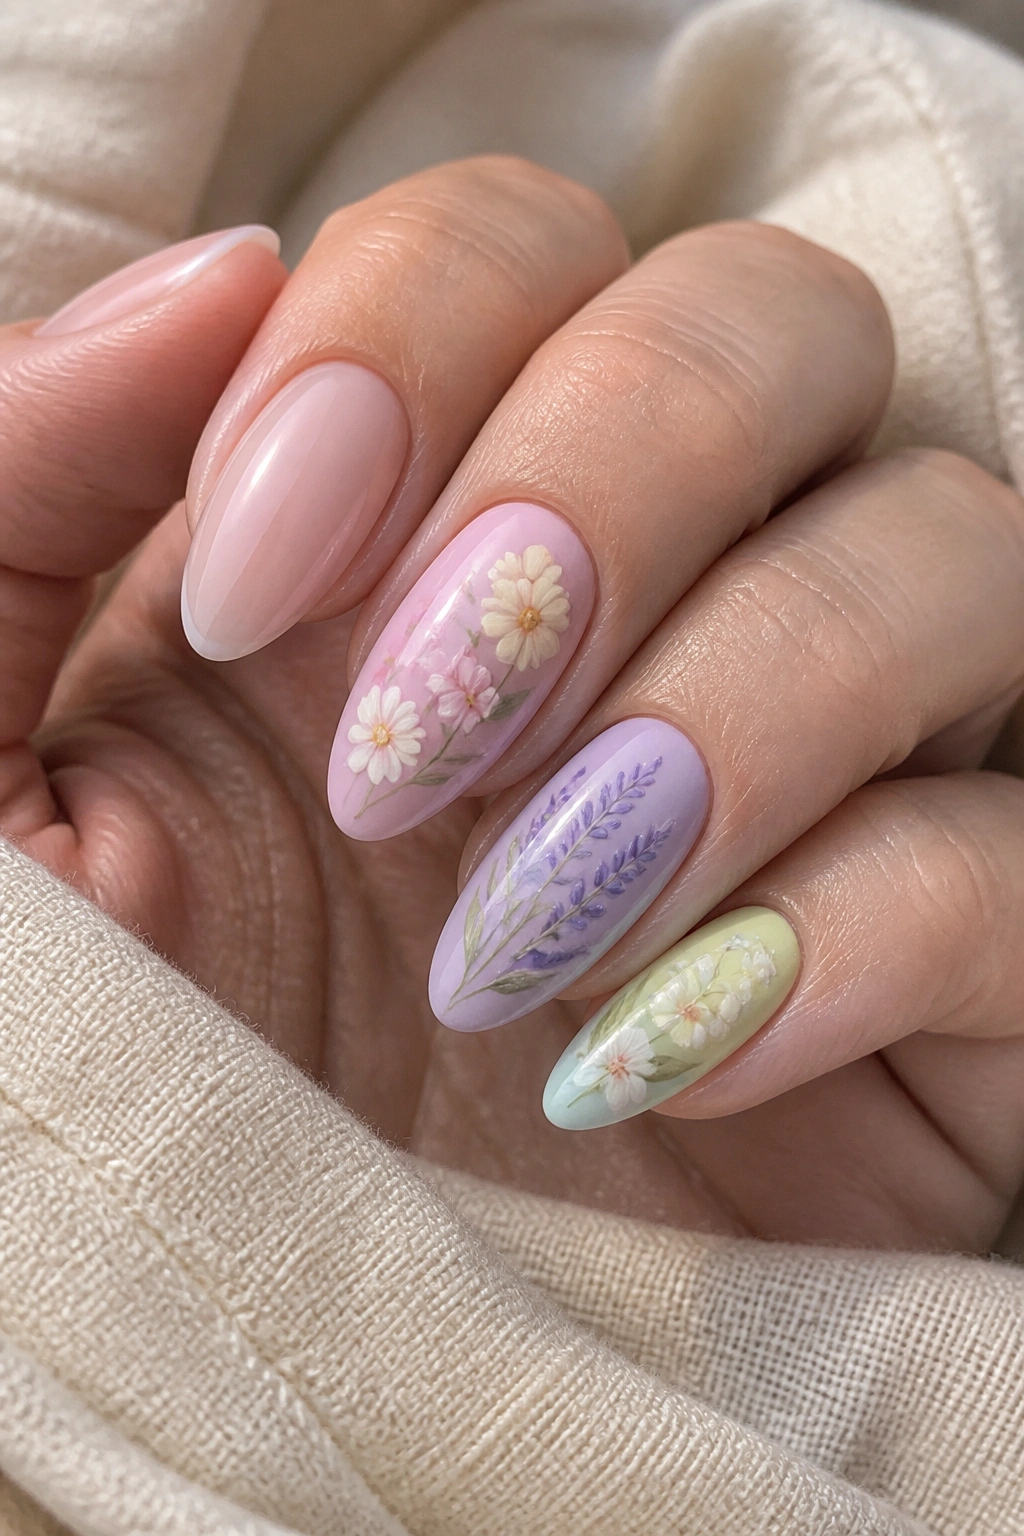
If you want your nails to look like a small spring bunch, this is the layout to copy. Each nail carries a different flower, but the palette stays tight enough that the set still feels coordinated.
Blush, lilac, butter yellow, and mint green make a good four-color mix. Use one flower type per nail if you want order, or repeat the same bloom twice and switch the colors on the others. Either way, the almond shape keeps the set from looking too blocky.
The trick is not making every nail loud. Let one flower be the hero and make the others smaller. A tiny daisy, a rounded rosebud, a soft lavender sprig, and one little bud cluster can all live on the same hand if the spacing stays open.
One bare or near-bare nail helps more than people expect. It gives the bouquet room to breathe.
5. Red Poppy Almond Nails That Use Color As The Focal Point
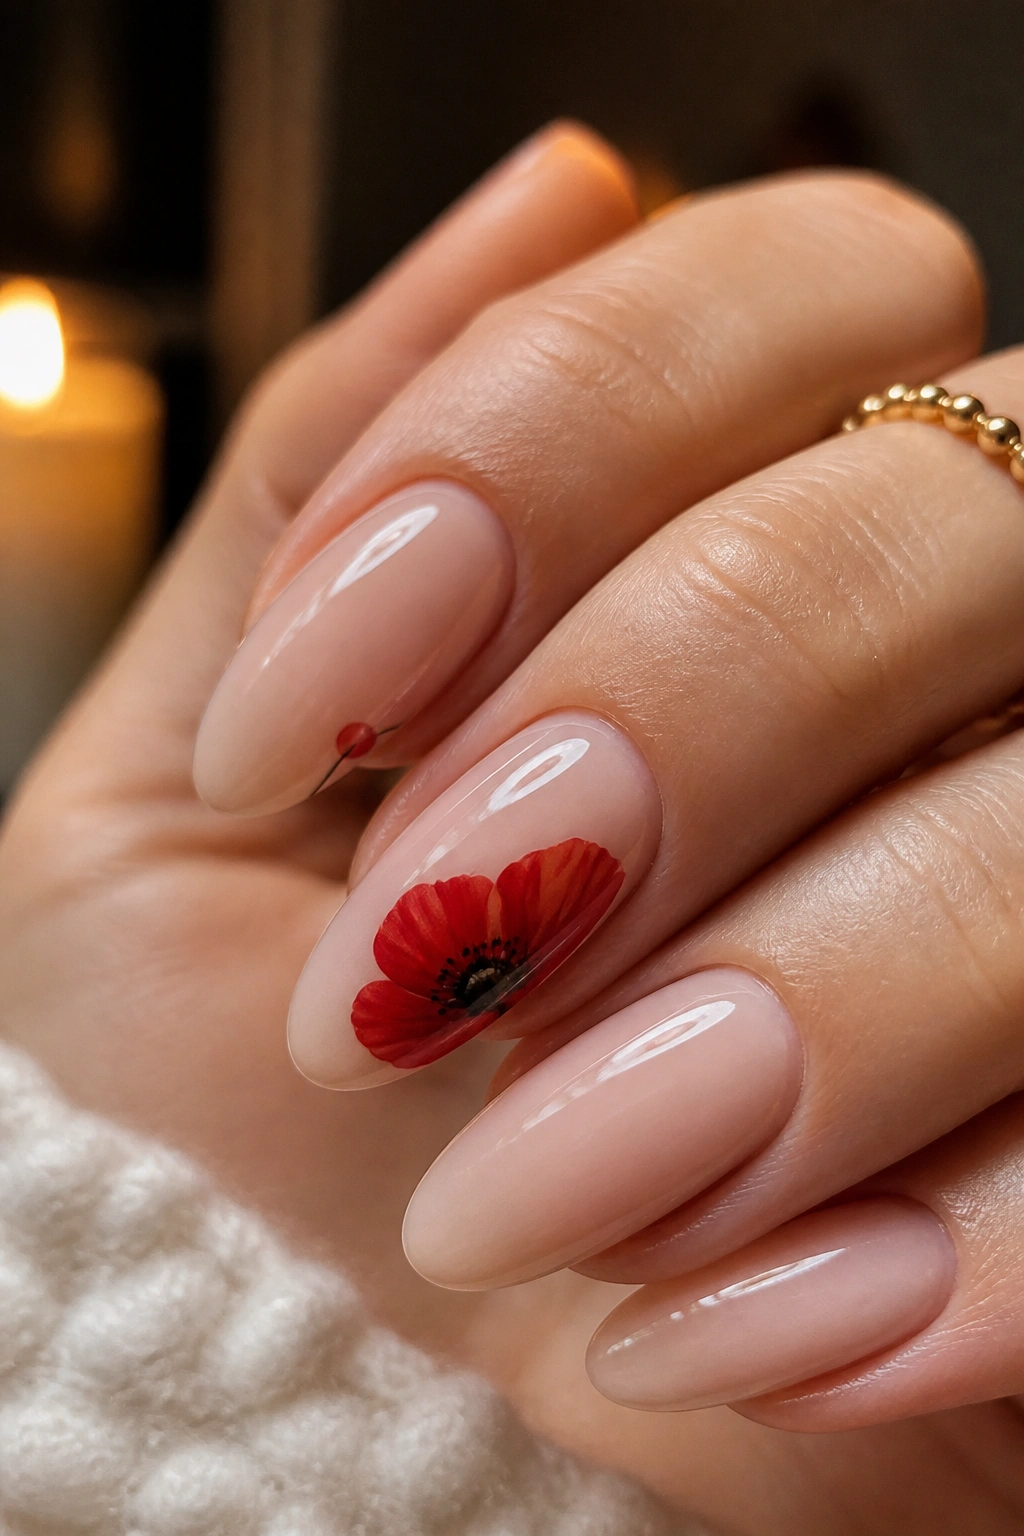
Red poppies change the whole mood of floral nails. They are bolder than daisies, less delicate than cherry blossoms, and they look especially good on almond shapes because the petals can follow the taper of the nail without fighting it.
A nude or milky base keeps the design from going too heavy. Then the poppy petals do the work: bright red, almost flat against the nail, with a dark center or a tiny black dot. That one small dark detail keeps the flower from looking cartoonish. It gives the bloom a little edge.
The smartest way to wear poppies is with space around them. One large bloom on the ring finger and smaller petals on two side nails is enough. More than that, and the design starts to crowd the curve of the nail. Less is often smarter here.
This is also one of the few floral looks that can handle a slightly longer almond shape without losing balance. The extra length gives the petals more room to open, which makes the red read rich instead of cramped.
6. Lavender Sprig Nail Art With Fine Line Stems
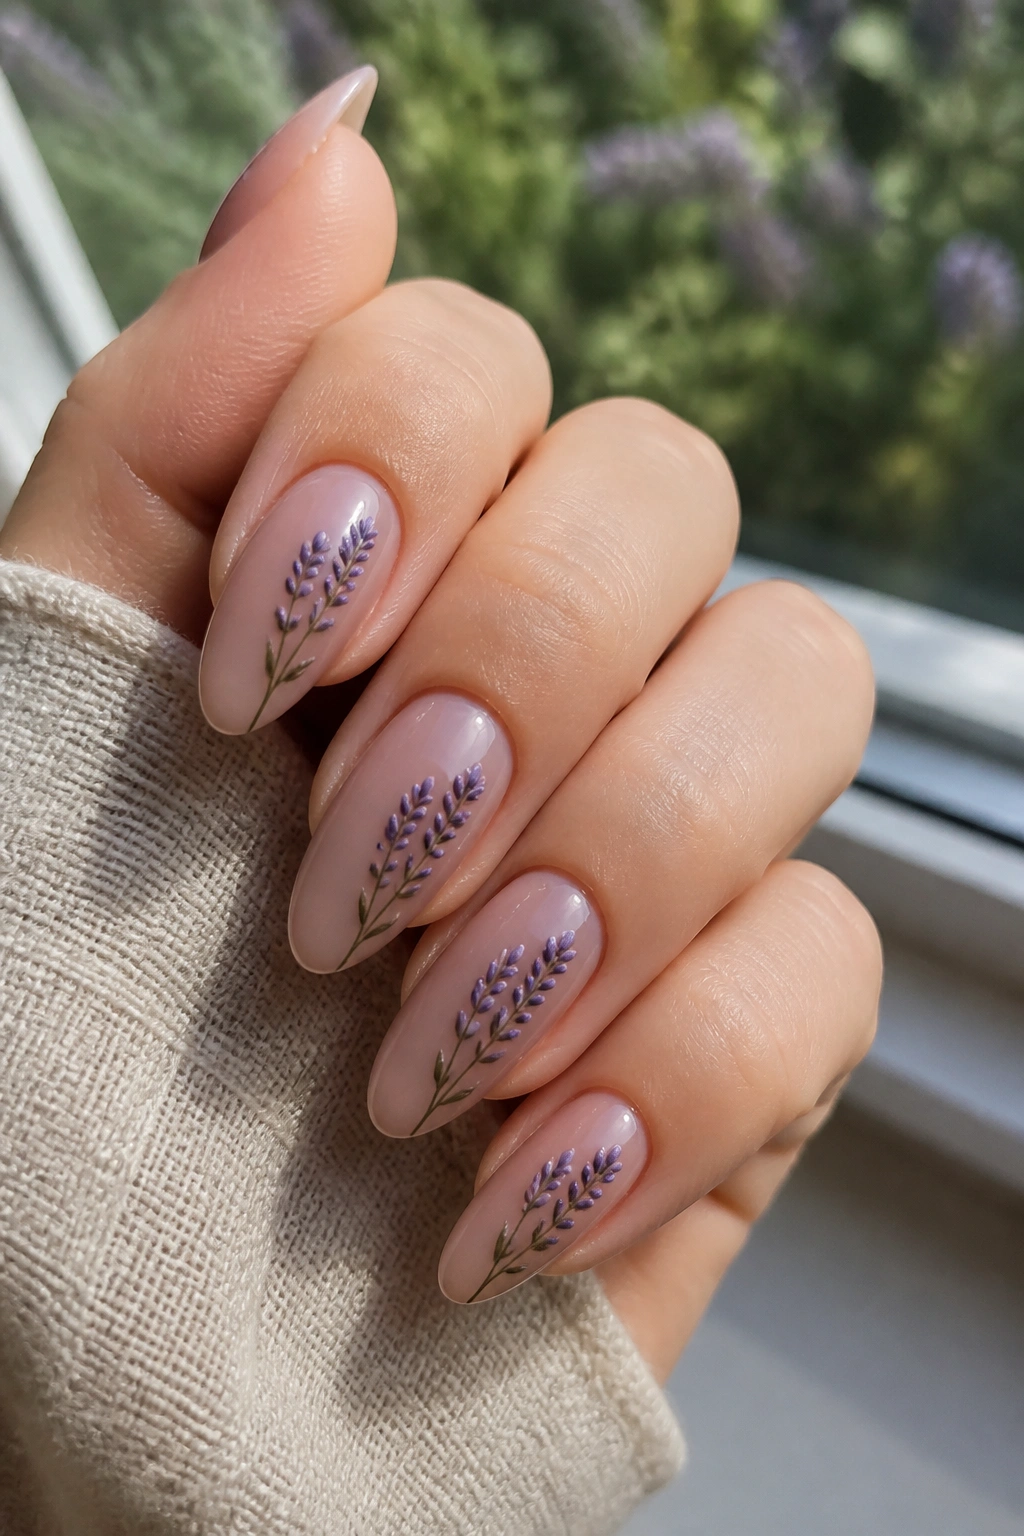
Lavender is the quiet one in the floral set. Unlike daisies or poppies, it does not need a big center or a wide petal shape; it works because the stem is elegant and the little buds sit in a neat, narrow row.
That makes it a strong choice for almond nails. The taper of the nail echoes the long stem, so the design feels natural even when it is very small. A pale nude, dusty mauve, or soft gray base helps the lavender stand out without turning bright.
What Makes It Different
Lavender reads cleaner than a full bouquet. There is less visual noise, which is useful if you like nail art but not a crowded hand. One sprig near the sidewall can carry the whole nail.
A fine liner brush matters here. Thick stems ruin the look fast. Keep the bud marks tiny, almost dotted, and let the negative space do the rest. If the design starts looking like grass, it has gone too far.
This is a good set for people who want floral nails that feel calm, not sugary.
7. Chrome Petals Over Nude Almond Nails
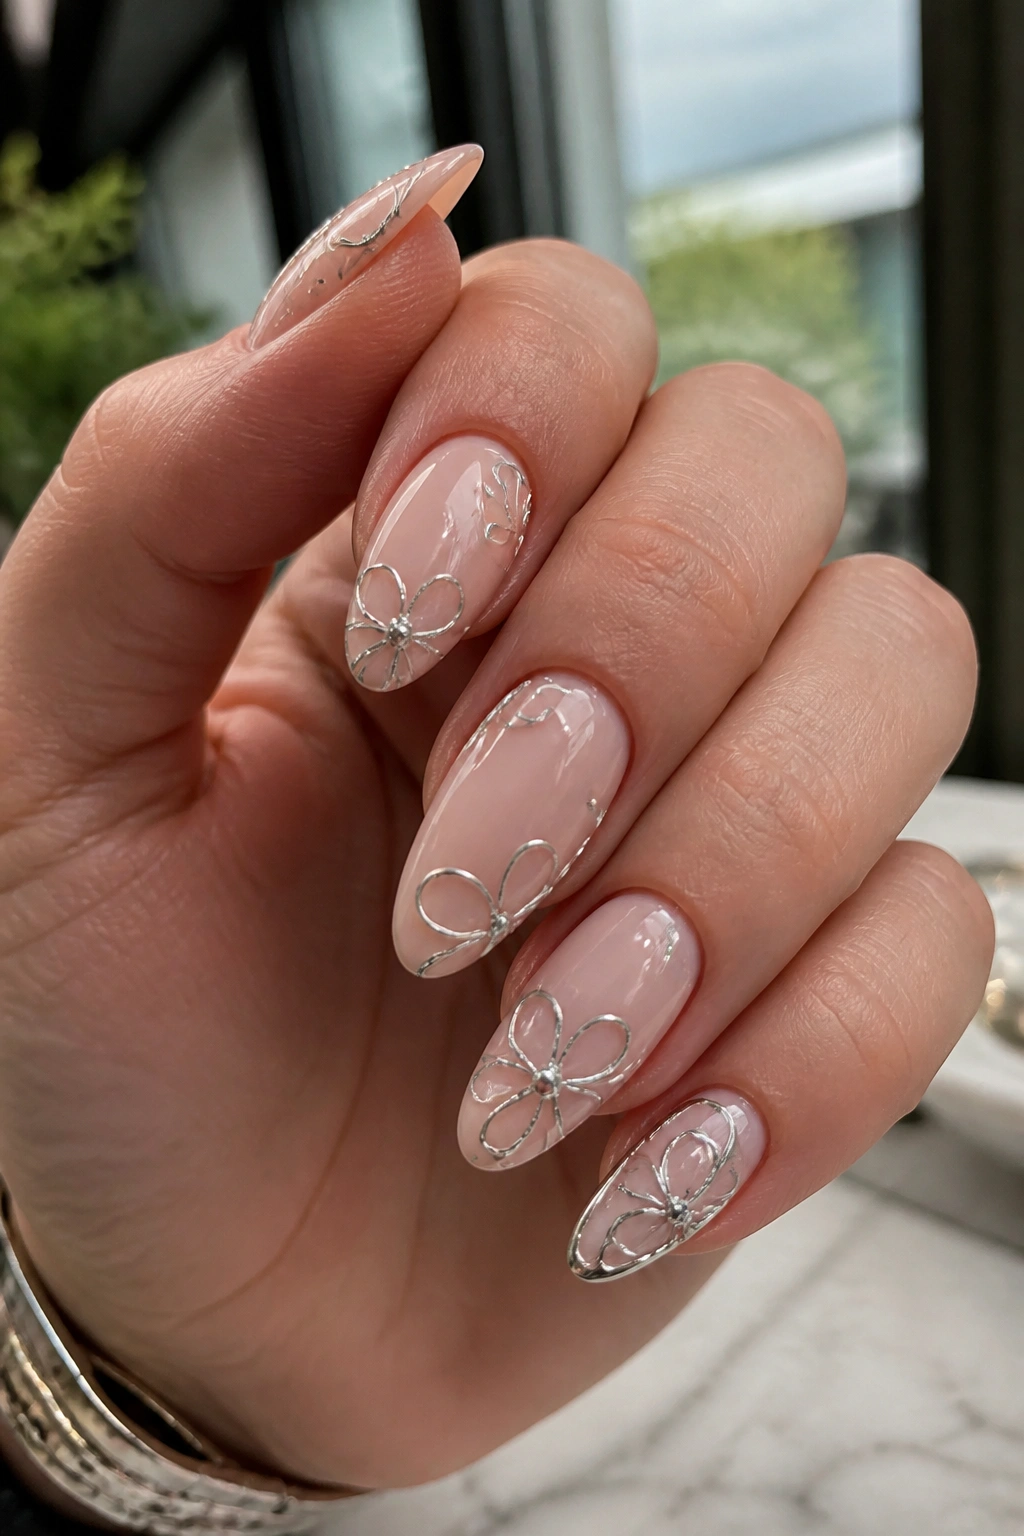
Chrome and flowers sounds like an odd mix at first. It is not. The shine can make the petals look sharper, especially when the flower is drawn as an outline instead of a filled-in shape.
A nude or pale pink base keeps the chrome from overpowering the set. Then silver, rose gold, or soft gold chrome can trace the petal edges or sit in the flower’s center like a metallic bead. On almond nails, that little flash of metal follows the curve nicely.
What Makes It Different
Chrome flower patterns work best when they stay thin. Thick metallic petals feel heavy and can make the nail look more costume than chic. A narrow outline around each petal gives you the shimmer without the weight.
- Choose one chrome shade and repeat it.
- Keep the flowers small enough that the metal does not dominate.
- Add chrome to one accent finger if you want less shine.
- Seal everything with a smooth top coat so the surface stays even.
A glossy top coat helps the metallic lines look cleaner. Without it, the design can feel patchy.
8. Buttercup Yellow Florals On A Clean Pink Base
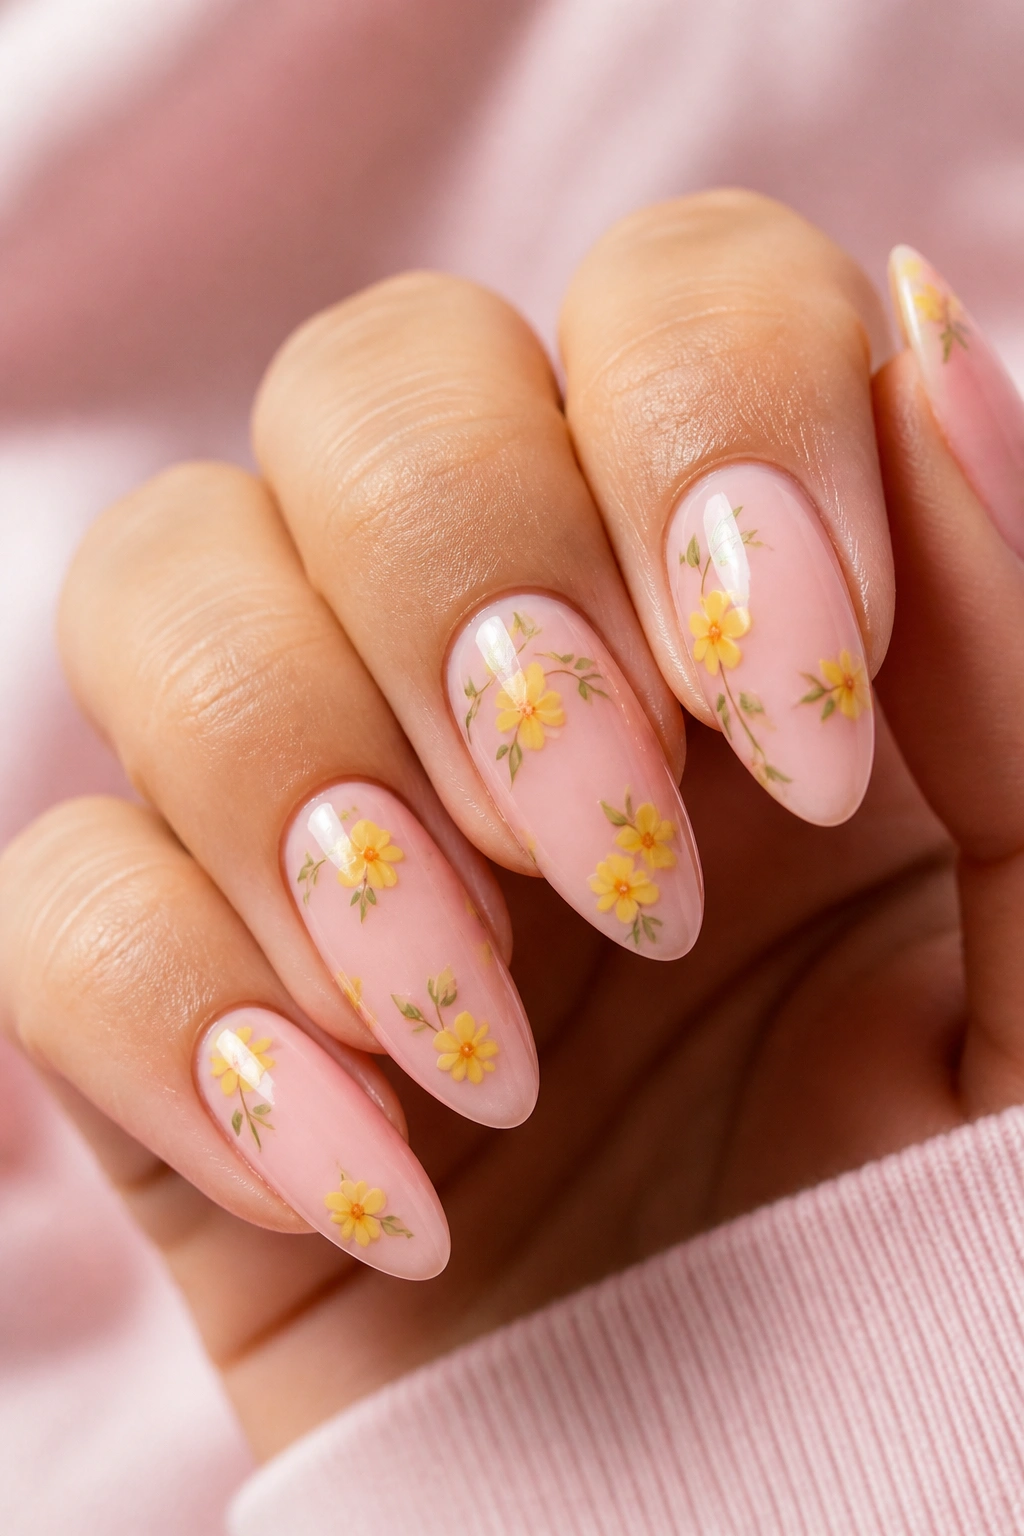
Yellow flowers need room. That’s the whole game. If you pack them too tightly, the design starts looking busy and the cheerful color loses its edge.
A clean pink or milky nude base keeps buttercup yellow from reading harsh. Then tiny round blooms, small dot centers, and a little green leaf or two do the rest. On almond nails, the shape gives the flower an upward sweep that keeps the color from sitting flat.
One or two yellow blossoms per hand is often enough. That might sound restrained, but it is the best way to stop the nails from turning into a wall of color. Leave the pink base visible between flowers.
The nicest detail here is the contrast between the bright bloom and the soft background. It feels sunny, but not loud.
9. Negative-Space Botanical Outlines For A Barely-There Floral Look
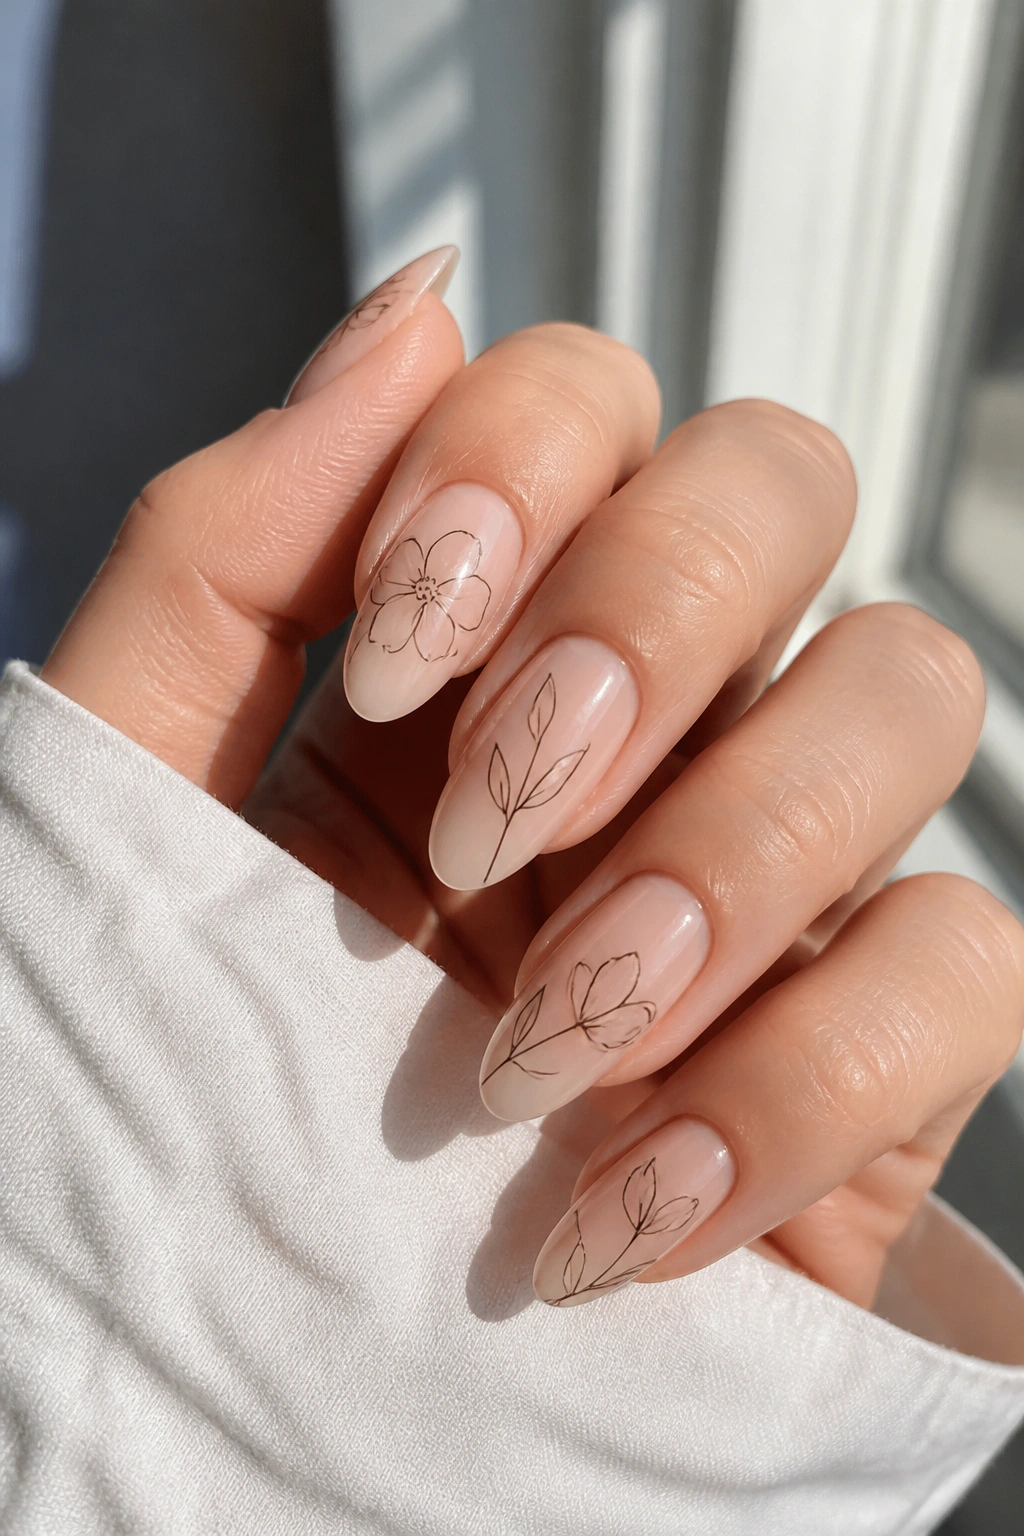
Do floral nails have to be filled in? Not at all. A thin botanical outline on a clear or sheer base can look sharper than a fully painted flower, especially on almond nails where the shape already gives you movement.
The design is simple: trace the outline of petals, add a slim stem or two, and leave the center open. No heavy fill. No crowded shading. The nail keeps most of its bare surface, which makes the flowers feel airy instead of dense.
How To Wear It
Use a very thin liner brush and keep your hand steady. If the line wobbles, the whole design looks sloppy because there is nowhere to hide it. A clear or barely pink base works best since the negative space needs contrast to register.
A couple of outline flowers on the ring and middle finger can carry the full set. The rest can have just a single leaf or a tiny stem. That light touch is what makes this style feel modern without trying too hard.
10. 3D Gel Flower Accents That Sit Just Above The Surface
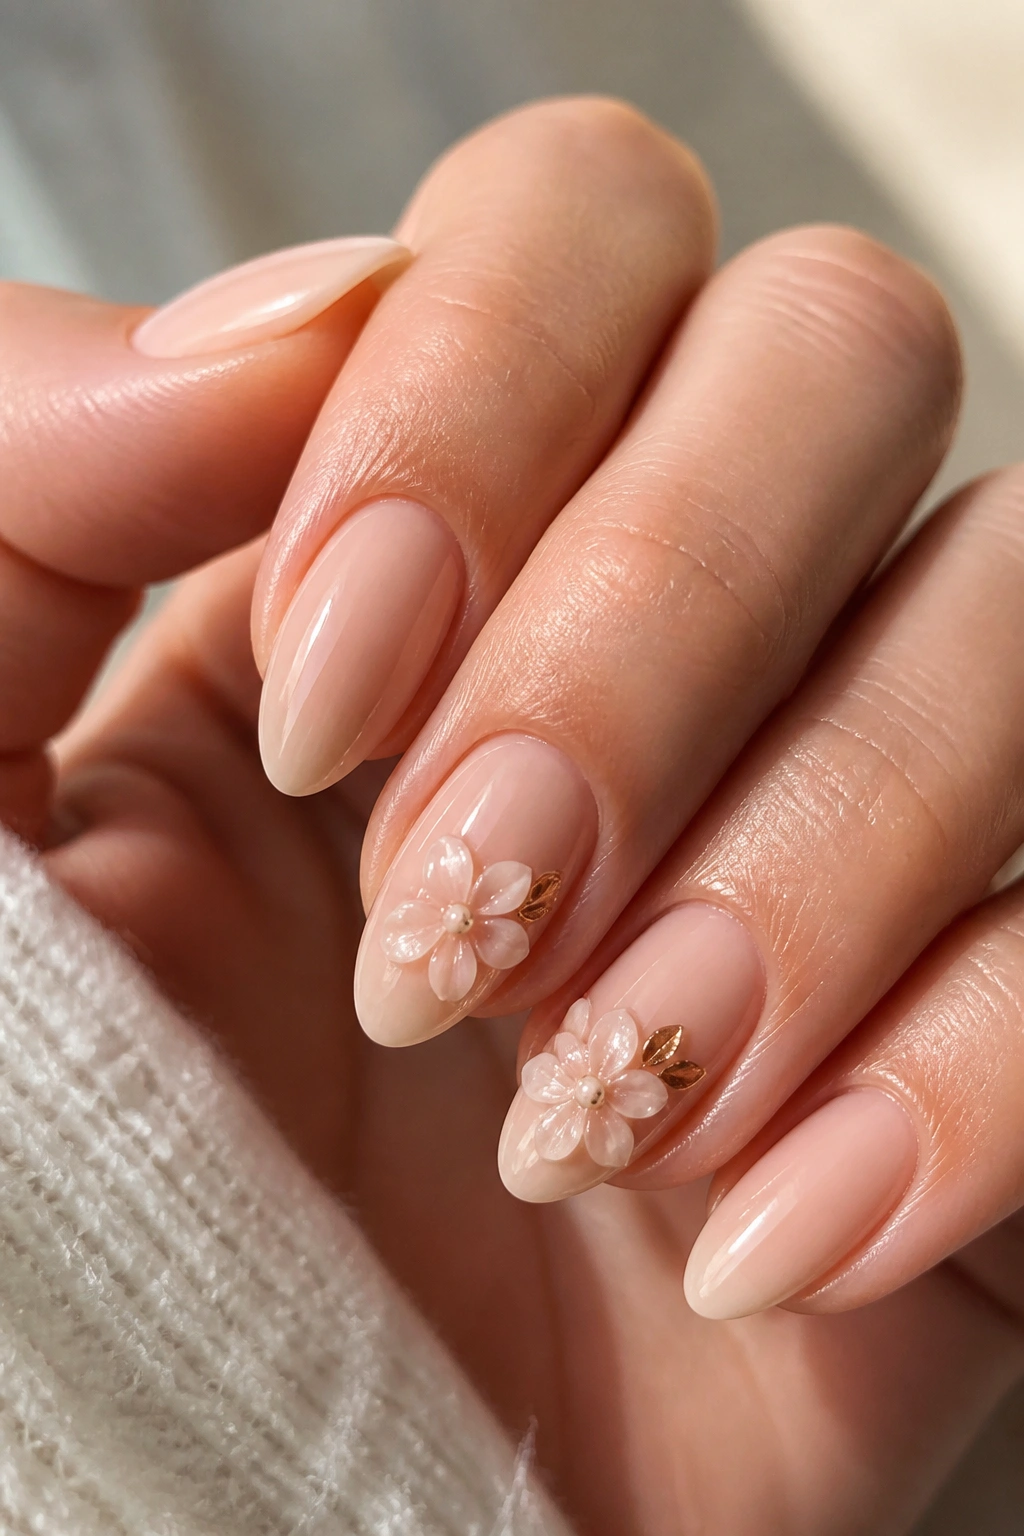
If you like nails you can feel with your fingertips, raised gel flowers are in their own lane. The petals sit just above the nail surface, so the flower catches the eye before the color even does.
A soft nude or pale blush base keeps the 3D detail from turning too busy. Then one or two accent nails get the raised bloom, while the others stay smooth. That contrast matters. A full hand of 3D petals can start to feel bulky fast, and almond nails look better when the texture is selective.
3D work also changes how the manicure reads in motion. The little shadows around each petal make the design more visible than a flat painted flower. It is a good choice if you want something a little more sculpted.
- Keep the raised petals small and rounded.
- Place them away from the nail edge so they do not snag as easily.
- Pair the texture with plain glossy nails on the other fingers.
- Ask for a sealed top layer around the flower base, not over the petals if the sculpt is meant to stay raised.
11. Matte Wildflower Nails With Muted Colors
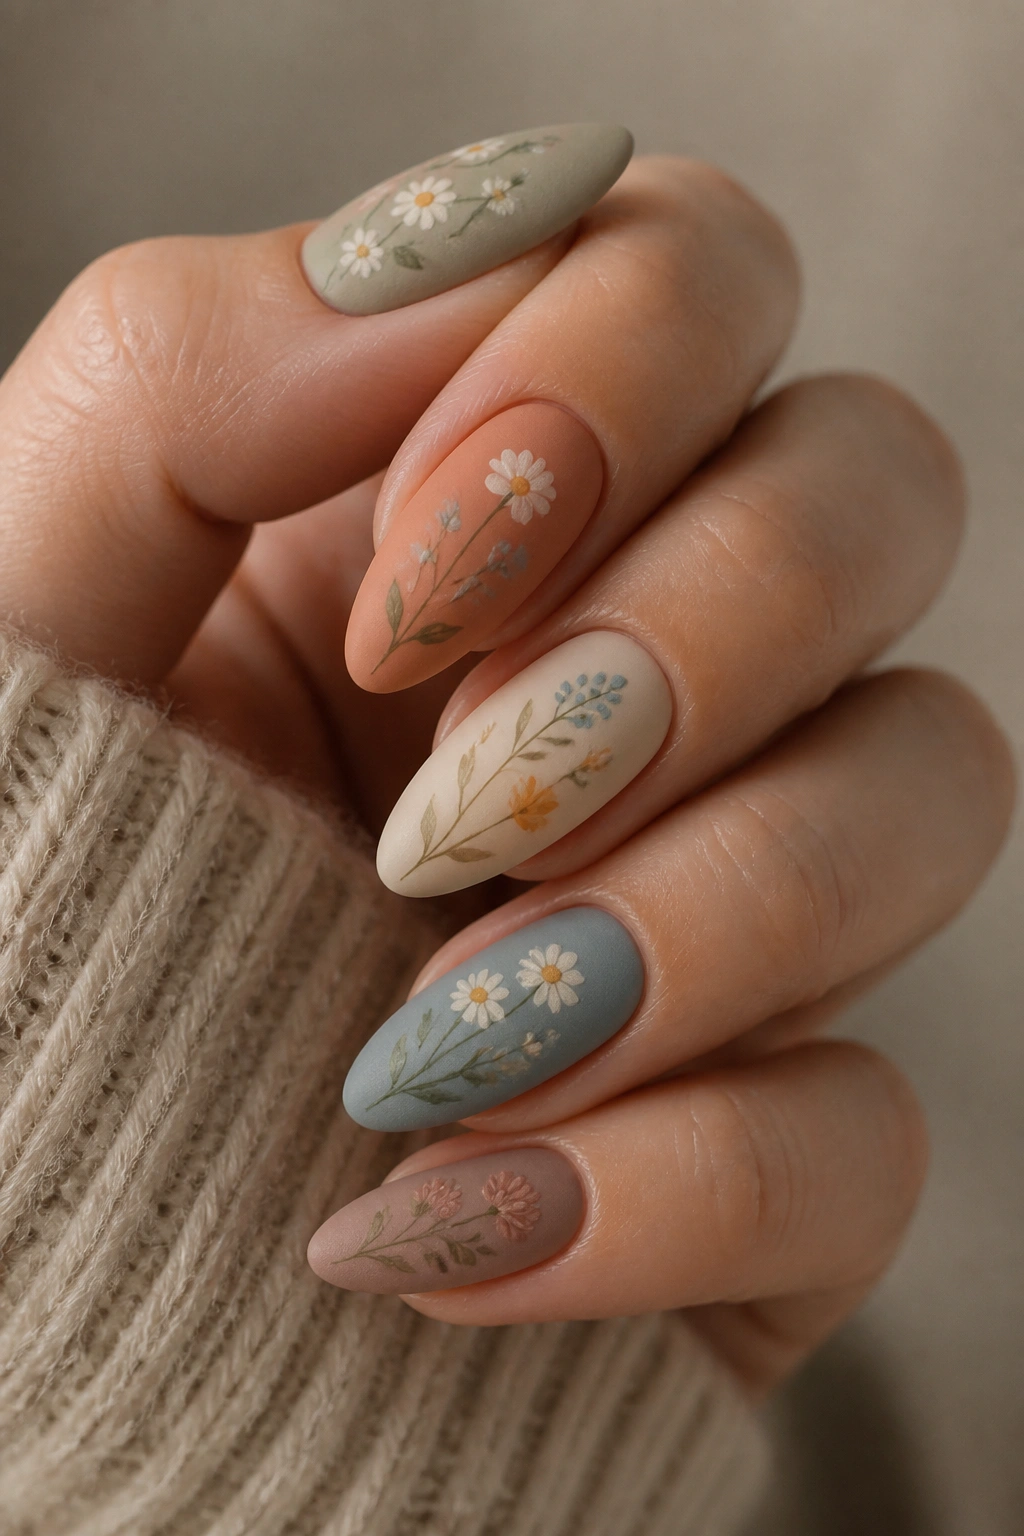
Matte top coat changes floral art fast. Bright petals become softer, tiny stems look chalkier, and the whole nail takes on a dry, painted feel that suits wildflower patterns especially well.
This style works because wildflowers already feel a little loose. You do not need perfect symmetry. A small mix of tiny blossoms, simple leaves, and uneven spacing looks better than a rigid bouquet. On almond nails, the matte finish keeps the design from reflecting too much light, which helps the details show up without shouting.
The color palette should stay muted. Dusty peach, faded blue, sage, and soft cream sit together better than saturated neon shades. That is where the charm is. It feels like a field sketch rather than a poster.
A matte set can also hide tiny brush marks, which is useful if the flowers are hand-painted. Still, the shapes need to stay clean. Matte is forgiving, but not magic.
12. Micro Floral Borders Along The Cuticle Line

Floral borders are a good option when you want nail art that grows out gracefully. Instead of putting the design in the middle of the nail, the flowers sit near the cuticle or run along one side like a tiny garland.
That placement does a lot of work. The eye follows the curve of the almond shape, and the border feels deliberate even when the flowers are small. A sheer pink or milky base keeps the border from looking too heavy.
Compared with full-cover floral art, this style stays neat longer because the design lives near the base. As the nail grows out, the border still looks tidy for a while. That makes it a smart pick for anyone who wants less obvious regrowth.
A line of micro blossoms, a few dots, and a short stem are enough. The border should feel like a frame, not a fence.
13. Peach And Coral Marigold Almond Nails
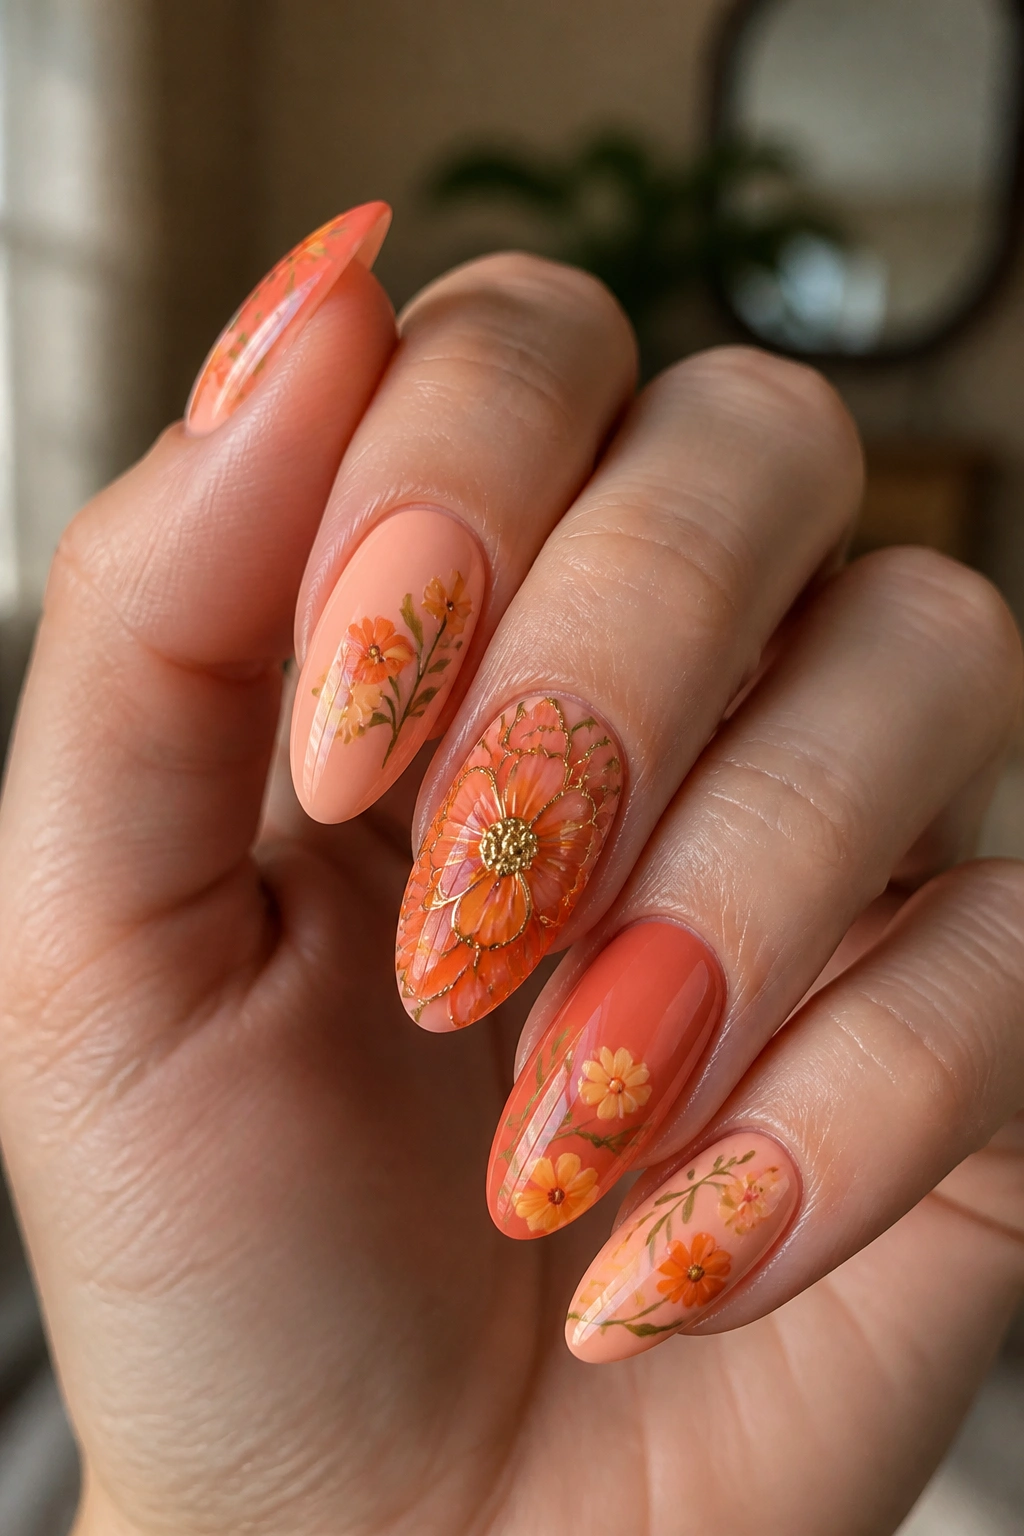
Warm florals are underrated. Peach and coral marigolds bring a softer kind of color than red poppies, but they still look vivid enough to stand on their own.
Why Warm Petals Read So Well On Almond Nails
The almond shape softens the roundness of a marigold petal. That matters more than you’d expect. A flower with a lot of layered petals can look heavy on a square nail, but on an almond tip it picks up motion.
Gold centers work especially well here. They echo the warmth of the petals and keep the flower from looking flat. If you want a little more contrast, add a thin bronze outline around one bloom and leave the rest plain.
A good layout uses one large marigold on an accent finger and smaller blossoms on the neighboring nails. Keep the petals slightly uneven so the flower feels hand-painted, not stamped. That tiny bit of irregularity gives the set a more natural look.
Peach and coral also play nicely with both glossy and satin top coats. Gloss makes the colors pop. Satin softens the whole thing.
14. Black Base Florals With High-Contrast Petals
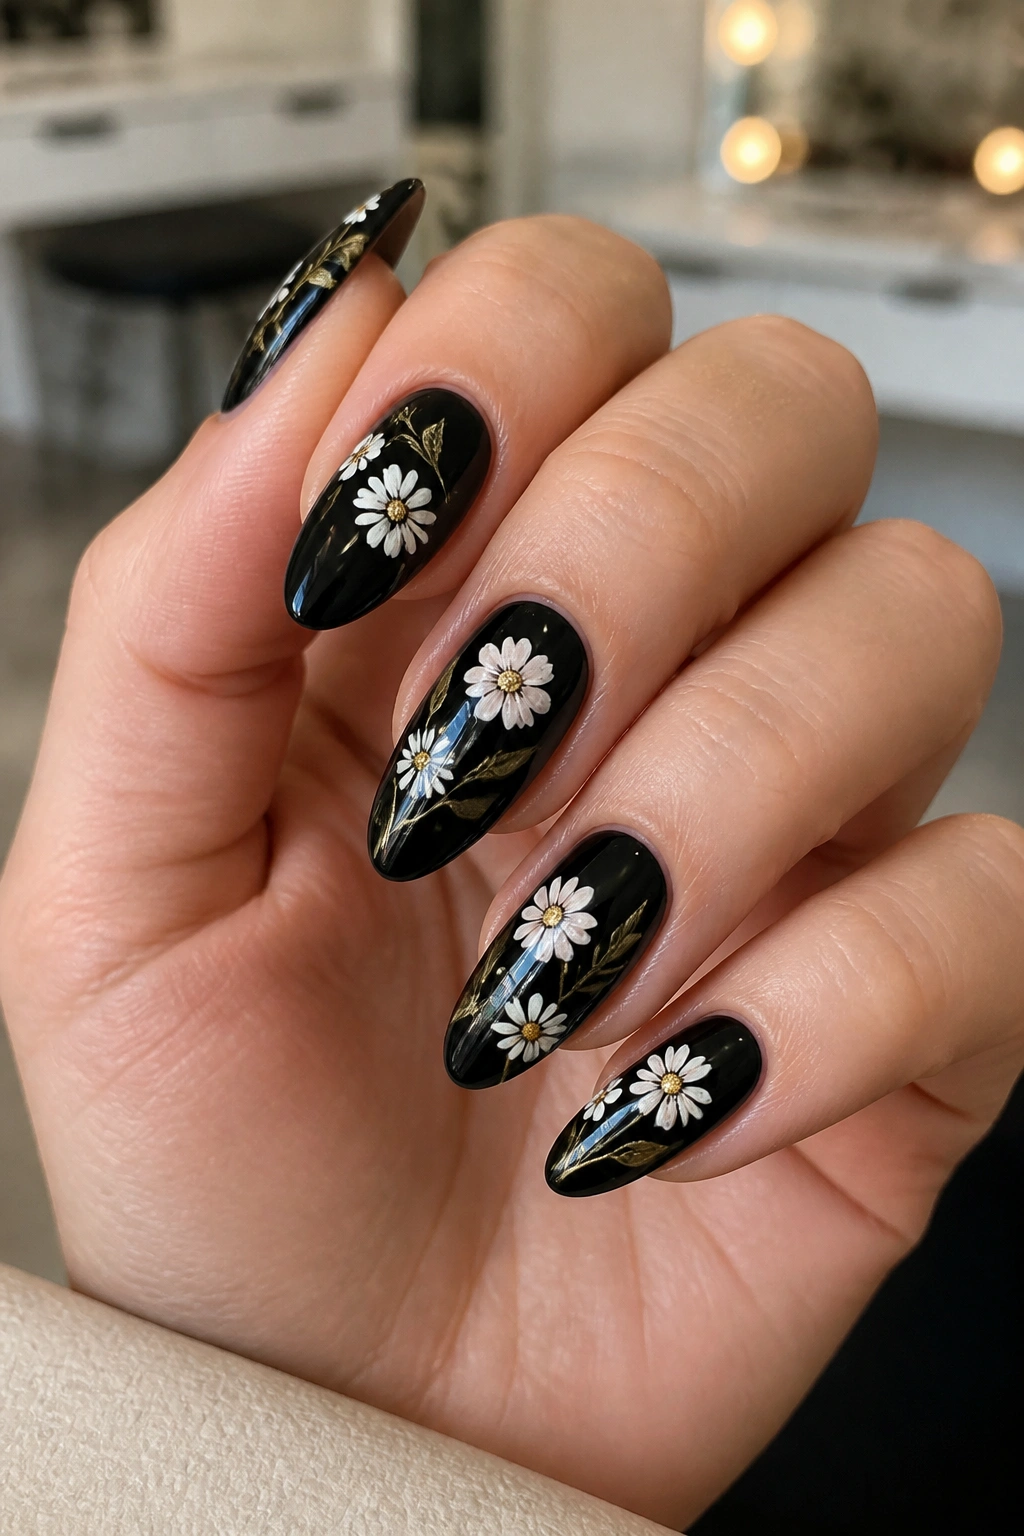
Black base florals are not subtle. That is the point. On almond nails, the dark background turns every petal into a small graphic shape, and the taper of the nail keeps the set from looking too blocky.
White daisies, blush roses, or tiny pale blossoms all stand out sharply against black. The contrast is what makes the design work. A thin stem in green or gold can help balance the dark base, but the flowers should stay the hero.
The downside is practical: black shows dust, chips, and dull top coat faster than softer colors. So the finish needs to be smooth. A glossy top coat is the right move here because it keeps the black looking deep instead of flat and chalky.
This style suits people who want floral nails with a little edge. It is still a flower pattern, but it does not lean sweet.
15. Green Vine Trails That Follow The Almond Shape
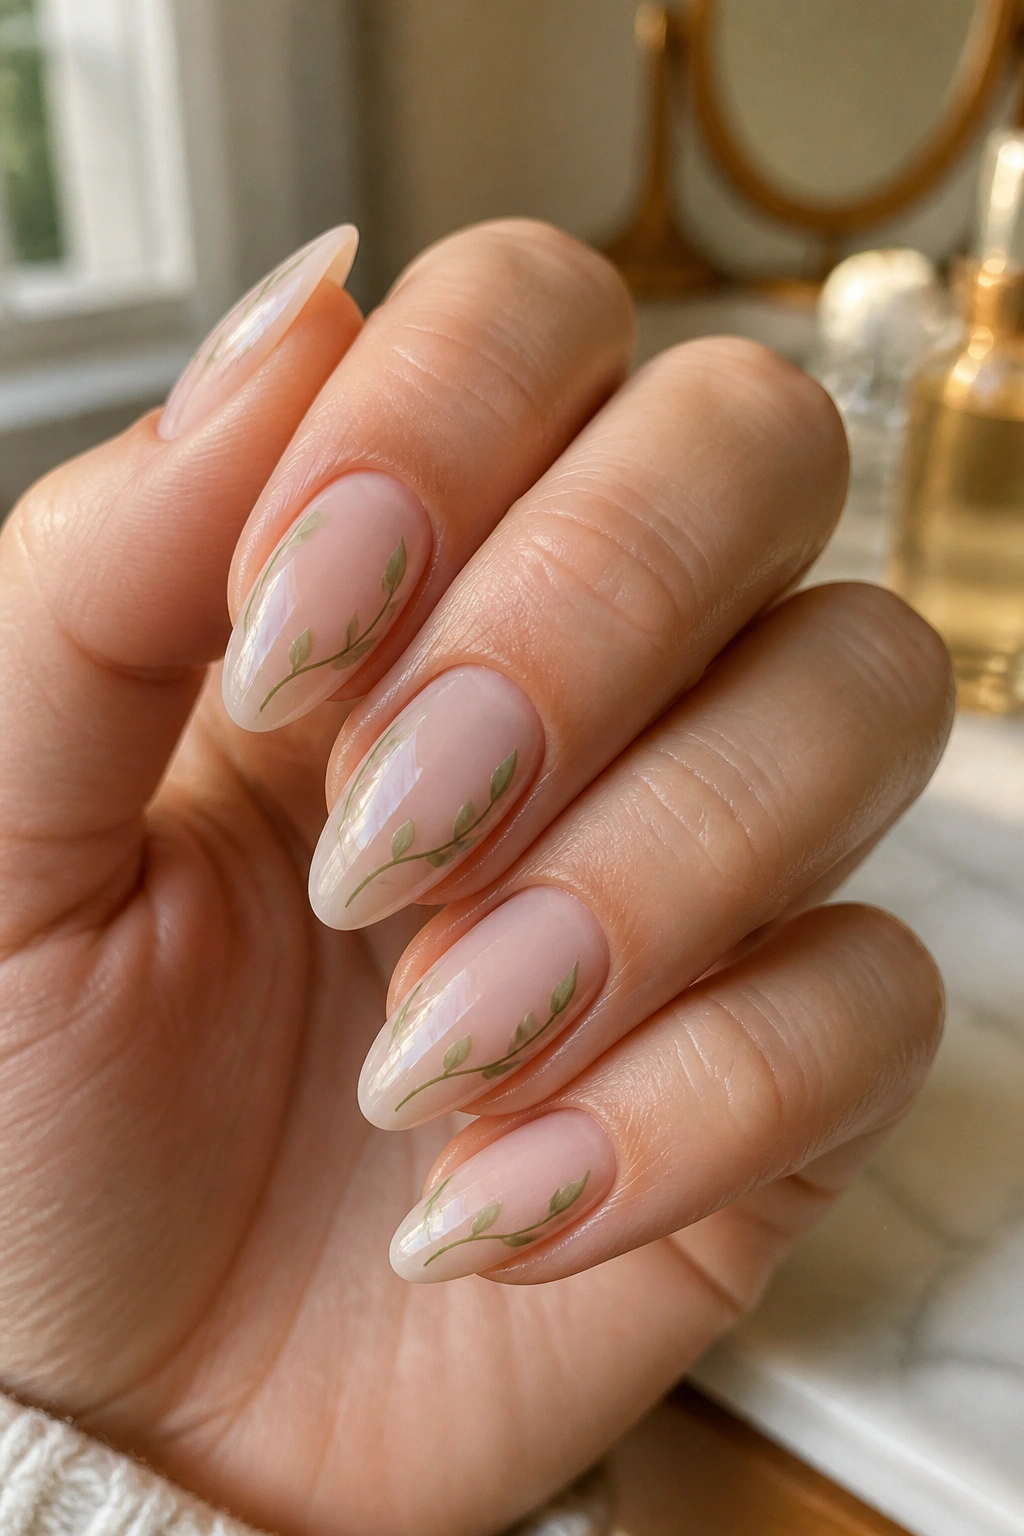
Can a vine pattern carry a full floral set on its own? Yes, and on almond nails it often looks better than a crowded bouquet. The curve of the nail gives the vine a natural path to follow.
A soft sage or olive stem with small leaf buds can sweep from the base toward the tip, then stop before the edge. That stopping point matters. If the vine runs all the way to the tip, the design starts to feel overdrawn. Leave a little space near the free edge so the nail still reads as almond, not covered.
How To Place The Vines
- Start the vine slightly off-center near the cuticle.
- Let it curve toward the sidewall instead of straight up.
- Add leaves in pairs of two or three, not in a dense cluster.
- Keep the stem thin enough that the line disappears from a distance.
A vine pattern is also good when you want a floral look without petals everywhere. It gives you botanical detail with less color, less clutter, and less upkeep.
16. Watercolor Rose Nails With Soft Blended Petals
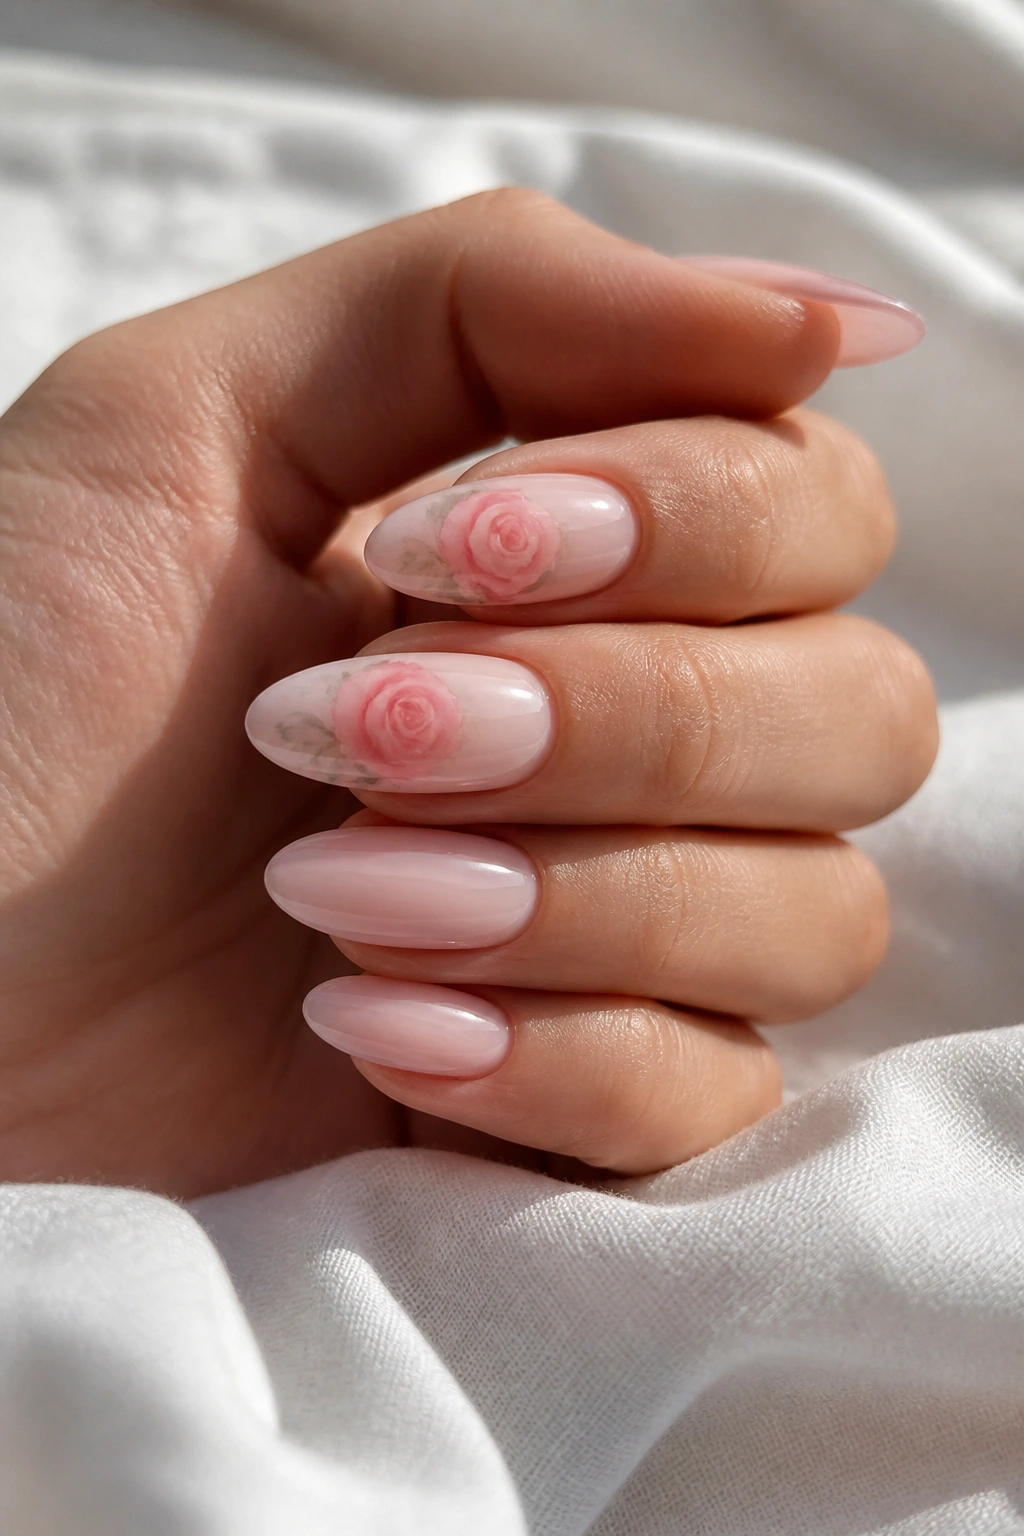
Watercolor roses feel painted, not drawn. The petals blur into each other a little, which gives the design a soft edge that works especially well on longer almond nails.
A sheer pink, nude, or ivory base is the right starting point. Then the rose is built in layers of diluted color: a pale center, a deeper outer petal, and a few soft shadow marks around the edges. The result should look brushed, not stamped. Hard outlines defeat the whole point.
A small watercolor rose on one or two nails is enough. If every nail gets the same treatment, the set can start looking muddy. Keep at least part of the manicure plain so the eye has a break.
Small Details That Matter
- Blend the color while it is still wet.
- Use no more than three shades in the same rose.
- Leave tiny gaps between petals so the flower keeps its shape.
- Pair the rose with a plain glossy nail on the opposite finger.
This is one of those designs that looks more expensive when the hand is light.
17. Pearly Bridal Florals With Ivory Details
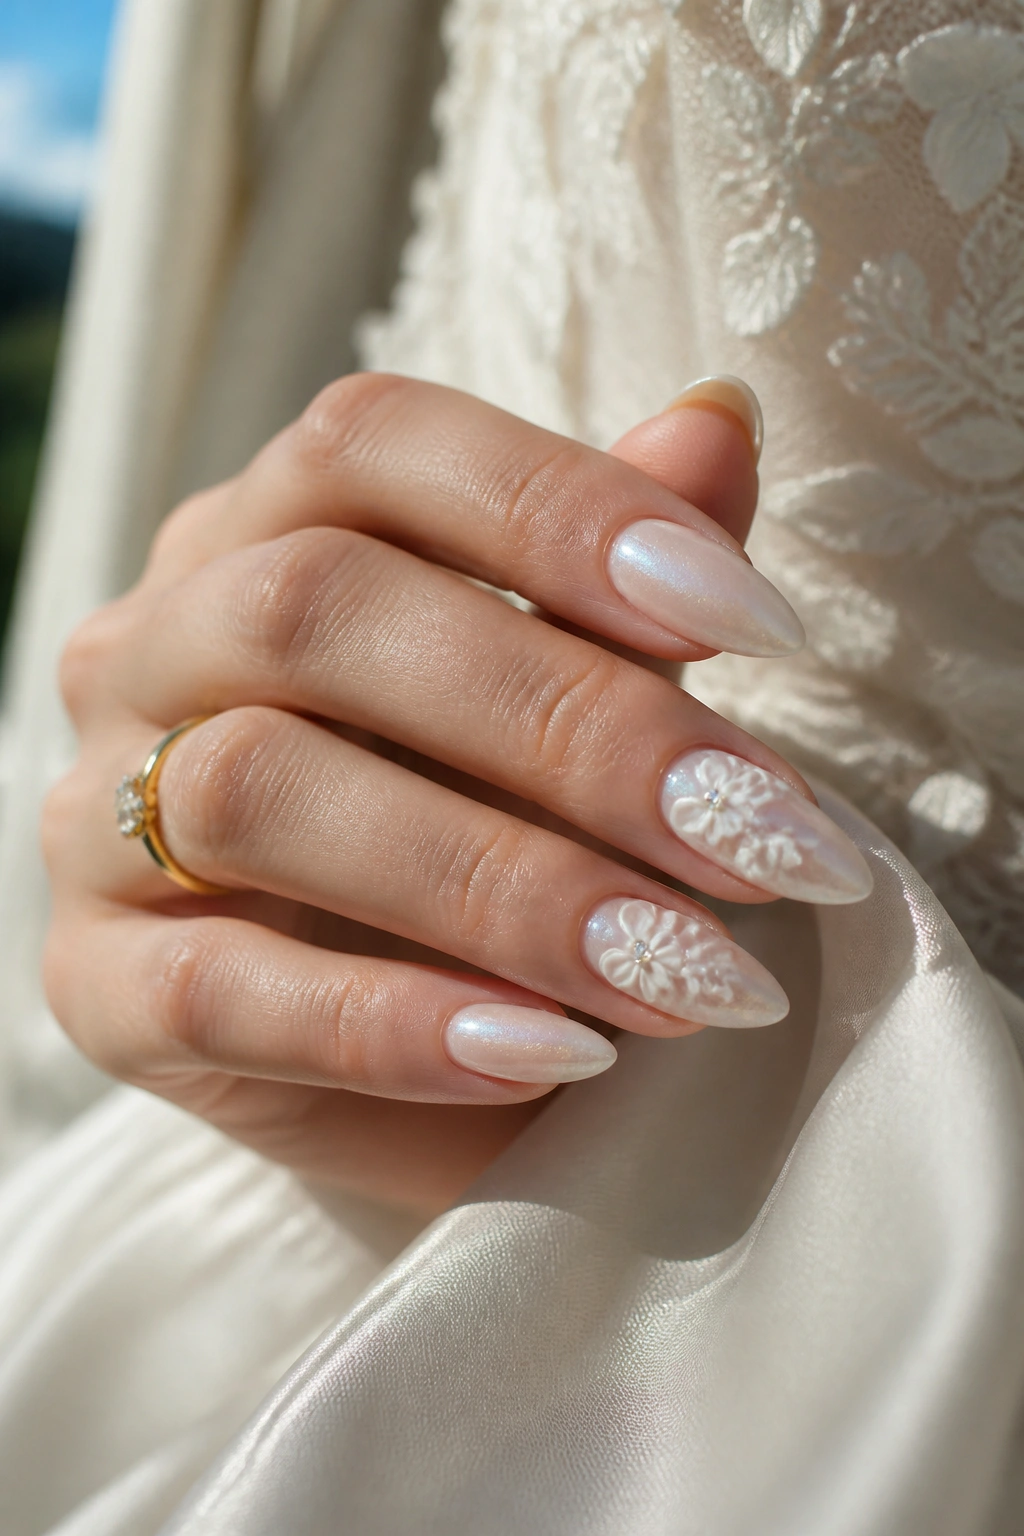
Pearly floral nails are soft in a way that flat white flowers never are. A pearl base gives the manicure a faint sheen, and ivory petals on top keep the whole set looking clean and formal without becoming stiff.
This style works because the details are small. Tiny blossoms, a few clear crystals, or a thin silver dot in the center of one flower are enough. You do not need a full bed of decoration. Almond nails already carry some elegance on their own.
The nicest versions stay close to one color family: pearl, ivory, pale blush, and maybe a trace of champagne shimmer. That narrow range keeps the flowers from looking busy. A glossy finish helps the pearl base move a little under the light, which is where the set gets its polish.
If you want floral nails for a formal event, this is the version that still looks good after the event, not just in photos.
18. Daisy-Chain French Tips That Wrap The Edges
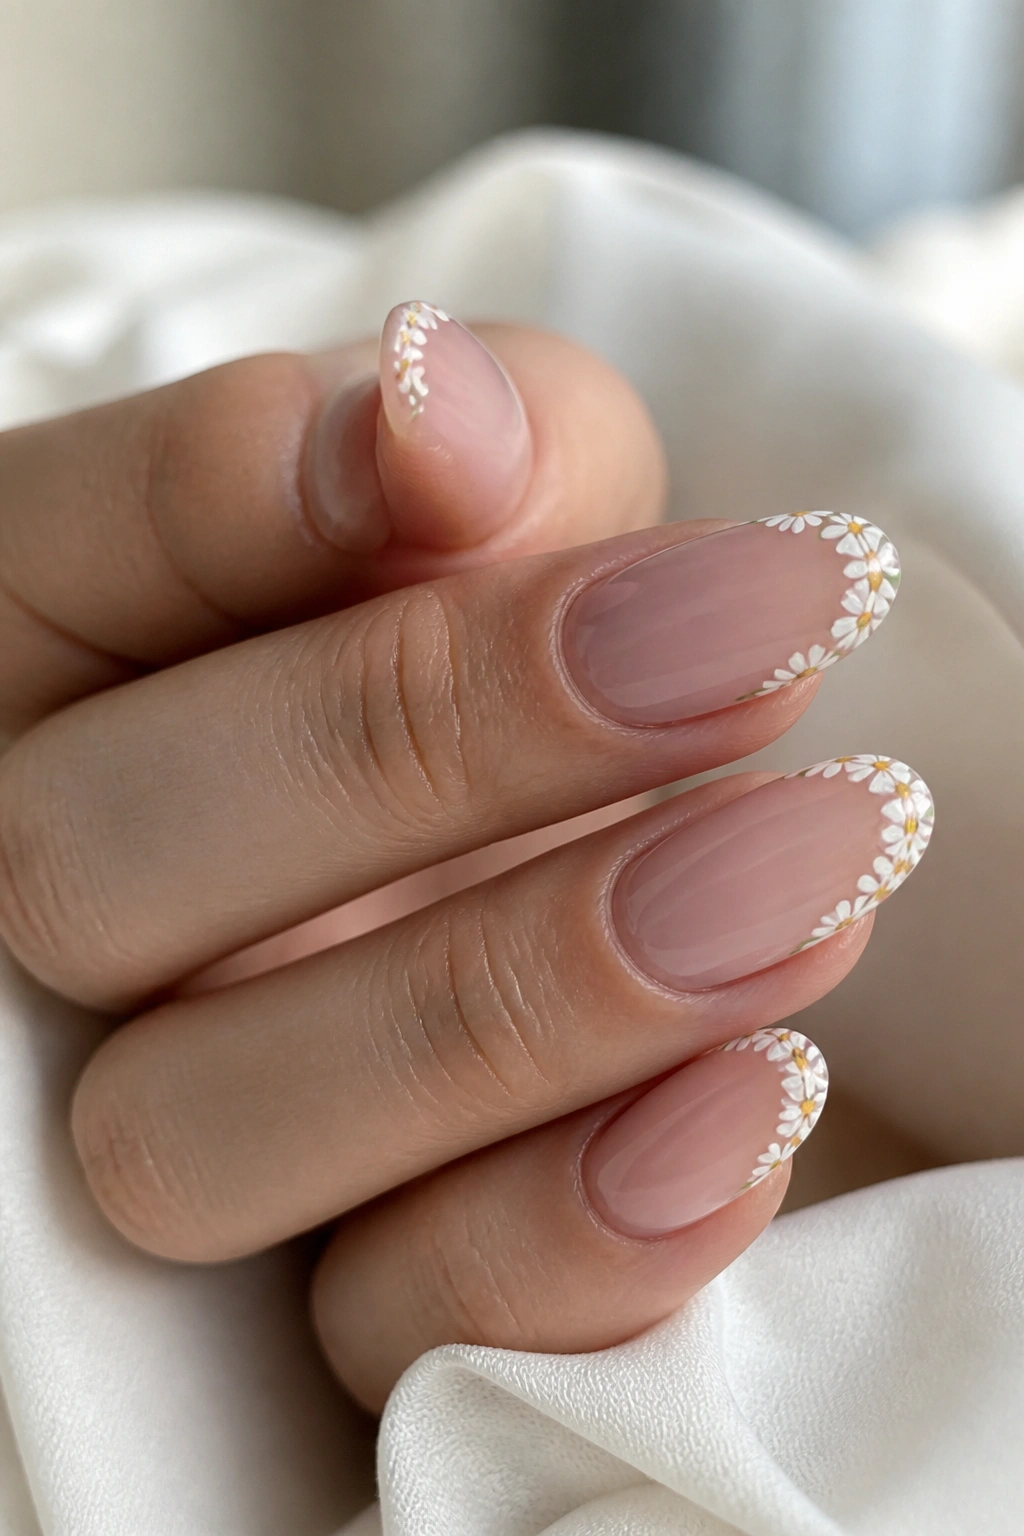
Daisy-chain tips are a smarter twist on the French manicure. Instead of one clean white line, the tip turns into a tiny garland of flowers that follows the curve of the nail.
On almond nails, that curved edge is half the work. The chain can sit right along the tip or slightly lower, leaving the free edge light and airy. A sheer pink base keeps the flowers from feeling crowded. Small yellow centers and thin white petals do the rest.
This design is better than a full floral overlay when you want something playful but controlled. It gives you flower patterns without losing the crisp shape of the nail.
The flowers should stay tiny, almost like little stitched marks. If the petals get too wide, the French edge disappears. Keep the chain consistent across the hand, then vary one nail with a single extra bloom if you want a bit of movement.
19. Tiny Mixed Blossoms With Gold Foil Specks
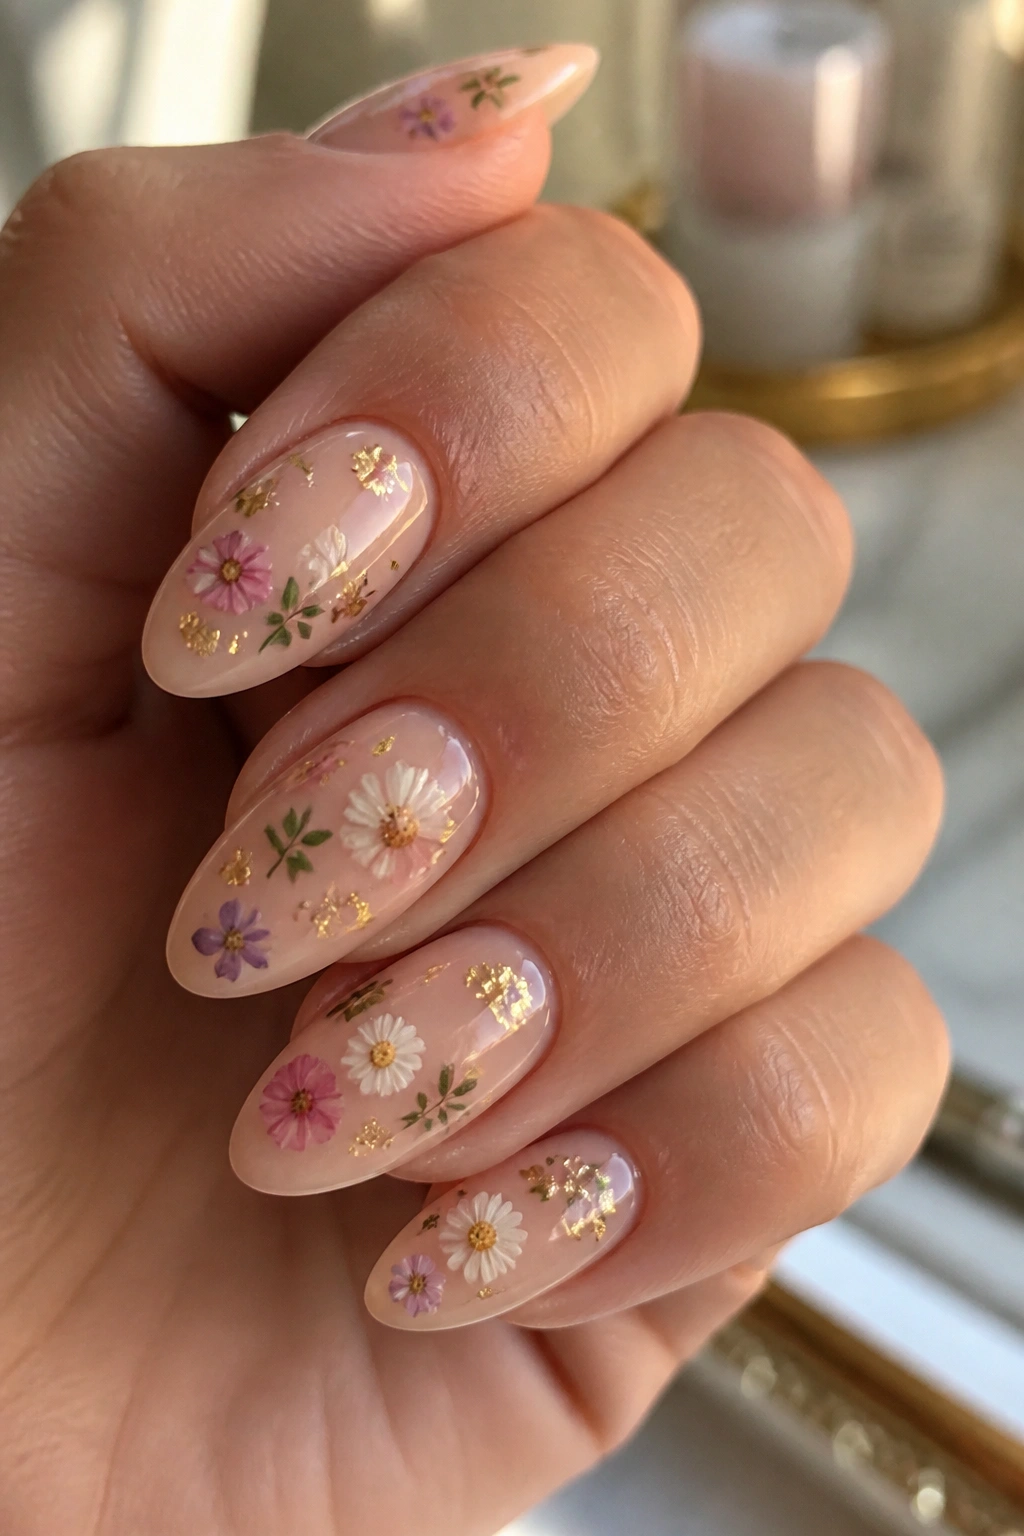
Mixed blossoms can go wrong fast if everything has the same size and weight. The fix is simple: keep the flowers tiny, mix two or three bloom types, and use gold foil sparingly.
A soft nude base works best here because it gives the foil and petals something quiet to sit on. Then add a small daisy, a five-petal blossom, and maybe one rounded bud. The flowers should not fight each other. They should look collected.
How To Keep It Elegant
- Limit foil to one or two specks per nail.
- Repeat the same flower color at least twice.
- Keep one nail almost bare so the set can breathe.
- Use foil near the center or sidewall, not everywhere.
The gold should feel like a glint, not a layer. That little flash makes the floral set feel finished without turning it into glitter art.
20. Seasonal Herbarium Nails With Mixed Floral Patterns
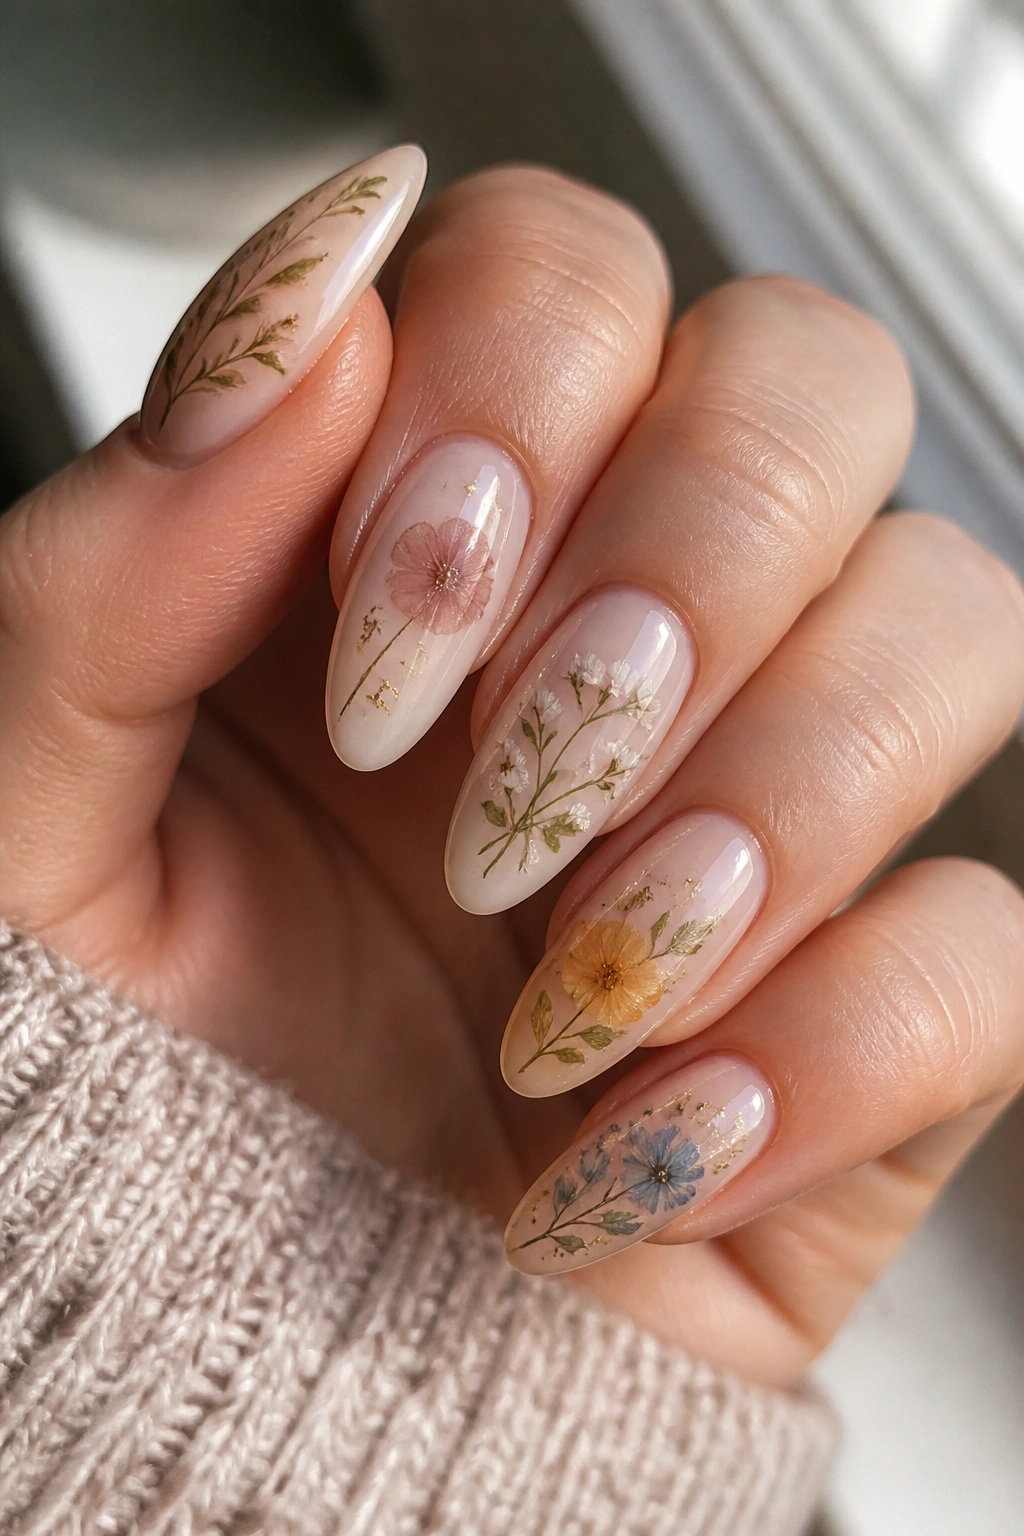
The strongest floral almond sets feel collected, not crowded. That is what makes herbarium-style nails so satisfying: each nail looks a little different, but the colors, stems, and scale still belong to the same family.
Think of this design as a small pressed collection spread across the hand. One nail can hold a narrow leaf stem, another a tiny blossom cluster, another a single petal with a thin gold line. The variety gives the set interest. The restraint keeps it from turning messy.
A muted palette helps most here. Sage, dusty rose, pale apricot, cream, and a touch of faded blue can all sit together if the base is sheer enough. A glossy top coat makes the tiny details look crisp; matte makes the whole thing feel more like dried paper. Both can work. Gloss feels fresher. Matte feels softer.
Keep the heaviest detail on the ring finger or middle finger, then let the rest of the nails taper down in complexity. That way the hand reads as one piece instead of five competing little canvases. If you want a floral almond manicure that stays interesting from every angle, this is the one worth saving for last.
