

Short almond nails and butterfly art belong together in a way that almost feels unfair to every other manicure idea. The shape already has that soft, tapered line that makes even a simple polish look cleaner and more intentional. Add butterflies—tiny wing details, fluttery outlines, little flashes of color—and the whole look picks up movement. Not fake movement. More like visual lift. Your nails start to feel a touch lighter, a little more styled, and a lot less generic.
I like short almond nails for one practical reason that never gets enough respect: they survive normal life. You can type, open cans, button jeans, dig around in a tote bag, and still keep the manicure intact longer than you would with a longer shape. And butterfly art works especially well on shorter nails because it doesn’t need acres of space. A partial wing, a micro decal, a single accent nail, a fine black outline across a nude base—done right, that’s all it takes.
There’s also something oddly flexible about this combination. It can lean soft and romantic, sharp and graphic, playful, clean, moody, or bridal depending on the color palette and how the butterfly shows up. That’s the part I keep coming back to. People hear “butterfly nails” and picture something overly sweet. Sometimes, sure. But a black-and-sheer butterfly set on short almond nails can look more polished than cute.
If you’re trying to pick a design that feels wearable but still has personality, this category has range. A lot of it.
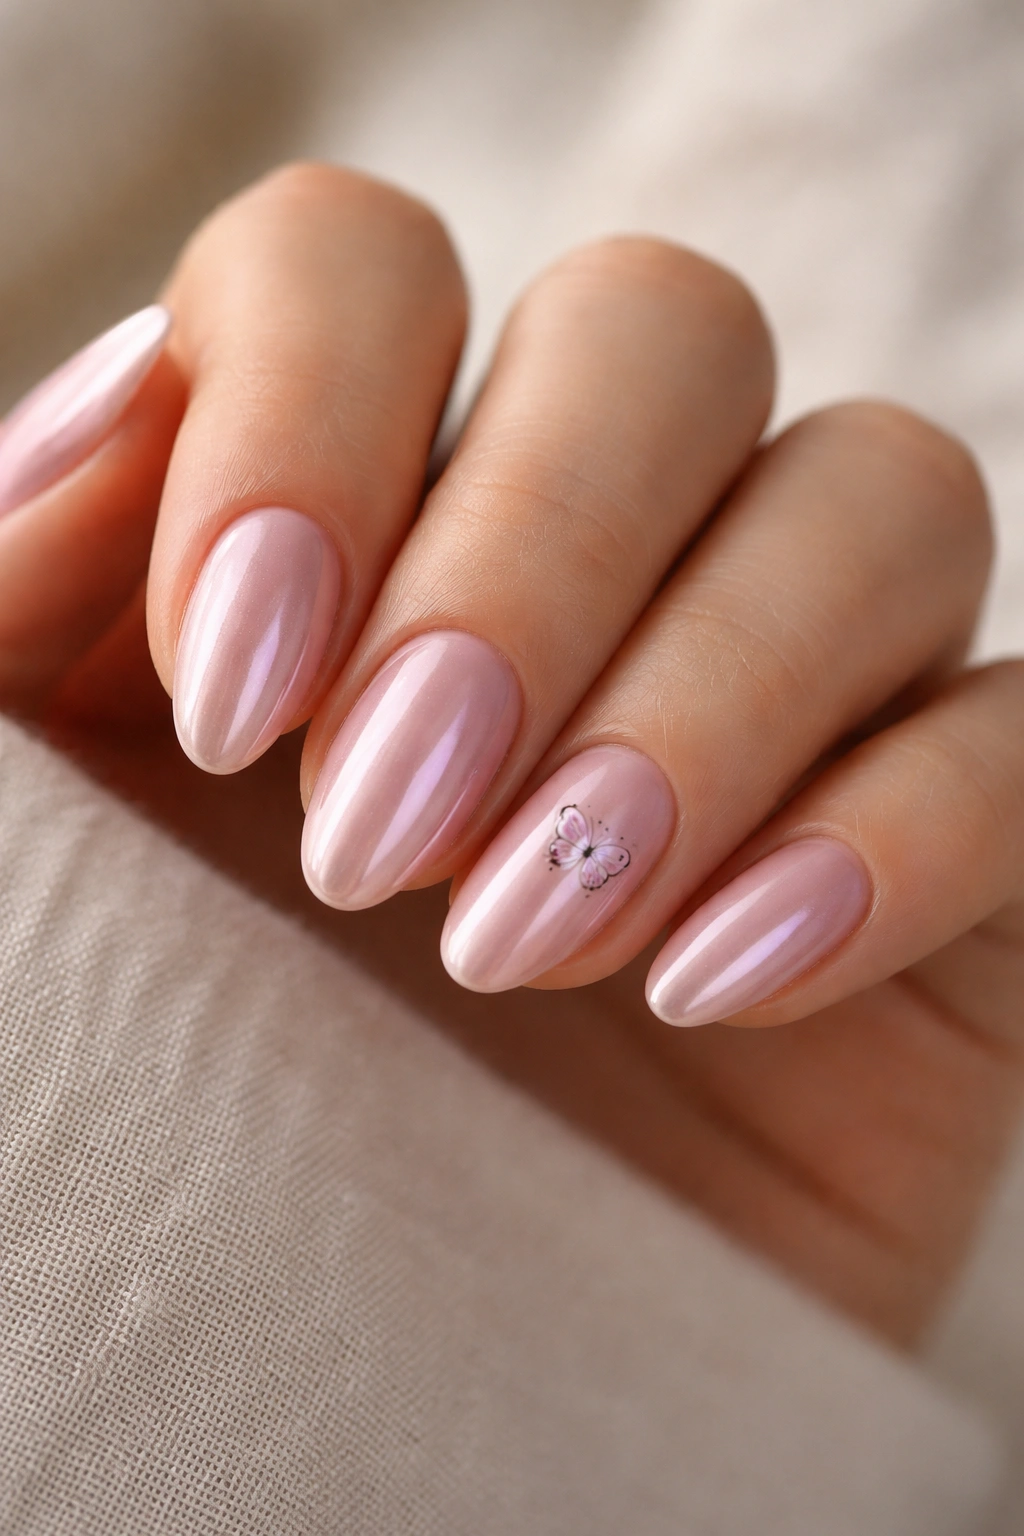
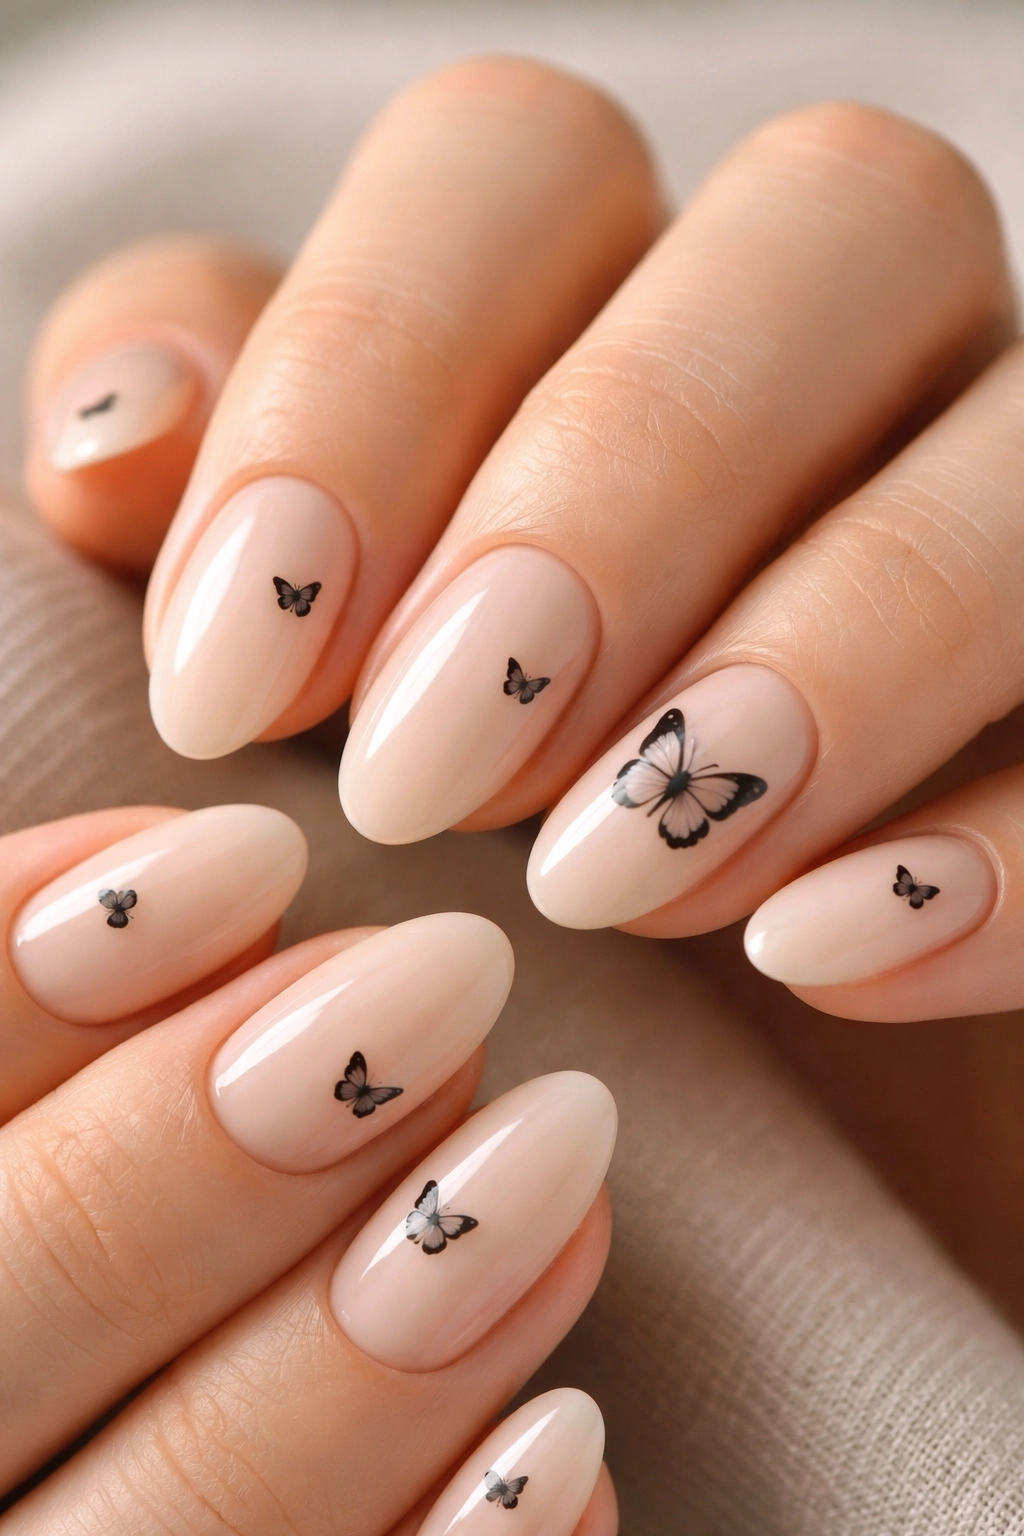
1. Milky Nude Nails With Tiny Black Butterfly Decals
If you want a design that looks expensive without trying too hard, start here. A milky nude base with tiny black butterfly decals is one of the cleanest versions of short almond nails with butterfly art because the contrast does most of the work for you. The base softens the nail and blurs imperfections, while the black detail keeps it from drifting into bland territory.
What makes this one work is scale. On a short almond shape, large butterfly art can crowd the tip and make the nail look stubby. Small decals—placed off-center, near one sidewall, or floating near the tip—keep the shape looking long. You get visual detail without making the design feel crowded.
Why this design looks sharper than it sounds
Black on milky nude reads crisp. Not harsh. There’s a difference. The softness of the base acts like a filter, so the butterfly art lands as refined instead of cartoonish.
A good nail tech will usually place:
- One full butterfly on an accent nail
- Half-wing details on two neighboring nails
- Minimal black dots or stars to fill negative space
- A glossy top coat to sharpen the contrast
Best pick for: office-friendly nail art, low-maintenance manicures, and anyone who wants butterfly nails without pastel overload.
2. Soft Pink Almond Nails With White Butterfly Wings
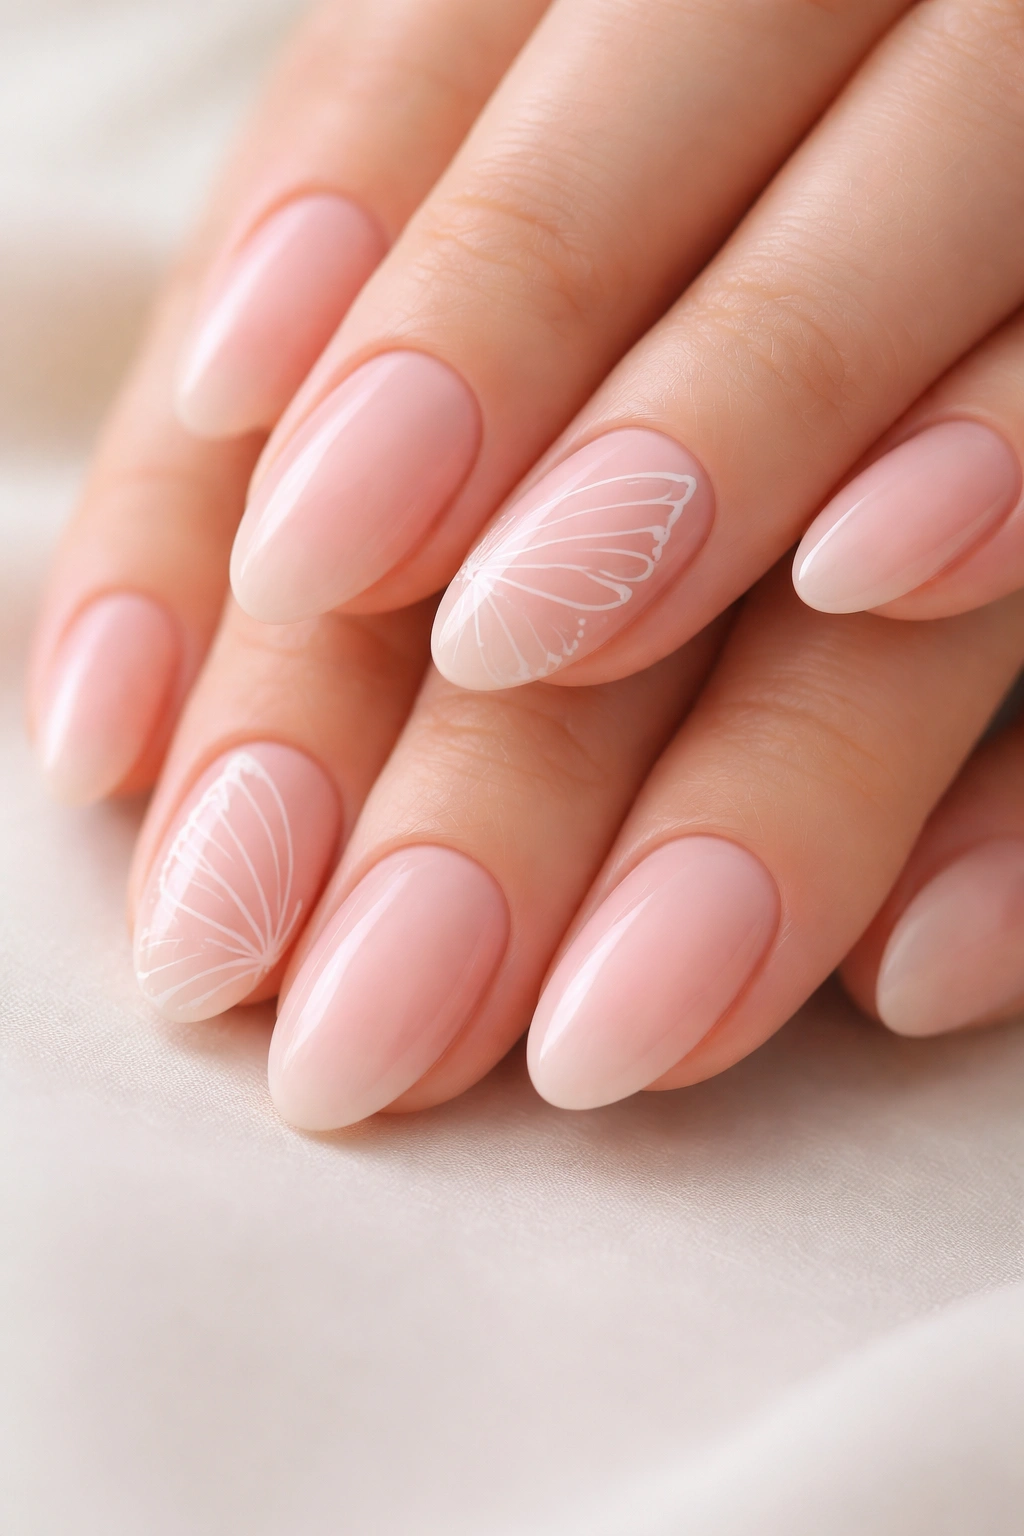
This one has a sweeter mood, but it doesn’t have to look juvenile. Soft pink almond nails with white butterfly wings work best when the pink is translucent or jelly-like rather than bubblegum opaque. You want that clean, flushed tone that makes the nail bed look healthy.
White wing art has a lighter hand than black linework. It almost disappears from a distance, which is exactly why it works on short nails. Up close, the details show. From across the room, the manicure still looks neat and simple.
I’d keep the wing art thin—fine lines, not thick painted blocks. A short almond nail doesn’t give you much room to recover from chunky detailing.
And this is one of those designs that pairs well with a slightly softer almond shape, not a dramatic narrow taper. The gentler curve makes the whole manicure feel airy.
How to keep it from looking flat
The trick is layering texture, even if the color stays subtle. You can add:
- A sheer pink base in two coats
- White wing outlines on 2 to 4 nails
- A tiny crystal at the center of one butterfly
- Either a glossy top coat or a soft satin finish
If you’re doing these at home, a white stamping gel or ultra-fine nail art pen helps more than a standard polish brush ever will.
3. Clear Pink Jelly Nails With Floating Blue Butterflies
Some designs look best when they don’t try to fill the whole nail. Clear pink jelly nails with floating blue butterflies are a good example. The jelly base gives the nails a glassy, translucent finish, and the blue butterflies appear to hover rather than sit heavily on top.
Blue is an underrated choice here. People default to pink, lavender, or white butterfly art, but blue—especially cornflower, sky blue, or a faint periwinkle—has more visual snap against sheer pink. It wakes the whole set up.
What makes jelly polish work on short almond nails
Jelly finishes create depth. Even on a short nail, that translucency gives the manicure more dimension than a flat cream polish would. It also helps butterfly decals or hand-painted wings look embedded rather than pasted on.
A few placement ideas I love:
- A single butterfly near the cuticle on the ring finger
- Two mini butterflies drifting diagonally across the middle and pinky
- One half-wing on the thumb edge
- Bare nails in between to keep breathing room
You do not need butterfly art on every finger. Actually, you probably shouldn’t.
Too much blue detailing across all ten nails can start to look busy fast, especially on shorter lengths. Restraint helps this set look fresh.
4. French Tip Almond Nails With Butterfly Accent Wings
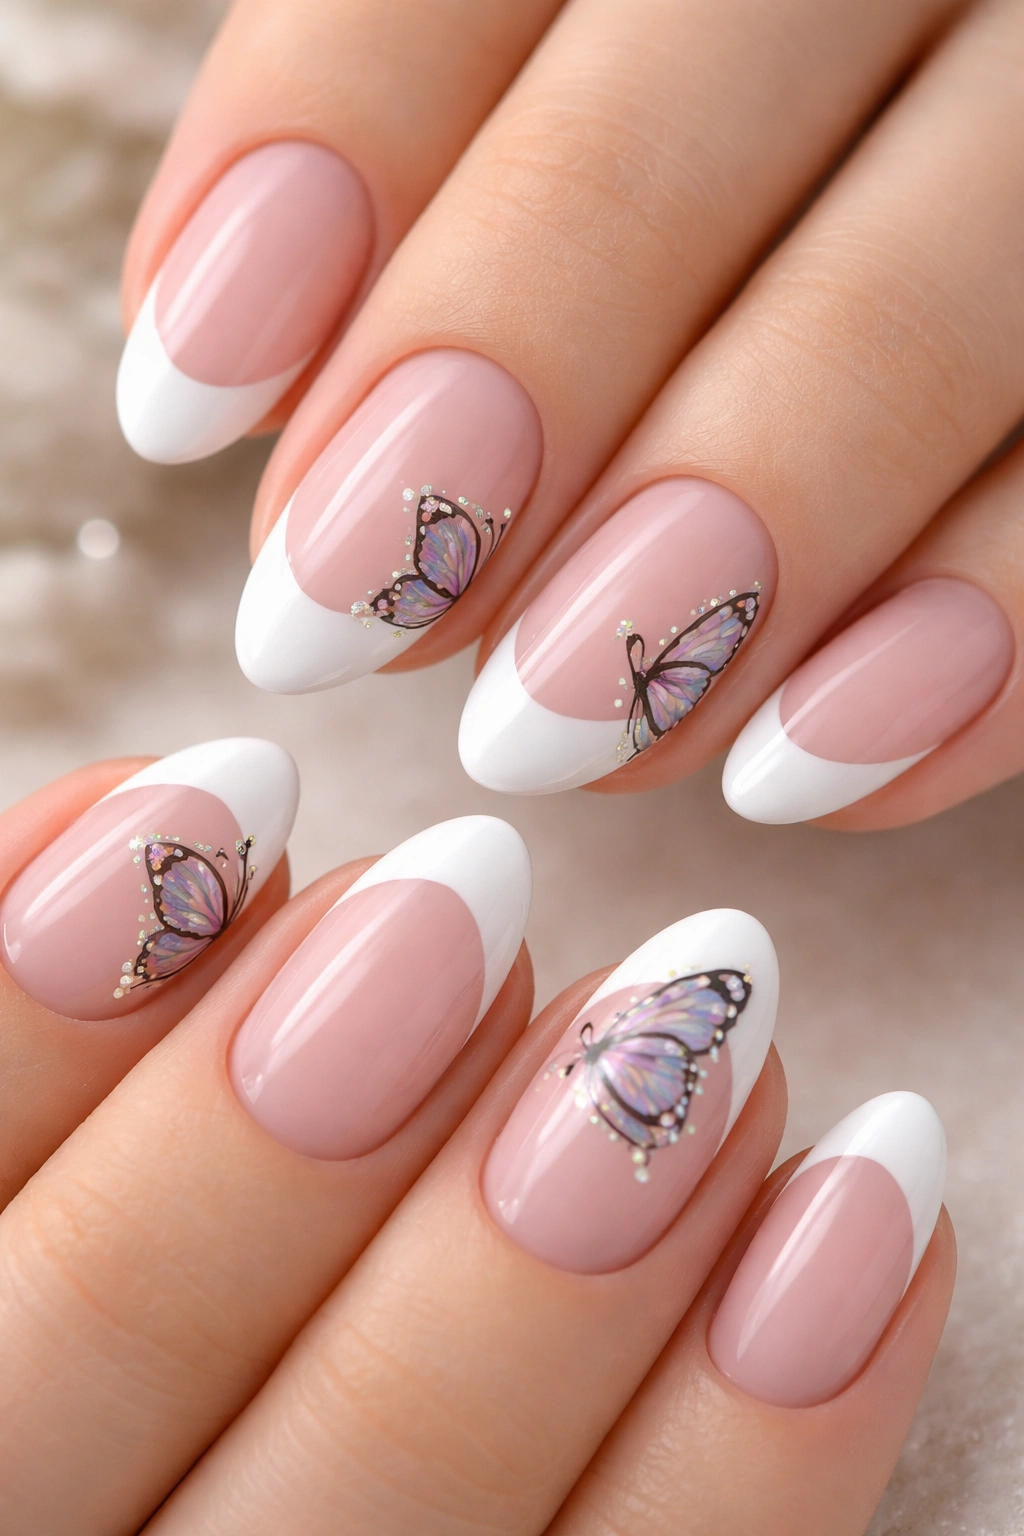
French tips and butterfly art should be paired more often. Short almond French tips with butterfly accent wings manage to look classic and decorative at the same time, which is harder to pull off than it sounds.
The base stays familiar: sheer pink, beige nude, or milky neutral. The tip can be bright white, soft white, or even micro-French thin. Then the butterfly art shows up as a wing detail crossing the tip line or sitting at the outer corner of one or two nails.
That crossing-line effect matters. It ties the butterfly into the French design instead of making it feel like a sticker added at the last minute.
Good ways to structure this set
A balanced layout might look like this:
- Index and pinky: slim French tips
- Middle finger: full French with a partial butterfly wing
- Ring finger: one small butterfly over a nude base
- Thumb: plain French or tiny dotted accent
The less symmetrical it is, the better it tends to look. Perfectly repeated butterfly placement can make nail art feel mass-produced. A little unevenness—done on purpose—usually reads more custom.
This set is strong for weddings, brunch, vacations, or honestly any moment when you want something feminine but not loud.
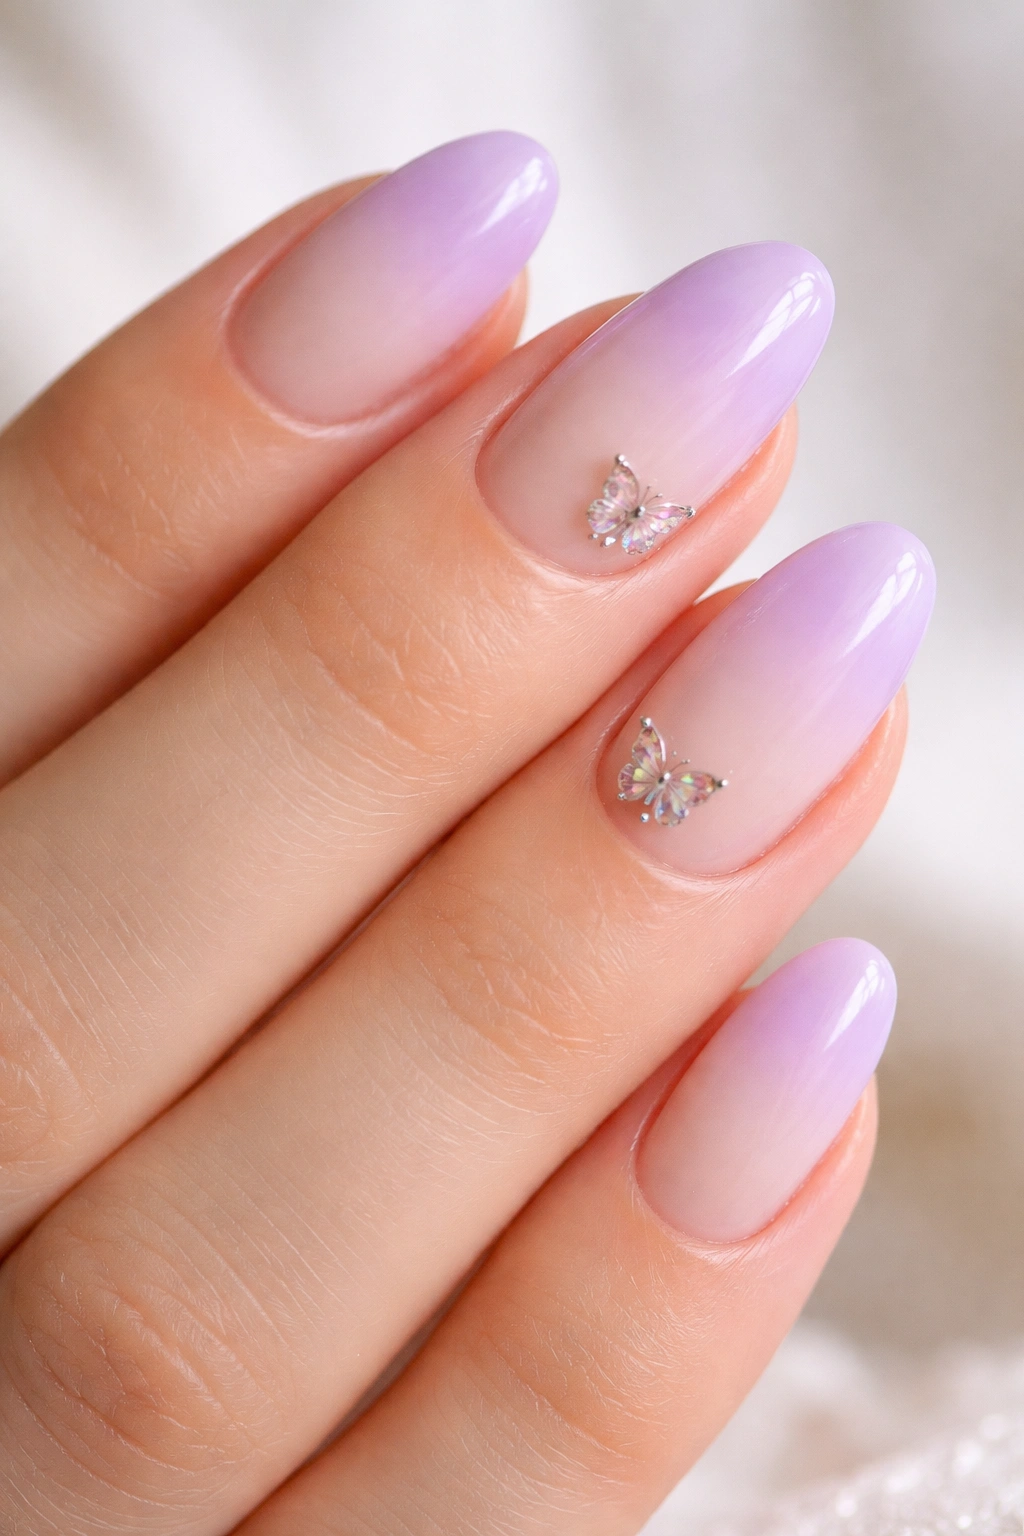
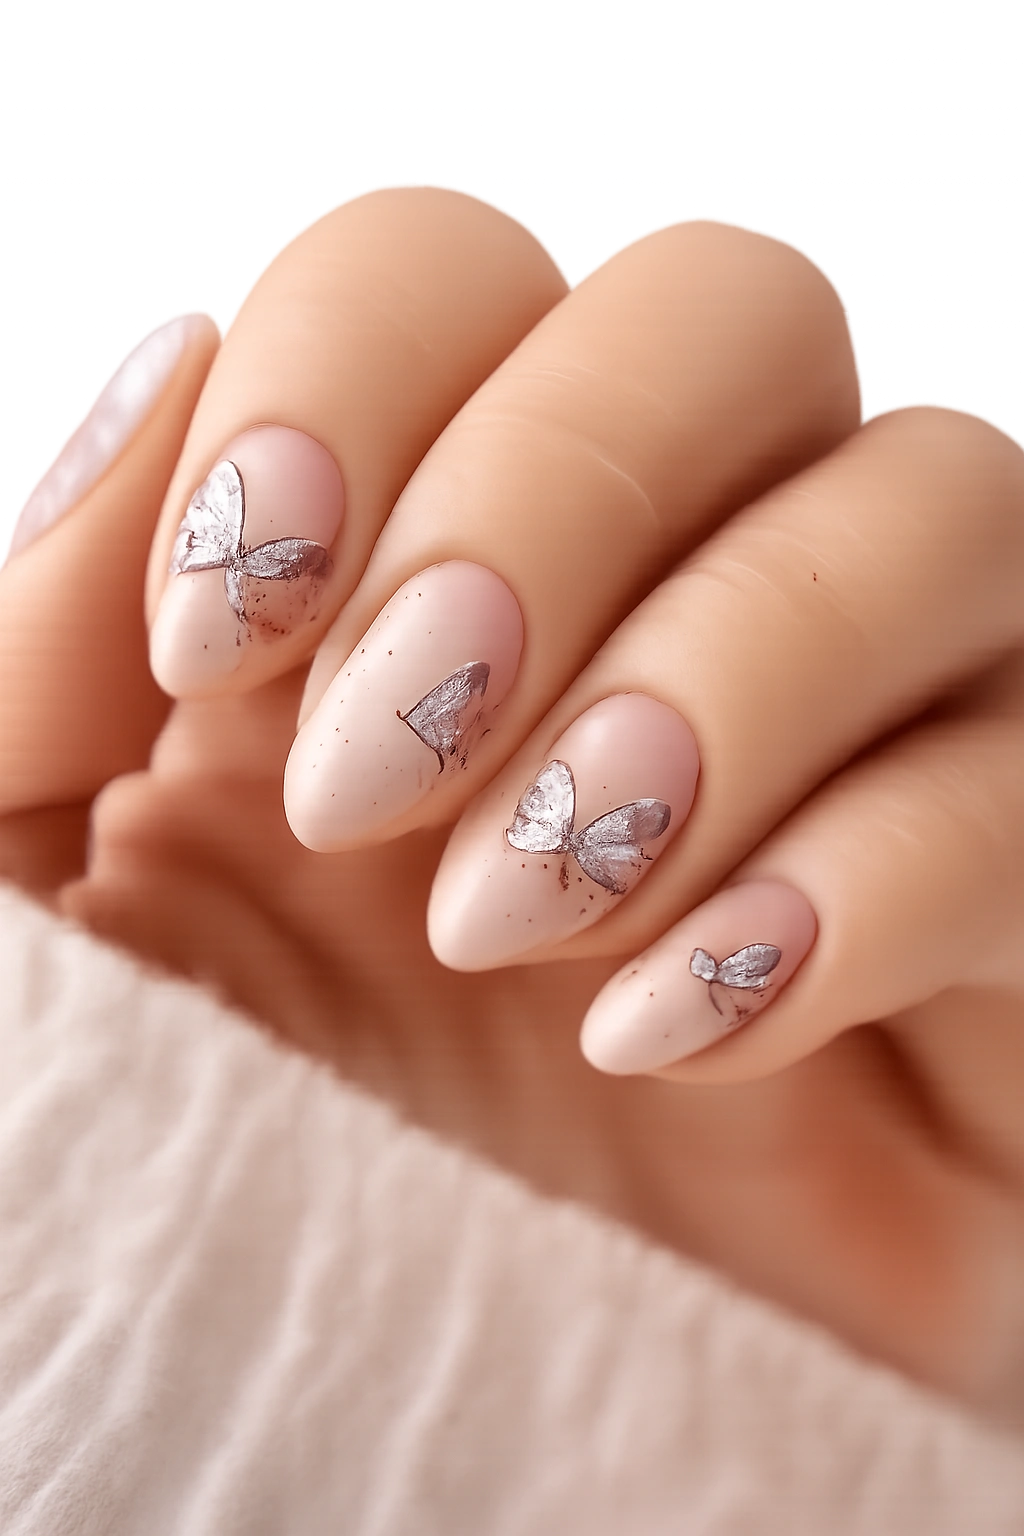
5. Lavender Short Almond Nails With Silver Butterfly Foil
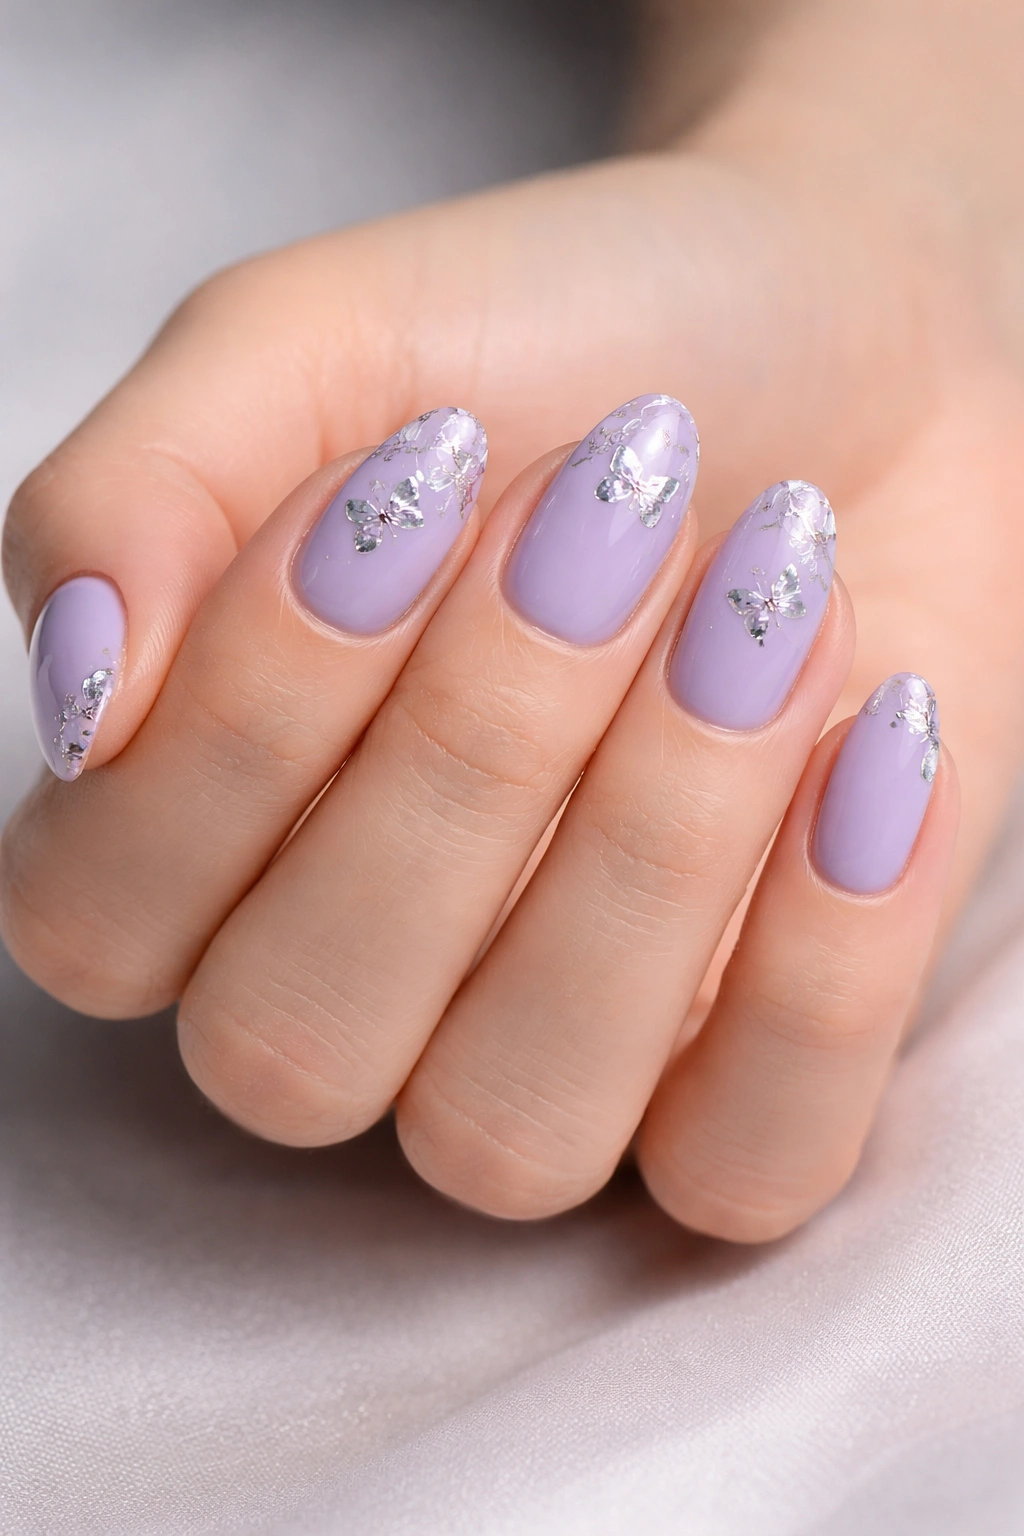
Lavender already has that soft, powdery quality that flatters short almond nails. Add silver butterfly foil, and the whole design turns cooler, a little dreamier, and slightly more fashion-forward than the usual pastel manicure.
Foil changes the energy immediately. Painted butterflies feel delicate. Foil butterflies feel more reflective and textured, with a broken-light effect that catches the eye when your hands move. On a short nail, that flash can stand in for extra detail you simply don’t have room to paint.
I wouldn’t use foil on every nail. That’s where people lose the plot.
Where silver foil works best
Use it where light naturally catches:
- Along the upper side of the ring finger
- Near the tip on the middle finger
- As fragmented butterfly wings, not solid butterfly shapes
- Mixed with one or two thin silver stars or dots
A cool lavender base with silver foil suits:
- fair skin with cool undertones
- neutral undertones
- deeper skin tones if the lavender has enough pigment and doesn’t go chalky
That last part matters. Pale lavender can turn ashy fast if the shade is too flat. Look for a lavender with a faint gray or pink base instead.
6. Matte Nude Nails With Glossy Butterfly Silhouettes
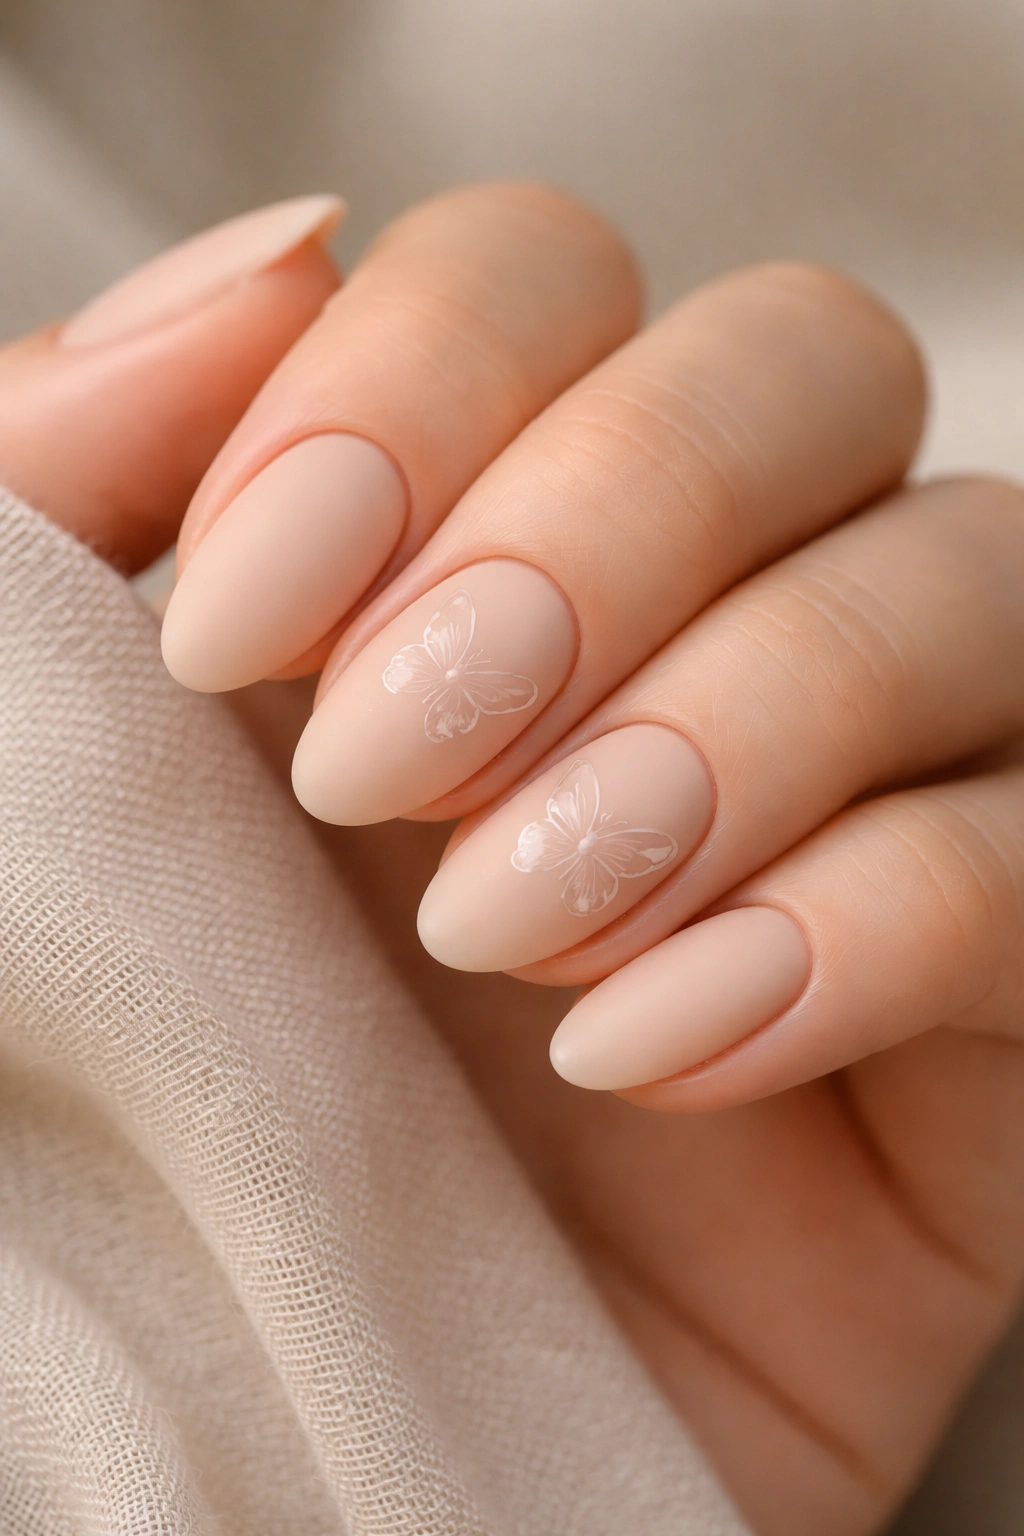
This one is smarter than it first appears. Matte nude nails with glossy butterfly silhouettes create contrast through finish instead of color, which makes the manicure feel subtle from a distance and much more detailed up close.
You’re working with the same shade in two textures: a velvety matte base, then butterfly shapes painted in clear gloss top coat. It’s restrained. Quiet. Still not boring.
Why does it work so well on short almond nails? Because texture contrast doesn’t crowd the nail plate. There’s no heavy color blocking, no thick gemstone cluster, no giant wing design swallowing the shape.
The effect in real life
Under indoor light, this design can look almost plain at first glance. Then your hand shifts, the gloss catches the light, and the butterfly silhouette appears. That reveal is the whole point.
You can go with:
- One large glossy butterfly on each ring finger
- Tiny silhouettes scattered across two nails
- A matte taupe-nude base for a more muted look
- A peach-nude base if you want warmth
This is one of the most wearable butterfly nail designs in the whole group. If you like minimal nail art but still want something intentional, it hits the sweet spot.
7. Peach Blush Nails With Monarch-Inspired Wing Tips
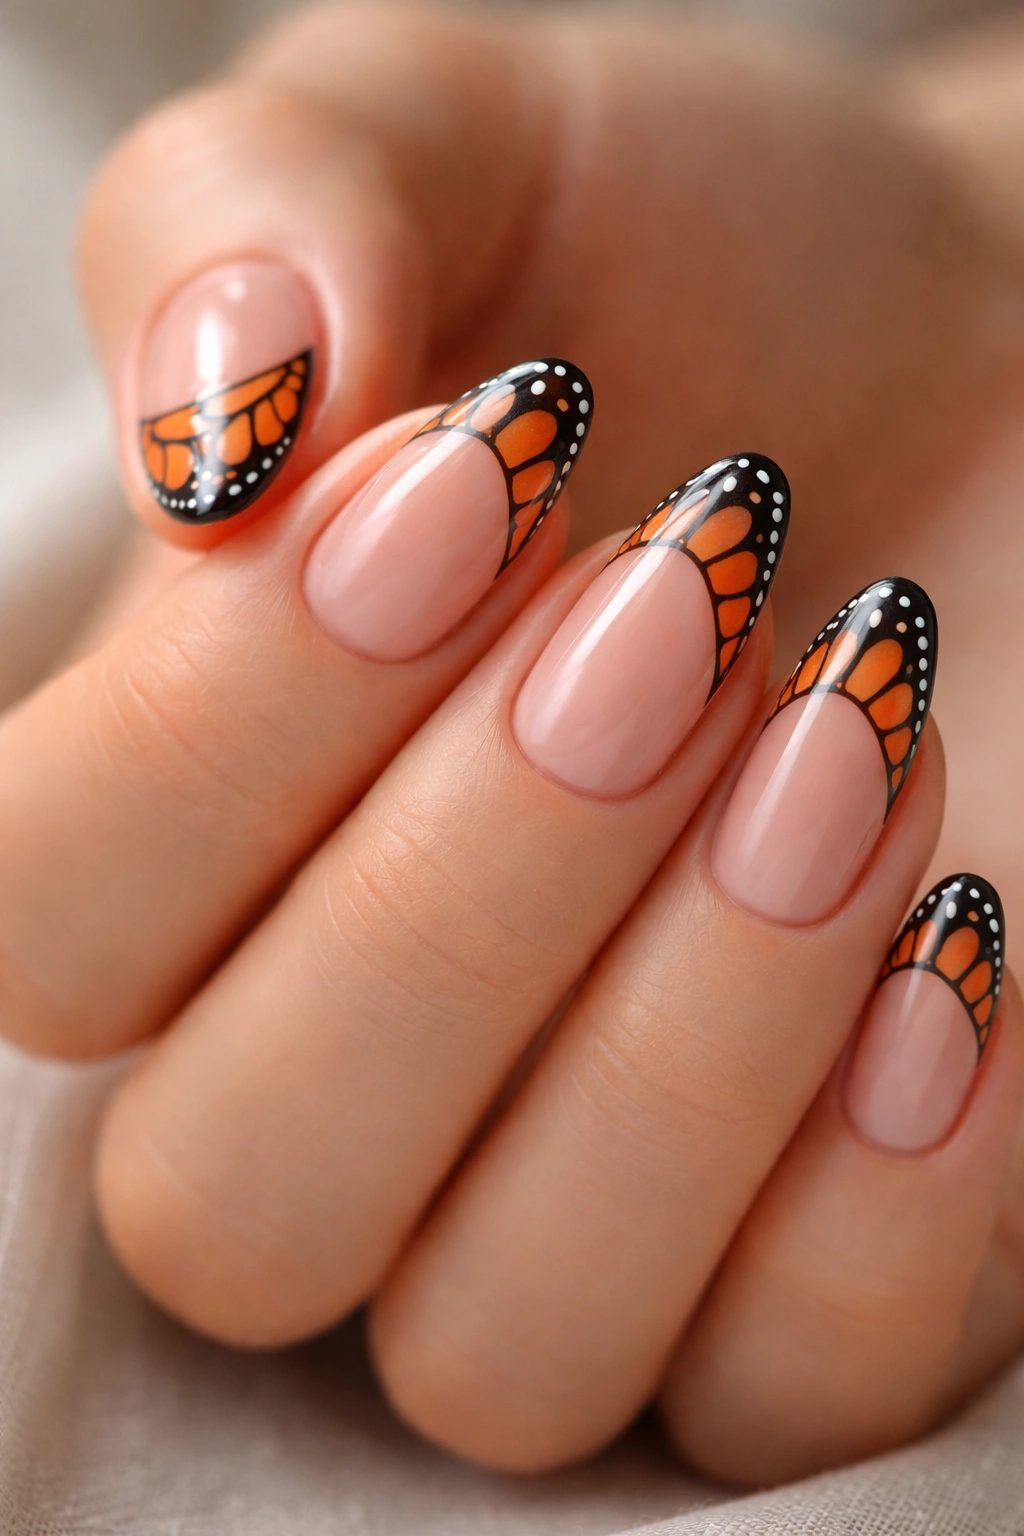
Monarch-inspired butterfly nails can go wrong fast. Too much orange, too much black, too literal, and suddenly your manicure looks like costume art. But on short almond nails with a peach blush base and monarch wing tips, the look can be surprisingly elegant.
The key is suggestion, not full replication. Think black veining at the tips, warm orange sections, and small white dot accents—not a full textbook butterfly on every nail.
A peach blush base softens the graphic detail and keeps the whole set flattering on the hand.
What to ask for at the salon
If you want this look to stay chic, ask for:
- A sheer peach or apricot nude base
- Monarch wing art only on 2 to 3 nails
- Fine black lines instead of thick borders
- White dot accents kept small and sparse
And skip extra rhinestones. This design doesn’t need them.
There’s already enough going on in the wing pattern. Piling on gems usually muddies the idea instead of helping it.
8. Baby Blue Nails With White Butterfly Line Art
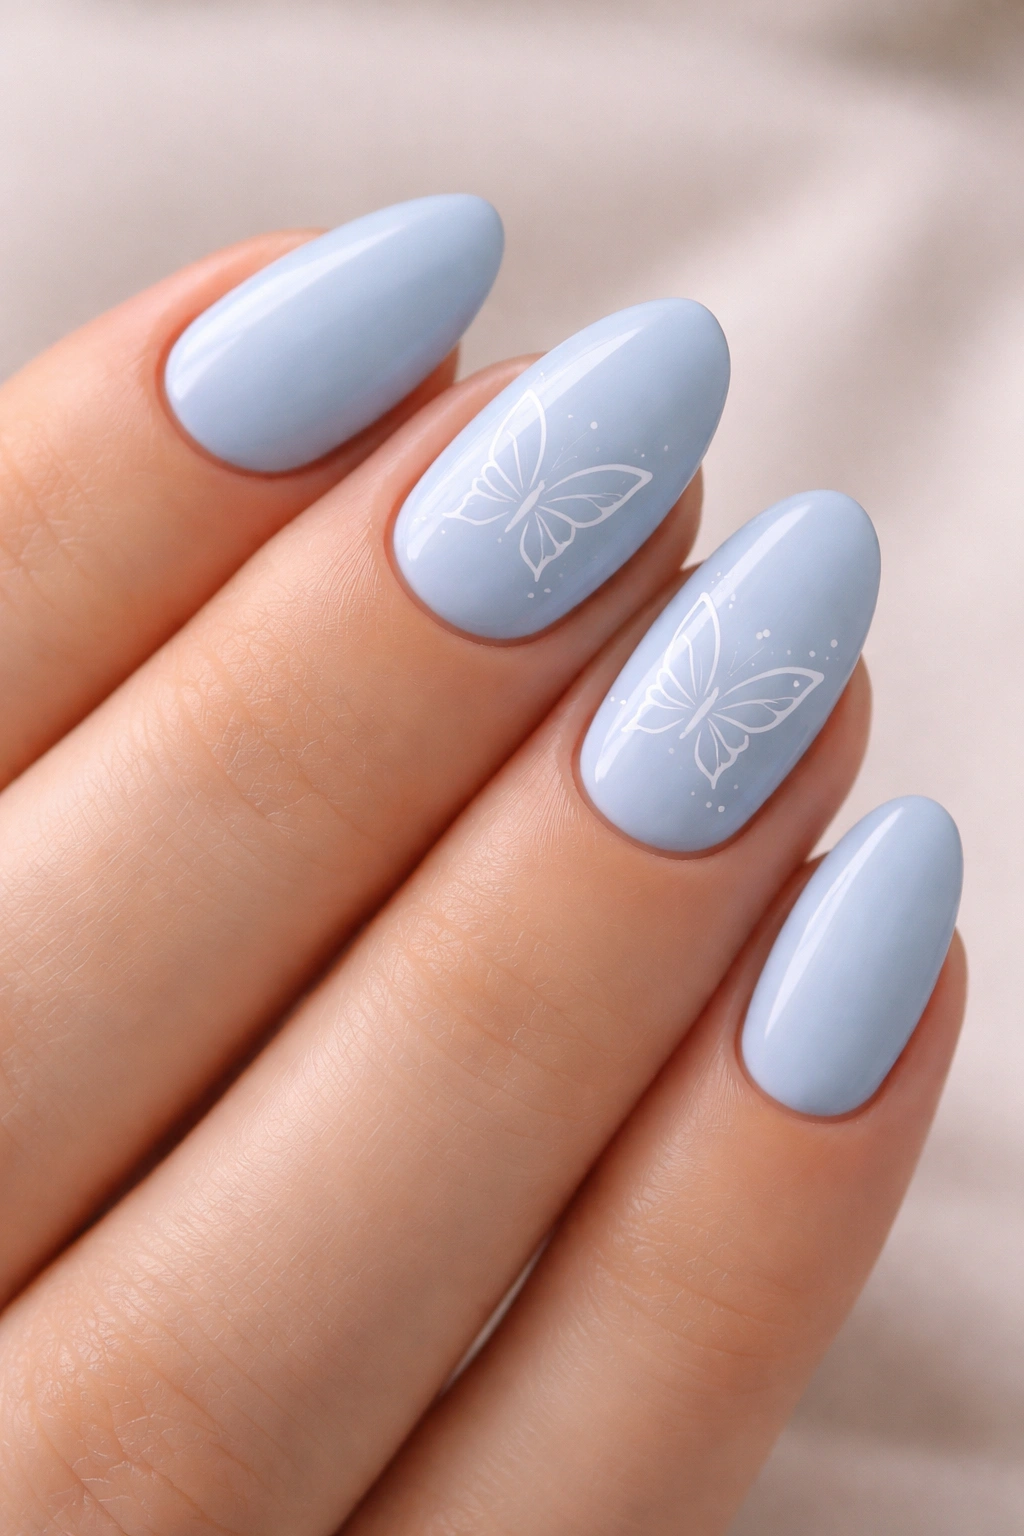
Some manicures feel like fresh air. Baby blue nails with white butterfly line art land in that category. The blue gives you color, but it’s still soft enough to stay easy on the eye, especially on a shorter almond shape.
What I like here is the mood shift. Baby blue butterflies feel cleaner and less expected than pink, and the white line art keeps the set from getting heavy. The result is soft, yes, but with a cooler edge.
Who this design suits best
Unlike warmer blush shades, baby blue can lean crisp on the hand. It tends to flatter:
- cooler undertones
- neutral undertones
- anyone who prefers silver jewelry over gold
If your skin pulls warm, choose a blue with a tiny drop of gray in it rather than a bright pastel. That small change usually makes the polish sit better against the skin.
For nail art placement, I’d keep at least three nails mostly plain. One butterfly on each hand, one partial wing, and one nail with tiny white dots is enough. More than that, and the set starts to feel themed.
9. Short Almond Ombré Nails With Butterfly Stickers

Stickers get dismissed too quickly. Good butterfly stickers—thin, flexible, properly sealed under gel—can look almost identical to hand-painted art, especially over a soft ombré base. On short almond nails, that matters because precision is harder on a smaller canvas.
A pink-to-nude or nude-to-white ombré gives butterfly stickers somewhere to sit without making the background compete. The fade also lengthens the nail visually. That’s one reason ombré works so well with short almond shapes in the first place.
Why stickers sometimes look better than hand painting
On tiny nails, scale is everything. Hand-painted butterflies can get clunky if the lines are too thick or the wings spread too wide. Stickers often have finer detail—delicate antennae, wing cutouts, shaded edges—that would take serious skill to recreate by hand.
A few useful details:
- Pick ultra-thin decals, not raised craft stickers
- Seal with two layers of top coat if you’re not using builder gel
- Place stickers slightly off-center for a more natural layout
- Keep the color story tight: 2 shades, maybe 3
No shame in using stickers. If the result looks better, the result looks better.
10. Sheer Beige Nails With Gold Butterfly Outlines
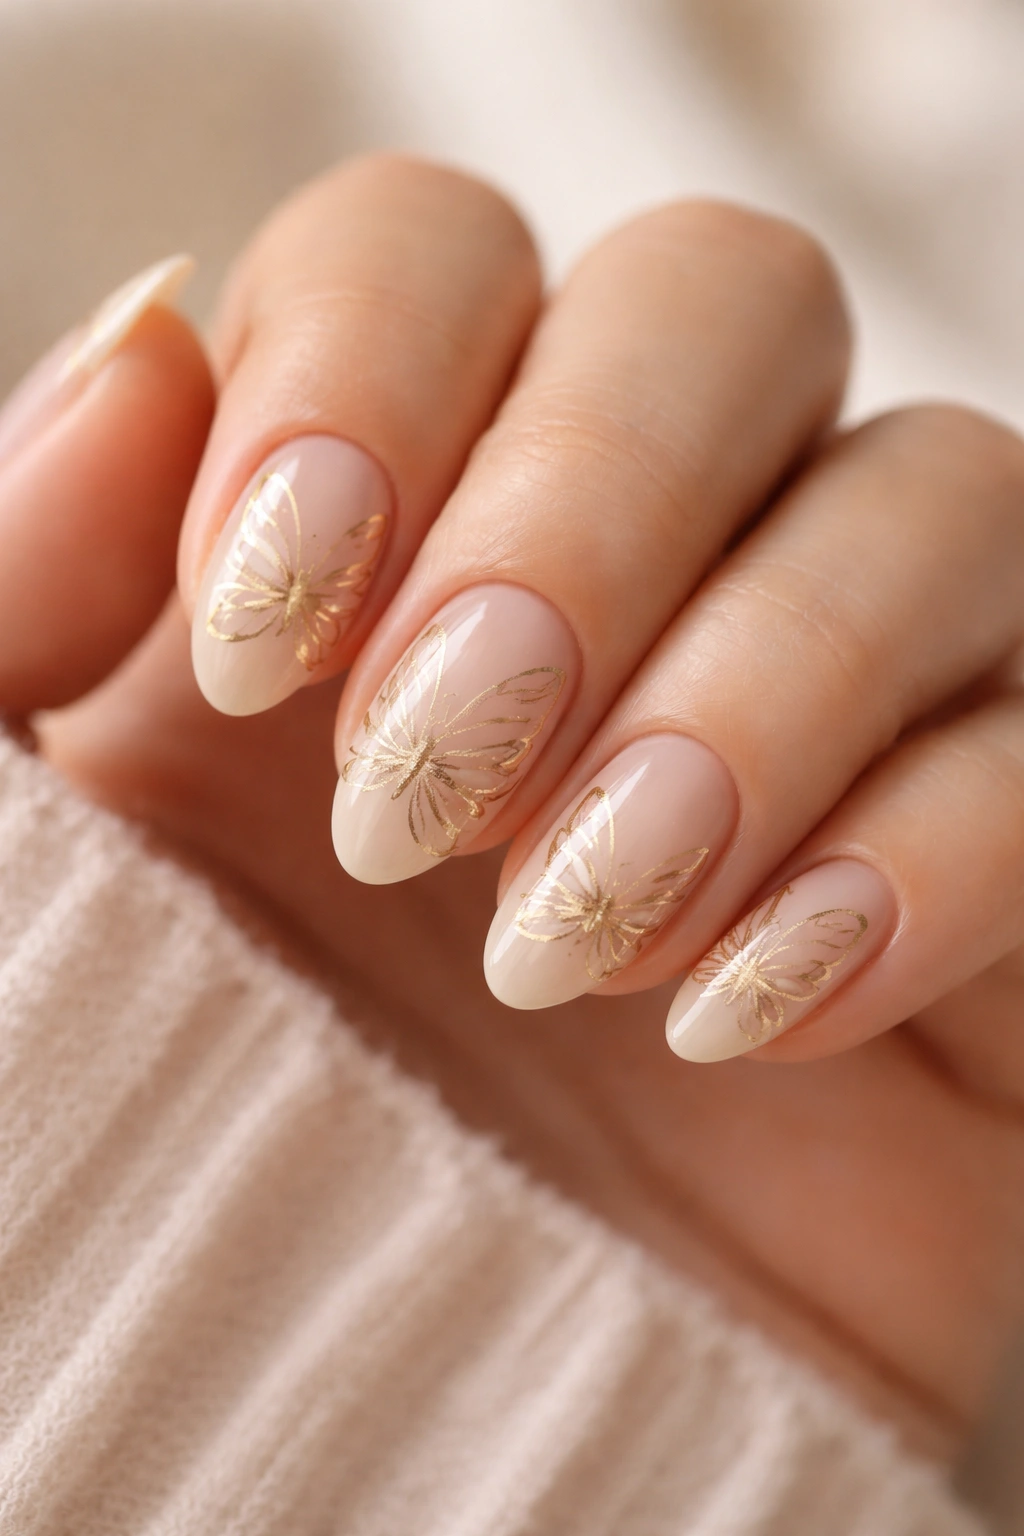
Gold butterfly outlines on a sheer beige base feel dressier without becoming flashy. This is the manicure version of a small gold hoop earring—noticeable, polished, and easy to wear with almost anything.
Gold linework tends to flatter warmer polish bases better than silver does. Beige, caramel nude, honey nude, soft tan—those shades give metallic gold enough warmth to make sense. Against a cooler gray-beige, gold can still work, but it needs to be a paler champagne tone.
The design sweet spot
The best version of this manicure uses thin metallic outlines, not chunky gold chrome butterflies. Big difference.
A clean layout might include:
- Gold butterfly outline on ring finger
- Partial wing detail on middle finger
- Tiny gold dots trailing across one side of the index nail
- Bare beige nails on the remaining fingers
Short almond nails benefit from negative space, and gold outline art uses that space well. The eye fills in the shape without needing every wing panel painted solid.
This style looks especially good with stacked rings, soft knitwear, satin outfits, and evening looks. But it’s not locked into formal wear. A plain white shirt and this manicure? Works.
11. Pink Chrome Nails With Micro Butterfly Accents
Chrome can get loud. On long coffin nails, that’s often the point. On short almond nails with pink chrome and micro butterfly accents, it can be a lot more controlled—still reflective, still noticeable, but less costume-like and easier to carry through a normal week.
The trick is using a softer chrome finish. Think glazed pink pearl rather than mirror-metal hot pink. Then add micro butterfly accents in white, silver, or black on one or two nails only.
This set lives or dies by restraint.
What to watch for
If both the chrome and the butterfly art fight for attention, the manicure turns noisy. Keep one part dominant and let the other support it. Usually that means:
- Soft chrome on all nails
- Tiny butterfly art on 2 accent nails
- No extra glitter
- No oversized gems
A lot of salon photos overdo chrome because it looks dramatic under flash. Real life is less forgiving. You want something that still looks good while holding a coffee cup in daylight, not only under a ring light.
12. Mauve Nails With Black Butterfly Wing Corners
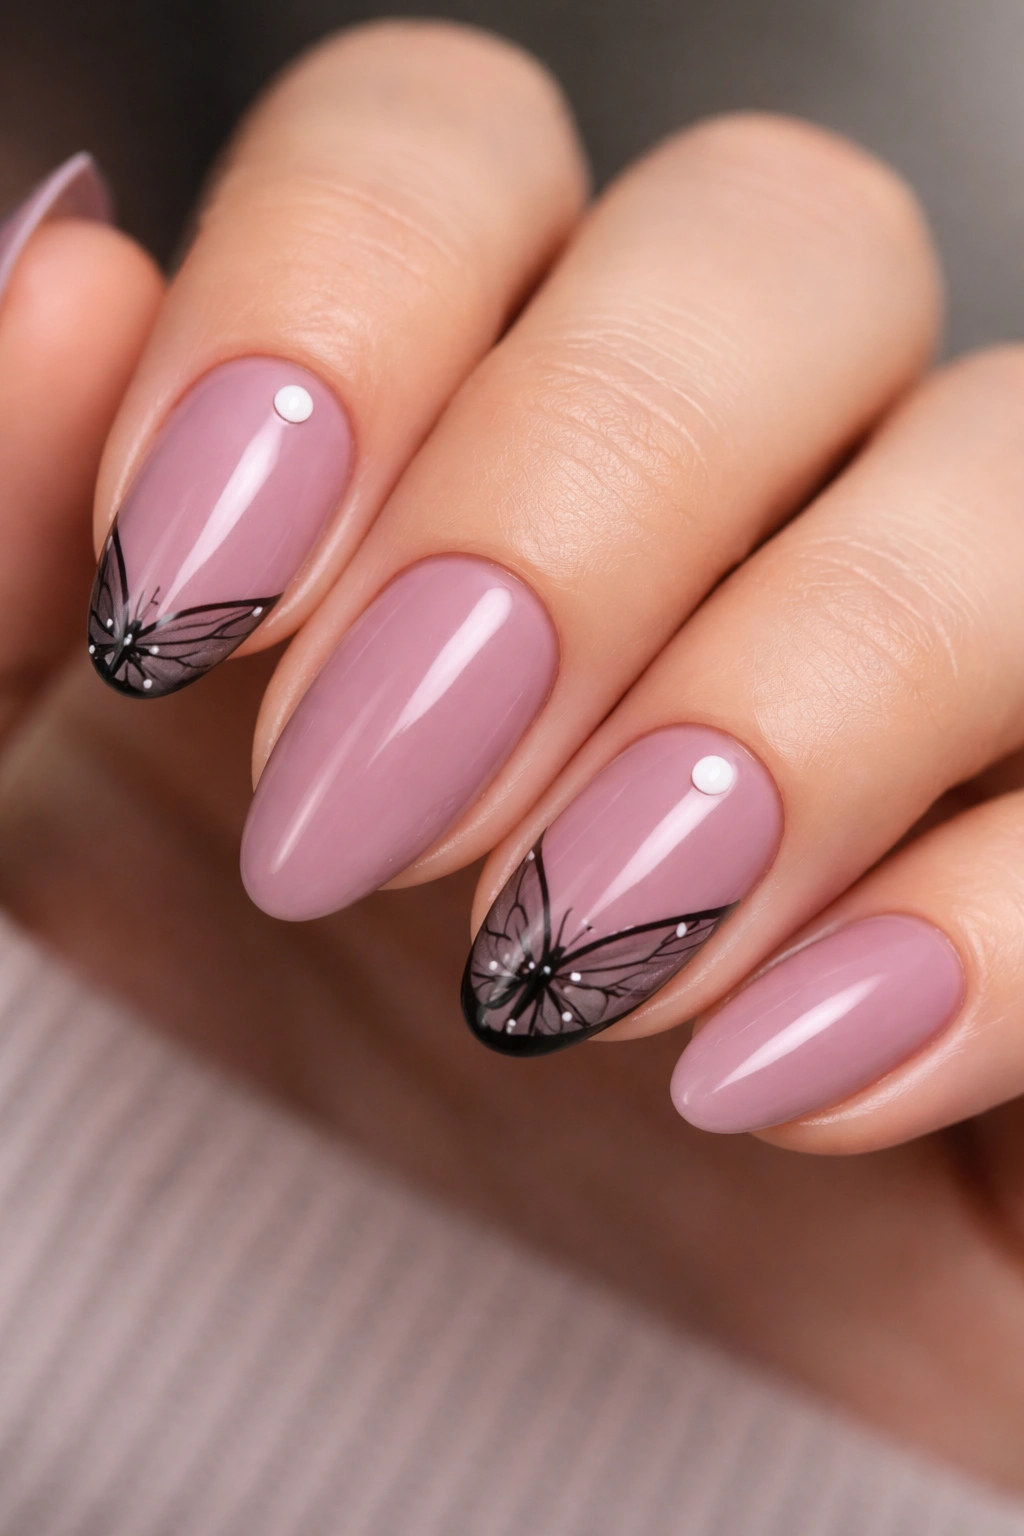
There’s a moody version of butterfly nails that deserves more love, and this is it. Mauve nails with black butterfly wing corners feel sharper, a little more grown-up, and far less sugary than the pastel-heavy styles people usually imagine.
The wing corner placement is what changes everything. Instead of painting a whole butterfly on the center of the nail, the art sits at the outer edge or tip corner, almost like a cropped photograph. That partial view looks modern and saves precious space on a short almond shape.
Why mauve works better than plain pink here
Mauve carries a muted gray-purple undertone, so black linework feels intentional against it. Plain baby pink can sometimes make black butterfly art look too stark. Mauve softens that contrast without losing drama.
A good version of this set might use:
- Full mauve color on all nails
- Black wing corners on the index and ring fingers
- Tiny white dots inside the wing pattern
- One plain glossy black dot accent near the cuticle
This manicure has more attitude than the others on this list. Not aggressive. Just cooler.
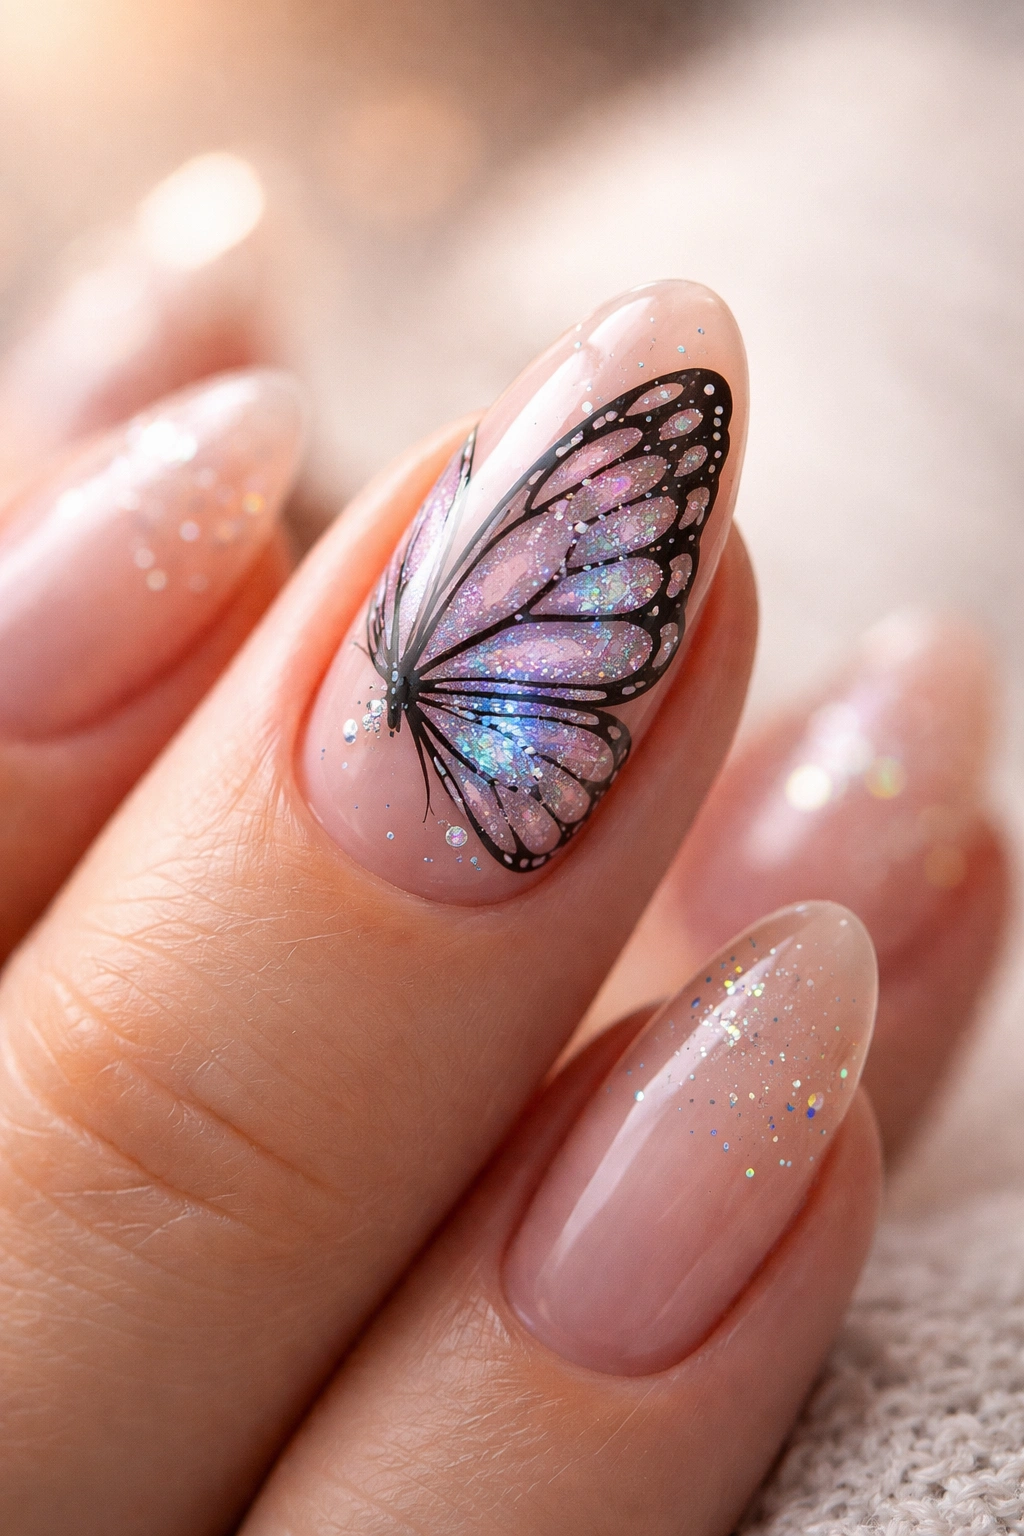
13. White Pearl Nails With Iridescent Butterfly Flakes
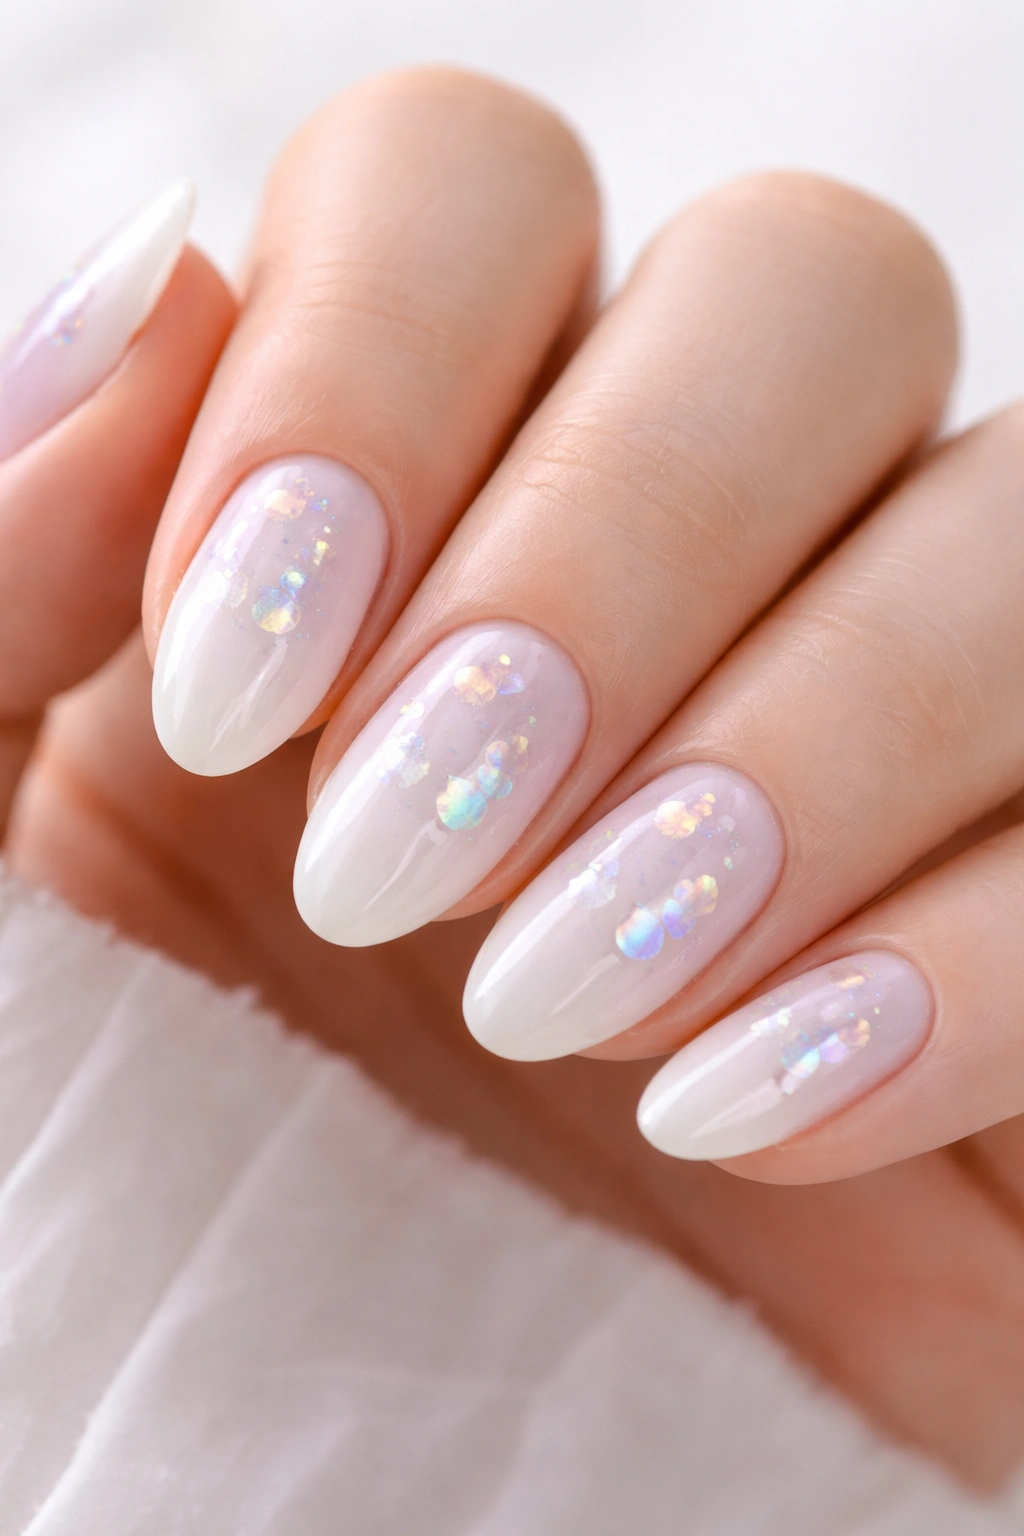
Some nail art looks best when it catches your eye sideways. White pearl nails with iridescent butterfly flakes do exactly that. Straight-on, the manicure reads clean and luminous. Tilt your hand, and flashes of lilac, mint, blue, and pale pink start to show up in the flakes.
That shift is why pearl finishes pair so well with butterfly elements. Butterflies already suggest movement. Iridescent flakes echo it without needing literal painted wings on every nail.
How to keep pearl polish from looking chalky
White pearl can go wrong if the base is too opaque and flat. The better option is a sheer milky white with a pearl top layer. That gives the nail more depth and keeps the finish from looking like correction fluid.
Placement ideas that work:
- One butterfly flake cluster near the cuticle
- Scattered wing-shaped flakes on the ring finger only
- Fine iridescent shimmer over all nails
- A thin builder gel overlay to smooth the surface
If you like bridal nails but don’t want standard French tips, this is a strong alternative.
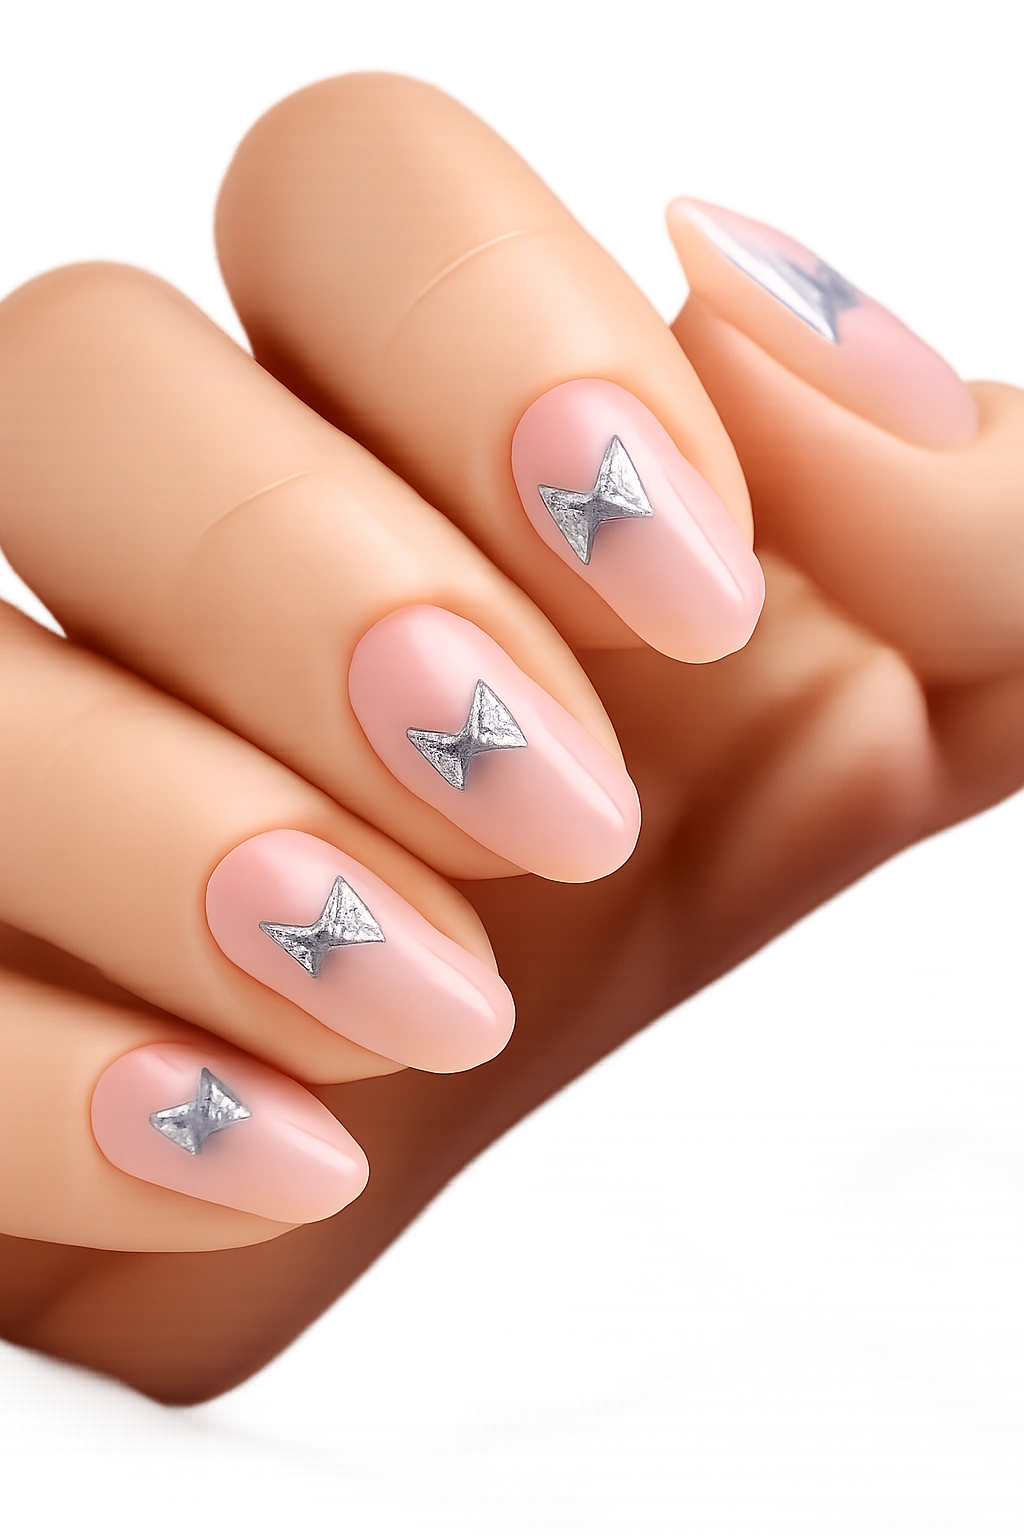
14. Nude Almond Nails With One Large Butterfly Accent Nail
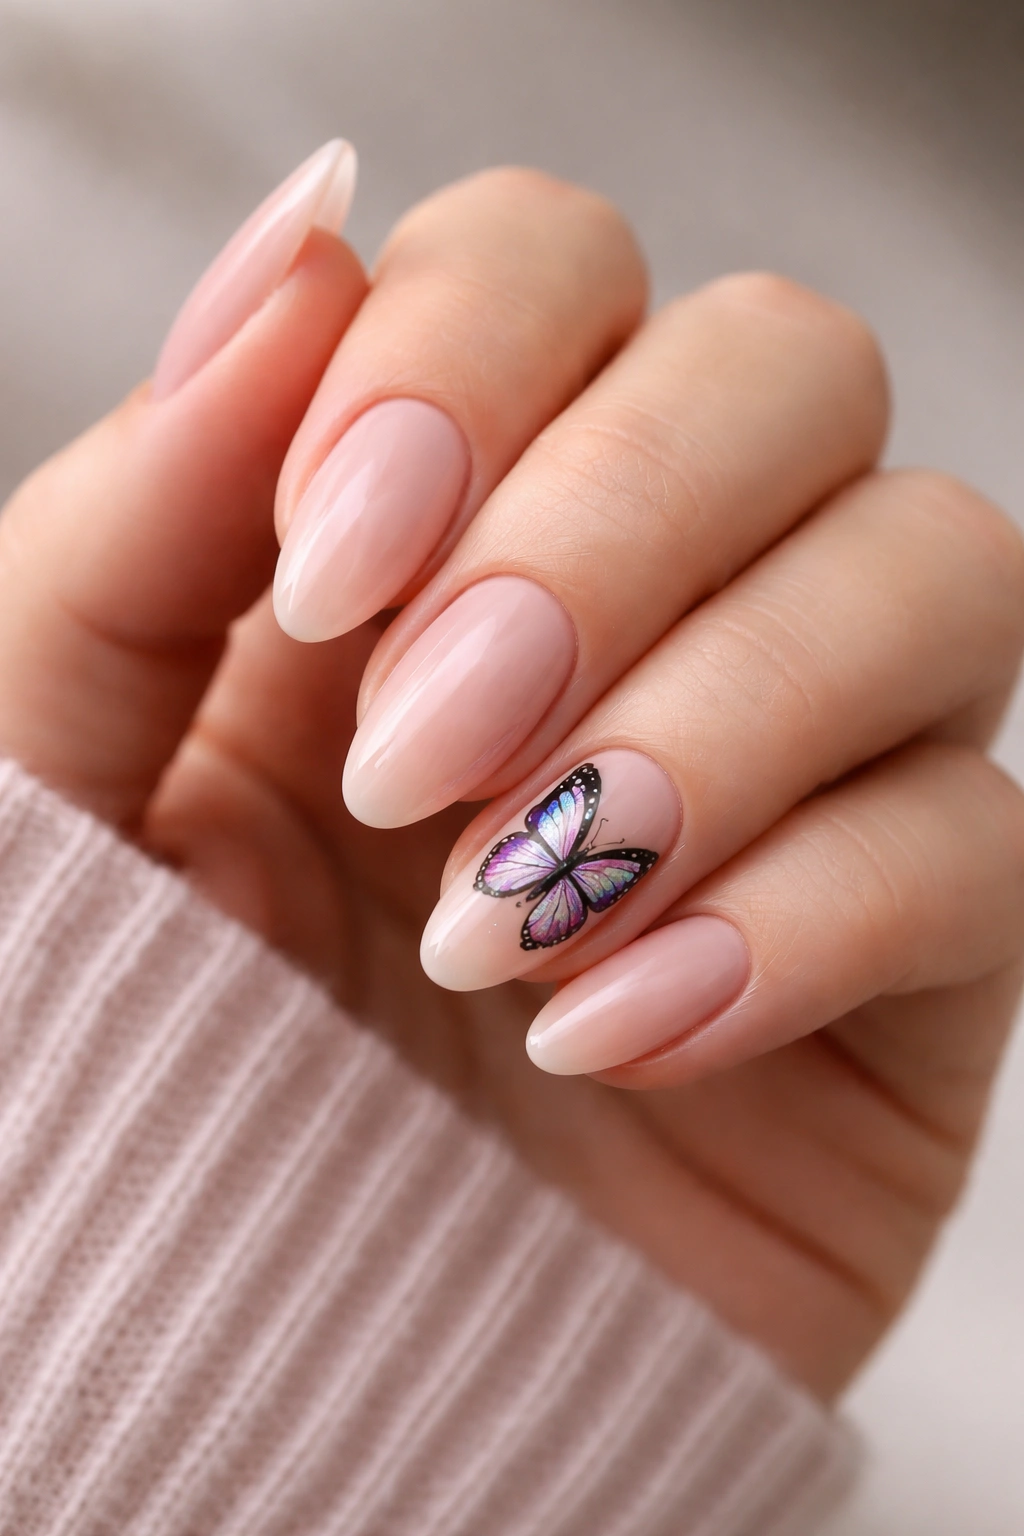
Sometimes the best move is to stop adding things. Nude almond nails with one large butterfly accent nail prove that a single focal point can carry the whole manicure better than ten small decorations.
Here, the nude base does the heavy lifting by making the hands look neat and elongated. One nail—usually the ring finger—gets a larger butterfly design with more detailed wing work, color, or embellishment. Every other nail stays quiet.
That contrast is why the set works.
When a single accent nail makes more sense
Go this route if you:
- want butterfly art without a busy overall look
- wear shorter nails and don’t want visual clutter
- like classic nude manicures but need one standout detail
- plan to keep the set for 2 to 3 weeks and want it to age well
Accent-only nail art also tends to grow out more gracefully. When every nail has tiny precise artwork, even small regrowth can make the whole set look off-balance. One statement nail is more forgiving.
I’d choose a nude with enough warmth to avoid making the hands look washed out. Beige-pink, rosy nude, soft caramel—those shades usually look healthier than a flat pale beige.
15. Lilac French Fade Nails With Butterfly Charms
Charms are where butterfly nails can get risky. They can look whimsical and cute, or they can catch on sweaters, hair, and your own patience. Still, lilac French fade nails with butterfly charms can be worth it if you keep the charms small and place them strategically.
A French fade—also called baby boomer ombré—gives the background a soft transition from nude to lilac-white. That gradient already looks polished on short almond nails because it stretches the eye from cuticle to tip.
The right way to use charms on short nails
Small charms only. Flat-backed pieces. One or two nails max.
Best placement:
- Near the cuticle on the ring finger
- Slightly angled on the thumb where there’s more surface area
- Embedded under a thicker gel layer if possible
Do not put chunky charms near the free edge on short nails. They snag faster, lift sooner, and can throw off the whole shape.
This design is less practical than decal or painted-art versions, no question. But for events, trips, birthdays, or a manicure you want to photograph a lot, it brings texture that flat nail art can’t.
16. Glossy Coral Nails With Butterfly Confetti Pieces
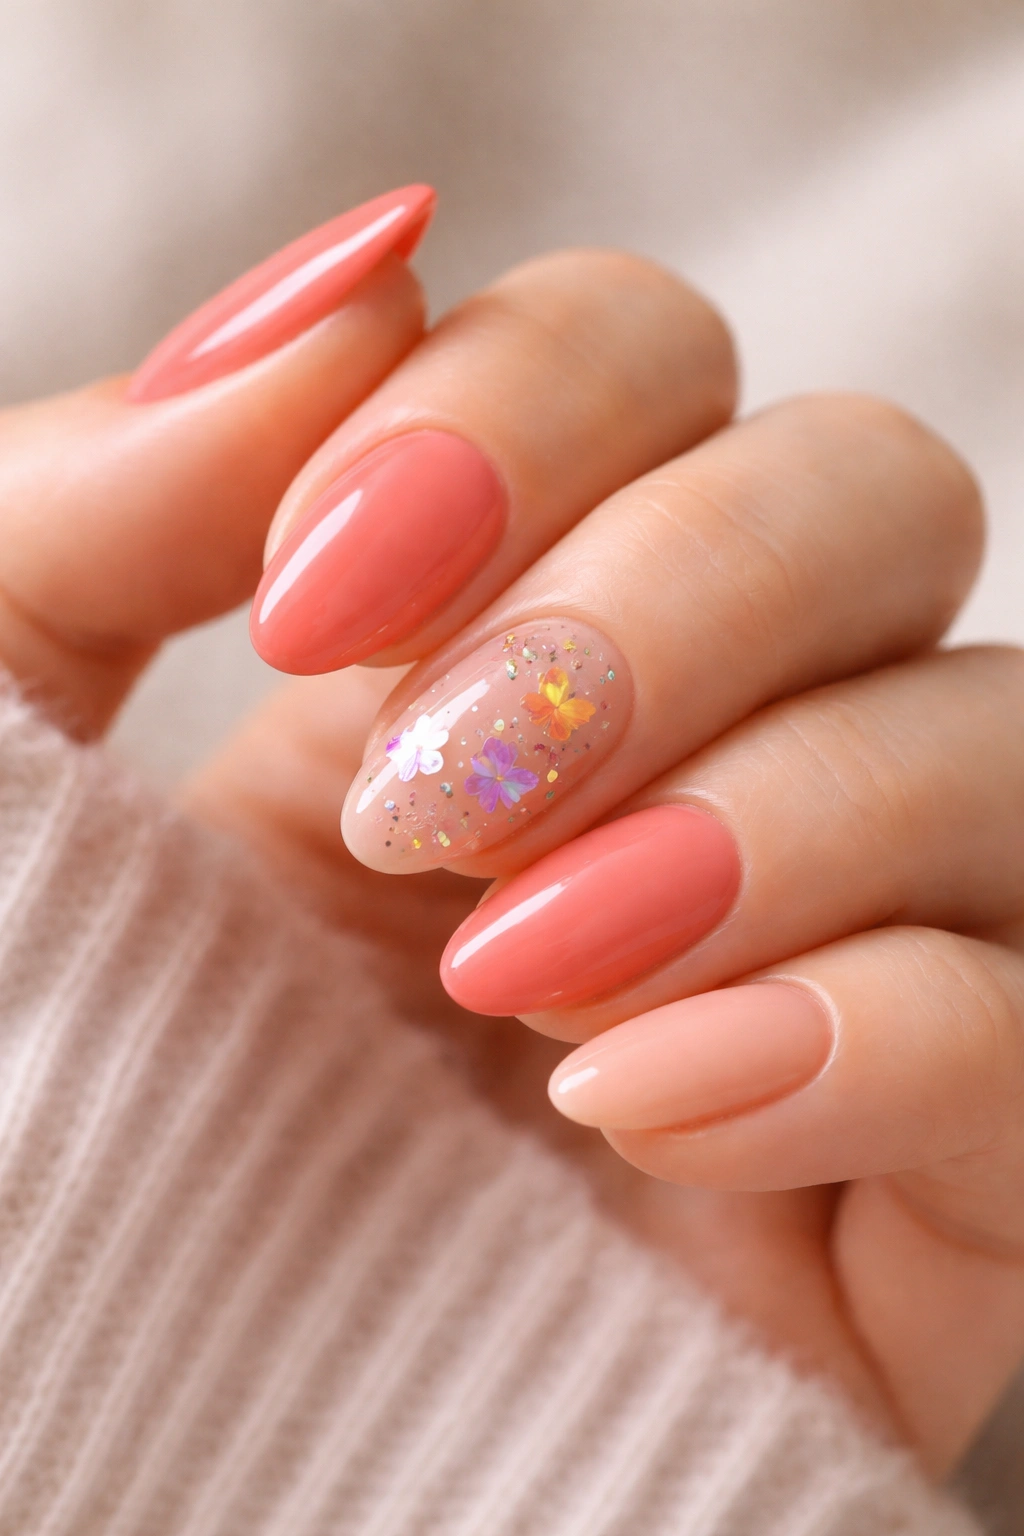
Coral brings energy fast. On short almond nails with butterfly confetti pieces, it turns butterfly art into something brighter and more playful without tipping into neon chaos—assuming the coral stays in that warm peach-pink zone and not traffic-cone orange.
Confetti pieces are useful because they create shape through layering. Instead of painting a butterfly exactly, you can use tiny wing-like slices, iridescent fragments, or pressed glitter pieces that suggest fluttering motion. It’s looser. More relaxed. A little less precious.
Why coral works well in warmer weather
Coral reflects light in a way muted nudes don’t. It stands up to sunshine, tan skin, white clothing, denim, and beachy accessories. It also flatters gold jewelry especially well, which matters more than people admit when they’re choosing nail colors.
A strong combination looks like:
- Glossy coral on 7 nails
- Butterfly confetti embedded on 2 nails
- One plain nude-coral accent to break up the color
- A smooth top coat to avoid texture bumps
This isn’t the most subtle design on the list. It’s not trying to be.
17. Taupe Nails With Minimal Butterfly Sketch Art
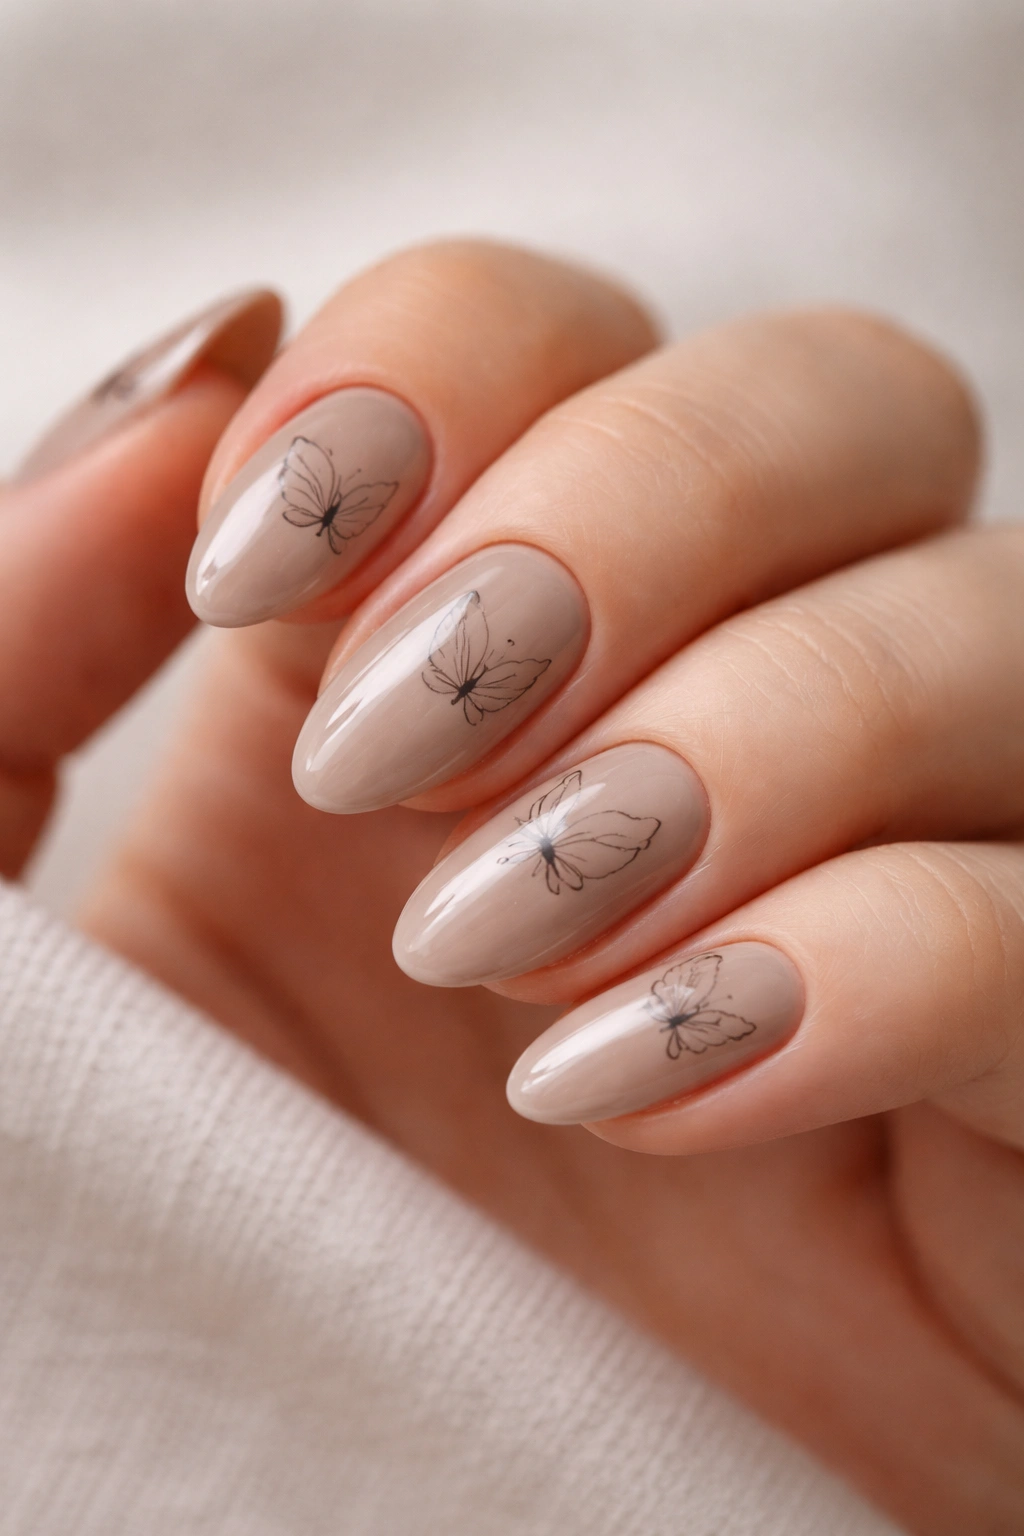
Taupe and butterfly art sound like they shouldn’t belong in the same sentence. They do. Taupe nails with minimal butterfly sketch art take a motif that often leans soft and decorative and pull it into cleaner, cooler territory.
The sketch effect is important. Instead of polished, fully symmetrical wings, think loose black or dark brown linework—slightly imperfect, almost like a fashion illustration drawn in a notebook margin. That rougher quality keeps the manicure from feeling overly precious.
What makes this version look modern
Three things:
- Muted taupe base
- Thin, incomplete butterfly outlines
- Strategic empty space
That last one matters most. If every wing is fully finished, the sketch idea disappears. Leaving small gaps in the lines gives the art movement and keeps it from looking stamped.
I’d pair this design with glossy top coat rather than matte. Matte taupe can go flat, and the sketch lines lose some definition. Gloss adds contrast and helps the dark linework stay crisp.
This is one of my favorite picks in the whole bunch because it doesn’t look like every butterfly manicure on social media.
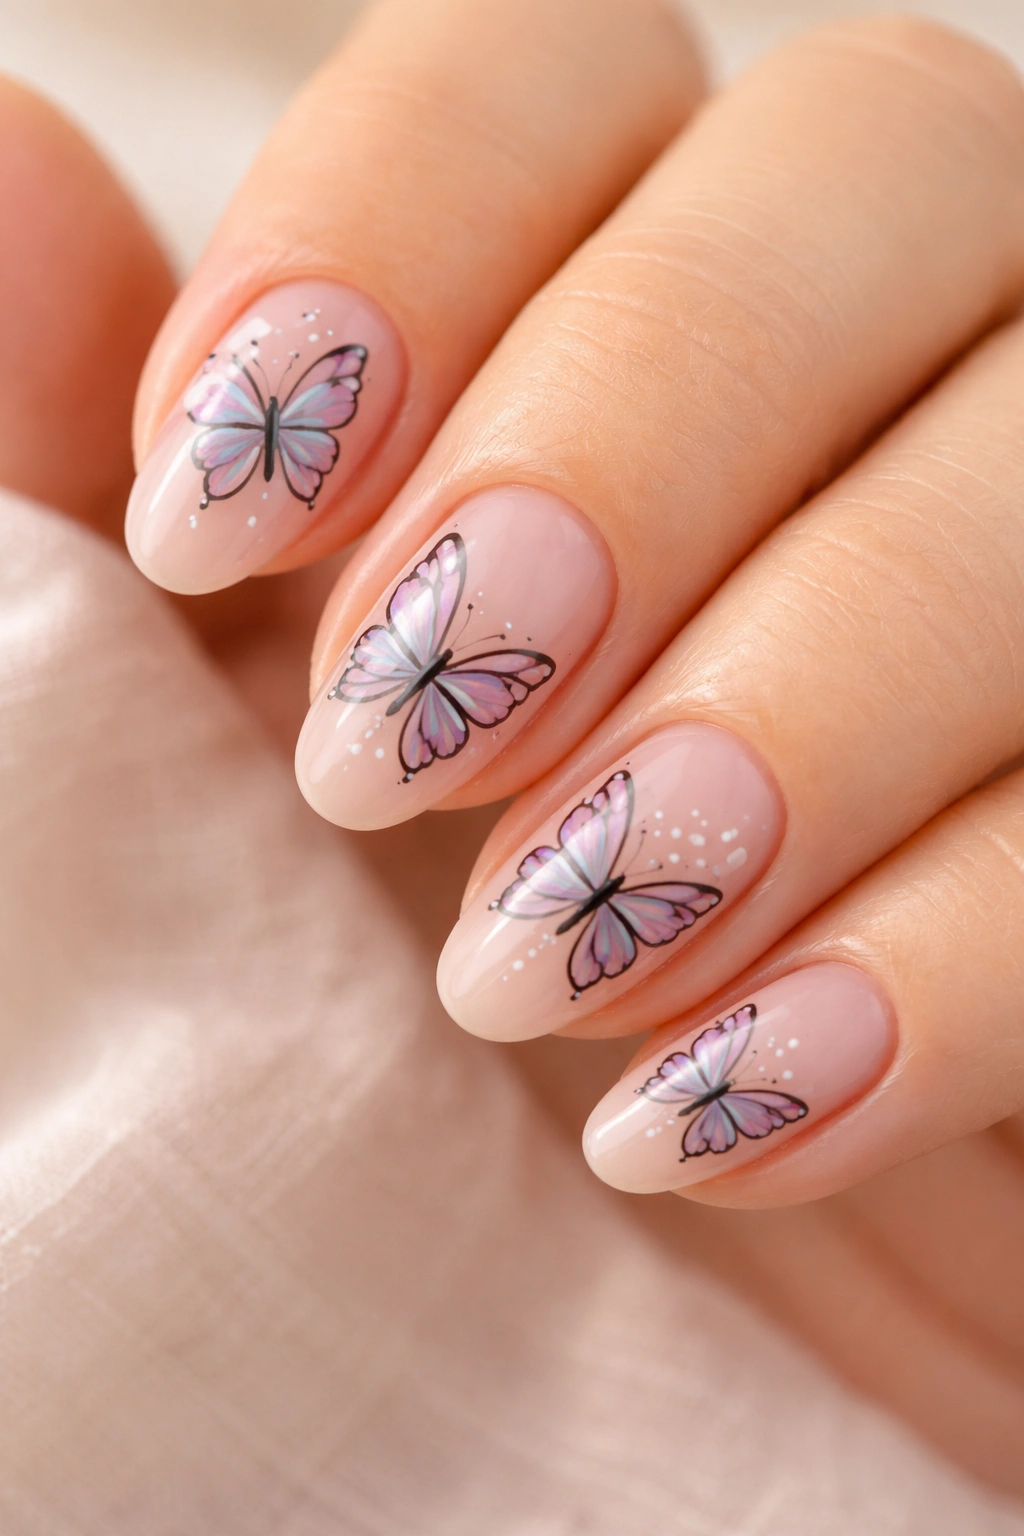
18. Clear Nude Nails With Scattered Pastel Butterfly Wings
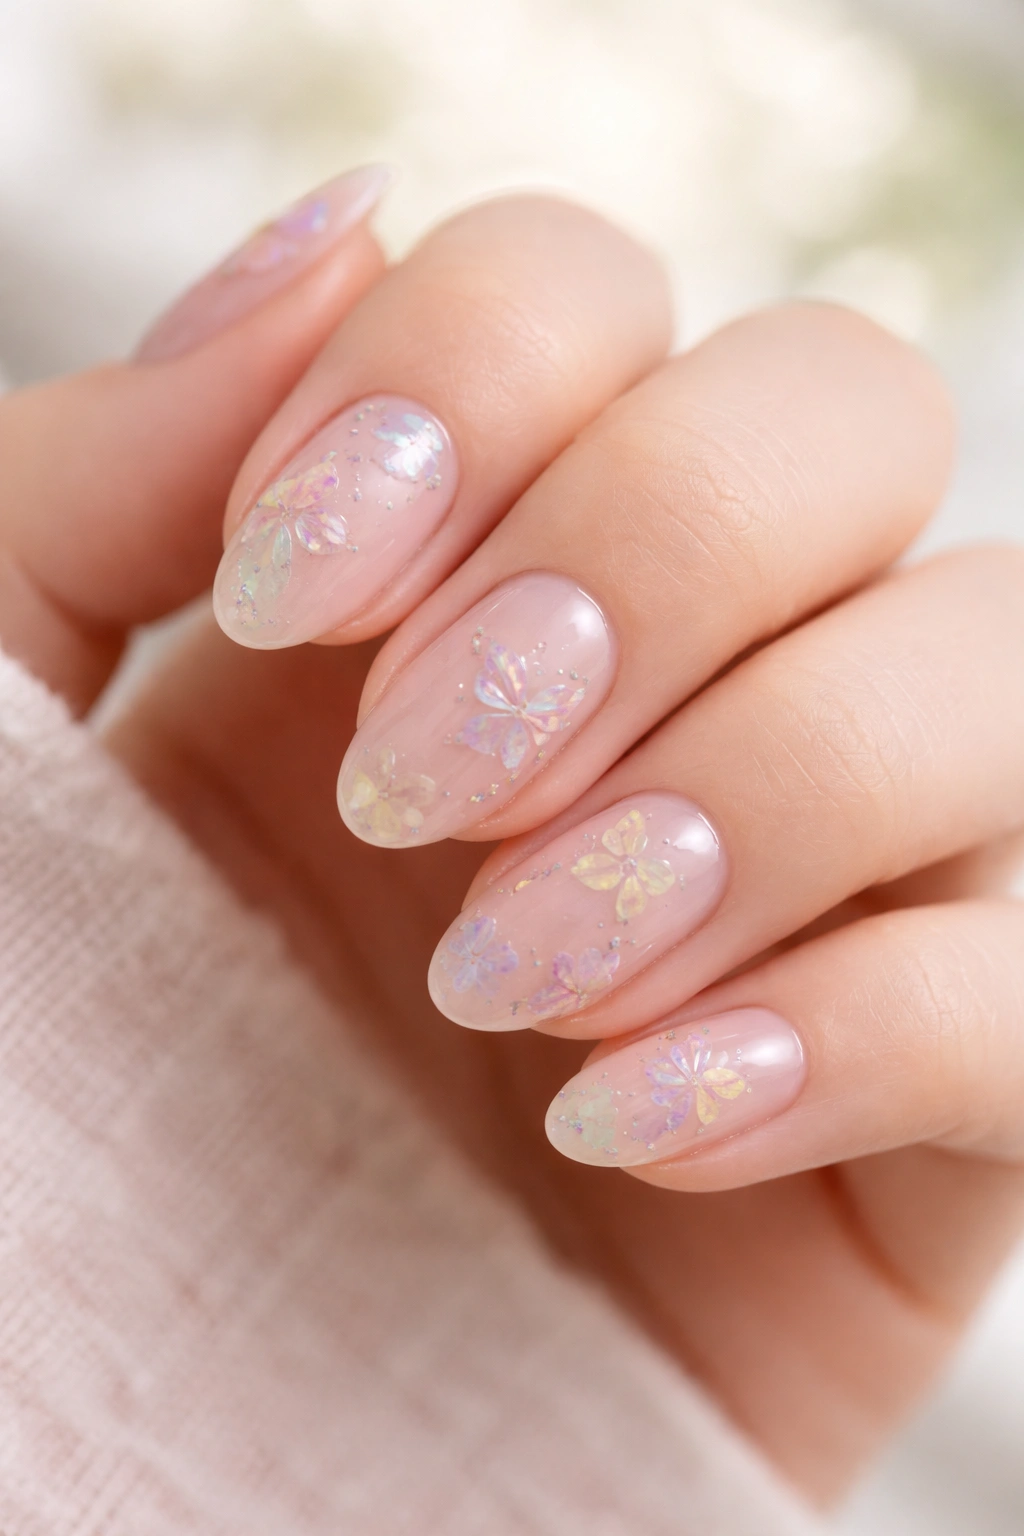
Scattered pastel butterfly wings have that soft, airy look people chase with spring nail art, but they also work far beyond one narrow seasonal moment. On clear nude short almond nails, pastel wing fragments look light and open rather than dense.
And fragments are the whole game here. Not full butterflies everywhere. A lavender wing tip on one nail, pale yellow edge detail on another, mint and pink half-wings on a third. The eye reads the pattern without needing every element spelled out.
How to keep pastels from turning childish
Use a grown-up nude base. Skip opaque candy shades. Keep the pastel tones washed and semi-sheer where possible.
A balanced color mix could include:
- soft lavender
- butter yellow
- pale mint
- baby pink
- a touch of white linework to tie them together
You can also add one or two tiny crystal dots at the center of a wing, but I’d stop there. More embellishment starts to crowd the design.
This set has a lighter, happier mood than the taupe or mauve options above. If you want butterfly art that still feels easy and fresh, it’s a strong place to end up.
How to Choose the Right Butterfly Nail Design for Your Hand Shape
Picking from photos is the easy part. Picking the design that will actually look good on your hands is where people get stuck. A butterfly manicure that looks balanced on long, narrow nail beds can feel crowded on shorter, wider nails.
A few rules help:
- Wider nail beds usually look better with partial wing art, corner details, or one accent nail
- Longer natural nail beds can handle centered butterflies more easily
- Short fingers often benefit from vertical placement that draws the eye upward
- Very small nails usually need micro butterflies or decals, not hand-painted full wings
Color matters too. Lighter bases elongate the nail. Heavy dark backgrounds with big wing art can shorten the look if the shape is already compact.
And don’t ignore your own style. If your closet is mostly black, cream, denim, and silver jewelry, a taupe-and-black butterfly set will probably get more wear than pastel rainbow wings, even if the latter looks cute in a saved photo.
What to Ask Your Nail Tech Before Getting Butterfly Art
Bring pictures, yes. But also bring words. Nail appointments go better when you can explain why you like a design, not only point at one image and hope for a clone.
Tell your nail tech:
- whether you want minimal or detailed butterfly art
- if you prefer stickers, hand painting, foil, flakes, or charms
- how long you need the manicure to last
- whether you type a lot, work with your hands, or want low-snug details
- if you want the design concentrated on 2 nails or all 10
Ask about scale before they begin. On a short almond shape, even a few extra millimeters in the wing span can change how the entire set looks.
Also worth asking: whether the art will be painted over gel color, embedded under builder gel, or sealed with standard top coat. Embedded art often lasts longer and looks smoother, especially with foil, glitter, or decals.
How to Make Short Almond Butterfly Nails Last Longer
Pretty nail art is one thing. Keeping it from chipping in four days is another.
Short almond nails already have an advantage because they’re less likely to catch and snap than longer shapes. Still, butterfly art—especially anything with decals, foil, or charms—needs decent aftercare.
Small habits that help a lot
- Apply cuticle oil twice a day, especially around dry sidewalls
- Wear gloves for dishwashing and long cleaning sessions
- Do not use your nails to open cans, scrape labels, or pry at boxes
- Reapply top coat every 5 to 7 days if you’re wearing regular polish
- Book fills or removals before lifting turns into peeling
If you get 3D charms, be more careful with knit fabrics, hair washing, and tight pockets. Those are the snag zones.
One more thing. If your natural nails bend easily, ask for a thin builder gel overlay under the design. That extra support can make a huge difference in wear time, especially on shorter nails that still get daily impact.
Final Thoughts
The best short almond nails with butterfly art don’t try to cram an entire mural onto each finger. They choose one direction—soft, graphic, glossy, moody, pearly, playful—and commit to it with enough restraint that the shape still gets to shine.
If I had to narrow the list down, I’d say milky nude with tiny black butterflies, mauve with black wing corners, and taupe with sketch art are the strongest choices if you want something stylish and easy to wear beyond a single mood or occasion. For a lighter feel, the clear nude with scattered pastel wings is hard to beat.
Butterfly nails work best when they feel a little in motion, a little unexpected, and not overexplained. Short almond nails give them exactly the right amount of space.
