

Squoval nails have become the go-to shape for people who want something more interesting than a basic round or square, but without committing to the drama of a full almond or coffin nail. The short squoval — that perfect hybrid between square and oval — sits right at that sweet spot of modern elegance and everyday wearability. And when you add warm, rich color palettes into the mix, you get nails that feel sophisticated, intentional, and entirely in sync with what works during warmer months.
The thing about warm-toned nail designs is that they work with almost every skin tone, and they carry an inherent sense of polish without looking overdone. Whether you’re drawn to earthy terracottas, deep burgundies, honeyed golds, or spiced cinnamon shades, warm colors feel like they belong on your fingers year-round. Short squoval nails amplify this effect because the shape itself is understated — it lets the color and design do the talking without the visual weight of extra length.
But here’s what trips people up: not all warm nail designs are created equal, and not all of them translate well to the squoval shape. Some designs that look incredible on long coffin nails can feel cramped or overwhelming on shorter lengths. That’s why I’ve put together a collection of 15 short squoval nail designs specifically chosen because they work beautifully at this length, showcase warm color families in different ways, and give you enough variety to find something that matches your style and skill level.
Each design here ranges from beginner-friendly solids and simple gradients to more detailed finishes like geometric patterns, metallic effects, and stamped details. You’ll find inspiration whether you prefer minimalist elegance, bold color statements, or intricate artistic designs. Let’s dive into what makes each one special and how to recreate them.
1. Warm Terracotta with Gold Accents
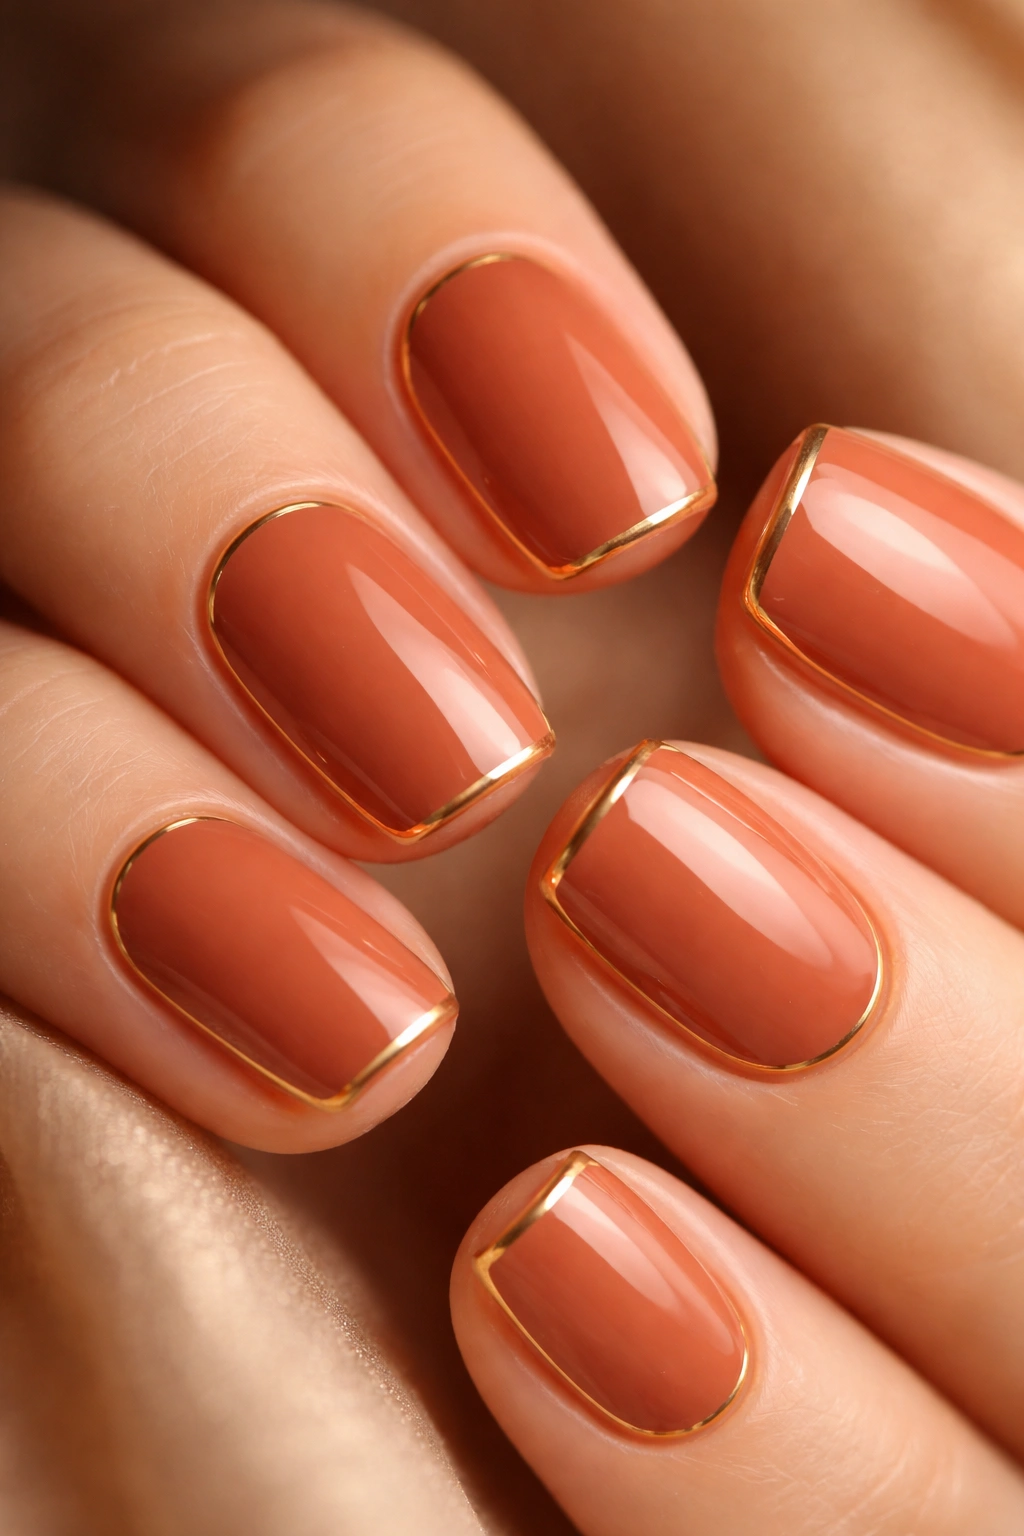
Terracotta is one of those warm tones that feels both earthy and refined at once — it’s the color of Mediterranean clay, sunset-baked pottery, and natural warmth without feeling overwhelming. On short squoval nails, a rich terracotta base provides the perfect canvas for delicate gold accents that catch the light without dominating the design.
Why This Design Works So Well
Terracotta sits in that ideal middle ground between neutral and statement-making. It’s warm enough to feel intentional and coordinated with your overall aesthetic, but it won’t clash with any outfit or occasion. The gold accents add just enough visual interest to elevate a simple base color into something that feels designed and deliberate. This combination works whether you’re going for a professional look or something more relaxed and creative.
Design Details to Know
- Start with a base of warm terracotta polish — a creamy, mid-tone terracotta gives the best results because it’s rich enough to show off metallic accents without being so dark it feels heavy
- After the base is fully dry, use a thin detail brush or a striping tool to add thin gold lines along the edge of the nail, creating a subtle frame
- Alternatively, paint a small gold accent on just the corner or along the side of each nail for a more minimalist approach
- A single gold dot near the cuticle or tip can also work beautifully if you prefer asymmetrical placement
- Seal everything with a glossy top coat so the gold catches light and the terracotta appears warm and dimensional
Pro tip: If you’re nervous about free-hand gold lines, use thin gold striping tape instead — it gives you perfectly straight lines with zero pressure, and you can peel it off if placement isn’t quite right before sealing with top coat.
2. Rich Burgundy with Matte Finish
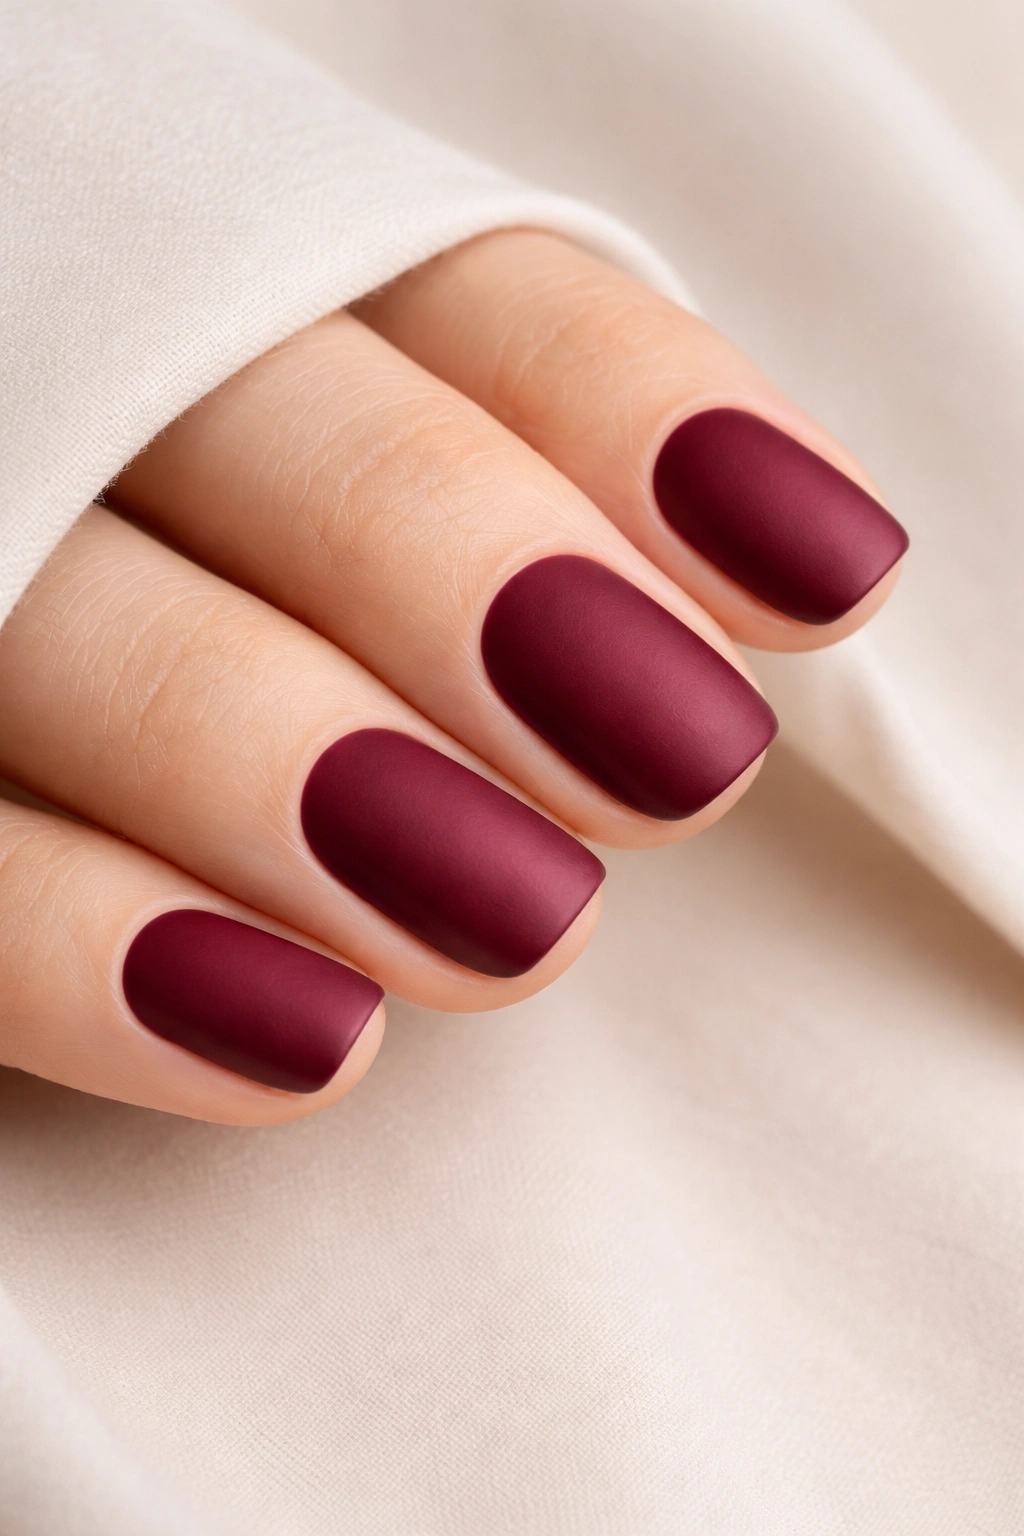
Burgundy is the sophisticated older sibling of red — it reads as powerful and elegant while feeling far less aggressive than a true crimson. A matte burgundy on short squoval nails creates an immediate sense of polish and intention, the kind of manicure that makes people assume you have your life put together (even if you’re secretly just really good at painting nails).
Why Matte Burgundy Commands Attention
The matte finish is what elevates this from a basic burgundy manicure into something that feels current and deliberate. Glossy burgundy is beautiful, but matte burgundy feels intentional — it says you made a choice and you’re committed to it. The texture also makes the color appear deeper and more luxurious, even though you’re using the same polish as the glossy version. On the short squoval shape, this matte finish doesn’t feel heavy because the shape itself is balanced and compact.
How to Execute This Flawlessly
- Choose a burgundy that leans slightly toward brown rather than pure red — this prevents it from feeling too bold or costume-y
- Apply two coats of your burgundy polish, allowing full dry time between coats
- Once completely dry, apply a matte top coat instead of glossy — this is the crucial step that transforms the look
- If you only have a glossy top coat at home, you can create a matte effect by lightly buffing the dried polish with a very fine buffing block, but a proper matte top coat gives a more even result
- Make sure your cuticles are pushed back and your nails are clean before application, because matte finishes show every speck and line more obviously than glossy finishes
Worth knowing: Matte finishes can chip slightly more easily than glossy, so consider reapplying your matte top coat midway through the week if you notice any wear.
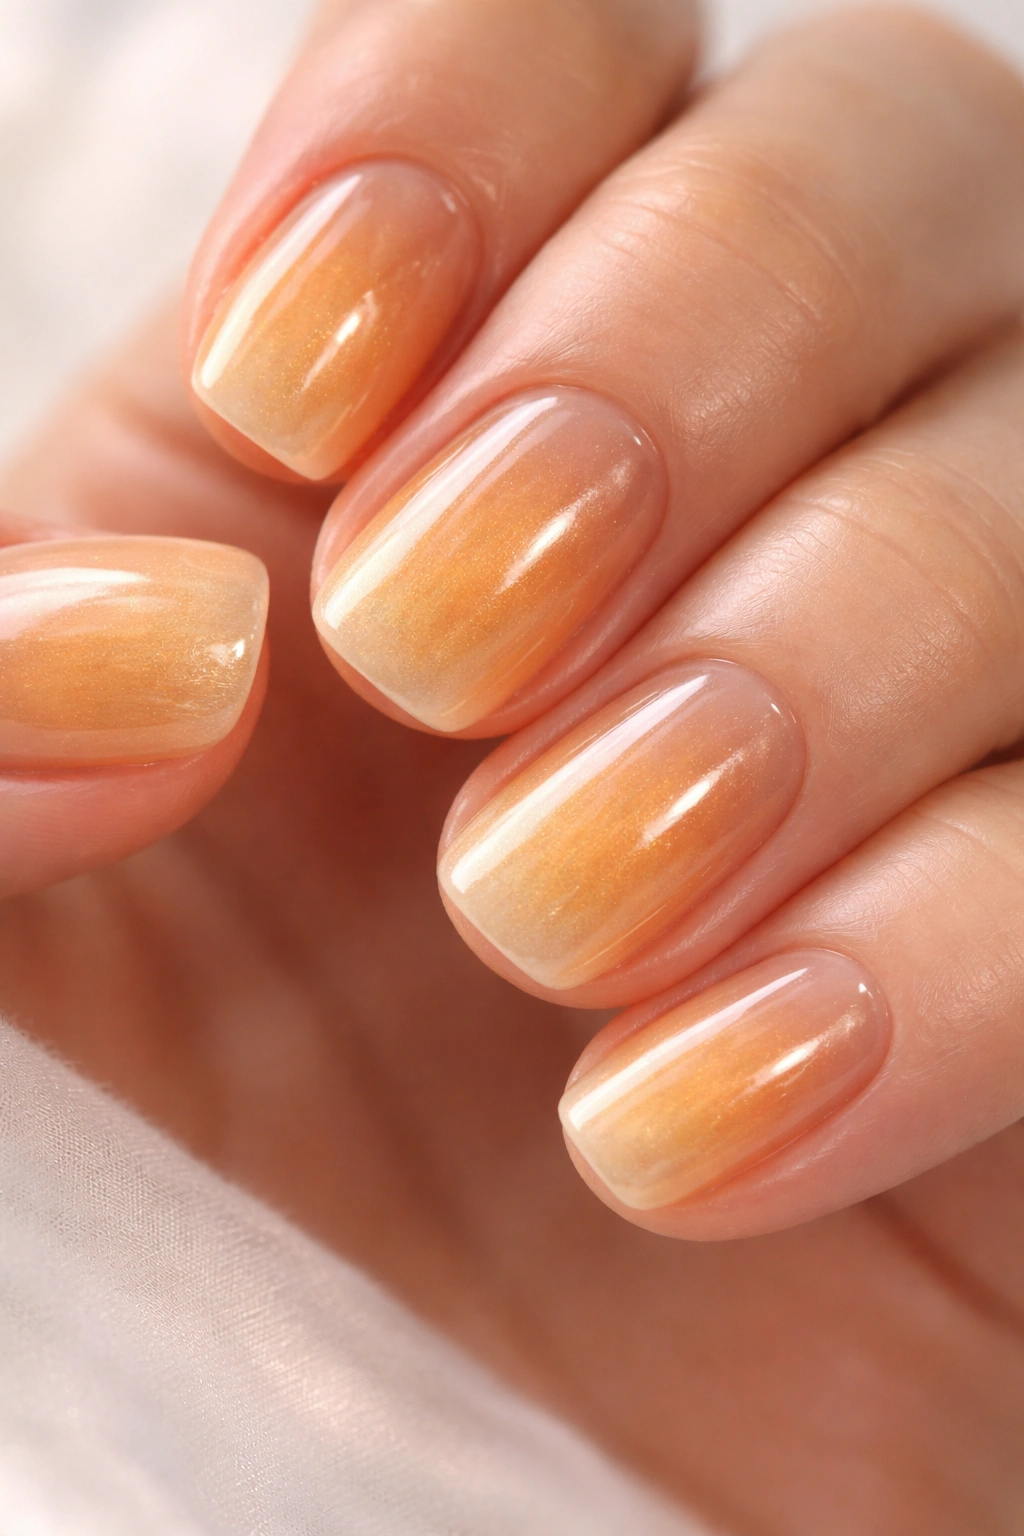
3. Warm Caramel Ombre
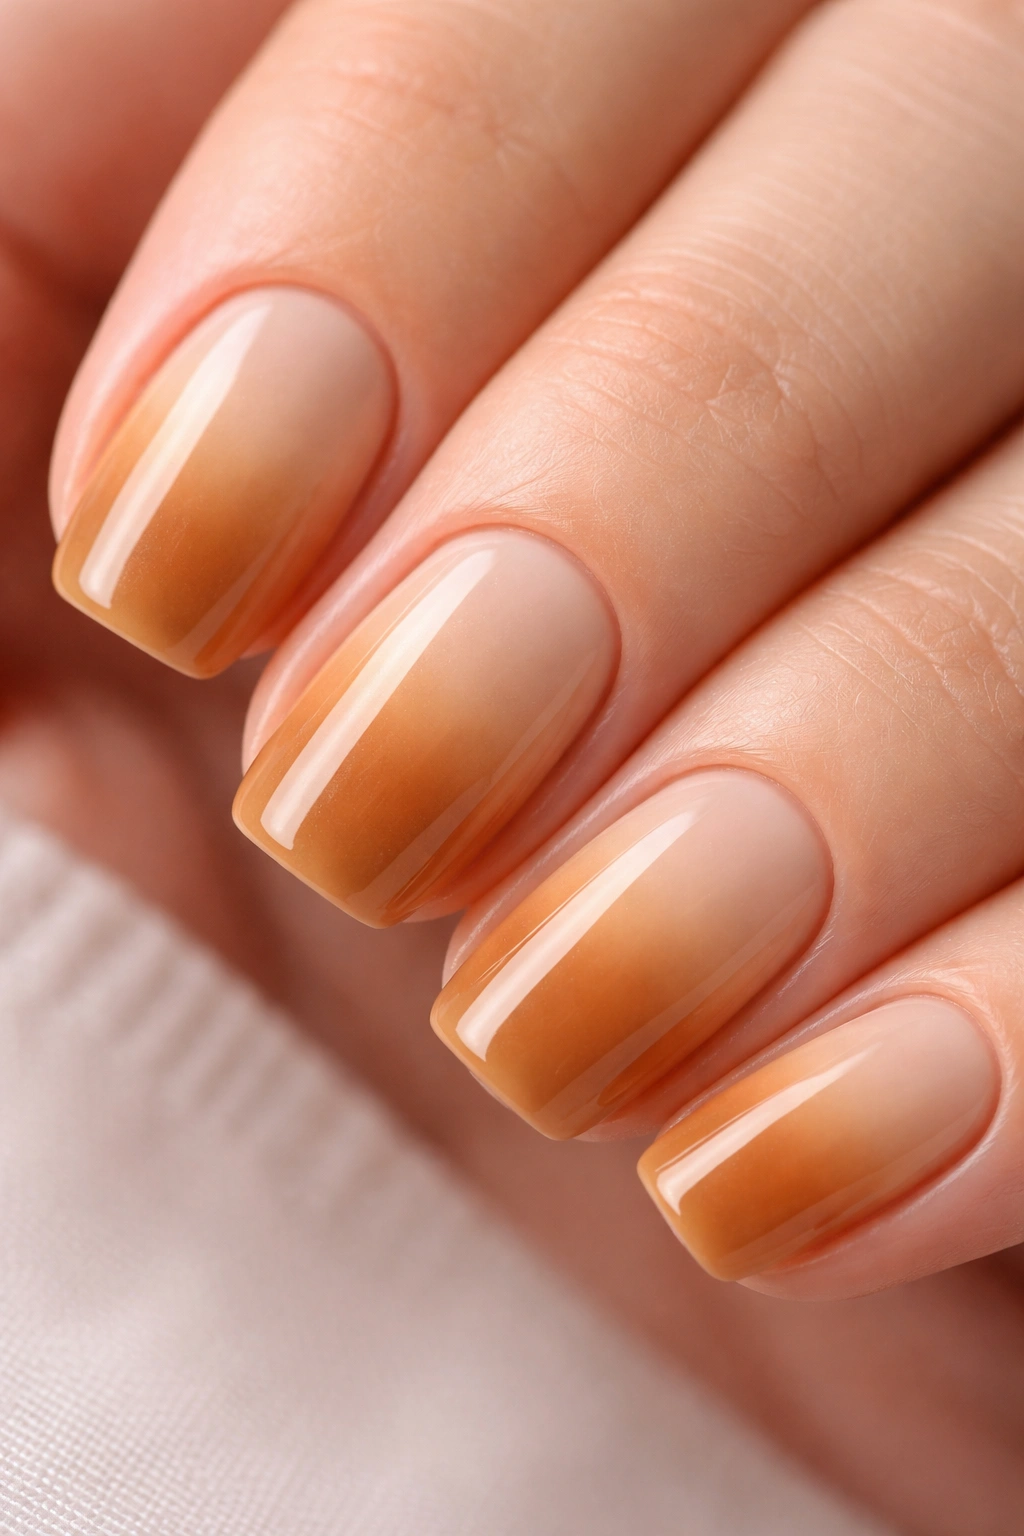
Ombre designs on short nails require more precision than on longer nails because you have less space to work with, but when executed well, a caramel ombre is stunning. This design features a gradient that transitions from a light cream or pale yellow at the base to a rich caramel or light brown at the tips, creating dimension and depth on each nail.
What Makes Ombre Special on Short Squovals
The beauty of an ombre on a short squoval is that the gradient has just enough space to feel intentional while not requiring the nail to be extremely long. The rounded-square shape of a squoval actually allows the ombre to flow more naturally than it would on a square nail with hard edges. Light-to-dark gradients are also incredibly flattering because they create the optical illusion of slightly longer nails without actually committing to length.
Step-by-Step Application Guide
- Paint a base coat, then apply 2 coats of your lightest shade (cream or pale yellow) and let dry completely
- On a makeup sponge, dab your medium caramel shade onto the edge, slightly overlapping the light base — this is where the gradient begins
- Dab your darkest brown shade onto the very tip of the sponge, creating a subtle transition zone
- Gently press the sponge onto your nail with a rolling motion from base to tip — avoid stomping, which creates harsh lines
- Repeat this sponging technique on all ten nails, allowing the colors to blend slightly
- Apply a glossy top coat to blend the transition further and create a seamless effect
- If the gradient looks too harsh, apply another layer of the medium caramel shade on the sponge and gently tap the middle of the nail to soften the lines
Pro tip: Practice your ombre sponging on a practice nail wheel or on a spare fingernail before committing to all ten — the pressure and rolling motion take practice to get smooth.
4. Burnt Orange with Geometric Patterns
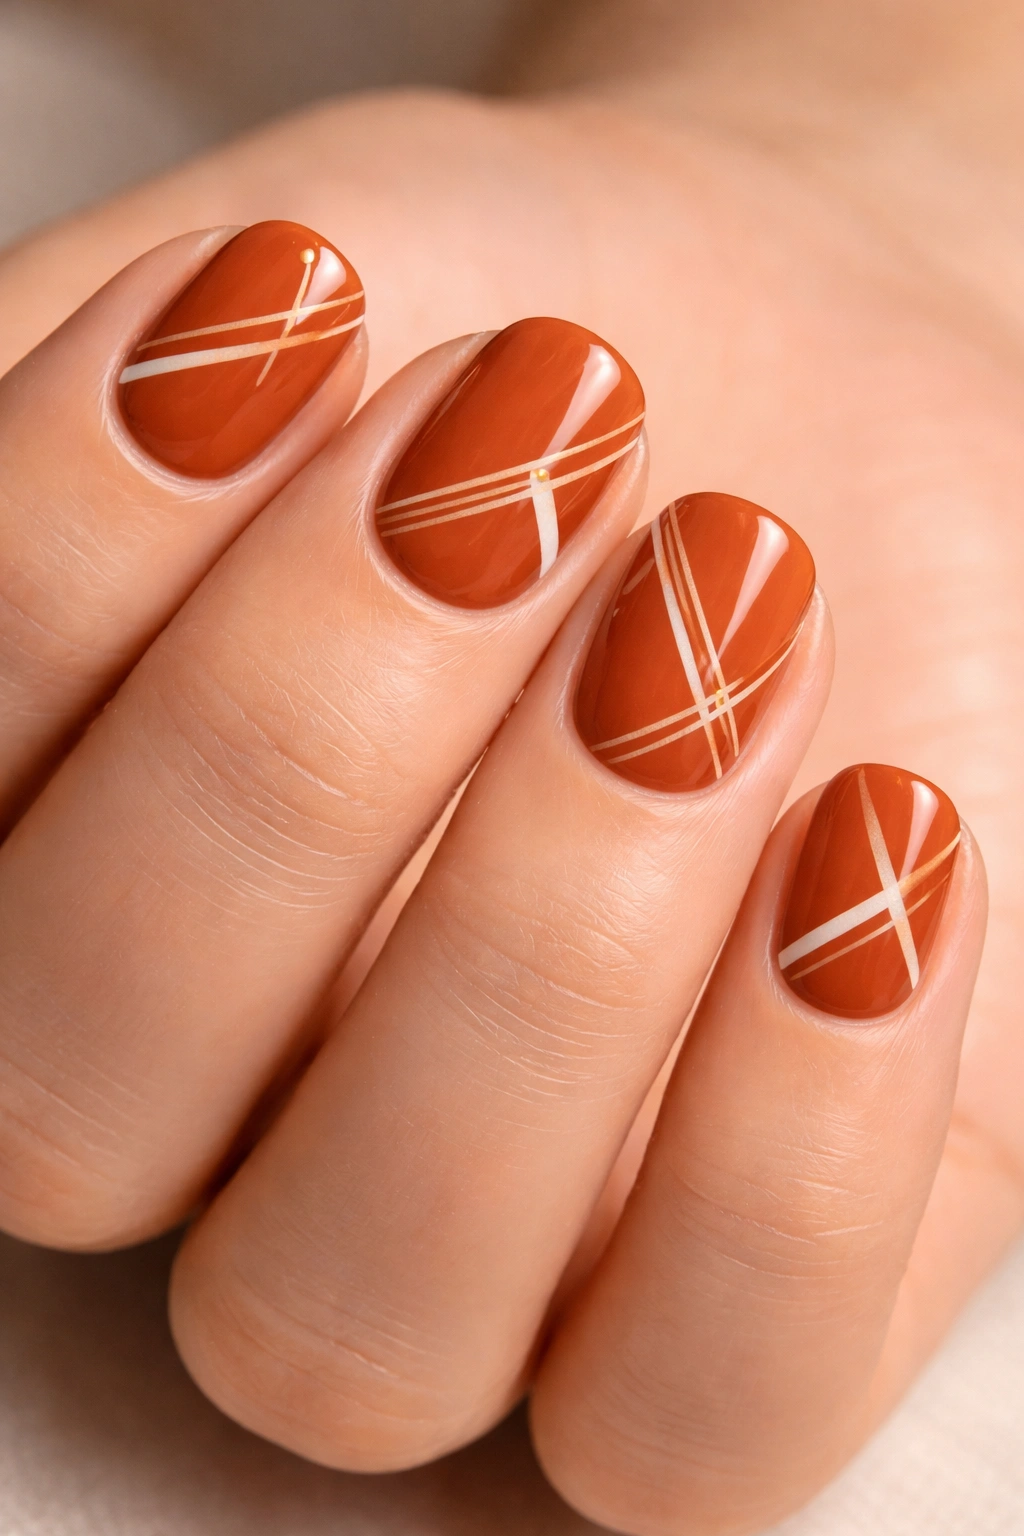
Burnt orange is the warm tone that feels both modern and slightly retro at once — it’s the color of autumn leaves, warm spices, and vintage design trends. Pair it with geometric patterns and you’ve got a design that feels intentional and artistic without being over-the-top. The key is keeping the geometric elements simple enough to read clearly on short squoval nails.
Why Geometric Patterns Elevate Simple Colors
A solid burnt orange is lovely, but add even simple geometric shapes and suddenly the design feels curated and thoughtful. Geometric patterns also give you flexibility — you can make them as simple or as detailed as your comfort level allows. Thin lines, simple triangles, stripes, or dots all work beautifully on short squovals, and they all communicate that this is a deliberate, designed look.
Execution Techniques That Work
- Apply 2 coats of a warm burnt orange base and let dry completely
- Using a thin detail brush or a striping tool with white, black, or gold polish, paint thin lines across the nail horizontally or vertically
- Create simple geometric shapes like small triangles near the tip or sides — these don’t need to be perfect to look intentional
- For a more intricate look, create a half-nail geometric pattern where the top half has lines or shapes and the bottom is solid color
- Alternatively, use striping tape to create perfectly straight lines — this removes the pressure of free-hand painting
- Seal with a glossy top coat so the details stay crisp
Real talk: Geometric patterns don’t have to be perfect to look great. Slightly imperfect lines often read as more handmade and artistic than perfectly executed ones, so don’t stress about perfection here.
5. Honey Gold Glazed Nails
Honey gold is a warm, translucent-looking tone that creates an almost luminous effect on nails — it’s the color of late-afternoon sunlight, golden honey held up to light, and luxury without loudness. A “glazed” effect means you’re layering the color so it appears to have depth and translucency, like you’re looking through layers of amber glass.
The Psychology of Honey Gold
Honey gold reads as universally flattering and inherently luxurious. Unlike pale golds that can read as washed out or cool metallics that feel impersonal, honey gold has warmth and presence while still remaining subtle and refined. On short squoval nails, this tone creates the impression of elegant, well-maintained hands without any edge of trying too hard.
How to Create the Glazed Effect
- Start with a neutral or peachy base coat that shows through — this creates the foundation for translucency
- Apply 1-2 thin coats of a honey gold or warm yellow-gold polish — the translucency of the polish matters here, so choose a shade that’s labeled as “sheer” or “glazed” rather than opaque
- If you want extra dimension, add a very thin layer of nude or beige polish over the gold for a slightly smoky, warm tone
- The glazed effect is amplified by a thick, glossy top coat — apply generously so the nails have a wet, luminous appearance
- Some people add a touch of fine gold glitter to the tip while the top coat is still wet for extra dimension, but this is optional
Insider note: This design works best when your nails have visible cuticles and nail beds — the contrast between the nude nail bed and the honey gold creates the glazed, translucent effect. So skip the opaque base if you’re going for this look.
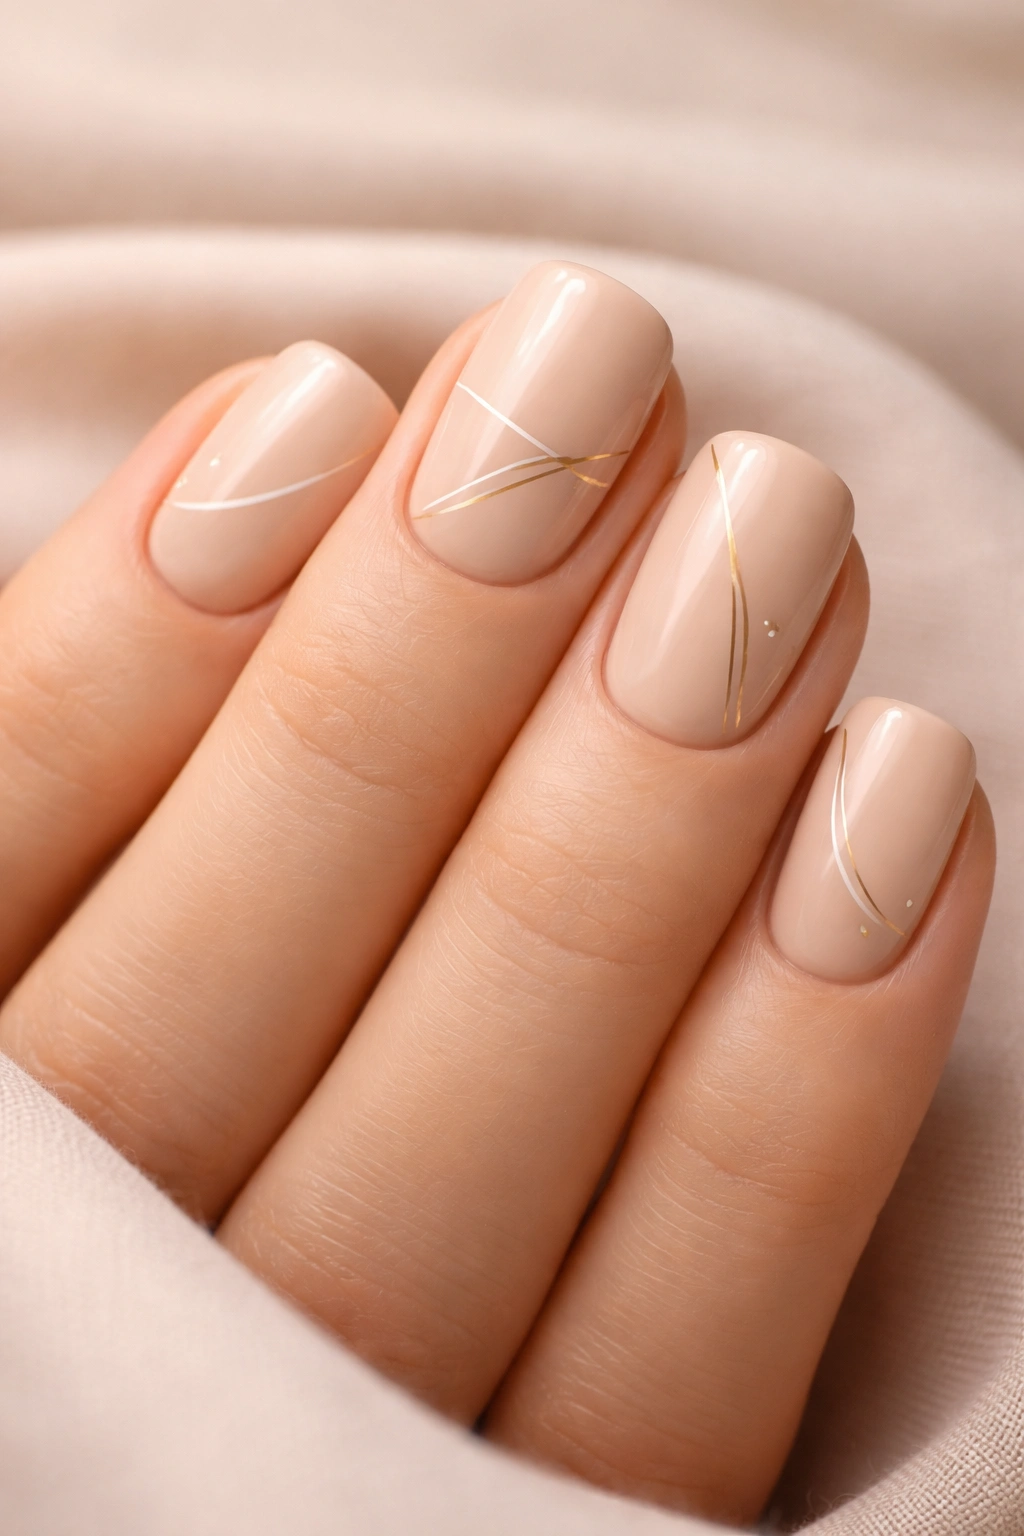
6. Warm Nude with Fine Line Details
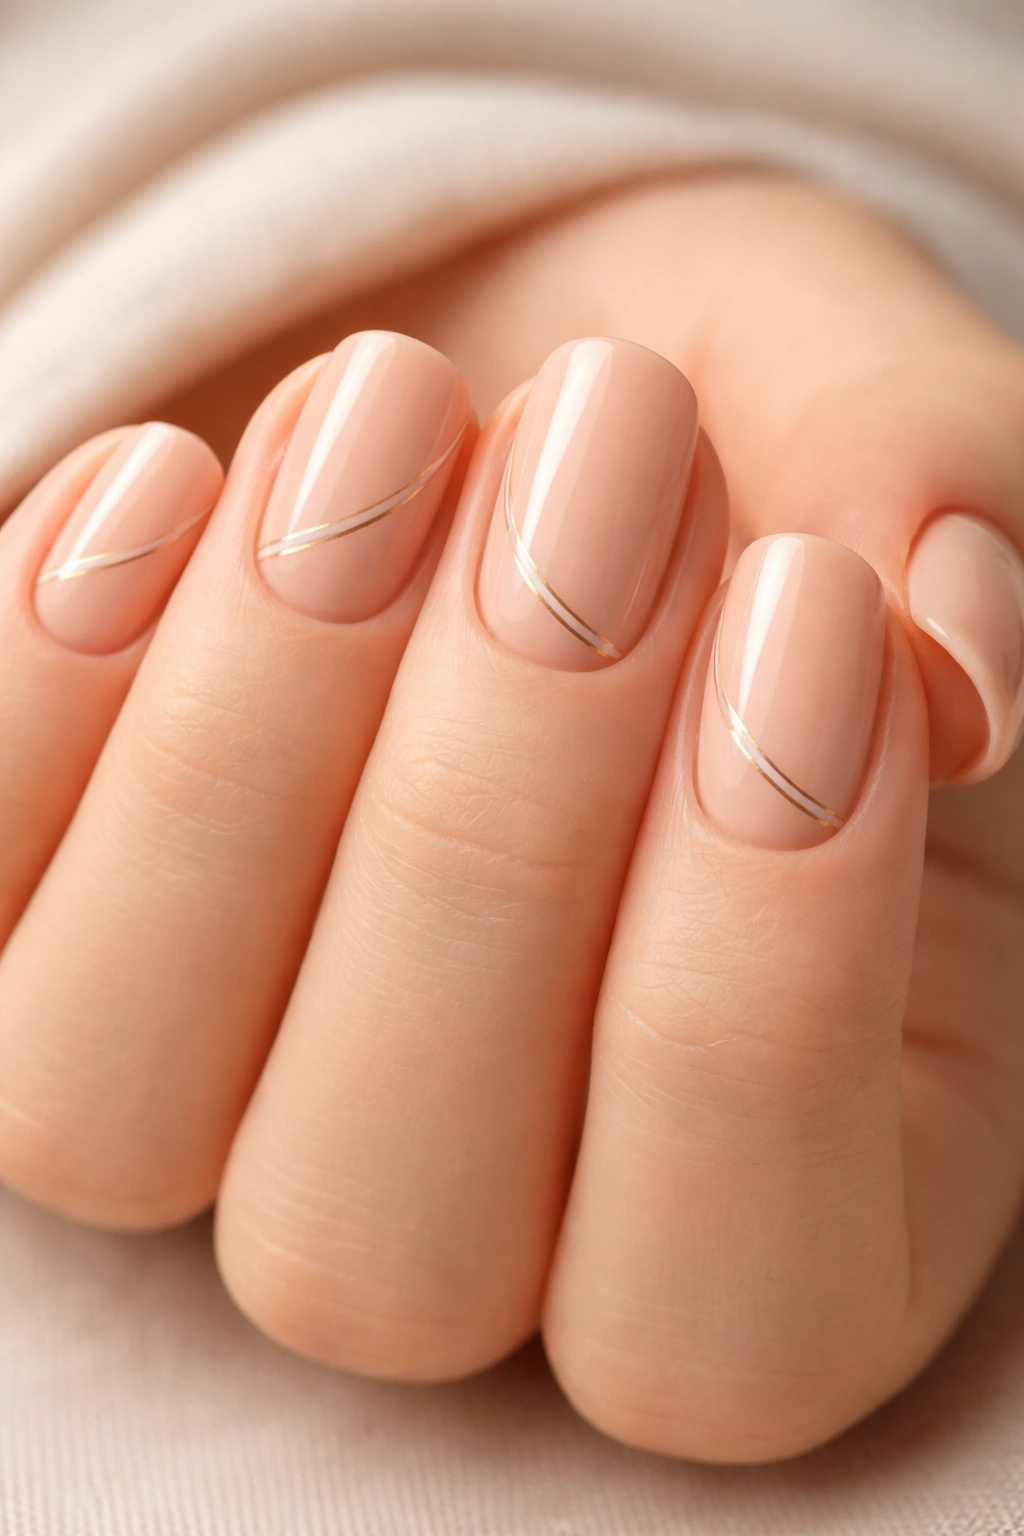
A warm nude base is the ultimate neutral canvas — it elongates the fingers, works with every skin tone, and pairs with any outfit or occasion. But a plain warm nude can feel boring, which is why adding fine line details transforms it into something that feels intentional and designed. Fine lines can be simple or intricate, depending on your comfort level.
Why Warm Nudés Are the Ultimate Versatile Base
The difference between a cool nude and a warm nude is significant. A cool nude with pink undertones can sometimes read as washed out on certain skin tones, while a warm nude with peachy, golden, or beige undertones feels flattering and intentional on almost everyone. On short squoval nails, a warm nude is the perfect base because it already reads as elegant — the fine line details then add personality without overwhelming the shape.
Line Detail Ideas That Work
- Thin horizontal lines across the nail in black, charcoal, or a darker nude shade
- A single vertical line down the center of each nail, creating a minimalist stripe
- Fine lines near the cuticle or tip, framing the nail without covering the whole surface
- An asymmetrical placement where lines appear on just 2-3 fingers rather than all ten
- Very thin gold or silver lines for a more luxe interpretation
- A negative space design where you paint lines on the lower half, leaving the upper half completely nude
Pro tip: If you’re worried about shaky lines, use a thin striping brush and very steady pressure — go slowly rather than trying to complete the line in one motion. Slow, deliberate strokes look more polished than rushed ones.
7. Rust and Copper Chrome
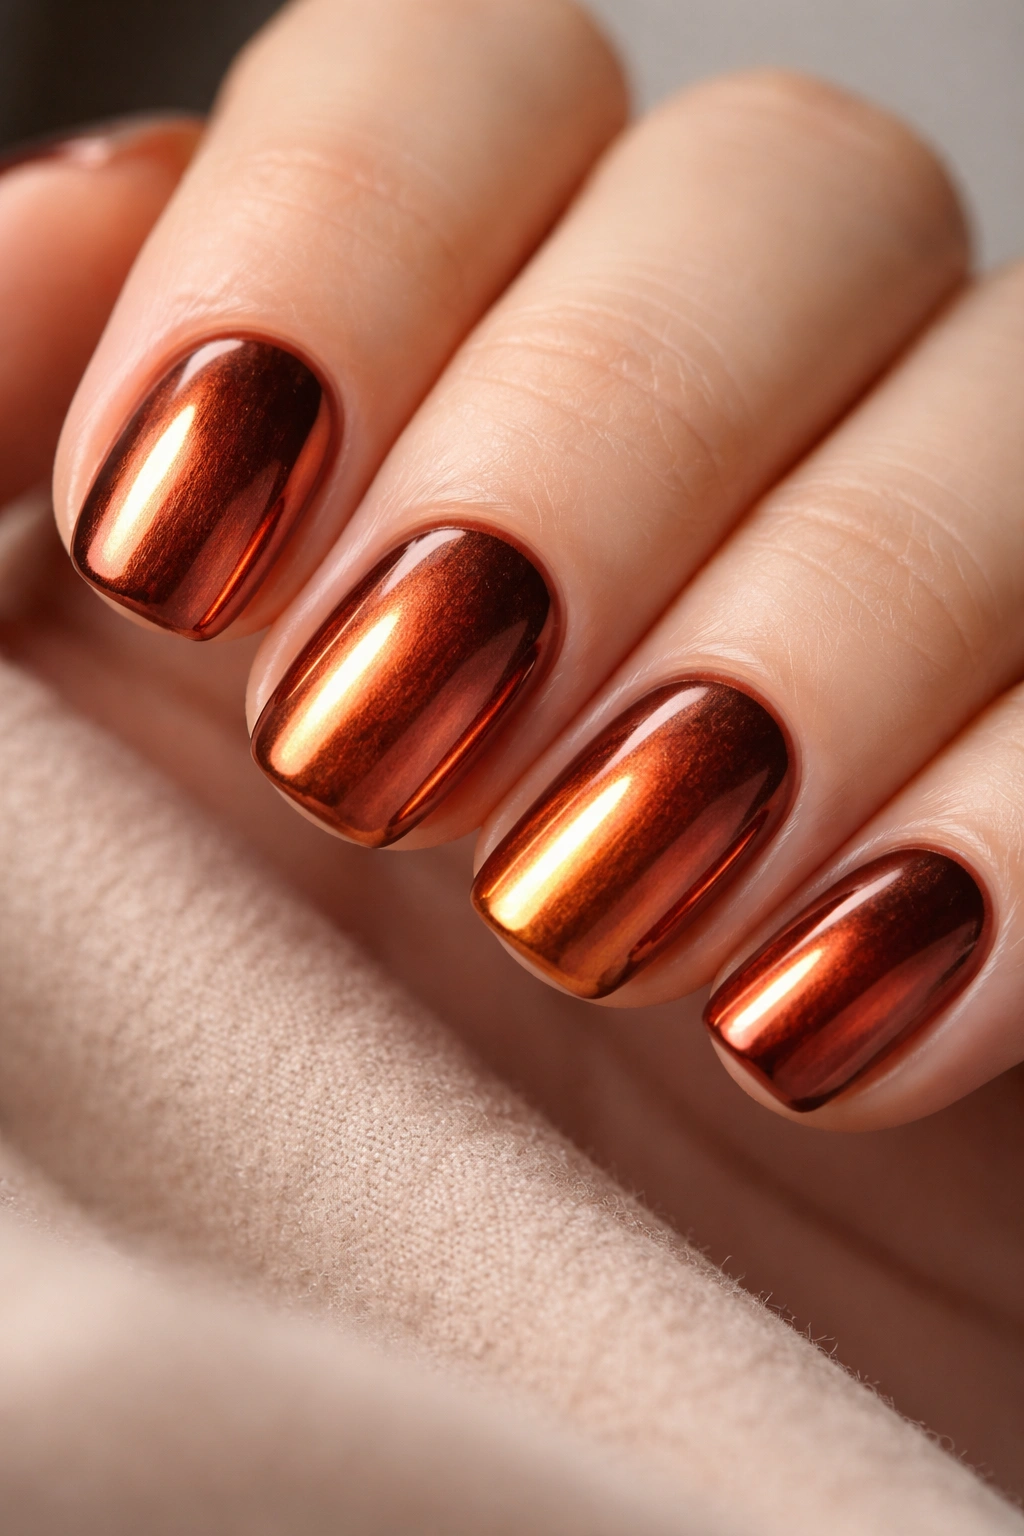
Chrome and metallic finishes have evolved dramatically — they’re no longer limited to silver and gold. Rust and copper chromes create a warm, dimensional effect that makes nails look three-dimensional and expensive. These finishes catch light differently than regular polish, creating movement and depth that commands attention.
What Makes Rust Chrome Special
Rust chrome sits in that perfect intersection between warm and metallic. It reads as luxurious and intentional without being as flashy as silver chrome. The warm undertones prevent it from feeling cold or icy, making it feel more approachable and wearable than cooler metallic finishes. On short squoval nails, the compact shape actually lets the chrome effect shine because there’s less surface area competing for attention.
How to Achieve the Chrome Effect
- Start with a smooth, well-prepared nail surface — any bumps or texture will show through the chrome
- Apply a base coat, then apply 1-2 coats of the rust or copper chrome polish
- Chrome polishes are typically thin, so you may need 2-3 coats depending on the brand’s opacity
- Allow full dry time between coats — rushing this step results in streaky, uneven chrome
- Seal with a glossy top coat for maximum shine and longevity
- If your chrome looks patchy after drying, you can apply another thin layer of the chrome polish to even it out
- Alternatively, some people use a chrome powder applied to a tacky base coat, though this requires a bit more technique
Worth knowing: Chrome finishes can appear different depending on lighting — indoors they may look more rust-toned, while in sunlight they appear more copper and reflective. Both are normal and beautiful.
8. Chocolate Brown with Metallic Tips
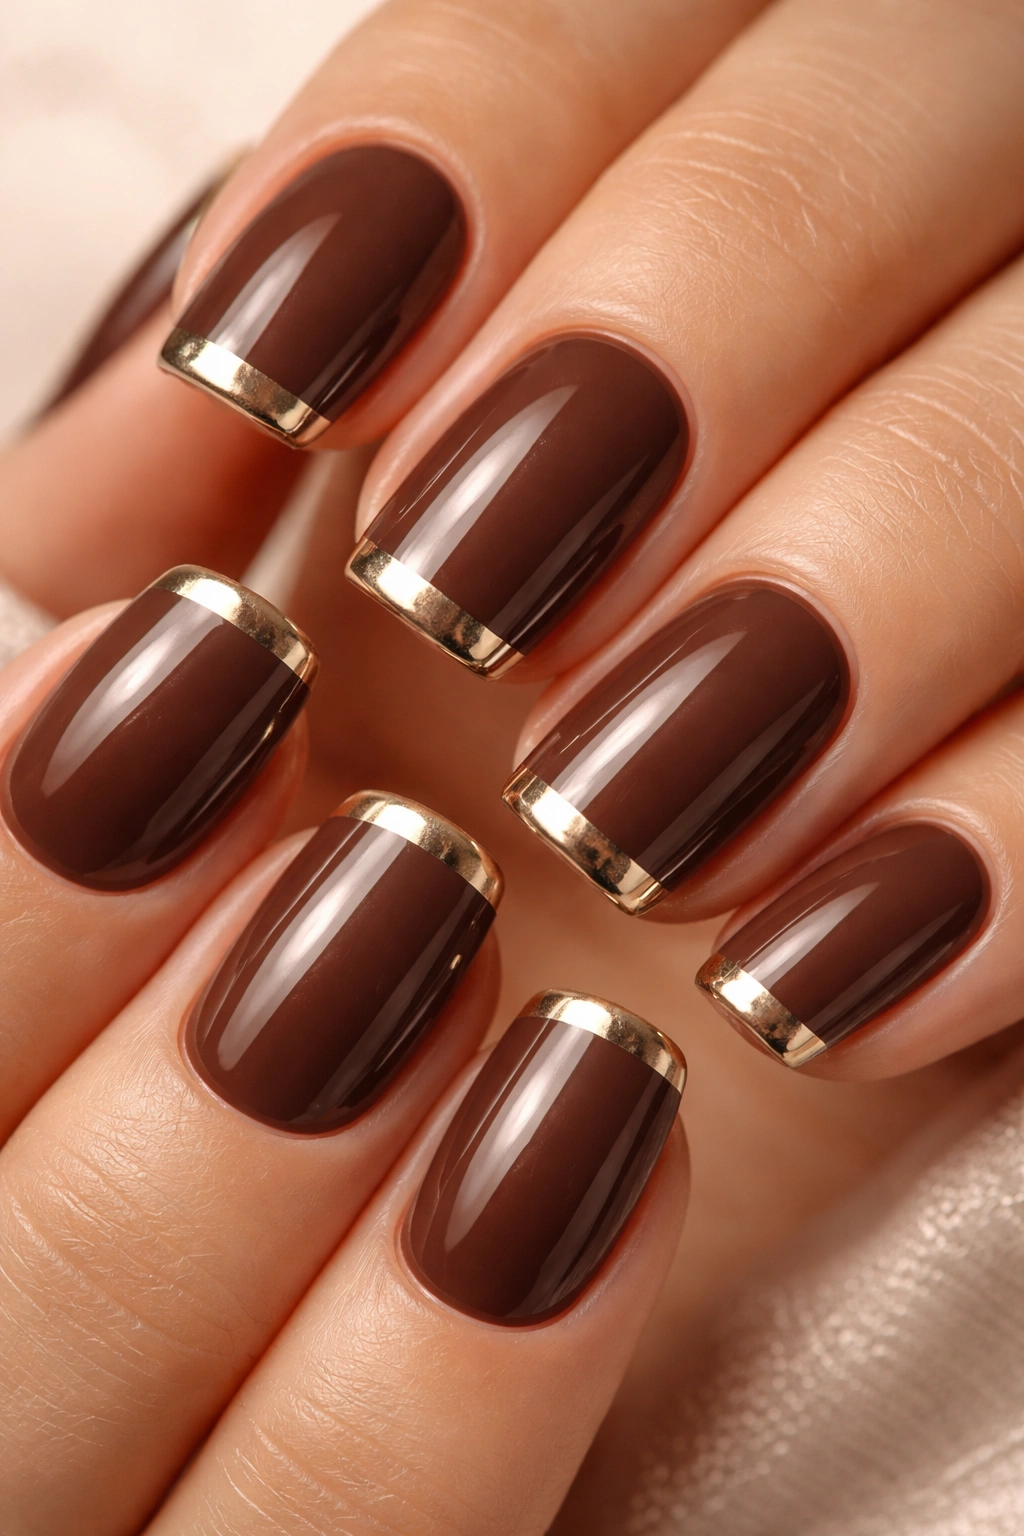
This design combines a creamy chocolate brown base with metallic tips — a twist on the classic French manicure that feels warm, luxurious, and modern. The metallic tips catch light and add just enough sparkle to feel special without being over-the-top. The chocolate brown creates a rich, sophisticated backdrop.
Why Metallic Tips Transform a Simple Design
A basic chocolate brown manicure is nice, but chocolate brown with any kind of metallic detail instantly feels more intentional and luxe. The metallic tip draws the eye to the fingertip, creating the optical illusion of slightly longer nails. On a short squoval, this is particularly effective because the tip shape is already rounded and elegant — the metallic accent enhances that without adding visual weight.
Painting the Metallic Tip
- Apply 2 coats of a creamy chocolate brown base and let dry completely
- Using a thin detail brush or a striping tool, carefully paint a thin metallic line just above the edge of the nail, creating a metallic “tip” that sits about 1-2mm below the actual nail edge
- Alternatively, paint a thicker metallic band — roughly 2-3mm thick — for a bolder look
- Use gold, copper, rose gold, or silver depending on your preference and skin tone — gold and copper complement brown beautifully
- You can make the metallic tip symmetrical across all nails, or vary the placement for an asymmetrical look
- Seal everything with a glossy top coat for maximum shine and protection
Real talk: Free-hand metallic tips take practice. If you’re not confident in your line work, use thin metallic striping tape — it’s forgiving and gives you perfectly straight, clean lines.
9. Warm Peach with Floral Stamping
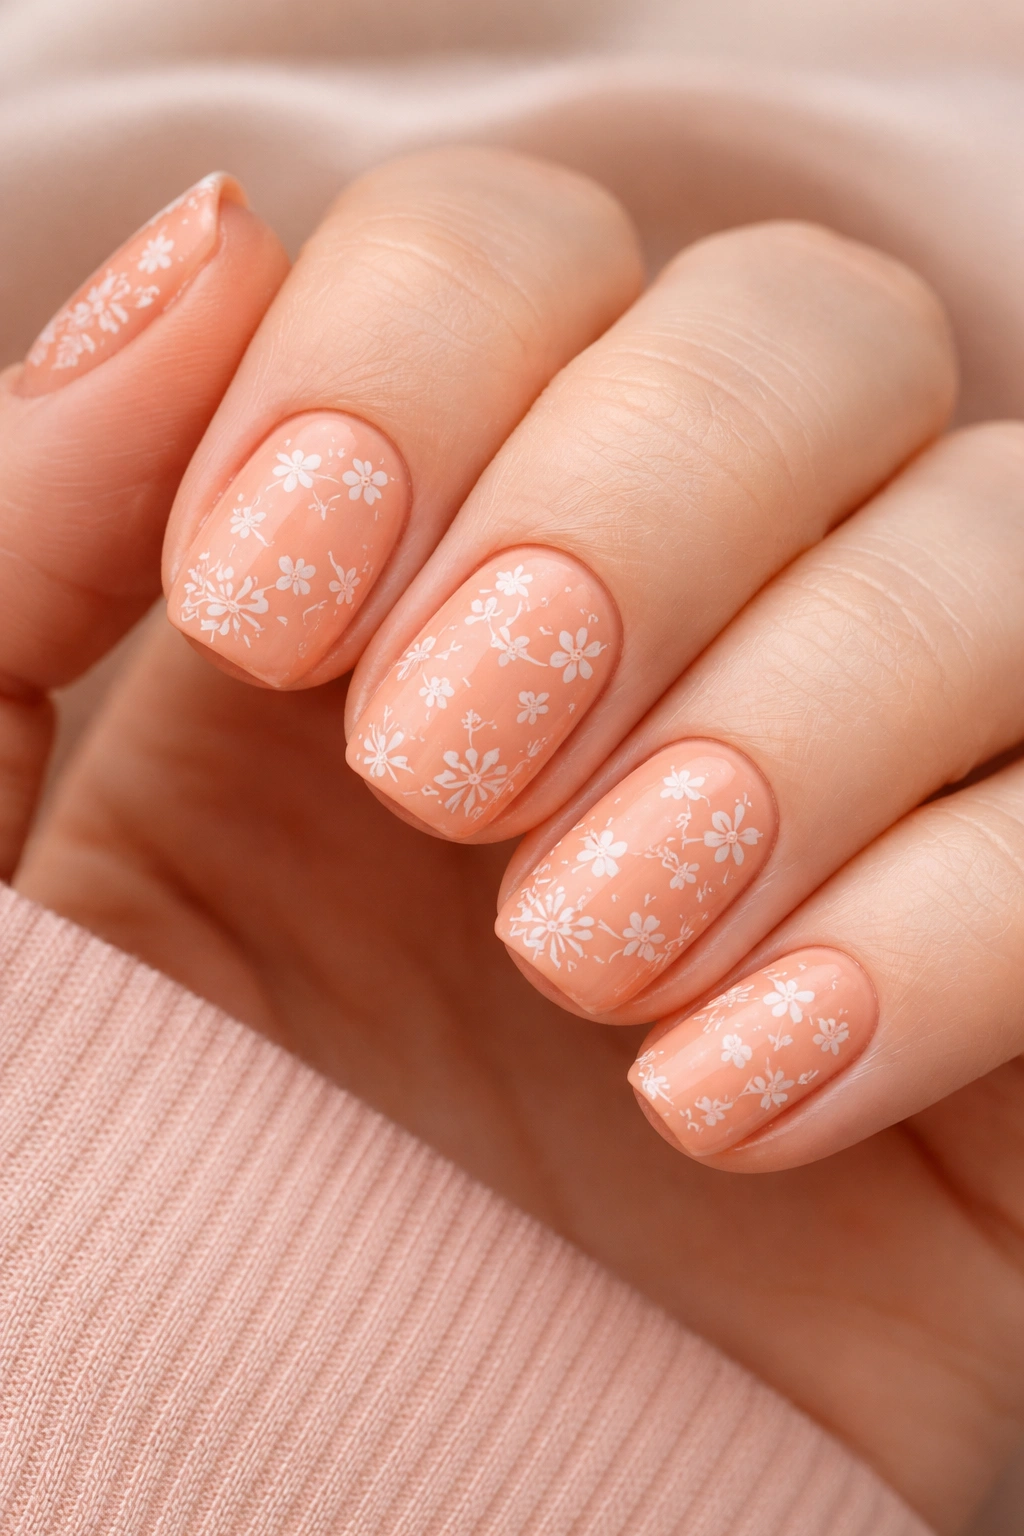
Peach is the universally flattering warm tone that makes almost everyone’s fingers look healthy, happy, and polished. Add floral stamping and suddenly your manicure feels artistic and thoughtful. The beauty of stamped florals is that they require minimal artistic skill — the stamp does the heavy lifting while you get all the credit for a complex-looking design.
The Universal Appeal of Warm Peach
Peach works on all skin tones because it’s warm without being orange-heavy, and it’s saturated enough to feel present without being loud. It reads as optimistic and approachable, the kind of color that makes people feel good about their hands. On short squoval nails, peach looks especially flattering because the shape is neat and modern — the color adds softness while the shape keeps it polished.
How to Stamp Florals Successfully
- Apply 2 coats of peach base and let dry completely — stamping works best on a smooth, fully dried surface
- Choose a stamping plate with small to medium-sized floral designs — large, intricate florals can feel crowded on short nails
- Scrape the stamping polish across the plate in one fluid motion, at about a 45-degree angle
- Press the stamper firmly onto the design for 2-3 seconds without moving it, then roll it off the plate in one smooth motion
- Position the stamper on your nail and apply firm, even pressure for 2-3 seconds
- Carefully roll the stamper away from your nail — this technique transfers the design cleanly
- Stamp all ten nails, then seal with a glossy top coat
- You can stamp all ten nails identically, or vary which nails get stamped and which stay solid peach
Pro tip: Keep a piece of scotch tape nearby while stamping — if a stamp doesn’t transfer cleanly, you can use a small piece of tape to gently pull up the partial design and try again.
10. Mustard Yellow with Black Stripes
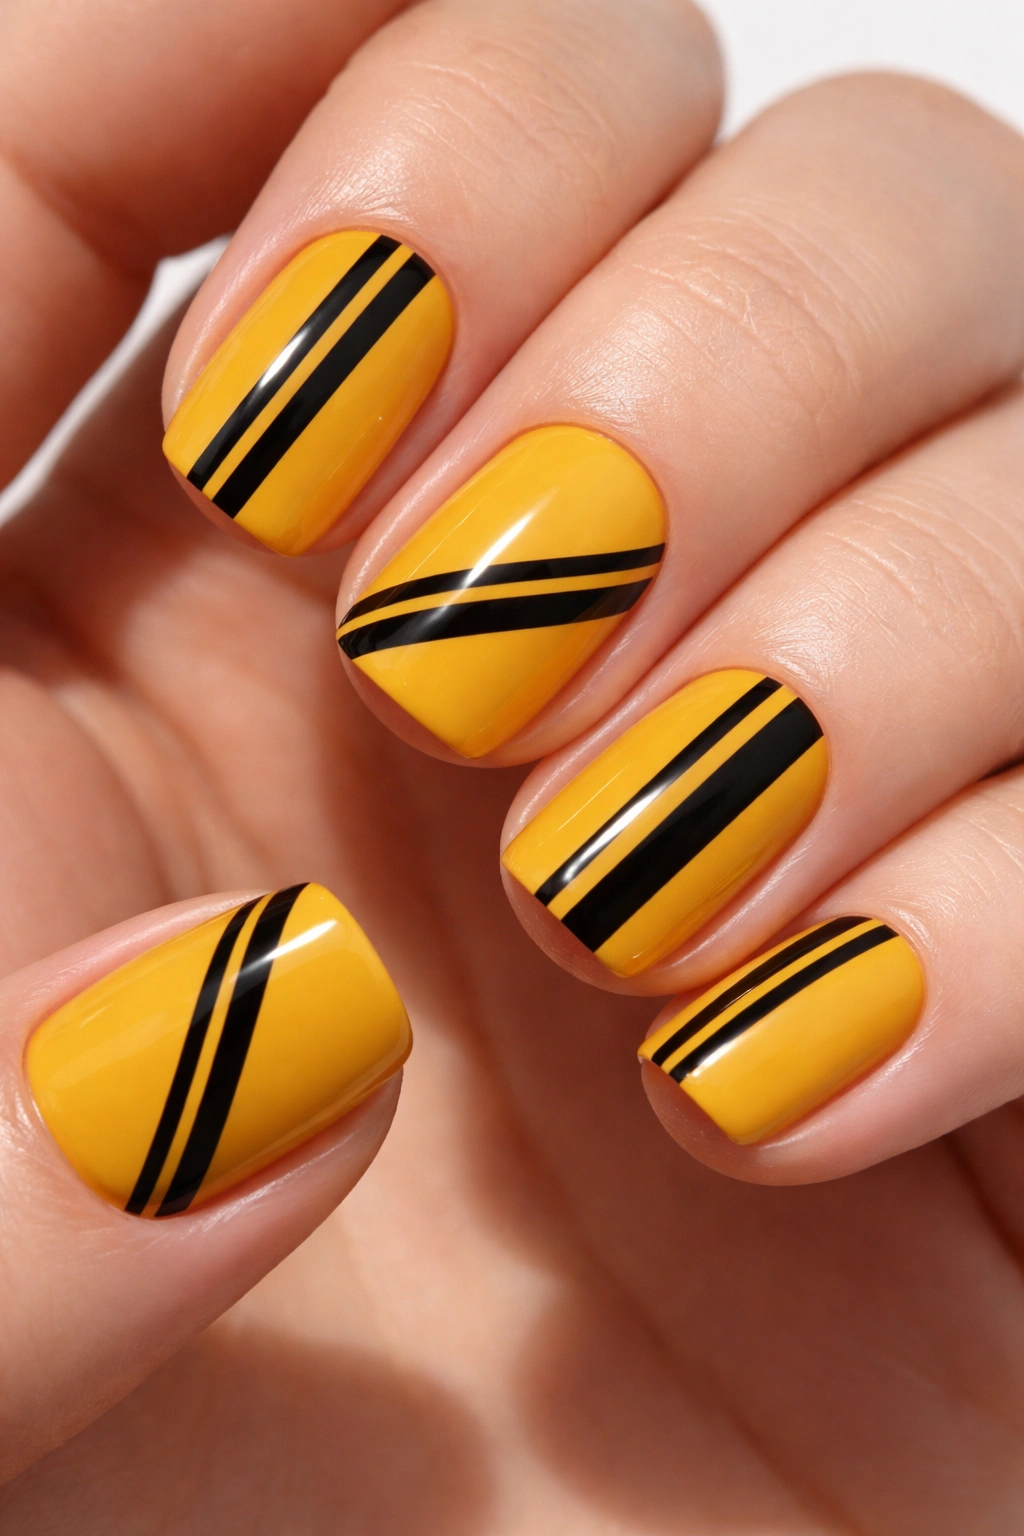
Mustard yellow is a warm, sophisticated take on basic yellow — it leans olive and earthy rather than bright and primary. Pair it with crisp black stripes and you’ve got a design that feels both retro-inspired and entirely modern. The combination reads as intentional and artistic without being whimsical or playful.
Why Mustard and Black Is Such a Power Combination
Mustard yellow alone is a bold statement, but it’s a statement that says you’re confident and thoughtful. Add black stripes and you’ve created contrast that makes both colors pop while adding geometric sophistication. This combo has a distinctly vintage-modern vibe — it references retro design but feels completely current. On short squoval nails, the boldness of this combination is grounded by the neat, modern shape.
Creating Clean Stripes
- Apply 2-3 coats of mustard yellow, allowing full dry time between coats
- Using a thin striping brush or striping tool, paint thin black lines either horizontally, vertically, or diagonally
- For horizontal stripes, create evenly spaced lines across the nail — roughly 2-3mm apart works well
- For a chevron or diagonal stripe pattern, paint lines at a consistent angle across all nails for a cohesive look
- Alternatively, use black striping tape for perfectly straight lines with zero pressure
- Keep stripes thin and crisp — thin lines read as sophisticated while thick stripes can feel overpowering
- Seal with a glossy top coat to make the black pop against the mustard
Real talk: This design is bold, and that’s the whole point. If you’re nervous about committing to mustard yellow on all ten nails, try it on four or five nails and keep the others solid mustard as a compromise.
11. Spiced Cinnamon with Holographic Accents
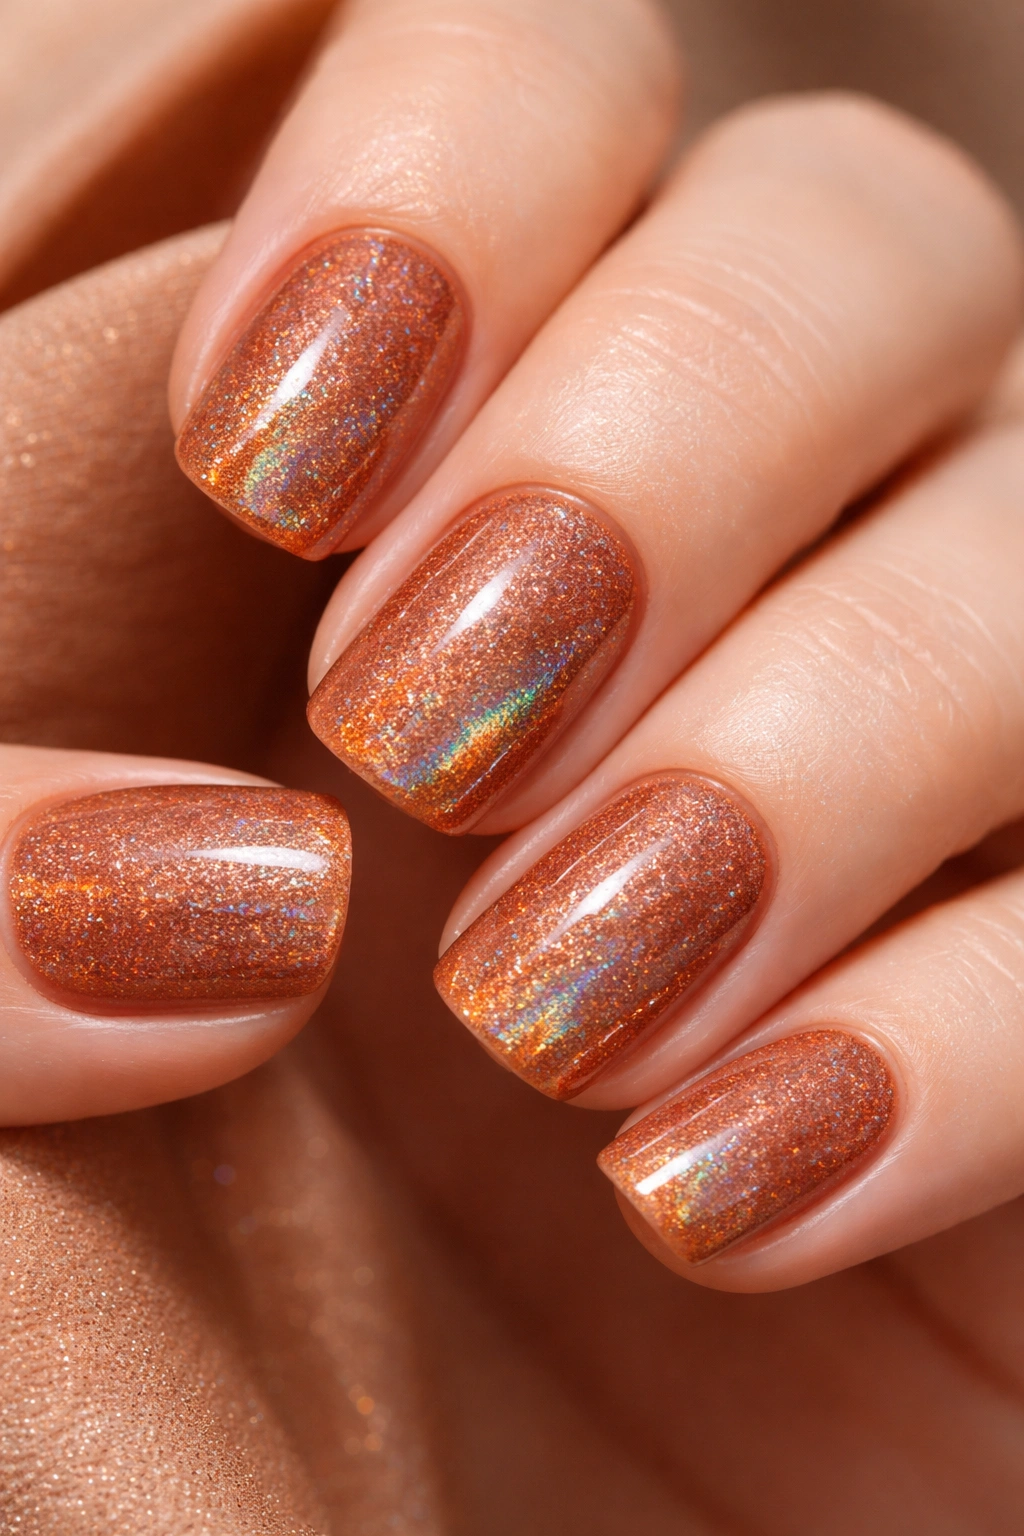
Cinnamon is one of those perfect warm tones that feels both spicy and cozy at once — it’s richer than nude, lighter than brown, and somehow works with almost every aesthetic. Add holographic accents (those rainbow-chrome elements that shift and shimmer) and you’ve created a design with personality and subtle playfulness without being childish or over-the-top.
The Allure of Holographic Details
Holographic accents work because they’re subtle but noticeable — they catch light and create rainbow reflections without overwhelming the base color. On a warm cinnamon background, holographic elements feel luxe and intentional rather than glittery or costume-y. The interplay between the warm, neutral base and the color-shifting accents creates visual interest and dimension.
Applying Holographic Accents
- Paint 2 coats of a warm cinnamon polish and let dry completely
- Holographic effects can be achieved multiple ways: holographic powder applied to a tacky base coat, holographic polish painted on top of the base, or holographic foil pressed onto the nail
- For the powder method: apply a thin layer of clear or tacky base coat over the cinnamon, then use a fluffy brush to press holographic powder onto the wet base coat, focusing on tips or specific areas
- For the polish method: use a thin detail brush to paint holographic polish onto specific areas — tips, corners, or accent nails
- For the foil method: apply a thin layer of special foil adhesive, let it get tacky, then press holographic foil onto it and seal
- Each method gives a slightly different effect, so experiment with whichever feels most achievable to you
- Seal everything with a glossy top coat to protect and enhance the holographic effect
Insider note: Holographic accents show up best in natural daylight and under certain indoor lighting. In some lighting conditions they’re more subtle, but that’s actually part of their charm.
12. Warm Beige with Minimalist Line Art
Minimalist line art is the thinking person’s nail design — it’s artistic and intentional without requiring advanced technical skill or being visually overwhelming. Warm beige is the perfect backdrop for minimalist line art because it doesn’t compete with the design. Simple lines, abstract shapes, or tiny illustrations read cleanly against a warm beige base.
The Power of Minimalism on Short Nails
Minimalist designs work beautifully on short nails because they don’t rely on size or surface area to be effective. A single thin line, a tiny abstract shape, or a small illustration read as intentional and artistic regardless of nail length. The warm beige base ensures that even very delicate line work remains visible and crisp without the nail feeling busy.
Line Art Ideas That Translate Well
- A single curved line flowing from the cuticle to the tip on each nail
- Tiny abstract geometric shapes — small triangles, circles, or lines arranged asymmetrically
- Small illustrations like a simple plant leaf, a tiny bird outline, or a minimalist wave
- A continuous line design that flows across multiple nails
- Scattered small dots or dashes that create a subtle pattern
- An asymmetrical design where only 2-3 nails feature line art while others stay solid beige
- Use thin black, dark brown, charcoal, or even thin gold lines depending on the effect you want
Pro tip: Thin line art is actually easier to execute than you might think — you’re not painting detailed illustrations, just simple lines and shapes. A thin detail brush and steady pressure are all you need.
13. Amber with Tortoiseshell Effect
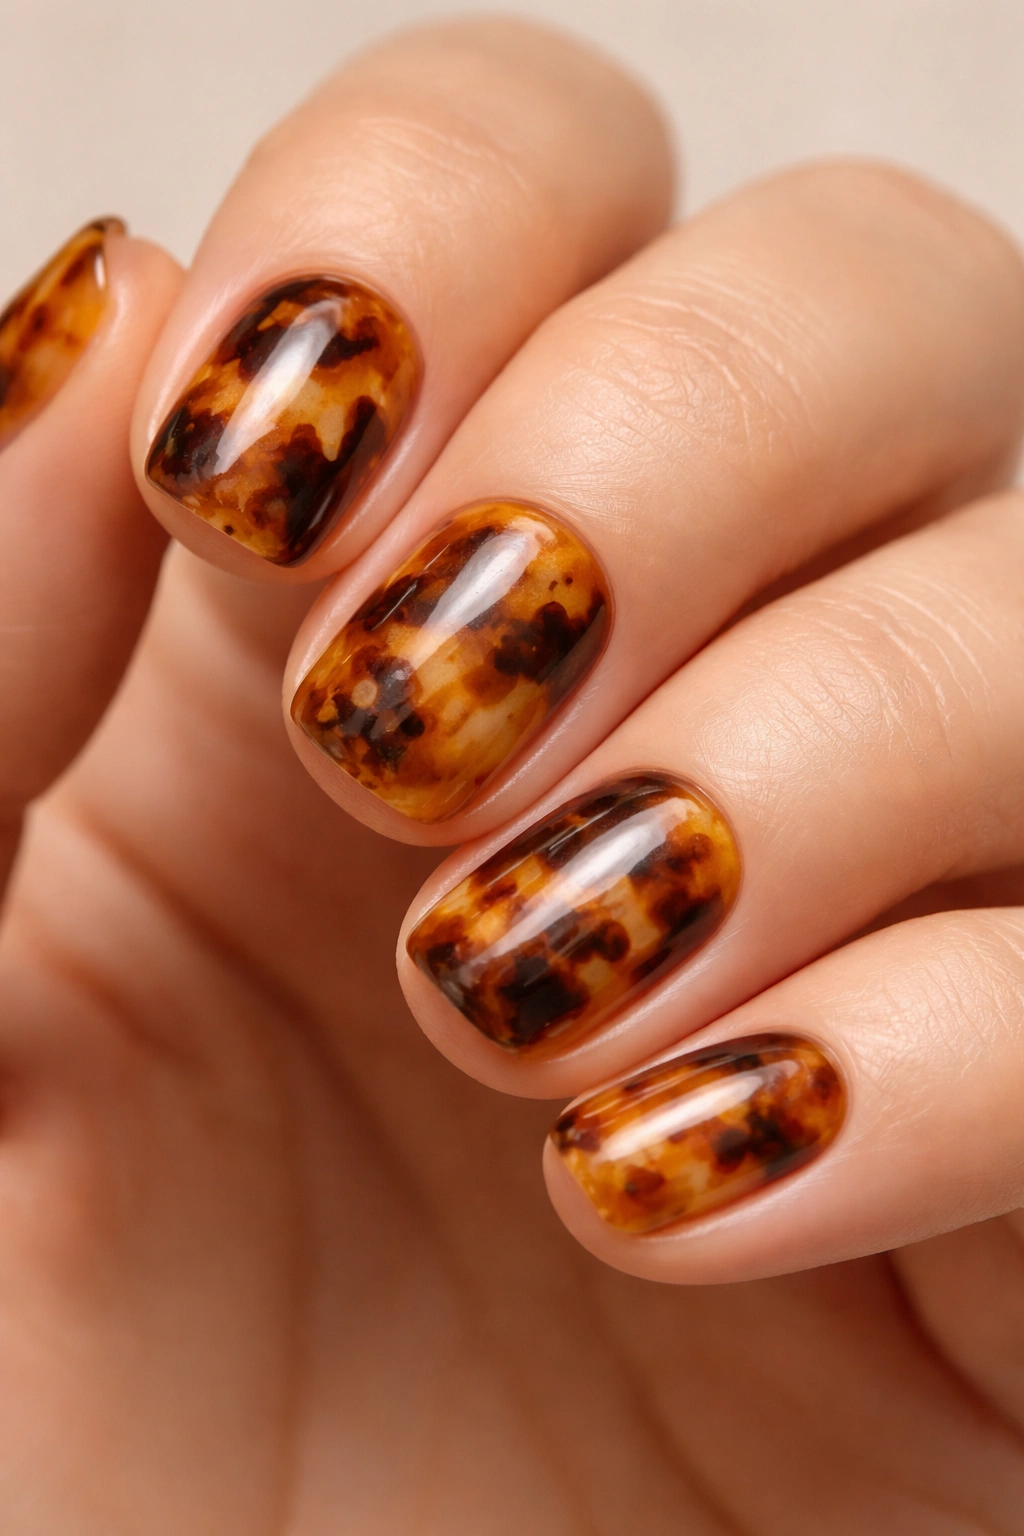
Tortoiseshell is a classic design that feels both vintage and timeless — it references 1970s nostalgia while reading as entirely modern and sophisticated. The amber base creates a warm foundation, while tortoiseshell patterns (usually a blend of amber, brown, black, and cream) add depth and visual movement. This design works beautifully on short squoval nails because the compact surface area lets the pattern read clearly.
Why Tortoiseshell Works on Short Nails
Tortoiseshell patterns can look chaotic on very long nails because there’s too much surface area for the pattern to stay cohesive. On short squoval nails, the pattern has just enough space to feel intentional without appearing overwhelming. The round-square shape also complements the organic, somewhat irregular nature of tortoiseshell patterns — there’s no tension between sharp nail angles and fluid pattern work.
Creating a Tortoiseshell Pattern
- Apply a base coat, then paint 1-2 coats of a warm, medium amber as your main base
- Once dry, take a thin detail brush or a sponge and dab darker browns and blacks onto the nail in irregular, organic patches
- Don’t aim for a specific pattern — tortoiseshell is supposed to look natural and irregular, like actual tortoiseshell material
- Add cream or very light tan details to break up the darker areas and add dimension
- Use a sponge to gently blend where the colors meet, creating softer transitions rather than harsh lines
- Some people add tiny black lines or cracks for added texture and authenticity
- Seal with a glossy top coat to give it that shiny, dimensional look
Worth knowing: Tortoiseshell is forgiving because perfection isn’t the goal — the pattern is supposed to look organic and natural, so slight irregularities actually enhance the effect rather than detract from it.
14. Apricot with Subtle Gradient
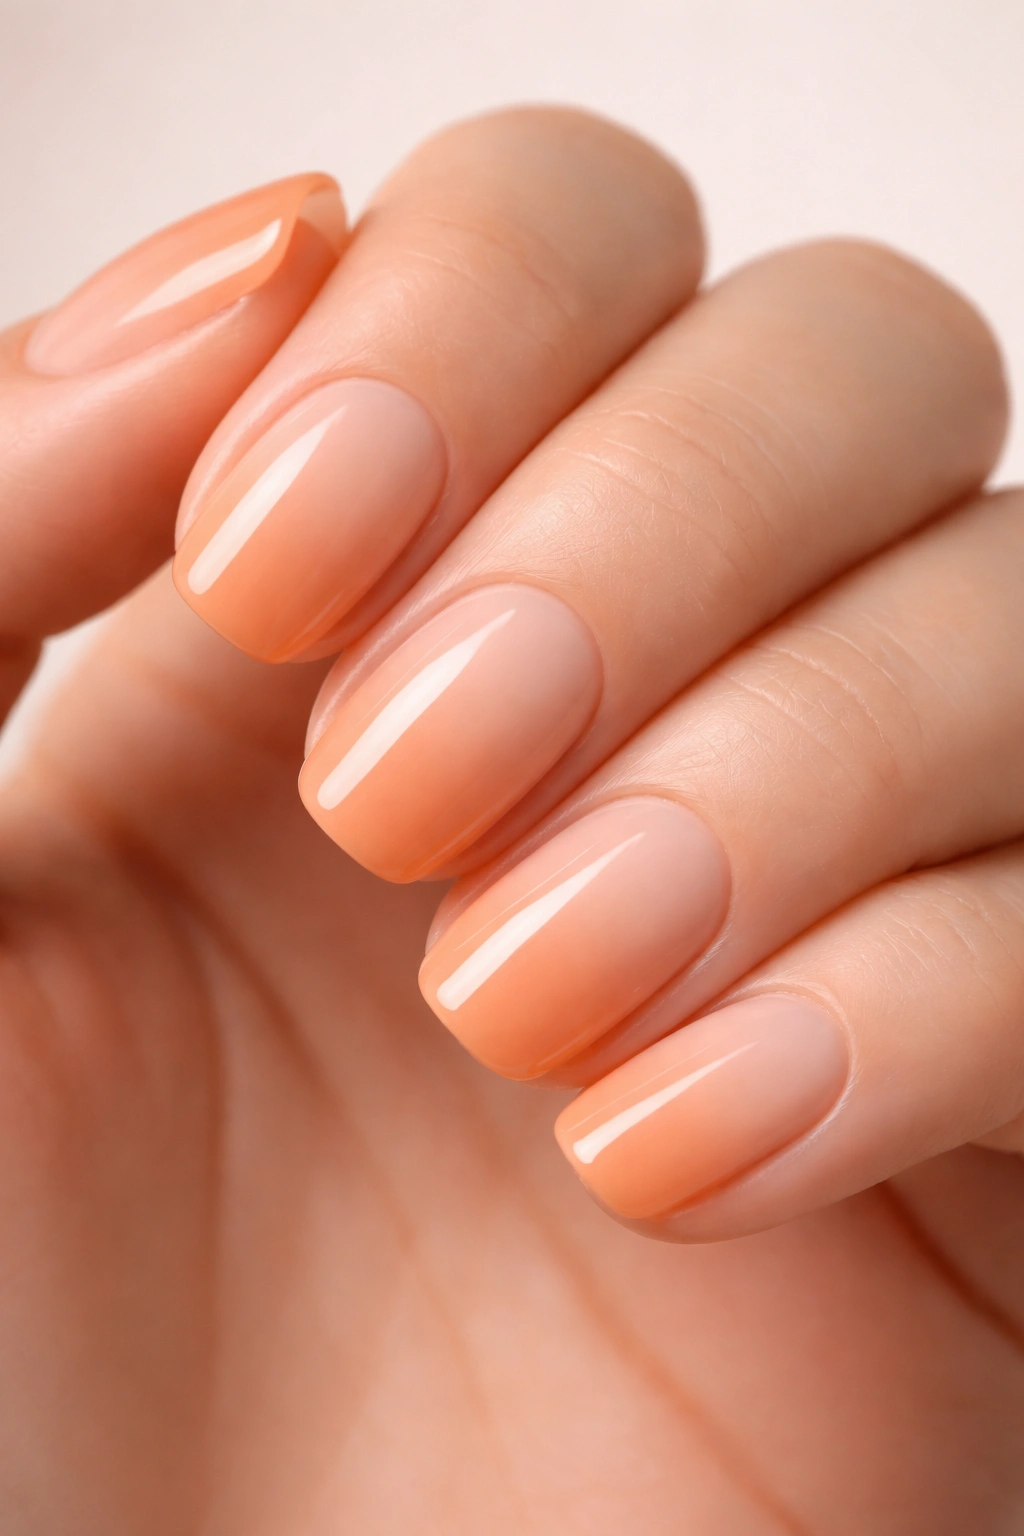
Apricot is that perfect warm tone that sits between peach and orange — it’s cheerful without being childish, warm without being overwhelming. A subtle gradient that moves from a lighter apricot at the base to a slightly deeper or warmer apricot at the tip creates dimension without feeling like a dramatic design. This is the sophisticated option for people who want visual interest without boldness.
The Elegance of Subtle Gradients
A subtle gradient is all about nuance and refinement. Rather than a stark, obvious transition from one color to another, a subtle gradient shifts so gradually that it’s almost imperceptible until you look closely. This communicates sophistication and intentionality while maintaining the clean, polished aesthetic of short squoval nails. The effect is luminous and dimensional without being dramatic.
Technique for Subtle Gradients
- Choose two apricot shades that are very close in tone — you want a shift in depth or warmth, not a dramatic color change
- Apply 2 coats of your lighter apricot shade as the base and let dry completely
- Create a sponge gradient by dabbing your deeper apricot shade onto a makeup sponge
- Instead of concentrating all the color at the tip (which creates an obvious gradient), spread the deeper shade gradually across the sponge so the color transition is softer
- Gently press the sponge onto your nail, focusing more pressure on the tip and less on the base
- Repeat on all nails
- Apply a glossy top coat — this blurs the gradient further and creates that luminous effect
- If the gradient looks too obvious, apply another very light layer of your base shade on a sponge over the entire nail to soften the transition
Pro tip: Less pressure and more blending create more subtle gradients. If your gradient appears too dramatic, you’re either using shades that are too different, or applying too much color concentration at the tip.
15. Warm Taupe with Gold Foil Inlay
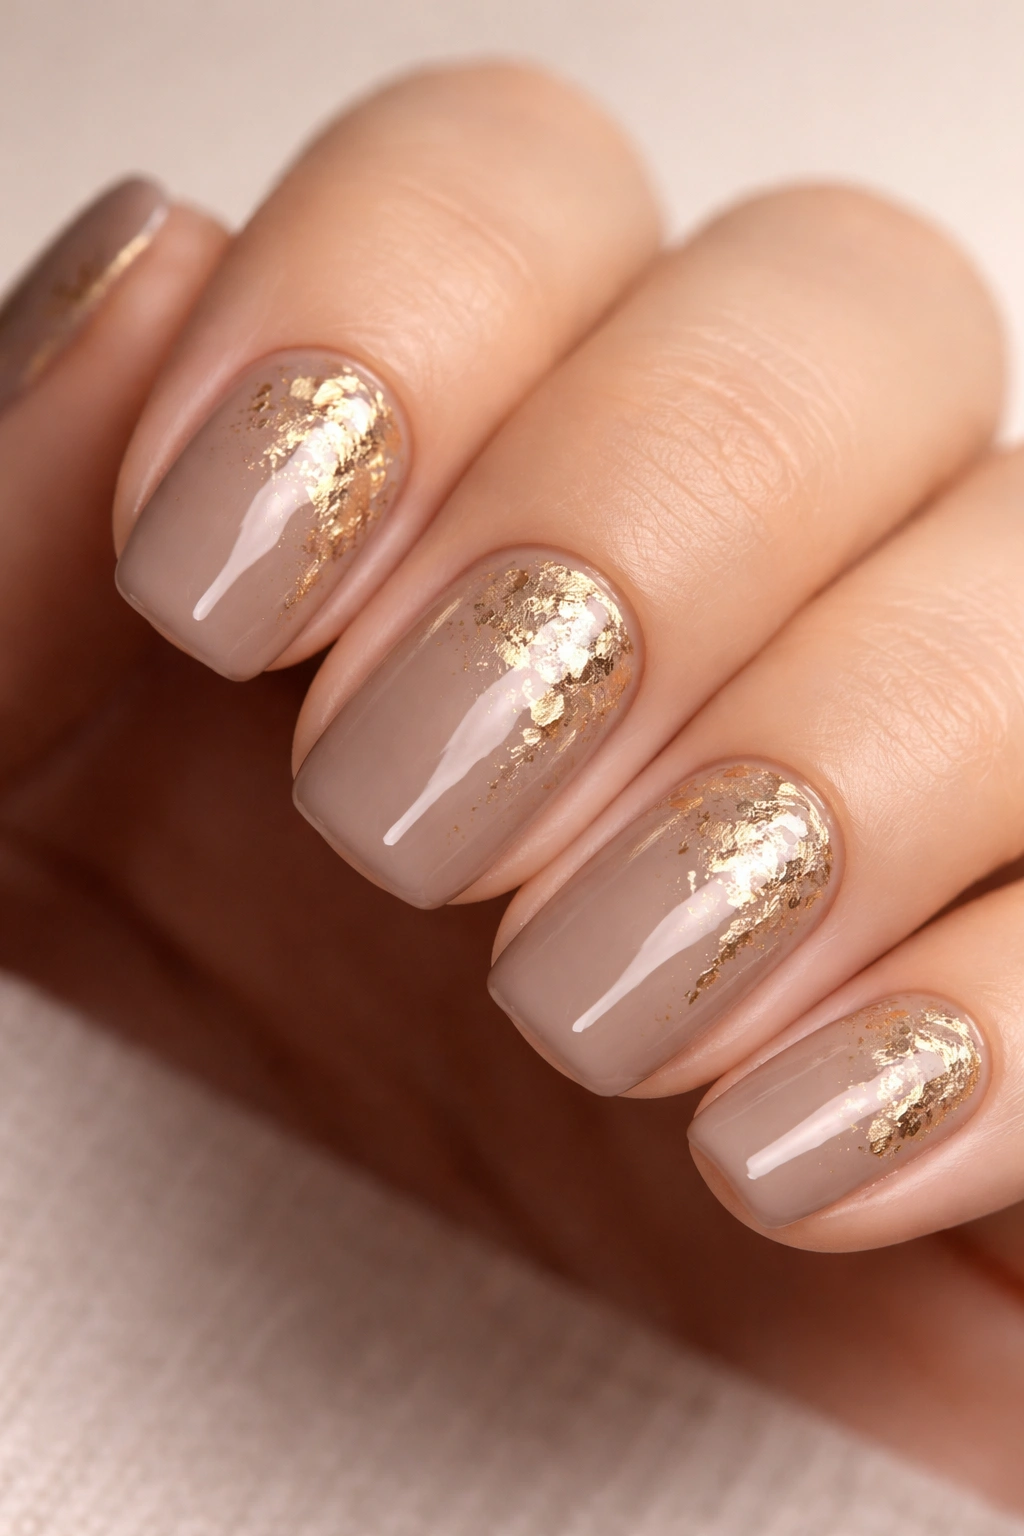
Taupe is the sophisticated neutral that feels effortlessly chic — it’s warm enough to feel grounding and elegant, neutral enough to work with any aesthetic. Gold foil inlay means actual gold foil is pressed into the nail surface, creating a luxurious, dimensional effect. This design reads as luxury without screaming for attention, making it perfect for short squoval nails where restraint and elegance matter.
Why Gold Foil Inlay Feels So Luxurious
There’s something inherently luxe about foil — it has real dimension and texture, catching light in a way that regular polish can’t. Unlike painted metallic details, actual foil elements have a tangible quality that feels special and intentional. The taupe base ensures that the gold doesn’t feel gaudy or overwhelming — instead, the combination reads as refined and thoughtfully designed.
Executing Gold Foil Inlay
- Apply 2 coats of warm taupe polish and let dry completely — the surface needs to be totally dry for foil to adhere properly
- Apply a thin layer of special foil adhesive (many brands make foil adhesive designed specifically for nails) over the areas where you want foil — this might be the entire tip, a corner, a half-moon shape, or just a delicate accent
- Let the adhesive become tacky — this usually takes 30-60 seconds depending on the brand
- Tear or cut gold foil into appropriately sized pieces (or use pre-cut foil if available)
- Press the foil firmly onto the tacky adhesive, rubbing gently to ensure it adheres
- Carefully peel away the foil backing — the shiny gold foil should remain on the nail
- Trim away any excess foil that extends beyond the nail edge
- Apply a glossy top coat to seal and protect the foil
Real talk: Foil application takes a bit of practice to get the adhesive tackiness just right — if it’s too wet, the foil won’t adhere; if it’s too dry, it won’t stick. Experiment on one nail first to get the timing down.
Final Takeaway

The beauty of warm short squoval nails is that you don’t need to choose between looking polished and having fun with color and design. These fifteen options give you a spectrum from sophisticated minimalism to bold geometric statements, from luxe metallics to subtle artistic details. The squoval shape itself does the heavy lifting of keeping everything feeling elegant and current, which means you can be more adventurous with color and design than you might expect.
The designs that resonate most will depend entirely on your personal aesthetic, your comfort level with nail art application, and what feels right for your life right now. Some of these designs are genuinely beginner-friendly — a solid color with a matte finish or a simple ombre requires minimal skill but delivers maximum impact. Others, like the tortoiseshell or the gold foil inlay, benefit from practice but aren’t impossibly technical.
The real magic of short squoval nails is that they’re democratizing — they work for people with active hands who don’t want to commit to length, for people who value neatness and elegance over dramatic presentation, and for anyone who wants their nails to feel intentional without being high-maintenance. Add a warm color palette to that equation, and you’ve got designs that feel current, sophisticated, and entirely wearable. Pick one that calls to you, gather your supplies, and enjoy the process of creating something beautiful on your own fingertips.
