

Squoval nails have become the go-to shape for people who want something between the softness of a square and the elegance of an oval—it’s literally the best of both worlds. And when you combine that perfect shape with the luxe, smooth finish of glazed donut nails (also called glazed chrome or jelly nails), you get a manicure trend that looks expensive, feels modern, and actually works with most nail lengths and lifestyles. The squoval silhouette is forgiving enough that it doesn’t demand constant maintenance, while glazed donut nails deliver that high-shine, three-dimensional glossy effect that makes your hands look like they just walked out of a premium nail studio.
The beauty of short squoval glazed donut nails specifically is that they’re wearable for every occasion—whether you’re heading to the office, out for a night with friends, or just want to feel put-together on a random Tuesday. The short length means they’re practical for daily life without any of the breakage concerns that come with longer nails, yet they still photograph beautifully and feel special. What makes this combination truly special is how the glazed finish catches light differently than regular polish or even standard gel—it creates this dimensional, almost candy-like sheen that reads as intentional and curated rather than accidental.
If you’re considering making the leap into this nail trend but aren’t sure where to start, here are fifteen short squoval glazed donut nail designs that range from understated elegance to bold statement-making. Each one is achievable at home with the right products or easy to request at your nail salon, and they all work beautifully on shorter nails.
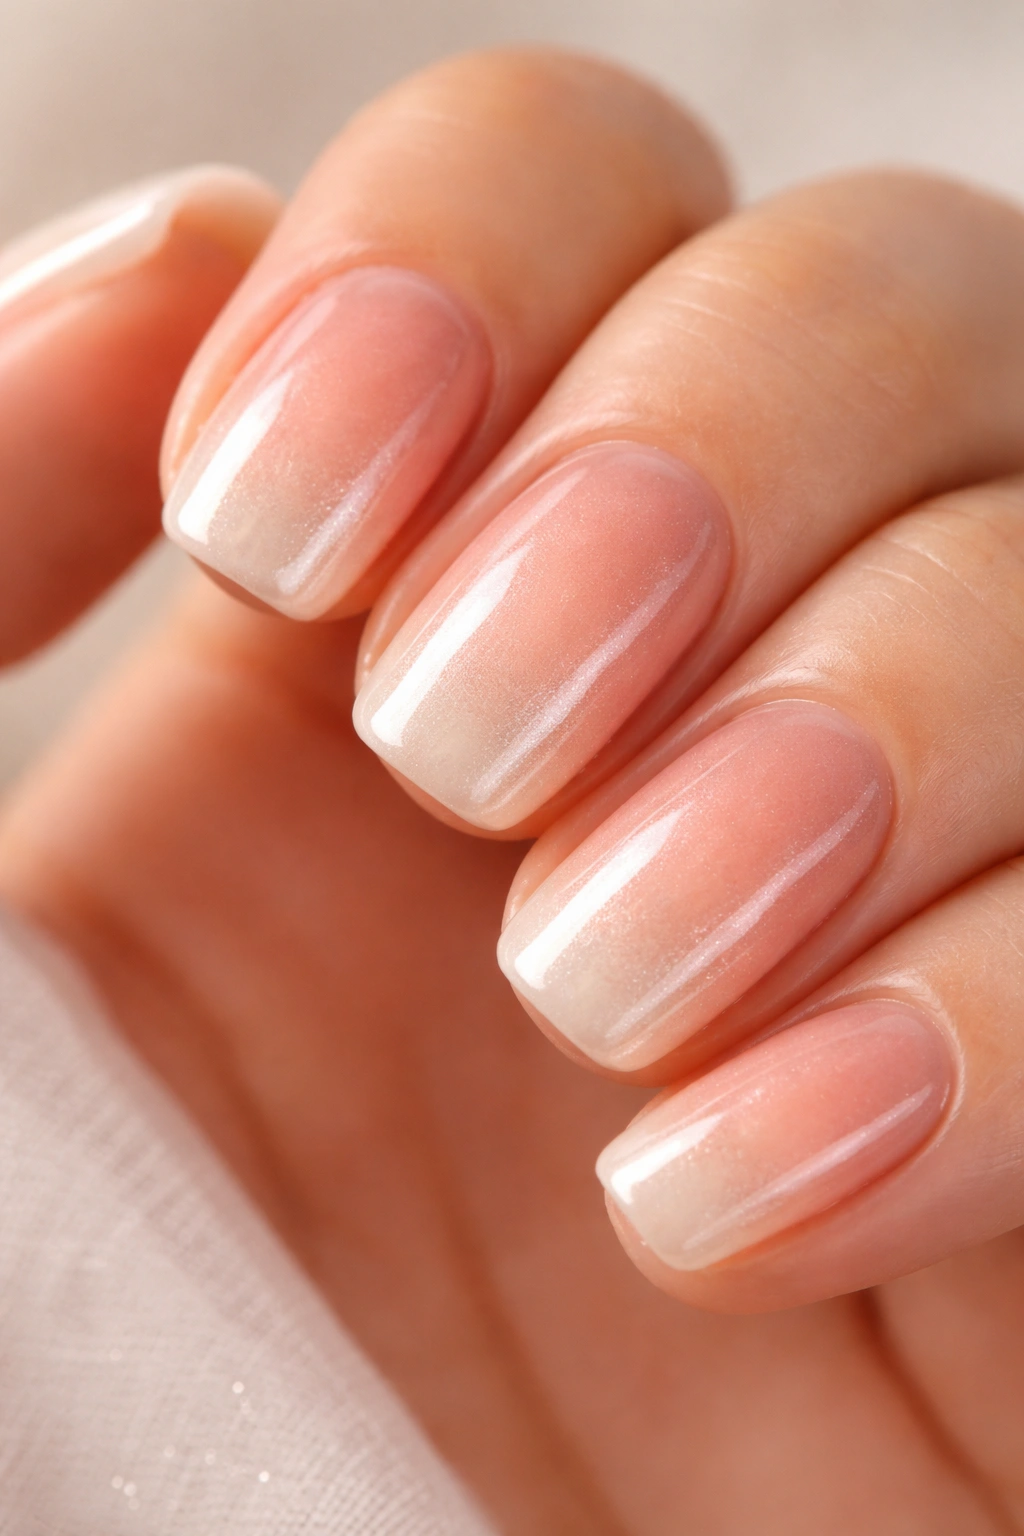
1. Classic Glazed Apricot
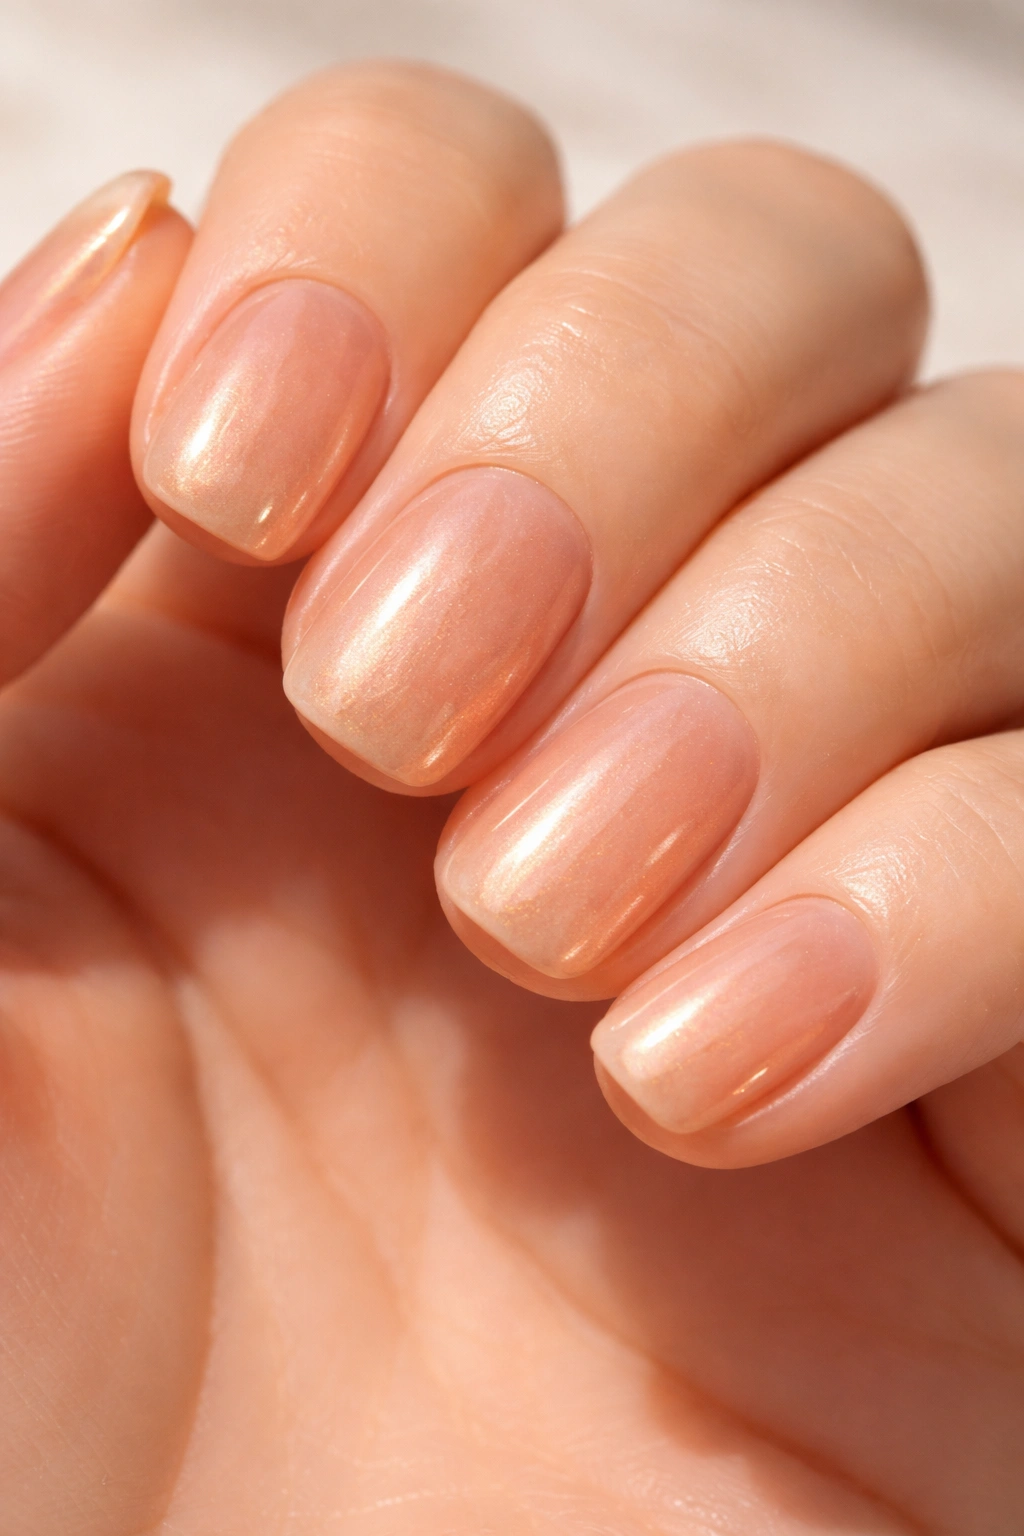
The foundational glazed donut nail look starts with a warm, creamy apricot base that mimics the glaze on an actual apricot donut. This shade is universally flattering because it sits right between pink and peachy, making it work on every skin tone imaginable. The glaze finish creates a soft, diffused shimmer across the nail rather than a harsh shine, giving you that “I woke up like this” vibe while still looking intentional.
Why This Works on Short Nails
Short nails benefit from warm, creamy colors because they make your fingers appear longer and more elegant than they actually are. The glazed finish adds dimension that distracts from length, making even very short nails feel substantial and styled. The apricot tone is also forgiving—it doesn’t show staining or imperfections the way deeper colors can.
How to Achieve the Look
- Start with a clear or nude base to build the glaze effect
- Apply 2-3 thin coats of apricot-toned gel polish, letting each layer cure fully
- Top with a glossy topcoat designed for that signature glazed shine
- The key is building the color gradually rather than using one thick coat, which gives you better control over opacity and that translucent glaze quality
- A quality glazed gel brand (like the ones specifically formulated for this effect) makes a huge difference in how smooth and dimensional the final result looks
Pro tip: If your apricot glaze looks too orange, mix a tiny drop of pale pink into your base to shift it toward a more peachy tone—this is an easy adjustment that changes how the color reads on your skin.
2. Honey Glazed with Micro Shimmer

This design plays with the idea of actual honey glazing by adding ultra-fine shimmer that you only notice when light hits your nails at certain angles. The honey base is deeper than apricot but still warm and golden, giving you something that feels sophisticated rather than playful. The micro shimmer isn’t glittery or chunky—it’s more like a subtle sparkle caught inside the glaze, which makes it work for both casual and dressier occasions.
Why Shimmer Elevates the Glazed Look
Adding micro shimmer to a glazed donut design takes it from simple to special without overwhelming the delicate glaze aesthetic. The trick is using a shimmer so fine that it blends into the glaze rather than sitting on top of it, which would break the smooth finish you’re going for. This version feels a little more elevated and celebratory than a solid glaze.
Application Technique
- Build your honey base with 2-3 coats of warm golden gel
- Mix a tiny amount of ultra-fine shimmer powder directly into your final topcoat (or use a shimmer topcoat designed for this purpose)
- Apply this shimmer-infused topcoat and cure—the shimmer settles into the glaze rather than sitting on top
- The result should be shiny and dimensional but not glittery from every angle
- This technique works best when you use barely-there shimmer—if you can see individual sparkles, you’ve used too much
Worth knowing: Honey-toned glazed nails photograph incredibly well under natural light because the warmth in the color and the subtle shimmer both catch daylight beautifully.
3. Nude Jelly Glaze with Rosy Undertone
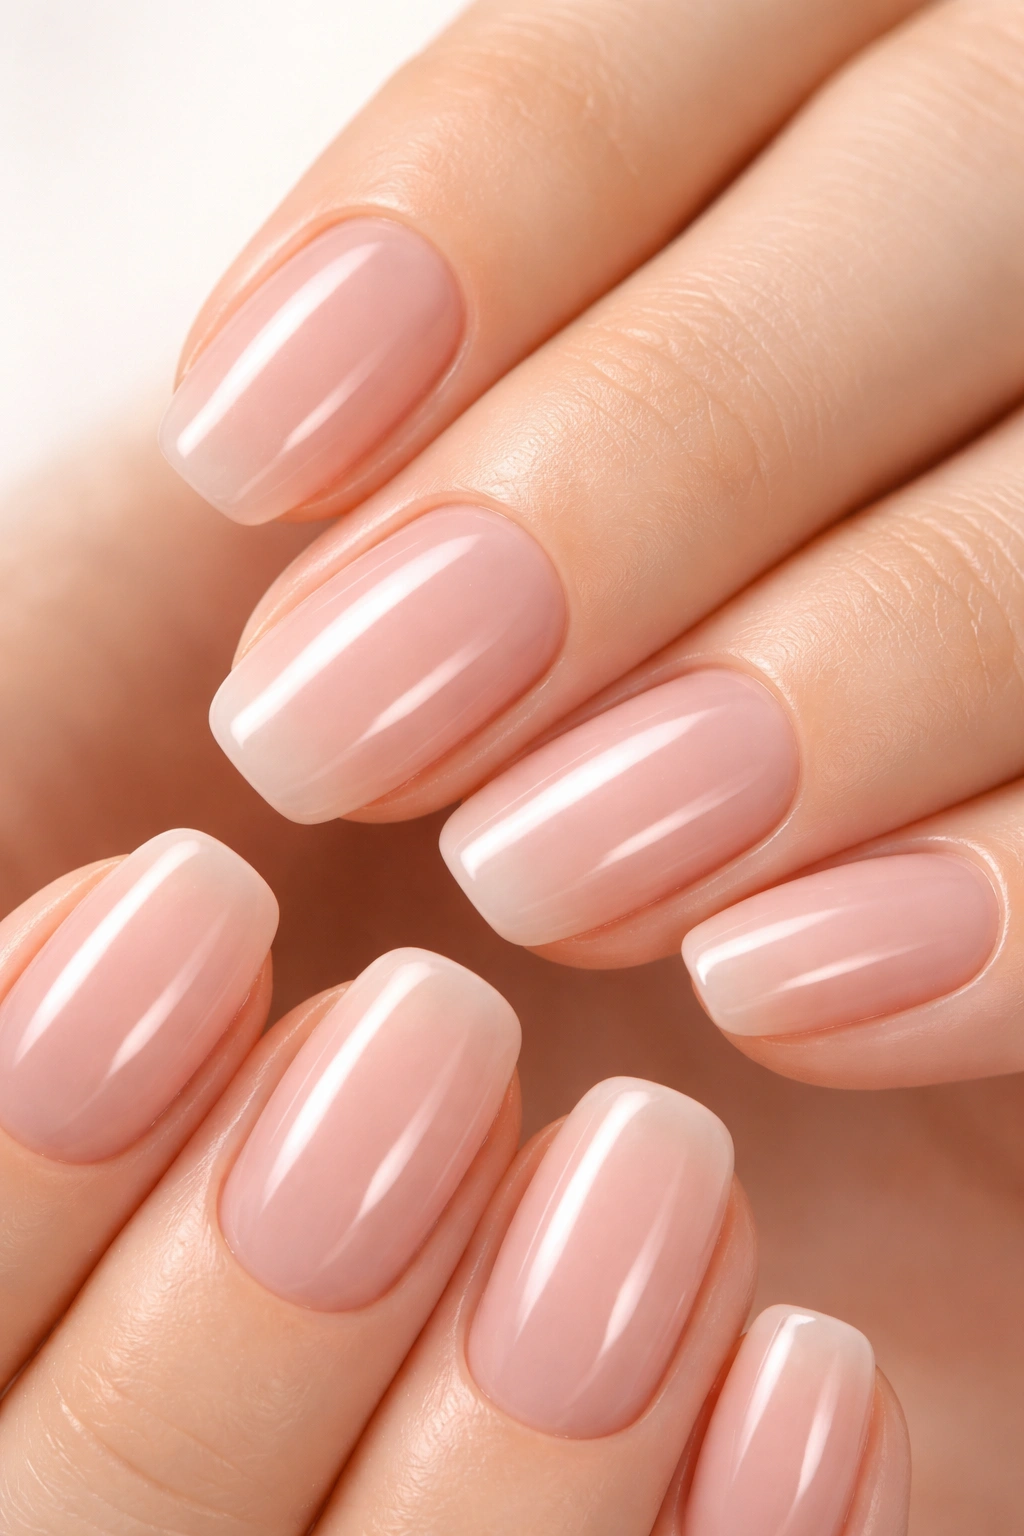
This is the minimalist’s glazed donut nail—a barely-there nude that has just enough rosy undertone to keep it from looking washed out or colorless. The glaze finish is what sells this design; without it, this would just be a basic nude, but the glazed effect makes it feel intentional and fashionable. It’s the perfect “I’m not trying too hard” manicure that somehow always looks polished.
What Makes Nude Glaze Different
A true glazed donut finish on a nude base has more depth and luminosity than standard nude polish. The glaze creates a soft, almost milky shine that makes your nails look longer and more defined, even though the color itself is incredibly subtle. This works because the finish, not the color, is doing the visual work.
Building the Perfect Nude Glaze
- Choose a nude gel that has a rosy or peachy undertone (not a gray undertone, which can look ashy)
- Apply one thin, sheer coat to let some of your nail show through—this is where the “jelly” quality comes in
- Add a second coat if you want slightly more opacity, but the goal is translucent, not opaque
- Finish with a high-gloss topcoat that’s specifically formulated for that glazed shine
- The rosy undertone should be just visible enough to prevent the look from feeling one-dimensional
Insider note: This design pairs perfectly with a simple gold or silver nail art detail (a thin line, a tiny dot, one small stone) because the simplicity of the base makes any accent pop without feeling cluttered.
4. Burnt Sienna Glaze with Gold Fleck
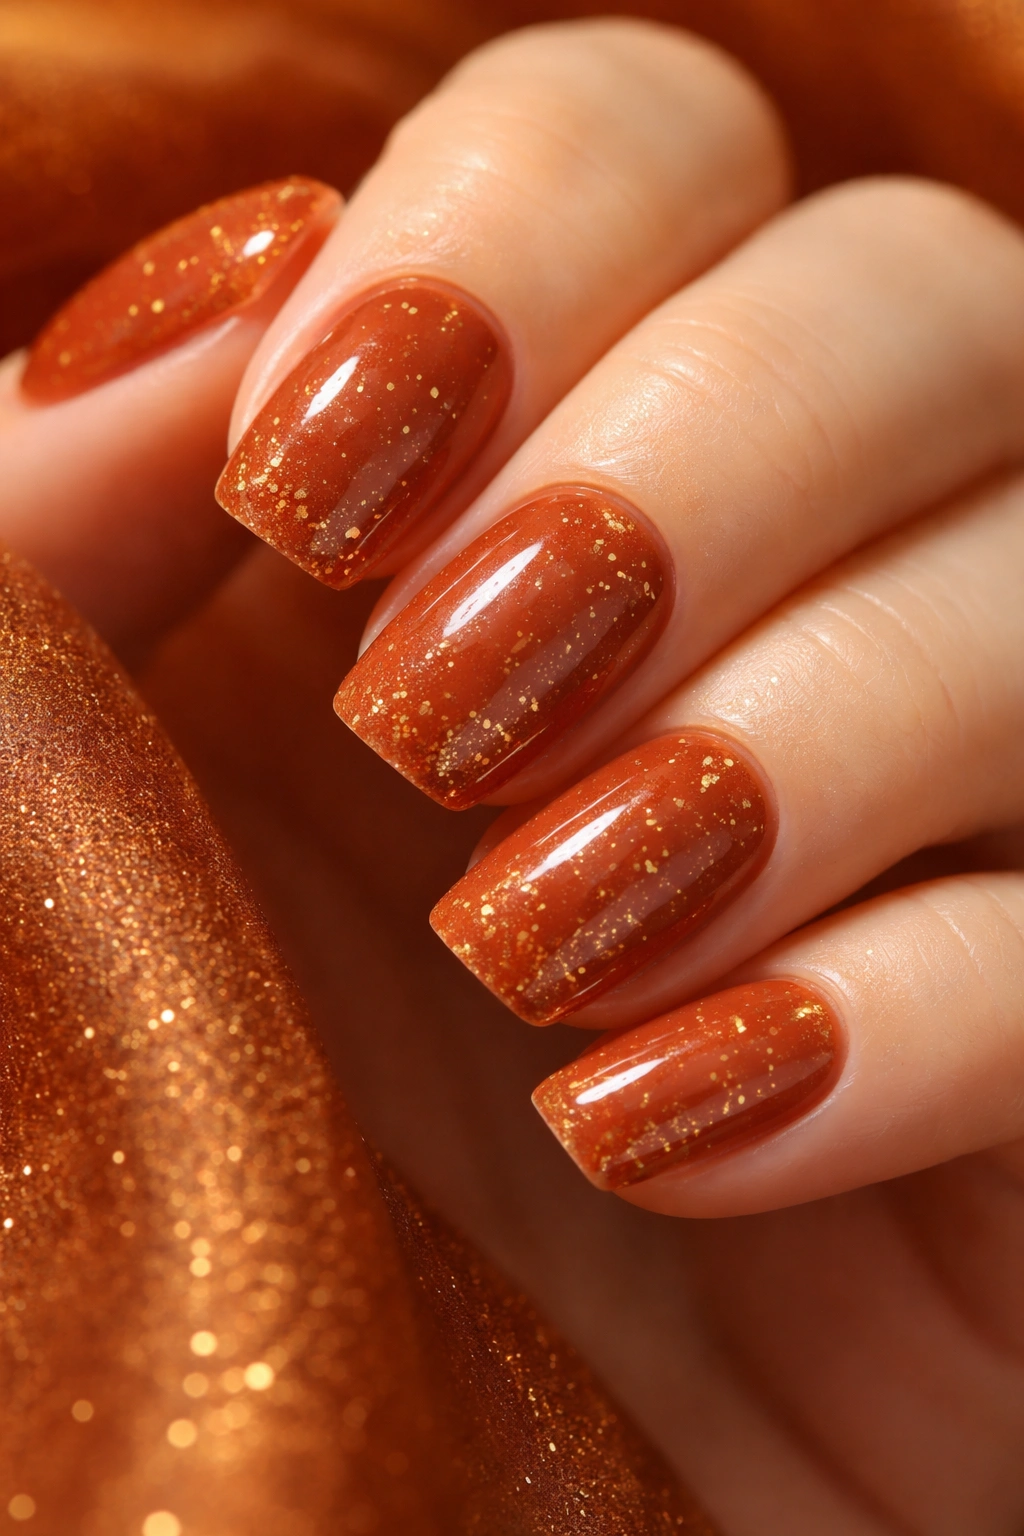
For people who want a warm, earthy tone with just a whisper of luxury, burnt sienna glazed nails deliver. The burnt sienna base is a muted russet tone that feels autumnal without looking seasonal, and the gold fleck accent (just a few tiny flecks scattered across the nail) adds just enough glamour. This design works beautifully with both casual outfits and dressier occasions because it’s sophisticated without being formal.
Why Earth Tones Work in Glaze
Glazed finishes actually make earthy, muted colors look more luxe because the gloss brings out subtle undertones that would otherwise disappear. A burnt sienna that might look flat or dull in regular polish becomes dimensional and rich when finished with a high-shine glaze. The gold fleck adds just enough visual interest to make it feel intentional rather than accidental.
Creating the Burnt Sienna Base with Gold Accent
- Apply 2-3 coats of burnt sienna gel to build full opacity
- Use a fine brush or dotting tool to place 3-5 tiny gold flecks on each nail—scatter them rather than lining them up, which would look too formal
- Alternatively, use a pre-made gold fleck gel and apply it sparingly over your dried sienna base
- Seal everything with a glossy topcoat for that unified glazed finish
- The gold should peek through just enough that someone has to look closely to notice it’s there
Pro tip: If you’re nervous about applying individual flecks, use gold leaf instead—tear small pieces and press them onto a tacky base layer, then seal with gloss. It’s more forgiving than trying to paint tiny flecks.
5. Cherry Cola Glaze
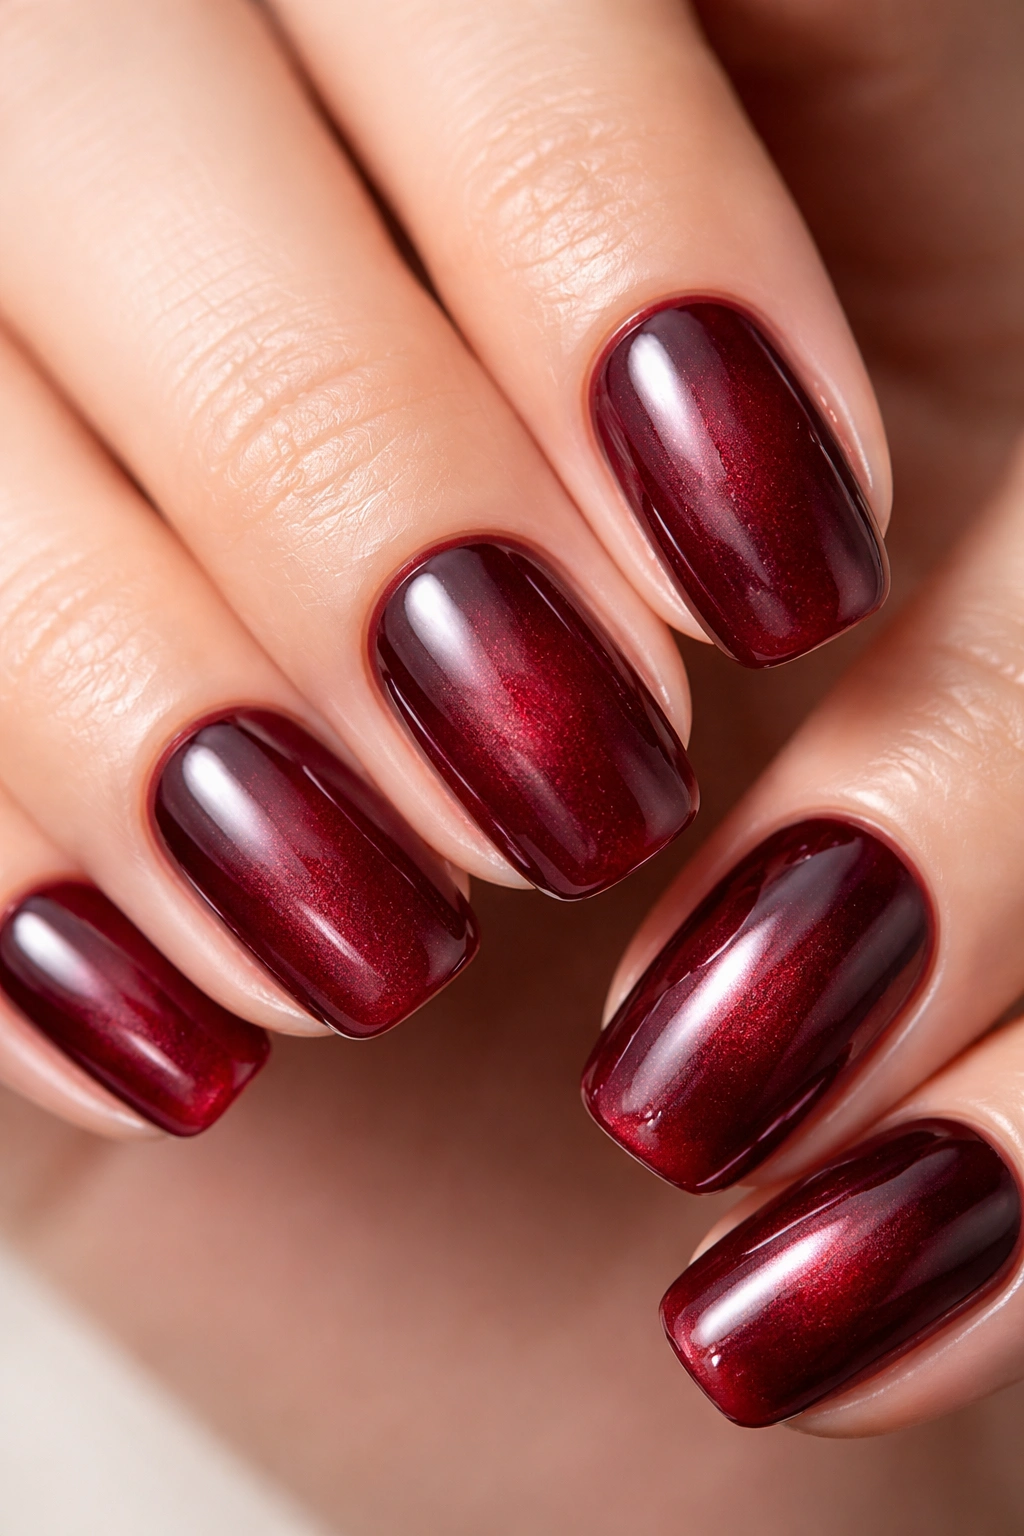
This design captures that deep, warm burgundy tone of cherry cola in glazed form—it’s moody without being gothic, luxe without feeling formal. The glaze finish on this deeper tone creates an almost translucent quality that makes it feel less heavy than the color might seem in regular polish. Short nails in cherry cola look sophisticated and intentional, perfect for someone who wants a bolder color but still needs something wearable.
The Psychology of Deep Glaze Colors
Deeper colors in a glazed finish read differently than deeper colors in regular polish because the gloss gives them dimension. A cherry cola glaze has depth—you can see layers in the color rather than a flat burgundy block. This makes it feel more expensive and considered, even though the application process is the same.
Achieving the Perfect Cherry Cola Finish
- Start with a burgundy or deep mauve base layer if your cherry cola gel is very sheer
- Apply 2-3 coats of the cherry cola gel until you reach your desired opacity (it should be fairly opaque but still have that glaze quality)
- The key is using a gel formulated for the glazed look rather than a regular gel polish—glazed gels have different light-reflecting properties that create that signature shine
- Top with a high-gloss sealer
- The finish should look smooth and glossy, not matte or textured
Worth knowing: Cherry cola pairs beautifully with gold accents, either as a thin stripe down the center of some nails or as a simple cuticle line. The warmth in cherry cola makes gold feel natural rather than competing.
6. Peachy Glaze with Soft Ombre Fade
This design takes glazed donut nails in a slightly more artistic direction by blending a peachy glaze at the base into a lighter, almost nude tone at the nail tip, creating a subtle ombre effect. The ombre is soft enough that it’s not immediately obvious from a distance, but up close it creates a dimensional, carefully-considered look. Short nails make this design feel elegant rather than trendy, and the color transition is forgiving enough to hide any imperfections.
Why Soft Ombre Elevates Glaze
A soft ombre on top of a glazed finish creates a two-part visual story—the color gradient plus the dimensional gloss. It’s more interesting than a solid glaze but less dramatic than a stark two-tone design, making it perfect for people who want something special but wearable. The glaze effect on an ombre looks like you had it professionally done, even if you created it yourself.
Creating a Glazed Ombre Effect
- Apply your peachy glaze base using 2-3 coats
- Using a makeup sponge, “bounce” a lighter peachy-nude shade onto the tip area in a rough ombre pattern
- Build the lighter color gradually, layer by layer, so the transition stays soft
- Alternatively, use a gel ombre tool or thin brush to feather the lighter shade into the base color while both are still slightly tacky
- Seal the entire nail with your glossy topcoat—the gloss unifies the colors and makes the transition look more intentional
- The key is making the ombre subtle; if someone has to ask whether your nails are ombre, you’ve done it right
Pro tip: Practice your ombre on a nail wheel or test nail before committing to all ten fingers. The sponge technique takes practice, but it’s the easiest method for creating soft, diffused color transitions.
7. Caramel Glaze with Darker Caramel Marbling
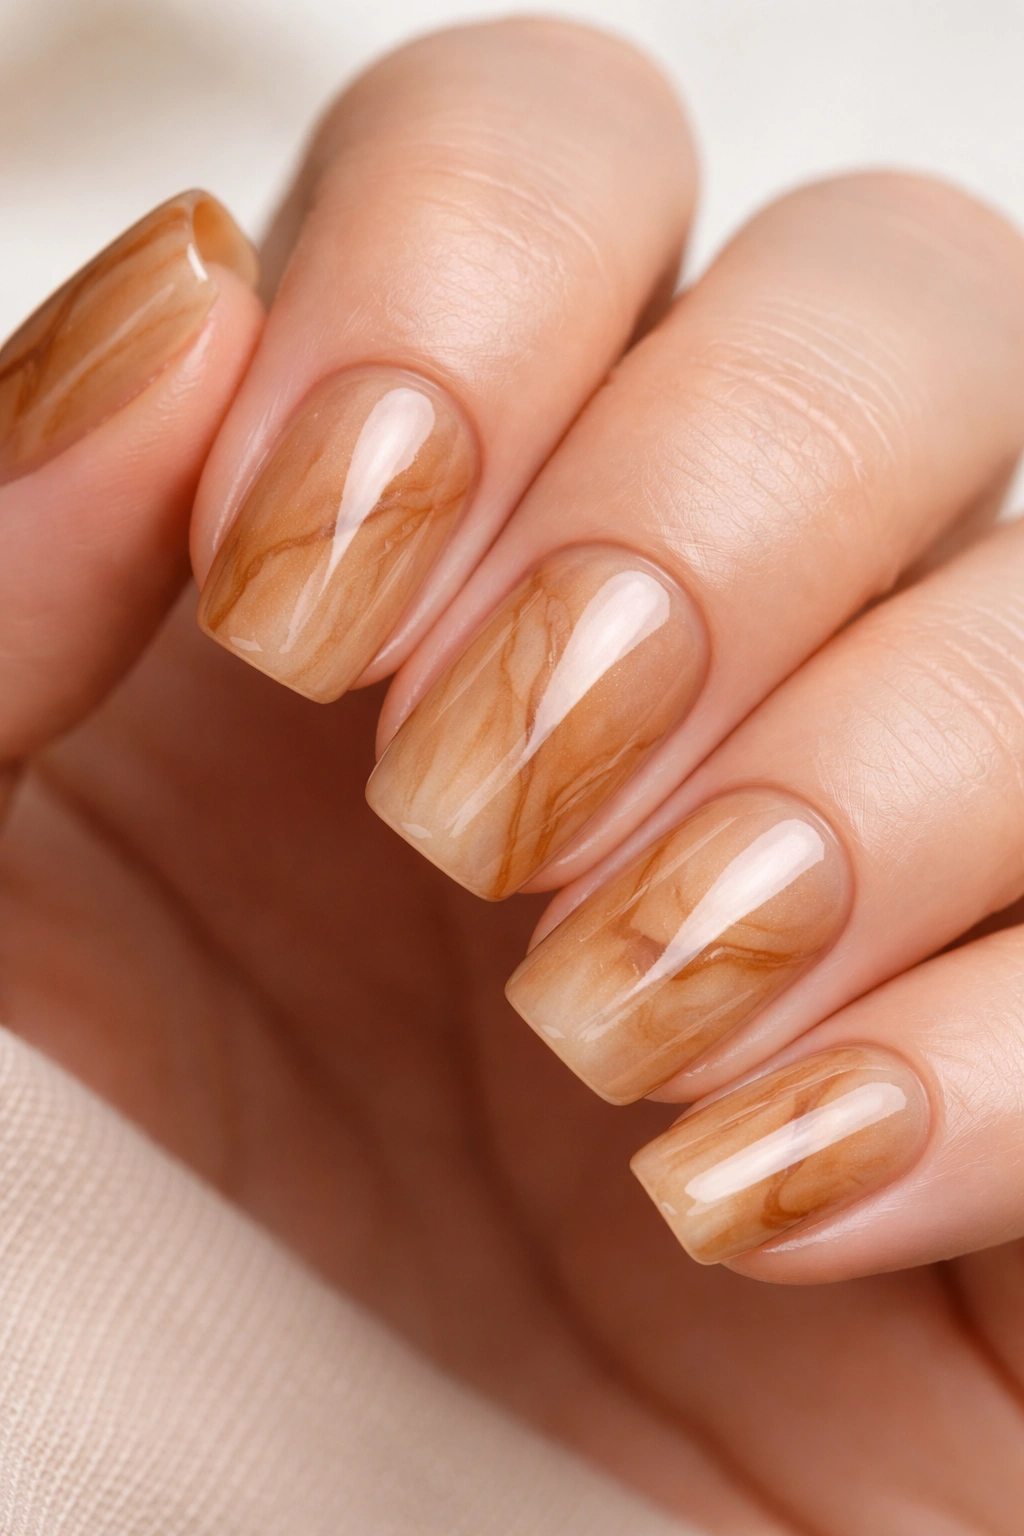
This design plays with depth by creating subtle marbled patterns using a deeper caramel tone dragged through a lighter caramel glaze base. The marbling isn’t meant to be obvious or bold—it’s just enough to add visual interest and break up what would otherwise be a solid color. The effect is like looking at ripples on the surface of caramel, and the glaze finish ties everything together into one cohesive, luxe look.
Marbling on Glazed Nails
Marbling works beautifully with glazed finishes because the high gloss makes even subtle pattern work look intentional. The glaze unifies different tones, so you don’t need dramatic contrast for the marbling to register—gentle, tonal marbling actually looks more sophisticated. This is one of those designs where restraint creates elegance.
The Marbling Technique
- Apply 2-3 coats of your lighter caramel glaze base
- While the final coat is still slightly tacky (just before curing), use a thin brush dipped in darker caramel to create loose, organic lines across the nail
- Drag a fine line tool or thin brush through the darker lines to create that pulled, marbled effect
- Keep the marbling loose and imperfect—the goal is artistic, not geometric
- Cure the design, then seal with a gloss topcoat
- The gloss will settle over everything and create that unified glazed appearance
Worth knowing: If your marbling attempt looks too obvious or messy, you can always cure it and try again with a new topcoat over it—the gloss has a smoothing effect that can minimize imperfect marbling lines.
8. Cream Glaze with Subtle Gold Leaf Detail
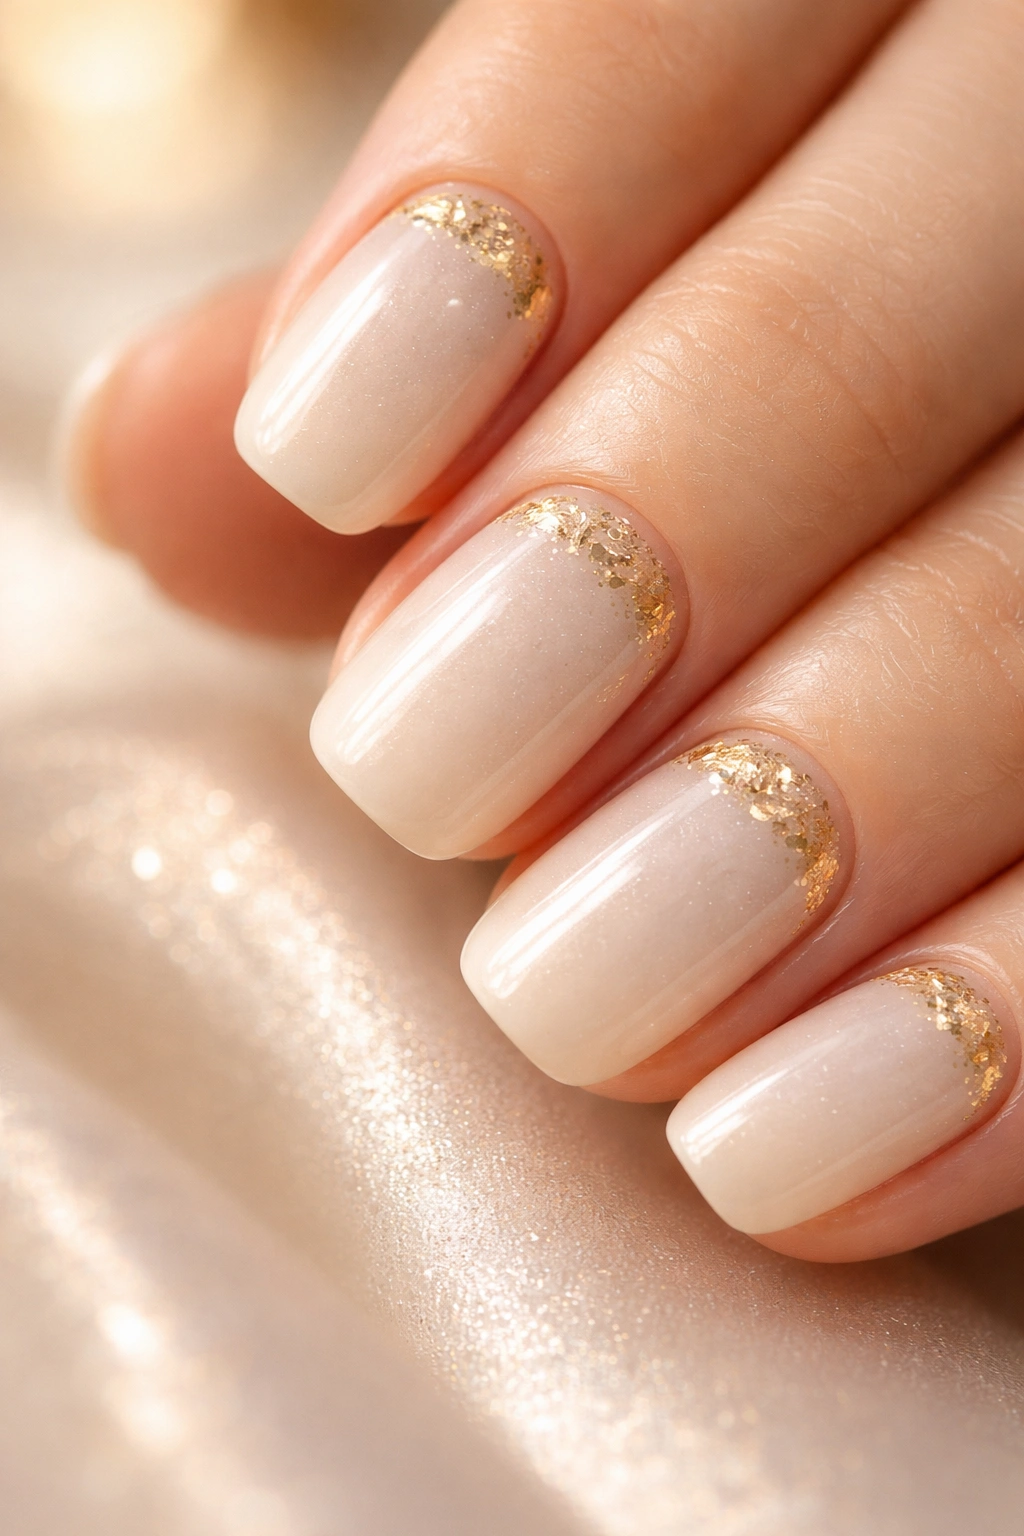
This is sophisticated simplicity: a creamy, pale glazed base topped with one or two pieces of tiny gold leaf on each nail, positioned near the cuticle or off to one side. The cream provides the canvas, the gold leaf provides the luxury, and the glaze finish ties them together. It’s understated enough for a corporate setting but special enough that it doesn’t feel boring.
Gold Leaf as Accent
Gold leaf adds instant luxury to any nail design without requiring perfect application skills—the organic, slightly rough edges of gold leaf actually look intentional and high-end. On a glazed base, gold leaf catches light beautifully and feels like a jewelry-level detail rather than just nail art.
Applying Gold Leaf to Glazed Nails
- Build your cream glaze base with 2-3 coats—aim for a pale, almost off-white tone with creamy warmth
- After curing, apply a tiny drop of tacky base or a specialized adhesive layer where you want the gold leaf
- Using tweezers, gently place small pieces of gold leaf onto the tacky layer (you can buy pre-cut gold leaf sheets and tear them into small pieces)
- Press down very gently—too much pressure will damage the leaf
- Seal everything with a glossy topcoat, which will protect the gold leaf and create your unified glazed appearance
- The topcoat should be applied carefully so it doesn’t disturb the gold leaf underneath
Pro tip: Buy gold leaf in sheets rather than pre-applied—it’s cheaper and you have more control over placement and sizing.
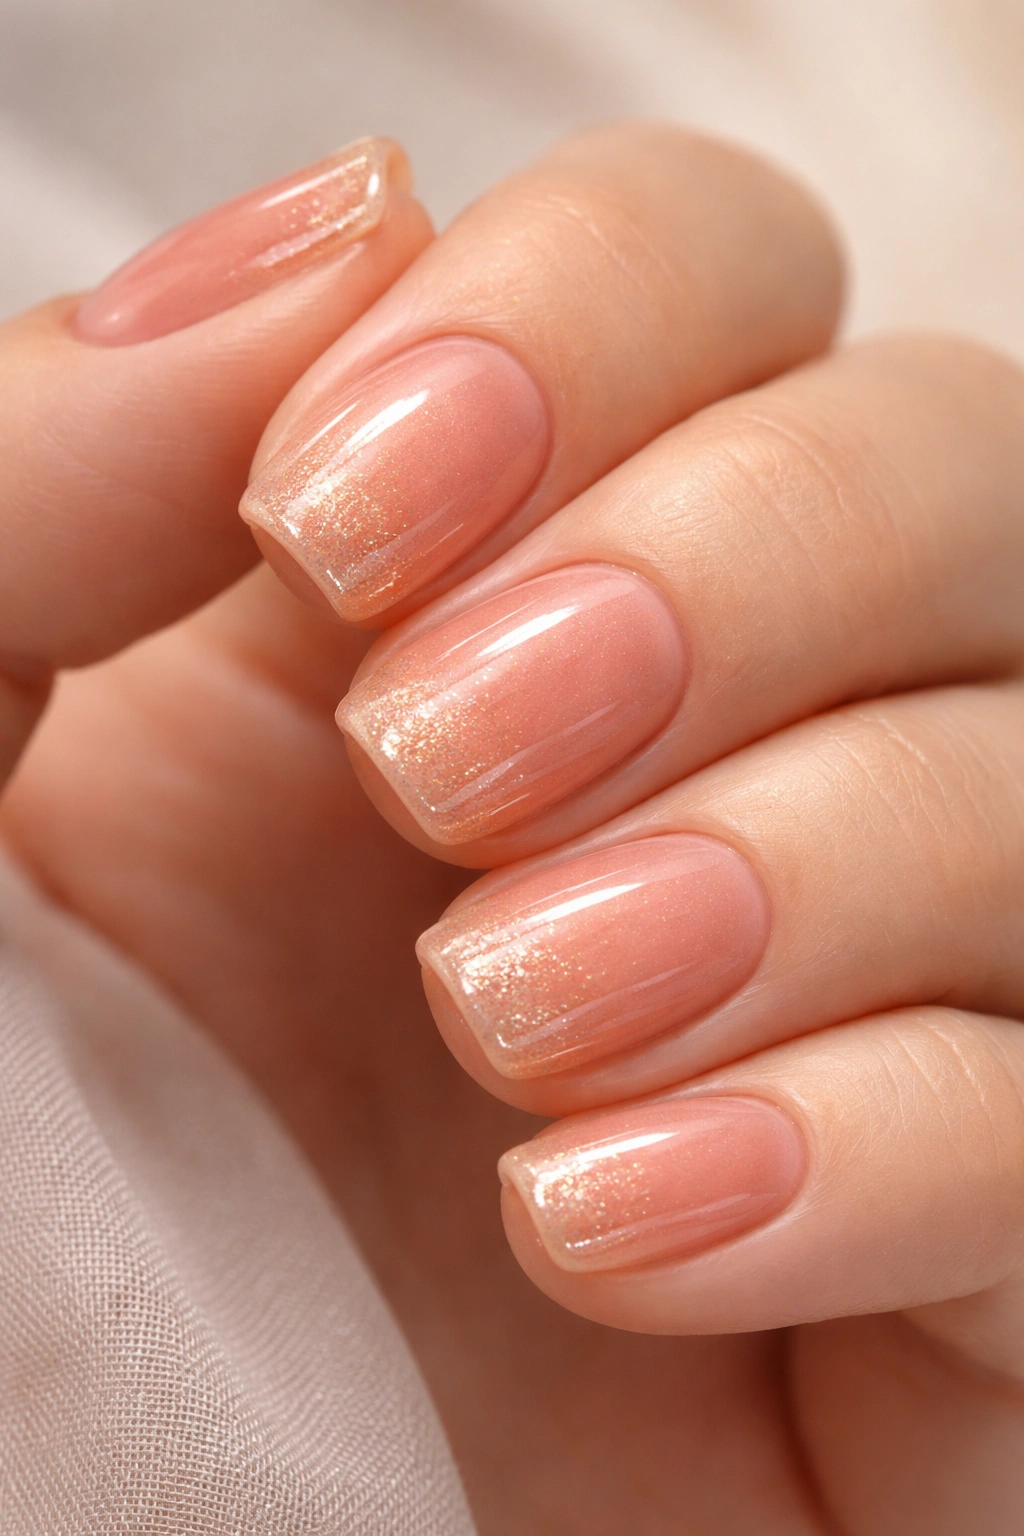
9. Champagne Glaze with Pearl Shimmer
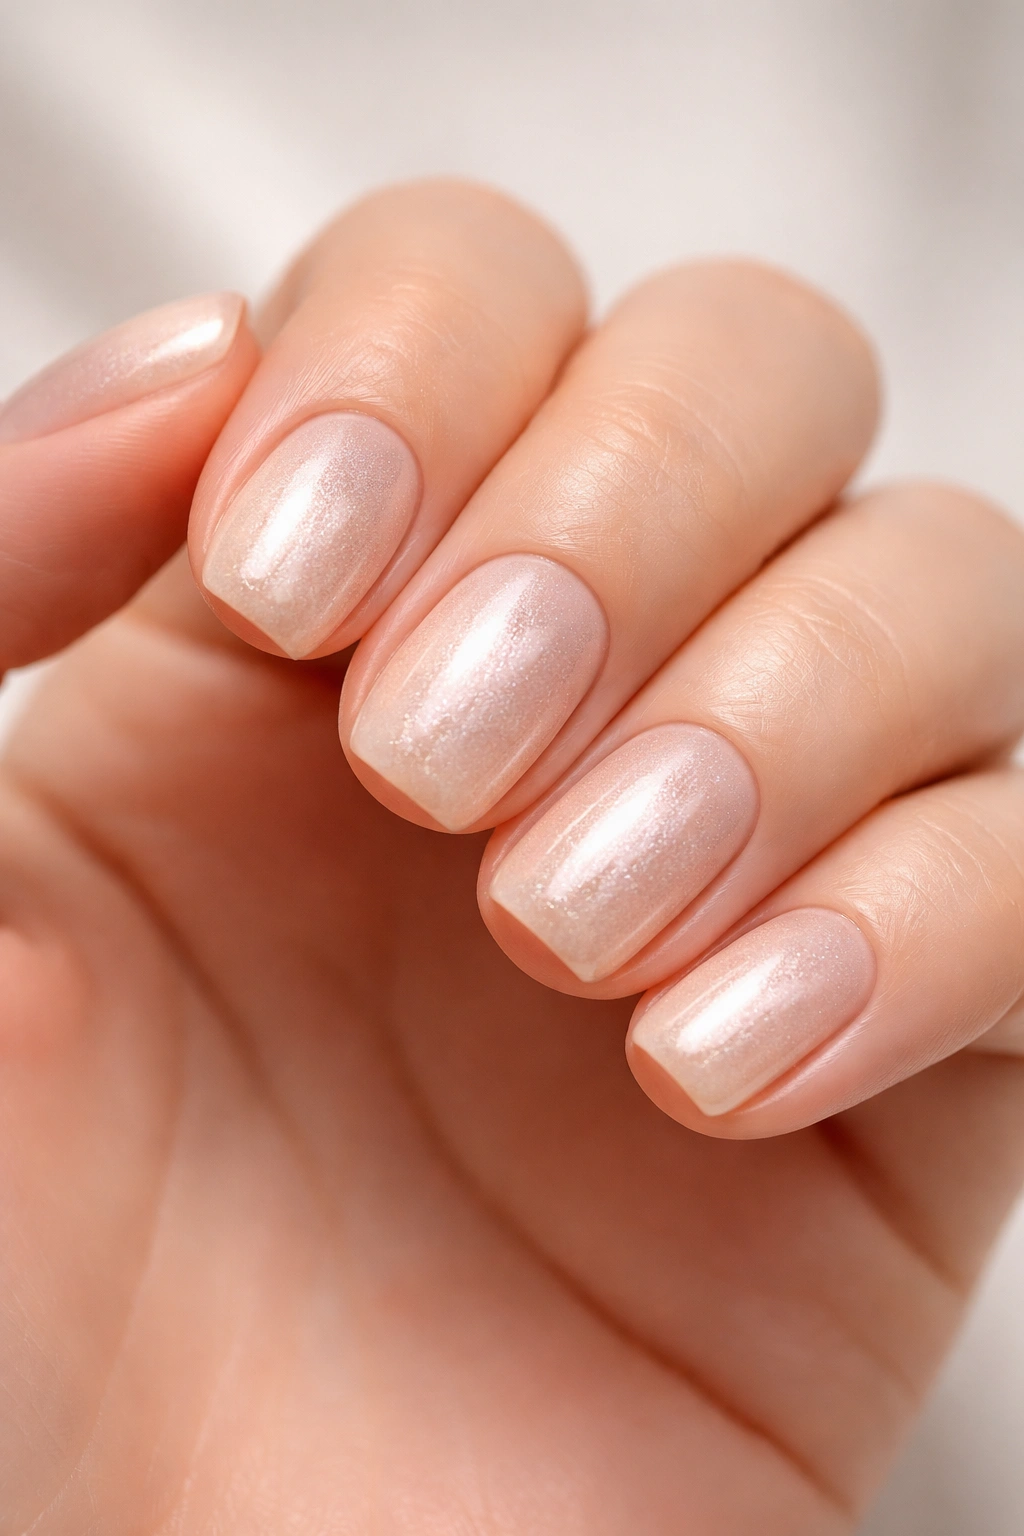
This design combines a pale, cool-toned champagne base with an ultra-fine pearl shimmer that creates that coveted “glowing from within” effect. Pearl shimmer is different from regular shimmer because it has an iridescent quality—it shifts slightly depending on how you move your hand. The result is sophisticated, celebratory, and somehow wearable even though it sounds fancy.
Pearl Shimmer vs. Regular Shimmer
Pearl shimmer has a three-dimensional quality that regular sparkly shimmer doesn’t—it’s more subtle, more refined, and it catches light in a way that makes it feel like the glow is coming from inside the nail rather than sitting on top. This is the difference between looking like you got manicured for a special occasion and looking like you just know how to do nails well.
Building a Pearl Shimmer Glaze
- Apply 2-3 coats of champagne gel to create your base—aim for a pale, slightly warm blonde tone
- Mix ultra-fine pearl shimmer into your final topcoat, or use a topcoat specifically formulated with pearl shimmer
- Apply this shimmer-infused topcoat generously and cure
- The shimmer should be visible but not glittery; it should look like there’s light trapped inside the glaze
- If your first application doesn’t show enough shimmer, you can apply a second shimmer topcoat layer
- The final result should look like pale, luminous champagne with an inner glow
Insider note: This design is absolutely stunning in natural daylight and photographs beautifully—it’s one of the most camera-friendly glazed donut designs because the pearl catches light in photos in a really flattering way.
10. Dusty Rose Glaze with Geometric Line Detail
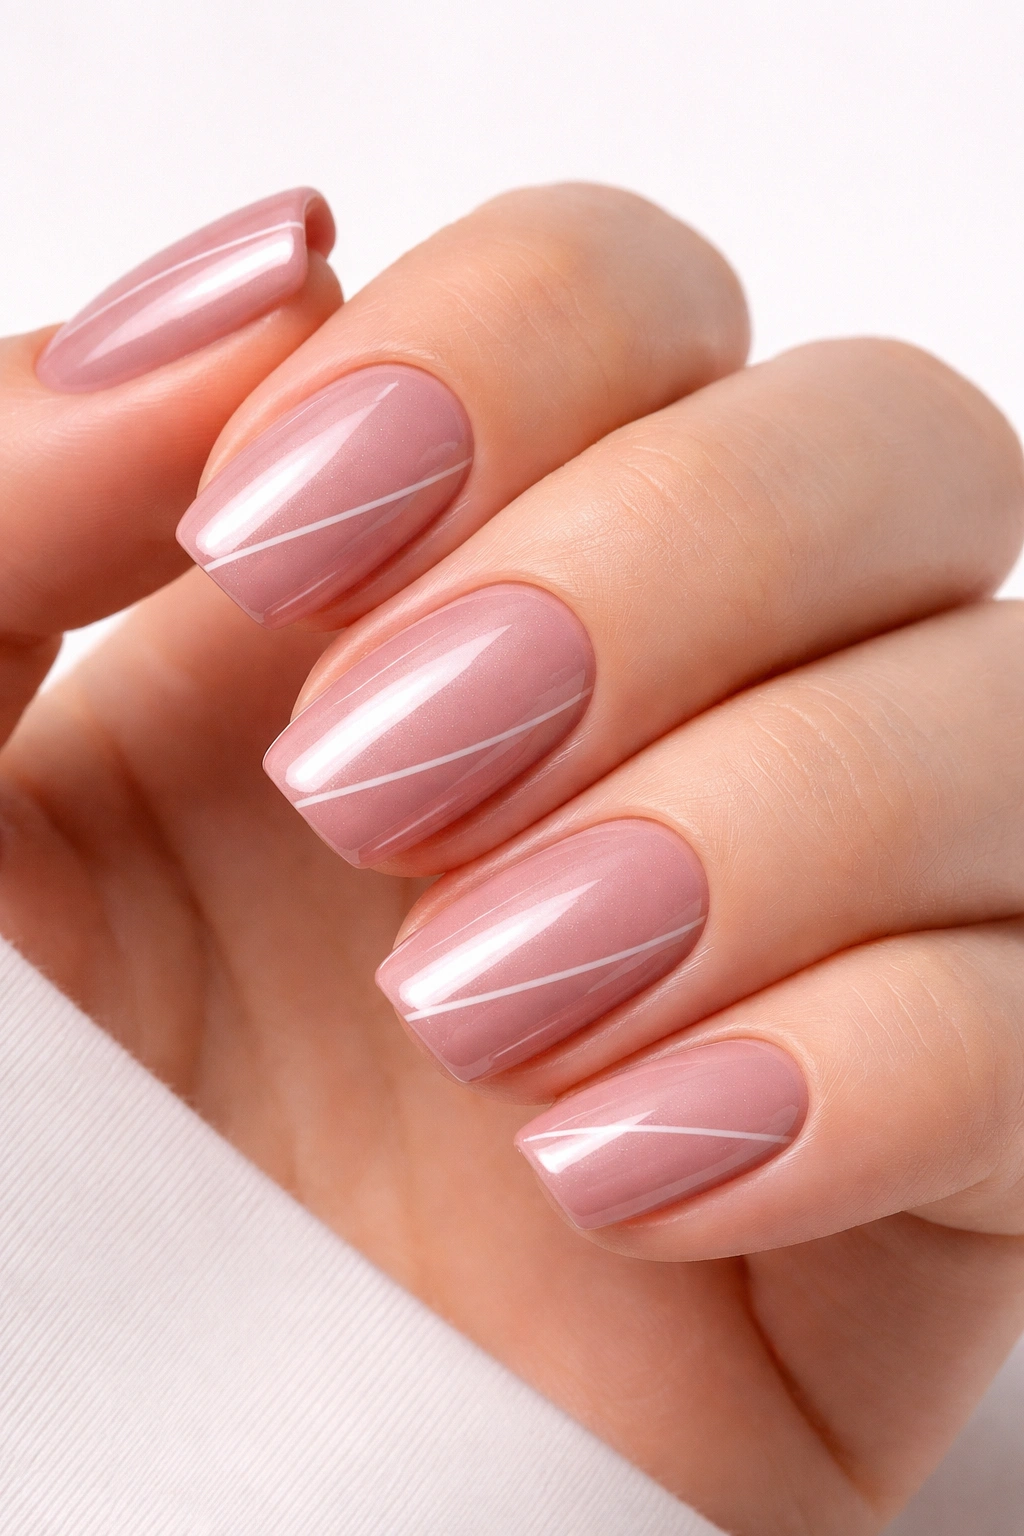
This design pairs a soft, muted dusty rose glazed base with a single thin geometric line (either a vertical stripe, a diagonal slash, or a thin triangle shape) in either white or nude. The geometry is modern and just detailed enough to feel intentional without being fussy. Dusty rose is inherently romantic, and the glaze makes it feel current rather than vintage, while the geometric line keeps it from feeling too soft or girly.
Balancing Soft Colors with Graphic Details
Dusty rose can sometimes feel too sweet or dated, but combining it with modern geometric line work elevates the entire design into “intentional and stylish” territory. The graphic element gives soft colors an edge they wouldn’t have on their own. This is how you make a romantic color feel fresh.
Creating the Geometric Detail
- Apply 2-3 coats of dusty rose glaze to build a solid, opaque base
- Using a thin striping brush or precision brush, paint your geometric line in white, nude, or even a complementary shade like sage
- The line should be thin and clean—this is where precision matters
- Keep the detail minimal (just one line or shape per nail, or just on an accent nail) so it feels sophisticated rather than busy
- Seal everything with gloss topcoat
- The topcoat will blend the line slightly with the glaze beneath, creating a soft, integrated look
Pro tip: If hand-painting lines feels shaky, use nail tape (thin, flexible tape designed for nails) to create straight, clean lines. Apply the tape to your cured glaze base, paint over it, remove the tape while the polish is still slightly tacky, then cure and seal.
11. Butterscotch Glaze with Tiny White Dot Pattern
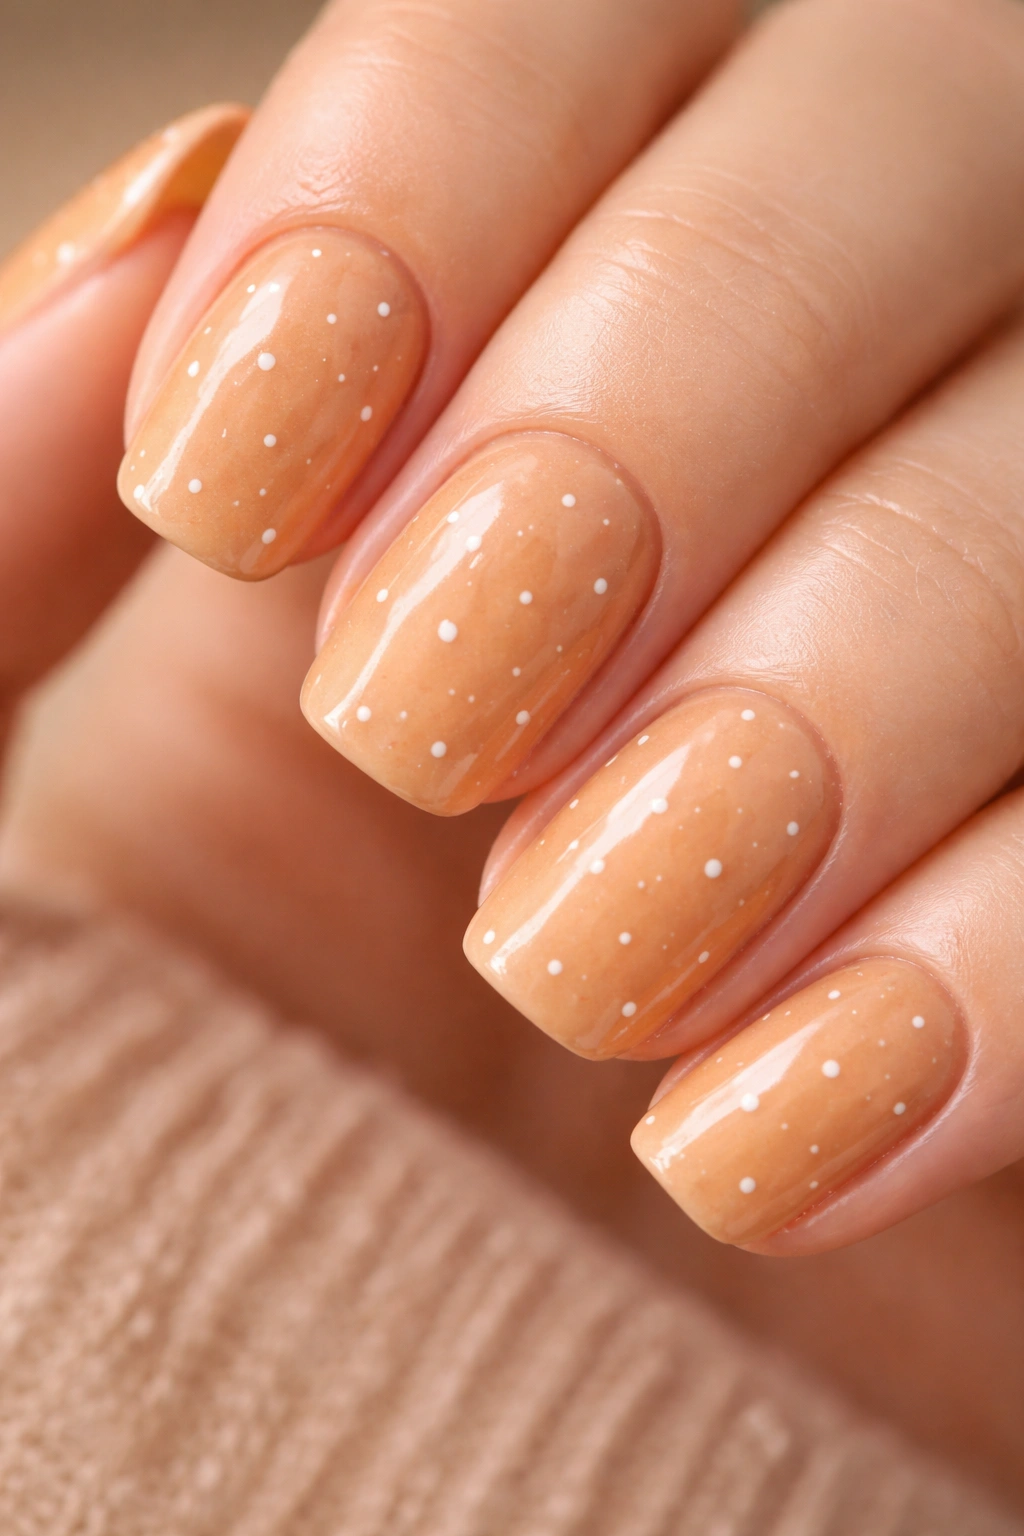
This playful design uses a warm butterscotch base with a scattered pattern of tiny white dots—think of it like the little dimples on a real glazed donut. The dots are small enough that they don’t overwhelm the glaze, but they create a subtle visual interest that elevates the design beyond a simple solid. Butterscotch is warm and a little playful, and the dots give it a friendly rather than formal feel.
Creating Personality with Minimal Details
Tiny white dots work because they’re not demanding—you don’t need perfect application to make them look good, and they’re instantly readable as intentional rather than accidental. This is the kind of detail that says “I thought about this design” without looking overthought.
Applying the Dot Pattern
- Start with 2-3 coats of butterscotch glaze to build your base
- Using a dotting tool (the smallest size you have) and white gel or regular gel polish, create tiny dots randomly scattered across the nail
- Aim for about 5-7 dots per nail, but space them unevenly so they don’t look too geometric
- The dots should be consistently small—this is what makes them read as “design detail” rather than “mistake”
- Cure everything together, then seal with topcoat
- The gloss will slightly blend the dots with the base, which actually looks good and unifies the design
Worth knowing: This design doesn’t need to be perfect because the imperfection actually adds to the handmade, artisanal quality. Someone just showed they have a specific creative vision.
12. Cognac Glaze with Glass Fleck Luxury Accent
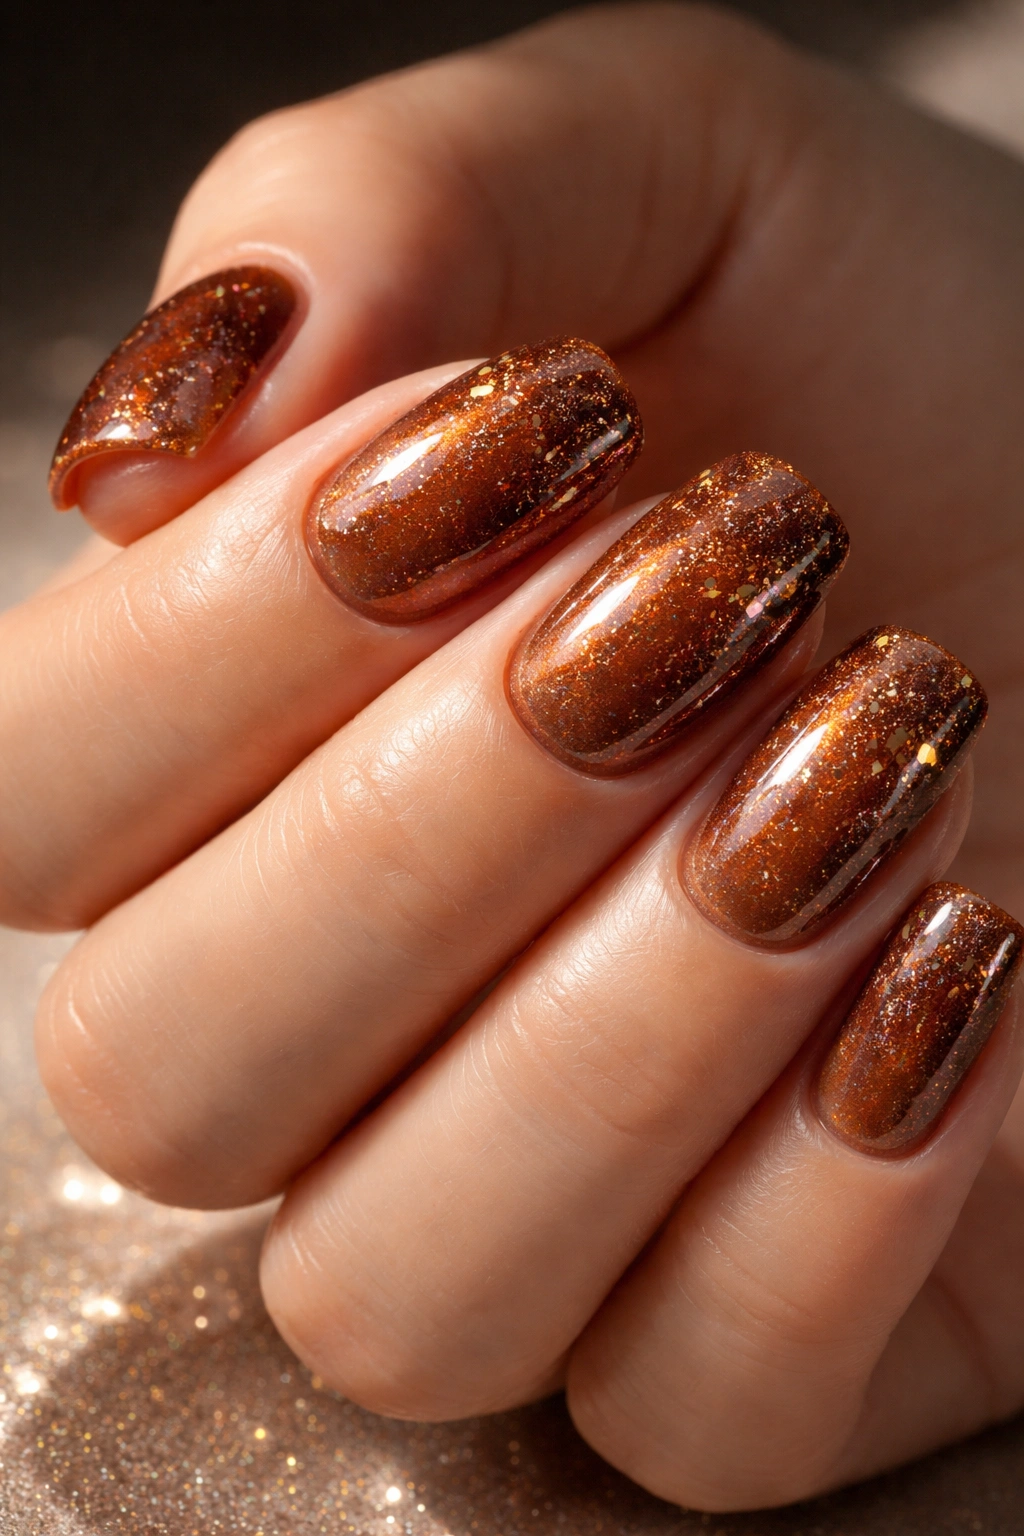
This is the richest design on the list: a deep, warm cognac glaze with strategically placed glass fleck or crushed mirror pieces that catch light and create a luxury jewelry-like effect. The cognac alone is beautiful and sophisticated, but the glass fleck transforms it into something that looks genuinely expensive. The flecks catch light in a way that makes your nails look three-dimensional and complex.
Glass Fleck vs. Shimmer
Glass fleck and crushed mirror create actual light-catching texture rather than shimmer settled into polish. The effect is more dimensional and eye-catching, but because the cognac base is dark and rich, the glass fleck reads as luxury accent rather than looking overdone. This is a design for someone who wants nails that get noticed.
Applying Glass Fleck to Cognac
- Build your cognac base with 3 coats to ensure full opacity and richness
- Sprinkle glass fleck (also called crushed glass or mirror fleck) onto the nail while the third coat is still slightly tacky—work on one or two nails at a time so the polish doesn’t cure too quickly
- Press the fleck gently with a soft brush or your finger to embed it into the polish
- Cure everything
- Apply a thick, generous topcoat that will seal and protect the fleck pieces
- The topcoat should be applied in a way that doesn’t disturb the fleck placement—apply it smoothly and carefully
- The sealed glass fleck will continue to catch light and glimmer even under the topcoat
Pro tip: Buy glass fleck in different sizes and use the smaller pieces for a more refined look—large fleck can feel costume-y, while small fleck reads as intentional luxury detail.
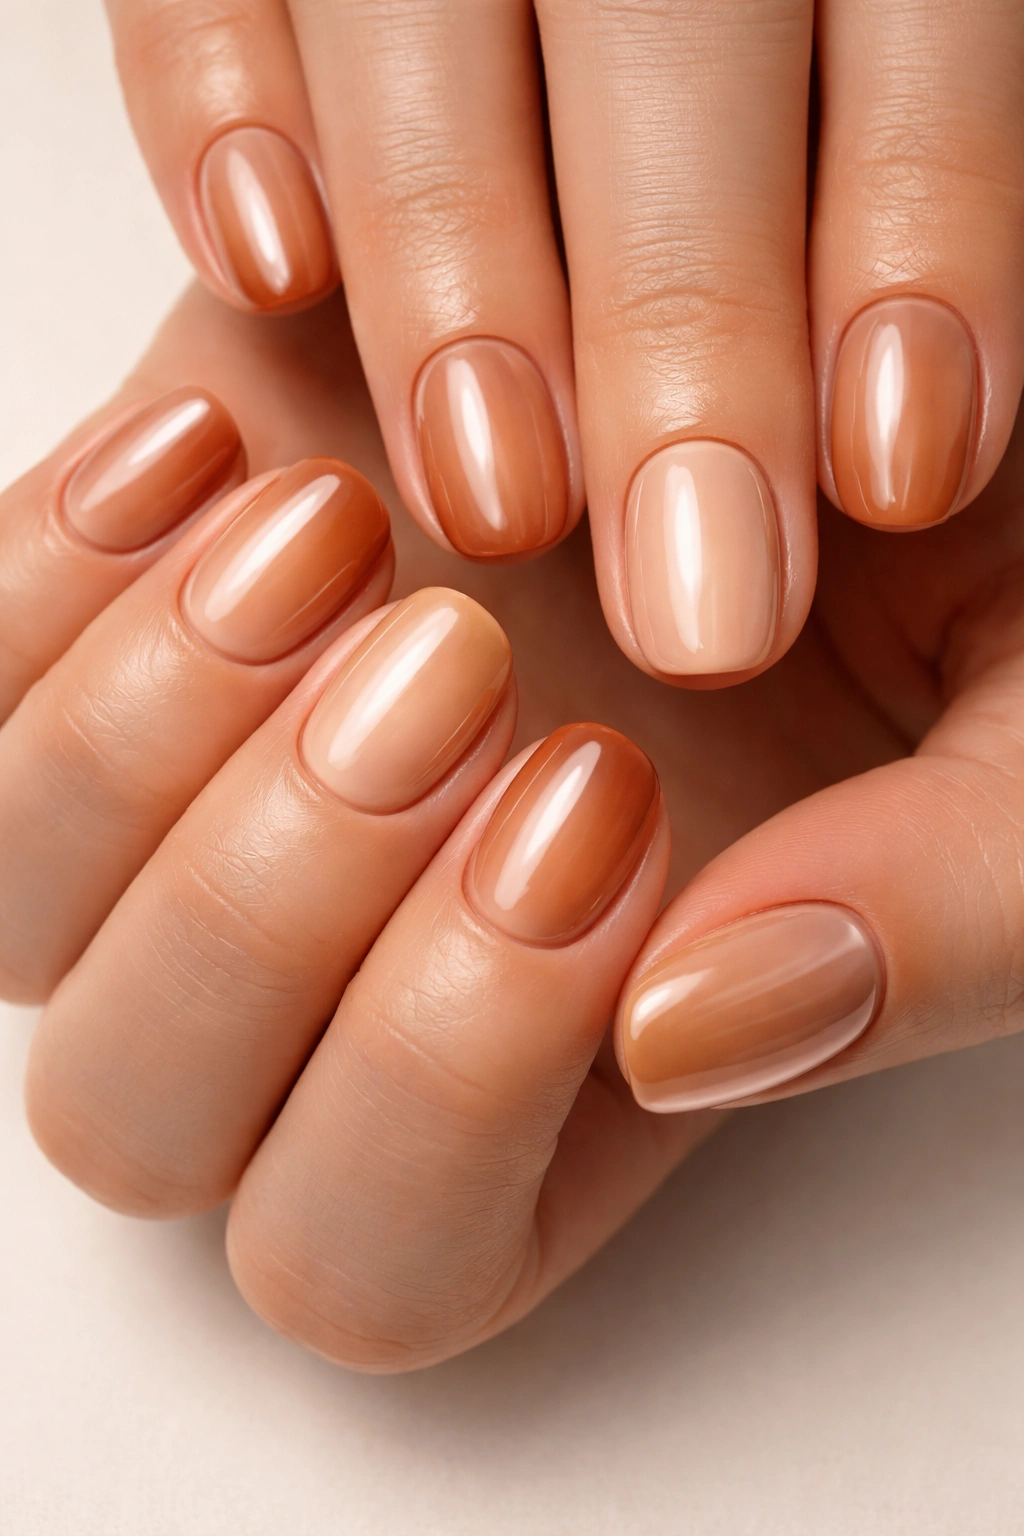
13. Nude Beige Glaze with Sheer Gradient Ombre to Darker Tip
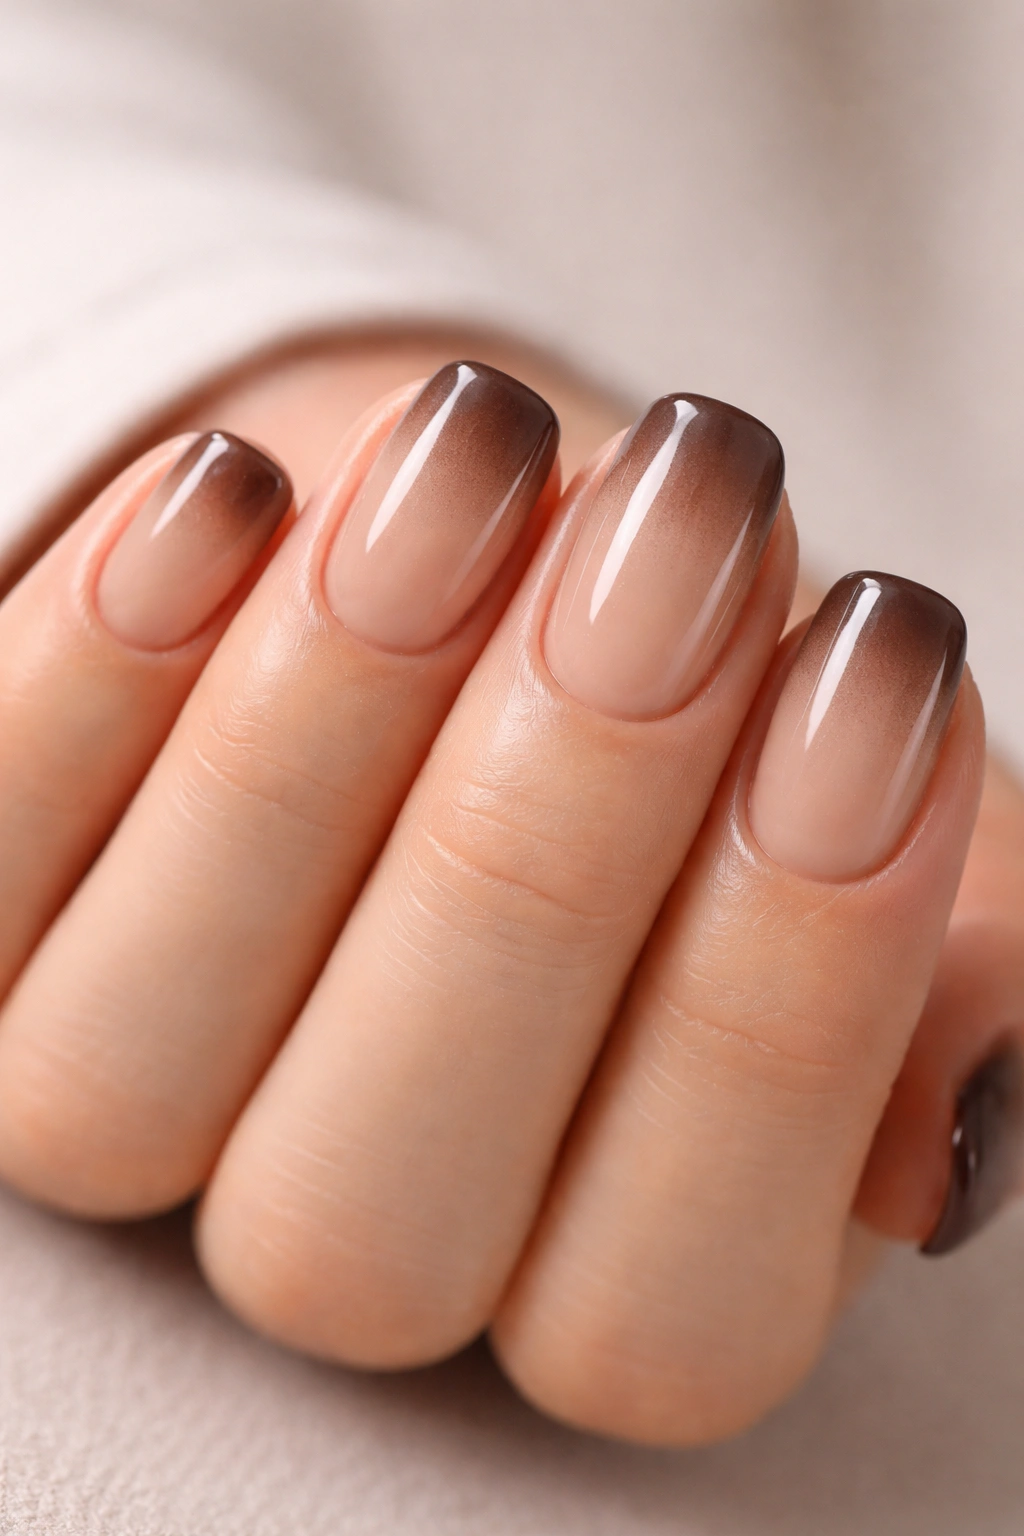
This design uses a nude beige glaze base that gradually deepens into a rich chocolate brown at the tip, creating an ombre that’s subtle enough to look elegant but clear enough that it’s obviously intentional. The glaze finish makes the color transition look like you just got a professional ombre at a high-end salon. It’s one of those designs that looks complicated but is actually quite achievable at home.
Why Neutral Ombre Works
Neutral color ombre is sophisticated because the color story is subtle—it’s not about bold contrast but about dimension and depth. The glaze amplifies this by making the ombre look luminous rather than flat. This is the design that makes short nails look elegant and elongated.
Creating a Neutral Ombre Glaze
- Apply 2-3 coats of your nude beige glaze base—this should be your main color, applied to the full nail
- Using a makeup sponge, “bounce” a darker chocolate brown shade onto just the tip area
- Build the darker color gradually, layer by layer (don’t apply all your dark color at once)
- The transition should be gradual enough that you can’t see a hard line between the two colors
- Cure everything together
- Apply a generous topcoat and cure—the gloss will integrate the colors and create that unified glazed appearance
- The final effect should look like a color fade rather than two separate colors
Insider note: This ombre works beautifully with any warm nude base and any complementary darker tone—you could also do nude-to-terracotta, sand-to-bronze, or cream-to-caramel for variations on the same concept.
14. Vanilla Glaze with Delicate Rose Gold Striping
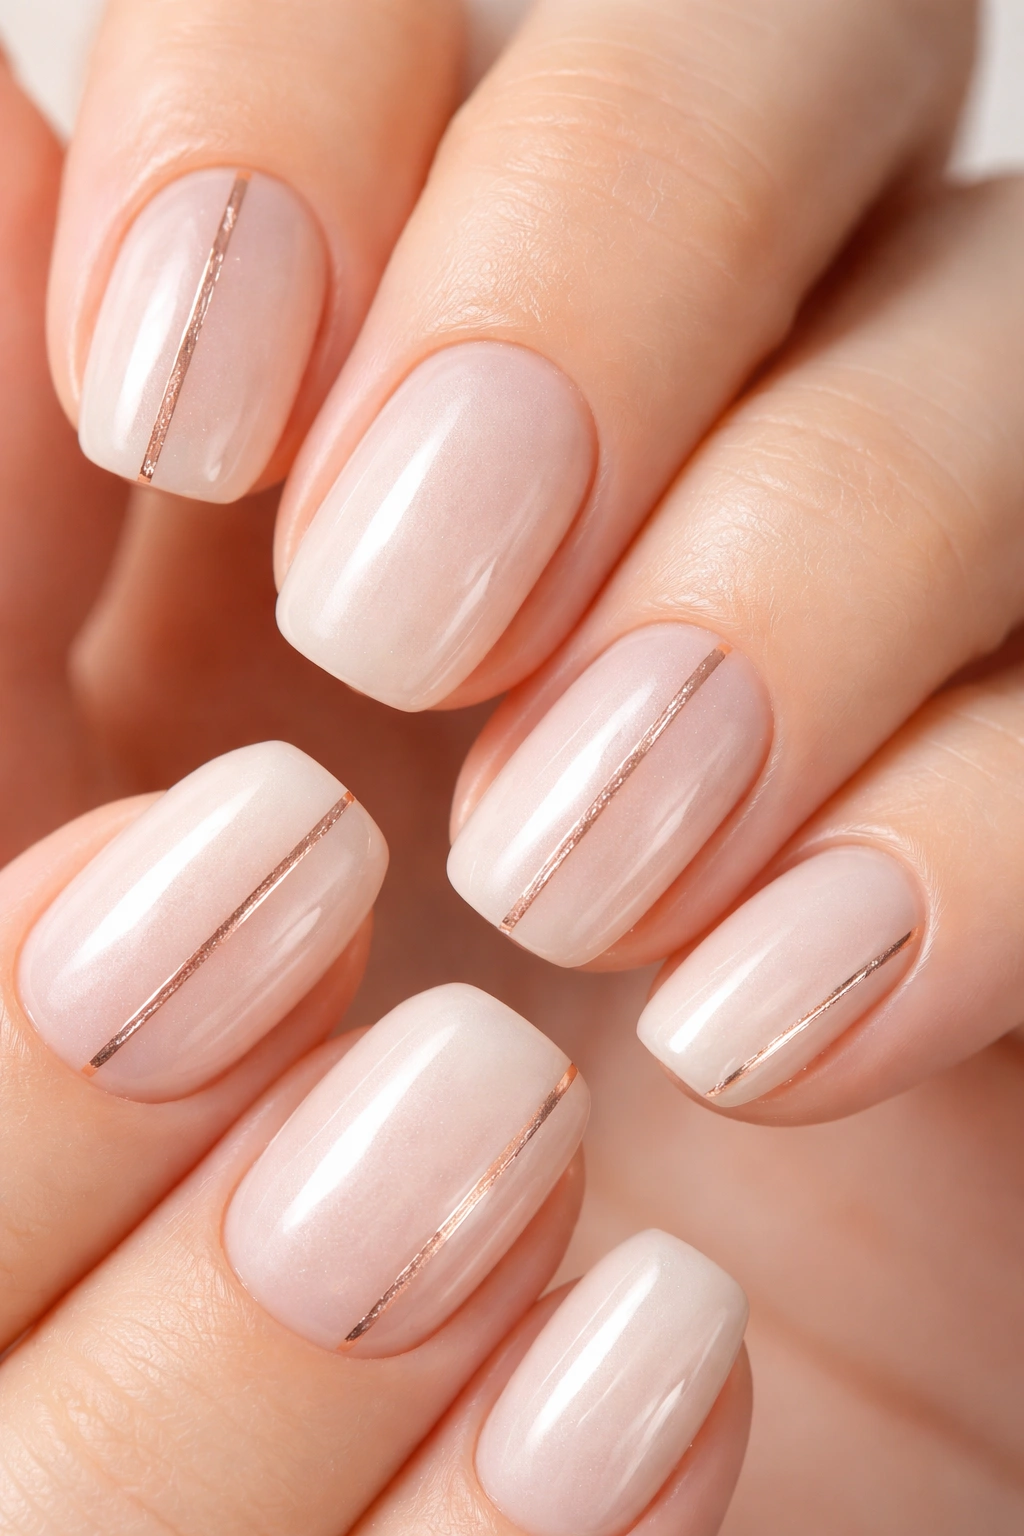
This design combines a pale vanilla glaze with thin, carefully placed rose gold stripes—either as vertical lines down the center of some nails or as a thin horizontal stripe near the cuticle. Rose gold on vanilla is inherently elegant: the warm tone of the rose gold complements the creamy vanilla base, and the stripes keep the design from feeling too minimal. It’s romantic and sophisticated without being fussy.
Delicate Striping on Glaze
Thin striping on a glazed base reads as sophisticated jewelry-level detail, especially when the stripe is placed intentionally rather than randomly across the nail. The glaze creates a unified visual story rather than the striping feeling like a separate layer on top.
Creating Rose Gold Stripes on Vanilla
- Build your vanilla glaze base with 2-3 coats—aim for a pale, creamy off-white with warmth
- After curing, decide on your stripe placement: vertical lines, a horizontal stripe, or diagonal accents
- Using a thin striping brush or a specialized nail liner, apply rose gold gel carefully along your chosen pattern
- The stripe should be thin enough that it registers as accent detail rather than a bold graphic
- You could also use rose gold metallic foil applied with a gel adhesive layer
- Cure the stripes, then seal with a glossy topcoat
- The gloss will integrate the stripes with the vanilla base, creating a seamless, high-end look
Pro tip: If you’re worried about shaky lines, use a thin striping brush with a steady hand and work slowly. Or, practice on a nail wheel first to build confidence—the better you understand how much gel to load on the brush, the easier it gets.
15. Spiced Peach Glaze with Mica Dust Texture Accent
This final design uses a warm spiced peach glaze (peach with a hint of brown, creating almost cinnamon undertones) combined with ultra-fine mica dust applied to just the nail tip or sides, creating a subtle texture that catches light. The mica dust doesn’t make the nail rough—it stays embedded in the topcoat and creates a soft, shimmering texture effect. It’s the most art-forward design on the list, but still wearable and not overdone.
Mica Dust for Textured Glaze
Mica dust creates a different effect than glass fleck because it’s ultra-fine and light-reflecting without being sparkly. It gives glazed nails a soft, ethereal quality that’s beautiful but understated. This is for someone who wants their manicure to be interesting up close but not overwhelming from a distance.
Applying Mica Dust to Spiced Peach Glaze
- Build your spiced peach base with 2-3 coats—aim for warmth with depth, almost a fuzzy peach tone
- Decide whether you want the mica dust on the entire nail or just the tips and sides
- Apply a thin layer of clear gel or tacky base to the area where you want texture
- Using a thin brush, dust ultra-fine mica powder directly onto the tacky layer—you can apply it generously or sparingly depending on how much texture you want
- Tap off any excess mica
- Cure the mica layer
- Apply a generous, smooth topcoat that will seal the mica and create that unified glazed appearance
- The topcoat should be applied carefully to avoid disturbing the mica placement
Worth knowing: You can buy mica dust in different colors and create multi-colored mica accents—try combining spiced peach with rose gold or bronze mica for a layered, dimensional effect.
Final Thoughts
Glazed donut nails work beautifully in short squoval lengths because the shape keeps them looking practical while the glaze finish keeps them feeling special. None of these designs requires hours at the salon or expert-level application skills—most are entirely achievable at home if you invest in quality glazed gel formulas and take your time with application. The key to any glazed donut design is building color gradually, using quality topcoats designed for that signature high-shine finish, and remembering that sometimes the most luxe-looking nails are actually the simplest ones done exceptionally well.
Whether you go for a classic apricot or push into something richer like cognac with glass fleck, the glazed donut aesthetic elevates short nails from practical to intentional. You’re not just keeping your nails neat—you’re making a specific, creative choice about how you want to present yourself. That’s what separates a good manicure from one that actually earns compliments.
