

Deep red nails have been a timeless symbol of confidence, sophistication, and understated power for decades. There’s something about the combination of a rich, dark crimson shade and the elegant canvas of long round nails that instantly elevates any look — whether you’re heading to a boardroom, a black-tie event, or simply want to feel more polished in your everyday life. The boldness isn’t in the length alone; it’s in the commitment to a color that says something about who you are. Long round nails, in particular, hit that sweet spot between glamorous and wearable, giving you the drama of extended length without the sharp points that can feel impractical for many people.
What makes deep red so special is its incredible versatility. This isn’t a color that demands a specific occasion or outfit — it’s sophisticated enough for formal events, classic enough to pair with business attire, and bold enough to make a personal style statement on any day of the week. The beauty of exploring different interpretations of deep red on long round nails is that you can shift the entire mood through finishes, accents, nail art details, and layering techniques. A matte deep red feels completely different from a glossy version, which transforms again under chrome or glitter effects.
Finding the exact deep red that works for your skin tone, lifestyle, and personal taste is part of the fun. Some reds lean more burgundy, some push toward wine, others have a more true crimson tone, and a few even incorporate subtle brown or black undertones that deepen the effect. Throughout this guide, you’ll find 15 specific ways to wear deep red on long round nails — from the purest, most classic versions to creative designs that play with texture, embellishment, and artistic detail. Each approach has its own moment and its own impact.
1. Classic Glossy Deep Red with Clean Lines
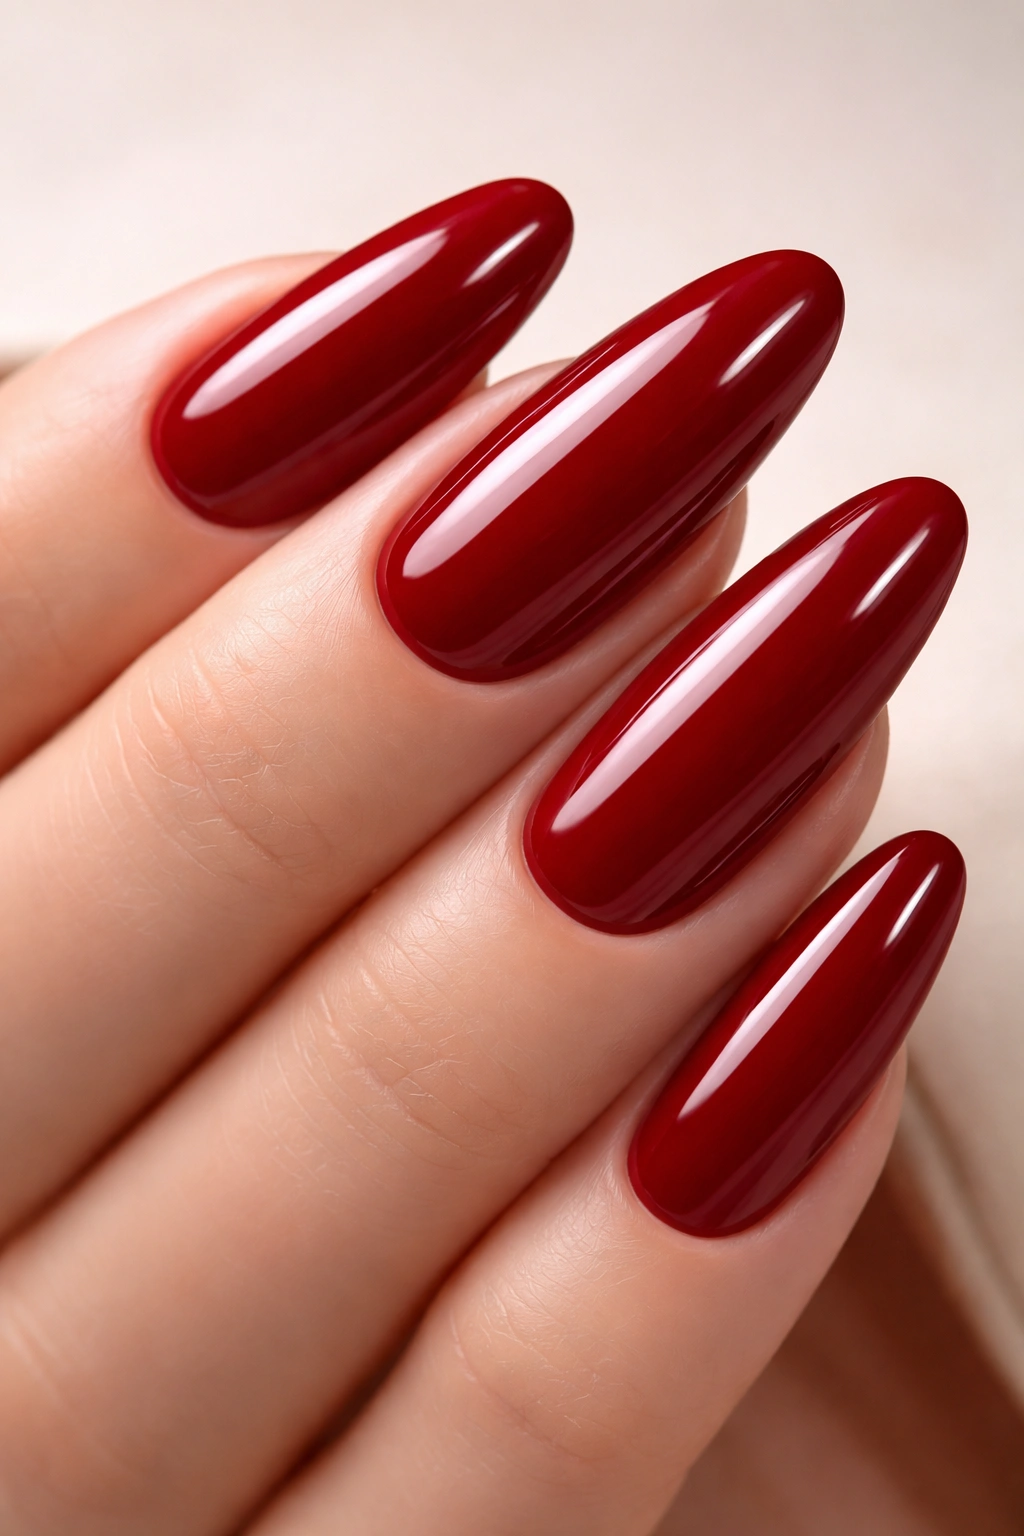
The foundational look that never goes out of style is a flawless glossy deep red applied to long round nails with razor-sharp edges and a shine that reflects light with every hand movement. This version of deep red — think of a true cardinal red with subtle burgundy undertones — becomes almost liquid-looking under a high-shine topcoat, creating an impression of depth and luxury. The appeal of this look is in its simplicity and its demand for perfection. There are no design elements to hide behind, no texture to distract from imperfection, which is exactly why it feels so powerful when executed well.
Why This Timeless Approach Works
A classic glossy finish catches light in a way that matte cannot, and on long round nails, that light reflection draws attention to the shape and length of your fingers in the most flattering way. The clean, polished appearance signals intention and care — you’ve taken time to create something finished and complete. This look translates across every setting imaginable, from casual to formal, and it pairs beautifully with every skin tone when you choose the right shade of red.
Application Tips for Perfect Results
- Use a base coat to prevent staining, which is especially important with deep reds
- Apply thin, even layers (two to three coats is typical) rather than one thick coat
- Cap the edge of the nail with topcoat to seal and create definition
- Invest in a high-quality glossy topcoat — the difference in shine and longevity is dramatic
- If you notice bubbles or unevenness, let the first coat fully dry before applying the second
Pro tip: Dip the brush edge-first into the polish, then drag it along the rim of the bottle to remove excess. This single technique prevents pooling at the cuticle and ensures your edges stay clean.
2. Matte Deep Red for Modern Sophistication
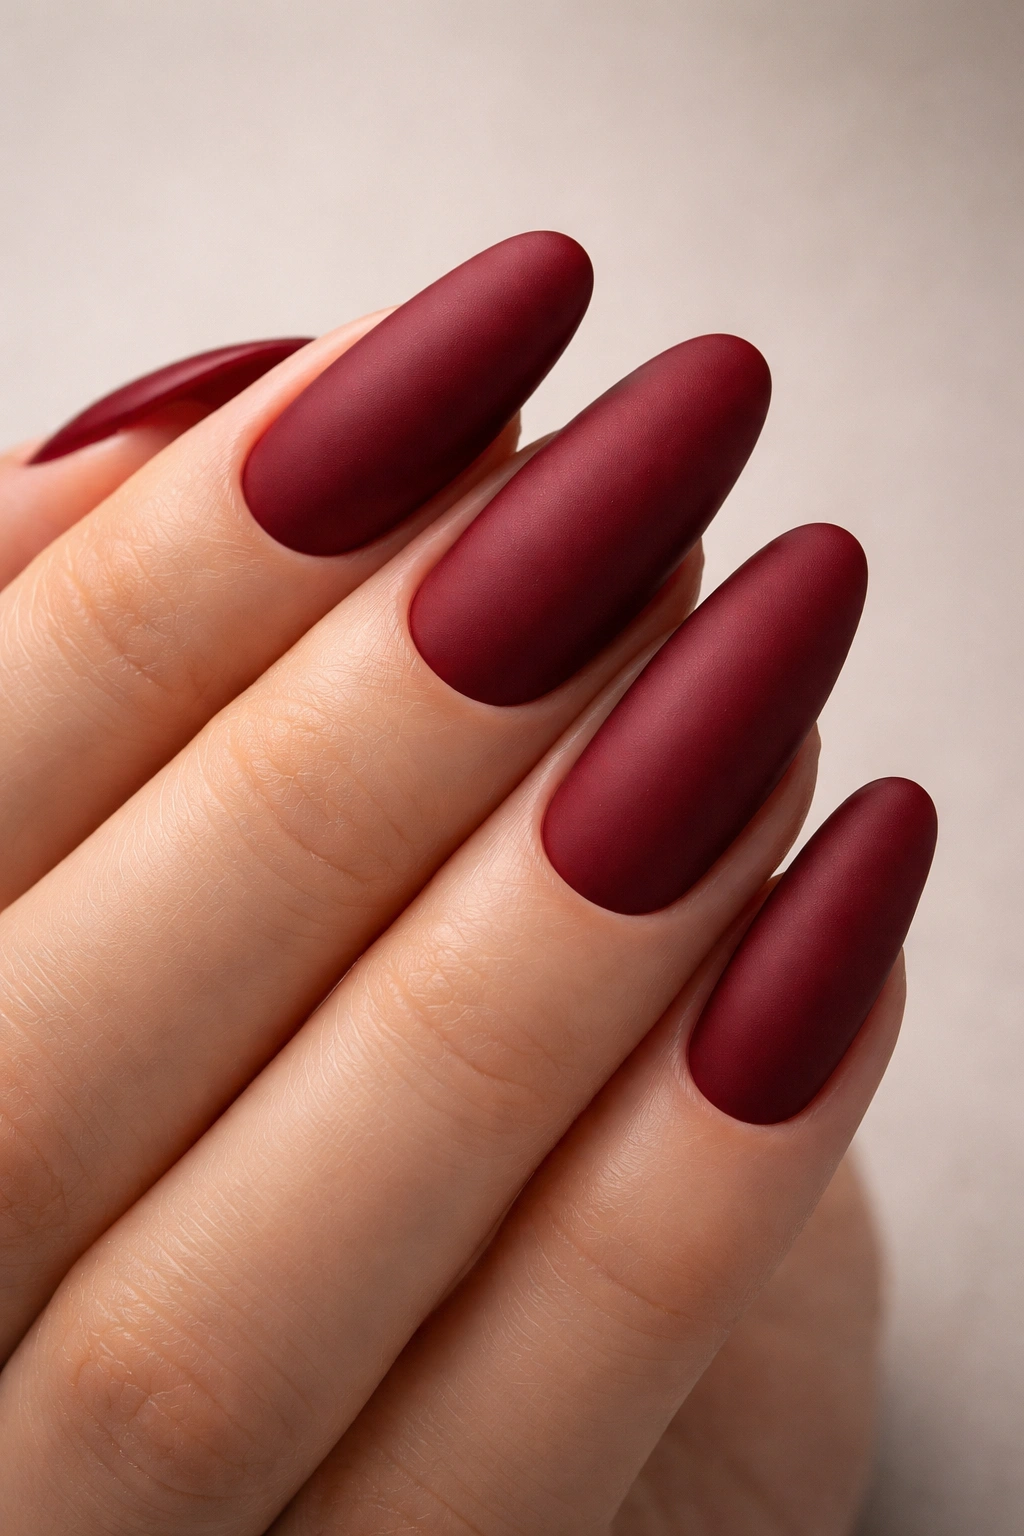
Where glossy red says “timeless elegance,” matte deep red whispers “deliberately modern.” The same deep crimson shade transformed by a matte topcoat becomes something entirely different — more velvety, more fashion-forward, and somehow more powerful because it deliberately rejects shine. Matte finishes on nails have become increasingly popular, and for good reason: they create a softer appearance while maintaining absolute boldness through color depth. The lack of reflection forces the viewer’s eye to focus entirely on the color itself, with no light interference to soften or complicate the message.
The Sophisticated Edge of Matte
Matte red feels intentional in a way glossy sometimes doesn’t — it’s a choice rather than a default. On long round nails, matte creates a modern silhouette that photographs beautifully and feels distinctly current without being trendy in a way that will date quickly. The velvety texture of a quality matte topcoat also creates an interesting contrast with the smooth nail surface, adding subtle visual interest even though there’s technically no design element involved.
Achieving a Perfect Matte Finish
- Apply your base coat and color coats exactly as you would for glossy — this doesn’t change
- Use a dedicated matte topcoat rather than applying matte powder to a glossy finish (the powder method wears inconsistently)
- Make sure your matte topcoat is specifically formulated for nails — some products designed for other surfaces leave a gritty or unfinished appearance
- One coat of matte topcoat is usually sufficient, unlike glossy topcoats which often benefit from a second coat
- If your matte finish starts to wear in high-traffic areas, you can add a glossy topcoat just to those spots for a mixed-finish effect
Pro tip: If you love matte but worry about durability, try a matte gel formula instead of traditional matte polish — gel mattes are far more durable and maintain their finish better through daily wear.
3. Deep Red with Gold Geometric Accents
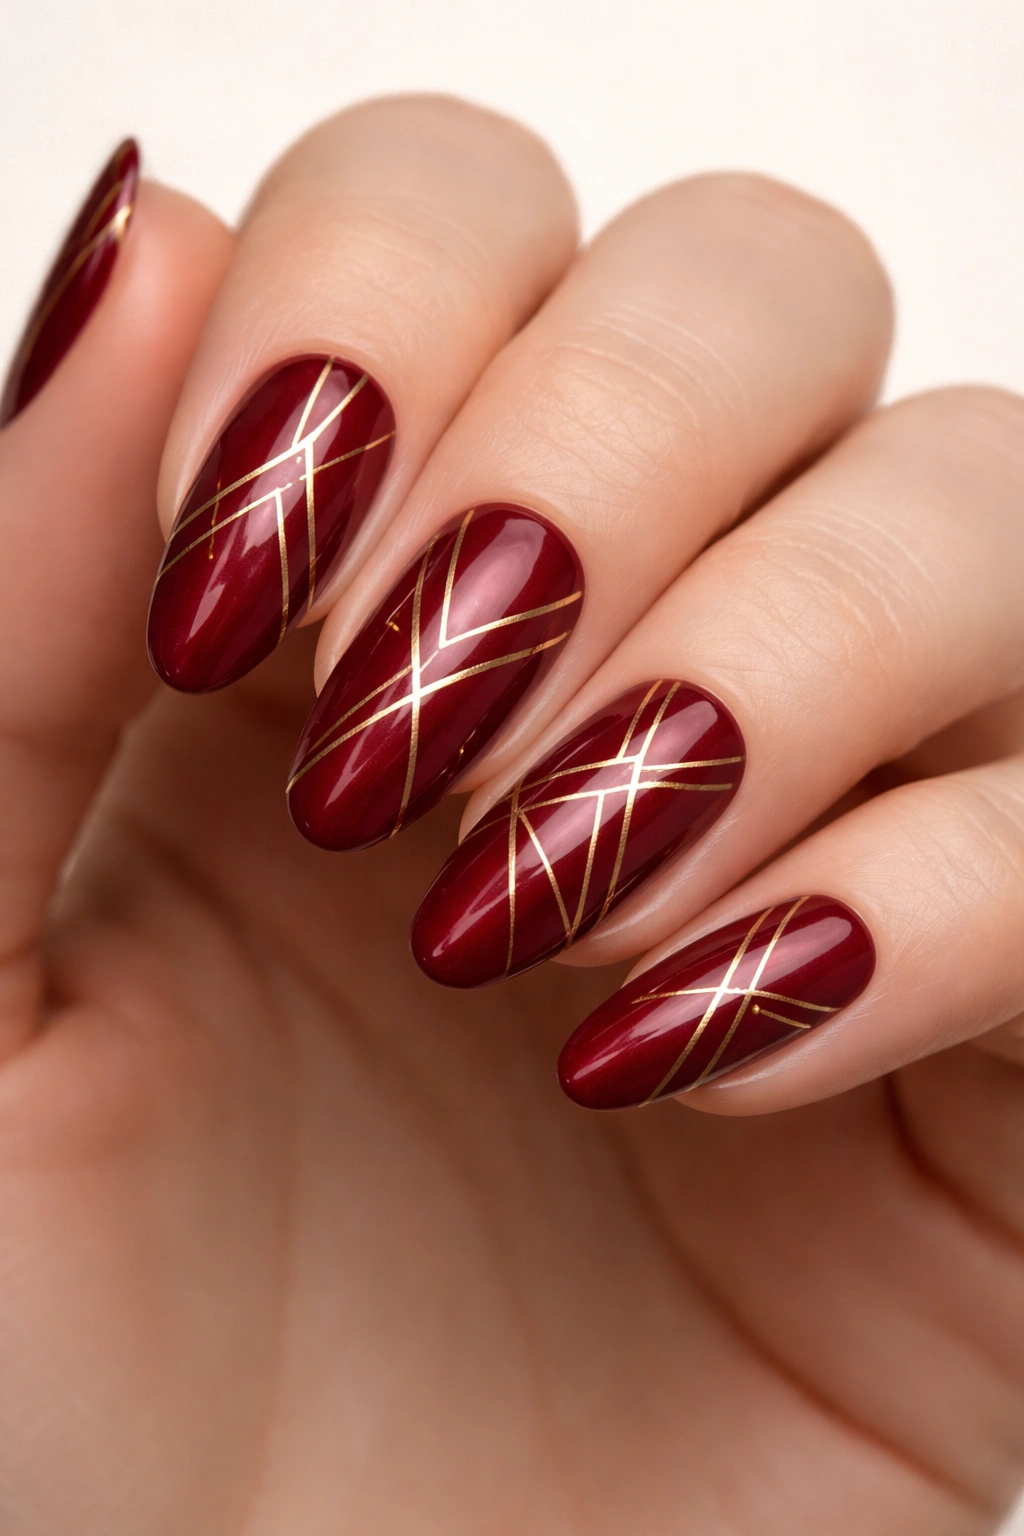
This version elevates deep red through precise geometric design work that plays with negative space and metallic contrast. Imagine long round nails in a classic deep red base with thin gold lines creating triangles, chevrons, or linear patterns across the nail surface or concentrated on an accent nail. The geometry brings structure and contemporary edge to an otherwise traditional color, and the gold creates warmth and luxury without competing with the red for attention. This hybrid approach works particularly well because the geometric pattern naturally complements the clean lines of round nail shapes.
Geometric Design as Modern Expression
Geometric patterns transform deep red from a statement about timelessness into a statement about intentional style. The precision required to create clean lines and balanced shapes demonstrates craftsmanship and attention to detail. On long round nails, geometric elements also create interesting visual division that can even make nails appear slightly shorter or stubbier if that’s a concern — the pattern breaks up length and creates resting points for the eye.
How to Execute Geometric Details
- Start with your glossy deep red base coat and let it cure completely if using gel, or dry fully if traditional polish
- Use a thin nail art brush or detail pen to apply gold lines with a steady hand
- Plan your design lightly with a pencil or toothpick first if you’re nervous about placement
- Gold gel paint or gold metallic polish both work — choose whichever application method matches your base color
- Seal everything with a glossy or matte topcoat depending on your preference for finish
- If freehand feels too risky, gold nail tape can create perfectly straight lines with zero skill required
Pro tip: Use a gold foil or metallic powder pressed into wet gel before curing — this creates a more solid, even metallic appearance than trying to paint gold lines, and the finish is more durable.
4. Deep Burgundy Red with Cream Accent Nails
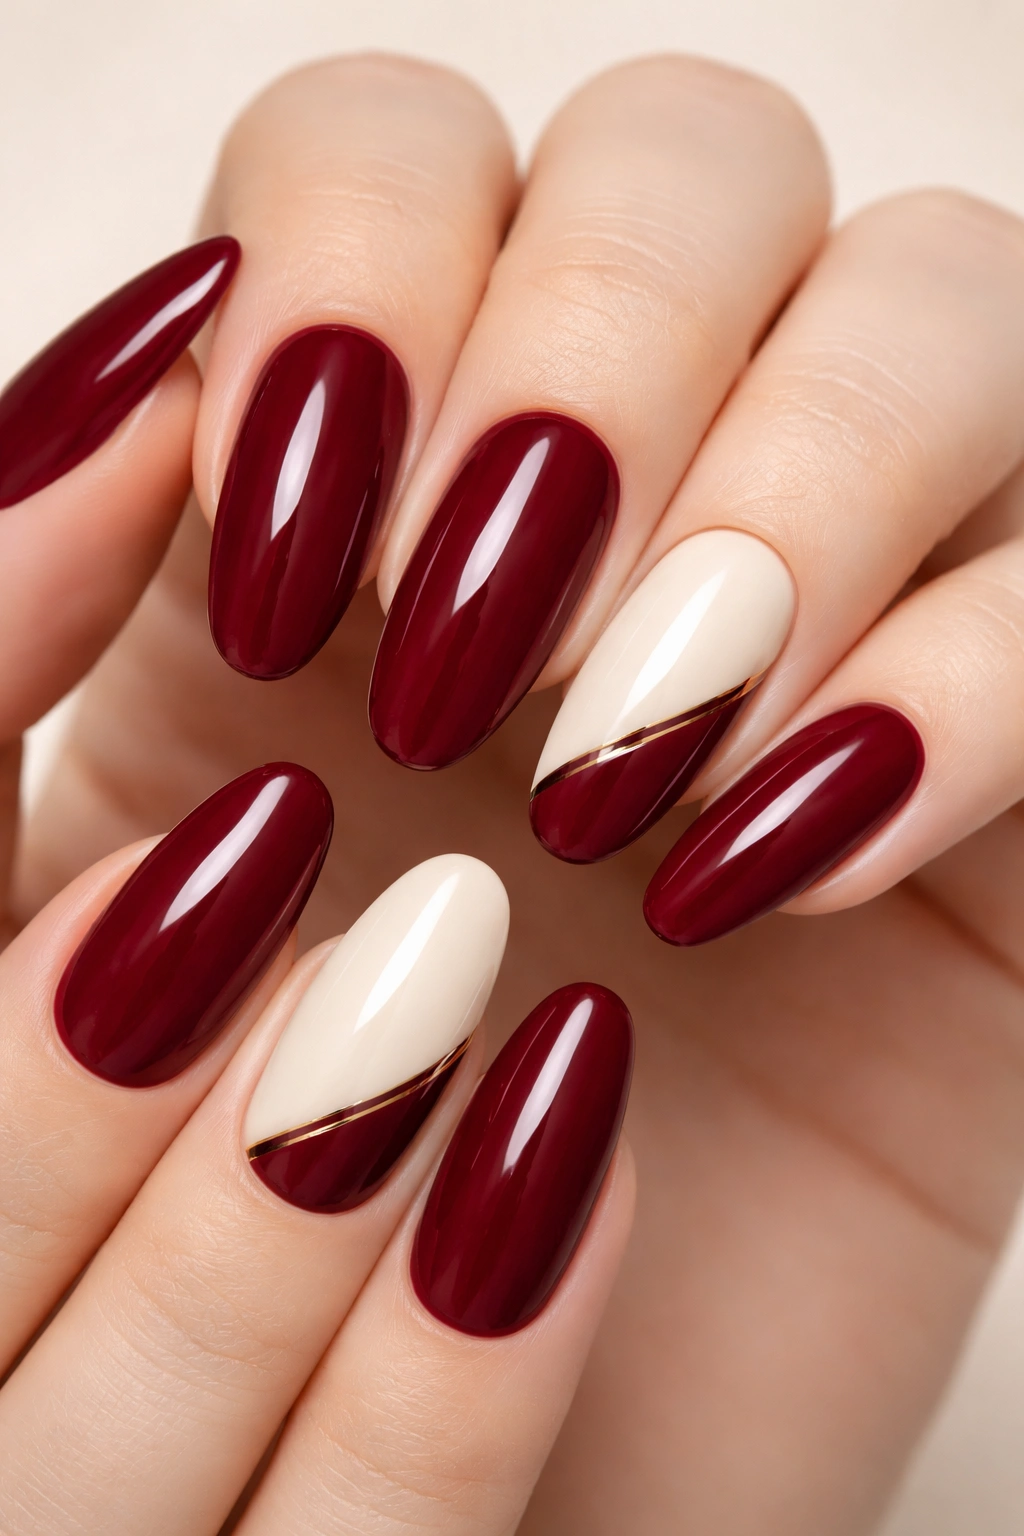
This sophisticated two-tone approach uses a deep burgundy-leaning red (darker and more wine-toned than pure crimson) as your primary shade, then picks one or two accent nails to paint in cream or off-white. The contrast between the warm darkness of the burgundy and the cool lightness of the cream creates visual interest and prevents the overall look from feeling heavy, even though both shades are applied to long nails. This particular combination suits fall and winter aesthetics beautifully, though it works year-round for anyone who loves the refined contrast.
Why Burgundy and Cream Create Perfect Balance
Burgundy contains brown undertones that make it feel warmer and more grounded than bright red, and pairing it with cream (rather than pure white) keeps the overall effect sophisticated rather than stark. The cream color draws focus to whichever nails you choose to paint it on, usually either the ring finger and pinky or just the ring finger, creating a focal point without fragmenting the overall look. Long round nails in this combination photograph beautifully and feel elegant enough for formal occasions while remaining approachable enough for daily wear.
Strategic Accent Placement
- Paint four nails in your chosen burgundy shade with two to three thin coats
- Choose your accent nail placement: single ring finger, or ring finger and pinky (ring finger alone feels more understated, while two accent nails create more impact)
- Apply your cream shade to the accent nails — cream is typically opaque, so two coats provides full coverage
- Seal everything with the same topcoat finish you choose (glossy, matte, or mixed)
- If you want to create even more contrast, consider applying a glossy topcoat to the burgundy nails and a matte topcoat to the cream nails for a mixed-finish effect
Pro tip: The richness of burgundy is enhanced by slightly cooler cream shades — an ivory or cool-toned cream creates better visual contrast than a warm, peachy cream.
5. Deep Red Glitter Fade for Texture and Dimension
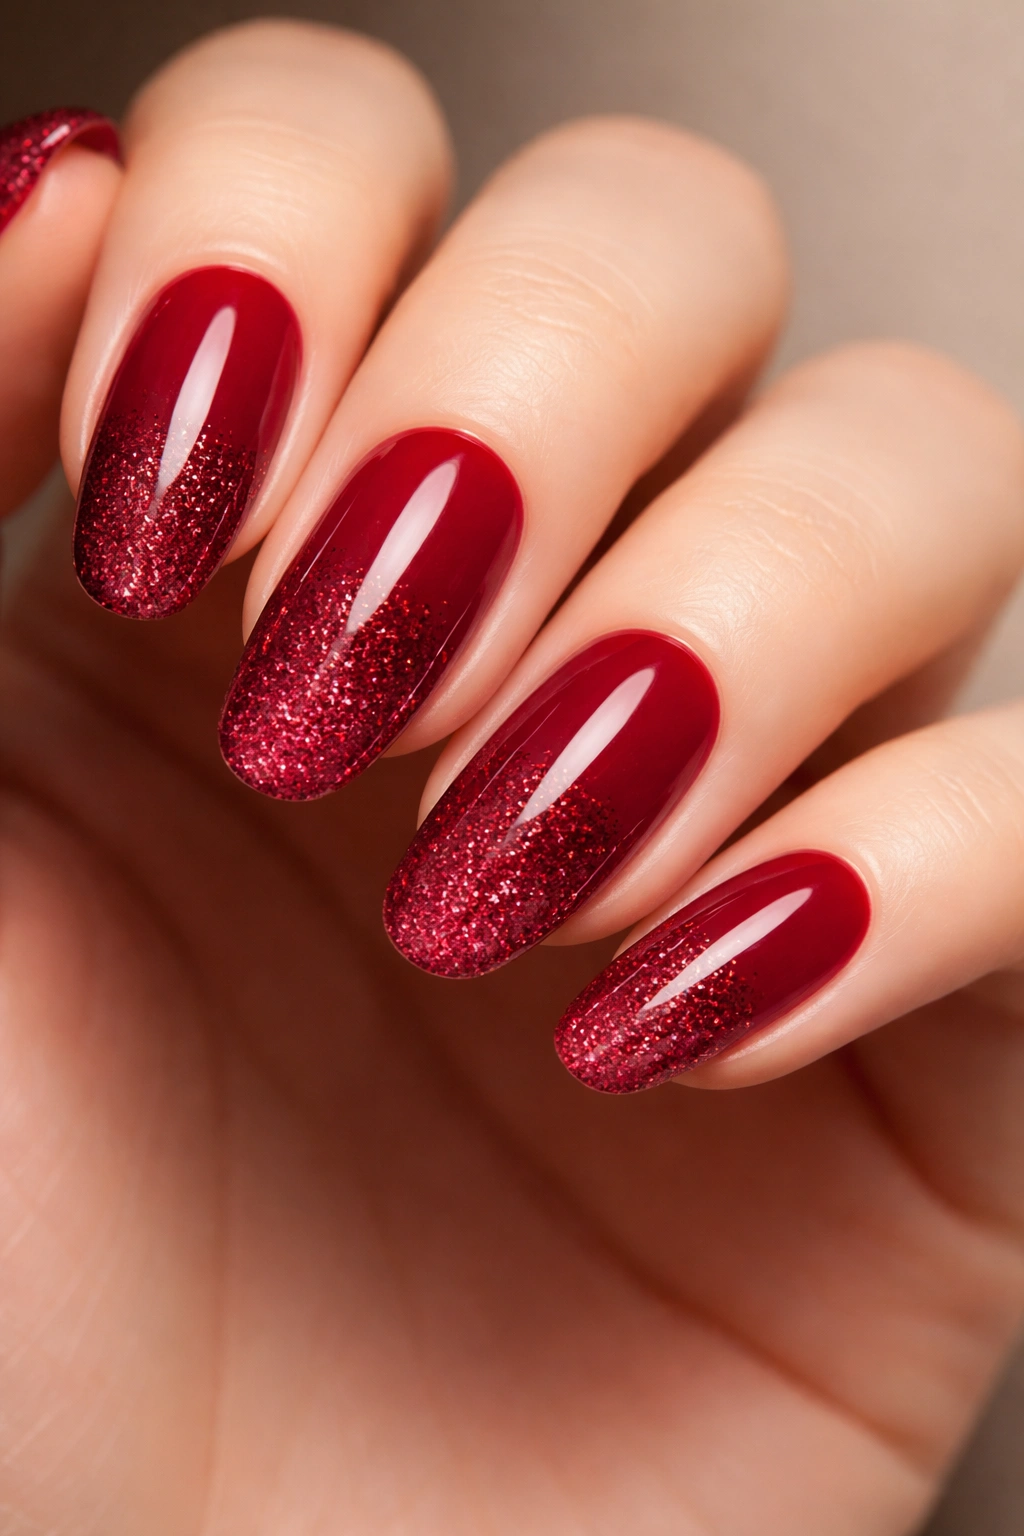
Taking deep red into more playful territory, a glitter fade effect uses your base deep red and gradually introduces fine or medium glitter particles toward the tips and edges of the nails, creating a dimensional effect that catches light and adds sparkle without going full glitter. This technique works beautifully on long round nails because the length gives you plenty of space to create a smooth, gradual transition from solid color to sparkle-heavy at the tip. The fade effect prevents the look from feeling too busy or costume-like while still adding celebratory texture and light-catching drama.
Building the Glitter Fade
A successful glitter fade requires strategic application and patience. You’re essentially creating a gradient from solid color to increasingly glitter-dense polish, and the transition should feel intentional rather than accidental. Deep red as your base color grounds the sparkle and prevents the glitter from reading as frivolous — instead, it feels elegant and considered. This technique works for both glossy and matte bases, though glossy backgrounds make glitter more prominent and reflective, while matte backgrounds make glitter feel more integrated.
Step-by-Step Glitter Fade Application
- Apply two coats of your deep red base color and let it dry completely
- Apply a clear or slightly tinted clear base coat over the entire nail
- On the tip half of the nail, apply a clear glitter polish (or clear polish mixed with loose glitter if using gel)
- While still wet, use a dry brush to extend glitter particles upward, creating a gradient effect
- Apply a second coat of glitter polish just on the final quarter of the nail for increased concentration
- Seal everything with a glossy topcoat, which will hold the glitter in place and create a smooth surface
Pro tip: If you’re using traditional polish, a pre-made glitter gradient polish (where the glitter concentration is already built into one bottle) can give a more consistent fade effect than mixing your own.
6. Deep Red with Negative Space Line Design
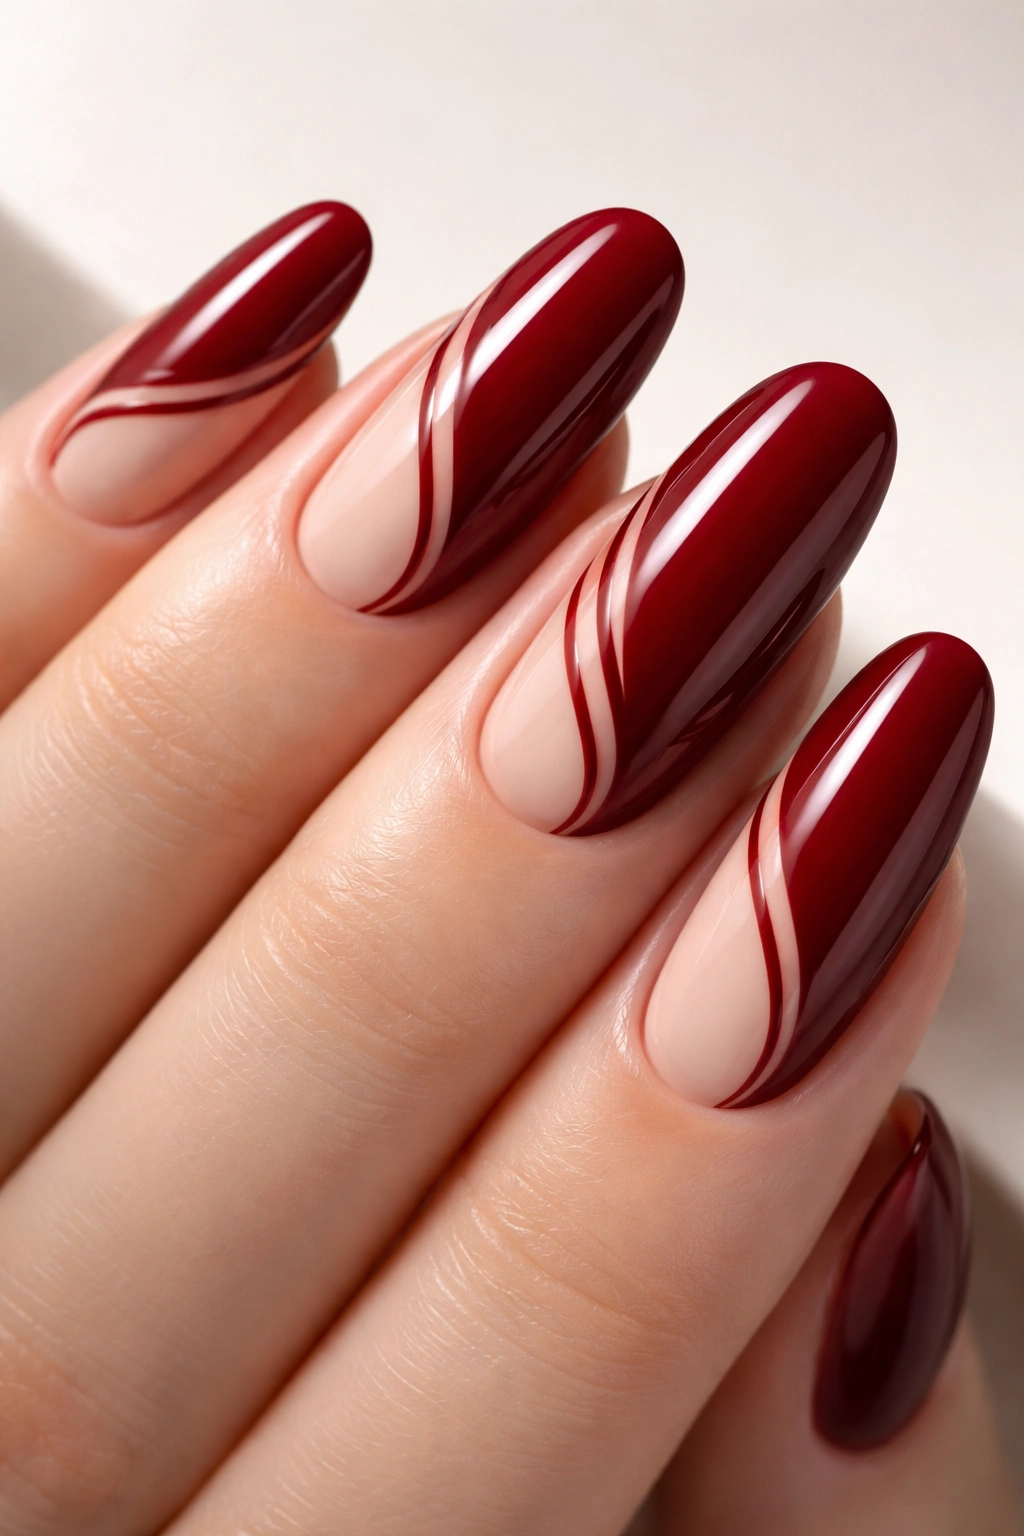
Negative space design uses the natural nail or a contrasting base color as a design element by deliberately leaving certain areas unpainted. On long round nails painted in deep red, this might mean painting the entire nail deep red except for thin curved lines, stripes, or geometric cutouts that reveal the nail underneath or a nude base. The effect is modern, artistic, and creates visual complexity without adding busy details. The deep red becomes the canvas for a more conceptual design rather than traditional nail art, and this approach feels especially sophisticated on elongated round nails where the negative space has room to breathe.
Negative Space as a Design Philosophy
Rather than adding to the nail with details and embellishments, negative space works by subtraction — it removes sections of color to create the design. This approach feels contemporary and design-forward, and because it involves less product and less detailed painting, it’s actually easier to execute than many other decorative techniques. On deep red specifically, negative space creates visual rest and prevents the nails from feeling overwhelmingly dark or heavy.
Creating Negative Space Designs
- Paint your entire nail with a nude or clear base color and let it dry completely
- Using deep red polish and a thin detail brush, paint your design while deliberately leaving gaps
- Common negative space patterns include: thin vertical lines leaving gaps of base color visible between them, curved lines following the nail’s contour, geometric shapes concentrated on specific areas, or a sweeping asymmetrical design
- If you make mistakes, use a small brush with acetone or a corrector pen to clean up edges
- Seal with your chosen topcoat finish
- Alternative method: paint the entire nail deep red first, then use a thin brush with acetone or a nude polish to create the negative space by removing color
Pro tip: Stencils designed for negative space nail art can help you create perfectly clean, consistent designs if you’re not confident freehand — they’re especially helpful for geometric patterns.
7. Wine-Toned Deep Red with Pearl Finish
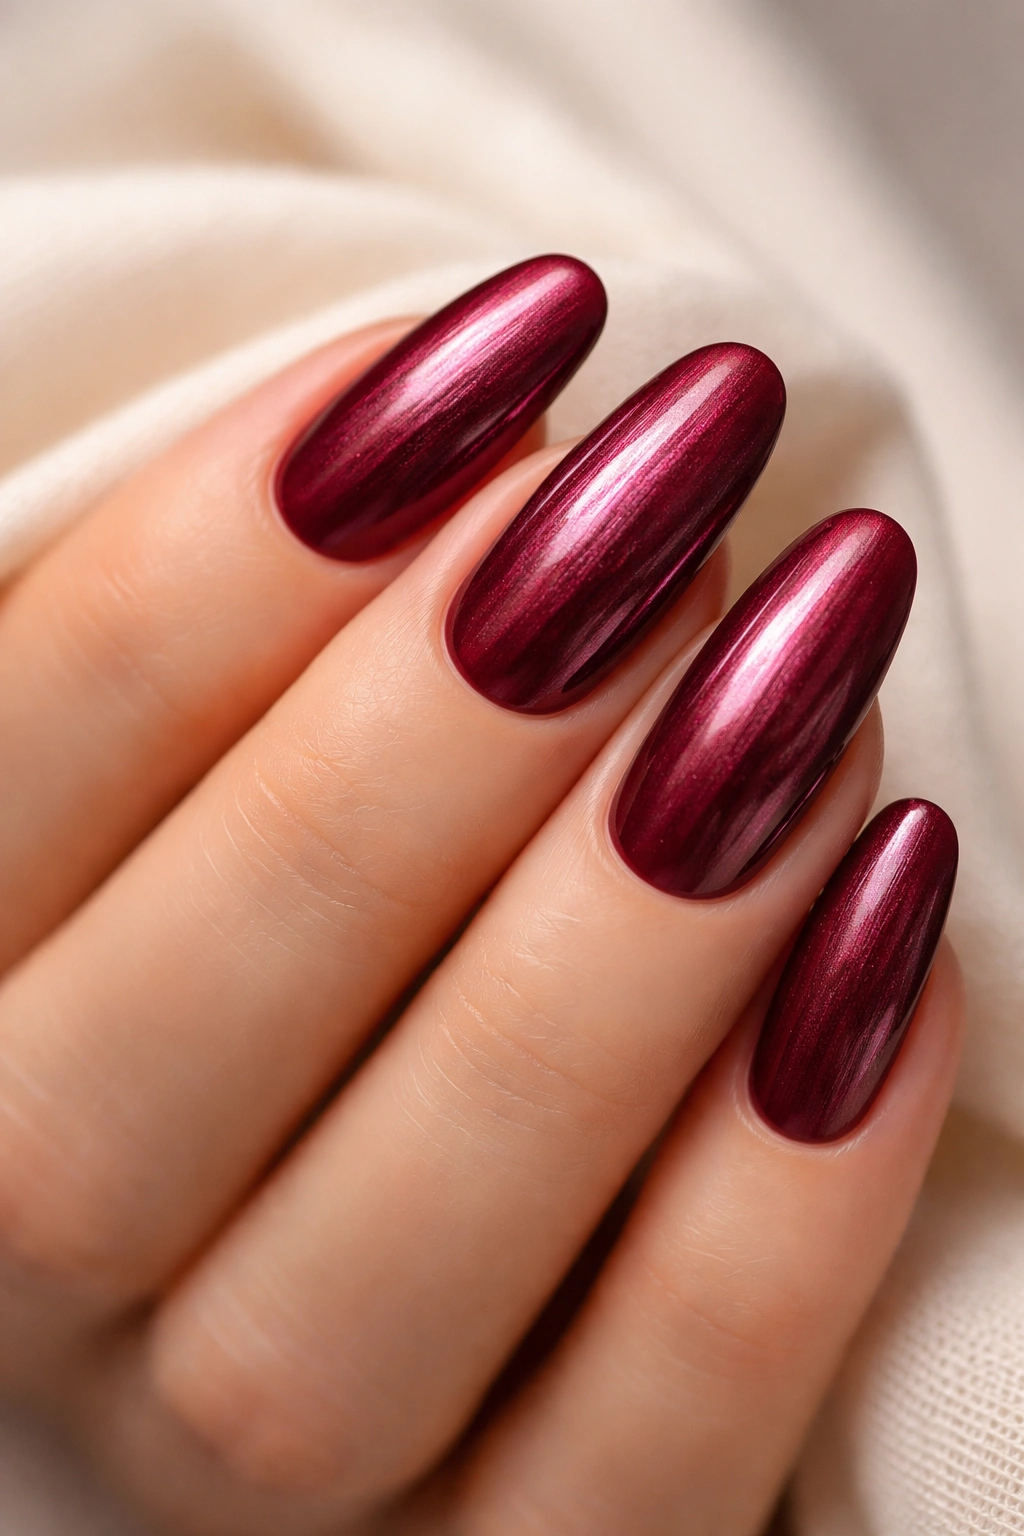
For a more sophisticated take on deep red, shift slightly toward wine-toned reds that incorporate more brown and maroon undertones, then apply a pearl topcoat that creates an iridescent, multi-dimensional finish. Rather than looking solid, the nails will shift slightly depending on the light and angle, creating an effect that feels luxurious and expensive. The pearl finish on wine-toned red creates a subtle sophistication that reads especially well on long nails, where the increased surface area allows the pearl effect to really shine. This combination feels particularly elegant for formal occasions while remaining fresh and interesting enough for everyday wear.
Pearl Finishes and Their Effects
Pearl topcoats contain fine mica particles that refract light, creating subtle iridescence. On wine-toned deep red, this effect is understated — the red remains the dominant color, but the finish gains dimension and complexity. The result feels like you’ve invested in premium nail care and attention to detail, even though applying a pearl topcoat requires no additional skill beyond applying any other topcoat. The wine tones naturally complement the pearl effect because the warmth of the burgundy creates richness when paired with light-refracting particles.
Achieving a Flawless Pearl Finish
- Apply your wine-toned deep red base in two to three thin coats, allowing complete drying between coats
- Choose a pearl topcoat specifically formulated for nails — salon-quality products create better effects than budget options
- Apply the pearl topcoat in one smooth, even coat — you don’t need multiple coats with pearl products, as they’re designed to create effect with a single application
- Some pearl topcoats are sheer and build on the color underneath; others are more opaque — choose based on whether you want the pearl effect to be subtle or more noticeable
- Allow full curing time before using your hands, as pearl finishes can take longer to set than traditional topcoats
Pro tip: Pearl effects are most visible in natural daylight and under certain indoor lighting — they’re especially dramatic in direct sunlight, so if you’ll be outside frequently, this finish choice will really pay off visually.
8. Deep Red Chrome with Metallic Mirror Effect
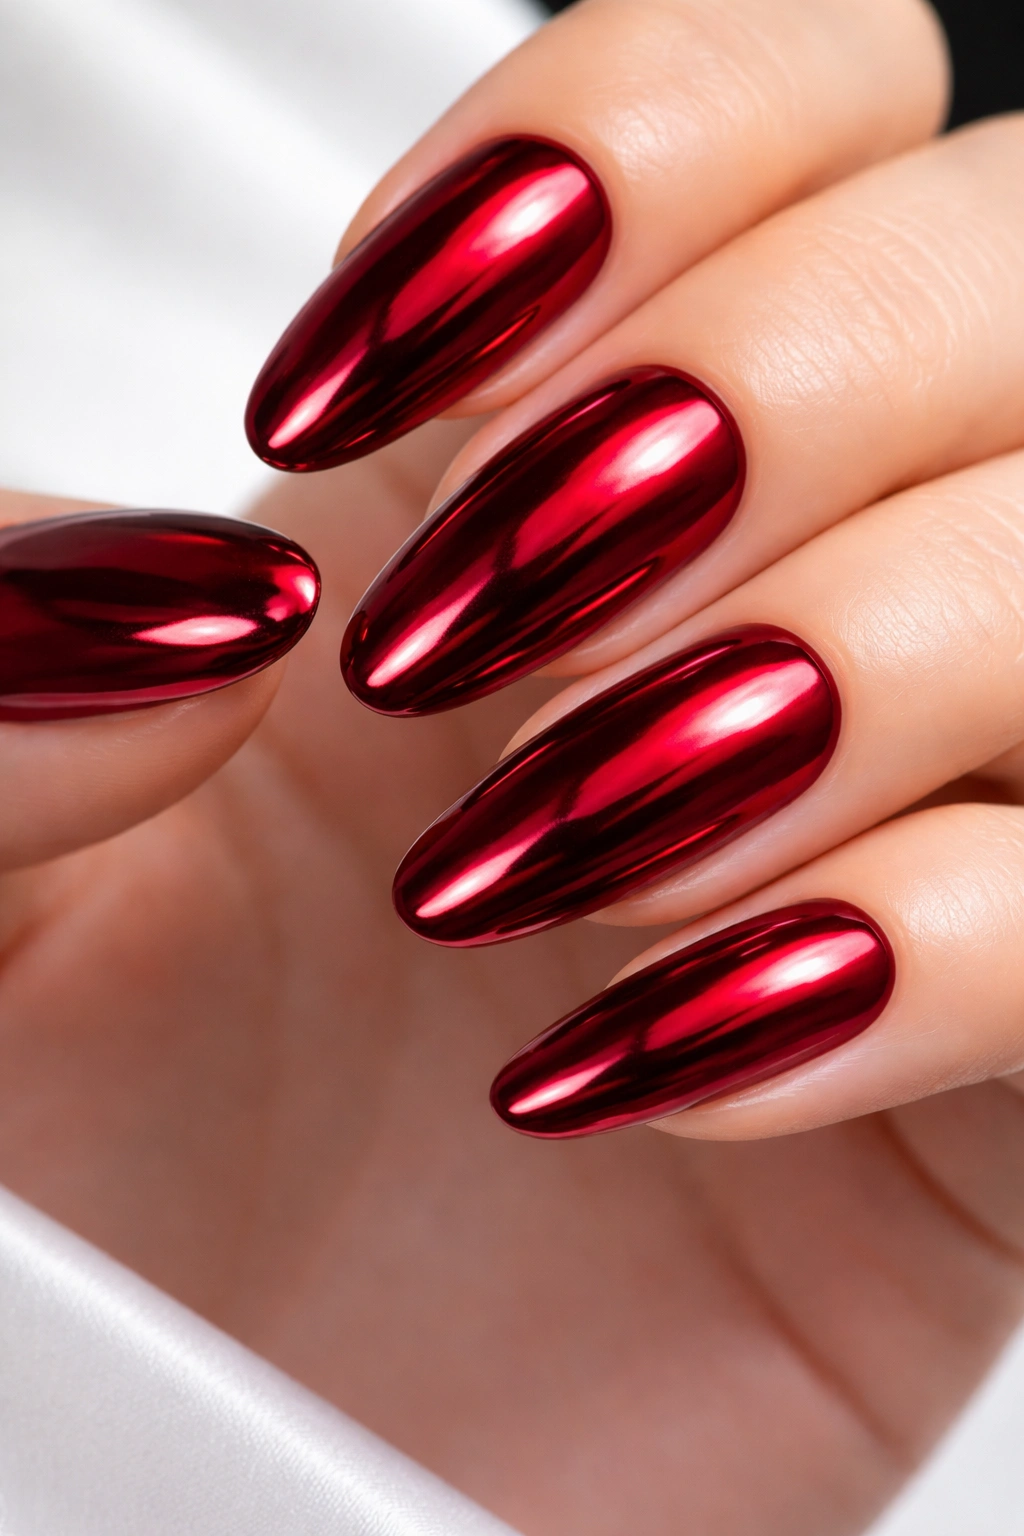
Pushing into more experimental territory, deep red with a chrome topcoat creates a mirror-like, nearly metallic finish that transforms the traditional color into something futuristic and bold. Chrome topcoats contain metallic particles that create an almost liquid mercury appearance, and when applied over deep red, the effect is sophisticated rather than costume-like. Long round nails with chrome finish feel especially striking because the length provides more surface area for the reflective effect to be visible and impactful. This look requires a high-quality chrome topcoat and good lighting to fully appreciate, but when executed well, it’s genuinely show-stopping.
Understanding Chrome Finishes
Chrome topcoats are a relatively newer innovation in nail technology, and the quality varies significantly between brands. The best chrome products create a true mirror effect with minimal visible brush strokes or imperfections. Over deep red specifically, the chrome creates a look that’s sophisticated and dramatic without feeling childish or gimmicky — the depth of the red base color grounds the futuristic finish. This combination works well for anyone who loves wearing fashion-forward nail art but wants it to still feel polished and intentional.
Applying Chrome for Maximum Impact
- Prepare nails with base coat as usual and apply two coats of your chosen deep red shade
- Apply a specialized chrome base coat if your chrome product requires one — some do, some don’t, so check product instructions
- Apply chrome topcoat using very light, feathering brush strokes — heavy application or overworking the product creates streaks and visible imperfections
- If using a gel-based chrome, cure under UV or LED light according to product specifications
- If using traditional polish chrome, allow extended drying time — chrome polishes typically dry more slowly than standard formulas
- Buff the surface gently with a soft buffer if you want an even more polished appearance, though this is optional
Pro tip: Chrome effects show every imperfection and dust particle, so make sure your deep red base is flawlessly smooth before applying — any bumps or irregularities will be amplified by the reflective finish.
9. Deep Red with Thin Gold Foil Accent Strip

This design element uses a thin strip of gold foil positioned horizontally across one or multiple nails, usually about one-third of the way down from the cuticle or positioned at mid-nail. The gold creates a surprising accent line that catches light beautifully and adds sophistication without requiring freehand design skills. On long round nails, a single foil strip per nail creates visual interest while a strip on every nail adds more impact. The combination of deep red and gold foil feels particularly luxurious, as both colors traditionally signal wealth and premium quality.
Strategic Foil Placement
The placement of your gold foil strip can change the entire feeling of the design. A strip positioned near the cuticle feels more minimalist and elegant, while a strip closer to the tip feels more decorative and bold. You can choose to apply foil to all ten nails for a cohesive look, or just use it on accent nails for more subtlety. The positioning options give you control over how statement-making you want the look to feel, ranging from sophisticated simplicity to full glamour.
How to Apply Foil Strips
- Paint your nails with deep red color and allow to dry completely
- Apply a base topcoat or a specialized adhesive layer if your foil requires it — many nail foils require a tacky base
- Measure and position your foil strip where you want it, using a ruler or the foil strip itself as a guide
- Press the foil down firmly and smoothly, avoiding bubbles and wrinkles
- Carefully peel away the foil backing in a single smooth motion
- Seal everything with a glossy topcoat once the foil is set — this protects the foil and creates a smooth, finished appearance
Pro tip: Cut foil strips to slightly longer than your nail width, then trim excess with nail clippers after sealing — this creates perfectly fitted, clean edges.
10. Deep Red Matte with Velvet Texture Effect

For a truly unique tactile experience, a velvet topcoat creates a soft, fuzzy texture on top of deep red that’s genuinely different from any other nail finish. The velvet effect feels luxurious and tactile in a way glossy and matte cannot — when people touch your nails, they’re surprised by the soft, powder-like texture. On long round nails, the velvet effect makes the color feel even more dramatic and statement-making because the unusual texture adds an element of surprise and luxury. This is a bold choice for someone who loves getting compliments and attention for their nails.
Velvet Nails as a Sensory Experience
Velvet nail texture engages multiple senses rather than just visual — people are drawn to touch them to understand what they’re feeling. The texture is created by micro-fine velvet powder that adheres to a tacky topcoat, creating a surface that’s soft to touch but durable and long-lasting when sealed properly. Deep red with velvet is particularly striking because the texture adds richness and dimension to an already bold color choice. This look is especially popular for special events and nights out when you want to be memorable.
Creating a Perfect Velvet Effect
- Apply your deep red base coat and let it dry completely
- Apply a specialized velvet base coat or a regular topcoat with extra tackiness
- While the base is still wet and tacky, gently press velvet powder onto the entire nail surface, or sprinkle the powder and let it adhere naturally
- Use a soft brush to smooth and distribute the powder evenly, or leave it as-is for a more textured appearance
- Once fully set (which may take longer than traditional topcoats), apply a clear sealing topcoat to lock everything in place
- Be aware that velvet texture can wear faster in high-friction areas, so maintenance and touch-ups may be needed more frequently
Pro tip: High-quality velvet powder stays soft and doesn’t feel gritty — budget products can feel rough and uncomfortable, so invest in salon-quality velvet products for the best experience.
11. Deep Red Ombre with Burgundy Gradient
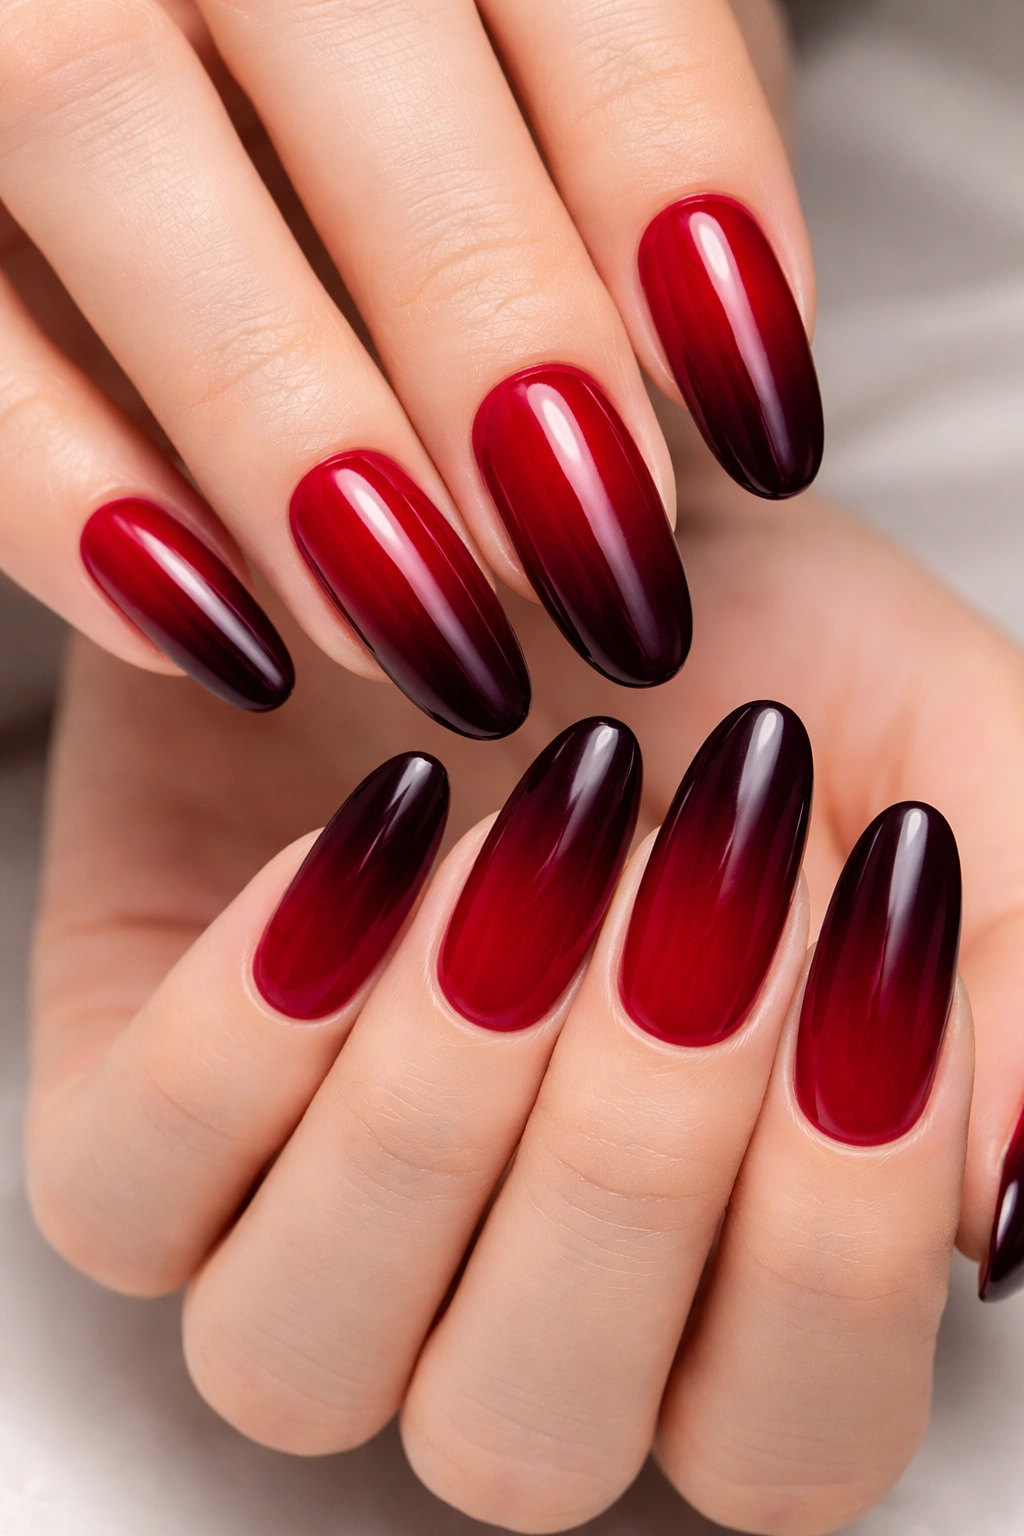
An ombre effect blends deep red at the base of the nail into a lighter burgundy or wine shade toward the tips, creating a graduated color transition that feels dynamic and artistic. On long round nails, this gradient effect has plenty of space to be visible and impressive, and the eye-catching nature of the ombre means you’re creating visual interest and movement even without additional design elements. The ombre approach to deep red works because both colors in the gradient are in the same color family, creating harmony while the shift in tone adds visual complexity.
The Art of Nail Ombre
An ombre requires blending two or more colors, which can be achieved through wet-blending on the nail or through strategic application of translucent shades. The key to a successful ombre is creating a smooth transition rather than a harsh line between colors — this requires patience and the right technique. On long round nails, the length of the nail gives you plenty of space to create a gradual, beautiful transition that feels intentional rather than accidental.
Techniques for Perfect Ombre Gradients
- Choose your two colors: deep red for the base and a lighter burgundy or wine shade for the tips
- Apply the deep red color to the bottom half of the nail and let it become slightly tacky but not fully dry
- Apply the lighter shade to the top half of the nail, overlapping slightly with the red
- Use a sponge or special ombre brush to blend the overlapping area, moving back and forth to create a smooth gradient
- Continue blending until you’re satisfied with the transition
- Apply a sealing topcoat to smooth out any texture created by blending and to create a finished appearance
- Cure under LED or UV light if using gel, or allow normal drying time for traditional polish
Pro tip: A clean sponge creates better blending than a brush — if you don’t have a nail sponge, a regular cosmetic beauty sponge cut into small pieces works perfectly.
12. Deep Red Gloss with Crystal or Rhinestone Accents
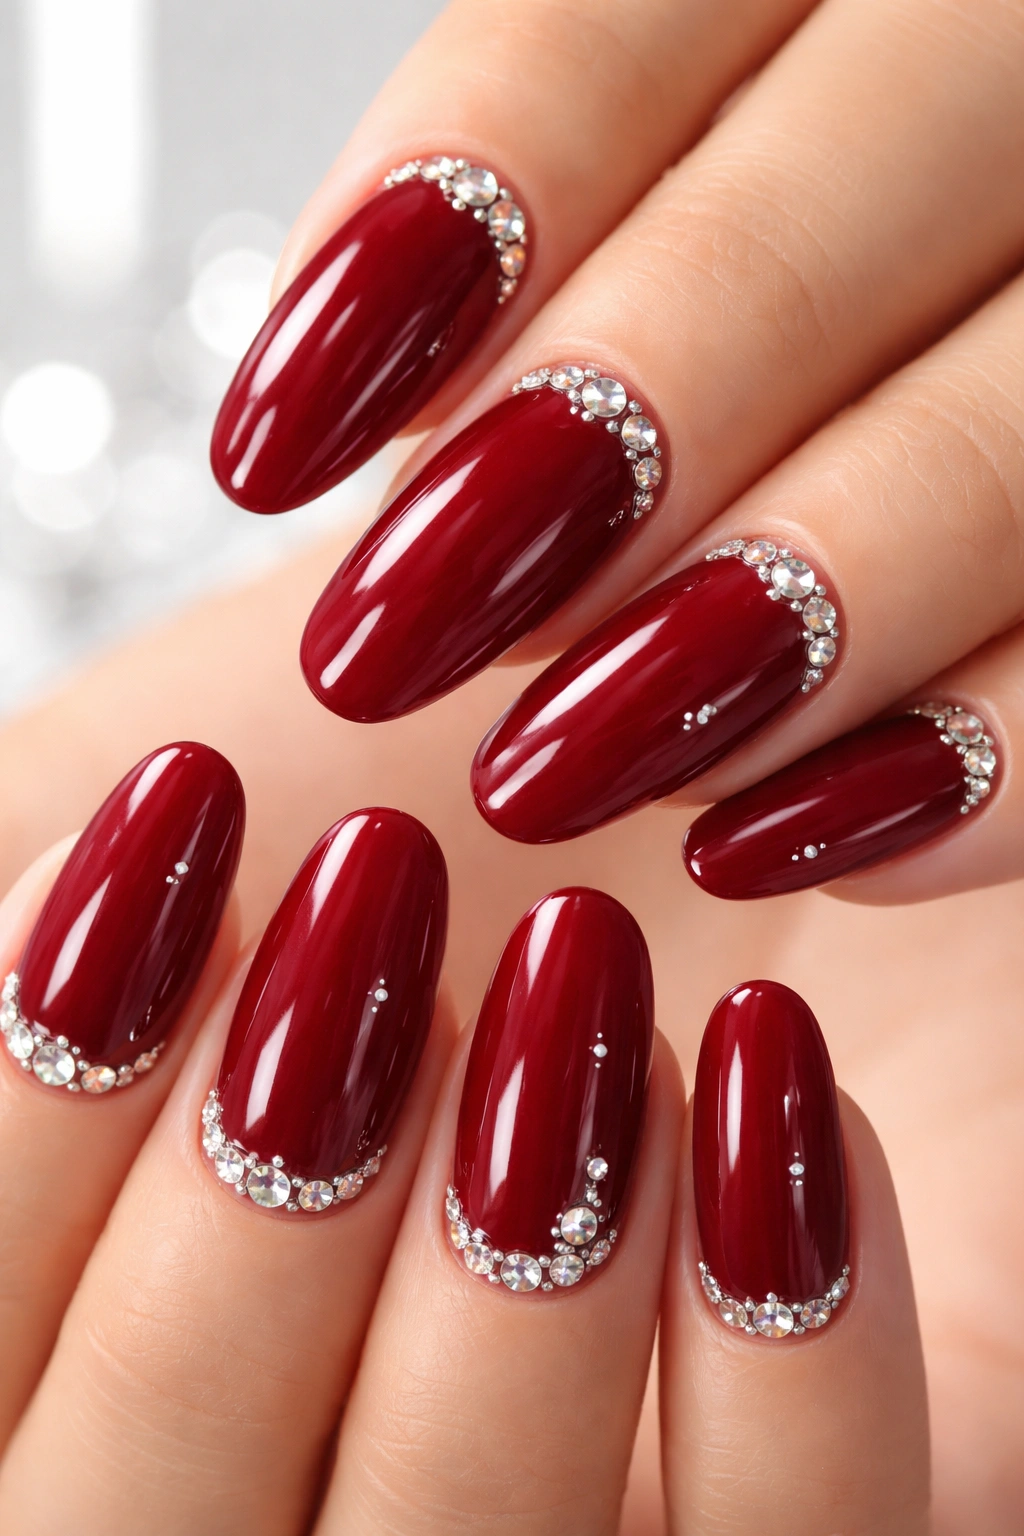
Taking deep red into celebratory territory, embedding small crystals or rhinestones into the topcoat creates sparkle and glamour without covering the entire nail in shine. This approach might involve placing a few strategically positioned crystals along the cuticle line, scattered across the nail in a constellation pattern, or concentrated on just one or two accent nails. On long round nails, crystal accents add luxury and catch light beautifully, especially in evening settings or under party lighting. The deep red base color keeps the overall look sophisticated rather than costume-like, as the richness of the red prevents the crystals from reading as frivolous.
Strategic Crystal Placement
The number and placement of crystals completely changes the feeling of the design. A few small crystals along the cuticle line feel delicate and refined, while scattered crystals across the entire nail feel more playful and celebratory. Larger statement crystals or rhinestones feel more dramatic, while tiny micro-crystals feel more elegant and understated. You can choose your crystal intensity based on the occasion and your personal style preference.
How to Secure Crystals for Longevity
- Apply your deep red base color and allow it to dry or cure completely
- Apply a glossy topcoat, but leave it slightly tacky (not fully dried) — this helps crystals adhere
- Using a small crystal picker or a damp toothpick, place individual crystals into the tacky topcoat in your chosen pattern
- Press each crystal gently but firmly to ensure full contact with the topcoat
- Allow the topcoat to fully dry or cure before sealing with an additional topcoat
- A final sealing layer of topcoat locks everything in place and creates a smooth surface over the crystals
- Make sure this final coat is very smooth and even to prevent the crystals from catching on clothing or hair
Pro tip: Swarovski crystals and high-quality rhinestones adhere better and stay longer than cheap alternatives — the small investment in quality crystals is worth the improved durability.
13. Deep Red with Black Lace or Filigree Details
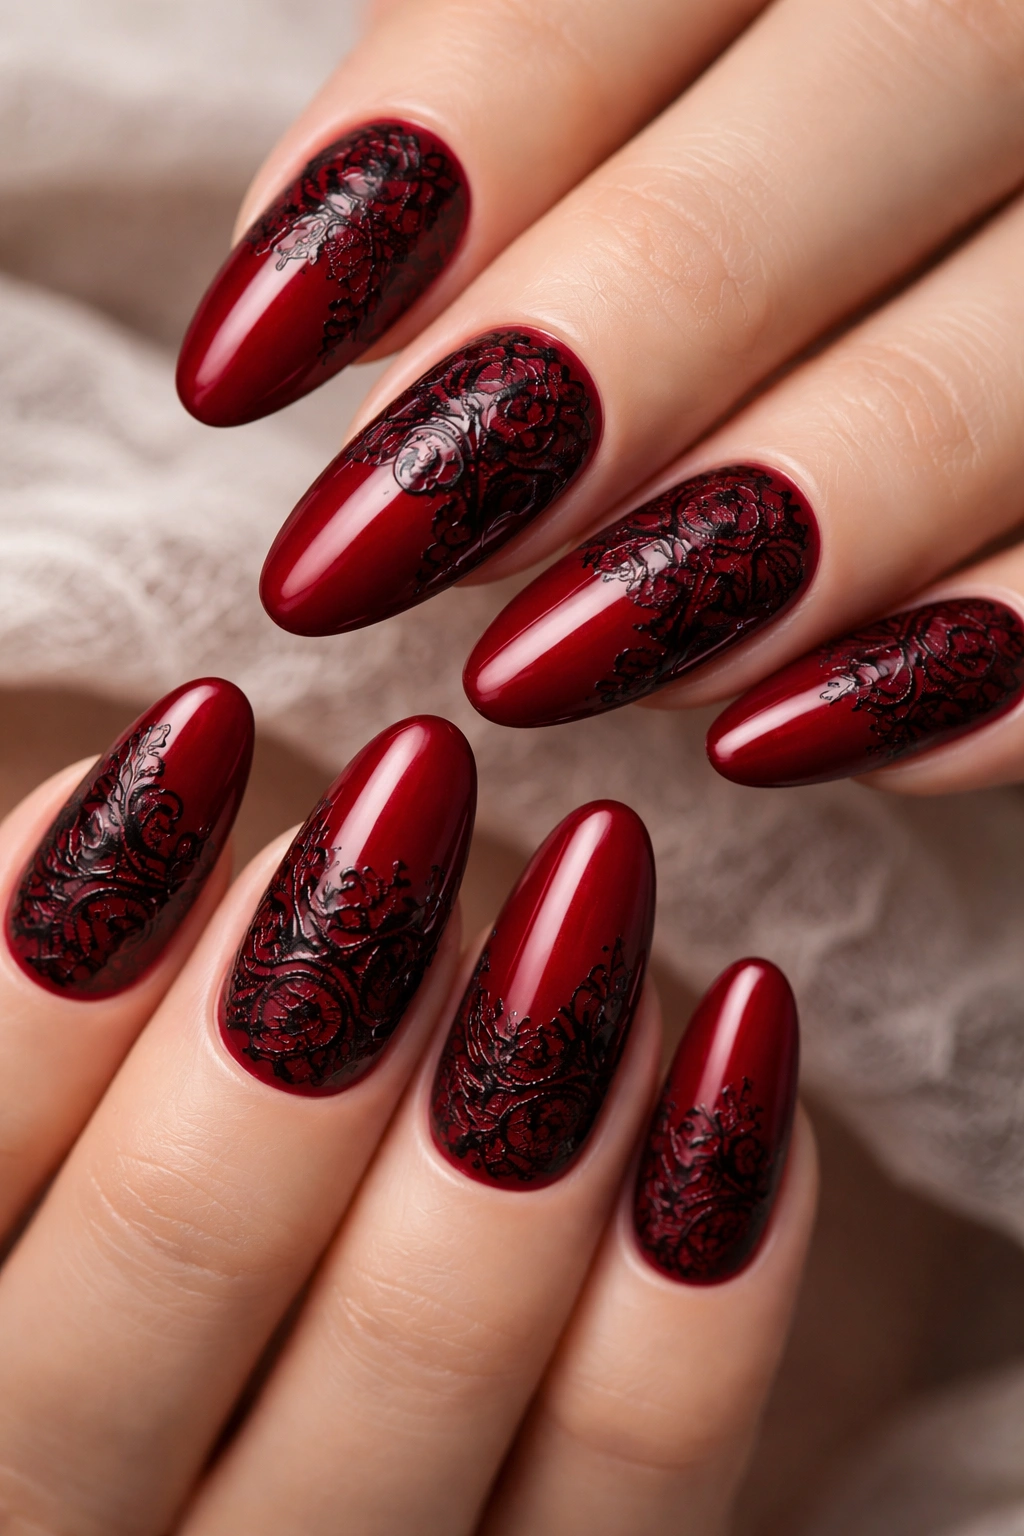
For a romantic or gothic interpretation of deep red, adding delicate black lace patterns or filigree designs creates intricate visual detail that feels elegant and intentional. The lace could be painted freehand using a detail brush, applied via nail decals, or created using specialized lace nail stamps — there are multiple techniques to achieve this look. On long round nails, the increased surface area allows the lace pattern to be visible and appreciated, and the contrast between the deep red background and black delicate lines creates striking visual contrast. This design approach feels particularly sophisticated for formal events or anyone who loves intricate, detailed aesthetics.
Black Lace as Design Element
Black lace patterns traditionally suggest femininity, elegance, and romance, and when combined with deep red, they create a luxurious, almost vintage-inspired aesthetic. The delicacy of lace patterns contrasts beautifully with the boldness of deep red, creating a design that feels both powerful and refined. This combination works particularly well for anyone who loves both boldness and detail, and it photographs beautifully.
Applying Lace Designs to Your Nails
- Start with your glossy or matte deep red base, fully dried or cured
- Choose your lace pattern application method: freehand painting with a detail brush, pre-made decals, or nail stamps
- If using decals: apply a base topcoat first, then position the decal on the nail and smooth out air bubbles
- If using stamps: use a specialized stamping plate with lace patterns, applying black stamping polish to the plate and stamping onto the nail
- If painting freehand: use a very thin detail brush and black polish or gel to paint delicate lace-inspired patterns, starting with light lines and building complexity
- Seal everything with a glossy topcoat once the black elements are dry
- Consider adding a tiny amount of glossy topcoat to just the black lace areas for extra shine and contrast if desired
Pro tip: Lace patterns are easier to apply using decals or stamps than freehand painting — if precision is important to you, choose one of those methods rather than attempting to hand-paint intricate details.
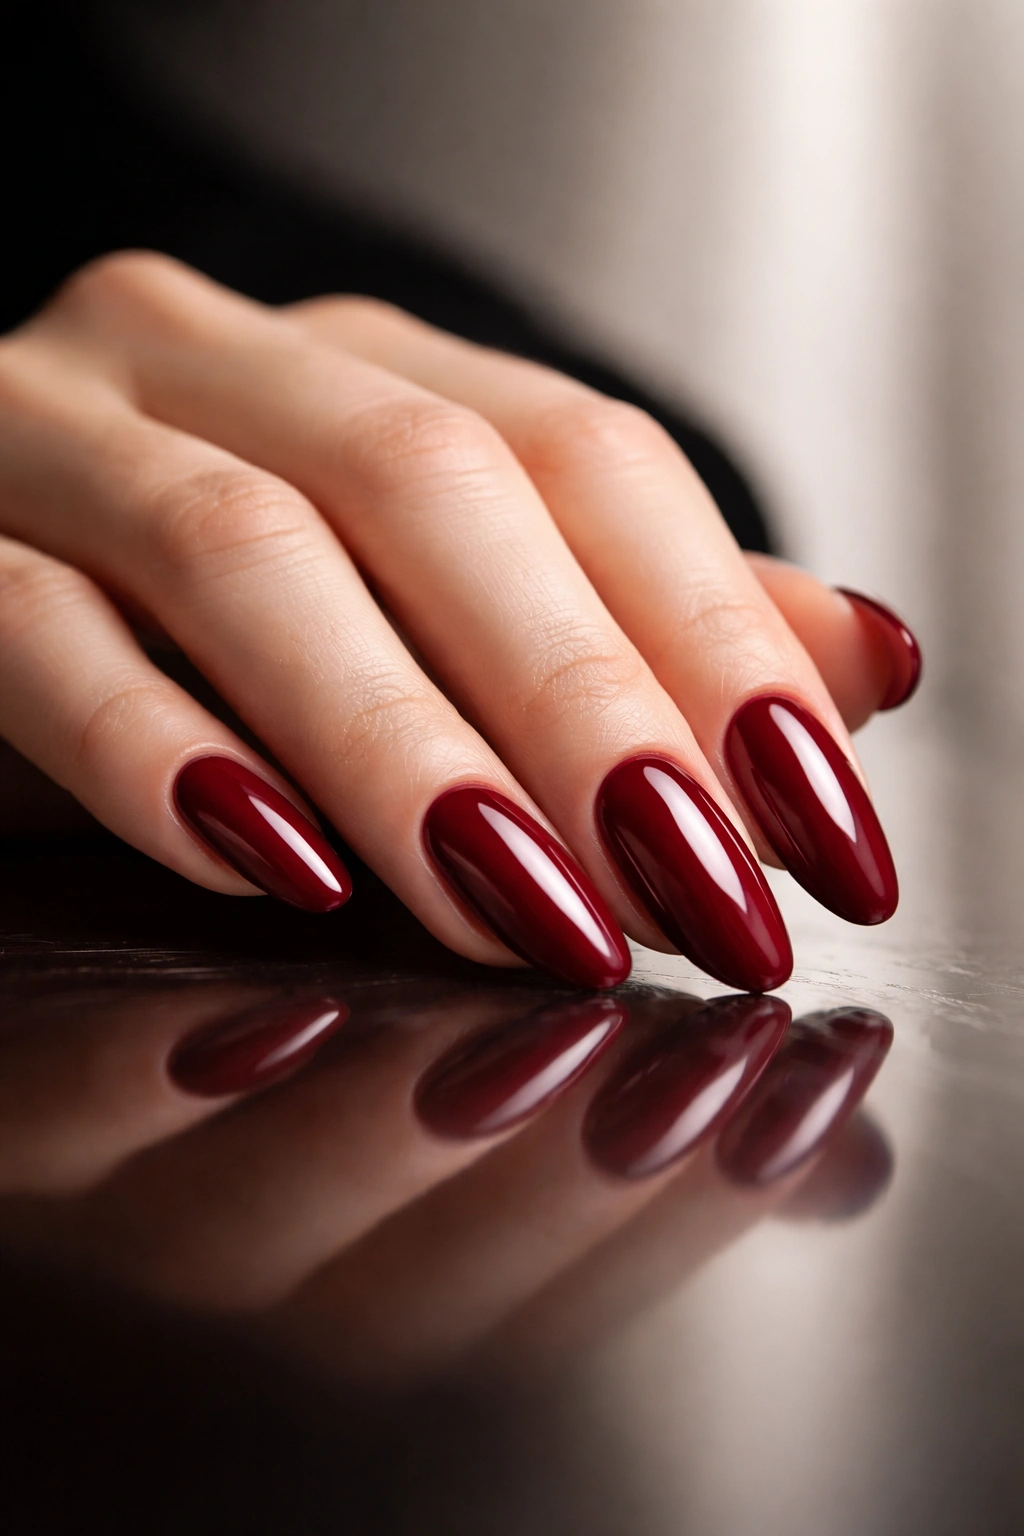
14. Deep Red Candy Apple Shiny Finish
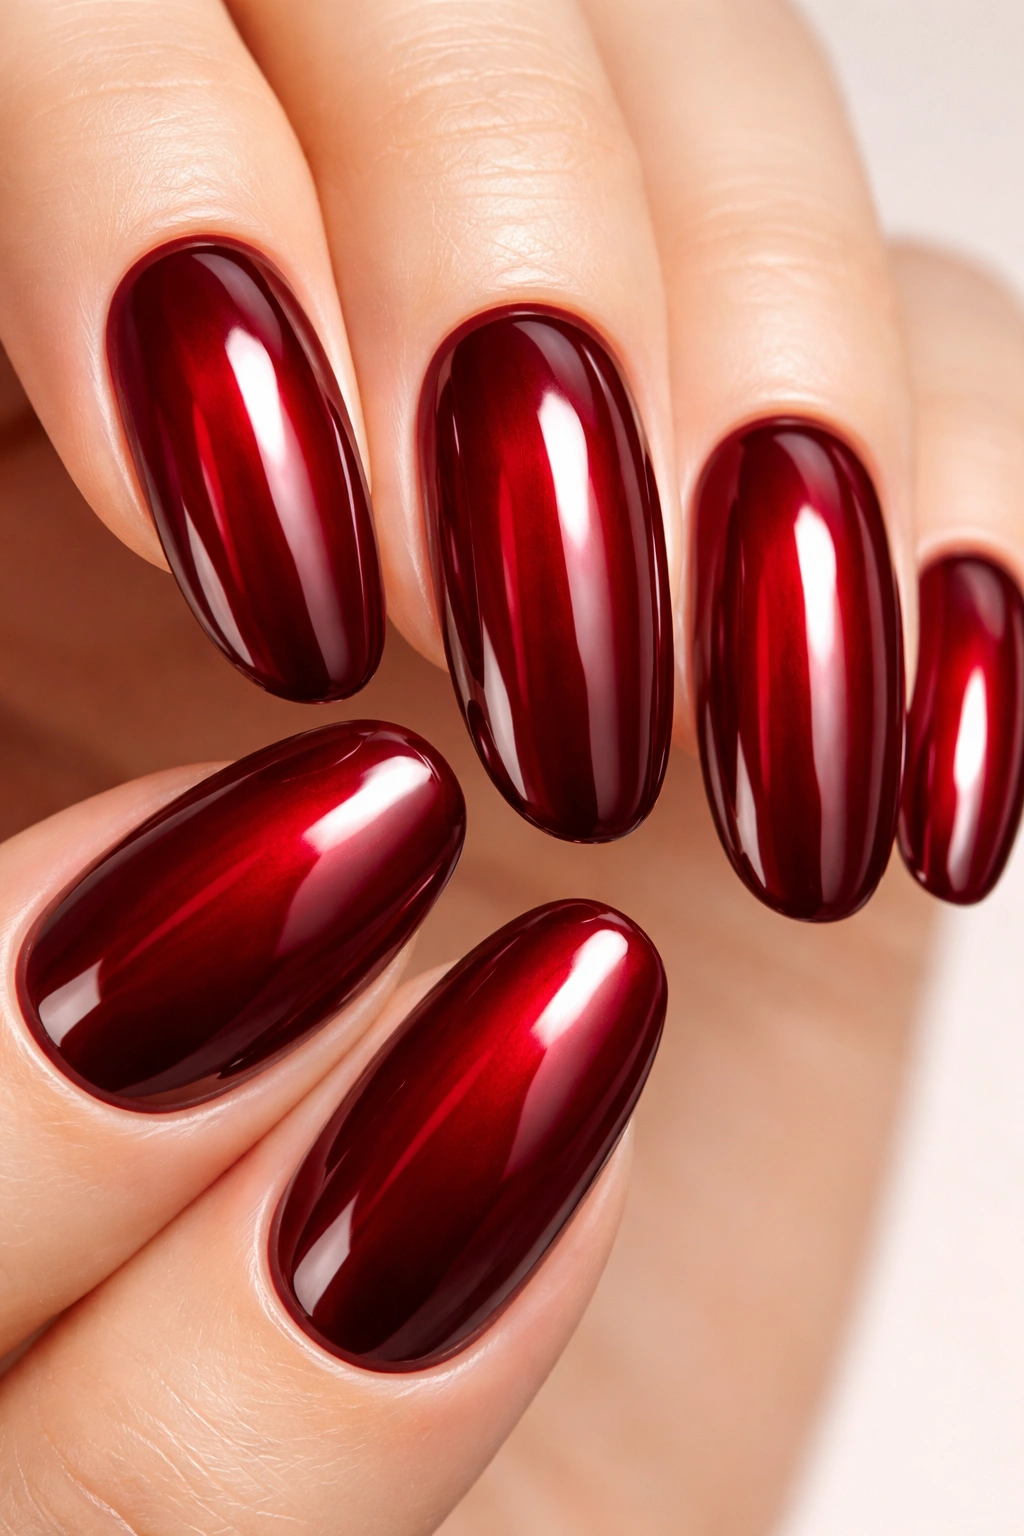
A candy apple finish creates an incredibly glossy, almost glass-like appearance that makes the deep red look almost liquid and reflective. This is achieved through multiple layers of high-quality glossy topcoat and careful application technique to eliminate all brush strokes and imperfections. The result looks professional, luxurious, and premium — like you’ve just left a high-end salon. On long round nails, the candy apple finish is especially striking because the length provides more surface area for the reflective effect to be visible from multiple angles.
Creating a Professional Candy Apple Finish
The candy apple effect isn’t about using a special product — it’s about application technique. Using regular, high-quality glossy topcoats but applying them in the right way creates this premium appearance. The key is building layers carefully to eliminate all imperfections and create a glass-smooth surface. Each layer must dry completely before the next is applied, which requires patience but results in genuinely stunning nails.
Technique for Flawless Application
- Apply a base coat and let it dry completely
- Apply your deep red color in thin, even coats — usually three coats creates better coverage than two thick coats
- Allow complete drying or curing between coats
- Apply a high-quality glossy topcoat in one smooth, even coat, using long strokes from base to tip to eliminate brush marks
- If you notice imperfections, allow it to dry completely, then carefully buff any rough spots with a fine buffer
- Apply a second coat of glossy topcoat for additional shine and smoothness
- Some nail professionals apply three to four layers of topcoat to achieve the ultimate candy apple effect — each additional layer adds shine and depth
Pro tip: Use a top-quality glossy topcoat like Seche Vite or Sally Hansen Insta-Dri — the difference in the final result is noticeable and worth the small additional cost.
15. Deep Red French Tips with Extended Gradient Transition
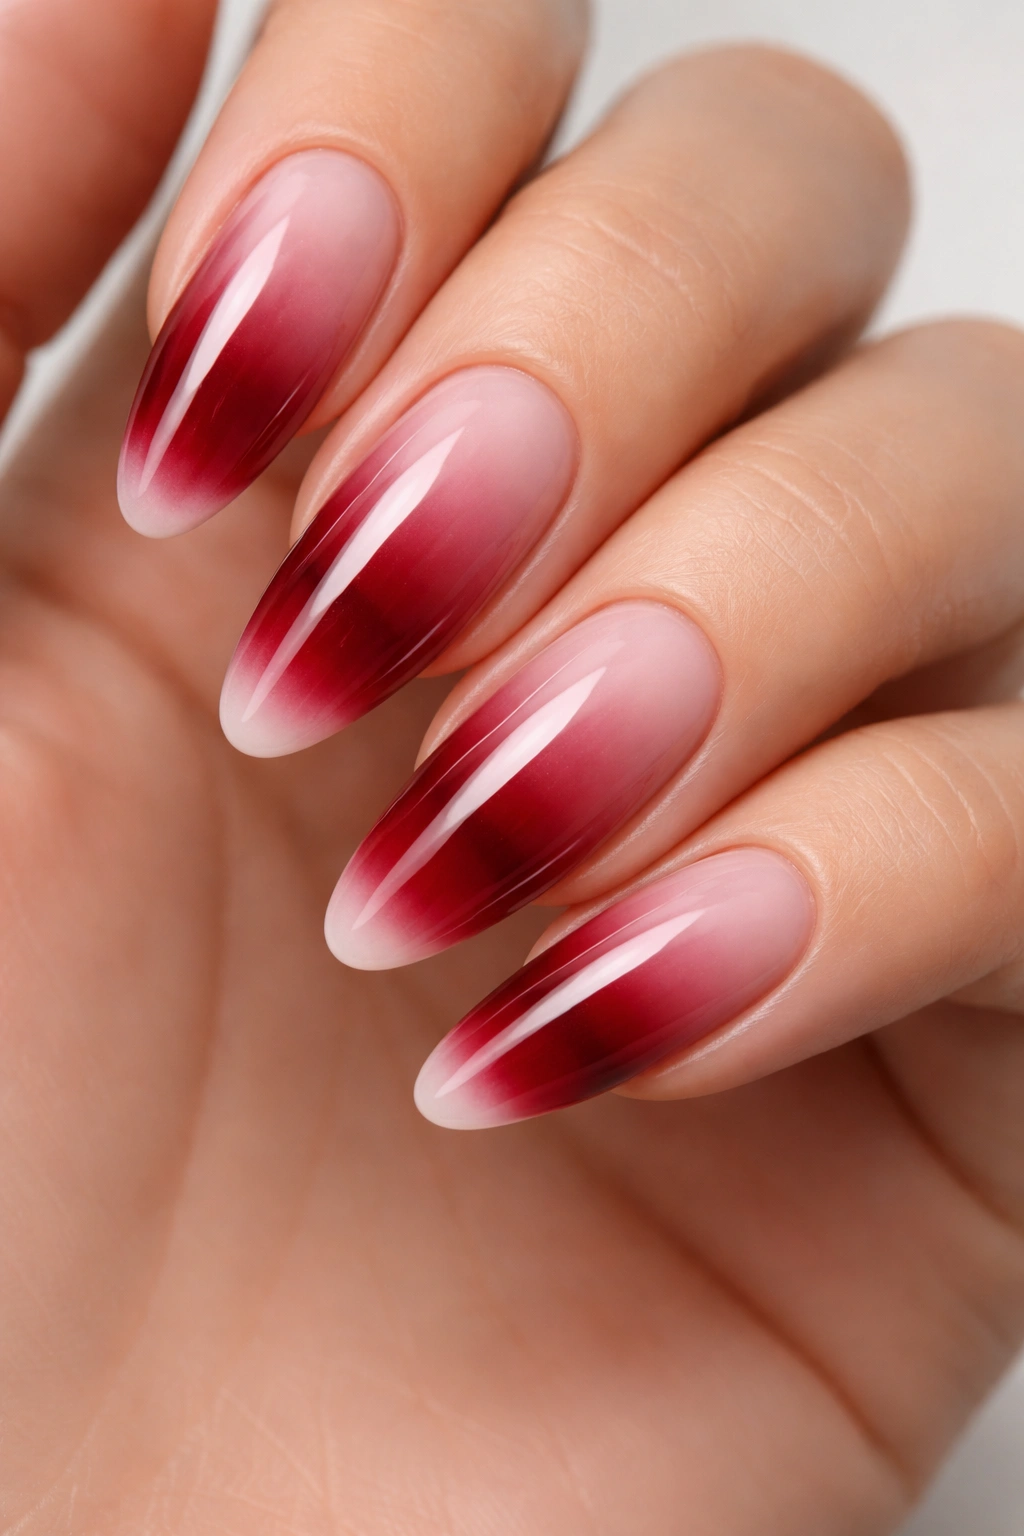
A modern take on the classic French manicure uses deep red as the base color with a delicate gradient transition to white or cream at the tips. Unlike a traditional sharp-line French manicure, this version creates a soft, blended transition zone that’s more contemporary and forgiving. On long round nails, an extended French tip with gradient transition looks elegant and interesting — the gradient nature of the design adds sophistication while the white tips keep it from feeling too heavy or dark. This approach works beautifully for anyone who loves French manicures but wants something slightly more modern and statement-making.
Modern French Manicure Aesthetic
The traditional French manicure has been updated countless times, and the gradient version is one of the most elegant modern interpretations. Using deep red instead of traditional pale pink or nude makes the statement stronger while maintaining the refined feeling of a French manicure. The gradient transition prevents hard lines and creates a softer, more blended aesthetic that feels contemporary and intentional. Long round nails showcase this design beautifully because the length allows the gradient to be fully visible and appreciated.
Creating a Perfect Gradient French Manicure
- Apply your deep red color to about two-thirds of the nail, from the base down
- Choose your tip color — cream, soft white, or even a metallic silver all work beautifully
- Apply the tip color to the final third of the nail, slightly overlapping with the red
- Using a damp sponge or blending brush, blend the overlapping area back and forth to create a smooth, gradual transition
- Work gently and gradually — the blending should create a soft gradient rather than a distinct line
- Apply a glossy topcoat to smooth everything and create a finished appearance
- Consider adding just a bit of glitter or shimmer to the white tip area for extra elegance and light-catching effect
Pro tip: This design looks best with a glossy finish — matte topcoats can make the gradient transition less visible and polished-looking, so stick with high-shine for maximum impact.
Final Thoughts
Deep red on long round nails is an investment in how you present yourself to the world — it’s a color that demands confidence and delivers elegance in return. Whether you choose the timeless simplicity of a classic glossy finish, the modern edge of matte deep red, or something more elaborate like chrome or velvet texture, the fundamental appeal remains the same: deep red communicates power, sophistication, and intention. The versatility of deep red means it works for virtually any season, any occasion, any age, and any personal style — it’s truly a color that transcends temporary trends while remaining perpetually current.
The 15 variations covered throughout this guide represent different moods, different occasions, and different expressions of confidence through nail design. Some are understated and refined, others are bold and celebratory, and all of them share the elegant foundation of deep red on the graceful canvas of long round nails. Your choice between these options doesn’t have to be permanent or singular — the beauty of nail design is that you can explore different looks, different finishes, and different embellishments depending on what you need from your nails in any given moment. What matters most is choosing an approach that makes you feel genuinely like yourself, amplified and polished.
