

Acrylic nails have become the ultimate canvas for self-expression, and when you add charms into the mix, you’re taking your manicure from pretty to absolutely show-stopping. There’s something magical about tiny embellishments catching the light every time you move your hands. Whether you’re drawn to delicate pearls or bold, statement-making crosses, nail charms offer endless ways to personalize your look.
The beauty of charms lies in their versatility. You can go subtle with a single rhinestone on your ring finger or go all out with what the nail community calls “junk nails”—those maximalist designs loaded with charms, gems, and every sparkly thing imaginable. And here’s the best part: these tiny decorations work on any nail length, though they really shine on acrylics where you’ve got a sturdy base to hold them securely.
If you’ve been scrolling through nail inspiration feeling overwhelmed by the options, you’re in the right place. We’re breaking down more than 15 stunning acrylic nail designs featuring charms that’ll make you want to book an appointment immediately. From beginner-friendly styles to intricate works of art, there’s something here for everyone who wants to add that extra dose of glam to their fingertips.
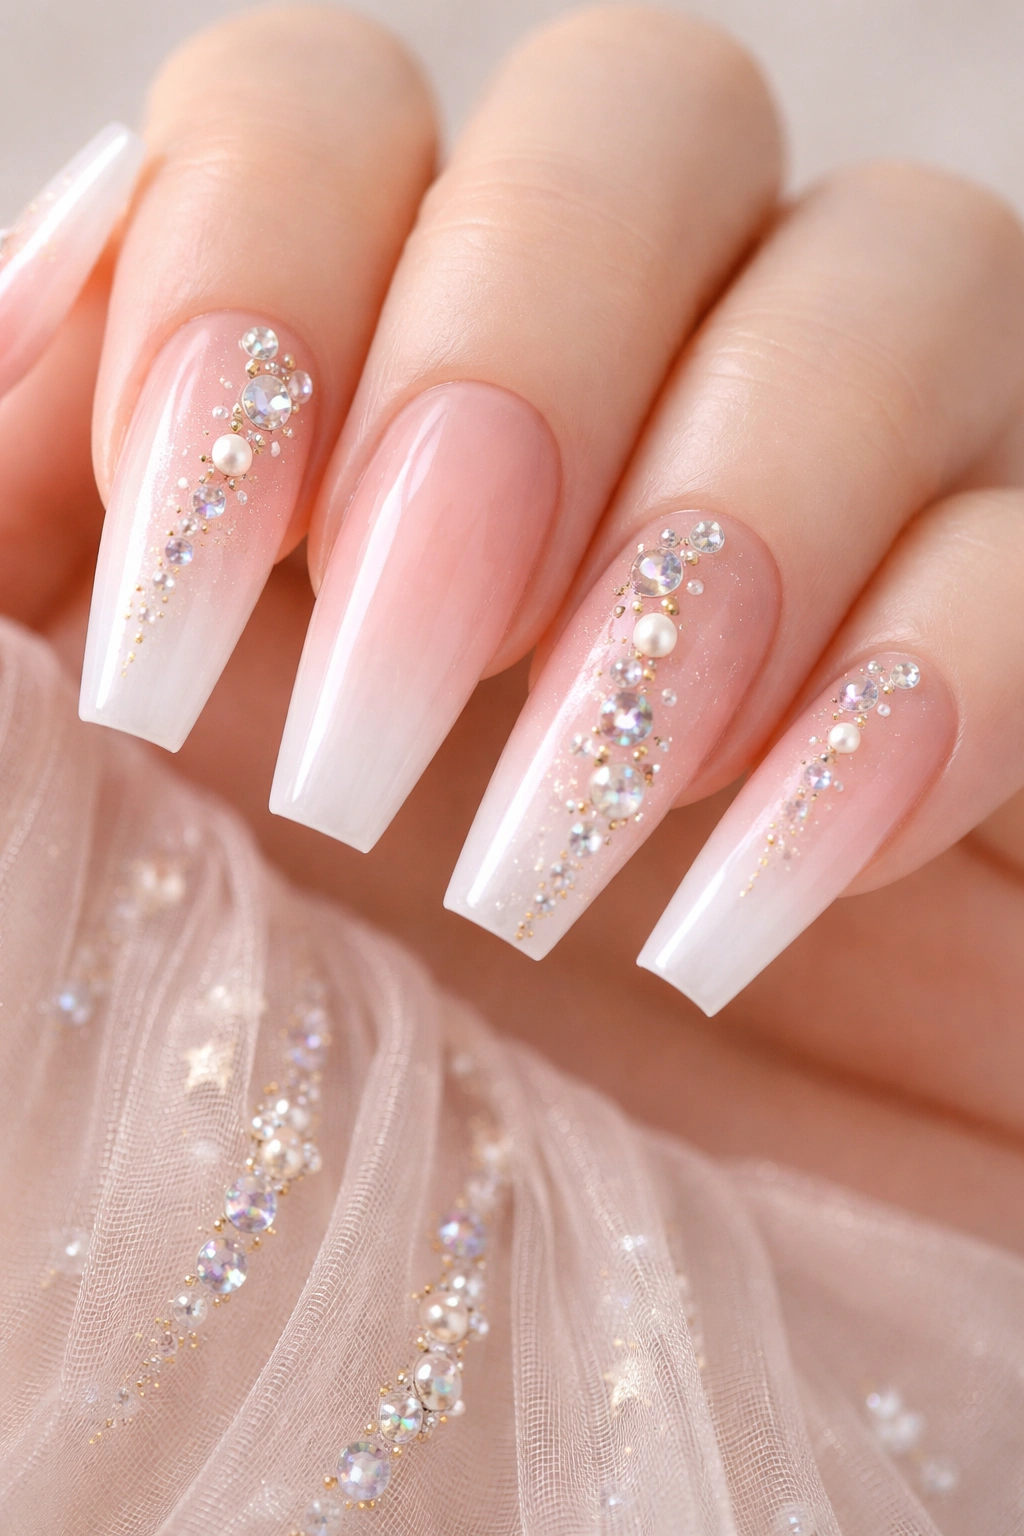
1. Classic French Tips with Delicate Pearl Accents

French manicures never really go out of style, but adding pearls takes this timeless look into sophisticated territory. Picture crisp white tips on a nude base, with a single pearl nestled at the base of each nail or strategically placed along the smile line. It’s elegant without being stuffy.
The pearl trend has exploded recently, and it’s easy to see why. These smooth, lustrous charms add dimension without overwhelming the nail. You can mix different sizes—think tiny caviar beads paired with larger statement pearls—to create visual interest that’s still office-appropriate.
For an extra touch of luxury, combine your pearls with gold foil accents or a subtle shimmer topcoat. This works beautifully for weddings, formal events, or when you just want your hands to look effortlessly polished. The best part? Pearls come in various colors beyond traditional white, including blush pink, champagne, and even black for a moodier vibe.
2. Y2K Throwback with Butterfly and Bow Charms
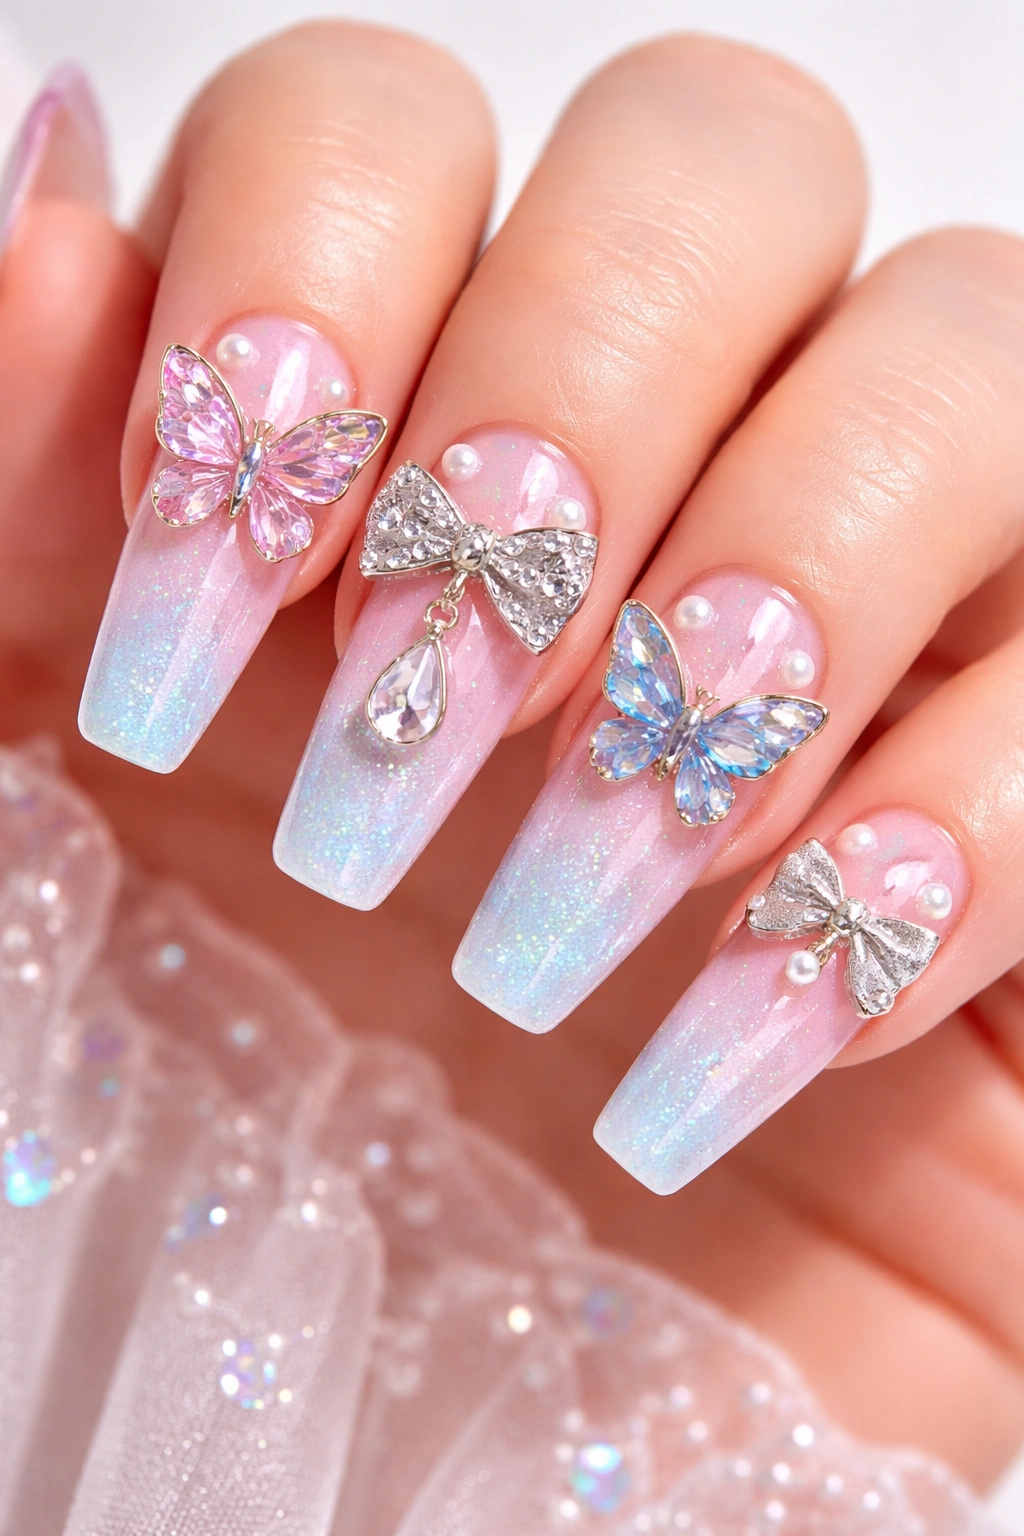
The early 2000s aesthetic is back with a vengeance, and nowhere is this more apparent than in nail art. Butterfly and bow charms capture that playful, nostalgic energy perfectly. These 3D embellishments come in solid colors, iridescent finishes, and even aurora effects that shift in the light.
Layer your butterflies across a pastel ombre base for maximum Y2K impact. Baby blue fading into lavender, topped with holographic butterflies? That’s the kind of look that gets saved to Pinterest boards. Bows work especially well on accent nails—try a single oversized bow charm on your ring finger while keeping the other nails simple with glossy polish.
The charm selection available now is incredible. You’ll find everything from tiny metal butterflies that look like delicate jewelry to resin bows in every color imaginable. Mix solid and iridescent pieces together, or stick with one finish for a more cohesive look. Either way, these charms bring serious personality to your nails.
3. Celestial Magic with Stars, Moons, and Planet Charms
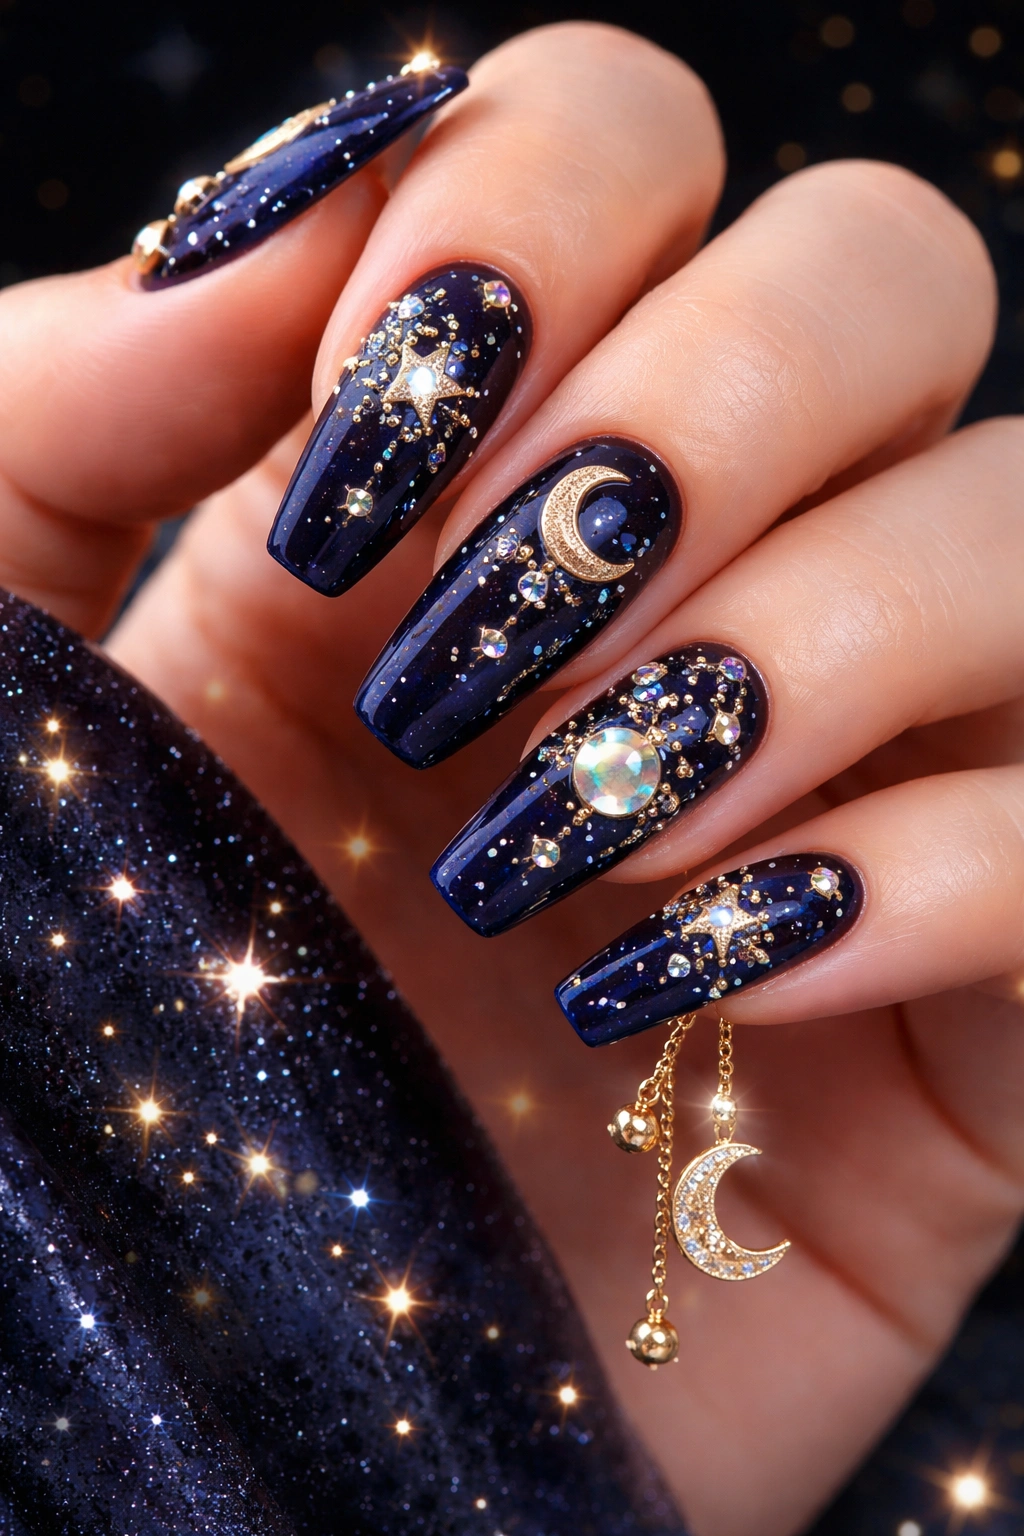
Astrology lovers, this one’s for you. Celestial charms transform your nails into tiny galaxies you can carry with you everywhere. Think gold stars scattered across a deep navy base, crescent moons catching the light, or even miniature planet charms for the ultimate cosmic vibe.
This style offers so much room for creativity. You could go literal with zodiac symbol charms that represent your astrological sign, or keep it more abstract with a random constellation pattern. Silver charms on a black chrome base create a sleek, modern take, while gold pieces on midnight blue feel more mystical and dreamy.
Many nail artists pair celestial charms with other space-themed elements like holographic glitter that mimics stardust or color-shifting chrome powders. The combination creates depth and makes your nails look like actual works of art. Pro tip: cluster smaller star charms together on one nail for a statement accent, then keep the others simpler with just one or two pieces each.
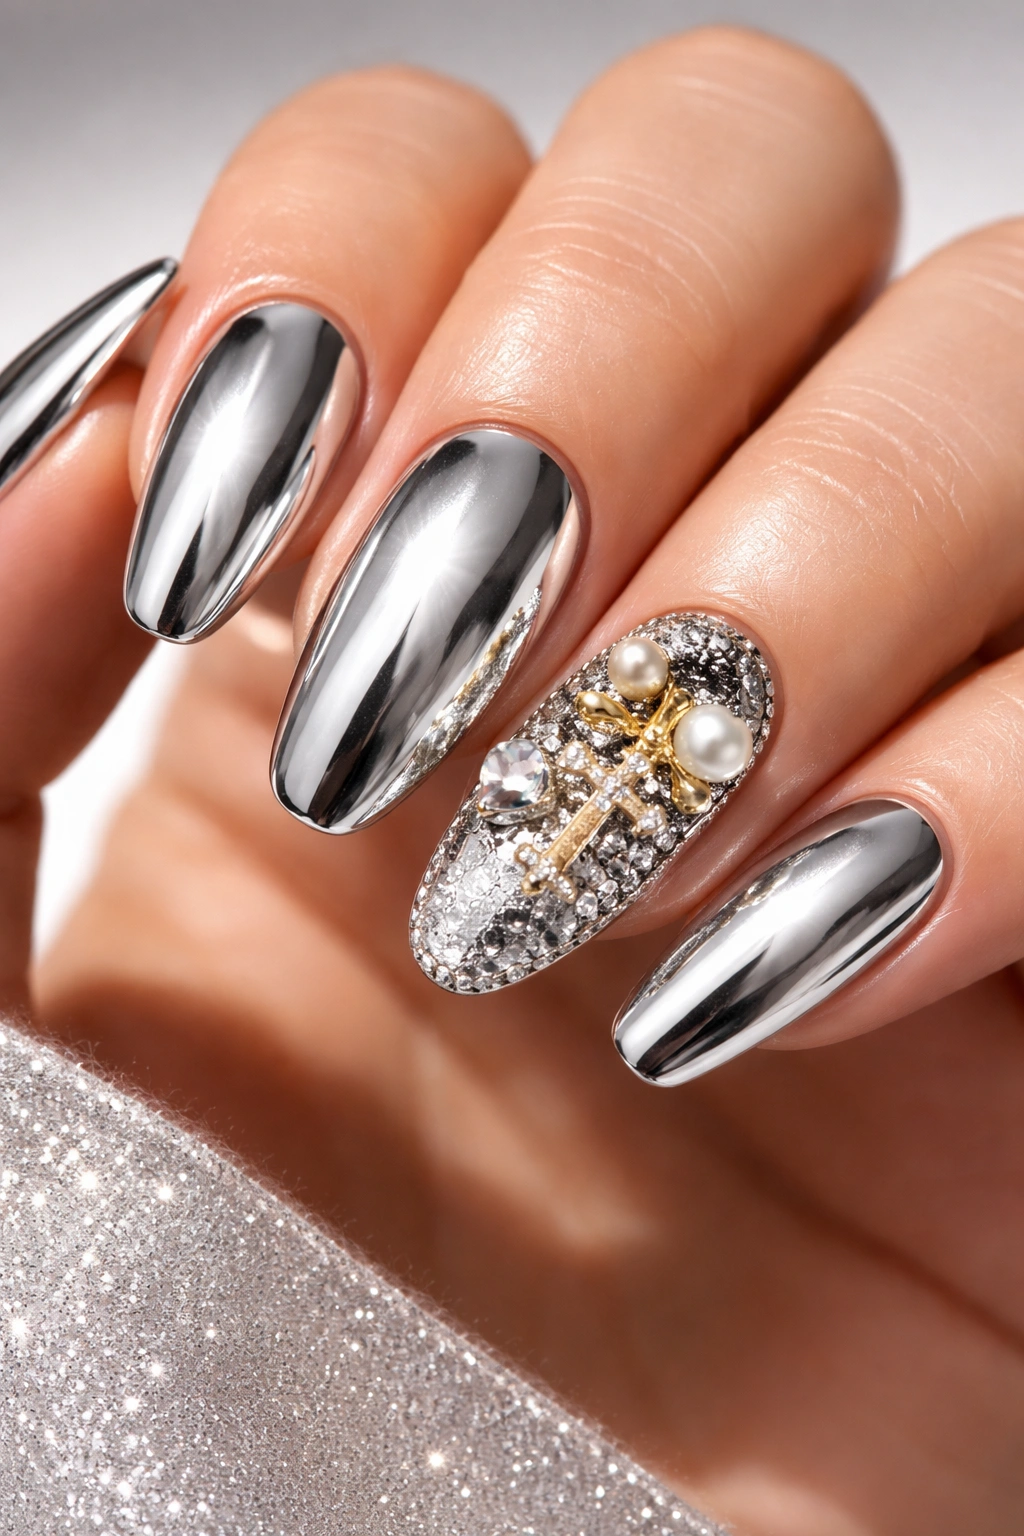
4. Glamorous Gold Cross Charms on Almond Acrylics
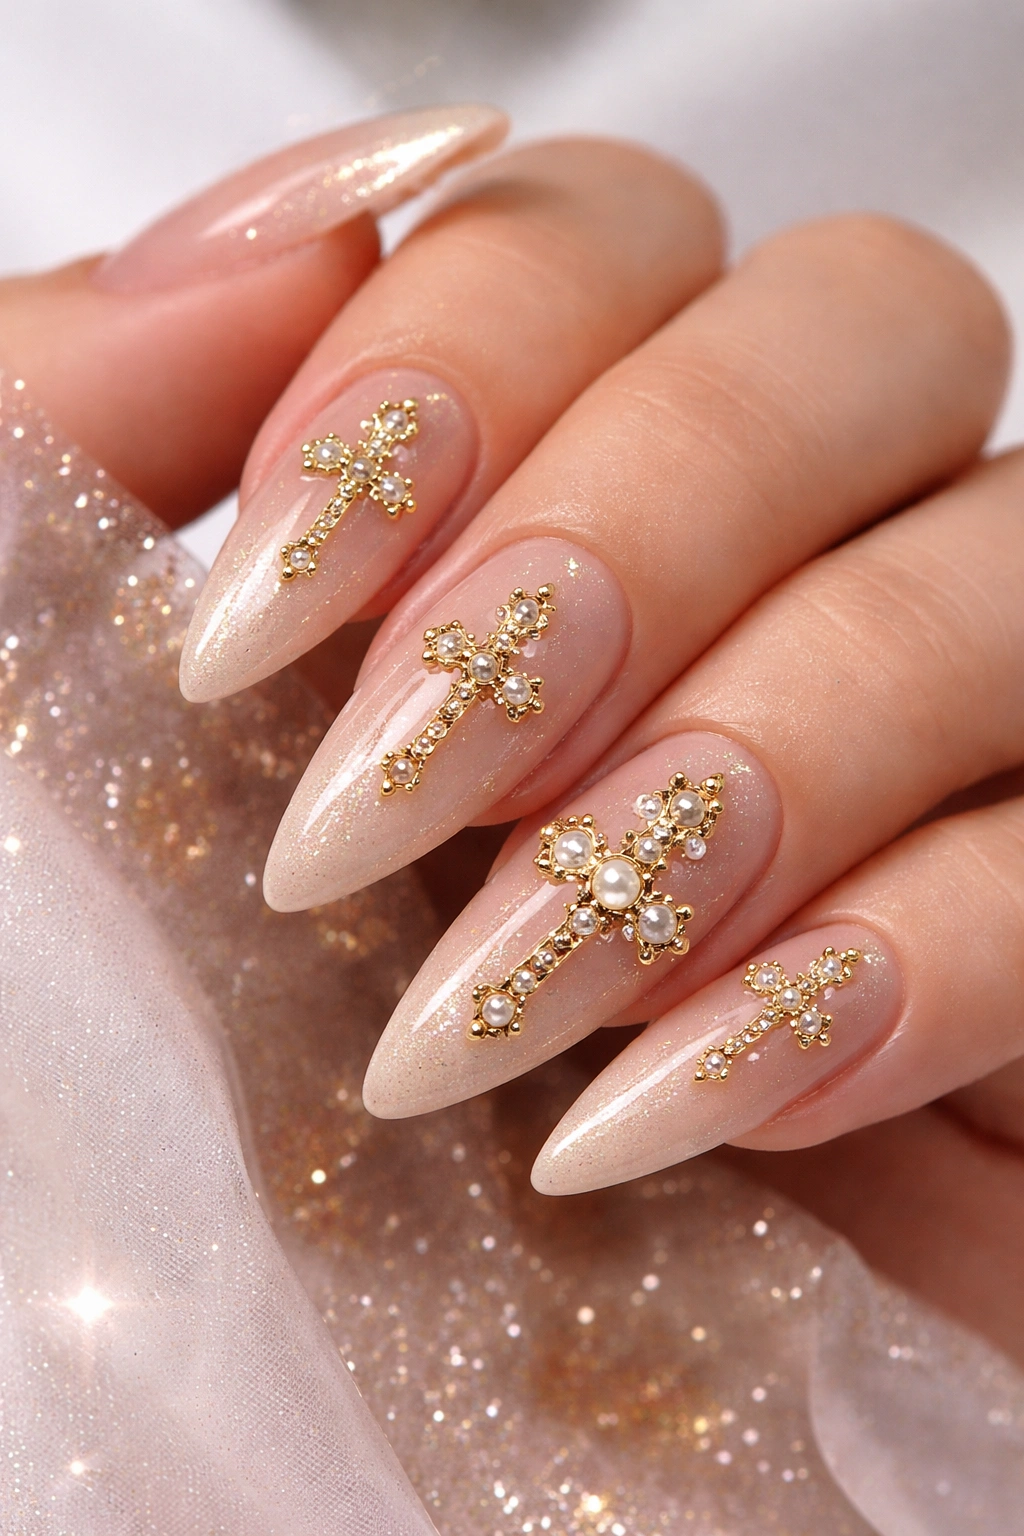
Cross charms bring an edgy, gothic elegance that’s been trending hard lately. Whether you connect with the religious symbolism or just love the aesthetic, these charms make a bold statement. Gold crosses against a nude or soft pink base create a sophisticated contrast that works for any occasion.
The size of your cross charm matters. Larger pieces work best as accent nails—maybe just on your ring fingers—while tiny crosses can be scattered across multiple nails without looking too busy. Some people even mix sizes, creating a layered effect that adds visual intrigue.
Beyond traditional cross shapes, you’ll find variations like ornate, detailed designs with embedded crystals or sleek, modern interpretations. Dangle cross charms—the ones that hang below your nail tip—add movement and extra drama. Just be prepared for these to catch on things occasionally. They’re gorgeous but require a bit more awareness in your daily activities.
5. Kawaii Overload with Hello Kitty and Character Charms
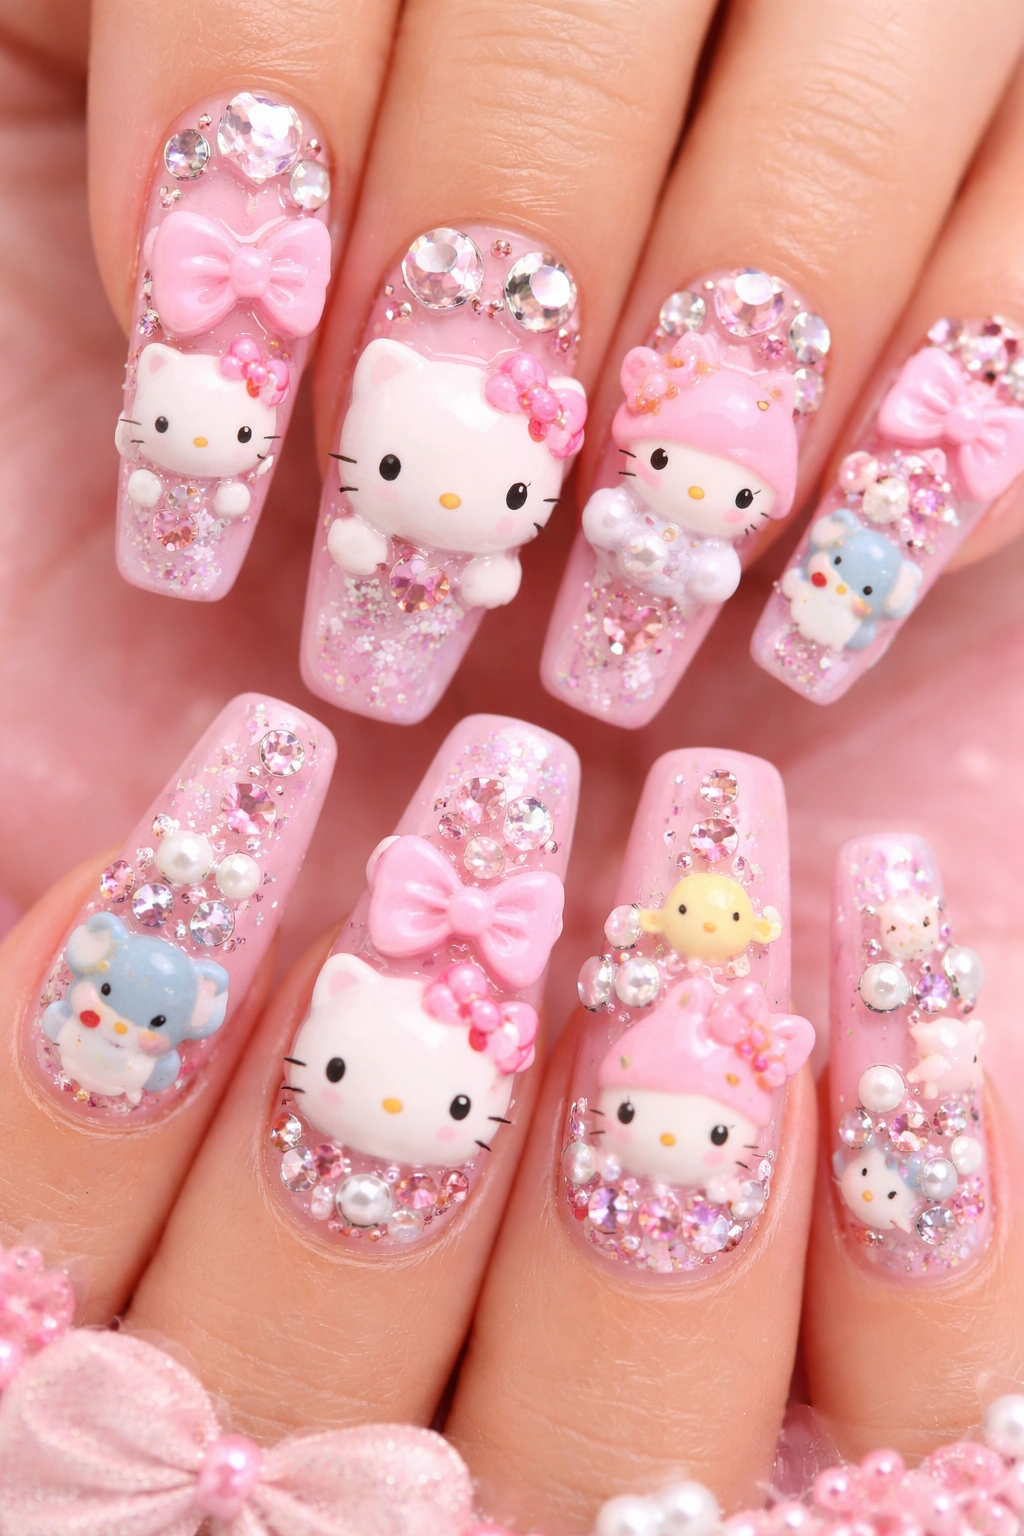
Character charms have taken over the nail world, and Hello Kitty leads the pack. These adorable embellishments tap into the kawaii aesthetic that’s everywhere right now. Pink bases with Hello Kitty face charms, bows, and even tiny resin kitty heads create nails that are unapologetically cute.
You’re not limited to just Hello Kitty, though. Kirby, Kuromi, and other beloved characters have nail charms available. The key to making character nails work is balance—use them as accent pieces rather than covering every nail. One or two character charms per hand, supported by coordinating colors and complementary embellishments, keeps the look playful without veering into childish territory.
Duck nails (that flared, squared shape) have become the go-to nail shape for character charms. The extra surface area gives you room to showcase these detailed pieces properly. Pair your character charms with coordinating rhinestones, small bows, or heart-shaped gems to build out the theme while keeping everything cohesive.
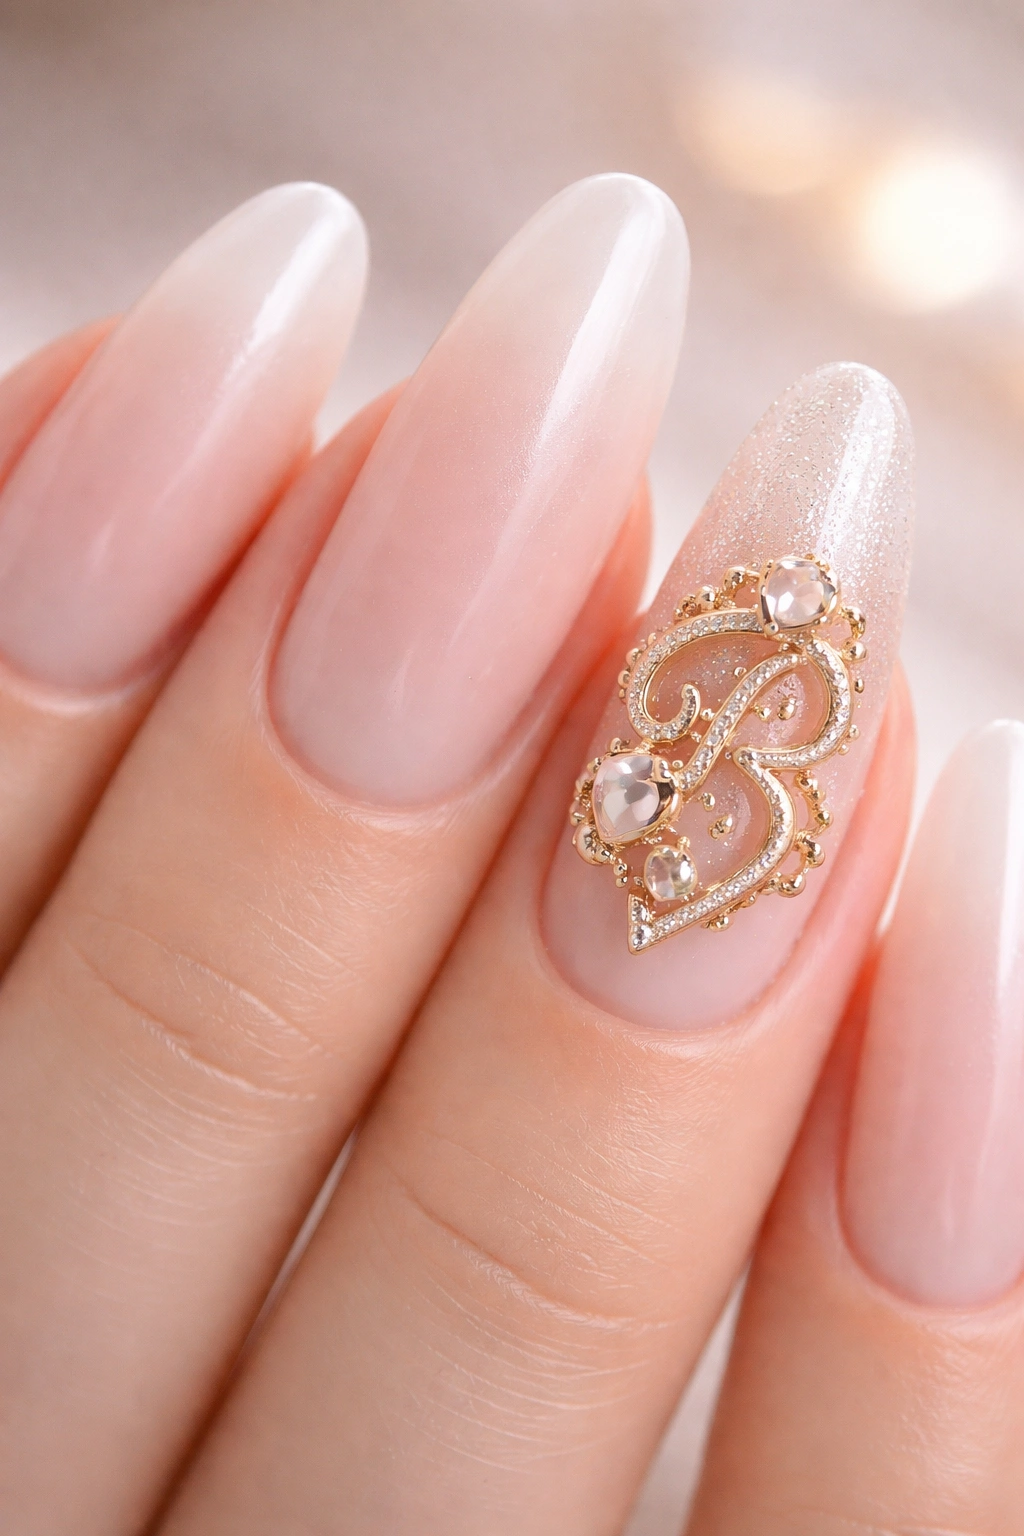
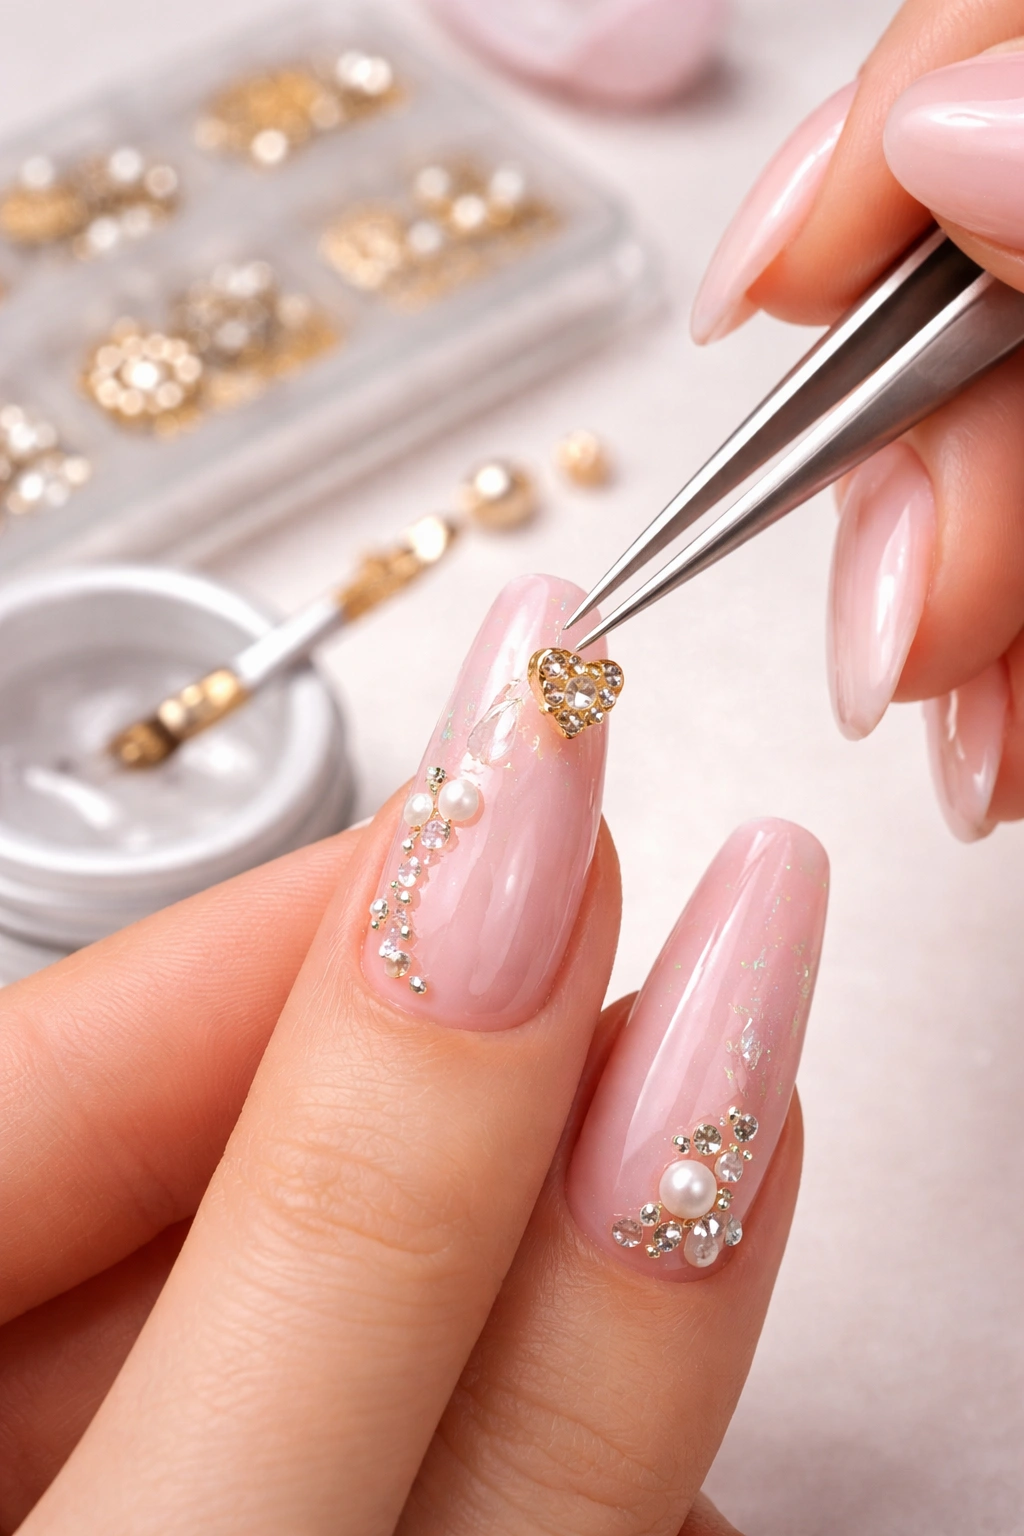
6. Luxe Rhinestone-Framed Charm Centerpieces
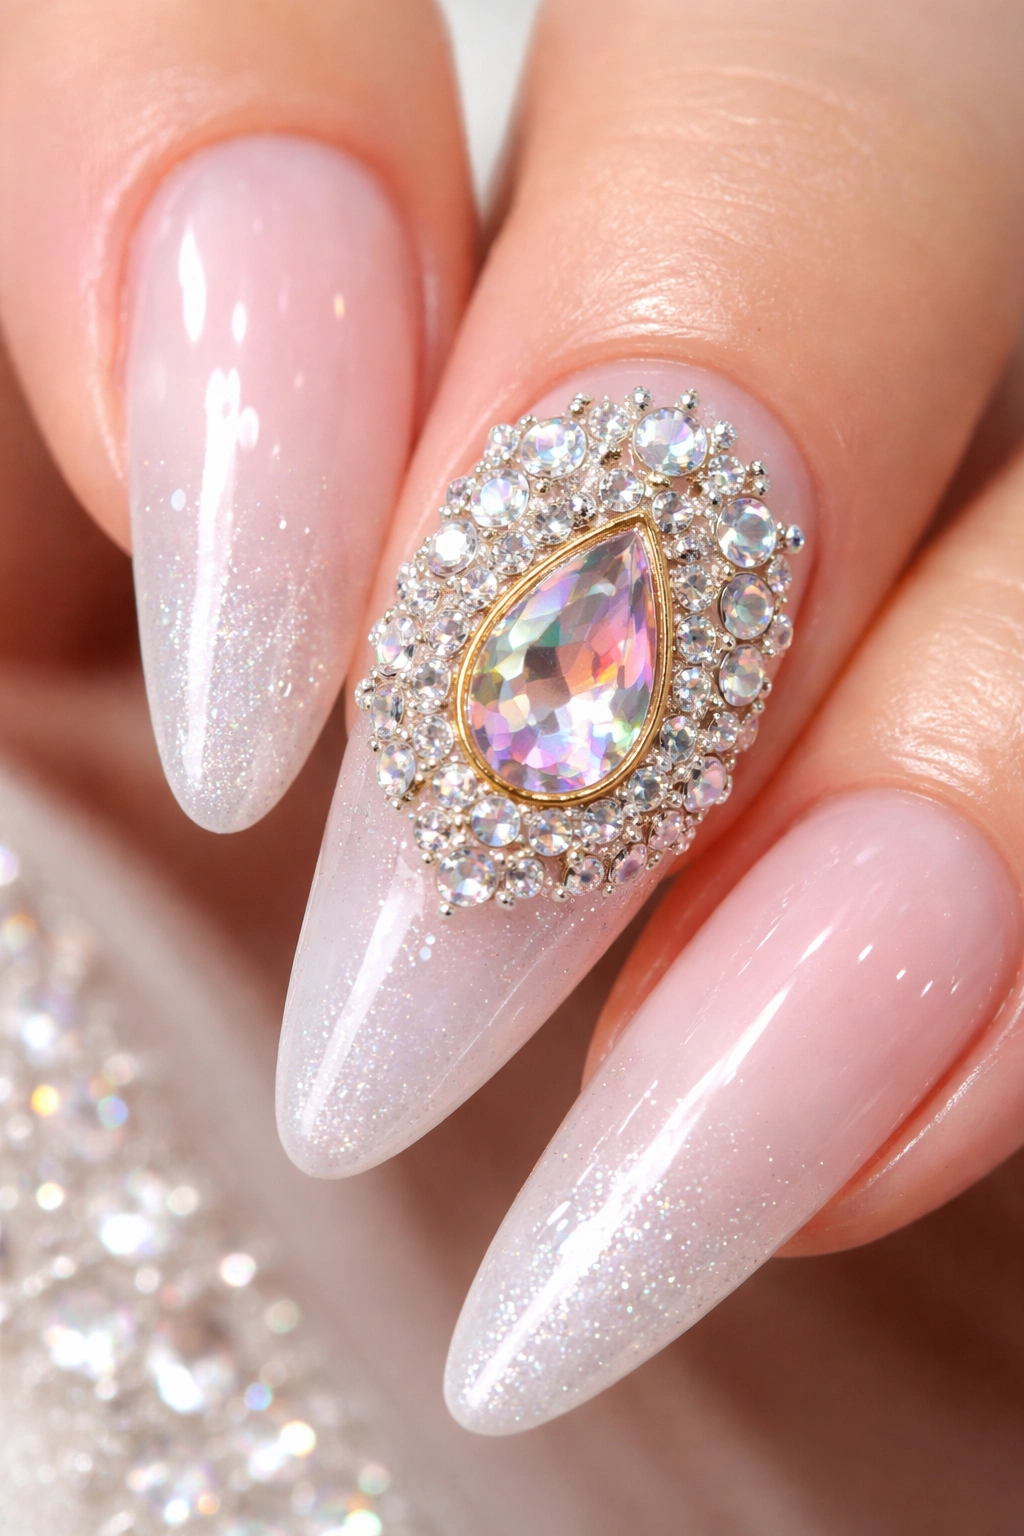
Why choose between rhinestones and charms when you can have both? This technique involves using tiny rhinestones to create a “frame” or halo around a larger charm centerpiece. The effect is incredibly luxurious and catches light from every angle.
Start with a charm that speaks to you—maybe a decorative flower, an ornate cross, or a chunky initial letter. Place it on your accent nail, then surround it with strategically placed rhinestones in varying sizes. Clear or AB (aurora borealis) rhinestones work with any color scheme, while colored stones can pull specific shades from your base polish.
This style requires patience and a steady hand, but the results are worth it. The rhinestone border elevates the charm from a simple embellishment to the star of the show. Many nail techs use specialized rhinestone glue for extra security—these pieces are too pretty to risk losing. Seal everything with a thick topcoat, being careful not to cover the charms’ dimensional details.
7. Mixed Metal Charms for an Edgy, Stacked Look
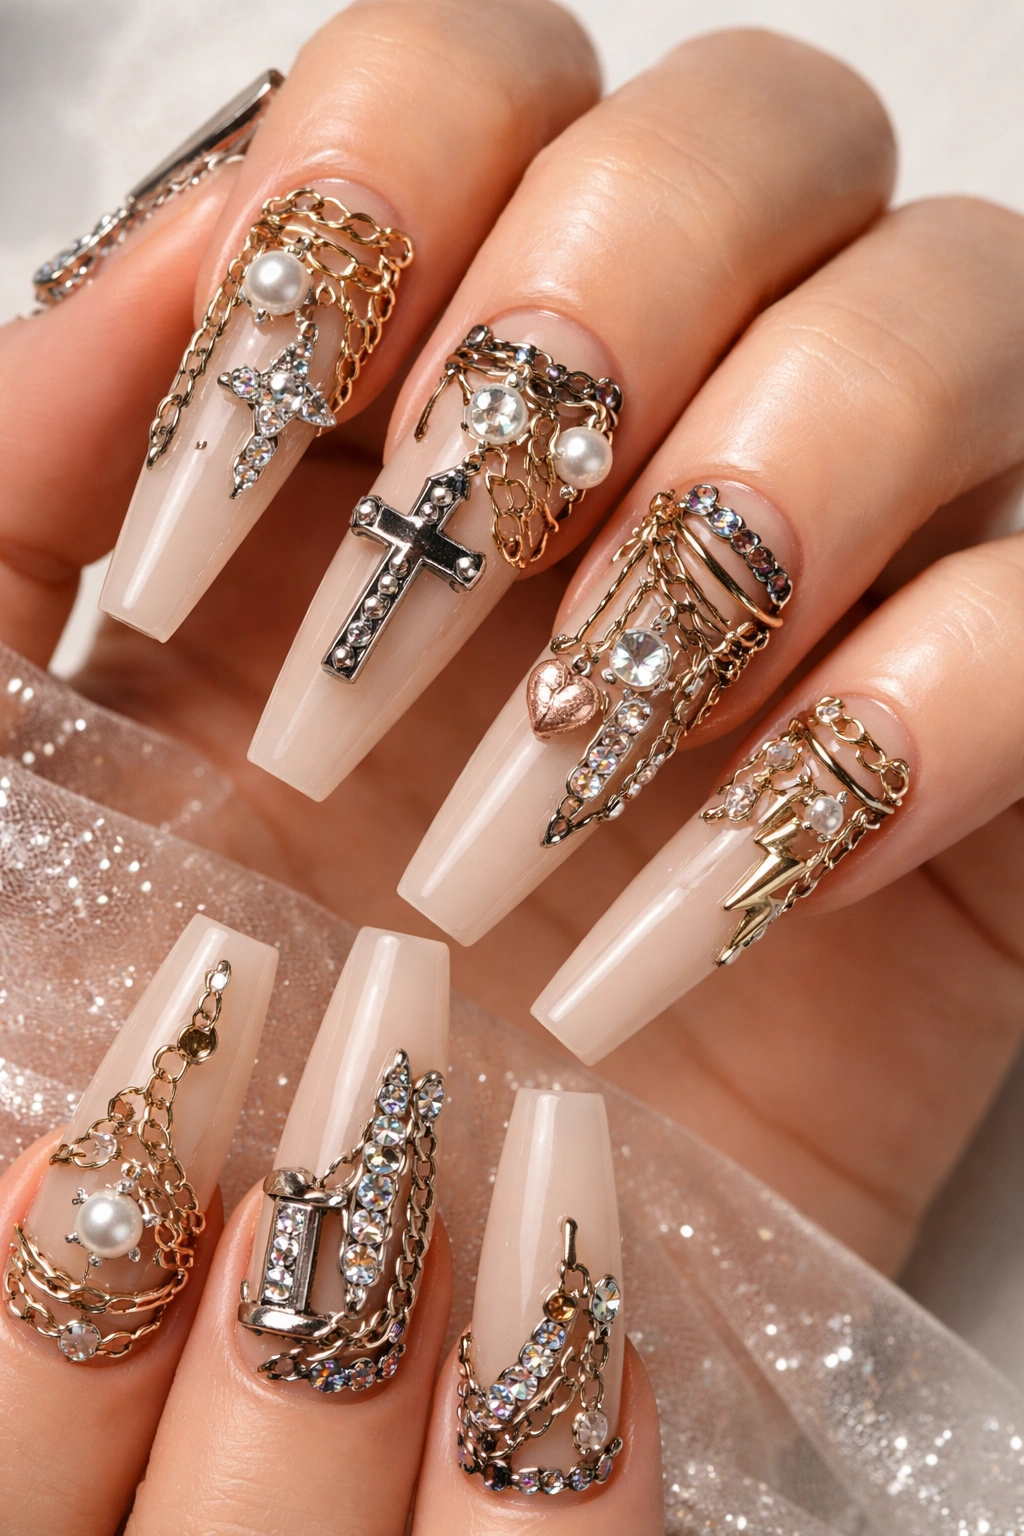
Mixing gold and silver used to be a fashion faux pas, but in nail art, it’s absolutely encouraged. Combining metal-toned charms in different finishes creates a layered, collected-over-time aesthetic that feels effortlessly cool. Think gold chains mixed with silver stars, or rose gold studs alongside gunmetal crosses.
The beauty of mixed metals lies in the visual texture they create. Your eye moves across the nail, discovering new details with each glance. This approach works especially well for longer acrylic nails where you’ve got more real estate to play with, though short nails can absolutely rock this trend too—just scale down the number of charms.
Pair your mixed metal charms with a neutral base color so the embellishments remain the focal point. Nude, soft gray, or even a sheer pink lets the metals shine without competing for attention. You can also try a matte topcoat on the base color while leaving the charms glossy for extra dimension and contrast.
8. Romantic Rose Gold with Floral Charms and Pearls
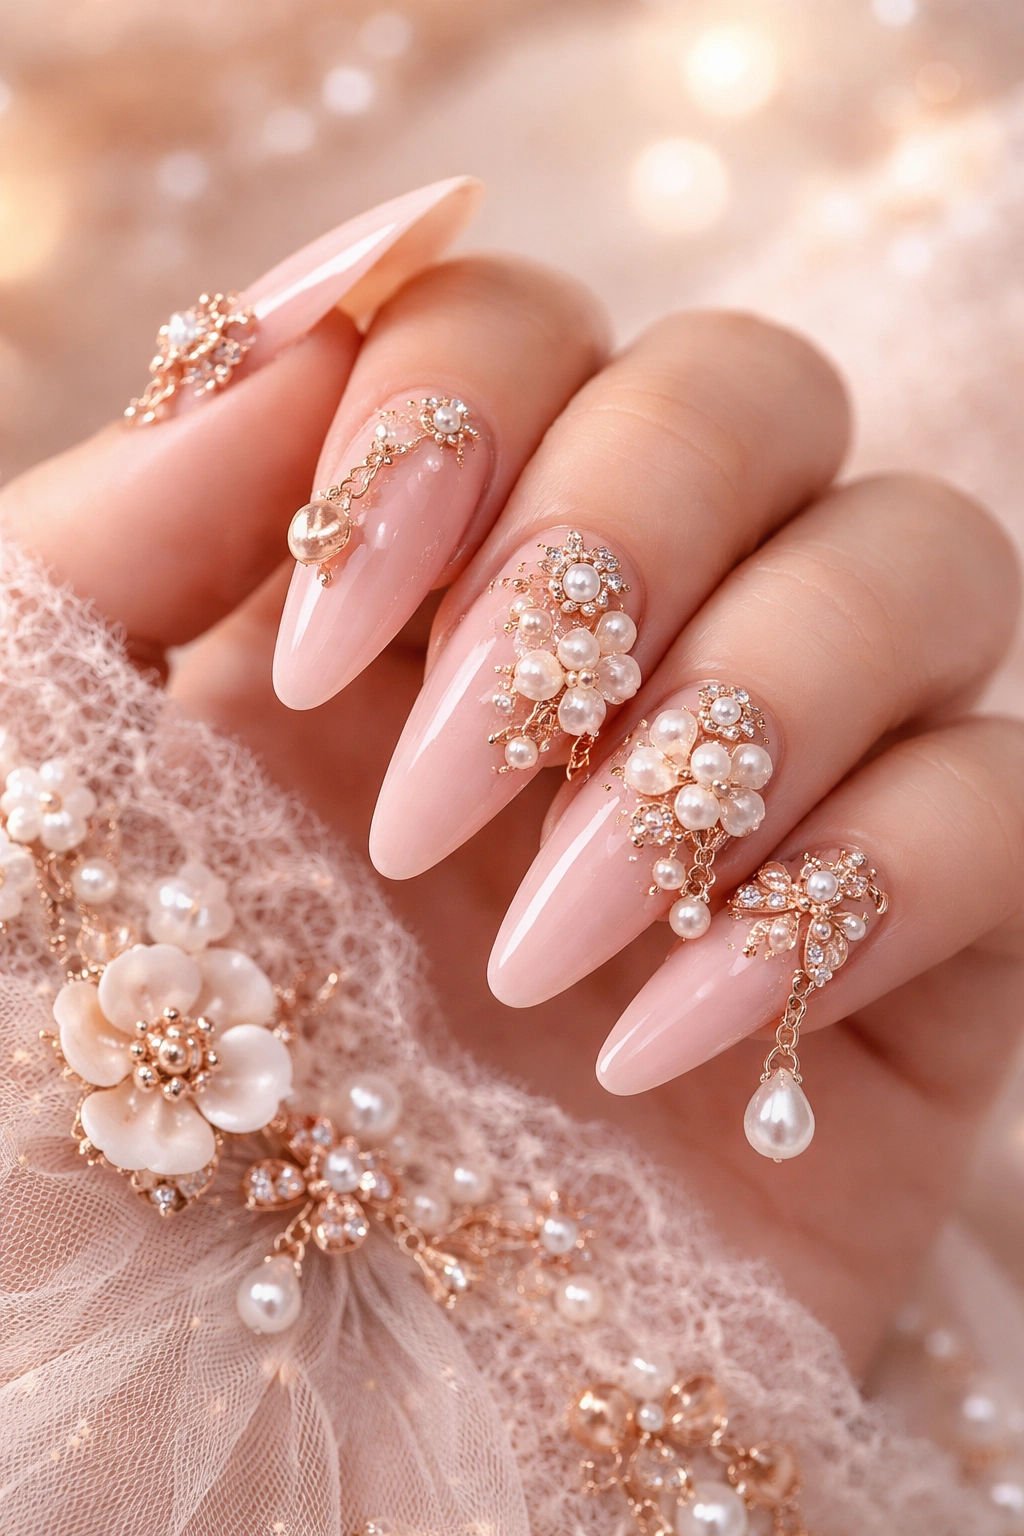
Rose gold has a warmth that flatters every skin tone, making it a foolproof choice for charm embellishments. When you combine rose gold charms with delicate floral pieces and pearls, you get a romantic, feminine look that’s perfect for special occasions or when you’re feeling particularly fancy.
Floral charms come in remarkably detailed varieties—tiny metal roses, cherry blossoms, daisies, and more abstract flower shapes. Layer them with rose gold rhinestones and cream-colored pearls on a soft pink or nude base. The combination feels garden-party-ready while still being wearable for everyday.
This aesthetic leans heavily into the “coquette” trend that’s dominated beauty spaces lately. It’s sweet without being saccharine, and sophisticated enough for any age group. Some nail artists add additional elements like lace-pattern stencils or hand-painted floral details to really drive the romantic theme home. The charms become part of a larger story rather than standalone decorations.
9. Chunky Chain Links and Punk-Inspired Hardware
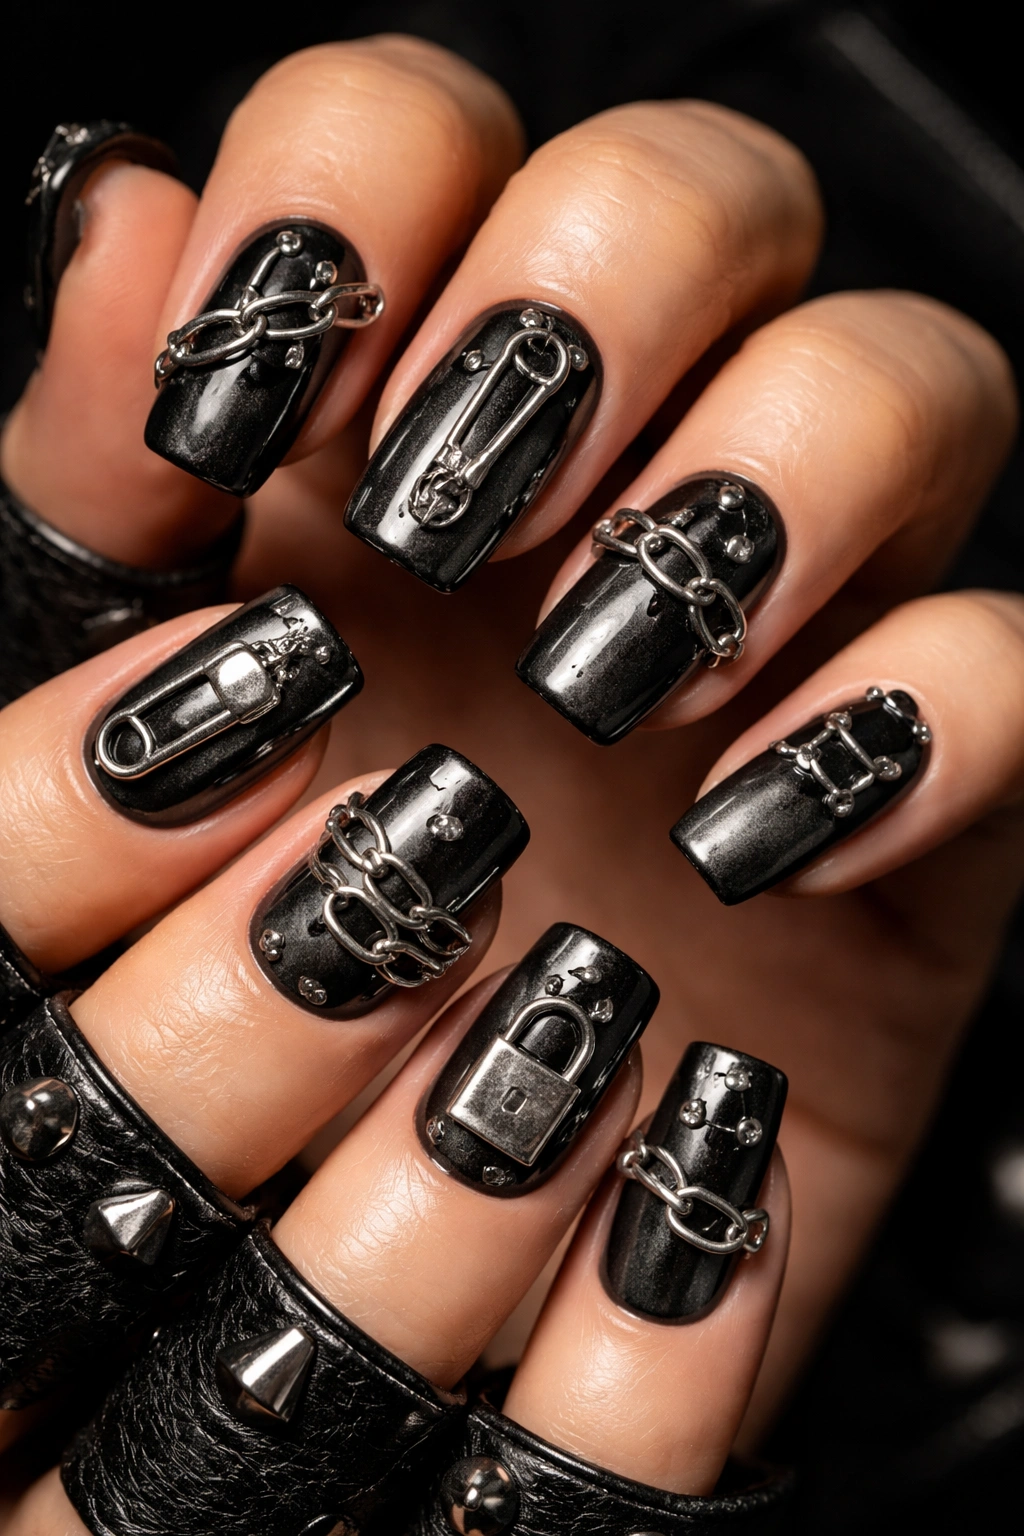
For those who prefer their glam with an edge, chunky chain charms and hardware-inspired embellishments deliver serious attitude. These pieces skew larger and more substantial than delicate pearls or tiny rhinestones. We’re talking miniature chain links, safety pin charms, stud accents, and even tiny padlock decorations.
This punk-inspired aesthetic works beautifully on shorter, square-shaped acrylics where the bold charms won’t catch on everything. Black polish provides the classic punk backdrop, but you can also try deep burgundy, forest green, or even bright neon shades for a more modern twist on the rebellious look.
The application process matters here. Hardware charms need strong adhesive—regular topcoat won’t cut it. Many professionals use specialized nail glue designed for 3D embellishments, then seal around (not over) the charms with a builder gel for extra security. These pieces have weight to them, so proper attachment is crucial if you want them lasting more than a day or two.
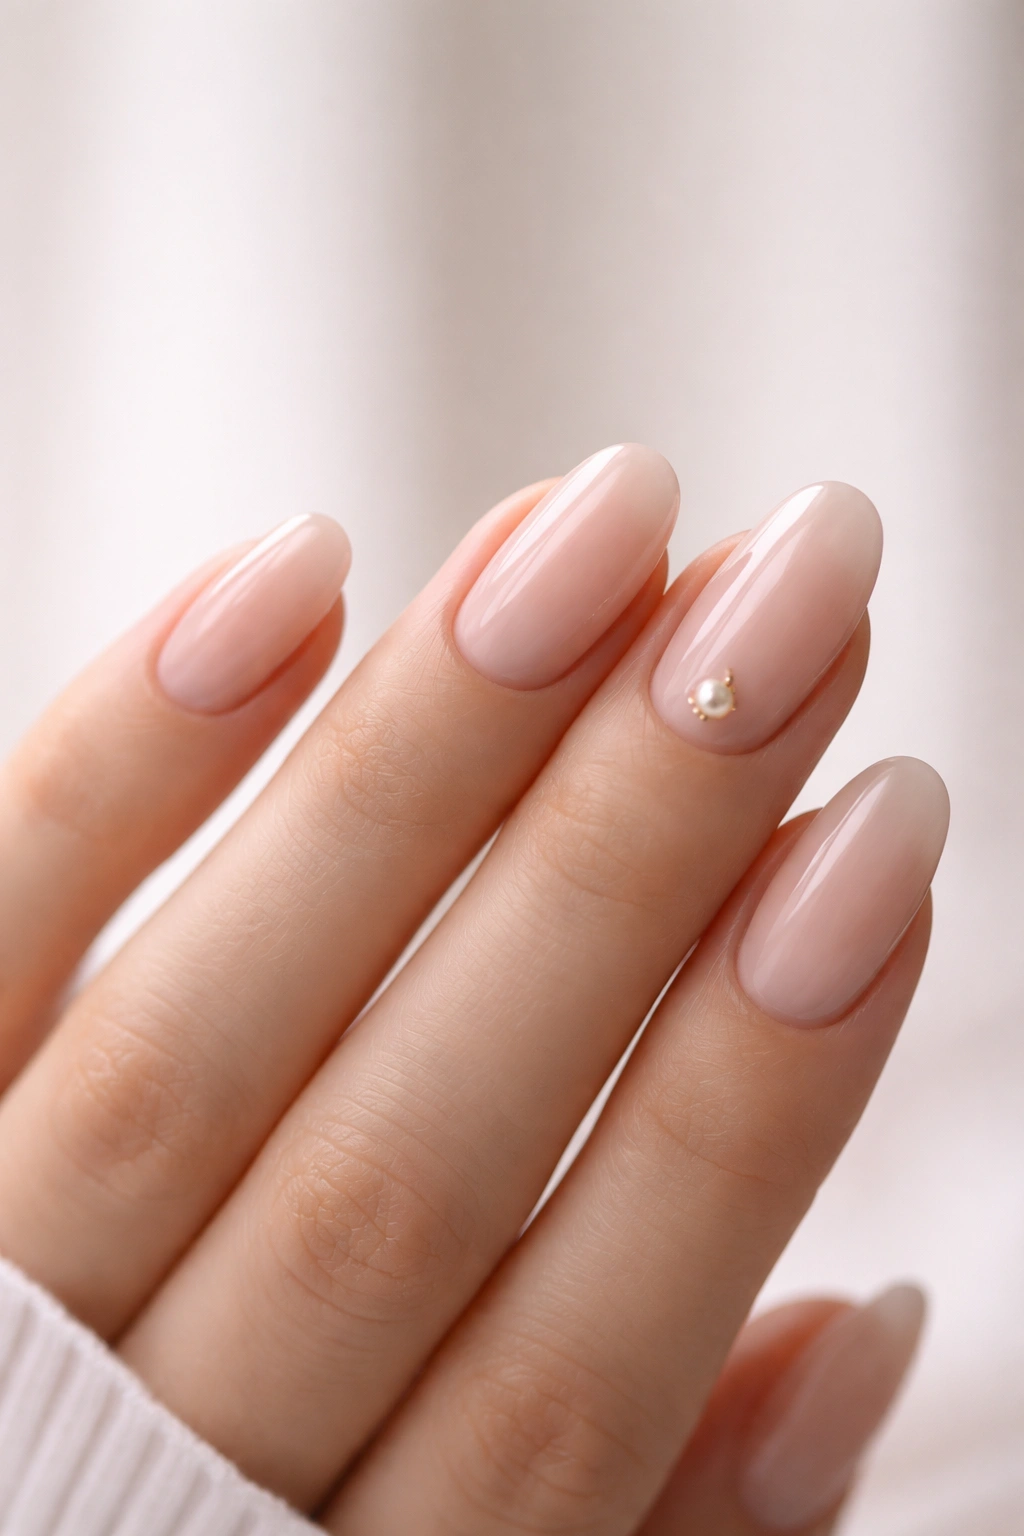
10. Minimalist Single-Charm Accent Nails
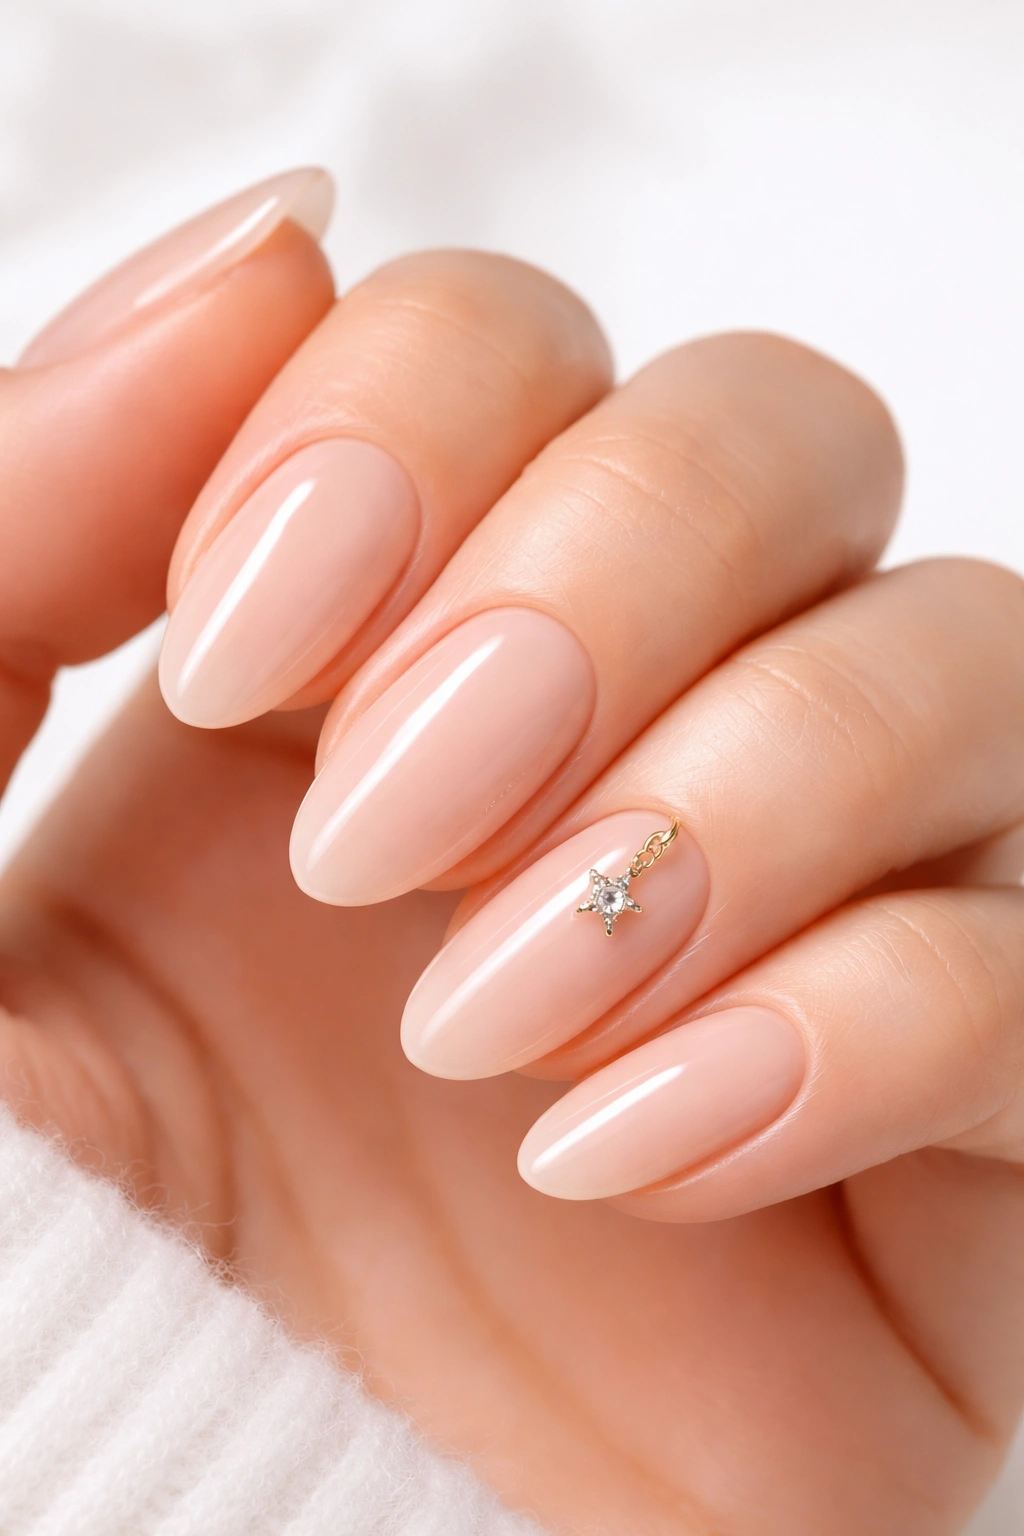
Sometimes less really is more. A single, well-chosen charm on an accent nail creates an understated elegance that works anywhere, from corporate offices to black-tie events. This approach lets you experiment with charms without fully committing to a bold, embellished look.
Choose a charm that means something to you—maybe your zodiac constellation, a tiny initial, or a symbol that represents something important. Place it strategically on your ring finger, either at the base of the nail, centered mid-nail, or floating near the tip. Keep your other nails in a complementary solid color or subtle design that doesn’t compete.
The minimalist charm approach is also budget-friendly and beginner-friendly. You’re not investing in multiple boxes of embellishments, and the application process is straightforward enough to attempt at home. It’s a gateway drug, honestly—many people start with one charm per manicure and gradually work their way up to more elaborate designs.
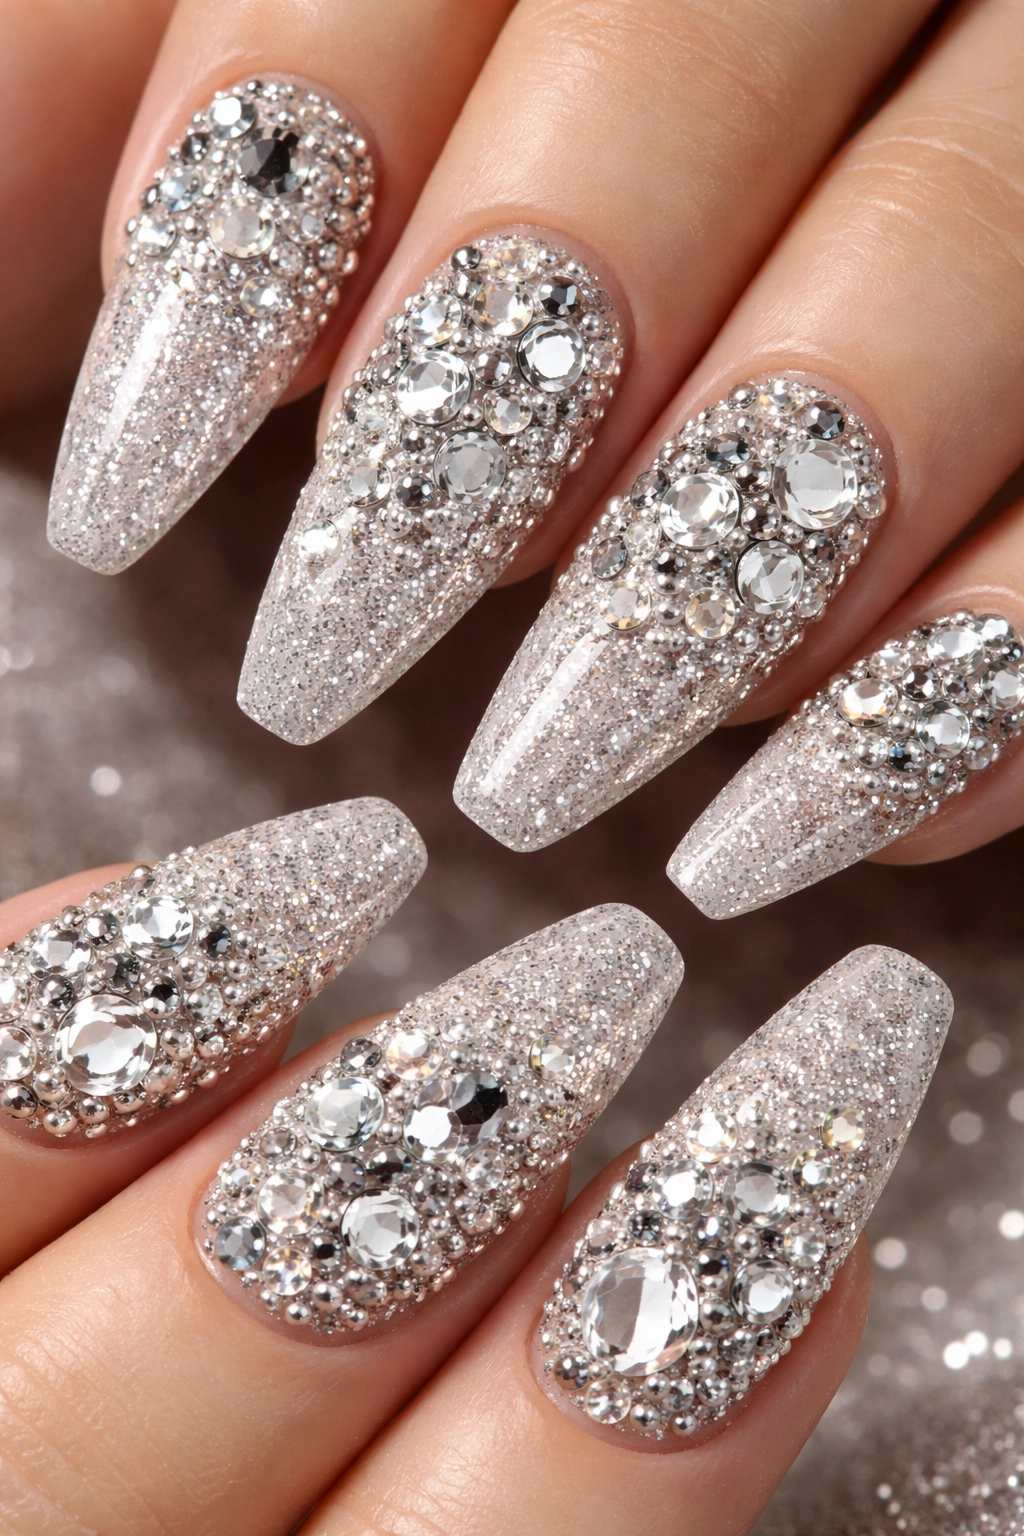
11. Junk Nails Maximalism with Every Charm Imaginable
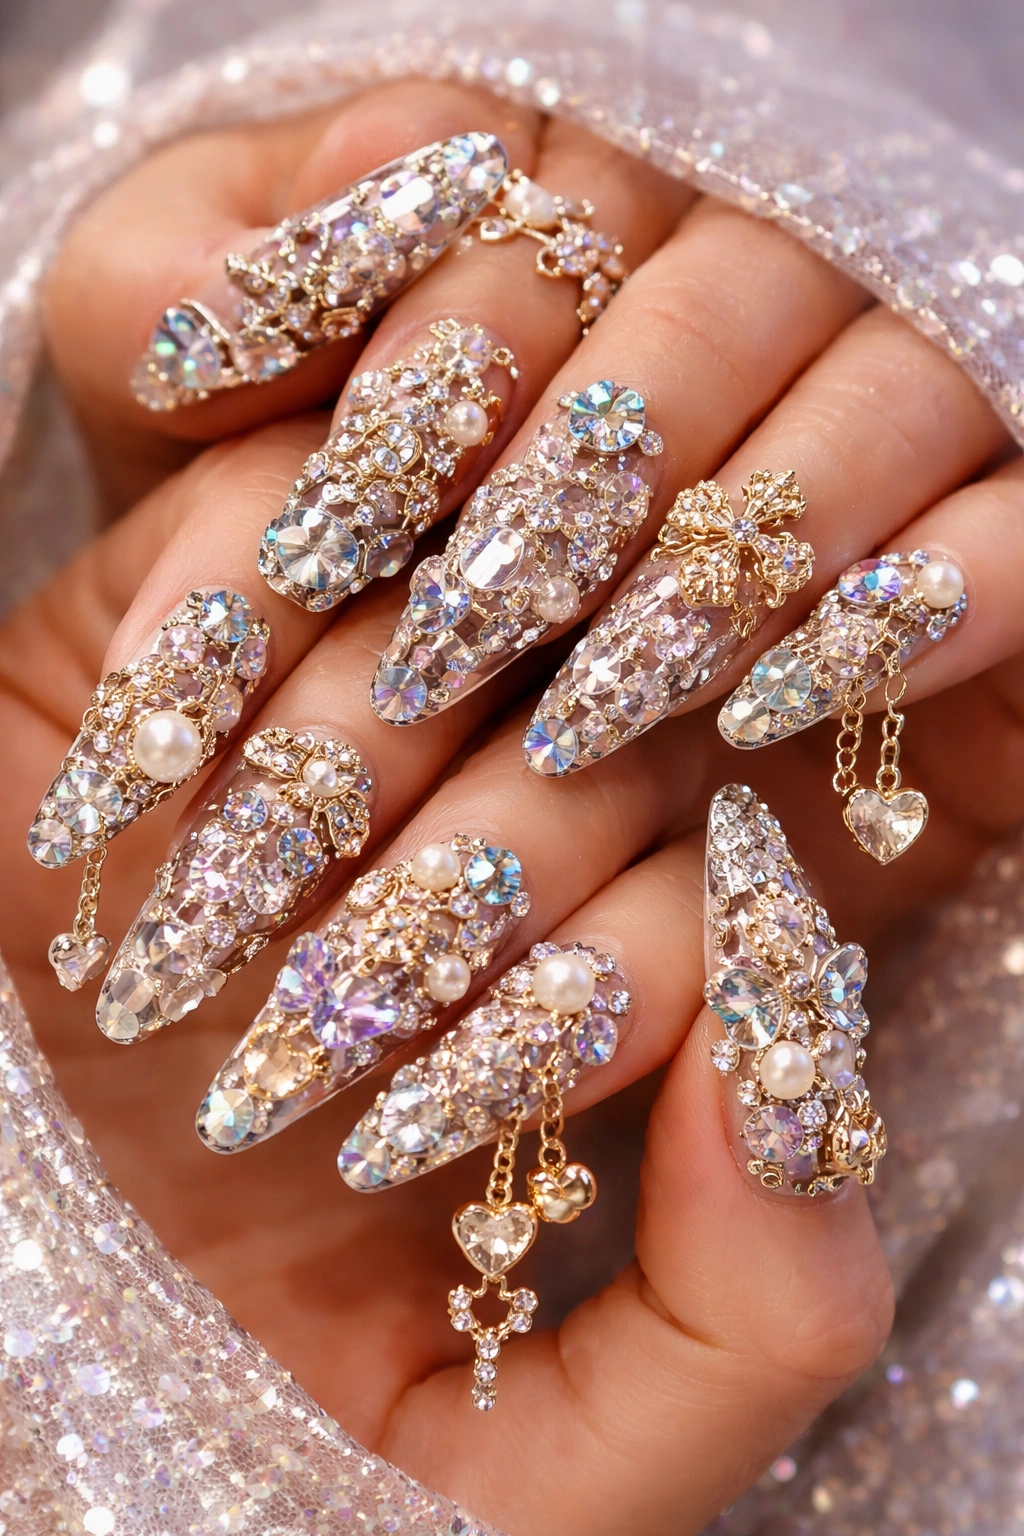
On the complete opposite end of the spectrum from minimalism, we have “junk nails”—the maximalist trend where more is more, and then you add even more. These designs pack every available surface with charms, gems, pearls, rhinestones, and anything else that catches light or adds dimension.
Creating successful junk nails requires strategy despite the chaotic appearance. Start with a base color (chrome finishes work especially well), then begin layering your largest charms first. Fill in gaps with medium-sized pieces, then use tiny rhinestones and caviar beads to eliminate any remaining empty space. The result should feel abundant but somehow still cohesive.
Color coordination becomes crucial here. Stick to a color family—like all pink and rose gold elements, or silver pieces with blue and purple accents—to prevent the design from looking messy rather than intentionally maximalist. Junk nails are definitely a commitment, though. They require careful handling, add length to your fingertips, and aren’t exactly practical for typing or other detailed hand work.
12. Seasonal Themes with Holiday-Specific Charms
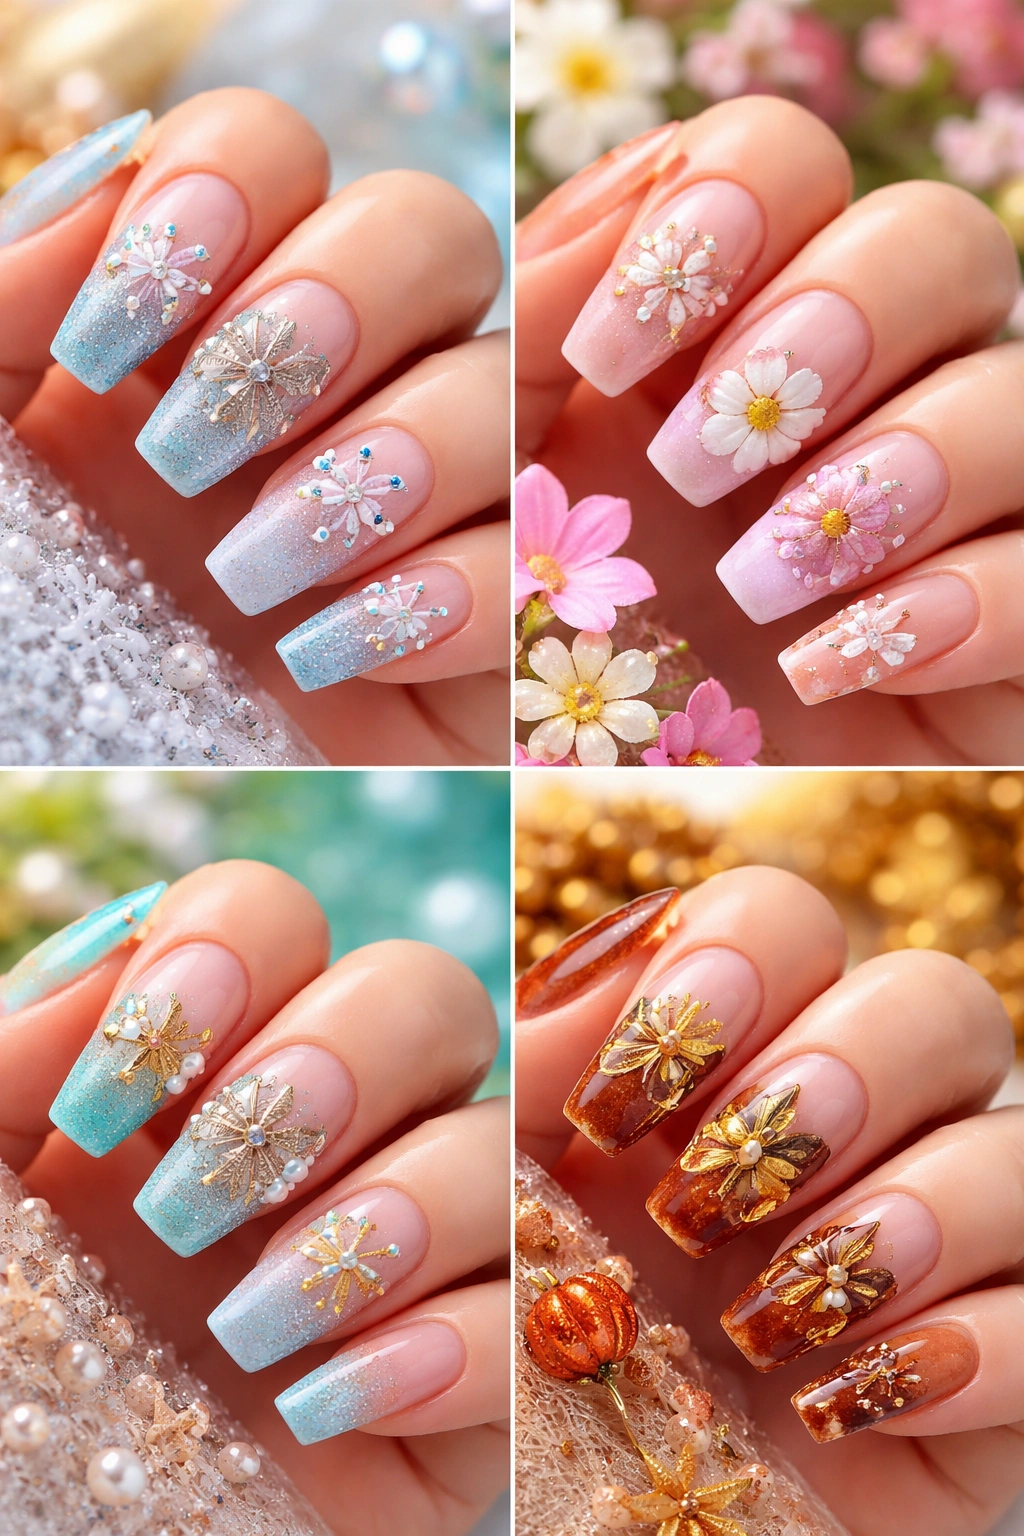
Nail charms make seasonal nail art so much easier and more impactful. Winter brings snowflake charms, tiny Christmas trees, and miniature bell embellishments. Spring means butterflies, flowers, and pastel-colored pieces. Summer calls for beach-themed charms like shells and starfish, while fall embraces leaves, pumpkins, and warm metallic tones.
The advantage of using charms for seasonal designs is how much more dimensional they are compared to painted art. A 3D snowflake charm catches light and creates shadows in ways that flat nail art simply can’t replicate. Plus, you can easily communicate your theme without needing the artistic skills to paint intricate details freehand.
Many nail supply companies release seasonal charm collections, making it simple to find coordinating pieces. You’ll discover charm sets specifically designed to work together—matching metals, complementary shapes, and pieces that layer well. This takes the guesswork out of creating cohesive seasonal nails even if you’re not naturally artistic.
13. Monogram and Initial Charms for Personalized Elegance
Personalization never goes out of style, and initial charms bring that custom touch to your manicure. Whether you feature your own initials, those of someone you love, or a meaningful word spelled out across multiple nails, letter charms make your nails uniquely yours.
Letter charms come in various fonts and finishes. Classic serif letters feel traditional and sophisticated, while script fonts lean romantic. Block letters with embedded rhinestones bring extra sparkle and glamour. You can place a single initial on each accent nail, spell out a whole word across your fingertips, or even incorporate numbers for meaningful dates.
Mixing initial charms with other embellishments creates a layered, custom look. Try your initial surrounded by your birthstone-colored rhinestones, or pair letter charms with small symbols that represent your interests or values. The personalization possibilities are genuinely endless, making each manicure a tiny billboard for your personality and story.
14. Chrome Base with Contrasting Charm Colors
Chrome nails already make a statement with their mirror-like finish, but adding charms in contrasting colors takes things next level. Silver chrome with gold charms creates a luxe mixed-metal effect. Pink chrome with dark, moody purple gems offers unexpected sophistication. The high-shine base makes every embellishment pop even more dramatically.
The trick with chrome and charms is letting each element shine individually rather than competing. Choose charms in colors that contrast with your chrome shade—if you’ve got warm gold chrome, cool-toned silver or blue charms provide visual interest. For silver chrome, warm rose gold or amber-colored pieces create that same eye-catching contrast.
Application requires a careful touch. Chrome powders need specific topcoats to maintain their finish, and adding charms introduces another layer of complexity. Many nail techs apply the chrome and its topcoat first, let it cure completely, then use nail glue to attach charms before doing a final seal around (not over) the embellishments. This preserves both the chrome shine and the charms’ dimensional quality.
15. Ombre Fade with Gradient-Placed Charms
Ombre nails transition smoothly from one color to another, and placing charms along that gradient creates a cohesive flow that guides the eye. Imagine a soft pink-to-white fade with pearls concentrated at the lightest point, gradually decreasing in density toward the darker shade. The effect is both artistic and wearable.
This technique works with any color combination. Try deep burgundy fading to soft blush, with gold charms following the transition. Or go bold with a rainbow ombre featuring different colored rhinestone charms that match each section of the fade. The key is making the charm placement feel intentional rather than random.
Creating this look requires planning. Map out your charm placement before committing anything to the nail—once those pieces are glued down, they’re not easy to reposition. Start with your largest charms, place them according to your planned gradient, then fill in with smaller pieces. The result should feel like the charms are naturally following the color flow rather than interrupting it.
16. Mixed Shape Caviar Beads and Gem Combination
Caviar beads—those tiny, round micro-beads—add incredible texture when combined with larger shaped gems. This technique layers different sizes and shapes of embellishments to create almost sculptural nail art. Start with flat gems in various shapes (hearts, stars, squares), then fill the spaces between with caviar beads for a luxe, encrusted effect.
The combination of flat and dimensional elements creates visual interest that changes depending on your viewing angle. Straight on, the flat gems create a pattern. From the side, the textured caviar beads become apparent. It’s nail art that rewards closer inspection and provides endless fascination.
Color selection matters tremendously here. Stick with a monochromatic scheme—like all silver elements—for a cohesive, high-end look. Or go multicolor with careful attention to how shades interact. Too many competing colors can look chaotic rather than intentional, so choose a palette of three to five shades maximum and stick with it across all embellishments.
17. Floating Charms on Sheer Nude Bases
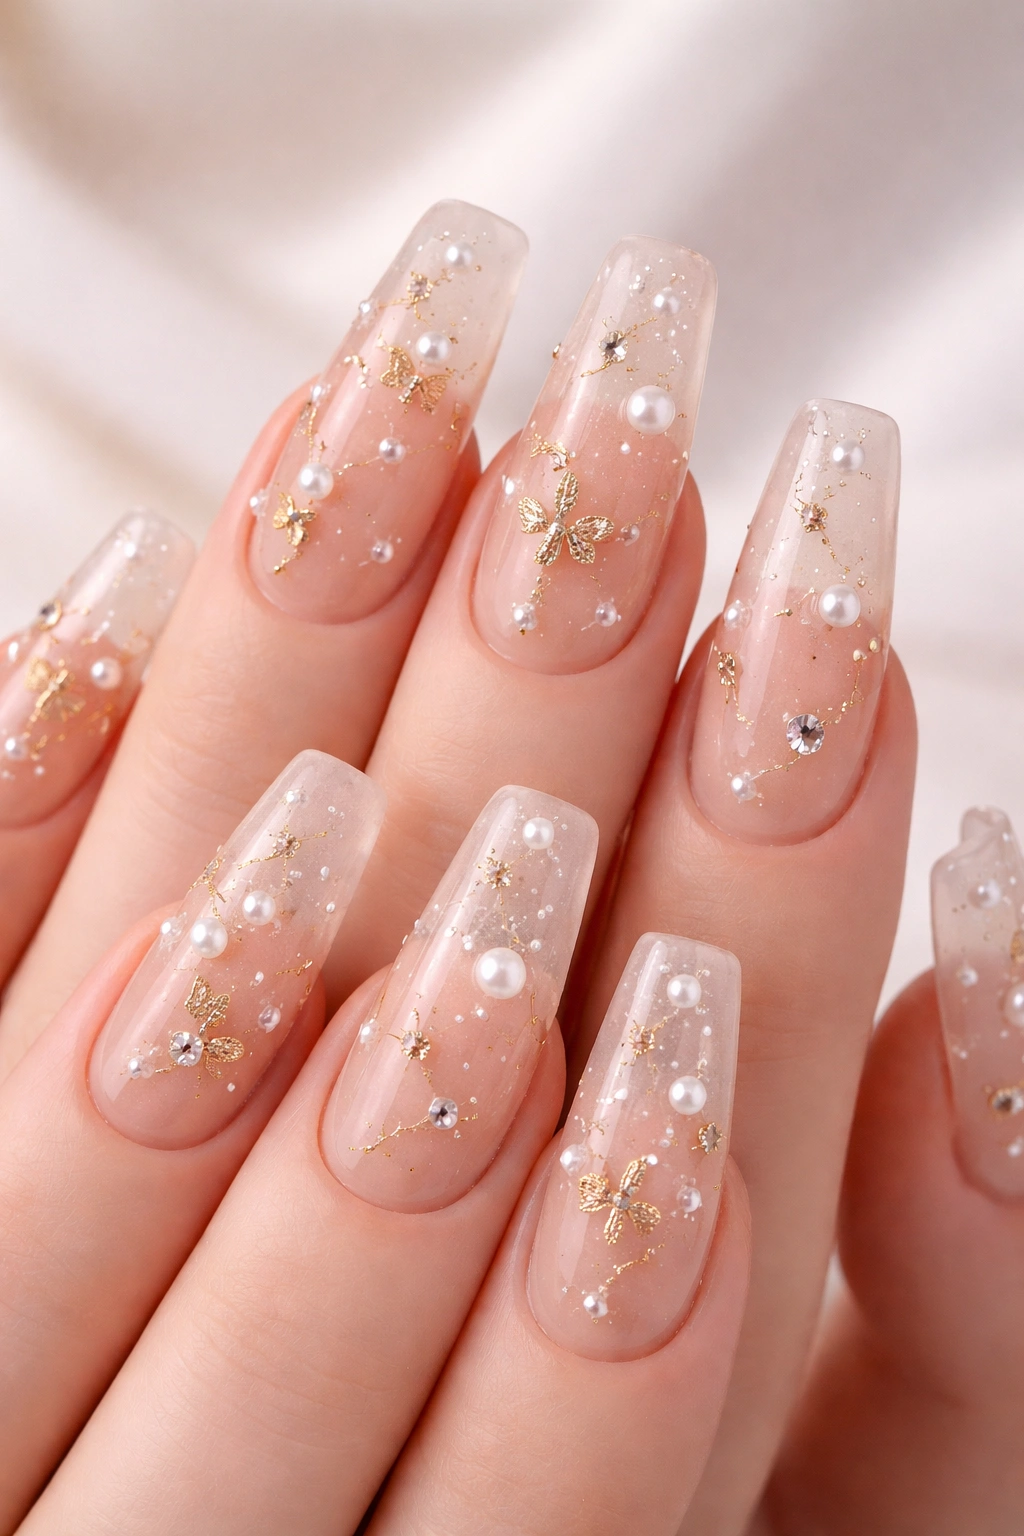
Sheer nude or “jelly” bases create a barely-there backdrop that makes charms appear to float on your natural nail. This technique feels modern and understated while still incorporating the glam of embellishments. The nude base keeps things wearable for any setting, while the charms add just enough personality.
This approach works particularly well for people transitioning from simple, classic manicures toward more decorative looks. It’s not as bold as charms on bright, opaque polish, making it an easier sell if you work in conservative environments or just prefer subtler nail art. Yet you still get that fun, embellished element that elevates your nails beyond basic.
Placement becomes extra important with sheer bases since there’s nowhere to “hide” less-than-perfect positioning. Each charm stands out distinctly against the transparent background, so precision matters. Consider symmetrical placement—like one charm in the same position on each nail—or create an intentional pattern that distributes charms evenly across both hands for visual balance.
How to Apply Charms Like a Pro
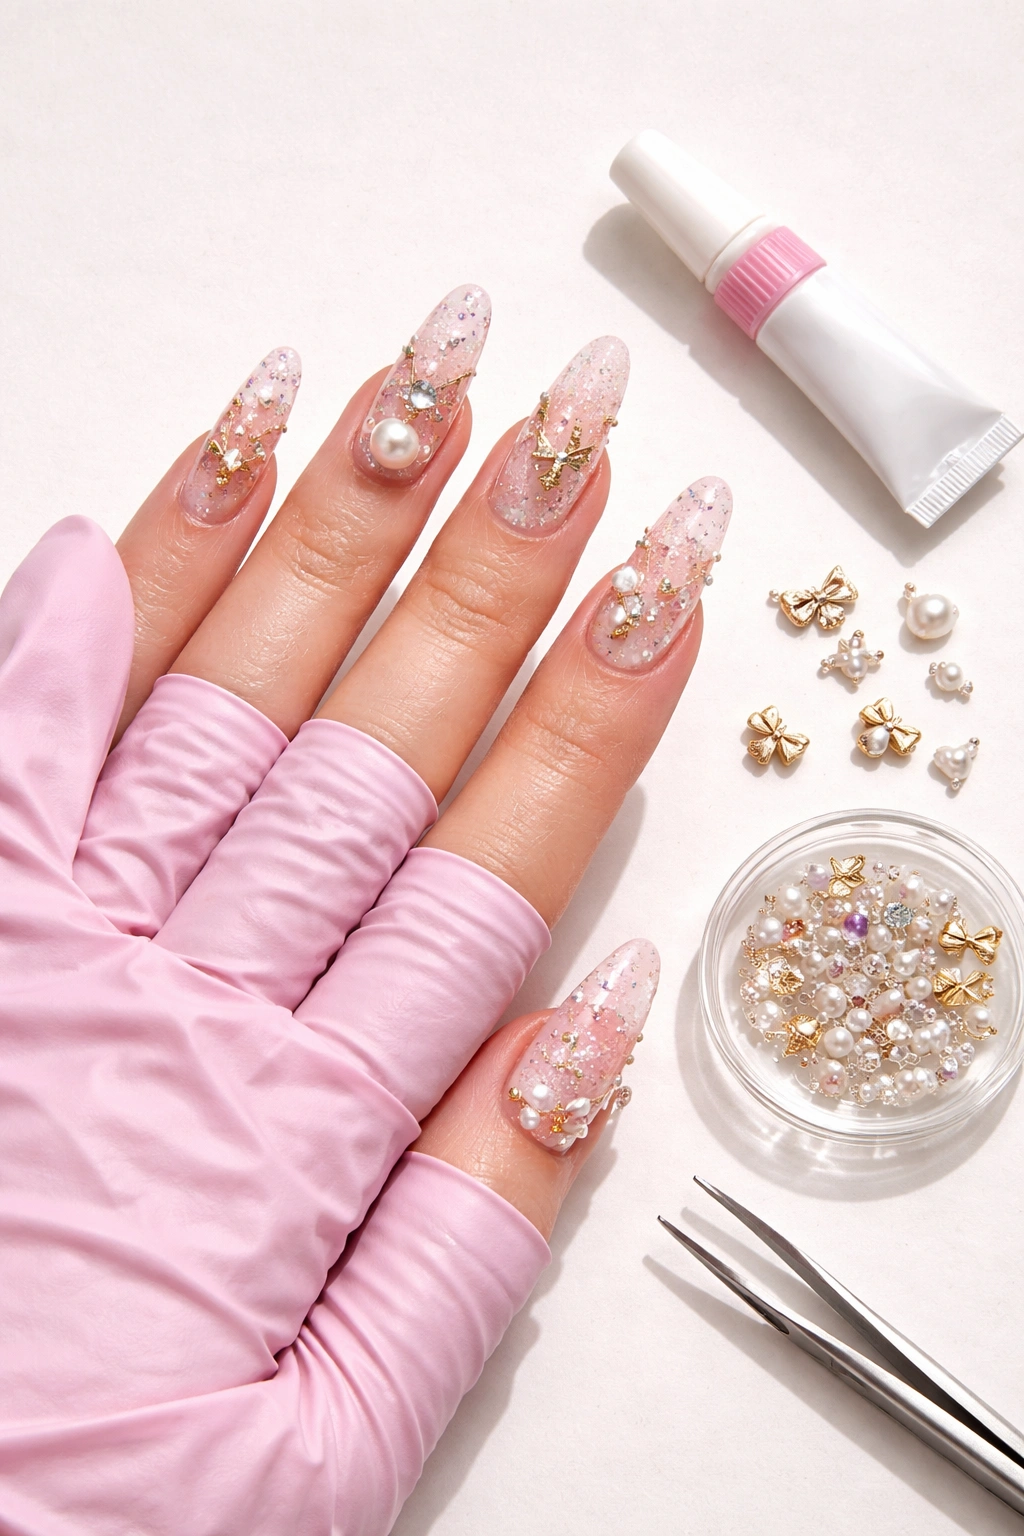
Getting charms to stick properly separates a manicure that lasts a day from one that goes the distance. The application process isn’t complicated, but it does require the right tools and techniques. Most charm kits come with a tweezer and wax pencil—these aren’t just bonus items, they’re essential for precise placement.
Start with a fully cured base. Whether you’re using regular polish, gel, or acrylics, make sure your base color is completely set before adding charms. For gel polish, this means a full cure cycle under your lamp. For regular polish, wait until it’s completely dry to the touch. Adding charms to tacky or wet polish causes them to slide around and never properly adhere.
Use specialized glue for 3D embellishments. Regular topcoat won’t keep heavier charms in place. Nail glue works, but rhinestone glue or gel-based adhesives designed specifically for nail art provide stronger, longer-lasting hold. Apply a tiny dot of glue where you want the charm, let it get slightly tacky (about 10 seconds), then press your charm firmly into place using tweezers.
The wax pencil becomes your best friend for tiny pieces. Touch the tip of the pencil to small rhinestones or caviar beads—they’ll stick to the wax, allowing you to position them precisely on your nail. Once in place, press gently with the flat end of an orangewood stick or similar tool to ensure good contact with the adhesive underneath.
Seal strategically. Heavy topcoat over dimensional charms flattens their 3D effect and can make them look cloudy or dull. Instead, carefully seal around the base of each charm, creating a protective barrier that keeps them from catching on things while preserving their dimensional quality. Builder gel works beautifully for this—it’s thick enough to create a secure seal without drowning the embellishments.
Choosing the Right Charms for Your Style
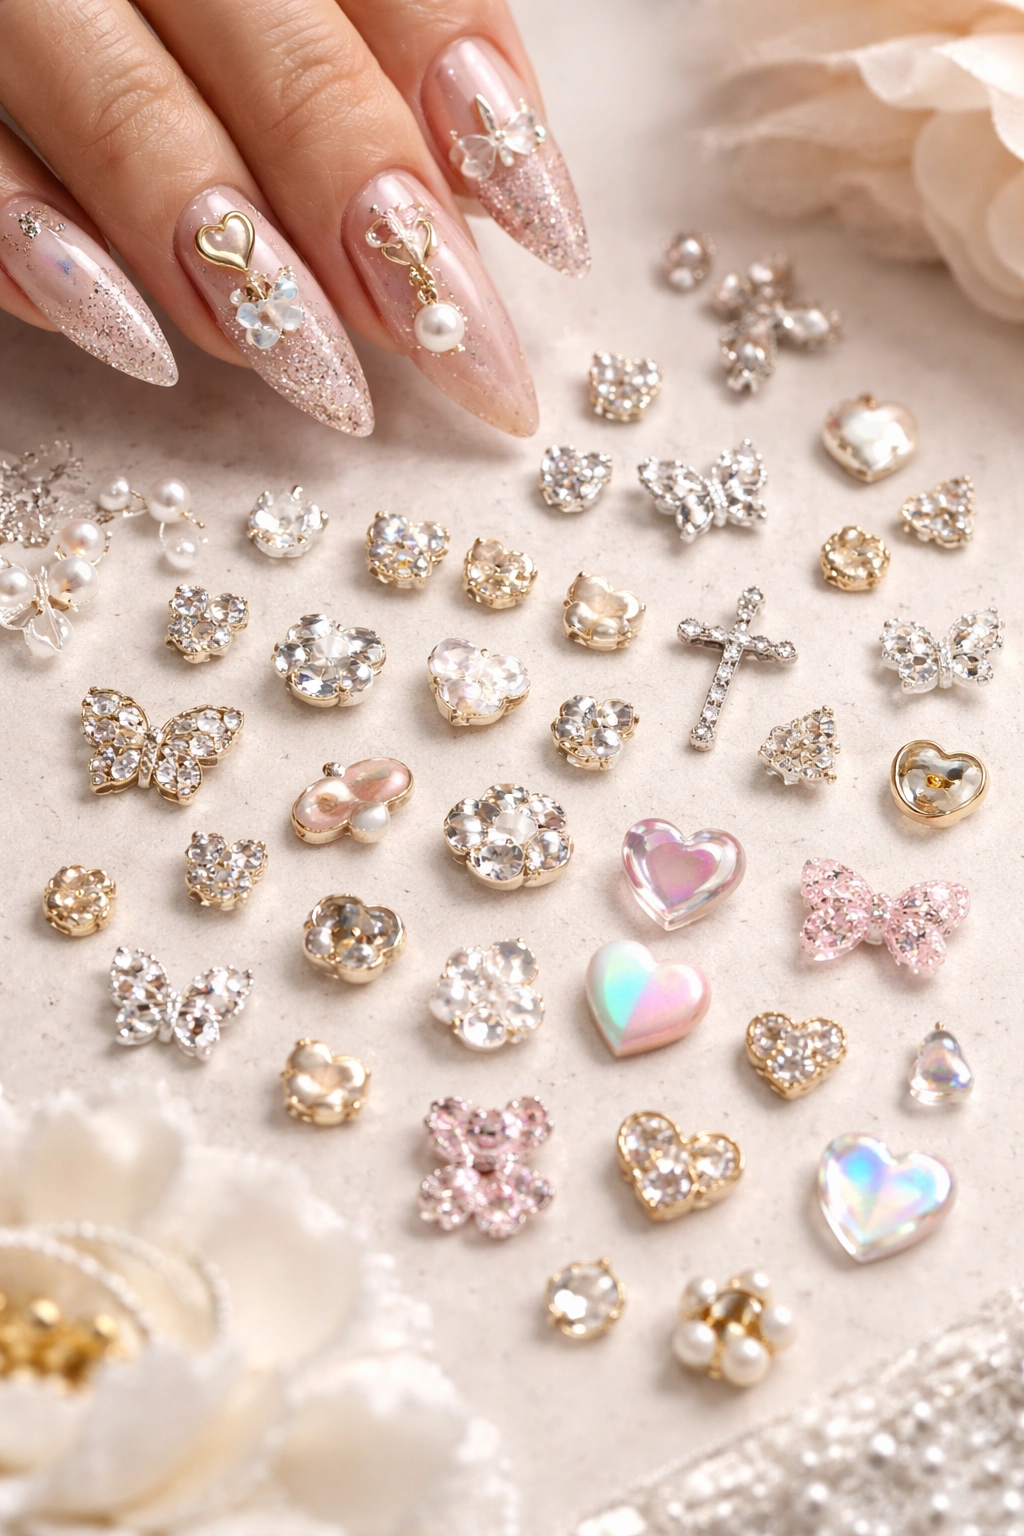
Walking into a nail supply store or browsing online charm collections can feel overwhelming. Literally thousands of options exist, from simple studs to elaborate resin sculptures. Narrowing down what works for your personal style, lifestyle needs, and skill level makes shopping so much easier and helps you build a charm collection you’ll actually use.
Consider your daily activities. People who type constantly might want to stick with smaller, flatter charms that won’t interfere with keyboard work. Those with hands-on jobs should think about durability and whether delicate charms will survive their workday. If you’re mostly adding charms for special occasions, go ahead and choose those dramatic pieces that might not be practical for everyday wear.
Start with versatile colors. Gold, silver, and clear rhinestones work with virtually any nail color or design. These neutral metallics should form the foundation of your charm collection. Once you’ve got those basics covered, branch out into colored gems, themed pieces, and more specific embellishments that speak to your aesthetic.
Quality matters more than quantity. One beautifully crafted charm that stays put for weeks beats a dozen cheap pieces that fall off after two days. Metal charms should have smooth edges without sharp burrs that could scratch your skin. Rhinestones should be cut well with multiple facets that catch light properly. Resin pieces should have clean, detailed sculpting without rough spots or asymmetry.
Keeping Your Charmed Nails Looking Fresh
Maintaining nails with charms requires slightly different care than regular manicures. These embellishments add vulnerable points where damage or loosening can occur, but with proper attention, your charmed nails can look salon-fresh for weeks. The key is protective habits and quick repairs when needed.
Wear gloves for wet work. Water exposure—especially hot water with soap or cleaning products—weakens the adhesive holding charms in place. Dishes, showering, and cleaning all threaten your embellishments. Wearing gloves creates a protective barrier that significantly extends your manicure’s lifespan. It might feel tedious initially, but when your charms are still perfect after two weeks, you’ll understand why nail artists always recommend this.
Keep spare charms and glue handy. Even with perfect application, sometimes a charm pops off. Life happens. Having backup pieces and a small tube of nail glue in your purse means you can make quick repairs anywhere. This is especially clutch for special events where you want your nails looking flawless.
Be mindful of your hands in general. Charmed nails require a bit more spatial awareness than regular manicures. You’ll learn to open car doors differently, adjust how you grab things from your bag, and develop new techniques for tasks that involve detailed finger work. This adjustment period is short—most people adapt within a few days—but going in aware helps prevent frustration and lost charms.
Wrapping Up
Acrylic nails with charms offer an incredible way to express your personal style and add that extra spark of glamour to your everyday look. From minimalist single-charm accents to maximalist junk nail extravaganzas, there’s a charmed nail style for every personality, occasion, and skill level. The designs we’ve explored here barely scratch the surface of what’s possible when you start playing with these tiny embellishments.
The beauty of nail charms lies in their accessibility. You don’t need to be an incredible artist to create stunning nail art—you just need good glue, steady hands, and a vision for how you want your nails to look. Start simple if you’re new to charms, maybe with a single pearl on your ring finger or a small rhinestone accent. As you get comfortable with application and develop preferences for what works with your lifestyle, you can expand into more complex, elaborate designs.
Remember that your nails are personal. What works for someone else might not fit your style, and that’s perfectly fine. Use these ideas as jumping-off points for your own creativity rather than strict blueprints to follow exactly. Mix elements from different designs, try unexpected color combinations, and don’t be afraid to ask your nail tech to customize these concepts to better suit your taste. Your nails should make you happy every time you look at your hands—that’s the ultimate measure of a successful manicure.
