

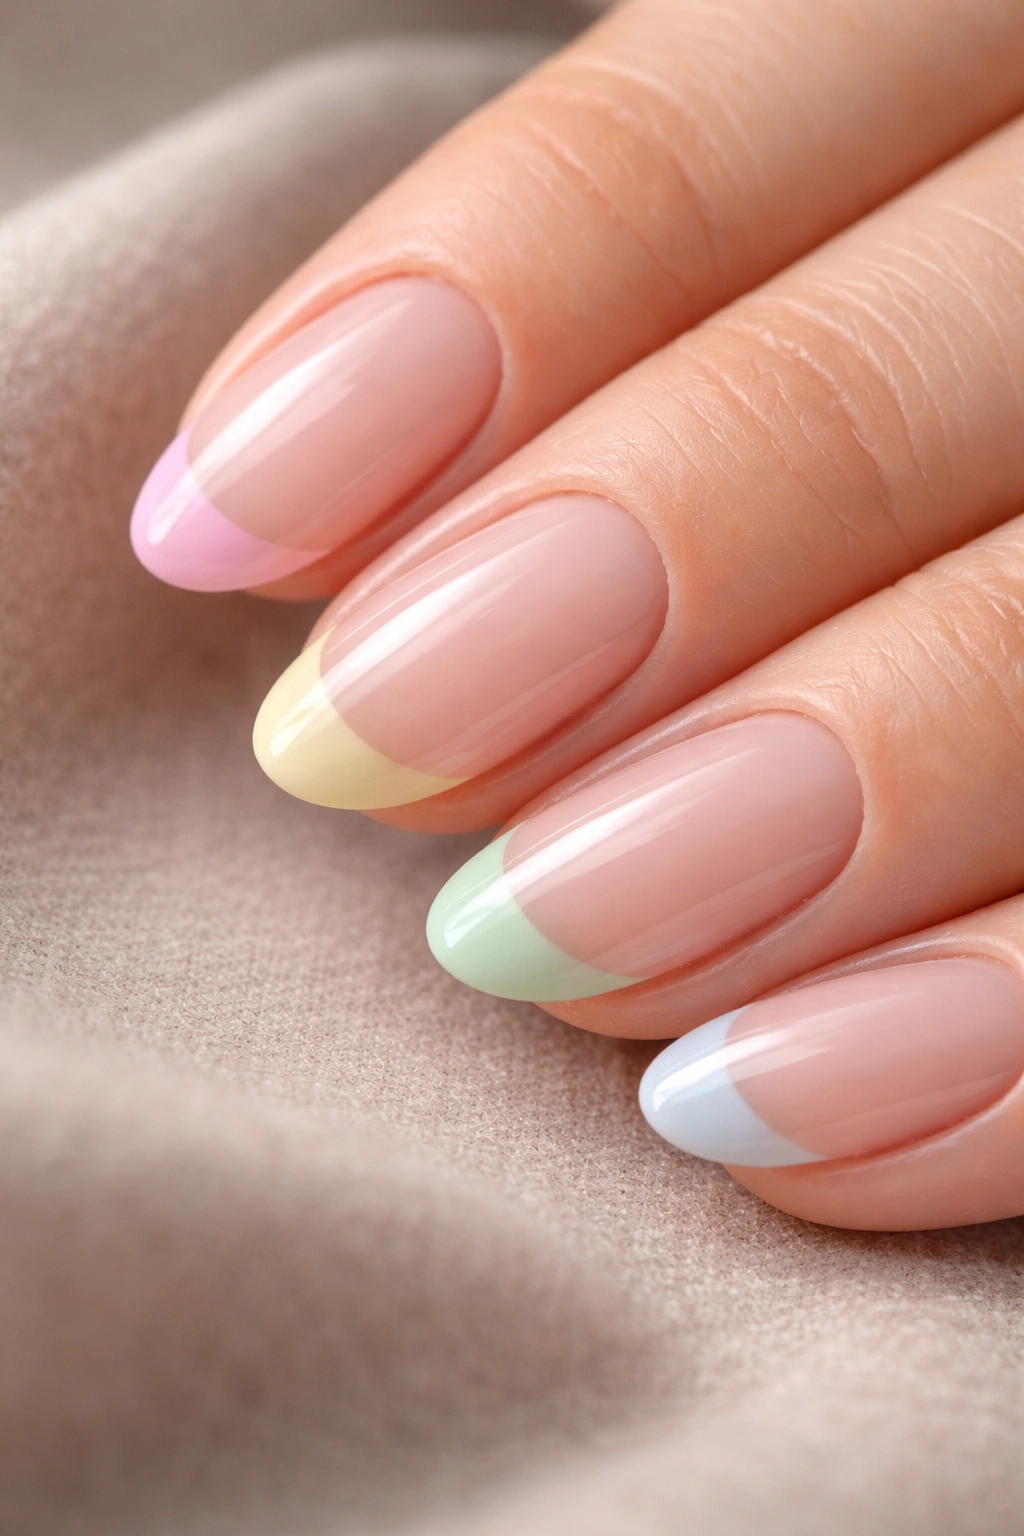
There’s something about a pastel French tip on short almond nails that just works every single time. Not flashy. Not demanding. Just quietly polished — the kind of look that makes your hands look put-together whether you’re typing at a desk, grabbing a coffee, or handling whatever the day throws at you.
Short almond nails sit in a sweet spot. Enough shape to elongate the finger without the vulnerability of long tips that snag on everything and snap at the worst moments. And when you layer that soft tapered form with a pastel tip, you get a delicate, almost watercolor-like effect that suits every setting. Boardroom, brunch, backyard — it doesn’t matter.
What separates the 13 looks below from a simple “pastel color list” is that each one brings something structurally different. A different finish. A different edge treatment. A different accent detail that quietly changes the whole mood. Some are three-step minimalist designs. Others have one decorative flourish that makes them feel custom without being complicated. If you’ve been sticking to the same white-tipped French for years, there’s something here that’ll push you pleasantly out of that habit.
Why Short Almond Nails Are the Ideal Canvas for French Tips
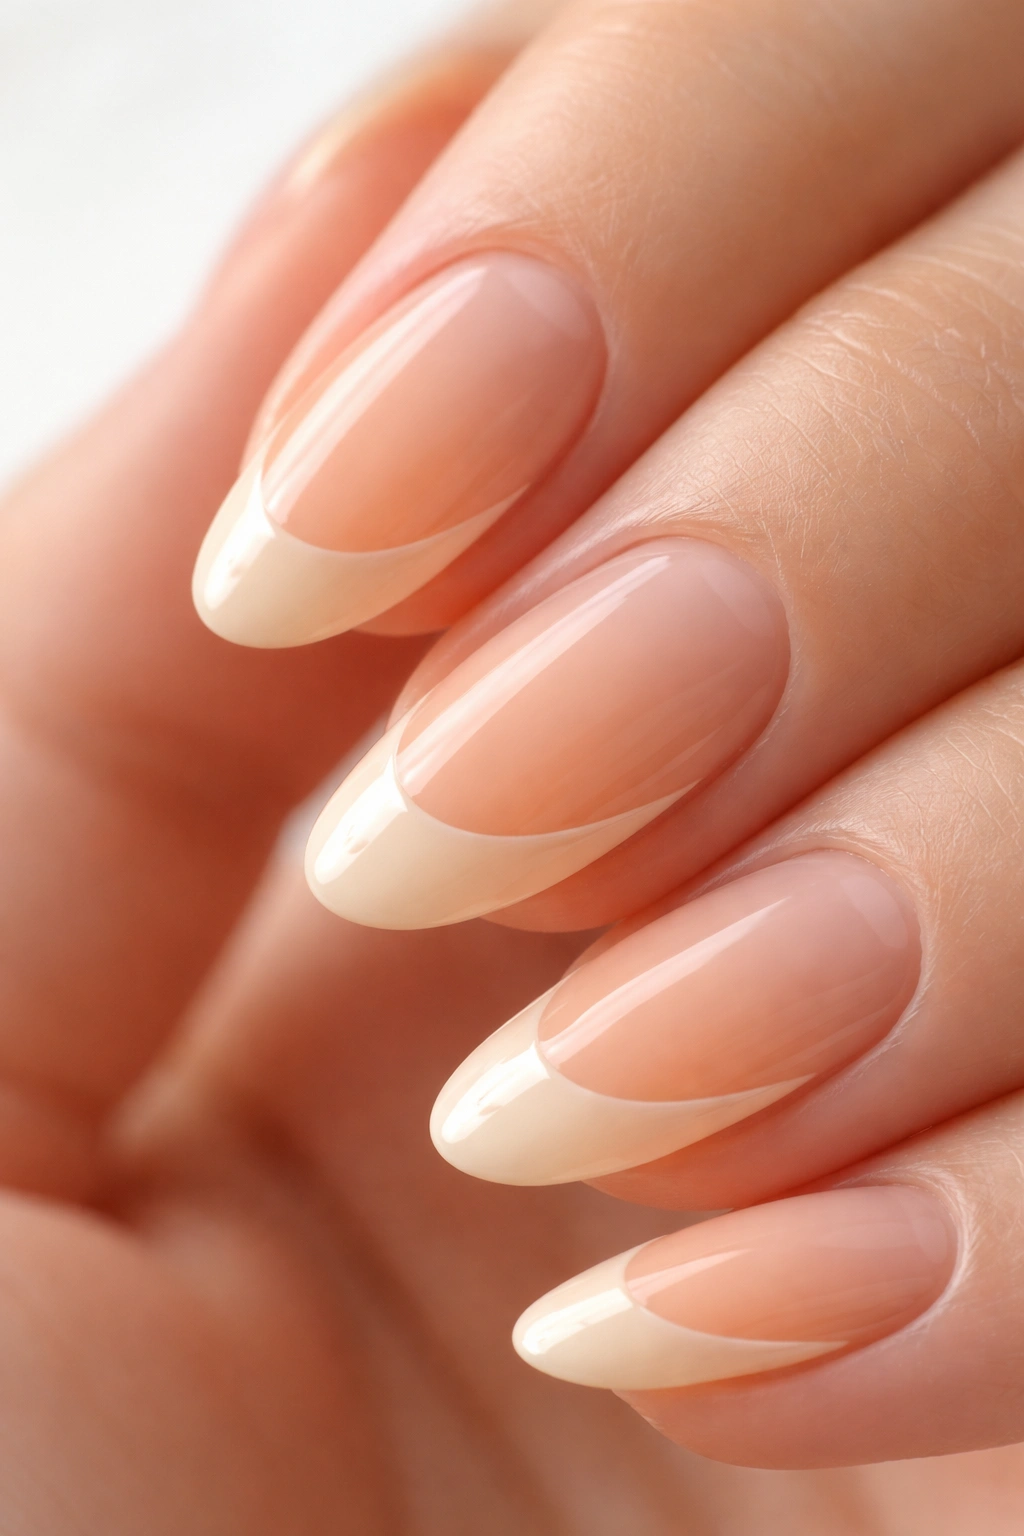
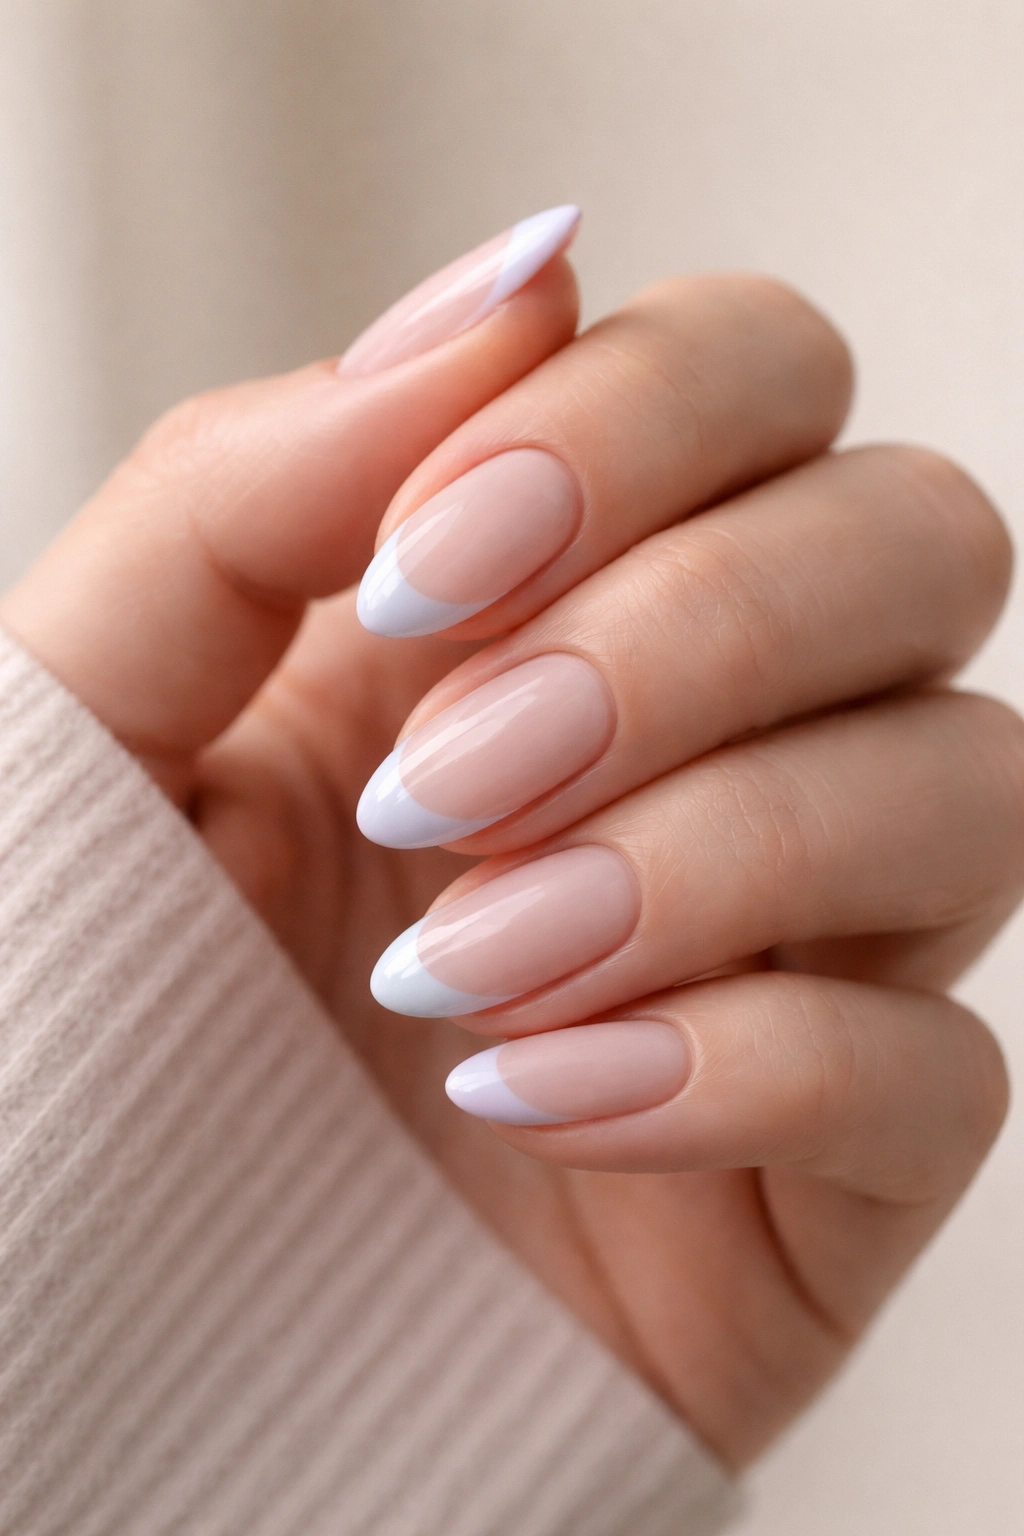
Short almond nails — typically filed to sit around 3 to 5mm past the fingertip — have a specific visual magic that longer shapes don’t quite replicate. The gentle taper draws the eye inward and makes the finger look narrower than it actually is. That elongating effect becomes even more pronounced when you place a pastel tip at the end, because the lighter color continues the illusion of length without the need for extensions.
What a lot of people underestimate is how the almond curve interacts with the French tip line. A square nail gives you a flat, horizontal tip. An oval gives you a gentle arc. But an almond nail gives you this graceful curved sweep that mirrors the finger’s natural contour — and when that arc is painted in dusty lilac or powder blue, it looks almost hand-drawn. Almost artistic, without any actual artistry required.
Short almond nails also have a structural advantage their longer counterparts don’t: they don’t snag, they don’t break mid-day, and they hold polish far better because there’s less leverage stress on the tip. For pastel colors specifically — which are often sheer and require 2 to 3 coats to look clean — that durability matters.
One thing worth knowing before you start: the shorter the nail, the thinner your French tip line should be. On a nail that’s only 4mm past the fingertip, a thick tip of 3mm or more looks clunky and actually shortens the appearance of the nail further. Aim for a tip roughly 1 to 1.5mm wide on short almond nails — barely there, just a whisper of color at the edge.
1. Soft Lavender Tips on a Sheer Nude Base
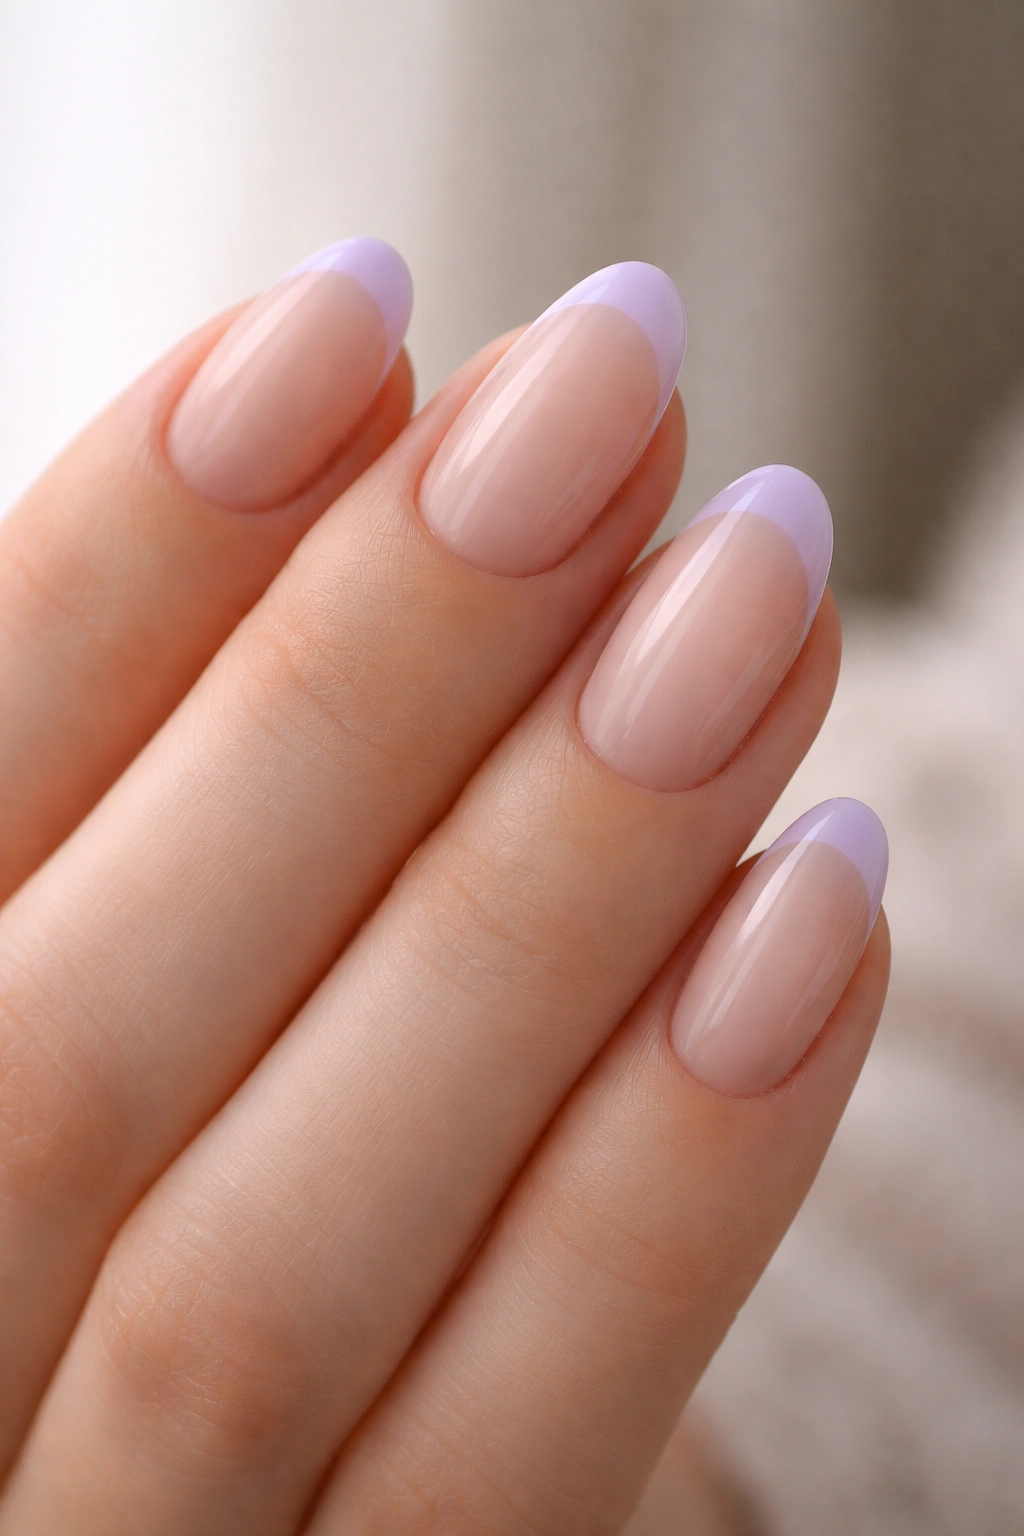
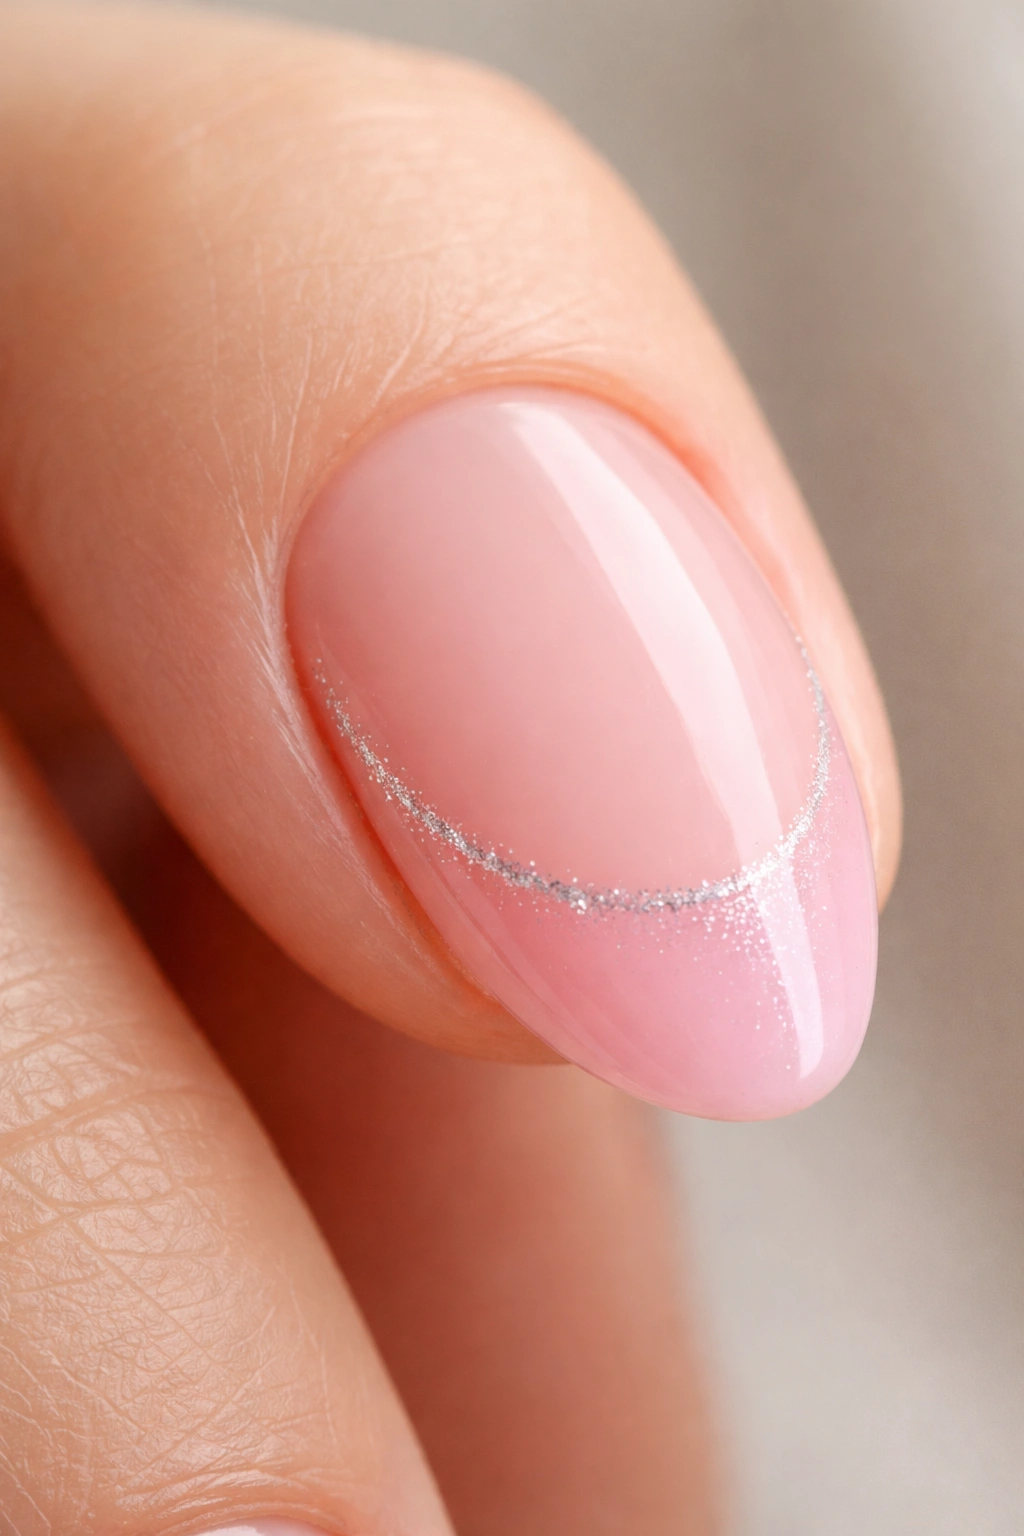
Lavender might be the most forgiving pastel in this whole list. It works across skin tones in a way that most pastels don’t — soft enough not to clash with deeper complexions, cool-toned enough to look crisp against fairer skin. On a short almond nail with a sheer nude base, a soft lavender tip reads almost like a shadow at the end of the nail. Barely-there, unmistakably intentional.
The sheer nude base is doing a lot of work here. You want a base that sits close to your natural nail color — not stark white, not peachy-beige, but something that lets the lavender tip float without hard contrast. Two coats of a sheer milky pink or natural buff creates that soft foundation. Let each coat dry fully before adding the lavender.
For the tip itself, a true soft lavender — not purple, not periwinkle — is what you’re after. Think dried hydrangeas. Some polishes labeled “lilac” lean blue; some “lavender” polishes lean pink. Hold the bottle to natural light before you commit, or swatch it on a nail wheel if you’re deciding at a salon.
A glossy top coat keeps the whole thing luminous — like the tip has a subtle backlight. Matte can work here, but it tends to flatten the lavender, nudging it toward gray. A high-shine finish is the better call for this specific combination.
One underrated finishing touch: a tiny drop of silver shimmer dusted only along the outermost millimeter of the lavender tip — not a full shimmer coat, just the very edge. It catches light at angles the polish alone wouldn’t reach. Completely optional. Worth trying once.
2. Baby Blue French Tips with a Thin White Outline
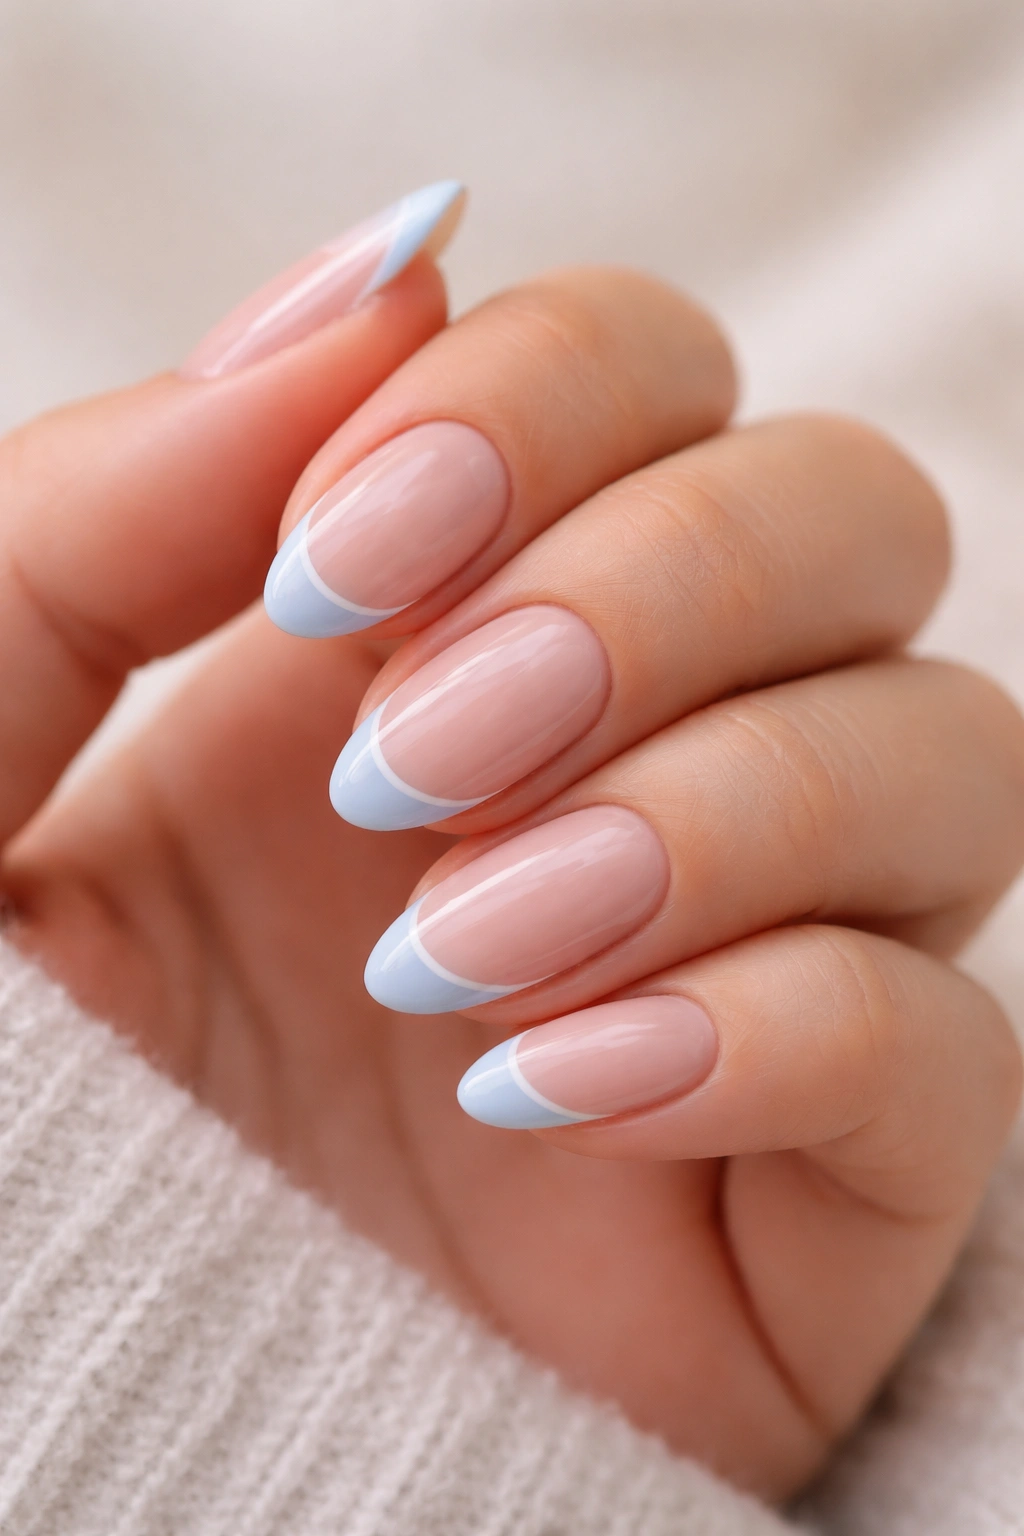
Here’s a design that takes the classic French tip and adds exactly one layer of detail — a hair-thin white outline drawn directly on top of the blue tip line, following its curve. That’s it. And somehow that single line makes the whole look feel finished in a way that a plain blue tip simply doesn’t.
How to Get the Outline Right
The white line needs a liner brush — the kind that’s 8 to 10mm long and only a few hairs wide. Nail art liner polishes work well because their thinner consistency is built for precise strokes. Load the brush lightly, press the tip to one corner of the arc, and sweep across in a single motion. Do not reload mid-stroke. Breaks in the line are nearly impossible to fix cleanly once they’re there.
Getting the Blue Right
Baby blue covers a wide range — from ice (almost white) to sky (noticeably saturated). For this design, you want the lighter end: a blue that reads almost gray in low light and clearly blue in natural sun. The white outline pops much more against a soft blue than a saturated one.
- Apply the blue tip in two thin passes rather than one thick stroke
- Let the first coat go slightly tacky — about 60 seconds — before the second
- Clean up the curved edge with a thin brush dipped in acetone before the outline step
- Do the white outline before your top coat so it seals flat under the gloss
The finished nail is clean, graphic, and lighter than it sounds in description. On short almond nails, the slight curve of the tip makes the white outline arc upward like a tiny crescent.
3. Pale Mint Tips with a Matte Finish

Mint is the most underused pastel for French tips. Everyone reaches for pink, lavender, or blue — but mint on a nude almond nail has this fresh, slightly unexpected quality that people actually notice. And matte mint? That combination feels genuinely different from anything you see repeatedly.
Matte finishes change a pastel completely. A glossy pale mint looks soft and pretty. A matte pale mint looks architectural. Deliberate. The color shifts from pleasant to interesting just by swapping the finish. The key is using a proper dedicated matte top coat rather than a regular gloss that’s simply left to dry — a true matte finish coat creates that chalky, velvety surface that makes the color richer, not washed out.
The base for this design should stay cool-toned. A milky white or light cream works better than a true nude here, because the green undertone in mint can read slightly yellow against warm skin without enough contrast underneath. Two coats of a cool-toned sheer white, then two thin passes of mint at the tip.
One practical note: matte top coats wear faster than gloss. They show minor nicks more readily. Reapply a thin layer of matte top coat every two days to keep the chalky finish looking intentional — or embrace the slight softening that happens around day three or four. It shifts toward a satin finish that’s honestly just as good.
4. Blush Pink Tips on a Milky White Base
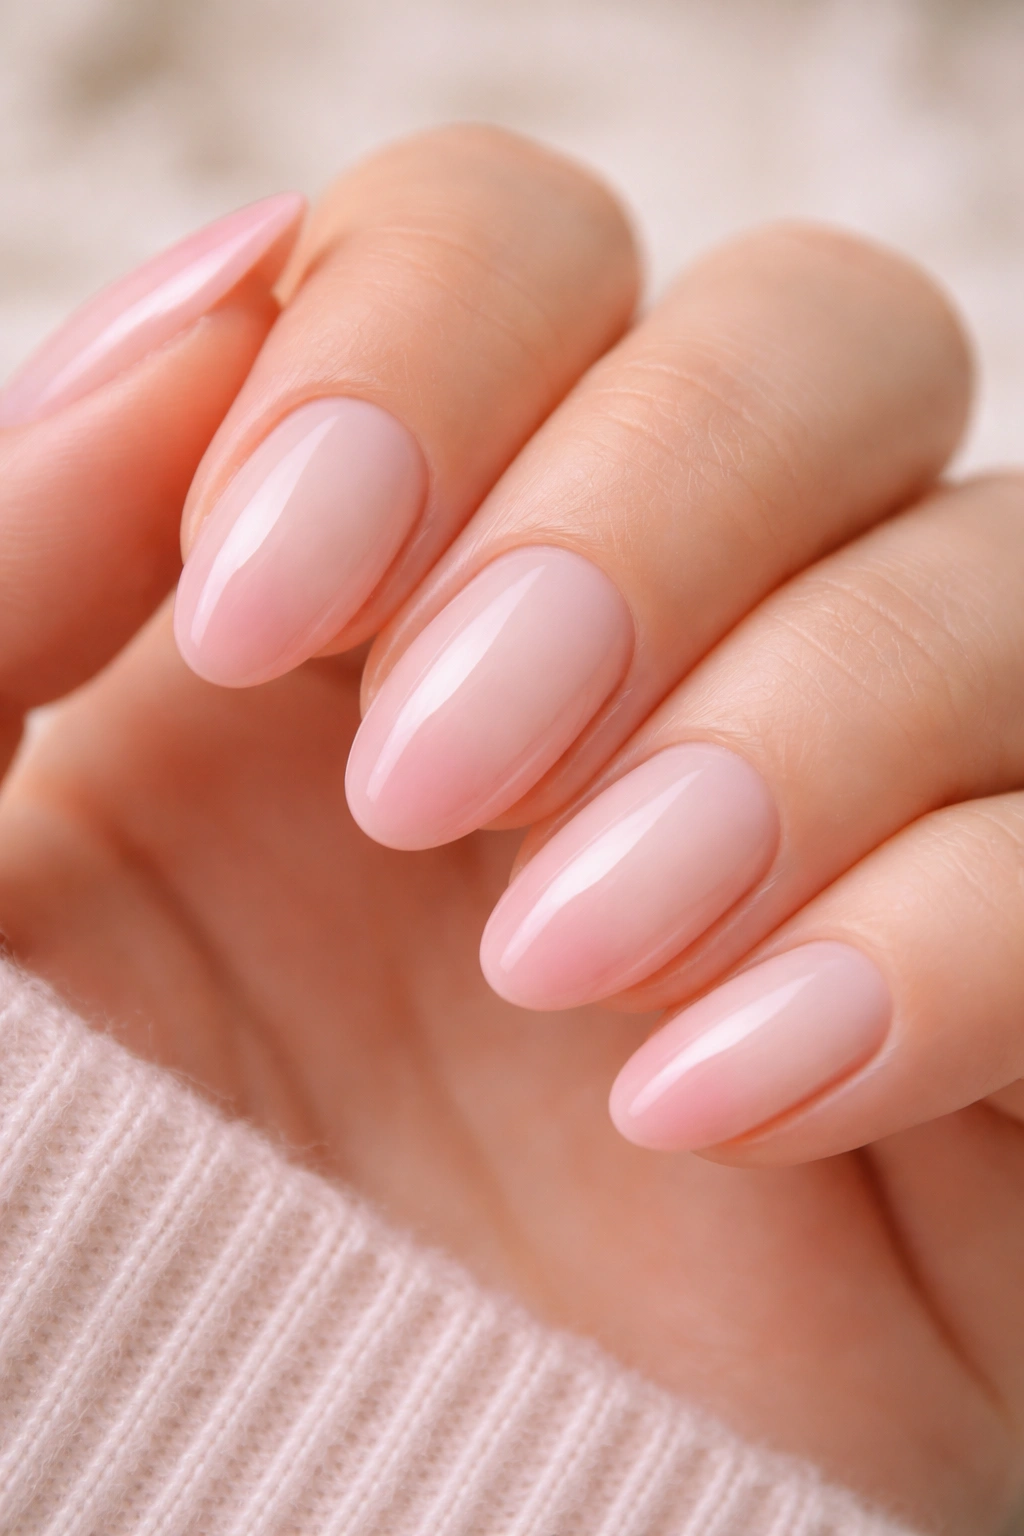
You might wonder what separates “blush pink French tips” from the standard pink French tip everyone already knows. The difference is almost entirely in the base. A milky white base — think fresh mozzarella, not stark printer paper — makes the blush tip look softer and more diffused, like the color is washing in gradually rather than sitting on top. That gradient-without-gradient effect is what makes this specific combination work so well on short nails.
Blush pink covers a wide spectrum, so be precise about which end you want. Cool blush (pink with slight gray or mauve) leans sophisticated and works better against milky or off-white bases. Warm blush (pink with peach or beige) works better against nude or natural-tinted bases. On a milky white base specifically, a cool blush pink creates the most pleasing contrast.
Building the Milky Base
The milky white base requires two to three coats of a sheer, slightly opaque white — not white-white, but that translucent quality you get from jelly polishes or sheer nudes. This creates a lit-from-within foundation that makes the blush tip read as part of the nail rather than painted onto it.
Tip Width and Shape
On short almond nails, the blush tip should curve gently to follow the almond point — not a straight horizontal line, but a slight arc that mirrors the nail’s shape. Keep the tip to about 1.5mm at its widest point. Any thicker and the design starts reading as full-coverage nail rather than a French tip.
A high-shine top coat is non-negotiable here. The milky base and soft pink tip need that gloss to look intentional. Apply it generously and let it self-level before it dries.
5. Buttery Yellow Tips with a Fine Gold Accent Line
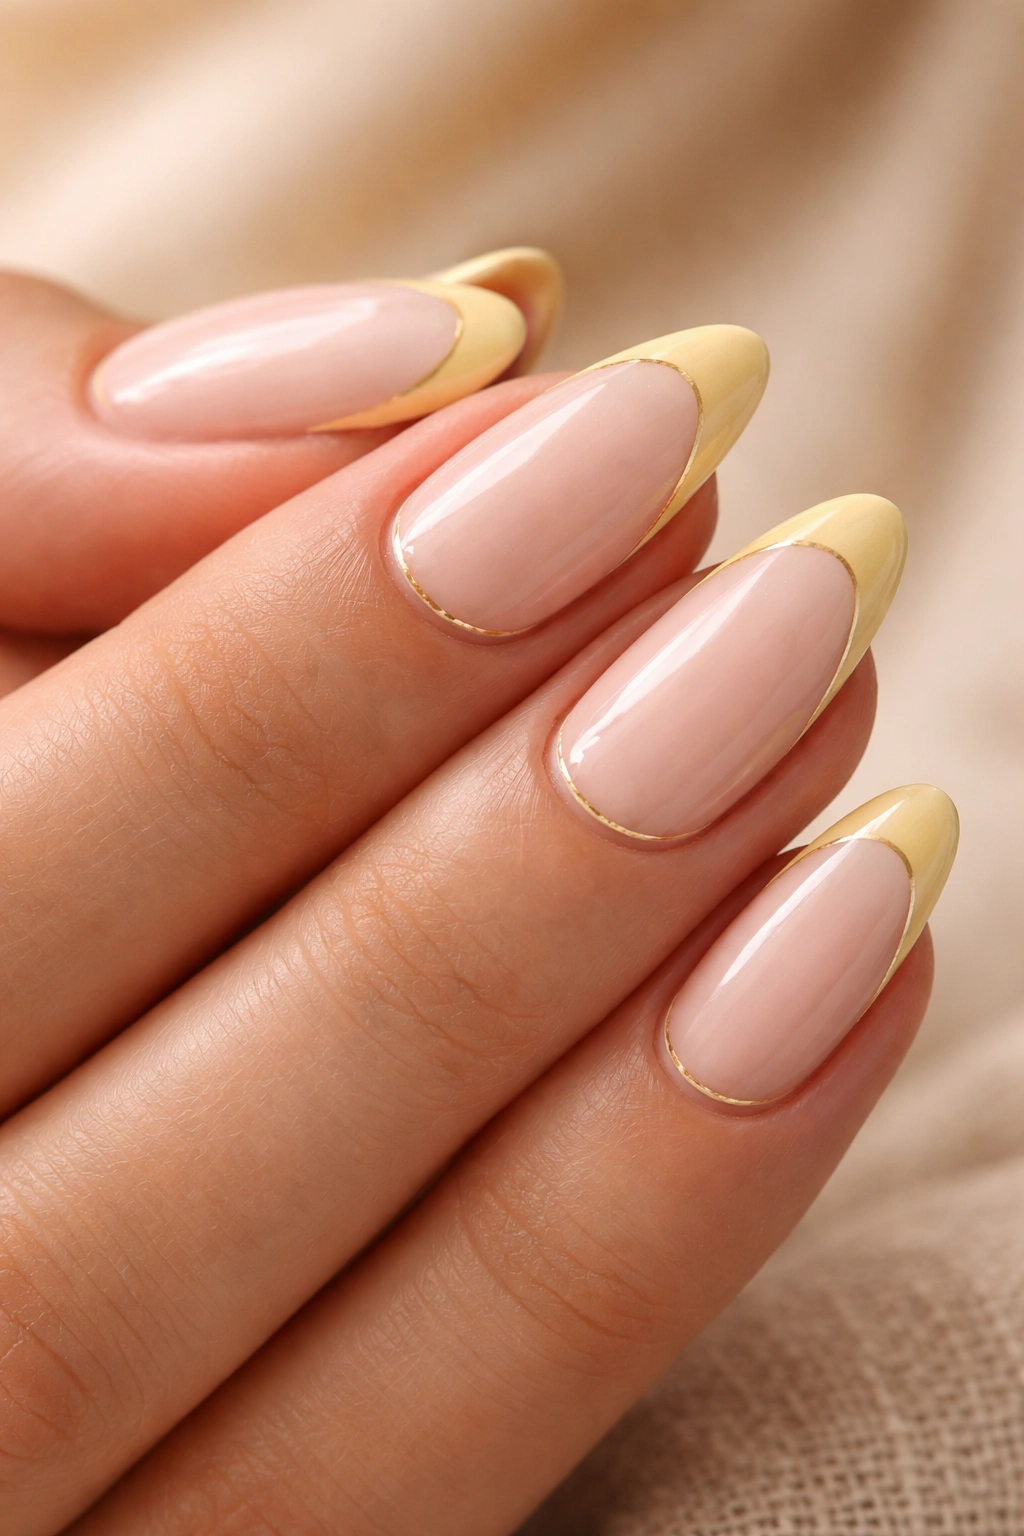
Most people don’t associate yellow with French tips. That’s exactly why this works. Buttery yellow — not saturated, not neon, but the color of white chocolate or unsalted butter — is a pastel that barely reads as yellow in most lighting. It hovers closer to cream. Add a single 0.5mm gold accent line right at the base of the tip, and suddenly the design has a detail that elevates it above every other French tip in the room.
Unlike metallic tips or full gold foil designs, the gold line here is an accent only. A single stroke of gold liner polish drawn along the curve where the yellow tip meets the base — not over the tip, not through it, just at the seam. It takes about 30 seconds per nail once you have the liner brush loaded, and the payoff is disproportionate to that effort.
What makes this different from other accent-line designs: yellow is warm, and gold is warm, and both together against a sheer or nude base form a cohesive warmth that feels like intentional color theory rather than coincidence.
This is a particularly strong choice for warmer and olive skin tones where some cool pastels — lavender, mint, baby blue — can look slightly washed. Yellow and gold are both warm-spectrum colors that complement golden and yellow undertones naturally. Keep the base color neutral or slightly warm — a sheer ivory or light sand works well. Avoid a pink-tinted base, which can conflict with the buttery tip.
6. Lilac Tips with Pressed Flower Accents
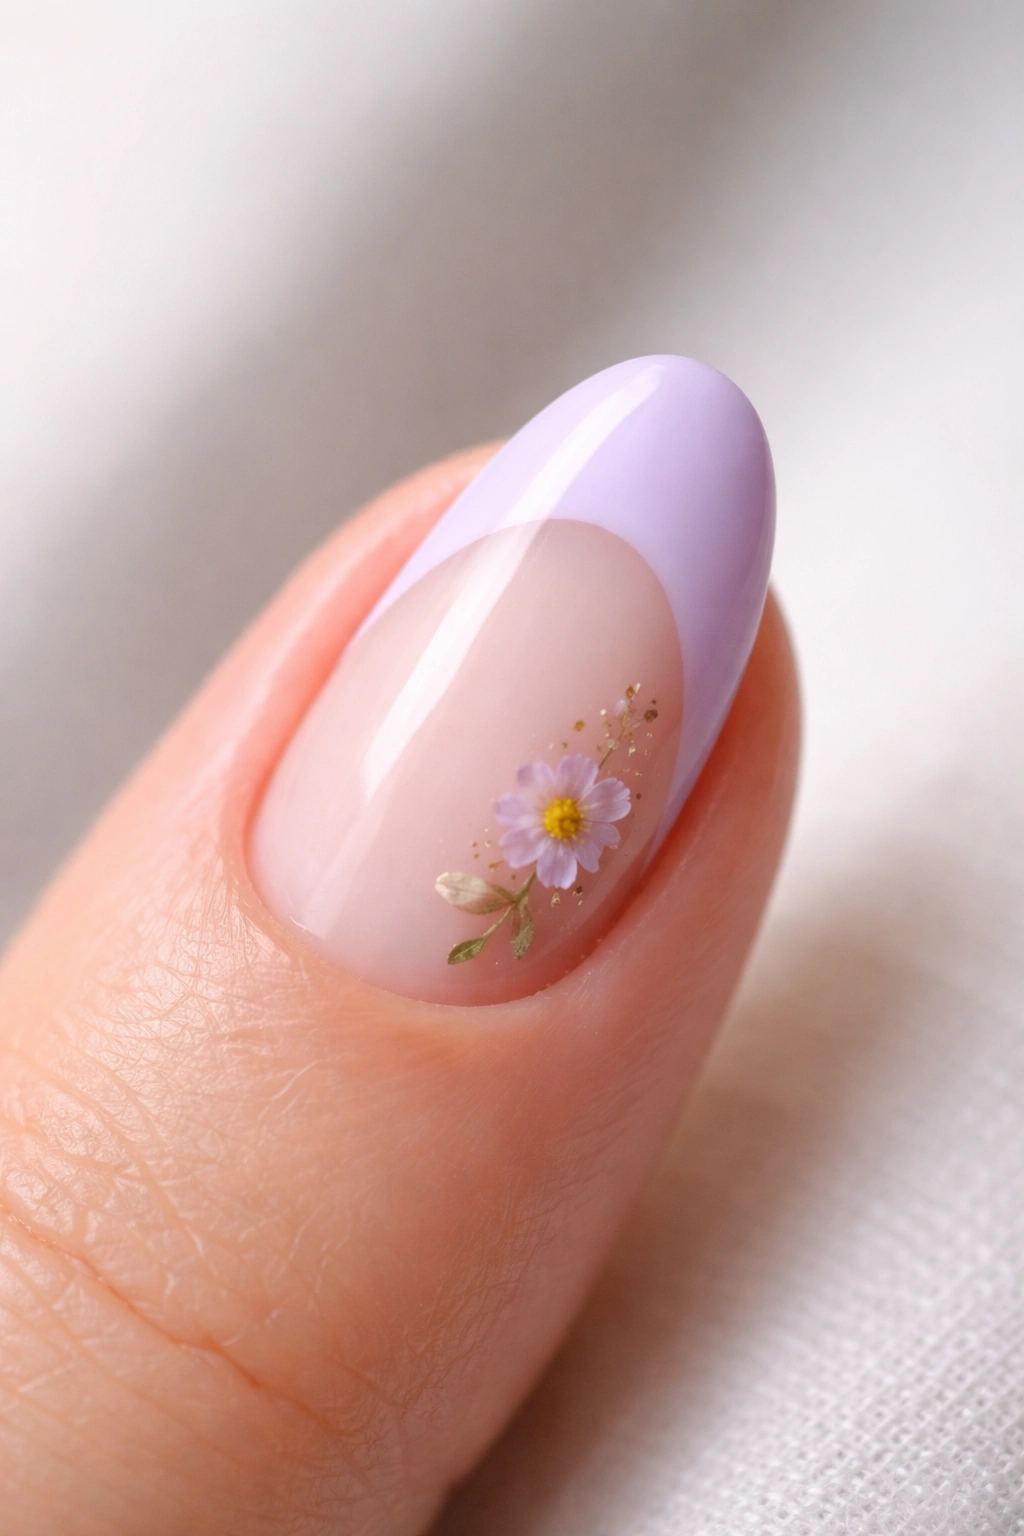
A single pressed flower on the nail — placed at the base of the lilac tip, or right in the corner where the tip begins — takes a standard French design and makes it look custom. Like something off a specialty nail artist’s booking page, but achievable with a $4 nail foil sticker or actual pressed flowers sealed under top coat.
The scenario: you want something that still reads as “French nails” but has one element that makes someone ask what salon you went to. This is that design.
What Pressed Flower Options Actually Look Like
Two routes exist here. Actual pressed flowers — dried florals sold in nail supply shops in small transparent packets — have a three-dimensional quality that adds visible texture under the top coat. Nail foil stickers printed with florals are flatter and easier to work with but look slightly less organic. Both work.
- Place the flower at the junction of the tip and base, not centered on the nail
- Use a dab of top coat under the flower as adhesive before pressing it down
- Seal with two generous coats of top coat over the flower for a smooth, glass-like finish
- The ring finger accent nail approach exists for a reason — the nail you type with most will wear faster
Getting the Lilac Right for This Design
The lilac tip for this look should lean purple rather than pink — something that complements the usually yellow and warm tones in pressed flowers without competing with them. A dusty, slightly desaturated lilac works better than a bright or blue-leaning one. Pure bright lilac alongside orange and yellow florals looks competitive; dusty lilac lets the flowers read as the focal point.
7. Peachy Cream Tips with a Negative Space Gap
Negative space nail design sounds complicated. It isn’t. The concept here is leaving a hair-thin unpolished gap between the natural nail base and the start of the French tip — so instead of the tip appearing to grow seamlessly out of the base, there’s a tiny clear line separating them. About 0.5 to 1mm. That gap creates a graphic, modern edge that makes the design feel intentionally planned rather than standard.
Peachy cream is the right color for this specific technique because its warmth keeps the look soft even with the structural negative space element. A cooler color — blue, lavender, mint — would make the gap feel sharper and more editorial. The peachy cream keeps it wearable, friendly, thoroughly every-day.
The base for this design should be completely bare or covered in only a clear base coat — the negative space is meant to show the actual nail through that gap, so any base color defeats the point. Apply your clear base coat, let it dry fully, then apply two thin coats of the peachy cream tip starting about 1mm above where you’d normally begin a French tip. That deliberate offset is the gap.
The practical challenge: keeping the gap perfectly even across all ten nails. Striping tape works well here — press the tape horizontally at the line where you want the gap to start, apply the tip color above it, wait 60 seconds, then remove the tape carefully. The result is a crisp, clean gap line that looks like a decision, not an accident.
8. Dusty Rose Tips on a Translucent Pink Base
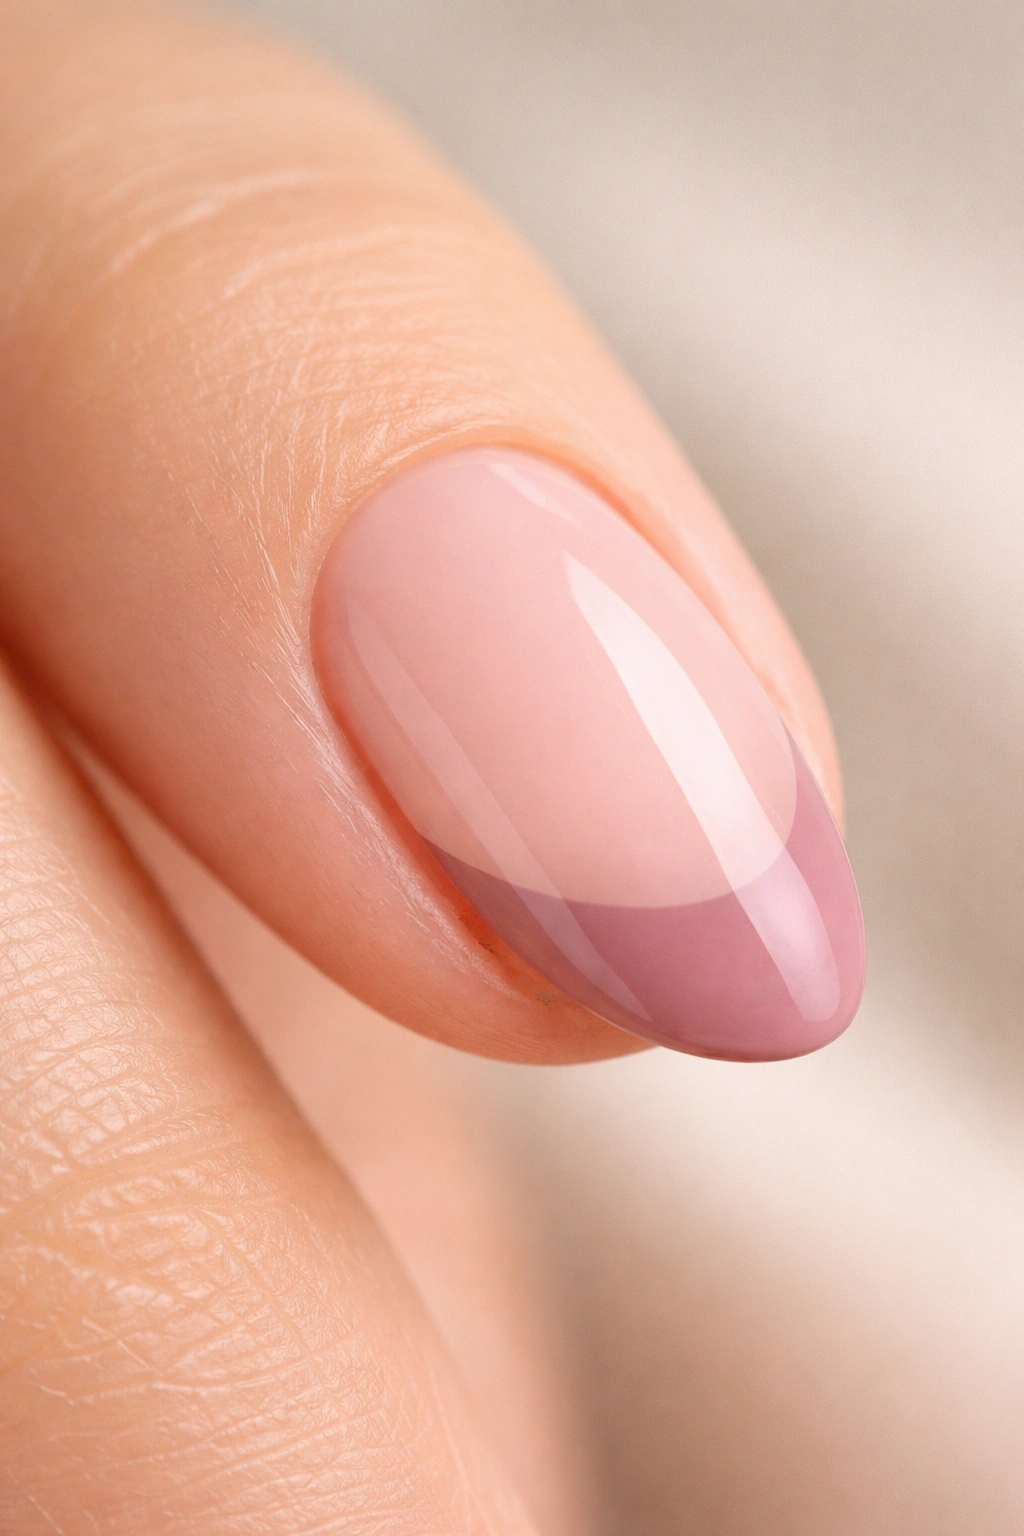
Dusty rose is not baby pink. That distinction matters. Baby pink is light and airy, a whitened pink. Dusty rose is mauve-tinged, slightly gray-toned, muted in a way that reads closer to an old photograph than a spring flower. On a short almond nail with a translucent pink base — not milky, but genuinely transparent — a dusty rose tip creates a tonal look. Everything within the same pink family, but different enough in depth to read as a deliberate two-tone design.
Tonal French tips have built a loyal following among nail enthusiasts for good reason. The monochromatic feel makes the look wearable everywhere without the stark contrast of a classic white French tip. It doesn’t demand attention; it rewards a closer look.
The translucent pink base matters enormously here. A sheer pink jelly polish — two to three coats — gives you that see-through candy glass finish. You should be able to faintly see the nail’s natural color beneath it. That transparency is what makes the dusty rose tip look like it’s part of the nail rather than applied to it.
Gloss is the right finish for this design. The combination of translucent base and muted rose tip is delicate, and a high-gloss top coat keeps it feeling precious rather than flat. If you want to extend the life between touch-ups, apply a fresh layer of top coat every 48 hours — it maintains the depth of gloss and protects those sheer layers from minor chips.
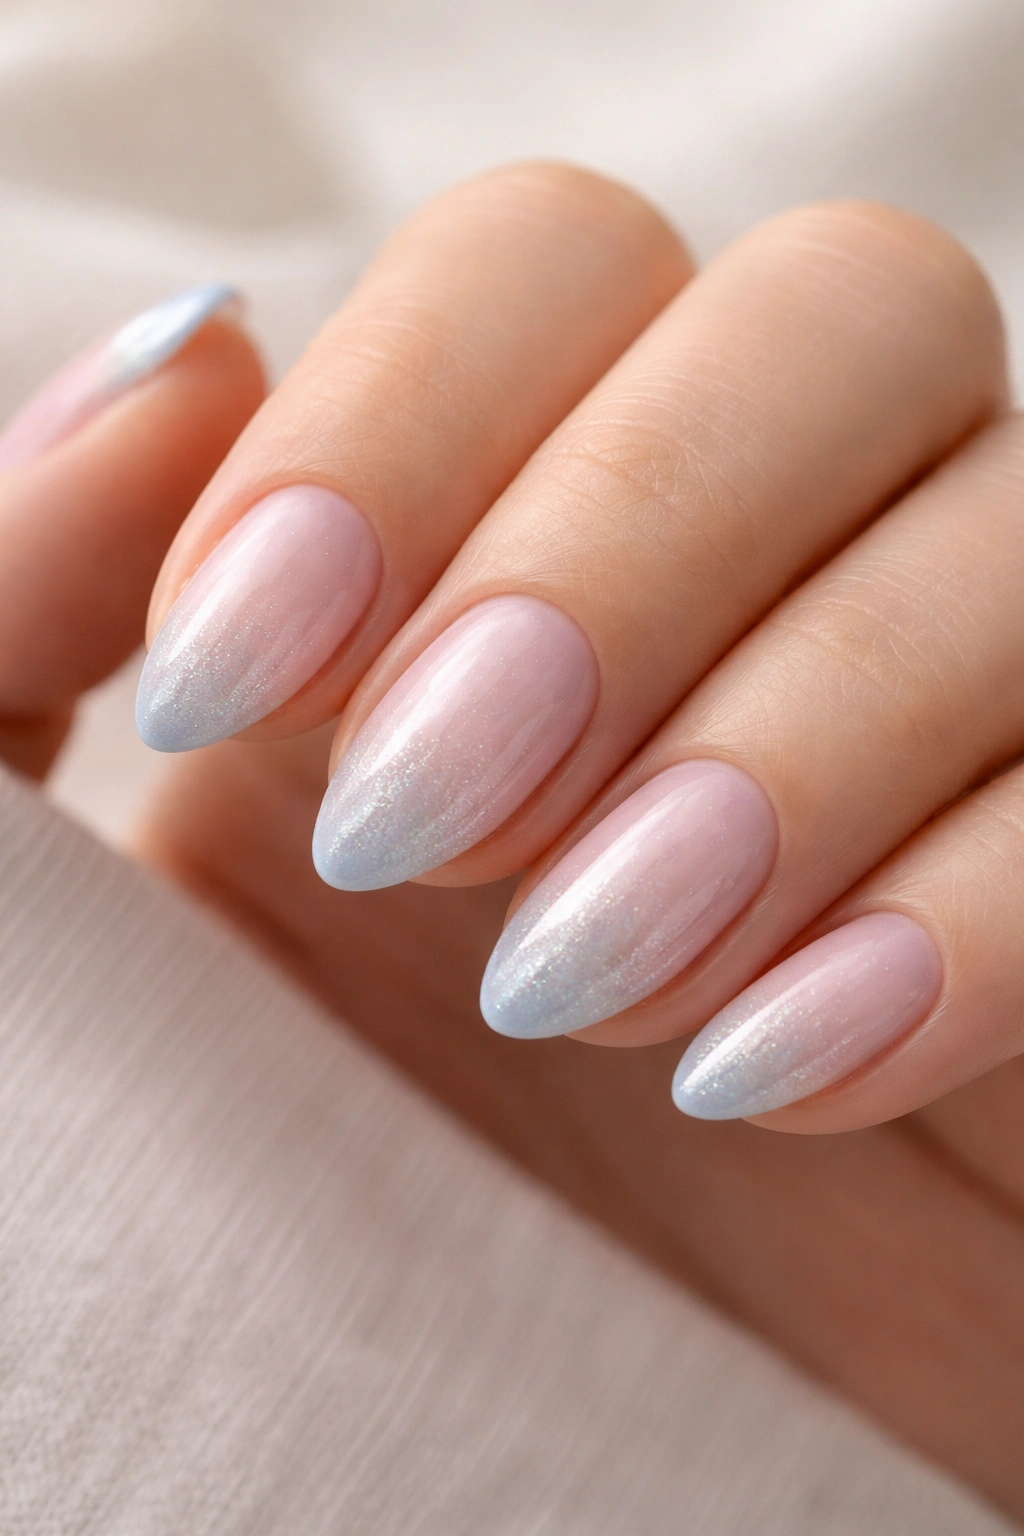
9. Powder Blue Tips with Pearl Shimmer
Some pastels have a shimmer version that’s clearly better than the cream version. Powder blue is one of them.
A cream powder blue tip is fine — soft, pretty, simple. A powder blue tip with a pearl shimmer finish is something else entirely. It catches light differently at every angle, shifting from silver to sky blue to almost white depending on how your hand moves. On the curve of a short almond nail, that shimmer becomes even more dynamic.
Choosing the Right Shimmer Intensity
There’s a meaningful difference between pearl shimmer and glitter shimmer. Pearl shimmer polishes contain fine mica or duochrome particles that reflect light without visible sparkle — the color shifts, but you don’t see individual glitter pieces. That’s what works here. A chunky glitter in powder blue looks completely different — more like a party nail, less like a refined French tip.
Look for polishes described as “duochrome,” “holographic shimmer,” or “pearl finish” in powder blue or sky blue tones. One coat of shimmer over a cream powder blue base gives you more control than shimmer applied alone — the cream underneath enriches the color and prevents patchiness.
Base Options That Work
- A sheer white base keeps things light and airy
- A clear base lets the shimmer carry all the color weight
- A white gel base gives the cleanest backdrop for the shimmer tip
The finished nail has a polished, lacquered quality. People will ask if it’s chrome — it isn’t, but the pearl shimmer mimics that effect at a fraction of the effort.
One tip: seal the shimmer tip with a stroke of top coat along the tip edge specifically before applying your full top coat. Shimmer particles can lift or streak if a top coat is brushed directly over them too aggressively. Cap the edge first, let it set 30 seconds, then apply your full top coat in gentle strokes.
10. Sage Green Tips with a Minimalist White Edge

Why does sage green work as a French tip when most greens don’t? The gray content. Sage isn’t a pure green — it’s green with enough gray mixed in that it reads as neutral in many lighting conditions. On a nude or natural base, a sage green tip looks botanical without being loud. The minimalist white edge — a thin white stroke right along the curved tip line — grounds the design and keeps it from reading as seasonal.
The white edge is painted over the sage tip once it’s fully dry, using a liner brush loaded with white nail art polish. One sweep along the arc without reloading mid-way. It sits on top of the sage, not under it, creating a clean layered effect. That order matters: sage first, dry, white edge second.
Sage green and white together hit a specific aesthetic register that’s clean and considered. It pairs with natural textures, warm neutrals, anything linen-colored. The nail design equivalent of a well-organized kitchen counter — nothing excessive, everything placed with purpose.
This design suits every skin tone but reads differently depending on undertone. On warmer skin, the gray in sage leans slightly yellow-green and feels earthy. On cooler skin, the gray reads more clearly and the design looks more graphic. Neither reading is wrong. Just different moods from the same polish.
Keep the base color understated — a light beige or barely-there nude lets the sage tip do all the work.
11. Soft Coral Tips on a Warm Beige Base
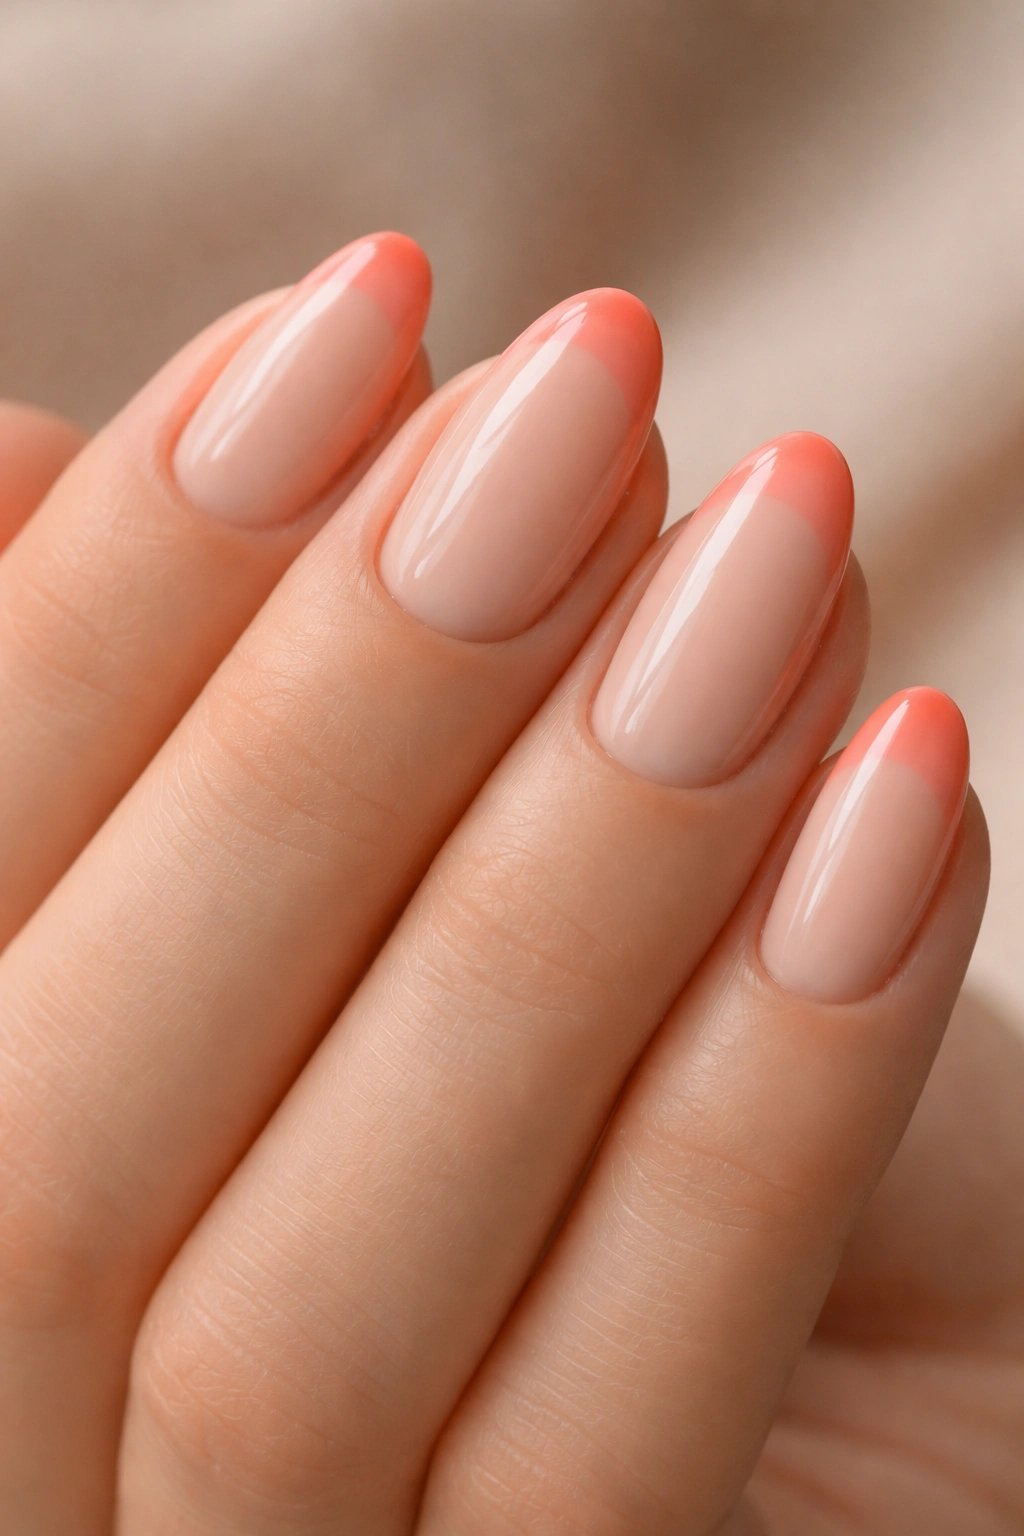
Soft coral walks the line between pink and orange — and that makes it one of the most wearable pastels for skin tones that find pure pink too cool and pure peach too warm. Coral lives right in the middle. Against a warm beige base (the color of latte foam, if you need a mental image), it creates a sun-drenched warmth that looks like the combination was chosen specifically for your complexion.
The contrast in this design is subtle by design. The coral tip and beige base are so close in temperature that the French tip effect is something people notice only when they look closely. That subtlety makes this one of the most practical looks on this list. It works in professional settings where louder pastels might distract. It holds up for 7 to 10 days without a chip looking out of place, because the warm color tones blend at the edges naturally.
For the base, aim for a sheer or semi-sheer warm beige — not an opaque tan, but something transparent enough that the nail’s own warmth comes through. Two coats is usually enough. The coral tip should be slightly more saturated than what you’d call classic “pastel” — a genuinely pale coral can disappear against a warm beige base. Go one or two shades deeper than your instinct says, and the contrast will be exactly right.
This one touches up beautifully, too. A small dab of coral and a fresh coat of top coat on a chipped nail is nearly invisible against the warm base — which is a practical advantage worth considering if you’re hard on your nails.
12. Cotton Candy Pink Tips with a Micro Glitter Seam
Picture this: you’ve asked for a standard French tip, and the nail technician suggests adding just a thin line of micro glitter along the base of the tip. You’re not sure — it sounds like it might be too much. You say yes anyway. Three days later, you’ve gotten more compliments on those nails than on anything else you’ve worn in months.
That’s this design.
Micro glitter — not chunky, not holographic, but fine iridescent or silver micro shimmer — applied as a 1mm seam at the junction between the cotton candy pink tip and the base coat. The glitter seam catches light from angles the tip alone wouldn’t. It creates a sense of depth that turns a pretty but simple design into something genuinely eye-catching without crossing into party-nail territory.
The cotton candy pink for the tip should be a clear, bright light pink — not dusty, not muted, but the unambiguous cheerful pink the name suggests. This is one of the few designs in this list that benefits from a slightly more saturated pastel rather than a very pale one, because the micro glitter seam needs a visible tip to anchor to.
Application: use a liner brush loaded with a loose glitter/gel mixture, or choose a polish formulated as a micro glitter. Press the glitter in gently with a clean brush after applying rather than just painting it on — pressing creates better adhesion than brushing. Top coat with a strong gel top coat or a high-build regular top coat to lock everything flat.
This design works for events. It’s festive without being formal — the kind of nail that works at a birthday dinner and still looks reasonable the Monday after.
13. Pale Periwinkle Tips with Scattered Dot Detail
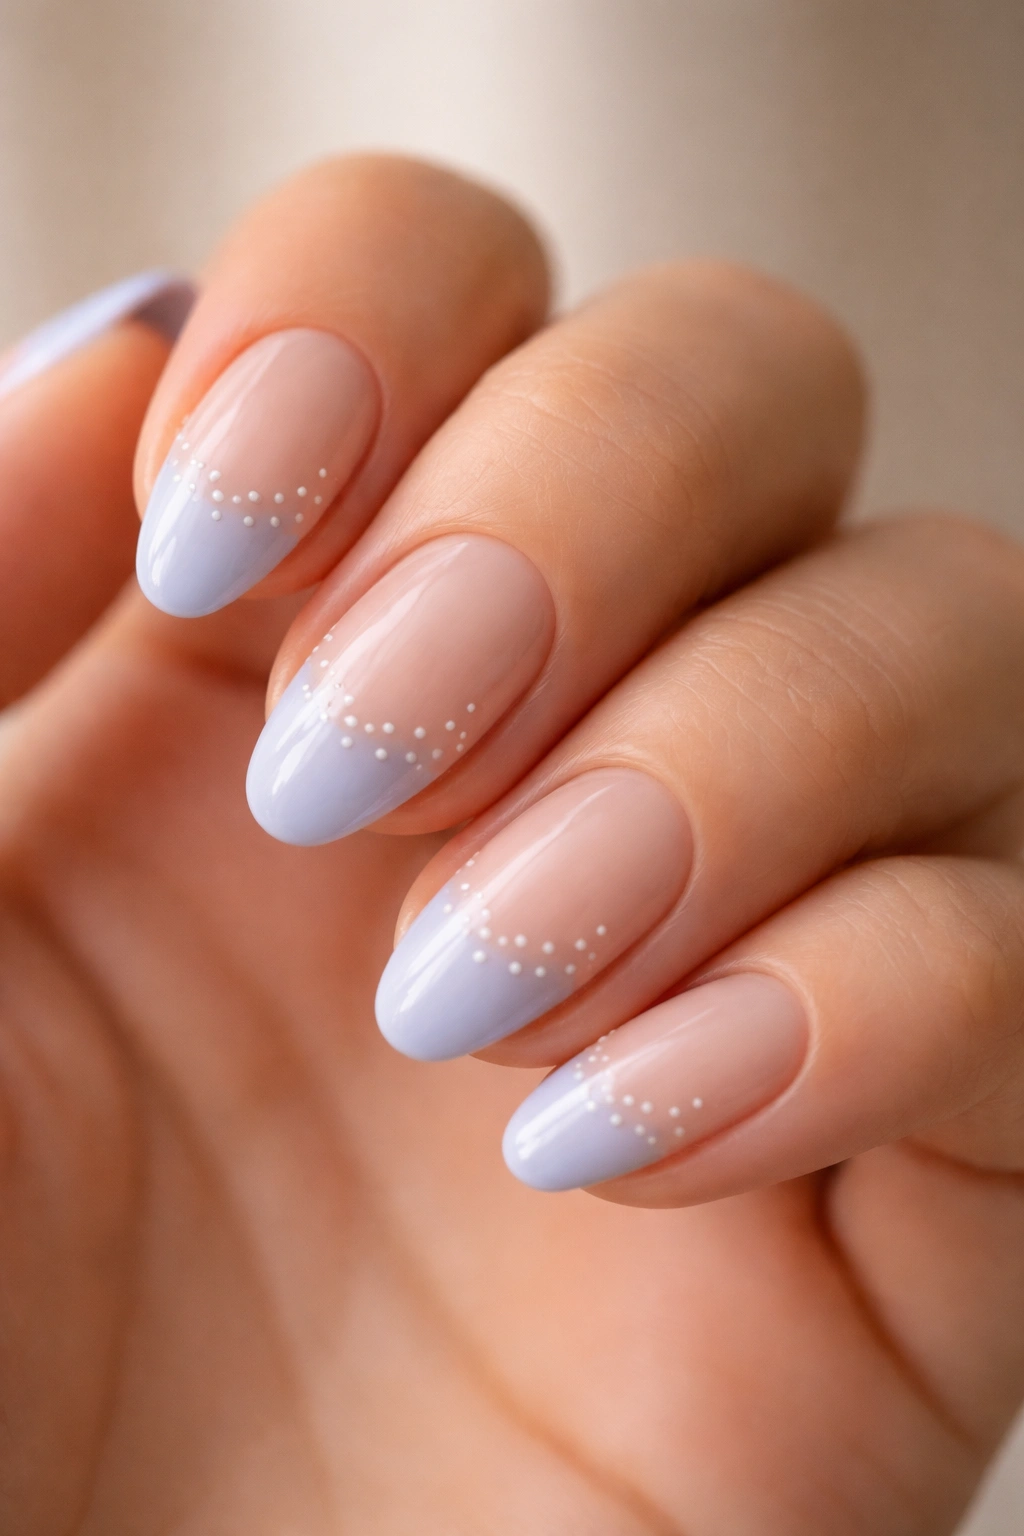
Periwinkle is the color that can’t decide whether it’s blue or purple — and that indecision is its whole appeal. Pale periwinkle sits in this hazy, slightly dreamlike space between lavender and sky blue, and as a French tip on a short almond nail, it creates a look that’s softer and more interesting than either pure color would be on its own.
The scattered dot detail is what makes this design worth calling out separately from the other pastel tip entries. Two or three tiny dots — no bigger than a ballpoint pen tip — placed on the base of the nail in white or in the same periwinkle as the tip. The dots can follow a loose arc near the cuticle or scatter randomly across the lower third of the nail. They don’t need to match exactly across all ten nails; a little variation between fingers makes the design look hand-done rather than templated.
A dotting tool (a metal tool with a ball at one end, available for under $5 at any beauty supply store) makes these dots perfectly round in two seconds per dot. The blunt end of a bobby pin works just as well. Load it with polish, press once to the nail surface, and lift straight up. Don’t drag.
This design works with both gel and regular polish. With regular polish, apply the dots on top of your dried base coat before your top coat — they’ll seal flat and smooth. With gel, cure the base, apply the dots, cure again, then apply the periwinkle tip.
The end result is soft, a little whimsical, and completely wearable. Not over-styled, not childish — just a French tip with enough personality to hold your attention.
How to Make Pastel French Tips Last on Short Almond Nails
Pastels chip faster than dark colors. That’s just physics, not bad luck. Lighter pigments require a more translucent base in the formula, which means less solid coverage per coat and, in many cases, less adhesion. On short almond nails, the tip is the most vulnerable spot because it’s also the contact point for almost everything you touch throughout the day.
The single most effective thing you can do is cap the free edge. Before and after every color coat, swipe your brush along the thin edge of the nail — the part that makes contact with surfaces. Do this with your base coat, your color, and your top coat. This seals that exposed edge and prevents the peeling that typically starts at the tip and travels down. It takes 10 extra seconds per nail. Not glamorous advice, but nothing extends a manicure more reliably.
Base coat matters more than most people give it credit for. A sticky, high-adhesion base coat grips the nail and gives the pastel layers something to hold onto. Rubber base coats — popular in gel manicures and now available in regular polish form — have a particularly strong grip and are worth seeking out if you tend to chip within three days.
For regular polish, wait at least 2 full hours before washing your hands vigorously or doing dishes after a manicure. Polish looks dry to the touch in about 15 minutes, but it takes several hours to fully harden. Hot water and friction on fresh polish is the number one reason manicures chip on day one.
If you’re working with gel, cure each layer thoroughly and don’t skip the flash cure between your base and color coats. Under-cured gel is the main culprit behind French tips that lift at the edges within three days, long before the color itself shows any wear.
One last thing worth mentioning: cuticle oil, applied daily. One drop per nail, morning and night. It seems unrelated to tip longevity, but keeping the nail plate flexible with regular oil application reduces the micro-cracking and brittleness that causes chips along the tip edge. It also makes the finished nail look healthier without any additional effort. These are small habits — but on short almond nails where the French tip line is compact and precise, every small habit adds up.
Final Thoughts
Short almond nails with pastel French tips are a nail design category that rewards restraint. The looks that actually last — the ones you’ll want to wear for a full week and photograph before you remove them — are almost always the ones that get the small details right rather than the ones that pile on the most elements.
The 13 designs here cover a wide enough range that there’s something for every mood, every skill level, and every occasion. Some are achievable with a steady hand and a liner brush. Others take patience and the right tool. But none of them require a professional appointment to pull off at home, and that accessibility is part of what makes short almond pastel French tips one of the most reliably satisfying nail looks to do yourself.
If you’re new to French tips on almond nails, start with the blush pink on milky white base or the dusty rose tonal look — both are forgiving, low-contrast, and genuinely hard to mess up. Once you’re comfortable with those, the accent-line and dot designs become a lot less intimidating.
Your hands are in your line of sight all day. It’s worth spending a little time making them look like you meant it.
