

If you’re celebrating a birthday and want your nails to match the occasion, short squoval nails are genuinely one of the best choices you can make. This shape hits the sweet spot between looking polished and staying practical — it’s got that perfect width of a square with the softer edges of an oval, so your nails look intentional and elegant without the breakage risk that comes with longer lengths. Birthday nails should feel special without requiring you to sacrifice comfort or durability, and squovals deliver exactly that.
The beauty of short squoval nails is that they’re incredibly versatile for whatever vibe you want to bring to your celebration. Whether you’re going for glittery glamour, soft and romantic, bold and statement-making, or playful and fun, this shape adapts beautifully to any design direction. You’ll find that short squovals actually show off nail art better than longer shapes because the design sits perfectly in the visual sweet spot — not so small that details get lost, not so long that the design feels overwhelming.
Let’s walk through 12 stunning short squoval birthday nail designs that’ll make your nails the best-dressed part of your celebration.
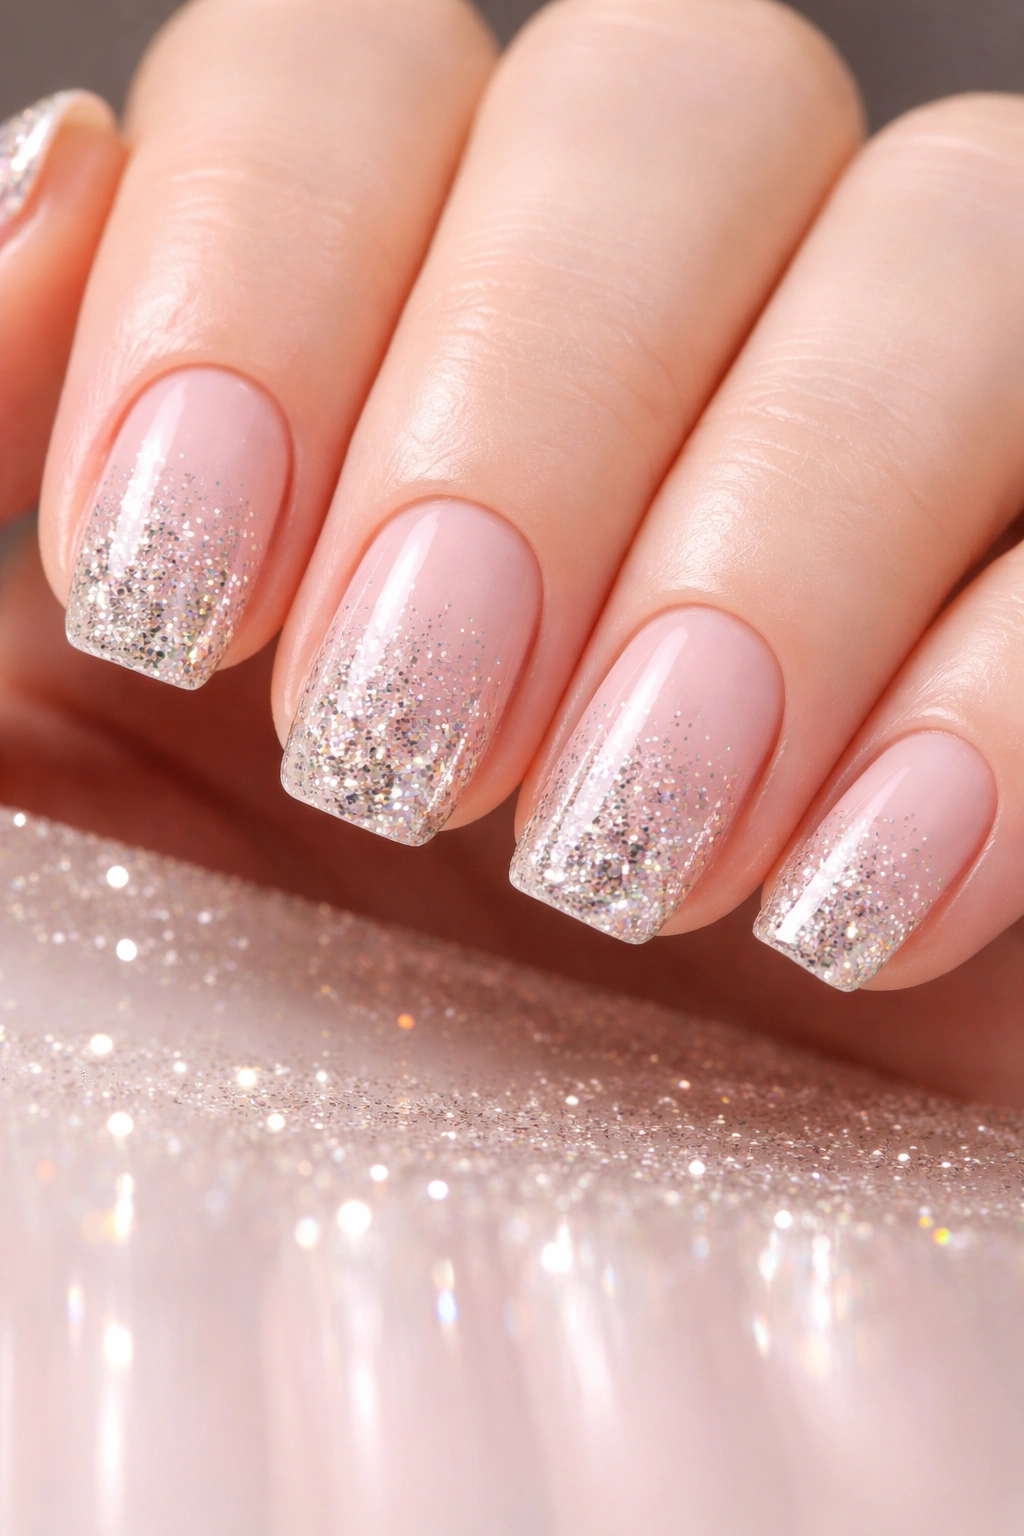
1. Sparkly Champagne Celebration
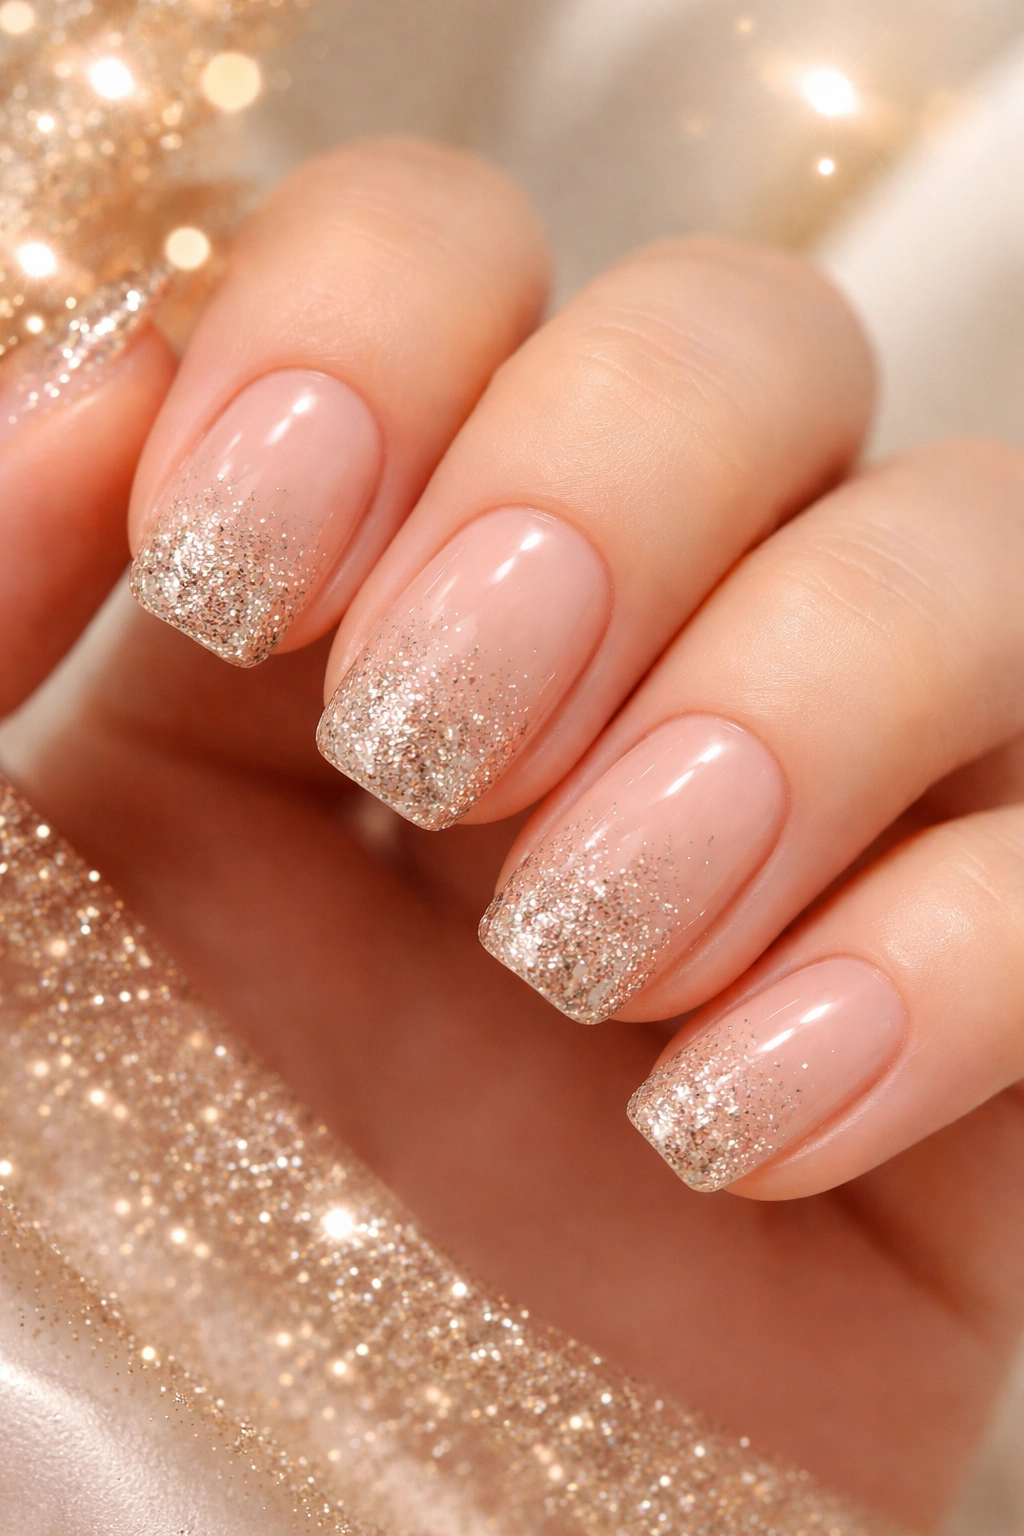
Picture soft champagne-nude as your base with a subtle glitter gradient that gets denser as you move toward the tips. This design screams “it’s my special day” without being over-the-top, and the neutral base works with absolutely any outfit you throw together. The glitter catches light beautifully whether you’re indoors at a party or out in natural daylight, creating this gorgeous shimmer effect that feels celebratory without looking costume-y.
Why This Design Hits Different for Birthdays
Champagne nails have this inherent sophistication that makes you feel elevated and celebrated. The color sits right at that intersection of elegant and playful — it’s fancy enough for a night out but soft enough that it works for casual birthday gatherings too. The glitter gradient means the sparkle is concentrated at the tips where it catches light most dramatically, so you get maximum impact with subtlety.
How to Execute This Look
- Use a creamy champagne base polish as your foundation color — apply two coats for opacity
- Once the base is fully dry, use a glitter gradient sponge technique with fine gold or champagne-tinted glitter on the tips
- Seal everything with a glossy topcoat to make the glitter practically glow
- The whole manicure takes about 30 minutes and lasts 2-3 weeks with a good topcoat
Pro tip: If you’re getting this done at a salon, ask them to use a gel base under the glitter — it makes the whole manicure last significantly longer and keeps the sparkle bright throughout your celebration.
2. Ombre Sunset Birthday
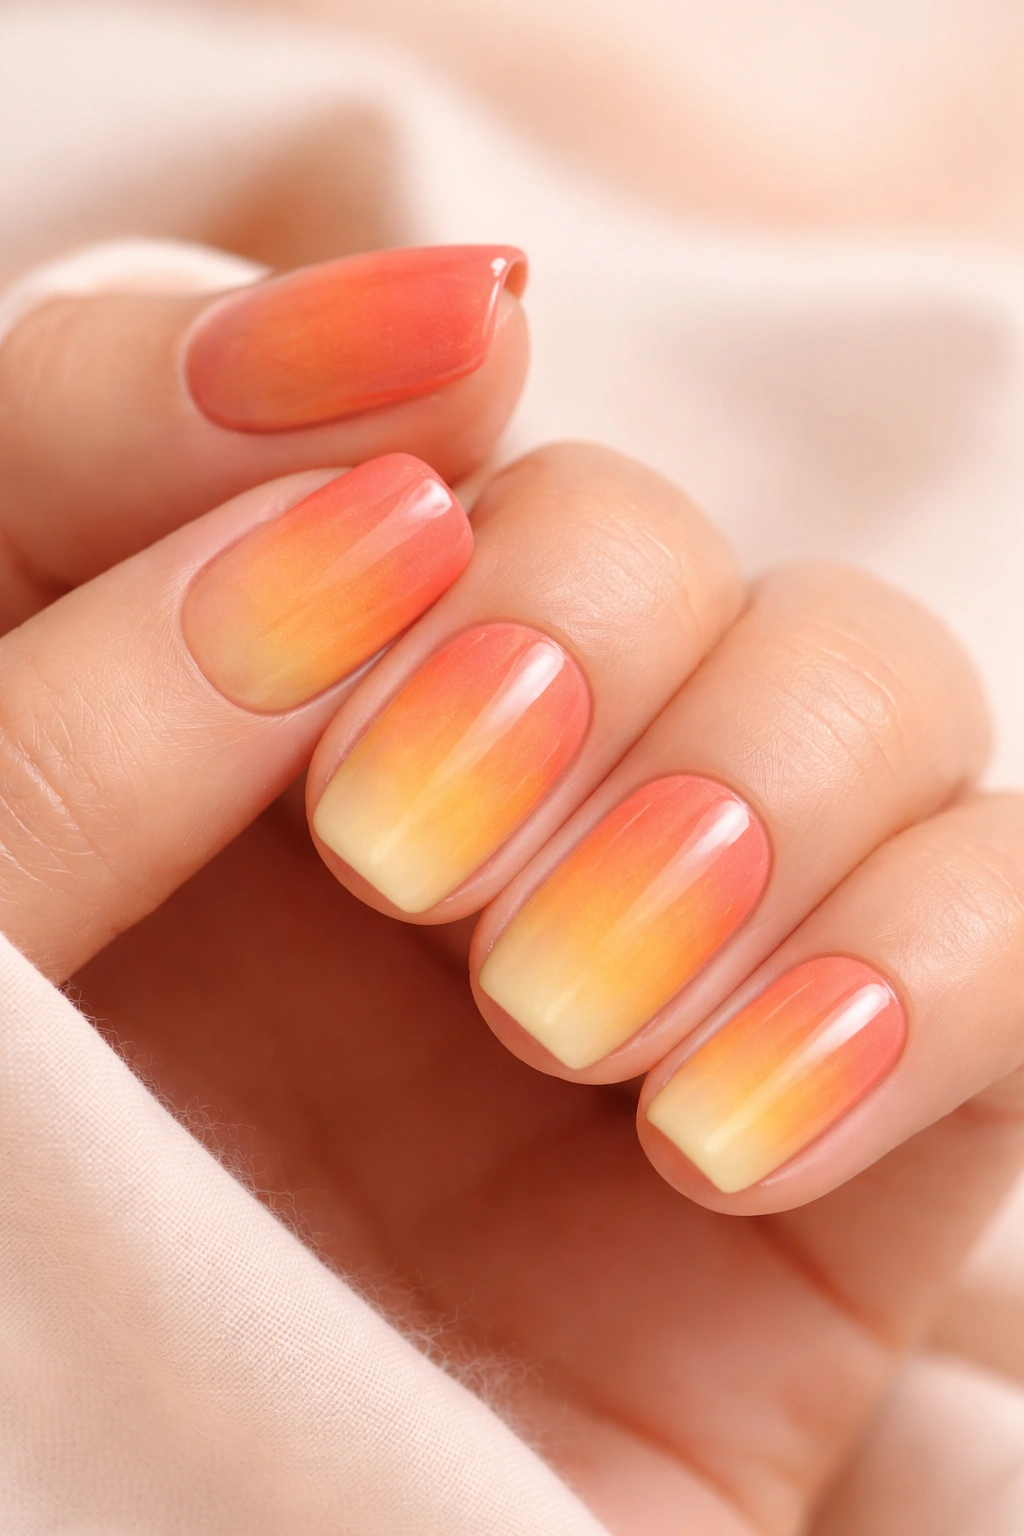
Create an ombre that flows from warm peach or coral at the base through soft orange to golden yellow at the tips. It’s like watching a birthday sunset happen on your fingertips, and the warm color story feels inherently celebratory. The beauty of this design is that each nail can have slightly different proportions of the ombre, so even though all ten fingers have the same concept, each one feels a little unique.
The Psychology Behind Warm Ombre Designs
Warm sunset colors actually trigger feelings of joy, energy, and celebration in your brain — there’s legitimate science behind why birthday vibes feel right with these hues. The gradient keeps your eye moving across the nail, which makes the design feel dynamic and exciting rather than static. Plus, warm tones are universally flattering against skin, so your hands just look better in photos and in person.
Creating This Gradient Masterpiece
- Start with a peach or coral base and apply it to about two-thirds of the nail
- Blend in the orange shade in the middle section using a makeup sponge or blending tool
- Transition to golden yellow at the tips with another careful blend
- Finish with a shiny topcoat to unify the whole look and add dimension
- Each nail takes about 2-3 minutes if you’re comfortable with sponge blending
Worth knowing: This design actually looks better the morning after you apply it, once all the colors have had time to fully set together and the blending softens even further.
3. Rainbow Confetti Pop
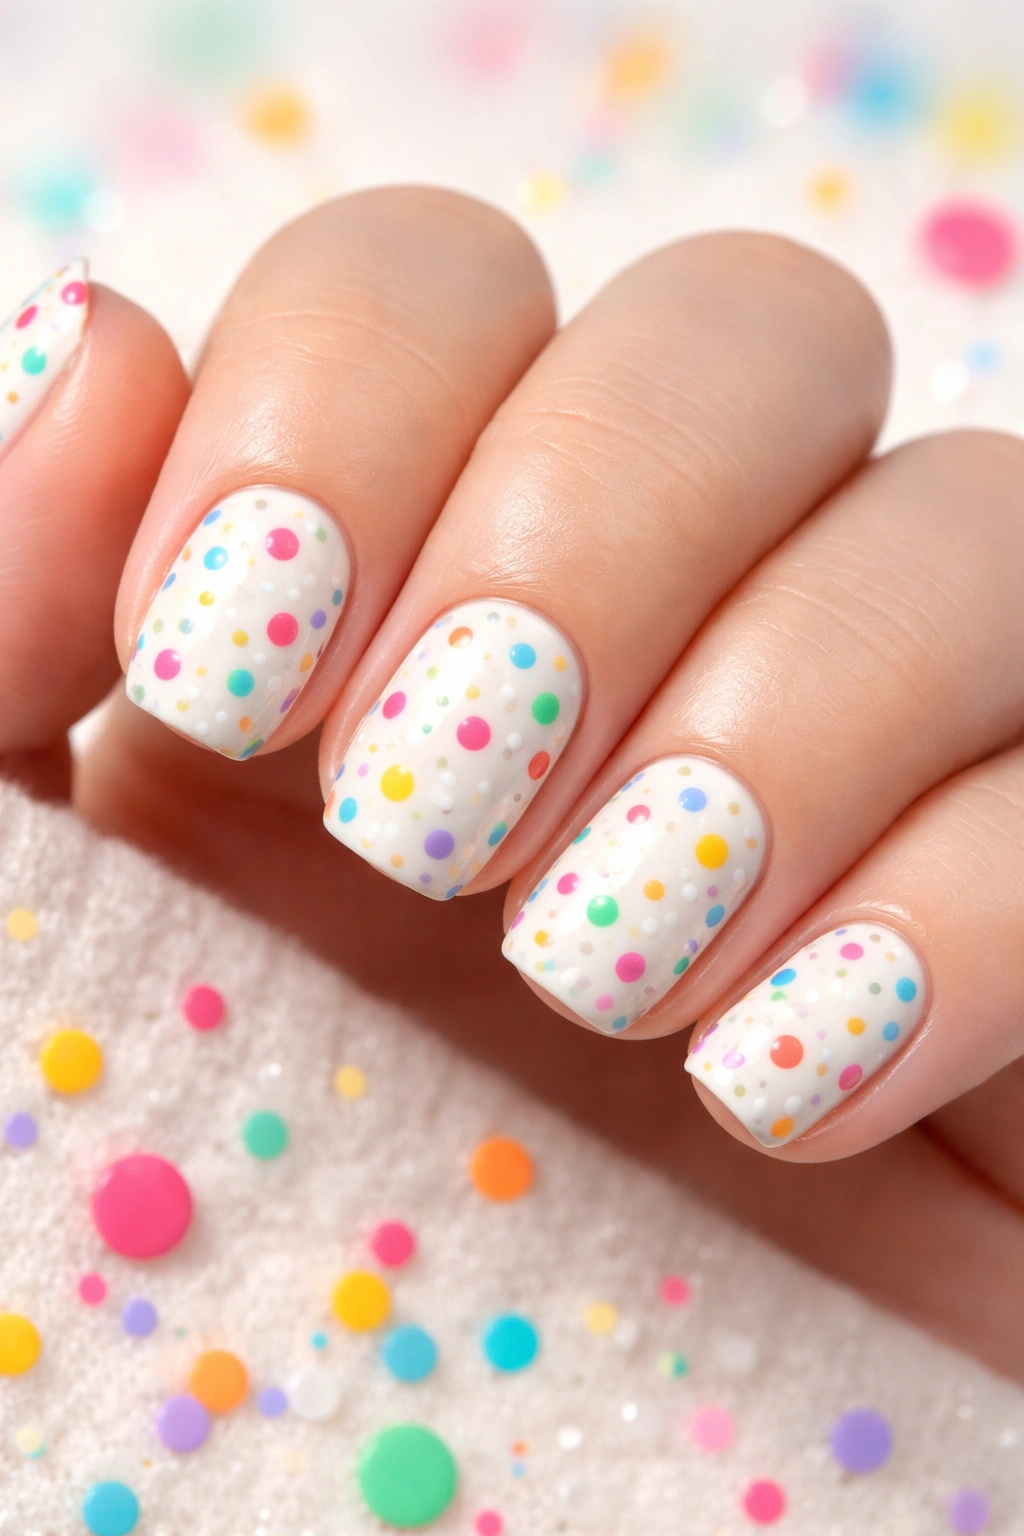
Go bold with a white or cream base and add tiny colorful confetti-style dots in rainbow colors — reds, yellows, blues, greens, and pinks scattered across the surface like a birthday party exploded in the best way. The dots should vary in size, some barely visible and others more prominent, so it feels organic and celebratory rather than perfectly patterned. This design is pure joy in nail form, and it honestly photographs better than you’d expect.
Why Confetti Designs Feel Authentically Celebratory
There’s something about confetti that our brains instantly recognize as “party” — it’s almost a shorthand for celebration that doesn’t require elaborate nail art skills to pull off effectively. The scattered, random nature of the dots means there’s no “right” way to do it, which takes the pressure off if you’re doing this at home. Short squoval nails are actually the perfect canvas for this because the confetti shows up clearly without overwhelming the space.
Nailing the Confetti Technique
- Apply a bright white or soft cream base and let it dry completely
- Use a fine detail brush or a dotting tool to add rainbow dots in random placement
- Vary your dot sizes — some should be tiny pinpricks and others about the size of a sprinkle
- Don’t overthink placement; genuinely random-looking is the goal here
- Seal with a glossy topcoat that makes those colors pop even more
Insider note: If you’re not confident with a detail brush, use a toothpick dipped in gel polish or regular polish — it’s easier to control and actually gives you better dot consistency.
4. Nude Base with Gold Accents
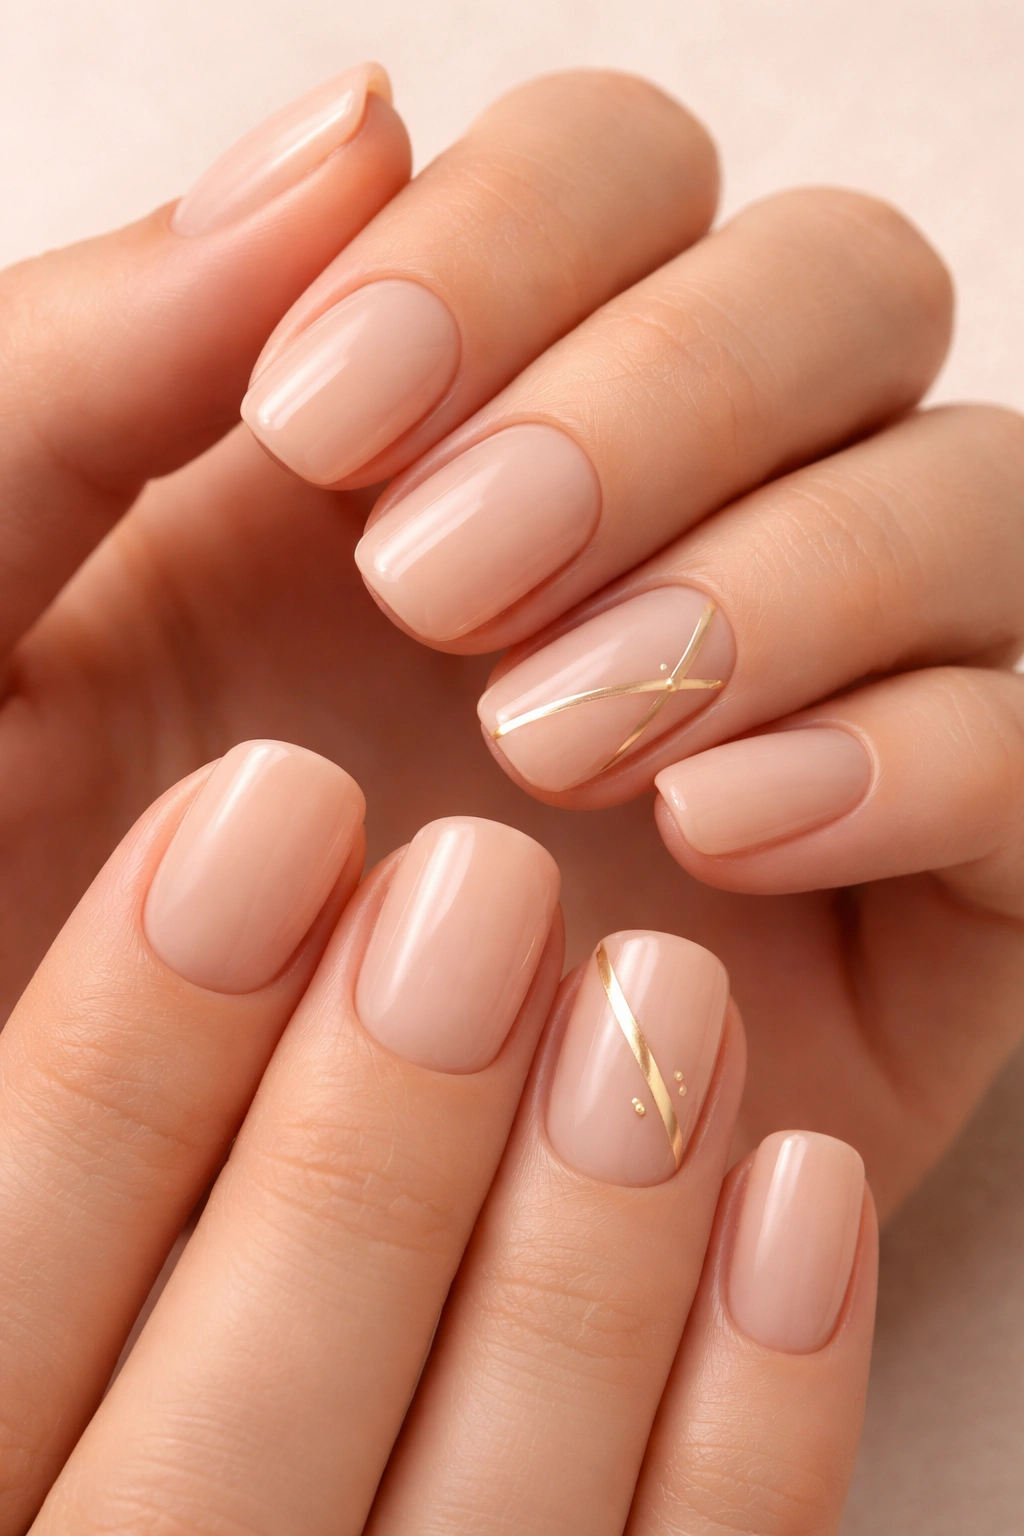
Take a warm nude or beige base and add thin gold stripes, geometric shapes, or accent lines on one or two nails per hand. The nude keeps things sophisticated and wearable while the gold adds just enough sparkle and intention to say “I’m celebrating.” This is the design you pick when you want to look absolutely pulled together and intentional without being loud about it.
The Timeless Appeal of Nude-and-Gold Combinations
Nude-and-gold is genuinely one of the few color combinations that works across virtually every skin tone and every season. It reads as refined and intentional without screaming for attention, which makes it perfect if you’re going to a more formal birthday celebration or if you just prefer understated elegance. The gold draws the eye just enough to keep things interesting while the nude base keeps the whole look wearable.
Building This Elegant Manicure
- Choose a nude shade that matches your skin tone closely — the closer the match, the more elongated your nails look
- Apply two coats of the nude base and seal with a matte or glossy topcoat (matte actually looks more sophisticated here)
- Use a thin gold stripe brush or a detail brush to add linear accents on your ring finger and pinky
- Consider adding a thin geometric frame on just the accent nails for extra visual interest
- The entire manicure takes about 25 minutes and requires a steady hand for clean lines
Pro tip: Use a gold gel polish for the accents rather than regular polish — it applies more precisely and lasts longer without chipping at the edges.
5. Pastel Gradient Dreams
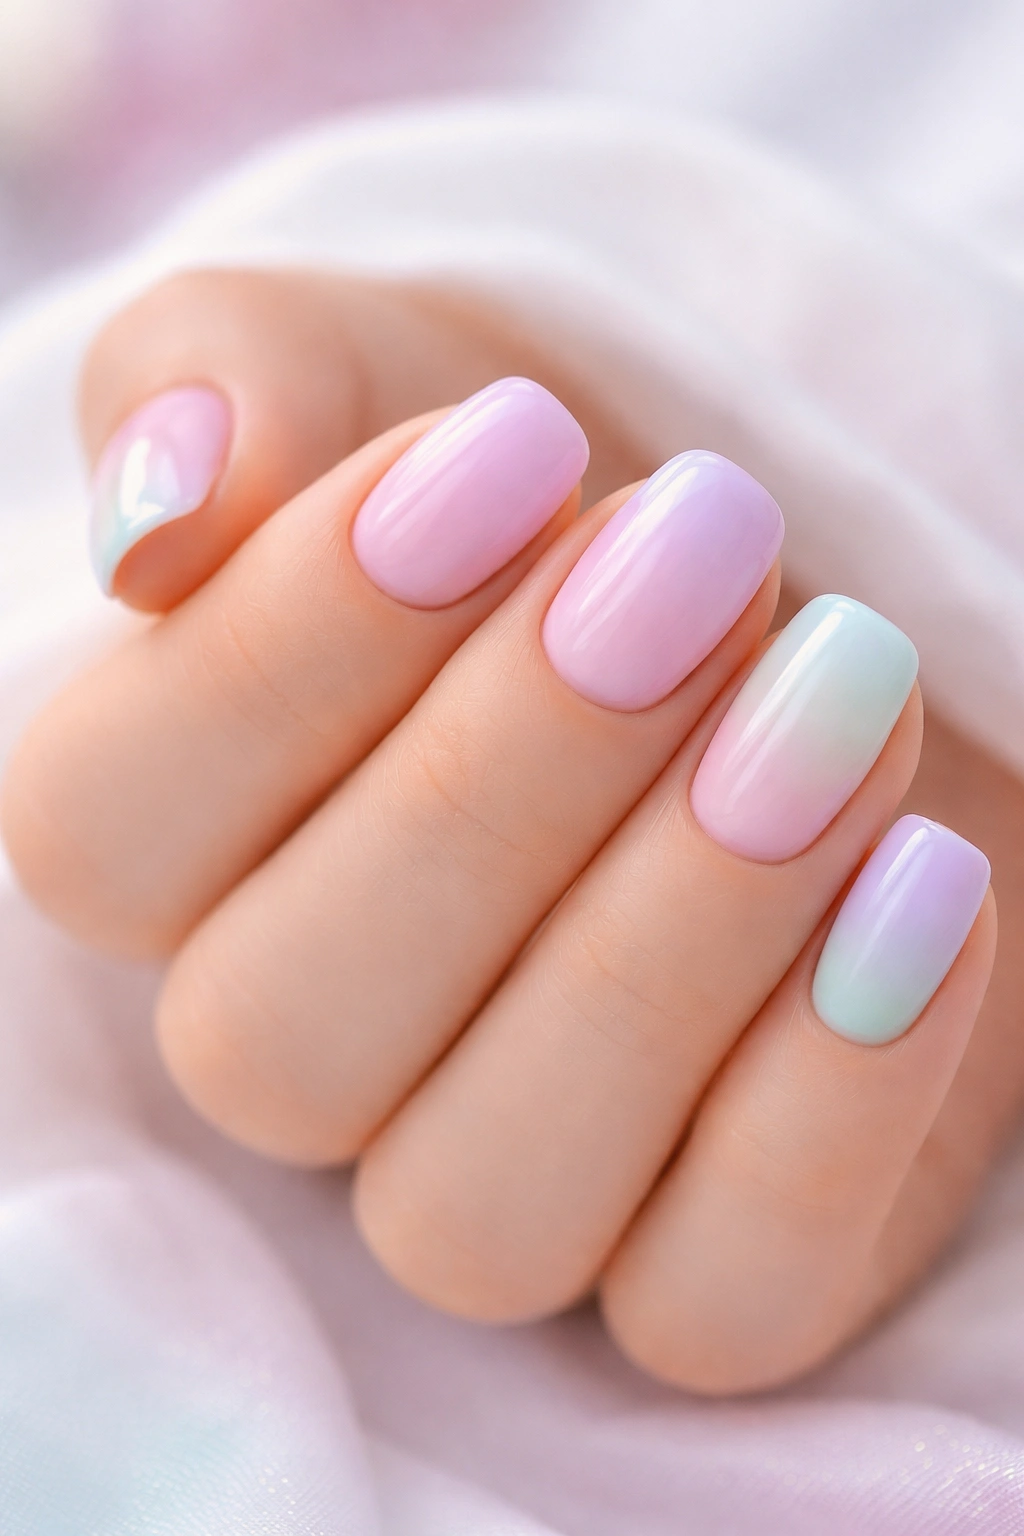
Blend soft pastels from pale pink through lavender to mint green, creating this dreamy, ethereal gradient that feels like a birthday cake decoration came to life on your nails. Each nail gets the same color sequence, so they look intentional and coordinated rather than random. This design works especially well for daytime birthday celebrations because the soft colors feel gentle and pretty without being overdone.
Why Pastels Scream “Celebration” Without Yelling
Pastels tap into that nostalgic, joyful feeling associated with celebrations and femininity, but in a modern, sophisticated way that doesn’t feel childish. The soft color transitions are inherently soothing to look at, which means your nails can be celebratory without being stressful or aggressive. Pastel gradients also photograph beautifully, so your birthday nails will look stunning in party photos.
Executing the Pastel Gradient
- Start with a pale pink base and apply evenly across all nails
- Sponge in lavender in the middle section of each nail using a makeup sponge
- Blend mint green at the tips with another careful sponge blend
- Use a damp cotton swab to soften any harsh lines between colors
- Apply a glossy topcoat that emphasizes the dreamy quality of the gradient
- Allow 40-45 minutes for this technique because the blending is crucial
Worth knowing: Pastels show every little imperfection, so make sure your base is perfectly clean and smooth before starting the gradient. Any dust or debris will show.
6. Black with Rhinestone Details
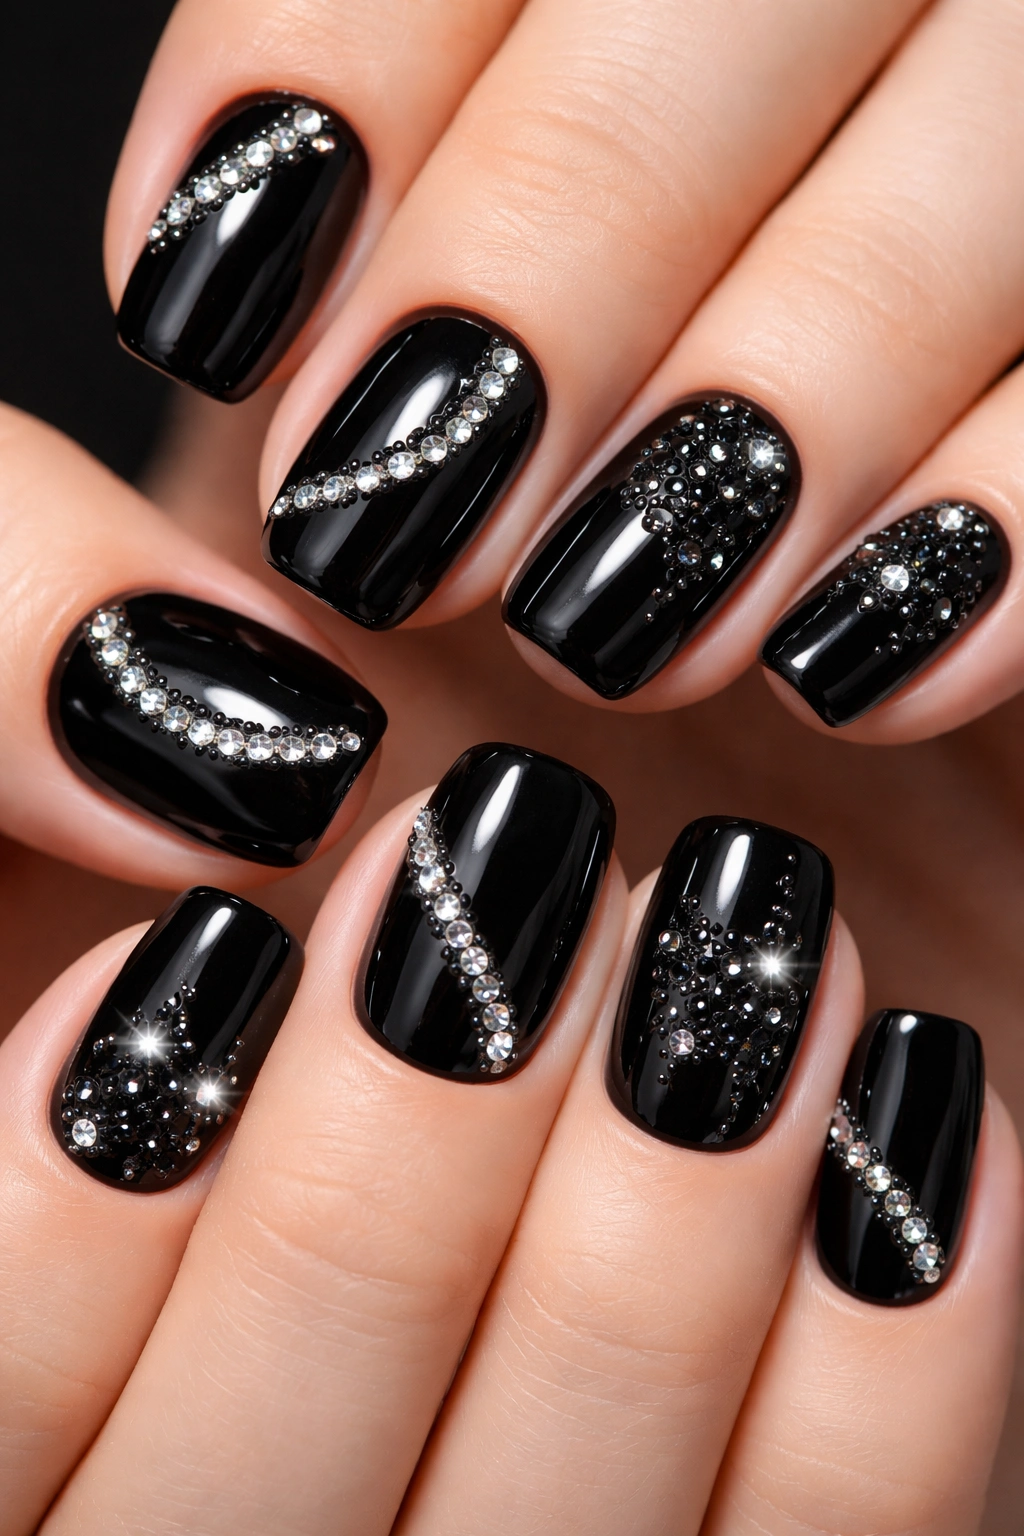
Create a sleek black base on short squoval nails and then strategically place rhinestones in elegant patterns — maybe a curve across the nail, a geometric frame, or a constellation-style scattered look. Black is the perfect backdrop for sparkle because it creates serious contrast, making every rhinestone pop like a tiny star. This design is secretly one of the most flattering for any skin tone because the contrast makes your hands look dramatic and expensive.
The Power of Black as a Celebratory Base
Black might seem like an unusual choice for birthday nails, but it’s actually incredibly sophisticated and makes any accent detail shine. It doesn’t compete with other elements of your outfit or jewelry, so it works beautifully if you’re already wearing makeup or other statement pieces. Black-and-rhinestone is a combination that reads as upscale and intentional, which makes it perfect if you’re celebrating at a nice restaurant or special event.
Creating the Rhinestone Statement
- Apply a jet black gel or regular polish base — black needs to be completely opaque, so use three coats if necessary
- Once fully dry, use a clear gel or adhesive to place rhinestones in your chosen pattern
- Rhinestones work best if you’re creating a line, a frame, or a scattered constellation rather than covering the entire nail
- Seal everything with a topcoat that keeps the rhinestones secure and protected
- This technique takes about 35-40 minutes depending on how many rhinestones you’re placing
Pro tip: Use a rhinestone picker tool (they’re inexpensive and available everywhere) rather than tweezers — it grabs the stones without leaving fingerprints and places them more precisely.
7. Classic Red with Metallic Tips
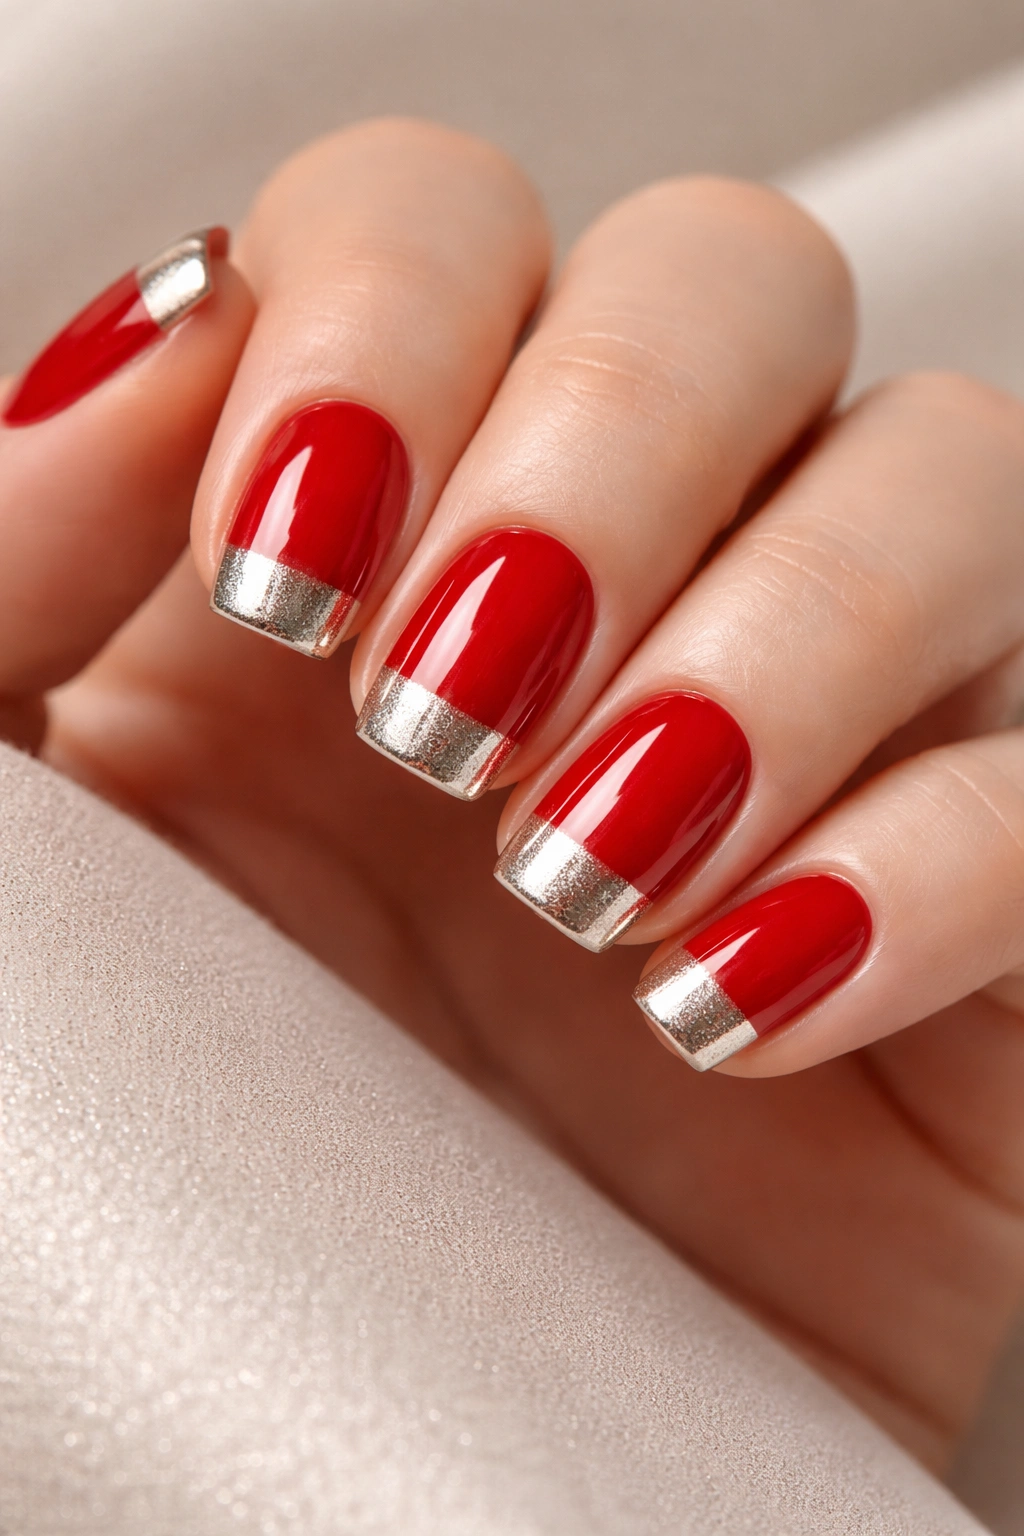
Go for a timeless true red base with shimmery gold or silver metallic tips that look like you’ve dipped your nails in liquid metal. Red is the ultimate celebration color — it’s bold, confident, and says “something special is happening” without any subtlety required. The metallic tips add glamour and a touch of something unexpected, so the whole look feels modern and intentional rather than basic.
Why Red Remains the Ultimate Birthday Power Color
Red nails genuinely make you feel more confident and celebratory — there’s psychological research showing that red actually influences how others perceive you and how you perceive yourself. On short squoval nails, true red looks crisp, polished, and professional in a way that longer lengths sometimes struggle to achieve. The metallic tips are just the right amount of extra without being over-the-top or impractical.
Building the Classic Red Metallic Look
- Choose a true red or blue-based red (avoid orangey reds, which can look less intentional)
- Apply two coats of the red base, making sure coverage is completely opaque
- Use a metallic polish or gel in gold or silver for the tips — the metallic should start about one-third down the nail
- Blend or create a distinct line depending on the look you’re going for (distinct is easier and looks cleaner on short nails)
- Seal everything with a high-gloss topcoat that makes both the red and metallic shine
- This manicure takes about 20-25 minutes and looks good from day one
Insider note: Red polish stains skin more easily than other colors, so apply a thin coat of clear base polish before the red, and be extra careful with the edges around your cuticles.
8. Soft Pink Marble Swirl
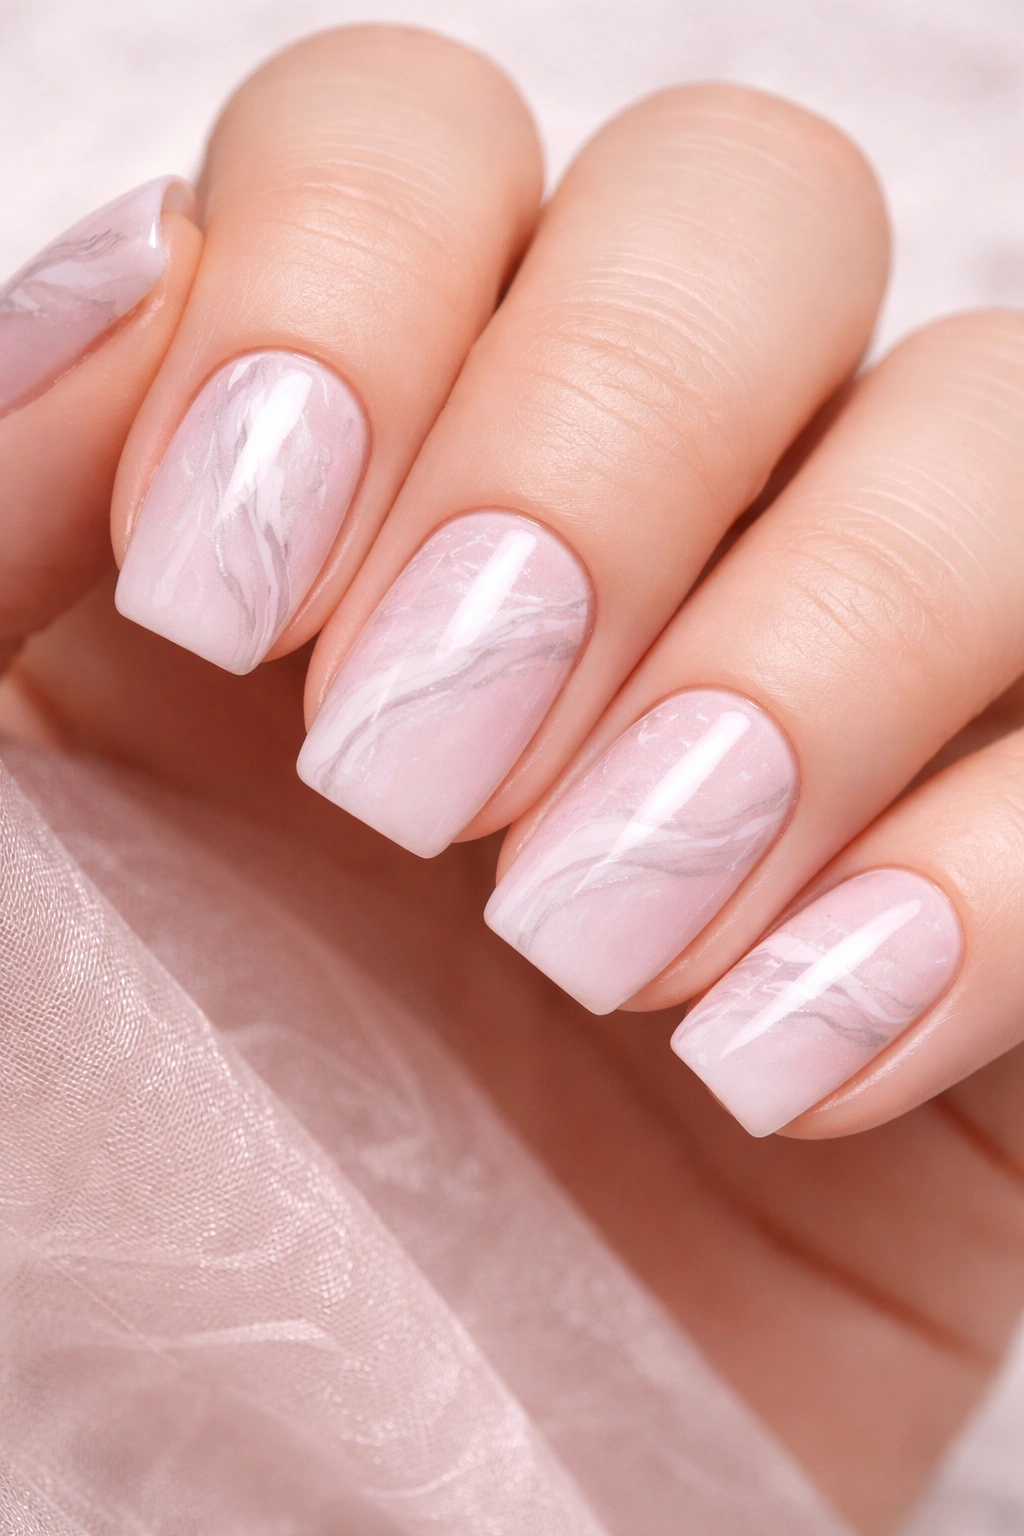
Create a soft pink base and add delicate white and gray marble veining across the surface for an elegant, organic look that feels expensive and intentional. Marble patterns are inherently sophisticated, and on soft pink they create this spa-like, luxurious vibe that feels like pampering yourself for your special day. Each nail will have a slightly different marble pattern, which makes the whole manicure feel unique and custom.
The Elegance of Organic Marble Patterns
Marble designs work because they’re organic and natural-looking rather than rigid or overly patterned. Your brain recognizes marble as something luxurious, which automatically makes your nails feel more elevated. Soft pink marble is particularly clever for birthdays because pink feels celebratory and feminine without being loud, and the marble adds sophistication that keeps it from feeling young or inexperienced.
Mastering the Marble Technique
- Apply a soft pink base in two coats and let it dry completely
- Use a thin detail brush to create delicate white veining across each nail — think of organic, branching patterns rather than rigid lines
- Add gray or light gray accent lines that cross and intersect the white veining
- Use a dotting tool to create tiny organic “pockets” where the colors meet
- Seal with a glossy topcoat that unifies the whole look
- This technique takes 45-60 minutes depending on how detailed you want the marble pattern to be
Worth knowing: If you mess up the marble pattern, just wipe it off immediately with a cotton swab and start again — there’s no committed step until you apply the topcoat, so you can keep adjusting until it’s perfect.
9. Glitter Ombre Effect
Build a gradient from a solid color at the base to progressively more glitter as you move toward the tips, so the sparkle intensity increases. This is the design that catches light from every angle and makes your hands look like they’re glowing, which is genuinely perfect for birthday celebrations where you’ll be around variable lighting. The short squoval shape means the glitter shows off beautifully without looking costume-y or over-the-top.
Why Glitter Ombre Feels Both Playful and Elegant
Glitter ombre walks the line between pure fun and genuine sophistication because you’re building it intentionally from subtle to statement-making. Starting with a solid base color keeps it grounded and wearable, while increasing the glitter toward the tips adds excitement and dimension. This design works with virtually any base color — nude, blush, champagne, even soft blue or purple — so you can customize it to match your outfit.
Executing the Glitter Buildup
- Start with your chosen base color and apply two coats
- In the middle section of the nail, apply a thin layer of fine glitter using a sponge or a glitter-embedded gel
- In the tip section, apply a denser layer of the same glitter, using a second coat if necessary to build intensity
- Blend the transition between no-glitter and glitter using a sponge with a tiny bit of clear gel
- Seal everything with a glossy topcoat that makes the glitter practically luminous
- Allow 35-40 minutes for this technique because the layering and blending takes time
Pro tip: Use a glitter gel polish specifically made for ombre effects rather than loose glitter — it applies more evenly and lasts significantly longer without flaking.
10. Birthday Cake Design
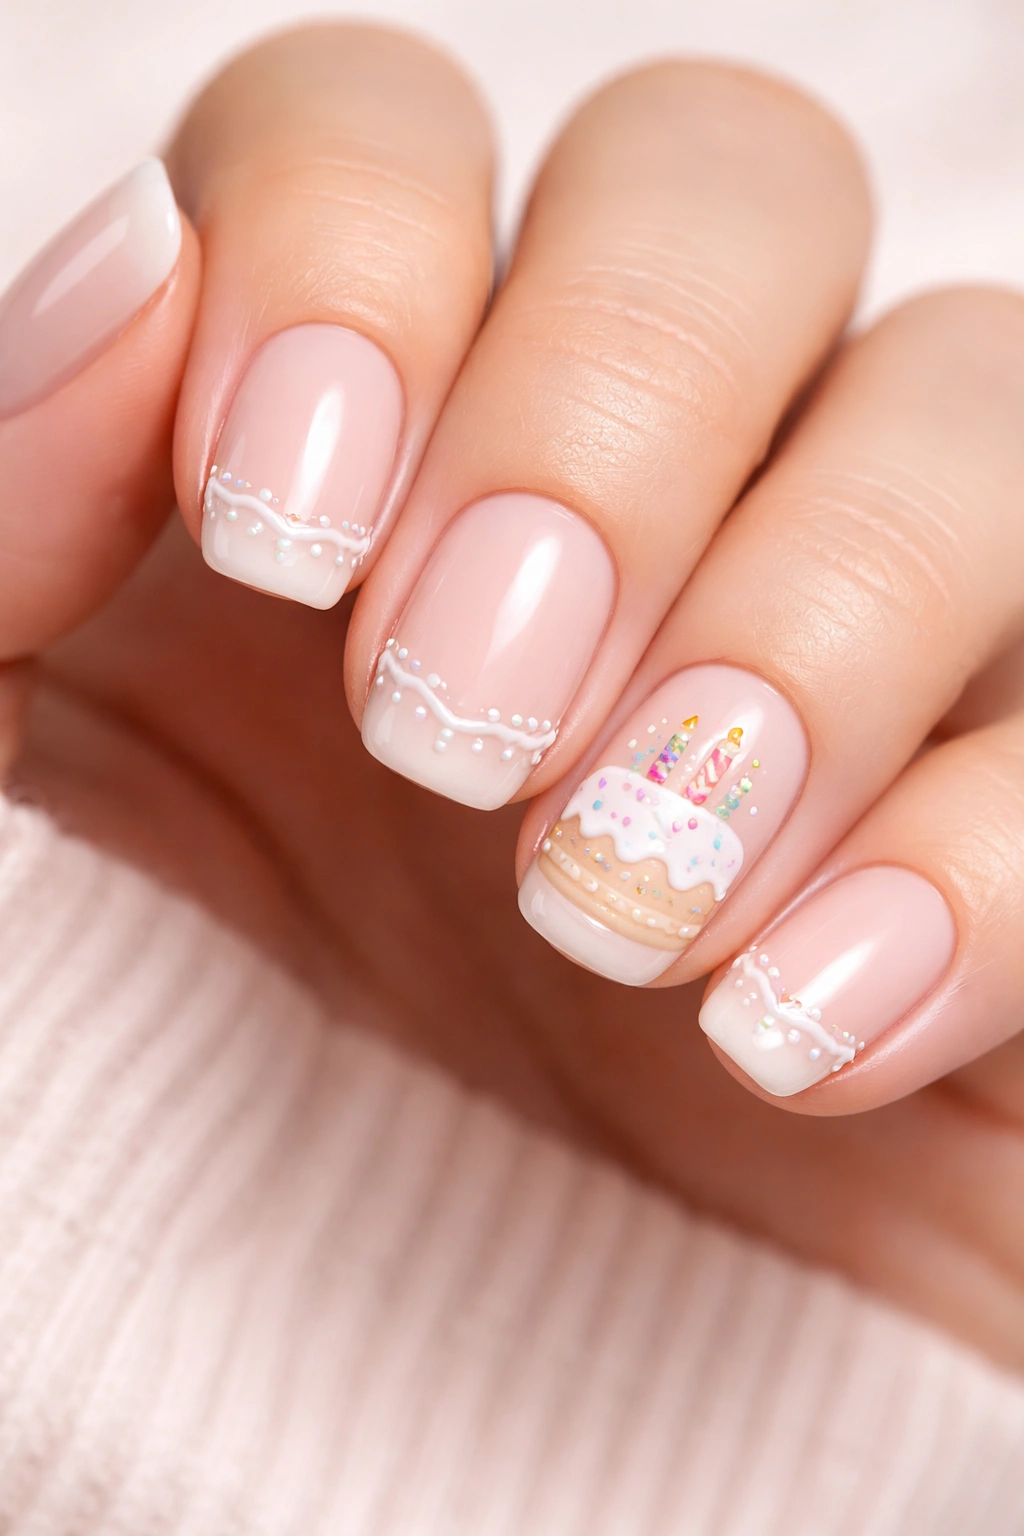
Create a design that actually looks like a birthday cake on your nails — think a neutral base representing cake, with frosting piping detail work on top and maybe tiny fondant balls or pearl accents representing decorations. This is playful, instantly recognizable, and makes people smile when they see it. One accent nail with the full cake design with the others in a coordinating solid color often looks more polished than trying to fit a full cake design on every nail.
The Joy of Literal Birthday Nail Art
There’s something delightful about nails that tell a specific story or represent a specific thing — it shows personality and celebrates the occasion in a lighthearted way. A cake design immediately communicates “it’s my birthday” without any explanation, and it tends to be a conversation starter. On short squoval nails, the cake design has just enough space to show detail without looking cramped or messy.
Building Your Edible-Inspired Manicure
- Choose a color for the cake base — typically something that reads as cake-like, like soft tan, pale pink, or ivory
- Apply two coats of your base color on all nails
- On one or two accent nails, use white or cream gel with a fine detail brush to create piping details that look like frosting swirls
- Add tiny pearl accents or delicate dots to represent frosting pearls or sprinkles
- Use a slightly darker shade of your base color to create definition or shading if desired
- Seal with glossy topcoat that makes the whole thing look like actual frosting (in the best way)
- This takes about 40-50 minutes because the detail work is intricate
Insider note: Practice your piping details on paper first if you’re not confident with a detail brush — it only takes a few minutes but makes a huge difference in the final look.
11. Matte Finish with Gems
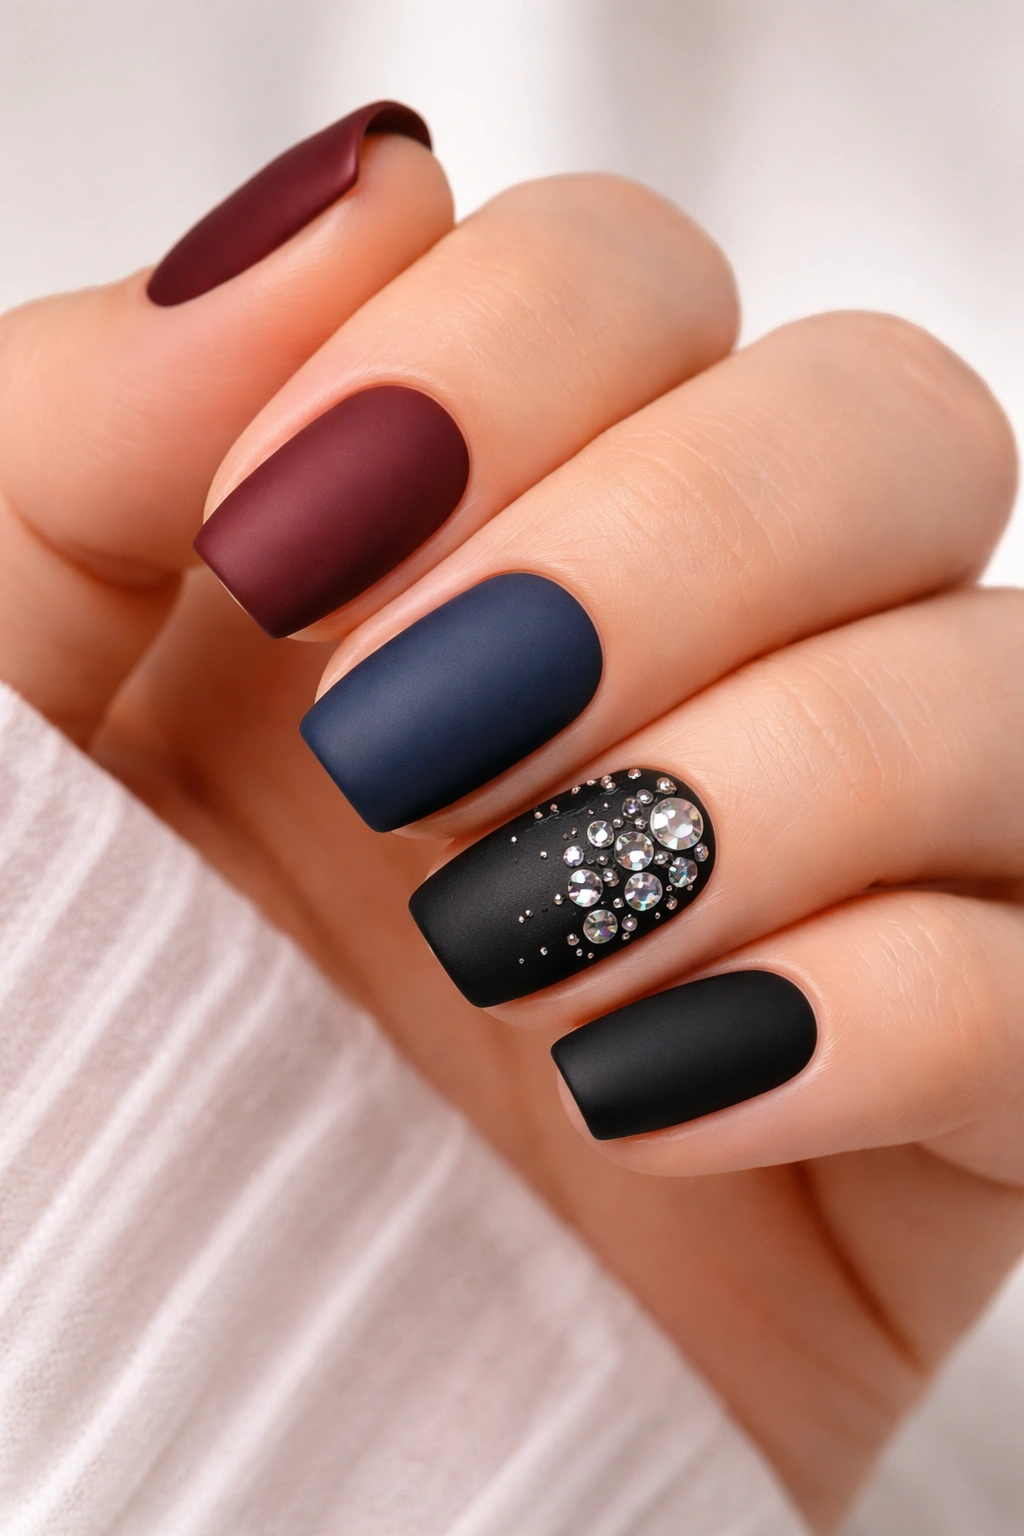
Go for a sleek matte base color (try deep burgundy, navy, forest green, or classic black) and then add scattered gems or crystals in strategic places for a look that’s modern, tactile, and undeniably special. Matte finishes are having a serious moment because they feel more sophisticated than glossy, and adding gems to matte creates this compelling contrast between smooth and sparkly. Your nails will literally feel different when you touch them, which is fun and celebratory.
Why Matte Textures Elevate Any Design
Matte polish reads as more expensive and intentional than glossy, which is partly psychological but also genuinely true about how light hits the surface. Adding gems to matte creates a compelling visual and textural contrast that makes the design feel more artistic and curated. This combination works particularly well for birthday celebrations because it feels elevated without being overdone or costume-y.
Creating the Matte Gem Statement
- Apply two coats of your chosen matte color and seal with a matte topcoat (not glossy)
- Use a clear adhesive gel or regular clear polish to place gems or crystals strategically on one or two accent nails
- Consider placing gems in a line, a frame, or a scattered pattern depending on your preference
- Press each gem firmly so it bonds completely with the matte surface
- Seal with a matte topcoat over the gems so they’re protected and stay secure
- This manicure takes 30-40 minutes depending on how many gems you’re placing
Pro tip: Gems stay more secure on matte finishes than glossy because matte provides more surface friction — but still give them at least 24 hours to fully cure before doing dishes or heavy-duty activities.
12. Chrome and Pearl Mix
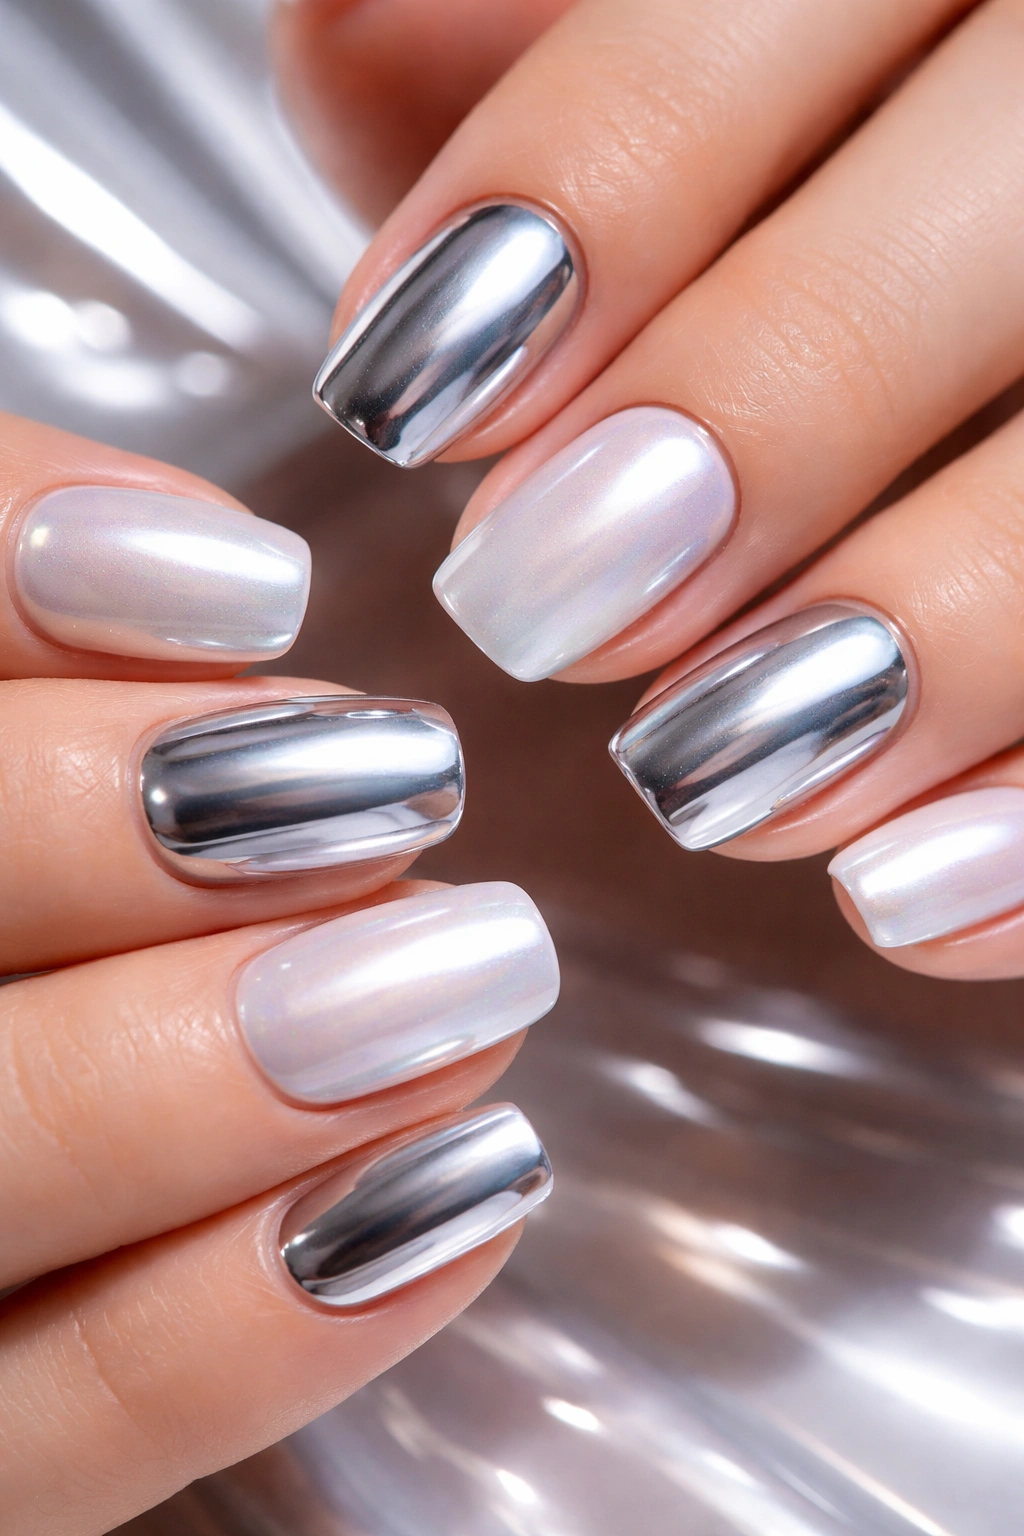
Combine chrome finish (that liquid metallic look that seems to shift between silver, gold, and iridescent) on some nails with pearl finish on others, creating a luxe, modern birthday look that feels genuinely high-end. Chrome and pearl together create this futuristic, sophisticated vibe that’s totally unexpected for birthday nails. Each time you move your hands, the chrome and pearl catch light differently, so the whole manicure stays interesting and dynamic.
The Modern Luxury of Chrome and Pearl
Chrome finishes became popular relatively recently, and they still feel novel and special — which makes them perfect for birthday celebrations when you want something that feels a little unexpected and current. Pearl finishes add softness and dimension to what could otherwise feel metallic and cold. Together, they create this perfect balance between futuristic and elegant, modern and timeless.
Applying Chrome and Pearl Like a Pro
- Start with a smooth, clean nail surface because any imperfection shows on chrome and pearl finishes
- Apply a thin base coat on all nails
- For chrome nails, apply the chrome powder or gel according to the specific product instructions — most chrome products require a specific technique
- For pearl nails, apply a pearl gel or polish that shifts in light as you move your hands
- Alternate chrome and pearl across your hand — for example, chrome on thumb, pointer, and pinky; pearl on middle and ring finger
- Seal everything with a topcoat designed for these specialty finishes
- This technique takes 45-50 minutes because applying chrome correctly requires patience and precision
Worth knowing: Chrome and pearl finishes require absolutely pristine base nails — any bumps, ridges, or imperfections will show dramatically, so spend extra time prepping your nails and applying base coat.
Final Thoughts
Short squoval nails are genuinely the sweet spot for birthday celebrations because they’re practical enough for real life while still being beautiful enough to feel special. Every design on this list plays to the strengths of this shape — the designs show up clearly, your nails look intentionally groomed and polished, and you don’t sacrifice durability or comfort just to have pretty nails for your big day.
The thing about birthday nails is that they’re ultimately about how they make you feel. Whether you go for understated elegance or pure sparkly celebration, the most important part is choosing a design that makes you smile when you look at your hands. Spend some time with these ideas, pick the one that resonates with your birthday vibe, and commit to making your nails match the joy of the occasion.
Your birthday celebration deserves nails that are as special and unique as you are — and one of these short squoval designs is absolutely going to deliver exactly that.
