

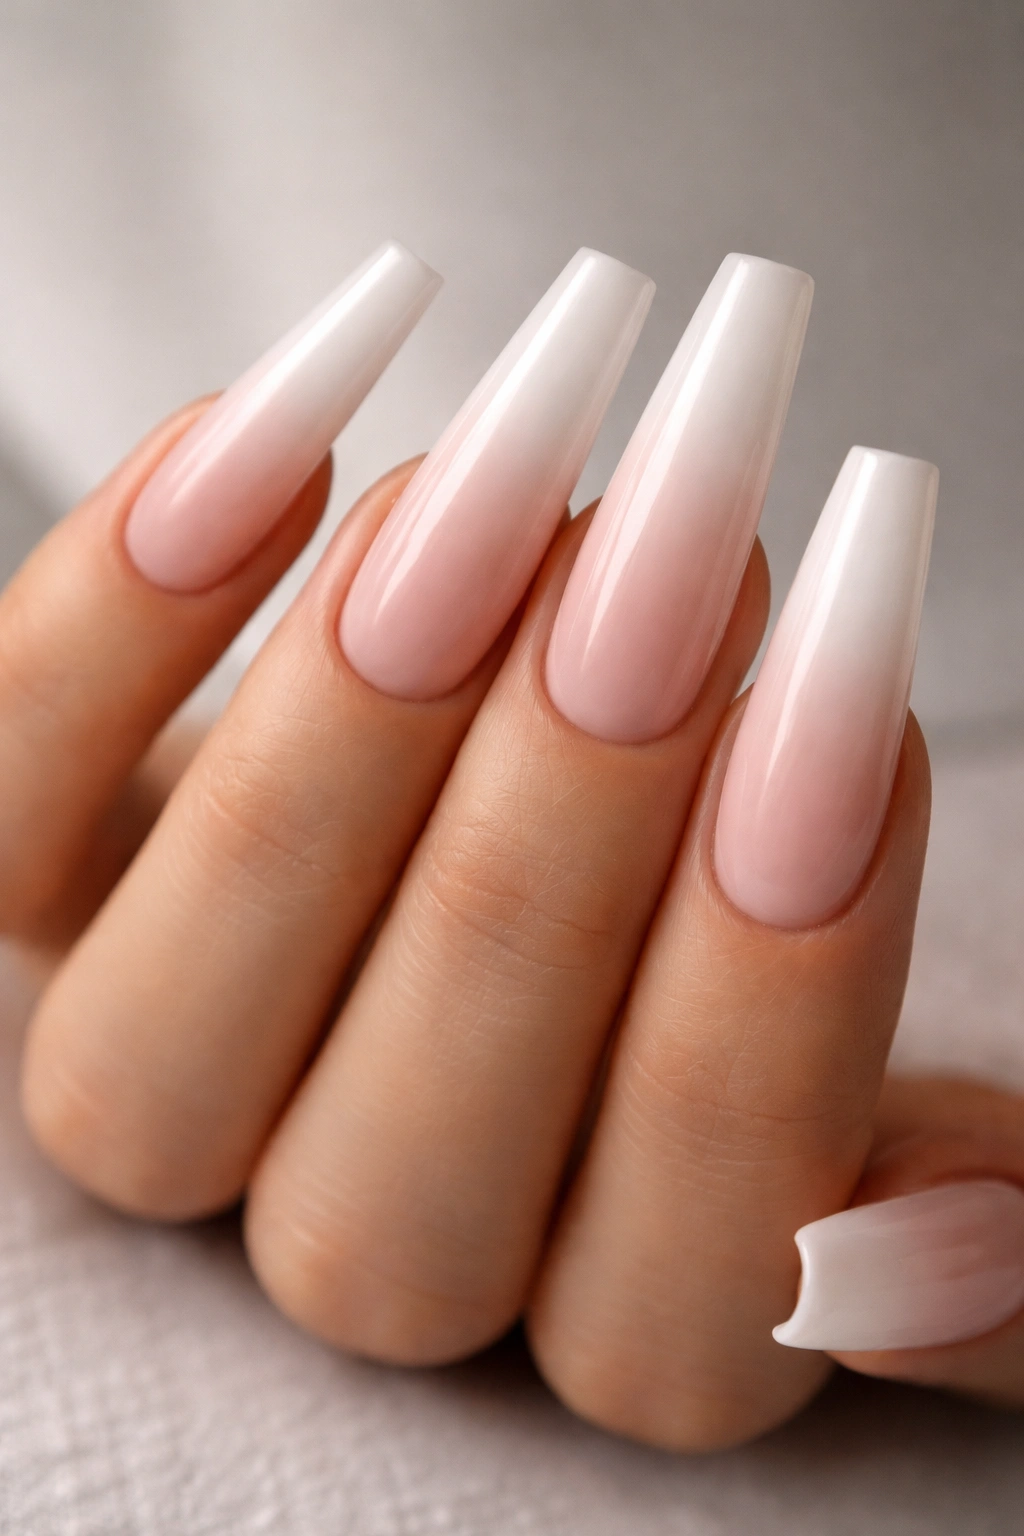
Most nail designs look better in a still photo than they do on an actual hand. Pink and white ombre coffin nails pull off the harder trick: they look polished when you’re holding a coffee cup, typing, reaching for your keys, or waving across a room. The fade softens everything. Fingers look longer. The square-tapered coffin shape gives the set structure, while the ombre keeps it from looking stiff.
That balance is why people keep coming back to this style. A hard French tip can look crisp, sure, but it also tells on every tiny flaw—the smile line sits too low, the white is too chalky, the sidewalls flare, and suddenly the whole set feels off. Ombre is more forgiving, though not in a lazy way. The blend still has to be clean. Milky pink has to stay milky, not peach-orange or gray. White has to fade, not sit on top like correction fluid.
I’ve seen more sets ruined by heavy white powder and over-filed sidewalls than by any rhinestone or chrome experiment. The best pink-and-white coffin nails are built with restraint. The apex sits where it should, the taper is even from both angles, and the fade starts high enough to flatter the nail bed instead of chopping it in half.
Once those basics are right, the fun starts.
Why Pink and White Ombre Coffin Nails Keep Getting Rebooked
Call them baby boomer nails, French fade nails, or the set your salon tech quietly recommends when someone wants “clean but not boring.” The core appeal stays the same: this design gives you the softness of a nude manicure and the finish of a French tip, with fewer sharp edges.
Coffin shape matters more than people think. A good coffin nail narrows through the sidewalls, then ends in a flat tip, which creates a long visual line from cuticle to edge. Put an ombre on top of that line and the eye keeps moving. That’s why the shape makes hands look more elegant than a blunt square with the same color blend. The structure does half the work.
The fade also helps with grow-out. No, it doesn’t make fills disappear—nothing does—but the absence of a hard tip line means the set holds its look longer between appointments. On a traditional French, one millimeter of shift can make the whole design feel crooked. With an ombre, the look stays softer for a longer stretch.
Skin tone plays into this too. Soft pink and white is one of the few nail combinations that can be warmed up, cooled down, made sheer, or made denser without losing its identity. A peachy blush base flatters golden undertones. A cooler pink works better on rosy or neutral skin. Same idea, different mood.
And there’s a practical reason salons love it: the design can go bare, bridal, glossy, matte, crystal-heavy, or chrome-topped without losing that clean foundation.
What to Decide Before You Ask for Pink and White Ombre Coffin Nails
Walking into an appointment and saying “pink and white ombre, coffin shape” is enough to start the conversation, not enough to get the exact set you want. This look changes a lot based on length, opacity, and product choice.
Pick these details first:
- Length: Short coffin usually sits about 6 to 8 mm past the fingertip. Medium lands around 10 to 14 mm. Extra-long starts looking dramatic once you move past 16 mm.
- Pink tone: Ask for neutral pink, cool pink, blush nude, or peachy pink instead of leaving the shade up to chance.
- White intensity: Decide between milky white, soft white, or bright snow white. A harsh white changes the whole mood.
- Blend placement: A low fade makes the tip look more French. A high fade makes the nail bed look longer.
- Product system: Acrylic gives strong structure for long coffin nails. Hard gel feels lighter and can look glassier. Soft gel tips or press-ons work well for shorter wear.
- Finish: Glossy topcoat shows off the gradient. Matte makes the fade look velvety and more editorial.
- Accent count: One accent nail can look intentional. Four accent nails can bury the ombre.
Bring two reference photos if you can. One should show the shape from the side, because that tells your tech more about structure than a straight-on hand pose ever will. The other should show the fade density you want. People often mean different things when they say “soft ombre.”
You’ll save time, and the set will come out closer to what’s in your head.
Prep and Fill Timing for Pink and White Ombre Coffin Nails
A clean ombre starts before the pink hits the nail.
Cuticle work and surface prep change the final look
If dead skin is still hugging the nail plate, the blend never looks expensive. Product pools, the base looks bulky near the cuticle, and the regrowth line shows up sooner. Good prep means pushing back the cuticle, removing the thin film on the plate, and lightly etching the surface so the product grips evenly.
Structure matters just as much. The apex should sit roughly a third of the way down from the cuticle on a coffin nail, not dead center and not pushed too far forward. When the apex is misplaced, long coffin nails start to look flat from the side and heavy at the tip. That’s where breakage likes to happen.
Fill timing is not cosmetic nitpicking
Dermatology references often place natural nail growth at about 3 millimeters per month, give or take, which explains why a set can look balanced one week and awkward not long after. Once the growth gap gets wide, the blend may still look decent from the front, but the structure has already shifted.
Most people wearing medium or long coffin sets need a fill around the 2- to 3-week mark. Shorter sets can sometimes stretch longer. If you’re rough on your hands, type all day, lift boxes, or absentmindedly use your nails as tools, do not wait until one corner lifts.
One more thing—because it gets skipped too often. If your tech is using gel products, uncured gel should never touch your skin, and cure times need to match the lamp and product line being used. That is not salon fussiness. It is basic safety.
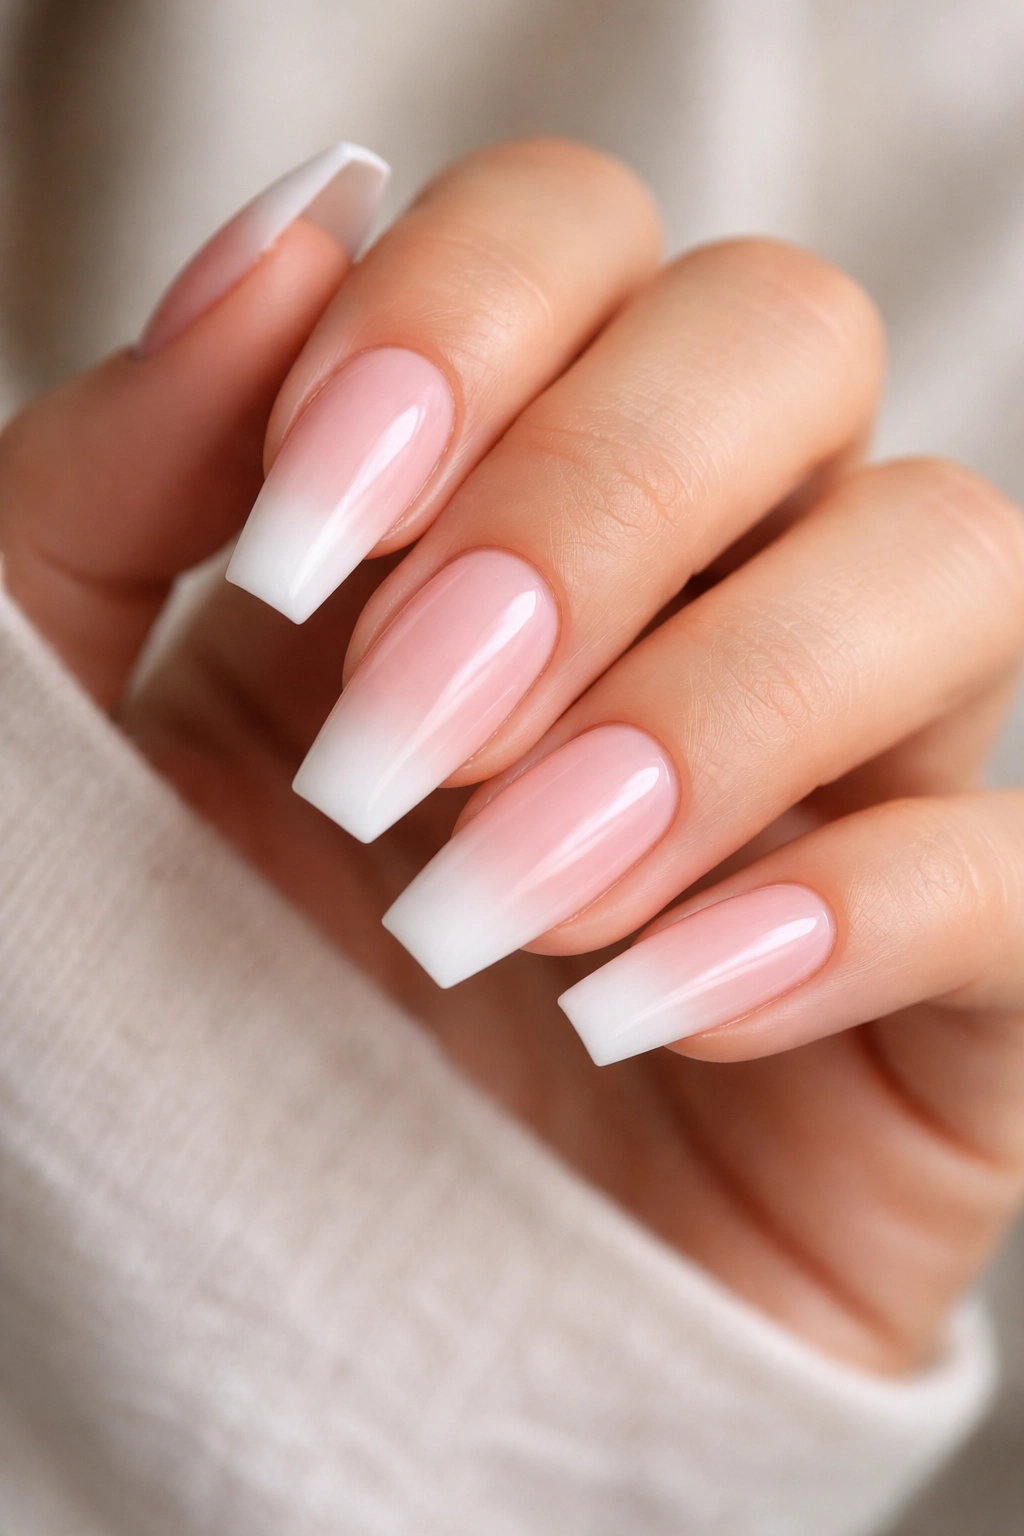
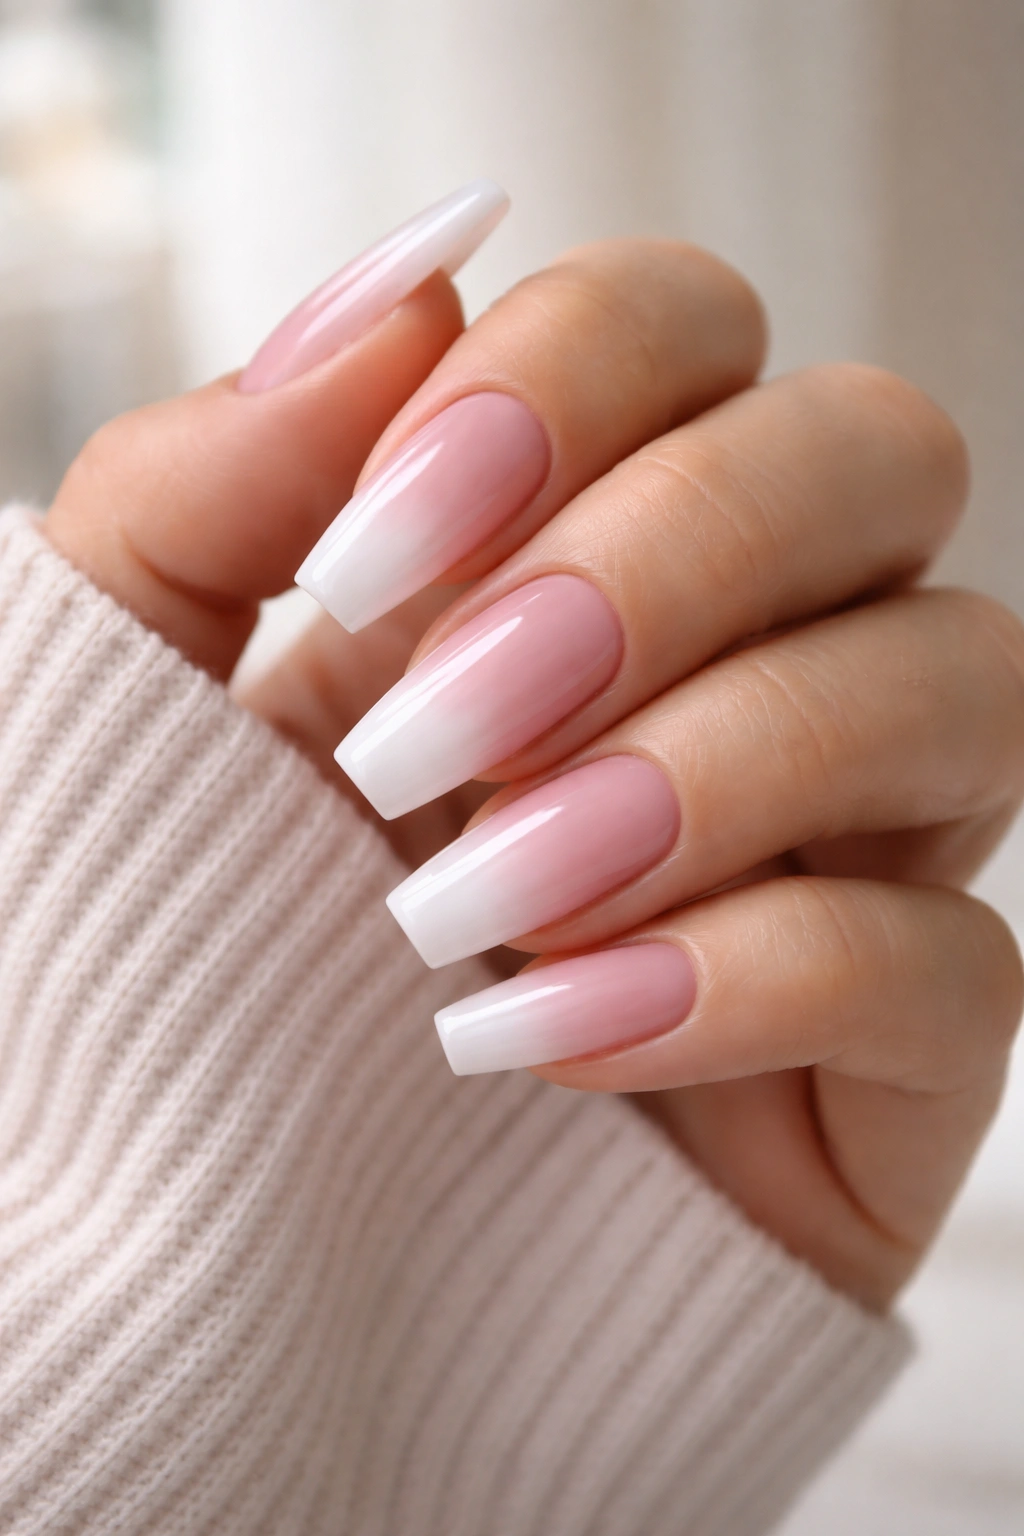
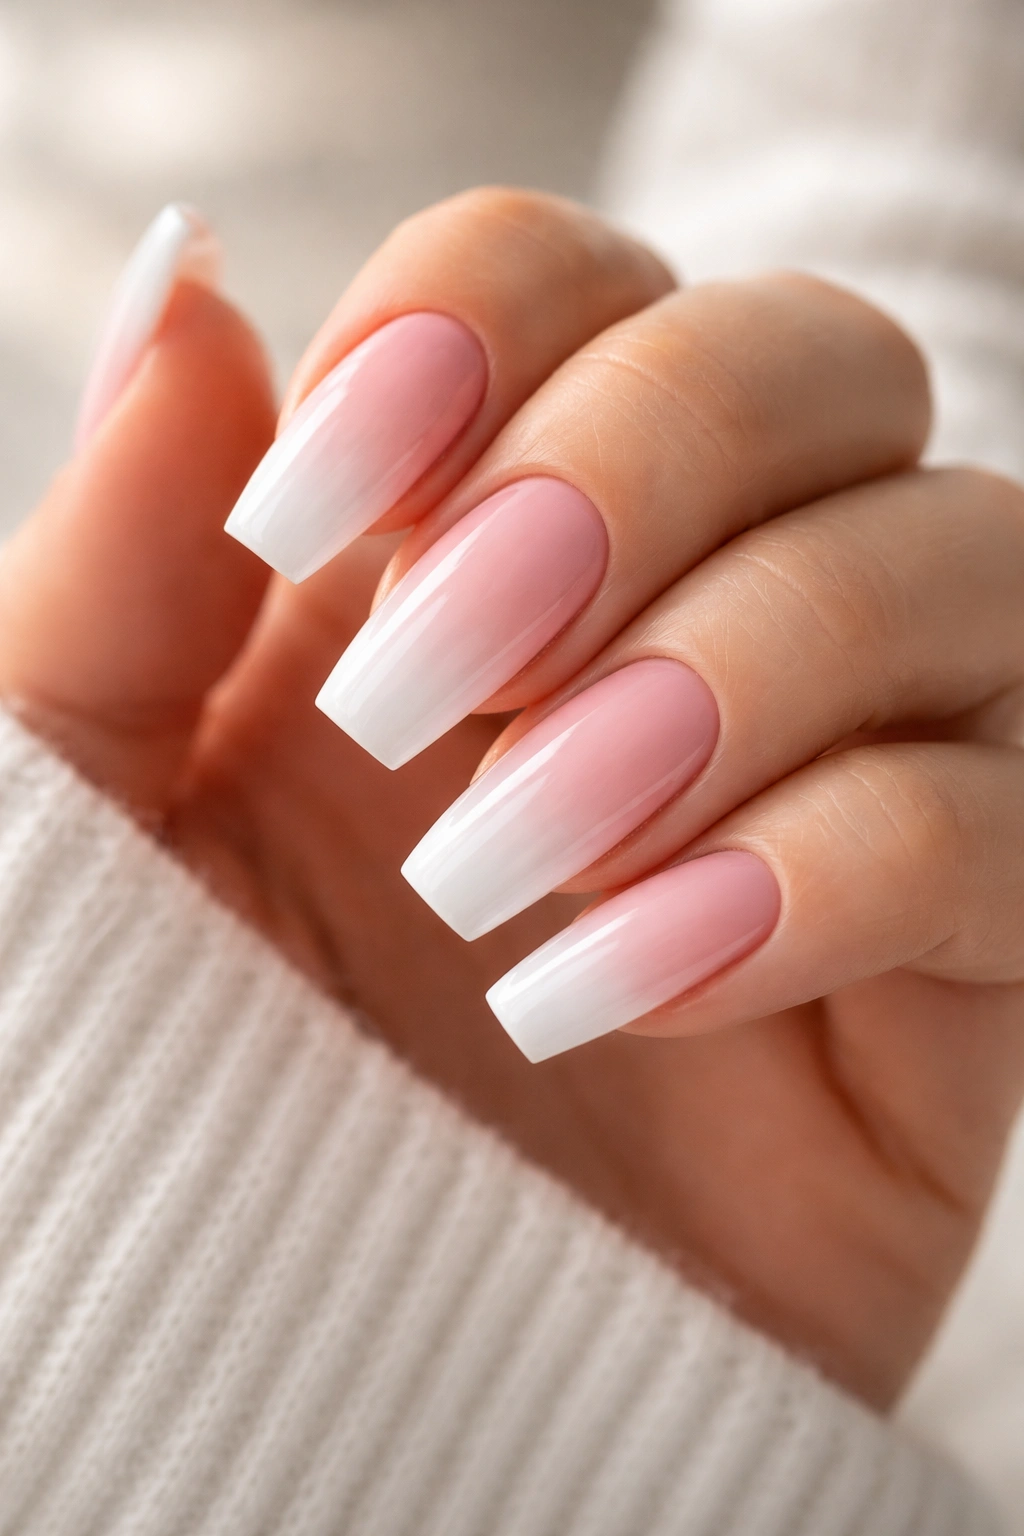
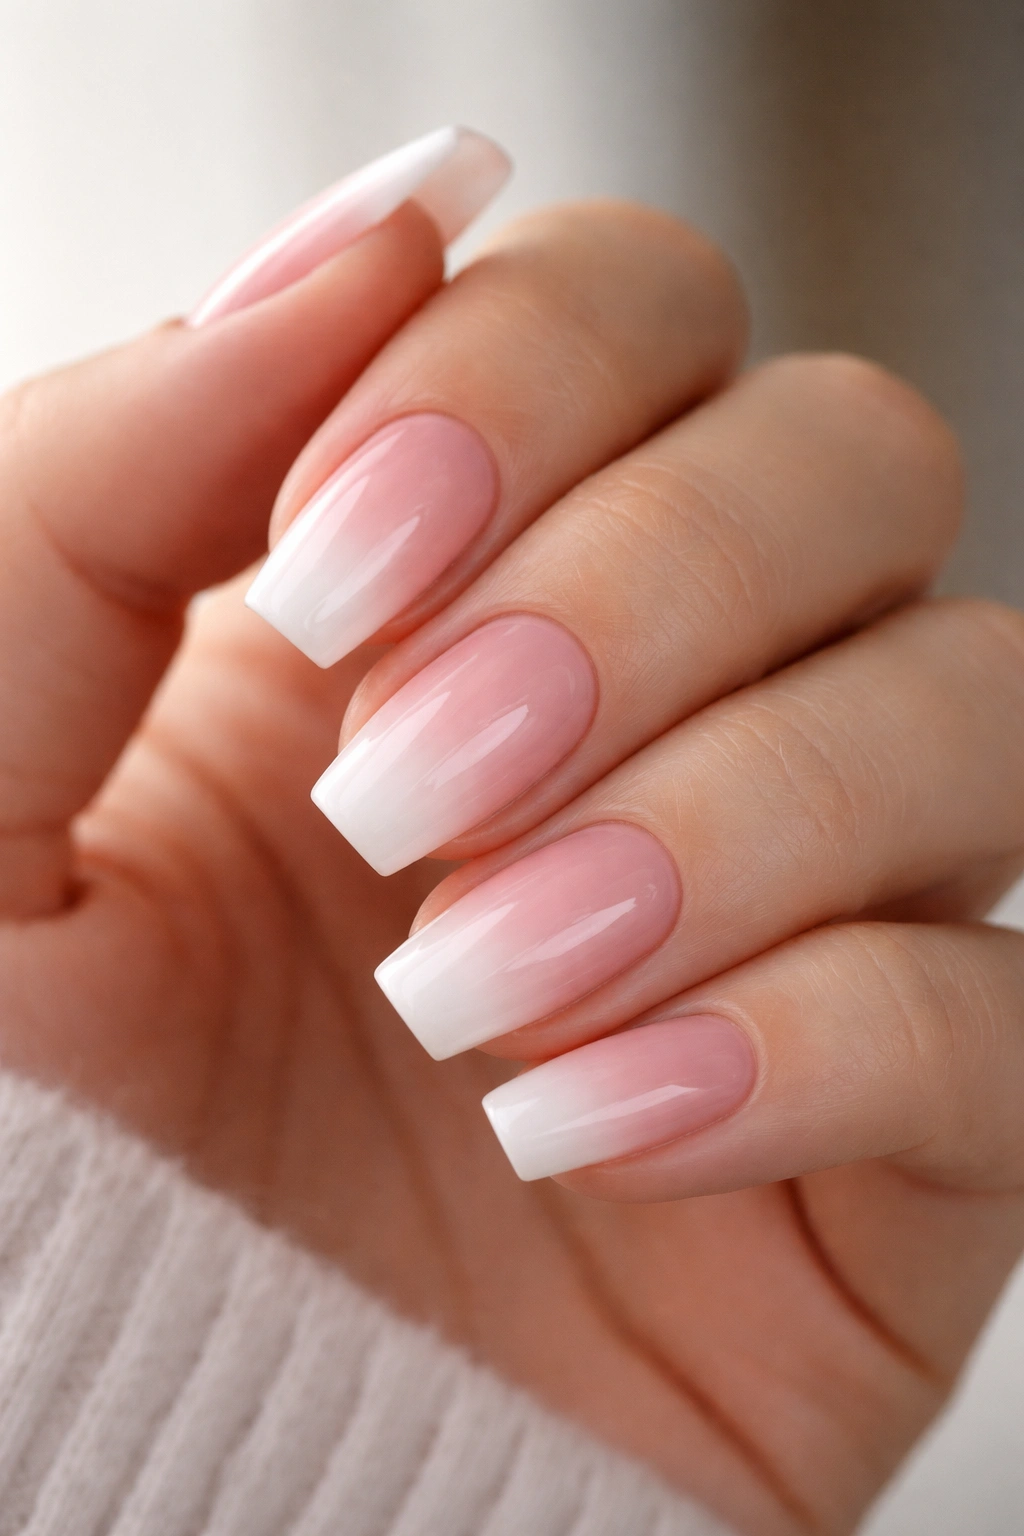
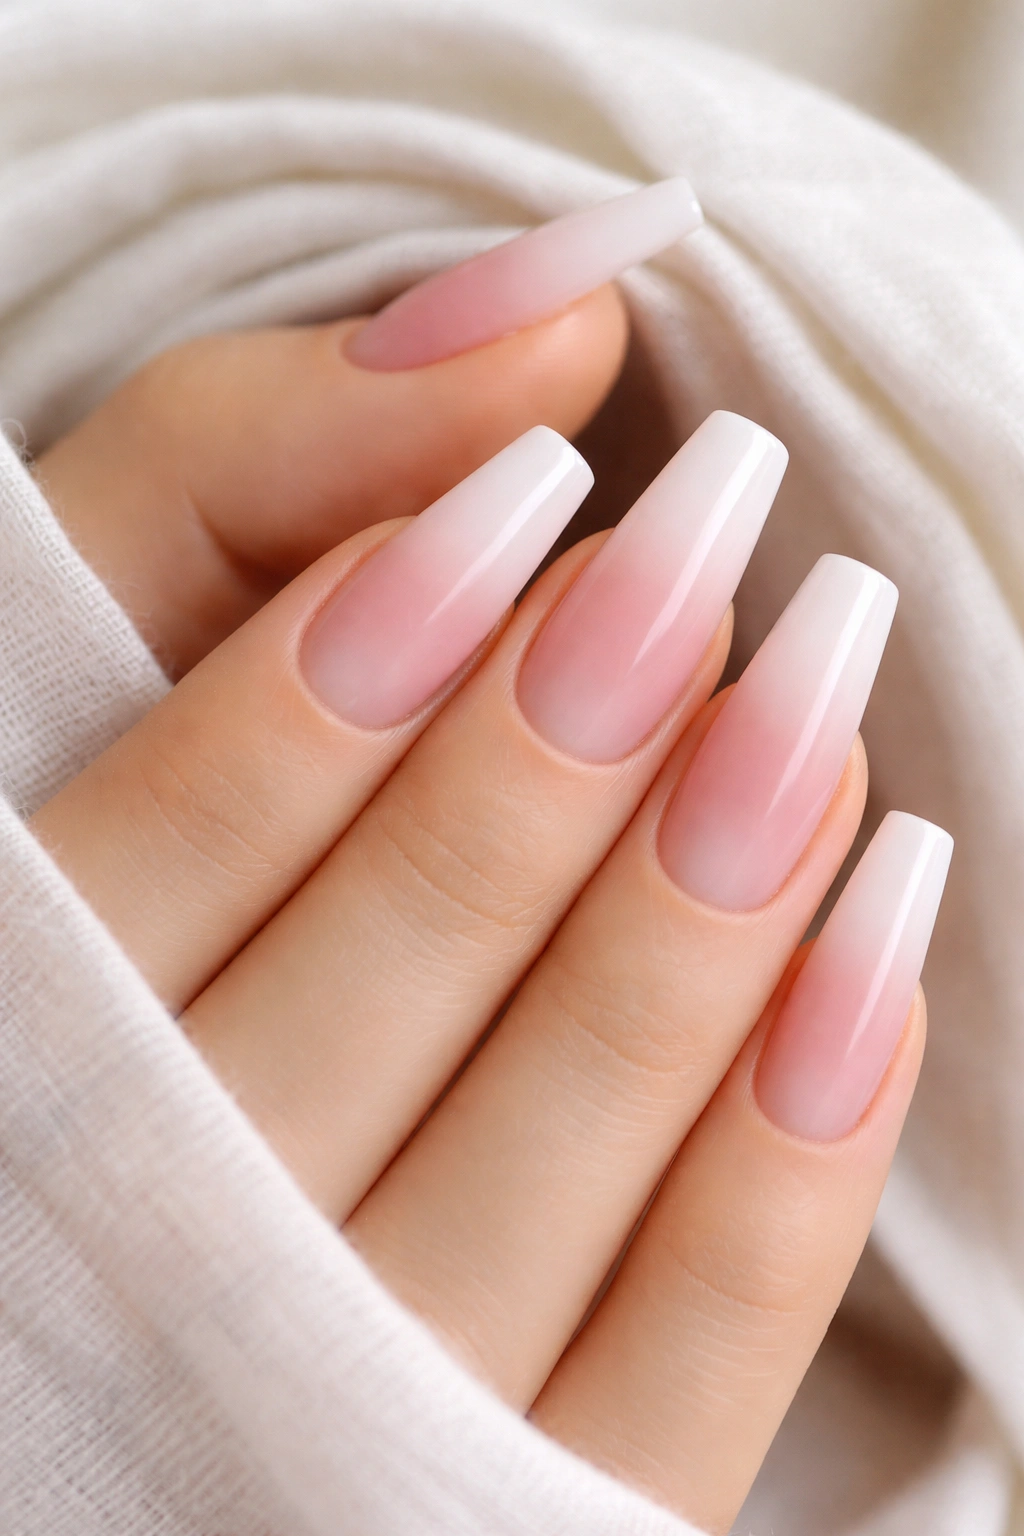
1. Soft Baby Boomer Fade With a Milky Tip

If you want the version that almost never looks wrong, start here. The classic baby boomer set uses a sheer pink base that melts into a soft, milk-white tip, and on a medium coffin shape it hits the sweet spot between polished and easy to wear.
The reason this design works so well is proportion. The white doesn’t begin halfway down the nail like a French tip. It creeps upward in a haze, which makes the nail bed look longer and cleaner. On shorter fingers, that visual stretch matters.
Why this version keeps looking expensive
A milky tip reads smoother than a stark white one. You still get contrast, but the finish looks creamy instead of chalky. That’s the difference between a set that looks custom and a set that looks rushed.
Salon menus often show this style with a glossy topcoat, and I think that’s the right call. Gloss makes the fade look deeper, almost like it sits inside the nail rather than on top.
Quick details to ask for
- Request a neutral or cool pink base if you want the set to stay crisp.
- Ask for the white to start around the last third of the nail, then feather upward.
- Keep the coffin shape medium length for the most balanced look.
- Choose a high-shine topcoat rather than matte for this version.
Best pick for: first-time ombre wearers, bridal nails, job-friendly sets, and anyone who wants a manicure that still looks right with every outfit.
2. High-Contrast Pink Base With Cloud White Ends
This one is sharper, cleaner, and less forgiving. That’s why I like it.
A high-contrast ombre takes the soft pink-and-white idea and tightens it up. The base stays more obviously pink—think rose-blush or cool ballet pink—while the tips move into a denser cloud white. The fade is still there, but you can see the shift from one shade to the other right away.
Longer coffin nails handle this look best because the tech has enough surface area to blend without the transition turning muddy. On a short set, a high-contrast fade can look abrupt unless the white is softened. On a 12 to 16 mm extension, it looks deliberate.
This is the set for someone who likes a French manicure but wants a softer edge instead of a hard smile line. It still reads clean from across the room. Up close, you get more drama. A white-heavy tip also photographs better in low indoor light, which is why this style keeps showing up for engagement shoots and formal events.
I would skip chunky gems here. The gradient itself is doing enough, and heavy embellishment can make the white tips look thicker than they are.
3. Short Coffin Ombre With a Blurred Smile Line
Can pink and white ombre work on shorter coffin nails? Yes—if the fade is placed with discipline.
Short coffin sets get messy fast when the nail tech tries to copy a long-nail design on a smaller canvas. The answer is not “more white.” The answer is a blurred smile-line effect that sits low on the nail and fades upward in a tighter, softer band.
That tiny shift changes everything. The shape still looks coffin because the sidewalls taper and the edge stays squared, but the design doesn’t crowd the nail bed. You get the clean look of an ombre without giving up typing speed or everyday comfort.
What to ask for on a shorter set
Tell your tech you want the white concentrated at the free edge only, with the fade ending before the midpoint of the nail. If the white climbs too high, the nails start looking stubby.
A sheer pink base helps. Dense cover pink can make short nails look thicker, especially after two coats of gel color and topcoat. If you wear press-ons, look for sets labeled “natural fit” or “thin cuticle area” so the ombre does not end up with a bulky ledge near the base.
Short coffin ombre is one of the smartest choices for people who want a neat manicure without babysitting extra length all week.
4. Extra-Long Coffin With Airbrushed White Fade
Walk past a salon display wall and you can spot this set from six feet away. The white looks misted on, not dabbed. That difference is the whole point.
Airbrushed ombre on extra-long coffin nails gives the smoothest gradient of the bunch. Sponged blends can look soft too, though on long nails they sometimes leave a faint grainy texture under the topcoat. Airbrushing keeps the fade cloudlike from cuticle to tip, which matters once the nail length starts demanding attention.
You need strong structure here. Long coffin nails with a flat apex and thin sidewalls do not stay cute for long.
Acrylic usually makes more sense than a flimsy overlay on this style because the tip length adds leverage every time you grab a drawer pull or button jeans.
Key details worth asking for:
- Length: at least 16 mm past the fingertip so the fade has room to breathe
- Blend: ask for a soft airbrush or fine mist fade, not a stamped-on white block
- Shape: the sidewalls should taper evenly and the tip should stay flat, not rounded
- Thickness: request a slimmer free edge so the nails do not look paddle-shaped
If you want a statement set that still stays in the pink-and-white family, this is the one I’d choose before jumping straight to crystals or heavy art.
5. Sheer Pink Ombre With a Pearl Chrome Veil
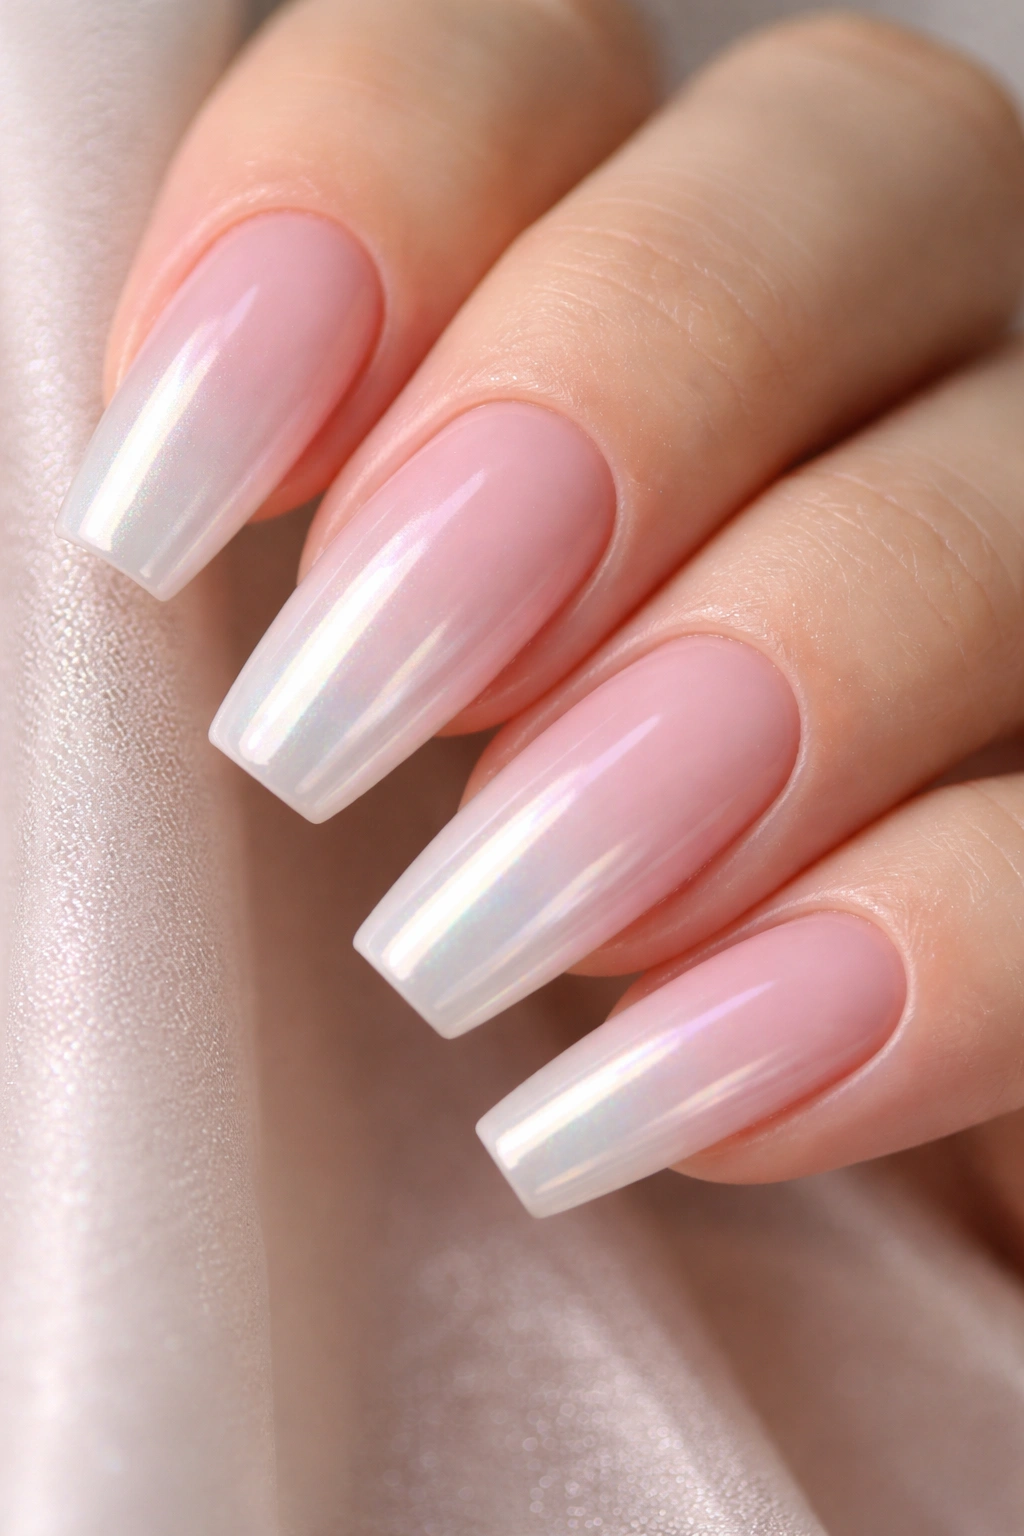
Not every pink-and-white set has to end in plain gloss. A pearl chrome veil over a sheer ombre gives the nail a glazed sheen that shifts when your hands move, and on coffin shape it looks polished in a cooler, more modern way.
I’m picky about this finish. Too much chrome and the white disappears under a silvery cast. Too little and you paid for an extra step nobody can see unless they’re holding your hand under a lamp. The sweet spot is a fine pearl powder rubbed over a cured no-wipe topcoat, then sealed with one more layer of gloss.
The base should stay sheer. That matters. When the pink is too dense, chrome turns the whole nail flat and metallic. With a translucent blush underneath, the ombre still shows through, and the white tip catches the light in a softer way than glitter.
This set suits medium coffin length better than extra-long. Once the nail gets too long, pearl chrome can lean icy and a little harsh—especially if the pink undertone is cool. On a 10 to 14 mm coffin, it stays elegant and fresh.
Wear this if you like clean nails with one extra note of sheen. Skip it if you already know you want crystals, foil, or 3D art. Chrome wants room.
6. Matte Pink and White Ombre With Sharp Sidewalls
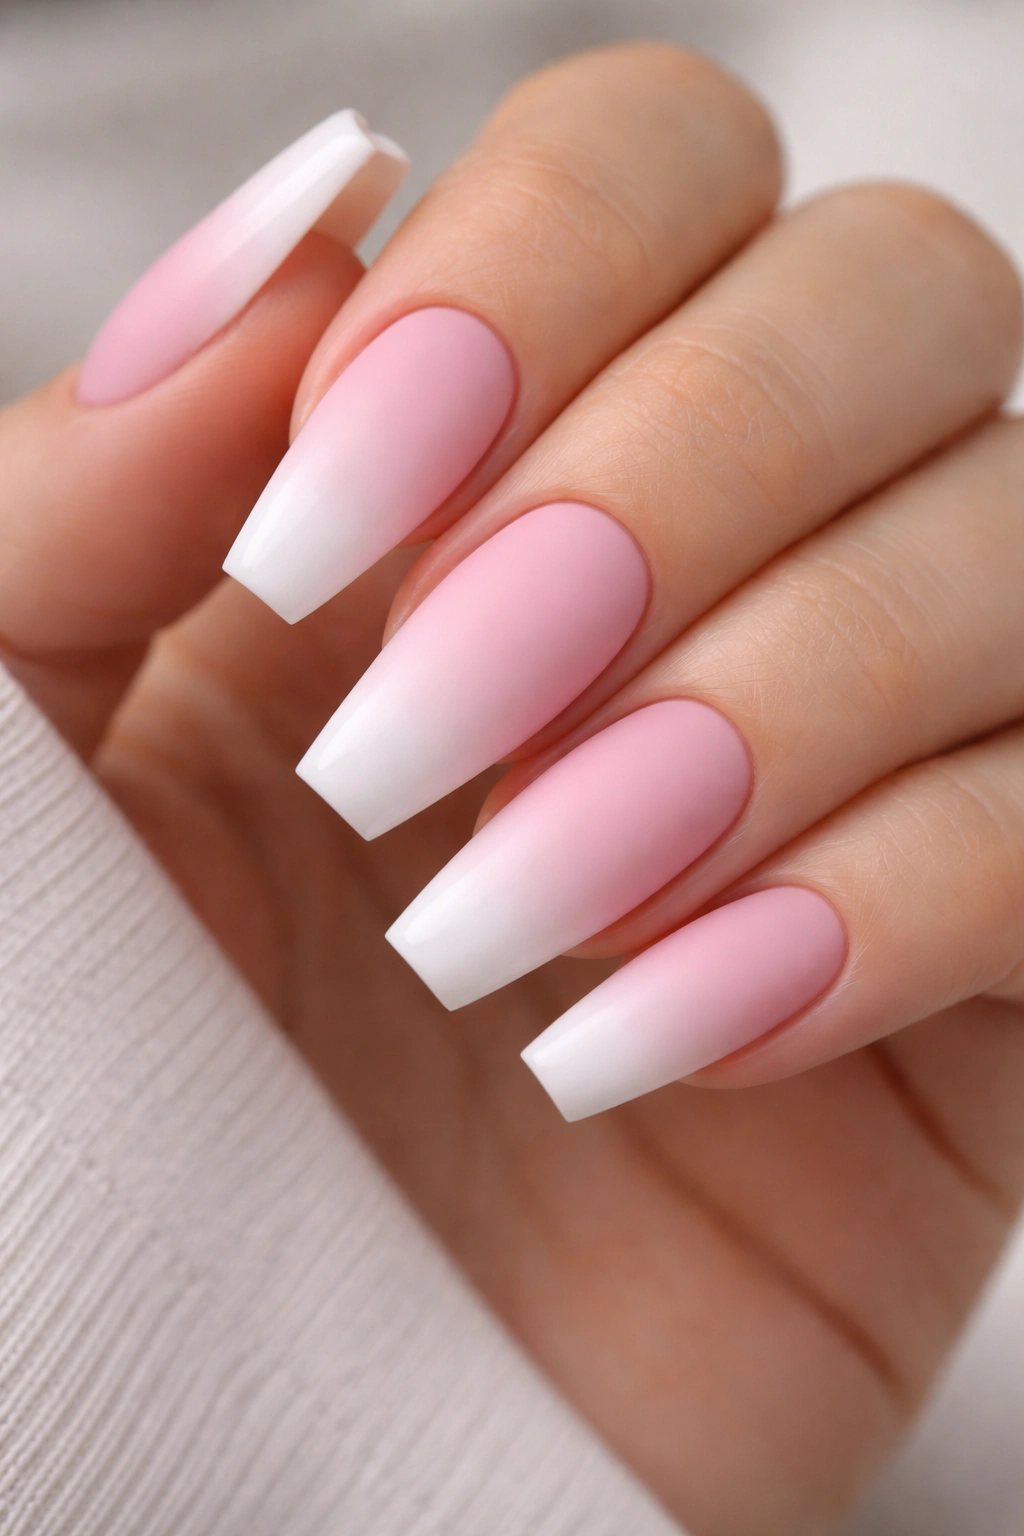
Unlike glossy ombre, which blurs every edge, matte makes shape do the talking. That’s why this version only works when the coffin structure is crisp.
The first thing matte changes is texture. The fade looks powdery, almost velvety, and the white tip appears softer even when the color itself is dense. The second thing it changes is discipline. Uneven filing, lumpy apex placement, or bumpy topcoat cannot hide under shine because there is no reflective surface to distract the eye.
Who should wear it? Someone who loves a clean manicure but wants less “bridal” energy and more fashion-editor energy. Matte pink-and-white coffin nails look good with monochrome outfits, tailored clothes, and shorter jewelry. They do not need sparkle to feel finished.
I’d keep the length medium or long, not tiny. Short matte coffin can look blunt unless the taper is dialed in. Ask for a soft blush base, not peach, and a white fade that stays milky rather than bright. Snow white plus matte can look dry.
One practical warning: matte topcoat shows makeup, self-tanner, ink, and cooking stains faster than gloss. If you cook with turmeric or wear a lot of foundation, plan on a little extra care.
7. Glitter-Cuticle Ombre Over a Pink and White Base
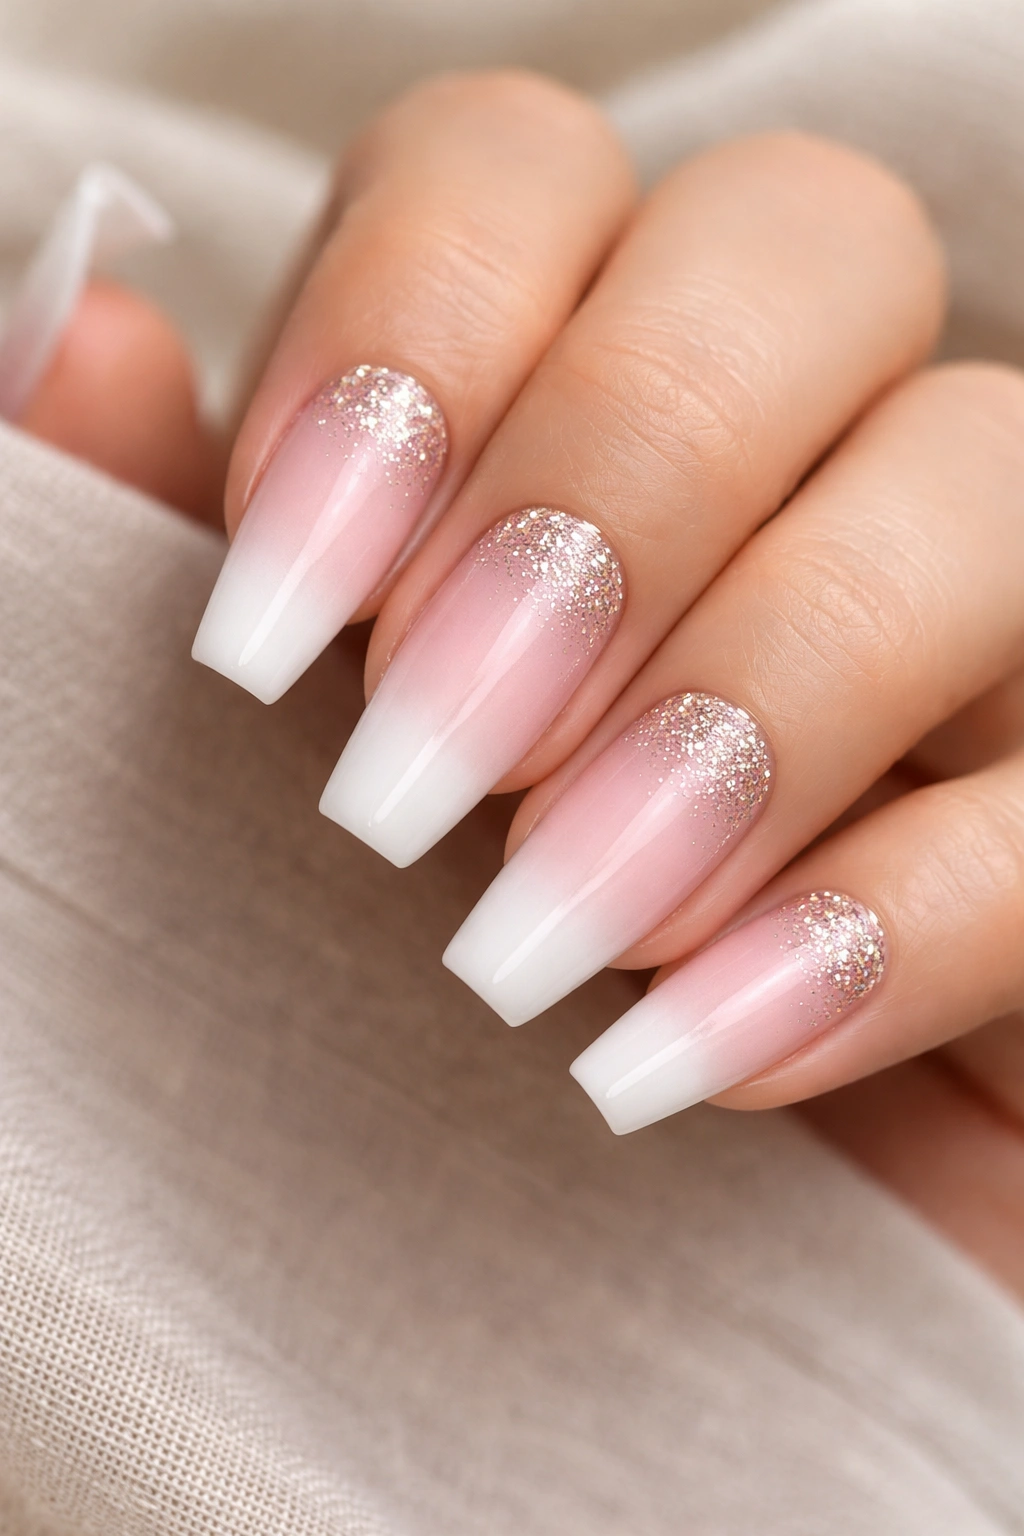
A good glitter set is about placement, not quantity. Put the sparkle at the tips and it can fight the white ombre. Move it to the cuticle area, and the whole nail looks more balanced.
That’s why a glitter-cuticle fade works so well over pink and white coffin nails. The eye starts at the base, catches the shimmer, then moves through the soft pink toward the white tip. You keep the clean ombre while getting some movement and shine.
Where this style can go wrong
Big hex glitter is the fastest route to a bulky nail. Fine glitter gel or hand-placed micro glitter sits flatter and looks cleaner. I’d use champagne, soft silver, or iridescent pink, not rainbow craft glitter.
Best way to wear it
- Keep glitter on one or two nails per hand if you want the ombre to stay front and center.
- Let the glitter fade stop within 5 to 7 mm of the cuticle area.
- Use a high-gloss topcoat to smooth the surface.
- Skip heavy crystals on top of the glitter; the nail gets crowded fast.
This version makes sense for parties, birthdays, and dressier weekends, though it can still work in daily life if the sparkle stays tight and fine-grained.
8. White-Heavy Ombre With a Soft Bridal Coffin Edge
Most “bridal” sets go too bright. The white is icy, the pink is flat, and the nails end up looking disconnected from the hand. A better route is a white-heavy ombre with a softened coffin edge.
By softened, I do not mean almond. I mean a coffin shape that still has a flat tip, though the corners are lightly refined so the silhouette looks gentler from the front. That subtle change makes the whole set feel less severe.
The ombre itself should lean white, with the fade starting higher on the nail bed than it would on a standard baby boomer set. This gives a cleaner, more formal finish, especially in satin fabrics and pale makeup looks where warm beige tones can look muddy.
I also prefer a milk-bath white here instead of a bright salon white. It photographs more naturally against skin, lace, and sheer fabrics. If the base pink is too rosy, the manicure can start competing with blush and lip color. A pale neutral pink keeps the balance.
This style is not only for weddings, by the way. It also works for anyone who likes a neat, dressy manicure and has no interest in glitter, chrome, or 3D art. Sometimes restraint wins.
9. Pink and White Ombre Coffin Nails With 3D Flowers on Two Fingers
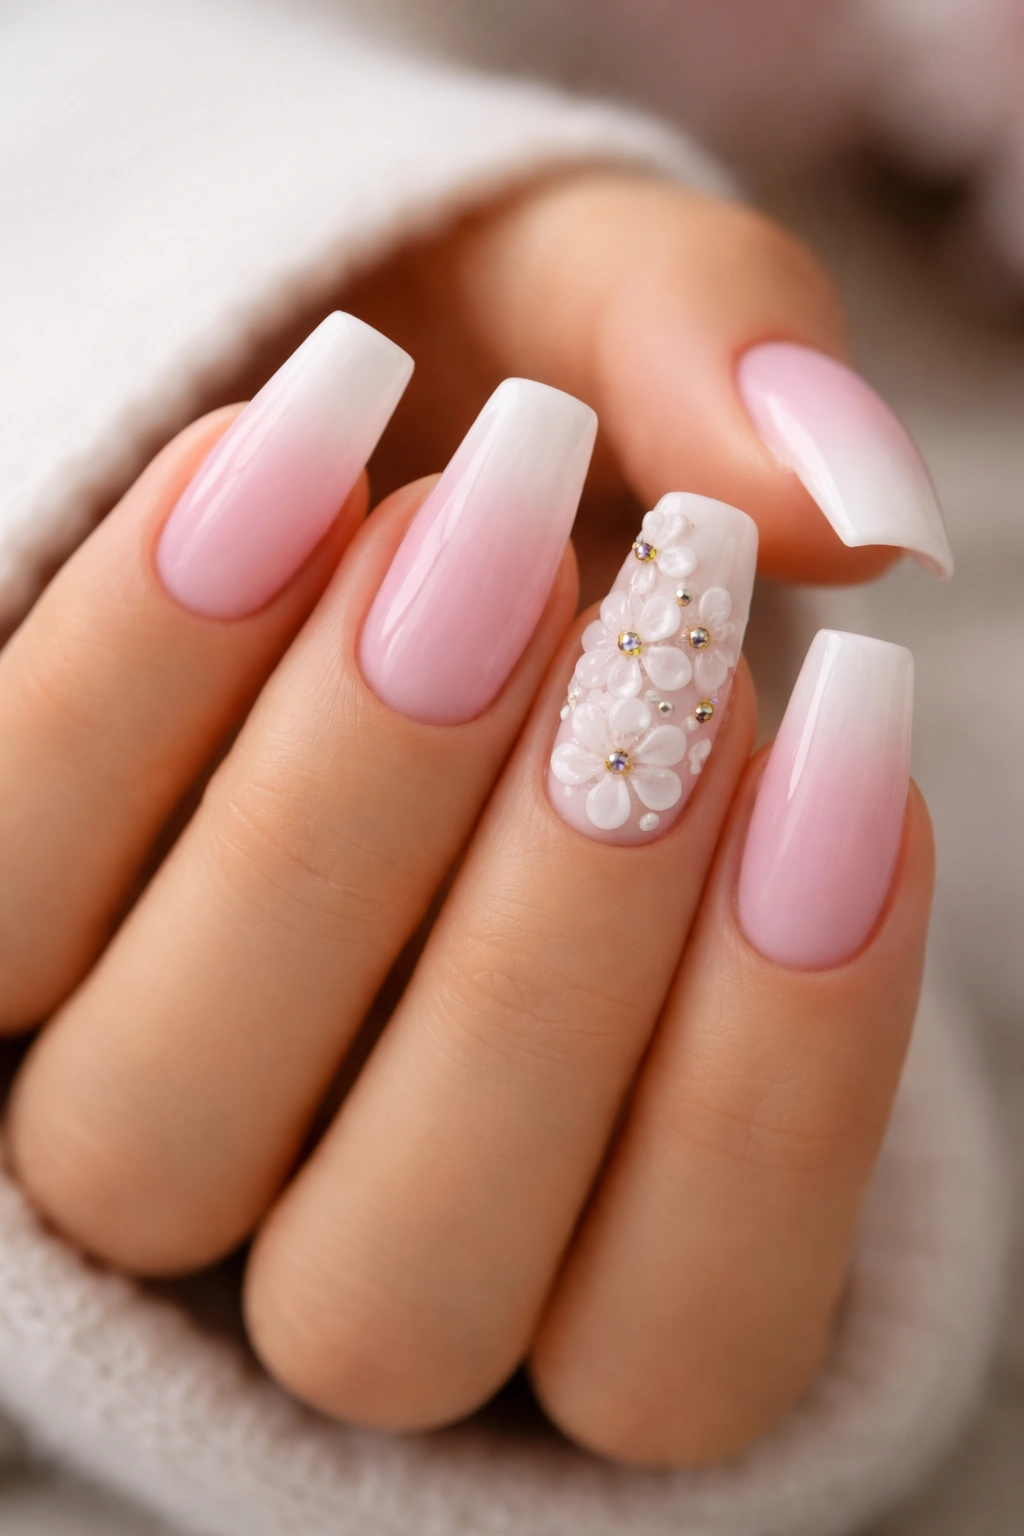
There’s a narrow lane where floral nail art still looks refined, and this is it. Two accent nails. Raised flowers with some space around them. No more than that.
The base needs to stay simple: a soft pink-to-white ombre, glossy finish, medium or long coffin shape. Then you place 3D flowers—usually acrylic flowers or sculpted gel blooms—on the ring finger and maybe the thumb or middle finger. Keep them small enough that you can still see the fade underneath.
Flower placement matters more than flower count
I like flowers set near the lower third of the nail or drifting slightly off-center, rather than slapped dead center like a sticker. That leaves breathing room at the tip and keeps the coffin shape visible.
Details that keep this style from tipping into costume territory
- Use white, blush, or translucent petals, not five different colors
- Limit each accent nail to one main bloom and one tiny bud, or a small cluster
- Add micro beads or a single pearl center instead of chunky rhinestones
- Keep the other nails clean ombre with no extra art
This design has a soft, romantic mood, though it still needs decent upkeep. Raised flowers catch on knits, towels, and hair if they’re built too high. Tell your tech you want low-profile petals.
10. French-Outline Ombre With a Thin White Border
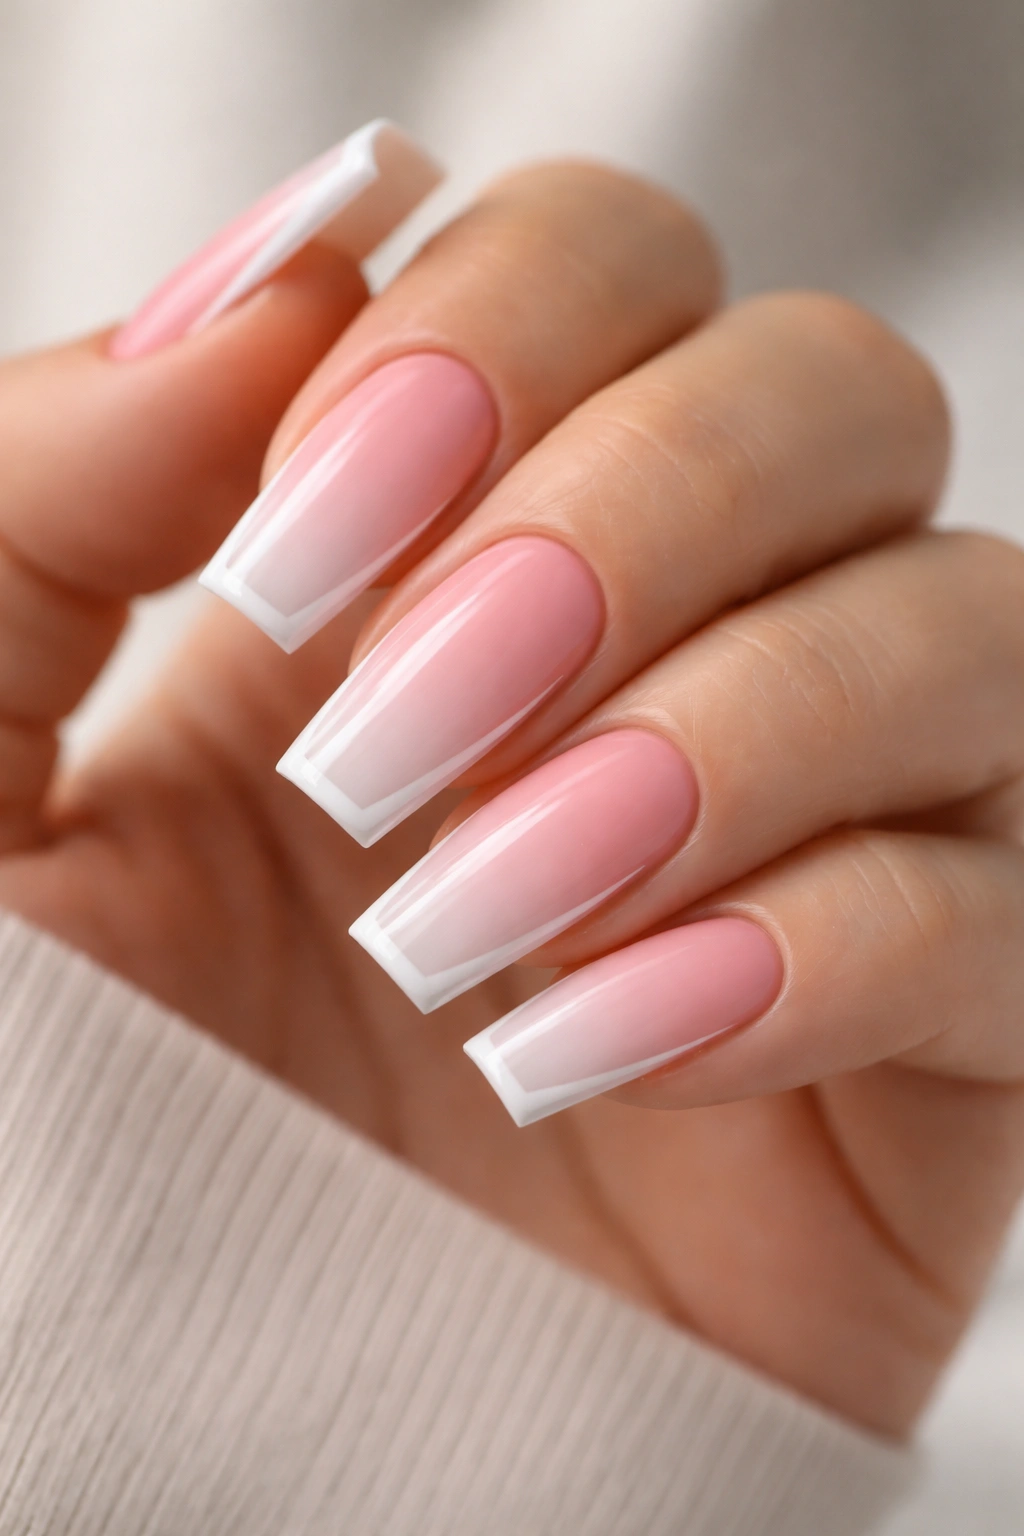
What if you like ombre and still miss the crispness of a French tip? There’s a smart middle ground.
A French-outline ombre uses the usual pink-and-white fade across the whole nail, then adds a razor-thin white border tracing the squared coffin tip. You keep the softness through the center of the nail, but the edge gets a frame. The effect is sharper than a baby boomer set and less stiff than a standard French.
Why the border works
That thin line gives the eye a place to land. Coffin shape loves definition at the tip, and the border reinforces the silhouette without slicing the nail bed in half with a hard smile line.
This works best on medium and long sets because the outline needs space to stay thin. On a short coffin, the extra line can make the tip look crowded. Ask for a border around 1 millimeter wide, no thicker. Once the line gets chunky, the whole design changes.
If you order custom press-ons, send a side-view reference. Tip outline placement depends on where the free edge sits, and press-on artists need that angle to avoid a border that looks too low from the side.
It’s a clever design. Clean, a little architectural, and far less common than plain ombre.
11. Nude-Blush Ombre With Tiny Cuticle Crystals
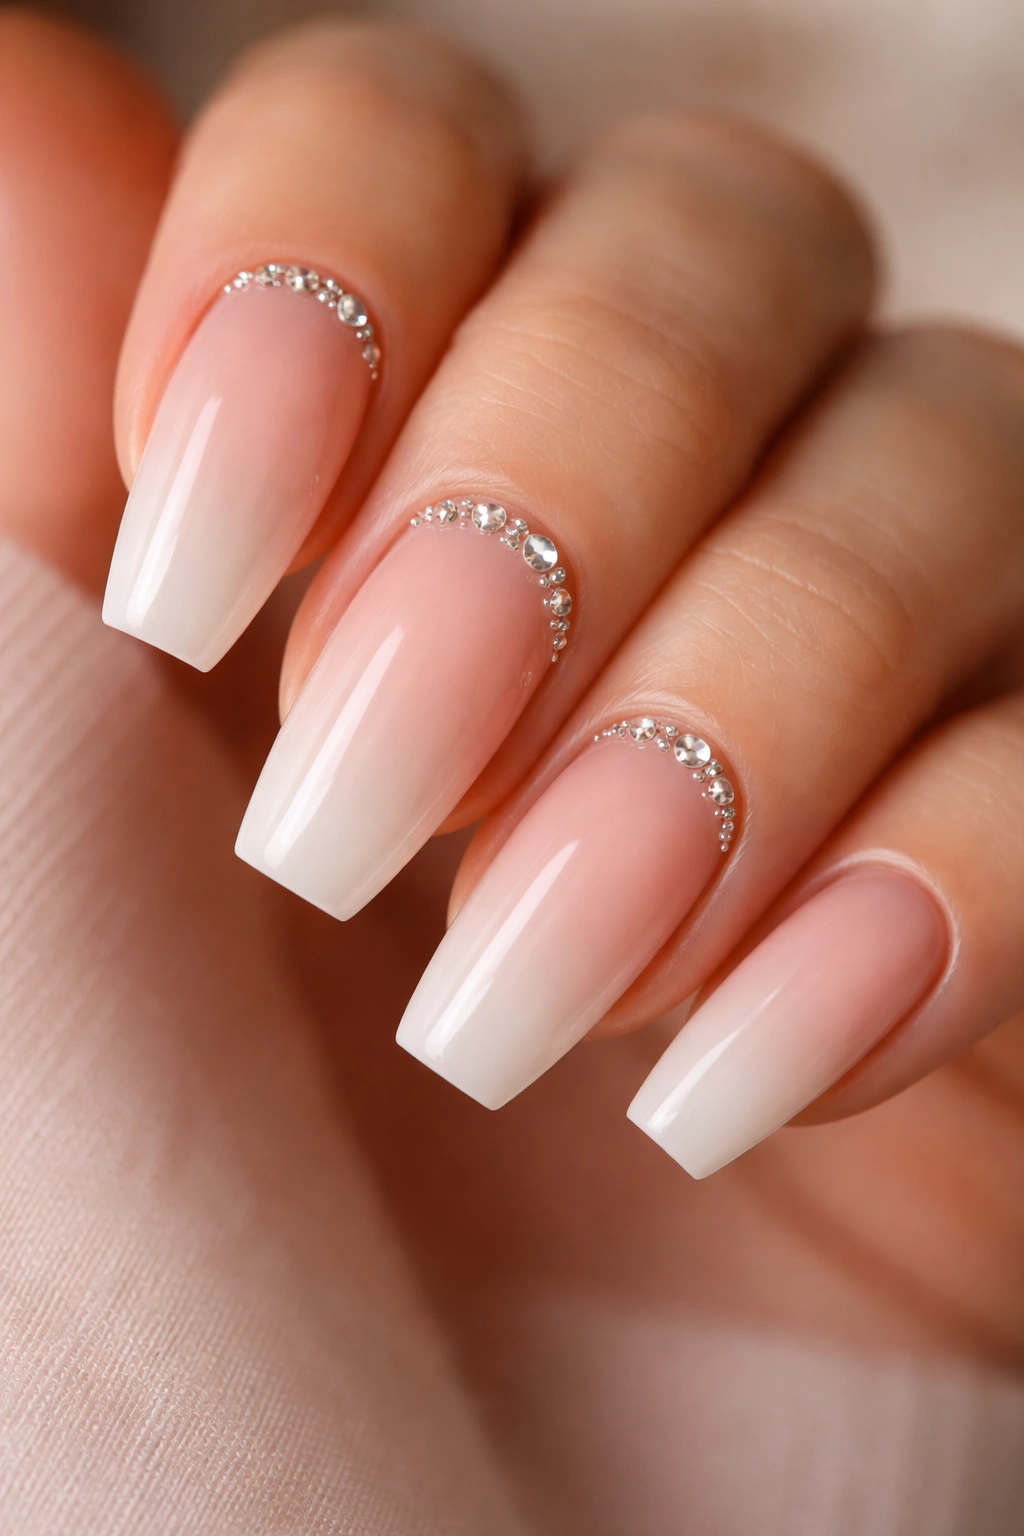
Some embellished sets feel loud before your hand even moves. This one doesn’t. The crystals stay tiny—think ss3 to ss5 size, not statement stones—and they sit close to the cuticle where they act more like punctuation than decoration.
The base ombre shifts away from candy pink and toward a nude blush, which makes the crystals stand out without making the manicure feel sugary. White tips still matter, though the fade should stay softer and more translucent than bridal white. You want glow, not glare.
I’d place crystals on one side of the cuticle line rather than making a full tiara shape across every nail. A small curved cluster on two fingers often looks better than matching arcs on all ten. Repetition can make a delicate detail start looking stiff.
Gloss is the right finish here. Matte topcoat kills the crisp sparkle that makes the tiny stones worth the effort.
One caution: placement near the cuticle means the stones grow out more noticeably than tip art. If your nails grow fast, you’ll see it. If that bothers you, save this design for shorter wear periods or ask for the crystals one-third down the nail instead.
12. Reverse Ombre Coffin Nails With White Near the Cuticle
This is the outlier, and I’m glad it exists.
A reverse ombre flips the expected layout by placing the white near the cuticle and letting it fade into pink or blush toward the tip. Done badly, it looks backward in a way that never settles. Done well, it looks soft, airy, and unusual without wandering off into novelty territory.
The trick is tone. The white near the cuticle cannot be stark. It needs to look almost milky, then drift into a warmer pink through the middle of the nail. I would not try this with a hot pink base or a bright-white root. That version gets harsh fast.
Long coffin nails wear this design best because the color shift needs room. A shorter reverse ombre can look crowded near the cuticle and unfinished at the tip. On a longer set, the eye reads it as a gradient instead of a mistake.
A few specifics make the difference:
- Use a soft white halo near the cuticle, not a dense painted block
- Let the pink deepen toward the last half of the nail
- Keep the surface glossy and smooth
- Skip heavy tip art, which fights the reversed color flow
If you’re bored with classic pink-and-white ombre but still want something clean, this is the direction I’d try first.
Final Thoughts
Pink and white ombre coffin nails work best when the structure is doing as much work as the color. Get the taper right, keep the sidewalls even, choose the right pink for your skin tone, and the design almost sells itself.
If I had to narrow the field, I’d put soft baby boomer fade, matte sharp-sidewall ombre, and French-outline ombre at the top. Those three cover the cleanest everyday look, the crispest editorial look, and the smartest twist on the classic.
Pick one that matches how you actually use your hands, not only what looks good on a salon card. A gorgeous set that catches on every zipper and needs constant care stops feeling gorgeous in a hurry. The right version, though, keeps earning compliments long after the appointment ends.
