

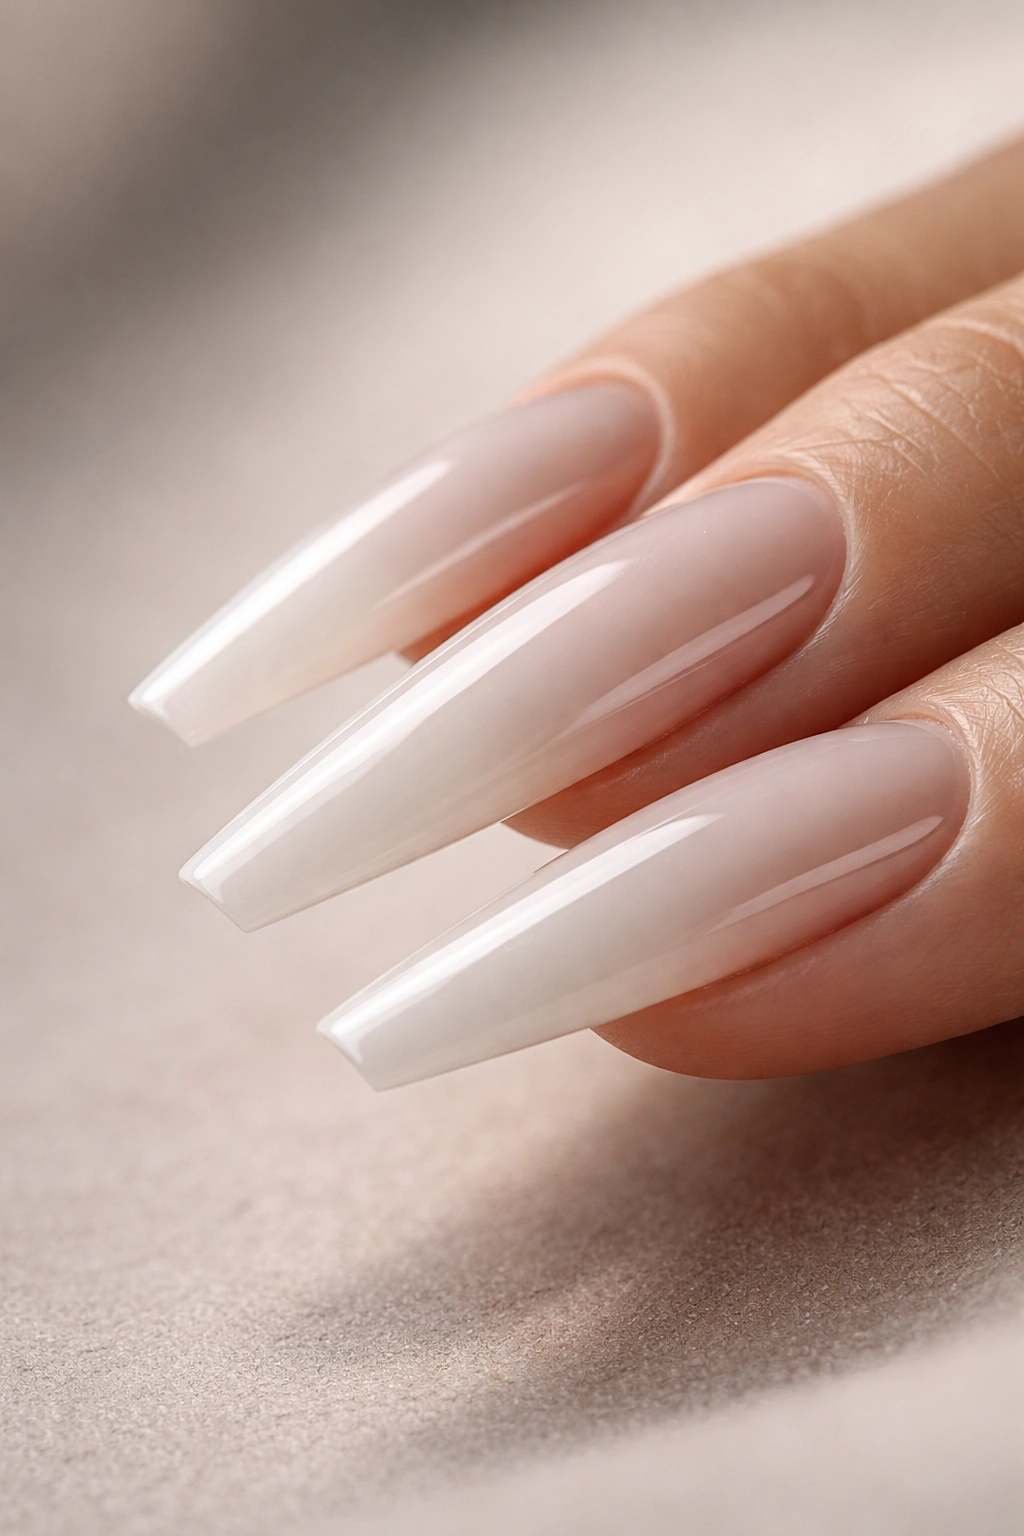
Milky white coffin nails for long nails have a built-in advantage: they soften length instead of fighting it. A solid white can make a long set look thick and blunt. A sheer nude can fade into the background. That creamy, blurred white in the middle hits a sweet spot that makes the shape look longer, slimmer, and a lot more polished.
Long coffin nails also expose every little mistake. If the sidewalls flare, you see it. If the free edge is bulky, the white shade makes it louder. If the product is too opaque, the set can look like correction fluid. The best milky white sets avoid all of that by letting a little light pass through the nail while still hiding enough of the natural plate to look smooth.
I keep coming back to this look because it does something a lot of nail colors do not: it can be plain and still feel finished. No charms. No loud art. No heavy glitter. Just a soft white wash on a clean coffin shape, and the hands already look put together.
That is where the fun starts, because once the base is right, you can push milky white in a dozen different directions without losing that clean look.
Why the Soft White Wash Flatters a Long Coffin Shape
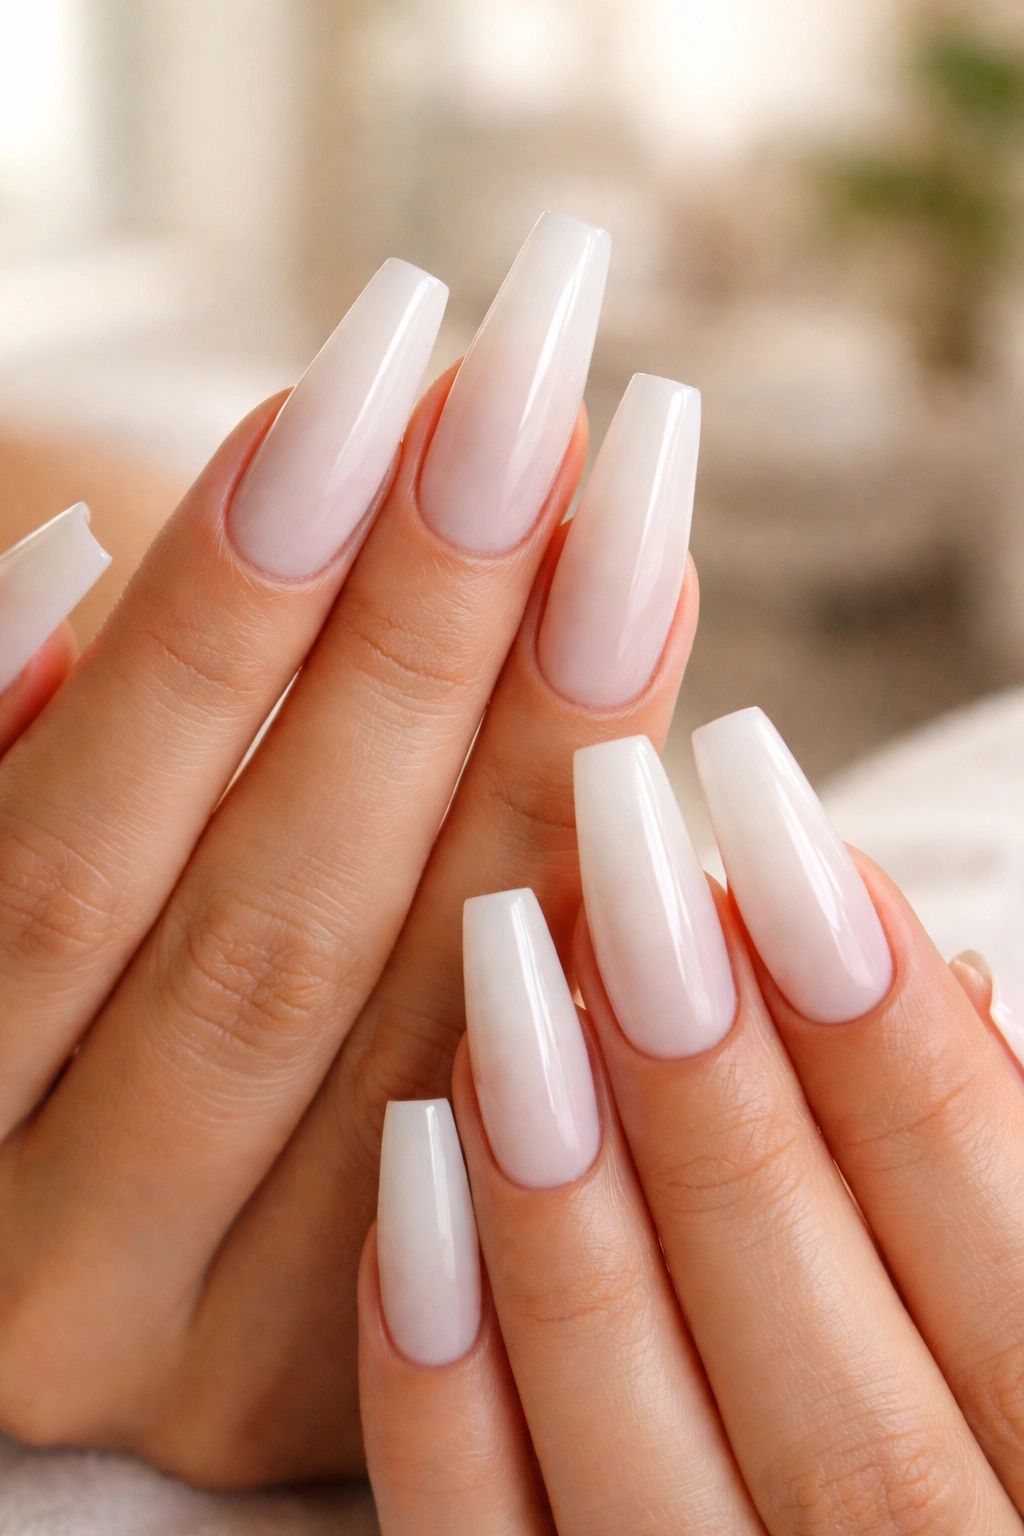
Milky white is kinder to a long coffin shape than flat white polish. That sounds small, but it changes the whole set. Coffin nails already have visual width through the middle and a squared-off tip at the end. A chalky white covers every part of that shape evenly, which can make the nail look wider than it is.
A milky finish breaks that up. Light still moves through the color a little, so the center of the nail keeps some depth. The tip looks softer. The sidewalls look less harsh. On a long ballerina shape, that slight translucency gives you length without the “block of white plastic” problem.
Opacity matters here. I like milky white best when it lands around 40 to 60 percent coverage—enough to blur the nail bed and free edge, not enough to make the nail look painted shut. One thin coat often looks too watery on long extensions. Two thin coats, or a milky builder gel topped with sheer white gel polish, usually gives the smoother result.
The finish matters too.
A high-gloss top coat turns milky white into something creamy and glassy. Matte shifts it toward porcelain, which can look stunning on the right set but also shows surface bumps much faster. If your nail tech does not smooth the structure well before color, milky white will tell on them.
The Apex and Sidewall Shape That Keep Long Coffin Nails From Snapping
How do long coffin nails stay elegant instead of clunky?
Structure. Always structure.
Color gets the screenshots, but the apex, sidewalls, and free-edge thickness decide whether your long milky white nails look expensive on day one and still look balanced a week later. On a well-built set, the highest point of the nail sits a little back from the center—usually around the stress area, not right at the cuticle and not all the way at the tip. That placement helps the nail carry length without feeling floppy.
Here are the details worth checking from the side and from straight on:
- Apex placement: On a long coffin set, the apex often sits about one-third of the way down from the cuticle area, right where the nail needs support.
- Free-edge thickness: The tip should not look chunky. From the side, it should taper down, closer to the thickness of a gift card than a spoon handle.
- Sidewalls: They should run straight, then narrow cleanly toward the squared tip. If they bow out, the shape gets wide fast.
- Underside cleanup: A pale shade makes a messy underside stand out. Ask for the underside to be refined and sealed.
- Corner strength: Coffin corners take hits. A tech who leaves them paper-thin is asking for cracks.
Acrylic and hard gel both work for this shape. Builder gel overlays can work too if the natural nail underneath has enough strength and the length is not extreme. For extra-long sets, I lean toward systems with a little more backbone.
Skip this part, and no design will save the set.
What to Ask for at the Salon for Milky White Coffin Nails on Long Nails
Walk into a salon and ask for “milky white,” and you can get five different nails back. One tech hears soft sheer white. Another hears opaque baby powder white. Someone else reaches for a pink-leaning milky shade that looks almost beige under indoor light.
You will get closer to what you want if you ask in layers.
Ask for the Color in Plain Language
Say you want a semi-sheer creamy white, not a flat white and not a nude. If you have a reference photo, point out why you like it: the softness, the glow, the amount of coverage, the finish. “Milky” means different things to different people.
Ask for the Shape and Length Separately
Tell them you want long coffin or long ballerina nails with straight sidewalls and a soft square tip. If you only say “coffin,” some salons taper too hard and leave you halfway to stiletto.
A practical salon script looks like this:
- Length: “Past the fingertip by about 10 to 15 mm.”
- Shape: “Long coffin, straight sides, not too narrow at the tip.”
- Color: “Sheer milky white, not bright white.”
- Surface: “Smooth apex, slim tip, glossy top coat.”
- Art add-ons: “Keep the base milky, then add chrome / glitter / flowers on top.”
That last line helps more than you would think.
How to Keep Milky White Coffin Nails Bright Between Appointments

White shows everything. Makeup. Hair dye. Self-tanner. Turmeric. Tomato sauce. Even the blue cast from dark denim can dull a pale nail if the top coat is scratched up and porous.
Cuticle oil is the first habit that makes a difference. Not because it sounds nice, but because dry enhancement product looks dusty faster, and dry skin around a milky white set makes the whole manicure look tired. Two small drops, rubbed into the sidewalls and cuticle area morning and night, goes a long way.
Public guidance from the American Academy of Dermatology also warns against cutting cuticles aggressively, and that is advice worth following. The cuticle helps seal the nail area from irritation. If that skin gets nicked and inflamed, even the cleanest milky manicure looks rough.
A few things stain pale nails faster than people expect:
- Self-tanner and bronzing mousse
- Hair color and tinted shampoos
- Curry, paprika, and turmeric-heavy cooking
- Strong cleaners without gloves
- Foundation or concealer rubbed off with nails
If you cook a lot, wear gloves for dishes, and use self-tanner, apply it with a mitt and wash your palms well after. Also, book fills before the white starts looking gray near the cuticle line. On long coffin nails, two to three weeks is the window where shape and color usually still look sharp.
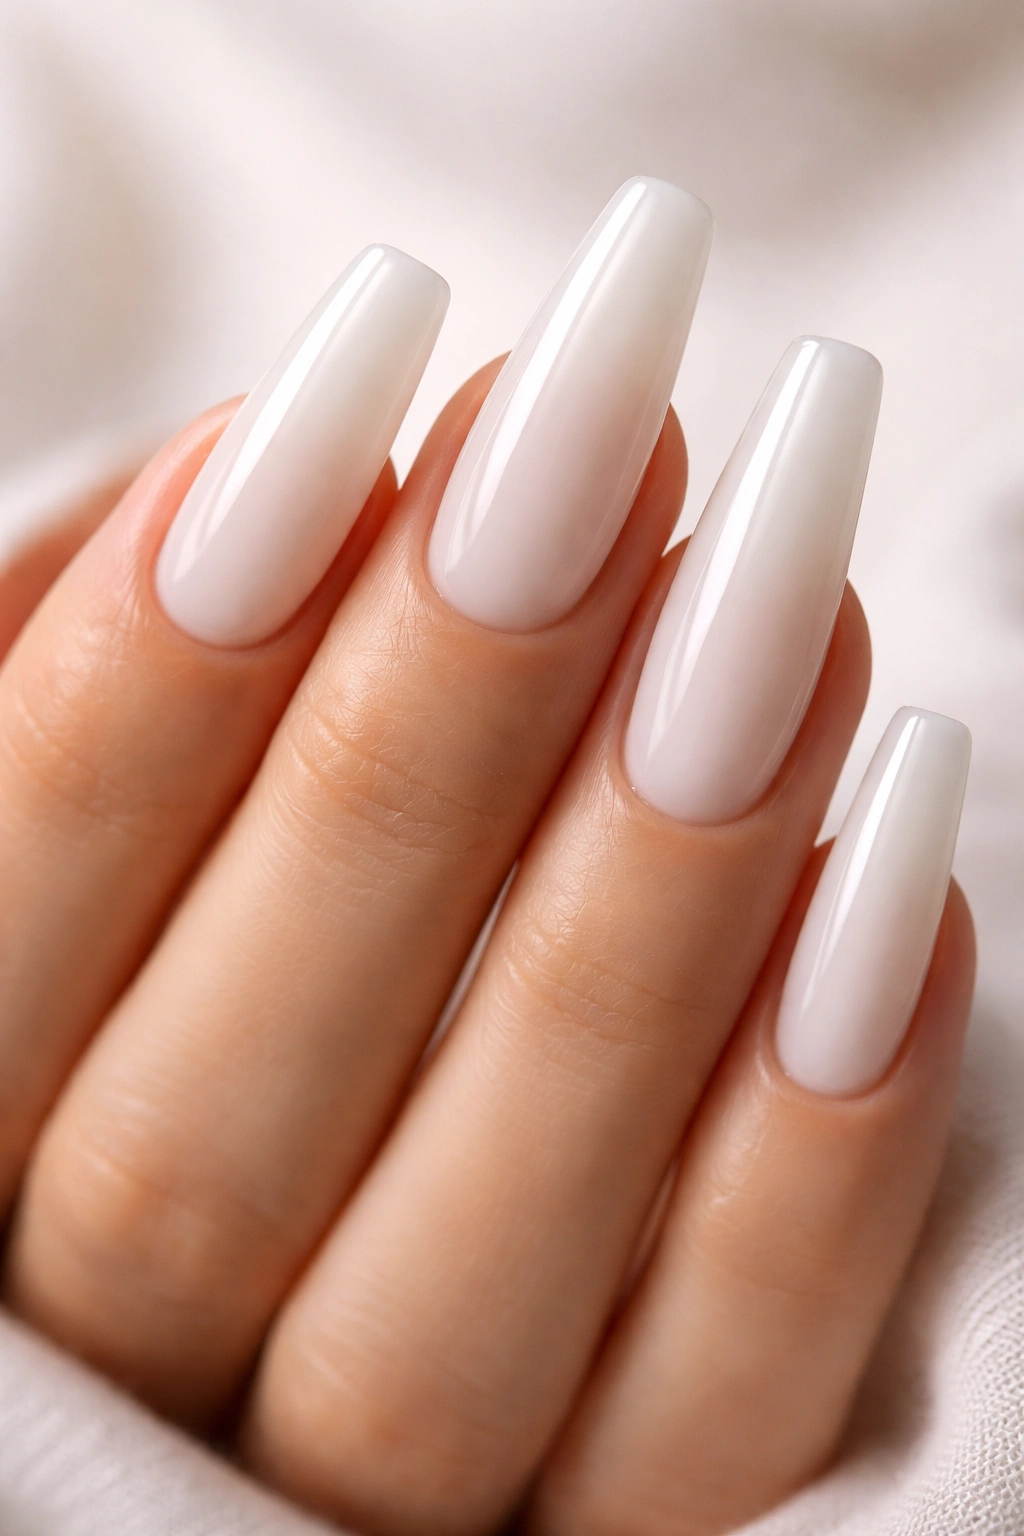
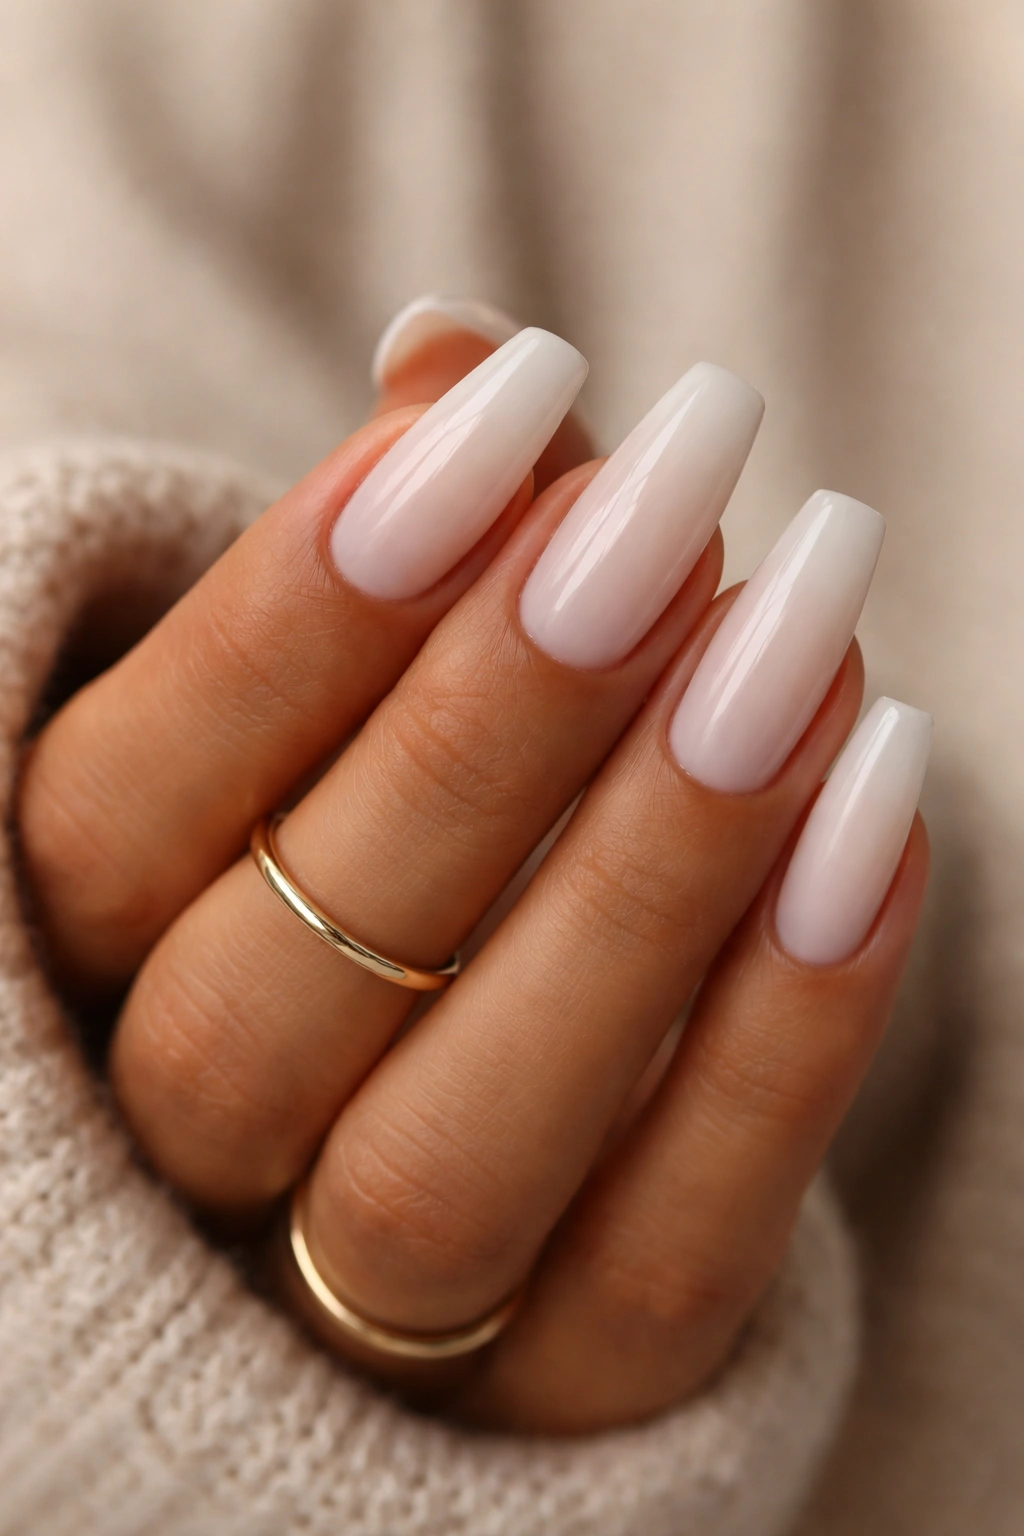
1. Pure Milky White Glass-Finish Coffin Nails
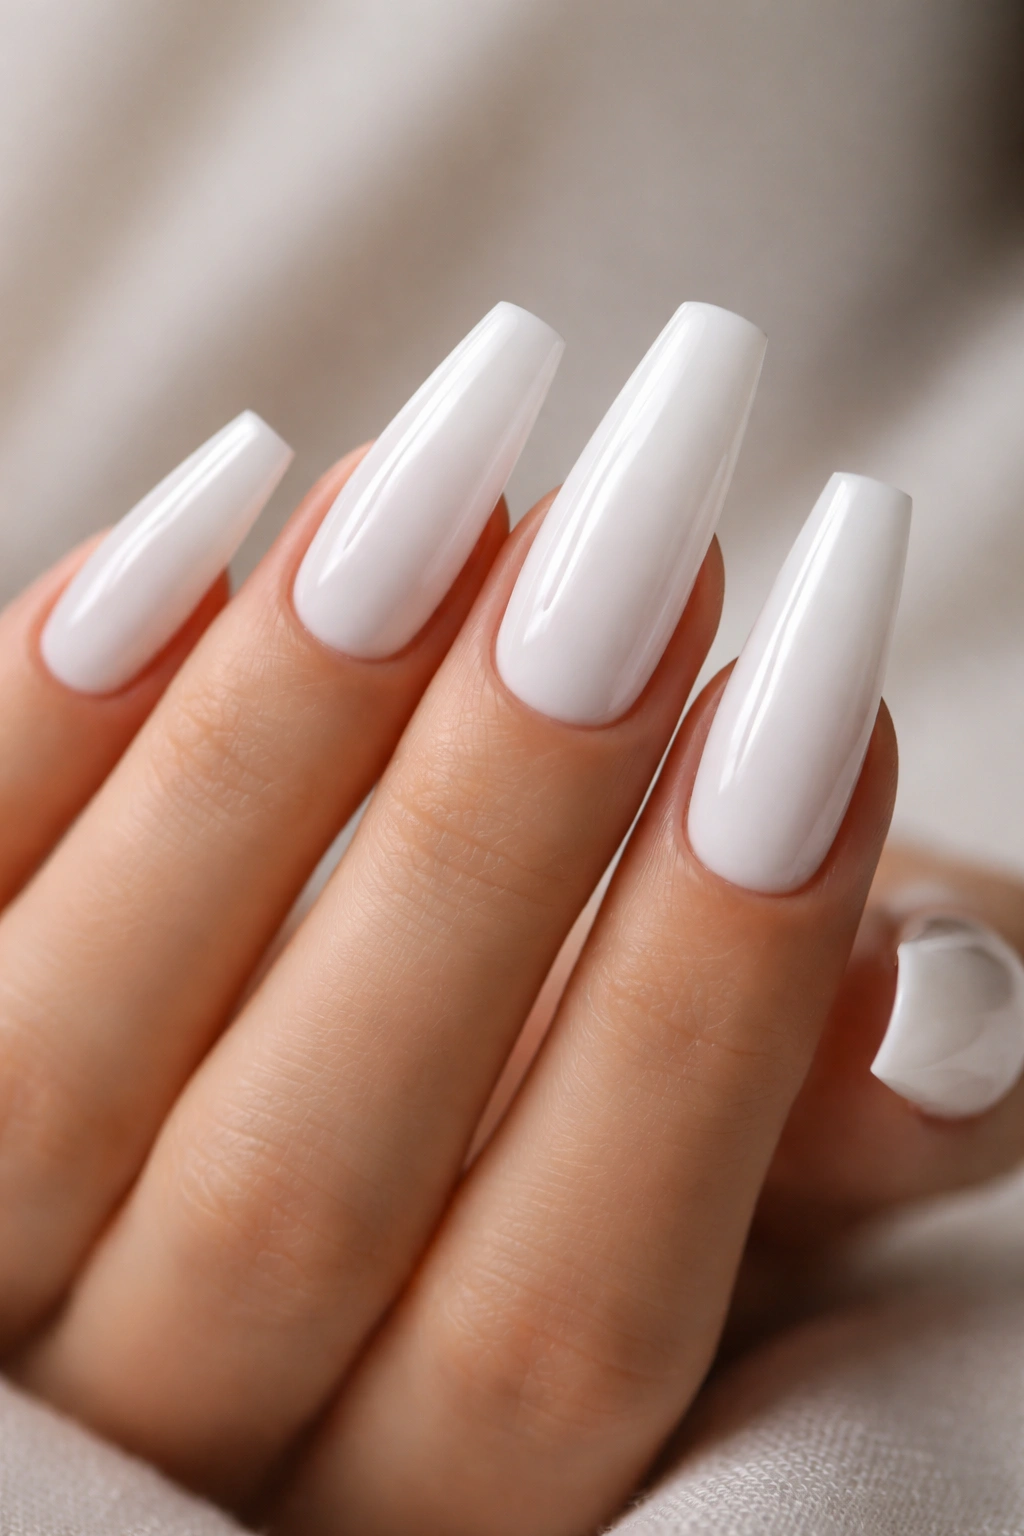
This is the baseline set, and I mean that as praise. A plain milky white coffin manicure with a wet-look gloss does not need extra art to hold attention. On long nails, it looks crisp, creamy, and expensive in the old-school salon sense—the kind of set where the shape does most of the talking.
The trick is restraint. You want a white that softens the nail bed, not one that erases it. A glassy top coat over a semi-sheer white gives that smooth “milk bath” look without pushing the set into costume territory.
Why It Works on Long Nails
Long coffin nails already have drama from the shape alone. A clean glass-finish milky white lets the length read as sleek instead of loud. It also hides tiny color shifts in the natural nail underneath better than a sheer nude, which matters once you get into longer extensions and refill cycles.
Quick Details to Ask For
- Use two thin coats of milky white instead of one thick coat, which can pool at the sidewalls.
- Keep the tip narrow but not pinched; a squeezed coffin shape looks cheap fast.
- Ask for a high-gloss, scratch-resistant top coat so the white keeps its depth.
- If your skin has warm undertones, a creamy milk tone often looks softer than an icy blue-white.
Best tip: if you want a set that works with every outfit, event, and hand pose, start here before you add anything else.
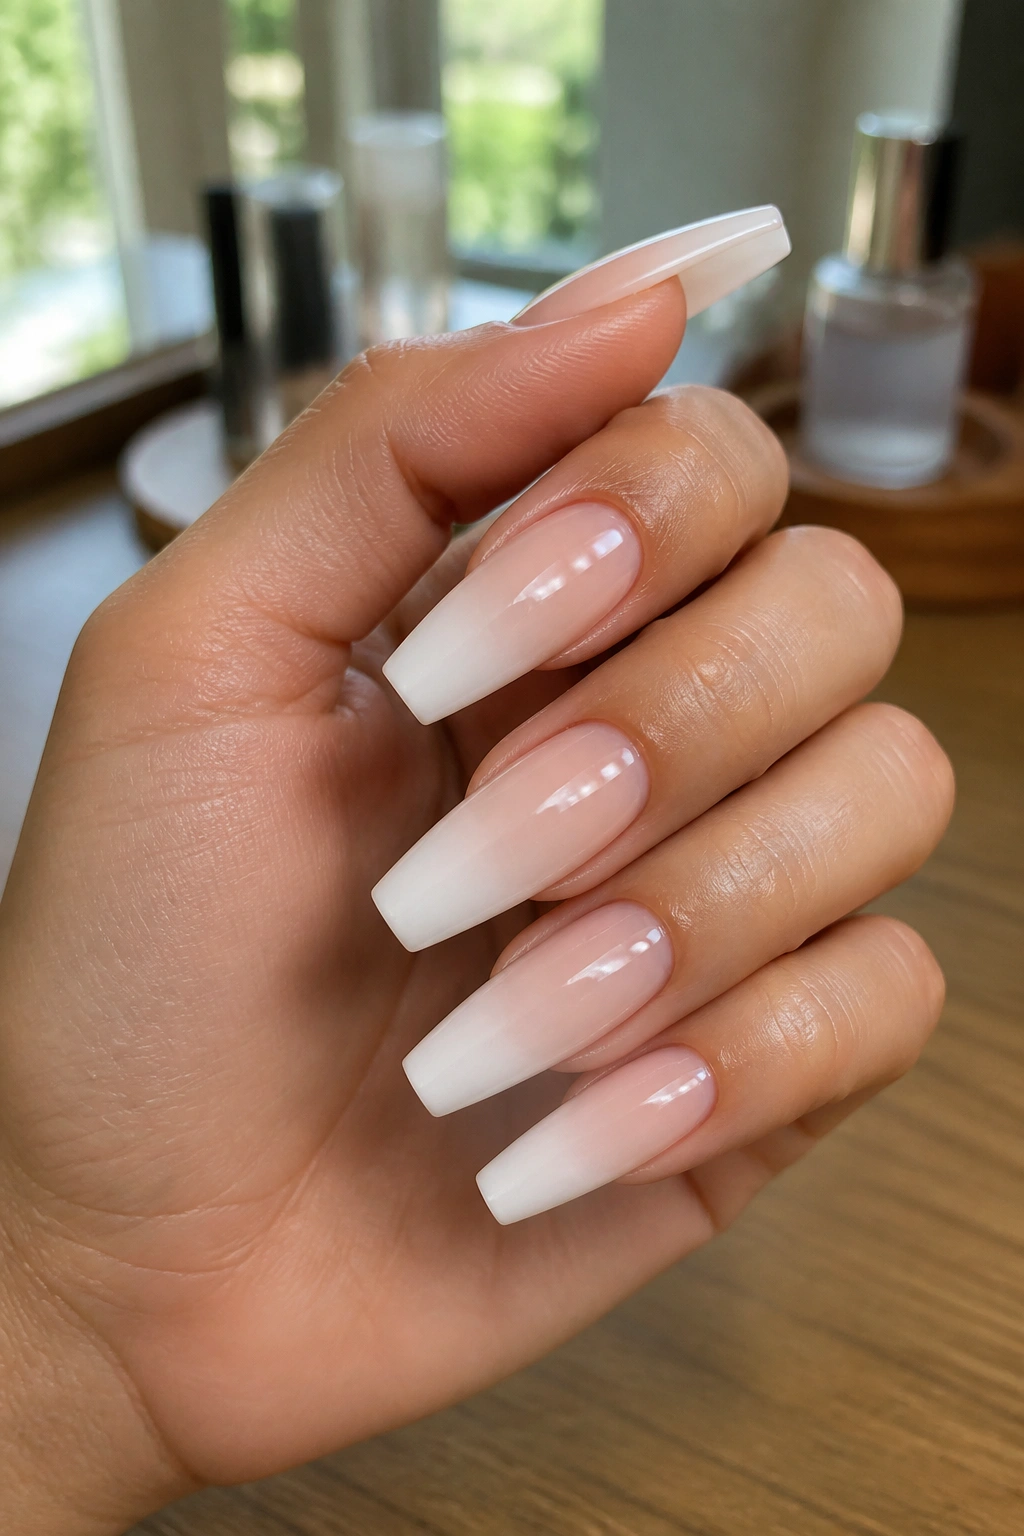
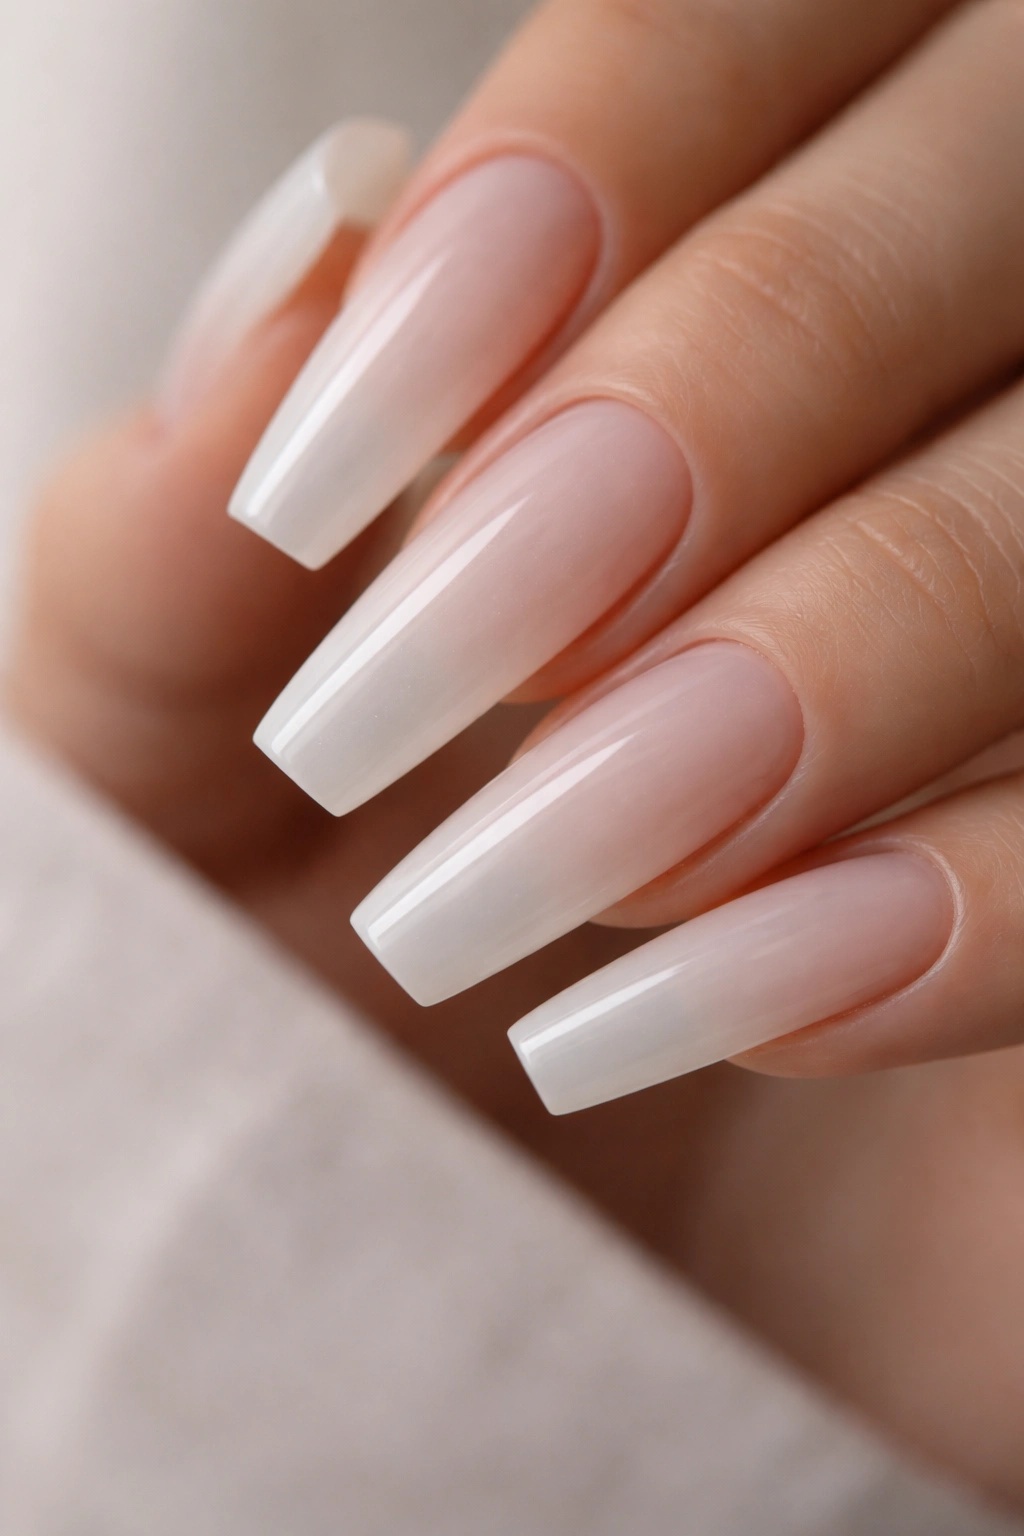
2. Milky White Ombre Coffin Nails with a Clouded Tip
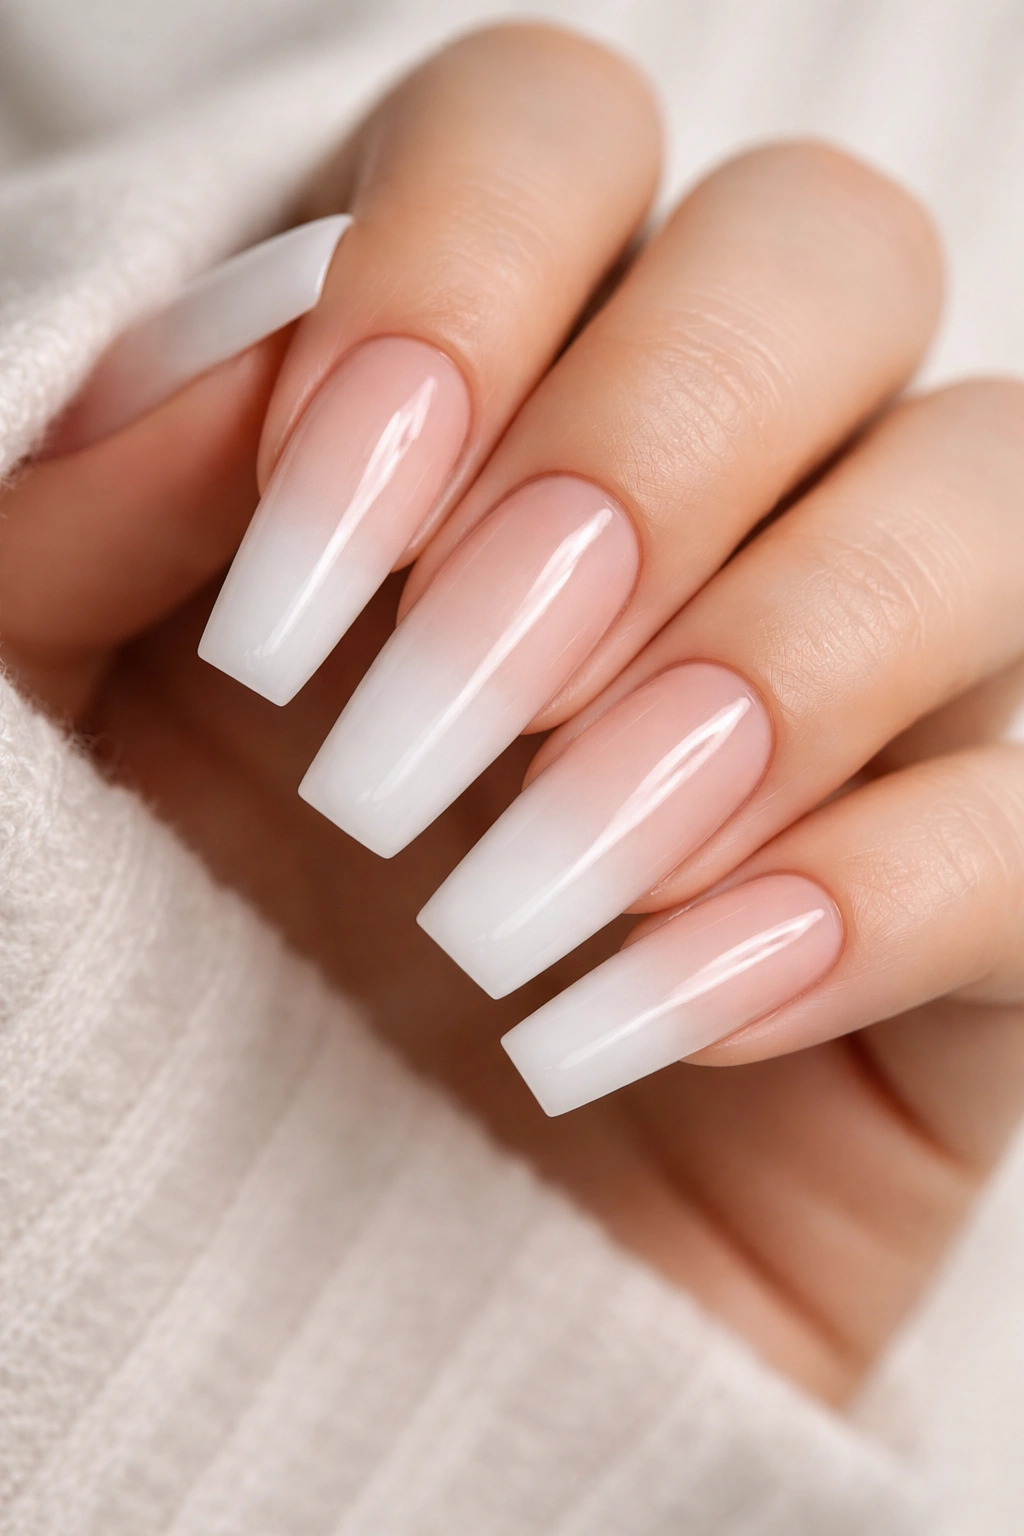
A soft ombre is often more flattering than a full white nail on long lengths. That is because the fade breaks up the distance from cuticle to tip, which makes the shape look slimmer and a touch more natural.
On this set, the nail starts with a sheer nude or pale pink near the cuticle and drifts into milky white toward the free edge. The fade should be misty, not striped. If you can see the exact point where nude stops and white starts, the blend needs more work.
This style also buys you a cleaner grow-out. A hard color line near the cuticle shows new growth fast. A blended base gives the refill area more forgiveness, which matters if you stretch your appointments by a few days. It does not hide growth forever—nothing does—but it looks neater in the middle stage.
I like this design most on long nail beds and longer fingers, where the fade has room to breathe. On shorter nail beds, the transition can feel cramped unless the tech keeps the white soft and starts the blend higher than expected.
There is one catch. Poor ombre work turns muddy. Ask for the white to stay airy, with the deepest concentration at the tip and a clean seal over the whole nail so the color does not look grainy.
3. Deep Smile Line Milky White French Coffin Nails
Why does a French set sometimes look sharper on a coffin shape than a full milky white nail? The answer is the smile line. A deep, curved smile line pulls the eye inward and makes a long coffin nail look narrower through the center.
This version keeps the base soft and milky instead of pink-clear, then layers a slightly denser milky white on the tip. The effect is cleaner than a stark salon French and easier on the eye than a bright white band across a long nail.
A shallow French line can make coffin nails look flat. Go deeper, and the nail starts to look sculpted. That is the difference. The curve creates movement and makes the tip feel intentional, not chopped off.
How to Wear It Without Losing the Soft Look
Ask for the tip white to stay one shade denser than the base, not three shades brighter. You still want separation, but you want it to feel creamy and blended, not painted with correction fluid. A thin line of pearl top coat over the whole set can soften the contrast even more.
This is a strong choice if you like structure and neatness but do not want a plain all-over color. It has enough detail to feel special and enough softness to keep the long shape wearable.
4. Pearl Chrome Milky White Coffin Nails
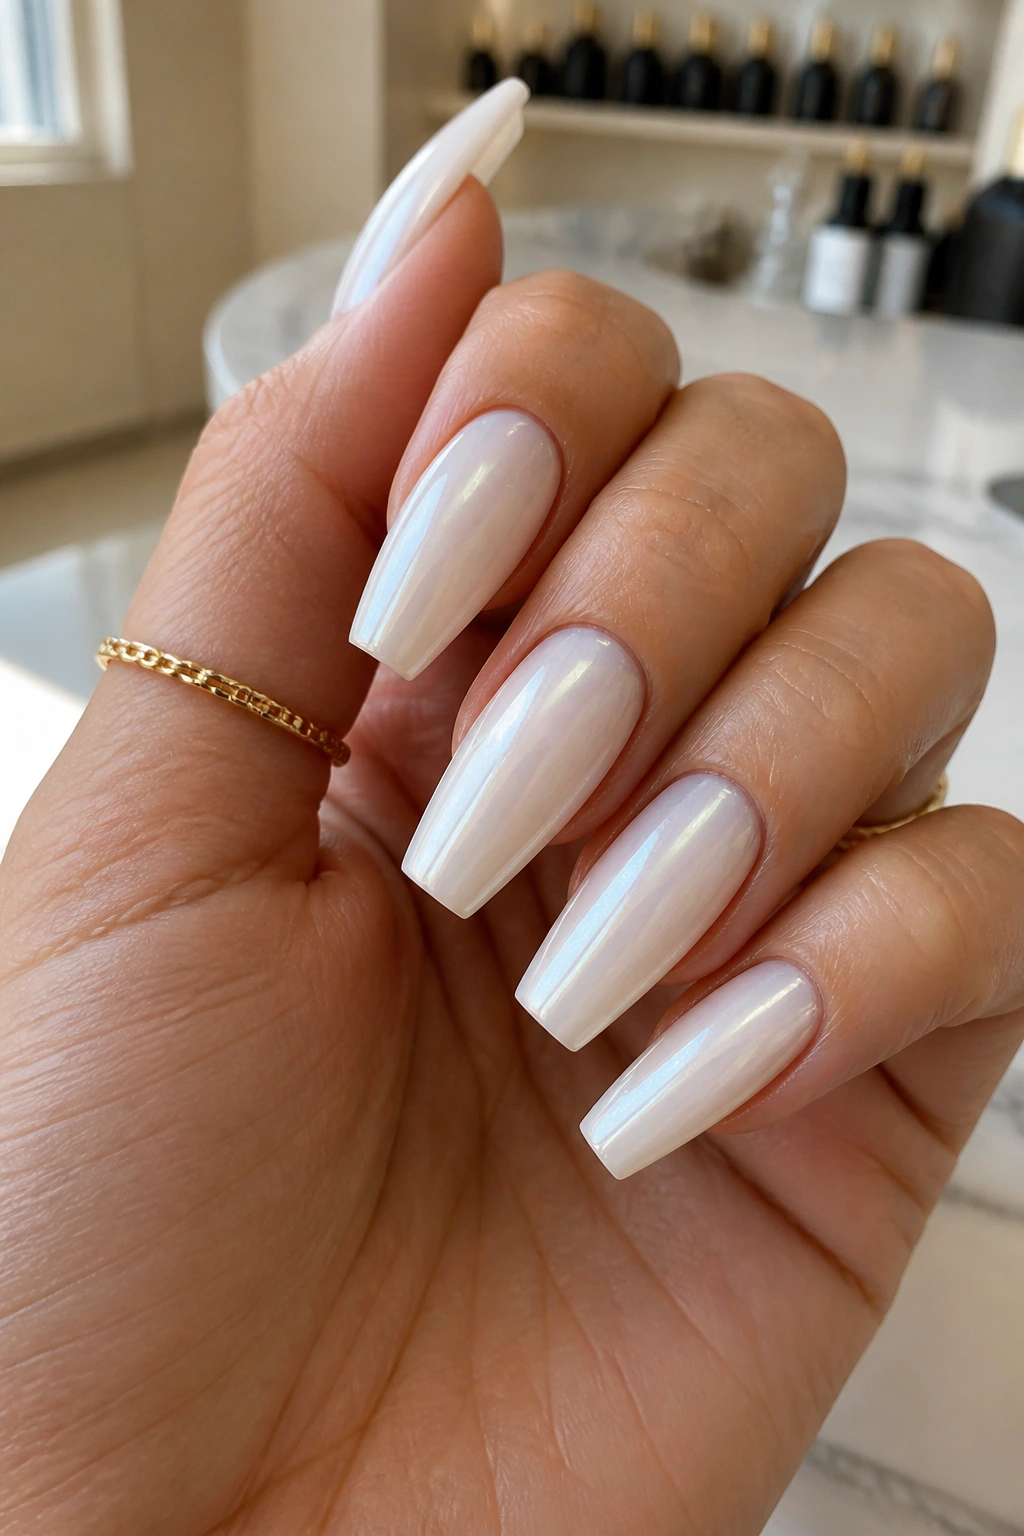
A lot of people ask for chrome when what they actually want is sheen.
I see this happen all the time: someone wants a soft pearly finish, gets a mirror chrome instead, and ends up with nails that throw a gray cast across the white base. On milky white coffin nails, the better move is fine pearl chrome buffed in a thin veil, not a heavy silver layer.
The reason it works is simple. Milky white already has depth. A pearl powder sits on top of that and shifts the light without hiding the creamy base underneath. Mirror chrome flattens the color and can make long nails look colder and harder than you intended.
A few details make this version look polished instead of flashy:
- Choose pearl or opal chrome, not gunmetal or full mirror silver.
- Apply it over a smooth no-wipe top coat so the surface stays even.
- Keep embellishments off the set, or use only one tiny stone per hand.
- Pair it with almond-soft cuticle shaping and crisp coffin tips for balance.
The finished look feels bridal, editorial, and clean without turning sugary. If you wear silver jewelry often, this one tends to sit right at home on your hands.
5. Velvet Matte Milky White Coffin Nails
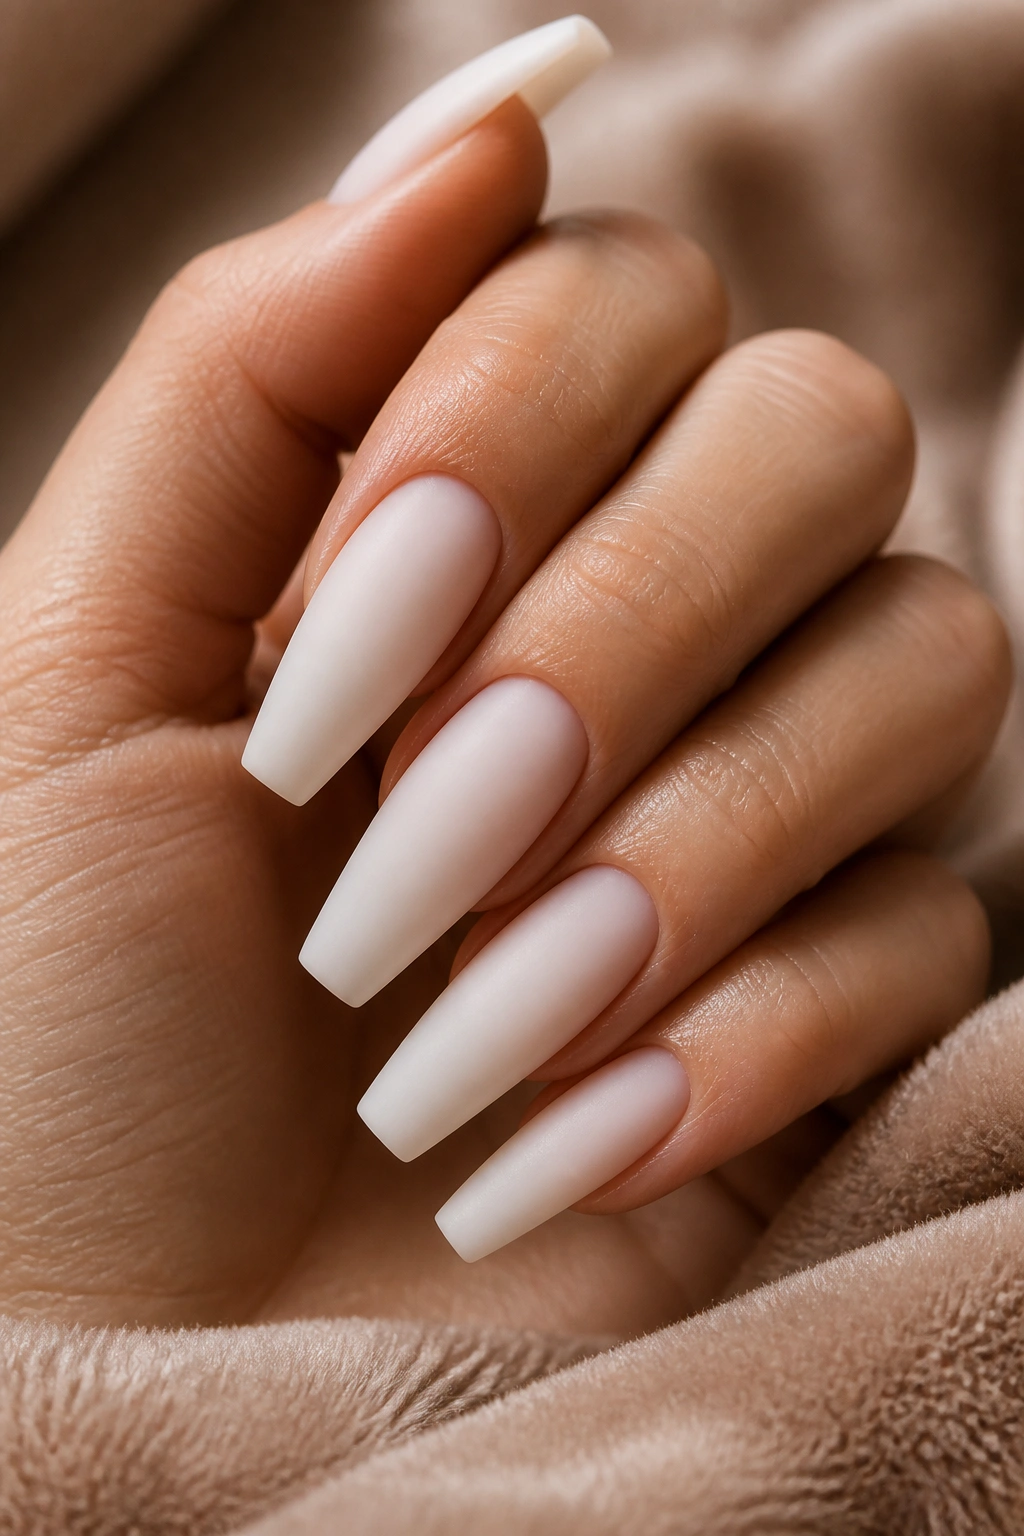
Matte milky white nails are not forgiving.
That is why I like them.
A matte top coat strips away the shine that usually hides tiny dips, ridges, and uneven filing. What you get instead is a porcelain-like surface that makes a long coffin shape look sharp, modern, and a little severe in the best way. On a good set, matte milky white looks smooth as ceramic. On a sloppy set, it exposes everything.
Because the shine is gone, the color needs more depth in the base. One watery coat under matte often reads chalky and thin. Two soft coats or a milky builder base under the color keeps the nail from looking dry. I would also avoid a cold paper-white here. A creamier milk tone has more body and keeps matte from looking dusty.
Hand cream changes the finish through the day. That is normal. Matte nails pick up oils from skin, products, and even your steering wheel, so the surface can darken in patches if the top coat is low quality. A velvet matte top coat tends to wear better than a flat one.
This style suits long coffin nails with clean lines and almost no extras. One ring, neat cuticles, and sharp shaping do enough. If you want a set that feels a little fashion-forward without using loud art, matte milky white is hard to beat.
6. Milky White Coffin Nails with Cuticle Gold Foil
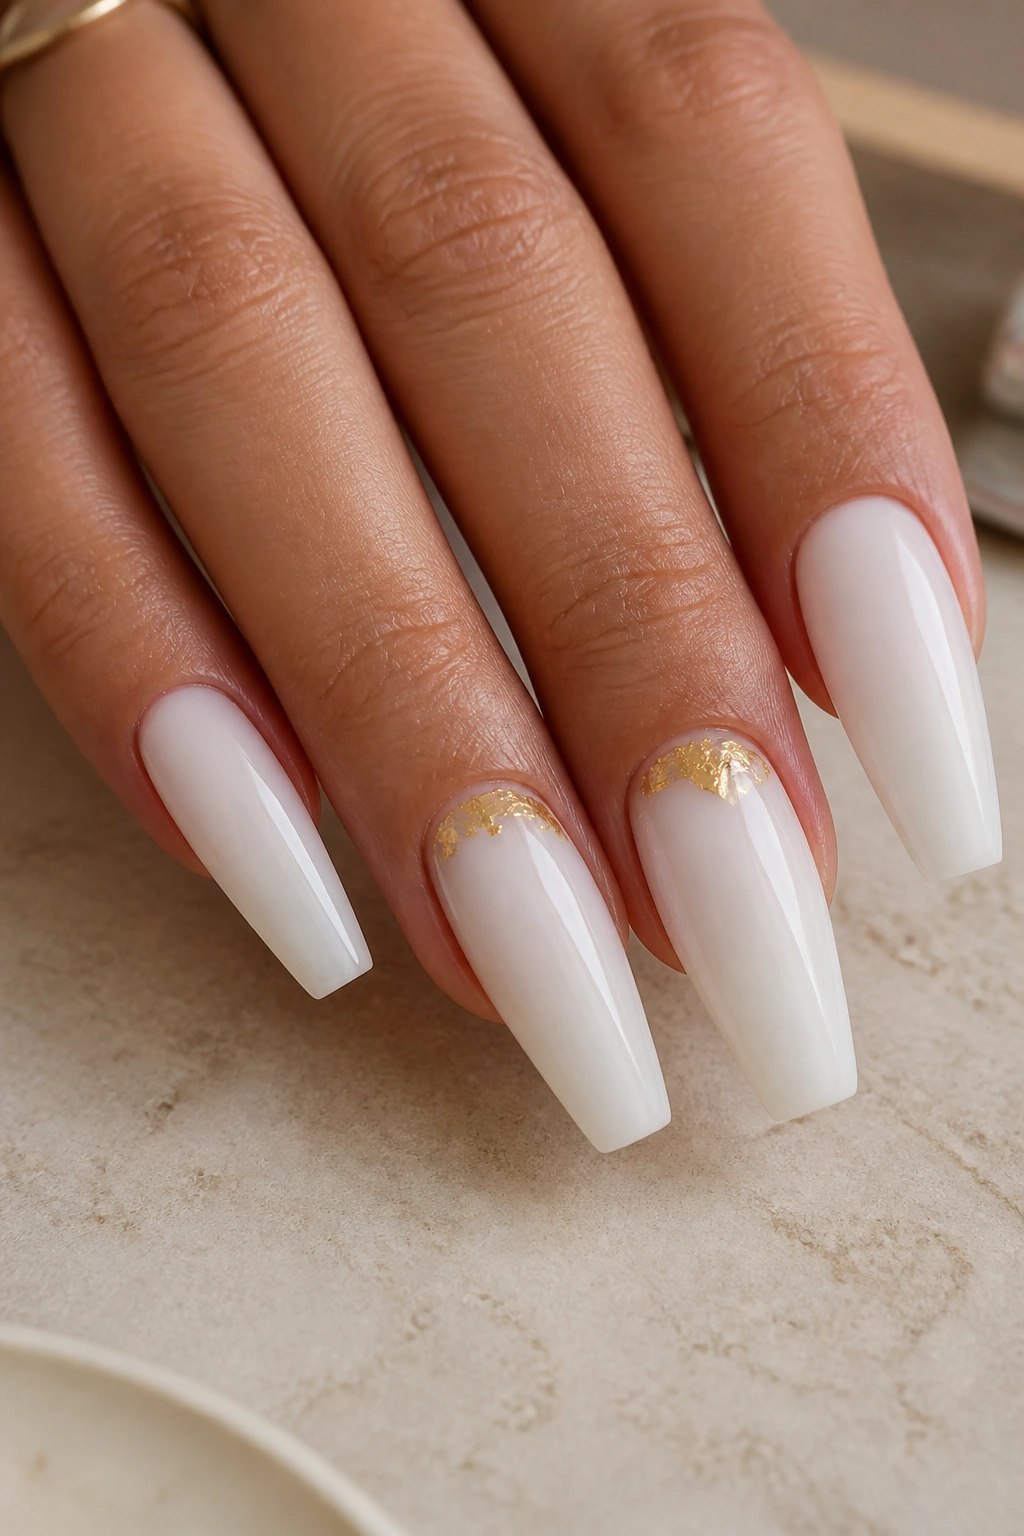
Unlike full foil nails, cuticle foil leaves the center of the nail clean, which is exactly what long milky white coffin nails need. The white still gets space to breathe, and the gold gives the set a frame instead of taking over.
Placement decides whether this looks polished or messy. I like foil tucked close to the cuticle arc, mainly on one or two nails per hand. A scattered foil patch in the middle of a long white nail can look random. Near the base, it feels deliberate and balanced.
There is also a practical upside. Tiny foil near the cuticle hides small refill shadows better than center placement does, so the manicure stays looking fresh longer. That does not mean you should skip fills. It means the set ages with a little more grace.
This design suits people who want some jewelry on the nail without dealing with raised stones. If your wardrobe leans warm—gold rings, cream knits, camel coats, tan bags—this style ties in fast.
My recommendation: keep the foil broken into small flakes, not giant leaf pieces, and top it with a thick glossy seal so the edges do not catch.
7. Baby Boomer Milky White Coffin Nails with a Pink Base

The baby boomer fade has been around forever for one reason: it flatters hands. On a long coffin shape, that soft drift from pink nail bed to milky white tip makes the fingers look longer and the nails look thinner through the middle.
This version works best when the pink stays soft. You do not want a loud blush base fighting the white. Think natural nail-bed pink, then a cloudy white tip that melts upward until there is almost no line left to find.
The Blend Matters More Than the Pink
A weak blend gives you a stripe. A strong blend gives you that creamy airbrushed effect people keep trying to copy with filters. Sponge ombre can work, but on long salon sets, I prefer an airbrushed gel fade or a brushed builder blend because the surface stays smoother.
What to Ask For
- Keep the pink neutral or slightly warm, not candy pink.
- Build the white strongest at the free edge and fade it upward by at least half the nail.
- Seal the set with a glossy top coat unless you want the softer porcelain look of matte.
- If your hands tan easily, avoid an icy pink base that can turn gray against the skin.
Best tip: this is one of the safest choices if you want a bridal-looking set that still works long after the event is over.
8. Micro Glitter Fade Milky White Coffin Nails

Chunky glitter ruins milky white faster than almost anything else. Fine glitter, though, is another story. A dusting of micro shimmer at the tip or along one side of the nail gives the set movement without turning it into party nails.
The key word is micro. You want fine reflective particles or iridescent dust, not hex pieces you can spot from across the room. On a long coffin shape, a tiny fade at the last third of the nail keeps the design airy and still lets the white base do the heavy lifting.
I like this one for evening events, holidays, or anyone who wants their manicure to feel a little dressier while staying pale and clean. It also works on press-ons if the maker uses a sheer base and a sealed glitter fade instead of mixing glitter straight into thick gel.
Try it with a soft diagonal placement instead of a straight tip fade if you want the shape to look even longer. The line pulls the eye across the nail instead of cutting it off at the end.
9. Milky White Marble Coffin Nails with Soft Gray Veining
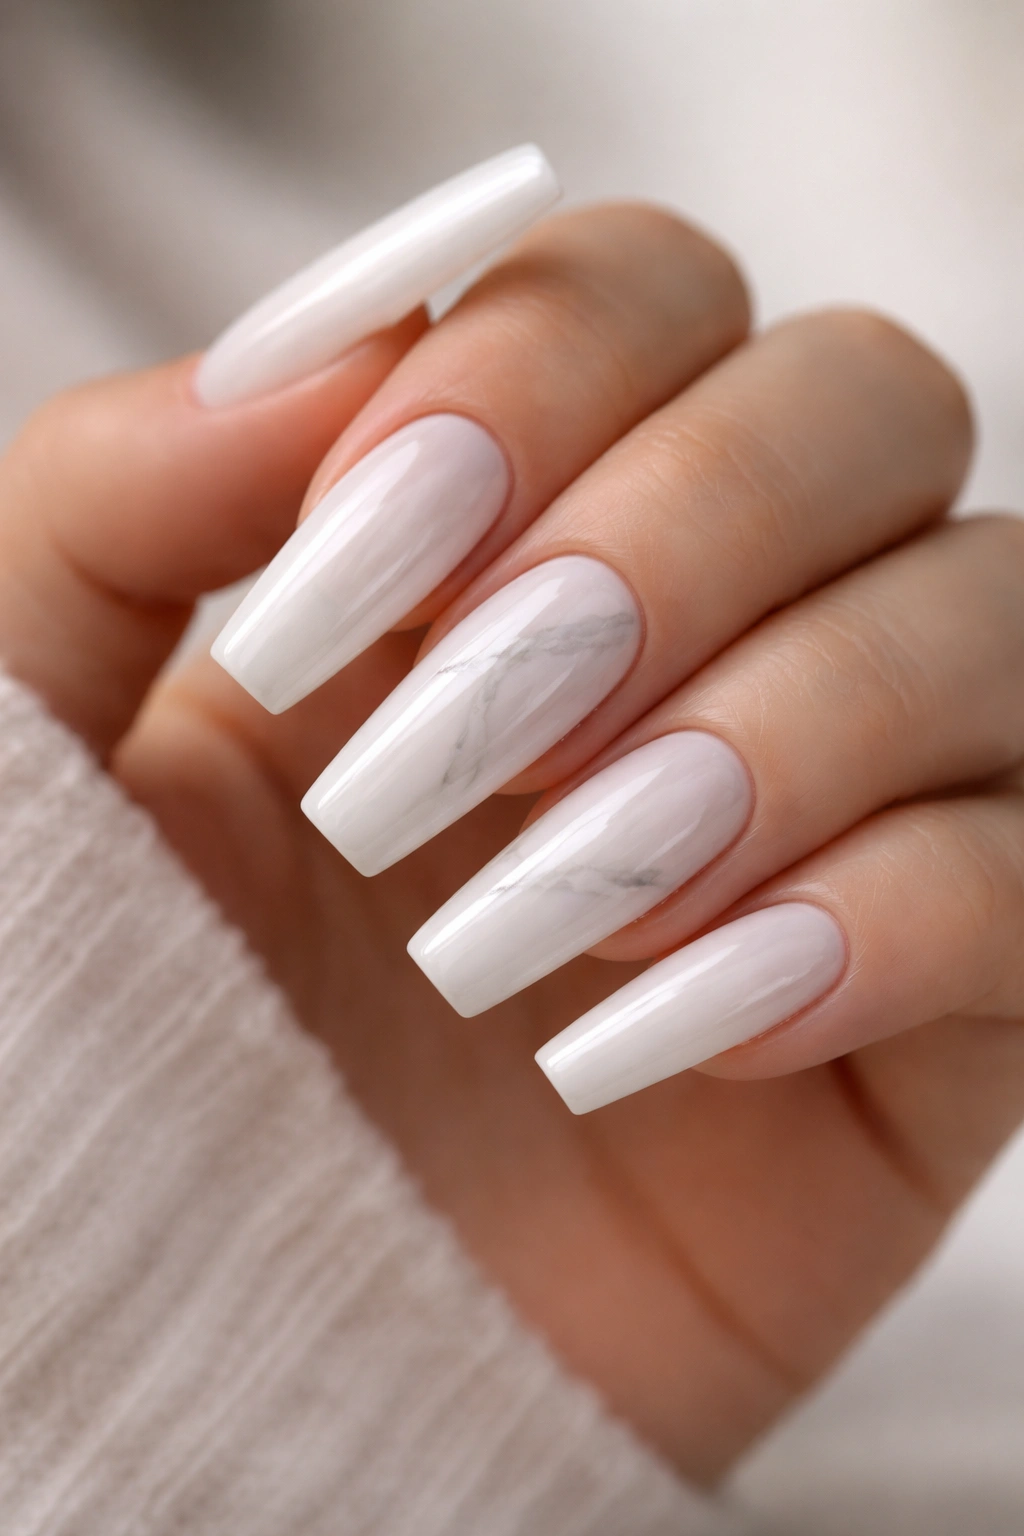
Can marble work on long milky white coffin nails without making them look busy? Yes—if the veining stays faint and the set gives the eye a place to rest.
The nicest marble versions on this color family use soft gray, pale taupe, or translucent smoke lines over a milky white base. Jet black veining is too harsh for the look most people want from milky white. It turns the set graphic in a way that fights the softness of the base.
I would also keep marble to two or three nails, not all ten. Long coffin nails already have a strong shape. Cover every nail in stone lines and the set can start feeling heavy, almost tile-like. A couple of accent nails next to clean milky whites gives the marble room to matter.
Placement Rules That Keep It Chic
Veins should stay thin, broken, and slightly irregular. Real stone is not striped with marker-straight lines, and nail marble should not be either. A little gold thread through one vein can work, but only if the rest of the nail stays quiet.
This design suits people who like white nails but want more texture than a plain set can give. Ask for wispy marbling with negative space in the design, not dense all-over veining.
10. Milky White Jelly Coffin Nails
Picture a long clear extension dipped in sweetened milk. That is the idea here.
Milky white jelly nails lean more translucent than classic milky white, so the nail looks lit from within instead of painted over. On a coffin shape, that gives length a cleaner, lighter feel. The edges look slim. The body of the nail looks glossy and soft, almost like glass with cream folded into it.
This style demands neat structure because there is nowhere to hide. If the extension underneath is uneven, or the free edge color shifts from nail to nail, the jelly finish will show it.
A few things help:
- Use a translucent milky builder or tinted gel, not dense white polish.
- Keep the underside of the extension spotless.
- Choose long lengths with balanced taper; jelly finishes look best when the shape is precise.
- Skip heavy nail art, which can crowd the transparency.
I like this version most in warmer months, on vacation, or anytime you want long nails that feel lighter than solid color. It has that fresh, clean look people chase with nude jelly nails, but with more contrast and more presence.
11. 3D Floral Milky White Coffin Nails
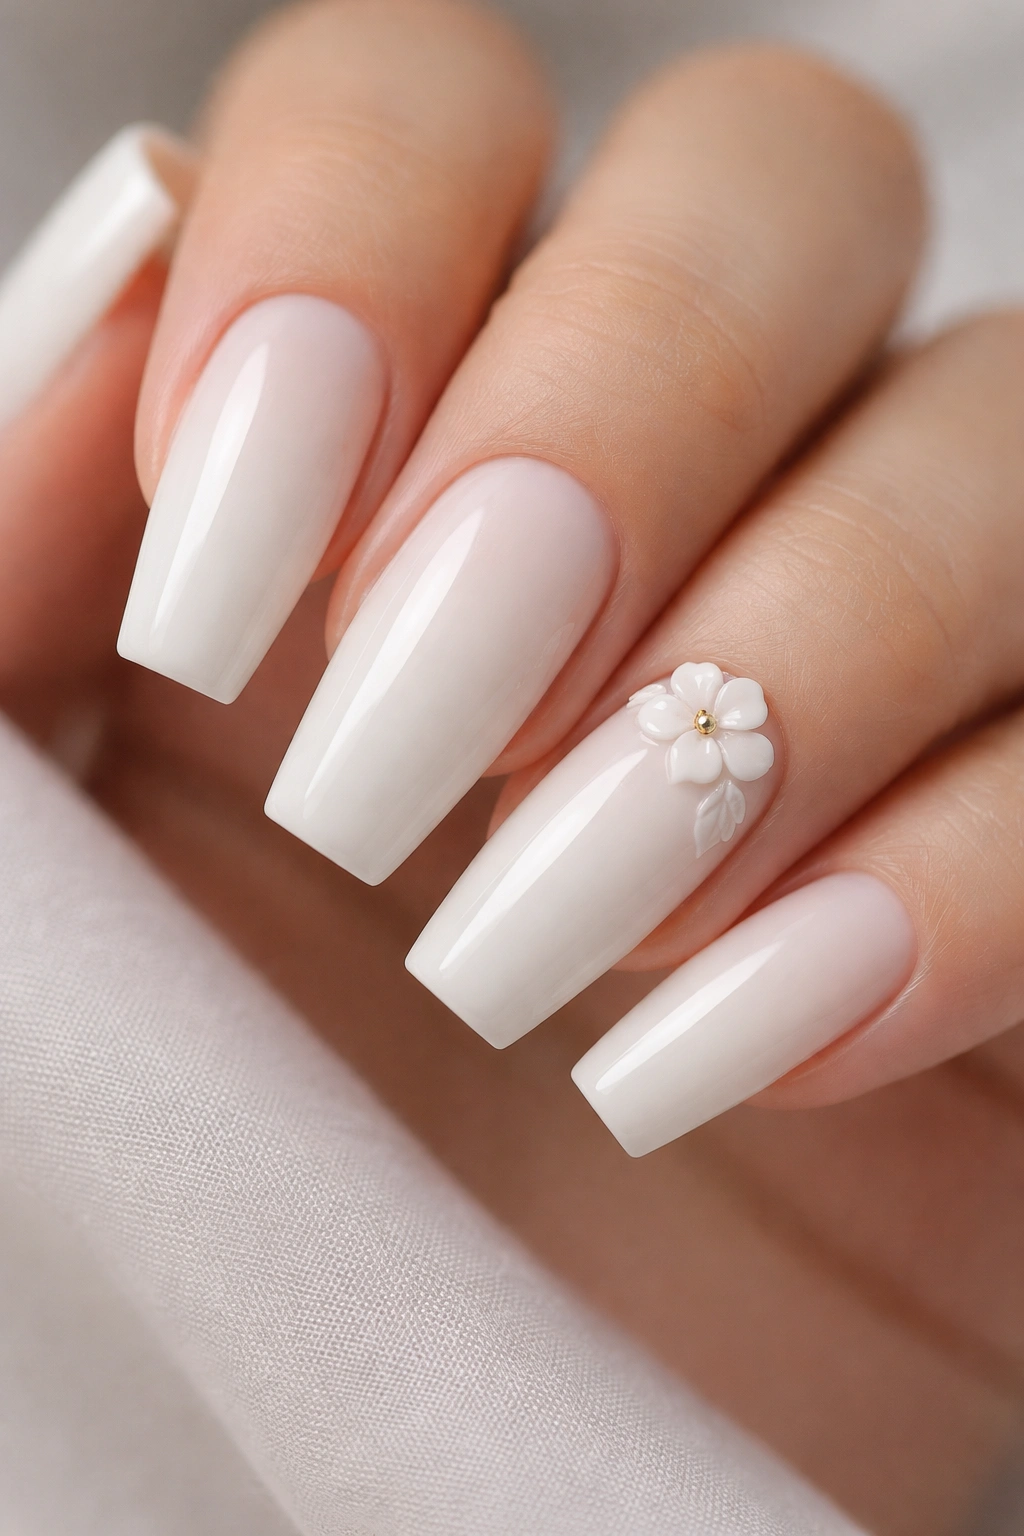
3D flowers can go wrong fast on long nails. Too many petals, too much height, too many accent fingers, and the set starts snagging on sweaters and reading more costume than polished.
Used with restraint, though, a single sculpted flower on a milky white base can look gorgeous. Milky white is a smart backdrop because it keeps the flower from looking pasted on. The base and the art sit in the same soft color family, so the shape of the flower gets attention without the whole set turning loud.
Placement matters more than petal count. I prefer one flower near the cuticle area on the ring finger, maybe a second small bloom on the thumb if the rest of the nails stay plain. Put a big flower dead center on a long coffin tip, and the nail can look shorter and heavier.
The best 3D flowers for this style are low-profile. You want lifted petals, yes, but not a half-inch sculpture. Tiny pearl centers or a small crystal can work. Giant gem clusters usually do not.
This is the set I would pick for a dressy event when you want nail art that feels soft rather than flashy. Keep the flowers tonal, keep the rest glossy, and let the white do the grounding.
12. Side-Swept Crystal Milky White Coffin Nails
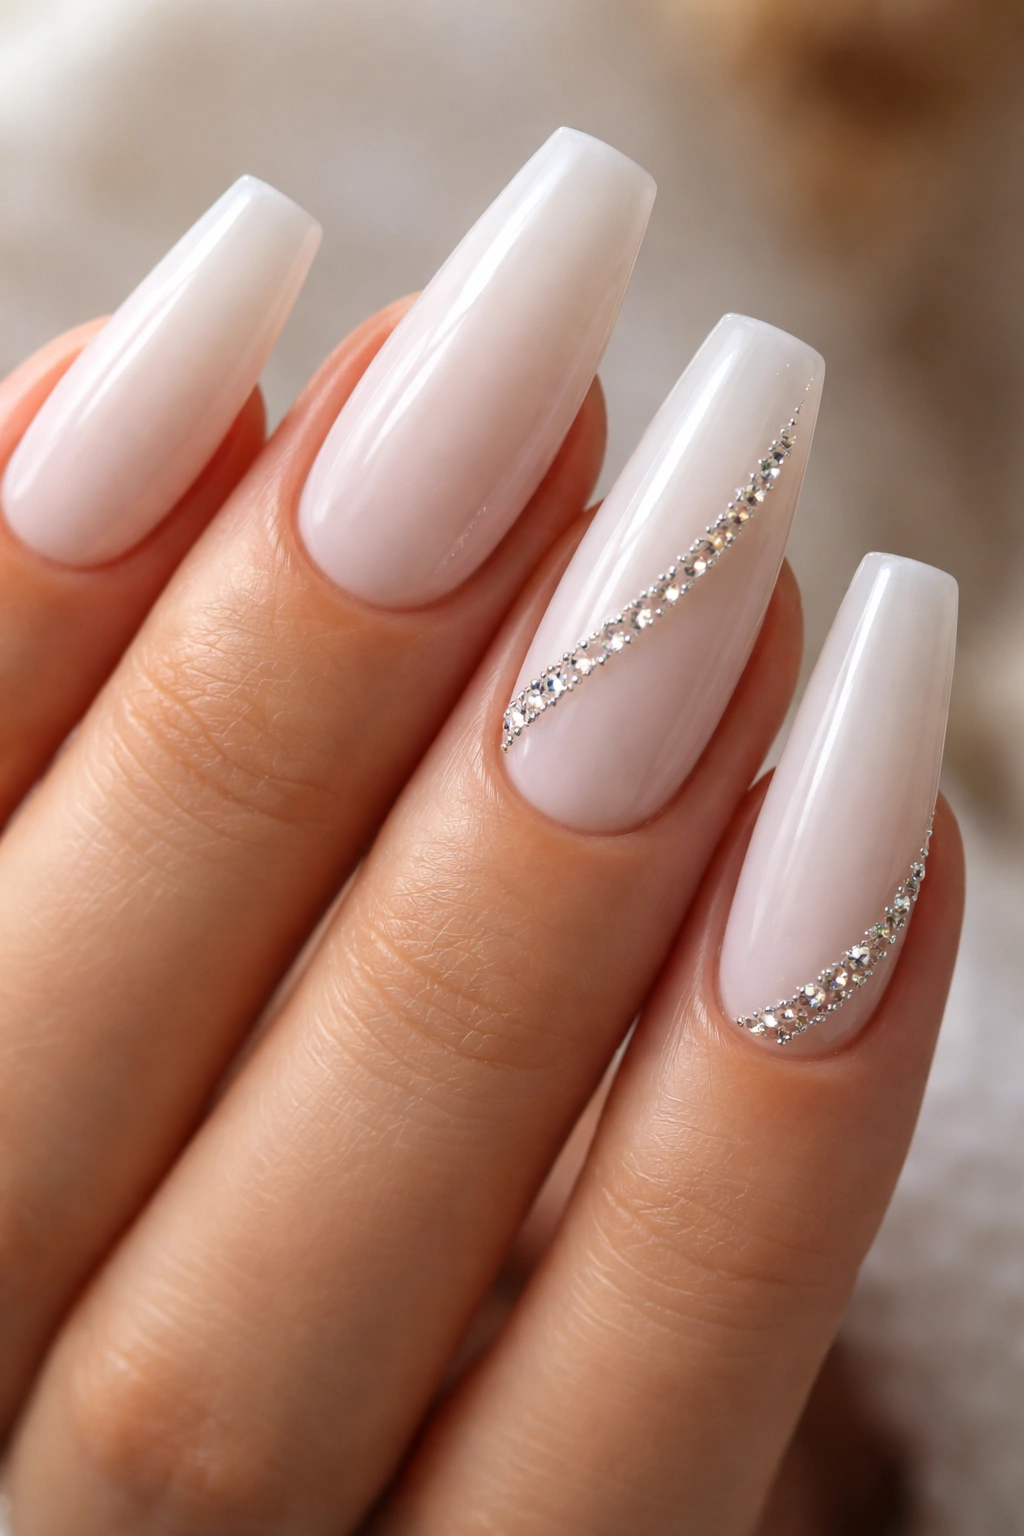
Unlike full crystal nails, a side-swept crystal line keeps the coffin shape visible. That is why I like it on long milky white nails. You still get sparkle, but the nail does not disappear under stones.
The placement is what makes the design. A slim curve of small crystals running from one side of the cuticle toward the opposite side of the tip creates movement across the nail. It also slims the shape because the eye follows the diagonal path instead of reading the full width at once.
This style is best for someone who wants a dressed-up manicure without bulky charm pieces. Use stone sizes that step up gradually—small near the base, slightly larger through the center, then taper down again. A random mix of sizes looks messy on a pale nail.
My advice is to keep crystals on two accent nails per hand at most. The rest should stay glossy milky white. That contrast is the whole point. If every nail gets loaded up, the clean softness that makes milky white special disappears under hardware.
Matching Milky White Coffin Nails to Skin Tone, Jewelry, and Style
Here is the part people skip, then wonder why the same white looks soft on one person and harsh on another. Milky white is not one color. Some shades lean creamy, some lean icy, and some hide a hint of pink or beige under the white veil.
If your skin has warmer undertones, a creamier milk shade often looks smoother against the hand. On cooler undertones, an icier milky white can look sharp and fresh. Neutral undertones can wear both, which sounds lucky—and it is—but even then, your jewelry can steer the choice.
Gold rings tend to love warmer milky whites. Silver jewelry and pearl details can handle cooler whites with more ease. That does not mean you need to match metal and polish in a strict way. It means the whole hand looks more cohesive when the white does not fight the tone of everything around it.
Style plays a role too. If you wear tailored clothes, clean lines, and little color, plain gloss milky white, French variations, or side crystals will probably feel right. If your look has more softness—silk, knits, romantic shapes, pearl earrings—baby boomer blends, pearl chrome, and floral details may suit you better.
You can also use nail length to balance all this. The longer the coffin shape, the softer the white usually needs to be. That one rule saves a lot of bad sets.
Final Thoughts
Milky white works on long coffin nails because it does two jobs at once: it gives you the clean look of white polish and the softness of a sheer finish. That mix keeps the shape from turning heavy, which is the trap long pale nails fall into more than any other set.
If I had to narrow the field, I would start with three winners: a plain glass-finish milky white, a baby boomer fade, and a deep-smile French in a creamy white tone. Those three cover most moods without losing the reason this look works.
Structure still comes first. Always. Get the apex right, keep the sidewalls straight, and choose a white with some depth in it. Once that foundation is solid, even the smallest design detail—a pearl sheen, a whisper of glitter, one crystal line—has room to land.
