

Your wedding day deserves nails that make you feel confident, beautiful, and undeniably yourself. Here’s the thing about wedding nail trends: the most stunning manicures aren’t always the most complicated ones. Sometimes the most memorable bridal nails come from a place of elegant simplicity—a mindful choice to let your hands shine without overwhelming your overall look. Simple doesn’t mean boring or plain; it means intentional, polished, and timelessly beautiful.
The pressure to have elaborate nail art, 3D embellishments, or statement designs can feel overwhelming when you’re already juggling a hundred wedding-related decisions. But nail artists and brides consistently agree that understated elegance holds its own magic. A beautifully executed simple manicure photographs better, lasts longer through a full day of festivities, and—most importantly—lets you be the focal point rather than competing with your hands for attention.
This guide walks you through ten simple wedding nail ideas that deliver maximum impact through thoughtful design choices, strategic color selection, and flawless execution. Whether you’re drawn to the timelessness of a classic French manicure, the sophistication of neutral tones, or the subtle glamour of a glazed finish, you’ll find inspiration here that speaks to your personal style and wedding vision.
1. Soft Pink French Manicure
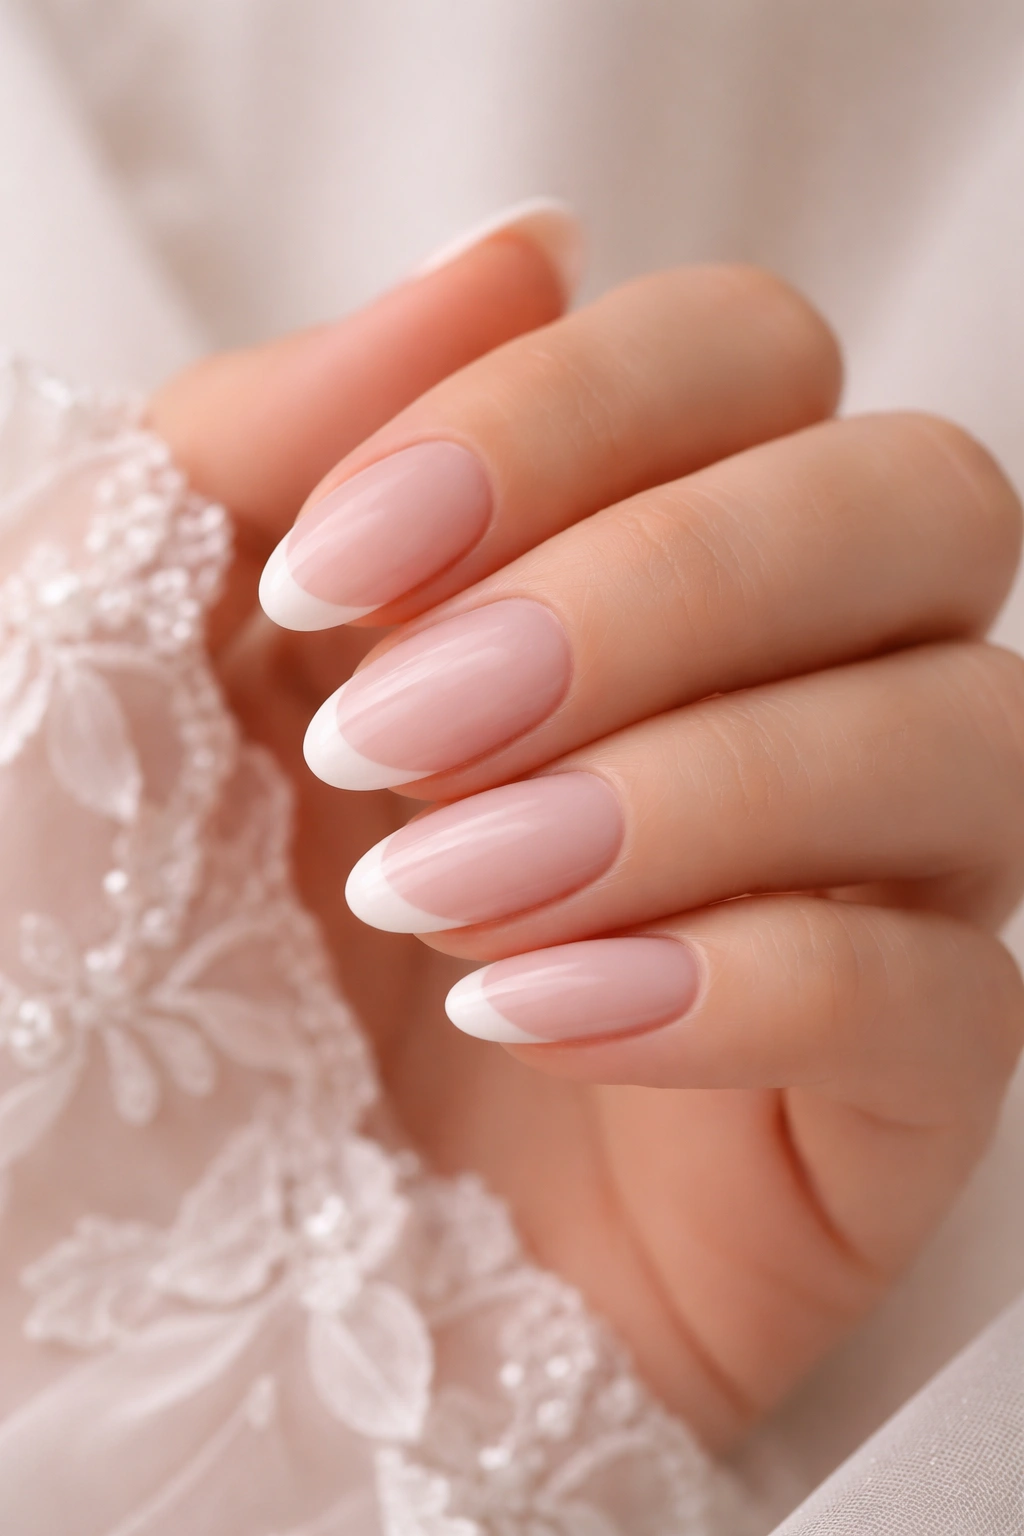
The soft pink French manicure is the definition of understated elegance, and it’s earned its place as a bridal favorite for genuinely good reasons. This design pairs a sheer, barely-there pink base with a delicate white or ivory tip, creating that coveted “your nails but better” effect that photographs beautifully in both close-ups and wide shots.
Why It’s Perfect for Brides
A soft pink French manicure works with virtually every skin tone, wedding dress color, and bouquet choice imaginable. The sheer pink base creates softness and romance without demanding attention, while the clean white tip adds definition and visual interest. This design has been beloved by brides for decades precisely because it never looks dated—it’s a choice that feels both classic and current at the same time. The look is also incredibly forgiving; if a tip chips during dancing or celebration, it’s far less noticeable than a bold statement color would be.
How to Make It Your Own
- Opt for OPI Bubble Bath or a similar warm, sheer pink as your base—it’s the shade most brides choose because it complements virtually every complexion
- Keep your tips at medium length in an almond or oval shape—the elongation flatters your hands while remaining practical for wedding day tasks
- Ask your nail artist for thin, clean white tips rather than the thicker French tips of previous decades for a modern, refined look
- Consider adding a single coat of glossy top coat for extra shine and longevity
- If you want subtle glamour, request a barely-there shimmer mixed into the white tip—it catches light beautifully in photos without looking overdone
Pro tip: Have your manicurist apply cuticle oil generously before your appointment and send you home with a bottle. Moisturized cuticles make even simple nails look more polished and expensive, and your hands will look their absolute best in those critical ring and bouquet photos.
2. Glossy Milky White Nails
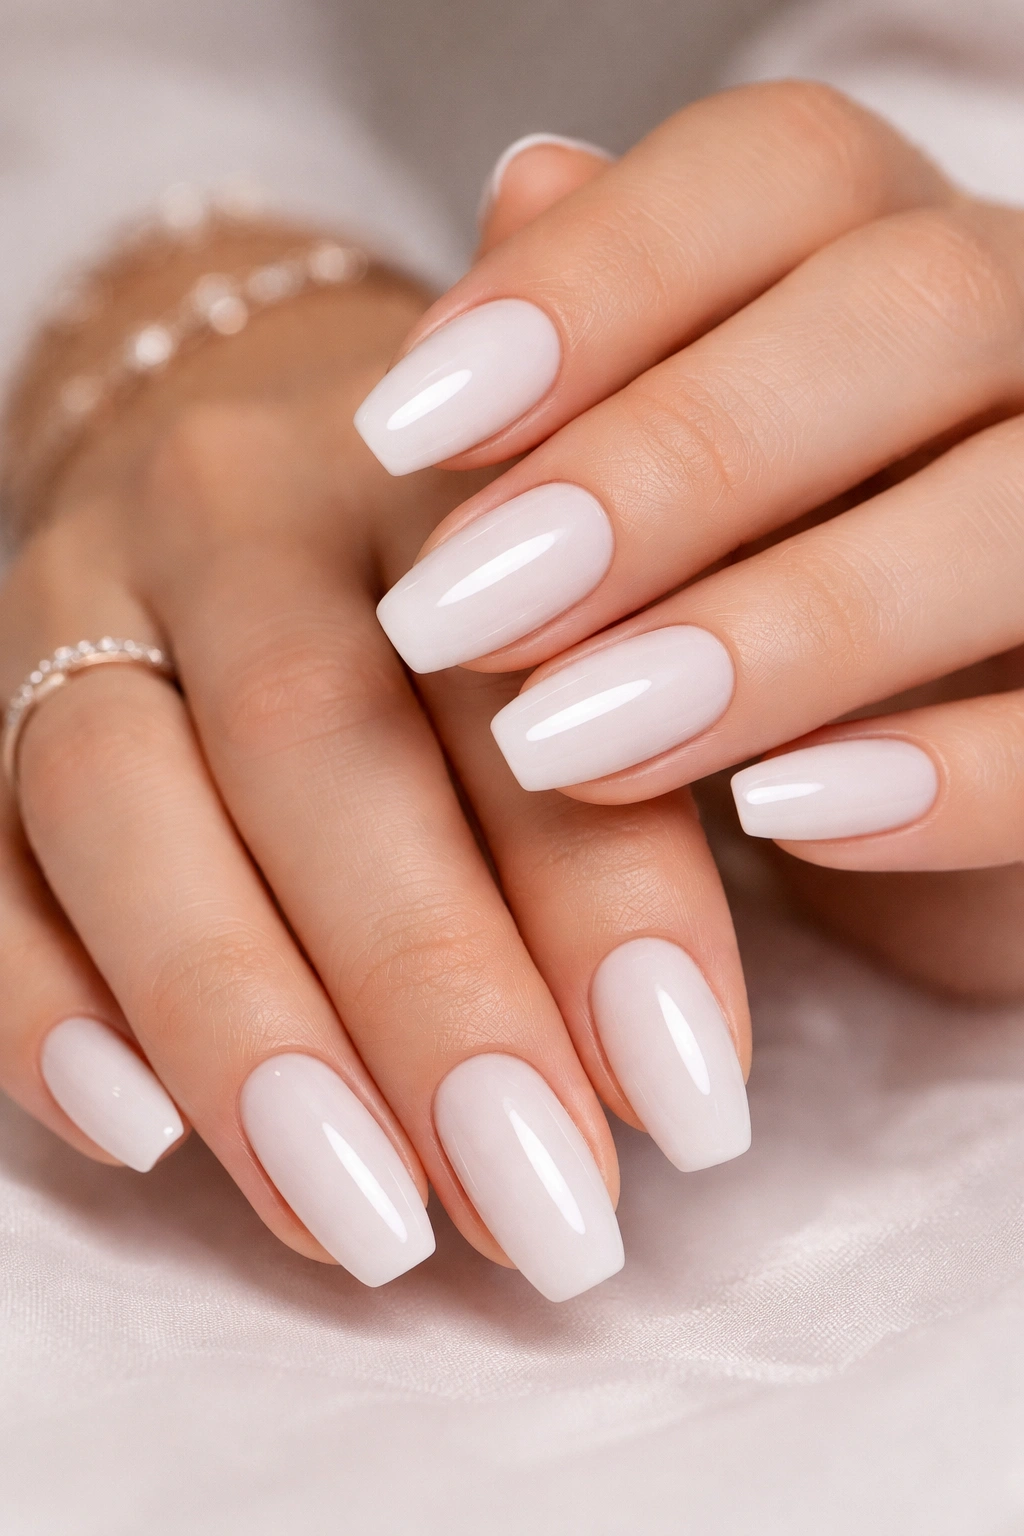
Milky white nails have surged in popularity as brides recognize how undeniably chic and modern they feel. This design features a soft, opaque white base with a high-shine glossy topcoat, creating an almost luminescent quality that catches light beautifully without feeling stark or clinical.
The Appeal of This Simple Style
Milky white sits in the perfect sweet spot between crisp white and creamy nude—it’s polished and intentional without the severity of pure white, and it’s clean enough to feel bridal without disappearing completely. The opaque coverage means no visible nail bed, which many brides prefer, while the glossy finish adds modern glamour. This look pairs exceptionally well with rose gold, yellow gold, or white gold engagement rings, making your jewelry the undisputed star while your nails provide the perfect supporting frame.
Making Milky White Work for You
- Choose medium length in any shape—milky white works equally well on short squoval nails or longer almond shapes
- Look for nail lacquers or gels specifically formulated for a creamy, milky appearance rather than stark white, as the undertone makes an enormous difference
- Apply at least three coats to achieve full opacity while maintaining that luminous quality
- Seal with a glossy, long-wear top coat that’s formulated to resist chipping and maintain shine through dancing, toasts, and celebration
- Keep edges perfectly crisp and clean—impeccable application is essential for this simple style to feel elevated
Insider note: This shade requires maintenance to stay looking fresh. Have your manicurist include touch-up supplies in your wedding-day emergency kit, as any chips become immediately visible on white nails.
3. Nude Base with Delicate Pearl Accents
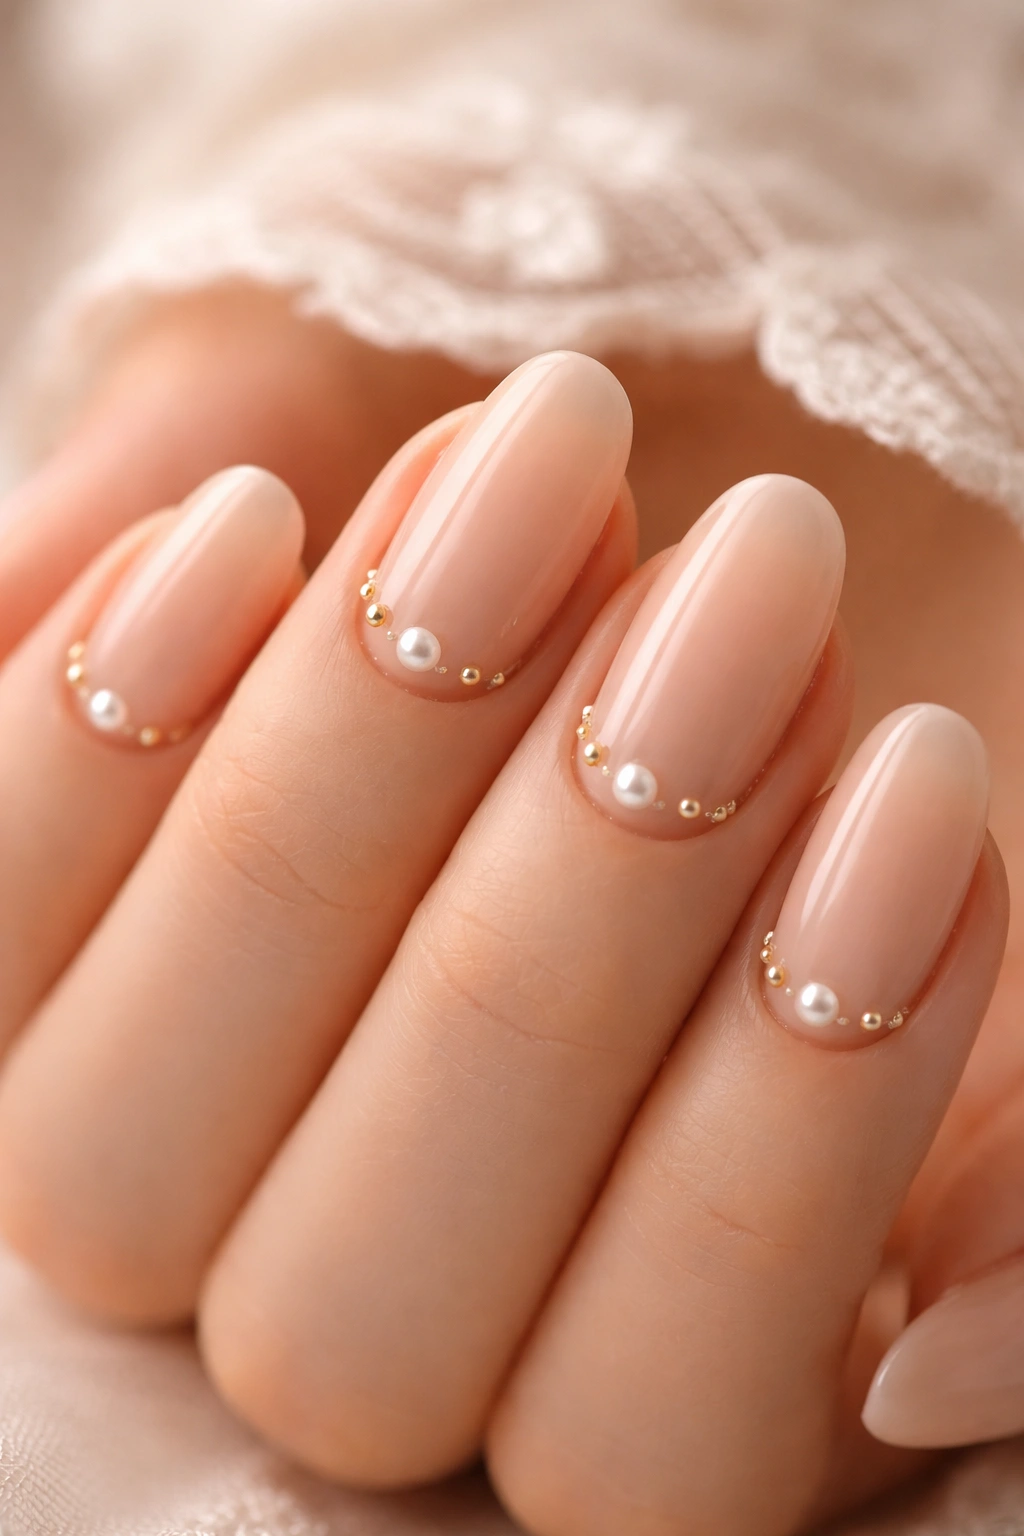
For brides who want to add a whisper of glamour without overwhelming a simple aesthetic, a nude base paired with strategically placed pearl accents delivers sophisticated sparkle. This design keeps the nail foundation minimal and neutral while introducing just enough shine to feel special and bridal.
Why This Design Works
Pearl accents feel inherently romantic and elevated without reading as over-the-top. A single pearl placed at the base of each nail, along the cuticle line, or scattered delicately across the nail adds visual interest while remaining understated. The pearlescent quality catches light beautifully in photos, making your nails look more polished and intentional than a solid nude alone. This approach also gives you the flexibility to choose the pearl placement and density—whether you prefer one per nail, multiple scattered placement, or even pearls on just your ring finger and accent nails.
How to Execute This Look
- Start with a warm, creamy nude base that matches your skin tone as closely as possible—this creates that elongating, elegant effect
- Source high-quality pearl nail studs or adhesive pearls from your nail artist or a reputable beauty supply—cheap pearls look cheap, full stop
- Place pearls along the cuticle line for a dainty, refined appearance, or scatter them in a deliberate pattern if you prefer
- Use quality nail glue specifically formulated for nail art rather than regular superglue, which will eventually fail and leave you searching for a lost pearl mid-celebration
- Seal everything with a strong, glossy top coat that will protect the pearls and keep them secure throughout your wedding day and beyond
Worth knowing: Ask your manicurist to send you home with extra pearls and nail glue in your emergency kit. Pearls occasionally shift or dislodge, and having replacements means you can maintain this look through the entire celebration.
4. Classic White French Manicure
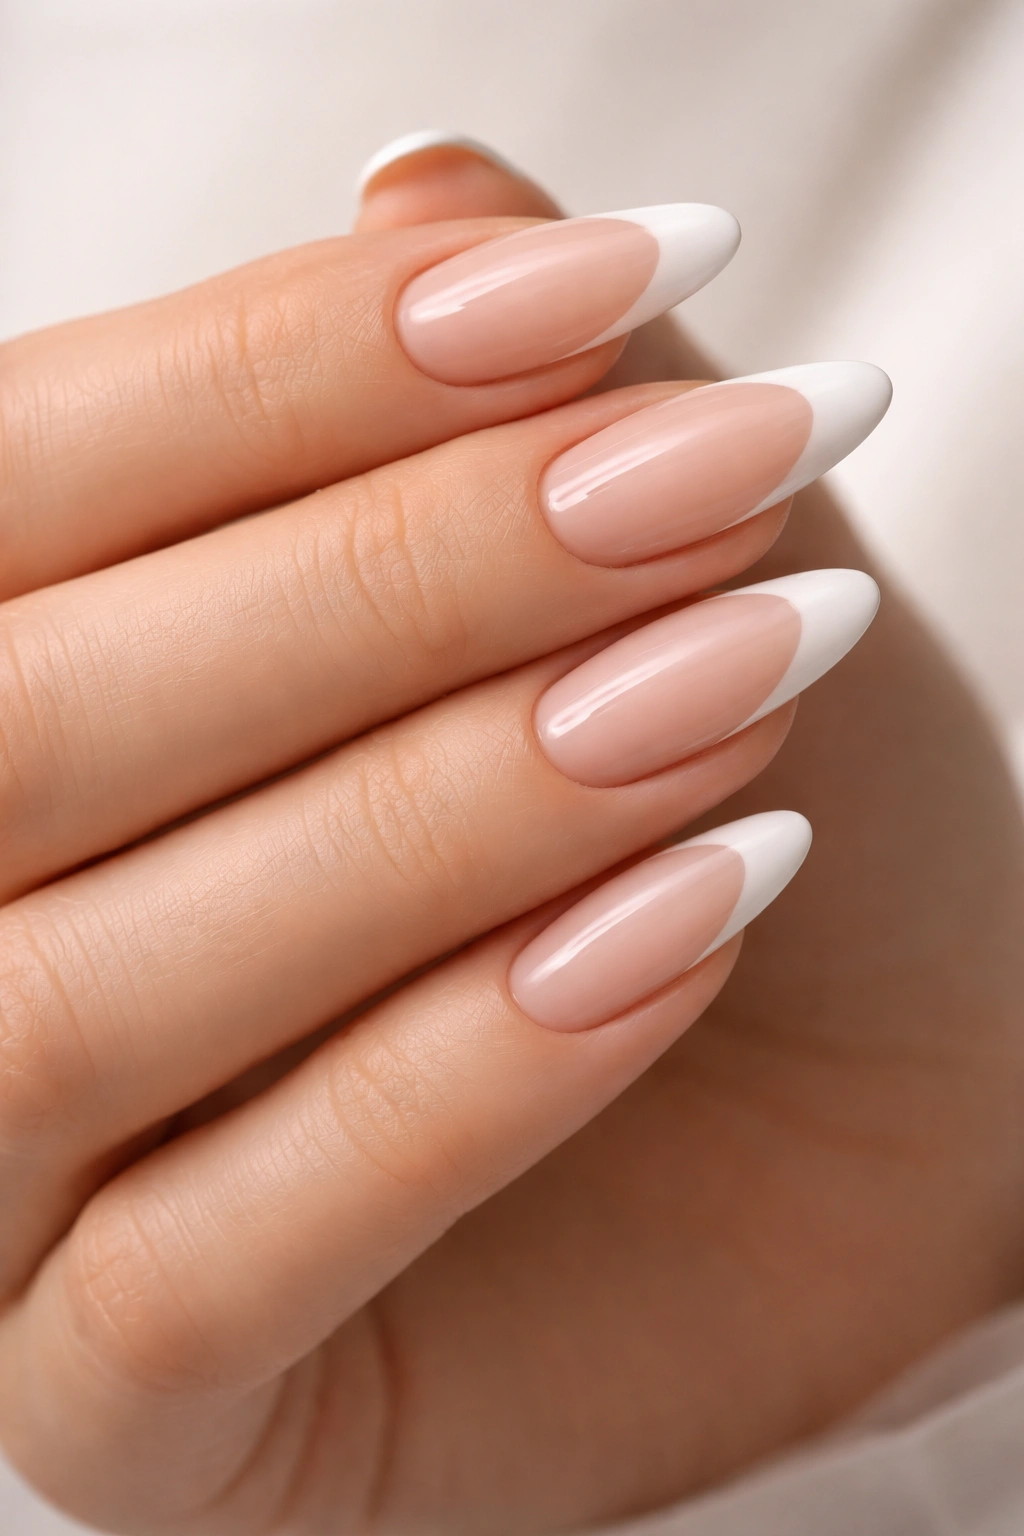
The classic white French manicure is the ultimate timeless choice, and it remains a favorite for brides who want to feel absolutely certain their nails will look perfect in every single photo. This clean, crisp design pairs a sheer or soft pink base with a traditional white tip, creating unmistakable elegance.
Timelessness Meets Modern Appeal
While the French manicure isn’t trendy or new, it’s chosen by brides over and over because it simply works. The high contrast between the base and tip creates visual interest and makes hands look defined and elongated. A well-executed French manicure flatters every hand shape, works with every dress style, and complements every bouquet. The design reads as intentional and bridal without requiring extensive nail art or complicated embellishments. It’s the choice that lets you sleep soundly knowing your nails will look exactly as you envisioned them.
Executing a Modern French Manicure
- Request a soft pink or sheer base rather than pure white—this creates a sophisticated look while maintaining the classic French proportions
- Opt for a medium white tip that covers roughly one-third of the nail—too thin and it looks wimpy, too thick and it reads dated
- Ensure the white line is perfectly clean and straight—impeccable application matters more in a simple design where there’s nowhere to hide
- Choose an almond or oval shape that elongates the hand while remaining practical for your wedding day
- Apply a glossy topcoat that emphasizes shine without any glitter or sparkle—the classic French is pure in its simplicity
Pro tip: Practice wearing French manicures several weeks before your wedding if you haven’t worn them recently. Some brides find they prefer the look of their natural nails slightly more visible, or they want to adjust the tip width. A trial manicure gives you the chance to ensure this classic will feel right on your wedding day.
5. Soft Ombré Pink Fade
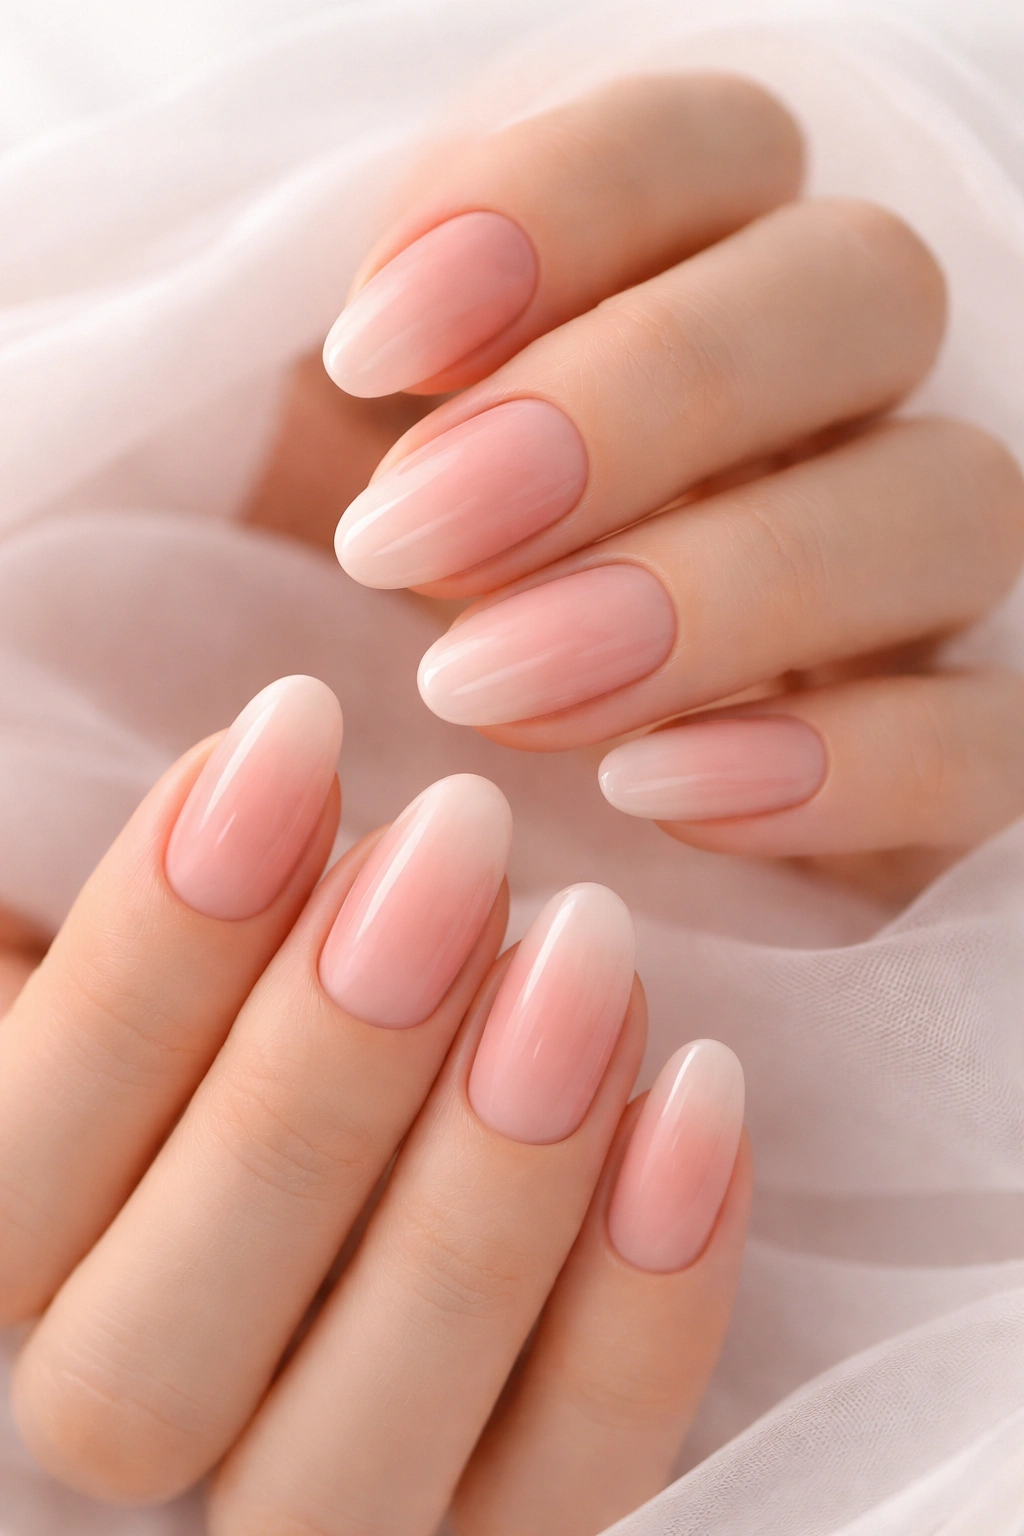
An ombré manicure creates visual depth and dimension while maintaining complete simplicity in execution. This design fades gradually from a deeper peachy pink at the base to a light, almost sheer pink or white at the tips, creating an elegant gradient effect that feels modern and romantic.
Why Ombré Works for Weddings
Ombré nails achieve dimension and visual interest through color graduation rather than through art or embellishments, making them perfect for brides who want something more than a solid color but prefer to keep things understated. The gradient creates the illusion of length and elegance, flattering the hands from every angle. Because the ombré is achieved through blended color rather than sharp design elements, it photographs beautifully without looking overly trendy or temporary. The soft pink-to-white ombré specifically feels inherently bridal and romantic.
Creating Your Ombré Manicure
- Choose two complementary shades—perhaps a warm nude-pink at the base and a sheer white or pale pink at the tips
- Your nail artist will apply the darker shade at the base and gradually blend and fade the lighter shade toward the tips, creating a seamless transition
- Request an almond or oval shape to best showcase the gradient effect
- Ensure the ombré is smooth and blended rather than striped—the quality of the blending determines whether this looks sophisticated or amateur
- Finish with a glossy topcoat that unifies the gradient and adds shine
Real talk: Ombré requires a skilled nail artist who understands how to blend colors smoothly. It’s worth investing in an experienced manicurist rather than trying this at a budget salon—the difference in execution quality is significant and immediately visible.
6. Sheer Natural Nails with Minimal Design
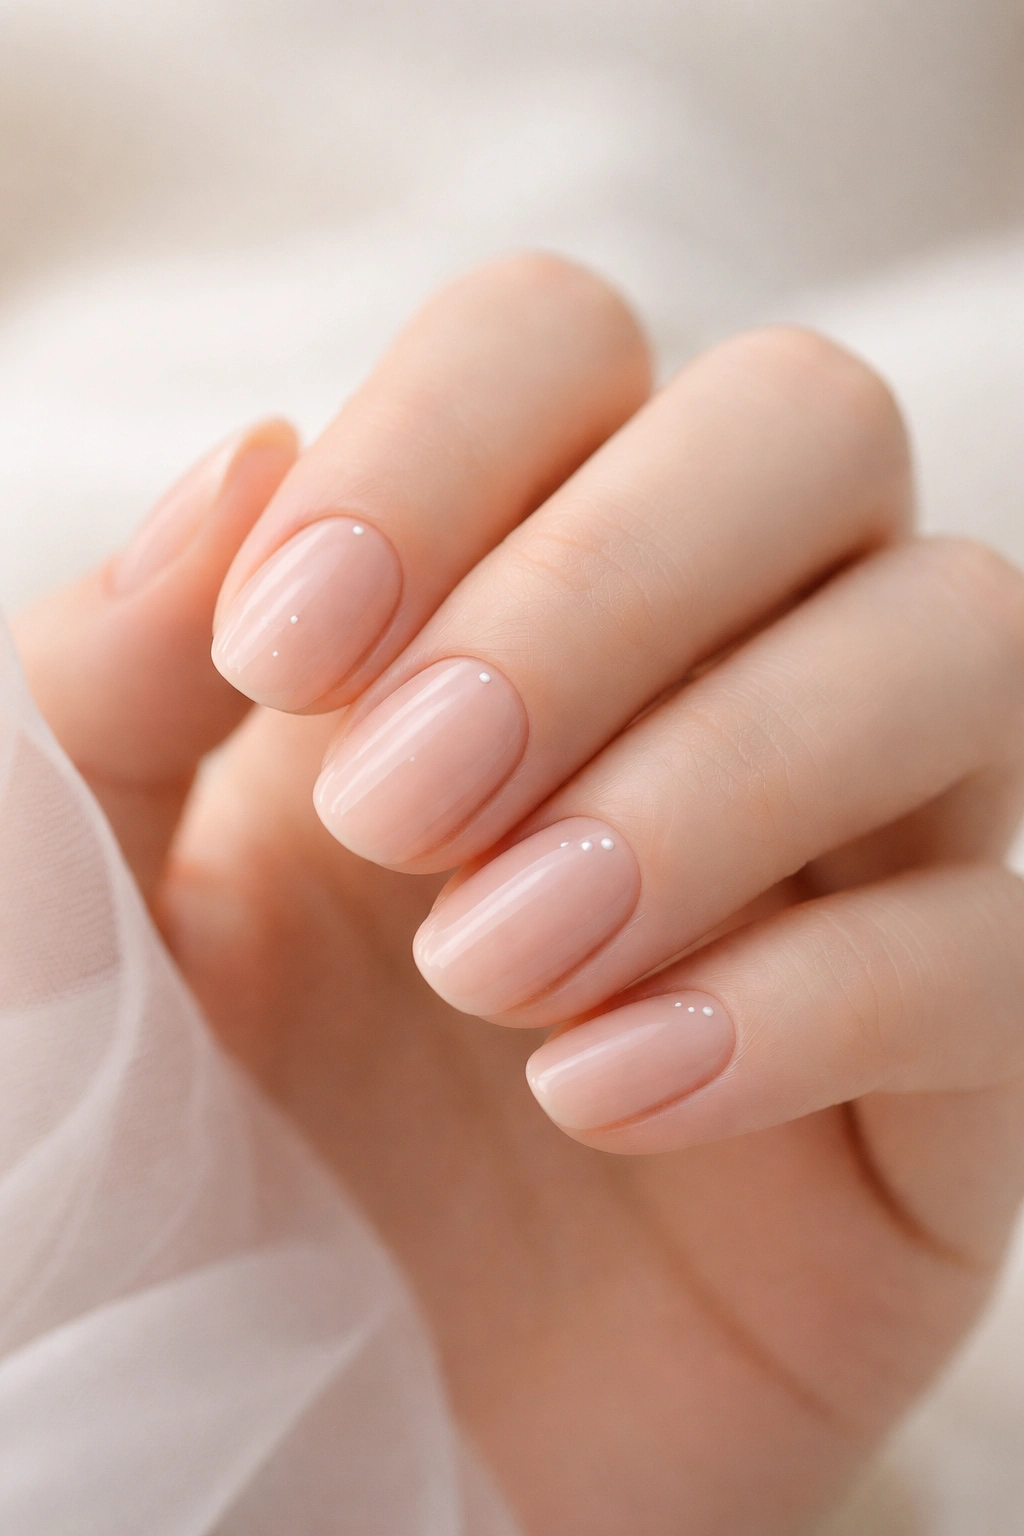
Sometimes the simplest choice is the most powerful. Natural nails with minimal or no design—perhaps just a subtle topcoat that enhances your actual nail color—create an effortlessly beautiful look that feels modern and understated.
The Appeal of Going Nearly Bare
Natural nails convey confidence and authenticity. They let your skin tone, your ring, and your overall bridal look take center stage while your hands still look polished and intentional. This choice works especially well if you’ve been prioritizing nail health in the months before your wedding, as natural nails can be genuinely beautiful. The “clean girl” aesthetic has made natural nails feel fresher and more intentional than ever, and many brides are embracing this approach rather than feeling obligated to cover their nails completely.
Making Natural Nails Look Bridal
- Keep nails trimmed to your natural length—natural nails look best when they’re well-maintained but not dramatically extended
- File into a soft, slightly rounded or oval shape that complements your hand shape
- Choose a clear or barely-there pink topcoat that enhances rather than transforms your natural nail color
- Prioritize exceptional cuticle care—push back cuticles gently, keep them moisturized, and avoid raggedy or overgrown cuticles
- Apply a glossy, long-lasting topcoat that adds shine and protection while maintaining that natural, your-nails-but-better effect
- Consider adding one accent nail with a delicate design if you want to introduce something beyond pure natural nails
Worth considering: If you naturally have discoloration, ridges, or uneven tone in your nails, a sheer color or topcoat will do more to even out your appearance than going completely bare. There’s no shame in choosing what makes you feel most confident.
7. Glazed Donut Nails
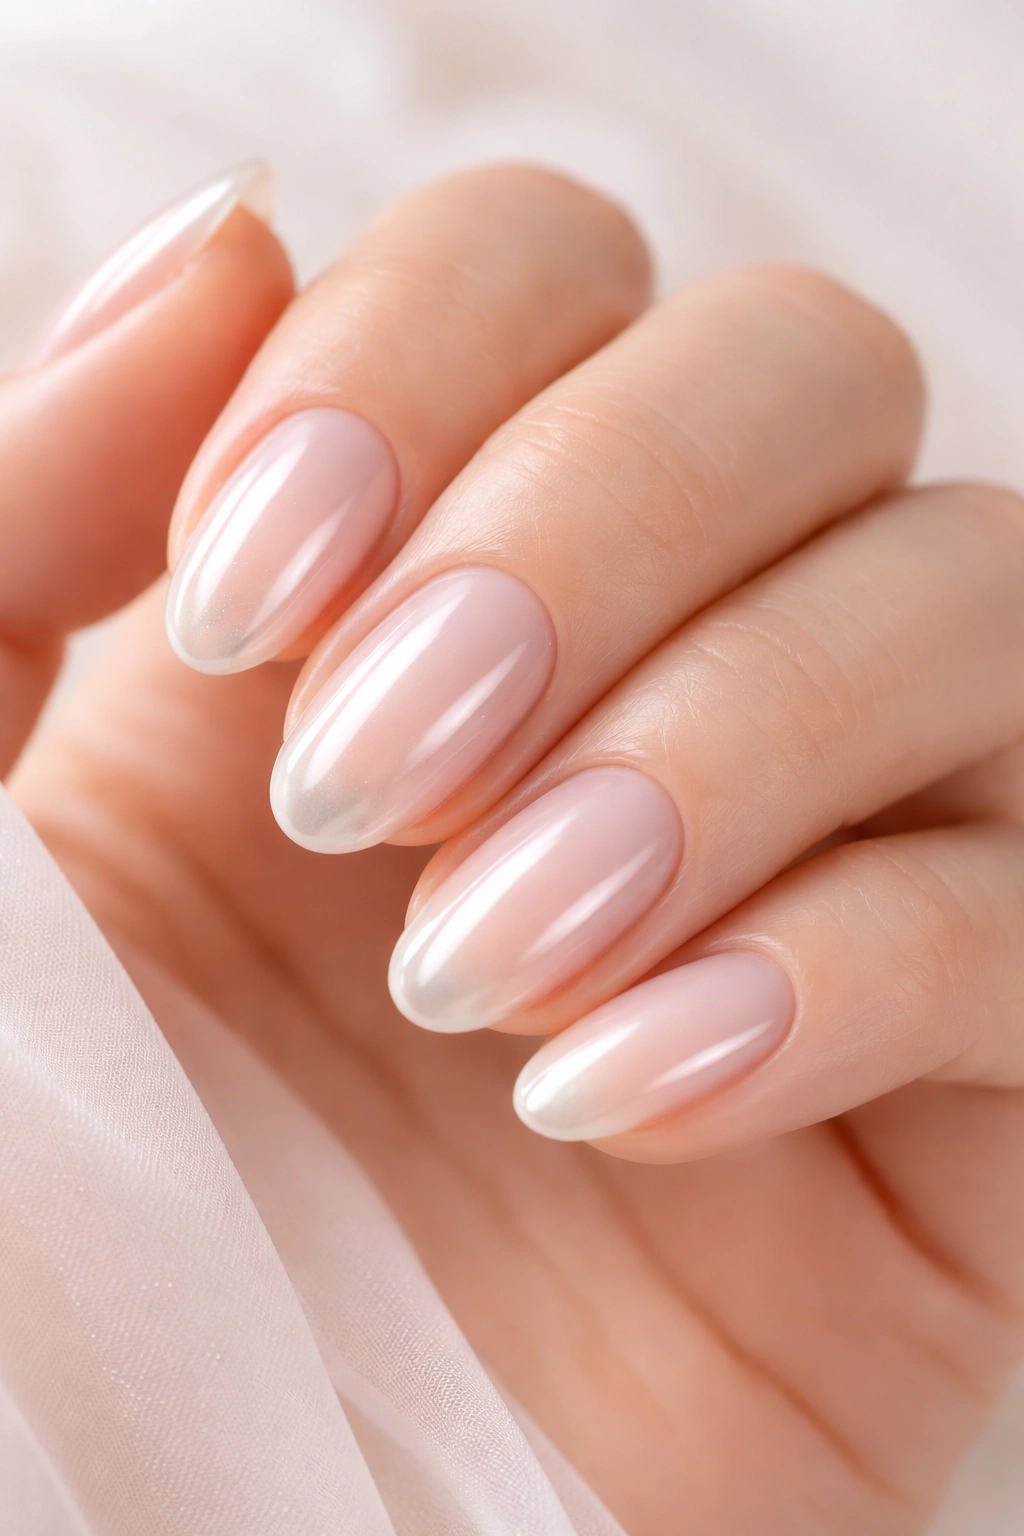
Glazed donut nails combine the “your nails but better” concept with a modern, high-shine finish that makes even a minimal manicure feel special and intentional. This design features a milky sheer or pale pink base with an ultra-glossy, almost wet-looking topcoat that creates that characteristic glazed donut appearance.
Modern Sophistication with Minimal Effort
The glazed donut manicure became popular because it solves multiple bridal concerns at once: it’s elegant and refined, it photographs beautifully with that reflective shine, it coordinates with virtually any wedding aesthetic, and it requires no complicated nail art. The glossy finish adds modernity and glamour, while the sheer base keeps the look soft and romantic. This design works equally well on short natural nails or longer extensions, making it accessible regardless of your nail preference or timeline.
How to Achieve the Glazed Donut Look
- Select a milky sheer base in pink, nude, or white—the key is opacity without boldness
- Ensure your manicurist uses a specialized glazed finish topcoat that creates that distinctive reflective, almost wet appearance rather than standard glossy topcoat
- Choose any nail shape, though almond and oval showcase the shine beautifully
- Request that the base color is smooth and even without visible texture or inconsistency
- Make sure the finish is ultra-high-gloss—this specific shine is what elevates glazed donut nails from ordinary to special
Pro tip: Glazed nails require more frequent touch-ups than other finishes as the glossy topcoat shows wear more visibly. Schedule your appointment just two or three days before your wedding to ensure maximum shine on the actual day.
8. Pale Pink with Delicate Gold Details
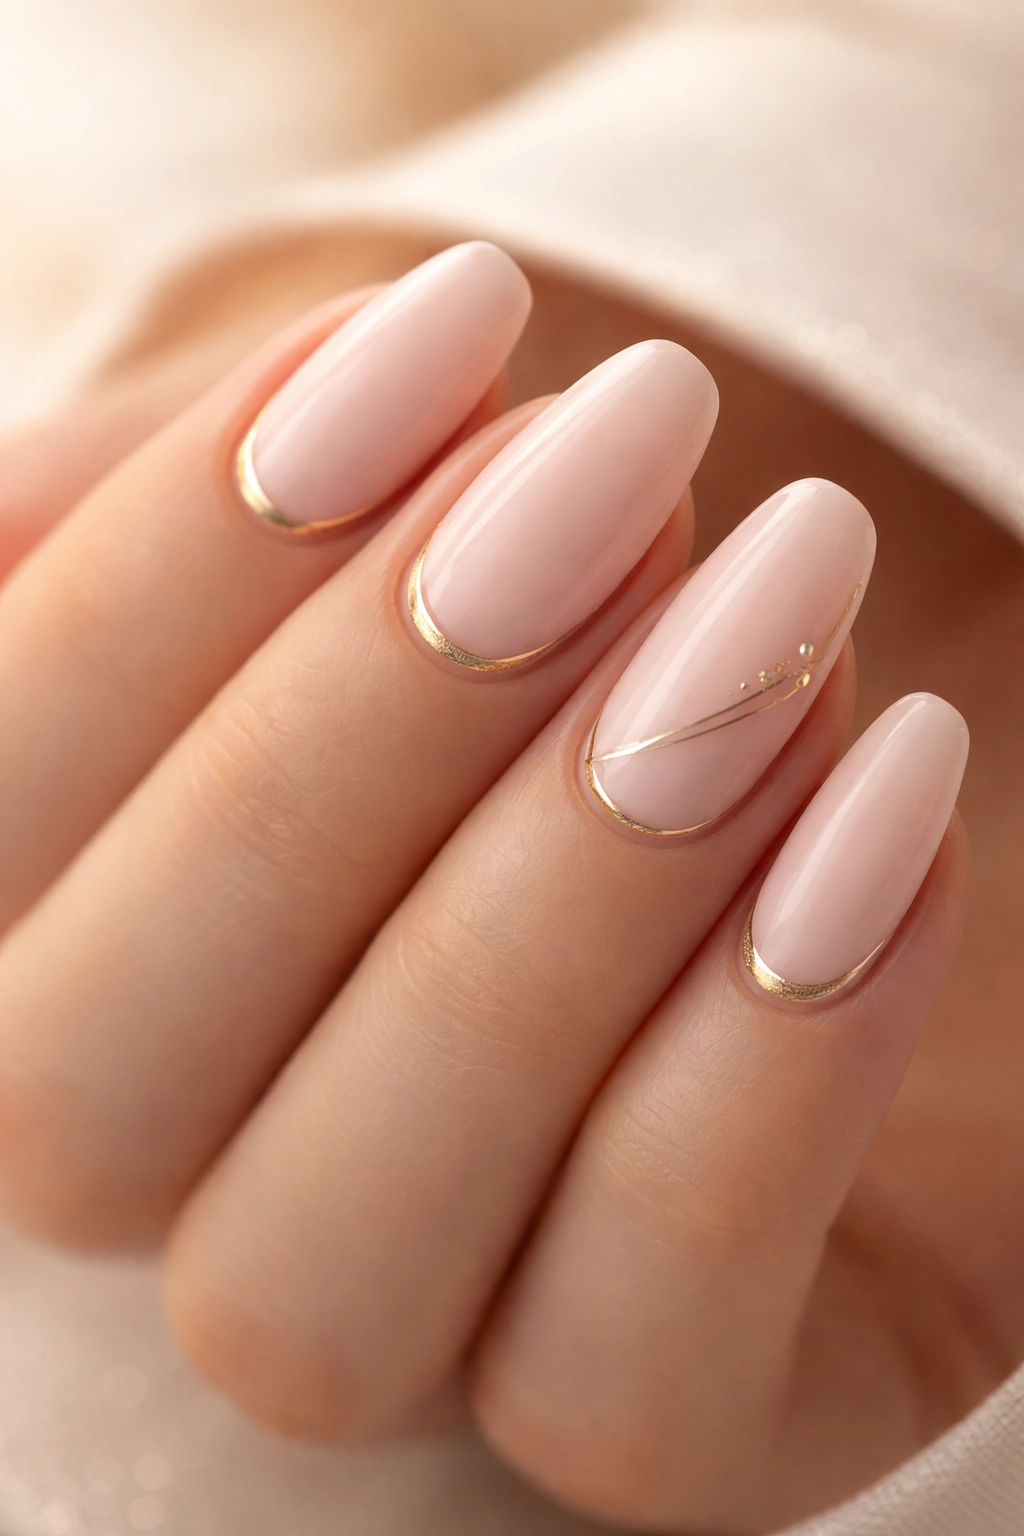
Combining a soft, pale pink base with minimal gold accents creates understated luxury. Whether the gold appears as thin lines at the cuticle, delicate striping, or scattered geometric elements, this design introduces warmth and glamour without demanding attention.
Luxury Through Restraint
Gold details feel inherently elegant and expensive, and when used sparingly on a soft pink base, they create a manicure that reads as both bridal and sophisticated. The pale pink provides romance and femininity, while the gold introduces luxury and glamour. This combination works beautifully for brides who want their nails to feel special and intentional while still maintaining a clean, simple aesthetic. The warmth of gold also complements most skin tones and jewelry metals beautifully.
Creating Your Gold-Accented Manicure
- Start with a soft, pale pink base—think ballet slipper pink rather than vibrant bubble gum
- Request thin gold lines or details—perhaps along the cuticle line, as a delicate striping pattern, or as minimalist geometric shapes
- Use high-quality gold foil or gel that won’t tarnish or fade throughout your wedding day
- Pair with medium-length nails in almond or oval shape to best showcase the gold details
- Seal everything with a glossy topcoat that protects the gold and adds shine to the entire manicure
Insider note: Gold details show fingerprints and smudging more readily than solid colors. Have your manicurist include a microfiber polishing cloth in your emergency kit so you can wipe your nails clean in photos without the hassle of washing your hands.
9. Creamy White with Soft Matte Finish
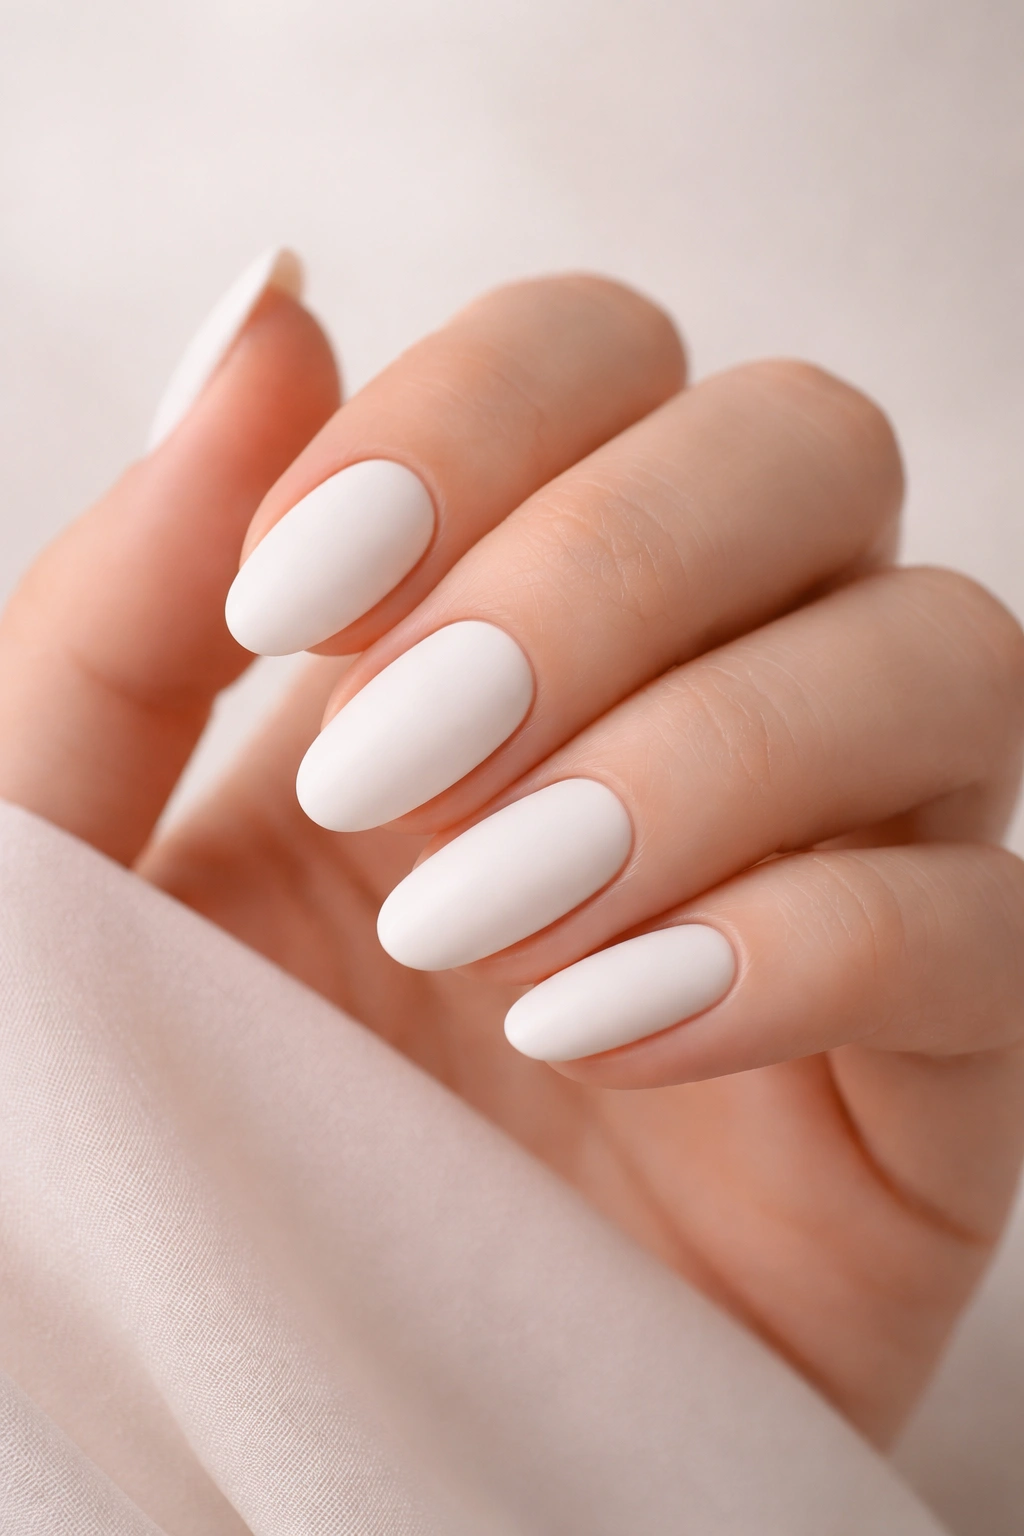
While most bridal nails feature glossy finishes, a creamy white with a soft matte or satin finish creates a sophisticated, modern look that feels less expected than shiny options. This design maintains elegance while introducing texture and a contemporary edge.
Modern Sophistication with Unexpected Texture
The matte finish feels more understated and refined than high-gloss alternatives, creating a look that’s simultaneously modern and timeless. A creamy white base with matte finish photographs beautifully, creates the illusion of smoother, more perfect nails (since the matte finish hides minor imperfections better than gloss), and feels luxuriously simple. This choice suits brides with a more contemporary or minimalist aesthetic while still delivering undeniable elegance and intentionality.
Executing a Matte Bridal Manicure
- Choose a creamy, opaque white base rather than stark white—this prevents the matte finish from looking flat or dull
- Request a true matte topcoat specifically formulated for that velvety, non-reflective finish
- Keep length at medium and shape in almond or oval to showcase the sophisticated finish
- Ensure the application is absolutely flawless, as matte finish shows any unevenness more visibly than gloss
- Ask your manicurist how to maintain the matte finish throughout your wedding day, as some matte topcoats can become shiny with handling or sweating
Worth knowing: Some matte topcoats require special care to maintain their finish. Ask whether your manicurist’s product is water-resistant and how to keep it looking fresh through your celebration.
10. Barely-There Nude with Rhinestone Tips
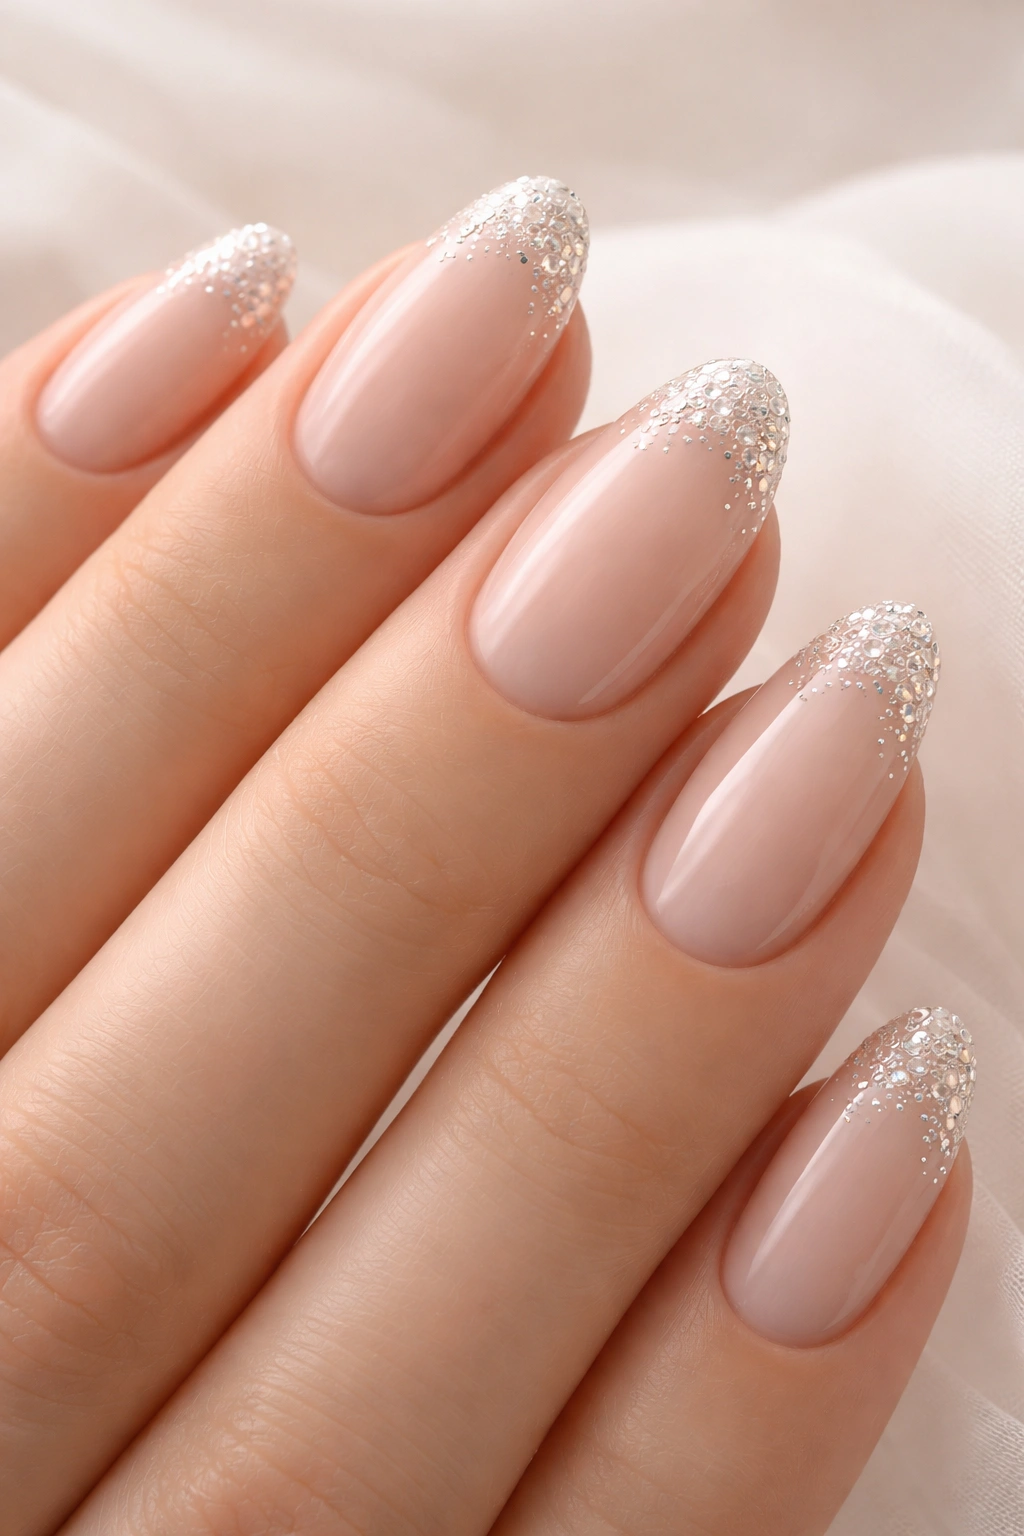
For brides who want a whisper of sparkle without full commitment to a statement design, barely-there nude nails with rhinestones concentrated at the tips offer the perfect balance. This design keeps the nail foundation soft and understated while introducing strategic glamour exactly where light hits.
Subtle Sparkle, Maximum Impact
Rhinestones catch light and create visual interest without overwhelming a simple aesthetic. By concentrating rhinestones on just the tip of each nail, you create dimension and shimmer that photographs beautifully while maintaining restraint. This design feels special and intentional without looking overly embellished, making it ideal for brides who want something beyond a solid color but prefer their nails to remain grounded in simplicity.
How to Create This Look
- Choose a barely-there nude base that matches your skin tone as closely as possible, creating that elongating effect
- Have your manicurist apply high-quality rhinestones specifically designed for nails (not costume jewelry stones) across the tip area
- Consider arranging stones in a scattered pattern for organic beauty rather than perfect rows
- Use jewelry-grade nail glue to ensure stones stay secure throughout dancing, toasting, and celebrating
- Pair with medium-length nails in any shape you prefer
- Seal with a clear, glossy topcoat that protects the rhinestones and enhances their sparkle
Pro tip: Have your manicurist include extra rhinestones and nail glue in your emergency wedding day kit. If a stone dislodges during celebration, you can have it reattached quickly without derailing your day.
Final Thoughts

Simple wedding nails shine because they prioritize you and your overall bridal vision rather than demanding attention in isolation. Every design in this guide proves that elegant doesn’t require complicated—it requires intentionality, quality execution, and a clear understanding of what makes you feel beautiful and confident.
When choosing your wedding nail design, think about what you’ll actually enjoy looking at and feeling in your hands throughout your celebration. Will you prefer the reassurance of a timeless French manicure you’ve worn before, or does the modern sophistication of matte nails or glazed finishes excite you more? Will you feel more like yourself with the romance of soft pink, or does creamy white or barely-there nude better match your aesthetic?
Schedule a trial appointment with your nail artist several weeks before your wedding. Paint on a design, live with it for a few days, look at yourself in photos and in person, and notice how it feels. The right choice is the one that makes you feel absolutely like yourself—polished, intentional, and ready to marry the love of your life.
