

There’s something absolutely mesmerizing about watching holographic nail art catch the light. One moment your nails shimmer with soft iridescence, the next they burst into a full rainbow spectrum depending on the angle and lighting. It’s the kind of nail trend that makes people stop and stare, asking “how did you do that?” The magic comes from special holographic pigments and powders that contain microscopic reflective particles—they bend and refract light in ways that create an otherworldly, almost three-dimensional effect on your fingertips.
What makes holographic nails so brilliant is their incredible versatility. They work with practically any color palette, nail shape, and design style you can imagine. Whether you’re drawn to bold, statement-making drama or subtle, understated sparkle, there’s a holographic approach that fits your aesthetic perfectly. You can layer holographic elements over vibrant neons, soft pastels, deep jewel tones, or even classic neutrals. The effect shifts and changes throughout the day as you move your hands, meaning your manicure never looks quite the same way twice.
The trend really exploded across social media when nail artists and beauty influencers started showcasing increasingly creative applications. Celebrity manicurist Fleury Rose notes that “holographic nails are created using either a holographic powder or polish, and may be layered over different colors for various shimmering effects.” The accessibility factor matters too—you can achieve this look at a professional salon, through press-on nails, or even as a DIY project at home if you invest in the right products. The result is always eye-catching, which is exactly why this trend refuses to fade.
If you’re ready to embrace a nail design that commands attention while maintaining serious style credentials, these ten holographic nail ideas will inspire your next manicure. Each one showcases a different approach to the trend, proving that holographic nails are far more than a one-trick pony.
1. Classic Holographic with a Nude Base
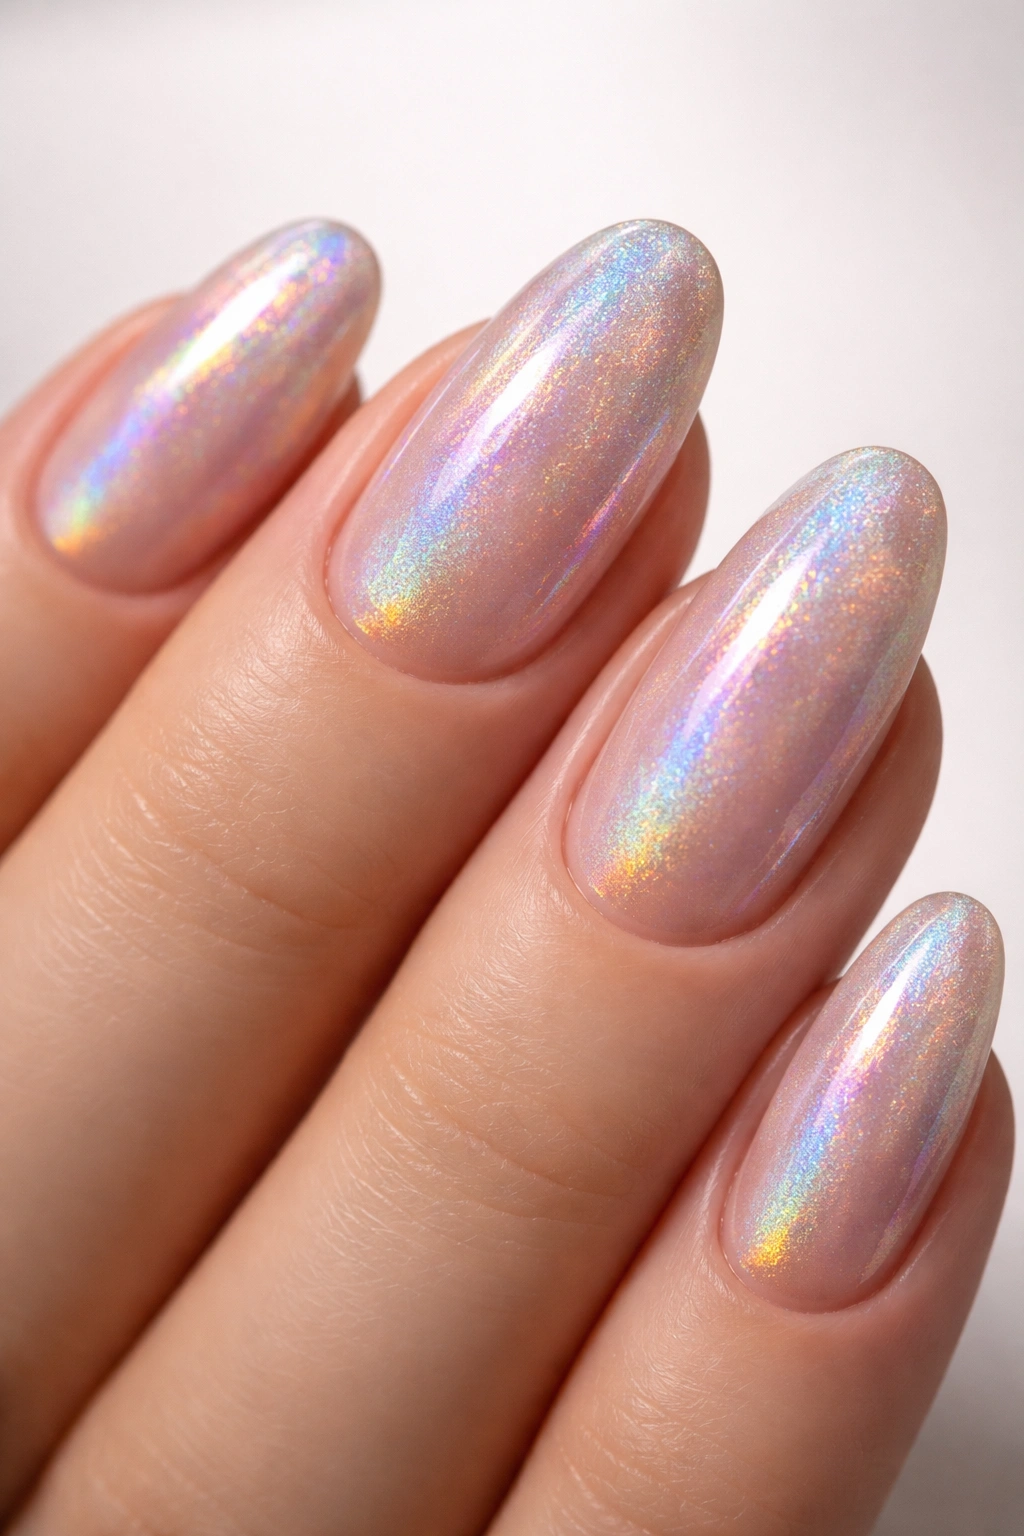
Sometimes the most stunning effects come from the simplest combinations. A nude or beige base provides the perfect canvas for holographic magic to truly shine through—literally. When you apply a neutral base, it creates an almost blank slate that lets the prismatic effect take center stage without any competing colors demanding attention.
Why This Look Stands Out
The nude base strategy is genius because it balances drama with sophistication. Your nails catch light and throw rainbow effects in all directions, creating that unreal quality that makes people double-take, yet the overall aesthetic remains wearable for virtually any occasion. It’s bold enough for a night out but polished enough for the boardroom. The restraint of using a single neutral color actually amplifies the holographic effect—there’s nowhere for the eye to go except to marvel at that shifting, shimmering finish.
Application Tips for Flawless Results
- Start with a quality base coat to create a smooth, even foundation
- Apply two thin coats of your chosen nude polish rather than one thick coat
- Allow each layer to dry completely before adding the next step
- Apply holographic powder using gentle, circular motions with a soft applicator
- Seal everything with a high-shine top coat to lock in the effect and extend wear time
- The nude shade works best when it’s truly neutral—neither too pink nor too yellow
Pro tip: If you’re doing this at home, apply the holographic powder while your base coat or gel layer is still slightly tacky. This helps the particles adhere better and creates a more even, dimensional finish that lasts longer.
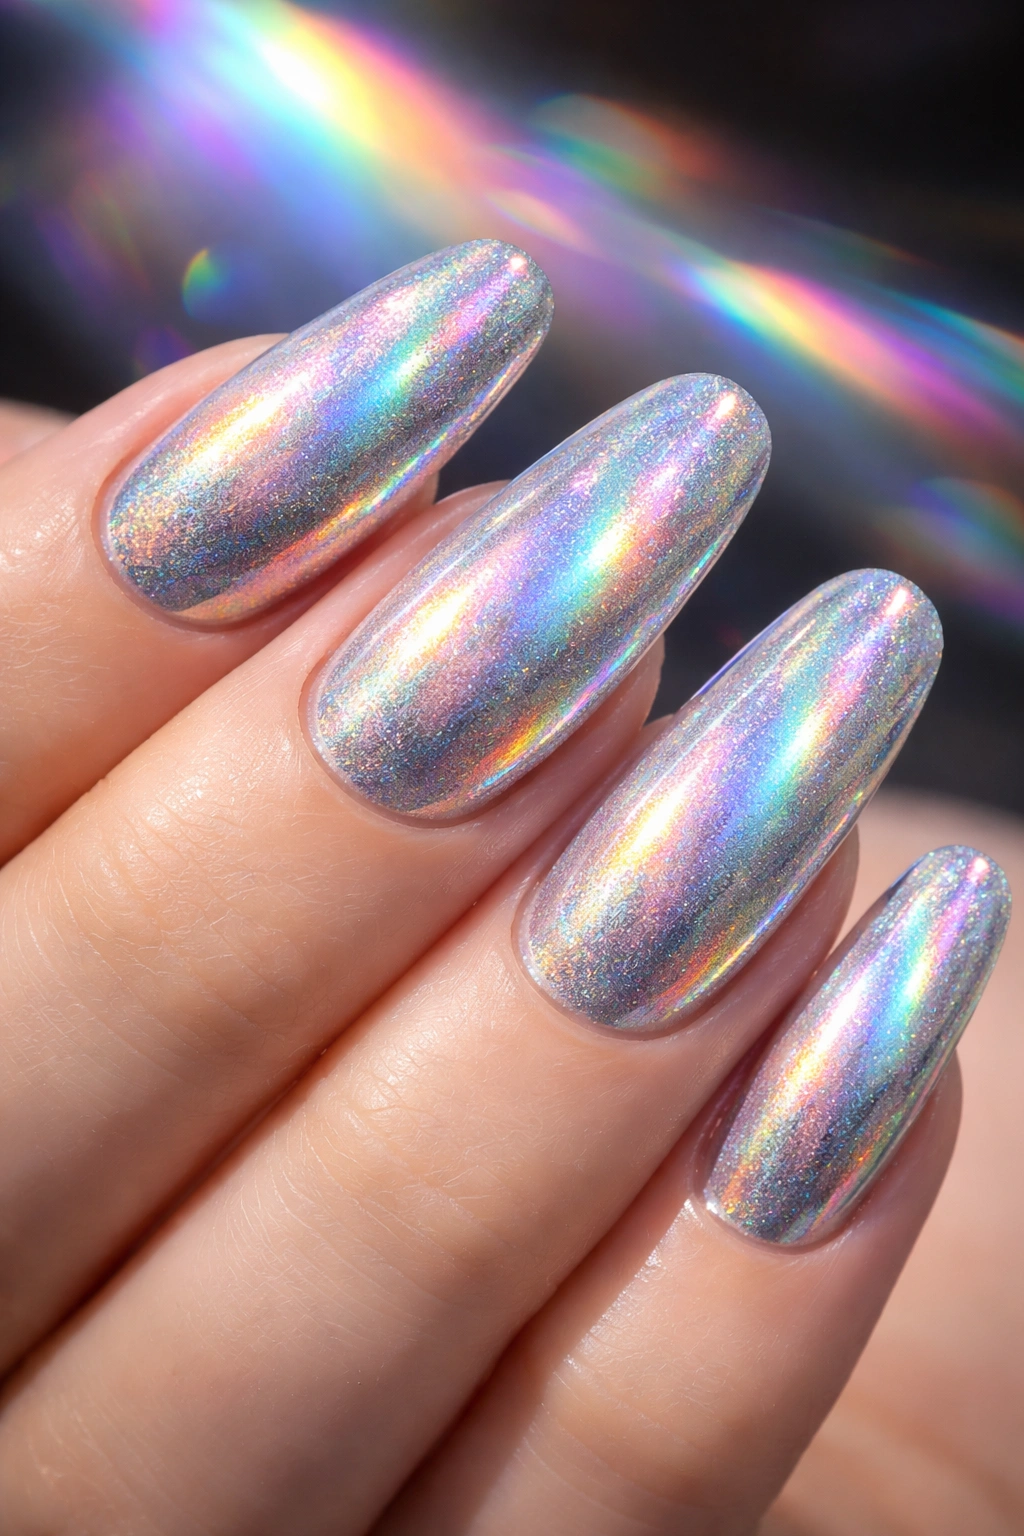
2. Holographic French Manicure with Chrome Tips
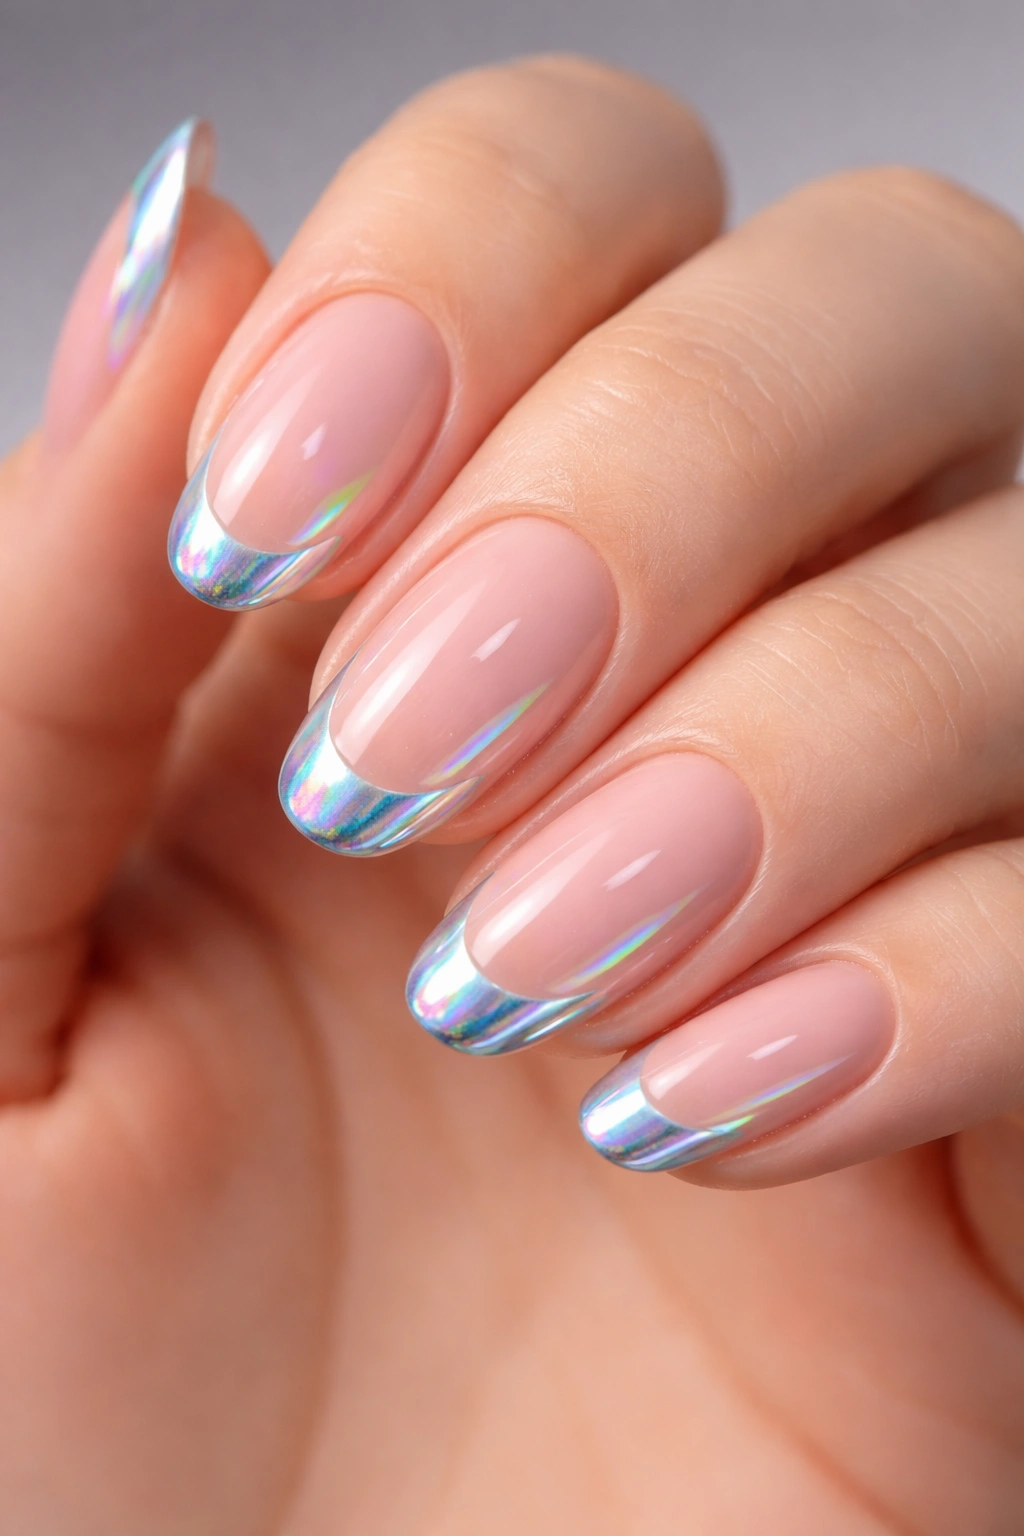
The French manicure is undeniably iconic—but why stick with classic white tips when you can upgrade to shimmering chrome holographic tips? This modern twist on the timeless style keeps the elegance and structure of the original while injecting a futuristic, head-turning element that traditional French nails simply can’t match.
The Elegance of Elevated Classics
French manicures have survived decades of beauty trends for a reason. They’re endlessly flattering, surprisingly versatile, and somehow sophisticated without trying too hard. By swapping the white tip for a holographic chrome finish, you’re maintaining that perfect balance of understated and striking. The neutral base keeps your hands looking polished and professional, while the holographic tips ensure you’ll catch every glimmer of light that passes by. This is the manicure for someone who wants to turn heads without shouting about it.
Making It Work Across Different Nail Shapes
- Coffin nails create a dramatic frame for the holographic tips and look exceptionally striking
- Almond shapes offer a classic, elegant silhouette that complements the high-shine effect beautifully
- Oval nails provide a softer, more traditionally feminine take on the trend
- Square tips work perfectly for those who prefer a more structured, modern appearance
- Stiletto nails amplify the futuristic vibe to maximum intensity
Worth knowing: The width of your tip makes a difference in how the holographic effect appears. A thicker tip creates a bolder, more visible holographic band, while a thinner tip offers subtlety. Experiment to find what feels right for your style.
3. Rainbow Holographic Ombre Gradient
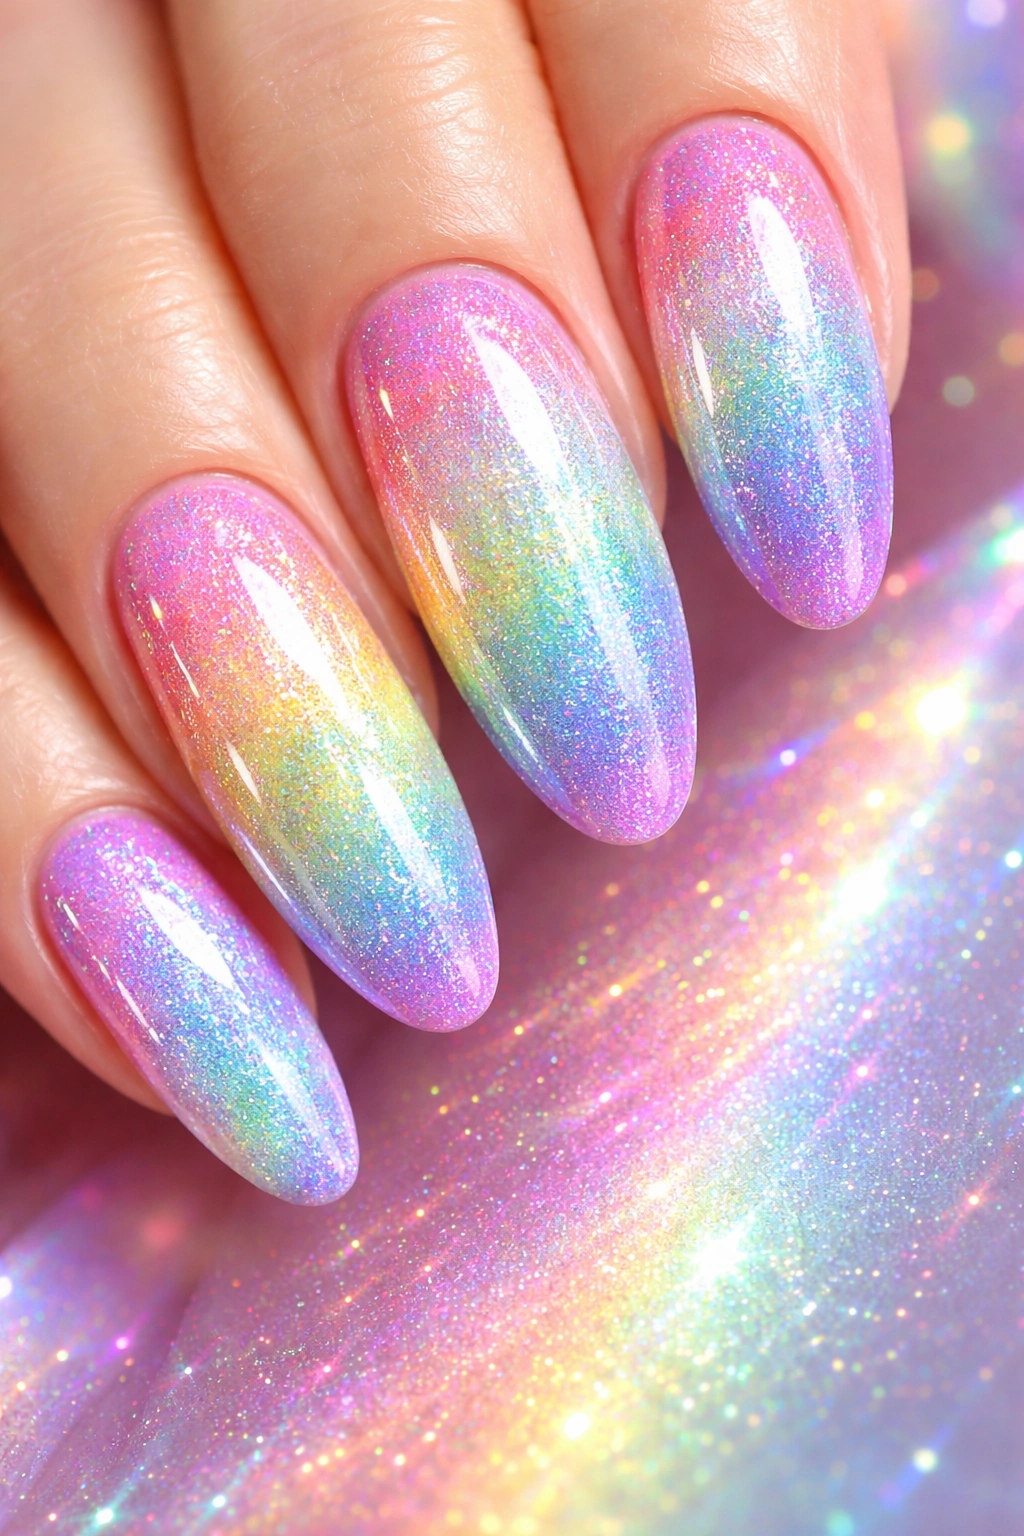
If there’s one design that truly captures the “unreal” quality holographic nails promise, it’s a full rainbow ombre gradient. This design celebrates every color in the spectrum, layered and blended so smoothly that it feels like you’re wearing captured light on your fingertips. The effect is whimsical, joyful, and absolutely impossible to ignore.
Creating the Ombre Transition
The beauty of a rainbow ombre is that it tells a story from cuticle to tip. The base might start with soft pinks and purples, transitioning through blues and teals in the middle, then finishing with greens and golds at the tip. Each nail can be identical or slightly varied for a more artistic, hand-painted feel. The holographic powder amplifies every single color shift, making the transition even more dynamic and mesmerizing. When light hits this design, it’s genuinely difficult to capture in a single photograph because the colors change so dramatically depending on the angle.
Techniques for a Flawless Gradient
- Use a makeup sponge to blend multiple polish colors before the holographic powder application
- Apply holographic powder in sections, working carefully from one color zone to the next
- Use a fluffy brush to blend excess powder and create seamless transitions
- Layer your top coat in thin applications to avoid disturbing the powder placement
- Cure each layer properly if working with gel to ensure everything sets correctly
Insider note: The sponge method works better than brushing when you’re trying to create smooth gradients. Dabbing rather than stroking helps colors blend together more naturally without creating harsh lines.
4. Holographic Accent Nails with Minimalist Design
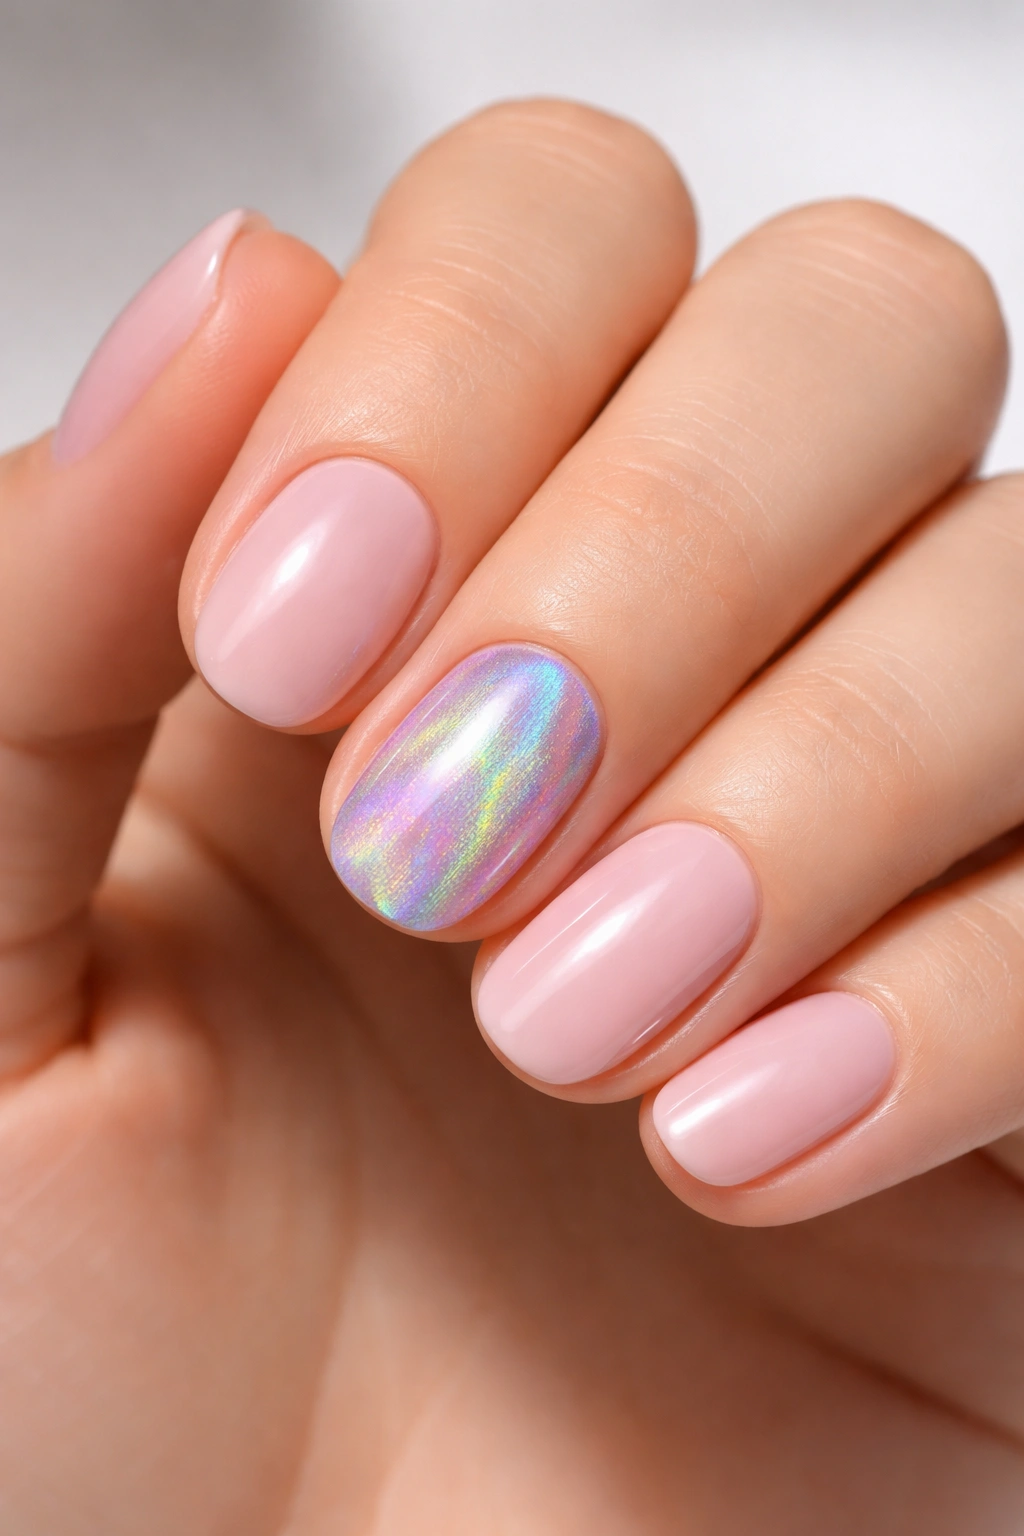
Not everyone wants their entire manicure covered in holographic shimmer, and that’s completely valid. This approach uses holographic accents strategically—perhaps on just the ring finger, or as a delicate detail on one or two nails—letting the rest of your manicure remain understated and elegant. It’s the “best of both worlds” strategy that gives you high-impact sparkle without overwhelming your overall look.
The Power of Strategic Placement
Accent nail designs let you control the drama level of your manicure. Maybe you choose to apply full holographic powder to just your ring finger while keeping the other four nails a clean, simple color. Or perhaps you use holographic stickers to create a small geometric pattern, or a tiny holographic heart on one accent nail. This approach appeals to minimalists who love the trend but want it to complement rather than dominate their nail aesthetic. The restraint actually makes the holographic effect feel even more special and intentional.
Design Ideas for Accent-Based Holographic Nails
- Single holographic nail among four solid-color nails creates immediate visual interest
- A thin holographic stripe or line detail across one or two nails offers subtle sophistication
- Holographic dots or circles applied strategically can feel playful and modern
- A holographic geometric shape (triangle, diamond, or line art) on an accent nail feels artistic and intentional
- Mixing holographic stickers with solid polish provides an easy DIY option with professional results
Quick fact: Accent nails actually make the holographic effect more noticeable because the contrast between matte or glossy regular polish and the shimmering holographic surface makes the difference more striking.
5. Purple Holographic Ombre with Glitter Finish
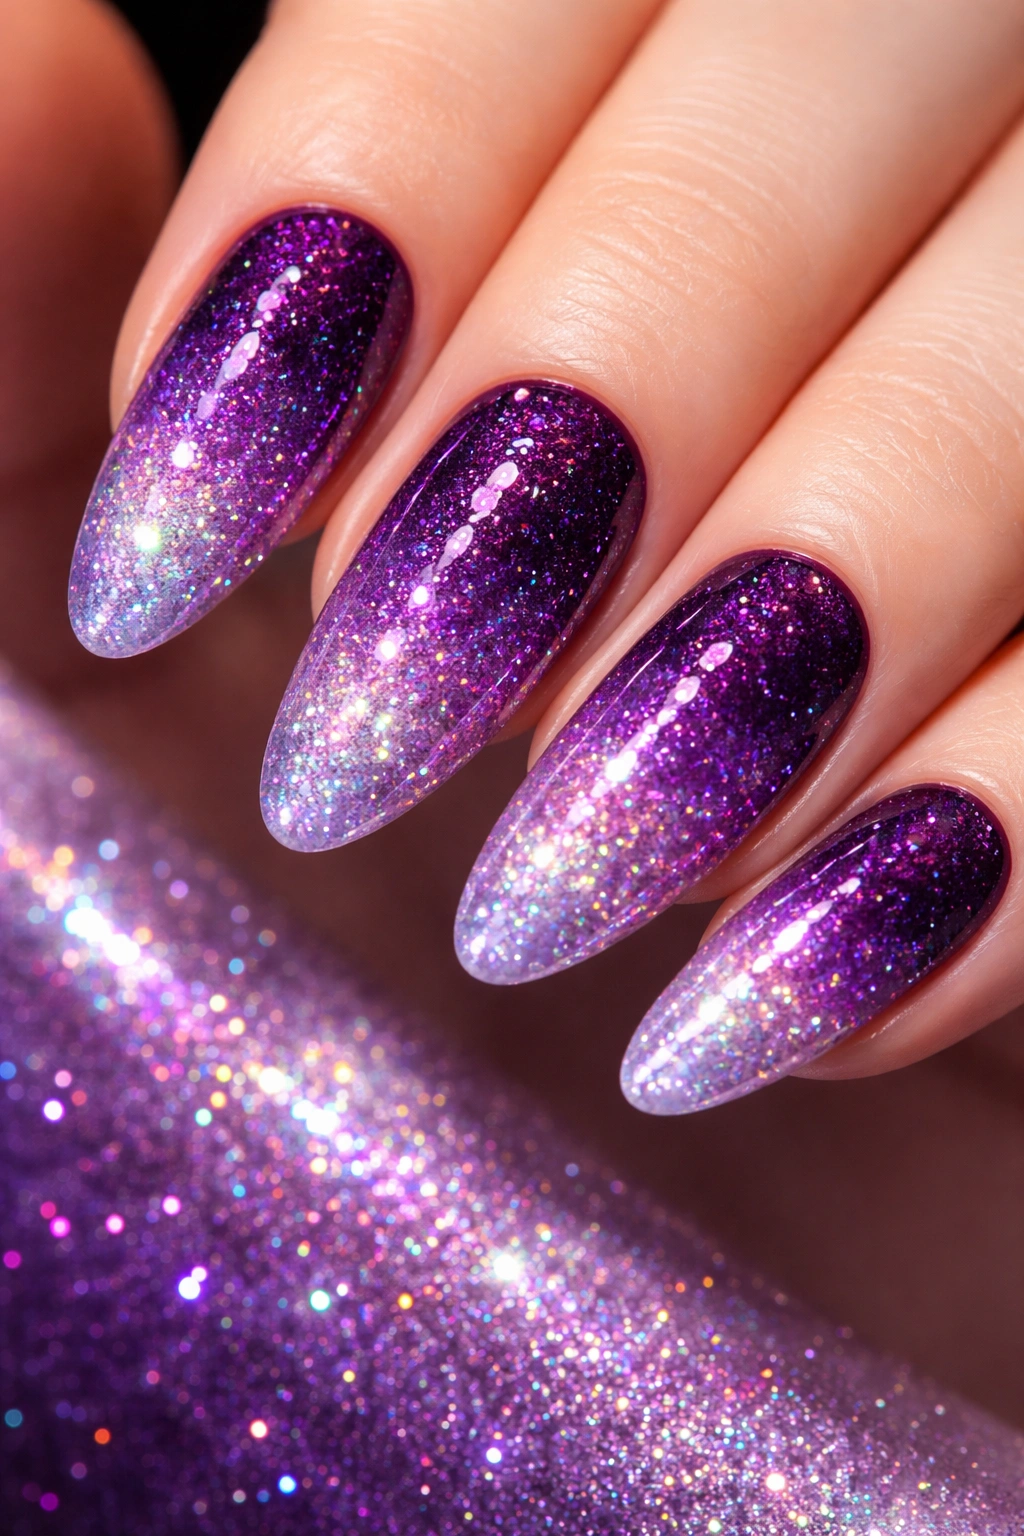
Deep purples layered with holographic powder create an absolutely dreamy, almost mystical effect. When you add dimension through an ombre gradient—moving from darker purple at the base to lighter shades toward the tip—and then enhance it with holographic glitter, you’ve created a manicure that looks like pure magic. This design feels luxe, mysterious, and genuinely unreal in person.
Why Purple Is the Perfect Holographic Canvas
Purple has always held associations with creativity, luxury, and mystique. When you apply holographic effects to purple polish, something extraordinary happens—the powder catches and reflects light in ways that make the purple seem to glow from within. The ombre gradient adds depth and dimension, so your nails don’t read as flat or one-dimensional. Instead, they appear to have layers of light and color rippling across the surface. This is the manicure for someone who wants to feel powerful and a little bit otherworldly.
Building Your Purple Holographic Ombre
- Begin with a dark purple base that will serve as your anchor color
- Apply progressively lighter purple shades in an ombre pattern using a sponge
- Let each layer dry slightly before adding the next to prevent muddiness
- Apply holographic powder using circular motions for even coverage
- Add optional glitter pieces while your top coat is still slightly tacky
- Seal with a glossy top coat for maximum shine and dimension
Pro tip: Purple can sometimes appear a bit flat on its own, but the holographic powder brings out hidden undertones—blues, pinks, silvers—making the color infinitely more interesting and dynamic.
6. Clear Base with Holographic Confetti
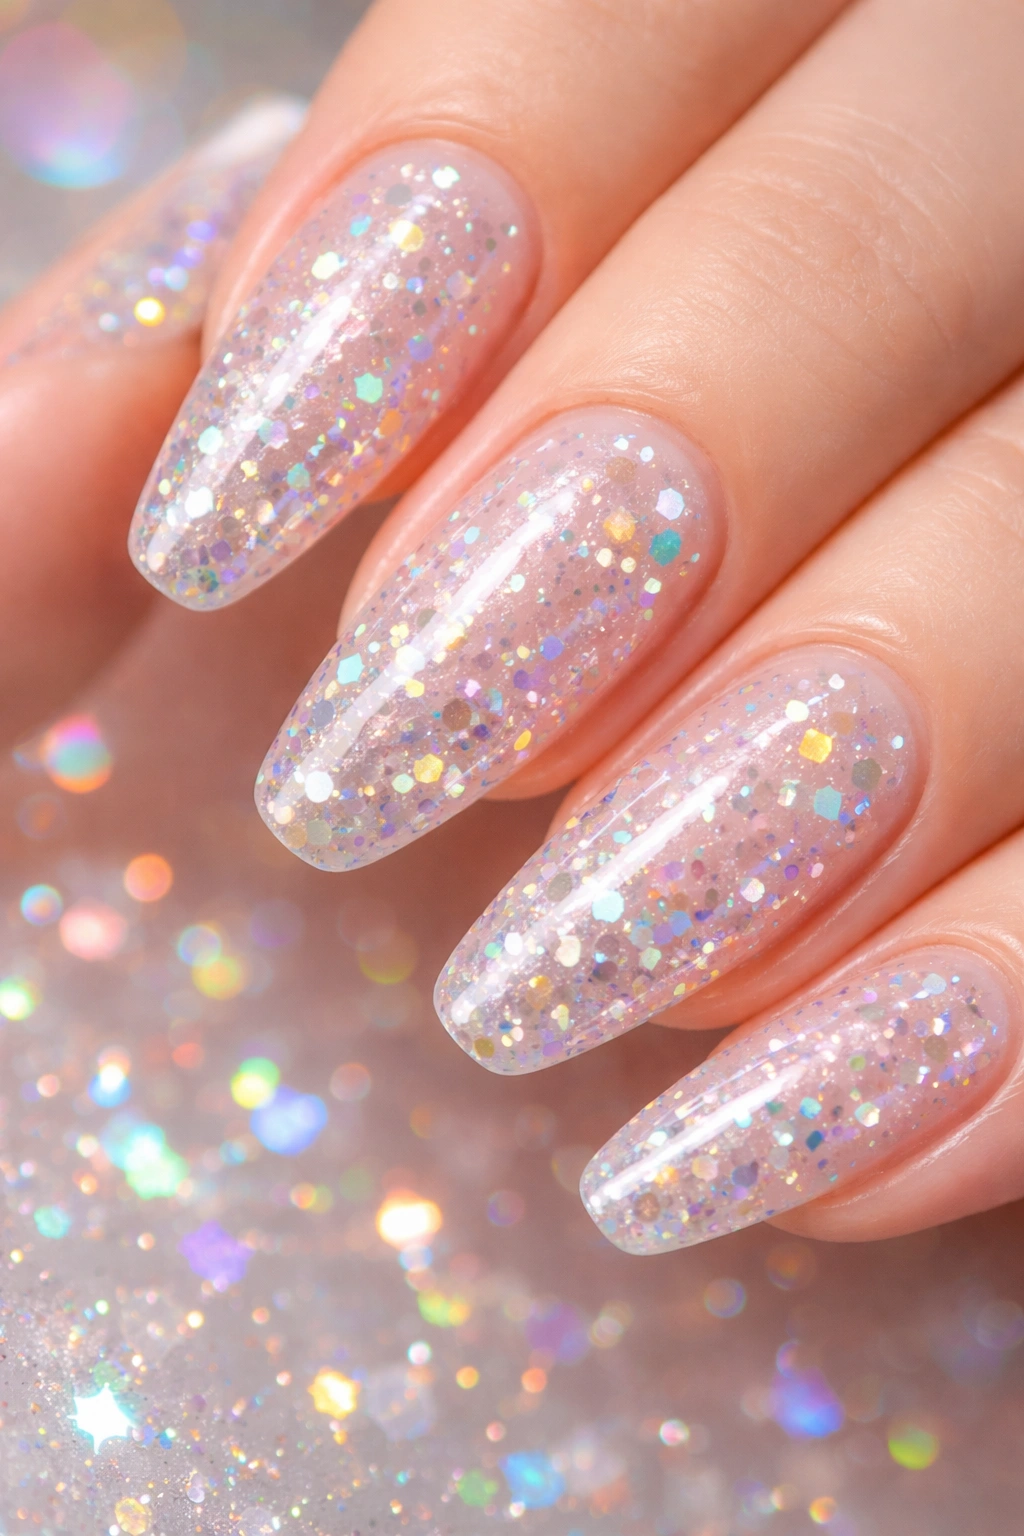
This design takes a completely different approach by using transparency as your secret weapon. A completely clear base with holographic confetti elements scattered across it creates an airy, ethereal effect that somehow feels both minimalist and maximalist at the same time. The confetti pieces float against the transparency, catching light and creating depth that’s genuinely stunning.
The Magic of Transparency in Holographic Design
When you work with a clear or semi-transparent base, you’re inviting light to pass through your nail rather than simply reflect off the surface. Adding holographic confetti—whether that’s small glitter pieces, powder particles, or tiny foil flakes—creates focal points for light to bounce off. The result is an incredibly dimensional, almost three-dimensional effect. You can see through some areas while the holographic bits create dazzling light shows. It’s delicate, it’s sophisticated, and it never fails to impress people who look closely.
Creating the Confetti Effect
- Apply a clear gel base coat and cure it completely
- Sprinkle small holographic confetti pieces onto the uncured layer
- Allow them to settle naturally into the sticky surface
- Add your clear top coat carefully to seal everything without disturbing placement
- Cure the entire design until fully set
- Consider varying the density of confetti across your nails for visual interest
Worth knowing: Clear nails with holographic elements work beautifully at any length or shape, but they’re particularly striking on longer nails where there’s more surface area for the confetti to dance across.
7. Holographic Flame Design on Dark Base
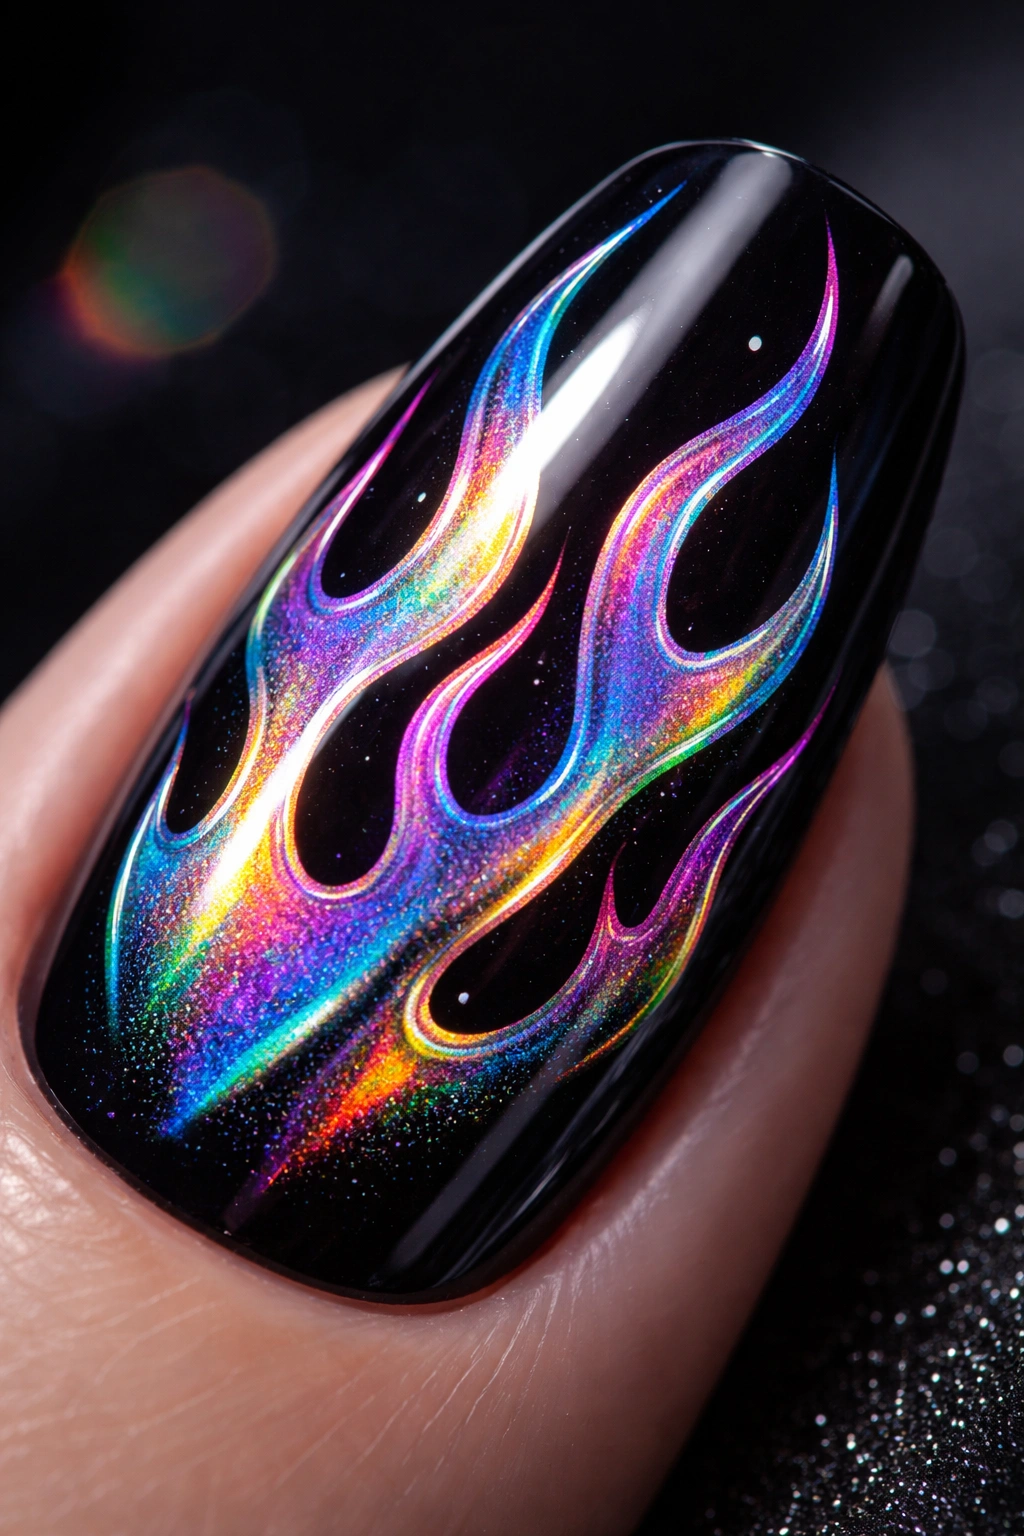
Take holographic effects into edgy, dramatic territory with a flame design layered over a deep black or dark navy base. The contrasting colors make the holographic effect absolutely pop—instead of blending into a background, the shimmering flames practically leap off your nails. This design walks the line between sophisticated and bold, making it perfect for anyone who wants to make a serious statement.
The Drama of High Contrast
Dark backgrounds amplify holographic effects because they create visual contrast that makes the shimmer impossible to ignore. Black is the ultimate choice because it’s neutral enough to work with any holographic color while providing maximum contrast. A navy or deep charcoal base offers slightly more sophistication while still delivering that dramatic contrast. The flame design itself adds movement and energy—they feel alive, dynamic, and genuinely fierce. This is the manicure for someone with confidence and style in spades.
Executing Flame Designs
- Start with a dark base coat applied in thin, even layers (2-3 coats)
- Allow the base to cure completely if using gel
- Use a thin brush or nail art pen to sketch flame outlines in a lighter color
- Apply holographic powder within the flame shapes using a small applicator
- Seal with a top coat that won’t disturb your design
- Practice on a nail wheel before committing to your actual nails
Insider note: If flame design feels too advanced, you can use holographic stickers designed to look like flames and apply them over your dark base for a similar effect with less technical difficulty.
8. Holographic Rose Gold with Geometric Accents
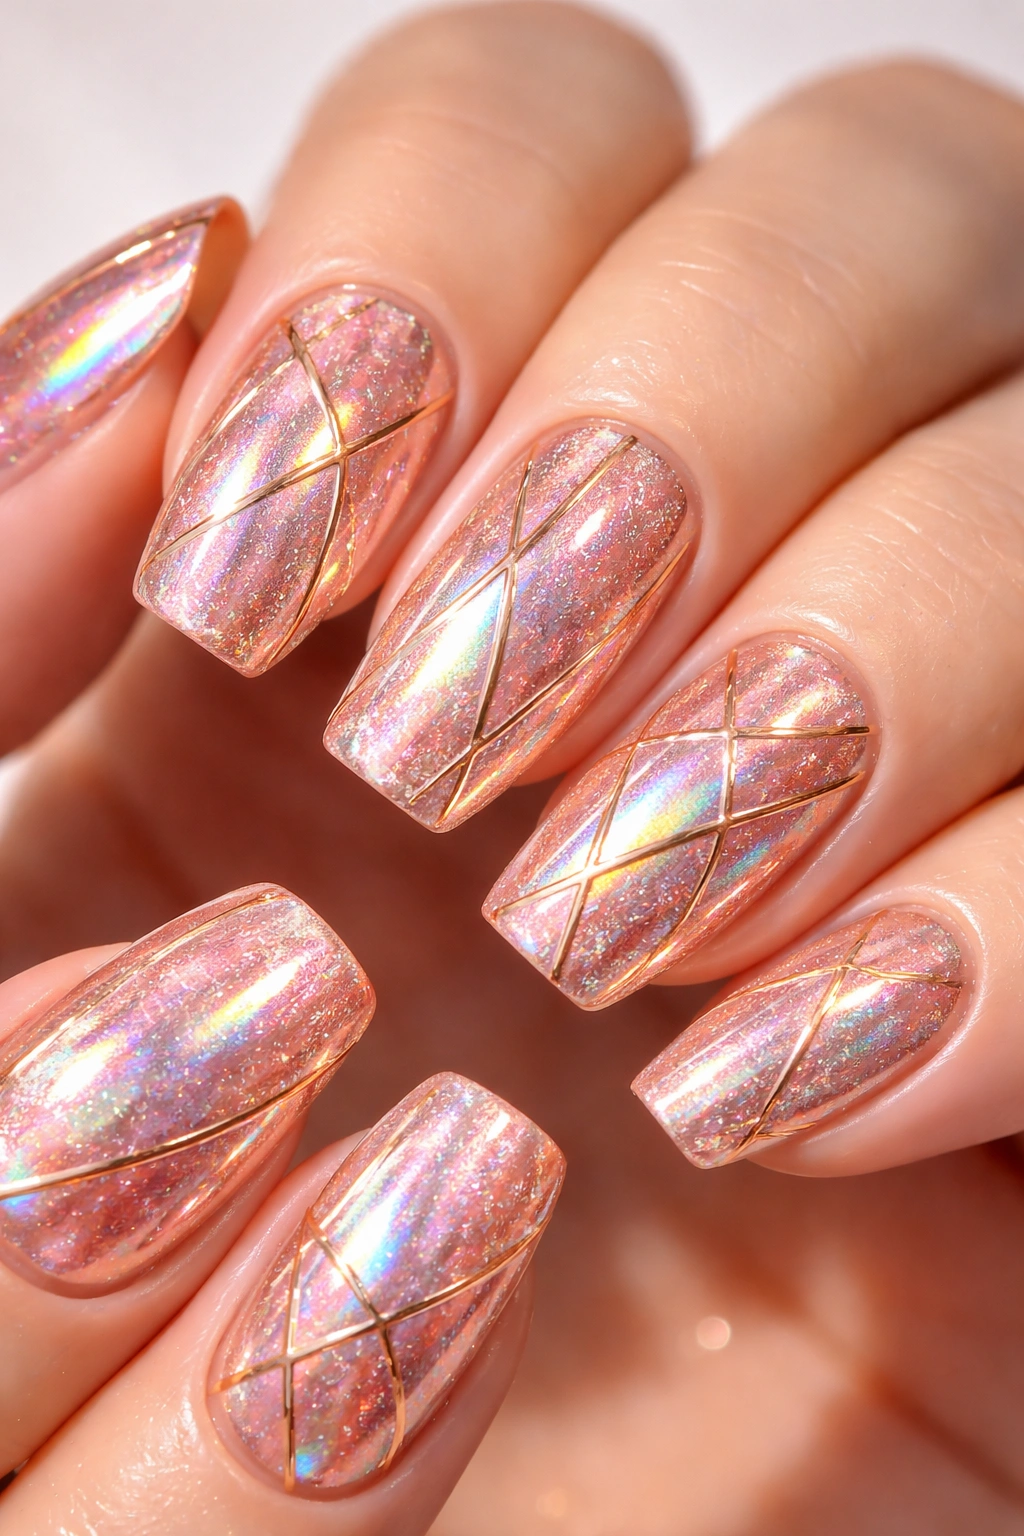
Rose gold is having a major moment, and when you combine it with holographic effects and geometric line work, you create something that feels both trendy and timeless. The warm, romantic quality of rose gold paired with the futuristic shimmer of holographic effects creates an interesting tension—it’s glamorous but modern, feminine but edgy. Add geometric patterns for structure and visual interest, and you’ve got a manicure that works for literally any occasion.
The Romance of Rose Gold Holographic
Rose gold has this magical quality of flattering virtually every skin tone while feeling innately luxurious. When you apply holographic powder to a rose gold base, it reveals hidden peachy, pink, and golden undertones. The geometric accents—whether that’s thin lines, angular shapes, or structured patterns—provide contrast and prevent the design from feeling too soft or overly romantic. The result is a manicure that’s undeniably beautiful but also demonstrates sophisticated design sense and technical skill.
Geometric Patterns That Complement Rose Gold
- Thin gold lines creating abstract angular designs feel modern and intentional
- Small triangles at the tips or cuticle line add architectural interest
- Striped patterns running vertically or diagonally add movement
- Minimalist square or rectangular shapes create clean, structured contrast
- Half-moon designs at the base or tip offer a classic geometric approach
Quick fact: Rose gold holographic nails photograph beautifully because the colors read clearly in different lighting conditions—they don’t wash out in bright light or disappear in dim conditions like some holographic designs can.
9. Pastel Holographic with Subtle Sparkle
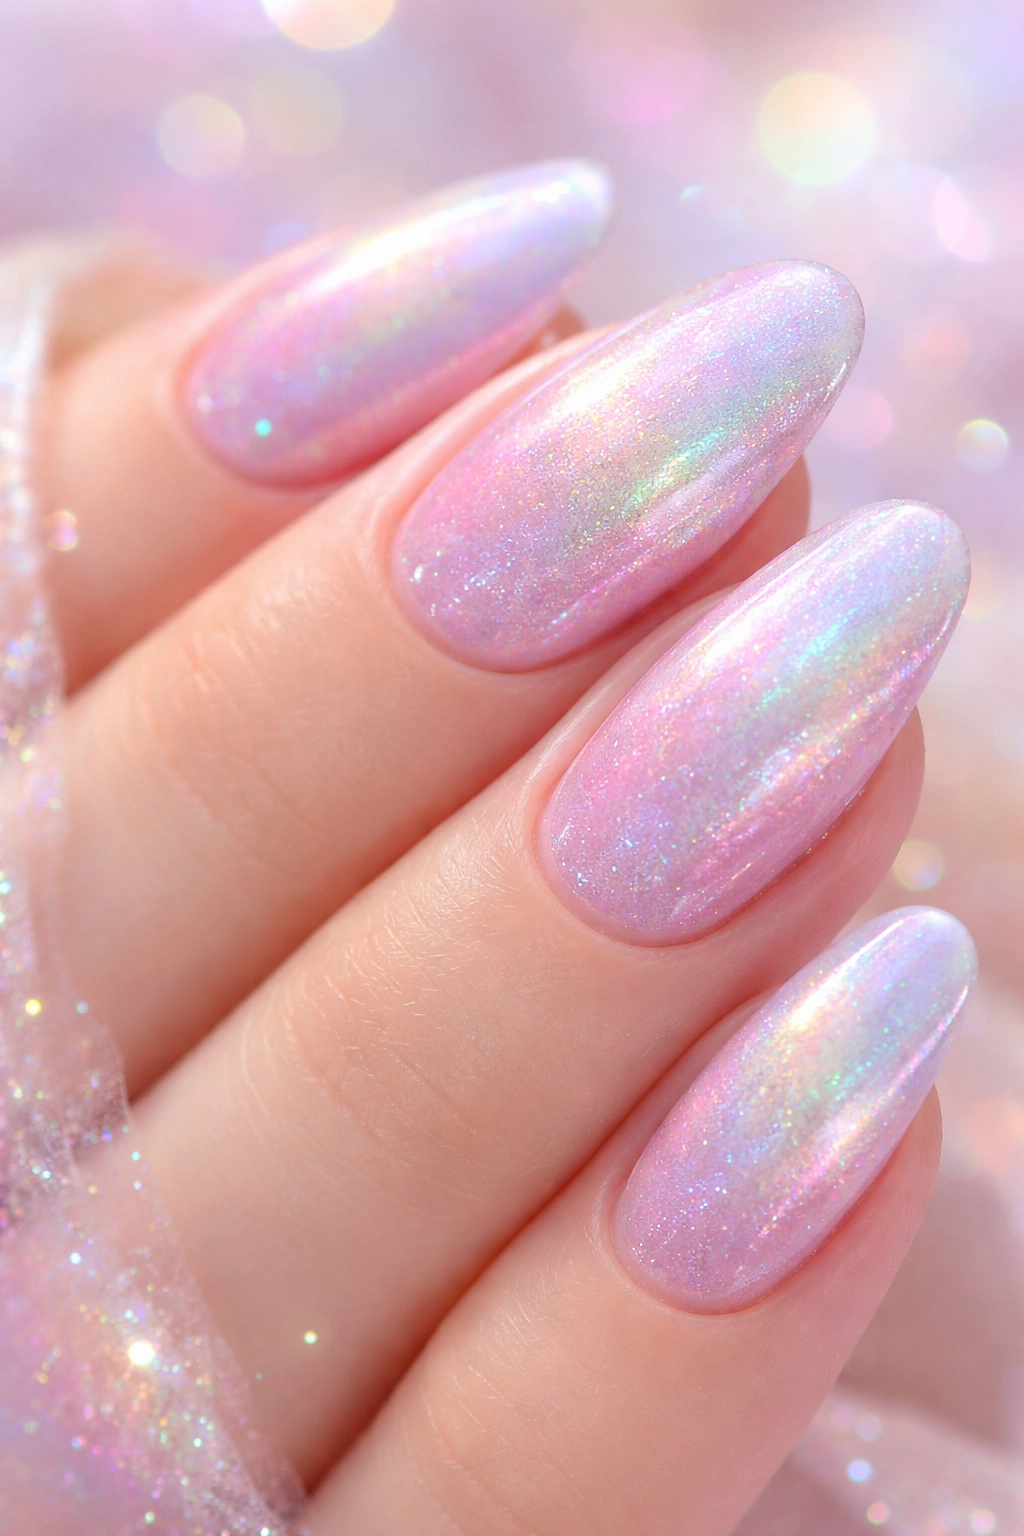
If bold holographic statements aren’t your style, consider the softer side of the trend with pastel holographic designs. Soft pinks, lilacs, light blues, and creamy yellows create a whimsical, almost fairytale quality when paired with holographic effects. The sparkle is still there—undeniable and magical—but it whispers rather than shouts. This approach proves that holographic nails don’t always have to be loud to be absolutely stunning.
The Delicate Side of Holographic Nail Art
Pastel holographic nails work beautifully for spring occasions, weddings, or anyone who gravitates toward softer aesthetics. The pastels immediately soften the futuristic quality of holographic effects, creating something that feels both dreamy and wearable. There’s something uniquely appealing about watching soft pink nails shift into subtle rainbow sparkles as light catches them. It’s the kind of detail that makes people lean in closer to get a better look. The effect is mesmerizing without being aggressive or overwhelming.
Building Your Pastel Holographic Manicure
- Choose pastels that genuinely suit your skin tone rather than just following trends
- Apply holographic powder in lighter layers for a more subtle effect
- Consider using matte top coats for an interesting contrast with the shimmer
- Layer holographic effects over white bases for maximum pastel vibrancy
- Mix and match different pastel shades across nails for a cohesive, multi-color look
- Add delicate details like tiny dots or thin lines in metallic gold or silver
Pro tip: Pastel holographic nails benefit from professional application because the subtle effects are easier to execute evenly with proper tools and technique. That said, DIY is definitely possible with care and patience.
10. Holographic Chrome Mermaid Gradient with 3D Details

For the ultimate “unreal” holographic nail experience, combine chrome, gradient effects, and three-dimensional embellishments. A mermaid-inspired gradient flowing from teal to purple to pink, enhanced with holographic powder and topped with tiny pearls or gems, creates a manicure that looks like it came from another dimension. This is maximalist holographic at its finest—unapologetic, gorgeous, and absolutely unforgettable.
Creating the Ultimate Holographic Masterpiece
This design represents the height of nail art ambition. You’re layering multiple techniques—gradients, holographic powder, chrome effects, and 3D embellishments—to create something that genuinely looks impossible. The mermaid theme works perfectly because it’s inherently fantastical and magical. The colors flow naturally from cool teals and purples into warm pinks and corals, mimicking the way light refracts through water. Three-dimensional elements catch additional light, adding another layer of dimension and movement. This is genuinely a wearable work of art.
Technical Execution for Complex Designs
- Create your color gradient using multiple polish shades and a sponge blending technique
- Apply holographic powder in sections that coordinate with different color zones
- Use chrome powder carefully around embellishments so it doesn’t overshadow them
- Apply gems or pearls using a strong nail glue while your top coat is still slightly tacky
- Seal everything with multiple layers of top coat for durability
- Consider reinforcing 3D elements with additional top coat layers for longevity
Worth knowing: These complex designs are genuinely challenging to execute at home. If you love this aesthetic, visiting a professional nail artist who specializes in detailed nail art is worth the investment. The results last longer and look infinitely more polished than DIY versions typically do.
The Final Sparkle
The beauty of holographic nail art is that it works for literally anyone who wants to experiment with shimmer, sparkle, and light-catching effects. Whether you gravitate toward minimalist accents or full-coverage rainbow gradients, there’s a holographic approach that matches your vibe perfectly. The trend isn’t going anywhere because it delivers something genuinely magical—nails that change and shift throughout the day, revealing new colors and dimensions depending on lighting and angle.
The accessibility factor matters too. You don’t need expensive salon appointments to achieve these looks, though professional application certainly results in flawless finishes. Quality holographic powders and polishes are available at reasonable price points online and in beauty stores. Press-on holographic nails offer an instant solution if you want the effect without the application process. DIY enthusiasts can absolutely master these techniques with practice, patience, and quality products.
What makes holographic nails truly special is that they feel like a celebration of light itself. There’s something joyful about wearing nails that catch every beam of light and transform it into something beautiful. Whether you choose a subtle accent or a full rainbow explosion, holographic nails prove that nail art isn’t just decoration—it’s a form of personal expression that makes you feel confident, creative, and genuinely magical.
