

Gold chrome nails have this amazing ability to make your hands look like you just left a luxury salon, even if you did them yourself in your living room while binge-watching your favorite show. There’s something about that reflective, metallic finish that screams sophistication without saying a word. And here’s the best part: you don’t need to drop a hundred dollars at the nail salon to get that high-end look.
The magic of gold chrome lies in its versatility and accessibility. Whether you’re into subtle elegance or full-on glamour, there’s a gold chrome design that’ll match your vibe perfectly. With just a few affordable supplies—chrome powder, a no-wipe top coat, and some basic gel polish—you can create manicures that rival anything you’d see on the red carpet.
I’ve rounded up 30 stunning gold chrome nail designs that look ridiculously expensive but won’t break the bank. From classic French tips to bold geometric patterns, these looks prove that luxury nails are totally achievable at home. Let’s get into it.
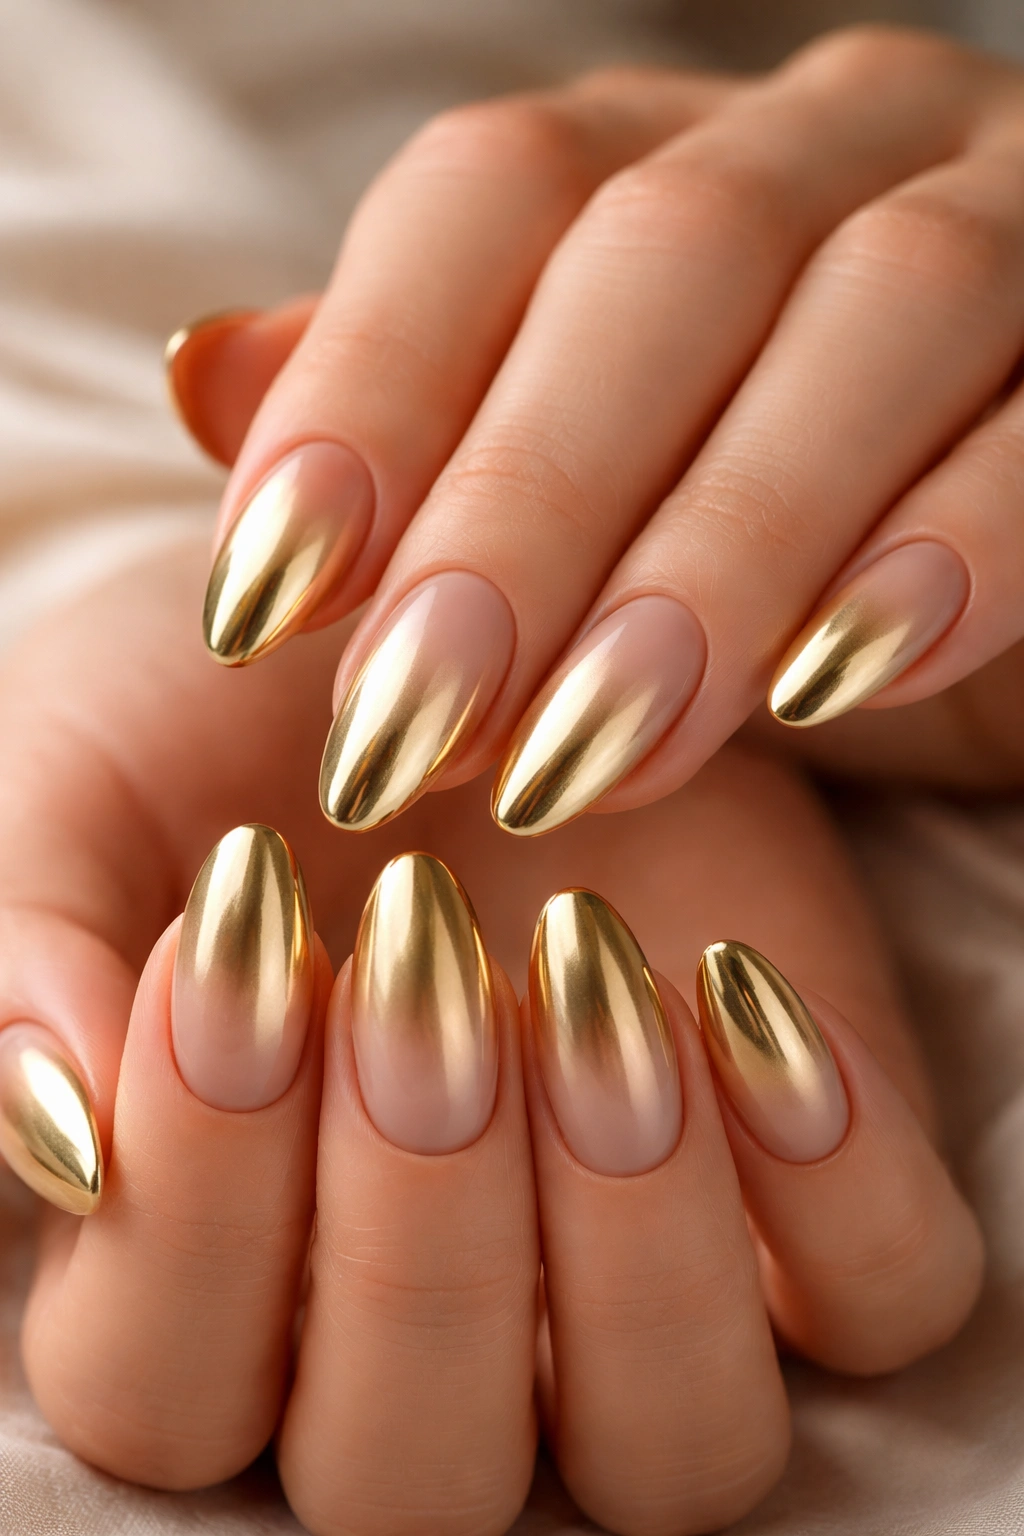
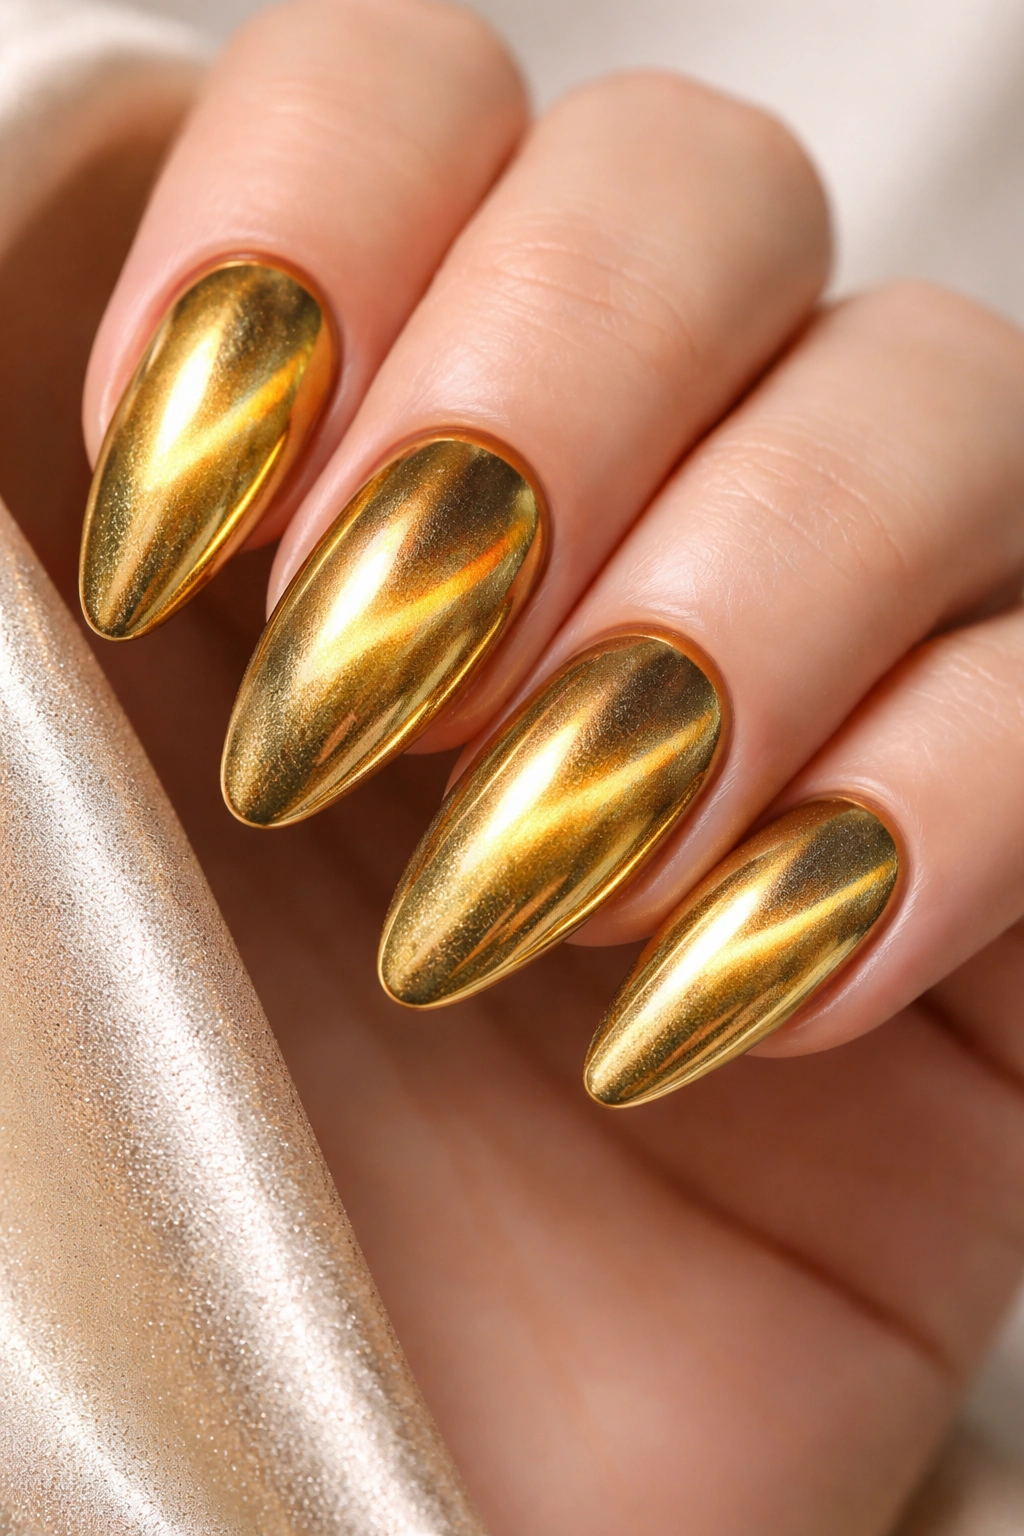
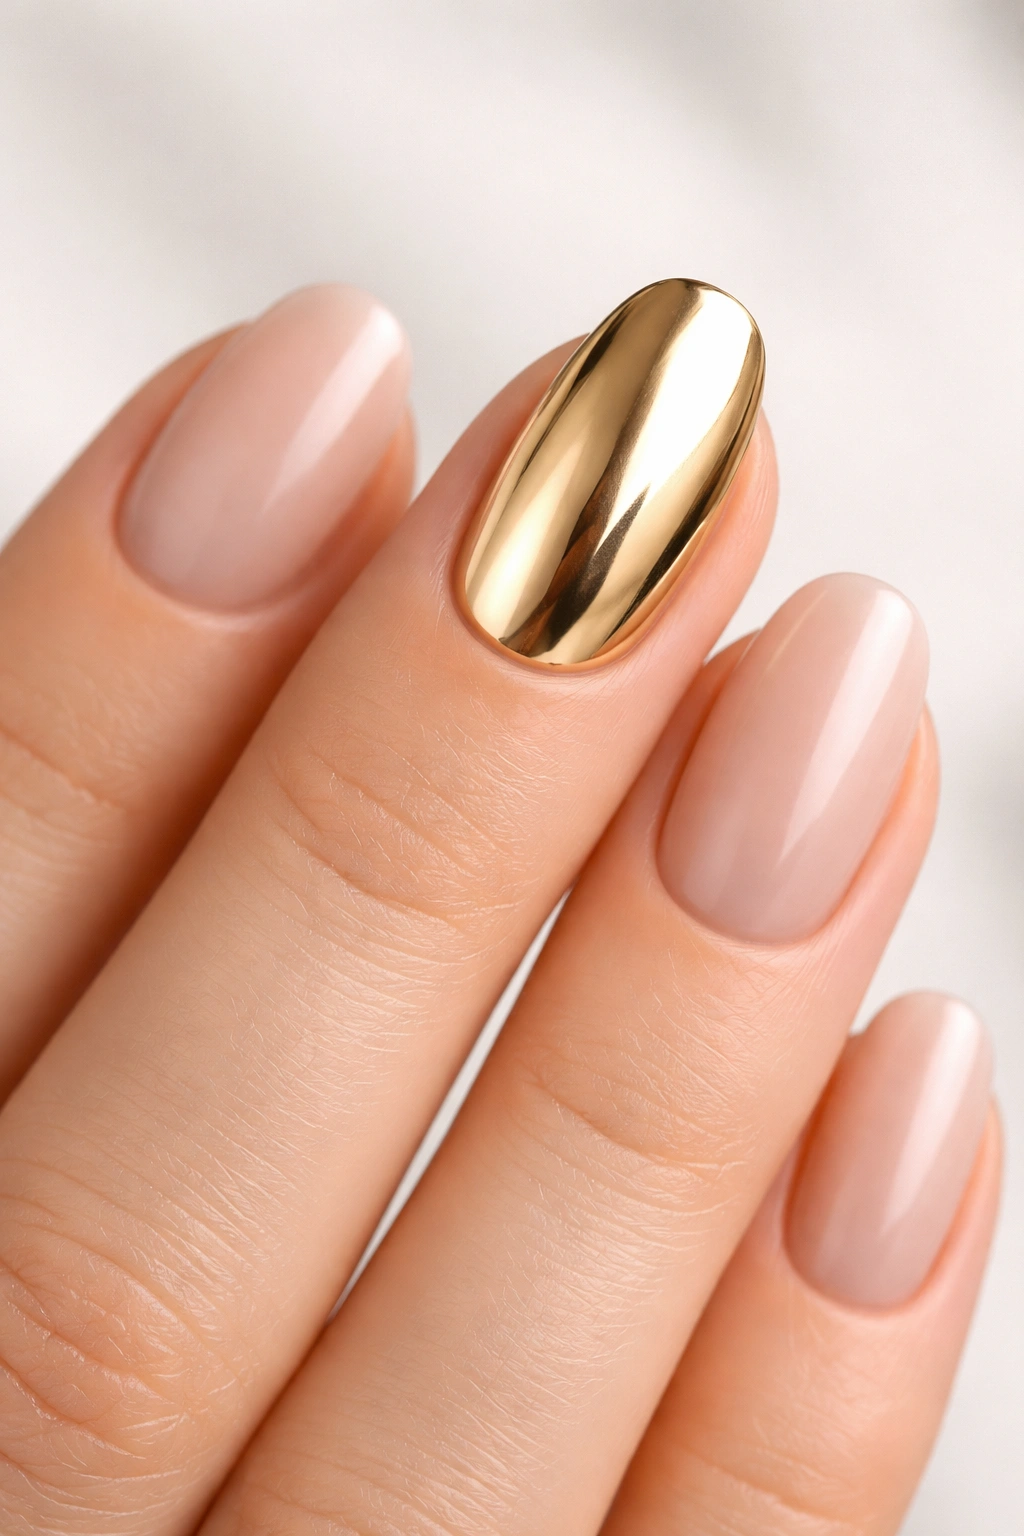
Classic Mirror Gold Chrome
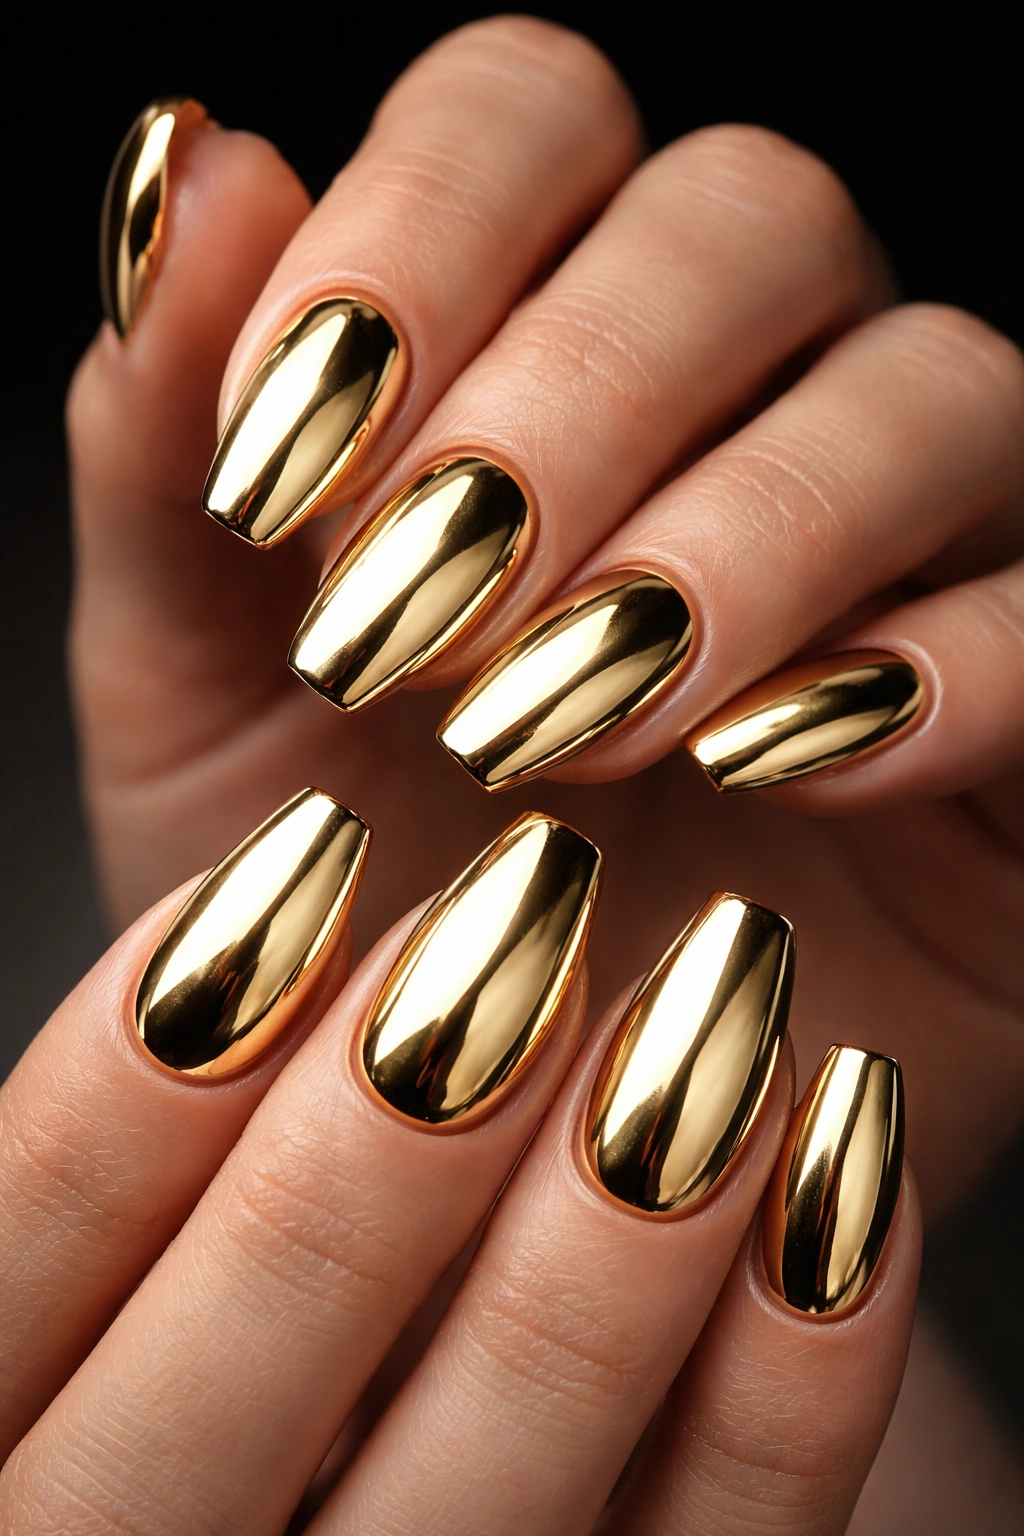
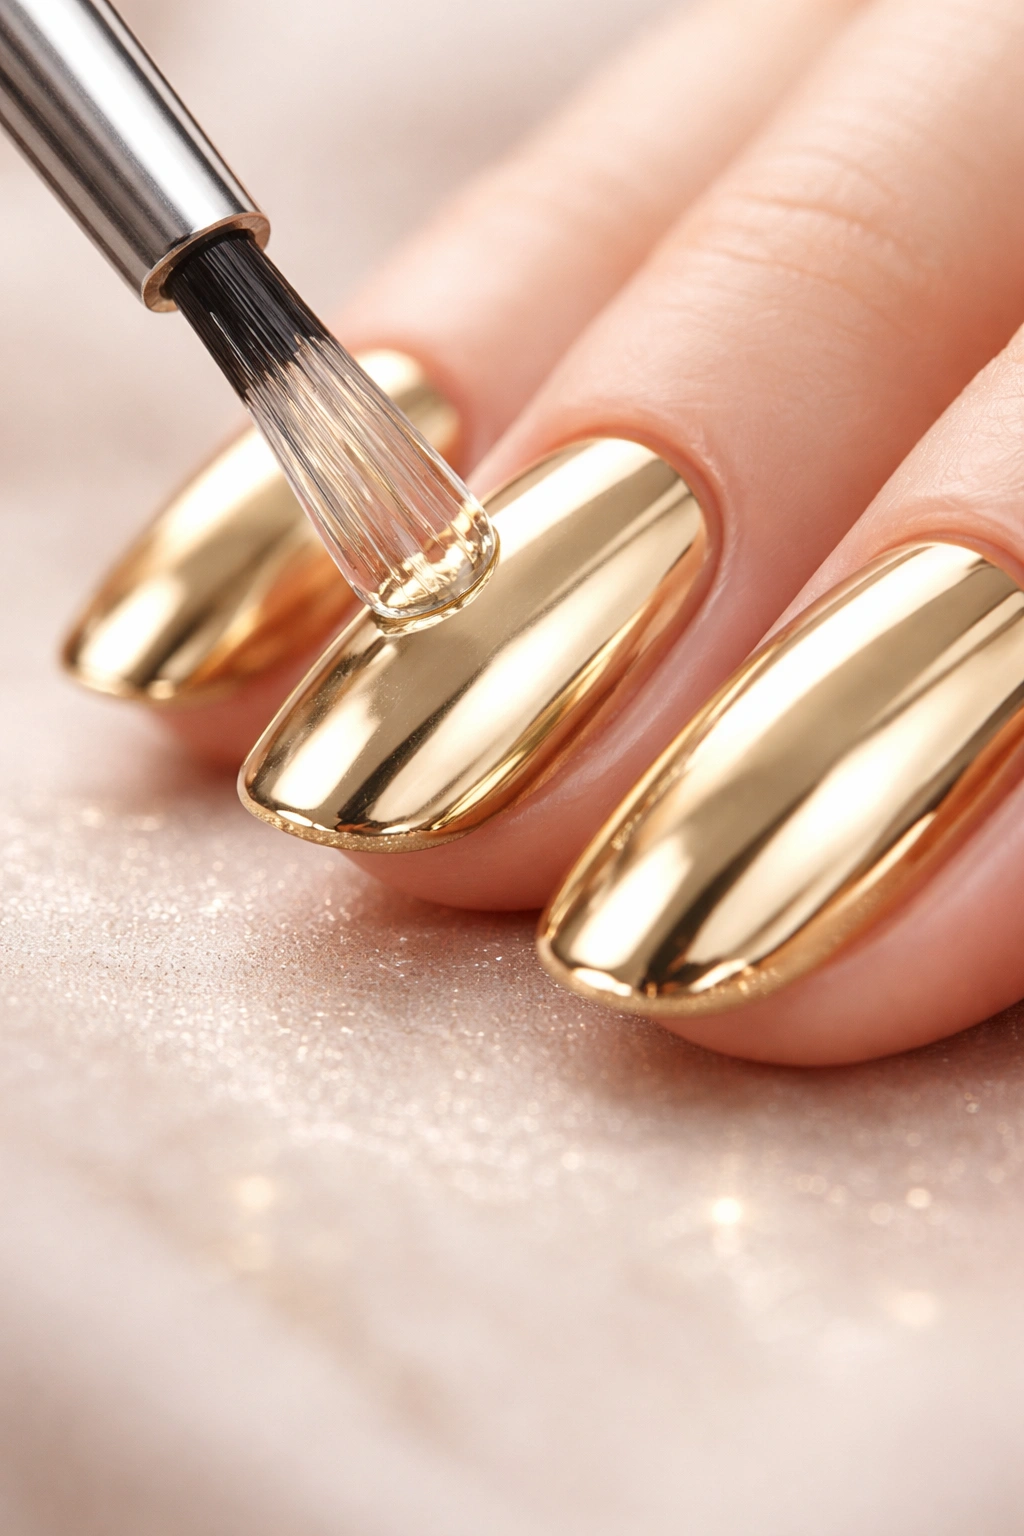
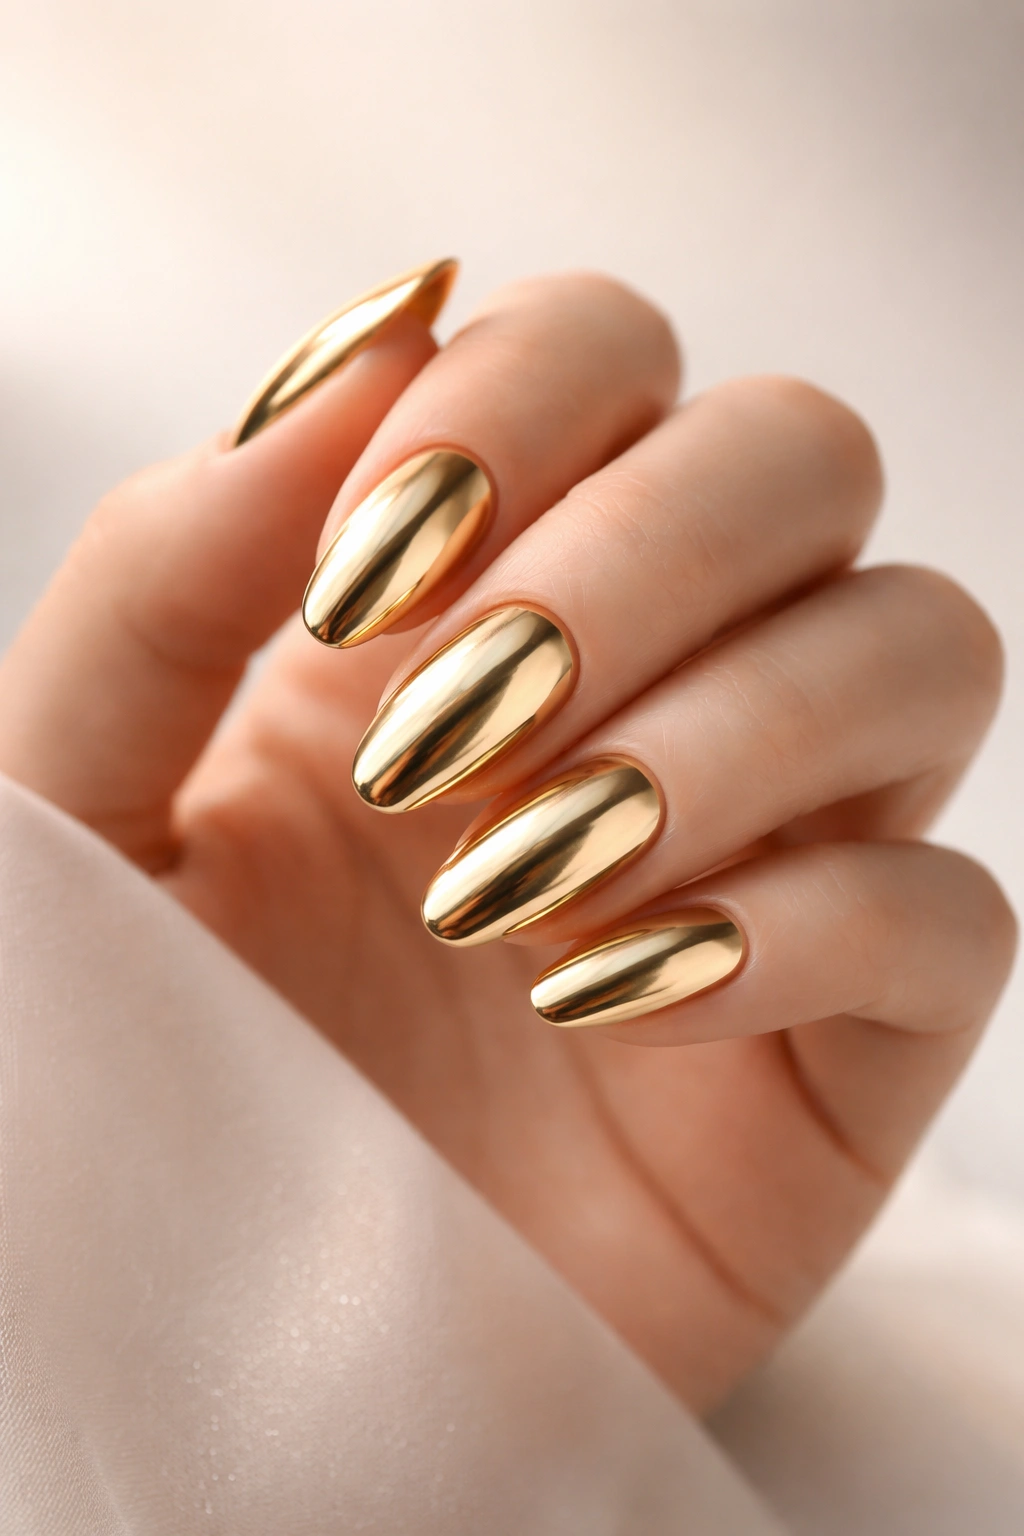
Sometimes you’ve just got to go full gold, and honestly? There’s no such thing as too much shine when it comes to chrome. Full-coverage gold chrome nails are the ultimate statement piece, turning your fingertips into tiny mirrors that catch every bit of light in the room.
To nail this look (pun intended), you’ll want to start with a black or deep brown base. The darker your foundation, the more intense that metallic gold reflection becomes. Apply your base color in thin, even coats—rushing this step with thick layers creates bubbles that’ll show through your chrome finish.
Once your base is cured, apply a thin layer of no-wipe top coat and cure it for just 15-30 seconds. You want it tacky, not fully hardened. Then grab a silicone applicator or small makeup sponge and gently rub the gold chrome powder onto your nails until you get that smooth, reflective finish. Seal everything with another layer of top coat, and you’re done.
This look pairs beautifully with structured blazers and tailored trousers for that power outfit energy. It’s bold, it’s confident, and it makes every hand gesture feel like an event.
Rose Gold Elegance
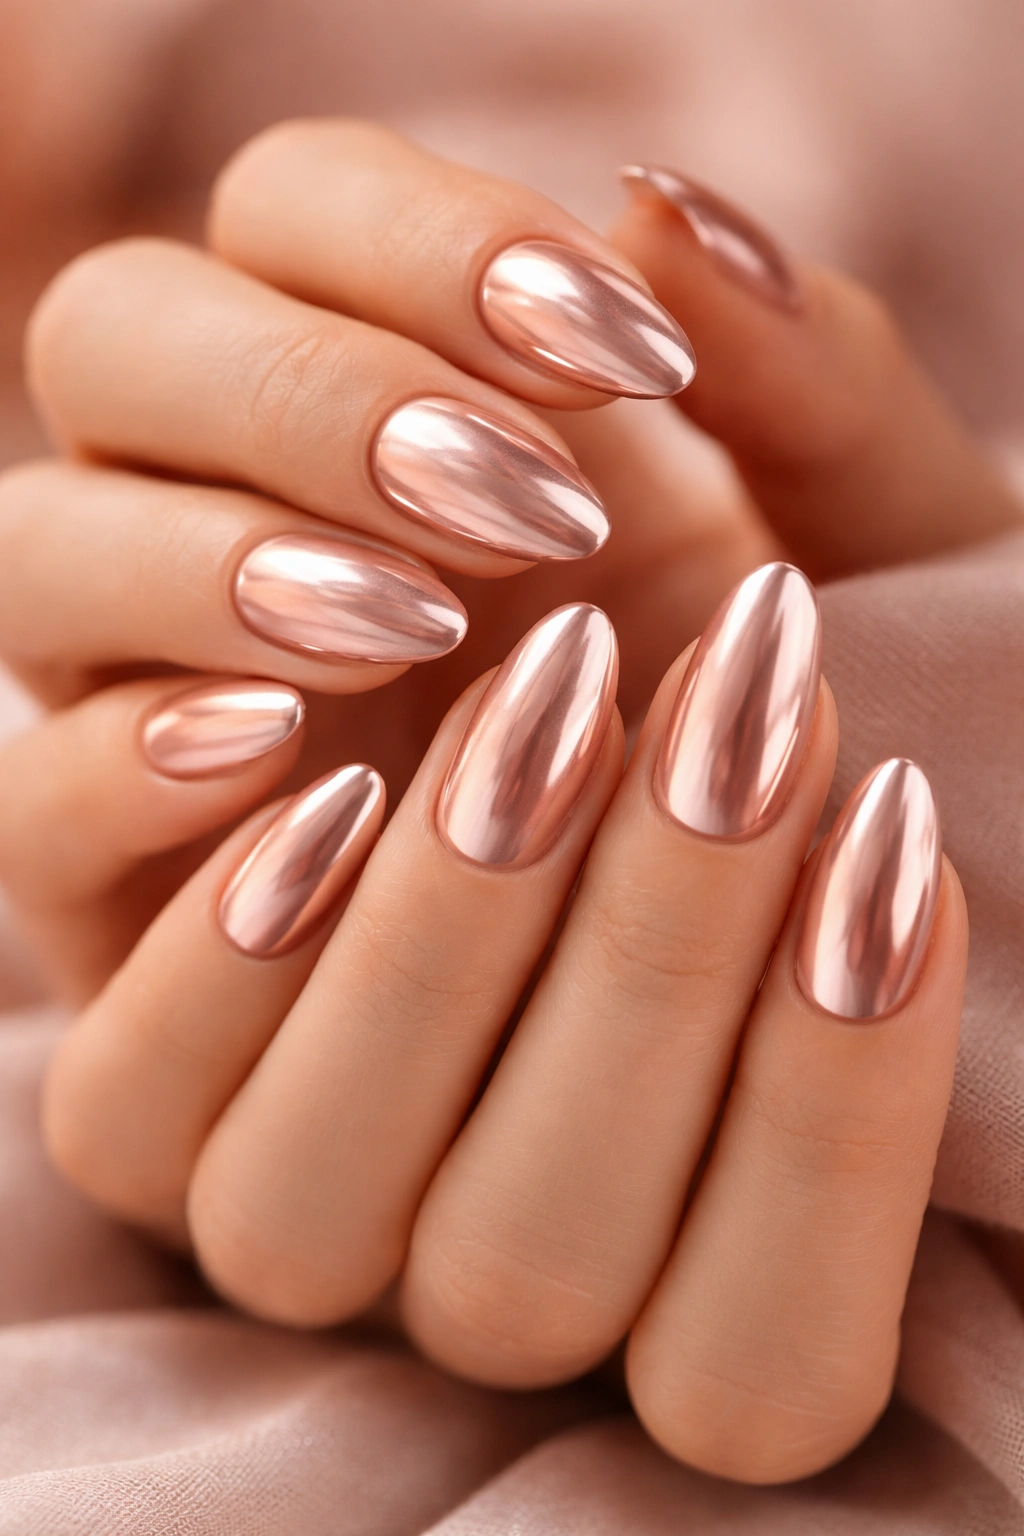
If straight-up gold feels a little too bold for your everyday vibe, rose gold chrome is like a warm hug for your fingertips. This gorgeous, pinkish-metal tone has become insanely popular because it works with literally everything in your closet while still giving you that luxe metallic moment.
The beauty of rose gold is how it flatters different skin tones. The warm undertones make it universally wearable, whether you’re rocking it over a dark burgundy base or keeping it soft with a nude foundation. It’s sophisticated enough for work meetings but still special enough to make you feel glamorous.
I love wearing rose gold chrome to everything from coffee dates to dinner parties. It’s that perfect middle ground between understated and eye-catching. Pair these nails with your favorite gold jewelry, and you’ve got yourself a coordinated look that feels intentional and polished.
For the best rose gold effect, try applying your chrome powder over a warm brown or mauve base. This creates depth and makes the pink tones really pop without looking too Barbie-core.
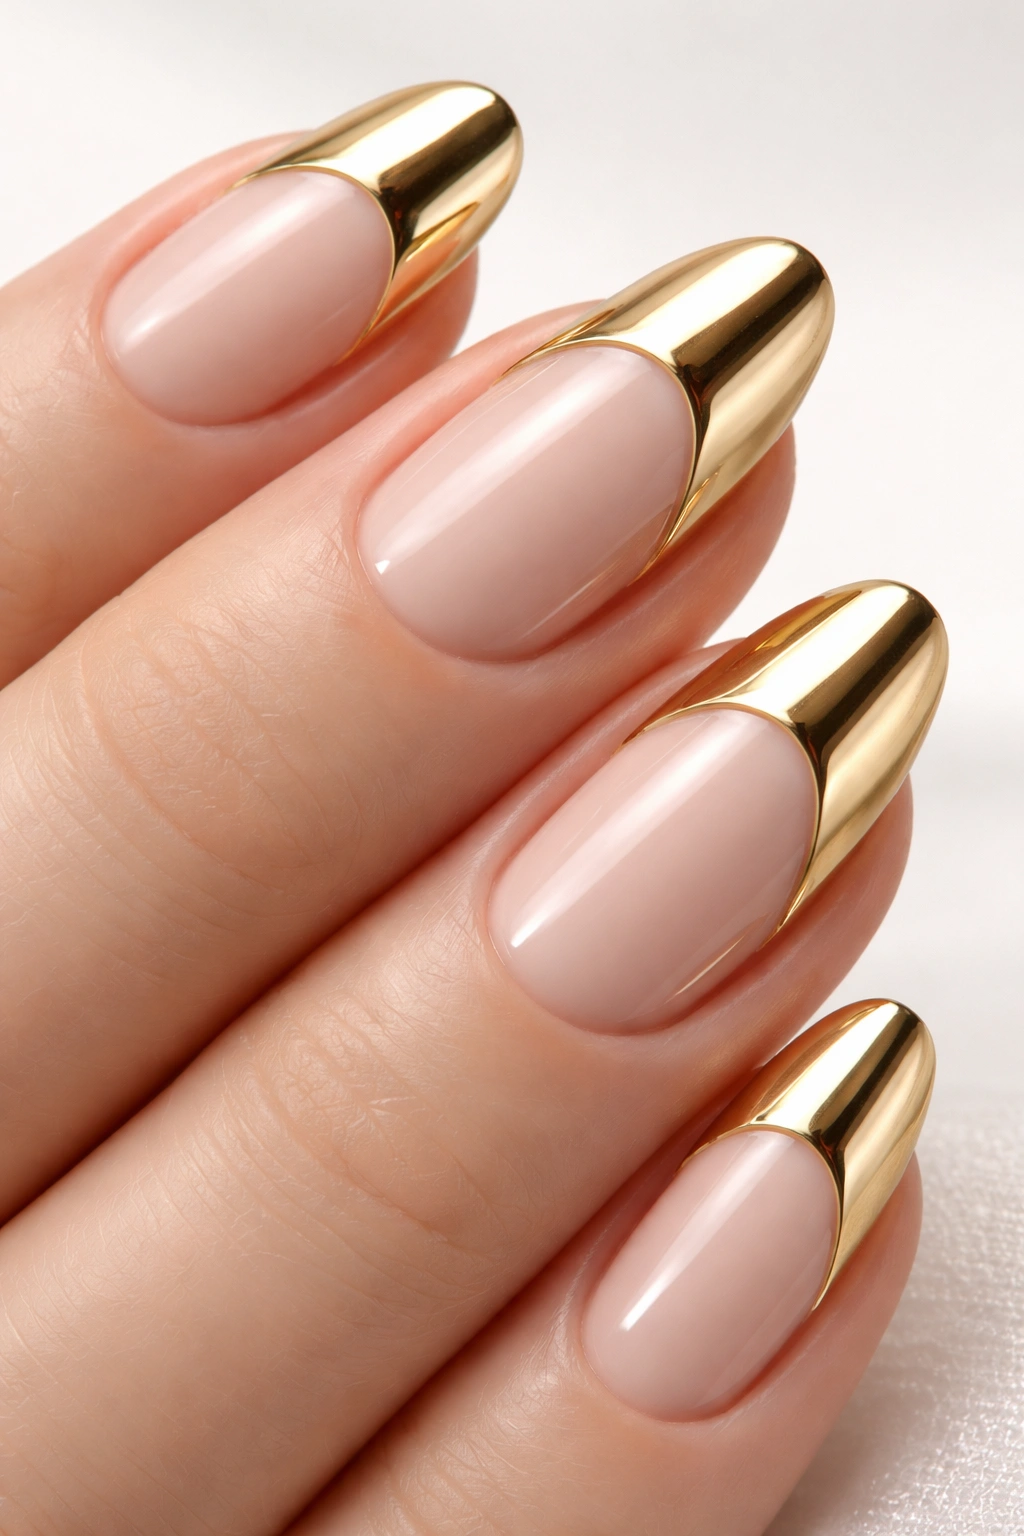
Gold French Tips with a Twist
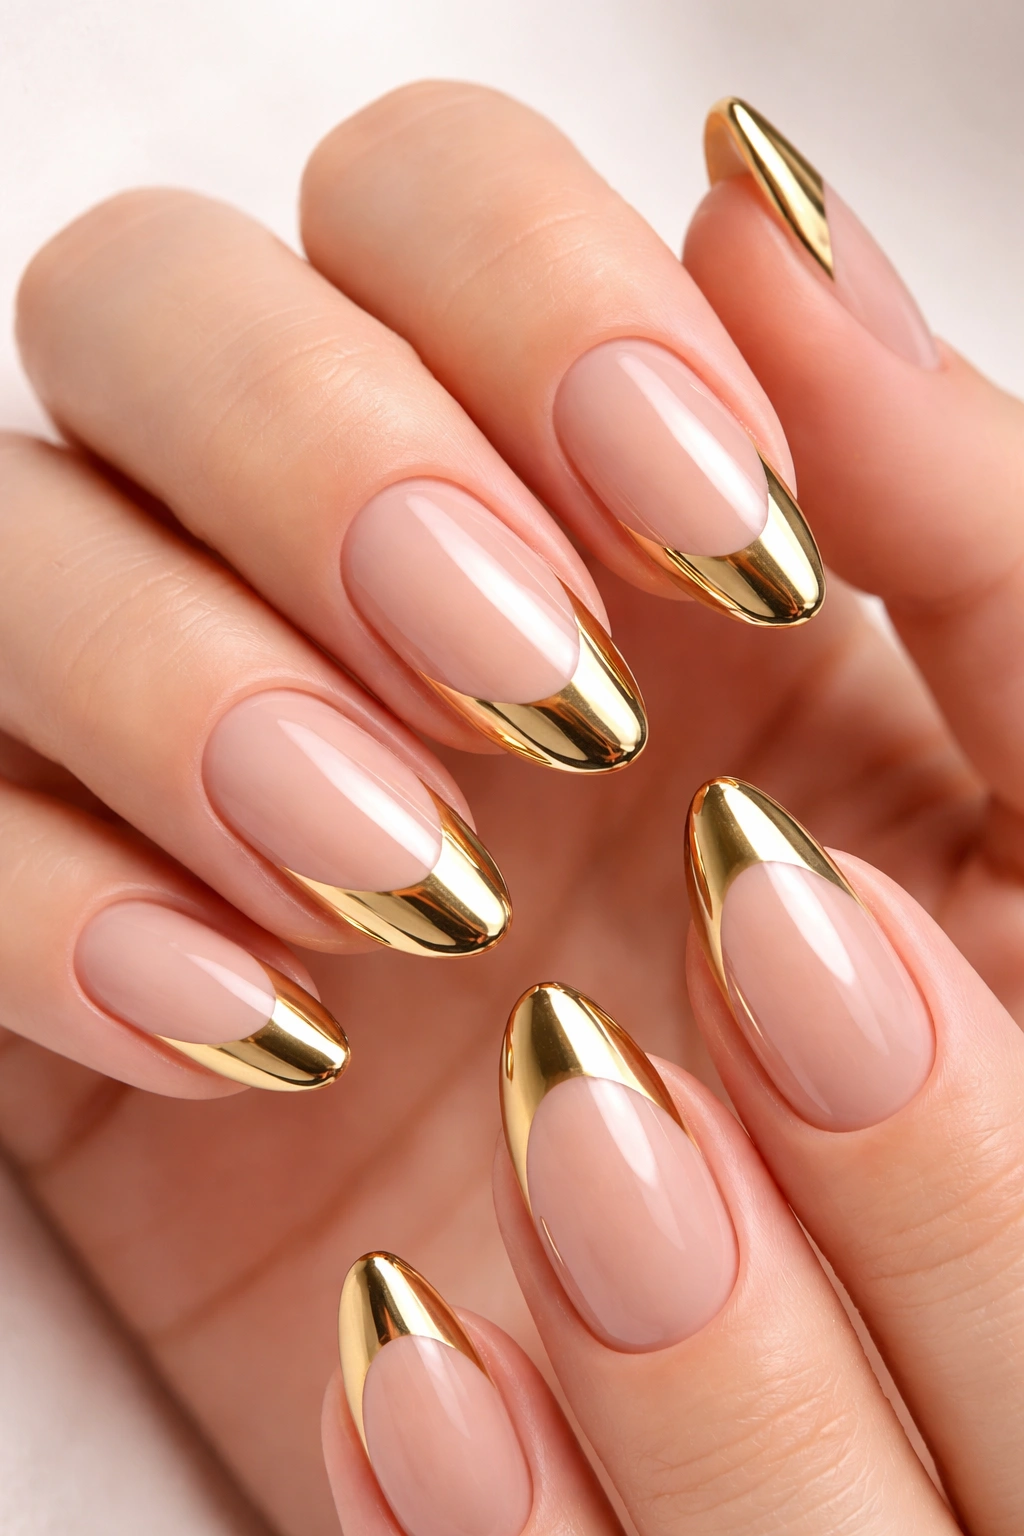
The classic French manicure gets a serious upgrade when you swap out that white tip for gold chrome. This modern take on a timeless design is perfect for anyone who wants to dip their toes into the chrome trend without going full metallic.
Start with a nude or soft pink base—think shades that complement your natural nail color. Once that’s cured, use nail guides or striping tape to section off your tips before applying your no-wipe top coat and chrome powder. The contrast between the natural base and those mirror-like gold tips is absolutely stunning.
Here’s a pro tip I learned the hard way: remove your tape guides while the top coat is still slightly wet. This prevents any peeling or lifting along the edges. Trust me, taking an extra 30 seconds to get this right makes all the difference in how professional your manicure looks.
Gold French tips work on any nail length or shape, making them incredibly versatile. Whether you’re team short nails or you’re rocking long coffins, this design delivers that expensive-looking finish every single time.
Champagne Chrome Shimmer
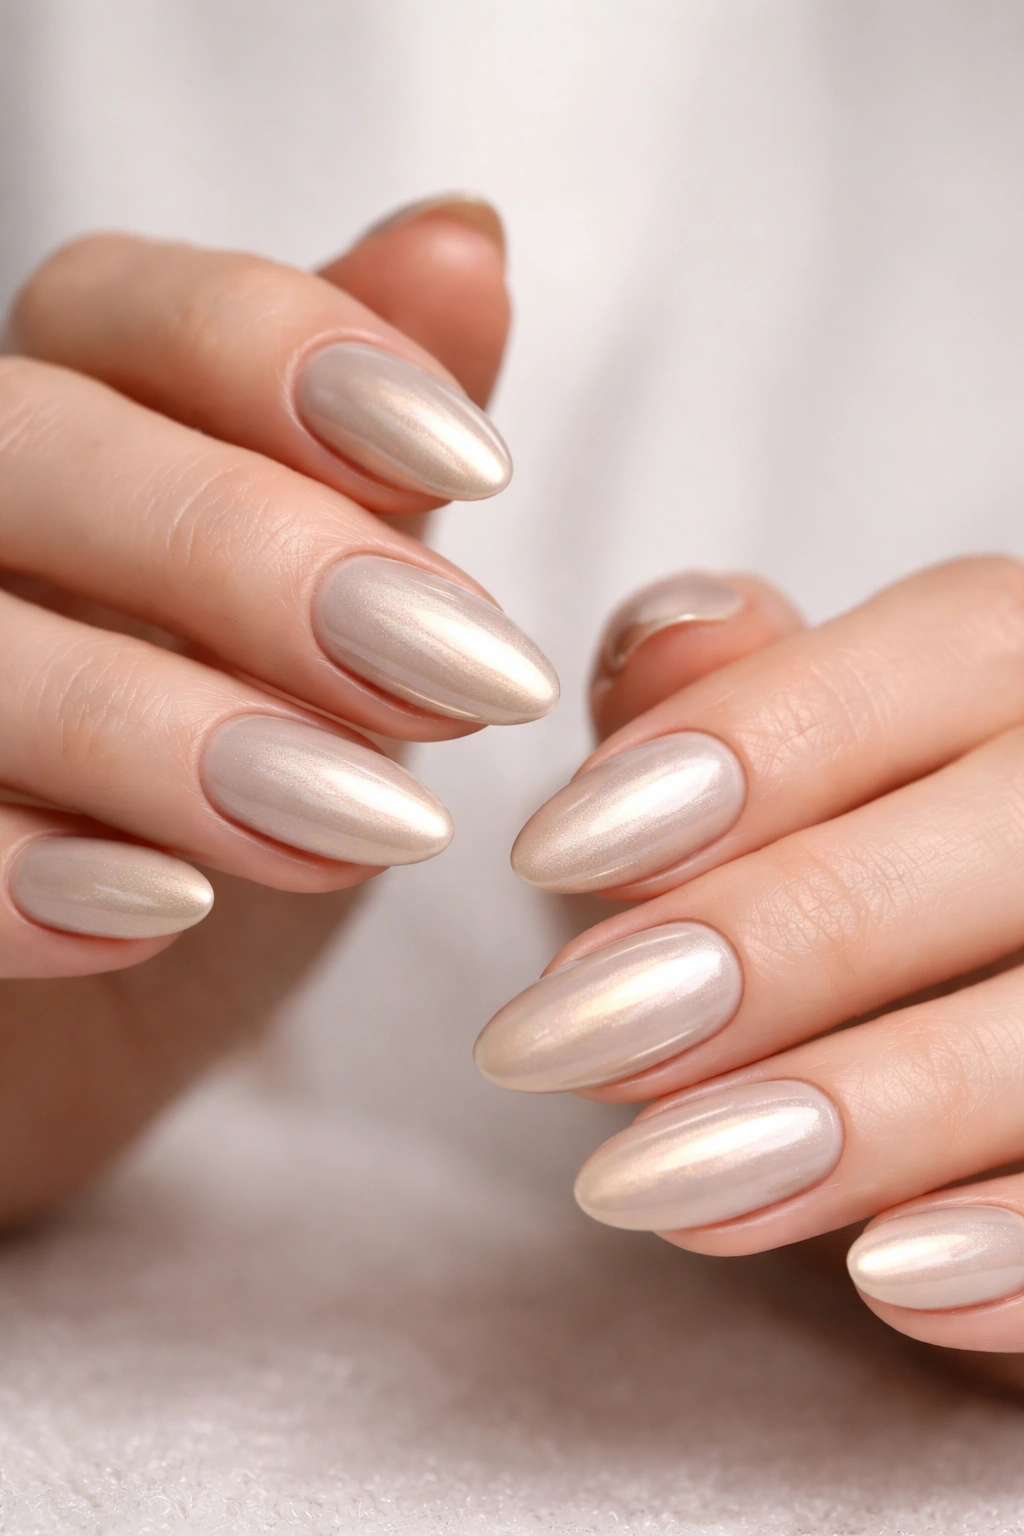
Think of champagne chrome as gold’s more sophisticated, quieter sister. This muted metallic finish has this beautiful, warm glow that’s luxurious without being overpowering at all. When you apply it over a light gray or soft taupe base, it creates this incredibly chic, minimalist look that feels so modern.
The subtle shimmer of champagne chrome makes it perfect for literally any occasion. It’s appropriate enough for professional settings but still interesting enough to get compliments. The finish shifts between gold and silver depending on how the light hits it, giving your nails this dimensional quality that flat polish just can’t achieve.
I think what makes champagne chrome so appealing is its understated elegance. It’s not screaming for attention, but people definitely notice it. Pair these nails with neutral tones in your wardrobe, and you’ve got that effortless, put-together aesthetic everyone’s after.
For the best champagne effect, use a pearl or opal chrome powder instead of straight gold. These create that softer, more iridescent finish that defines the champagne chrome look.
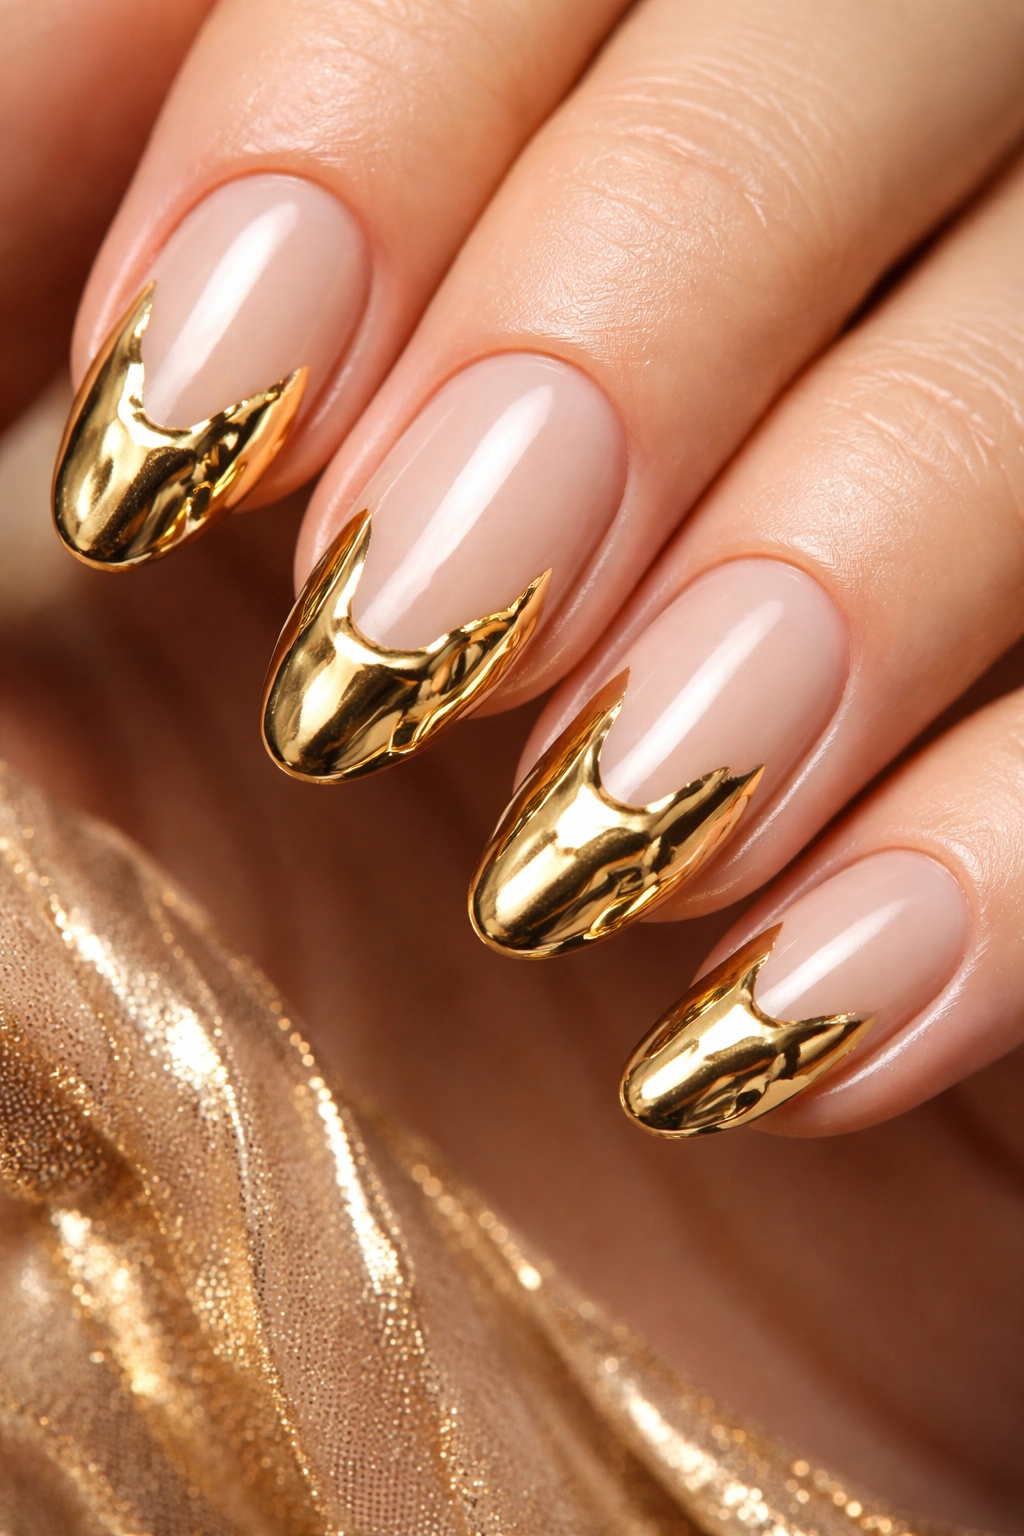
Reverse Gold French
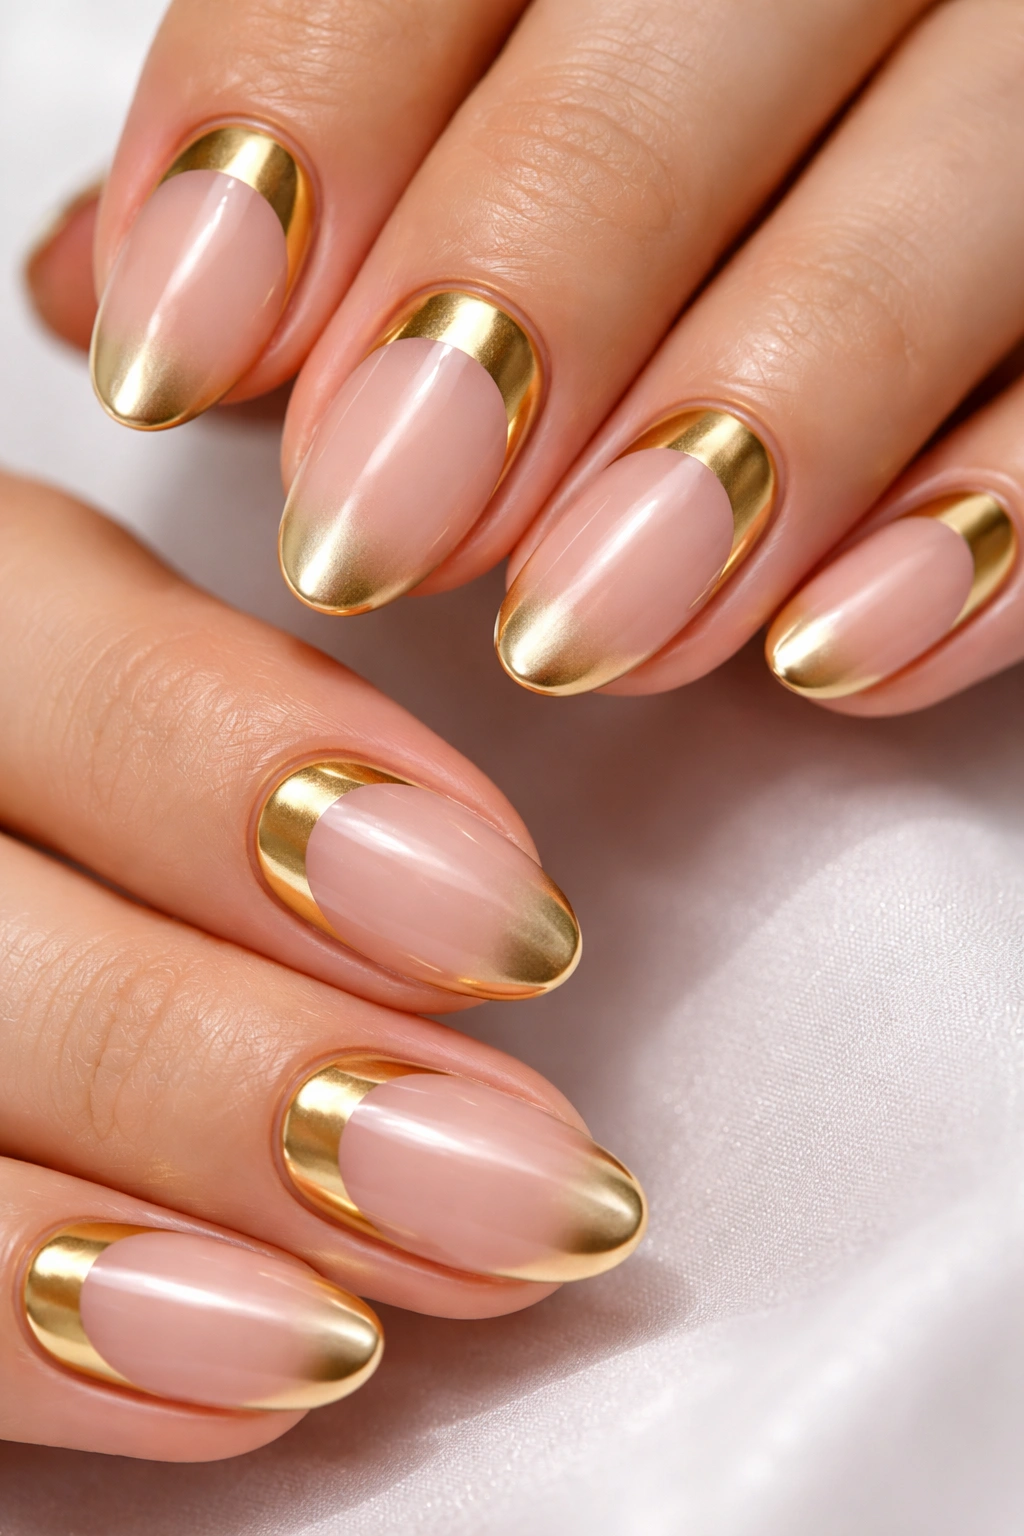
Why put chrome on the tips when you could flip the whole concept and put it at the base instead? Reverse French manicures with gold chrome at the cuticle area create this gorgeous gradient effect as the metallic fades into your natural nail color or a nude polish.
This design is unexpected and so chic—definitely a conversation starter. The gold crescent near your cuticles catches the light differently than traditional French tips, creating visual interest without being overwhelming. It’s bold but sophisticated, modern but wearable.
To create clean reverse French lines, you’ll need a steady hand or some nail vinyls. Apply your chrome powder in a half-moon shape at the base of each nail, then blend the edges slightly for that seamless gradient effect. The key is working quickly while your top coat is still tacky enough for the powder to adhere.
This look pairs beautifully with everything from casual denim to elegant evening wear. It’s one of those designs that feels fashion-forward without trying too hard, which is honestly the sweet spot for nail art.
Geometric Gold Accents
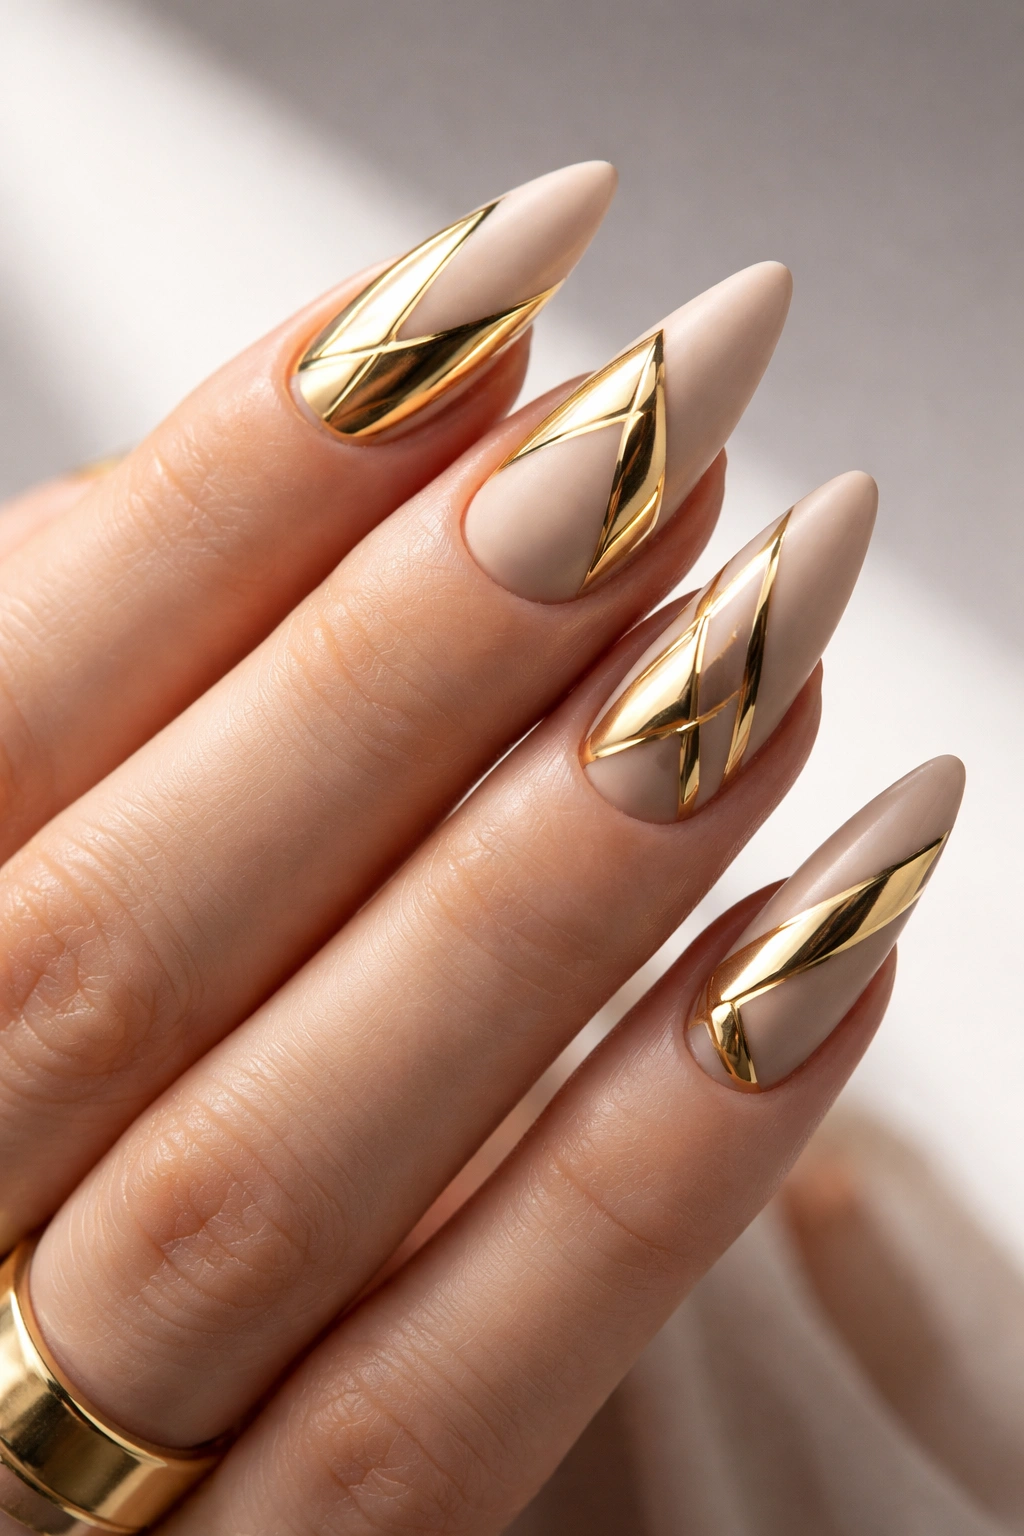
If you’re into modern, architectural vibes, geometric gold chrome designs are where it’s at. Think clean lines, sharp angles, and abstract shapes that transform your nails into tiny pieces of contemporary art. Use striping tape to create triangles, squares, or asymmetrical patterns, then apply chrome powder only to specific sections.
The contrast between matte nude polish and reflective gold chrome creates such a striking effect. It’s minimalist but still makes a statement, which is perfect for people who want interesting nails without going full maximalist. Each geometric shape catches the light differently, adding dimension to your manicure.
Creating geometric designs requires a bit more patience than all-over chrome, but the results are so worth it. Map out your design with tape, apply your no-wipe top coat to exposed areas, add your chrome powder, then carefully remove the tape. Seal everything with a final top coat, and you’ve got yourself a designer-looking manicure.
These nails look incredible with monochrome outfits or structured clothing. There’s something about the angular lines that complements tailored pieces and clean silhouettes perfectly.
Gold Chrome Ombre
Gold ombré creates this gorgeous gradient effect where intense metallic at your tips gradually fades to barely-there at your cuticles. It’s like capturing a sunset on your fingertips, and the dimensional quality is absolutely breathtaking. This technique requires a bit more skill, but once you get the hang of it, you’ll be obsessed.
The trick to perfect chrome ombré is working quickly while your no-wipe top coat is still tacky. Start by applying chrome powder heavily at the tips, then use a clean brush to blend it upward in lighter strokes. You’re essentially brushing the powder toward your cuticles, creating that fade effect.
Work in one direction only to avoid disturbing the chrome you’ve already applied. If you go back and forth too much, you’ll end up with a muddy, uneven finish instead of that smooth gradient you’re going for. Take your time, and remember that you can always add more powder—it’s harder to take it away.
Gold chrome ombré looks stunning on almond or coffin-shaped nails because the length gives you more space to showcase that beautiful gradient. Pair these with simple jewelry and let your nails be the star of your look.
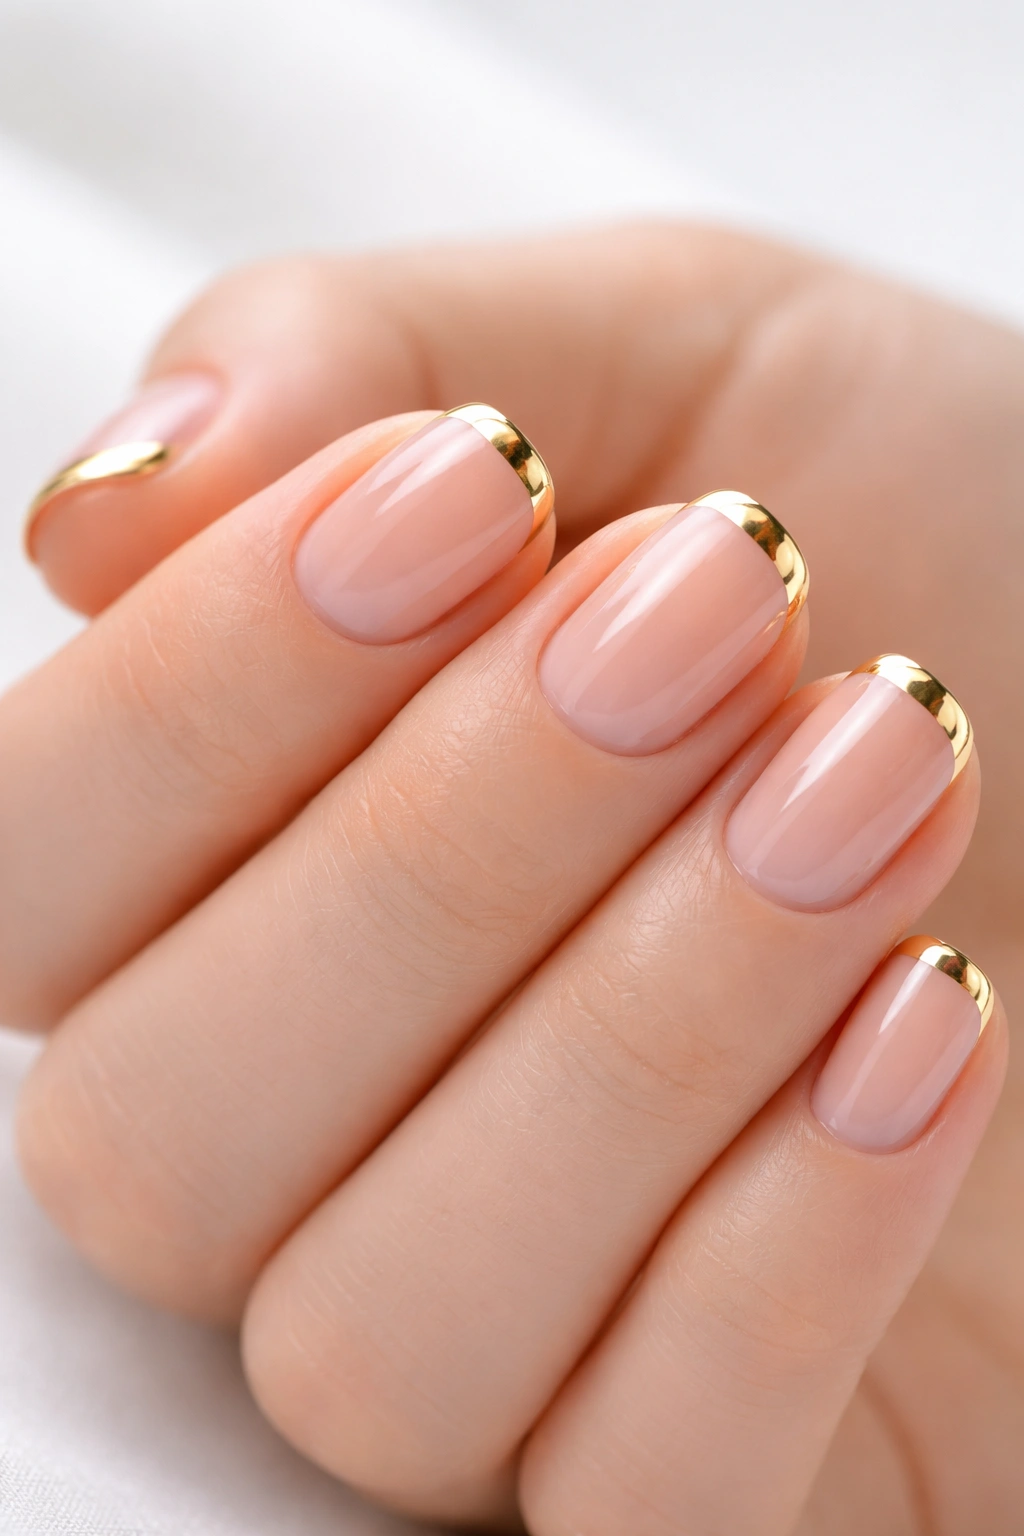
Micro Gold French
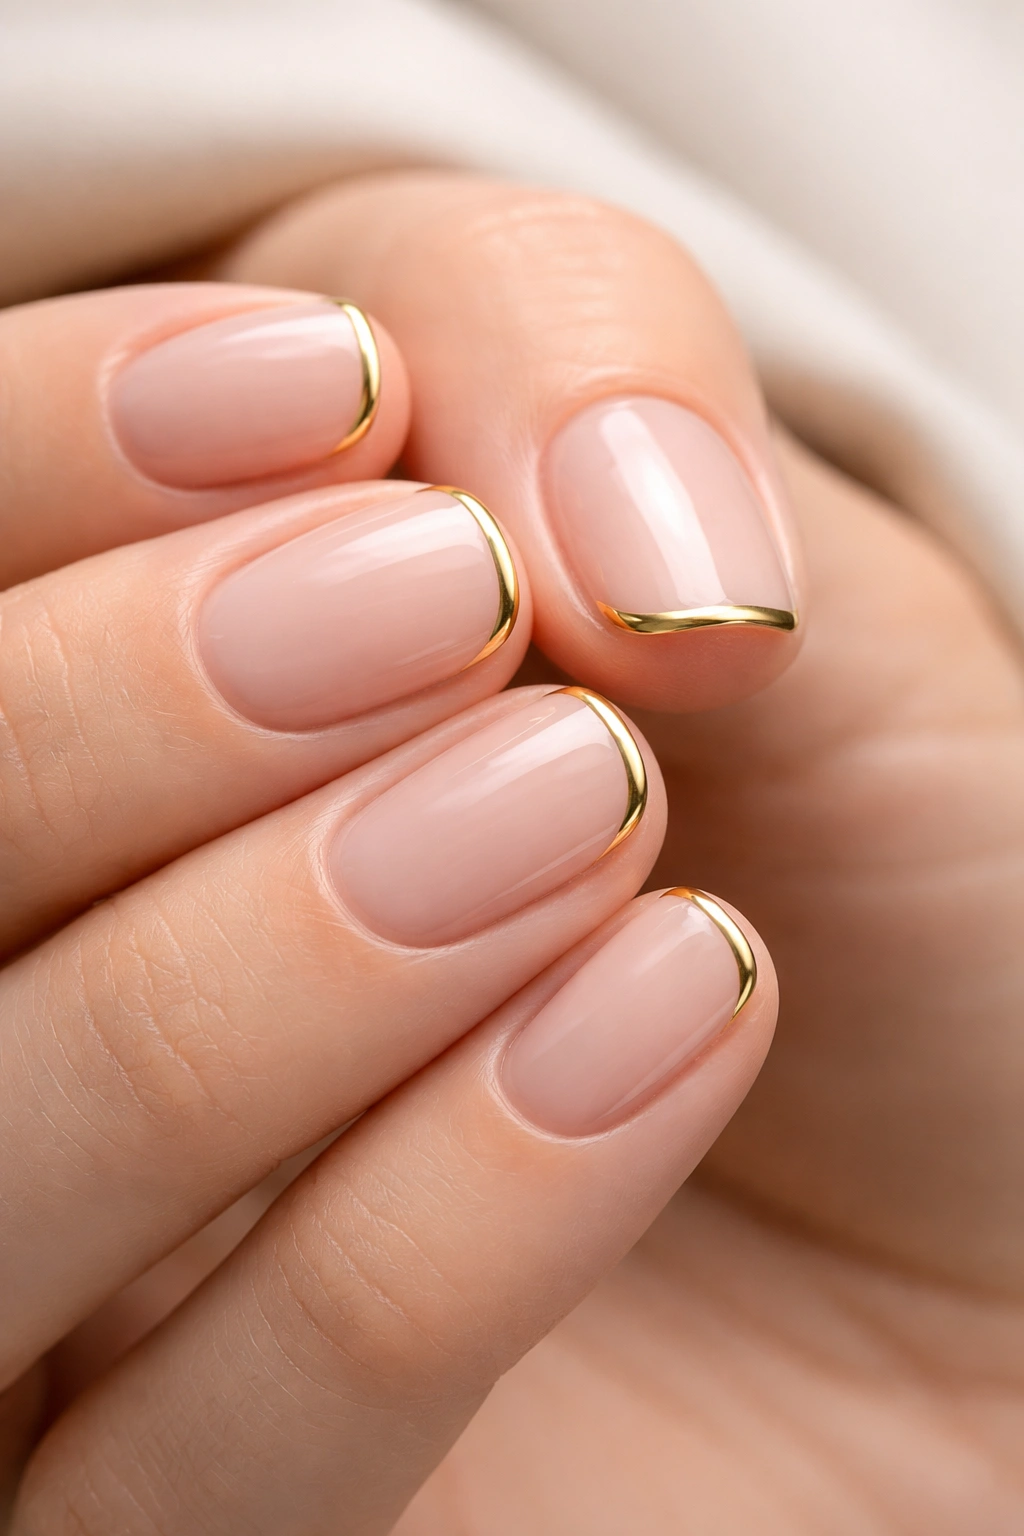
Micro French tips are having such a moment, and when you add gold chrome to the mix? Chef’s kiss. These ultra-thin gold stripes at the tips of your nails are subtle, sophisticated, and perfect for people who love the “your nails but better” aesthetic.
The beauty of micro French tips is how wearable they are. You get that polished, put-together look without anything feeling too bold or attention-grabbing. The thin line of gold adds just enough interest to elevate a simple manicure from basic to beautiful.
This design works especially well on short nails, which is great news if you’re not into the long nail life. The delicate gold stripe actually makes your nails look longer and more elegant without requiring any extra length. It’s one of those optical illusion tricks that nail artists love.
To create perfect micro French tips, use a thin striping brush or nail art pen for precision. You can also use ultra-thin striping tape as a guide if you’re worried about keeping your lines straight. The goal is a barely-there stripe that’s refined and clean.
Molten Gold Drip Effect
These nails look like liquid gold is literally melting off your fingertips, and I’m here for it. The drip effect takes chrome to an artistic level, with irregular, organic shapes that mimic flowing metal. Start with a nude or milky base, then create those drippy tips using gold chrome.
What makes this design so cool is that no two nails need to match exactly. The uneven, melted look is actually the point—it’s supposed to feel spontaneous and artsy. Some drips can be longer, some shorter, some thicker at certain points. That organic quality is what makes it look expensive and hand-crafted.
Creating the drip effect takes a steady hand and a bit of practice. You can either apply your chrome powder in irregular patterns at the tips or use gel to build up raised “drips” before adding the chrome. Either way, the dimensional quality is what makes this design pop.
These nails are perfect for fashion-forward folks who see their manicure as wearable art. Pair them with bold, sculptural jewelry and modern clothing for a look that’s totally editorial.
Gold Chrome with Negative Space
Negative space designs are so modern and fresh, and when you add gold chrome into the mix, they become absolutely stunning. These manicures leave strategic gaps of bare nail showing through, creating geometric patterns or abstract shapes that feel contemporary and artistic.
The see-through sections create visual interest without overwhelming your nails. You get that high-fashion editorial vibe while still keeping things relatively minimal. The gold chrome sections catch the light beautifully while the negative space provides breathing room for your eyes.
To create clean negative space designs, nail vinyls are your best friend. These adhesive stencils help you create perfect shapes and lines without needing the steady hand of a professional nail artist. Apply your chrome to exposed areas, carefully remove the vinyls, and seal everything with top coat.
This design looks incredible on longer nails where you have more real estate to showcase the pattern. The combination of sheer, natural nail and reflective gold creates such an interesting textural contrast that photographs beautifully.
Gold Chrome Cat-Eye Effect
When you combine gold chrome with cat-eye polish, magic happens. The magnetic cat-eye effect creates this stripe of concentrated color and shimmer that seems to move across your nail. Add gold chrome powder over that, and you get this incredibly dimensional, velvet-like texture that’s absolutely luxurious.
Start by applying a magnetic cat-eye gel polish in a complementary color—burgundy, navy, or deep green work beautifully with gold. Use your magnet to create that signature stripe, then cure it. Apply your no-wipe top coat and add gold chrome powder over the whole nail for a textured effect that shifts in the light.
The combination of the cat-eye stripe underneath and the chrome on top creates this incredible depth that makes your nails look like tiny pieces of jewelry. It’s one of those designs that people can’t stop staring at because it looks different from every angle.
This technique is a bit more advanced, but the wow factor is absolutely worth learning. It’s perfect for special occasions when you want your nails to feel extra luxurious and unique.
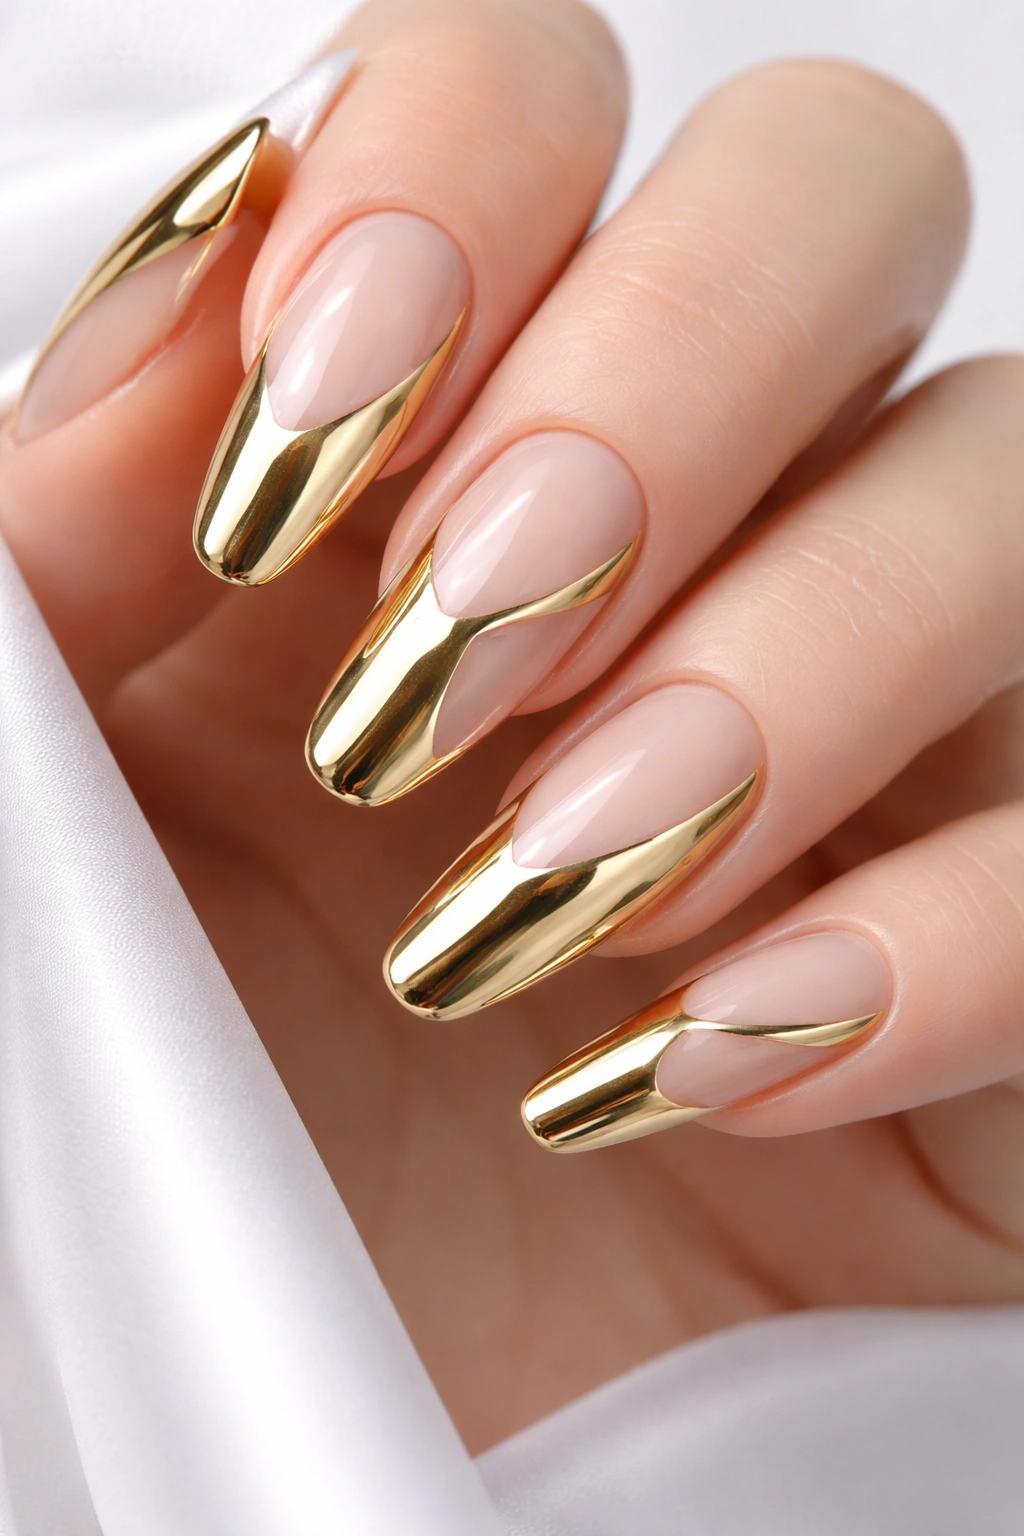
Gold Outlined French
Instead of filling in your French tips with solid gold chrome, try just outlining them. This creates a delicate frame effect that’s sophisticated and unexpected. The thin gold border defines your nail shape beautifully while keeping the overall look light and airy.
This design is sometimes called filigree French because it mimics the delicate metalwork you’d see on vintage jewelry. It’s intricate-looking without being busy, which is the sweet spot for elegant nail art. You need some length for these lines to really show up, so this works best on medium to long nails.
Creating perfect outline French tips requires precision and patience. Use a thin nail art brush dipped in gel polish mixed with a tiny bit of chrome powder, or apply striping tape as a guide for clean lines. Take your time—rushing this design will give you wobbly lines that break the illusion.
These nails look gorgeous with everything from wedding dresses to professional attire. They’re appropriate for any setting but interesting enough to feel special and thoughtful.
Gold Chrome Accent Nail
If you’re not ready to commit to a full set of gold chrome nails, the accent nail approach is your gateway into this trend. Paint most of your nails in a neutral shade—nude, soft pink, or sheer beige—then go full metallic gold chrome on one or two accent nails per hand.
This creates visual interest without overwhelming your look. Your accent nails become jewelry for your hands, catching light and drawing attention without making you feel like you’ve gone overboard. It’s the perfect compromise between subtle and statement-making.
The ring finger is the classic choice for accent nails, but honestly, there are no rules here. Some people prefer to do their thumb and ring finger, while others like to alternate throughout their hand for a more scattered effect. Do whatever feels right to you.
Gold chrome accent nails work with literally any outfit and any occasion. They’re professional enough for work but fun enough for weekends, making them incredibly versatile for people with busy, varied schedules.
Gold Chrome Swirls
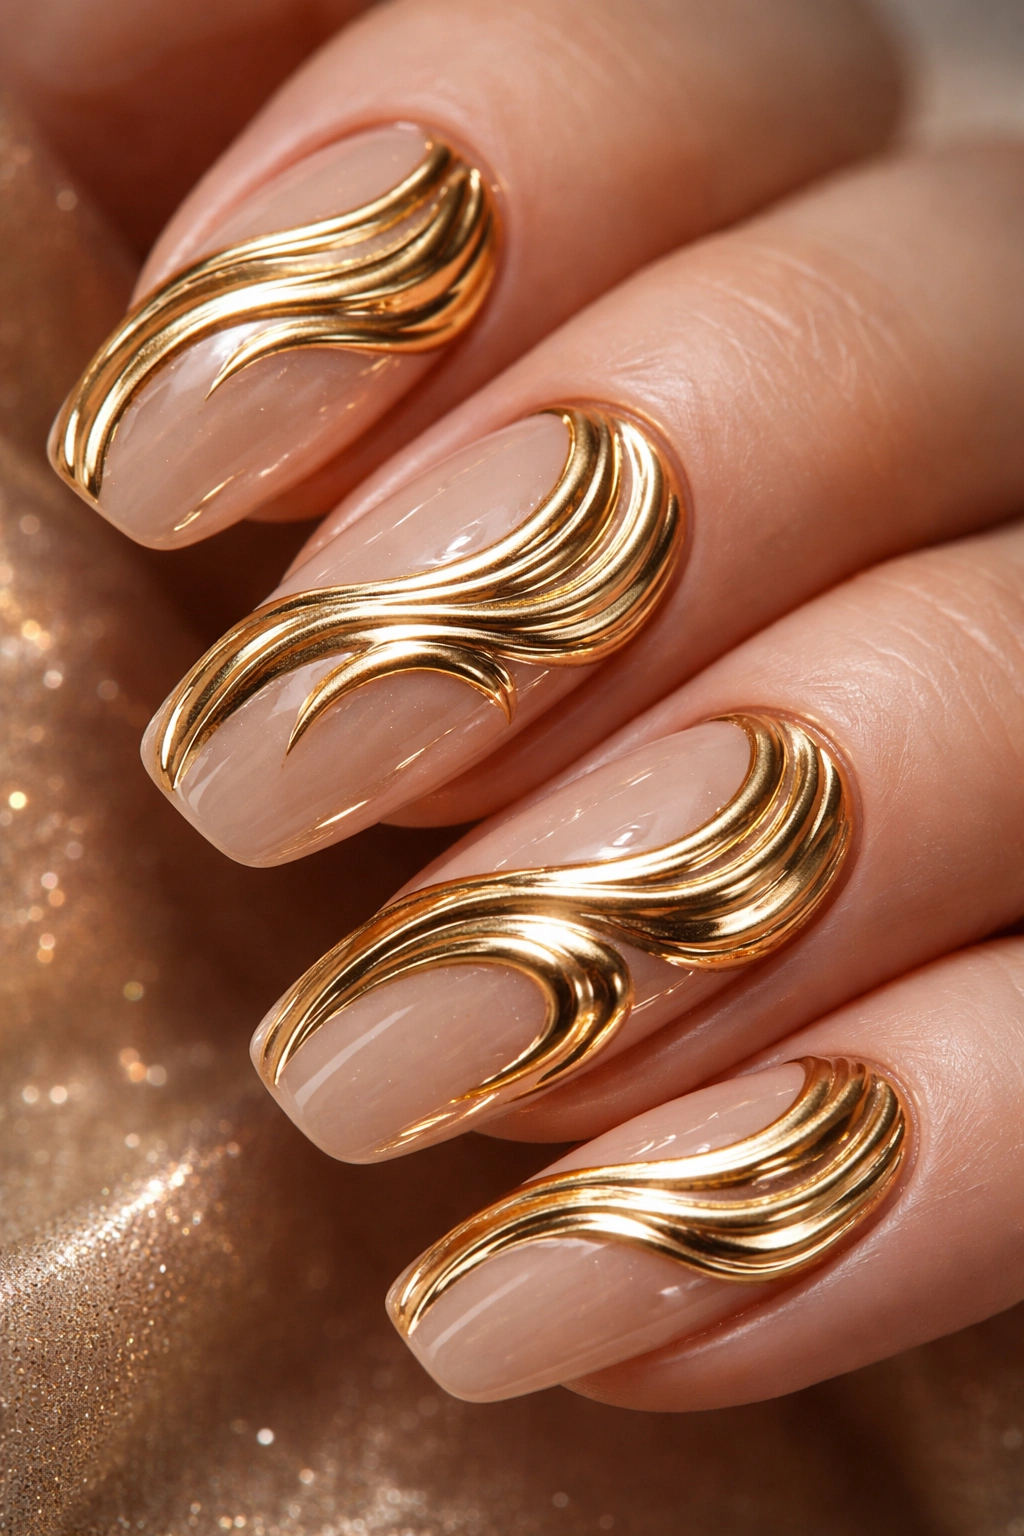
Abstract swirls bring movement and artistry to gold chrome nails. These flowing, organic shapes look like liquid gold frozen mid-swirl, creating a design that’s both modern and timeless. Start with a nude, white, or sheer pink base, then use gel to create raised swirl shapes before applying your chrome powder.
The dimensional quality of raised swirls is what makes this design feel so high-end. When light hits those textured areas differently than the flat sections, you get this incredible visual depth that flat nail art can’t achieve. It’s sculptural and artistic without being over-the-top.
You can create swirls freehand with a detail brush and thick builder gel, or you can use stamping plates for more uniform designs. Either way, the raised texture is key. Once your swirls are built up and cured, apply your chrome powder—it’ll stick to the raised areas and create that gorgeous contrast.
These nails look stunning with flowing, draped clothing or architectural pieces that echo the curved lines. They’re perfect for artistic souls who want their nails to reflect their creative side.
Gold Chrome Tips on Short Nails
Short nail crew, this one’s for you. Gold chrome tips on shorter nails prove that you don’t need length to pull off this trend. In fact, gold chrome can actually make short nails look more polished and intentional rather than like you’re just waiting for them to grow out.
Keep your tips thin—micro or slightly thicker—for the most flattering effect on shorter lengths. Too much chrome on short nails can overwhelm them, but a delicate stripe creates that perfect balance. The gold adds visual interest and draws the eye forward, making your nails appear slightly longer.
Short gold chrome tips are incredibly practical for people who use their hands a lot or work in professional settings where extreme nails aren’t appropriate. You get all the glamour of the trend without any of the impracticality of longer lengths. It’s the best of both worlds.
This design works beautifully for everyday wear and requires minimal maintenance. When you do get chips or growth, they’re less noticeable on shorter nails, meaning your manicure looks fresh longer.
Gold Chrome Half-Moon
The half-moon manicure gets vintage-meets-futuristic when you add gold chrome to the equation. This design features a gold crescent at the base of your nail near the cuticle, with the rest of the nail painted in a complementary color—think white, nude, or soft pink.
This style has serious retro elegance with roots in classic Hollywood glamour, but the chrome finish brings it firmly into modern territory. It’s that perfect mix of old-school sophistication and contemporary edge that feels both timeless and trendy.
Creating clean half-moon shapes requires nail vinyls or reinforcement stickers. Place them on your nail to protect the area you want to stay your base color, apply your no-wipe top coat and chrome powder to the exposed crescent, then carefully remove the vinyl. The result is a crisp, clean curve that looks professionally done.
These nails pair beautifully with vintage-inspired clothing, pearl jewelry, or classic trench coats. They’re for people who appreciate fashion history but still want their style to feel current and fresh.
Gold Foil Fragments
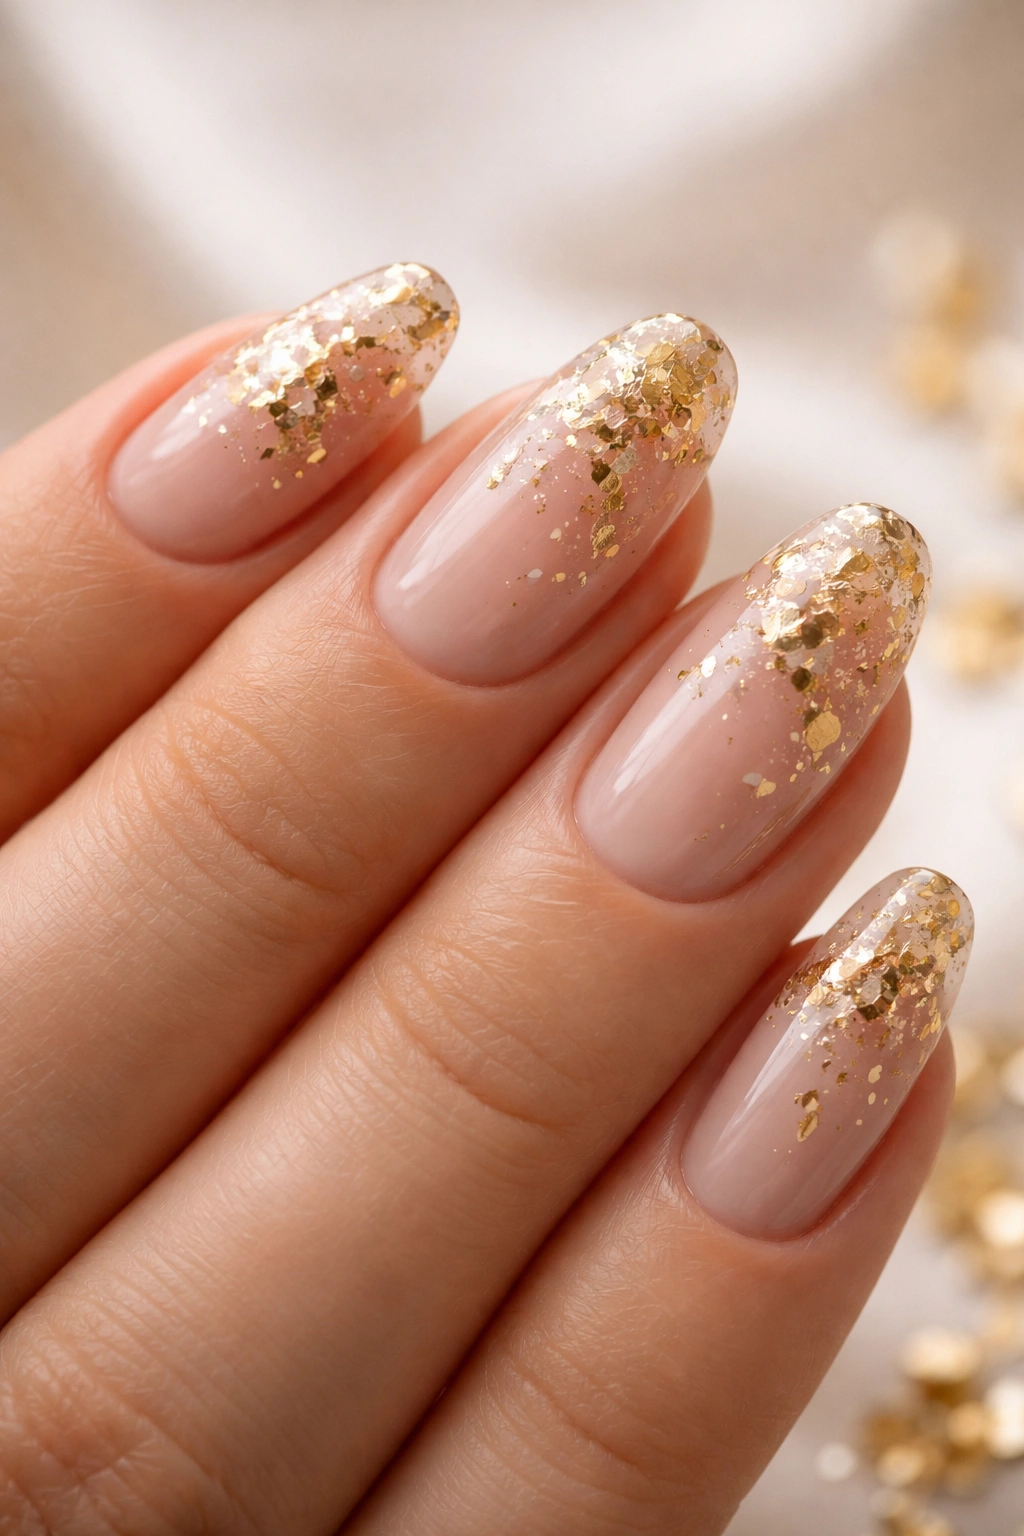
Gold foil creates a different look than chrome powder—it’s more textured and less uniformly reflective, with an organic, artsy quality. Scatter small pieces of gold foil across a nude or sheer base for a design that looks like you’ve sprinkled your nails with bits of precious metal.
The irregular, broken-up quality of foil gives your nails this handcrafted, one-of-a-kind appearance. No two nails will look exactly the same, which adds to the artistic appeal. Some pieces of foil will catch the light while others stay matte, creating beautiful dimension.
Applying foil is different than chrome powder. You’ll need foil adhesive or tacky gel polish. Apply a thin layer, let it get tacky (or cure it if you’re using gel), then press pieces of foil onto the sticky surface. Seal everything with top coat to smooth out the texture and protect your design.
This look is perfect for festival season, creative workplaces, or anytime you want nails that feel more artsy than polished. It’s got that effortlessly cool, “I’m not trying too hard” vibe that’s so desirable.
Gold Chrome Over Marble
When you apply gold chrome over a marble nail design, you create this incredible luxury stone effect. The marbled patterns show through the chrome, creating depth and visual interest that’s absolutely stunning. Think white or nude marble with veining that glows gold when light hits it.
Start by creating your marble base using the water marbling technique or by hand-painting veins with a thin brush. Once that’s cured, apply a light dusting of gold chrome powder over the entire nail. The powder will settle into the grooves and patterns, highlighting the marble effect beautifully.
The key is using chrome powder sparingly here—you want the marble pattern to remain visible underneath. Too much powder will cover everything up and you’ll lose that gorgeous textured effect you’re going for. A light hand is your friend with this design.
Gold marble chrome nails scream luxury and sophistication. They look like actual marble stone that’s been gilded, which is perfect for anyone who loves that high-end, architectural aesthetic in their fashion.
Gold Chrome with Rhinestones
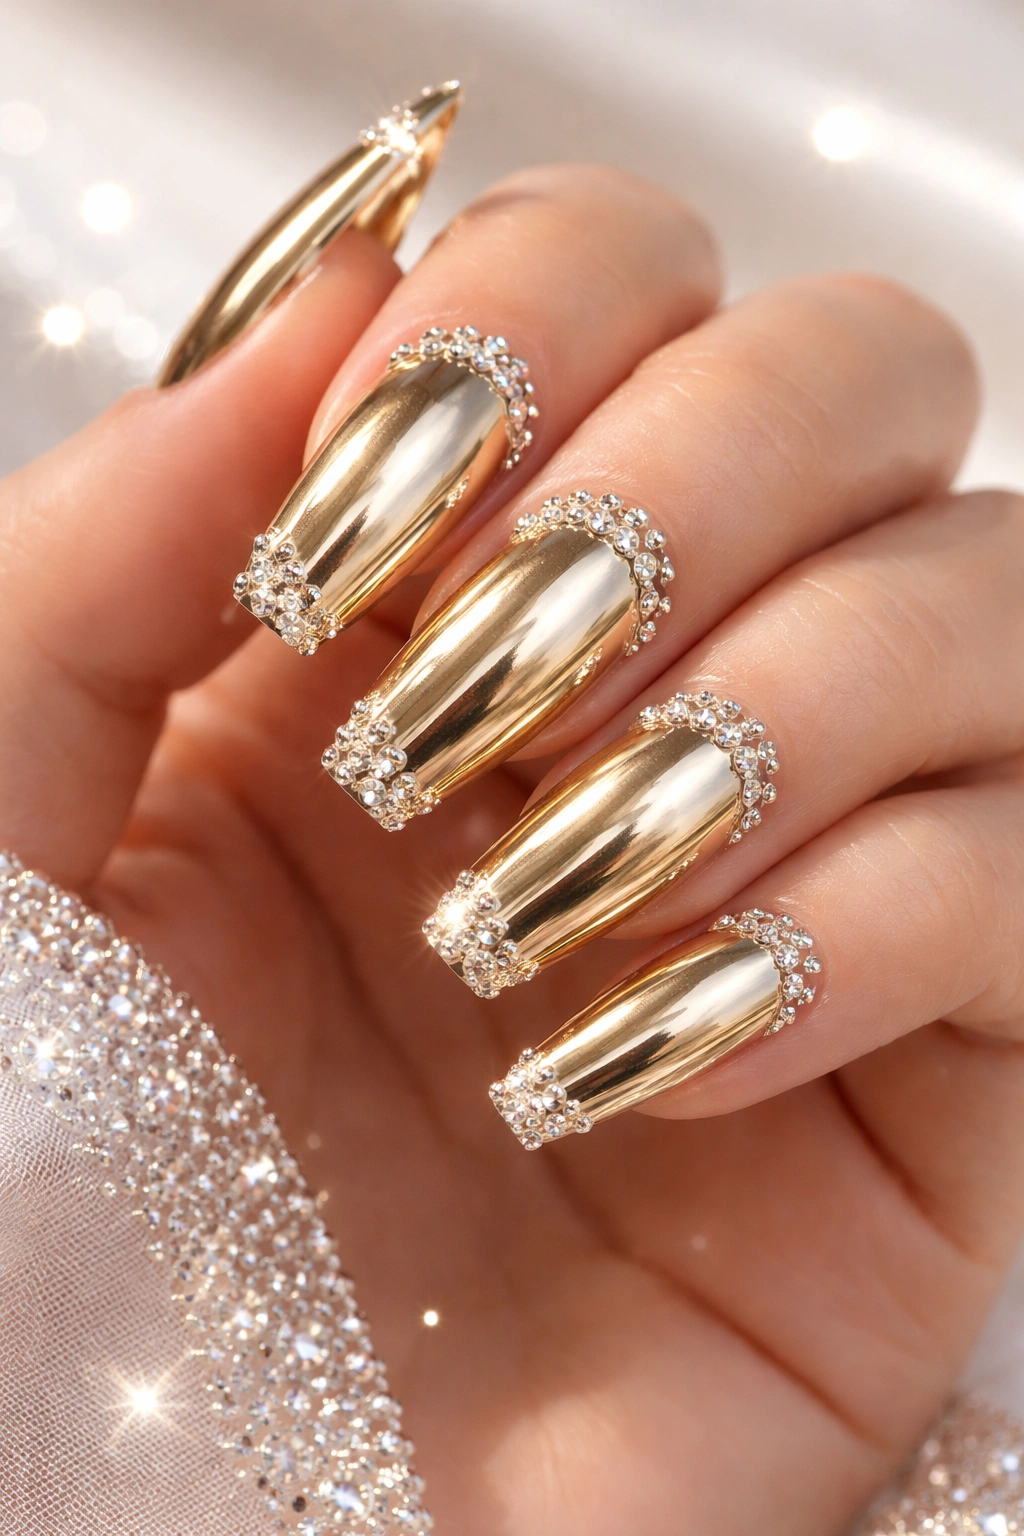
Sometimes more is more, and adding rhinestones to your gold chrome nails takes them from gorgeous to absolutely show-stopping. The combination of reflective chrome and sparkling crystals creates maximum impact that’s perfect for special occasions, holidays, or anytime you want to feel extra.
Place rhinestones strategically—along the cuticle line, at the tip, or in abstract patterns across the nail. The gold chrome serves as a stunning backdrop that makes the crystals pop even more. It’s like wearing fine jewelry on your fingertips, and honestly, who doesn’t want that?
Use nail glue or a thick, clear gel to secure your rhinestones. Make sure each one is pressed firmly into place, then cure everything if you’re using gel. Seal the edges with top coat, but be careful not to cover the stones completely—you want them to maintain their sparkle.
This design is perfect for weddings, parties, holiday celebrations, or any event where you want your nails to be as glamorous as possible. Fair warning: you’ll be catching yourself staring at your own hands constantly because they’re just that pretty.
Bronze Gold Chrome
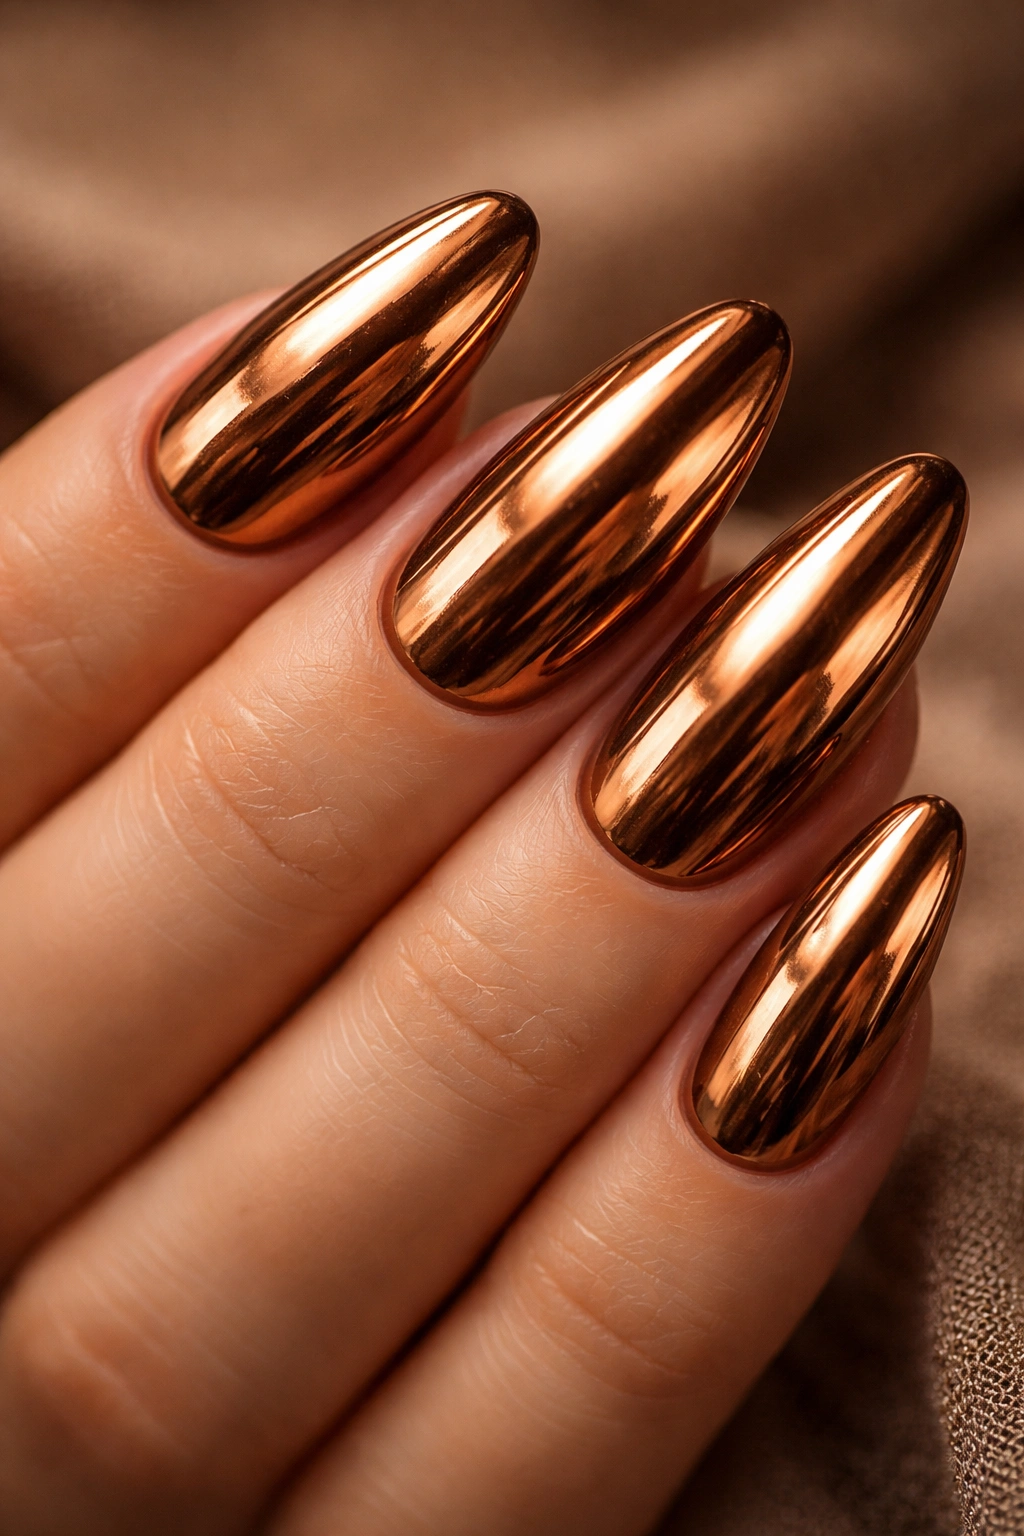
Bronze gold offers a deeper, more antique look compared to bright yellow gold. This darker metallic leans into brown and copper territory, creating a sophisticated, old-world elegance that feels rich and warm. It’s perfect for fall but honestly works beautifully any season.
The muted quality of bronze gold makes it incredibly wearable. It’s not as attention-grabbing as bright gold, which means it works well for people who want the chrome effect but in a more understated way. The warm, earthy tones complement most skin tones beautifully.
To achieve bronze gold chrome, look for copper or bronze-specific chrome powders rather than yellow gold. You can also layer gold chrome over a brown or rust-colored base, which will create that deeper, more antique effect. Experiment with different base colors to find your perfect bronze shade.
Bronze gold chrome looks stunning with leather jackets, warm-toned knitwear, and earthy accessories. It’s got that cozy, luxe vibe that makes everything feel a bit more expensive and pulled-together.
Gold Chrome Polka Dots
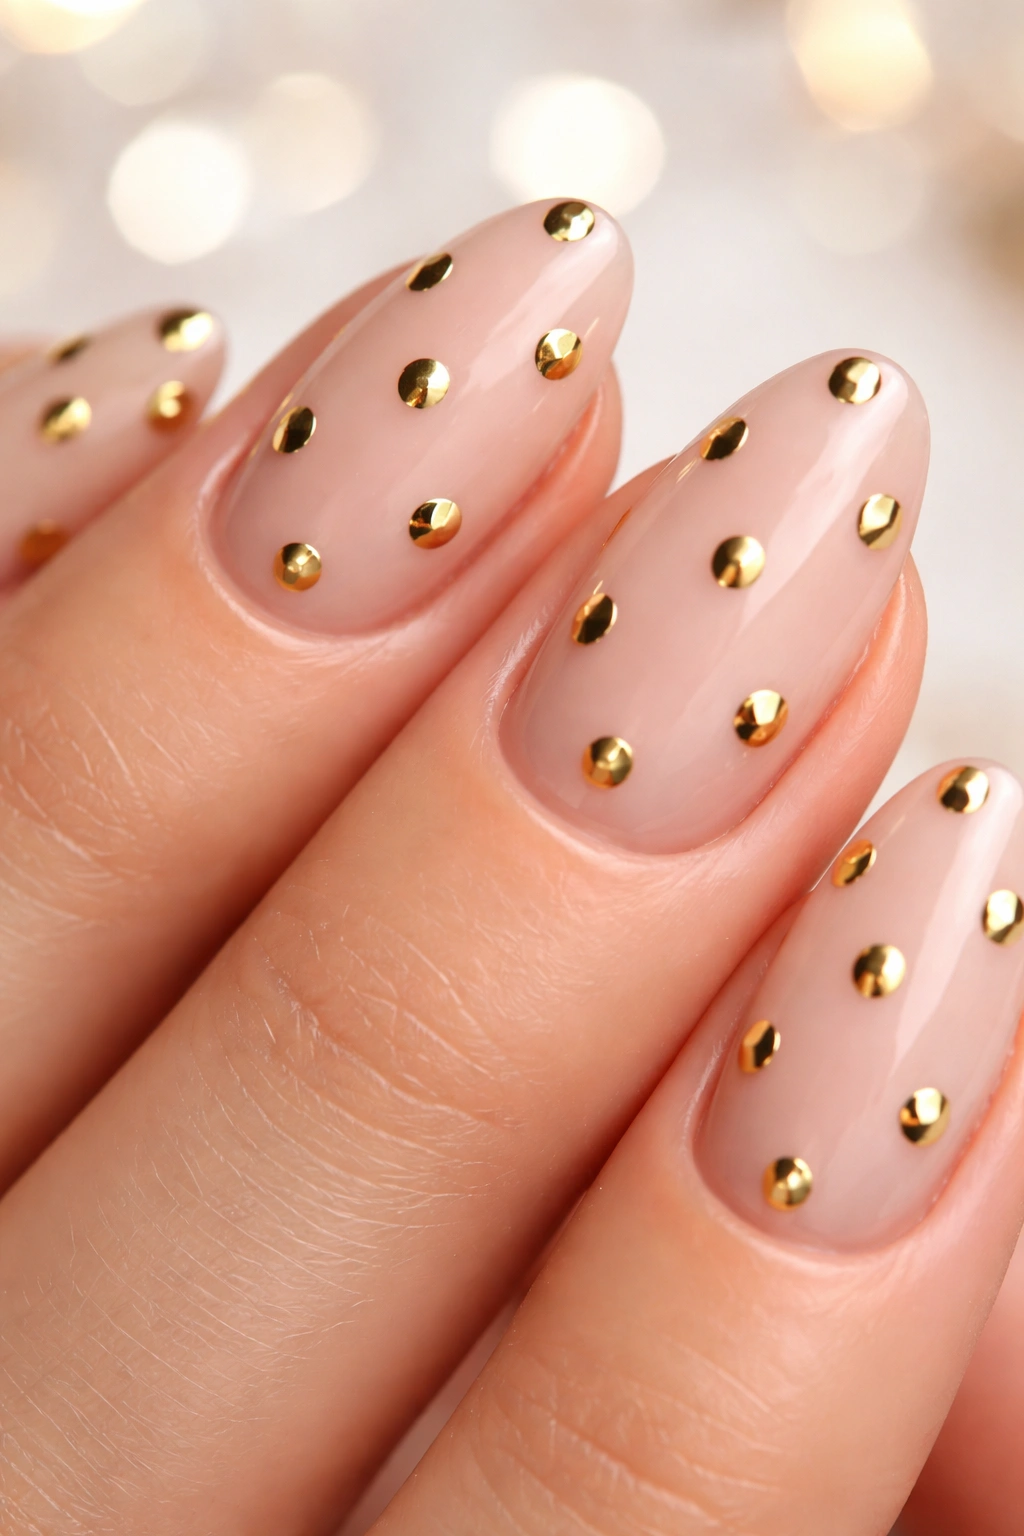
Who says polka dots have to be cutesy? When you create them with gold chrome on a nude or milky base, they become surprisingly sophisticated. The dots catch light individually, creating this playful but polished look that’s fun without feeling juvenile.
The key to grown-up polka dots is keeping them relatively small and evenly spaced. Giant, randomly scattered dots can look childish, but delicate, uniform dots feel intentional and chic. You can do them across all your nails or just add them to accent nails for a more subtle approach.
Create perfect dots using a dotting tool or the end of a bobby pin. Apply tiny drops of no-wipe top coat where you want each dot, then use your applicator to press gold chrome powder onto each sticky spot. It’s a bit time-consuming, but the results are worth the patience.
These nails pair beautifully with vintage-inspired clothing, retro accessories, or modern minimalist pieces. The polka dots add personality without overwhelming your look, making them incredibly versatile.
Gold Chrome Striped Design
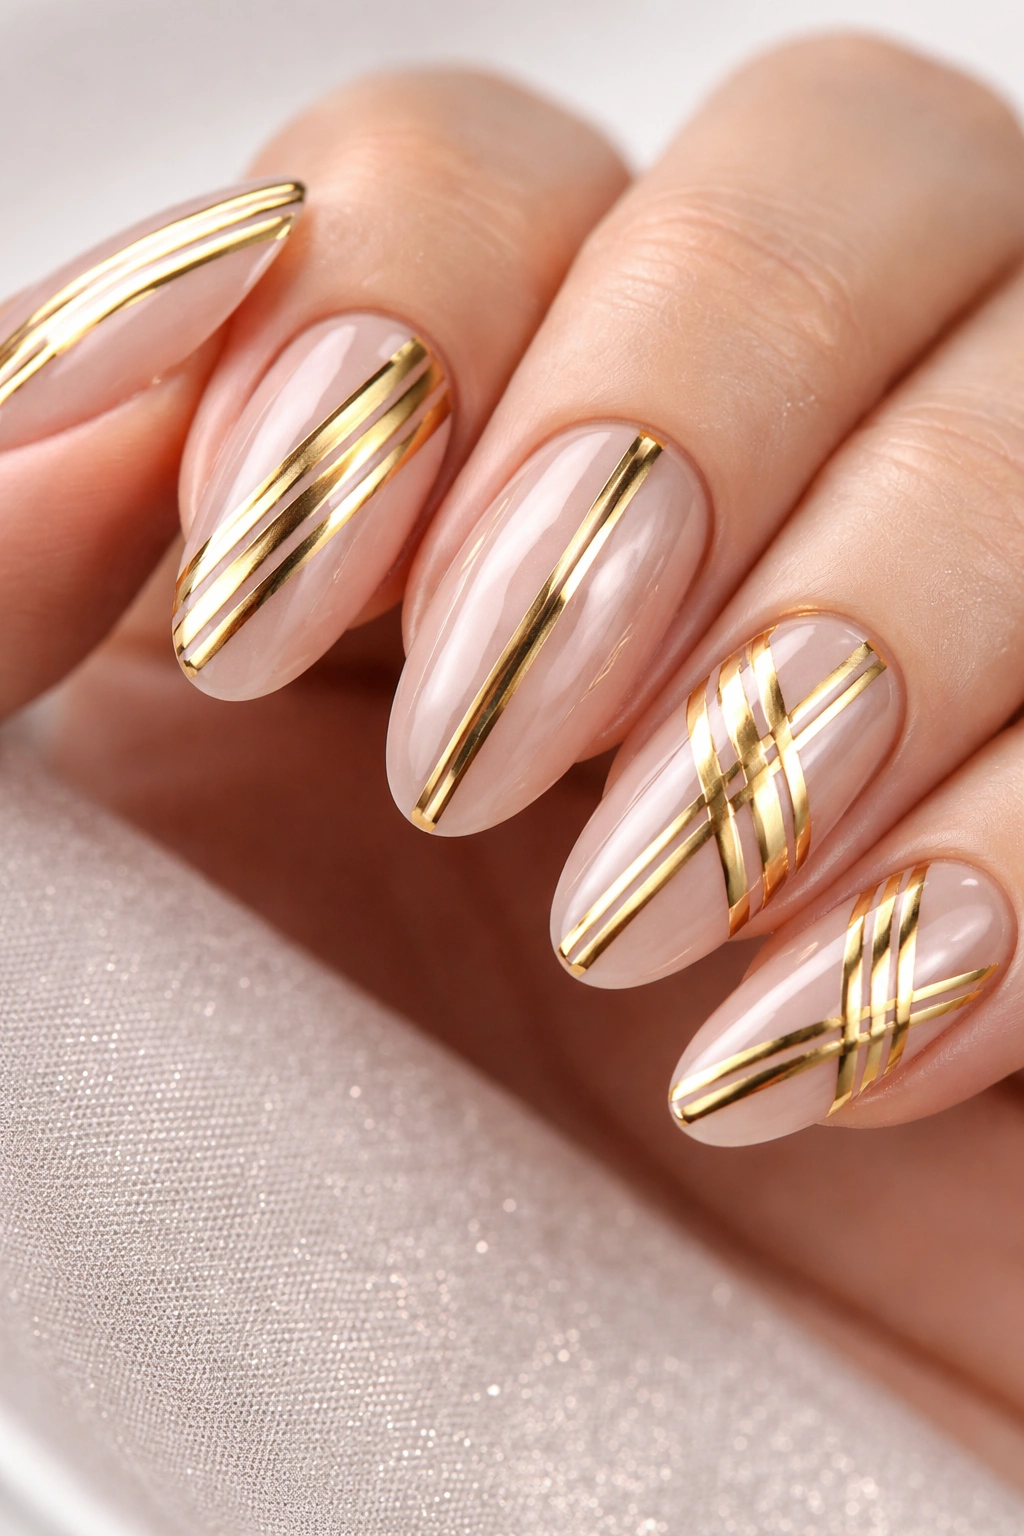
Clean, parallel stripes in gold chrome create a modern, graphic look that’s bold without being loud. These lines can run vertically, horizontally, or diagonally across your nails, creating different visual effects depending on which direction you choose.
Vertical stripes make your nails appear longer and more elegant. Horizontal stripes create a stacked, architectural effect. Diagonal stripes feel dynamic and fashion-forward. The direction you choose completely changes the vibe of your manicure, so think about what effect you’re going for.
Use striping tape to create perfectly straight lines. Apply it to your cured base color, paint your no-wipe top coat in the exposed stripes, add your chrome powder, then carefully remove the tape. The tape ensures your lines stay crisp and professional-looking rather than wobbly and homemade.
Striped gold chrome nails look incredible with bold, graphic clothing or color-blocked outfits. They’ve got that contemporary, fashion-week energy that makes simple outfits look more considered and stylish.
Gold Chrome Butterfly Accent
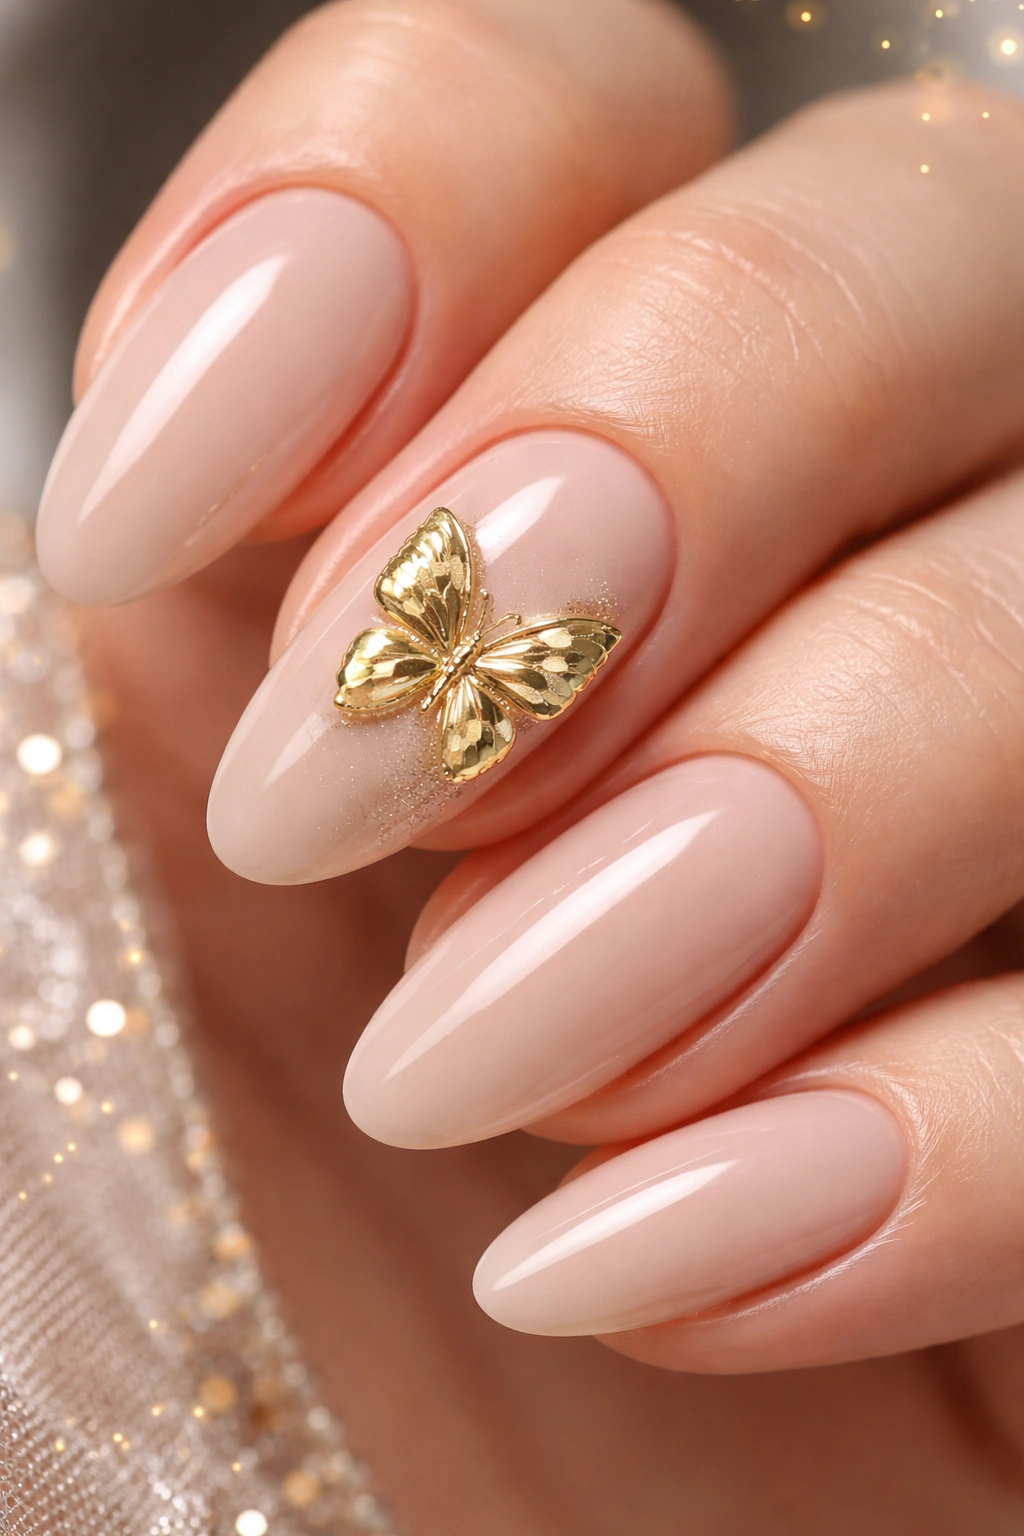
Adding a single gold chrome butterfly to an otherwise simple manicure creates the sweetest focal point. The butterfly can be hand-painted or created with a stencil, then covered with chrome powder for that metallic finish. It’s whimsical and feminine without being over-the-top.
Place your butterfly on one accent nail per hand—usually the ring finger—and keep the other nails simple in nude, pink, or clear polish. This creates balance and prevents the design from feeling too busy or young. The butterfly becomes a delicate detail rather than the entire concept.
You can create butterfly shapes using thin gel and a detail brush, or you can purchase butterfly-shaped nail stickers or stencils. Either way, build up the shape with gel so it’s slightly raised, then apply your chrome powder. The dimensional effect makes the butterfly feel more realistic and special.
This design is perfect for spring, garden parties, or anytime you want nails that feel soft and romantic. It’s got that gentle, feminine energy that makes you feel pretty and put-together.
Gold Chrome Stars
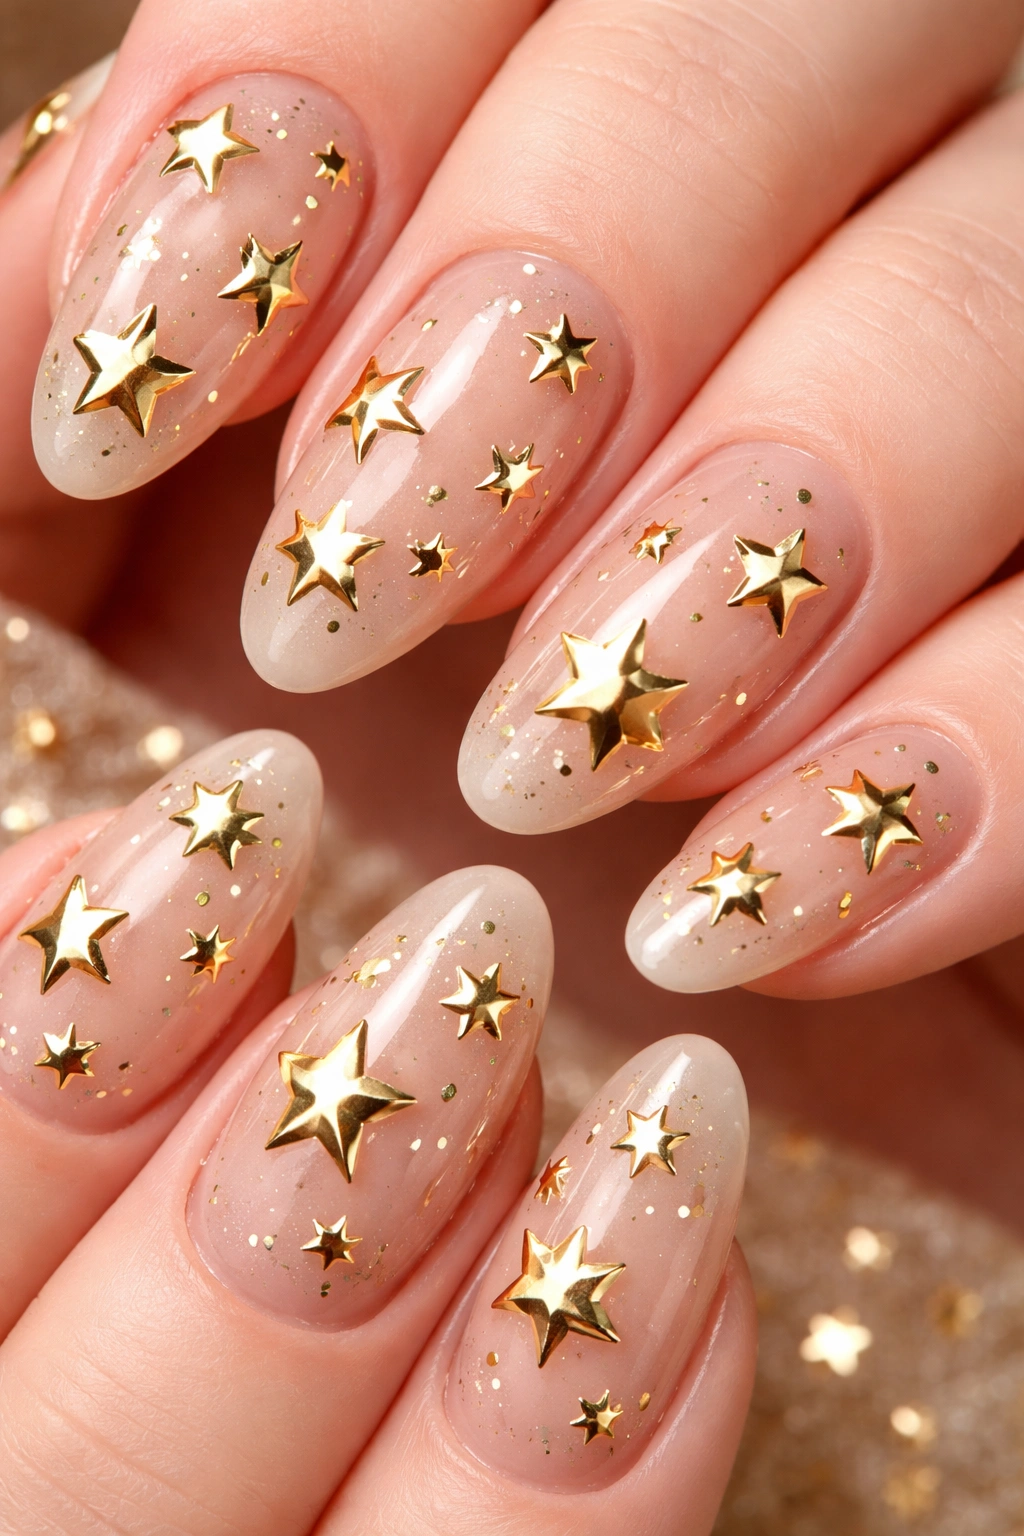
Celestial nail art continues to trend, and gold chrome stars take the look to the next level. Scatter small stars across a nude base, cluster them on accent nails, or create a full constellation design. The metallic stars catch light beautifully, making your nails sparkle like the night sky.
You can hand-paint stars, use star-shaped stencils, or apply pre-made chrome star stickers. For raised, dimensional stars, use builder gel to create the shapes before applying your chrome powder. The texture adds visual interest and makes the stars stand out even more.
Mixing different sizes of stars creates a more organic, realistic effect. Pair your gold stars with tiny rhinestones for extra sparkle, or keep it simple with just the metallic stars against a clean base. Both approaches work beautifully depending on your personal style.
Gold star nails are perfect for holiday season, special events, or anytime you want to feel a little magical. They’re playful enough to be fun but sophisticated enough to wear with grown-up outfits.
Gold Chrome Flames
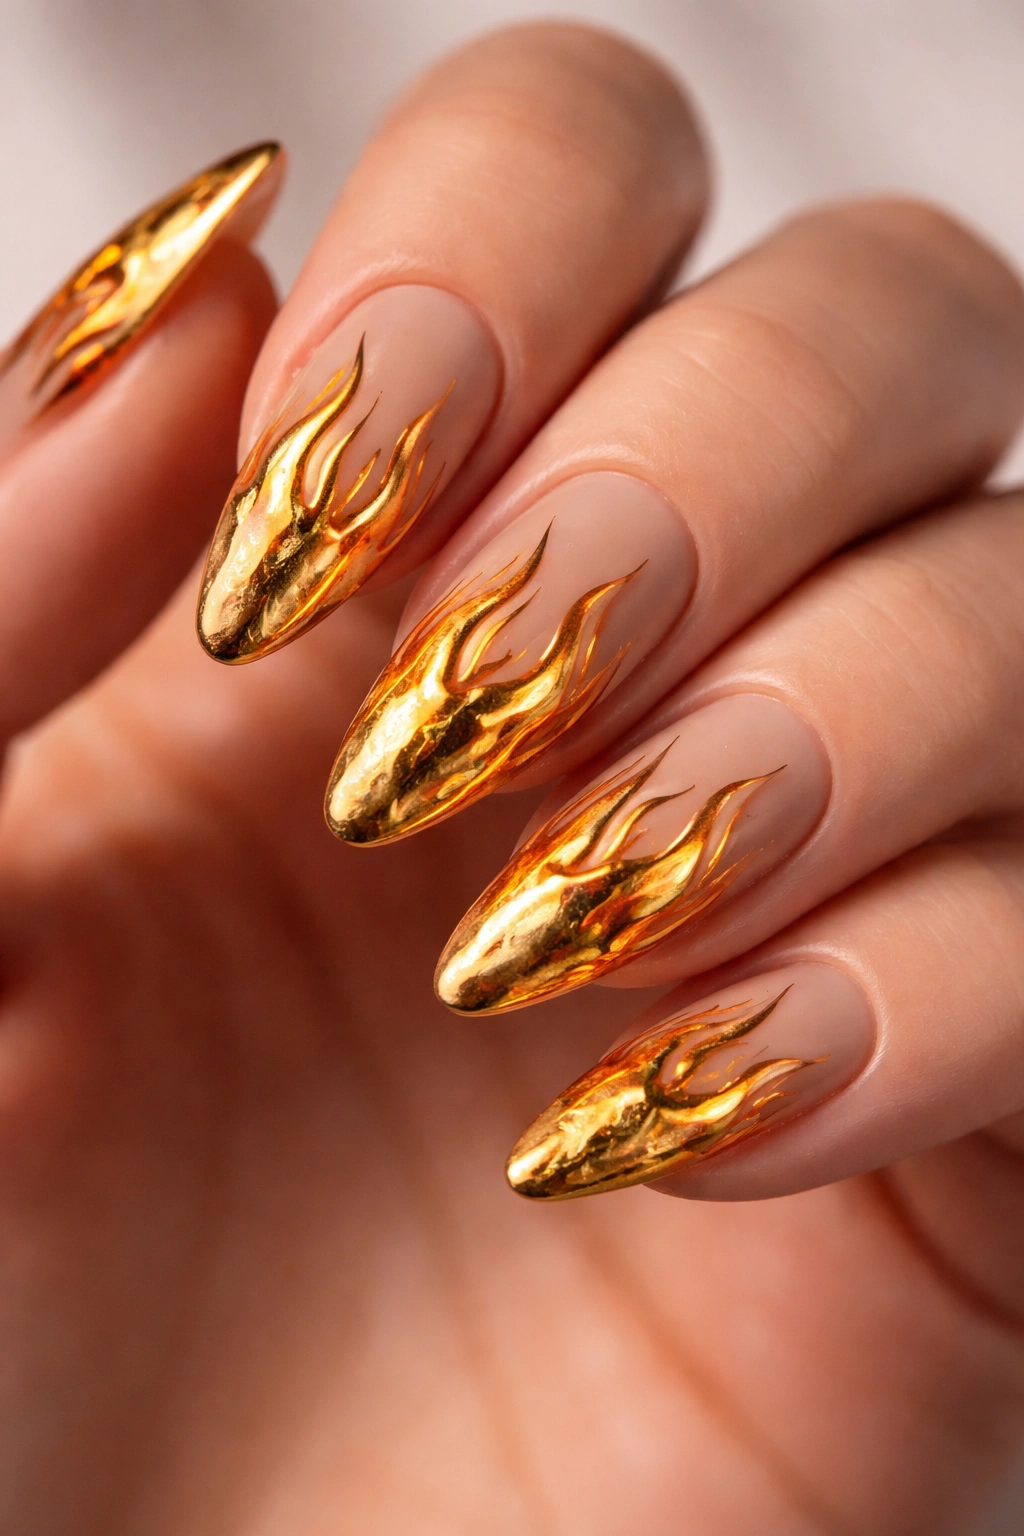
For an edgier take on gold chrome, try flame designs rising from your tips. These work especially well on almond or stiletto-shaped nails where the pointed tip mimics the shape of flames. The design is bold and fashion-forward, perfect for people who love making a statement.
Start with a nude or white base, then create flame shapes rising from your tips using red or orange gel polish. Once that’s cured and you’ve added your chrome powder, the flames will have this gorgeous glowing effect. The gold catches light and makes the flames look like they’re actually flickering.
This design definitely leans more bold than subtle, so it’s perfect for nights out, concerts, festivals, or anytime you want your nails to reflect your confident, fearless energy. It’s not for the faint of heart, but if you love attention-getting manicures, these are for you.
Pair flame nails with leather, bold red lips, or edgy accessories. They’re part of that whole “main character energy” aesthetic that’s been trending, and honestly, they deliver.
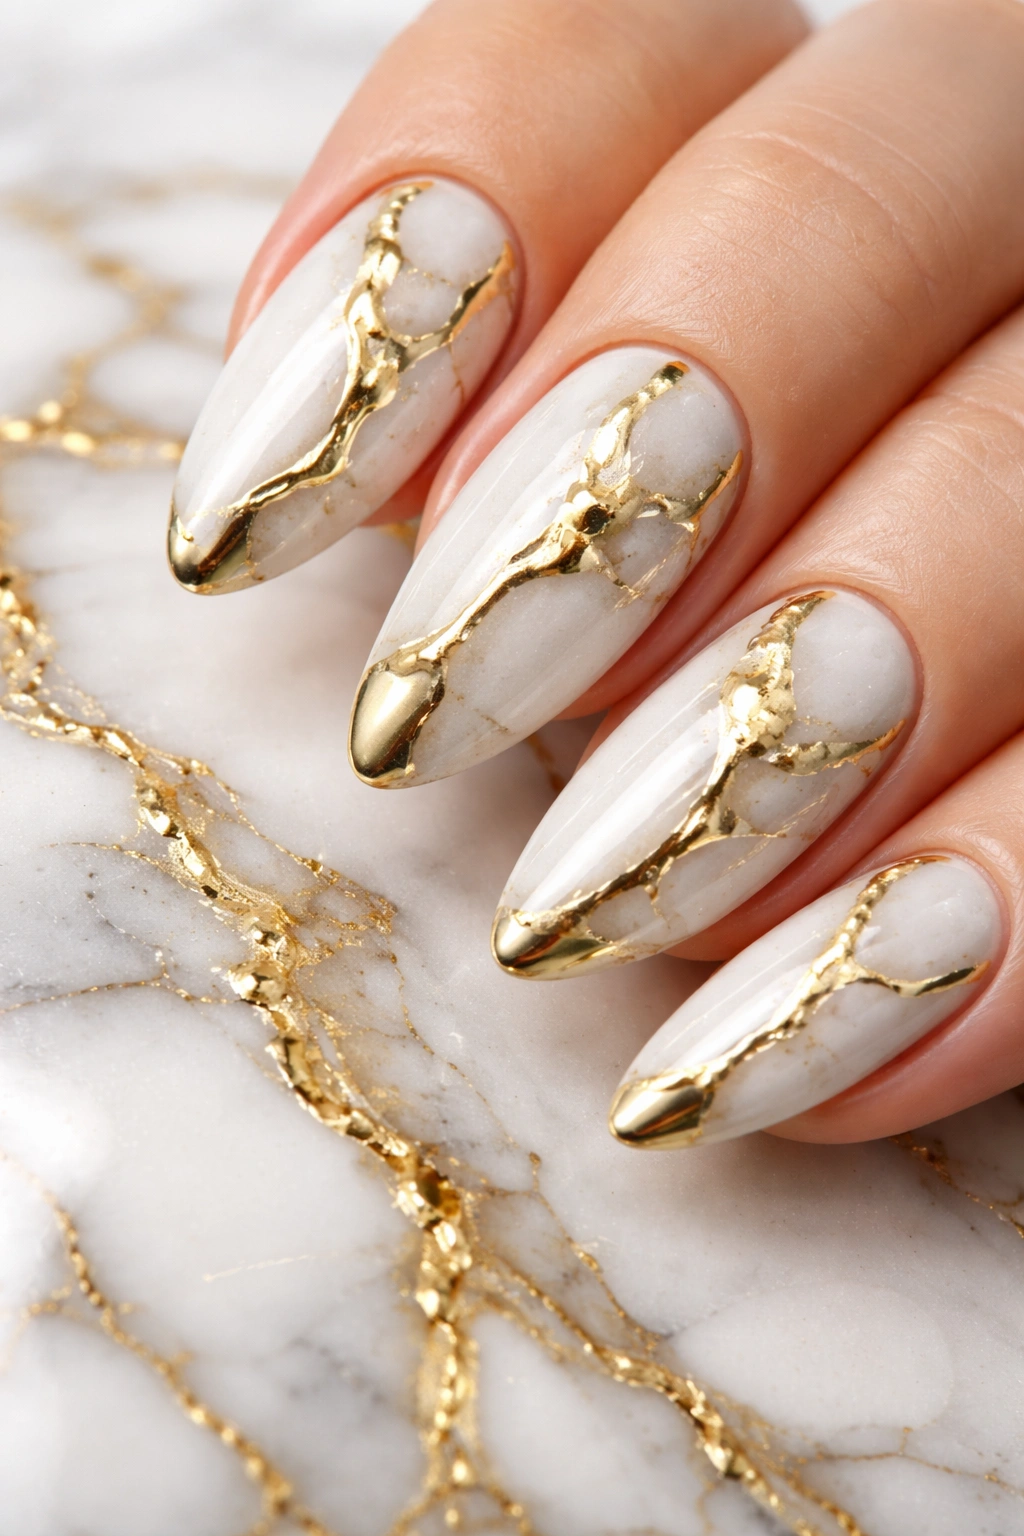
Gold Chrome and White Marble
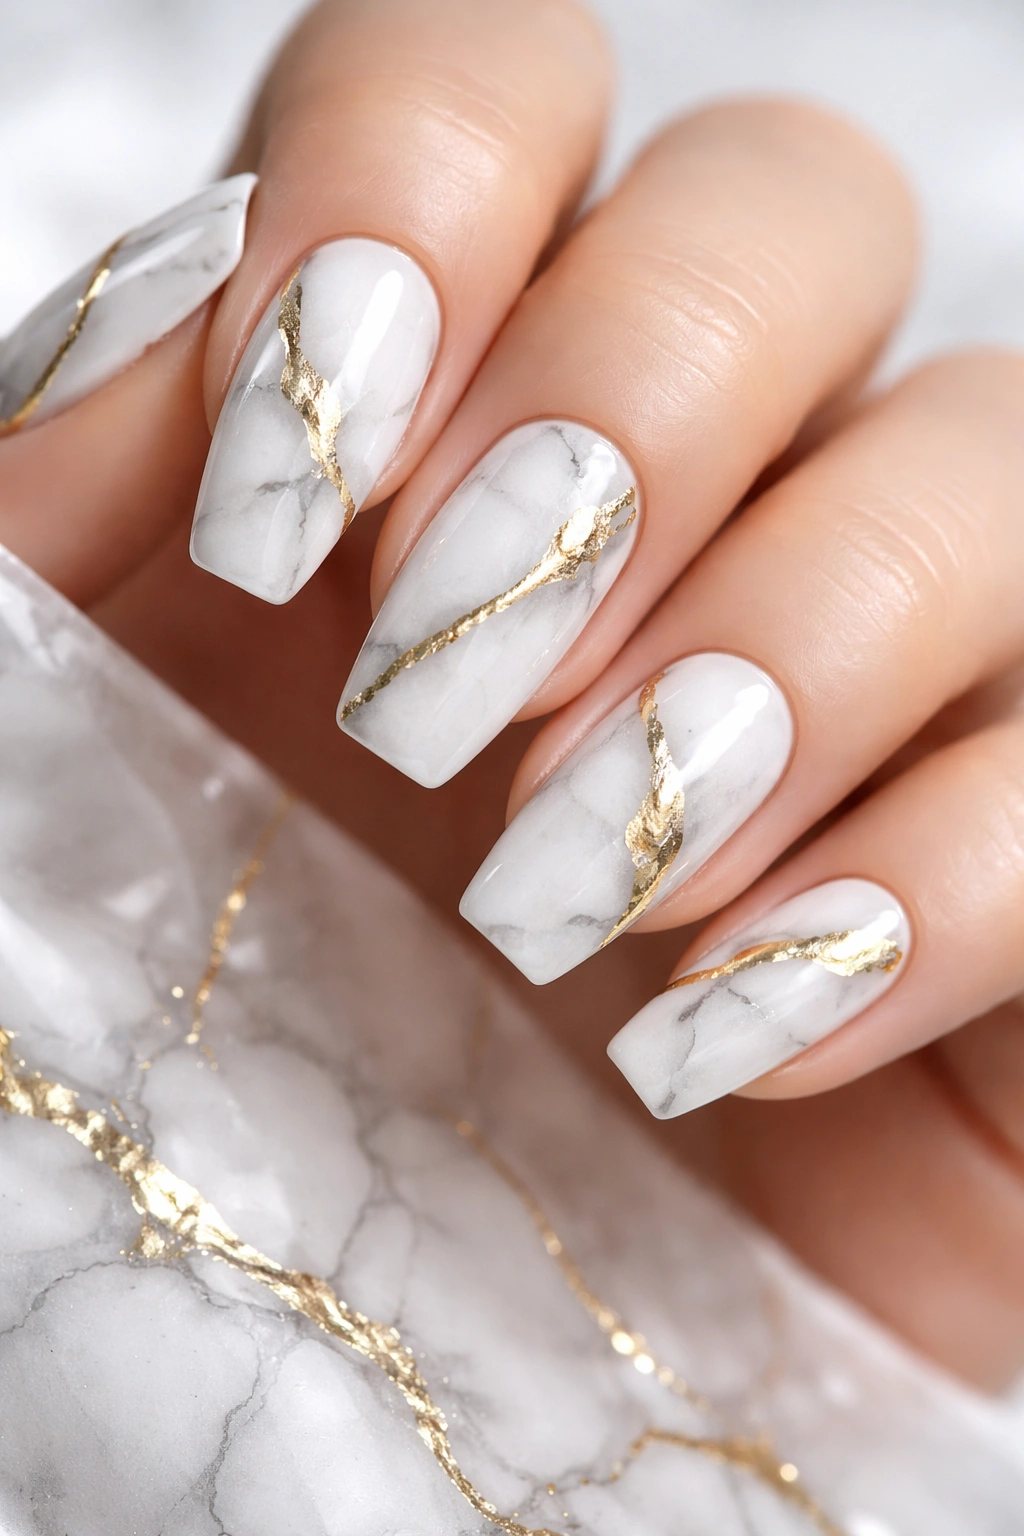
The combination of crisp white, soft gray veining, and gold chrome accents creates a marble effect that looks like expensive countertops or luxury hotel bathrooms. It’s sophisticated, clean, and undeniably high-end looking—perfect for people who love that minimalist luxury aesthetic.
Create your white marble base first using the water marbling technique or by hand-painting delicate gray veins with a thin brush. Once that’s done, add small accents of gold chrome along some of the veins or in abstract patches. The gold highlights the marble effect beautifully without overwhelming it.
The trick is restraint with the gold—you want it to accent the marble, not compete with it. Think of it like gold veining running through white stone rather than trying to cover the whole nail. A light touch creates that expensive, natural look you’re after.
This design looks stunning on any nail shape and pairs beautifully with neutral, monochromatic outfits. It’s appropriate for literally any occasion, from weddings to business meetings to casual weekends.
Gold Chrome with Matte Top Coat
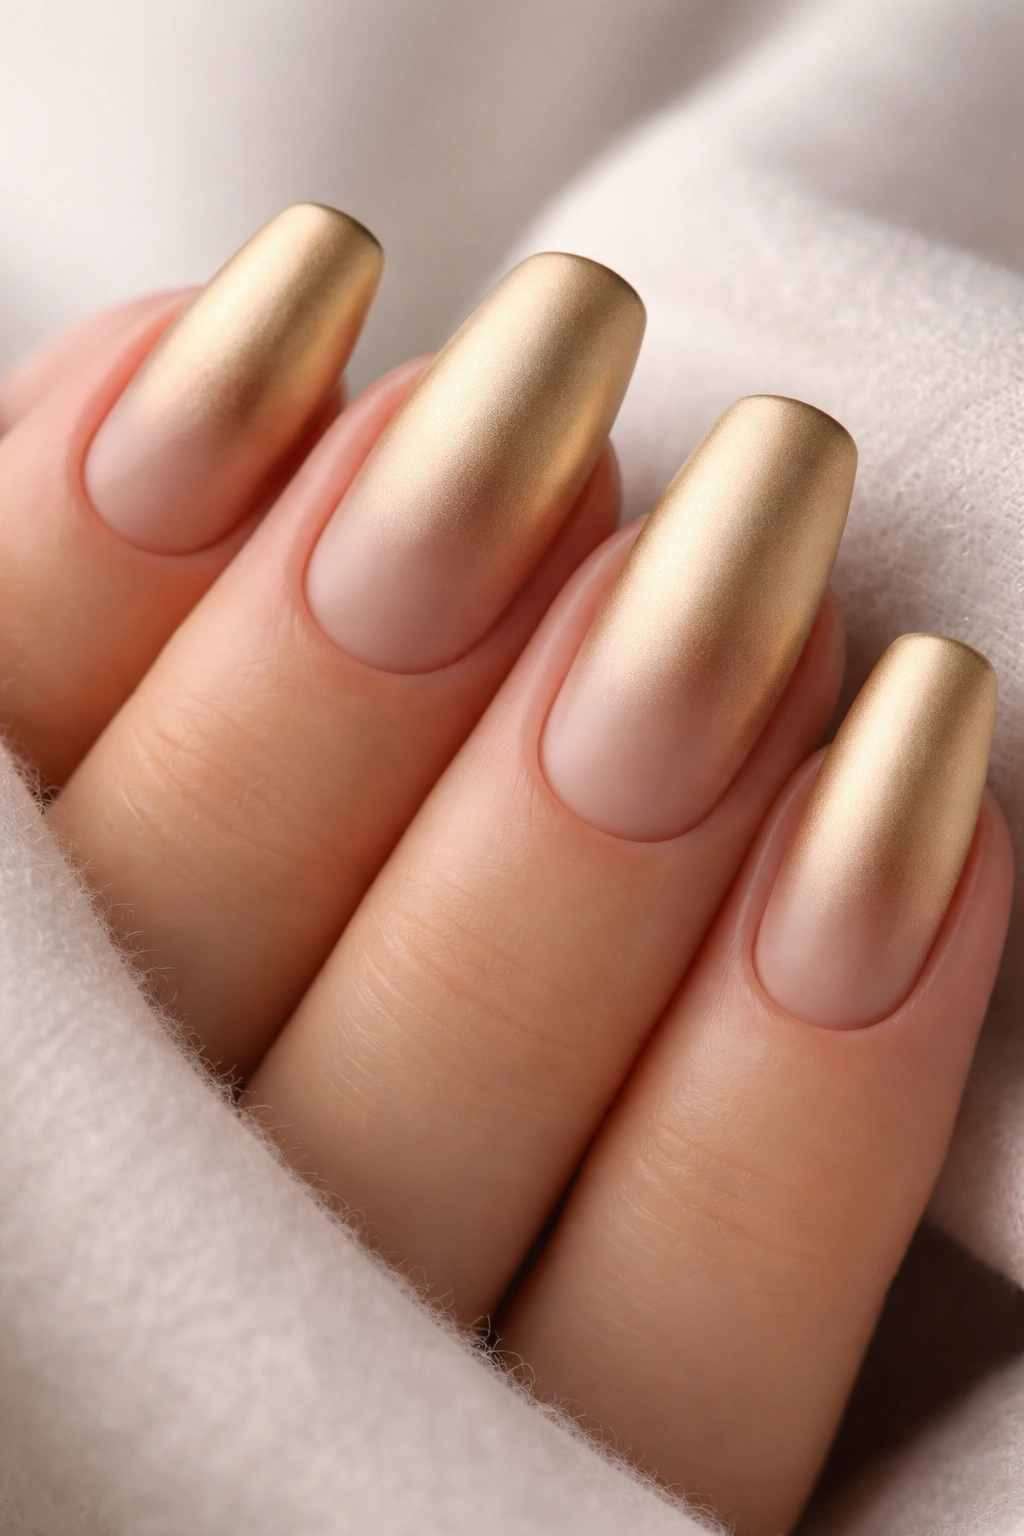
Here’s a twist: apply gold chrome, then seal it with a matte top coat instead of glossy. This creates an almost brushed-metal effect that’s softer and more subtle than the traditional mirror finish. It’s unexpected and surprisingly wearable for people who find regular chrome too flashy.
The matte finish tones down the reflective quality while still maintaining that metallic look. Your nails will have this beautiful, velvety appearance that catches light differently than glossy chrome. It’s sophisticated and modern in a completely different way.
Make sure you’re using a true matte top coat designed for gel polish—regular matte top coat might not work well over chrome powder. Test it on one nail first to see how you like the effect before committing to your whole hand.
Matte gold chrome nails look incredible with suede, wool, or other textured fabrics. The tonal matching of matte finishes creates a cohesive, considered look that feels very fashion-forward and editorial.
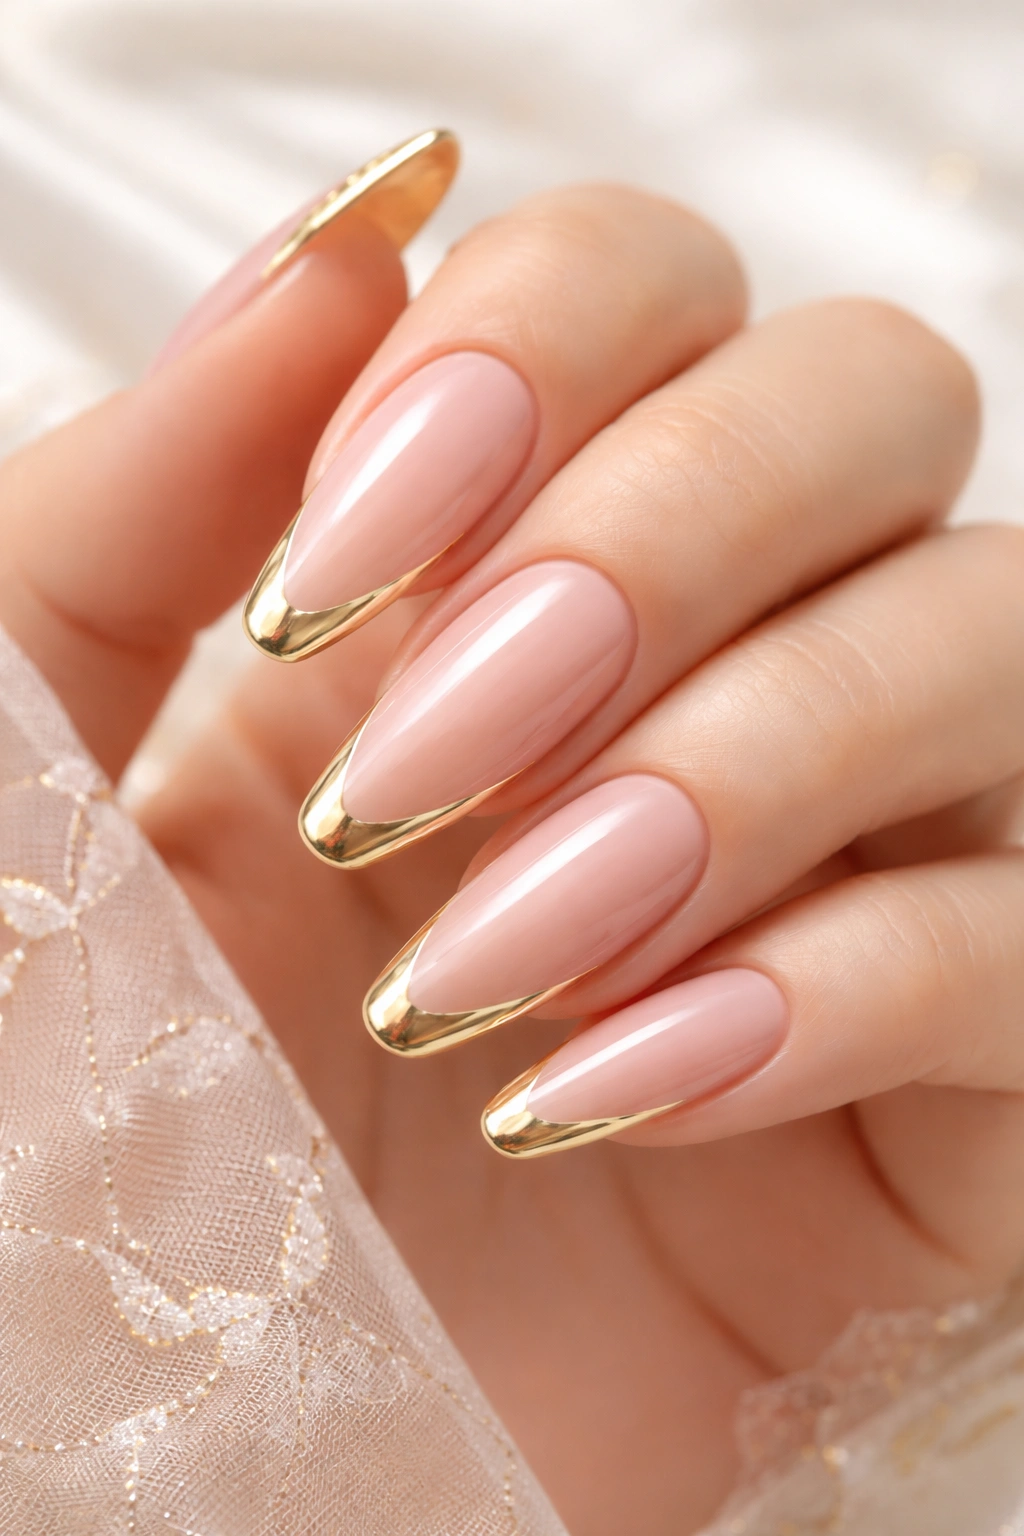
Gold Chrome Gradient French
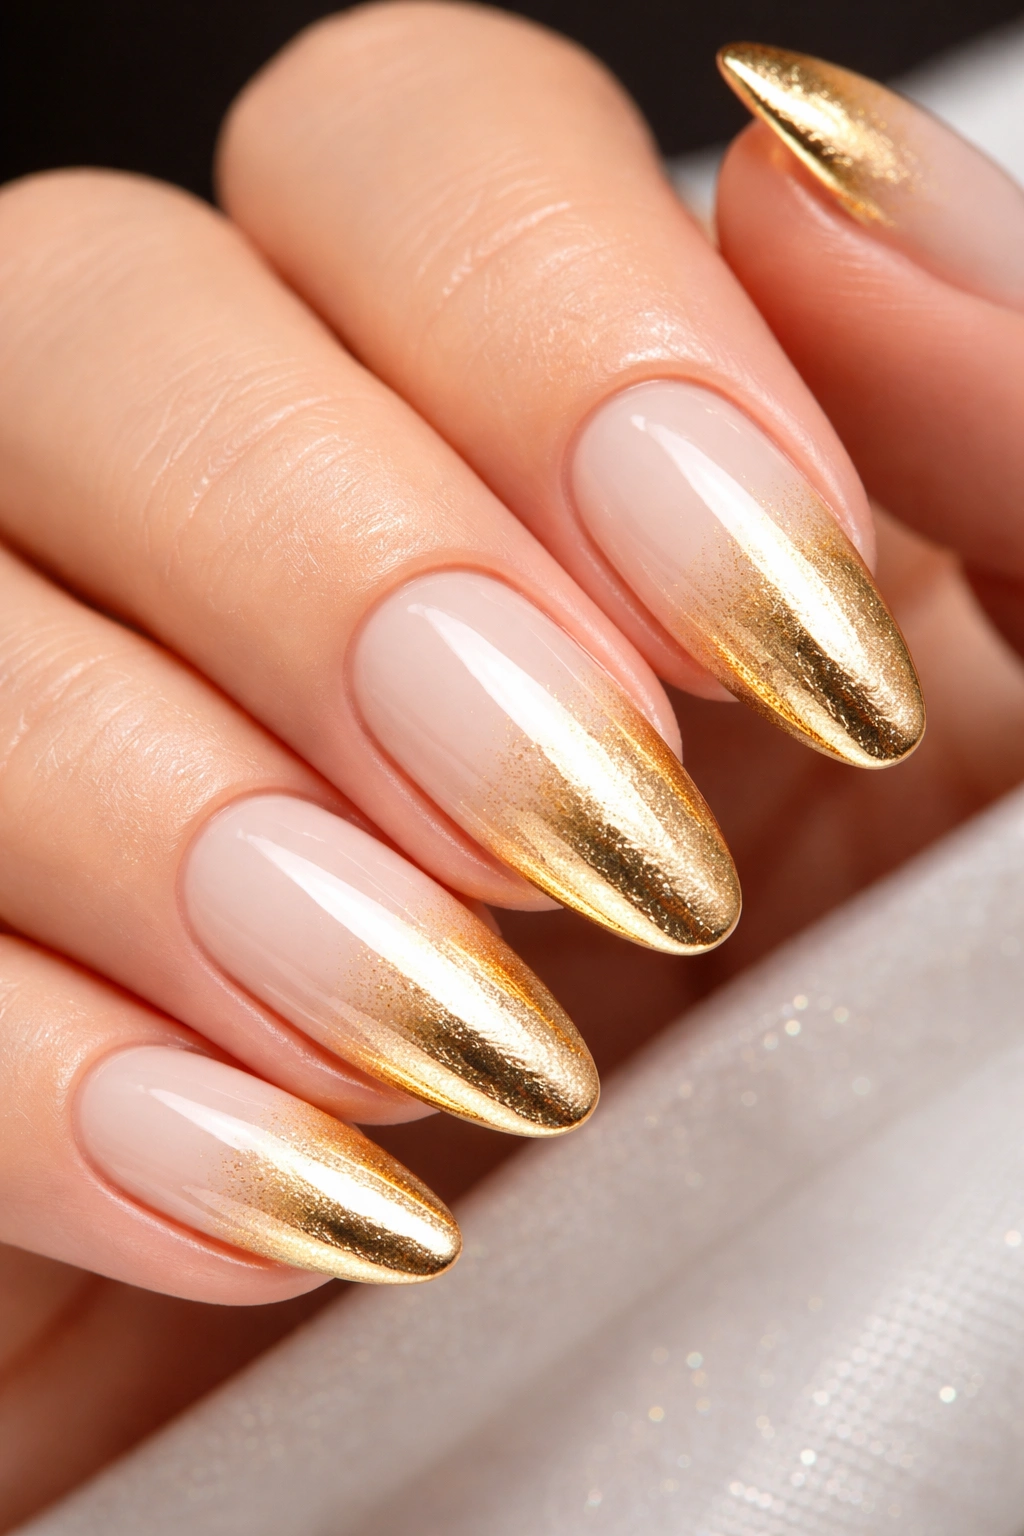
Instead of a solid gold tip or a full ombré, try a gradient French where the gold is most concentrated at the very tips and gradually fades as it moves down the nail. This creates a soft, ethereal effect that’s less dramatic than full-on French tips but more interesting than solid chrome.
The gradient effect makes your nails look longer and more elegant. The eye naturally follows the fade upward, creating the illusion of length even on shorter nails. It’s one of those optical tricks that makes a huge difference in how polished your hands look.
Creating this fade requires a light touch and patience. Start with heavily concentrated chrome at the tips, then use a clean brush to gently blend it downward in progressively lighter layers. You’re essentially dusting the chrome rather than rubbing it in as you move toward your cuticles.
This design is perfect for people who love French manicures but want something a bit more unique. It’s got that same clean, classic energy but with a modern twist that feels fresh and current.
Budget-Friendly Application Tips
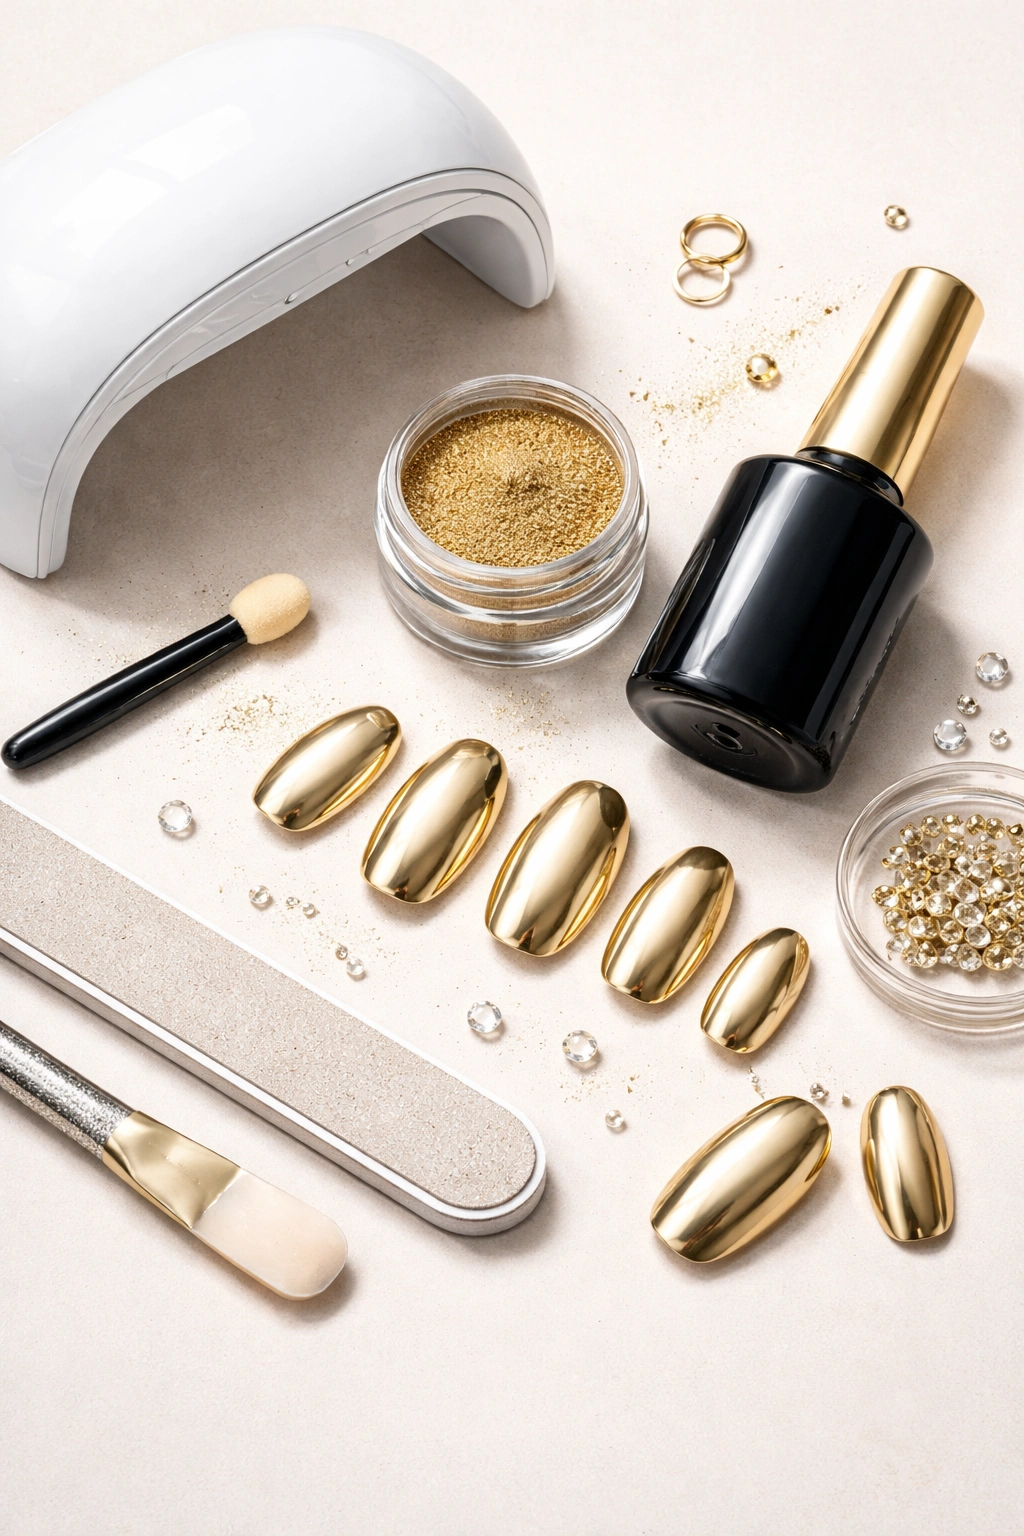
The secret to expensive-looking gold chrome nails without the expensive price tag is all about technique and the right supplies. You don’t need salon-exclusive products—everything you need is available online or at beauty supply stores for a fraction of what you’d pay for salon visits.
Chrome powder is your main investment, and the good news is it lasts forever. A small jar costs anywhere from five to fifteen dollars and will give you dozens of manicures. Look for fine-particle powders, as these create smoother, more mirror-like finishes than chunky glitters. The powder itself isn’t actually made of real gold—it’s cosmetic-grade pigment that creates that metallic effect through special light-reflecting particles.
You’ll also need no-wipe top coat, which typically costs between seven and twelve dollars. This is different from regular gel top coat because it stays tacky after curing, giving the chrome powder something to grip onto. Don’t skip this step or try to use regular top coat—it won’t work the same way, and you’ll be disappointed with your results.
Your UV or LED lamp is a one-time investment that’ll pay for itself after just a few at-home manicures. Entry-level lamps start around twenty-five dollars and work perfectly fine for chrome nails. You don’t need the most expensive professional lamp—the affordable versions cure gel polish just as effectively.
Silicone applicators or small makeup sponges work perfectly for applying chrome powder and cost just a few dollars for a pack. Some chrome powder sets even include applicators, making them excellent value. You’ll also want a soft, fluffy makeup brush for dusting off excess powder—one you already own works great, no need to buy special ones.
When you add up the costs, you’re looking at roughly forty to sixty dollars for all the supplies you need. Compare that to paying forty to eighty dollars (plus tip) for a single chrome manicure at the salon. After your first at-home attempt, you’ve basically broken even, and every manicure after that is essentially free minus the minimal cost of gel polish colors.
Making Your Chrome Manicure Last
Getting your gold chrome nails to last as long as possible means more time between manicures and better value for your money. With proper application and care, chrome nails can easily last two to three weeks—just as long as regular gel manicures.
Seal those edges like your manicure depends on it (because it does). Make sure your final top coat wraps all the way around the free edge of your nail. This is probably the single most important factor in preventing chips and extending wear time. Chrome nails are slightly more delicate than regular gel polish, so that edge sealing is crucial.
Prep your nails properly before you even start applying color. Clean, dry nails are everything. Use a nail dehydrator or just rubbing alcohol to remove any oils from your nail surface. This helps everything adhere better and prevents lifting at the cuticles, which is usually where problems start.
Apply thin layers of everything—base coat, color, top coat. Thick, gloopy layers take longer to cure and are more prone to peeling. Multiple thin coats always beat one thick one. This is especially true with chrome because you need that super smooth surface for the powder to look its best.
Keep your cuticles moisturized but keep oil away from your actual nails during application. Dry cuticles make even the most perfect chrome manicure look messy and unkempt. Apply cuticle oil daily, but make sure you clean your nails thoroughly before doing your manicure so oils don’t prevent proper adhesion.
Be a little gentle with your hands for the first 24 hours after application. Avoid super hot water, don’t go digging in your purse aggressively, and definitely don’t try to peel orange peels or do anything that puts direct pressure on your nails. Give everything time to fully bond and harden.
If you do get a small chip, you can often fix it without redoing the entire nail. Gently buff the chipped area smooth, apply a tiny bit of top coat, and cure it. For chrome-specific chips, you might need to reapply a small amount of powder to that area, but often just the top coat touch-up does the trick.
Final Thoughts
Gold chrome nails prove that luxury doesn’t have to come with a luxury price tag. With just a few affordable supplies and a little practice, you can create manicures that look like they cost hundreds of dollars. Whether you go for full-coverage metallic glamour or subtle gold accents, you’re getting that expensive, polished look without the expensive salon bills.
The beauty of chrome is how incredibly versatile it is. You can dress it up for special occasions or make it work for everyday wear. You can go bold or keep it subtle. You can experiment with different base colors, nail shapes, and design elements to create looks that feel uniquely yours. There’s no single “right” way to wear gold chrome—it adapts to your personal style.
Don’t get discouraged if your first attempt isn’t absolutely perfect. Chrome application has a bit of a learning curve, and that’s totally normal. Your technique will improve with each manicure, and you’ll figure out what works best for your specific nails. Take your time, follow the steps, and remember that even slightly imperfect chrome nails still look way more expensive than regular polish.
Which of these gold chrome designs are you most excited to try? Whether you’re starting with simple French tips or going straight for those 3D sculptural designs, you’re about to save yourself so much money while still having gorgeous, salon-quality nails. Your wallet and your hands will thank you.
