

Gold cat eye nails have taken the beauty world by storm, and honestly? It’s not hard to see why. There’s something almost hypnotic about watching that metallic shimmer shift and dance across your fingertips with every movement. If you’ve been scrolling through nail inspiration and find yourself captivated by those glowing, dimensional gold manicures, you’re in the right place.
Cat eye nails aren’t your average polish job. They’re created using magnetic gel polish that contains fine metallic particles suspended in the formula. When you hold a magnet close to the wet polish, those particles shift and align, creating a luminous streak that mimics the reflection in a cat’s eye. The effect is mesmerizing — part chrome, part shimmer, all elegance.
What makes gold cat eye nails particularly special is their versatility. Gold works beautifully across all skin tones and complements nearly every outfit in your wardrobe. Whether you’re heading to a formal event, running errands, or just want your nails to feel a little more special, gold cat eye designs deliver that touch of luxury without feeling overdone.
The magnetic effect creates depth that regular glitter or shimmer polish simply can’t match. You’ll notice the way light catches differently depending on the angle, making your manicure feel dynamic and alive. And the best part? These aren’t just pretty — when applied correctly with a quality base and top coat, cat eye gel manicures can last three weeks or more without chipping.
Ready to explore the most stunning gold cat eye nail designs? Let’s dive into ten gorgeous options that’ll have you reaching for that magnet.
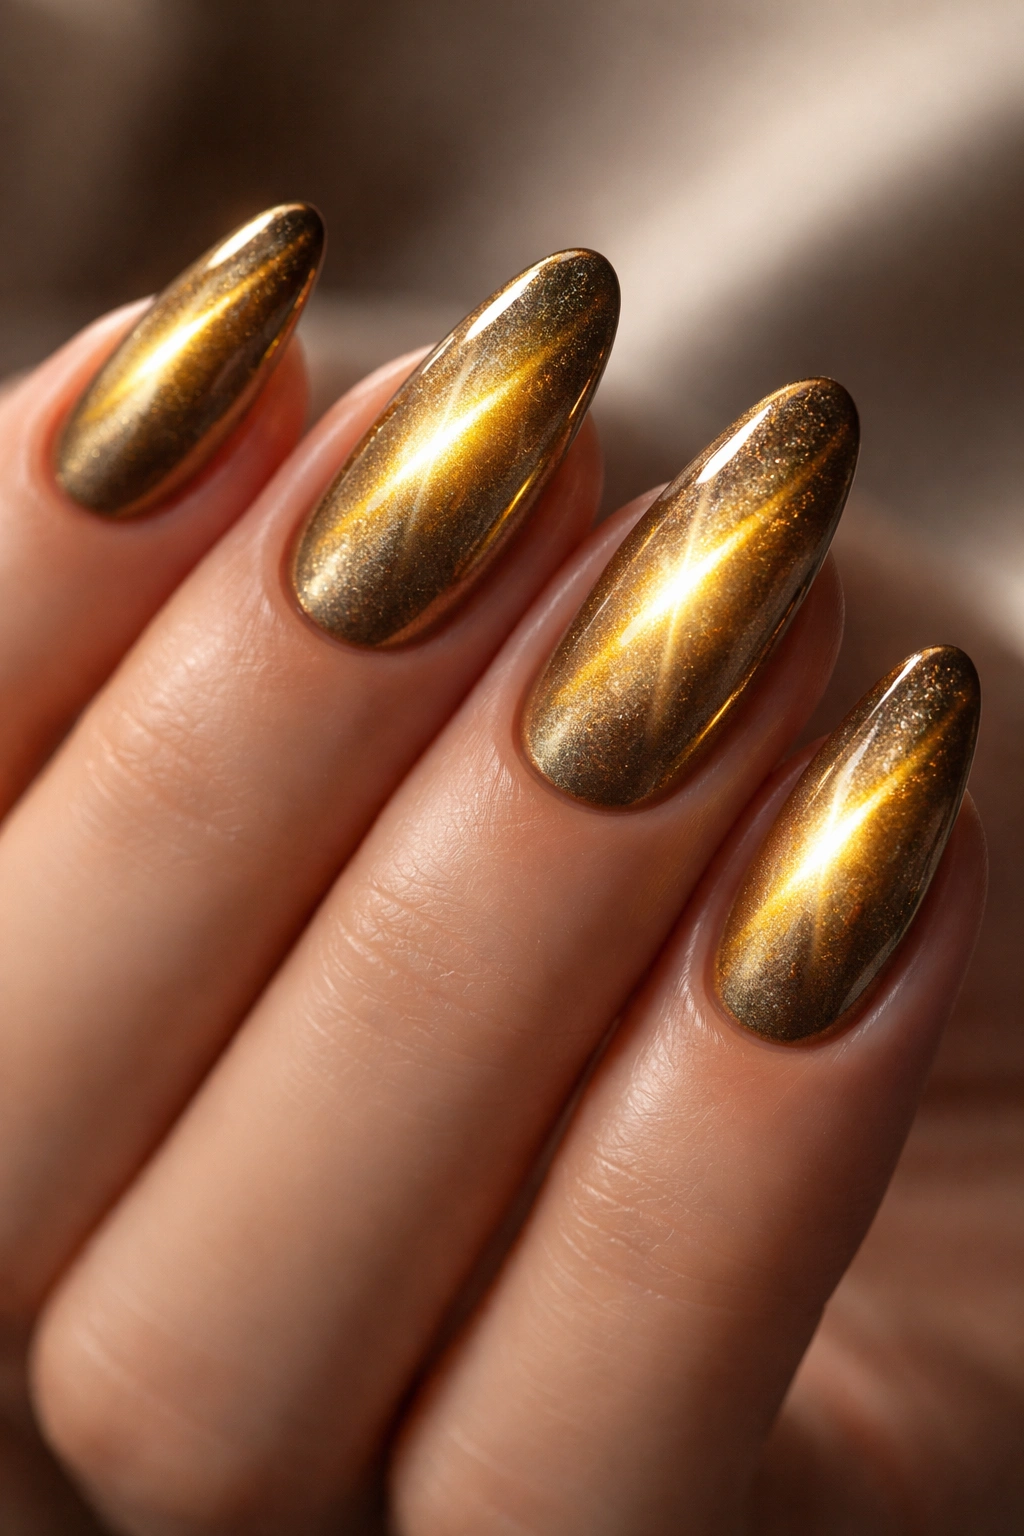
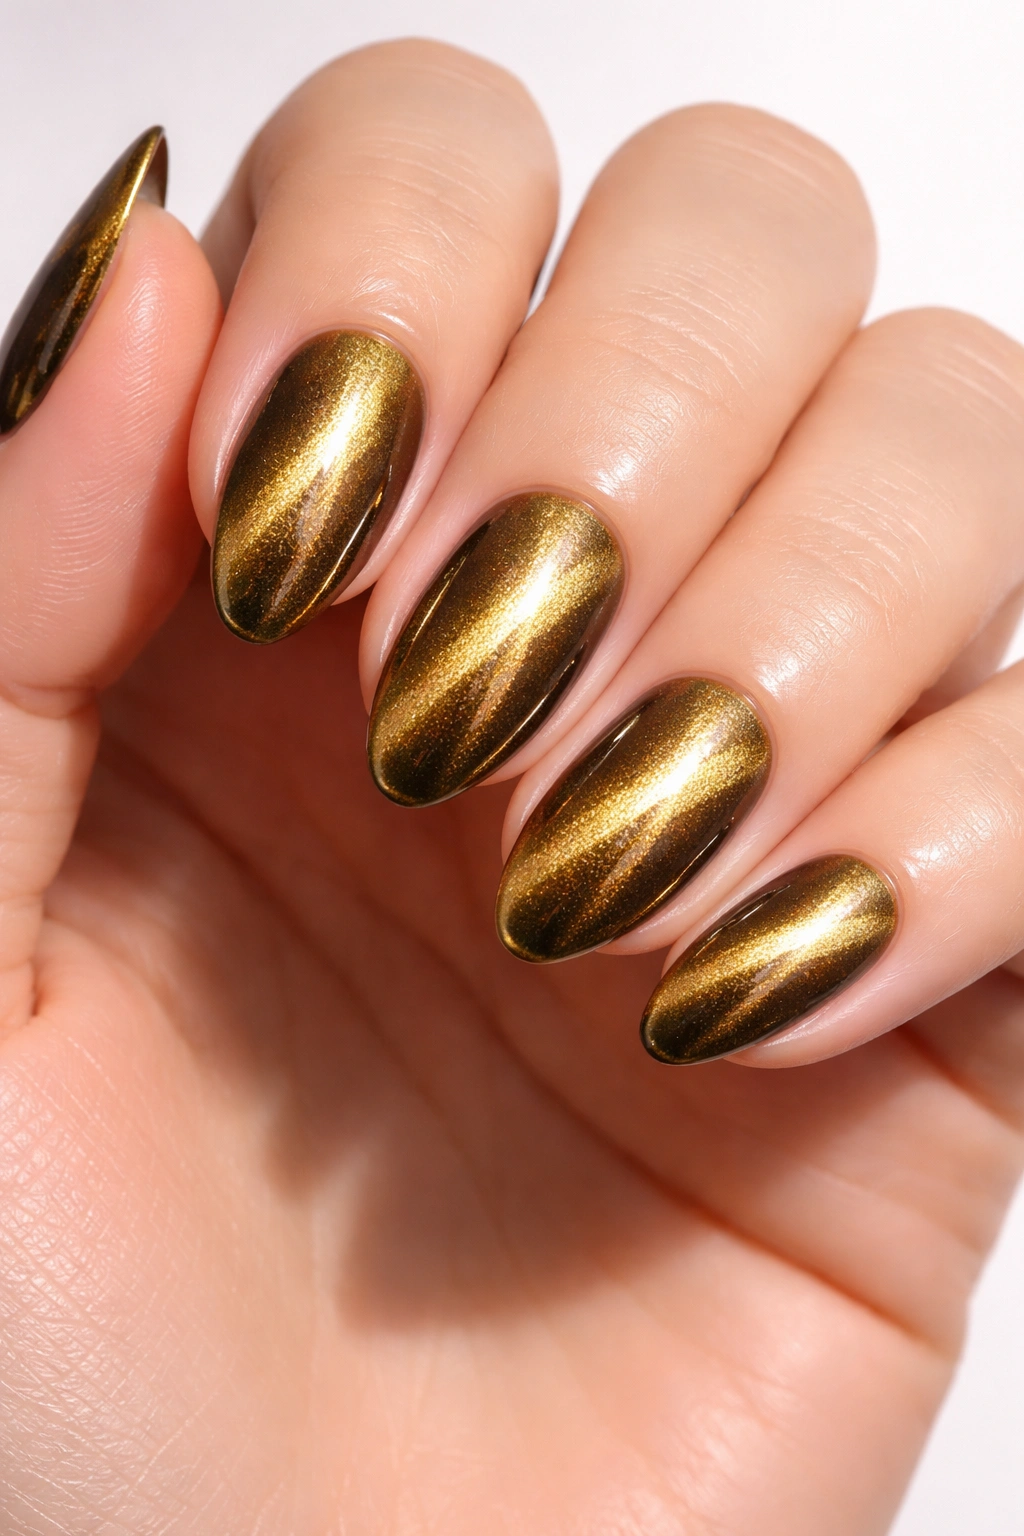
1. Classic Gold Cat Eye Streak
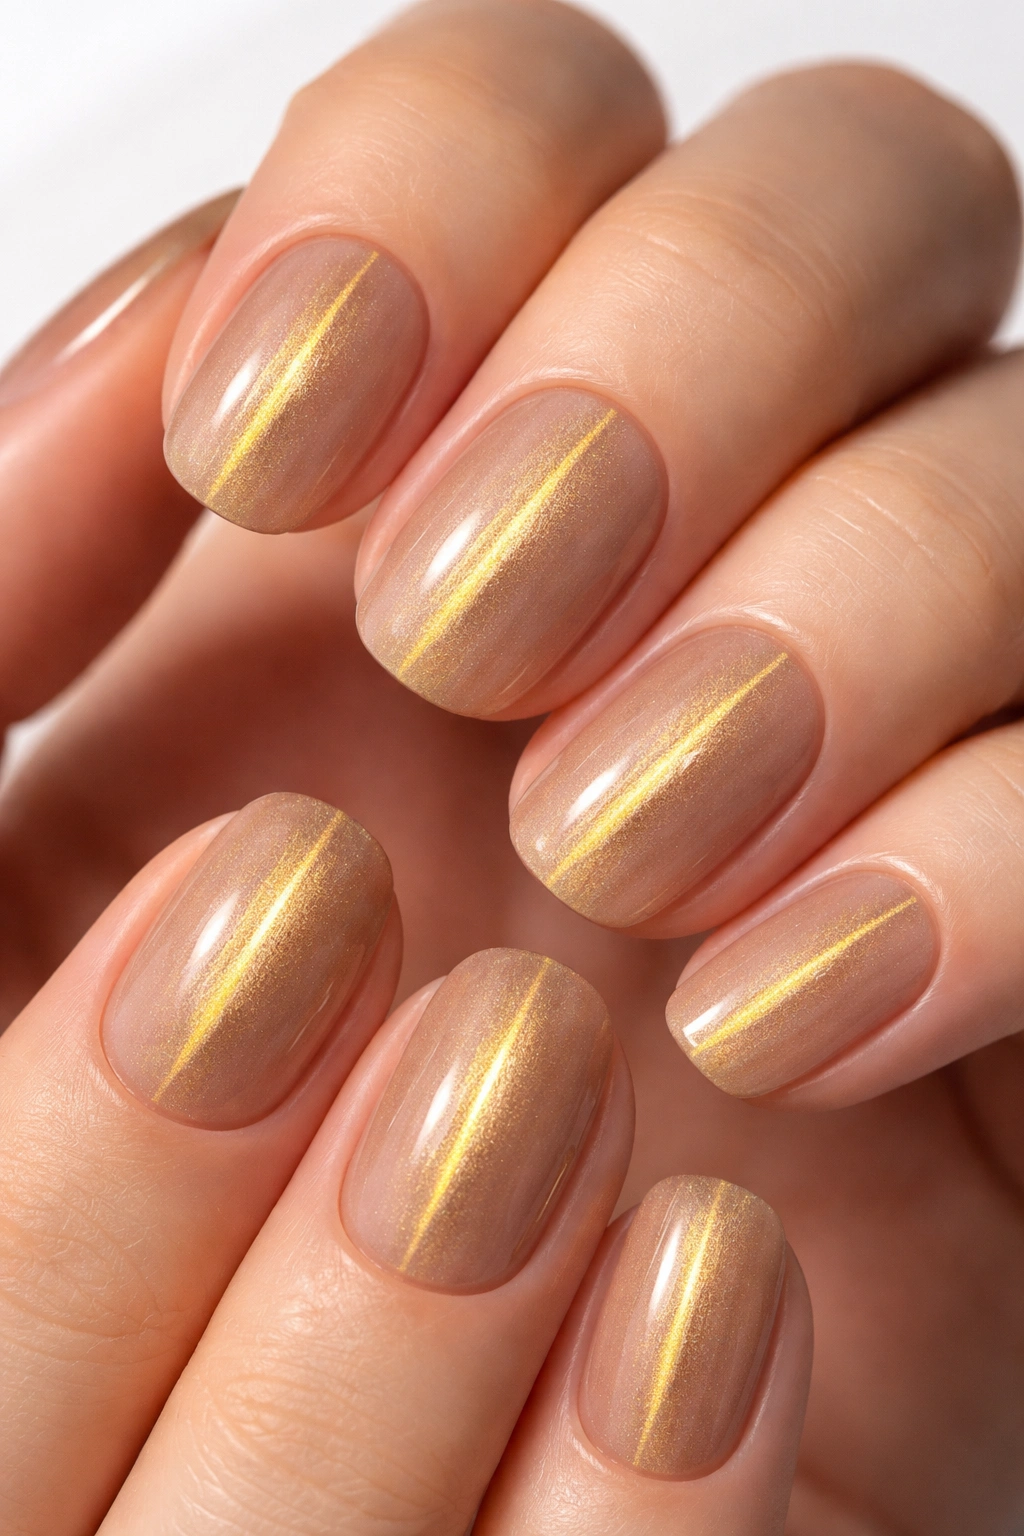
The timeless single-streak design never goes out of style. This look features one luminous gold line running vertically down the center of each nail, creating an elegant, understated effect that works for absolutely any occasion.
Why This Look Never Fails
The classic gold streak offers maximum impact with minimal fuss. By holding the rectangular magnet directly over the center of your nail, the metallic particles gather into a concentrated band of light. The result resembles a sliver of molten gold suspended beneath the polish surface. This technique highlights the natural shape of your nails, making shorter nails appear longer and adding graceful definition to any nail length.
The beauty here lies in its simplicity. You don’t need advanced nail art skills or multiple products. Just your gold cat eye polish, a magnet, and steady hands for about 10 seconds per nail. The single streak creates a refined, almost minimalist aesthetic that pairs beautifully with everything from jeans and a t-shirt to your most formal attire.
Application Tips
Apply your base coat and cure it completely. Then paint a generous layer of gold magnetic polish on one nail at a time. Immediately hold your magnet about 3-5mm above the nail’s center for at least 10 seconds. Don’t rush this step — patience creates stronger, more defined lines. The longer you hold the magnet steady, the more dramatic your metallic streak becomes.
Pro tip: Rest your hand on a flat surface while magnetizing to avoid shakiness. Any movement will blur your line, so stability is everything.
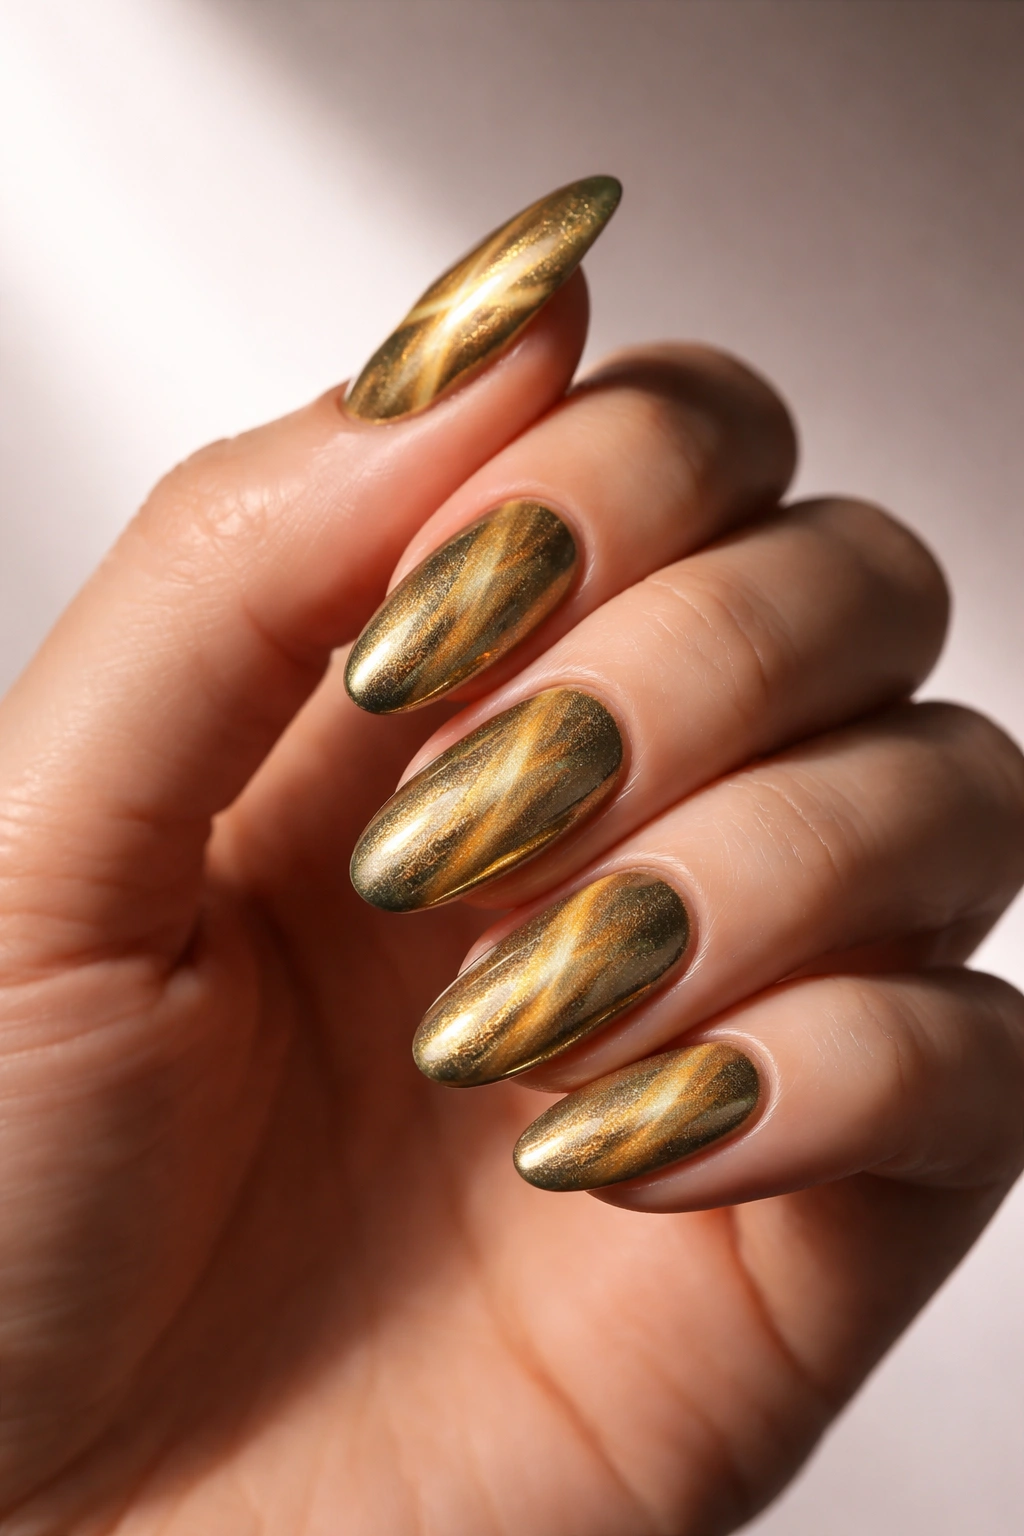
2. Champagne Gold Diagonal Effect
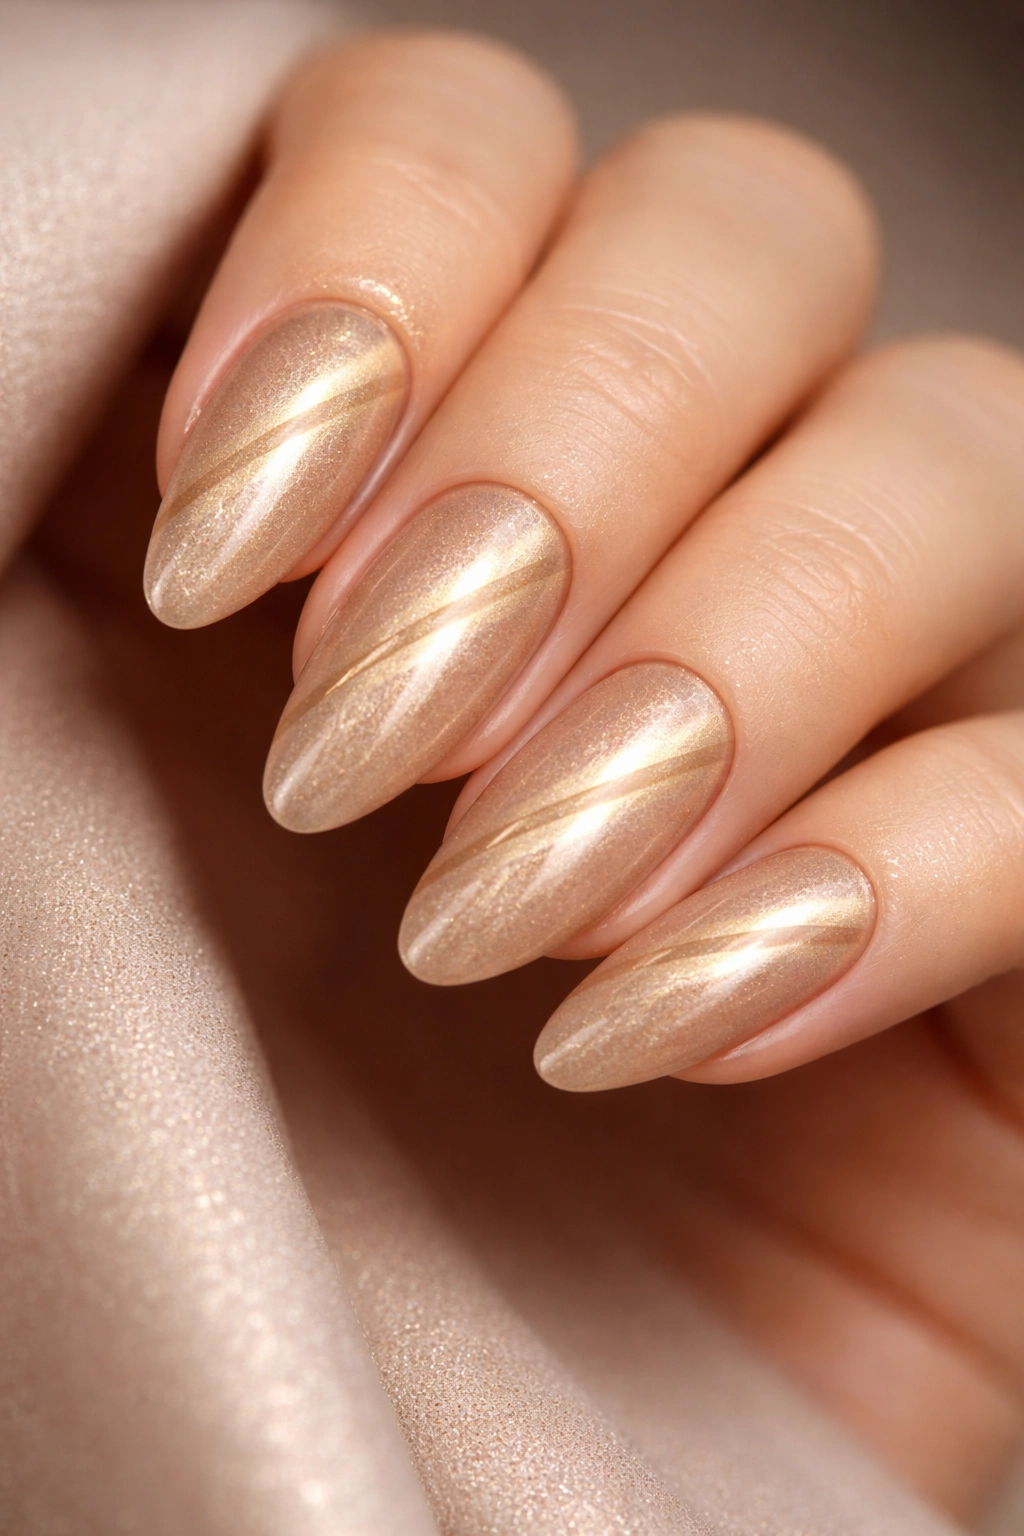
For those who prefer their gold with a softer, more romantic vibe, champagne gold applied diagonally delivers serious sophistication with a modern edge.
What Makes It Special
Champagne gold sits somewhere between traditional yellow gold and rose gold — it’s warm, luminous, and incredibly flattering. When you angle the magnet diagonally across the nail, the light reflection follows that slant, creating a dynamic streak that draws the eye and adds visual interest. This diagonal application makes nails appear longer and more slender, which is why it’s particularly loved for shorter nail beds.
The champagne shade works beautifully in natural light, catching subtle rainbow reflections depending on the formula. Some polishes contain holographic particles alongside the magnetic ones, creating an almost opalescent finish that shifts from gold to pink to bronze as you move your hands.
How to Achieve the Perfect Angle
After applying your polish, position the magnet at a 45-degree angle from one corner of your nail to the opposite corner. Hold it there without wavering for 8-10 seconds. You can angle from upper left to lower right, or reverse it — just keep your direction consistent across all nails for a cohesive look.
For extra dimension, try alternating the diagonal direction on each hand. Your left hand angles one way, your right hand the other. It creates a subtle asymmetry that feels intentional and artistic.
Fun fact: Diagonal cat eyes photograph exceptionally well because the angled light catches beautifully in pictures.
3. Rose Gold Velvet Finish
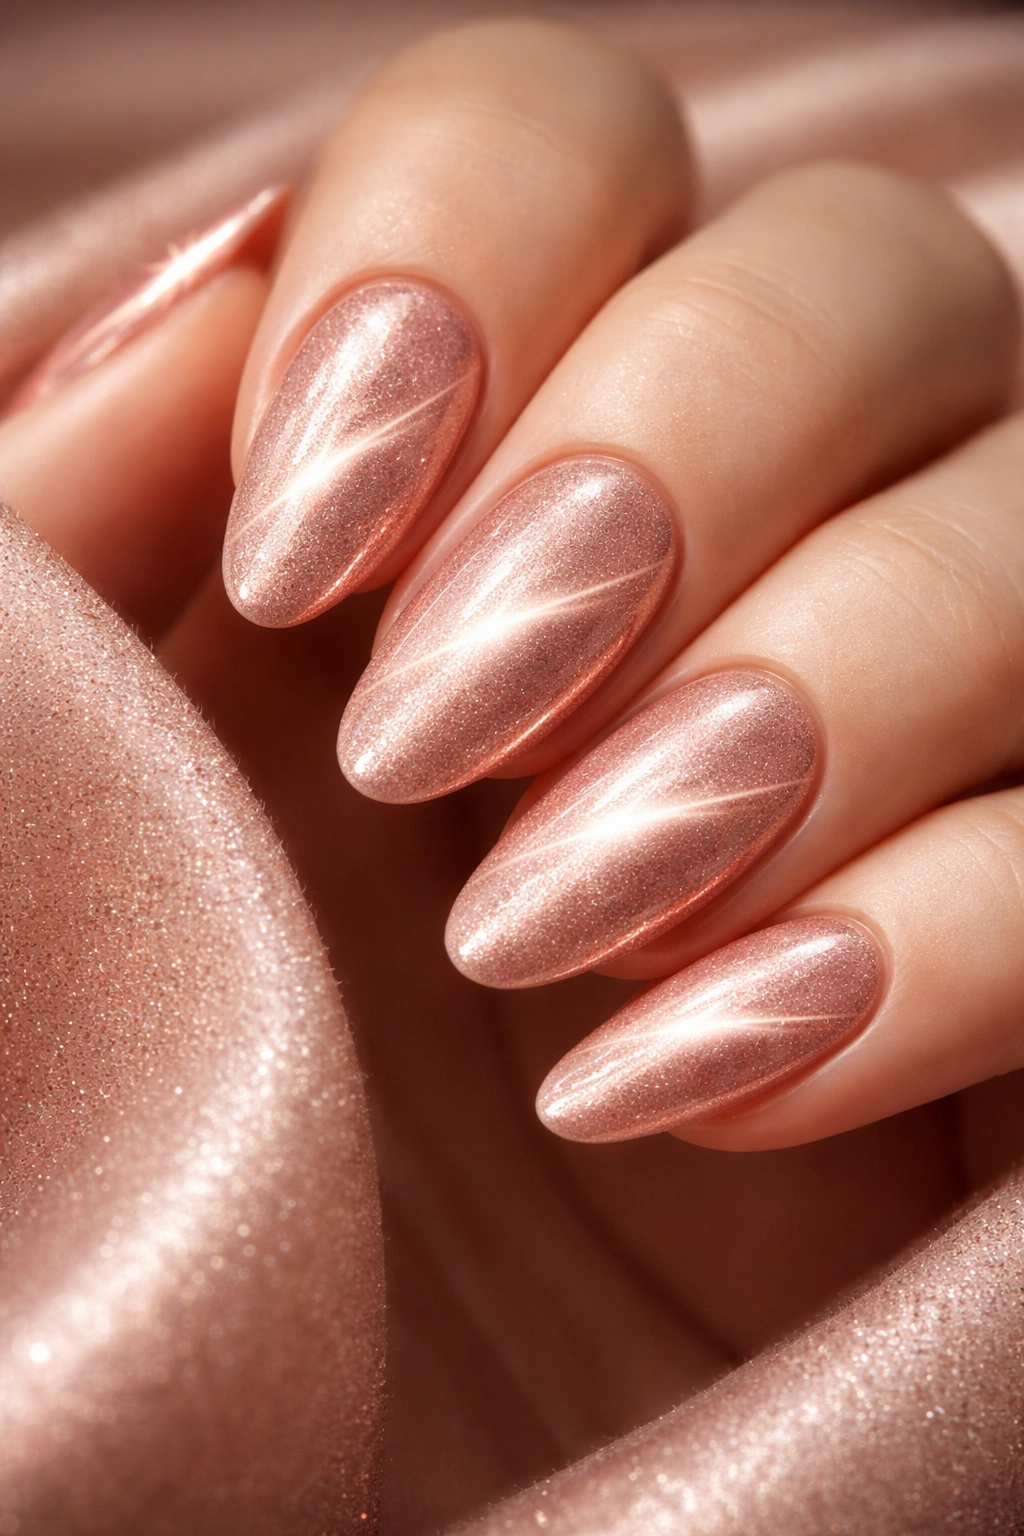
If you’re drawn to warmer metallics, rose gold cat eye nails with a velvet effect offer the perfect blend of cozy and glamorous.
The Velvet Effect Explained
Unlike the sharp, defined line of classic cat eye, the velvet technique creates a softer, diffused glow across the entire nail. You achieve this by using a flat, wide magnet and moving it slowly from one side of the nail to the other while the polish is wet. The magnetic particles distribute more evenly, creating that plush, velvety appearance instead of a concentrated streak.
Rose gold brings warmth and femininity to your manicure. It’s less bold than yellow gold but more interesting than nude polish. The velvet finish amplifies this gentle aesthetic, making it perfect for those who want their nails to feel special without being the loudest thing in the room. Think autumn vibes, cozy sweaters, and that perfect latte.
Creating the Soft Shimmer
Apply a thick, even coat of rose gold magnetic polish. Instead of holding the magnet stationary, position it parallel to one side of the nail and slowly sweep it toward the opposite side. This movement distributes the shimmer particles throughout the polish rather than concentrating them in one line.
The result? A dreamy, all-over glow that catches light from multiple angles. Your nails will have depth and dimension without harsh lines.
Pro tip: Layer rose gold velvet over a nude or soft pink base color for added depth and a more complex finish.
4. Galaxy Gold Shimmer
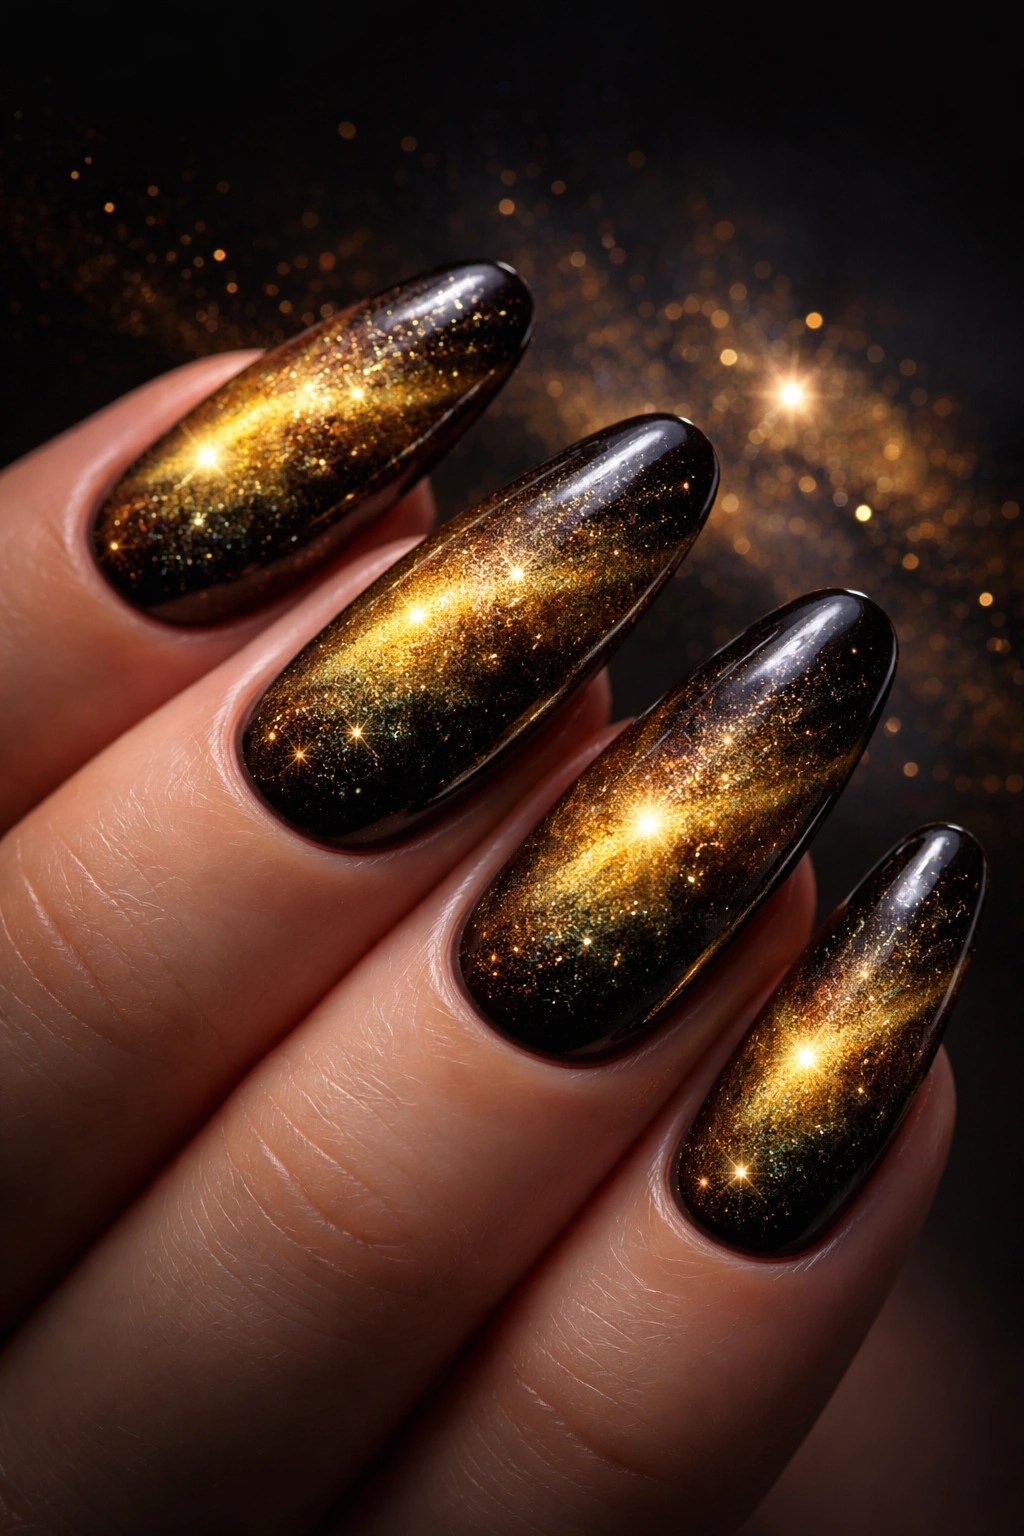
For maximum drama, galaxy gold cat eye nails combine deep, dark bases with explosive gold shimmer that mimics starlit skies.
Why It’s So Striking
The galaxy effect starts with a dark foundation — think black, deep navy, or rich burgundy. When you apply gold magnetic polish over these dark shades, the contrast becomes absolutely stunning. The gold particles seem to float in space, creating depth that looks genuinely three-dimensional. It’s cosmic, mysterious, and completely captivating.
This technique allows you to play with multiple magnet positions on a single nail. Create irregular patterns by moving the magnet around at different angles before curing. The result resembles nebulae and star clusters suspended in the cosmos. Some nail enthusiasts even add tiny rhinestones or gold flakes to enhance the celestial vibe.
Layering for Maximum Depth
Start with your dark base color and cure it completely. Apply your gold cat eye polish in a moderately thick layer. Use your magnet in multiple positions — hold it over one area for a few seconds, shift to another spot, then maybe create a diagonal sweep. Don’t overthink it; the beauty of galaxy nails lies in their organic, unpredictable nature.
Seal everything with a glossy top coat and cure again. The shine intensifies the dimensional effect, making those gold particles appear to hover at different depths within the polish.
Fun fact: Galaxy gold nails look completely different under various lighting conditions — daylight, lamp light, and evening mood lighting each reveal new details.
5. Bronze Ombré Cat Eye

Bronze adds an earthy, sophisticated twist to gold cat eye nails, especially when blended in an ombré gradient.
The Warmth of Bronze
Bronze sits on the warmer, more muted end of the gold spectrum. It’s less flashy than bright gold but richer than plain brown. When you incorporate ombré techniques, you create a gradual shift from deeper bronze at the base to lighter, more golden tones at the tips. The magnetic effect adds another layer of complexity, creating movement within an already dynamic color transition.
This look feels luxurious and grounded at the same time. It’s perfect if you want something eye-catching but not overly sparkly. The bronze tones work beautifully for those who prefer earthy, neutral aesthetics but still want their nails to have personality.
Blending Bronze Shades
You’ll need at least two shades of bronze or gold magnetic polish — one darker, one lighter. Apply the darker shade at your nail base and the lighter shade at the tips, blending where they meet using a small brush or sponge. While the polish is still wet, use your magnet to create your desired effect throughout the gradient.
The magnetic particles will align within both color zones, creating a cohesive shimmer that flows through the entire ombré. The transition appears seamless, with the cat eye effect unifying the different tones.
Pro tip: Bronze ombré cat eyes pair beautifully with fall and winter wardrobes — think camel coats, chocolate browns, and deep greens.
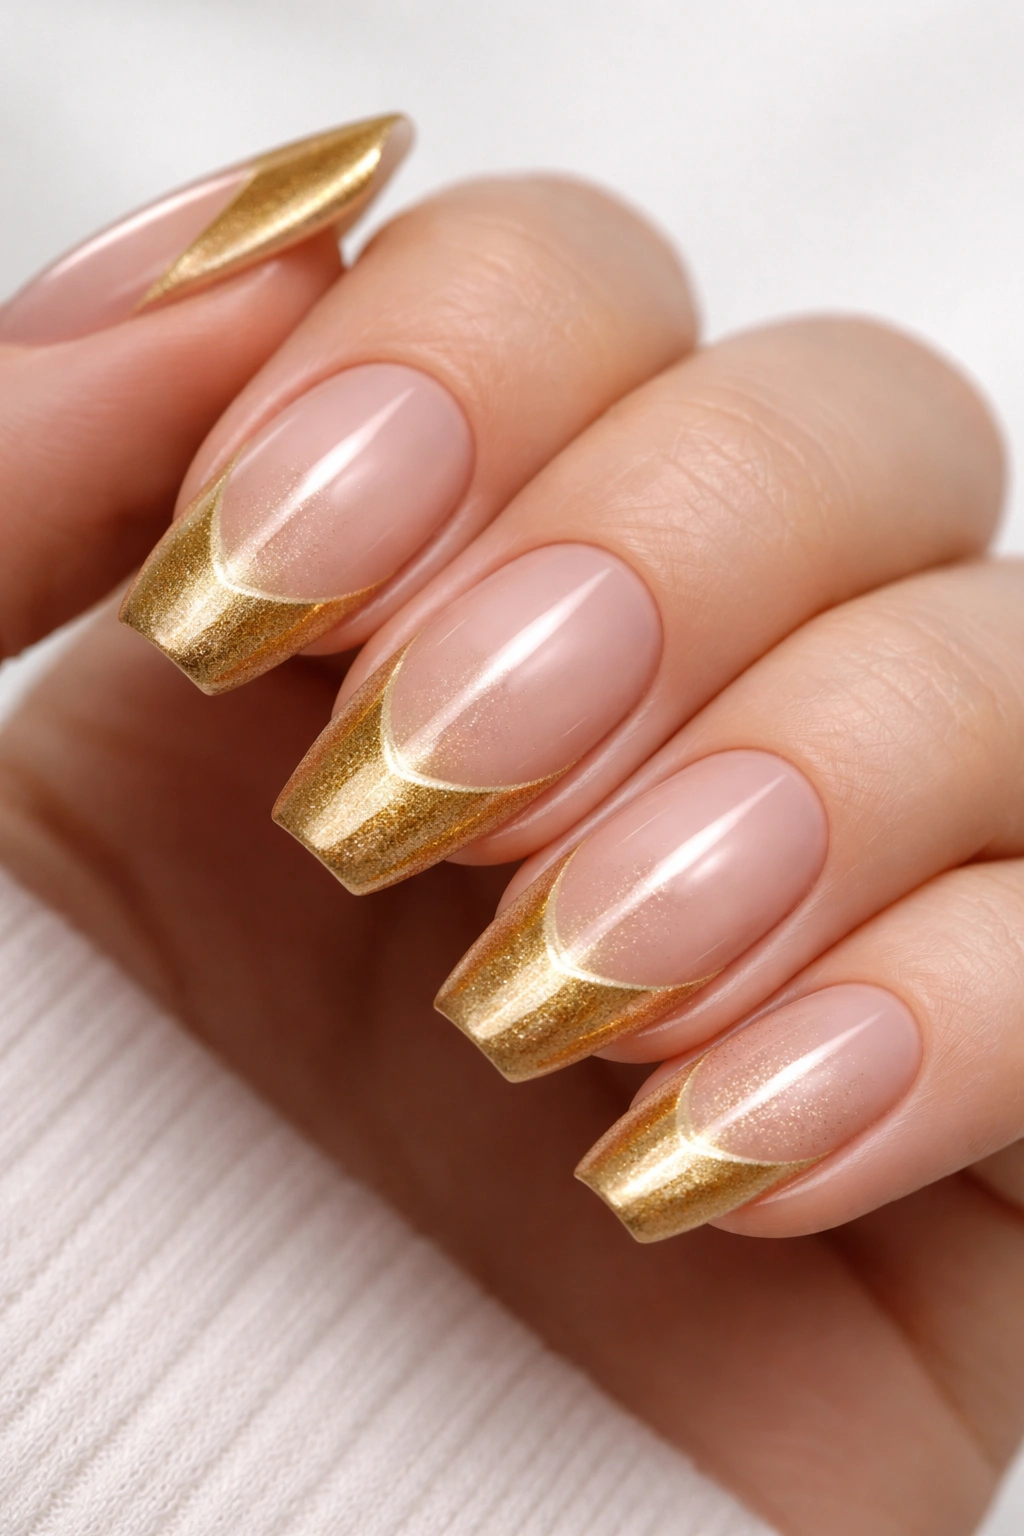
6. Gold French Tip Magnetic
French manicures get a serious upgrade when you add magnetic gold shimmer to those classic tips.
A Modern Take on a Classic
Traditional French tips feature white polish on the nail ends, but swapping that white for magnetic gold creates something fresh and contemporary. The gold shimmer adds dimension to the tips while maintaining that clean, polished French aesthetic. It’s sophisticated enough for professional settings but interesting enough to feel special.
You can go super subtle with just a thin gold line at the very edge, or bold with wider gold tips that cover a third of the nail. The magnetic effect makes even the thinnest application noticeable, so you don’t need thick, chunky tips to make an impact.
Application Technique
Start with a nude or sheer pink base and cure it. Using a thin brush or striping tool, carefully apply your gold magnetic polish to the nail tips in your desired width. Work one nail at a time, magnetizing each tip before moving on. Position the magnet horizontally across the tip to create a stripe that follows the natural curve of your nail edge.
For extra precision, use French tip guides or tape to keep your lines crisp and even. The magnetic shimmer will emphasize any wobbles, so take your time getting those edges smooth.
Fun fact: Gold French tips photograph beautifully for special occasions — they show up in pictures without overwhelming your overall look.
7. Dual-Tone Gold Cat Eye
Why choose one shade of gold when you can have two? Dual-tone designs layer different gold hues for incredible depth.
Playing with Light and Shadow
This technique involves using two different gold magnetic polishes — perhaps a bright yellow gold and a deeper champagne or rose gold. By applying them strategically and magnetizing each layer separately, you create dimension that single-color applications can’t match. The lighter gold might dominate the center of your nail while darker tones frame the edges, or vice versa.
The magnetic effect works on both layers, creating multiple light reflections at different angles. Your nails become tiny, shifting works of art that reveal new details every time you move your hands.
Layering Two Shades Successfully
Apply your first gold shade as a full coverage base and magnetize it in your chosen pattern. Cure completely. Then apply your second gold shade either as an accent — maybe just on the tips or in the center — and magnetize that layer too. The two magnetic effects will stack, creating complex light play.
Alternatively, apply both shades wet in different zones of the nail and use your magnet to pull them together slightly where they meet. This creates a blended effect with distinct tonal shifts.
Pro tip: Use complementary gold tones (warm with warm, or cool with cool) rather than contrasting temperatures for the most harmonious result.
8. Glitter Gold Cat Eye Overlay
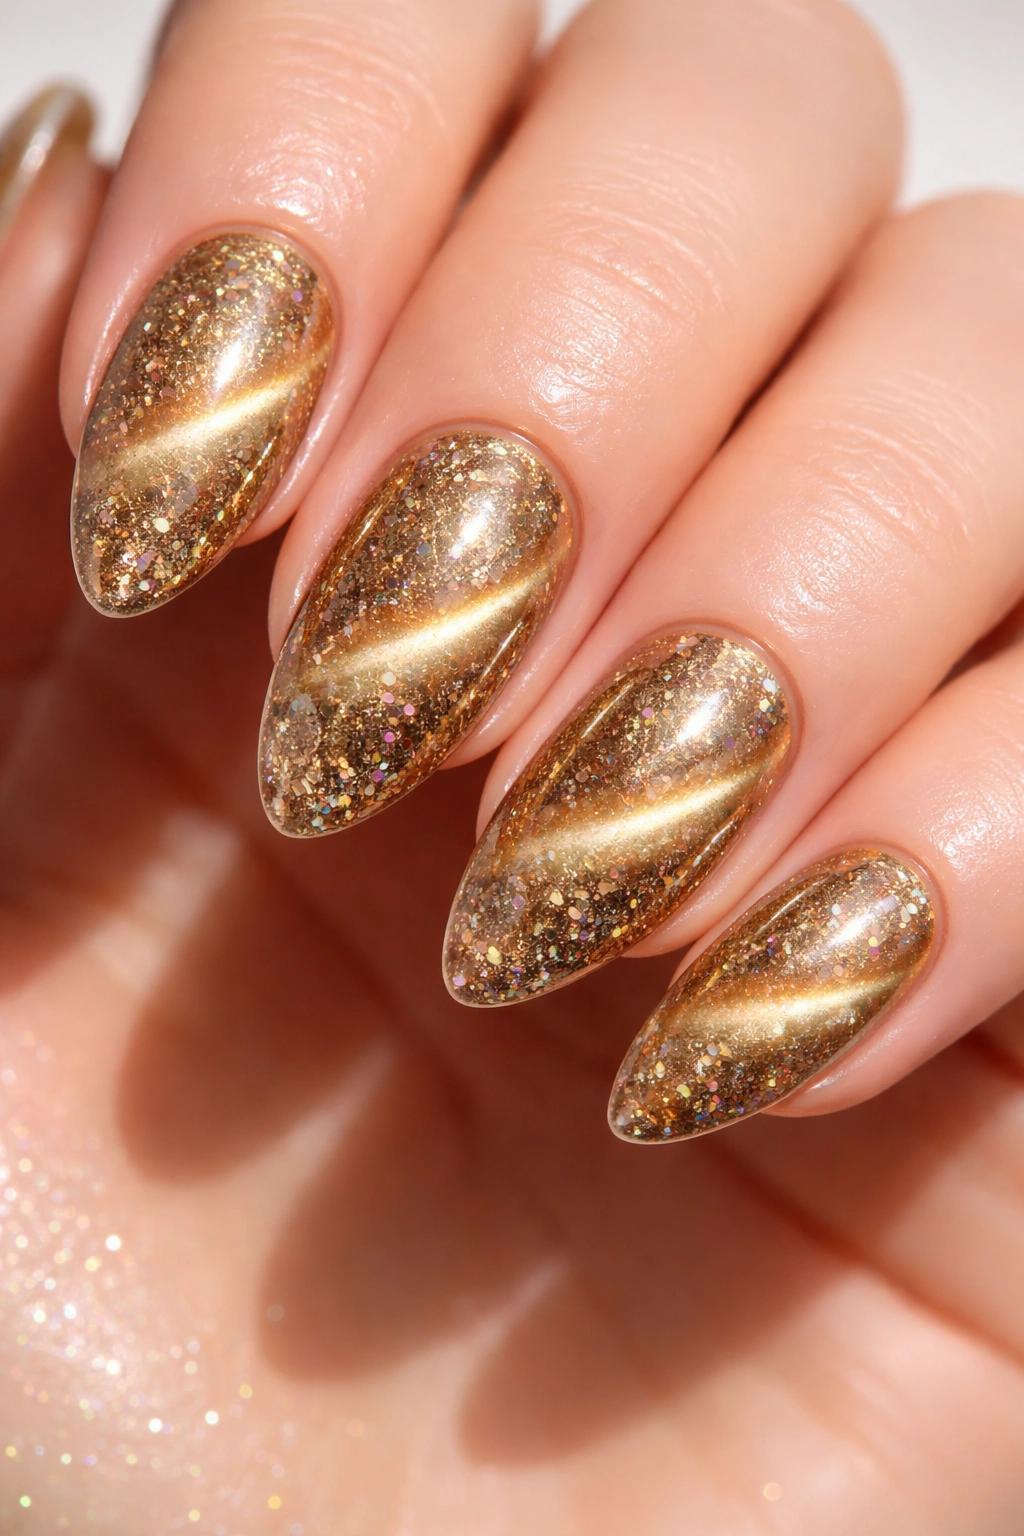
Magnetic shimmer meets traditional glitter in this maximalist approach that’s all about sparkle and shine.
Doubling Down on Dimension
Some magnetic polishes contain both magnetic particles and traditional glitter pieces. When you apply these formulas, you get the directional shimmer of the cat eye effect plus the all-over sparkle of glitter polish. It’s texture, dimension, and pure glamour all in one bottle.
If your magnetic polish doesn’t include glitter, you can layer a gold glitter topper over your magnetized cat eye before sealing with top coat. This adds another level of visual interest — the glitter catches light differently than the magnetic particles, creating a multifaceted finish.
Balancing Shimmer and Sparkle
If you’re using a glitter-infused magnetic polish, apply it generously and magnetize as usual. The glitter won’t respond to the magnet, but it’ll surround your cat eye effect with extra sparkle. For layered glitter, magnetize your cat eye polish first, cure it, then dab on your glitter topper before your final top coat.
Be mindful not to overwork the glitter layer — excessive brushing can disturb your carefully magnetized pattern underneath. Pat or dab the glitter on gently rather than brushing it.
Fun fact: Glitter gold cat eyes are perfect for celebrations and parties — they’re festive without being costume-y.
9. Gold Holographic Cat Eye
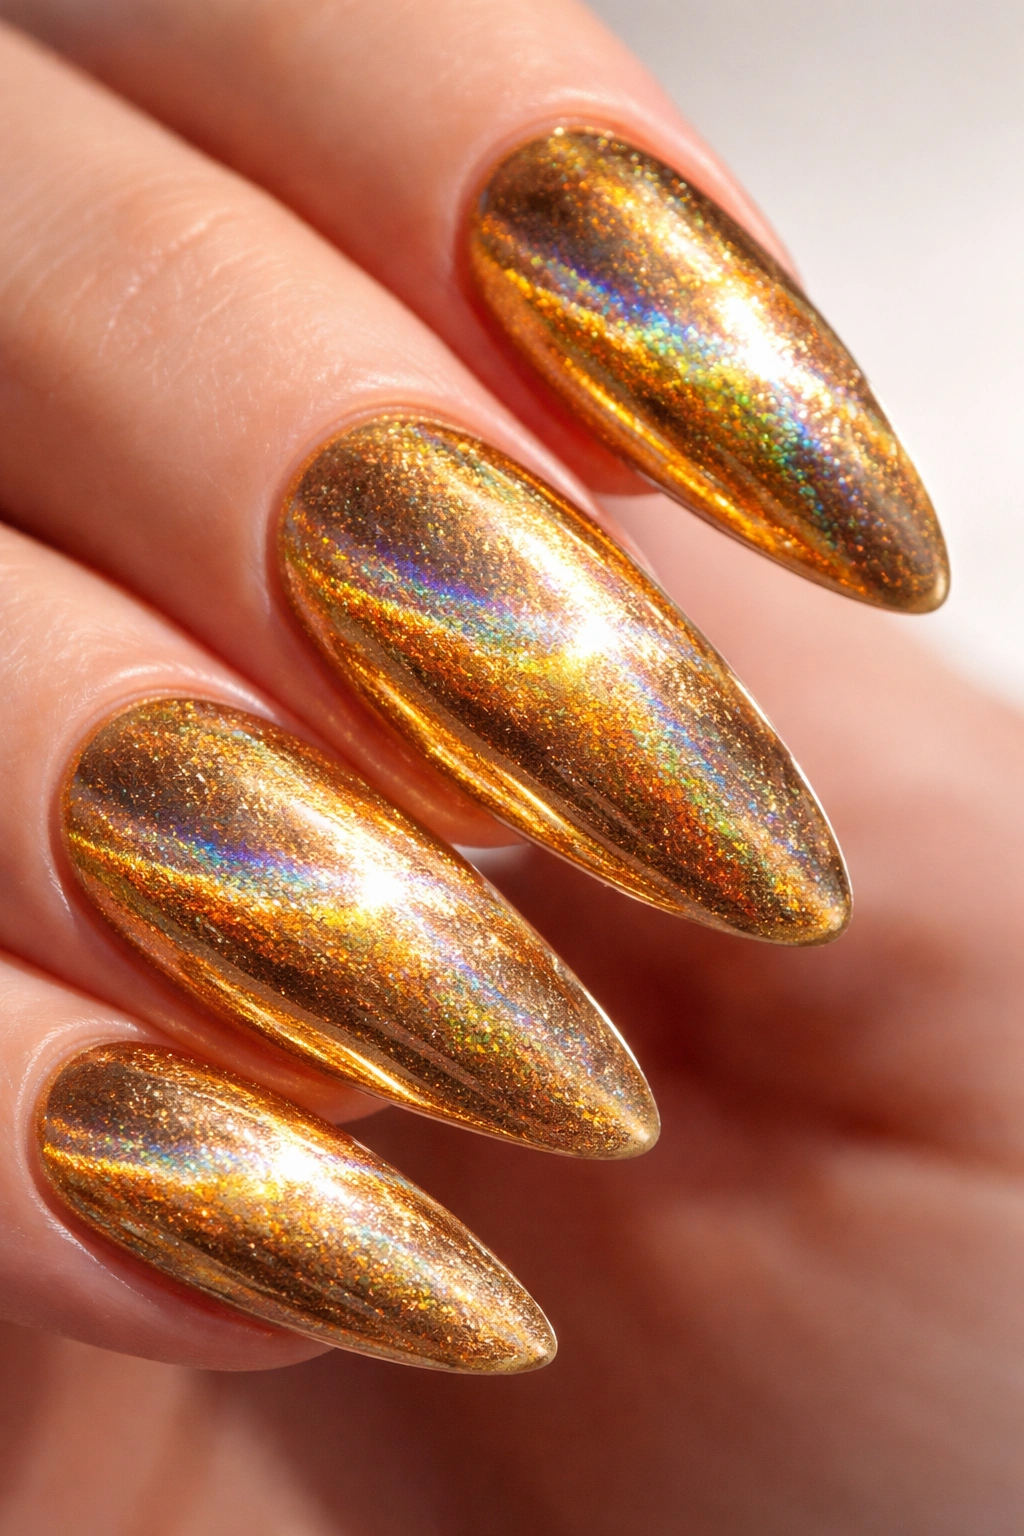
Holographic formulas take gold cat eye nails into rainbow territory, shifting through the spectrum as light hits from different angles.
The Rainbow Effect
Holographic polishes contain special pigments that refract light like a prism, creating rainbow flashes across the nail surface. When combined with magnetic gold particles, you get both the directional cat eye shimmer and the multi-colored holographic sparkle. The effect is nothing short of magical.
In bright light, these nails explode with color — you’ll see flashes of pink, orange, green, and blue dancing across the gold base. In lower light, they settle into a rich, warm gold with subtle rainbow hints. The variety keeps things interesting no matter where you are.
Choosing Holographic Formulas
Look for magnetic polishes specifically labeled as holographic or “holo.” These contain the special pigments needed for that rainbow effect. Apply them slightly thicker than regular polish to allow both the holographic particles and magnetic particles room to work their magic.
When magnetizing, expect the holographic element to remain fairly evenly distributed while the magnetic particles concentrate in your cat eye pattern. The combination creates incredible visual complexity.
Pro tip: Holographic gold cat eyes look absolutely stunning in natural sunlight — plan outdoor photos to capture their full glory.
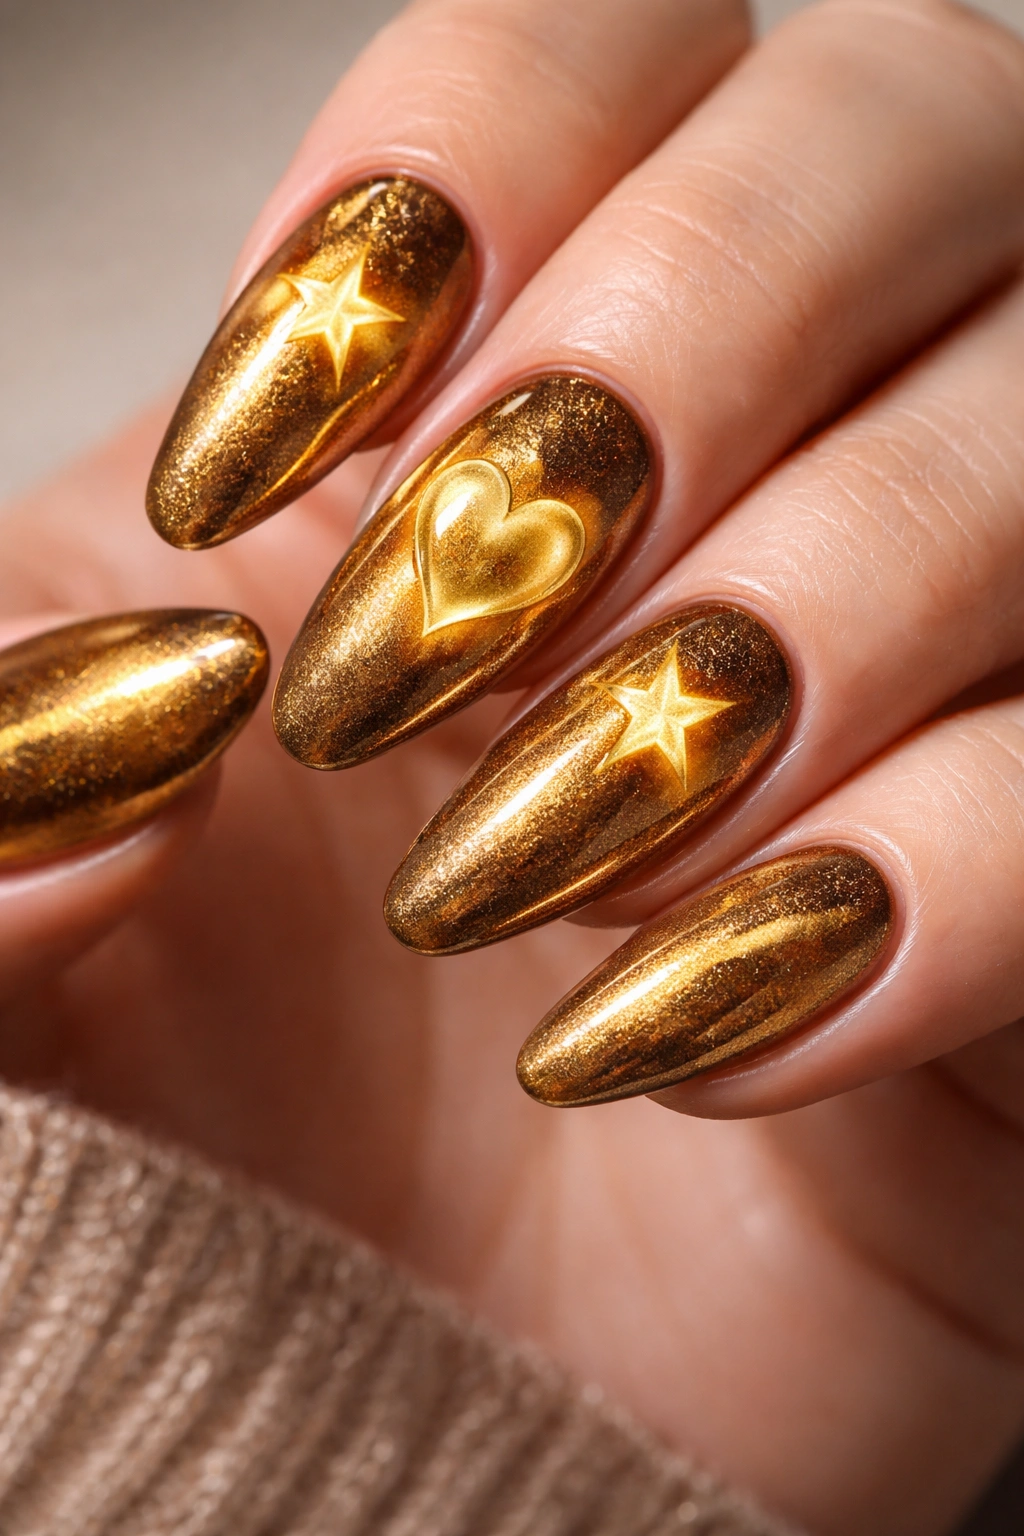
10. Amber Gold 3D Effect
For the deepest, most dimensional gold cat eye nails, amber gold formulas with 3D magnetic techniques deliver serious wow factor.
What Makes It Three-Dimensional
Amber gold has a rich, honey-like warmth that’s deeper than bright gold but more vibrant than bronze. When you use specialized magnets designed for 3D effects (often called “super magnets”), you can create patterns that appear to lift off the nail surface. Hearts, stars, and other shapes become possible, all in shimmering amber gold.
The 3D effect comes from using magnets with specific pattern cutouts. When held over wet polish, the magnetic field creates concentrated shimmer in the shape of the cutout while the surrounding area remains more diffused. The contrast between these zones creates the illusion of raised patterns.
Creating Dimensional Patterns
Apply your amber gold magnetic polish generously. Position your 3D magnet (whether it’s a heart shape, star, or geometric pattern) directly over the nail and hold it completely still for 10-15 seconds. The longer you hold, the more defined your shape becomes. Cure immediately without disturbing the polish.
These special magnets work best with polishes that have high concentrations of magnetic particles. Look for formulas specifically marketed for 3D cat eye effects.
Fun fact: Some nail artists create custom patterns by placing multiple magnets in sequence, building layers of dimensional effects before the final cure.
Keeping Your Gold Cat Eye Nails Flawless
Once you’ve created your perfect gold cat eye manicure, you’ll want it to last. Proper application and care make all the difference between a manicure that chips in days and one that looks fresh for weeks.
Application Best Practices
Always start with clean, properly prepped nails. Buff the surface lightly to remove oils and create better adhesion. Apply a quality base coat and cure it fully before adding your magnetic polish. When applying the cat eye gel, work with moderately thick layers — too thin and the magnetic effect won’t show properly; too thick and you risk wrinkling or poor curing.
Give yourself time when magnetizing. Rushing this step creates weak, barely-visible effects. Hold that magnet steady for the full recommended time, even if it feels like forever. Your patience will be rewarded with bold, beautiful shimmer.
Seal everything with a high-quality top coat. This protects your magnetic design and adds glossy shine that intensifies the metallic effect. Make sure to cap the free edge of your nails with top coat to prevent chipping.
Maintenance and Longevity
Cat eye gel manicures can last 21-28 days with proper care. Apply cuticle oil daily to keep your nails and surrounding skin healthy and hydrated. Wear gloves when cleaning or doing dishes — harsh chemicals and prolonged water exposure can compromise even the best gel manicure.
If you notice any lifting at the edges, resist the urge to peel or pick. This damages your natural nail. Instead, file the lifted area smooth and apply a thin layer of top coat to seal it down temporarily until you can get a proper fill or removal.
When you’re ready to remove your manicure, use proper gel removal techniques rather than forcing or peeling the polish off. Soak cotton pads in acetone, wrap them around your nails with foil, and wait patiently for the gel to break down.
Final Thoughts
Gold cat eye nails offer endless creative possibilities while remaining elegant and wearable. Whether you prefer the understated beauty of a classic single streak or the drama of galaxy shimmer, there’s a gold magnetic design that fits your style perfectly.
The magic of these manicures lies in their unique ability to shift and change with every movement. They’re never static, never boring. Each time light hits from a new angle, you’ll notice something different — a brighter shimmer here, a deeper gold tone there. It’s like wearing tiny, portable art installations on your fingertips.
Don’t be intimidated by the magnetic technique. Yes, it requires a bit more attention than regular polish, but the learning curve is gentle. After your first few nails, you’ll develop a feel for magnet placement and timing. Before long, creating stunning cat eye effects will become second nature.
Experiment with different gold tones to find what flatters your skin tone and matches your personal aesthetic. Try various magnet angles and patterns. Layer different shades. Add glitter or holographic toppers. The beauty of nail art is that it’s temporary — if you don’t love something, you can change it in a few weeks.
Gold cat eye nails bring together the best of nail art technology — the precision of gel, the visual interest of magnetic particles, and the timeless appeal of metallic shimmer. They’re sophisticated enough for any setting yet eye-catching enough to make you feel special every single day you wear them. Give them a try, and prepare to become mesmerized by your own manicure.
