

Nail foil transforms ordinary manicures into dazzling works of art, and here’s the best part—you don’t need a salon appointment to make it happen. Foil nail art uses ultra-thin metallic or patterned sheets that transfer onto your nails using a special adhesive or gel layer, delivering that high-impact, professional-looking sparkle at a fraction of the cost. Whether you’re drawn to minimalist designs or bold statement nails, foil gives you endless creative freedom without requiring advanced nail art skills.
What makes foil nail art so appealing is its versatility. You can go subtle with a single metallic accent, or go full-on glamorous with a complete foil coverage. It works beautifully on natural nails, gel polish, and acrylics—making it accessible no matter what your nail situation looks like. The technique itself isn’t complicated; it just requires the right supplies, a little patience, and proper technique to get those crisp, clean transfers.
The best part? Foil transfers last about a week when sealed properly with a quality top coat, giving you plenty of time to show off your handiwork before switching to your next design. Once you master the basics, you’ll find yourself experimenting with different foil colors, patterns, and placement options constantly. Let’s walk through ten stunning foil nail designs you can absolutely recreate at home, even if you’ve never tried nail art before.
1. Minimal Gold Accent Foil
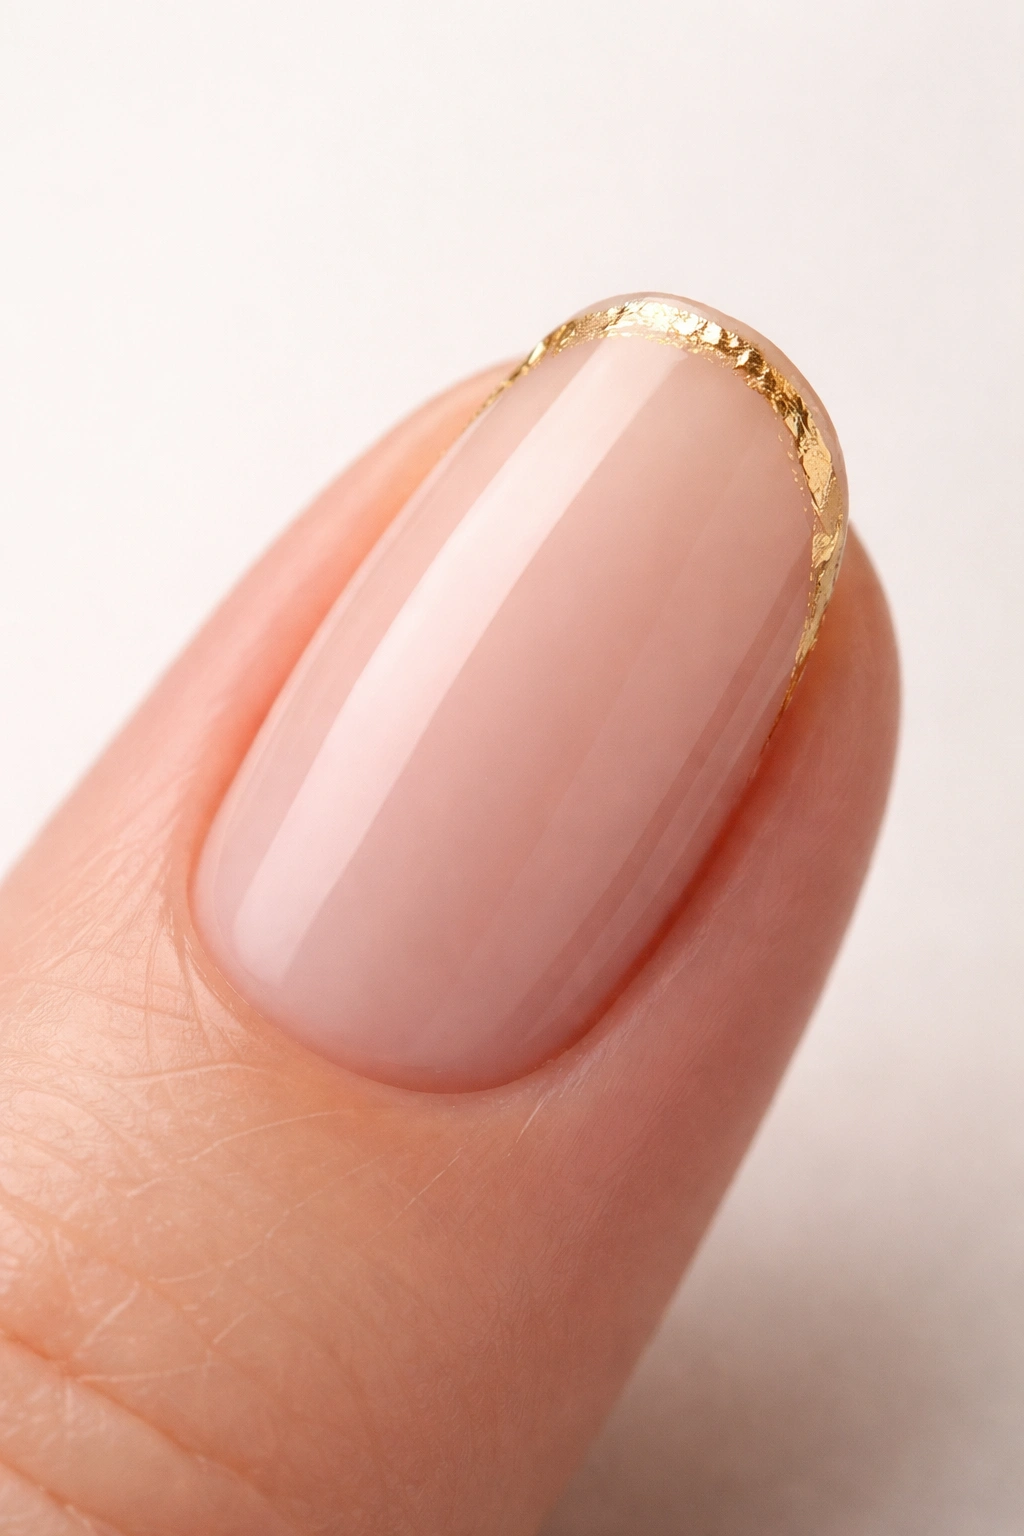
Sometimes the most elegant manicures are the ones that don’t try too hard. A single gold foil accent on one nail or along the cuticle line delivers polish and intention without overwhelming your look. This design pairs perfectly with nude, milky, or sheer pink bases that let the metallic shine become the star of the show without competing colors fighting for attention.
Why It Works So Well
The beauty of minimal foil designs is that they feel modern and intentional—like you actually planned this look rather than just randomly applying glitter. Gold foil has this sophisticated quality that instantly elevates a basic manicure into something you’d see on a fashion influencer. Placing the foil accent on just one or two nails (usually your ring finger or thumb) draws the eye without making the statement too loud. This approach is perfect if you work in a professional environment where you want to show personality without breaking dress codes.
How to Get the Look
- Apply a neutral base polish in your preferred shade—nude, milky pink, or soft beige work beautifully
- Allow the base to dry completely (or cure if using gel)
- Apply a thin, even layer of foil adhesive only to the area where you want the gold foil to sit
- Wait 15-20 minutes for the adhesive to become tacky (it should look clear when dry)
- Cut a small piece of gold foil slightly larger than your accent area
- Press the foil firmly onto the tacky surface, rubbing gently to ensure full transfer
- Peel away the backing layer slowly and carefully
- Seal with a quality top coat to lock in the shine
Pro Tip
Rose gold foil offers a softer alternative to traditional yellow gold, especially if you have cool undertones in your skin. The warmth is still there, but it feels more contemporary and blends beautifully with almost any base color you choose.
2. Marble Foil Nails
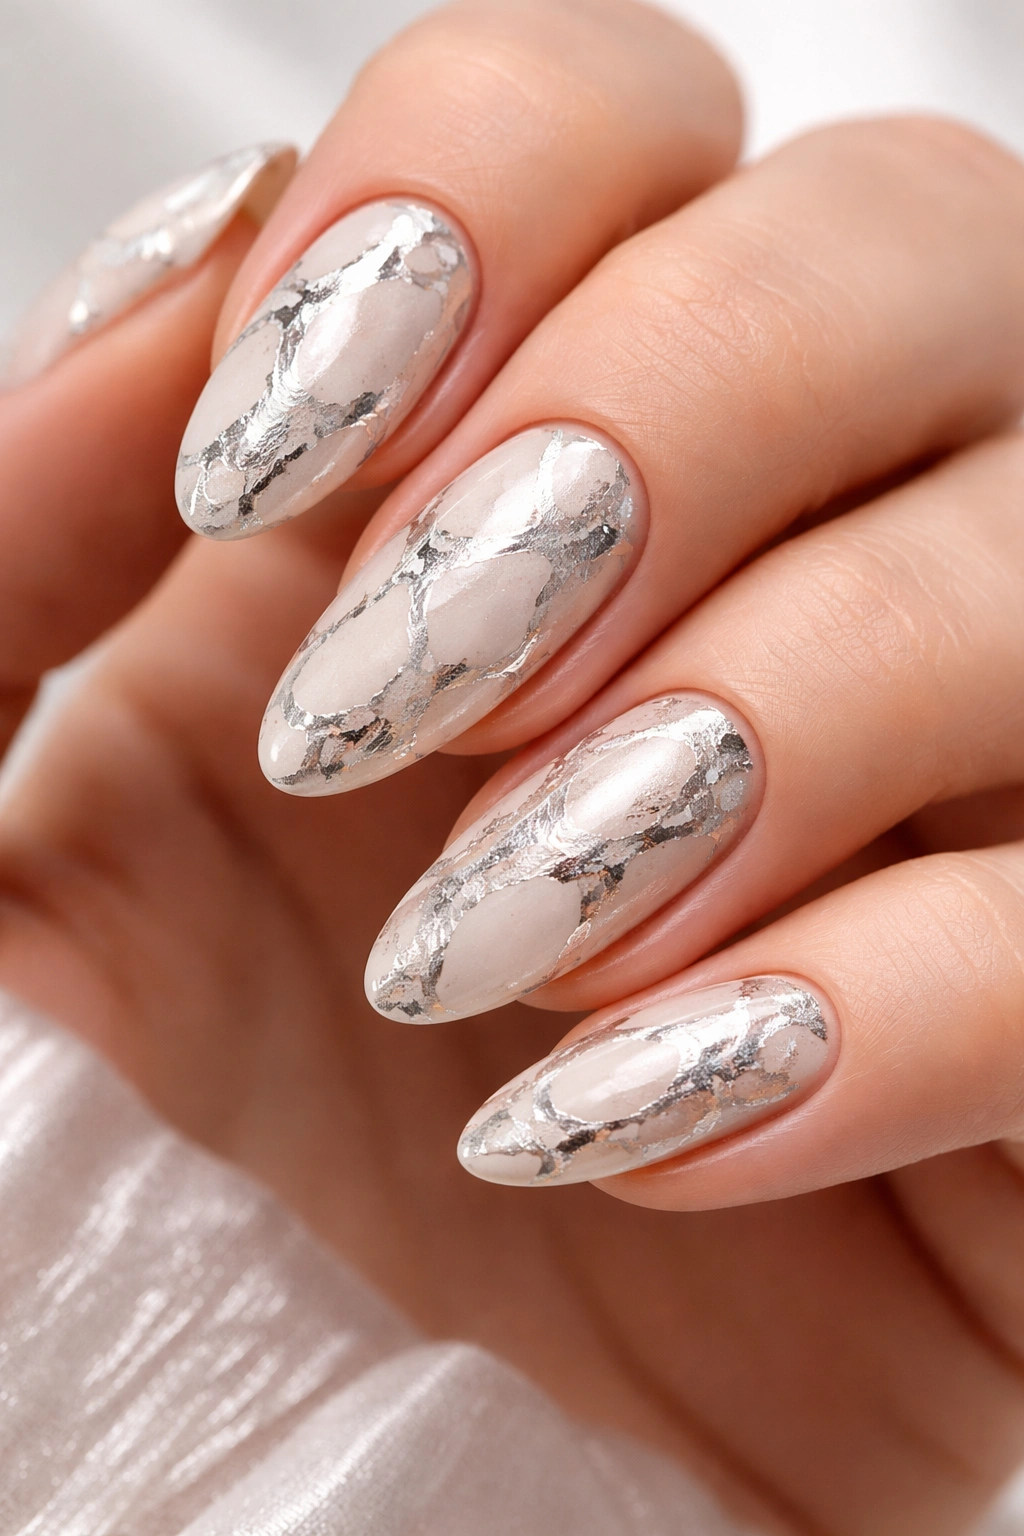
Create the sophisticated look of natural stone by combining foil with a marble effect. Marble nails have that timeless elegance that works for everything from casual weekends to formal events, and when you add foil to the mix, the entire design gains dimension and luxury. Use a white or nude base and apply silver foil in irregular, organic streaks to mimic the natural veining found in real marble.
What Makes This Design Special
Marble is one of those nail art designs that looks incredibly complex but is actually quite forgiving once you understand the technique. The key is embracing asymmetry—real marble doesn’t have perfect symmetrical patterns, so your irregular foil placement actually enhances the authenticity of the look. When light hits the foil portions, they shimmer and shift, making the stone effect feel even more realistic and expensive-looking. People genuinely think you’ve paid for a professional manicure when they see this design done right.
Step-by-Step Application
- Paint all nails with a white or soft nude base color and let dry completely
- Apply foil adhesive in random, organic patterns on one nail at a time—think veining, not stripes
- Allow adhesive to become tacky (15-20 minutes usually does it)
- Cut strips of silver foil and press firmly onto the adhesive in the same patterns
- Rub gently with a soft tool to ensure complete transfer
- Peel away the foil backing slowly
- Use a glossy top coat to seal and create that polished stone appearance
- A second thin coat of top coat adds extra dimension and durability
Quick Fact
The most convincing marble nails use multiple shades of foil or metallic colors. Try combining silver with gray foil on different areas for a more complex marble effect that catches light in interesting ways.
3. Galaxy Foil Nail Art
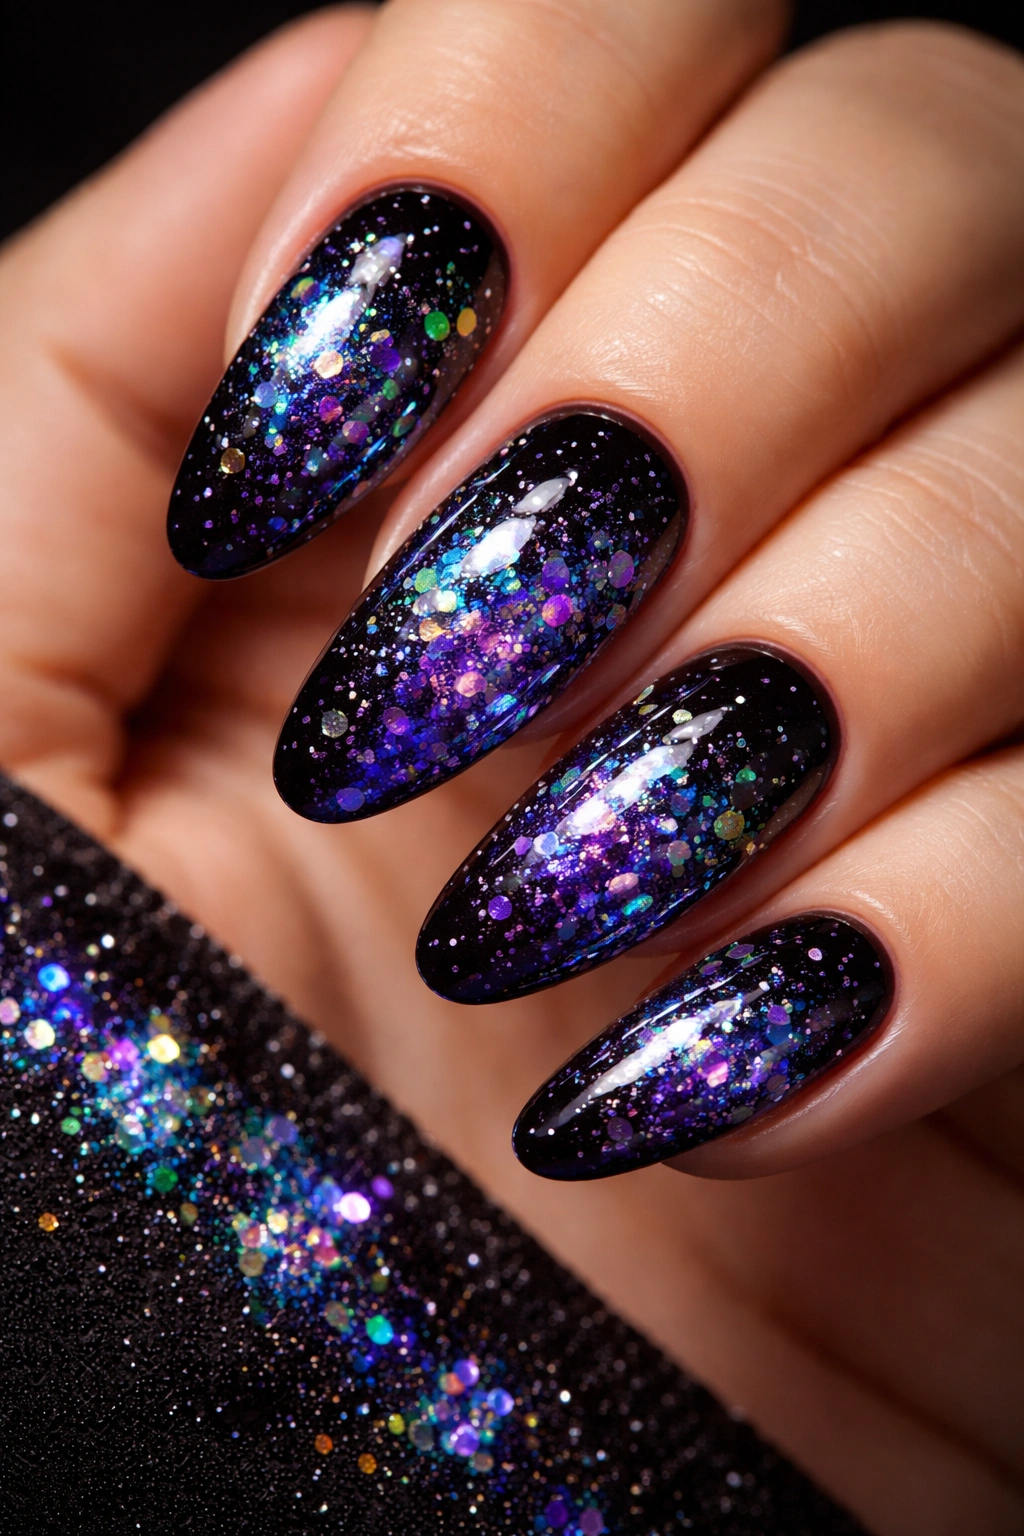
Take your nails to outer space with a mystical galaxy design featuring deep, moody base colors and scattered holographic foil creating a starry effect. This design taps into the romance of the cosmos—it’s dreamy, dramatic, and absolutely eye-catching. Layer deep shades like black, dark purple, and dark blue, then add holographic foil sparingly across the “sky” for maximum visual impact.
Why This Design Stands Out
Galaxy nails have this magical quality that draws people in. The holographic foil shifts colors depending on the light and angle, creating an almost 3D effect where the “stars” seem to float above the surface of your nails. Unlike some nail art designs that need to be viewed under specific lighting to really show, galaxy foils look stunning in any light condition. Whether you’re indoors under fluorescent bulbs or out in natural sunlight, the holographic shimmer catches and reflects beautifully.
How to Apply This Design
- Apply a base coat and let it cure
- Paint the first layer with deep black gel polish, covering the entire nail
- While still tacky, drop small amounts of dark purple and dark blue into the black base
- Gently blend the colors together with a brush to create a gradient effect—don’t worry about perfect blending; the more organic, the better
- Cure under UV/LED lamp
- Apply a thin layer of gel on top of the base colors
- Cut small pieces of holographic foil and press them randomly across the “galaxy”
- Rub gently but firmly to transfer the holographic effect
- Peel away backing layers
- Seal with a glossy top coat and cure for final durability
Insider Tip
Press the holographic foil sparingly and unevenly across your nails rather than covering large areas. The key to a convincing galaxy design is making it feel like distant stars, not a solid sheet of shimmer. Less coverage actually creates more visual interest.
4. Abstract Foil French Tips
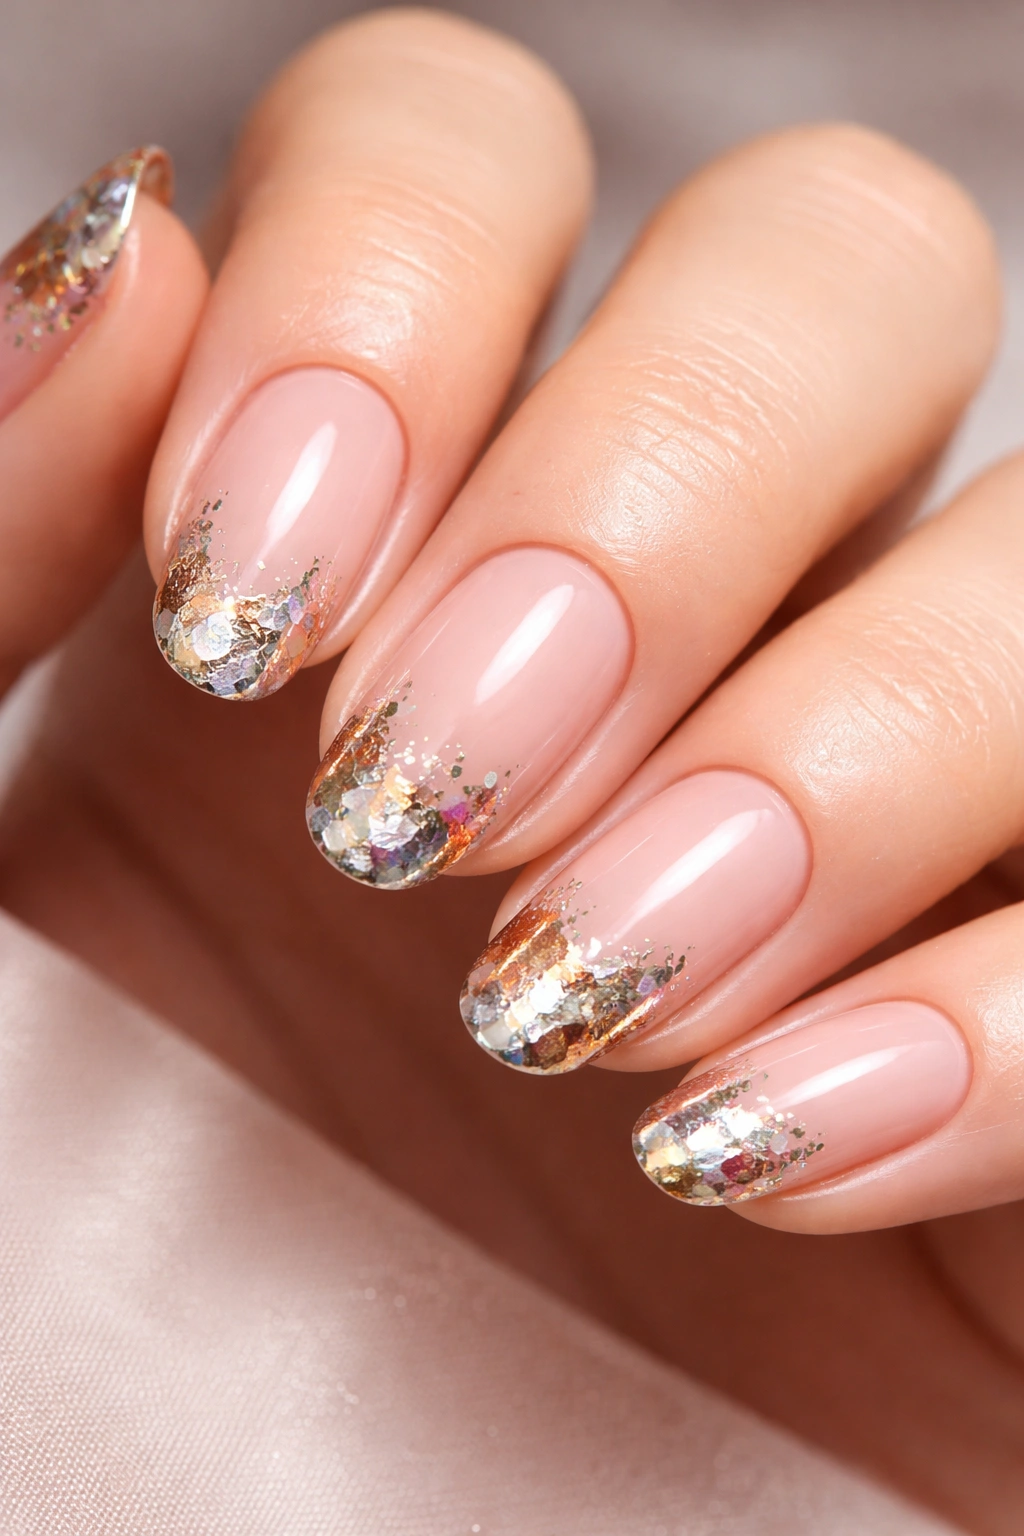
Reimagine the classic French manicure by swapping the traditional white tips for metallic foil applied unevenly and artistically across the edge. This fresh take on a timeless design feels modern while still paying homage to that iconic white-tip look everyone recognizes. Let the foil fade naturally or break unpredictably instead of creating a neat, straight line—that intentional imperfection is what makes this design so visually interesting.
What Makes It Different
Traditional French manicures can feel a bit dated if not done carefully, but abstract foil French tips modernize the concept instantly. The irregular foil placement along the tip creates movement and visual interest that a perfect straight line never could. You’re essentially combining the sophistication of French manicures with the edginess of contemporary nail art. It reads as both polished and artistic, professional and creative.
How to Create This Look
- Apply a neutral base polish in nude, pink, or white—whatever you prefer as your “base” color
- Let dry completely
- Apply foil adhesive along the tip area, but intentionally make it uneven—let it fade and fade out unpredictably rather than creating a neat line
- Allow adhesive to become tacky (15-20 minutes)
- Cut foil into strips and press along the tip area following your adhesive pattern
- The foil will only stick where you applied adhesive, so irregular application creates that abstract aesthetic
- Rub gently to ensure transfer
- Peel away foil backing
- Finish with a glossy top coat
What to Know
You can use gold, silver, rose gold, or even holographic foil for this design. Gold creates warmth and luxury, while silver feels crisp and modern. Experiment with different foil colors on different nails for a varied, artistic look that feels intentional rather than like you made mistakes.
5. Floral Foil Nail Art
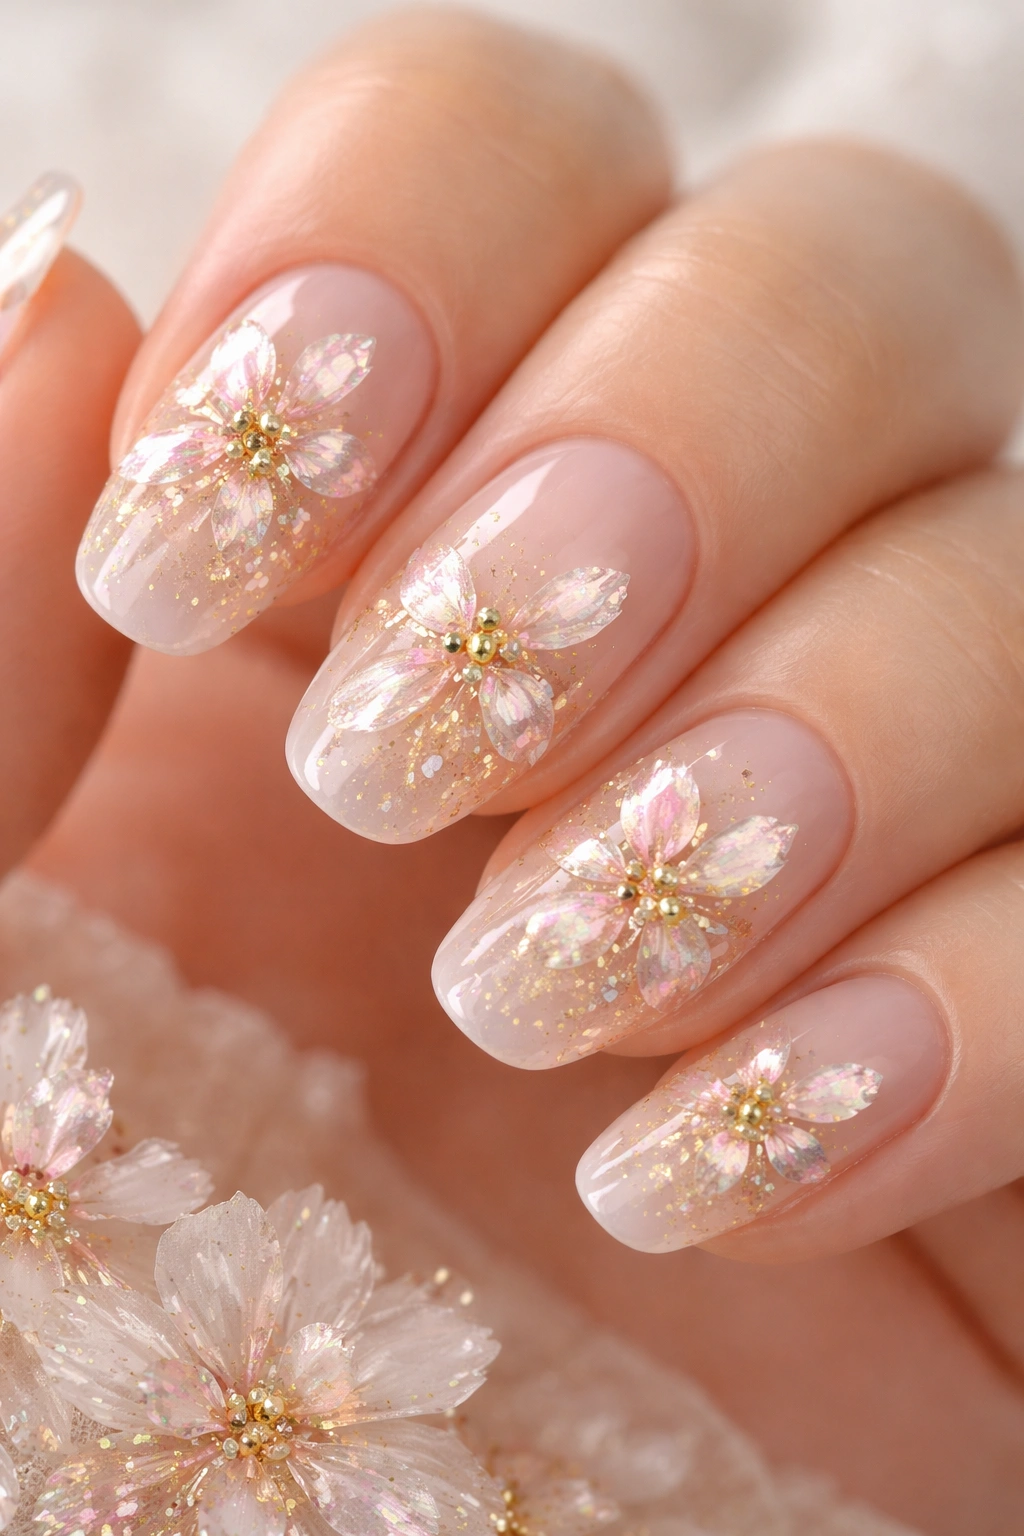
Combine delicate florals with foil elements to create an elegant, spring-ready design that works year-round. Use foil pieces shaped like flower petals over sheer polish, creating an ethereal floral effect that’s light, wearable, and perfect for special occasions or anyone who loves botanical-inspired designs. Soft pinks, creams, or clear bases keep this design looking romantic and refined rather than overly ornate.
Why This Design Works
Floral foil nails hit that sweet spot between “I’m fancy” and “I’m approachable.” The flowers feel romantic and artistic, while the foil brings a touch of glamour and shine. This design is particularly stunning on longer nails where you have real estate to work with, but it looks beautiful on shorter nails too if you scale down the foil pieces accordingly. The combination of hand-painted florals with crisp foil accents creates visual depth that makes the entire manicure feel professionally done.
How to Apply Floral Foil Nails
- Start with a sheer pink, cream, or clear base polish and let dry
- Using a thin nail art brush, hand-paint delicate flower outlines on each nail—simple five-petal designs work best
- Allow paint to dry completely
- Apply foil adhesive carefully within or around the painted flowers
- Wait for adhesive to become tacky
- Cut small petal-shaped pieces of holographic or metallic foil
- Press foil carefully onto the adhesive within your flower shapes
- Use a delicate touch when rubbing to transfer the foil—you want precise placement, not smudging
- Peel away backing layers slowly
- Finish with a glossy top coat to seal everything and add shine
Quick Fact
You don’t need to be a skilled painter to pull off this design. Simple flower shapes—literally just five circles arranged like petals—are all you need. The foil is what makes it look sophisticated and complex.
6. Matte + Foil Contrast Nails
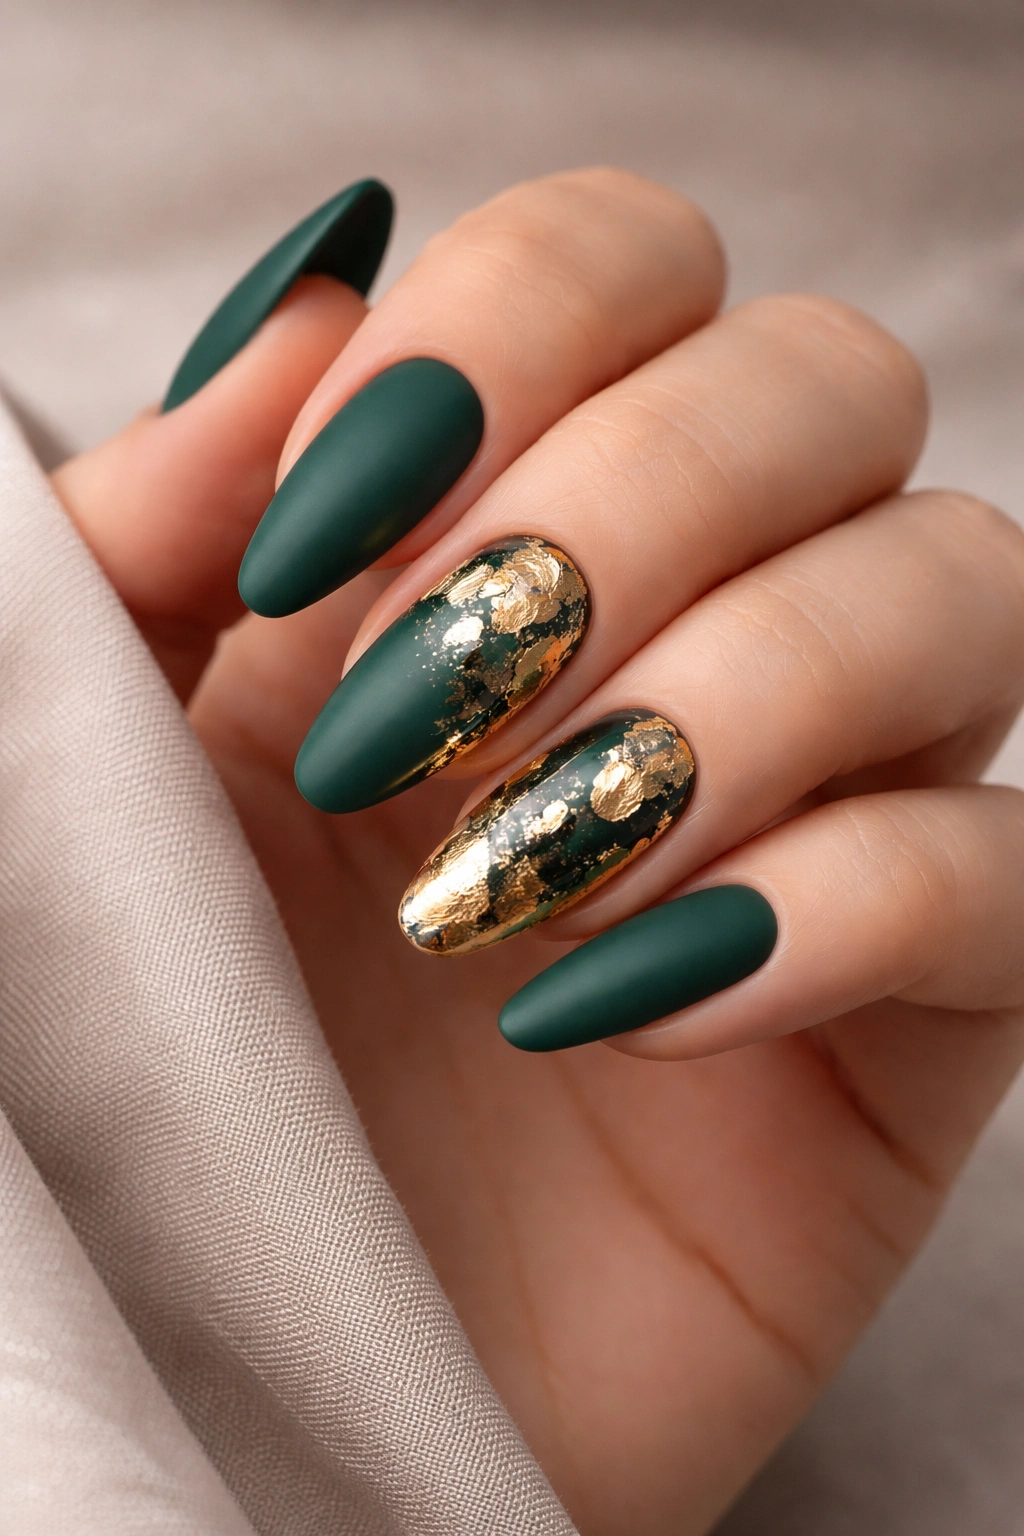
Pair matte polish with shiny foil accents to create a high-fashion contrast in texture that catches light and creates visual drama. The difference between matte and glossy surfaces is subtle but powerful—your eye is immediately drawn to whichever finish stands out more. This design works beautifully when you apply foil accents to just one or two nails while keeping the others matte, or create sections on each nail with mixed finishes.
What Makes It Stand Out
Texture contrast is one of nail design’s best-kept secrets. Most people focus on color combinations, but mixing finishes creates a sophistication that color alone can’t achieve. A matte forest green base with a glossy gold foil accent reads as intentional and editorial. This is the kind of manicure that makes people ask “where did you get that done?” because it feels so professionally executed and thoughtfully designed.
How to Get This Look
- Apply matte base polish in your chosen color and allow to dry completely
- Decide where you want your foil accents—typically on one accent nail or as geometric sections across multiple nails
- Apply foil adhesive to the foil areas only
- Let adhesive become tacky (15-20 minutes)
- Press foil onto adhesive and rub gently but firmly for complete transfer
- Peel away backing
- Apply a matte top coat to the non-foil areas to lock in that flat finish
- Apply a glossy top coat ONLY to the foil areas to make the metallic shine pop dramatically against the matte background
- Seal everything together with a final thin layer of glossy top coat, allowing the matte areas to peek through
Pro Tip
This design is particularly effective with jewel tones as your matte base. Deep emerald, sapphire, or amethyst bases paired with gold foil create a luxury aesthetic that’s stunning on any occasion.
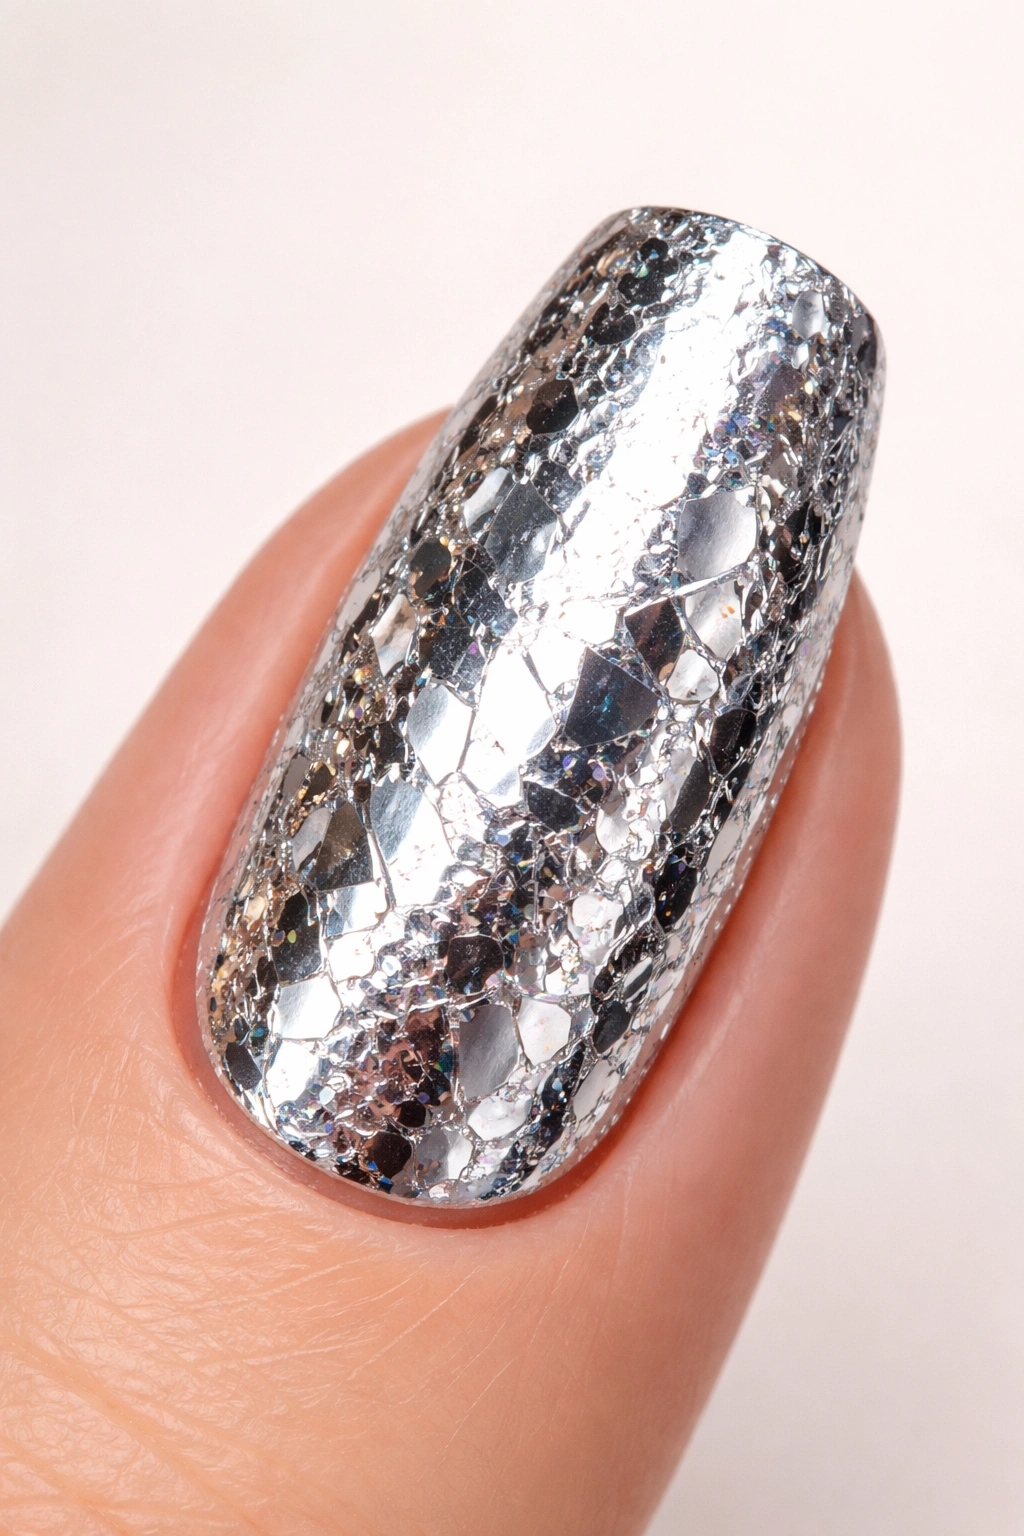
7. Cracked Foil Effect

Create intentional texture and edge with a cracked foil technique that transforms a simple foil application into modern art. Press foil onto your nail and lift quickly to create deliberate cracks and breaks in the metallic surface, turning what might look like a mistake into a purposeful design element. This technique works best with metallic or chrome-style foils that really emphasize the cracked texture.
Why This Trend Matters
The cracked foil effect taps into modern design’s love of intentional imperfection. It’s edgy, contemporary, and way easier to execute than it sounds. The beauty here is that the “imperfection” is actually the point—you’re not trying to hide cracks, you’re highlighting them as a design feature. This design feels artistic and experimental, perfect for anyone who wants nail art that’s bold but not overly feminine or delicate.
How to Create Cracked Foil
- Apply base polish in any color you prefer
- Allow base to dry or cure completely
- Apply foil adhesive generously over a larger area than you would for a smooth transfer
- Let adhesive become tacky
- Cut a piece of foil larger than your nail
- Press foil onto the adhesive, but instead of rubbing gently for a smooth transfer, press firmly and then lift quickly and abruptly
- The jerky motion creates natural-looking cracks and breaks in the foil
- Peel away the foil backing—the breaks should remain on your nail
- Repeat the pressing and lifting motion in different areas if you want multiple cracked sections
- Seal with a glossy or matte top coat depending on the mood you want
What to Know
You can control the intensity of the cracks by adjusting how aggressively you lift the foil. Gentle, quick lifts create delicate cracks, while more forceful lifting creates larger breaks and a bolder effect. Experiment on a practice nail before committing to all ten.
8. Holographic Foil Overlay
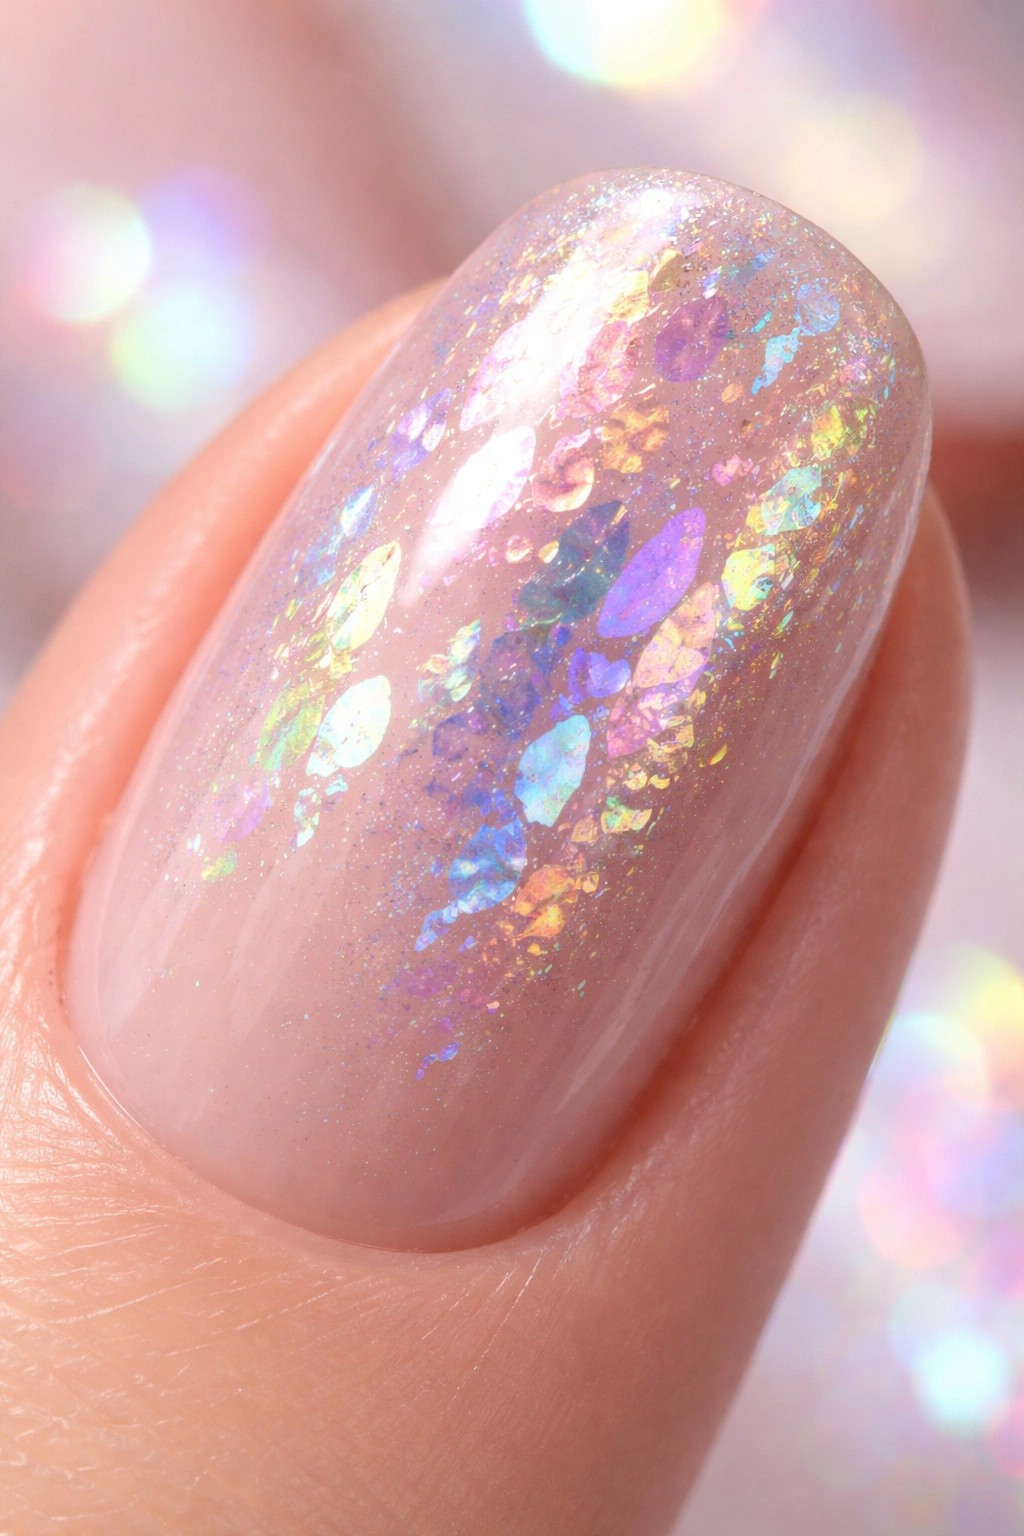
Apply holographic foil over a neutral base for subtle shimmer that shifts and changes depending on light and movement. Holographic foil is magic—it catches light in ways that solid metallics simply can’t. The effect is understated on the nail, but in person, the constant color-shifting creates an almost hypnotic visual effect that draws people in for closer inspection.
What Makes Holographic Special
Holographic foil adds dimension without being overwhelming. You can achieve that sparkly, eye-catching effect while still maintaining a wearable, everyday aesthetic by keeping your base colors neutral and applying foil sparingly. The technical term is “iridescence”—the foil contains microscopic structures that reflect light at different angles, creating that rainbow-shifting effect you see on holographic everything these days.
How to Apply Holographic Overlay
- Paint all nails with a neutral base—soft pink, nude, white, or even pale gray
- Let base dry or cure completely
- Apply foil adhesive to the entire nail surface, or just the areas where you want shimmer
- Allow adhesive to become tacky (15-20 minutes)
- Cut holographic foil to fit your nail shape
- Press foil firmly onto the adhesive and rub gently to ensure complete transfer
- Be extra careful when peeling away the backing—hold the foil close to the nail surface as you lift
- Apply a glossy top coat to seal and intensify the holographic effect
- A second thin coat of top coat adds extra durability without dulling the shimmer
Quick Fact
Holographic foil shows up best in natural light or bright indoor light. Under soft yellow lighting, the effect becomes more subtle, which is perfect if you want a design that’s dramatic in some settings and understated in others.
9. Multicolored Splatter Foil
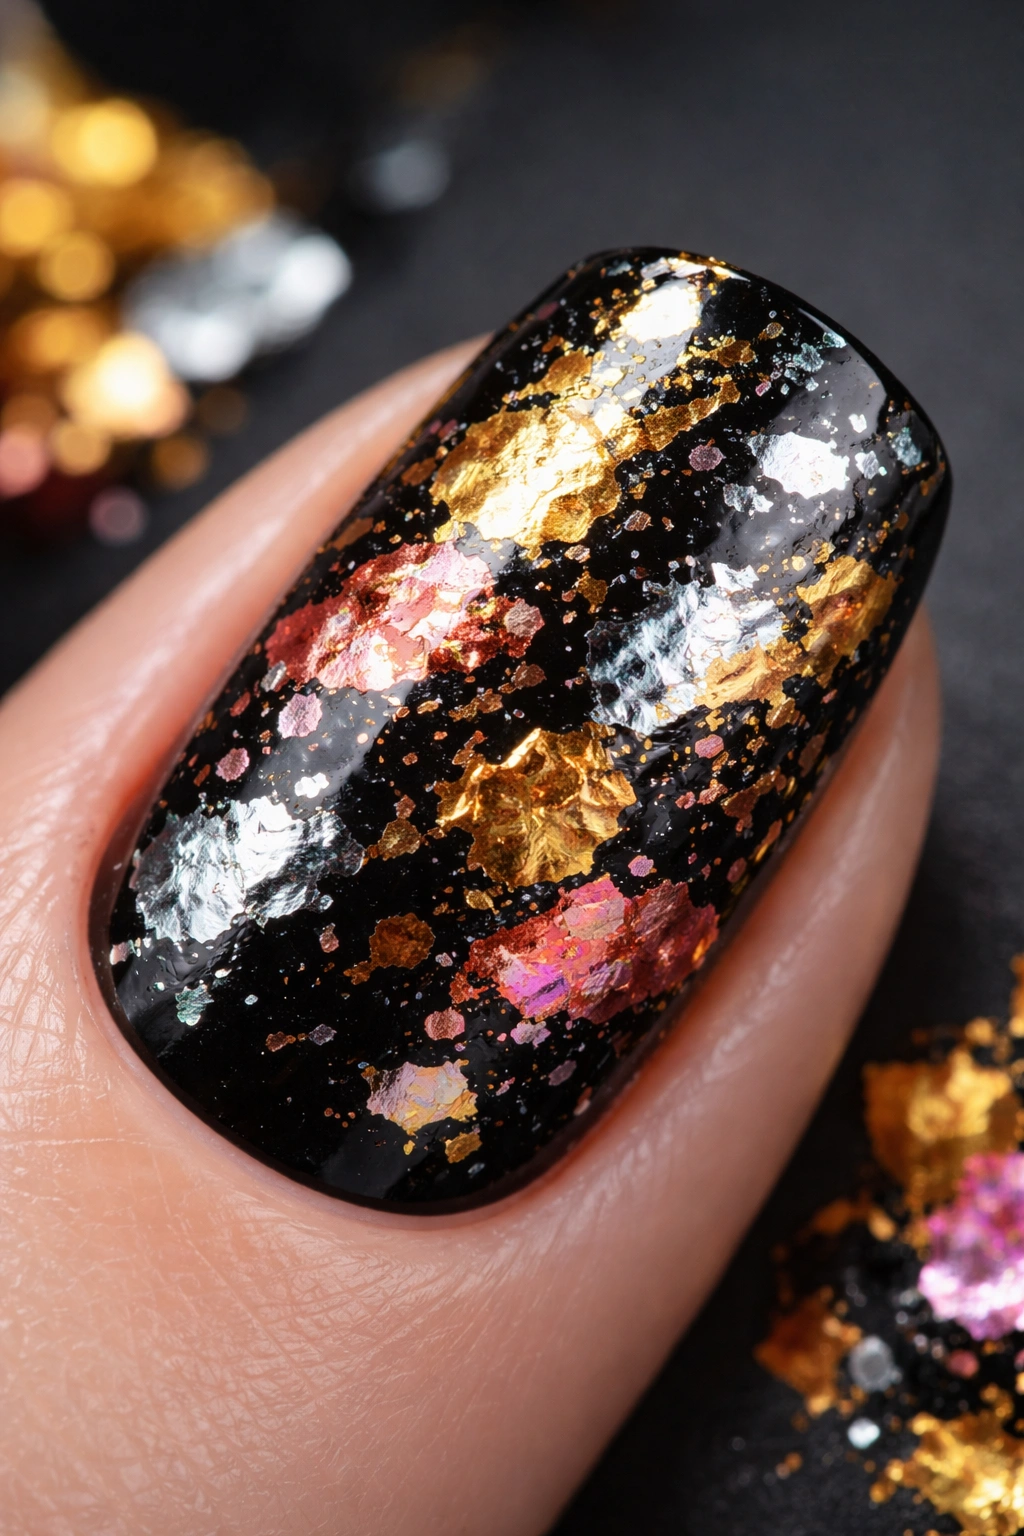
Embrace bold creativity with a design that uses four to five different colored foils scattered across a dark base, creating a modern art effect that looks like a curated explosion of color. This design is anything but subtle—it’s for people who love making statements with their nails. Apply various foil colors (try metallics in gold, silver, rose gold, and copper) in random splatters over a black, deep navy, or charcoal base for maximum visual pop.
Why This Design Captures Attention
Splatter foil designs tap into contemporary street art and graffiti aesthetics. The seemingly chaotic placement is actually thoughtfully curated to create visual interest across the entire nail. When you use metallics in different finishes and colors, each splatter catches light differently, creating depth and movement. This design reads as artistic and bold while remaining perfectly wearable because the dark base ground the design and keep it from feeling chaotic.
How to Get the Splatter Look
- Apply dark base polish (black, navy, or charcoal) to all nails
- Let dry completely
- Apply foil adhesive in small, random splotches across each nail rather than in neat patterns
- Let adhesive become tacky
- Cut small pieces from 4-5 different colored foils
- Press each foil color onto different adhesive splotches, creating a varied, multicolored effect
- Rub gently but firmly to ensure each foil transfers completely
- Peel away backing layers from each foil piece
- Apply a matte top coat for an artistic, gallery-like finish (the contrast between the dark matte base and shimmering foil accents is stunning)
Insider Note
The key to making this design look intentional rather than accidental is varying your foil colors significantly. A mix of warm metallics (gold, rose gold, copper) and cool metallics (silver, chrome) creates visual contrast that keeps the eye moving across the nail.
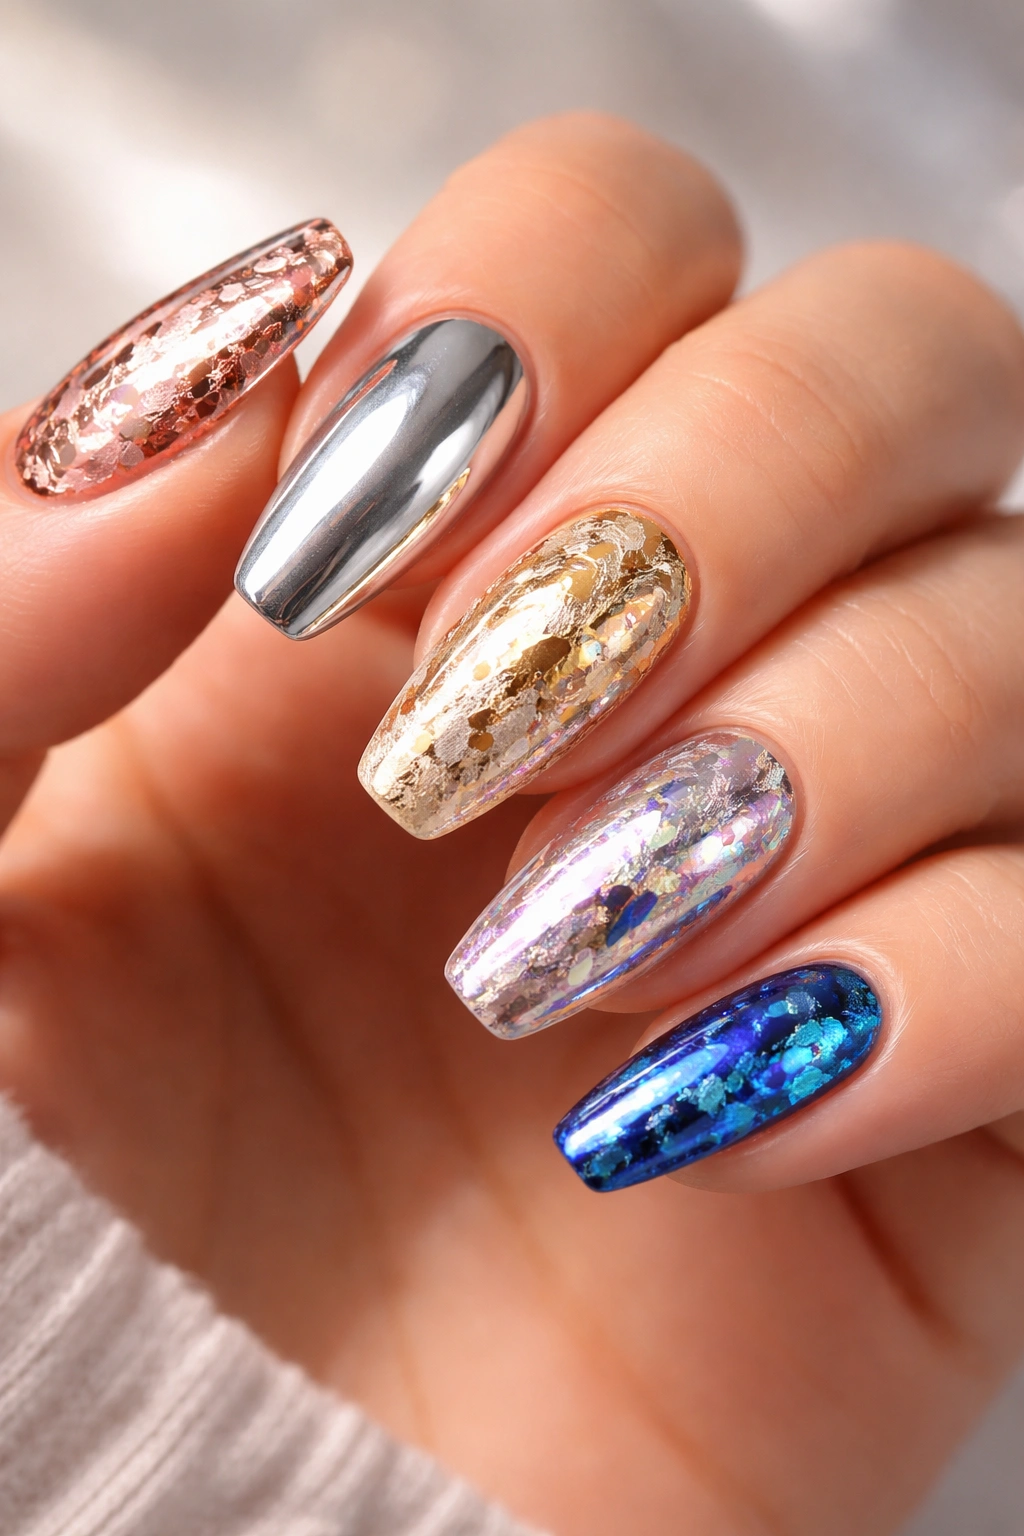
10. Full Foil Statement Nails
Go bold with coverage by applying foil to the entire nail surface, creating maximum shine and impact. This is your chance to wear a complete foil manicure that makes a serious fashion statement. Full coverage foil nails work best when applied to just one or two accent nails rather than across all ten, letting the statement piece shine without overwhelming your look.
Why Full Coverage Works
Full foil nails deliver the ultimate in shine and drama. When light hits your nails, they literally glow and reflect light back—it’s impossible not to notice. This is the design you choose when you want your nails to be a statement accessory, whether you’re heading to an event, a night out, or just feeling extra fabulous on a regular Tuesday. The key to pulling off full coverage without it feeling costume-like is keeping your base colors sophisticated (metallics, deep jewel tones) and limiting full coverage to accent nails.
How to Apply Full Foil Coverage
- Apply a base color (metallic or solid) to all nails first
- Let dry or cure completely
- On your accent nail(s), apply foil adhesive to the entire nail surface, creating an even, thin layer
- Wait for adhesive to become tacky (very important for full coverage—rushing this step causes patchy transfer)
- Cut foil to match your nail shape, slightly larger than needed
- Press foil onto the entire nail surface, smoothing out air bubbles as you go
- Rub firmly and evenly with a soft tool to ensure complete transfer
- You may need to make multiple passes to get full coverage on larger nails
- Peel backing away slowly and carefully
- For full foil nails, consider bonding the edges by applying a thin line of gel around the perimeter and curing before applying top coat
- Seal with a glossy top coat for maximum shine
What to Know
Full foil coverage requires patience and precision. Don’t rush the adhesive curing time—tacky adhesive is absolutely critical for getting smooth, complete transfer without gaps, wrinkles, or patchy spots. A thin, even application of adhesive makes the difference between a stunning manicure and a frustrating one.
Final Thoughts
Foil nail art has revolutionized at-home manicures by making professional-looking nail designs accessible to absolutely anyone. You don’t need years of practice or expensive salon equipment to create stunning, eye-catching designs. With the right adhesive, quality foils, and a little patience as you master the transfer technique, you can achieve results that rival anything a professional nail technician creates.
The most important thing to remember is that each design can be customized endlessly to match your personal style and preferences. Don’t feel locked into the exact colors or placements described here—experiment with foil colors that coordinate with your favorite outfits, try different base polish combinations, and test placement on practice nails before committing. Once you master the basic transfer technique, you’ll find yourself constantly dreaming up new combinations and designs.
Start with designs that feel most achievable to you, whether that’s the minimalist gold accent or the more complex galaxy effect. Build confidence with simpler designs, and soon you’ll be tackling intricate patterns with ease. The beautiful thing about foil is that it’s genuinely forgiving once you understand the adhesive timing—if a transfer doesn’t come out perfectly, simply reapply adhesive and try again. Every manicure teaches you something that makes the next one better, and within a few tries, you’ll be creating foil art that looks like you’ve been doing this professionally for years.
