

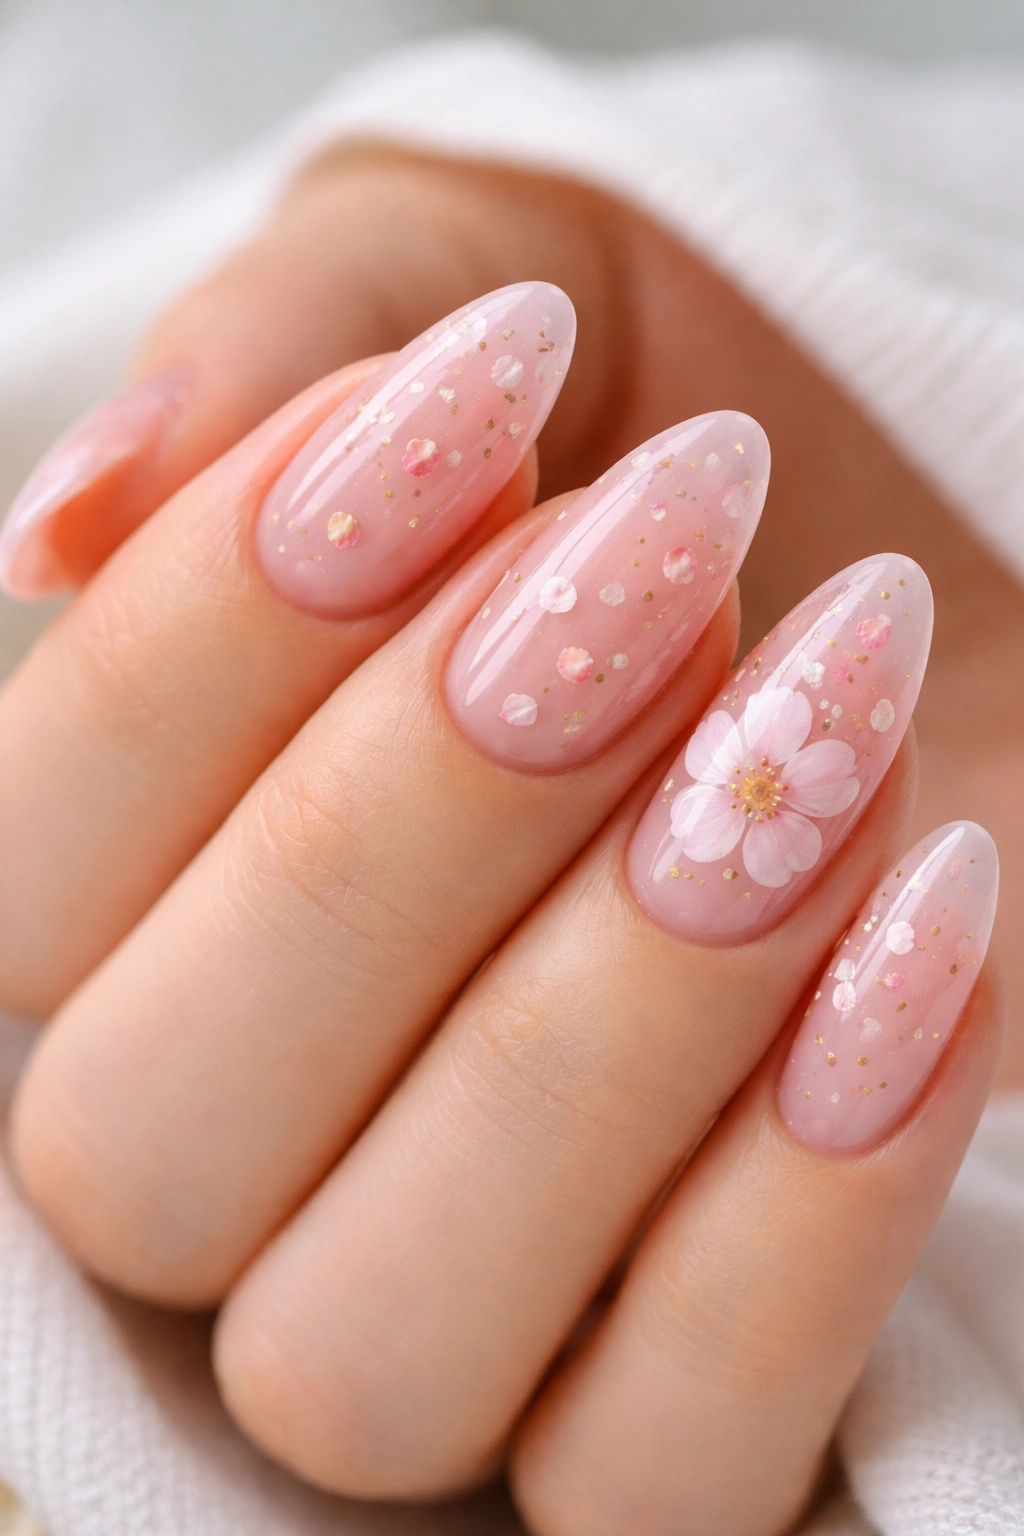
A good floral almond manicure should look painted, not pasted on. The almond shape already gives the hand a longer line, and petal details soften that shape in a way that feels cleaner than a full bouquet packed onto every nail.
Scale is the part people get wrong. Tiny petals can disappear if the base is too busy; oversized blooms can crowd the tip and make the nail look shorter than it is. Crowded is the enemy.
Petal shapes are forgiving in a way roses and daisies are not. A slightly uneven petal still reads as hand-painted charm, while a crooked center can throw off the whole set. That’s why floral almond nails are such a good playground for soft pinks, milky neutrals, chrome, moody berries, and all the little details that make a manicure feel personal.
1. Sheer Pink Almond Nails With Micro White Petals
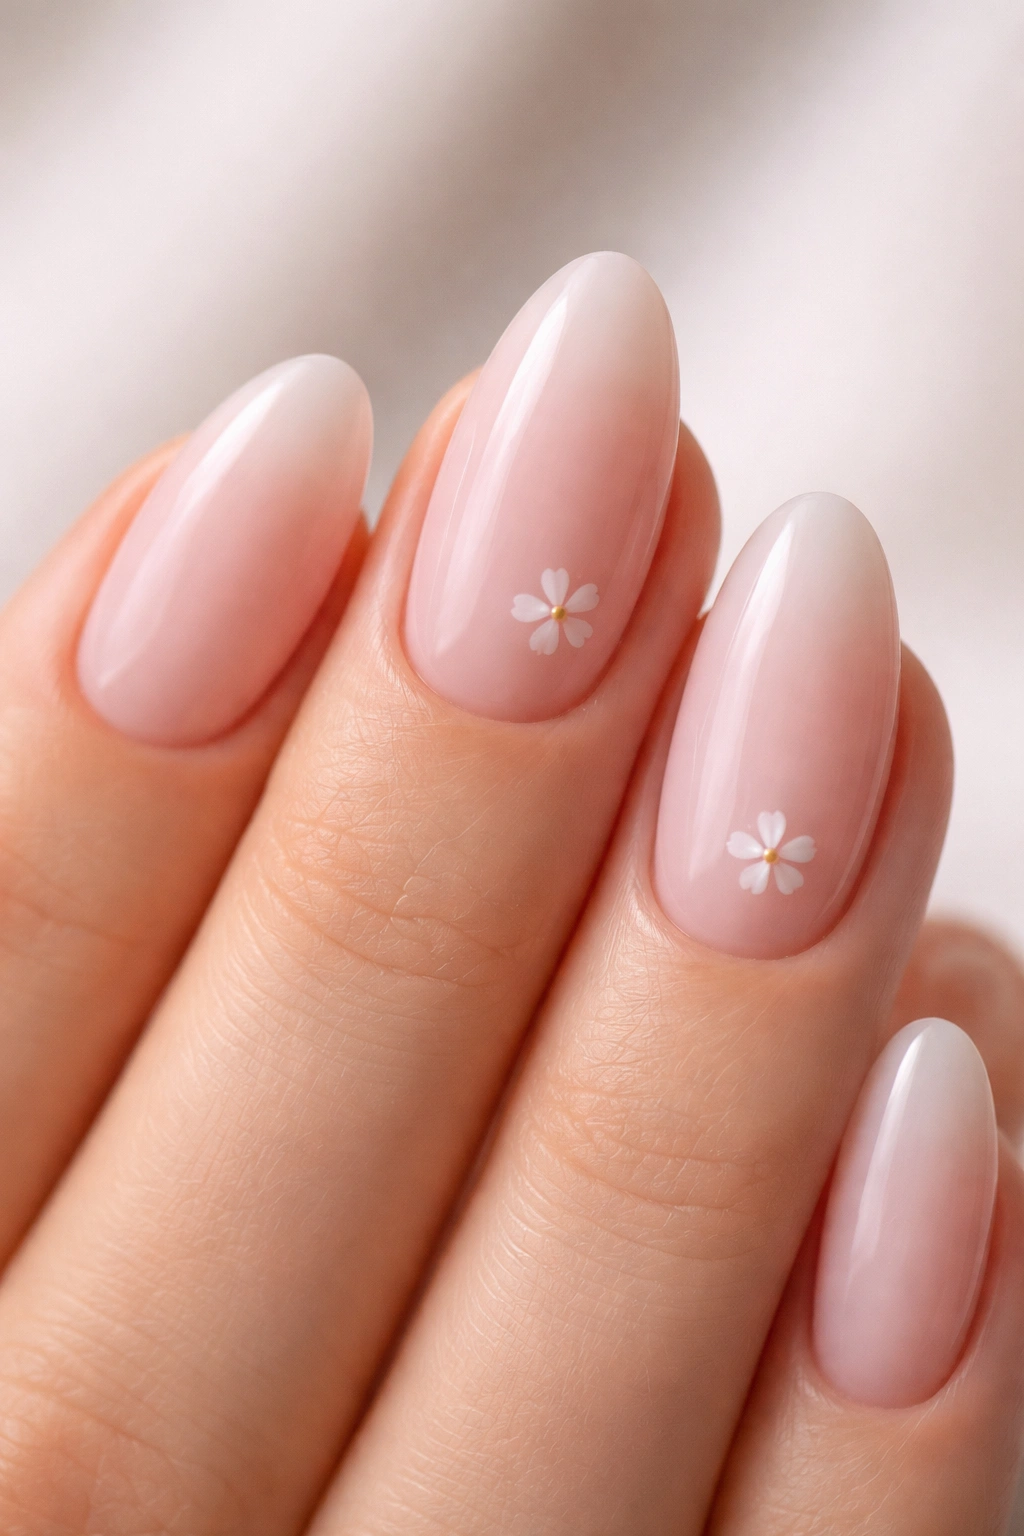
A sheer pink base is the cleanest place to start if you want floral almond nails that feel light. The petals stay visible, but the nail itself still looks like a nail, which is half the charm.
Why it works on almond tips
Micro florals give the eye one tiny focal point and leave the rest of the nail open. That matters on almond nails, where too many details near the point can crowd the shape fast.
- Use a sheer pink or milky blush base.
- Paint petals with a 1 mm liner brush and keep each petal around 2 to 3 mm.
- Put the bloom on the ring finger, then echo it with a smaller version on the middle finger.
- Finish with a glossy top coat so the tiny white lines stay crisp.
My favorite version: one small bloom per hand, not one on every nail. It feels intentional and keeps the design from turning into wallpaper.
2. Blush French Tips With Petals Along the Smile Line

Blush French tips with petals along the smile line are neat from a distance and interesting up close. The French base gives structure, then the petal work breaks the line just enough to keep the manicure from feeling strict.
I like this look for people who want floral art without a full garden on their hands. Keep the tips soft white or pale rose, then let a few petals spill from the edge into the nude base, as if the flower is leaning over the border.
That tiny overlap matters. If the petals stop too sharply at the French line, the design can look pasted on. When they cross the line by even 1 or 2 millimeters, the whole set reads more natural and a lot less stiff.
3. Milky Nude Nails With Gold-Leaf Petals
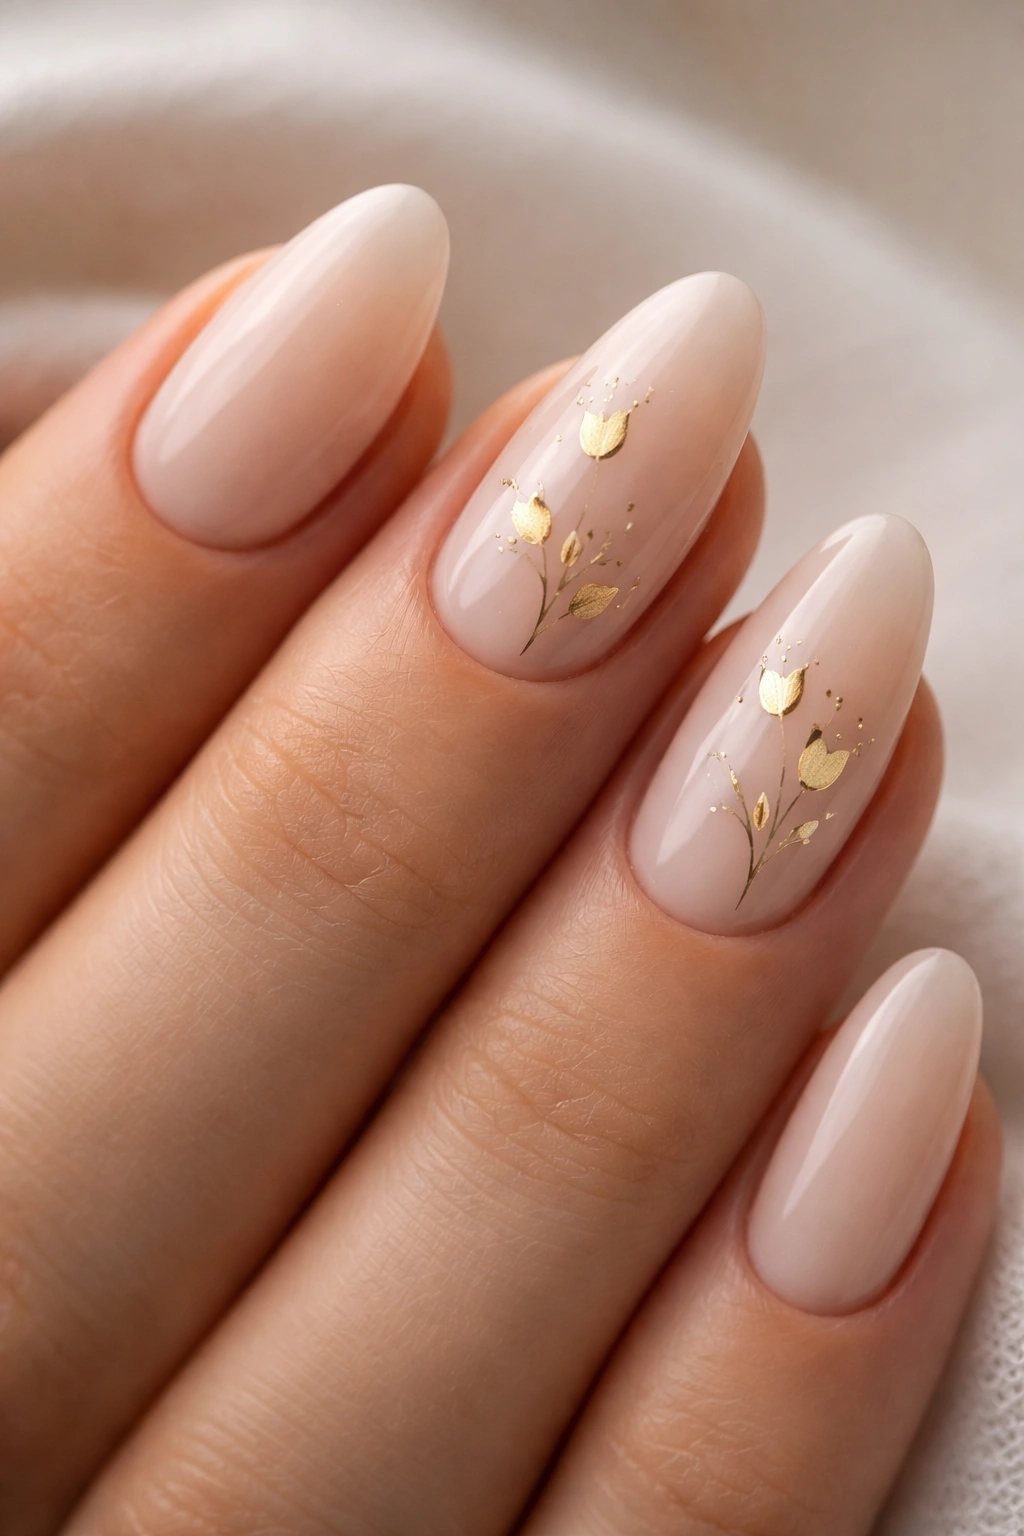
Why does gold leaf read so soft on a floral set? Because it behaves like a petal outline instead of a full metallic block. On milky nude almond nails, a few torn gold petals catch the eye without taking over the whole design.
Use champagne or pale gold rather than brassy gold, and keep the petals broken at the edges. Clean circles of foil make the manicure feel heavy. Irregular shards look more like petals blown open by hand. That small shift changes the whole look.
How to keep gold delicate
- Place gold on only 2 or 3 nails.
- Pair it with sheer nude or milk-white polish.
- Trace one or two petals with a fine liner instead of filling the whole bloom.
- Seal with two thin top-coat layers so the foil stays smooth.
This is the set I’d pick for someone who likes jewelry more than nail art.
4. Lavender Almond Nails With Tiny Daisy Sprigs

A salon chair, a keyboard, a coffee cup — lavender daisy nails fit all three without feeling fussy. The flowers stay small enough to read from arm’s length, but the yellow centers give the nails enough contrast that the petals do not vanish into the base.
Keep the lavender soft, not neon. A pastel base makes the white petals look clean, and it also gives the almond shape a sweet, tidy frame. One or two daisy sprigs per hand is enough.
- Put a fuller sprig on the ring finger.
- Keep the thumb and pinky solid lavender.
- Add a tiny yellow dot in the center with a dotting tool, not a chunky brush.
- Leave some bare space near the cuticle so the nail still breathes.
Skip the urge to fill every nail. Lavender needs room, and so do daisy petals.
5. Peach Gradient Nails With Watercolor Petals
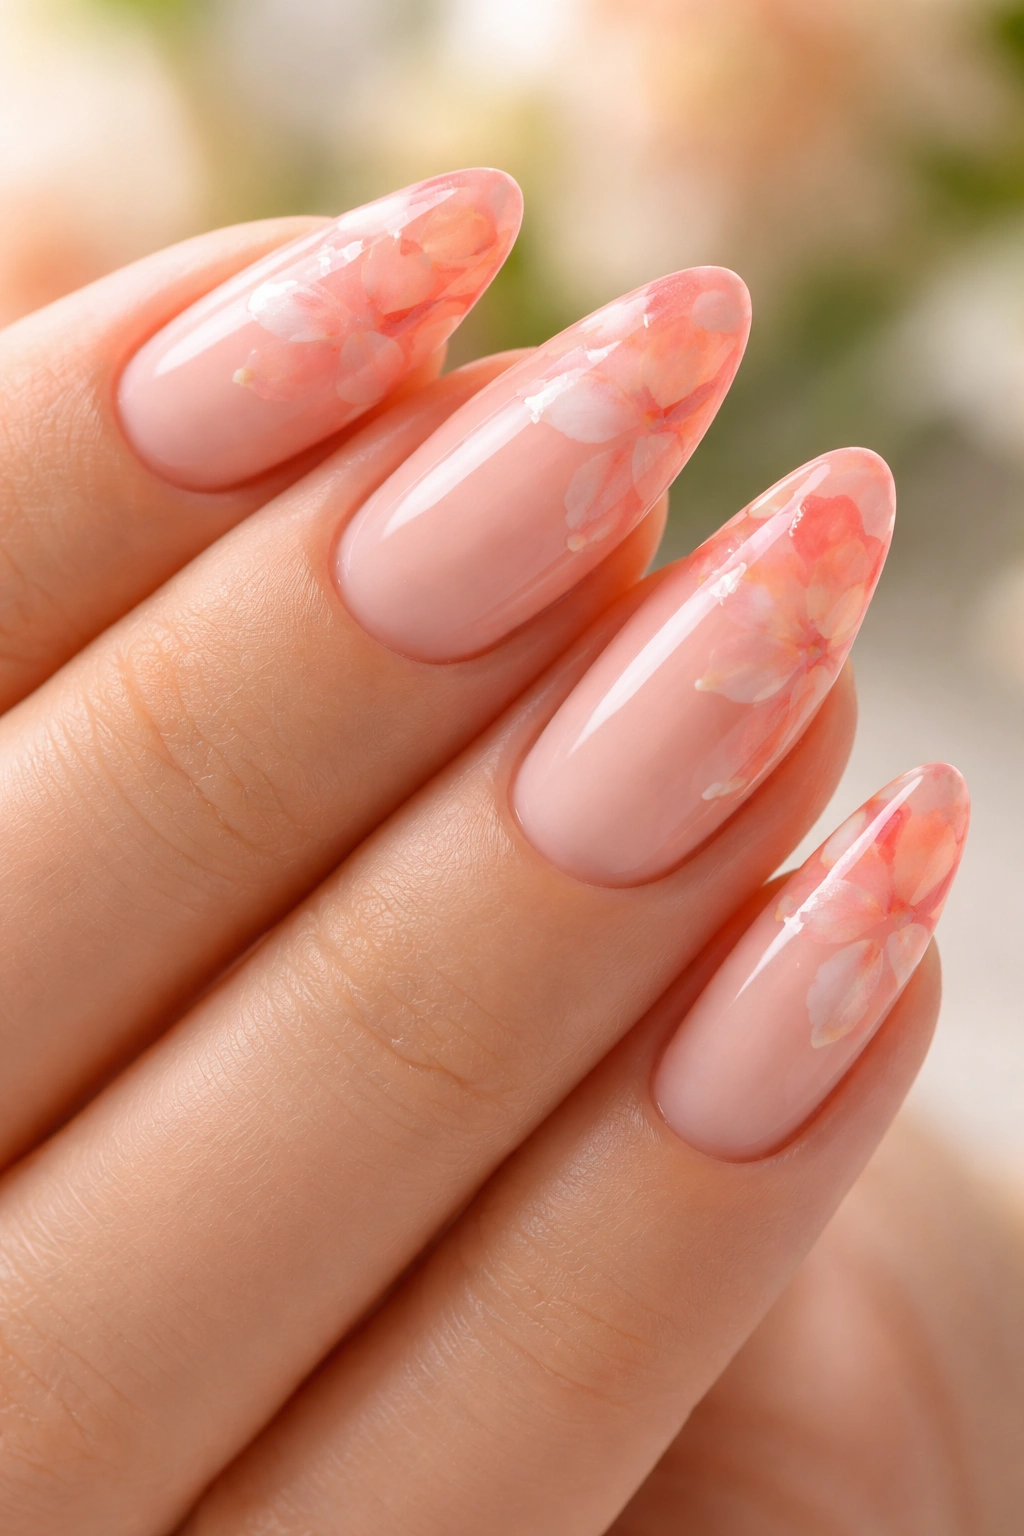
Peach gradient almond nails have a warmer feel than pink ones, and the watercolor petals suit that softness. Blend sheer peach at the cuticle into coral near the tip, then paint petals with diluted polish so the color pools at the edges.
The trick is opacity. Watercolor petals should look slightly see-through, almost like a stain on paper, not like a sticker sitting on top of the nail. A blooming gel base helps the color spread just enough to blur the petal edges.
I like this design on medium-length almond nails because the gradient has room to travel. Shorter nails can still wear it, but the petals need to stay smaller and farther apart.
A glossy top coat is the right finish here. Matte kills the glow and makes the whole thing feel dusty, which is a shame because peach usually looks best when it feels fresh and a little wet.
6. Matte Beige Nails With Raised 3D Gel Petals
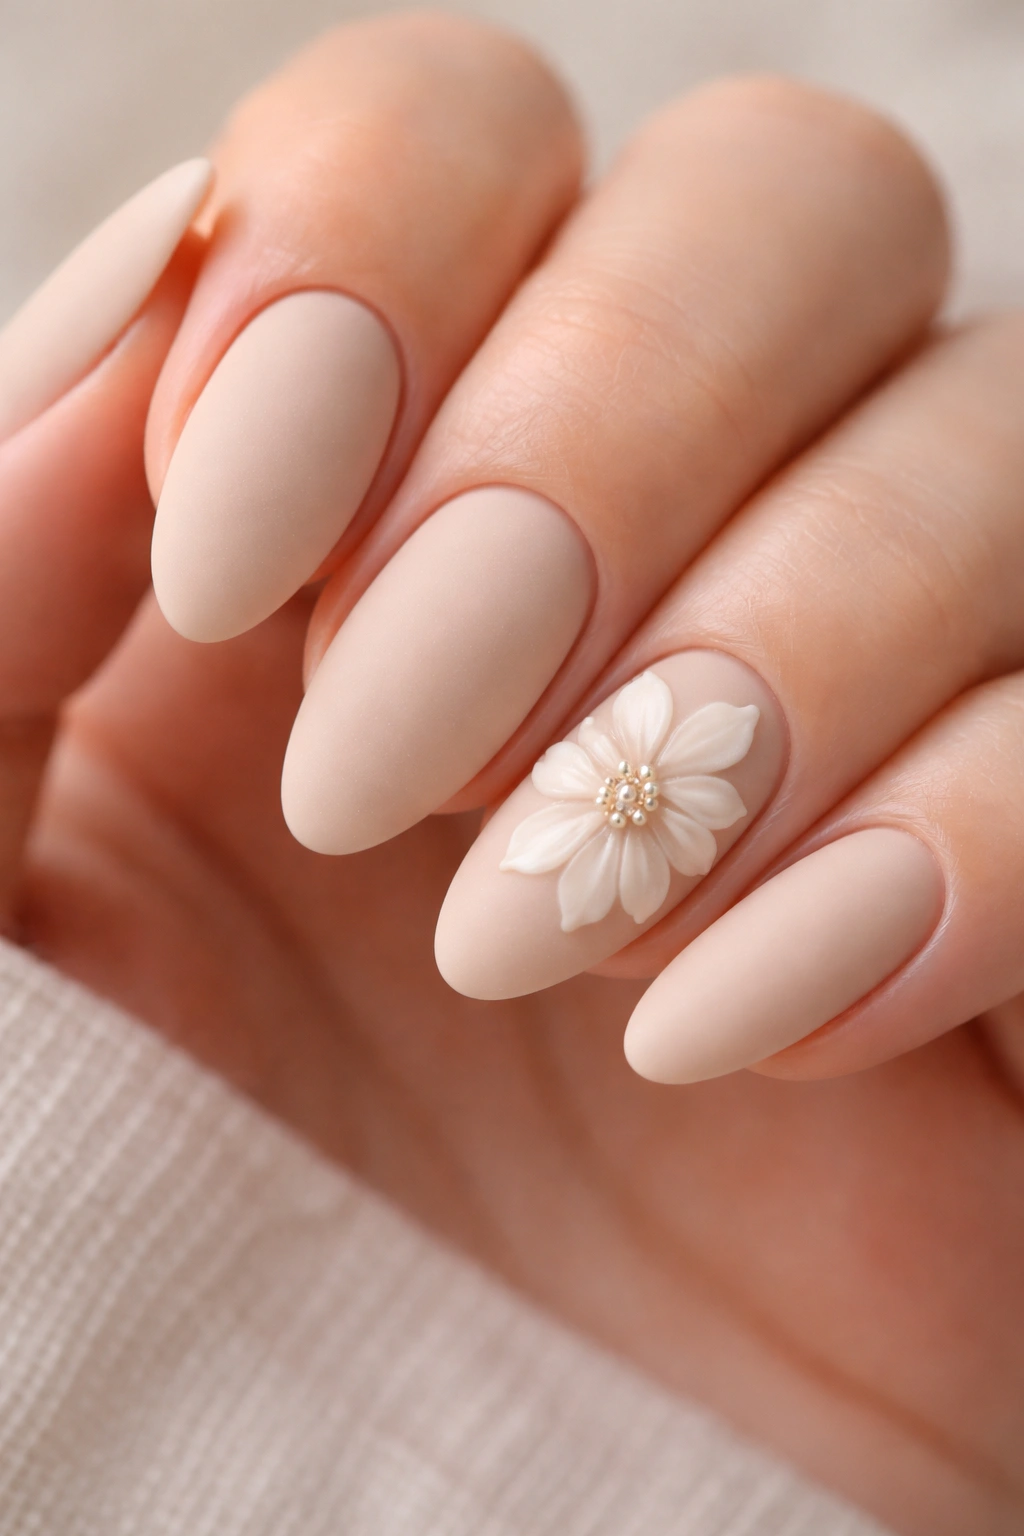
Flat petals are fine. Raised 3D petals are better when you want the manicure to feel like an object instead of a print. On matte beige almond nails, a thin bead of builder gel can form petal edges that rise a few millimeters off the surface, and that gives the design a real shadow line.
This set is not for someone who catches their nails on everything. The petals need protection, and they ask for a careful top coat around the edges, not over them. If the gel is too thick, it starts to look clumsy. If it’s too thin, you lose the whole point.
I like this on medium or long almond nails because the extra length gives the sculpted petals room to breathe. If you keep your nails short, the raised details can look crowded fast. One accent nail is enough, maybe two if the rest of the set stays plain.
7. Olive and Cream Botanical Petals on Almond Nails
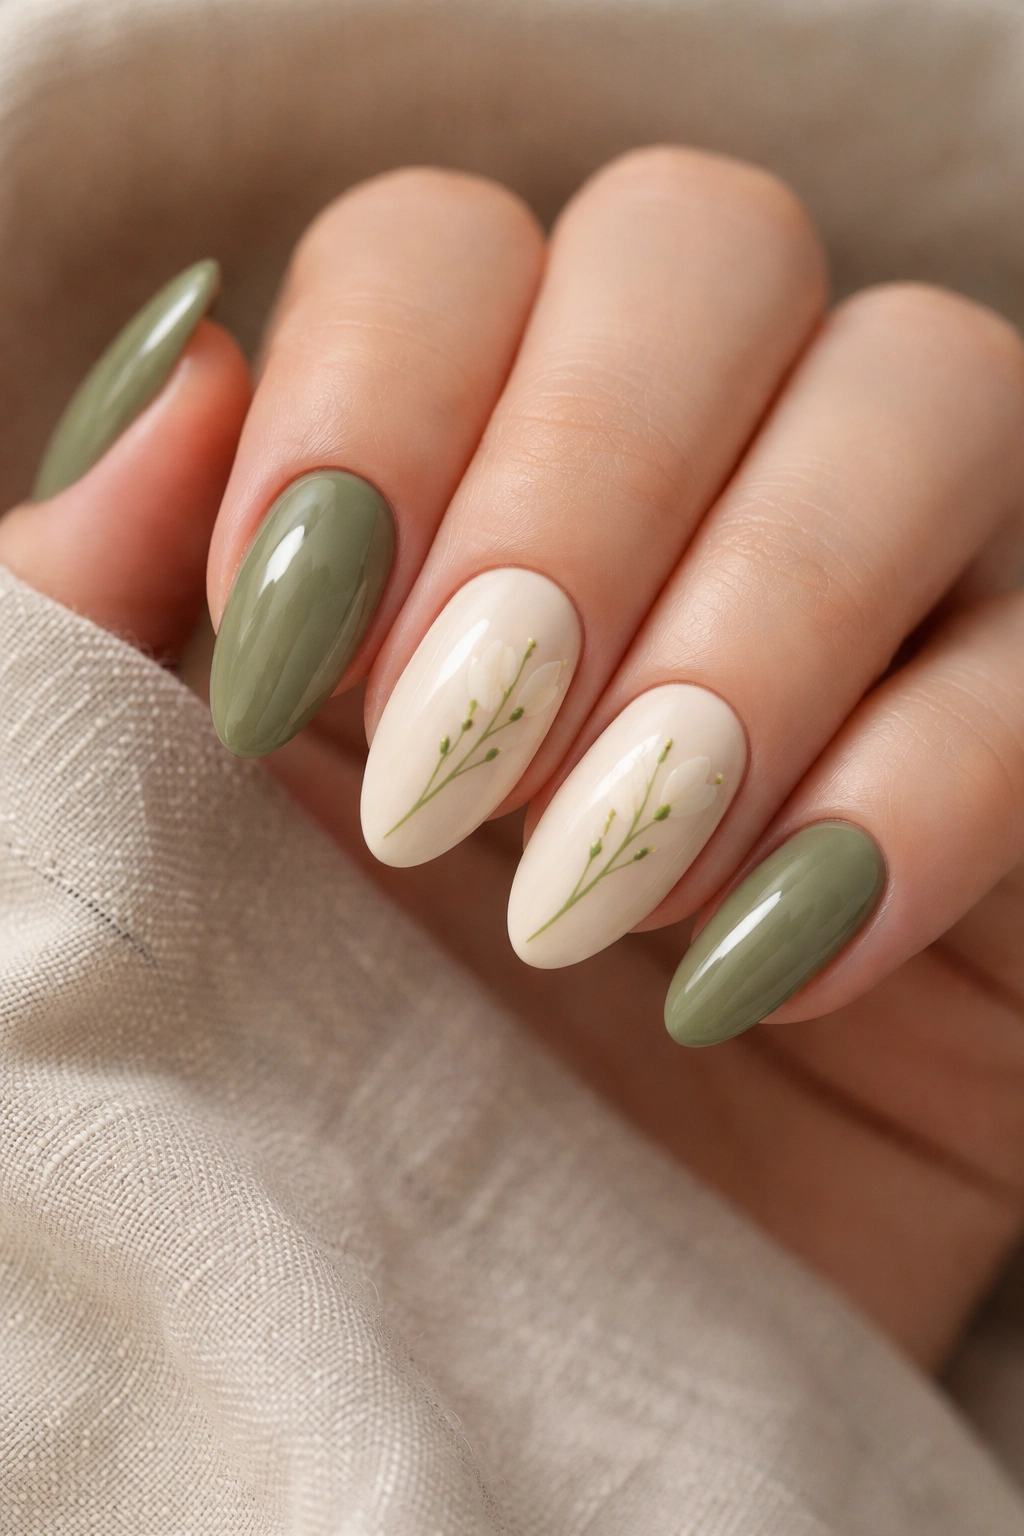
Olive and cream look calmer than they sound. The mix works because cream softens the green, while the petals keep the manicure from turning plain.
Color story
Use olive as the base on two or three nails, then switch to warm cream for the floral nails. Petals in off-white or pale sand keep the set earthy, not sour. A tiny stem in deep moss green ties the whole thing together.
Placement
I prefer this on medium almond nails, with the floral work sitting slightly off-center toward one side. That little shift matters. When every bloom sits dead center, the design can feel flat. Move the petals toward the outer edge, and the nail starts to look hand-drawn instead of stamped.
A thin glossy finish keeps the cream from drying out visually. Matte can work, but it leans softer and a little dustier, which suits this palette only if that is the mood you want.
8. Deep Red Poppy Petals on a Nude Base

Deep red poppy petals on a nude base carry more punch than a full bouquet ever could. A poppy has wide, open petals, so even one bloom on the ring finger can hold the whole set together.
The trick is contrast. Keep the nude base sheer and warm, then paint the petals in a red that leans slightly tomato rather than brick. A black center dot or a dark burgundy seed cluster gives the flower its shape.
I would not cover every almond nail with poppies. One accent nail, maybe two, is enough. The rest can stay bare or carry a single half-petal near the cuticle. That restraint is what keeps the design sharp instead of busy.
This one looks especially good on medium almond nails with a clean, narrow tip. The shape gives the flower enough room to open up, and that matters here.
9. Baby Blue Almond Nails With Forget-Me-Not Clusters
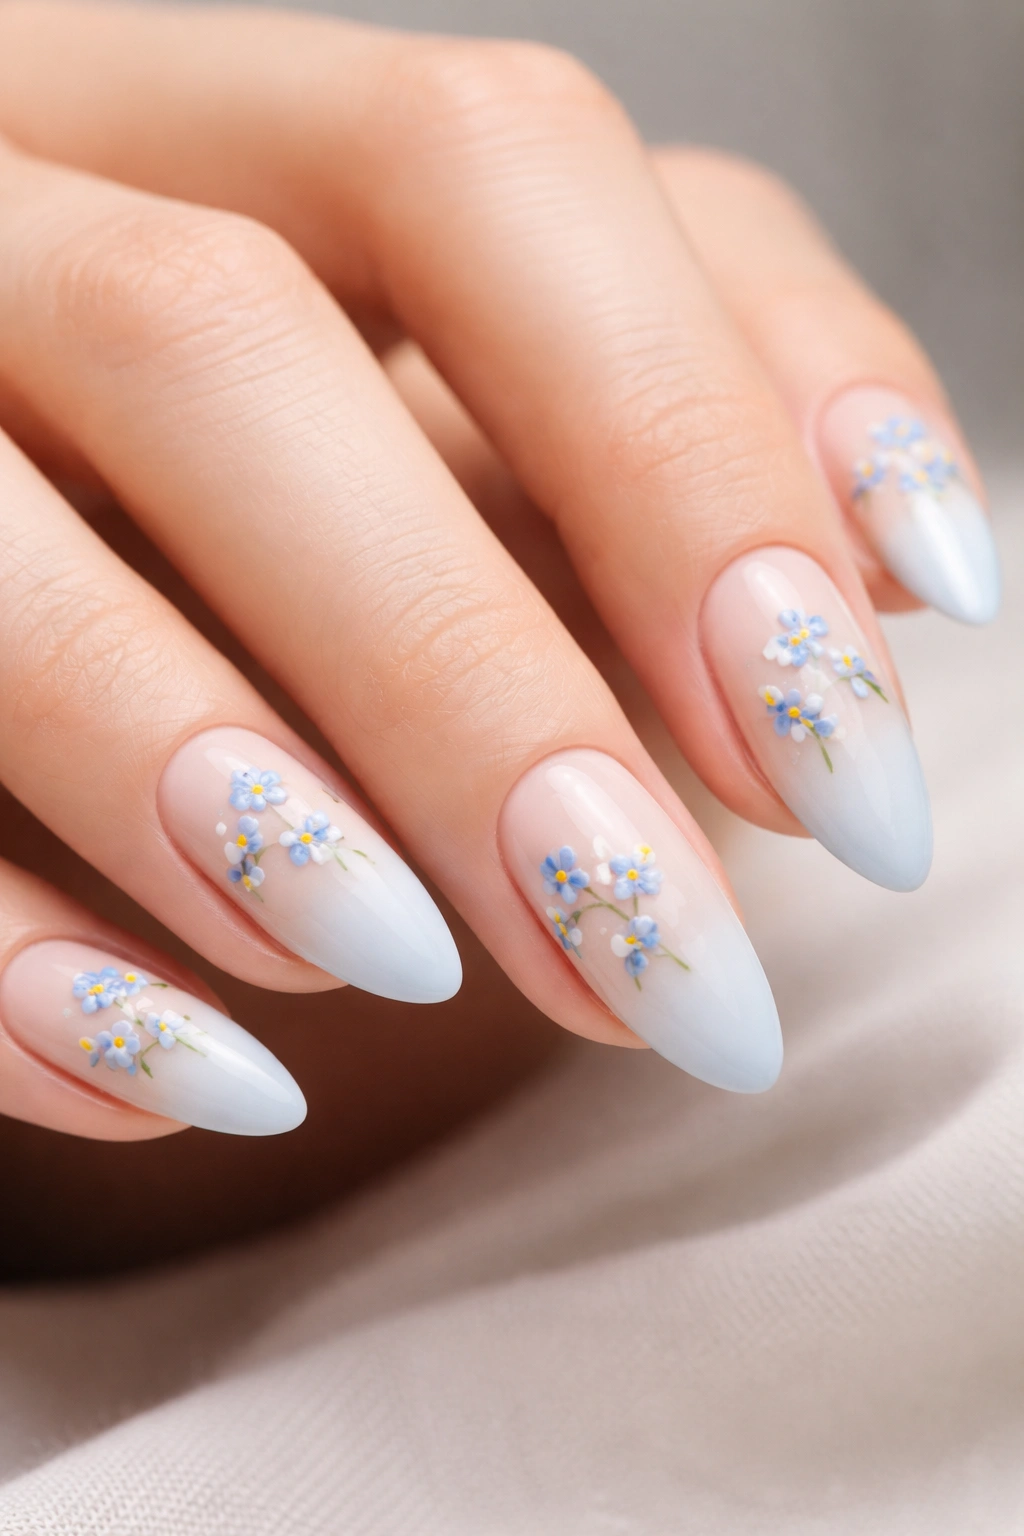
What makes forget-me-not clusters so good on almond nails? The tiny blooms are almost made for negative space. Baby blue petals read softly against a nude or milky base, and the yellow centers keep the flowers from flattening out.
Keep the flowers small. Three to five little blossoms across a hand is plenty, especially if the nails are short to medium length. On longer almonds, you can spread them out a little more, but the clusters should still look airy.
A small detail that matters
Use a pale green stem or leaf only if it stays thin. Thick stems make the design feel heavier than it should. A 9 mm liner brush helps here, because it gives you control without making the line wobble.
This set works when you want florals that whisper instead of announce themselves. It is the manicure version of a small vase on a clean table.
10. Chrome Nude Nails With Translucent Petal Overlays
Chrome changes this whole idea. Put translucent petals over a nude chrome base and the flowers stop looking flat; they seem to float a little above the nail.
The base should stay light. A soft beige chrome or pale rose chrome gives the petals room to show, while a jelly-like petal layer keeps the design sheer. I like this with very thin white veining inside the petals, almost like a shadow line rather than a drawing.
Keep the flowers spaced out. Too many petals over chrome can look busy fast, and the reflective base already gives you enough movement. One larger bloom on the ring finger and a few stray petals on the other nails usually does the job.
This is a good choice when you want floral almond nails with a little shine but do not want glitter everywhere. The chrome does the heavy lifting.
11. Clear Tips With Floating Pressed-Flower Petal Shapes
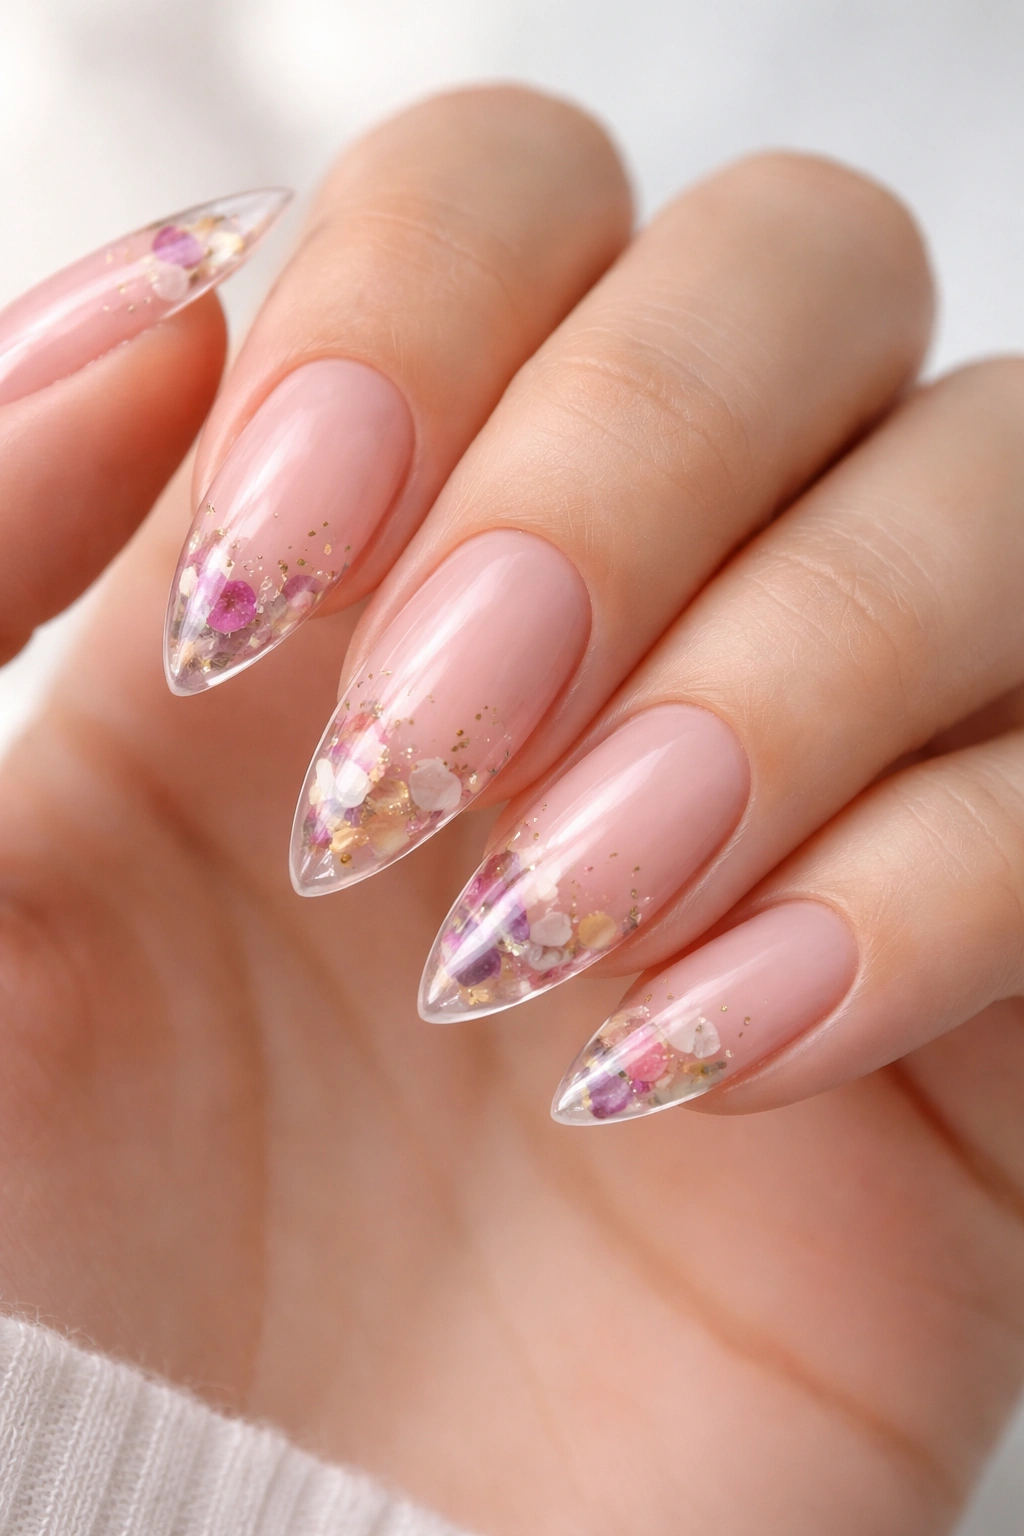
Picture a clear almond tip with petal shapes suspended inside it. That’s the appeal here. Pressed-flower nails can look very pretty, but on almond shapes they work best when the petals feel like they’re floating rather than packed under glass.
Use flattened petals, not thick dried blooms. Real dried petals should be trimmed so they sit close to the nail surface. Leave at least a 1 mm clear border around the edge, or the whole thing starts to look cluttered.
- Choose petals with soft edges and thin veins.
- Place one or two petals per nail, not a full flower head.
- Seal the clear tip with hard gel or a strong top coat.
- Keep the base sheer nude so the pressed pieces stay visible.
The best versions of this set look like a tiny botanical specimen, not a craft project. That difference is huge.
12. Mauve Nails With White Outline Petals
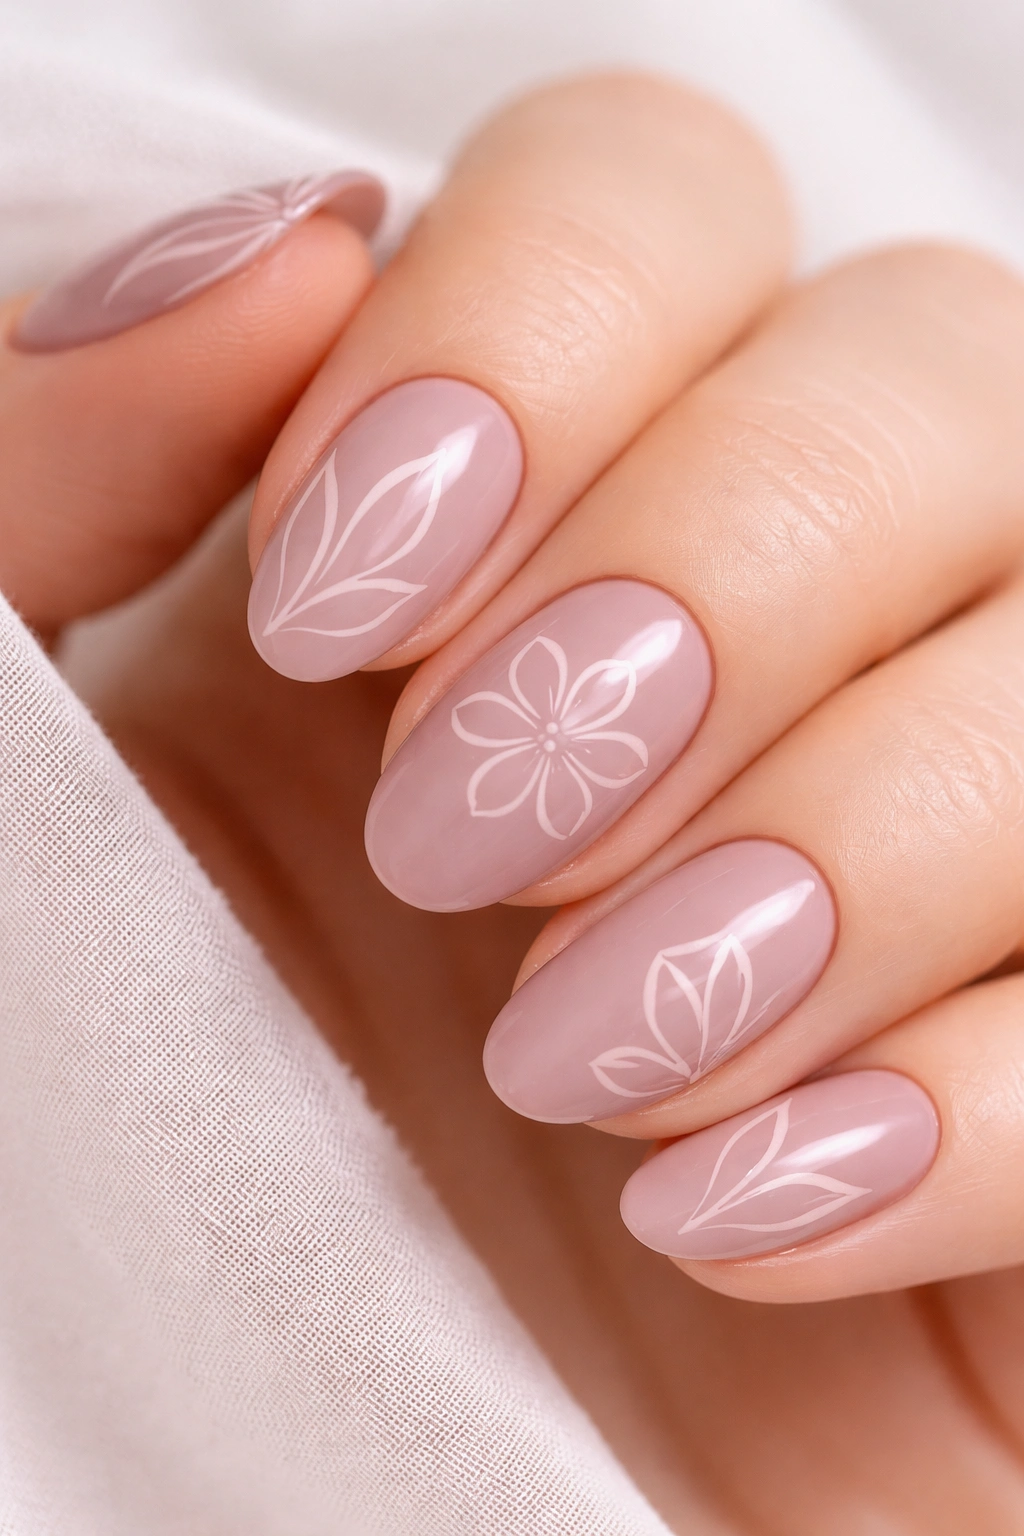
White outline petals on mauve are a cleaner answer if fully colored flowers feel too sweet. Mauve gives the manicure depth, and the white linework keeps the petals legible without blocking the base.
This style is sharp on short almond nails. The outline does not need much room, so the nail can stay compact and still hold the design. A full bloom in the center of one nail, then half-petals or single petals on the others, keeps the set from feeling crowded.
What I like most is the contrast. The mauve base pulls the design toward soft evening wear, while the white line keeps it readable in daylight. It’s a neat trick, and it saves you from needing a lot of color.
A glossy finish makes the lines crisp. Matte works too, but it changes the set into something more muted and a little cooler.
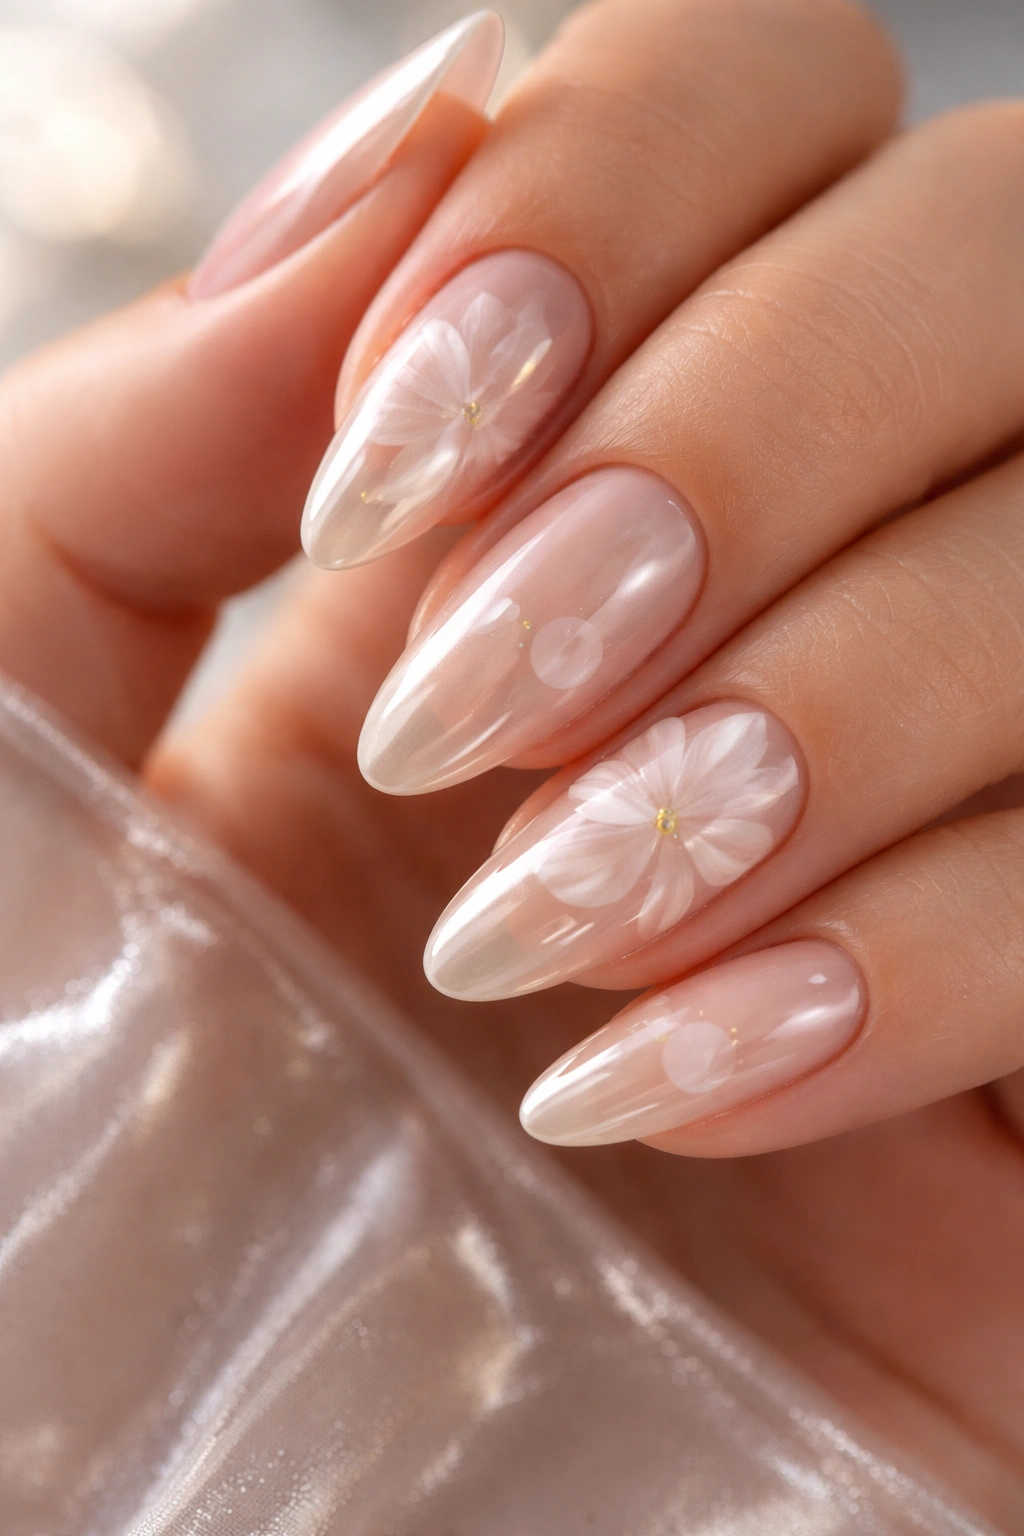
13. Ivory Bridal Nails With Pearl Centers and Petals
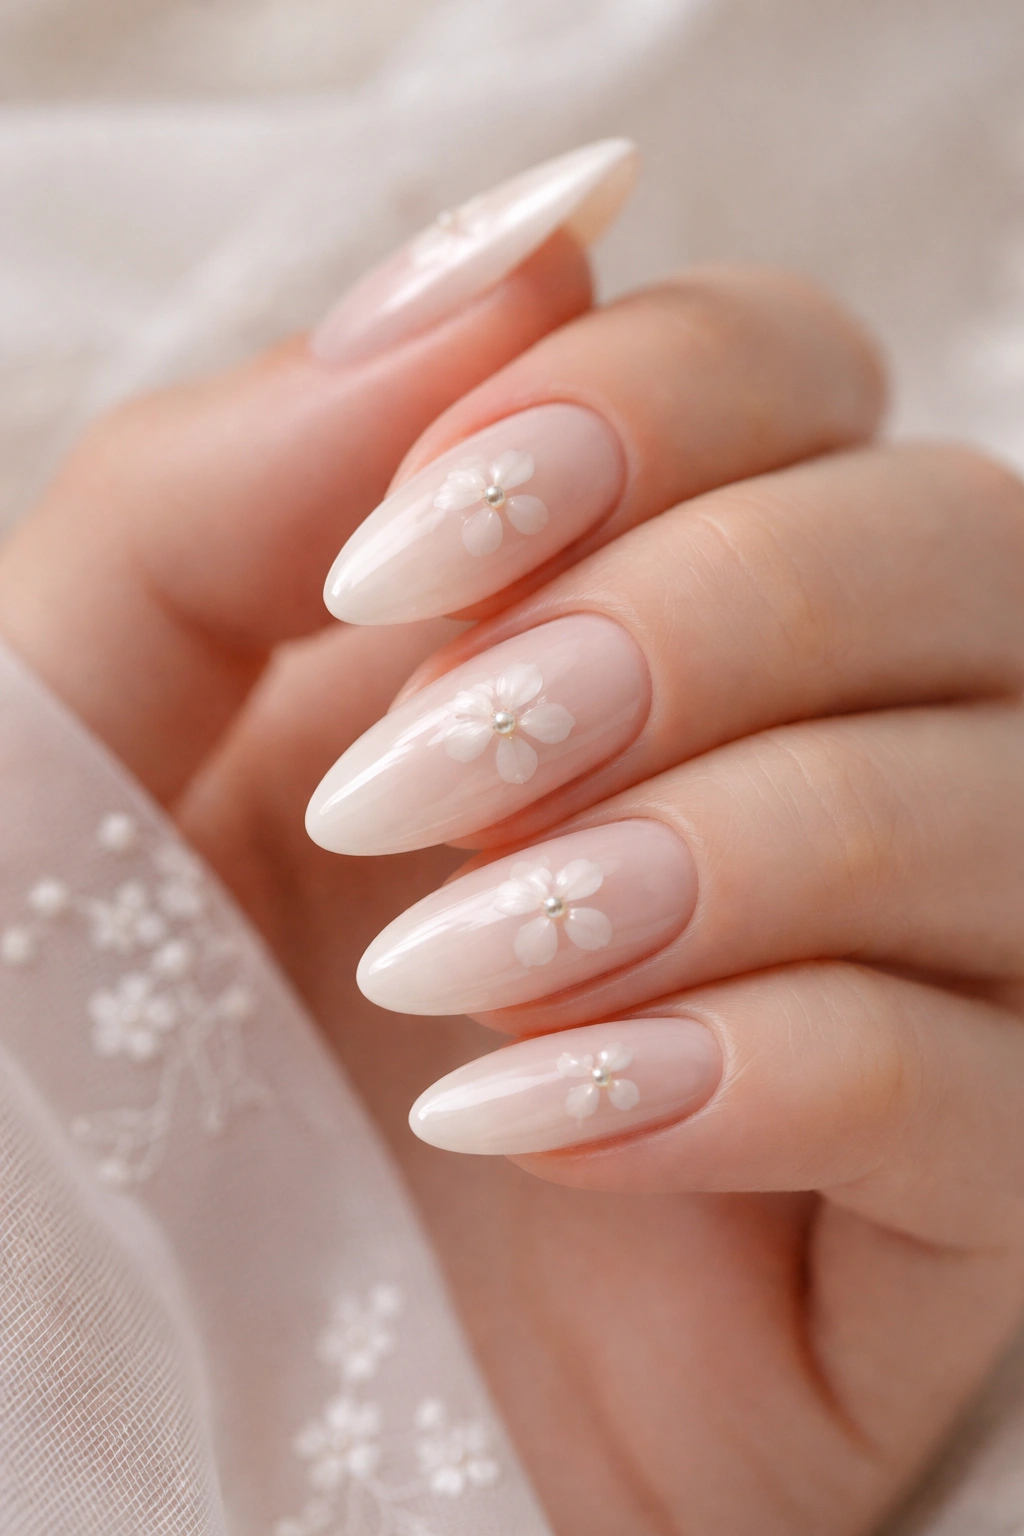
Ivory bridal nails need restraint. Too much ornament and the whole set starts to compete with the dress, the ring, the bouquet, all of it. Petal details and pearls solve that problem because they stay soft and still feel finished.
Bridal palette
Use ivory, sheer blush, or a pale milky beige as the base. These shades keep the manicure bright without tipping into stark white. On almond nails, that softness matters because the shape already gives you a long clean line.
Pearl centers
A single micro pearl or a small caviar bead in the flower center adds texture without weight. Keep the center tiny. If it’s too large, it starts to look like jewelry glued to the nail, and that is not the look here.
Why the set stays soft
The petals should be thin, pale, and slightly translucent. One or two floral nails on each hand is enough. The rest can carry a sheer gloss or a tiny half-petal near the tip so everything feels connected.
This is one of those sets that looks calm in photos and even better in person.
14. Black-Tipped Almond Nails With Pale Petals
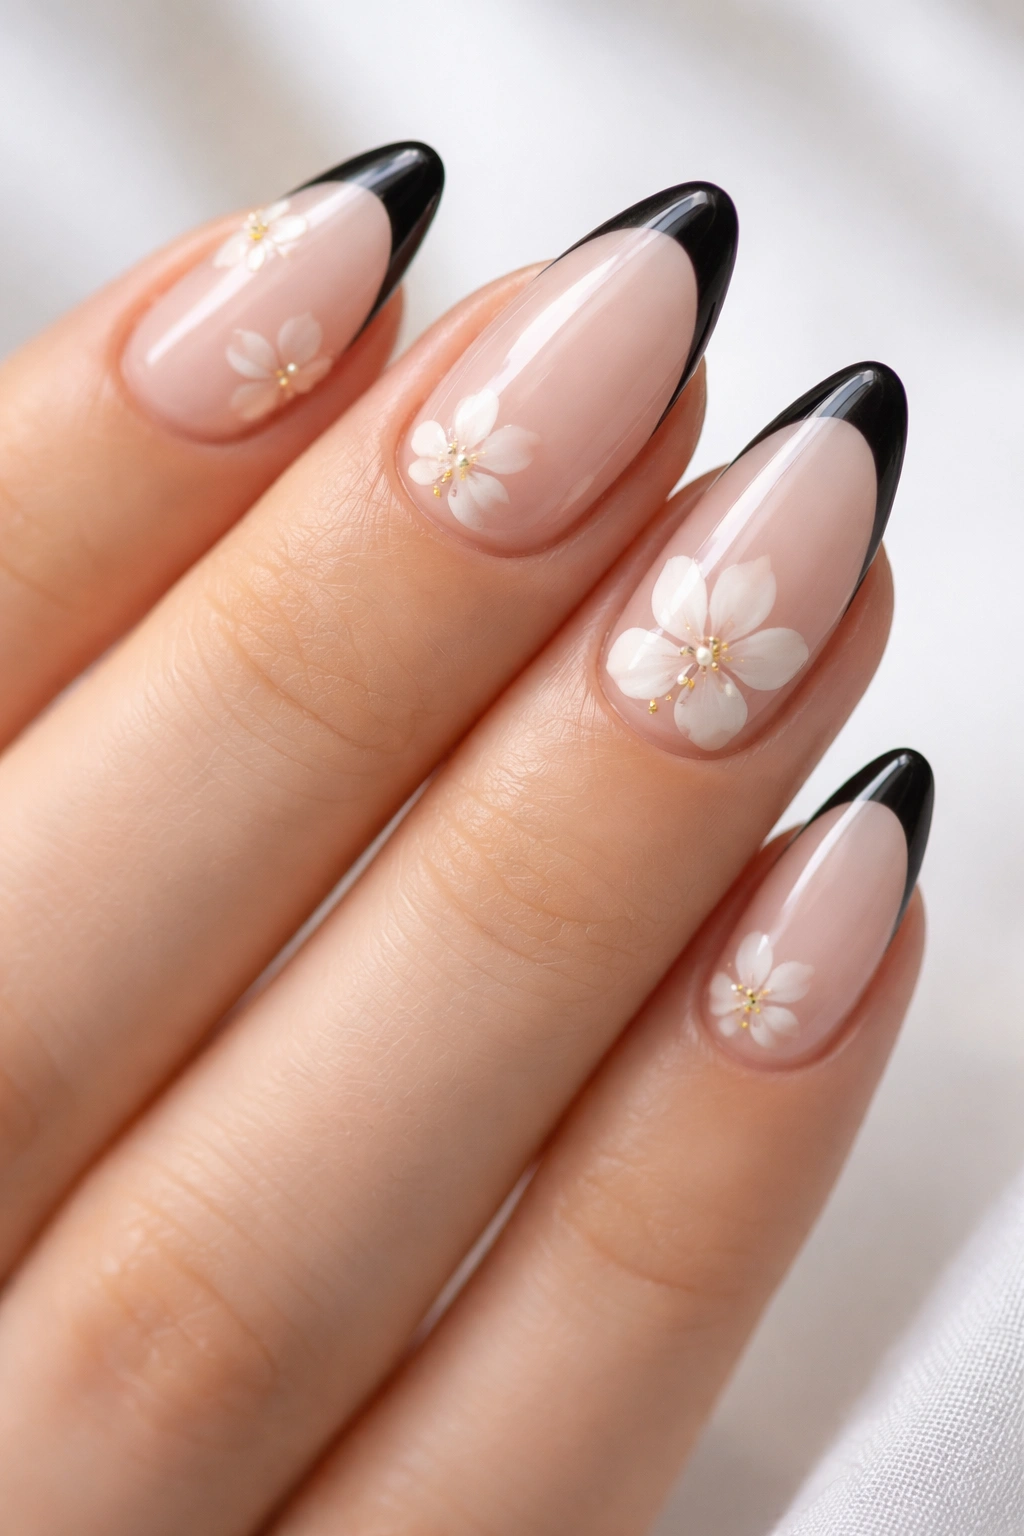
Black tips can handle flowers, and they look sharper because of it. The contrast keeps the petals from drifting into something sugary, which is useful if you like floral nail art but not the sweet side of it.
Keep the black tip thin — about 1.5 to 2 mm on medium almond nails. That leaves enough space for ivory or pale blush petals to bloom just under the line. If the black tip gets too thick, the petals start competing with it.
I like this set with a sheer nude base and one accent nail that carries a fuller flower. The rest can stay minimal, with a single petal arc or a tiny bud near the cuticle. That balance makes the black look deliberate, not harsh.
Skip glitter here. The whole point is contrast and shape. Glossy top coat, clean black edge, pale petals. That’s enough.
15. Sunset Ombre Nails With Coral and Rose Petals
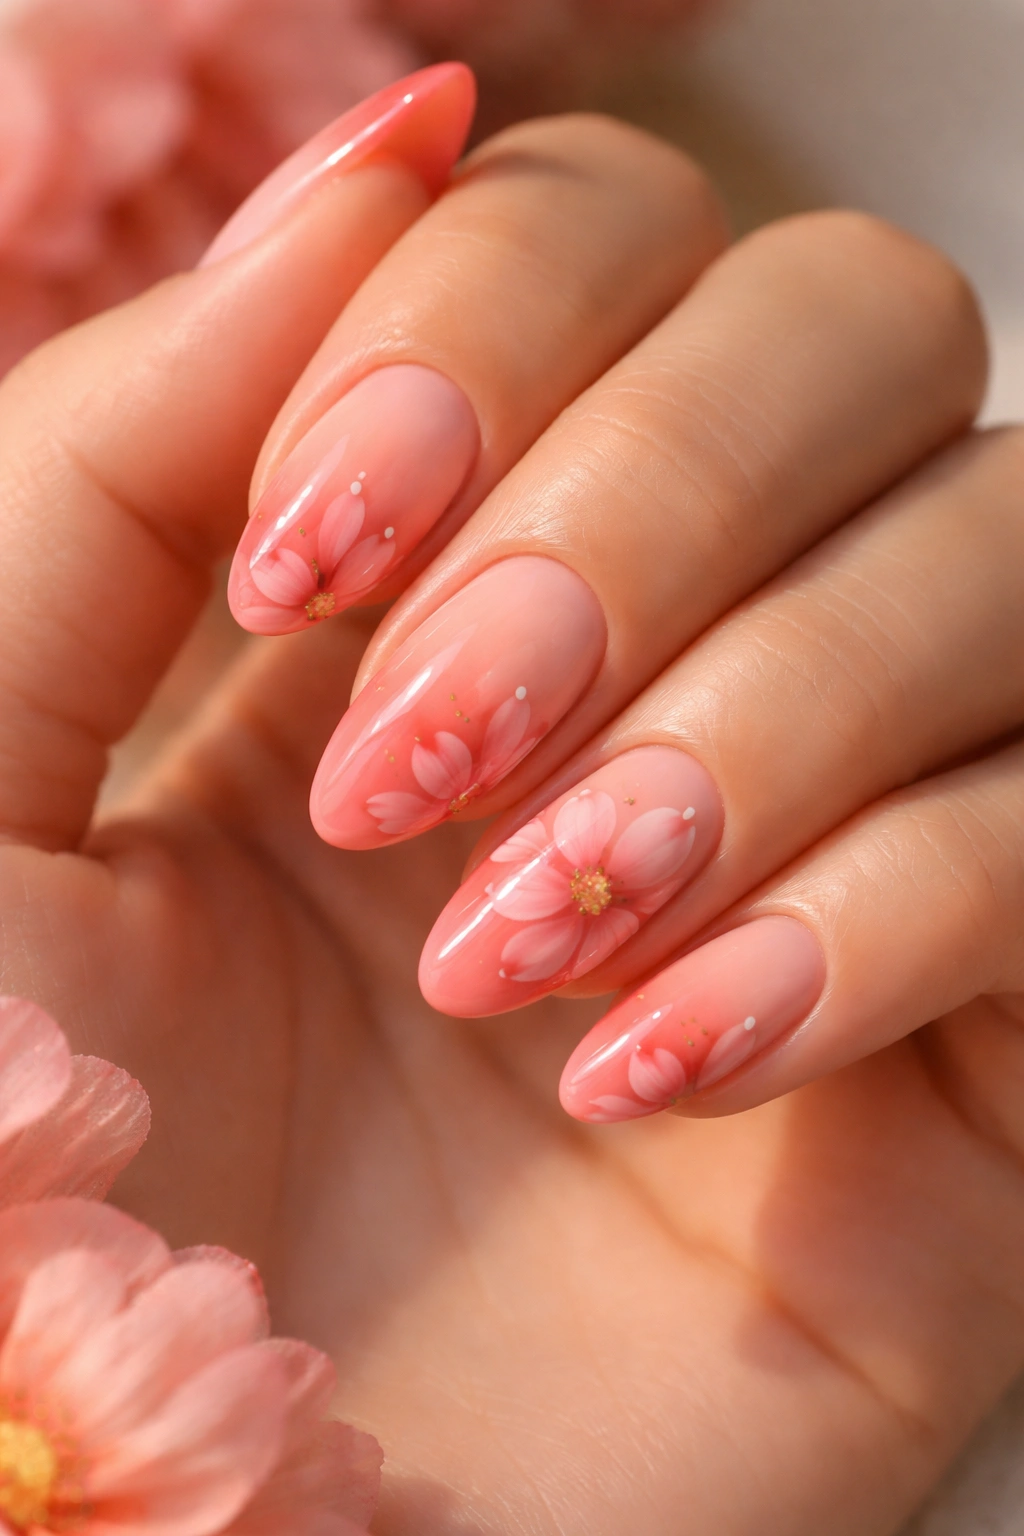
Why does sunset ombre feel so balanced with rose petals? Because the warm colors melt into each other before the flower details ever show up. Coral, apricot, and soft pink already sound like petals, so the floral art fits in without a fight.
Start with a gradient that moves from peach at the cuticle to deeper rose at the tip, then paint the petals in slightly darker coral so they stand apart. The petals should follow the curve of the nail instead of sitting in a straight row. That diagonal movement helps the almond shape stay graceful.
Where the petals land
Put the largest bloom on the ring finger, then let the other nails carry half-petals or tiny buds. If every nail gets the same flower, the gradient loses its drama. One full bloom is enough to anchor the set.
A glossy finish is the right call here. It keeps the ombre looking juicy and makes the petal edges hold their color.
16. Sage Green Nails With Tiny Budding Blooms
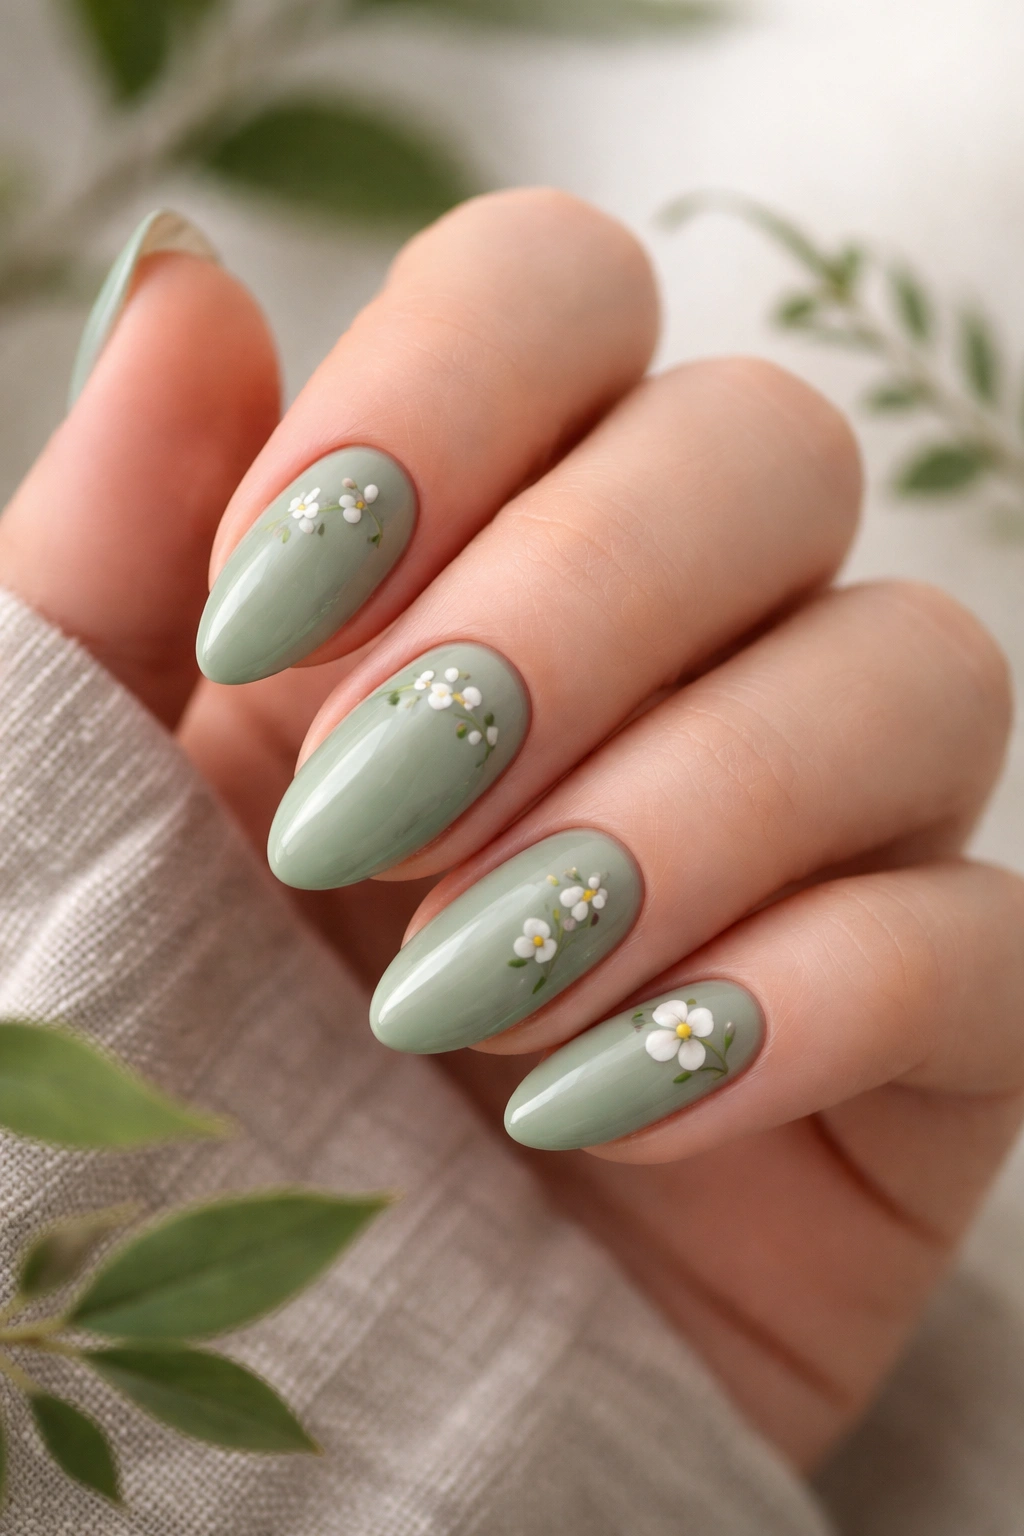
I keep coming back to sage green when someone wants floral nails without pink. It feels grounded, a little cooler, and it gives tiny buds a place to stand out without shouting.
This set works because the flowers are still in motion. Budding blooms, not full roses. A tiny white or pale cream bud near the cuticle, a narrow leaf beside it, and maybe one open petal on an accent nail — that’s enough.
- Use a muted sage base, not an olive one.
- Keep buds tiny and round, about 1 to 2 mm.
- Add one leaf pair on the ring finger for balance.
- Finish with gloss so the green stays fresh-looking.
The manicure feels tidy, almost botanical, and that’s the appeal. It looks like something clipped from a small herb garden rather than a painted bouquet.
17. Plum Nails With Velvet Finish and Fine Petal Linework
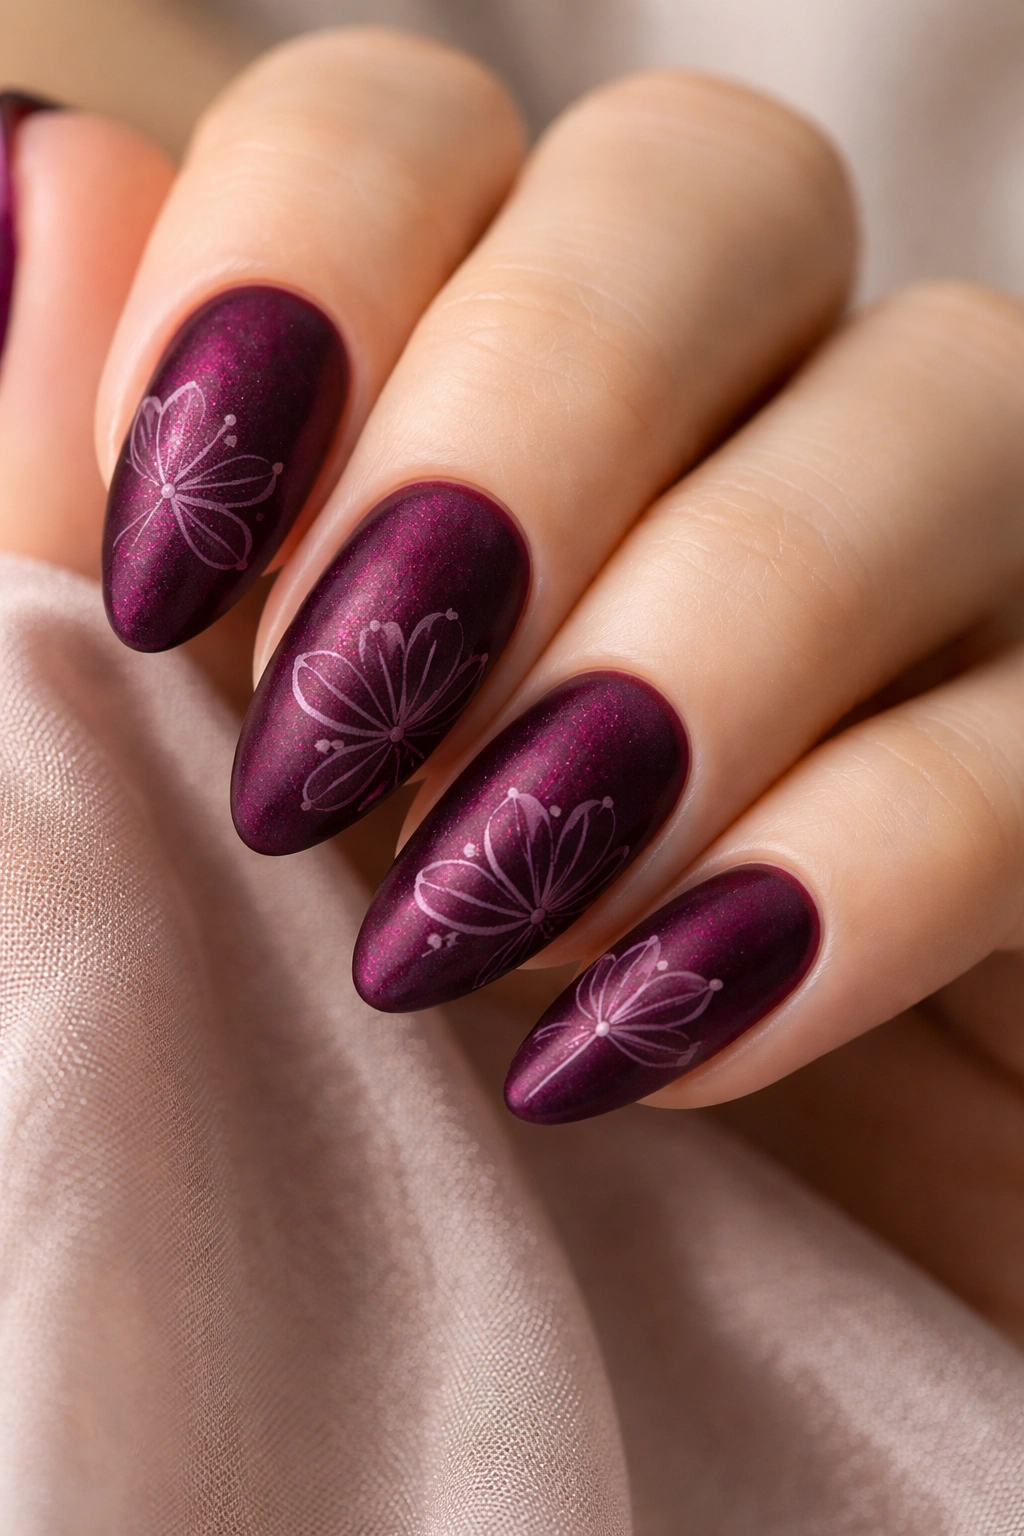
Plum velvet nails take a steady hand. The color is already rich, so the petal details need to stay fine if you want the design to hold its shape.
Glossy plum can feel heavy. Velvet plum softens the color and gives the nail a soft, almost fabric-like surface that makes pale lilac or silver petal linework pop without needing a lot of contrast. I like this with very thin petals, more outline than fill.
The almond shape helps here because the point keeps the darker color from feeling flat. On longer nails, the petals can stretch a little. On shorter ones, keep the flowers near the center and leave the tips cleaner.
This is a good night-out set, but not a loud one. It has depth. It does not need sparkle to work.
18. Pink Jelly Nails With Scattered Petal Confetti
Pink jelly nails can look childish fast if the petal pieces are too large. The trick is to keep the base translucent and the petals tiny, like little fragments suspended in syrup.
A jelly pink base gives the nail that glassy look people like, but the petal confetti stops it from feeling plain. Use a few small petal bits in soft white, rose, or pale coral. One nail can hold a slightly fuller flower, while the others stay scattered and open.
What to ask for
- A sheer jelly pink base, not an opaque cream.
- Petal fragments no larger than a grain of rice.
- One accent nail with a more complete bloom.
- A glossy top coat to keep the translucent effect alive.
This set is good if you like cute details but still want the manicure to feel grown-up. The transparency makes all the difference.
19. Short Almond Nails With One Petal Accent Per Nail
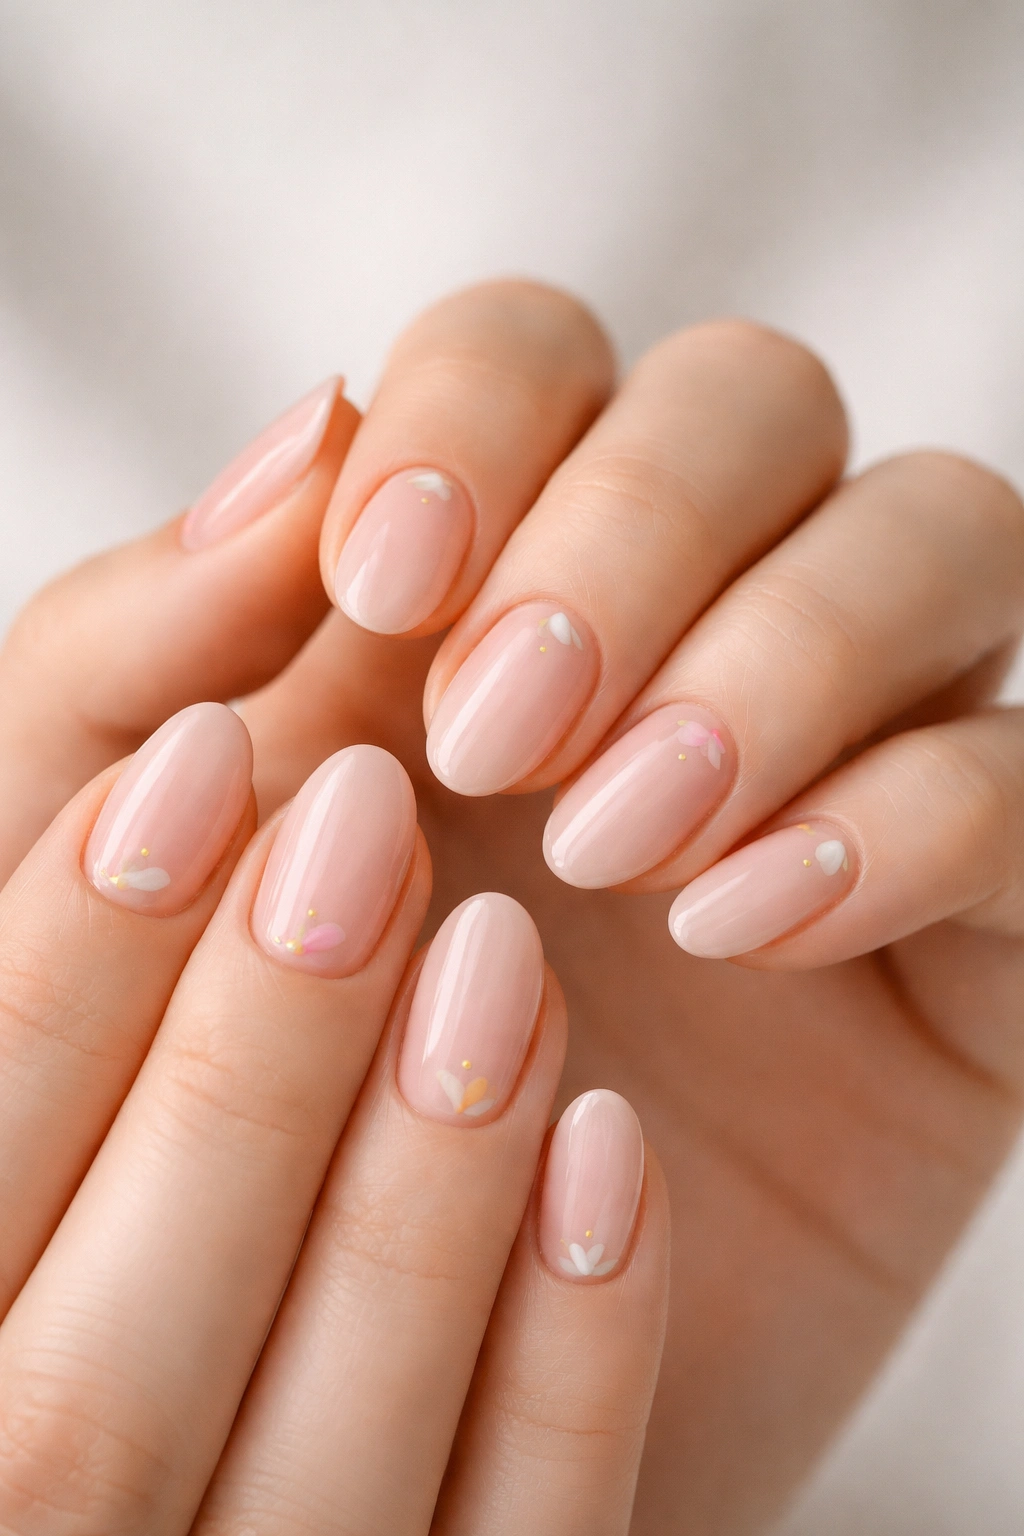
Short almond nails do not need big blooms. One petal accent per nail is enough to make the design feel floral without swallowing the shape.
Why the mini approach works
Shorter nails lose room fast, so a single petal cluster keeps the composition clean. A tiny blossom near the sidewall or a half-petal at the cuticle gives you the floral cue without crowding the free edge.
Best placement
I like a staggered pattern here. Put the fuller petal on the ring finger, a smaller one on the index, and keep the rest very light. That keeps the manicure from looking repetitive. Negative space is your friend on short almonds.
Color pairings
Soft nude, pale peach, and powder pink all work. White petals are safest if you want the set to stay clean. If you want more contrast, use a mauve base and a cream petal outline.
This is the practical option for people who type a lot but still want the florals to show.
20. Cream Almond Nails With Mixed Petal Details
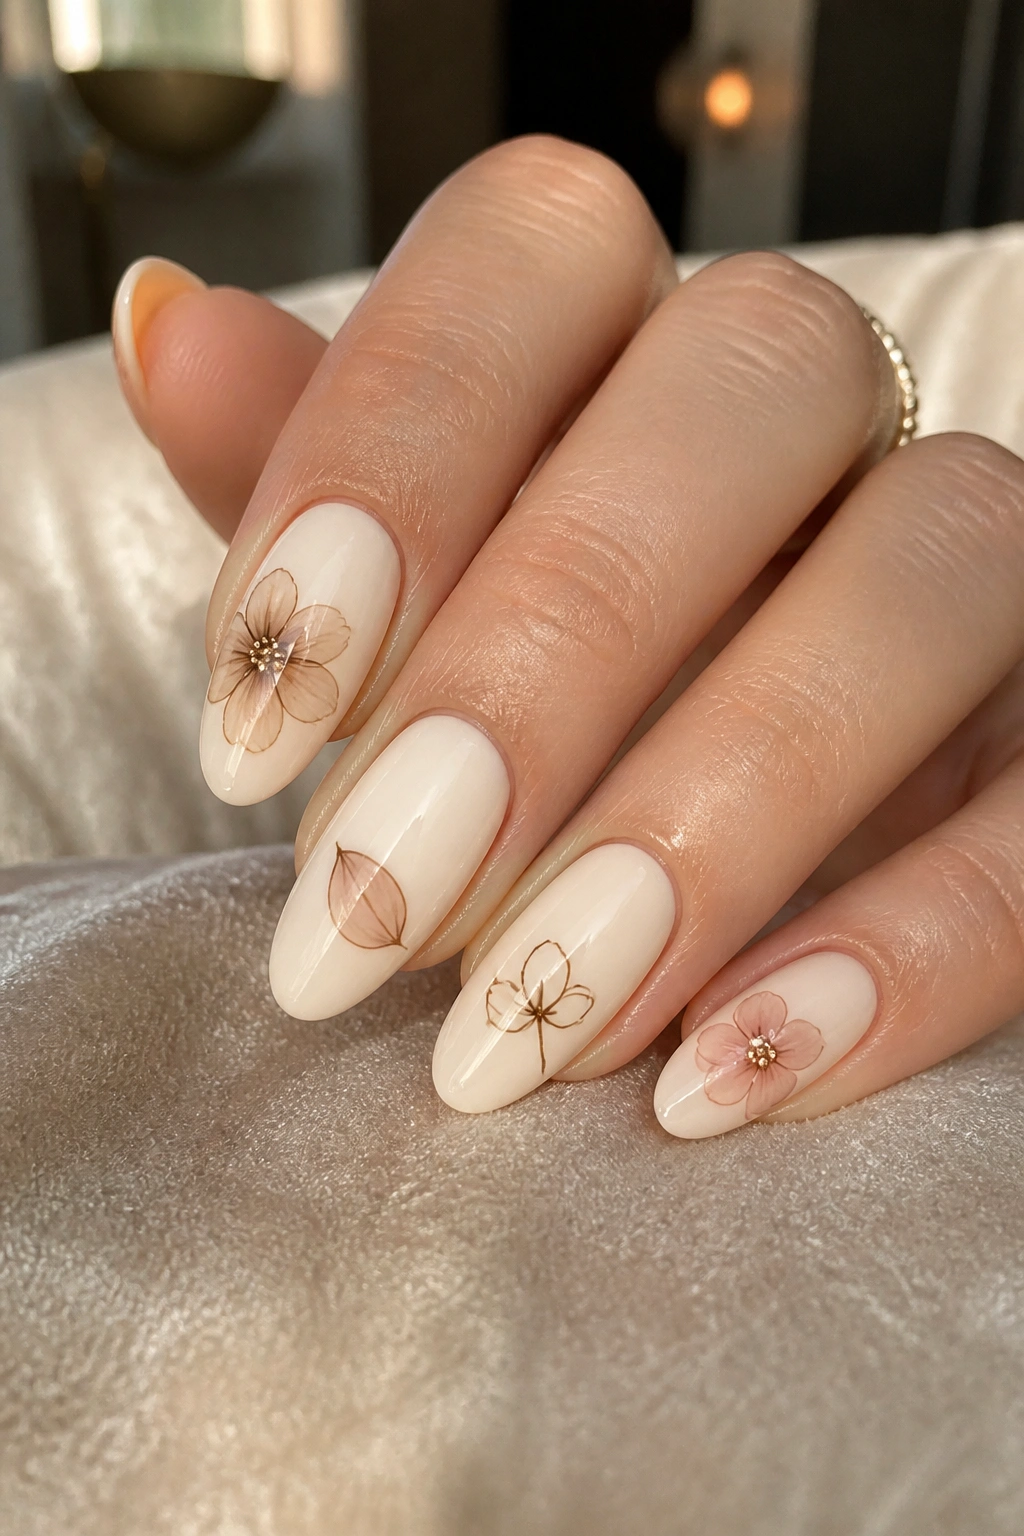
Cream almond nails are the easiest canvas when you want mixed petal details. One nail can hold a full blossom, another a single curving petal, another a tiny outline bloom, and the set still feels tied together because the base stays the same.
That’s what makes this idea such a useful final pick. It lets you borrow from the cleaner looks above and the bolder ones too, without locking yourself into one mood. A tiny gold center on one finger, a white outline petal on another, and a soft blush bloom on the ring finger can live in the same manicure without fighting.
If you only save one idea for a nail tech, save this one. It gives room to adjust the scale, the color, and the amount of detail to match your nail length and your patience level. That part matters more than people admit.
Cream is forgiving. Petals are forgiving too. Put them together on an almond shape, and you get a set that feels calm, polished, and easy to wear without looking plain.
