

Almond nails already do half the styling work. They slim the hand, soften the fingertip, and make even a plain nude polish look a little more finished. Add a bow, and the manicure moves straight into coquette territory without needing much else.
The strongest coquette almond nail ideas usually have one thing in common: restraint. A tiny bow near the cuticle, a ribbon-like French tip, a pearl accent, a single 3D charm on one finger—those details feel deliberate. Stack too many of them together and the nail starts to look busy instead of charming, which is a very different mood.
I’ve always liked bow details more on almond shapes than on square ones. The taper gives the art somewhere to live. A bow on an almond nail follows the curve instead of fighting it, and that little bit of shape discipline changes the whole result.
There’s also the wearability piece, which people skip too fast. If you type all day, wash dishes, or hook your nails into bags and jacket sleeves, the low-profile versions hold up better. Flat painted bows, micro stickers, and tiny pearls stay neat longer than a chunky charm that catches on everything. That is the whole game, really.
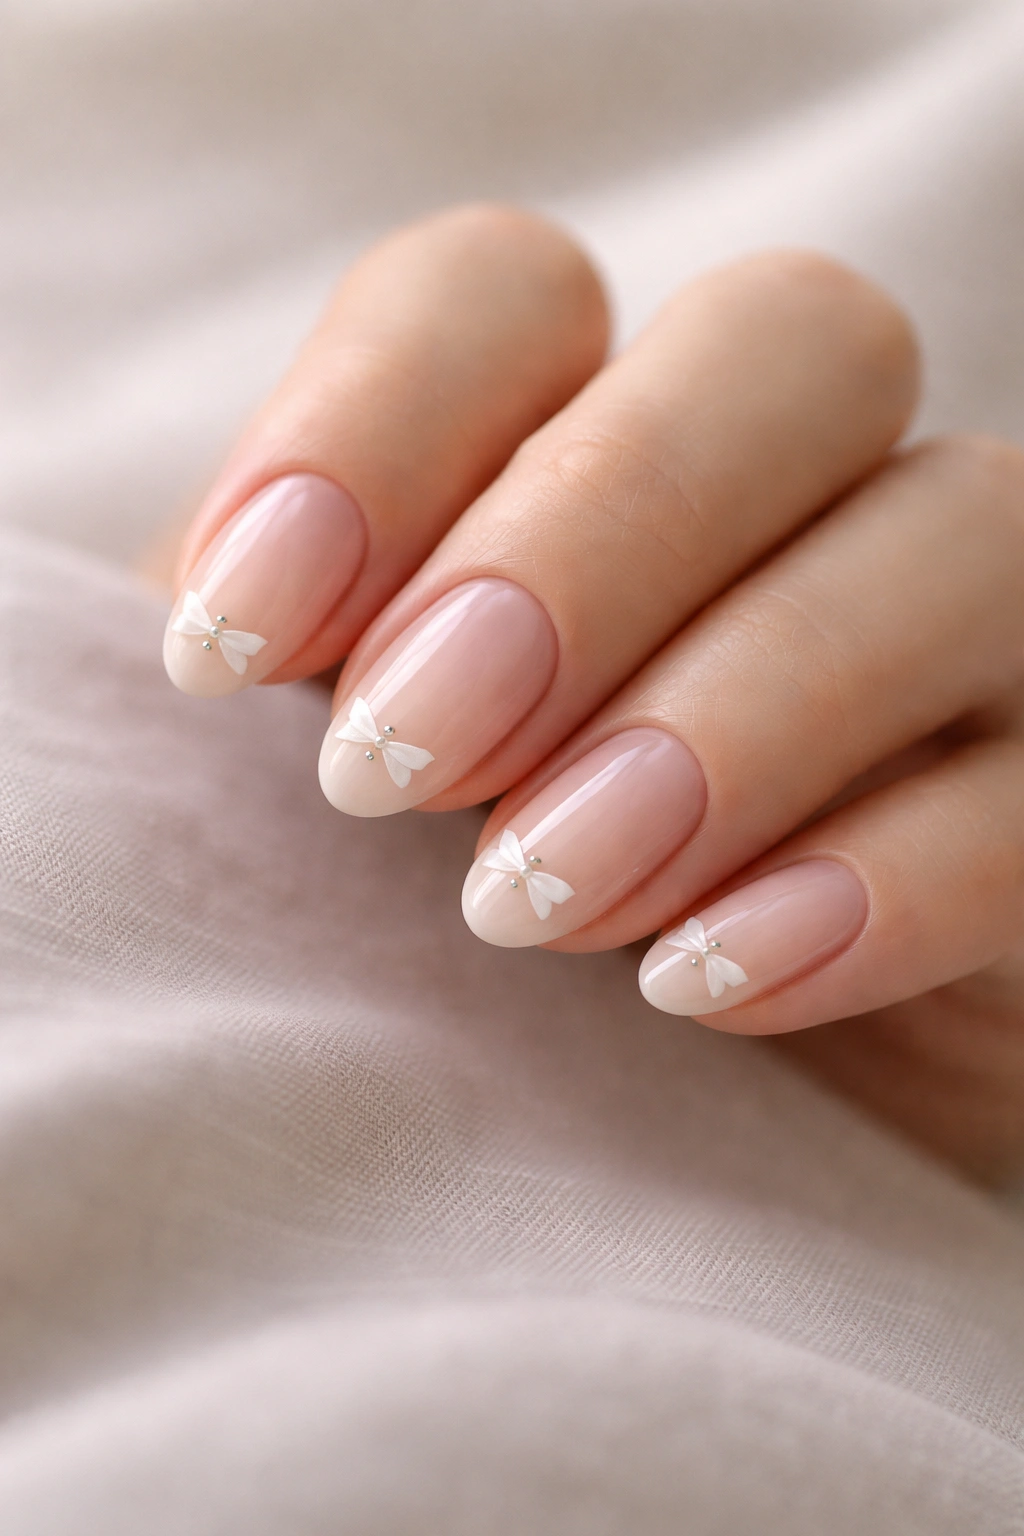
1. Sheer Blush Nails with Tiny Bow Cuticle Decals
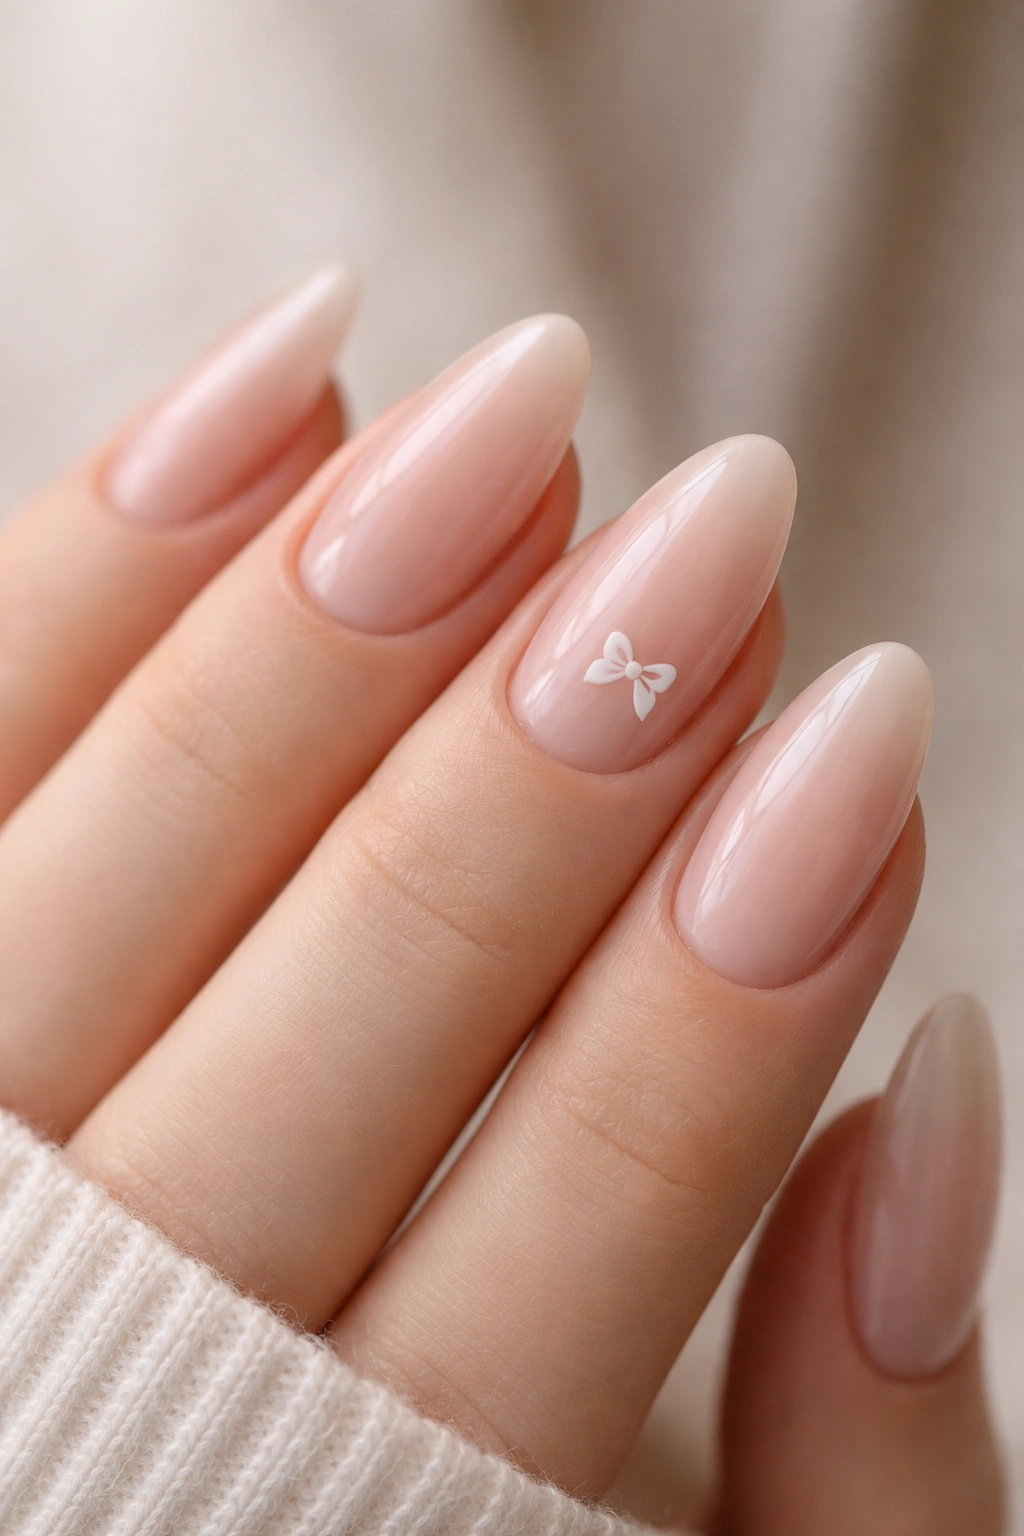
A sheer blush base with a tiny bow sitting near the cuticle is the cleanest way to wear this look. It feels soft from across the room, but up close it still has that little coquette wink that makes the manicure feel styled instead of plain.
Why this one works
The trick is scale. A 2 mm to 4 mm bow looks delicate on almond nails and keeps the negative space doing some of the visual work. I like this best on medium-length almonds, because there’s enough room for the bow to breathe without crowding the nail bed.
If you want it to look polished, keep the bow either pure white or pale pink. Nude-on-nude can disappear, which is fine if that is the point, but I prefer a tiny contrast. It reads cleaner.
- Ask for a sheer blush or jelly pink base.
- Place the bow just above the cuticle, not dead center.
- Keep the rest of the nail bare or add one thin glossy top coat.
- Choose one accent nail on each hand if you want a lighter look.
My favorite version: a blush base with one tiny white bow on the ring finger and nothing else. It never feels fussy.
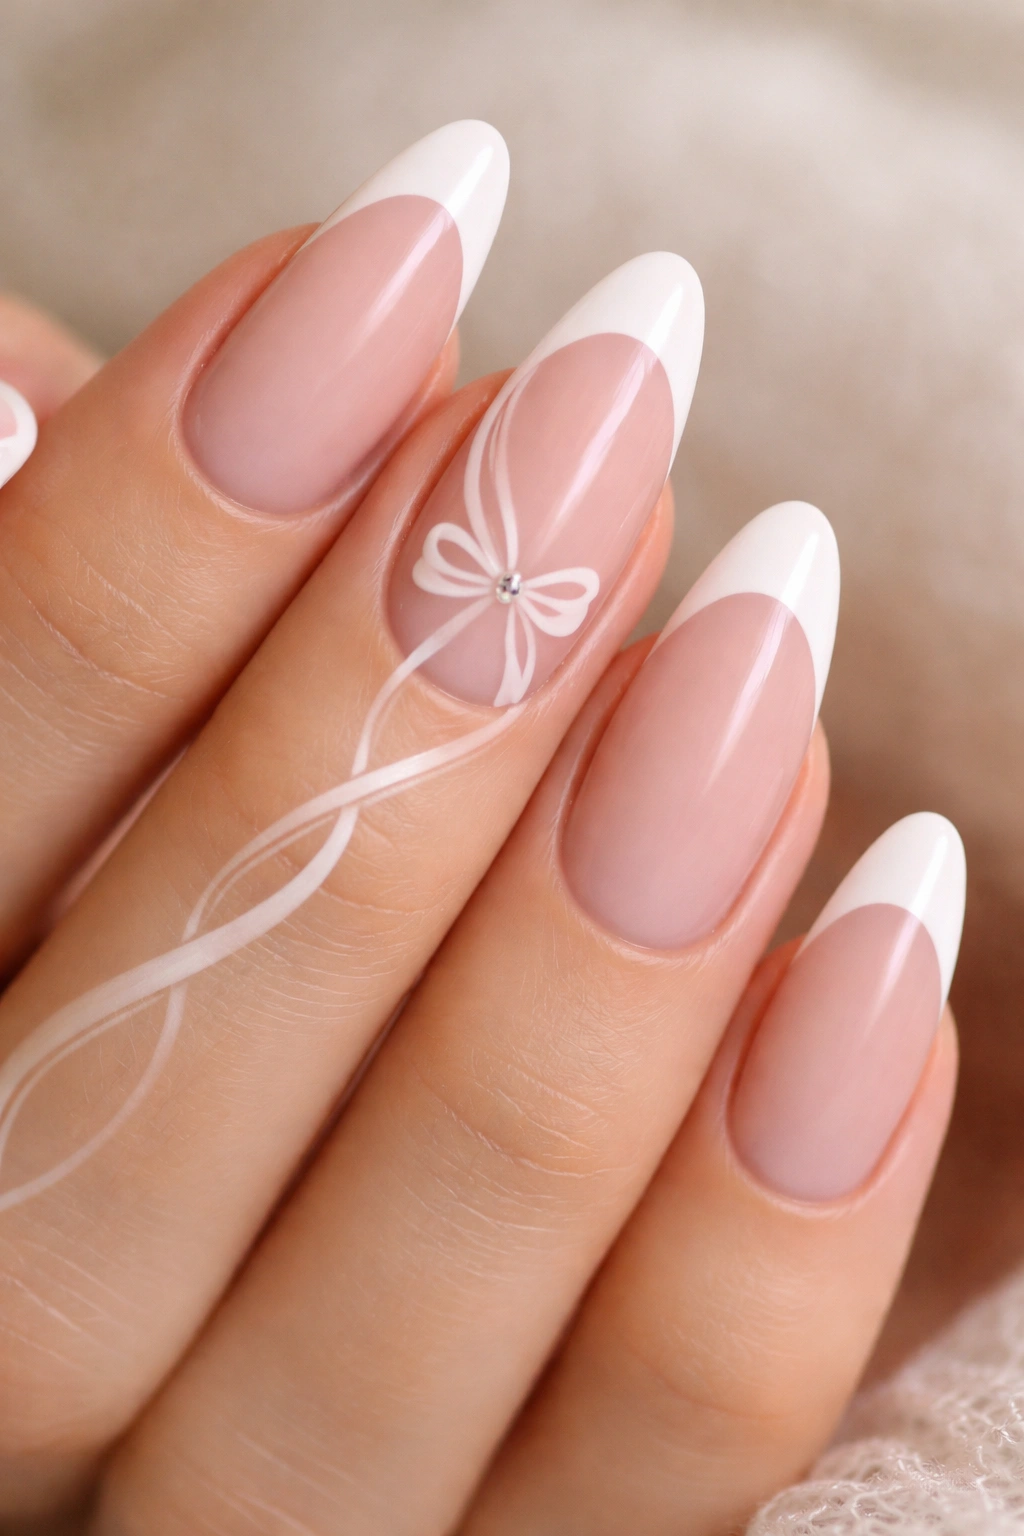
2. White French Tips with Satin Bow Accents
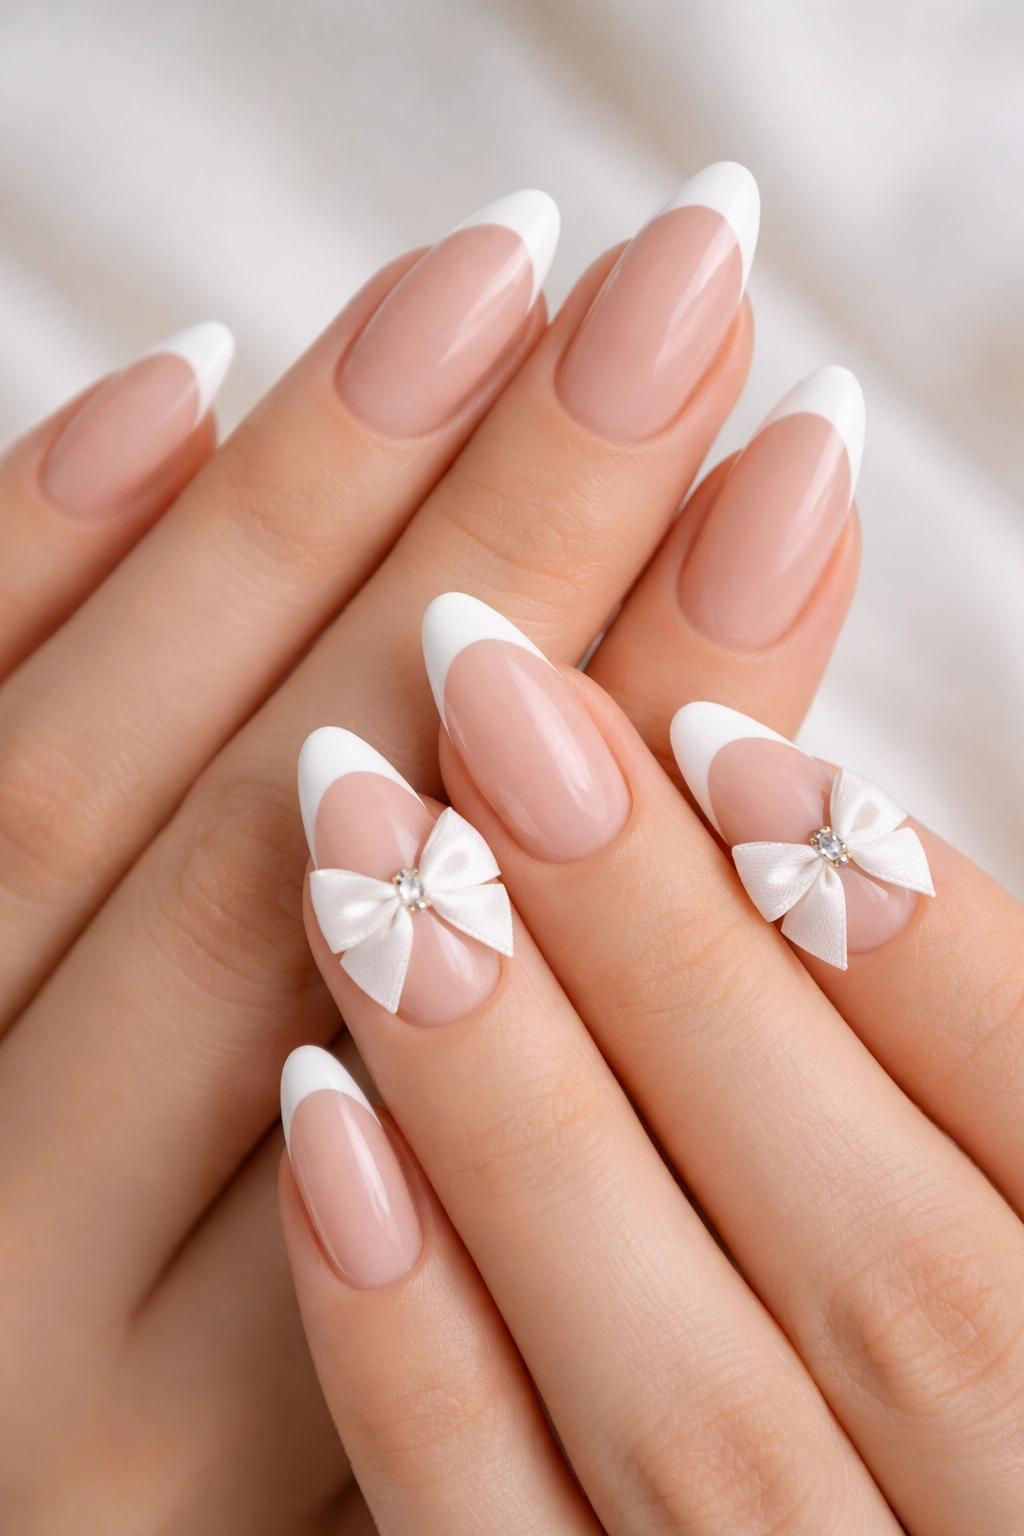
What happens when a French manicure gets a ribbon bow? It stops looking preppy and starts looking like a little gift box. That’s the charm of this one: the structure of the French tip keeps it tidy, and the bow softens all that crisp white.
The detail that matters here is the smile line. Keep the French tip narrow—about 2 mm to 3 mm on medium almonds—so the bow remains the star. If the tip is too thick, the whole nail starts to feel heavy. A satin bow, painted in opaque white or ivory, works better than a dark one because it keeps the look airy.
I like this version for people who want something sweet but not sugary. It has a neat, tailored feel. Almost old-fashioned, in a good way.
A small bow on just one nail per hand is enough. If you add one to every finger, the manicure can lose its shape and start to blur together.
3. Milky Pink Chrome with a 3D Bow Charm
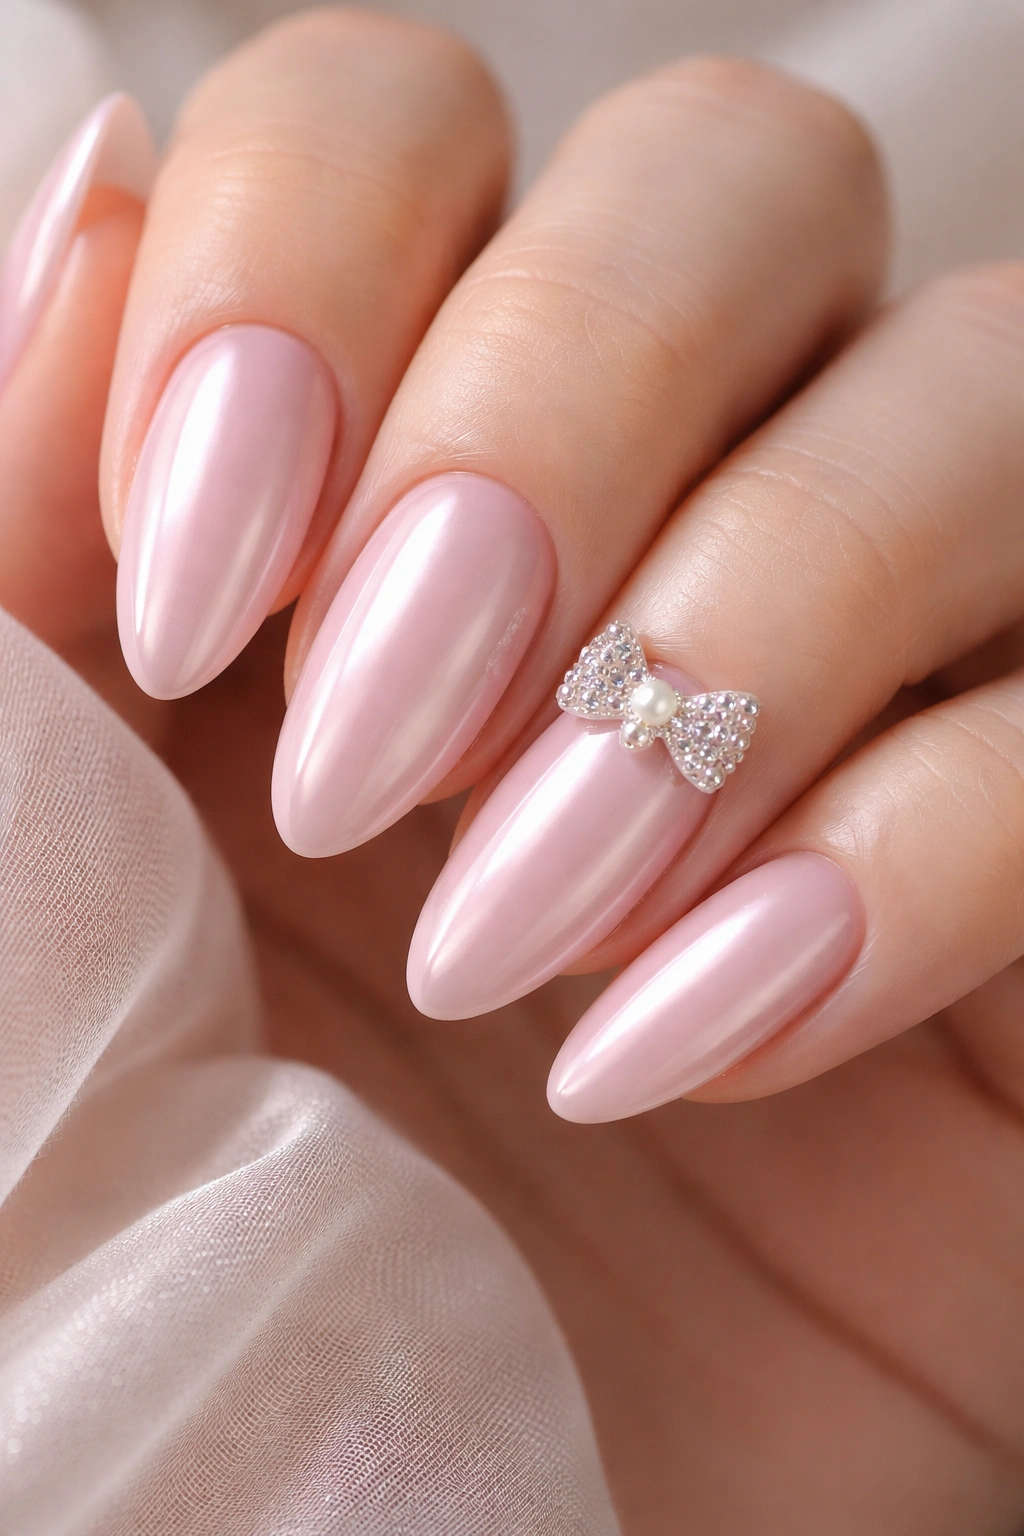
Milky pink chrome has a soft glow that changes as you move your hands, and a 3D bow charm sitting on top of that finish gives the whole manicure a tiny jewelry-box feel. It’s shiny, yes, but not the harsh kind of shine that makes the nail look cold.
The base should stay cloudy. That milky layer is doing the heavy lifting here because it stops the chrome from becoming too metallic. A soft rose chrome or pearl chrome is usually kinder than silver, especially if you want the bows to look sweet instead of futuristic.
A 3D charm needs a little planning. One accent nail per hand is usually enough, unless you live very gently with your hands. Anything taller than a few millimeters can snag on hair or knit sleeves. Keep the bow low-profile and ask for extra sealing around the edges, not across the whole charm, so the shape stays crisp.
This is the manicure I would wear for a party, a dinner, or anything where you want people to notice your nails in a second glance.
4. Ballet Pink Micro-French with Ribbon-Line Bows
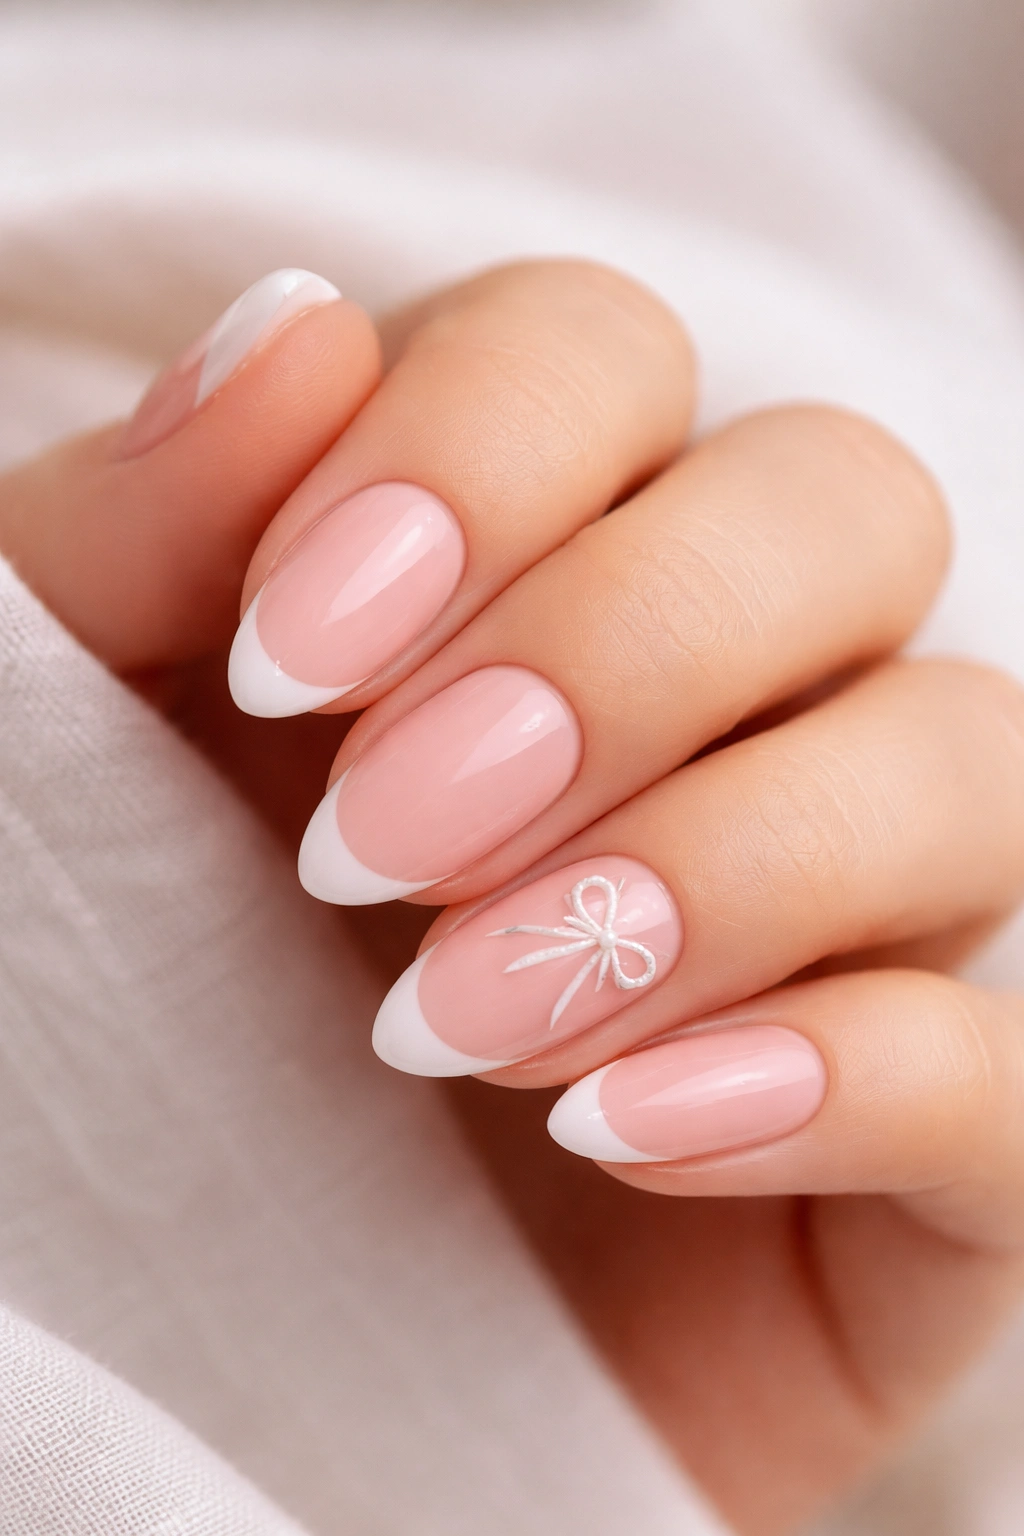
This is the cleanest coquette manicure on the list. Really. A ballet pink base with a micro-French line and a bow drawn in a thin ribbon style feels polished, grown-up, and still very feminine.
The key is the line work. A ribbon bow should look like it was sketched with one steady breath, not traced with a shaky hand and corrected three times. A fine liner brush and a steady top coat are what keep it from looking messy. If your nail tech is good with a striping brush, this design can look almost editorial.
What to ask for
- A pale ballet pink base with a glossy finish.
- A French tip that stays under 2 mm.
- One bow per accent nail, drawn with thin ribbon loops.
- No glitter, no pearls, no extra dots.
It’s a restrained look, and that is why it works. The almond shape already gives you the softness; the bow just points the eye in the right direction.
5. Red Coquette Nails with Polka Dots and Bows
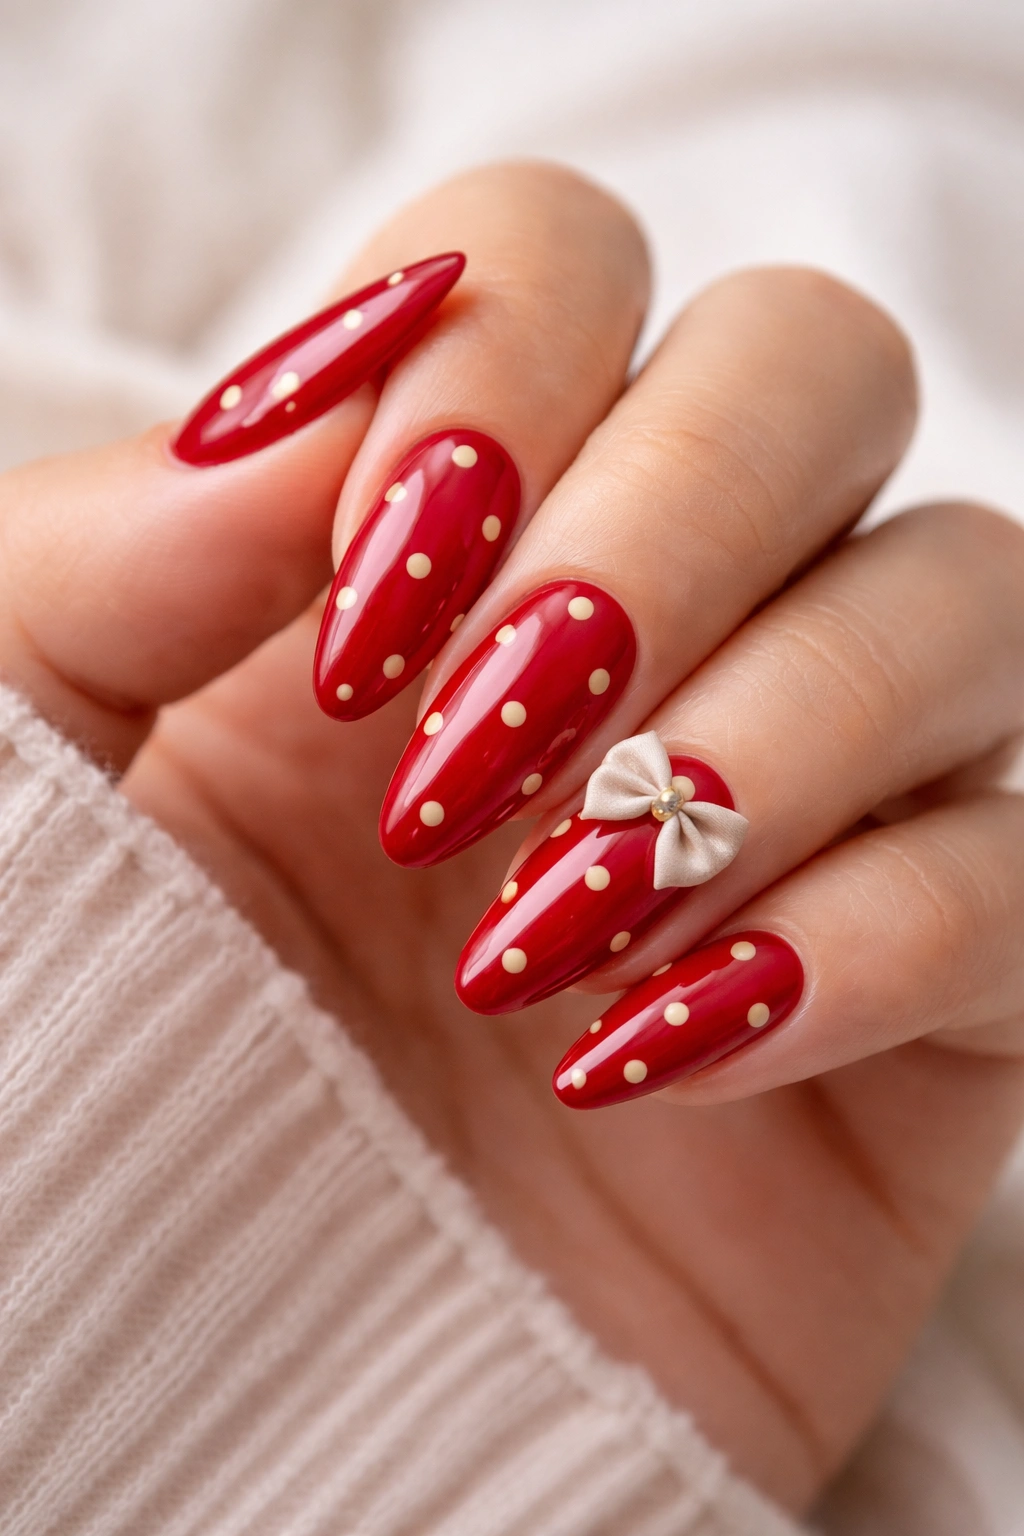
If you want your manicure to feel like a vintage candy box, start here. Red polish, cream dots, and a few tiny bows can look playful without tipping into costume territory—if you keep the palette tight.
I like a true cherry red rather than a brick red for this idea. Cherry red has that lively brightness that plays well with the coquette look. Cream or soft white dots break up the color, and the bows give the whole thing a more finished, dressy edge.
A small pattern rhythm helps. One bow on the ring finger, polka dots on two nails, and solid red on the rest is enough. Too many dots, and the nails start to feel crowded. Too many bows, and the whole thing gets loud in a hurry.
This one is for people who like their nails to have personality. Not every manicure needs to whisper.
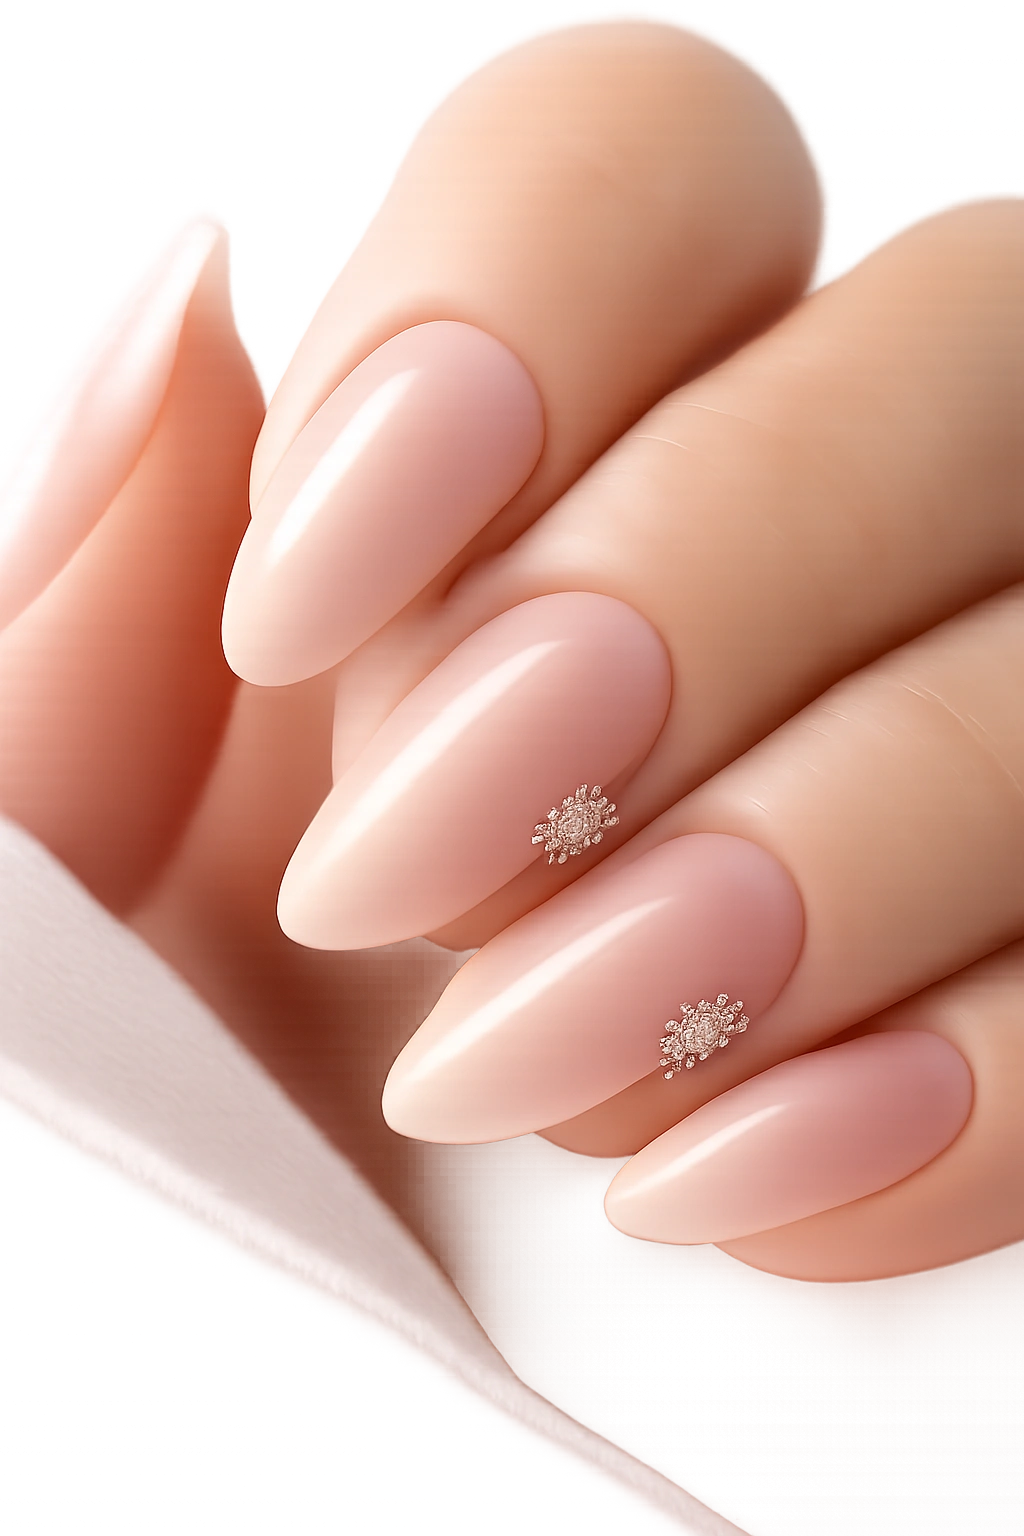
6. Nude Almond Nails with Pearl-and-Bow Details
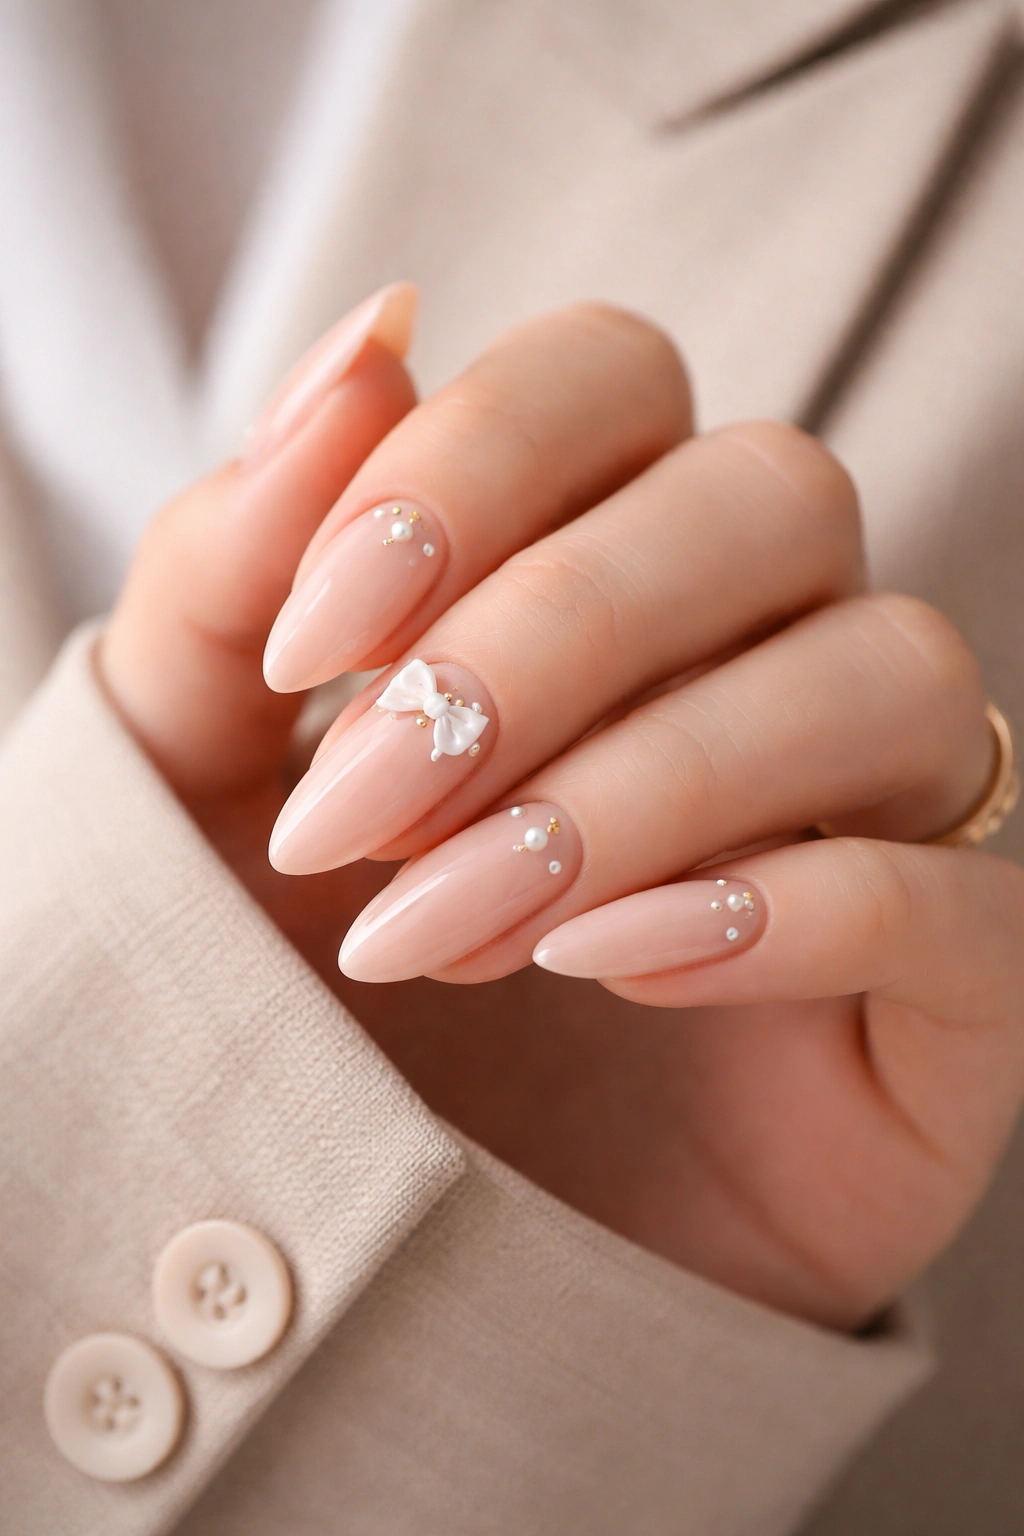
Can nude nails still read coquette? Absolutely, but only if the details earn their place. A nude almond manicure with tiny pearl clusters and one or two bow accents feels grown-up in a way that plain pink rarely does.
The best base shade depends on your skin tone. I like a nude that is one step lighter or deeper than your natural nail bed, because a dead-on match can make the bow disappear. The pearl detail gives the eye something to land on, so the manicure still has shape even when the color is quiet.
A bow and pearls sit nicely together when they’re not the same size. Keep the bow small and the pearls even smaller. Tiny beadwork around the base of the bow looks more elegant than a heavy cluster, which can feel old-fashioned fast.
This is a smart choice for anyone who wants the coquette mood but still needs the nails to work with business clothes, weddings, or plain denim.
7. Soft White Lace Nails with Floating Bow Art
Lace and bows can look elegant if the base stays sheer. The minute the nail gets too opaque, the design starts to feel dense. A soft white lace pattern on an almond shape keeps the whole manicure looking light.
I like this look best when the lace sits on only one or two nails per hand. The bow can float on an accent nail, either in the center or slightly off to one side, and the rest of the manicure can stay simple with a translucent white base. That contrast keeps the design from turning heavy.
How to keep it airy
- Use a milky or sheer white base, not a chalky flat white.
- Keep the lace thin and open.
- Draw the bow with a fine liner, then leave a small gap between the loops and tails.
- Finish with a glossy top coat so the white stays crisp.
This manicure is one of those rare designs that can look delicate without looking fragile. There’s a difference.
8. Pastel Blue Almond Nails with Silver Ribbon Bows
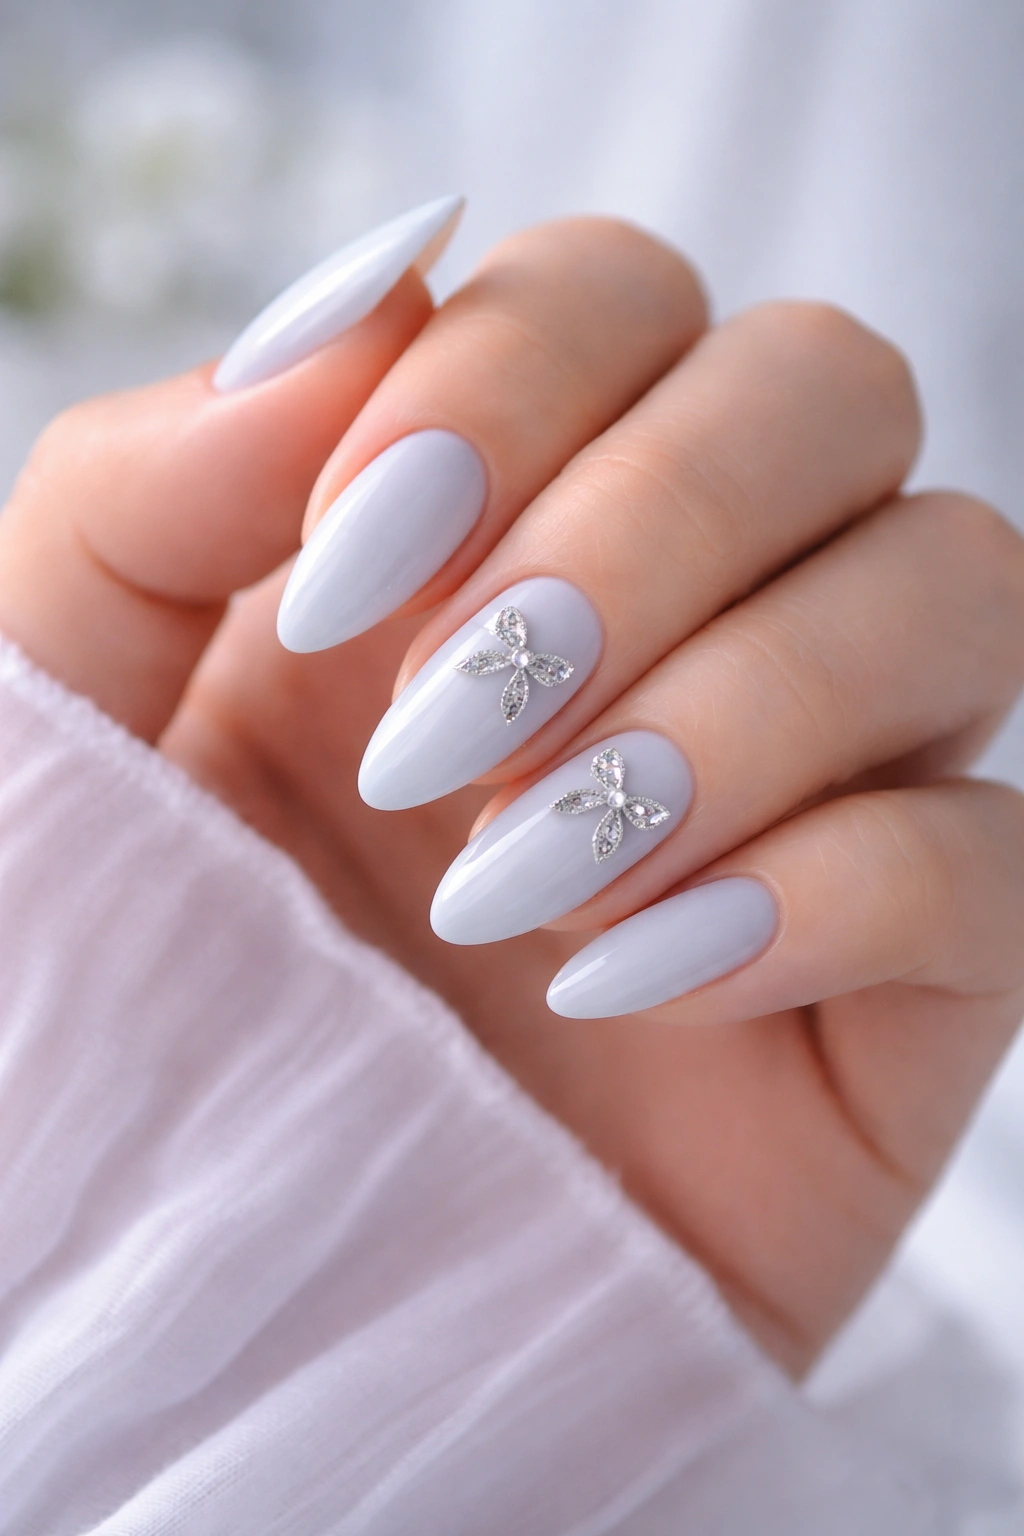
Baby blue changes the mood right away. It cools down the sweetness of the bow and makes the manicure feel a little fresher, almost like a ribbon tied around a pale gift box.
The silver detail matters here. Silver ribbon bows or tiny chrome accents work better than gold because they keep the palette in the same temperature range. If you mix warm and cool too aggressively, the look gets muddled. A soft blue base, thin silver bow lines, and a glossy finish is enough.
Best way to wear it
- Choose a pastel blue that still has a hint of milkiness.
- Keep the bows small and centered.
- Add silver only on accent nails if you want the look to stay soft.
- Leave one or two nails plain to avoid pattern overload.
This is a nice option if you want coquette nails that feel less pink, less obvious, and a little more fresh.
9. Matte Burgundy Nails with Glossy Bow Stickers
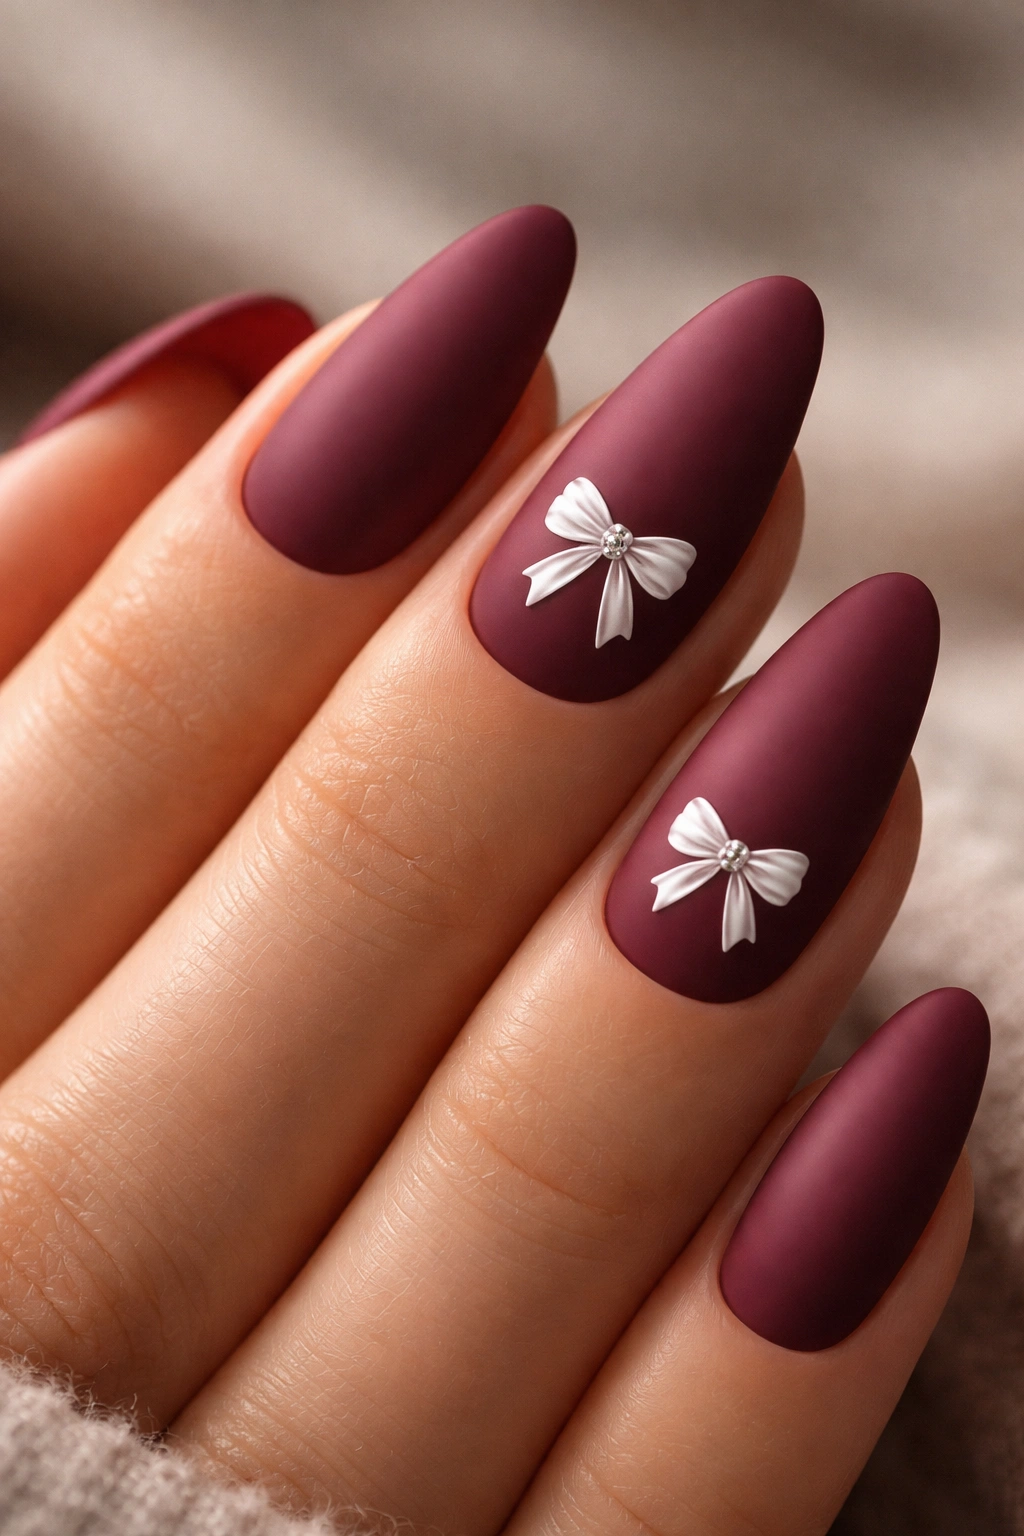
Matte. Then the bow pops. That contrast is the whole reason this manicure works.
Burgundy on almond nails already feels rich and a little dramatic. A matte finish makes it velvety, almost like fabric, and then a glossy bow sticker or gel bow on top gives you a neat little shine break. I love that kind of tension. It keeps the design from drifting into soft-focus sweetness.
The bow color can be the same burgundy in gloss, or you can go with black, ivory, or deep rose. Ivory is the easiest to read. Black is moodier. Same-color gloss-on-matte is my favorite if you want something subtle that still looks intentional.
Seal the edges carefully. Matte finishes tend to show wear a bit faster at the tips, and if the bow sits near the free edge, you’ll want the sides fully protected.
10. Peach Ombré Nails with Gold Foil Bows
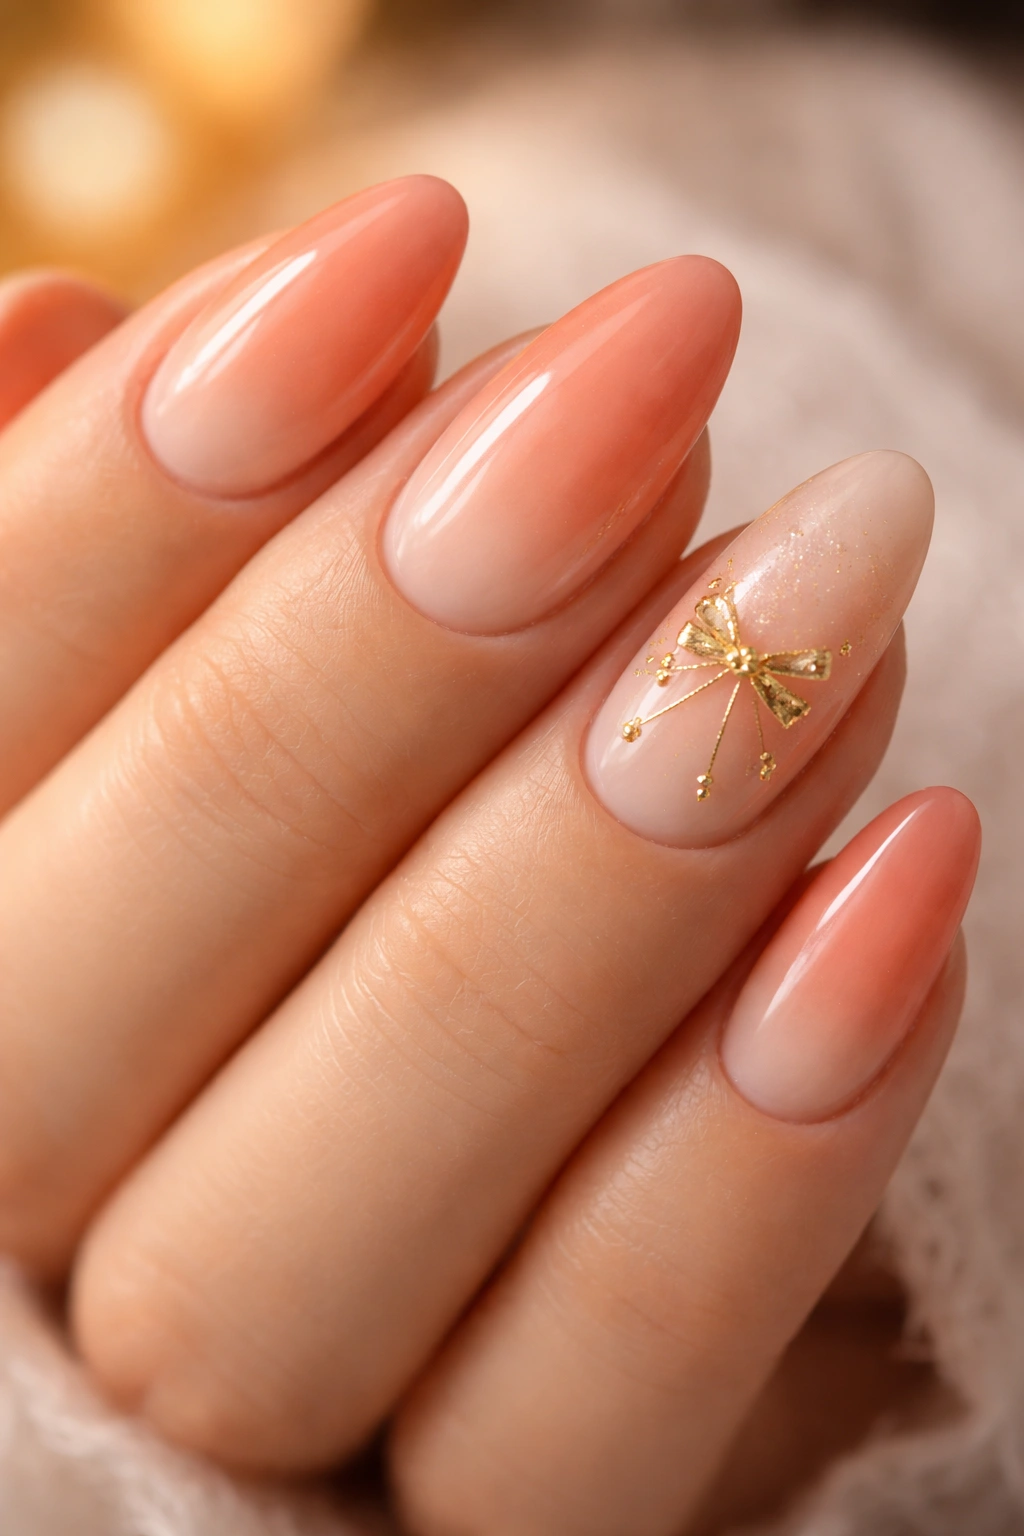
Want coquette nails that lean warm instead of sugary? This is the one. A peach ombré softens the almond shape, and a gold foil bow gives the manicure a little glow without making it feel flashy.
The ombré should be slow. Start with a pale peach near the cuticle and let it fade into a warmer coral-tinged tip. If the shift is too sharp, the nail loses that smooth, airy feeling almond shapes are good at. Gold foil works especially well because it looks less rigid than metallic paint.
I like this look for medium or longer almond nails. There’s enough room for the fade to show and enough surface area for the bow to sit without looking cramped. You can keep the bow on one accent nail or place a smaller version on two.
It’s one of the few bow designs that feels sunny without becoming loud.
11. Clear Jelly Almond Nails with Floating Bow Confetti

Clear jelly nails always look a little mischievous, and the bow confetti takes that feeling one step further. The result is light, translucent, and a bit candy-like, which suits almond shapes better than you might think.
The trick is keeping the embedded pieces tiny. A few micro bows suspended in clear or tinted jelly gel look crisp; too many and the nail turns busy fast. I prefer a pale pink jelly base or a sheer milky clear, because a fully transparent nail can read more plastic than pretty if the bows are not balanced.
What makes it hold up
- Use builder gel or a thicker gel overlay so the bow pieces sit flat.
- Keep the confetti small and evenly spaced.
- Choose one or two accent nails if you want a cleaner look.
- Finish with a glassy top coat so the edges don’t feel bumpy.
This style has a playful edge. It’s not the safest choice, but it is one of the most fun.
12. Black and Blush Almond Nails with Contrast Bows
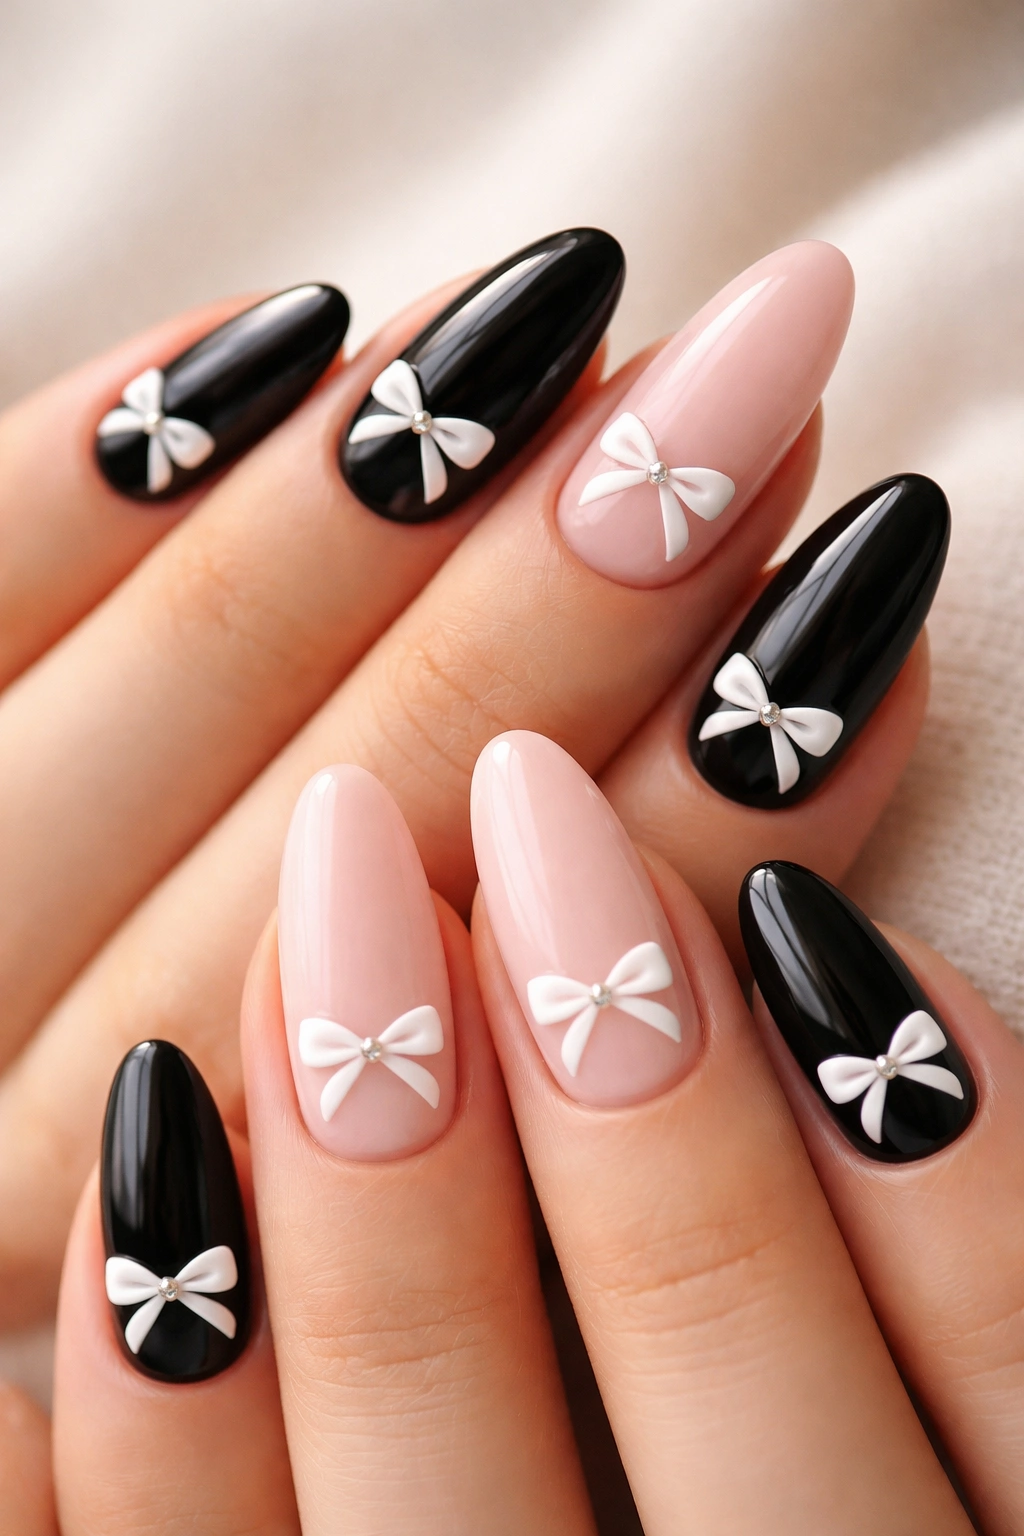
Coquette does not have to stay pastel. Black and blush together make the whole look sharper, and the bow becomes more graphic than sugary.
I like this pairing because it gives you contrast without needing extra art. A black base on one or two nails, blush on the others, and a clean white or blush bow on top can look unexpectedly balanced. The almond shape helps here because it softens the dark color enough that it does not feel severe.
If you want the manicure to read polished, keep the bow placement consistent. Same side, same size, same angle. The eye picks up those details fast, and consistency matters more with a high-contrast palette.
This one works especially well if your clothes lean dark, structured, or simple. It gives you the bow detail without turning the whole hand into a pastel statement.
13. Short Almond Nails with Minimal Bow Tips
Short almond nails can carry bow art better than a lot of people expect. The shape already suggests elegance, and the shorter length makes the manicure easier to live with if you type, cook, or spend half your day with your hands in motion.
The smartest version here is a minimal bow near the tip, almost like a tiny ribbon tied at the edge of the nail. Keep the base sheer pink, beige, or soft milky white. The bow can be painted in a single color, with no extra dots or pearls. Anything more tends to crowd the shorter length.
This design is a favorite of mine for office settings because it feels neat. Not boring. Just neat. There’s a difference, and it matters.
A short almond shape plus a small bow also grows out more gracefully than longer nail art. That means fewer awkward days between fill-ins, which I appreciate more than I probably should.
14. Cherry Print Almond Nails with a Tiny Bow Accent
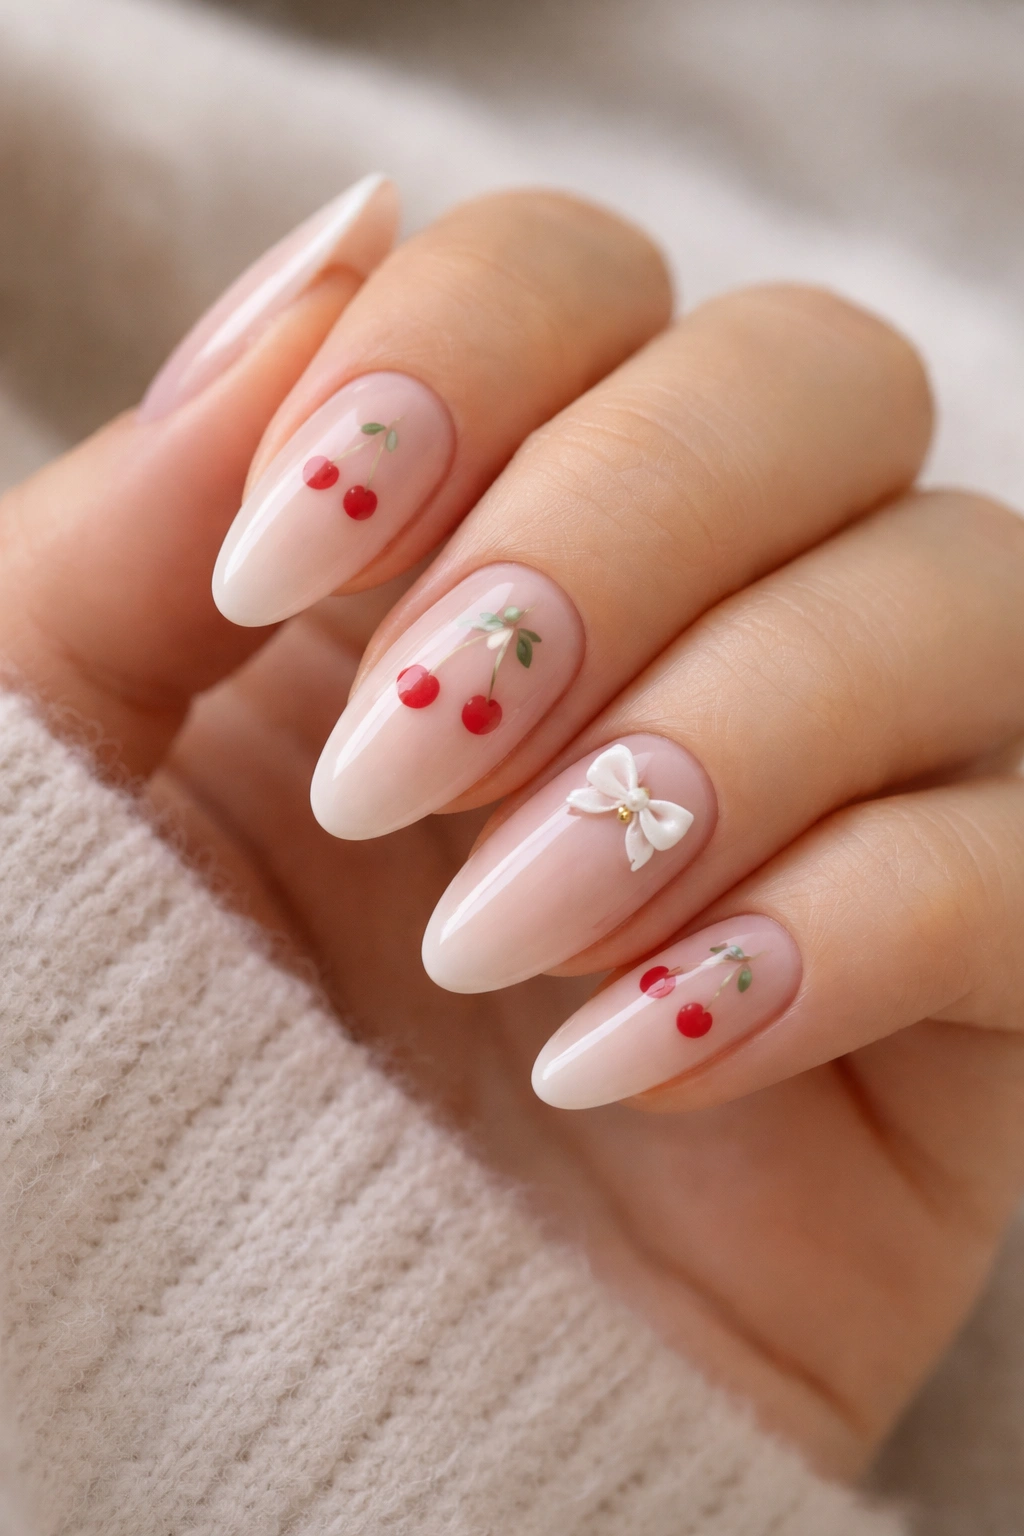
Cherry prints and bows have the same sugary, vintage mood, so they play well together when you keep the layout under control. Think one tiny bow accent, not a dozen competing motifs.
A pale pink or creamy base gives the cherries room to stand out. The cherries themselves should stay small and round, with slim green stems if you want the design to feel cleaner. Then place one bow on a different nail so the manicure reads as coordinated instead of repetitive.
The easiest mistake here is overloading every nail with both cherries and bows. That turns cute into clutter. Leave some nails plain. A little empty space is what makes the print look intentional.
I like this set for springy outfits, picnic dresses, or any wardrobe that already leans soft and feminine. It has personality without asking for too much.
15. Rosy Chrome Nails with Outline Bow Art
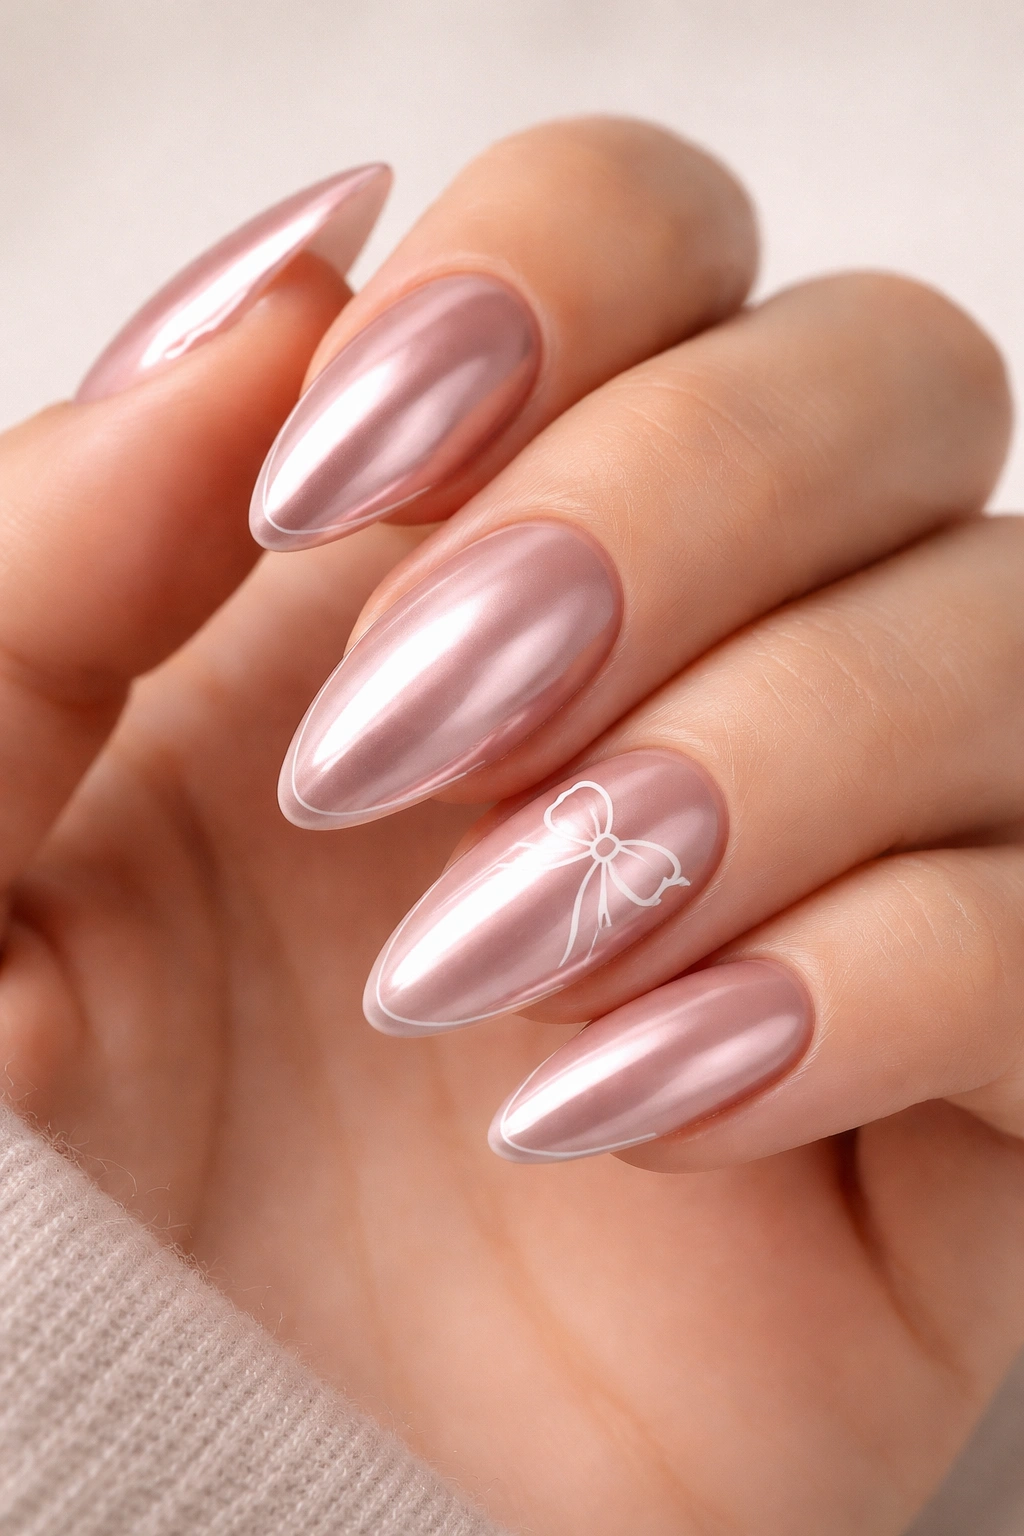
Rosy chrome has a mirror-like glow that feels a little more romantic than standard silver chrome. On almond nails, it gives the hand a smooth, polished line, and the outline bow art keeps the manicure from getting too reflective and flat.
The bow should be thin. Almost traced. If the outline gets thick, the chrome base loses some of its elegance and starts looking heavy. I prefer a white or soft rose outline, drawn around a tiny bow shape with a fine liner. That leaves the shine to do its job.
A rosy chrome manicure is one of those designs that looks more expensive than it is, mostly because the surface is doing so much visual work. You do not need much else. One bow accent nail can carry the whole set.
This is a good choice if you like the coquette mood but want something less obviously sweet.
16. Lilac Glitter Fade Nails with Tiny Side Bows
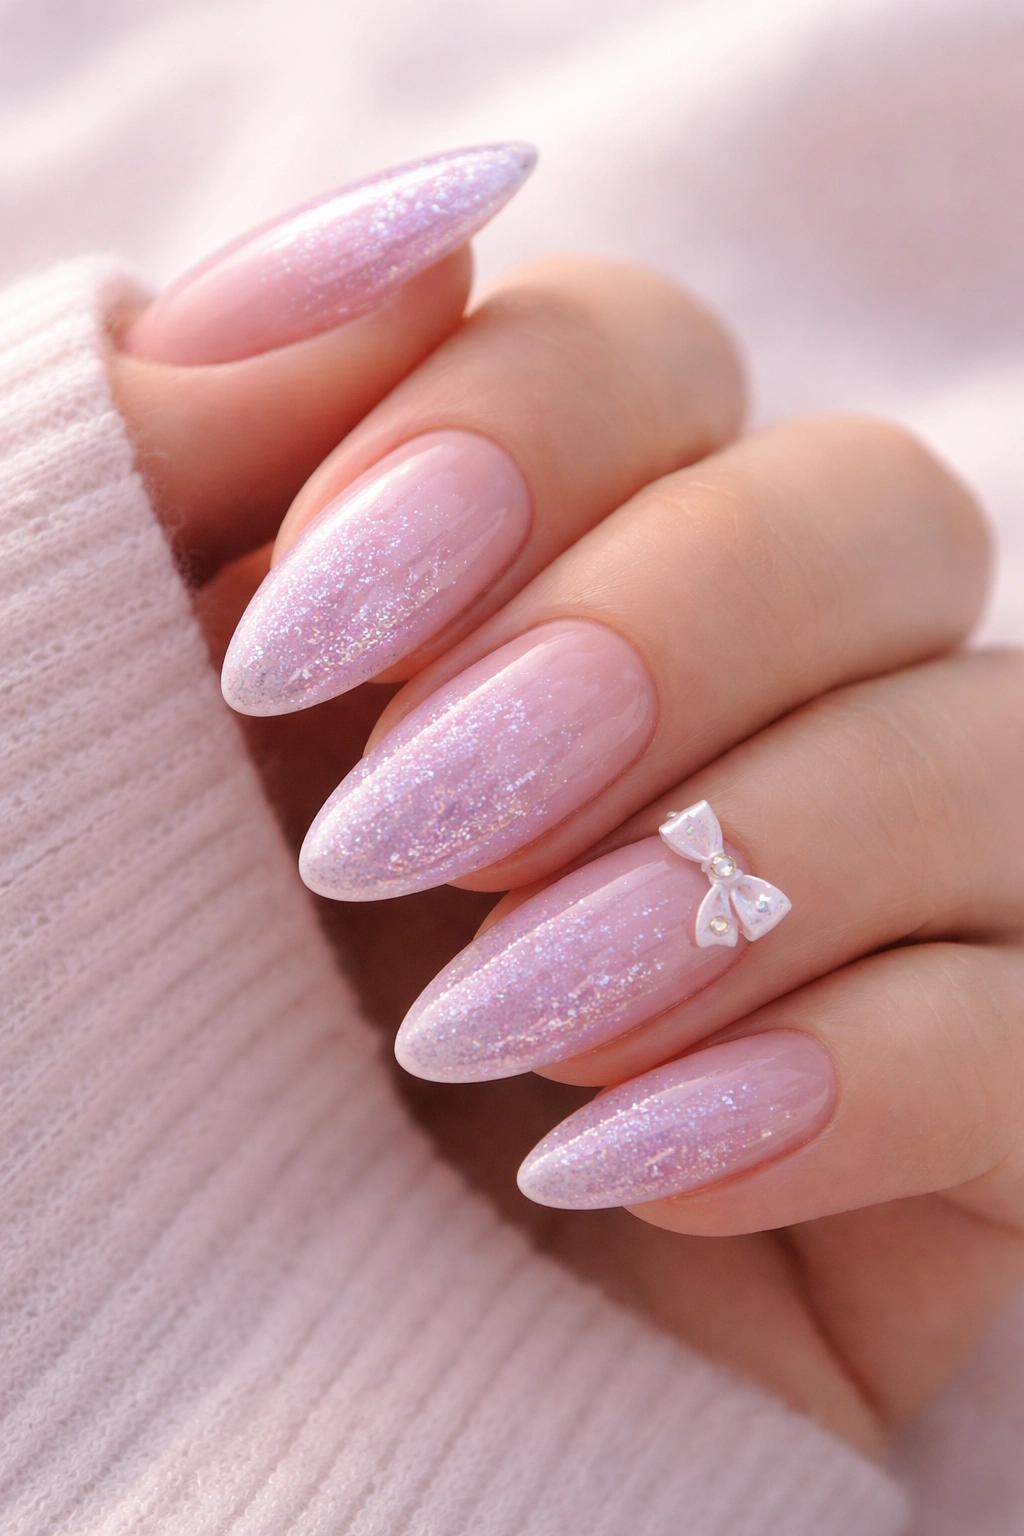
What if you want sparkle and still want the manicure to stay soft? Lilac glitter fade nails solve that better than most designs. The glitter sits where the eye expects motion, and the bow keeps the whole thing from feeling scattered.
The fade should start light near the cuticle and gather more sparkle at the tip. Fine glitter works best. Chunky glitter has too much texture for this look and can make the bow feel like an afterthought. A tiny side bow, placed just off-center, gives the nails a little asymmetry in the best way.
Good placement notes
- Keep the bow near the sidewall, not the middle.
- Use fine glitter, not large flakes.
- Choose a lilac base that stays soft and milky.
- Leave at least one plain nail on each hand.
This one feels playful, but it still has some manners. That is a rare combination.
17. Ivory Nails with Pearl Borders and Center Bows
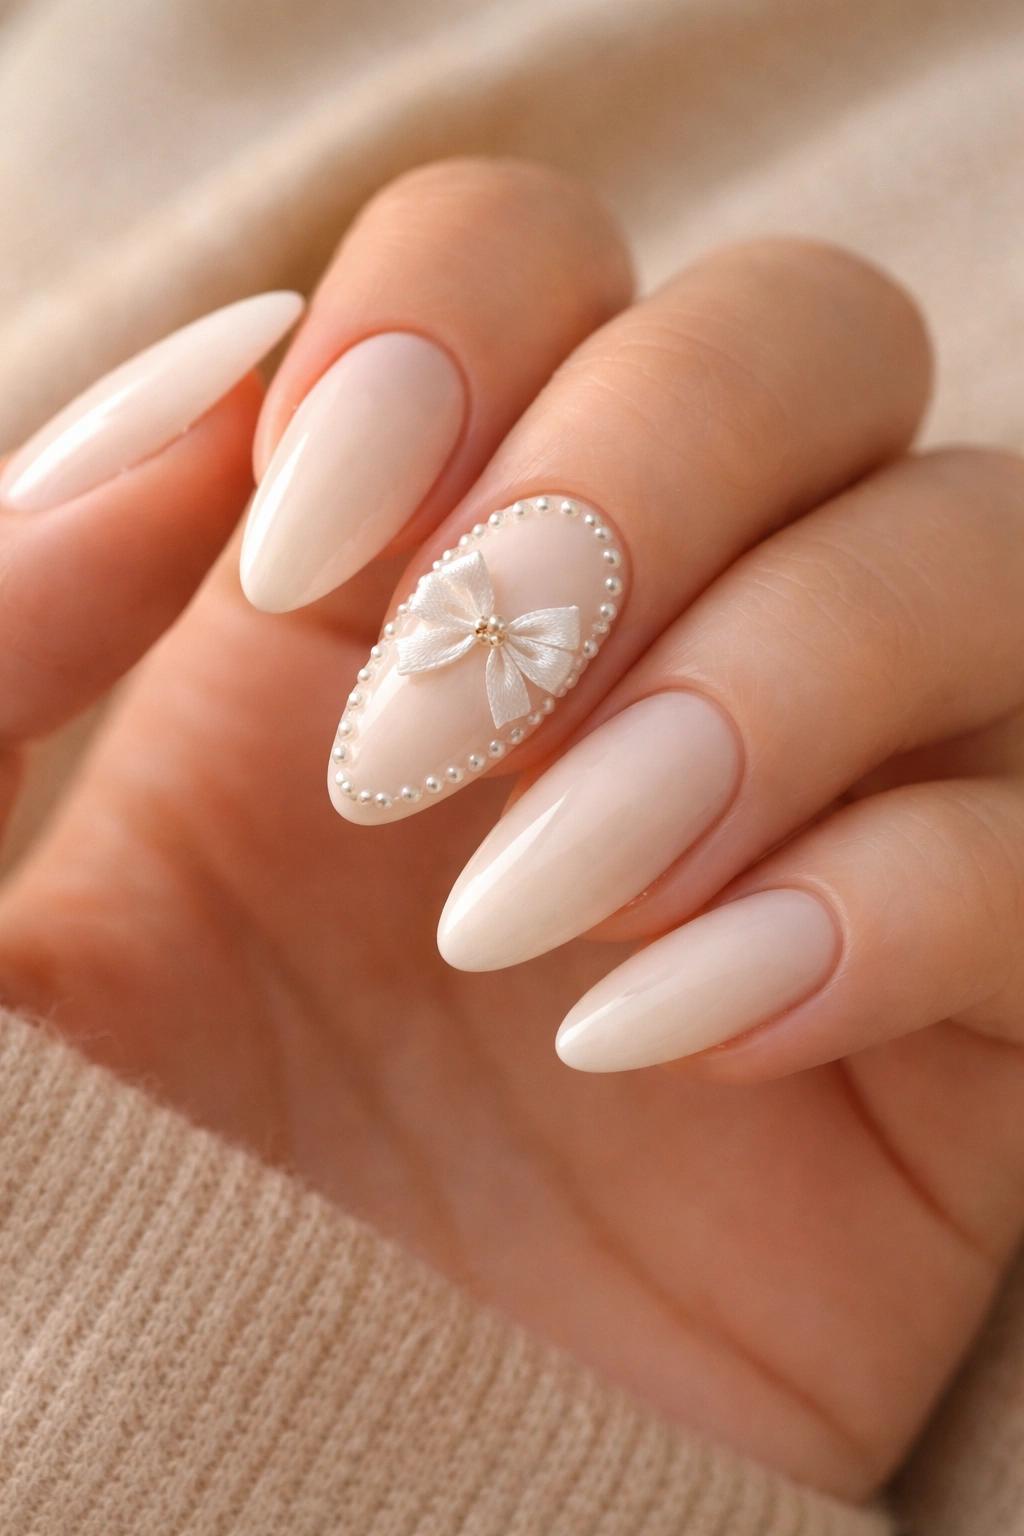
Ivory, pearls, and bows together make the manicure feel dressier right away. It’s one of the most polished versions of coquette almond nail ideas, and it leans into the jewelry-like side of the aesthetic.
The ivory base should stay creamy rather than chalky. That warmth matters. Then you can frame one accent nail with tiny pearl borders and place a bow in the center, or split the pearl detail across two nails so the look stays balanced. A glossy top coat keeps the finish from getting dusty.
This design does best when the nail length is medium or longer. Pearls need room. If the nails are too short, the border can crowd the shape and make the almond tip look stubby. A little space around the design helps the whole thing breathe.
For weddings, dressy dinners, or anything where you want your hands to look finished, this one is hard to beat.
18. Two-Tone French Nails with Ribbon Bow Swirls
This manicure has the same energy as wrapping paper and a neat ribbon tie. There’s something about a two-tone French that already feels styled, and the ribbon bow swirl makes it more interesting without adding clutter.
The color split can go white and blush, ivory and pink, or cream and soft red. I like alternating the French tone across nails so the set does not feel too symmetrical. Then add one long bow swirl across two adjacent nails, almost as if the ribbon is moving from one finger to the next.
That kind of placement keeps the eye moving. It also lets the almond shape stretch the design out naturally. Straight-on bows are fine, but the swirl gives the manicure a little motion, which I think flat designs sometimes miss.
This is a good set if you want something playful that still feels orderly.
19. Pink Sidewall Bow Nails with Clean Negative Space
The bow does not have to sit in the middle. In fact, placing it along the sidewall can make the nail look longer and more modern, which is handy if you want coquette details but hate crowded art.
A clear or sheer pink base works best here. Then the bow sits just off to one side, almost like a little signature mark. I like this approach because the negative space stays visible, and the almond shape gets to do its job without interruption.
This design looks best when the bows are thin and small. If they creep too far toward the center, you lose the point of the placement. A sidewall bow should feel like an accent, not a centerpiece.
It’s a smart choice for anyone who likes the bow idea but wants something a little less expected.
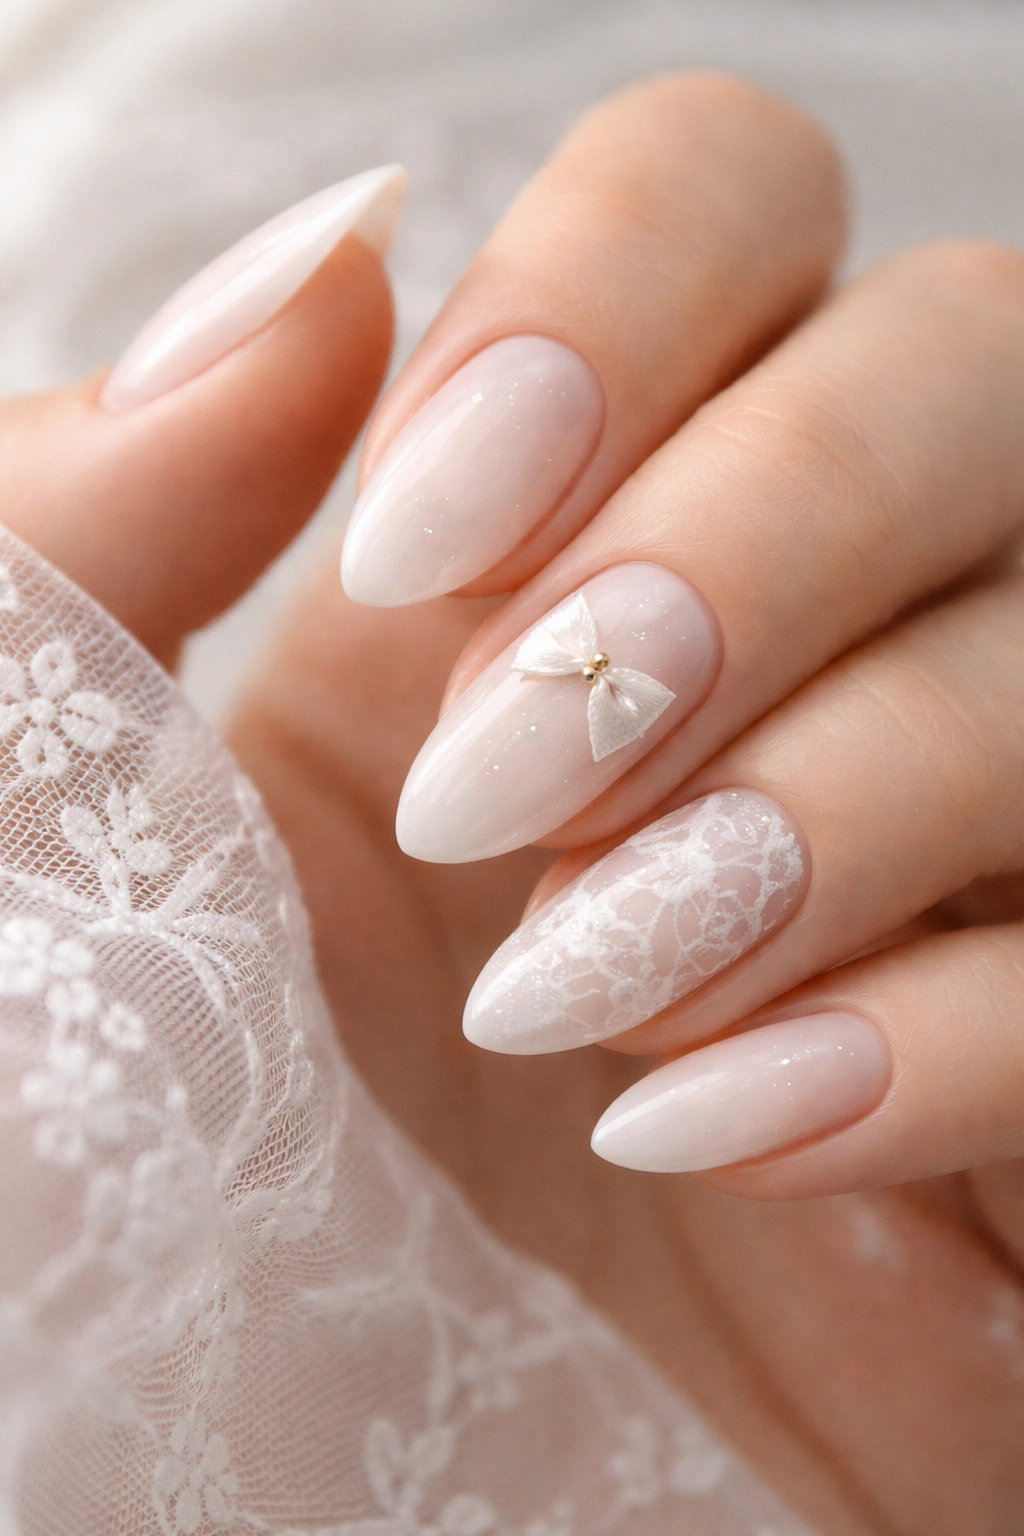
20. Translucent Bridal Almond Nails with Pearls and Satin Bows

This is the softest version of the whole set, and it works because every part of it stays one shade lighter than you expect. A translucent bridal base, tiny pearls, and satin bows create a manicure that feels delicate but not thin.
The base should be milky, not opaque. That little bit of transparency keeps the almond shape looking graceful. Pearl accents work best when they sit near the bow, almost like tiny buttons on a ribbon. I’d keep the bows small and placed on only one or two nails, because this design already has enough going on.
If you want the nails to feel formal, ask for a clean gloss finish rather than shimmer. Shimmer can compete with the pearl detail. Gloss gives you the smoother, cleaner look that makes the bow read properly from across the room.
This is the one I’d pick for a wedding, a formal event, or any moment when you want your manicure to feel quiet but fully finished.
